 BERNINA Corporate Blog -
Oops I did it again
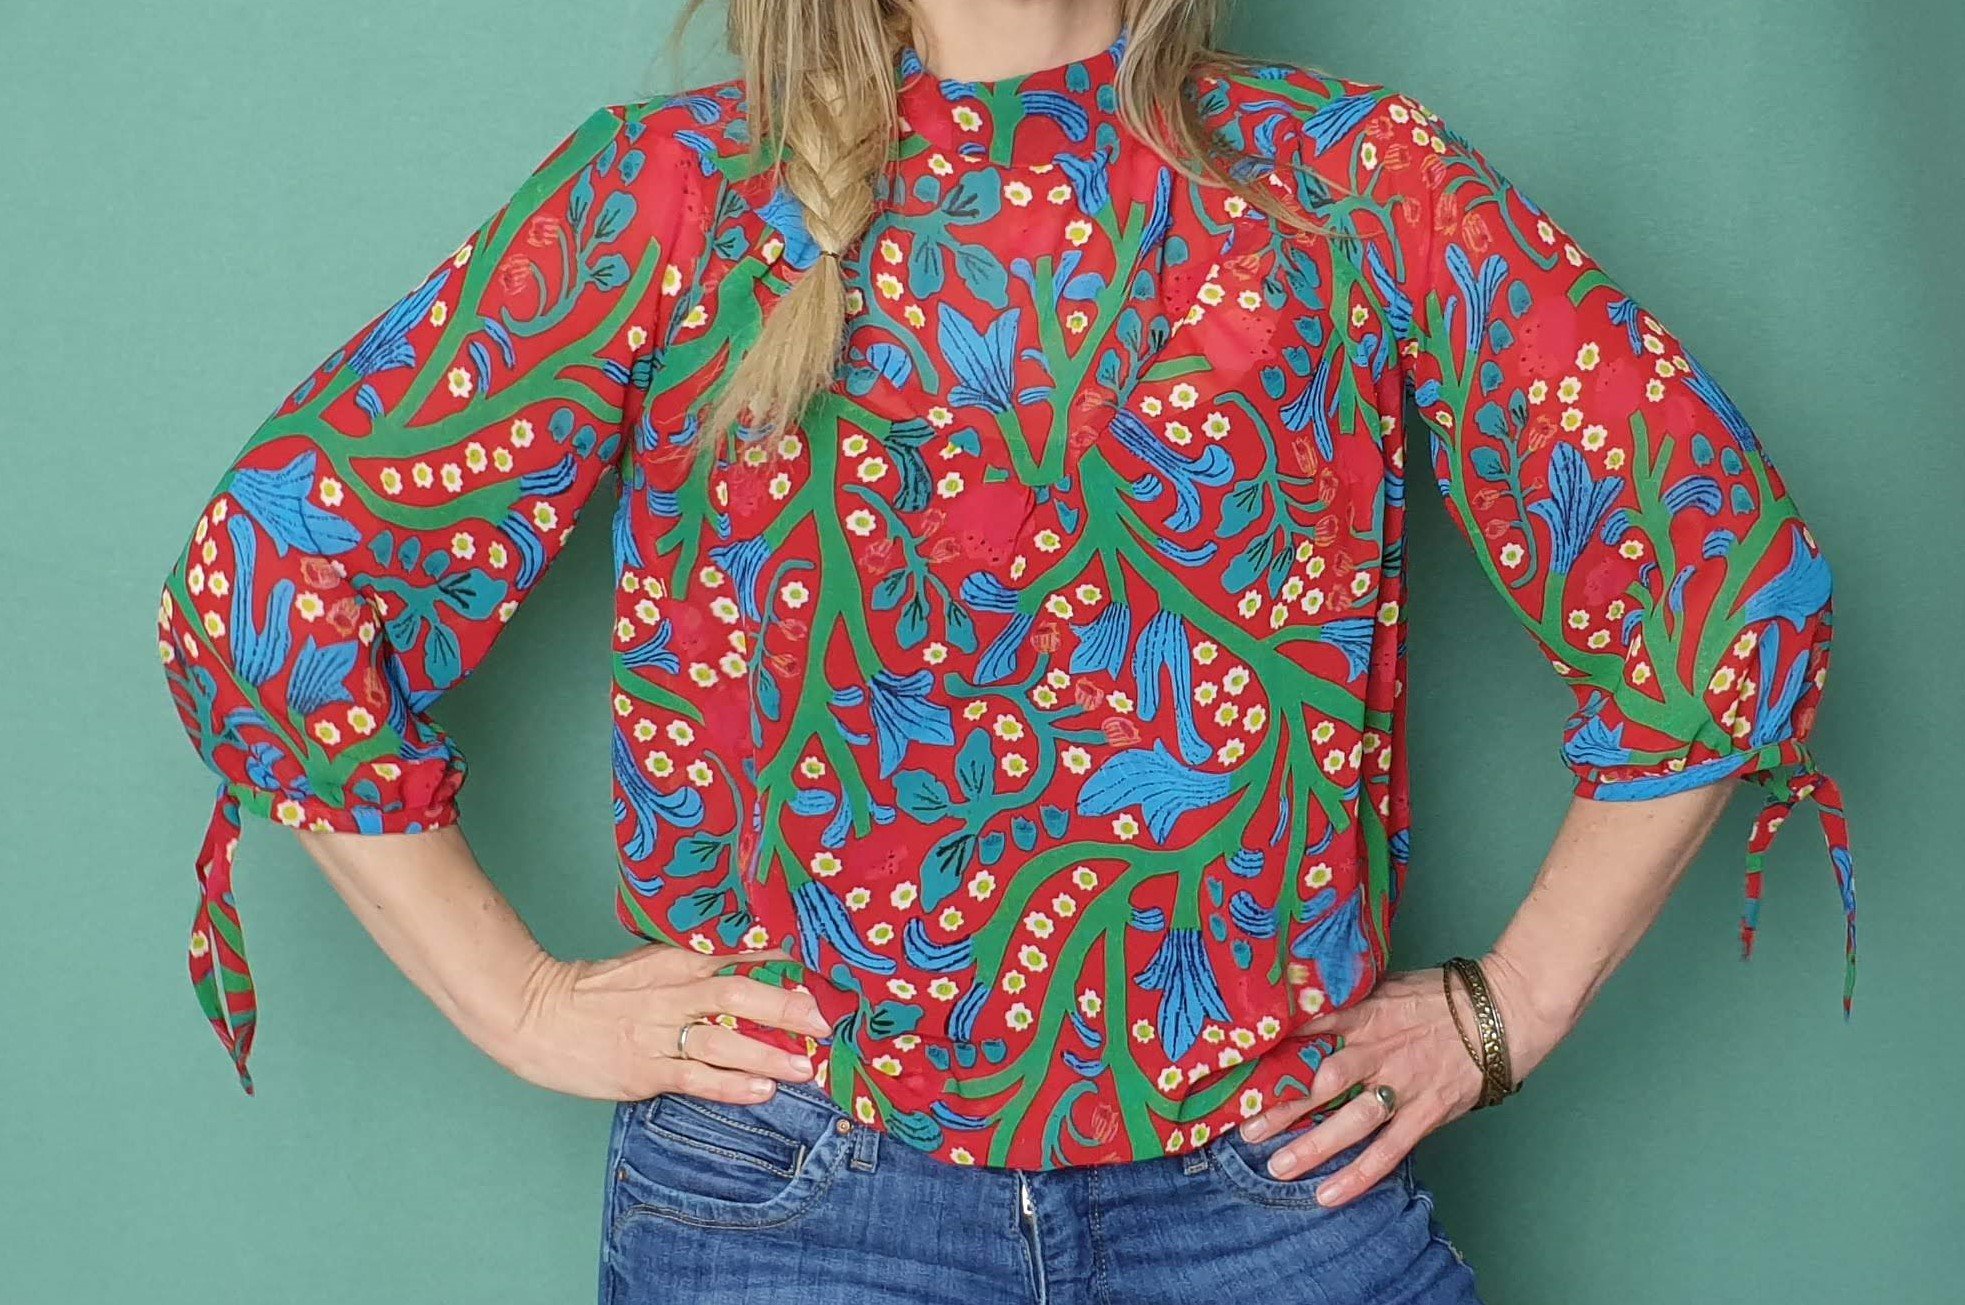
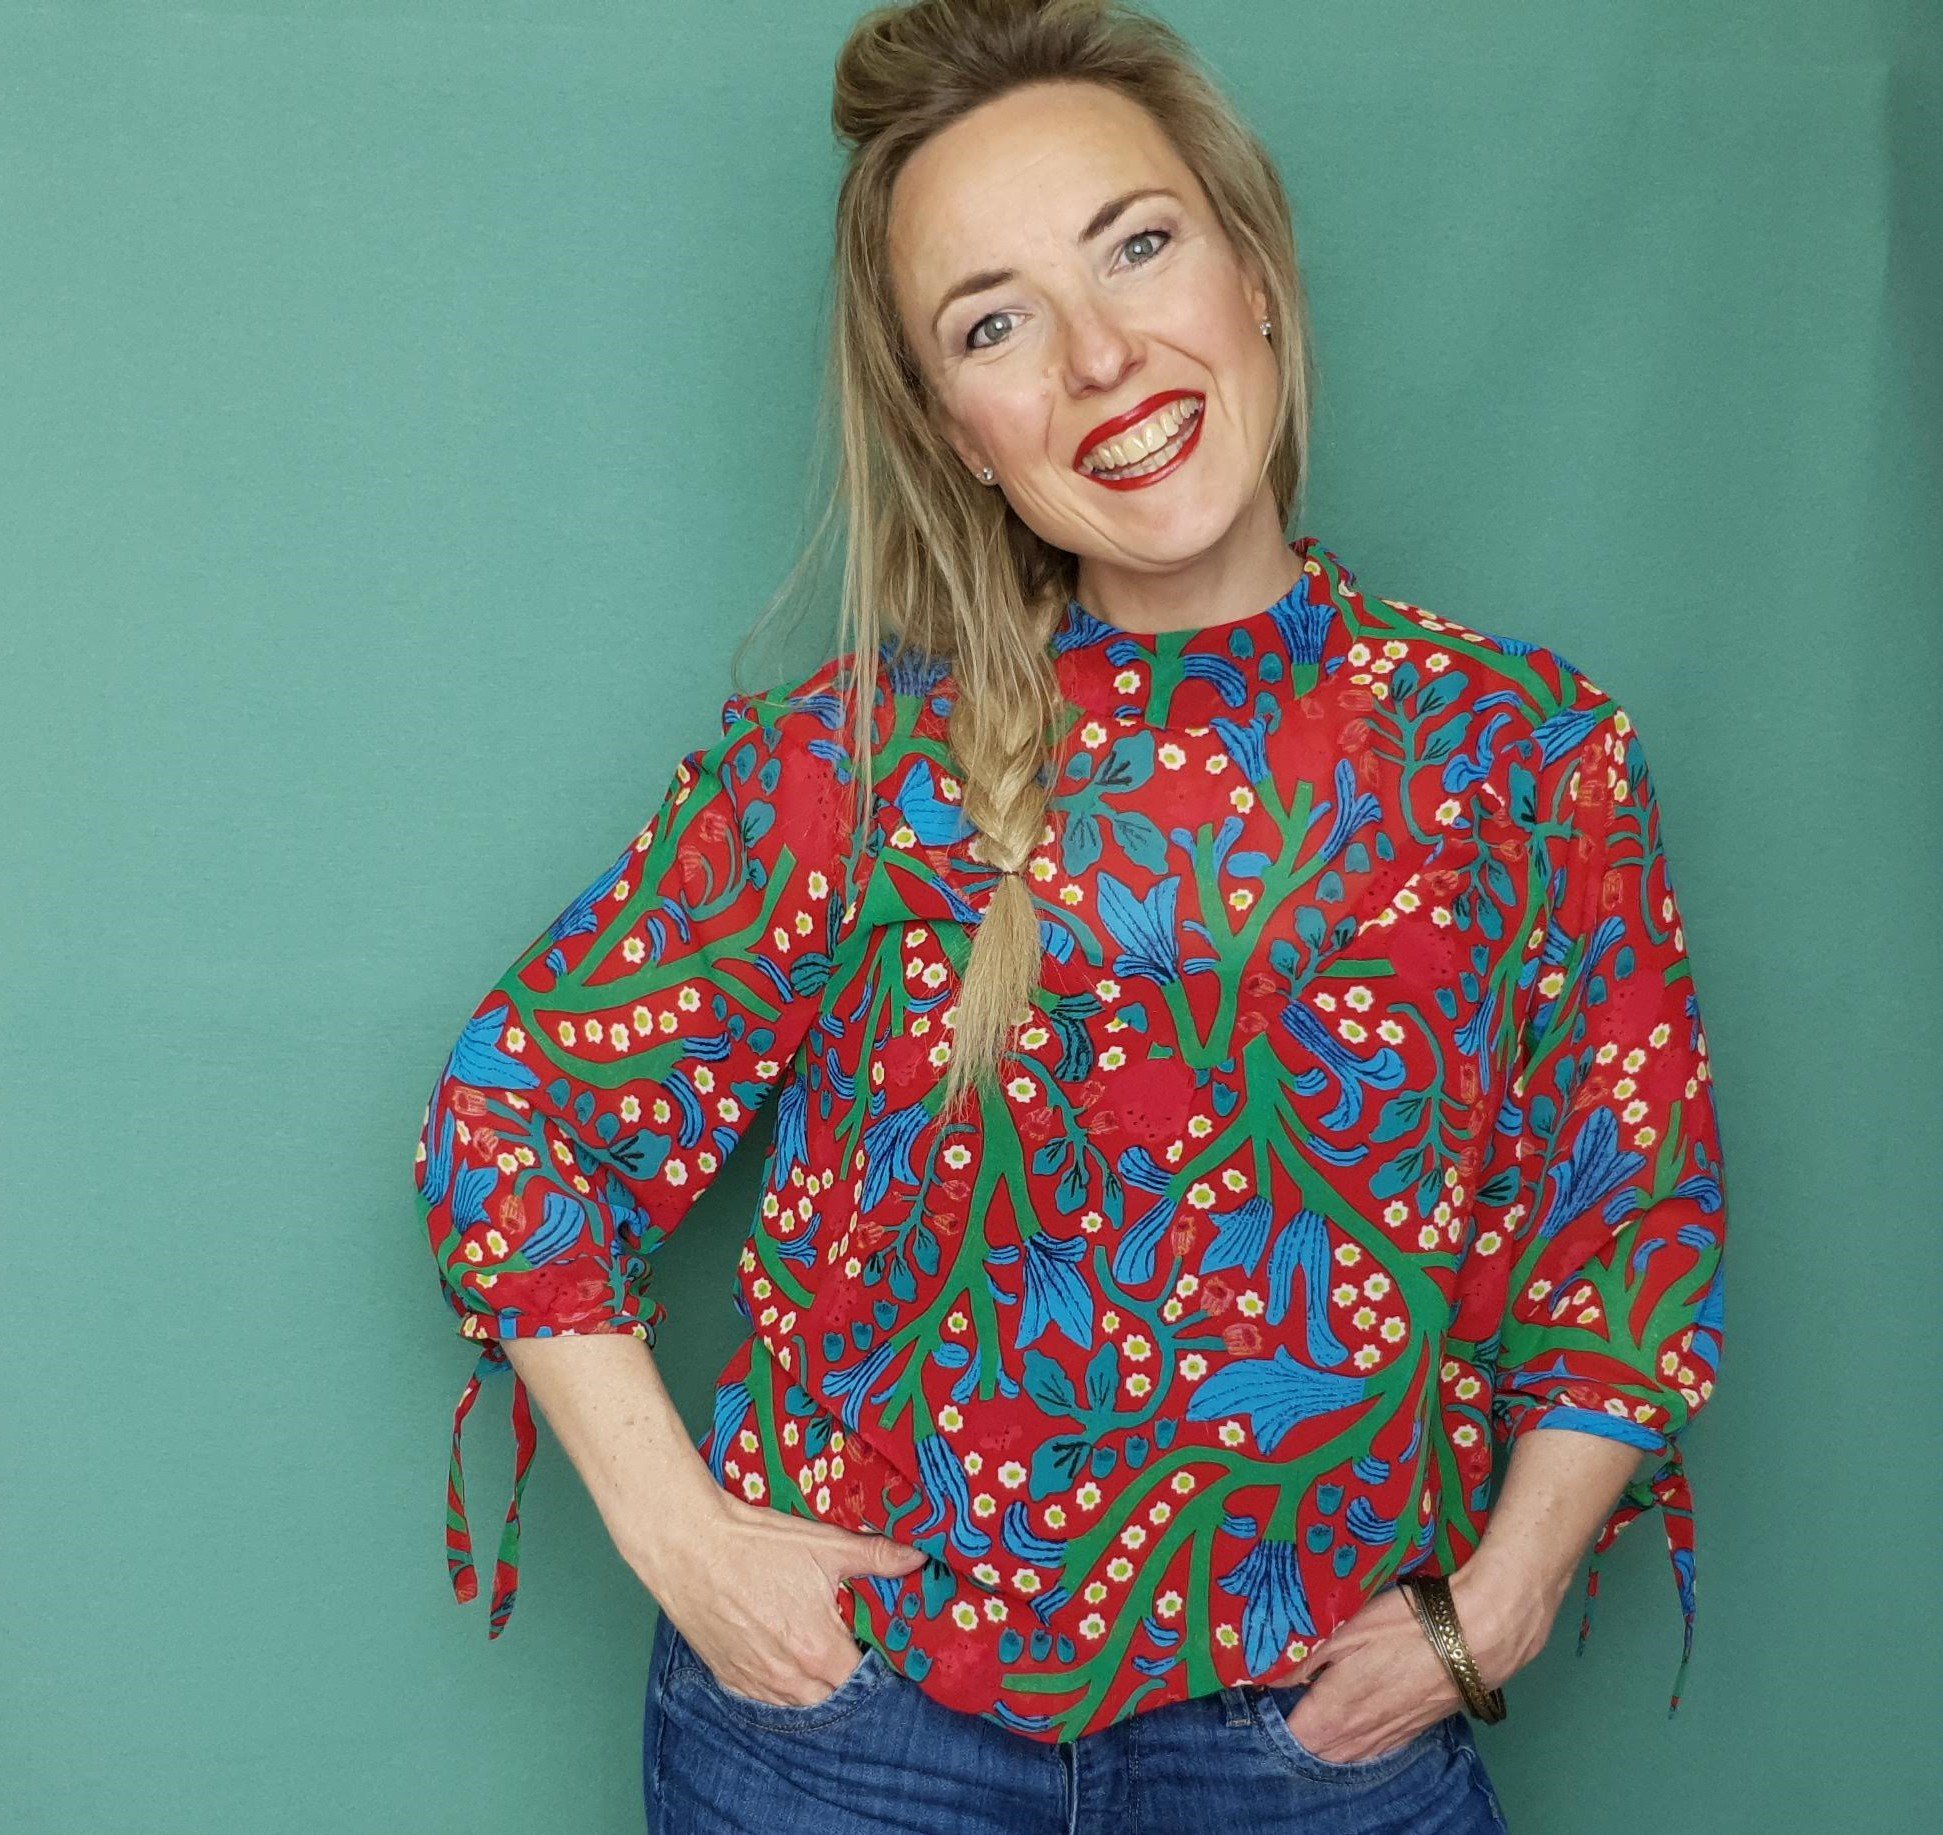
Did you ever encounter a pattern that fits you so well you make it not once, not twice … no three times in a row! Well this is a definite ‘Oops, I did it again‘ kinda blouse.
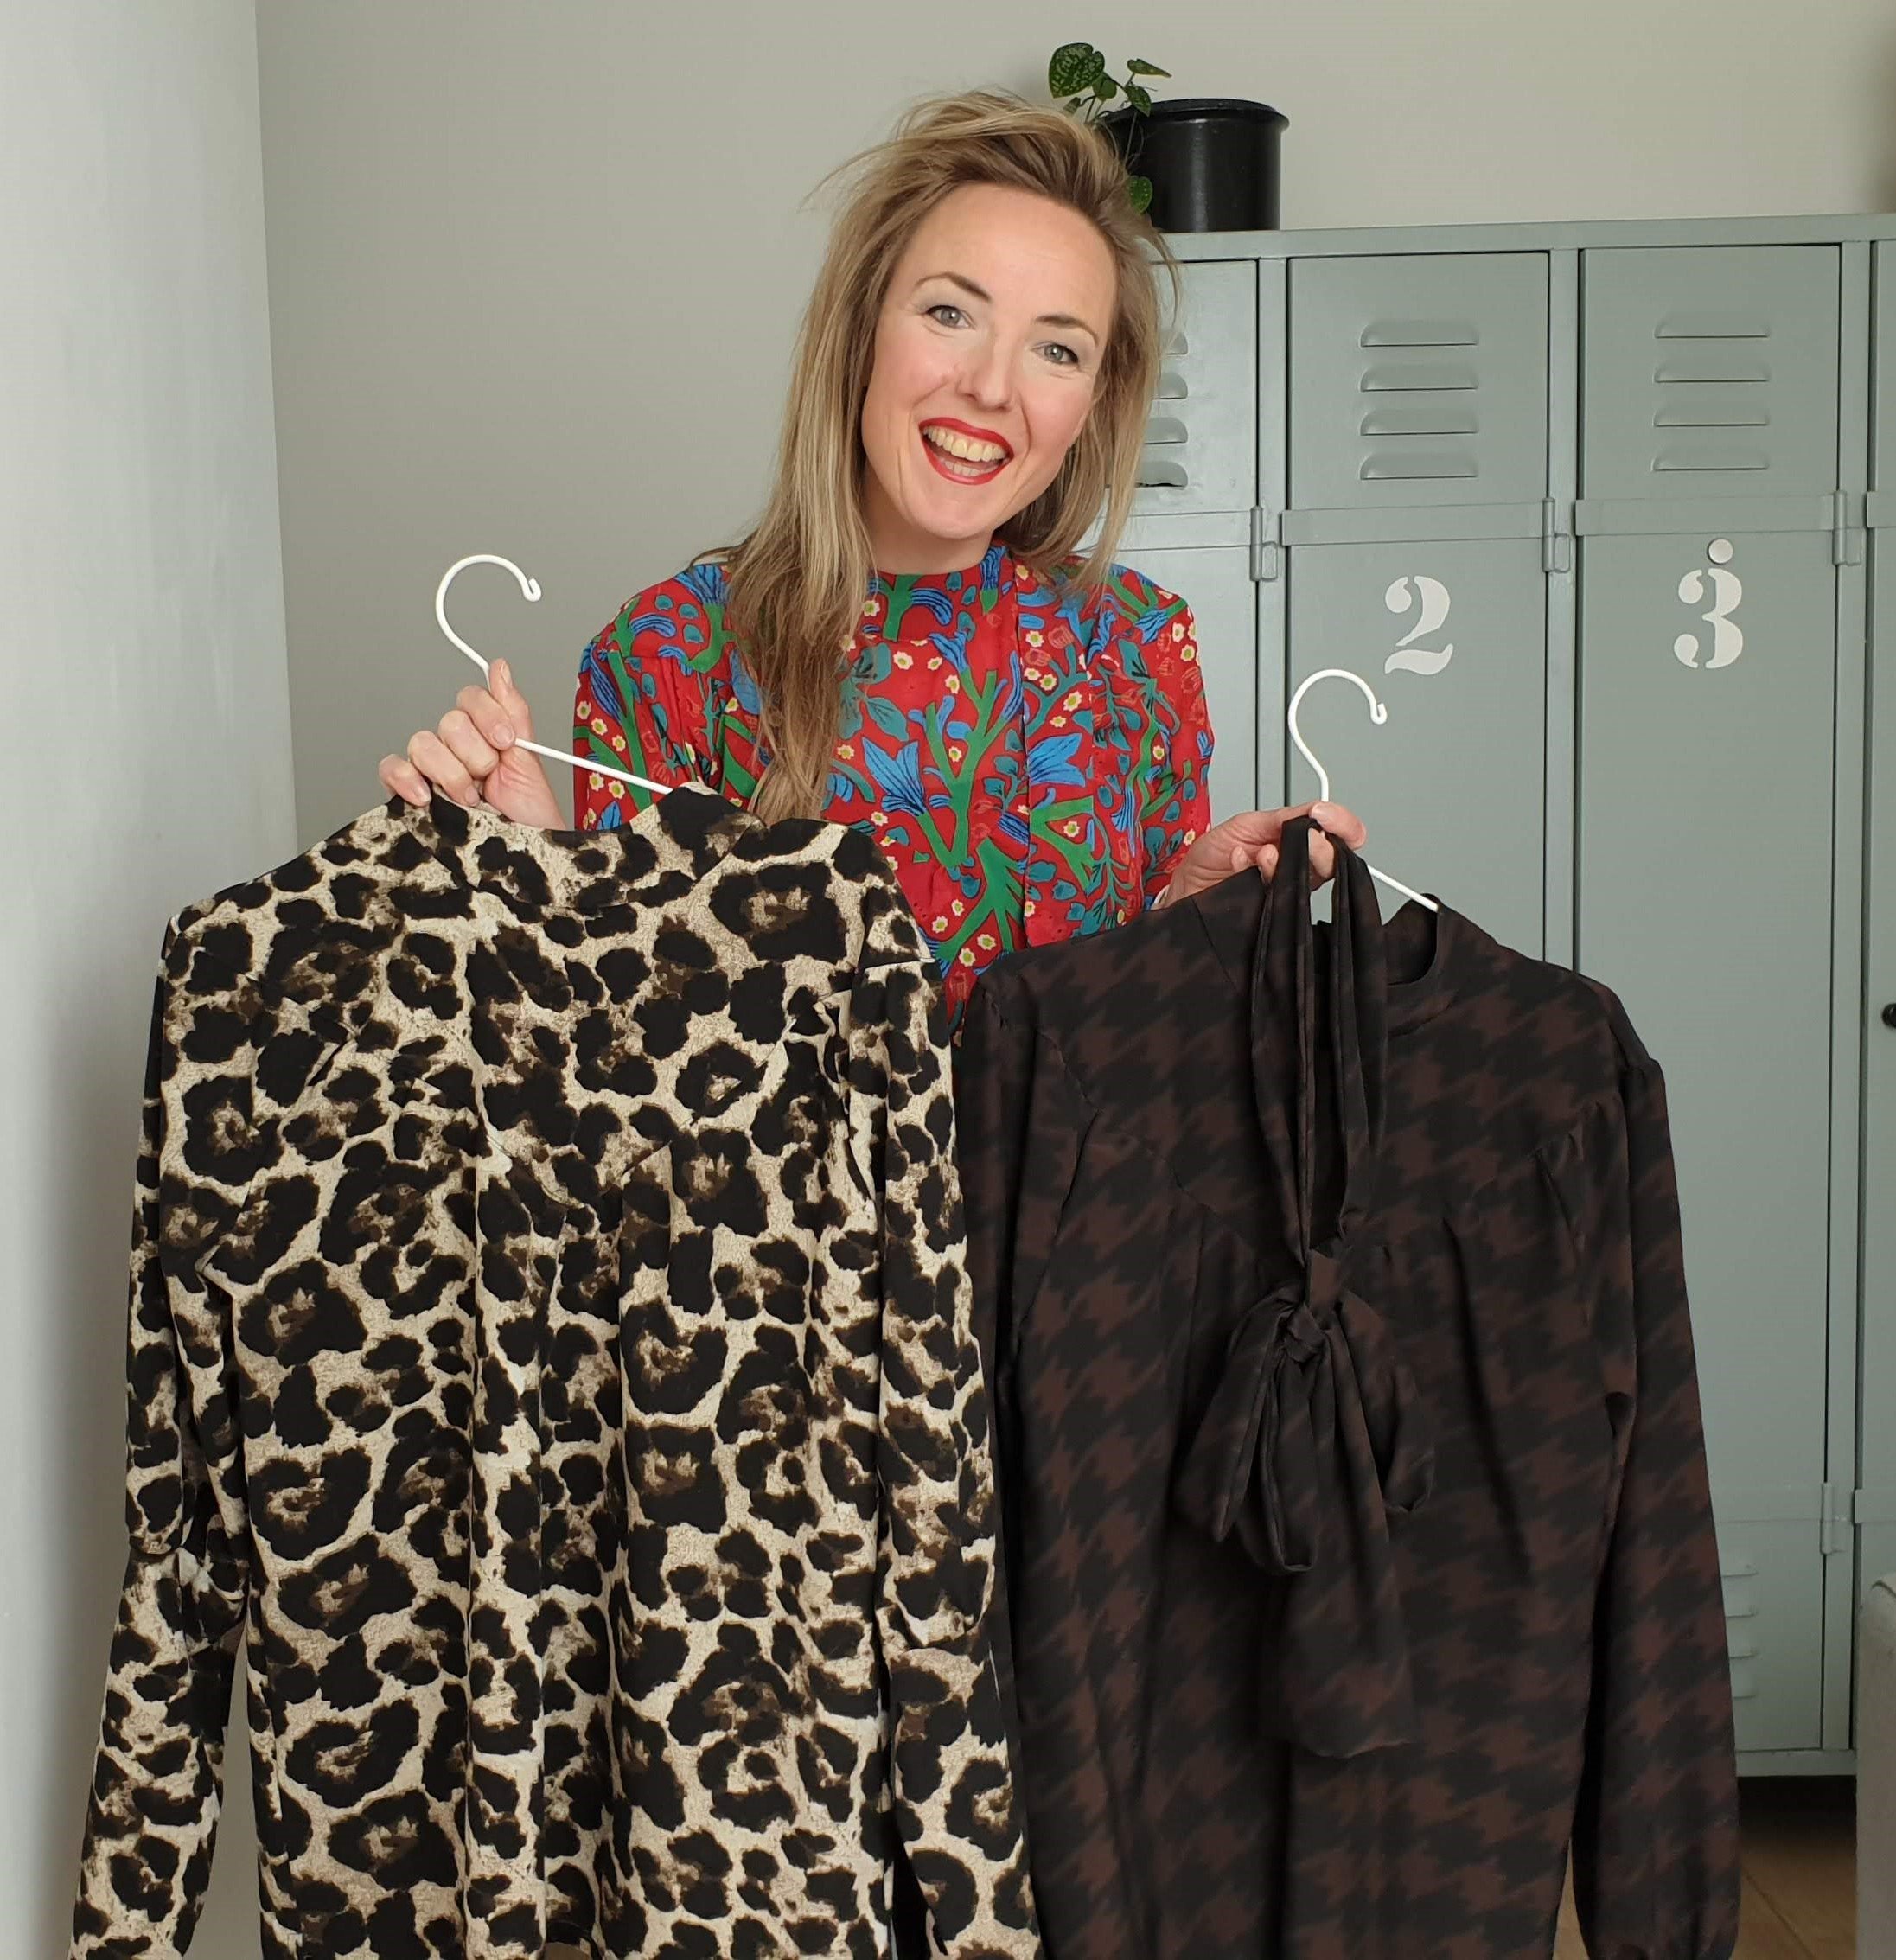
In the first, a leopard print, I used a thicker fabric which is perfect for the winter. The second, a houndstooth print, is made out of silk with a detachable bow. It was a perfect showstopper last Christmas. And the one I’m blogging about here is more suitable for the spring and is made out of a lovely bright colored viscose fabric. The pattern is of Knipmode.

Sew Happy Color
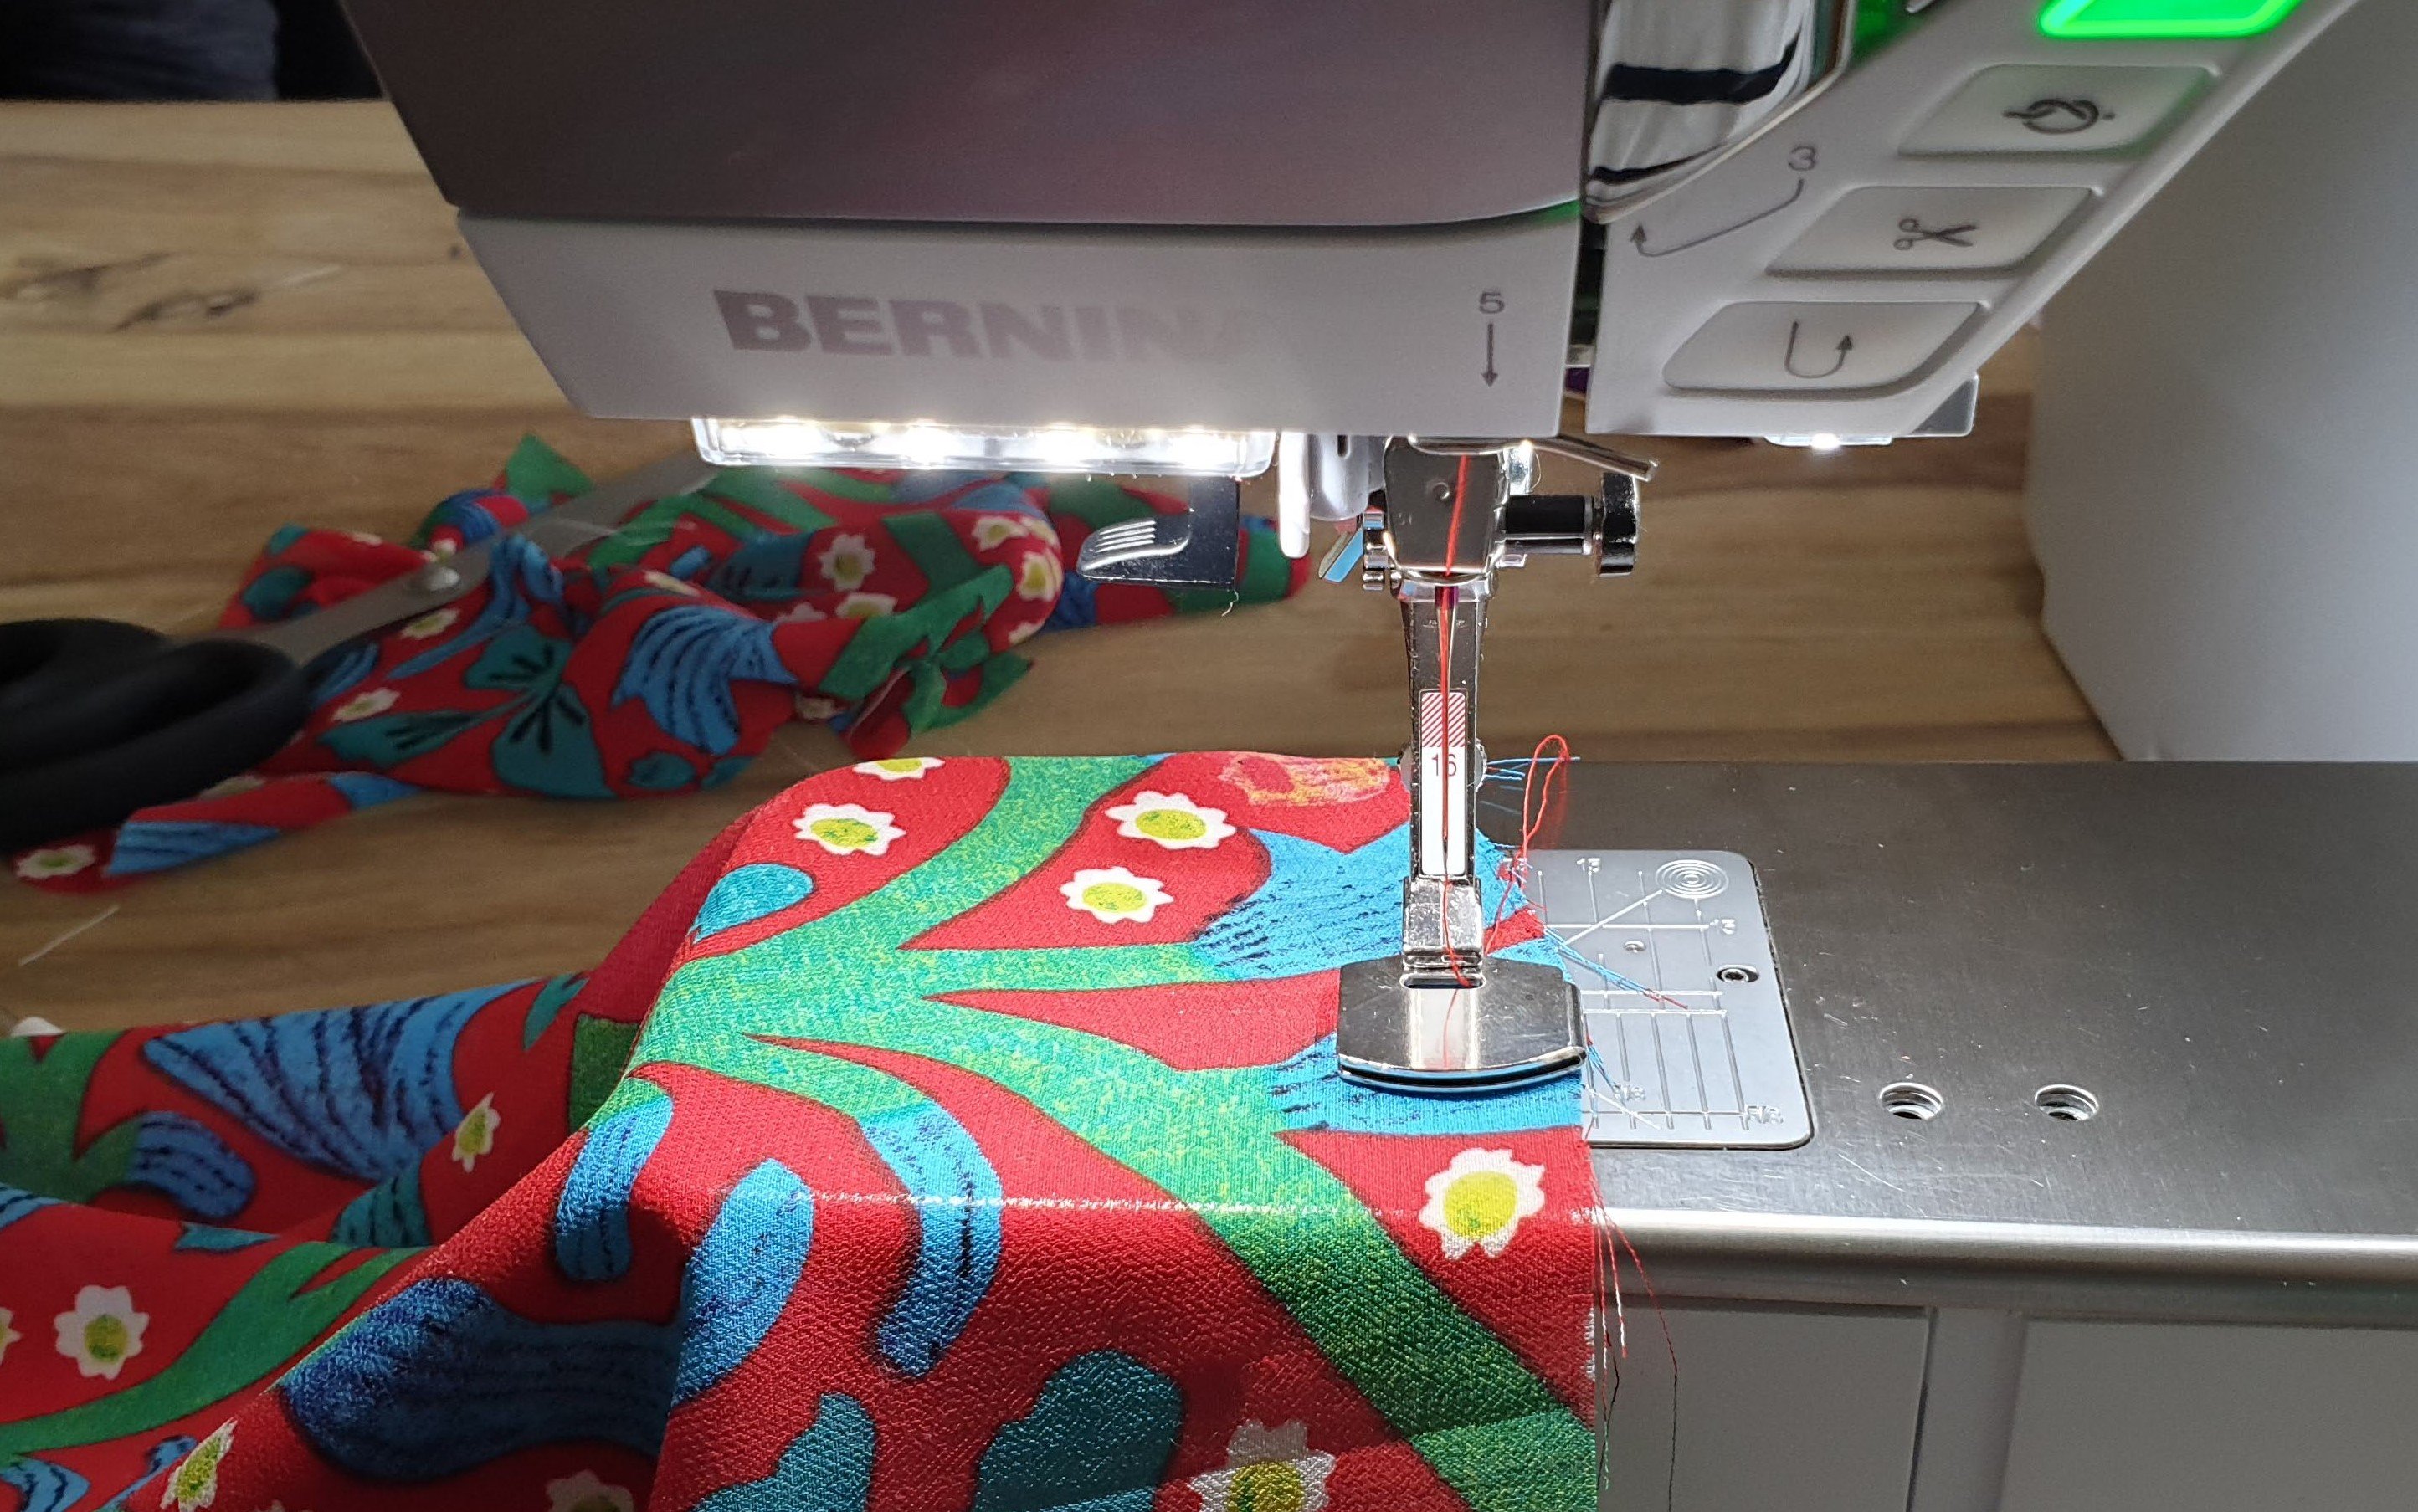
After participating in the #SewHappyColor challenge on Instagram I was so inspired to bring more color into my wardrobe that I couldn’t resist to buy this bright red floral fabric! That it is a, for me, difficult fabric to sew didn’t bother me. In my previous post here I challenged myself to sew flimsy fabrics. Now nothing, fabric-wise, scares me. I can tackle any fabric with my BERNINA 540! No sweat!

The gathering
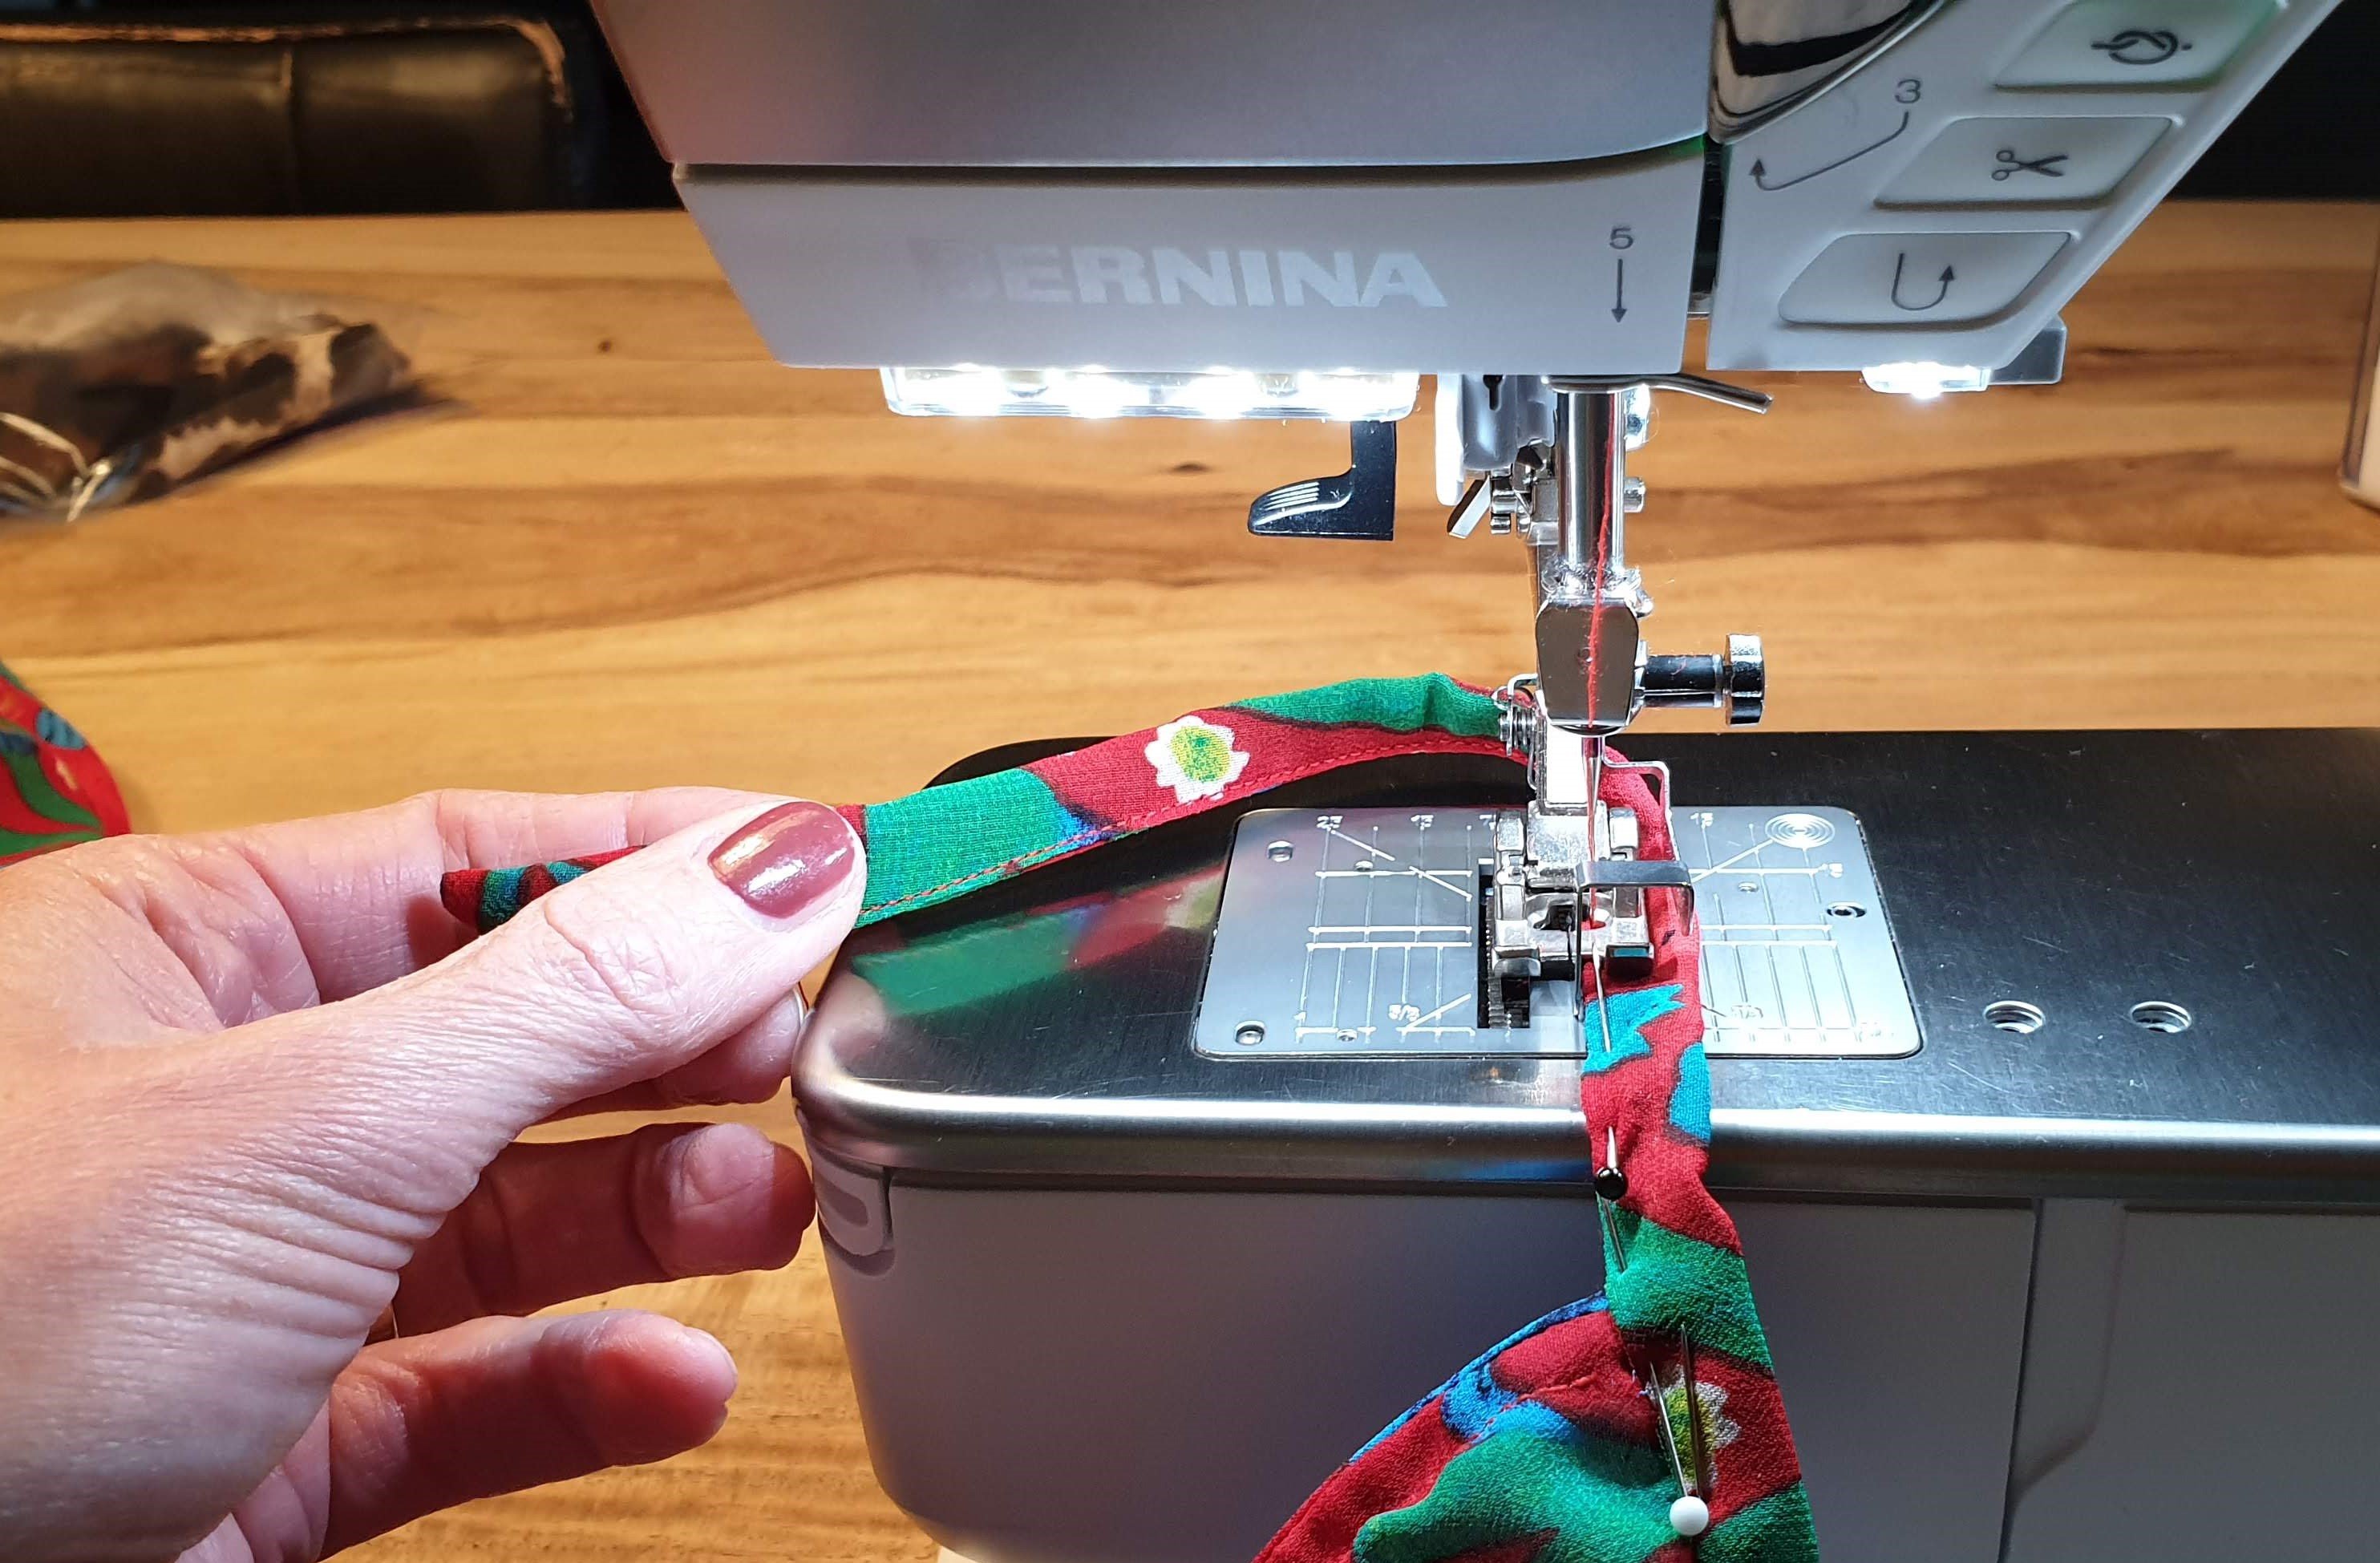
The first two blouses were made on my B530. Back then I didn’t have the gathering foot, so I had to gather the fabric by first loosly stitch two rows and then gather. In this blouse there is quite much to gather. In the front, back and at the bottom of the sleeves. Now I do own a gathering foot and could gather so much faster. Whoop whoop!
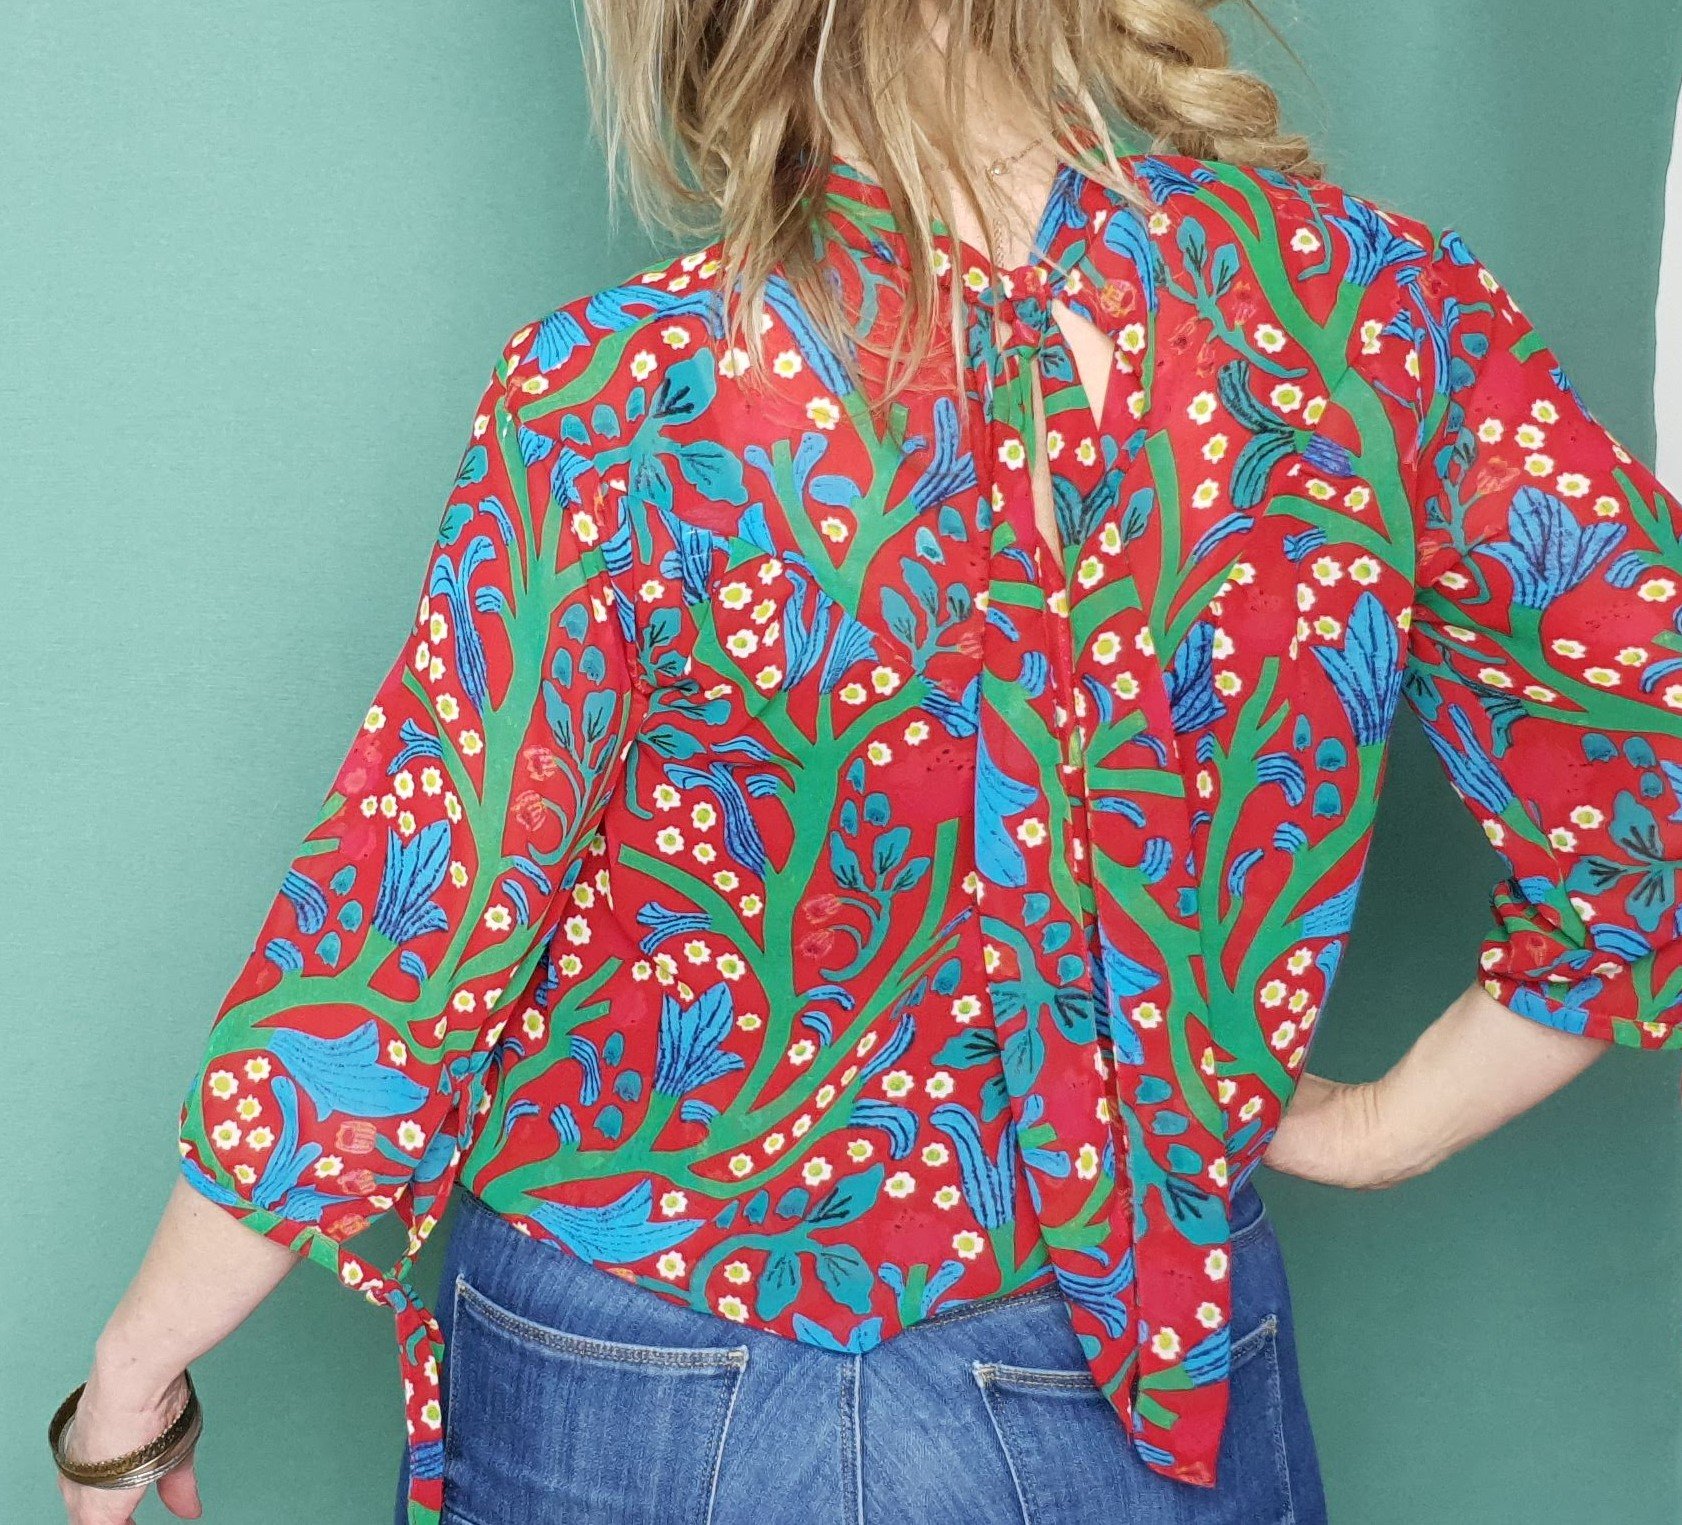
The closing
The blouse closes at the back with a bow. After attaching the bow I topstitched it first using presser foot 1c to stitch it exactly in the seam. Aligning the foot and the hem like shown makes this really easy. I like to do it this way so it’s not visible.

Furthermore I used the blindhem foot 5 to topstitch the part of the bow that has to be tied. This foot always does this trick. Look how neatly you can sew it this way. Love it!
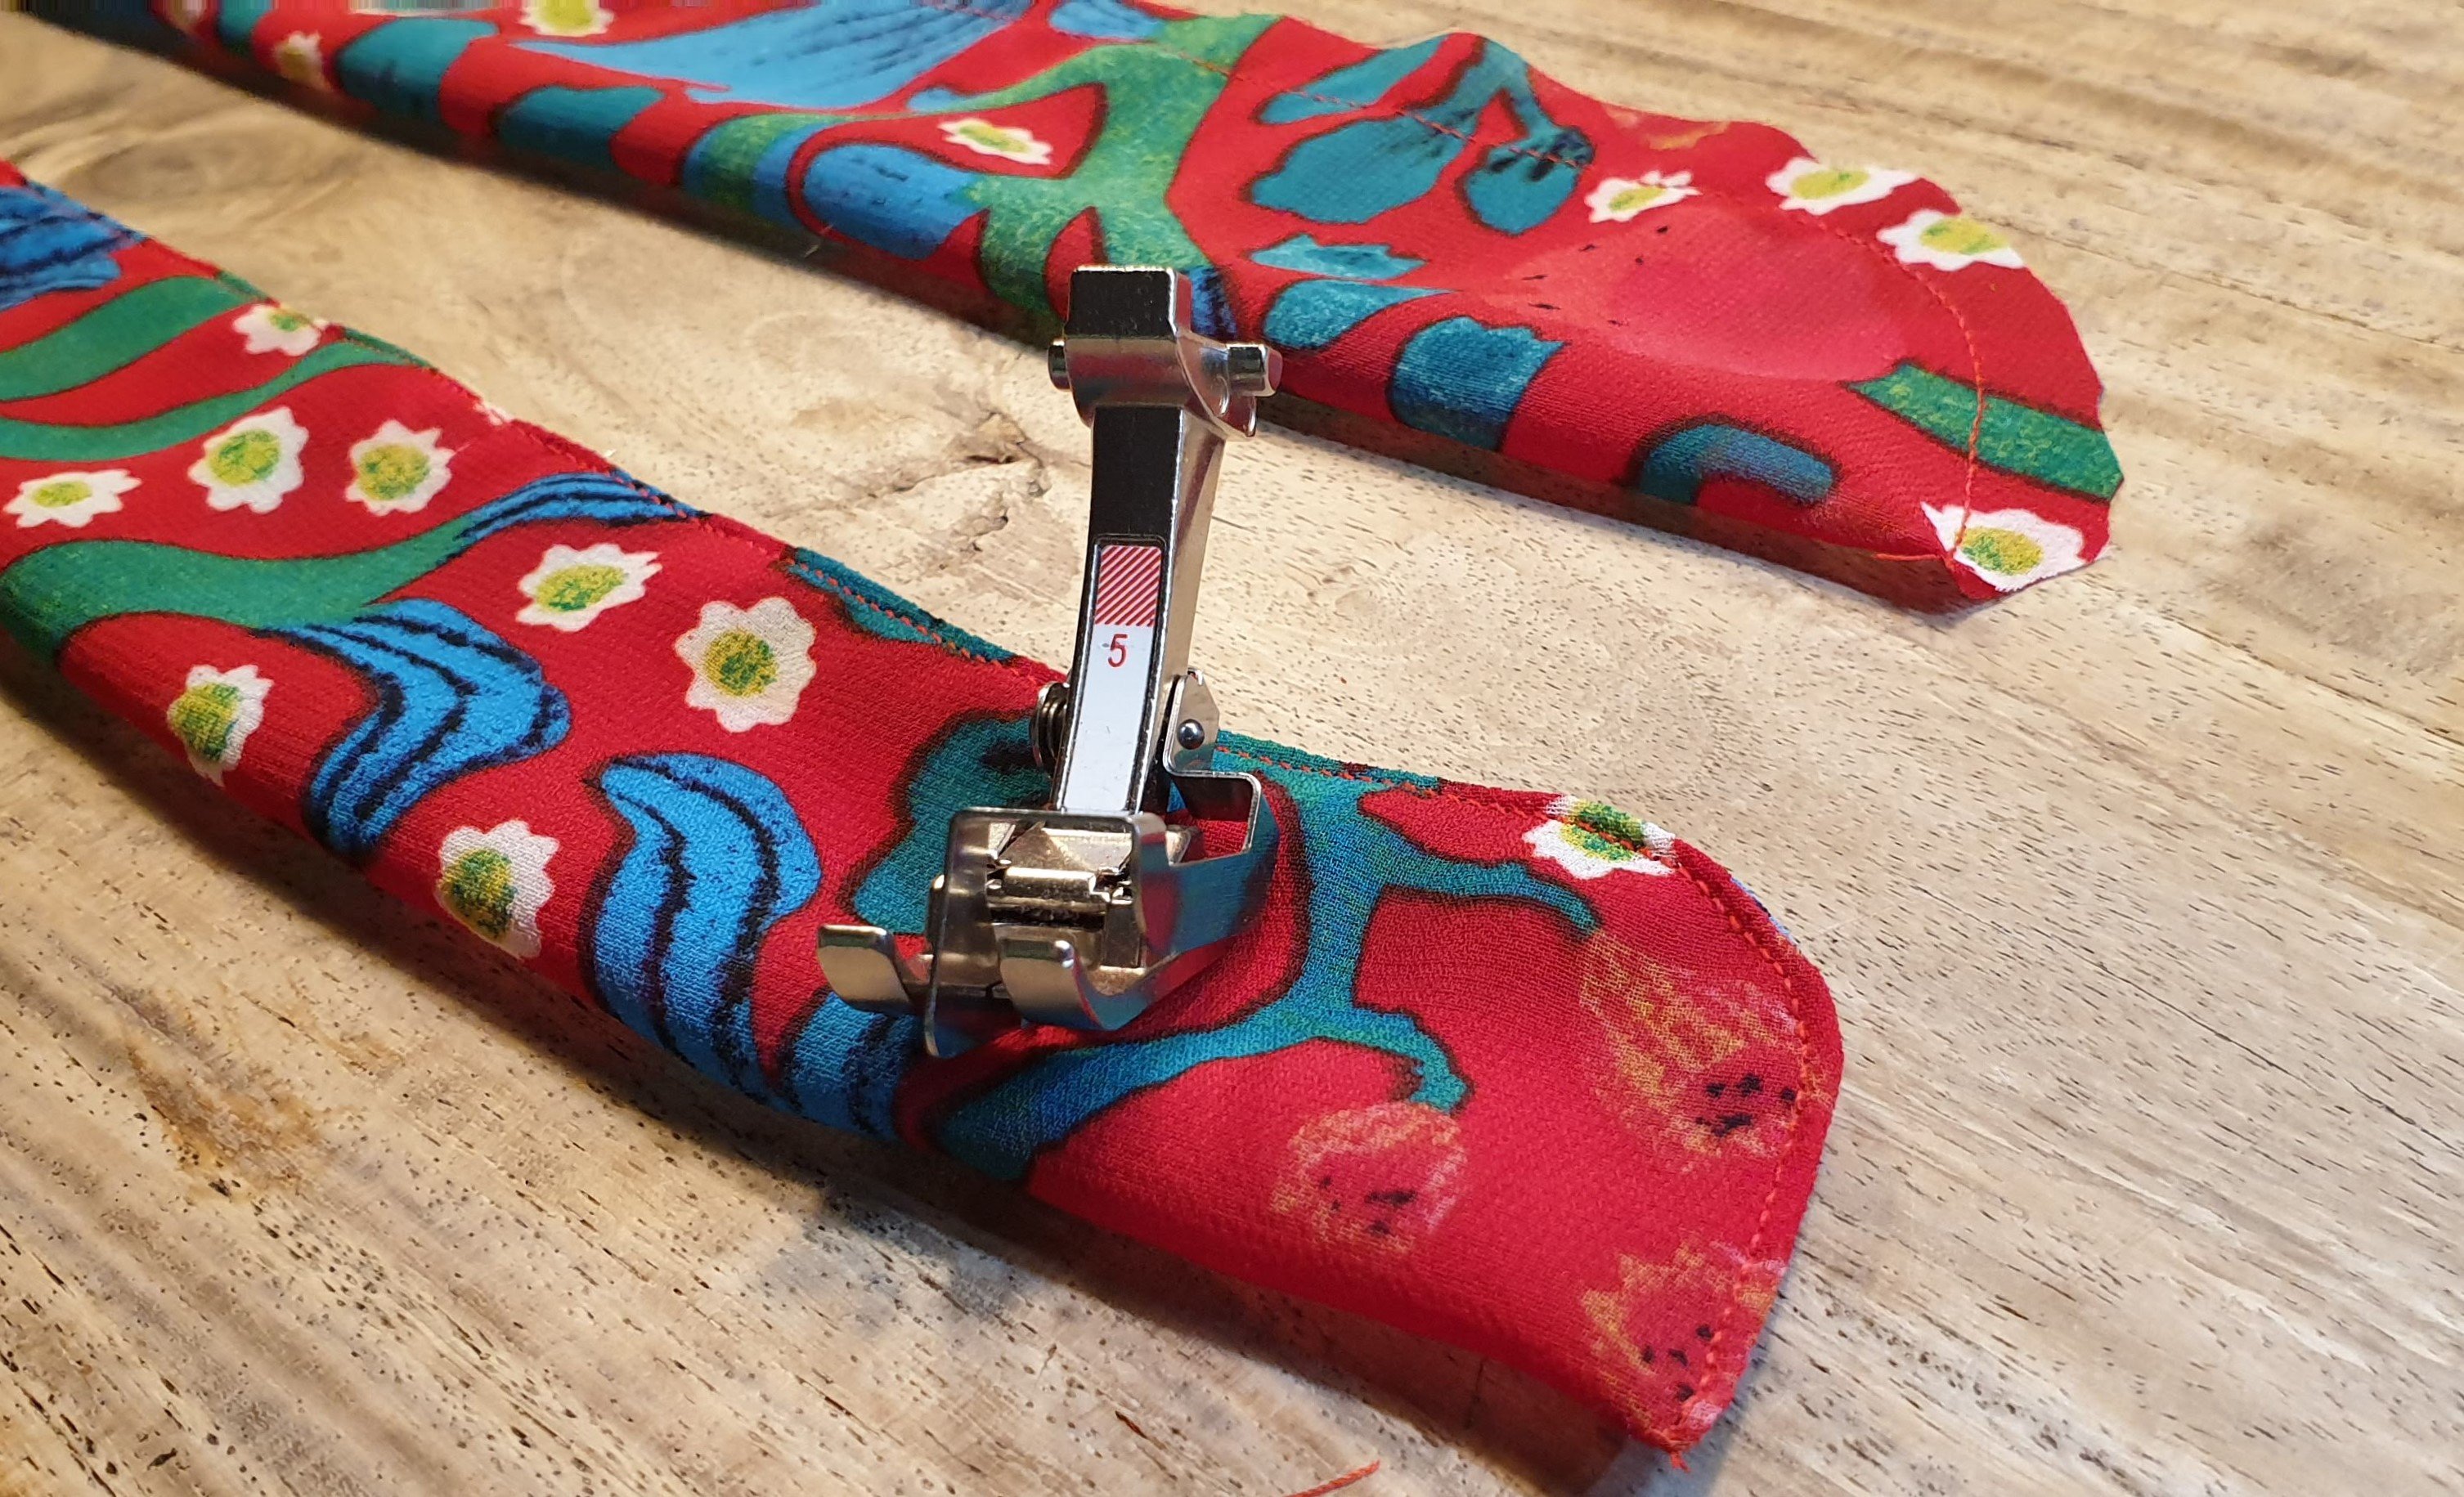
The closing of the blouse inspired me to do something similar at the sleeves. I cut a strip long enough to loosly fit around my arm and then added as much as I need to allow making a knot.
Half of the strip I reinforced with interfacing then I attached it to the bottom of the sleeves. Next steps were: first folding right sides together, stitch then turned inside out (using a crochet needle)…
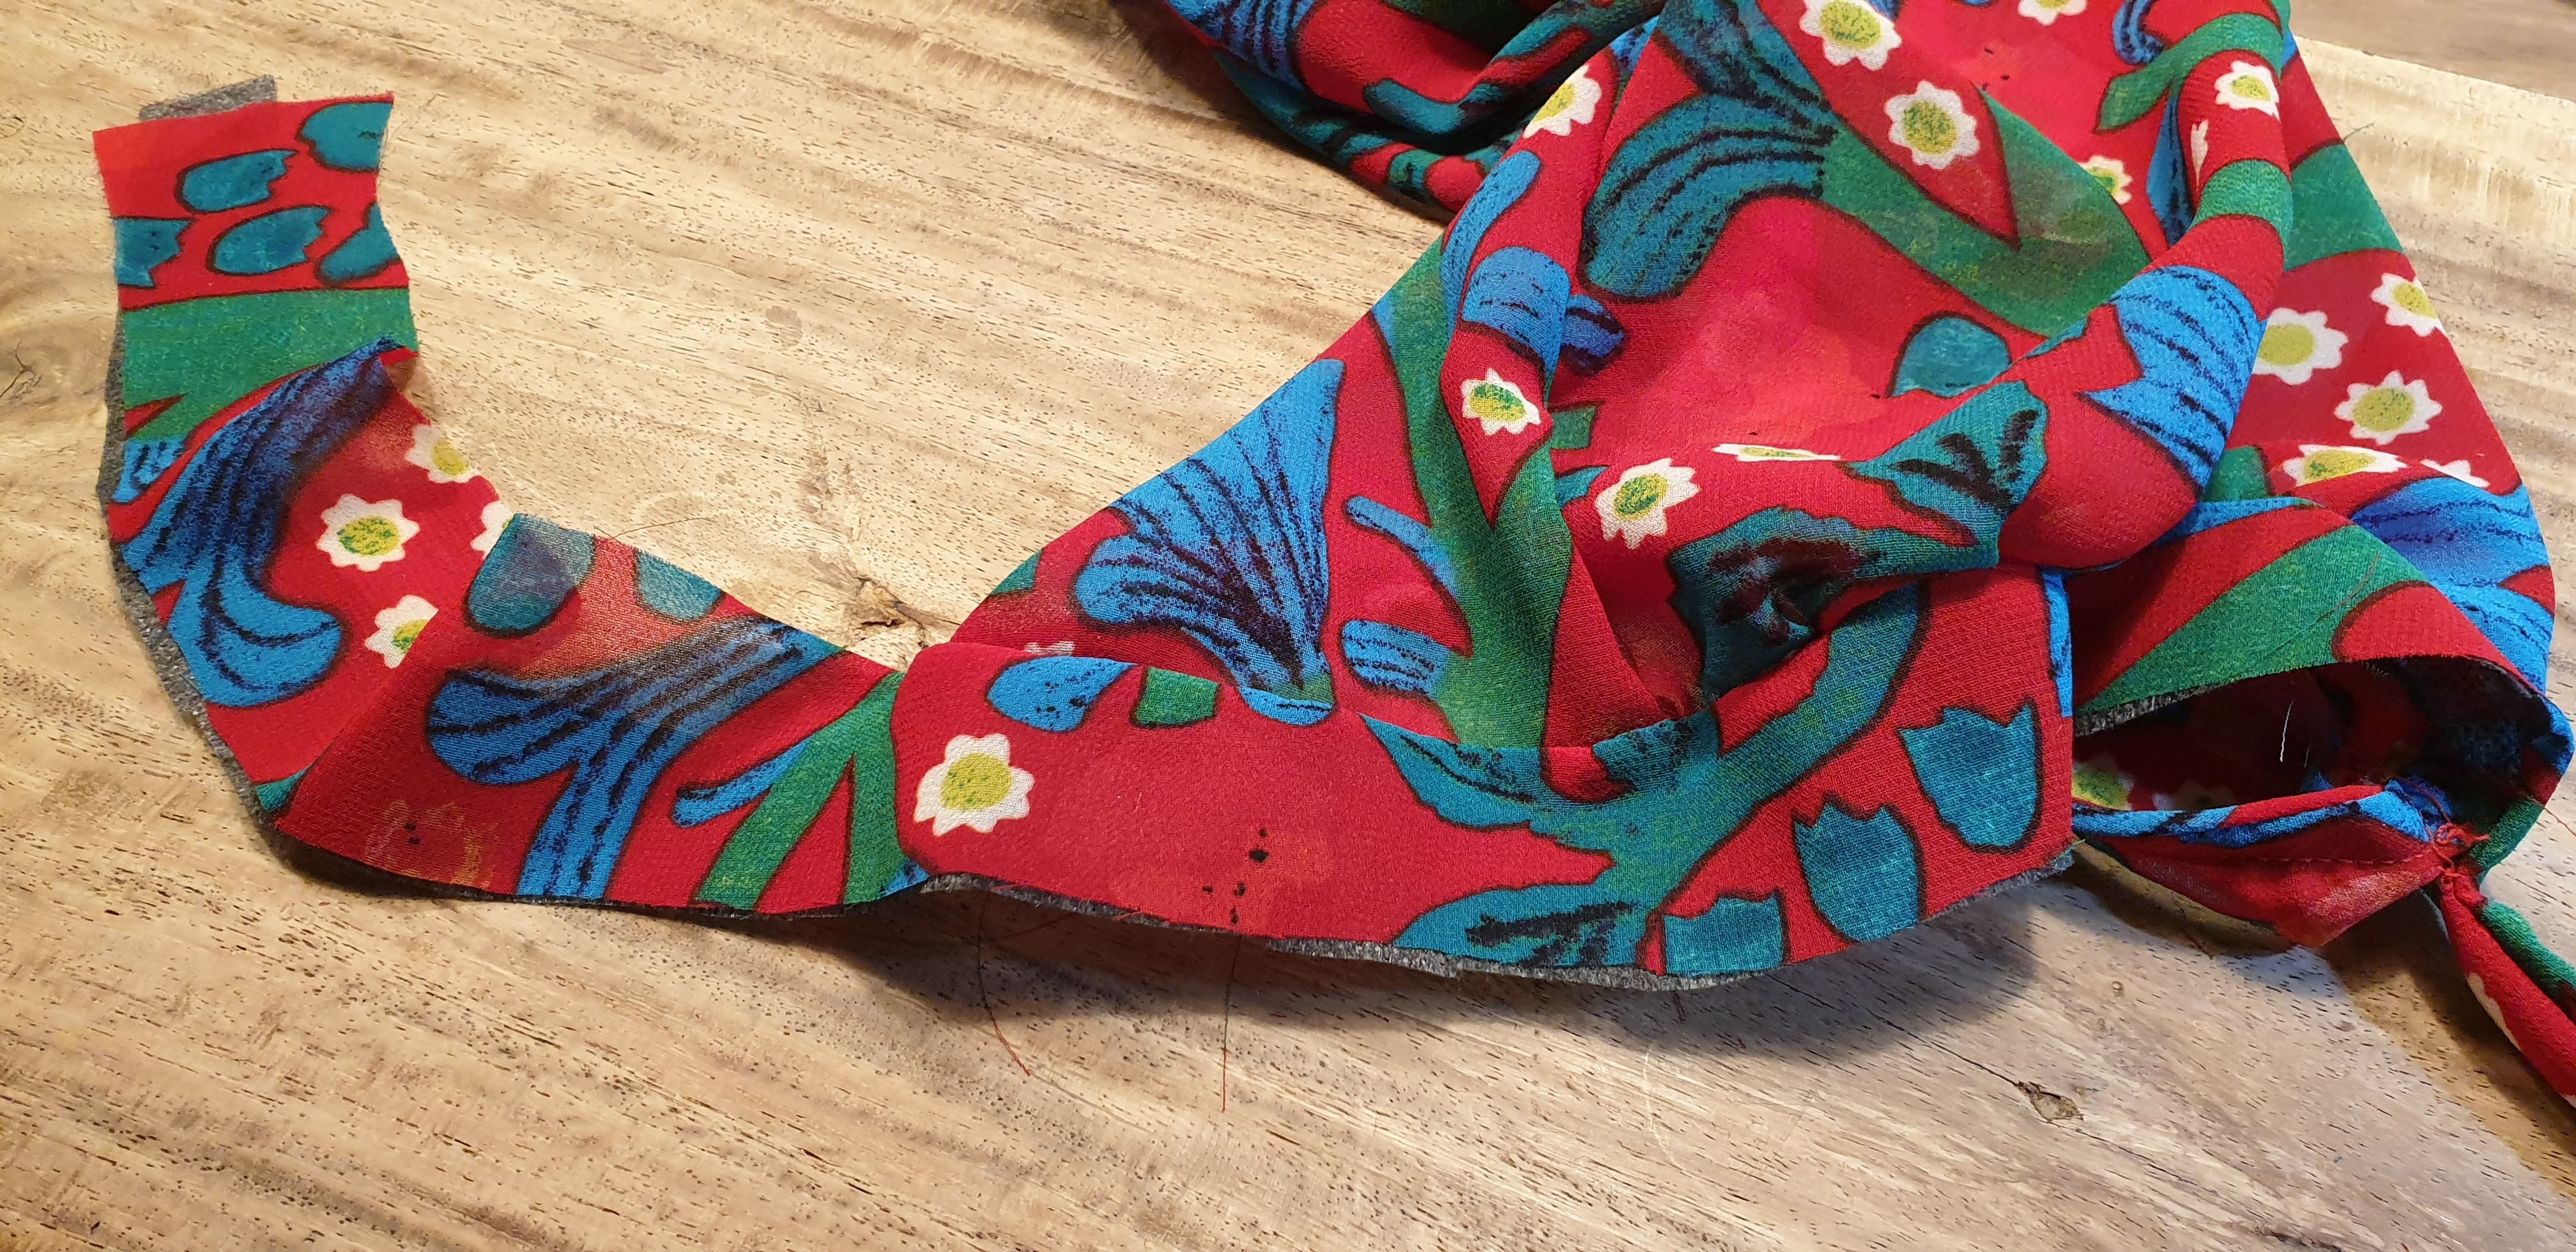

…followed by pinning all of the little bow and topstitching for a lovely finishing.

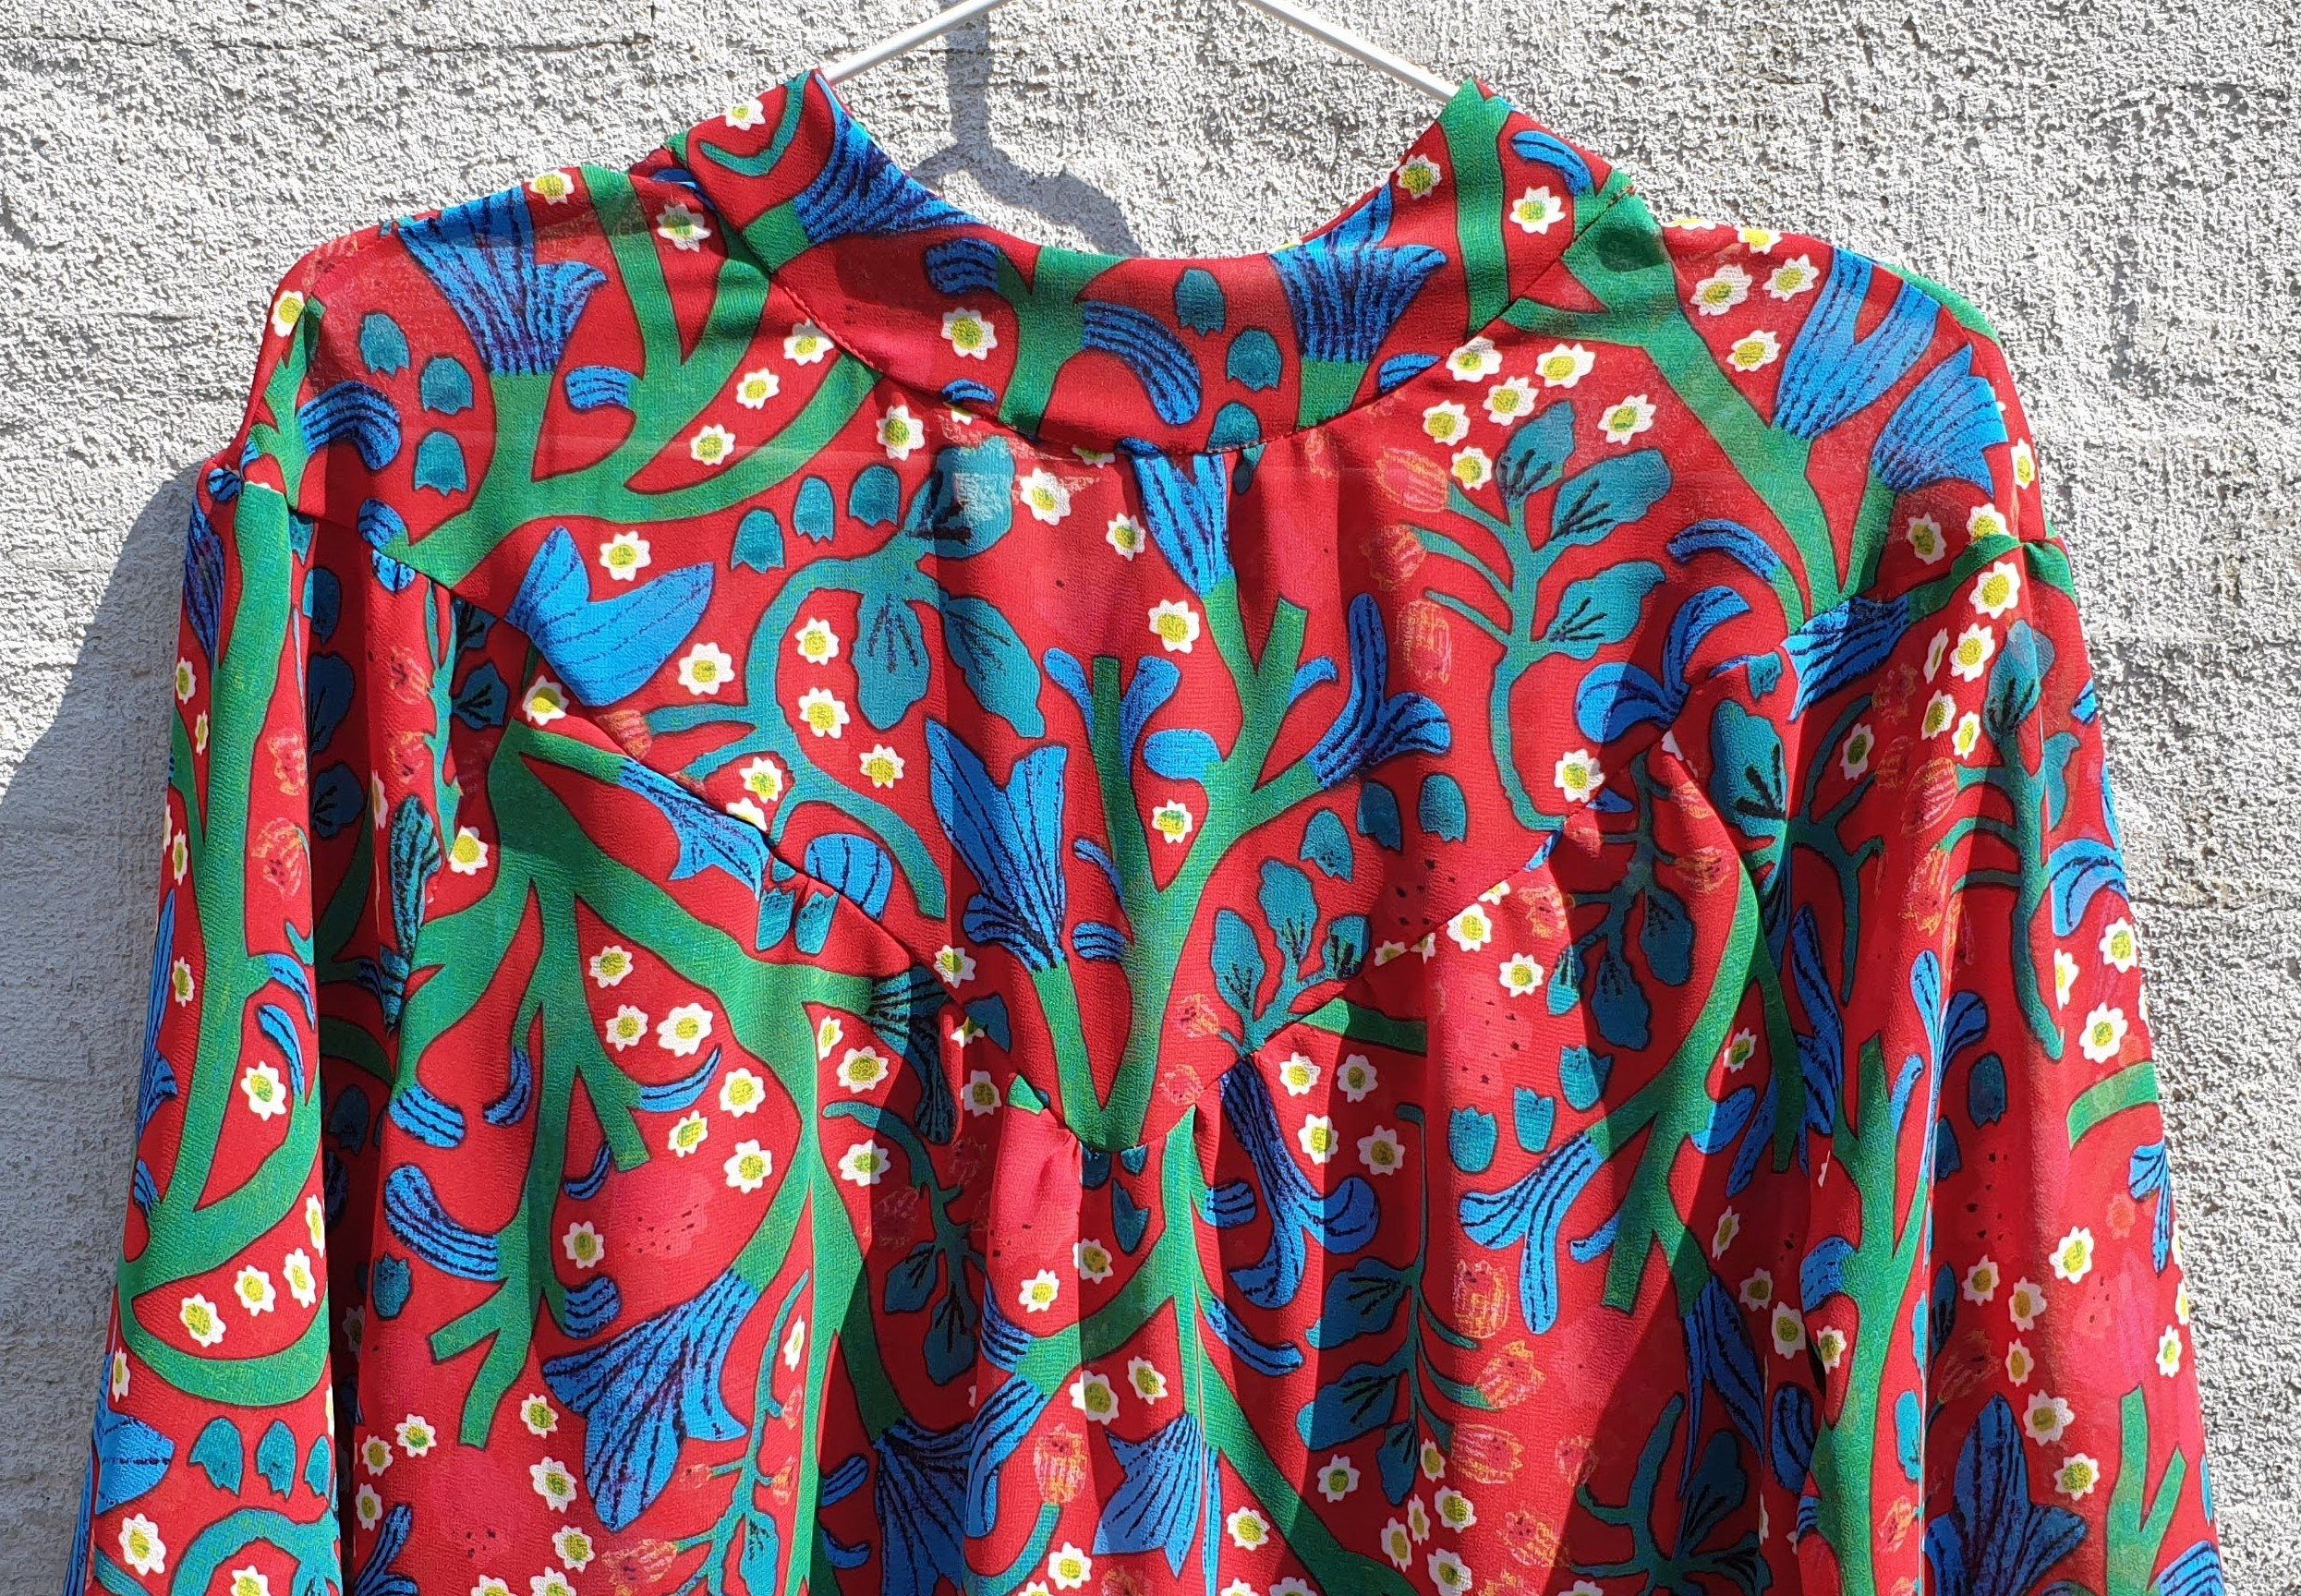
The bottom
The bottom of the blouse is nicely finished with a small hem. Which was a bit time consuming and with pinning this flimsy fabric I needed a little patience, because only by looking at the fabric the pins flew right out again. Aarrgh ;-)!
I know patience is a virtue so I practiced it again and with a good result. Smile!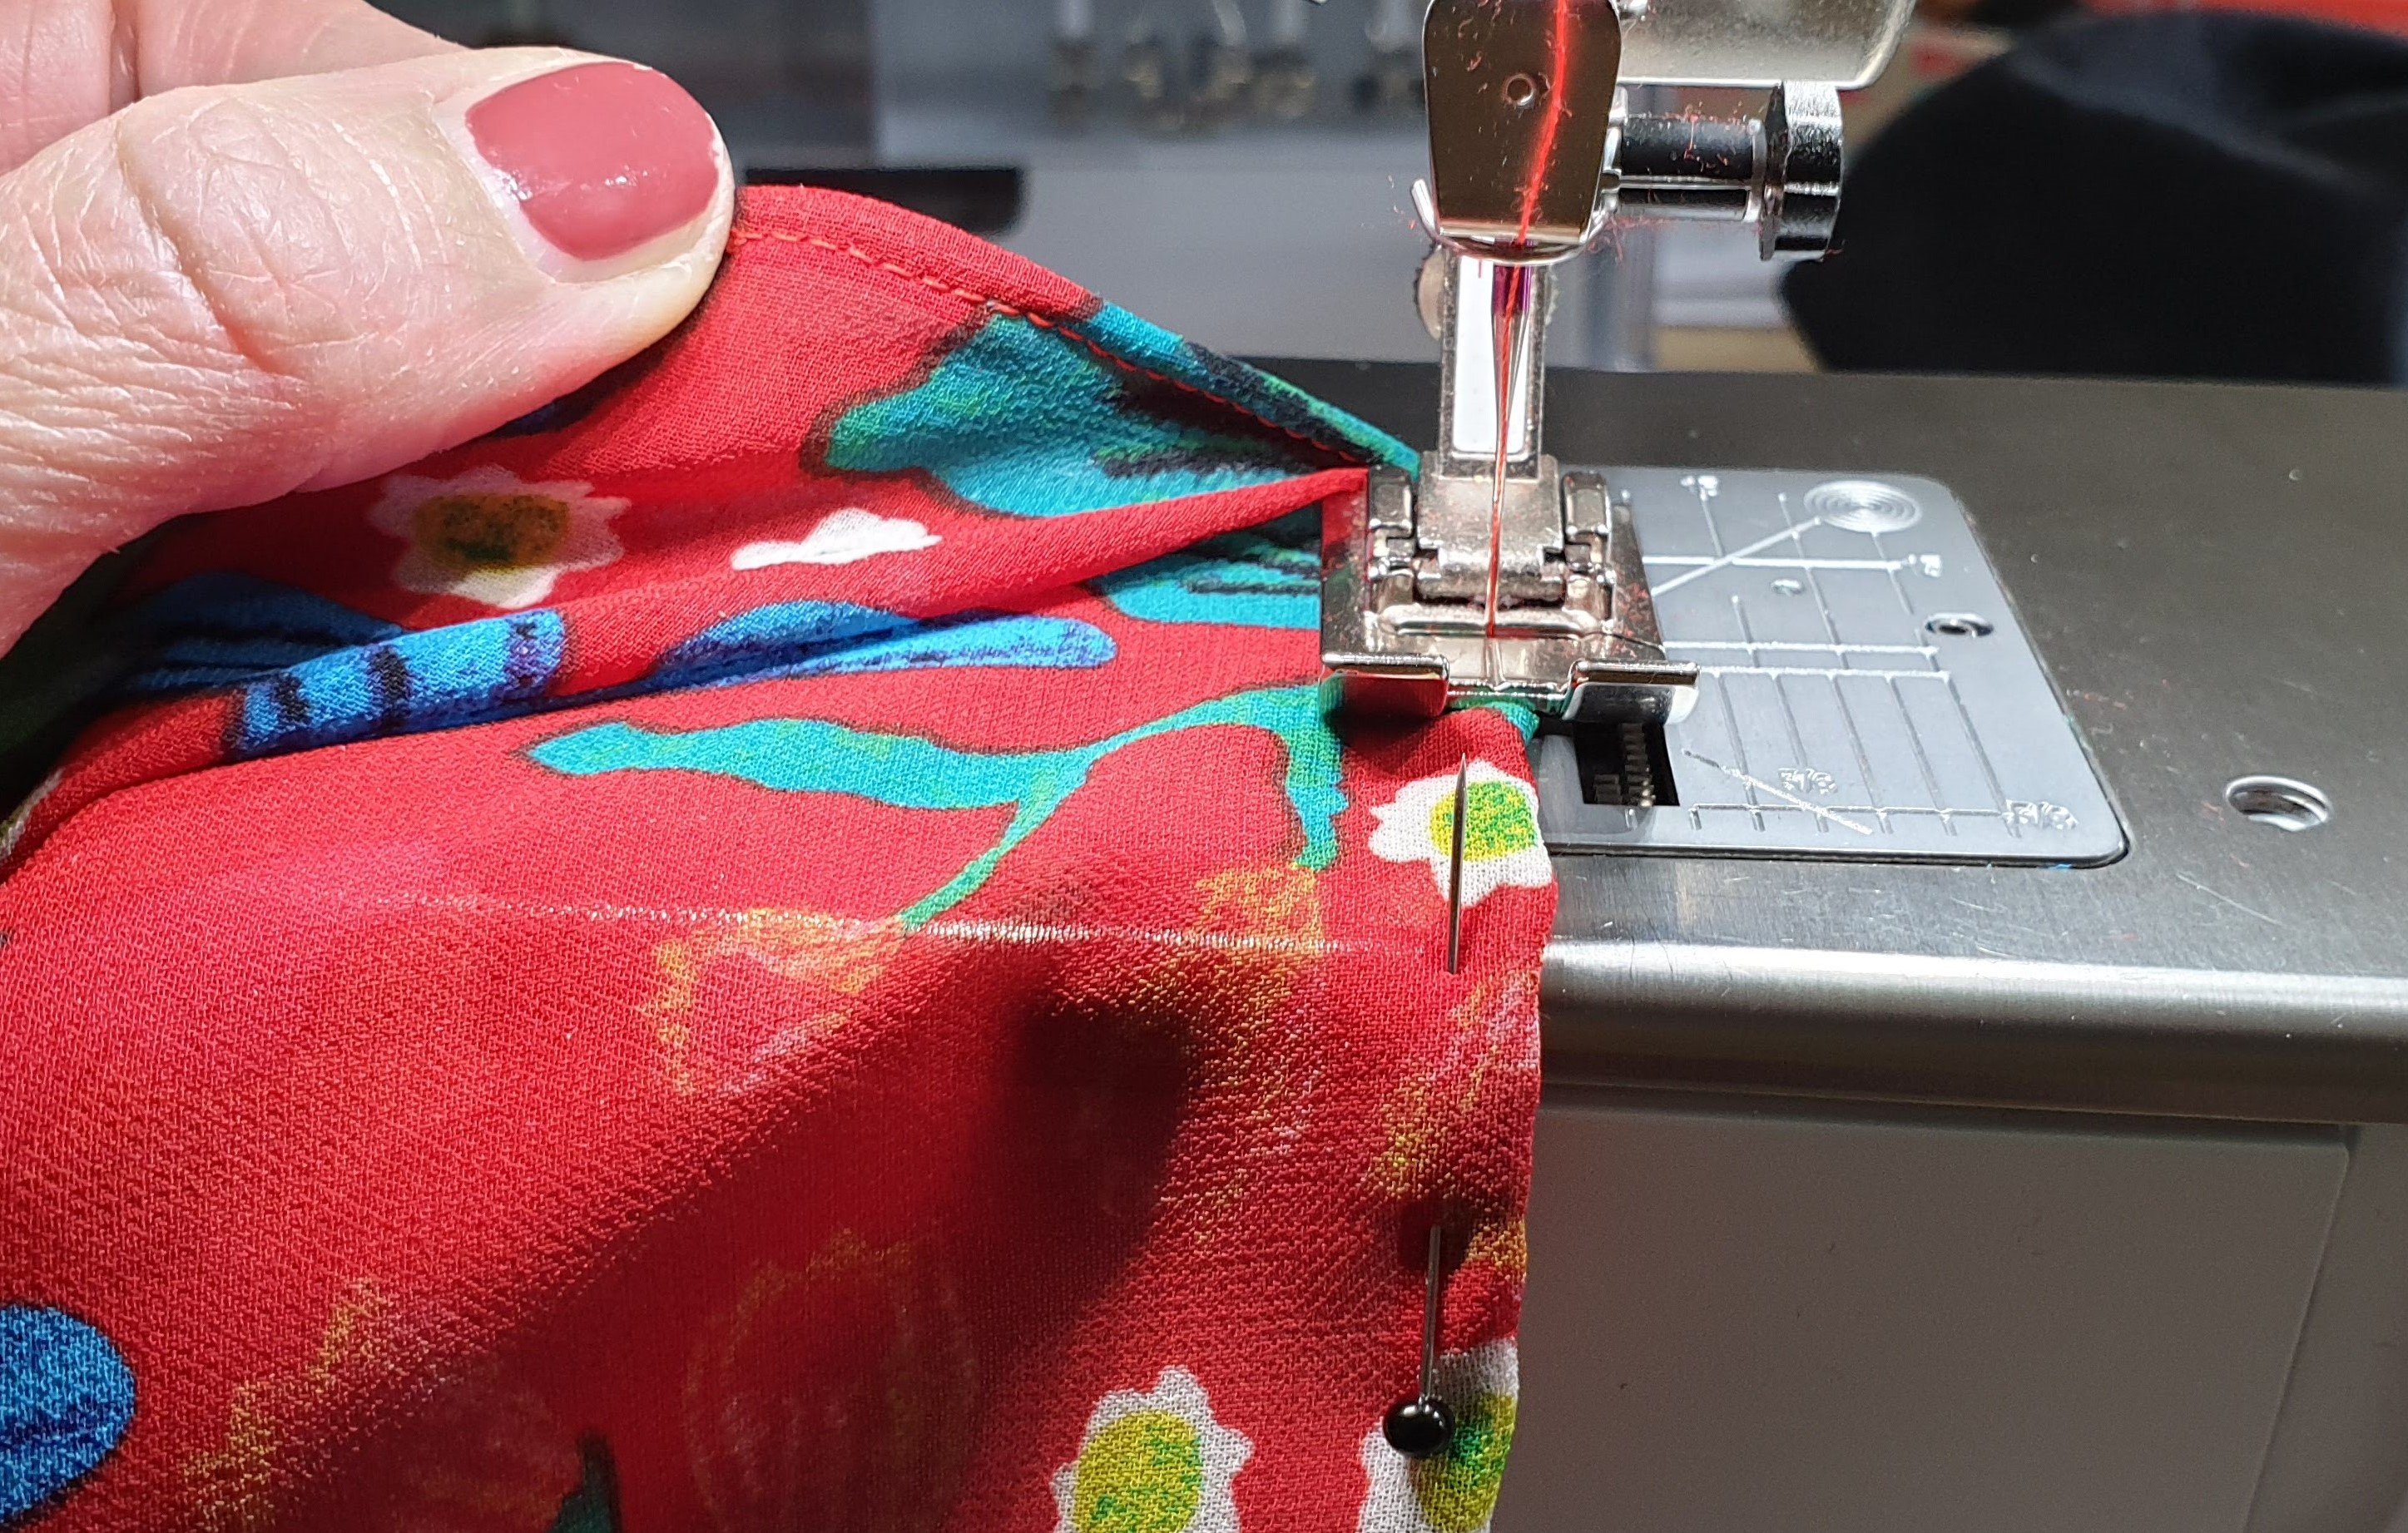
I always want to trie out new things! So even if this was three times the same pattern there are three different blouses in my wardrobe and not only because of the different fabrics. Every blouse has something different. Check out my Instagram to find out which differences I’m talking about. See you there!
Love this blouse! Might make a fourth ;-)!
Thank you for reading my blog! And if you have any questions…please don’t hesitate to ask.
Love,
Marlies


0 Responses