 BERNINA Corporate Blog -
This Toolbar contains icons to use for artistic effects, adding texture and curves, color changes and morphing objects. Also the 3D Globe Effect is included.
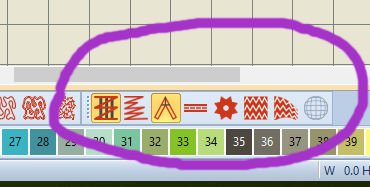
Let’s see what wonderful things we can do with these 8 icons.
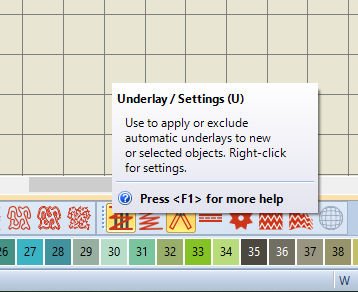
1) Underlay/Settings (U) – Use to apply or exclude automatic underlays to new or selected objects. Right-click for settings. The (U) from your keyboard can be used as a shortcut – use the lowercase ‘u’.
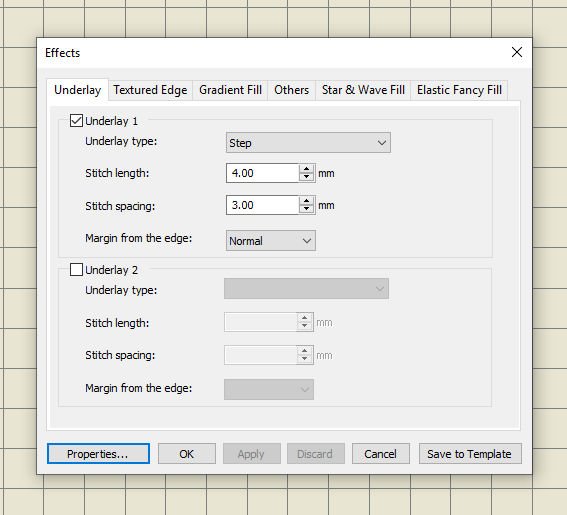
The Underlay = stabilizing function will be used to make zigzag stitches or double zigzag stitches, placing them underneath the embroidery objects, to support and improve the quality of the stitchout: also without an underlay, your fabric will show through. By default Underlay 1 is activated, but you can also select Underlay 2 for additional effect, i.e. raised embroidery. Stitch length and Stitch spacing can be adjusted. The Double Zigzag Underlay is only available for Satin Outlines and/or Alphabet/Letters.
For using a different type of underlay stitches (not default), click on the down arrow with ‘Step’ and choose a different underlay, depending on its purpose.
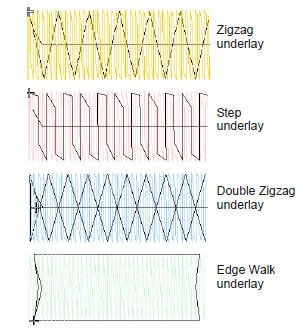
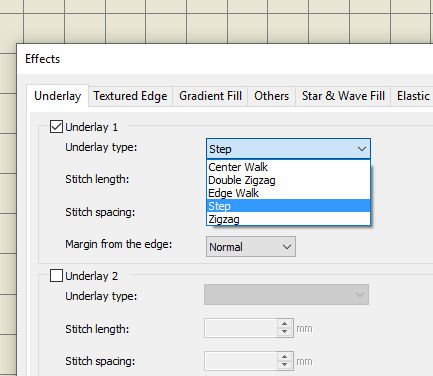
The picture above shows a Zigzag Underlay (top picture), a Step Underlay (2nd), a Double Zigzag Underlay (3rd) or a Edge Walk Underlay (bottom picture).
You can also choose a Center Walk Underlay; this will place a row of stitches along the center of a column. By drawing a Satin Outline, V8 automatically places both a Center Walk Underlay and a Step Underlay, for the best support.
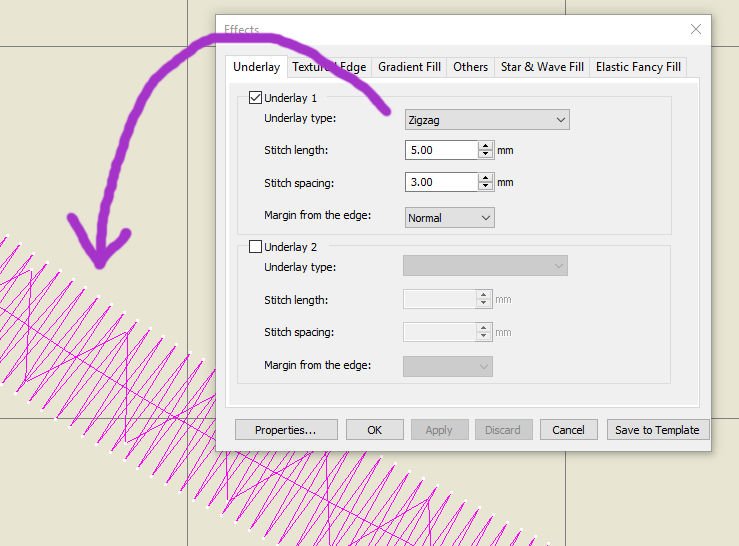
If you want to change the Step Underlay into a Zigzag Underlay, right-click on the Outline, and choose ‘Zigzag’ as Underlay Type. Click on ‘Apply’ to see what happens. If you want to continue, click ‘OK’ to set these adjustments. Be sure this gives you the best available stitchout, otherwise maintain the default settings.
You can choose to remove the Zigzag Underlay, leaving just the Center Underlay, but there will be less support with the Satin Stitches Outline. Always remember why V8 sets Stitches/Underlays: to give you the best result with the actual embroidery.

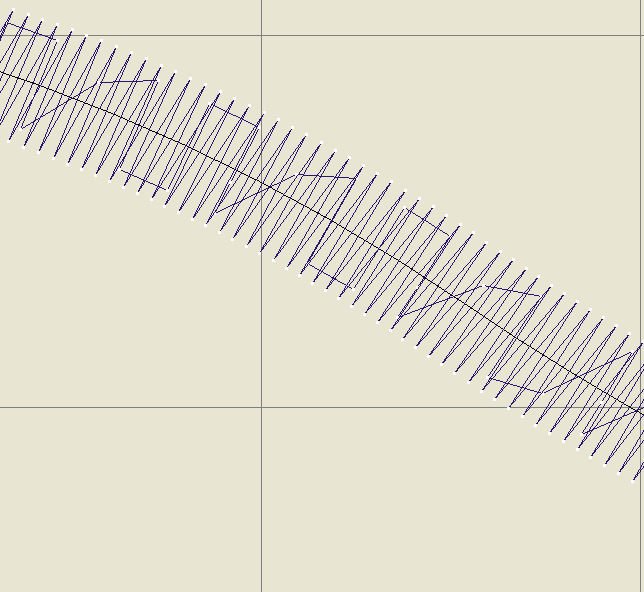
Zigzag or Double Zigzag Underlay stitches will be set different from Zigzag Cover stitches, when choosing Satin Outline or Double Satin Outline. You can see this with the picture above: an enlarged Double Satin Outline, showing many layers of Underlay stitches, all slightly different settings and not matching the final Zigzag Cover stitches. I am counting 5 underlays: 1 Center Walk Underlay, 3 Zigzag Underlay’s and 1 Step Underlay, plus the final Double Satin outline: it that won’t raise this Outline to create a 3D/Trapunto effect, then what will?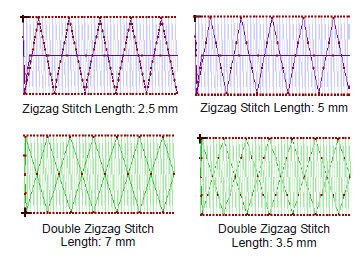 Stitch Length and Stitch spacing can be adjusted too, changing the density of the Underlay stitches.
 The Underlay Margin can be adjusted, to change the distance between an object Outline and the edge of the Underlay: the higher the setting, the less chance stitches of the Underlay will extend outside the Cover Stitches. Underlays are just there to support, not to be seen.
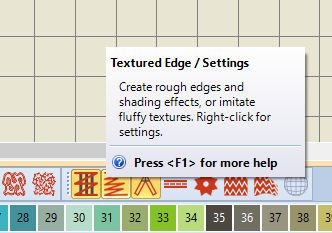
2) Textured Edge/Settings – Create rough edges and shading effects, or imitate fluffy textures. Right-click for settings.
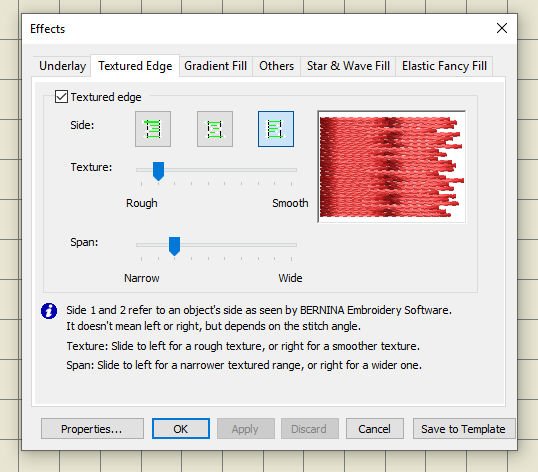
Notice the info: Side 1 and 2 refer to an object’s side as seen by BERNINA Embroidery Software. It doesn’t mean left or right, but depends on the stitch angle.
Texture: Slide to left for a rough texture, or right for a smoother texture.
Span: Slide to left for a narrower textured range, or right for a wider one.
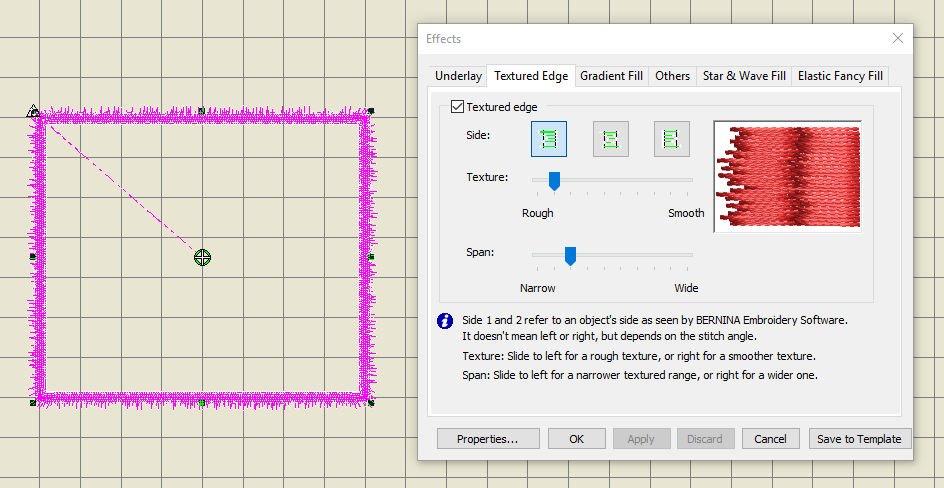
To practice, I have drawn a rectangle (outline) and selected this: clicked on the left icon ‘Side’, no other adjustments are done. You can see that the Textured Edges are all pointing outwards.
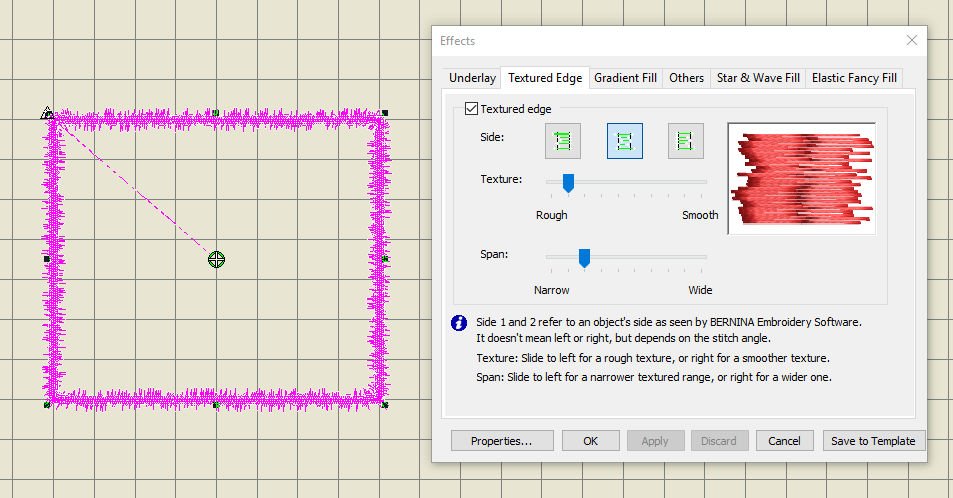
Next, I’ve clicked on the middle icon ‘Side’: now both sides of the Outlines are ‘fringed’.
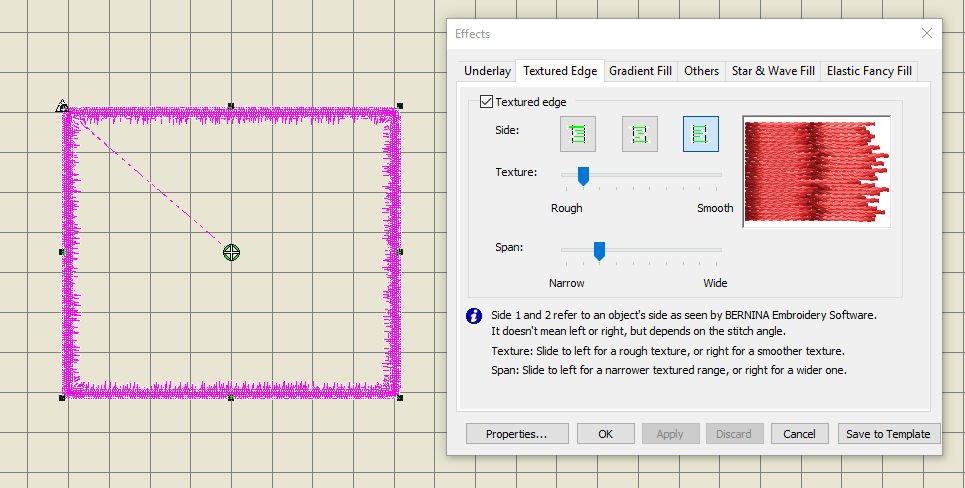
And last, I have clicked on the right icon ‘Side’: just the inner sides of the Outlines are changed. Notice the box with the ‘sample’ on the right of ‘Effects’ menu? It shows a preview of the effect you will get, before applying/OK it.
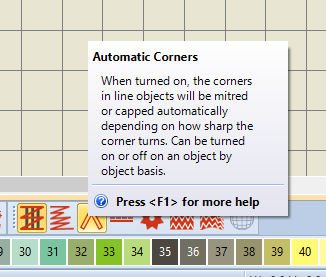
3) Automatic Corners – When turned on, the corners in the line objects will be mitred or capped automatically, depending on how sharp the corners turn. Can be turned on or off on an object by object basis.
The quality of corners is important in borders and with appliqué, and Satin Column sewing in general. Sharp corners may cause stitch bunching, which can create hard spots in the embroidery and may damage fabric or needle. Using Automatic Corners will reduce stitches and bunching, distorted embroidery in sharp corners.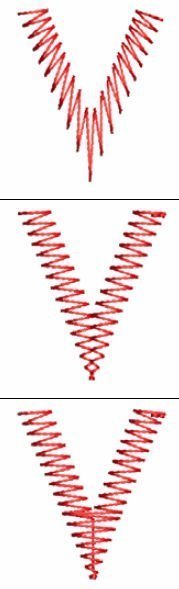
The picture above shows sharp corners; three different methods of embroidery:
1: Default corner = stitches curve around corners. This is a default Satin corner handling.
2: Mitre corner = corners are formed by two segments that join in a sharp point
3: Cap corner = corner is capped by an extra segment – sap stitching remains parallel to the column.
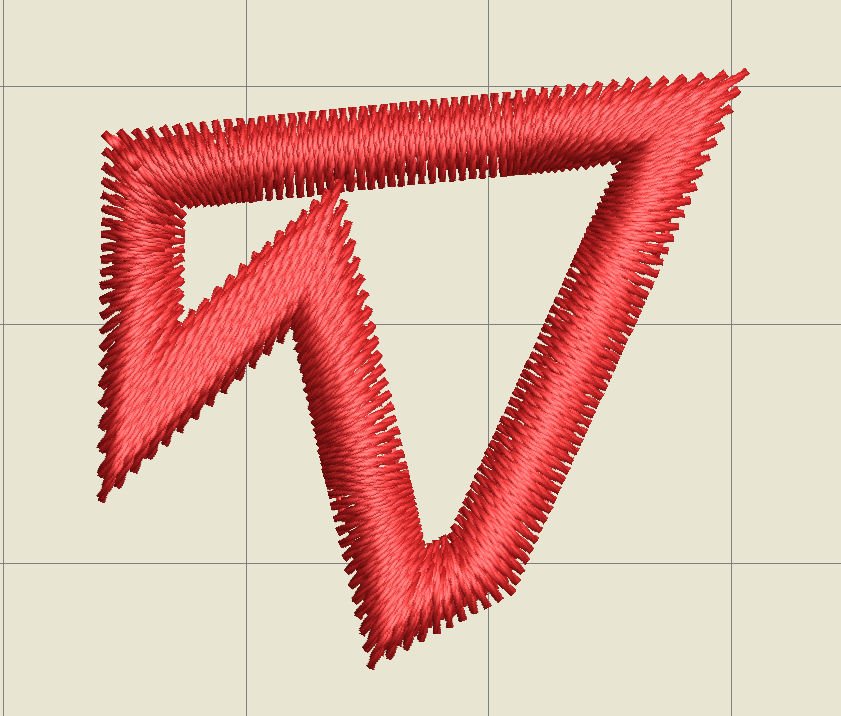
I have drawn an odd shape with different corners. This example is without using ‘Automatic Corners’…
and this is WITH: quite a difference, much smoother corners! V8 will choose the type of coners (1, 2 or 3), which will be the best for the shape/object. In this case mostly mitered corners,
but with this figure also a capped corner. It shows me that square corners with 90° or greater angles, are stitched in the direction of the Outline stitches, sharp corners, angle 45°, are mitered and very sharp corners, angle 30° or less, are capped. Try it yourself: pull corner nodes to see the type of corner change. Gives you a better idea how things work, doesn’t it?
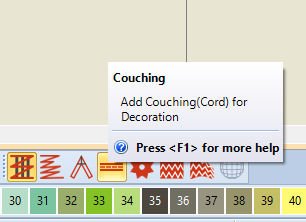
4) Couching – Add Couching (Cord) for Decoration. Using the BERNINA Couching Foot #43. Couching is made by working over a thick thread/cord, which is placed in the hole of the Couching Foot #43, covering this with smaller stitches = straight stitch in the middle of the cord.

Making different outlines, using the Couching function after selecting/drawing: now they are changed into (much thicker) couching lines, which your embroidery machine will recognize. Beware of sharp corners ( I have made a couple of them): they are difficult to ‘follow’ with couching. Soft corners and curves are ok. When couching a circle, the ends will be ‘buried’ into the fabric afterwards.
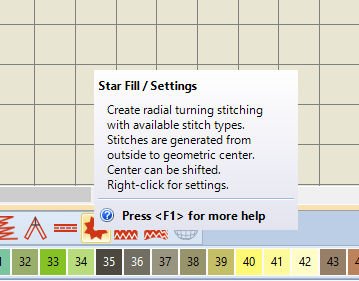
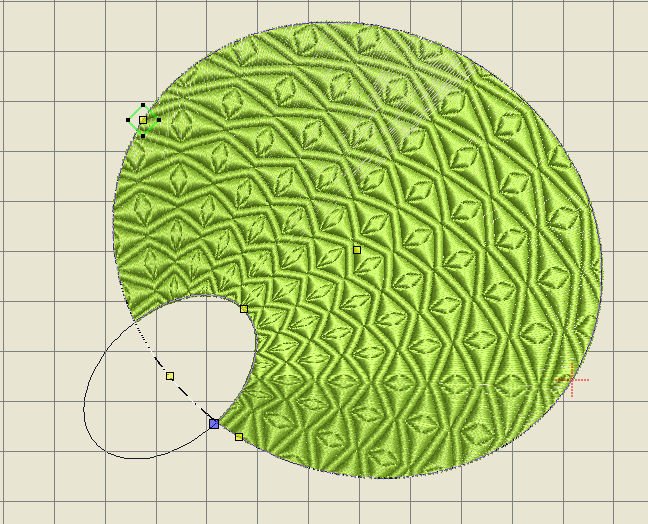
5) Star Fill/Settings – Create radial turning stitching with available stitch types. Stitches are generated from outside to geometric center. Center can be shifted. Right-click for settings.
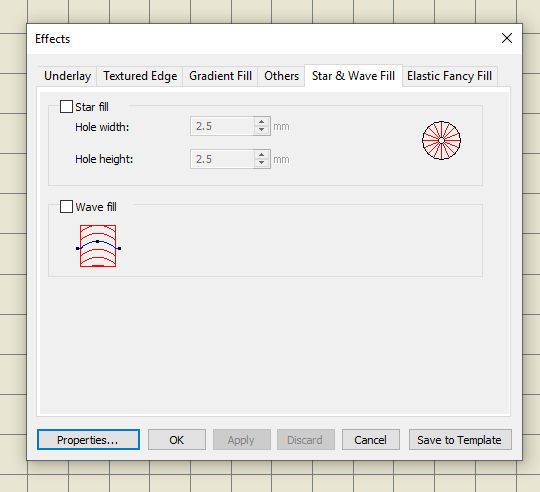
Effects – settings for Star Fill are for interesting patterns with your objects. You can change closed objects, circles and rectangles – with optional holes. Not all patterns and stitch settings or objects are suitable for Star Fill. Using it with larger objects, avoid bunching at the center = increase the size of the hole, move the center into an existing hole in the object or move it outside the object all together. You can also increase stitch spacing by about 20%. Choose stitch patterns where not too many needle penetrations are placed close to the center of the object. But it is all practice!
Activate this option by checking the box ‘Star Fill’. You can adjust Hole width or Hole height: both default 2.5mm.

I have drawn an oval shape, used a Step Fill, and activated ‘Star Fill’ by clicking on the icon. The stitches inside the oval are changed, with a small hole in the center. You can see there are a bunch of stitches around this hole, which will make stitching it out very difficult. Increasing the hole up to 9.90mm for both width and height is possible, but if you want to make a larger hole, ‘Apply’ is grayed-out = not possible.
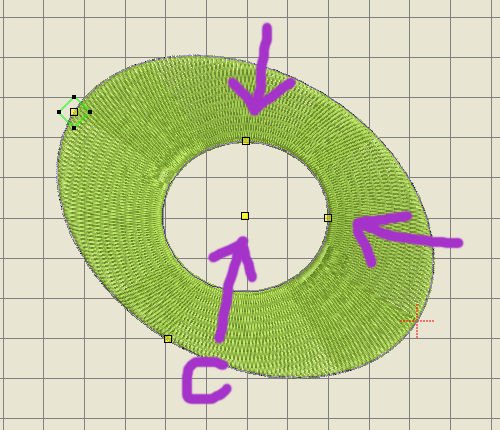
You can bypass that, by selecting the object with ‘Reshape’: three yellow nodes will appear in the centre. Just pull on one/both nodes separate = one for height, one for width) to enlarge the hole. There is often more than just one solution to a problem! The yellow node in the hole, pointed to as ‘C’ = center node. You can use this node to shift/drag the center to another point inside or outside your object.
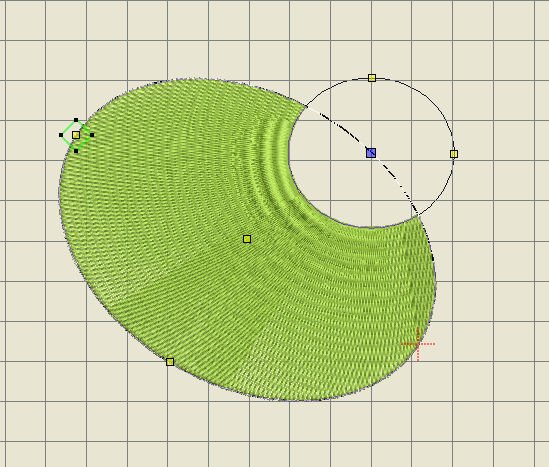
Placing the center halfway outside the object makes it even more interesting…
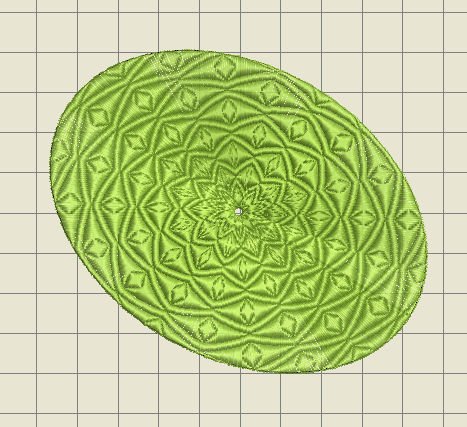
Want to create an actual STAR in the object? I’ve used the Sculptured Fancy Fill to change the appearance: love it! (But again, the hole in the center should be larger to avoid bulk). The pattern is ‘053 Glitter (90)’, but you can achieve this with other Fancy Fills too.
Shifting the center, enlarging the hole ( oval shape this time), creates another interesting object…. there is a lot to play with!
6) Wave Fill/Settings – Create contoured stitches along a digitized guideline – stitching maintains uniform density. Right-Click for settings.

You can create a Wave Fill by checking that box with ‘Effects: and making it more dramatic by pulling at one of the nodes at the end of the curved handle (via Reshape). But remember: the stitch count will increase too, so stitching this out will be a slow job!
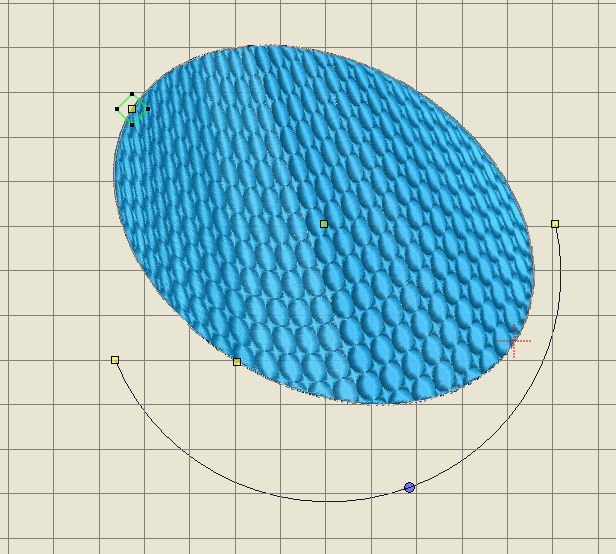
Use the same curved handle, center node – to change direction of the waves. This is an interesting pattern: Fancy Fill stitch, 157 Circle (0). Pulling the nodes on both sides of the curved handle, changes stitches/direction too.
You can apply Wave Fill together with Fancy Fill, Pattern Fill and some of the other craft stitch types. Try them and see how they can change your objects.
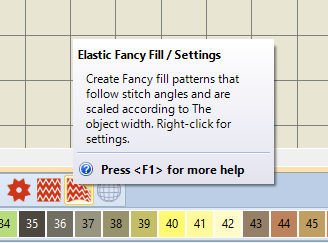
7) Elastic Fancy Fill / Settings – Create Fancy Fill patterns that follow stitch angles and are scaled according to the object width. Right-click for settings.
Using the same object, selecting it and clicking on ‘Elastic Fancy Fill’ makes this object almost look like a pinecone…Just try patterns and change settings!
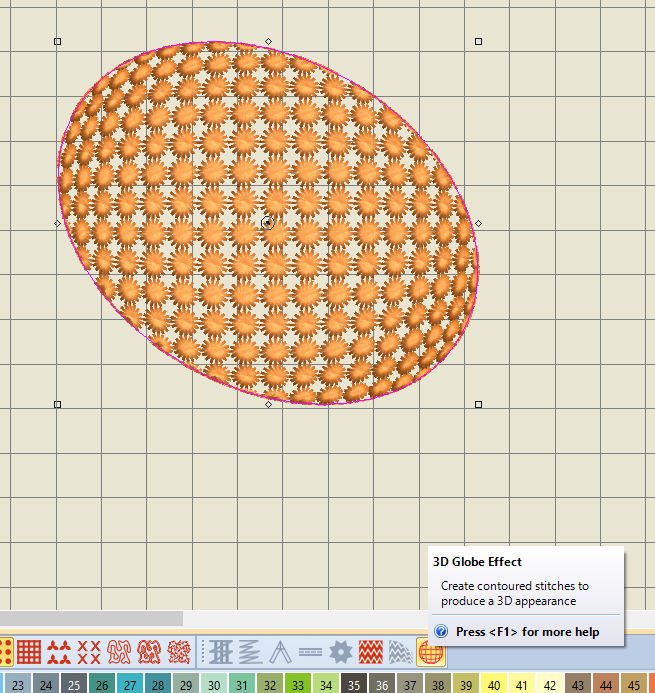
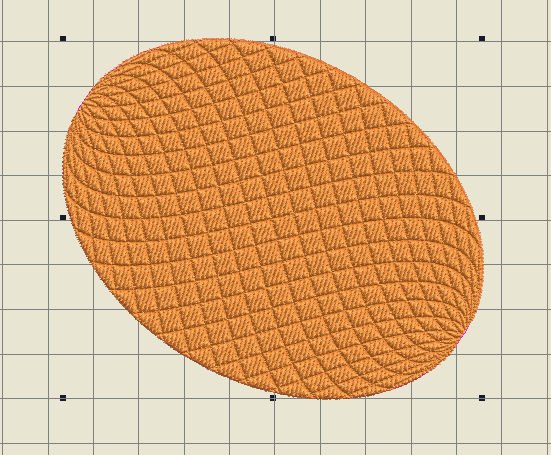
Now there is just one icon left: 8) 3D Globe Effect – Create contoured stitches to produce a 3D appearance. Because this is one of the three ‘specials’ in V8, for which users have bought (the upgrade for) V8 in the first place, I will explain more about this special feature in a separate lesson.
See you next time!
Happy Stitching
Sylvia Kaptein
Sylvia’s Art Quilts Studio
www.sylviasartquilts.nl
[email protected]

Sylvia, thank you again for the lesson, I am finally taking the time to learn this wonderful software. After much frustration as to why the icon for elastic fancy fill was staying grayed out. I realized I had to first create/select the object with a step fill pattern and then the system gives you the option to use the elastic fancy fill icon.
Lucia
That’s the thing with all objects or embroidery designs. If you have nothing selected, V8 doesn’t know it is supposed to do something and no options are activated. But it is good to find out.
Rankare Noven,
You’re welcome. Enjoy this lesson, and more to come
Sylvia
Thanks Ann, hope the lessons work for you.
Sylvia Kaptein
Wonderful ?