 BERNINA Corporate Blog -
It’s fun, discovering all the functions of the Toolbars of the BERNINA Embroidery Software V8. And sometimes there is a special icon for dramatic effect:
![]()
and dramatic effect is what you get when using the 3D Globe Effect.
This last icon of the Effects Toolbar is something special: many users have bought V8 (or the Upgrade) for this feature: making your flat embroidery look three-dimensional. This function is activated with a couple of fill stitches: Blackwork Fill, Candlewicking Fill, Lacework Fill and Pattern Fill. With the other icons the option 3D Globe is grayed-out.
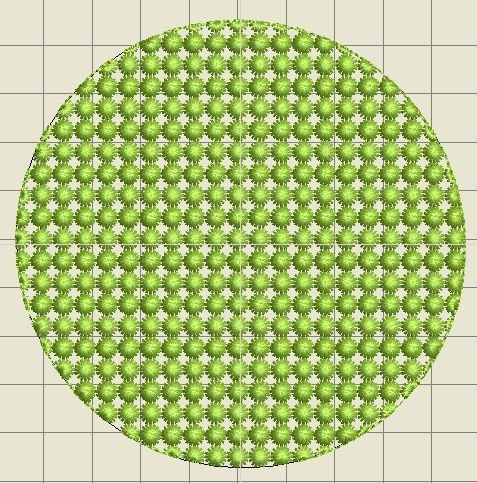
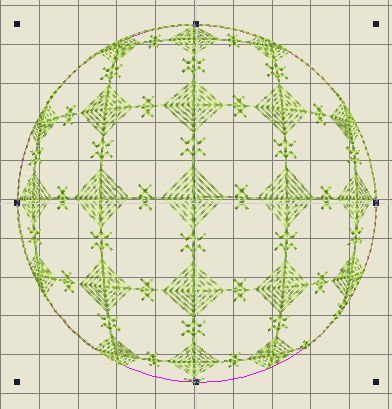
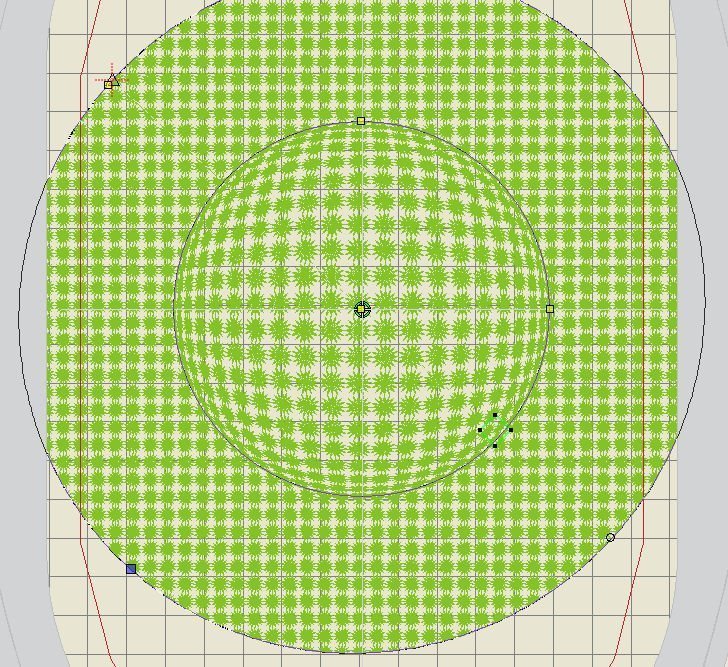
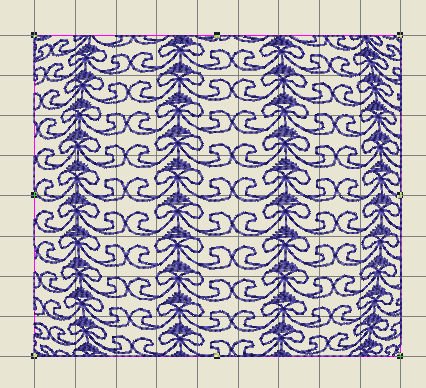
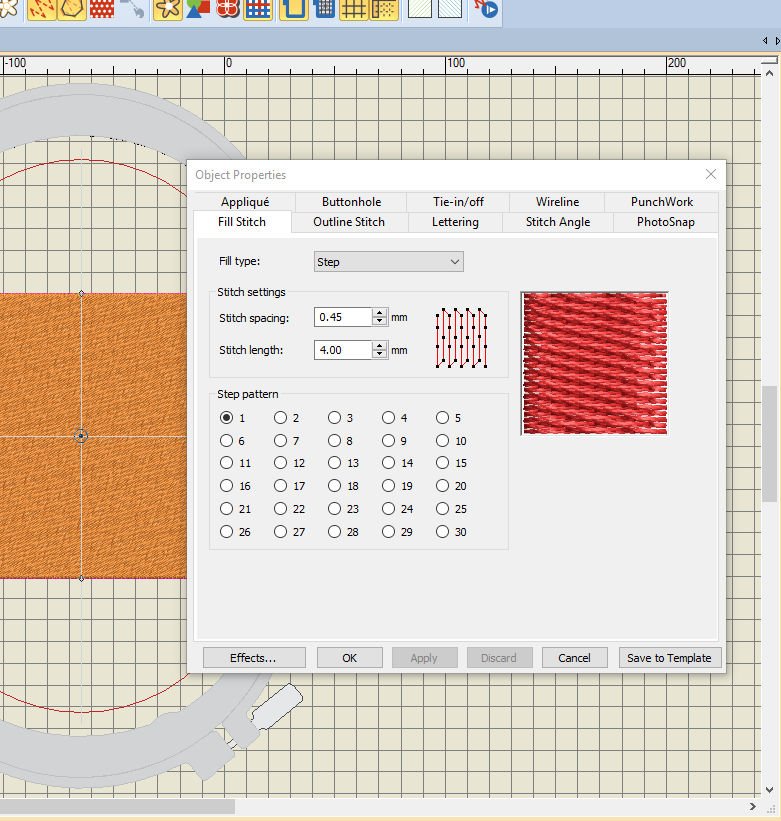
I have placed a Closed Object (left toolbar = Toolboxes, Digitize , Ellipse) on my workspace, and clicked on ‘Candlewicking Fill. Selected the circle and changed the color into a bright green (color change is just for fun). Stitch count with this circle = 14.004 at the moment.
With the selection still active, the 3D Globe Effect icon was also active: just clicked on this and the flat circle turned into a sphere. Wow, how great is that?! Stitch count has dropped to 10.356.
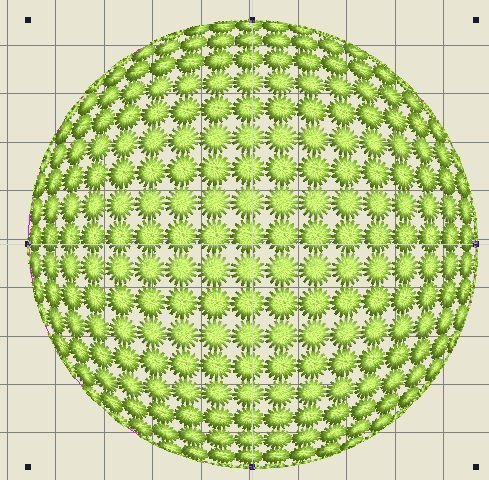
Deactivating ‘Show Artistic View’ shows you the start point = center of the hoop with actual embroidery, the start of the embroidery (small circle on the right) and the end point (triangle on the left). These start- and end points could be at another place on your embroidery).
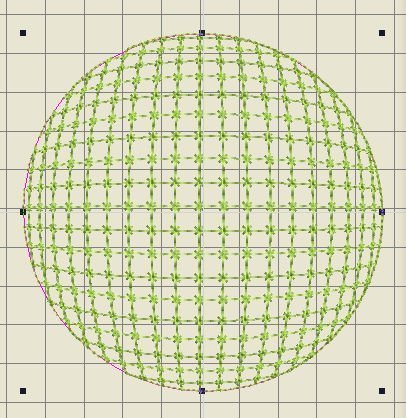
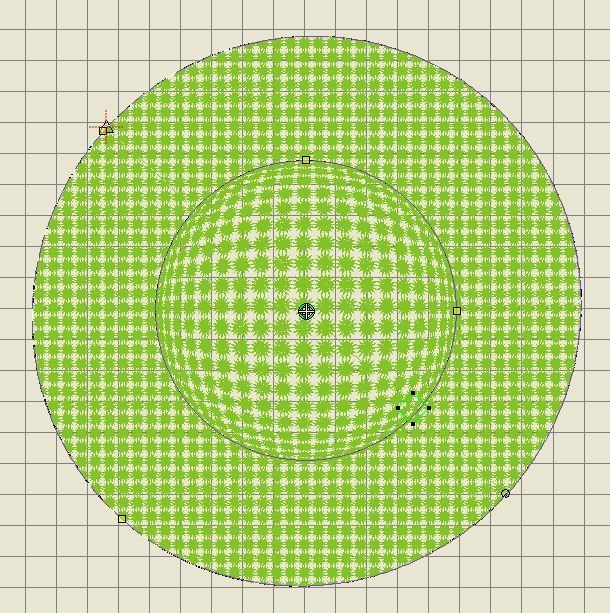
As long as the icon ‘3D Globe Effect’ is active, you can change Fill stitches, by choosing variations with this Candlewicking Fill, or using the other three Fills with all their variations. I have activated ‘Show Artistic View’ again to se e how the embroidery will look.
Choosing a Blackwork Fill, pattern B0009a…
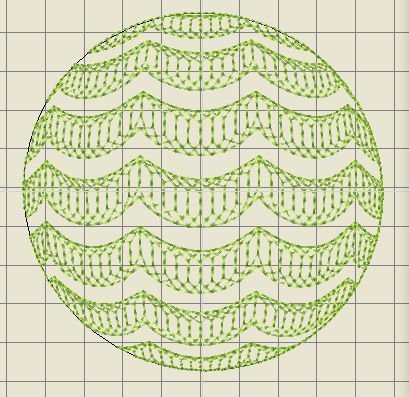
And a Lacework Fill, pattern L0003a…
How about Pattern Fill, pattern a701. It is fun to play with fill stitches and the 3D Globe Effect.
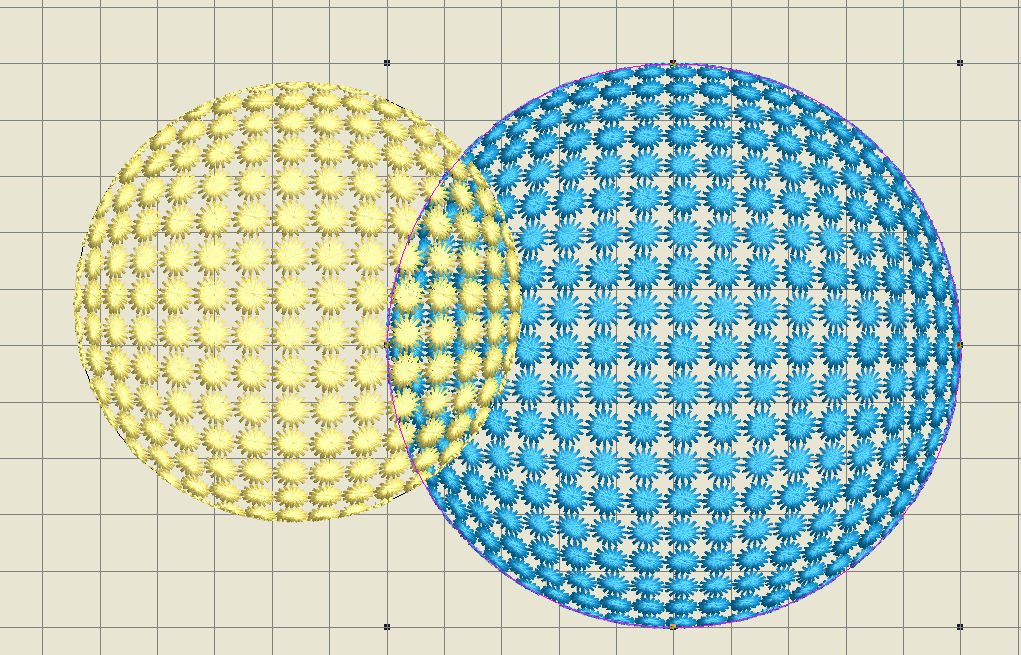
By placing two spheres partly on top of each other, notice that there is an overlap, where stitches will shine through. Not the best of results! Normally, you can ‘Remove Overlaps’, via ‘Edit’, available with the left toolbar ‘Toolboxes’. But this won’t work with the 3D Globe Effect activated on both objects.

To be able to do this anyway, change the sphere on top into a Step Fill; immediately ‘Remove Overlaps’ is activated. Click to use this function, and the overlap is gone.

Check the docker ‘Color Film’ to see a part of the underlying sphere is gone. This will not only change the appearance of your objects, but reduces stitches.
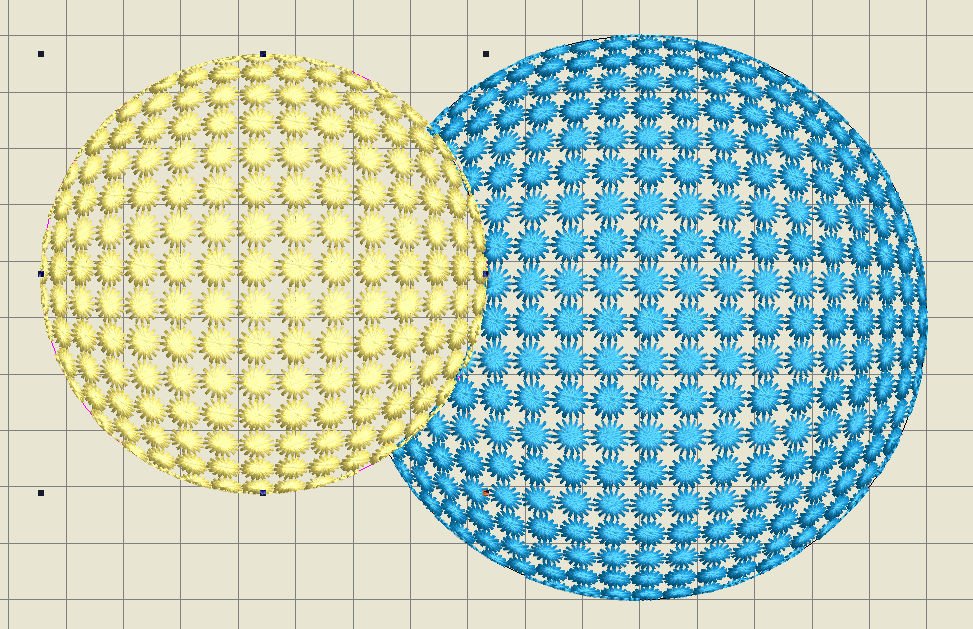
Change the upper object back to ‘Candlewicking Fill’ by clicking on the icon and then on the 3D Globe Effect icon and voilà: your spheres are back. Started with 16.624 stitches, now there are 15.415 stitches left. Saves you over 1.000 stitches!
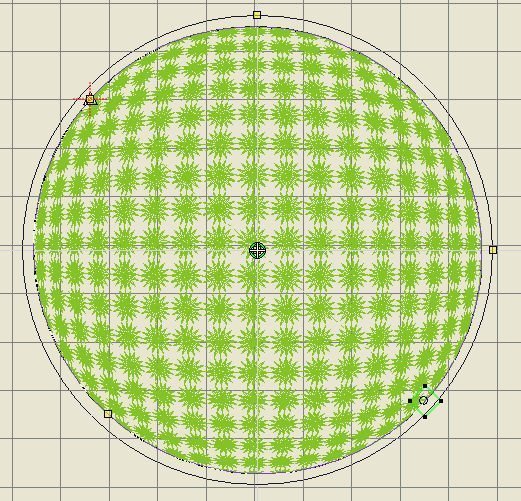
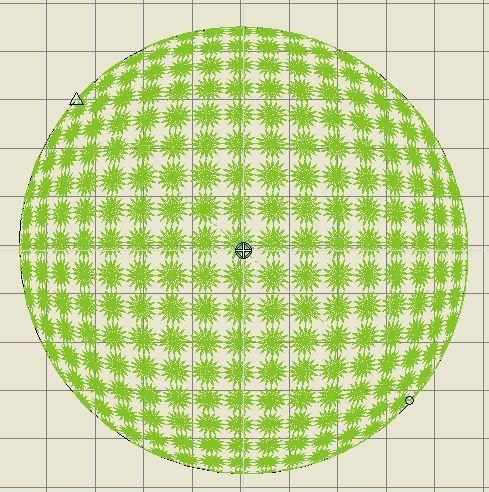
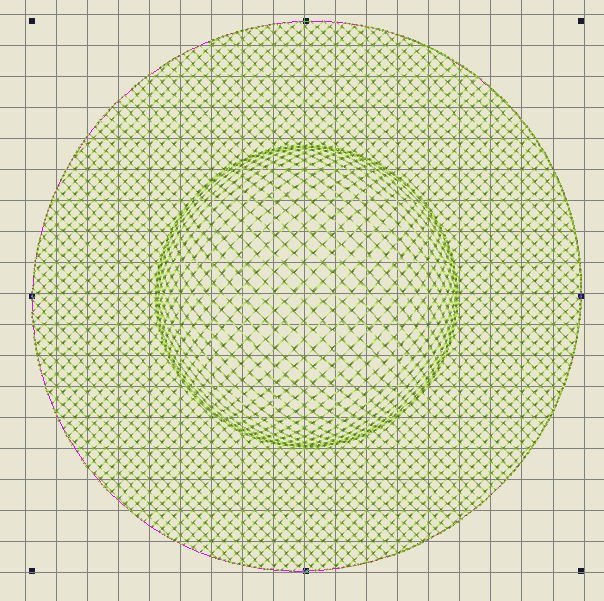
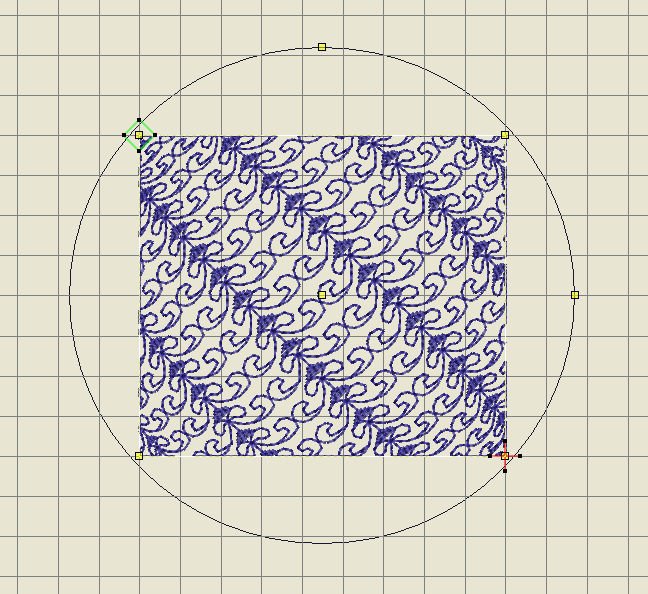
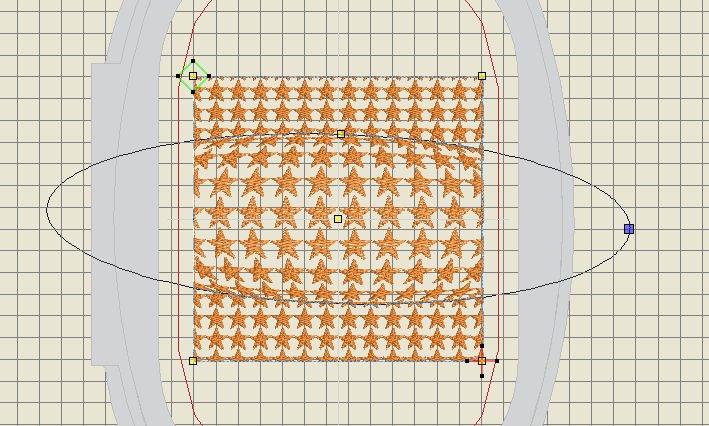
T0 get an even more dramatic affect with the 3D Globe icon, select the sphere again and use the ‘Reshape’ tool (Transform Toolbar). Extra lines are added outside and around the sphere, with two yellow nodes – one on top and one to the right (that is, with my example). If you look closely, you can see two other shapes a green square and a red cross: respectively start- and end point of the actual embroidery, both with yellow nodes too.
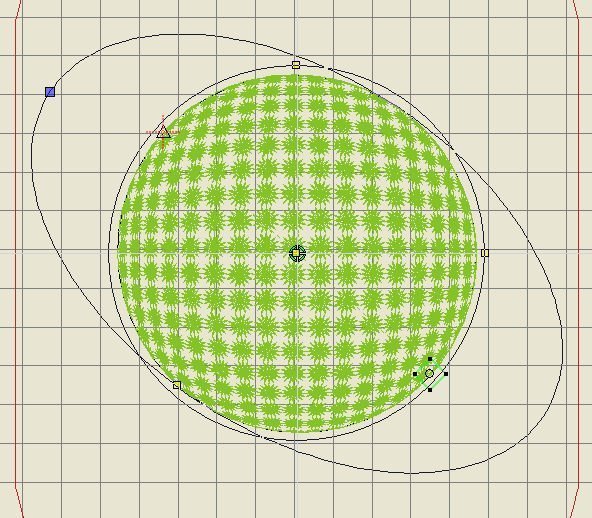
You can change the ‘frame’ of the 3D Globe: the width and even the position. I have pulled one yellow node outside the sphere, to create an ellipse. The picture above shows my action/pulling, before releasing the mouse button.

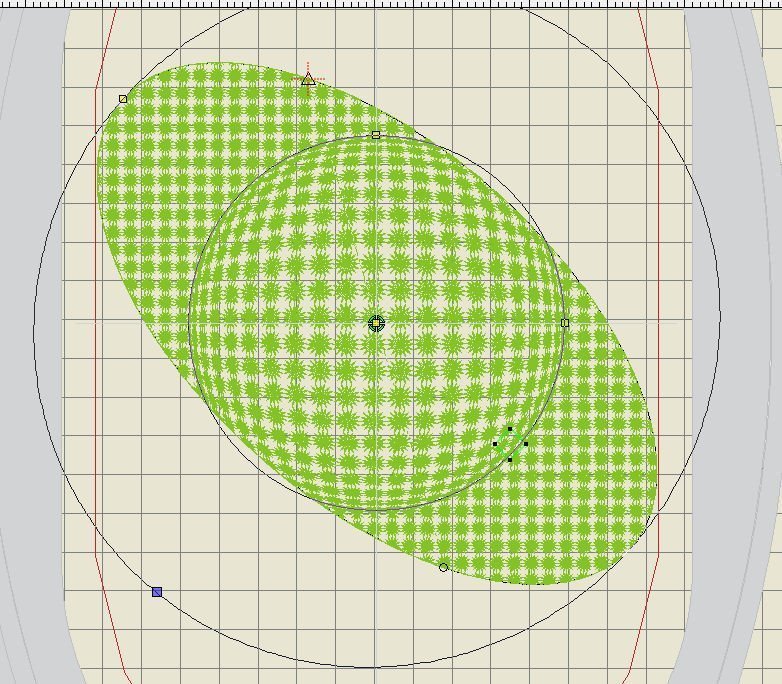
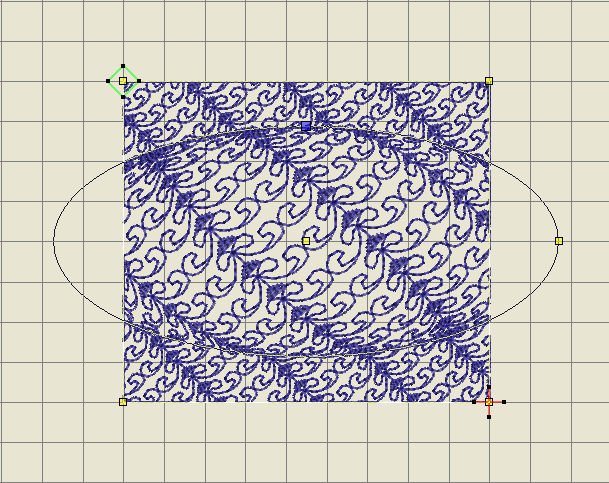
And here you can see what changed after releasing the mouse button: a new shape. The stitches outside the sphere are flat; they no longer belong to the Globe effect, but are creating a flat surface.
Pulling the other node too – first a picture before releasing the mouse button…
and after: because I had a embroidery hoop selected, the stitches will be made outside the hoop (left and right), because this object is too large for the current hoop.
I have deactivated ‘Show Hoop’ with the View Toolbar, and now you can see the entire object: looks like a hat!
Selecting it again and changing the Fill Stitch (Lacework Fill), makes the sphere stand out more!
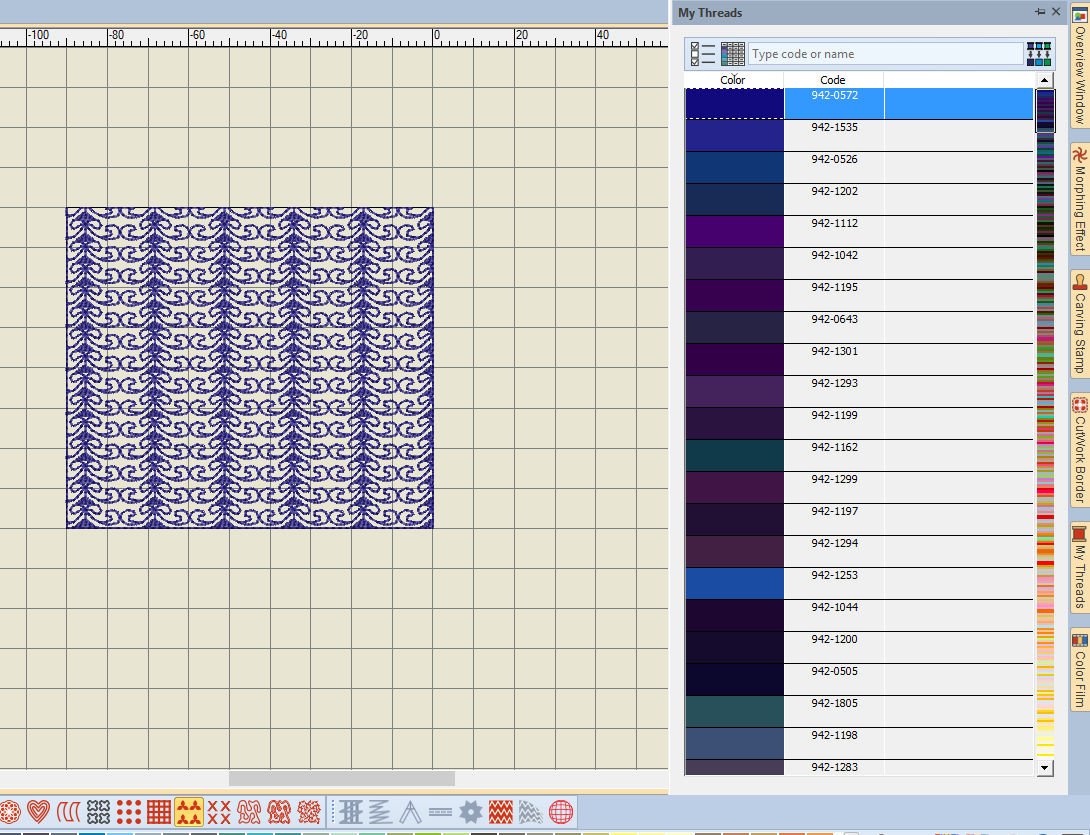
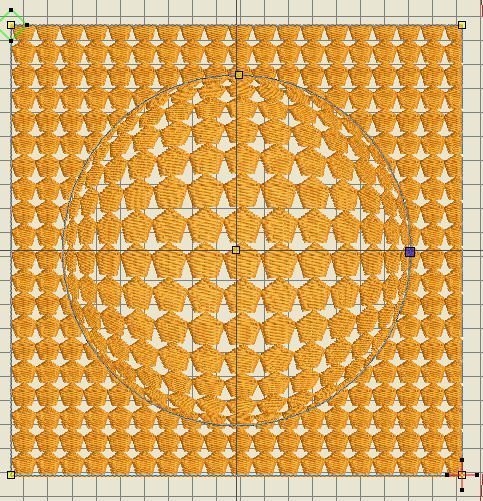
Let’s try making a different shape: a square. I have drawn a closed object (Toolboxes, Digitize, Rectangle). Selected it and used Pattern Fill – pattern no. A728. Changed the color by using the docker ‘My Threads’, clicking on the color of my choice (or trying some other colors). I’ve just double clicked on a dark/bright blue and my pattern changes into this color. Keeping the pattern selected, double clicking on another color and it changes into that one.
A beautiful Pattern Fill all by itself: looks like Roman drapes. But changing this into 3D Globe makes it even more round.

I will change some more, with 3D Globe effect still activated. By default, the angle is ‘0’, made that ’45’ to get a diagonal Pattern fill, just for the fun of it.
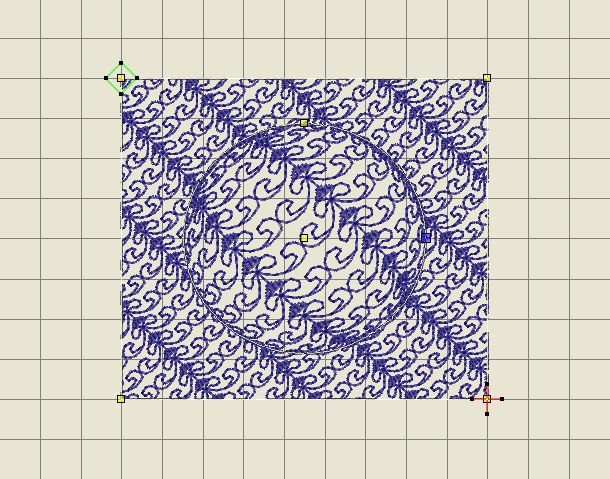
To create more effect, I’ve clicked on ‘Reshape’; a circle surrounds the Pattern Fill with nodes.
Getting the 3D Globe inside the Pattern Fill, I have pushed the ring/nodes to the center. First the node on top…
Then the node on the right: a small sphere is created. Almost as if I am looking through a magnifying glass.

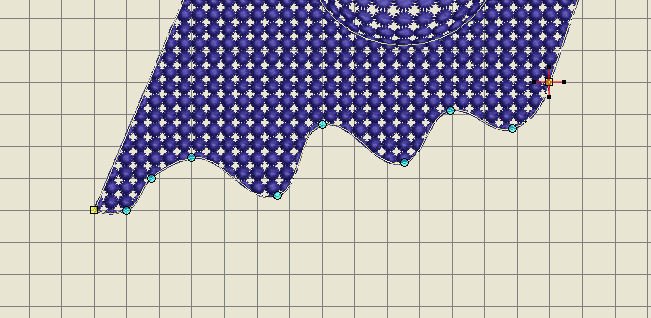
I’ve hanged the Pattern Fill in a Candlewicking Fill again, to show you more dramatic effects. With all still selected, I have clicked on the node on the right/corner rectangle: wait till you see the cursor of your mouse turn into a four-way arrow, to turn the yellow node blue = activated. Hit the Space bar of my keyboard and…. the corner and the node are rounded! I have turned the straight corner into a curved corner. How about that!
You can do the same with the opposite node: click on it to select, hit the Space bar of your keyboard and that corner will also be rounded.
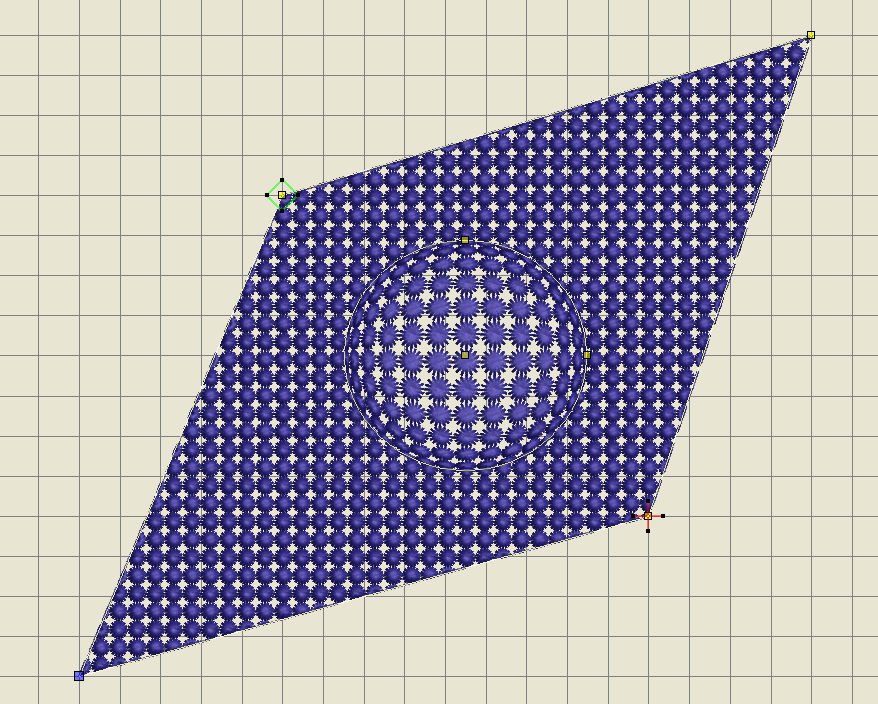
Used ‘Undo’, to change back to the last settings. Now I have pulled the right- and left node to stretch the Pattern Fill at these corners: a diamond shape is created.
So just play around: try different features, even adding nodes to add more effects, like curved edges…
The video at the bottom of this message shows how to make your own Pattern Fills for the 3D Globe effect. I will show you how to do this.

Click on ‘Artwork Canvas’ to go to the DRAW part of the software. You are now able to draw shapes etc.
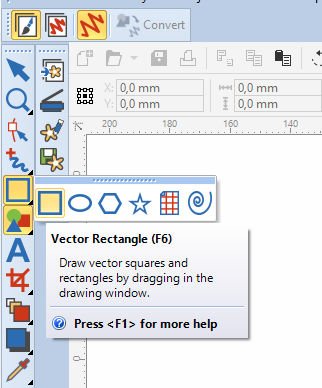
With ‘Vector Rectangle’, click on the down arrow, bottom right of the square, to choose the ‘Star’ shape.
 Click on this icon, and click and drag a Star shape on your workspace, while using the Ctrl key of your keyboard. Holding the Ctrl key down, makes all Star points even in size.
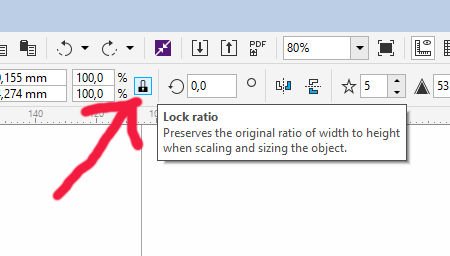
Be sure the Padlock with ‘size/100,0% is closed = to preserve the original ratio of width to height.
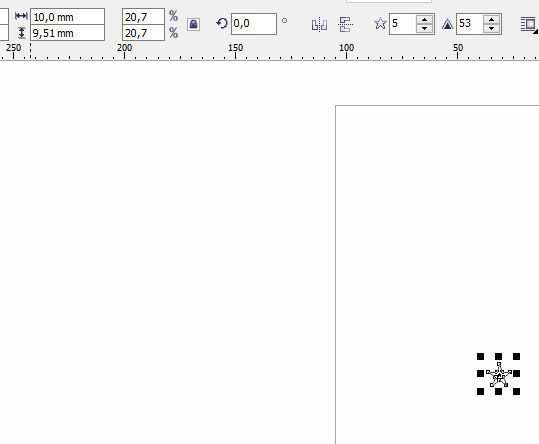
Change the width of the star to 10,0mm (using a comma for decimals instead of a point): this makes the height 9,511mm. Check if these sizes are correct, use enter to set. 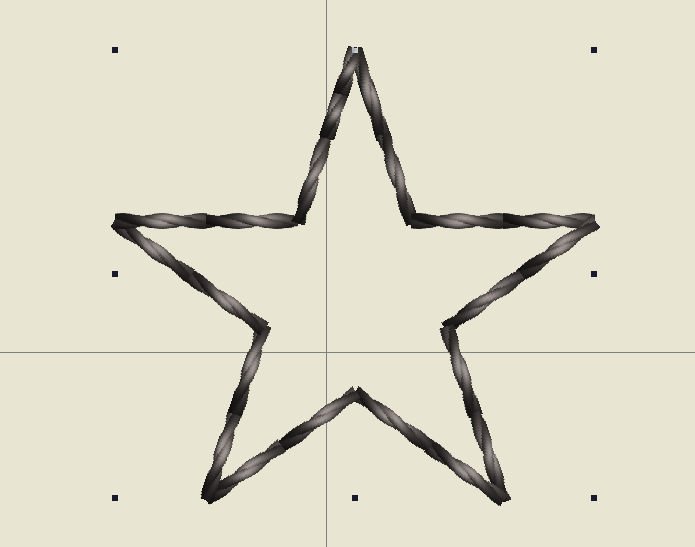
Use ‘Convert to Embroidery’ to actually make a Star with (Outline)stitches: no fills yet, because you have converted a line drawing. Enlarge your star with ‘To Fit’ on the Zoom Toolbar.
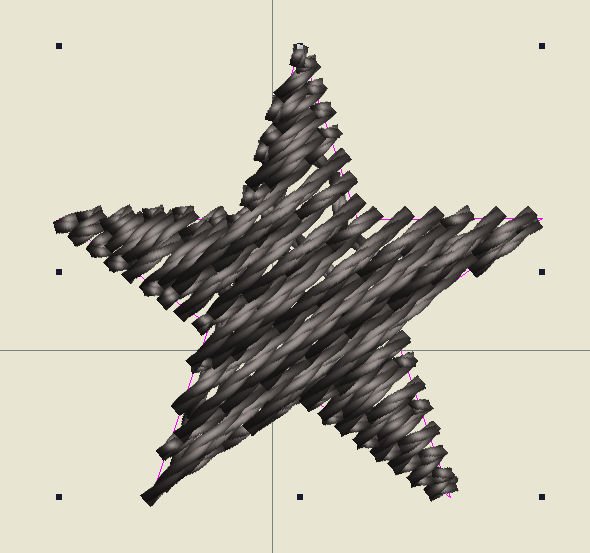
Change the Outline Stiches into a Step Fill: use the first icon on the Stitches Toolbar/Fills.

Use ‘Reshape’ to show nodes and the Stitch Angle line. The angle is currently set to 45°.
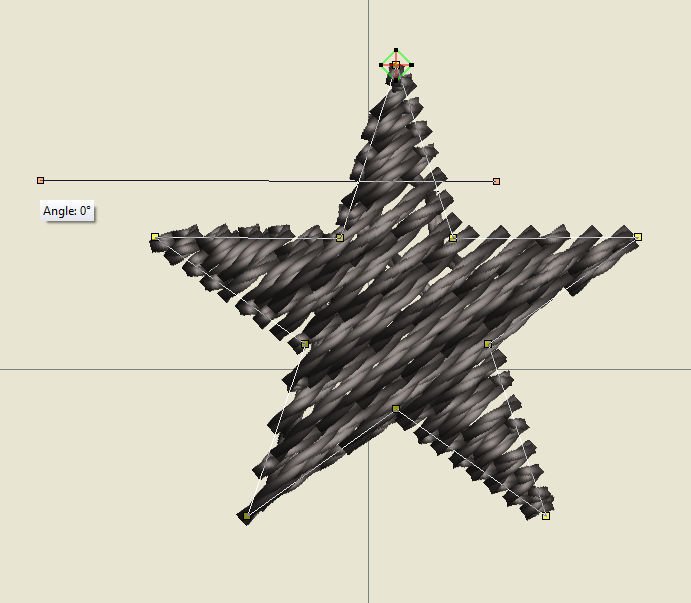
You will need to change the Stitch Angle to 0°: the stitches will be horizontal. Drag the left orange node of the Stitch Angle line up, to horizontal, until it reads ‘0°’. After releasing the mouse button, the stitches are placed horizontal.
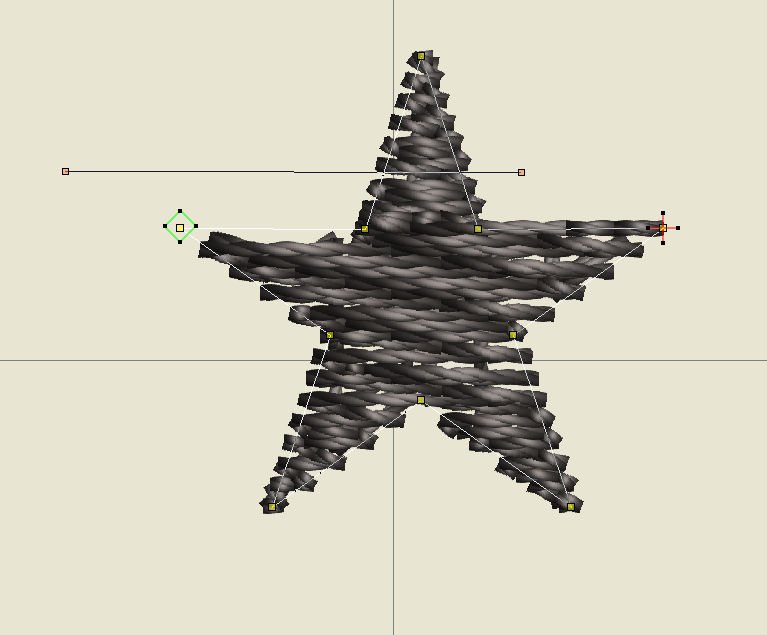
Replace the start- and end points: green square and red cross: with my Star, they are both on the top point. They can be somewhere else with your Star. Click and drag the green square to the tip of the left point, and the red cross tot the tip of the right point. Be sure they are placed right on top of the yellow node of each point. You’ve created new start- and end points, on a horizontal line.
Click ‘Underlay’ to remove all Underlay stitches: this function was activated because of the Fill Stitches. You don’t need these underlays right now.

Use ‘Esc’ and select the Star. Eight black nodes will surround this shape (the center on top is difficult to see, but it is there!).

While the Star is still selected, go to ‘Settings’ (Menu Bar), and choose ‘Create Pattern’.
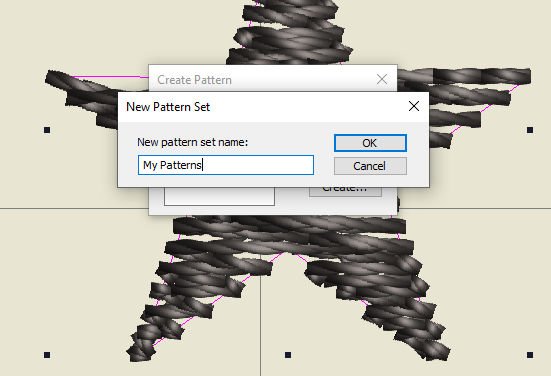
Select ‘Create’ to make a new Pattern Set. Via the pop-up menu, click on ‘Create’. Type ‘My Patterns’ in the empty space, and click ‘OK’.
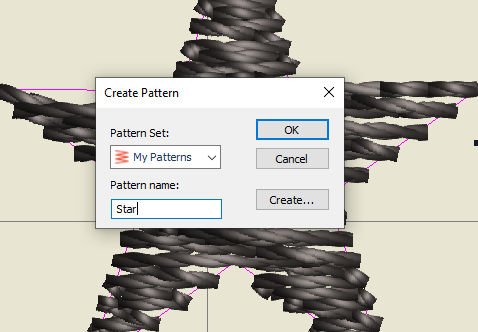
Type ‘Star’ in the next empty space – this will be the name of your new pattern – and confirm, using ‘OK’.
Next you will need to digitize reference points. Click on the black node, bottom left, and next on the black node, bottom right – to establish a reference line. The line will appear while doing this.

A message appears ‘Create Patterns – Pattern ‘Star’ has been created in pattern set ‘My Patterns’. Use ‘OK’ to confirm. Remove the star from your workspace = still selected, using ‘Delete’.
IMPORTANT: before moving on, you will have to be sure the grid shows many lines, setting it to 100% via the Zoom Toolbar. You will have to be able to view everything that you are doing, to place many stars on your workspace.
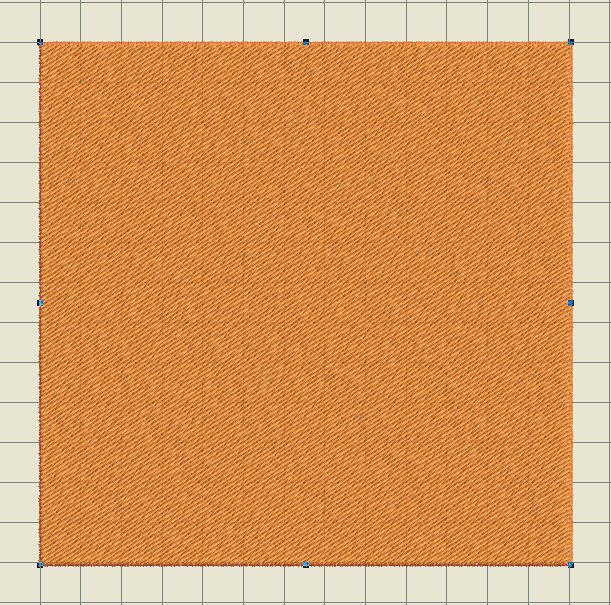
Draw a square via ‘Toolboxes’, toolbar on the left of your workspace, ‘Digitize’, ‘Rectangle’. To be sure you will get a square, use the Ctrl key while drawing. Release to make a perfect square.
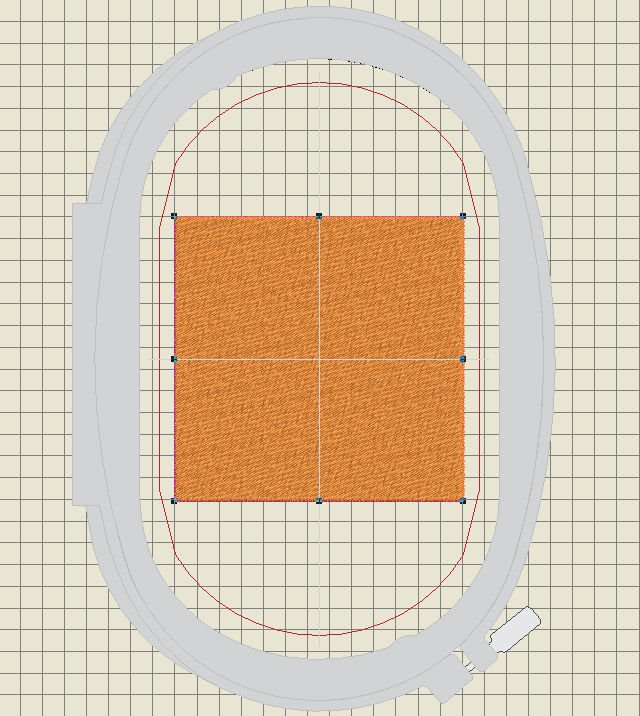
Use ‘Show hoop’, via the View Toolbar, to center your square in the Large Oval Hoop (or any other hoop where this square will fit), combined with the Type of Machine you want to use. If you square is not centered, right click on the icon ‘Show hoop’, and choose ‘Automatic Centering’.
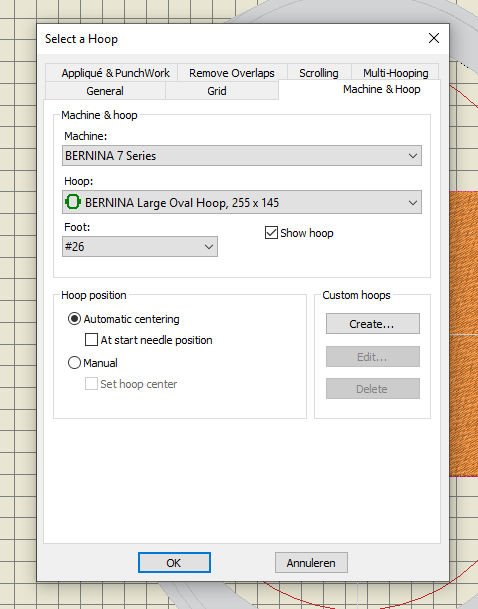
I have selected ‘BERNINA 7 series’, because of my BERNINA770QE, the BERNINA Large Oval Hoop, Embroidery foot #26 and ‘Autmatic Centering’. Using ‘OK’, confirms these settings.
Double click on the square to open ‘Object Properties’.

Change the Fill Pattern type, choosing the Star in ‘My Patterns’ = scroll until you find this category with the list of pattern types. Click on the star, and use ‘OK’ to set this pattern.

(If you want to see a preview of the embroidered star, click on the icon, second on the right, to show stitches)
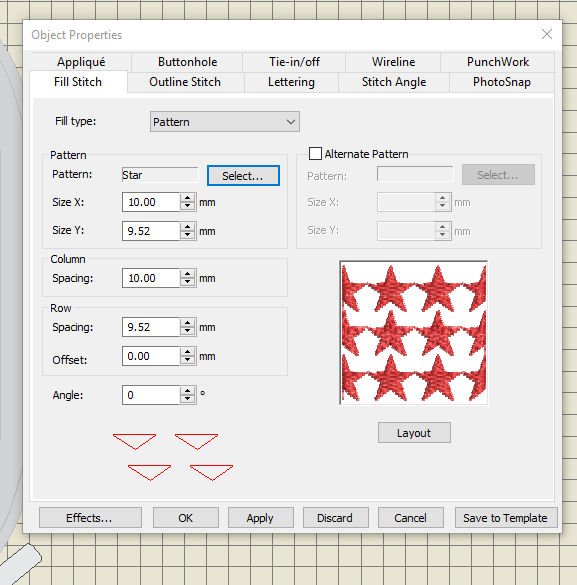
The Fill pattern with Stars you’ve just created appears with ‘Layout’. This gives you a preview. Use ‘Apply’ to see the Fill pattern of the square change, and use ‘OK’ to confirm.
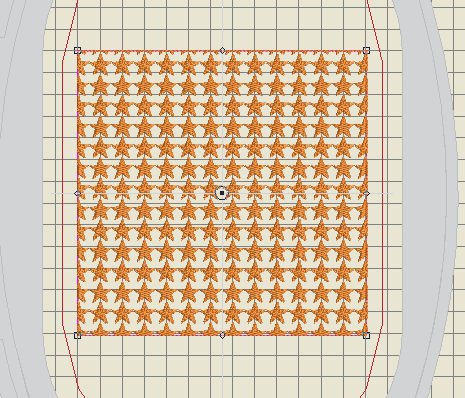
The embroidery inside the Hoop shows a pattern filled with stars.
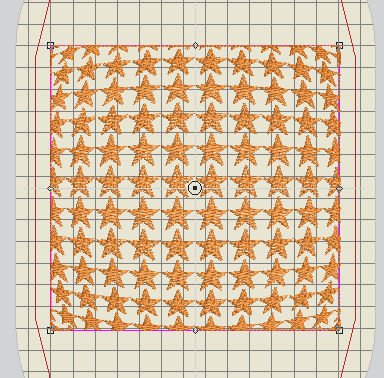
With the square still selected, use the ‘3D Globe effect’ to get 3D stars. Already quite a difference.
To get an even more dramatic effect, use ‘Reshape’ , pull the right node, beyond the boundaries of the square, to get an oval shape, and push the upper node down, for a globe effect. Save if you want to use this Pattern for a future object.
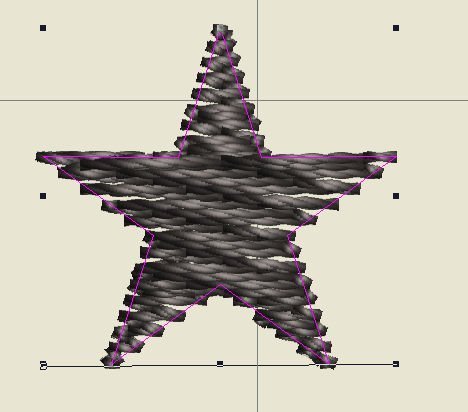
I have also made a pentagon shape, to make a Fill pattern. Using the same routine, ending up with this 3D Globe version. How fun is this?
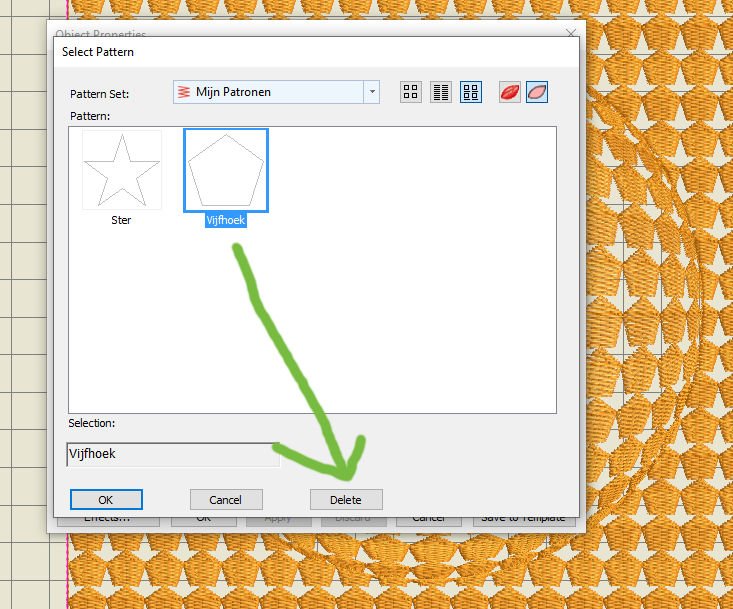
ADDITIONAL INFORMATION: if you want to delete a new made shape for a Fill pattern, right click on the design, and via Object properties: click on ‘Select’ with Pattern (you can see the pattern in the box layout). A ‘Select Pattern’ is opened. Click on the Fill pattern you want to delete, and use ‘Delete’. You are prompted to say yes or no (‘Are you sure you want to delete the selected pattern?’ is asked). Click on ‘yes’ to permenently delete your selected Fill pattern.
Next time we will take a look at the Color Palette Status Bar. See you then!
Happy Stitching
Sylvia Kaptein
Sylvia’s Art Quilts Studio
www.sylviasartquilts.nl
[email protected]


Hi Ann, this is just for Fill patterns that you create, not for regular patterns which are saved in the BERNINA Embroidery library.
Thank you, Sylvia. I seem to recall last time I created something, I had to go into the Bernina folder in the system files. This sounds much easier and maybe an update and I must have another go. I certainly couldn’t do that previously. Bless you …
Hi Ann,
To delete a saved pattern you’ve created: go to Object Poperties of your design, select the pattern you want to delete, and use ‘delete’. You are prompted to say yes or no (‘Are you sure you want to delete the selected pattern?’ is asked). Click on ‘yes’ to permenently delete your selected Fill pattern.’
I have added this information in the Blog post above (additional information), so you can see how easy this is.
Hope this helps
Sylvia
Another great chapter. Love this function.
Please could you add how to delete a saved ‘create pattern’. I recall I have to go into the filing system, but you’ll explain it correctly! Many thanks for everything.