 BERNINA Corporate Blog -
The first BERNINA Embroidery Software V8 lessons were all about the Toolbars, because it is important to understand the options you have, using icons and functions. Now I will open an existing embroidery design from the BERNINA Embroidery Library to edit, ungroup, preparing it for the actual embroidery.
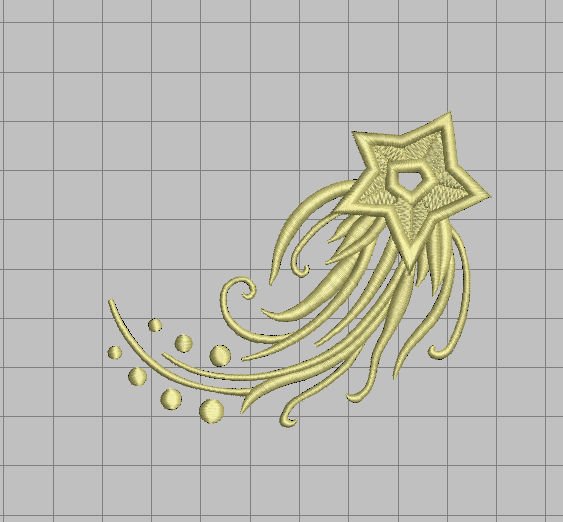
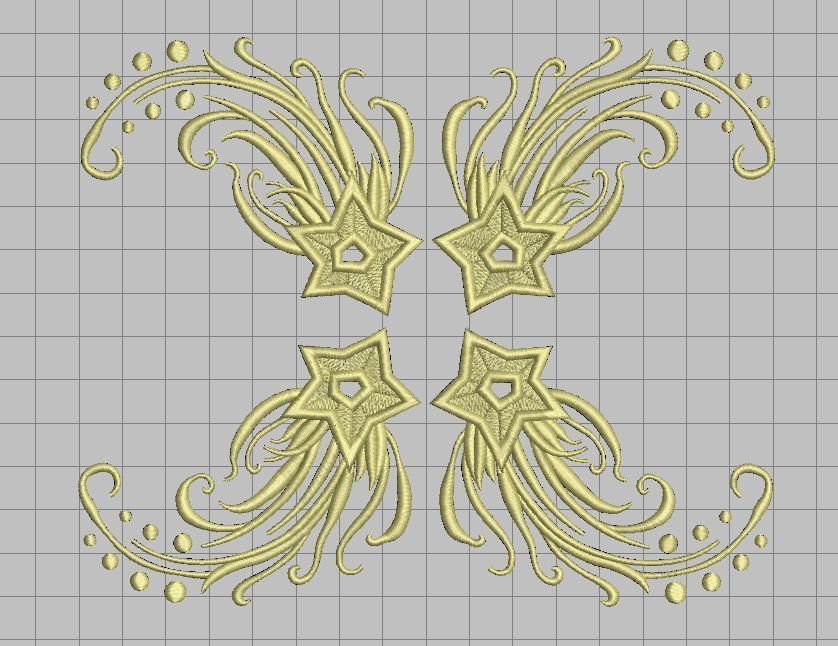
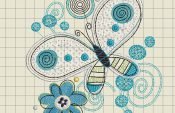
I have selected NA219.ART80 – a star with swirls. A good design to practice, changing direction of the swirls and more.
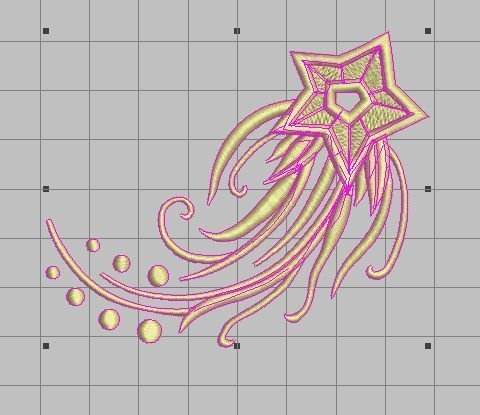
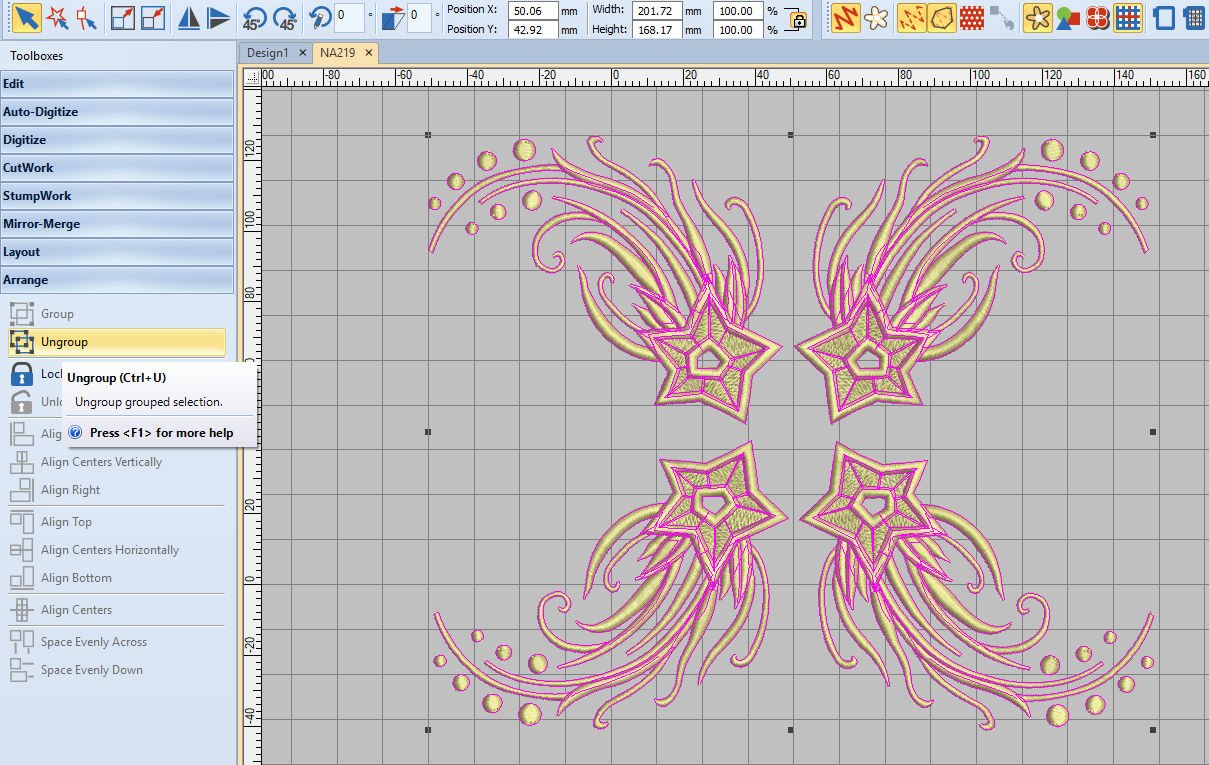
Drag a marquee around the design, then use the icon ‘Select’: black nodes appear, and all objects/outlines of the design turned pink. This indicates the design is selected.
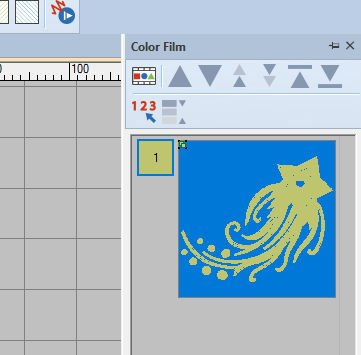
Or you can use the docker ‘Color Film’, and click on the single box = the entire design, to select it, but sometimes you will not see the pink lines surrounding each object.
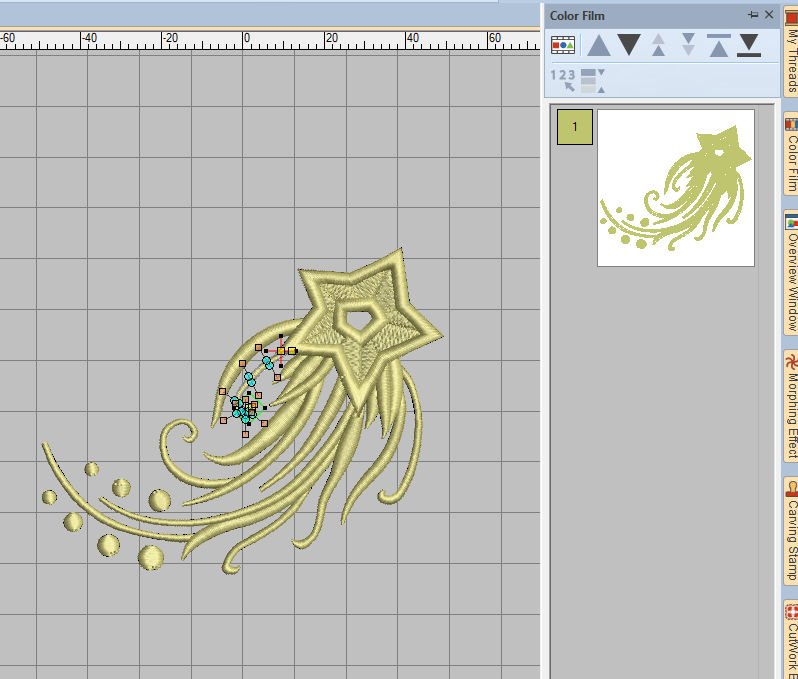
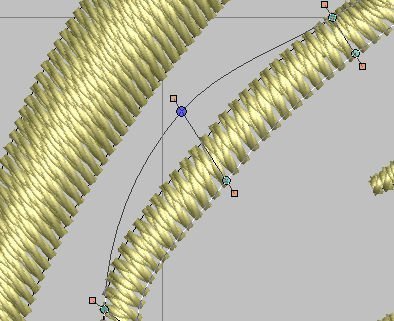
To be able to change shapes and/or entire objects, the design has to be ungrouped. You can do this by using ‘Arrange’ with the Menu Bar, then ‘Ungroup’, or use Arrange at the Toolboxes Bar (vertical Toolbar, left of your workspace), ‘Arrange’, then ‘Ungroup’. After this, select one object (picture above shows you which one), then use ‘Reshape’. A lot of nodes, start- and endpoint and stitch angles appear.
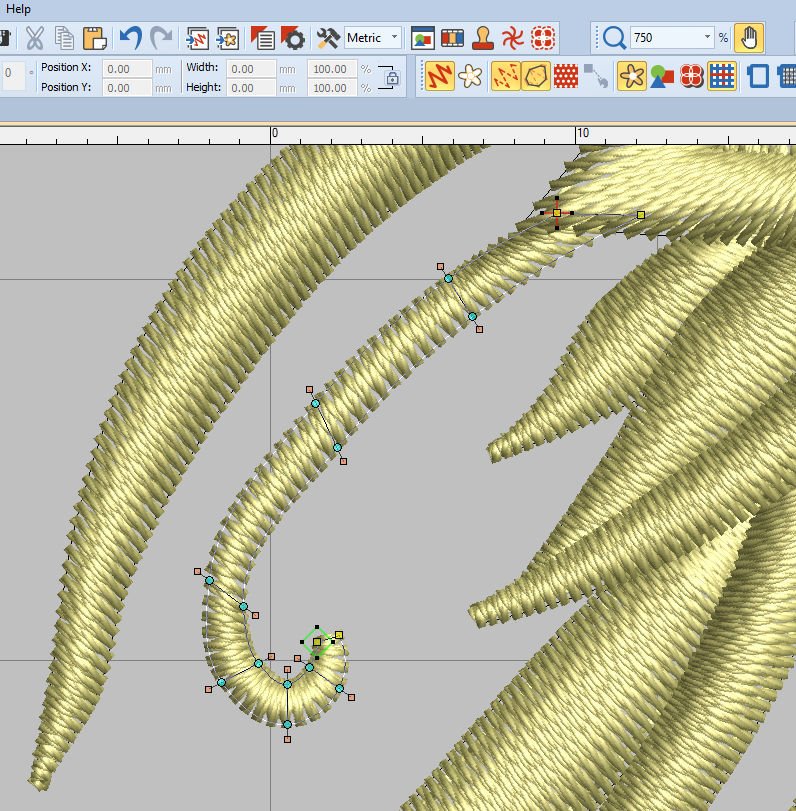
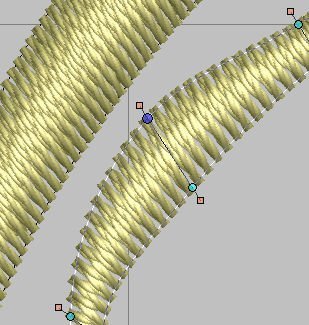
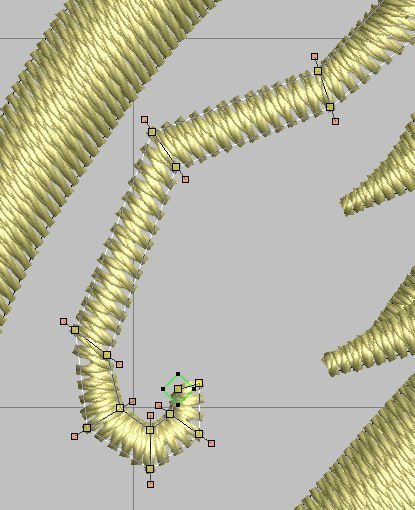
To be able to edit this shape, I have enlarged/zoomed in: up to 750%. You can see the 6 stitch angles/bars to use, and a lot of blue nodes, and even a couple of yellow, square nodes at the end of the object.
These yellow nodes for straight lines are at the beginning of an object. You can clearly see a green square covering the left yellow node, which is the is the start point of this object. Following the stitches of the object, going up, you can see a red cross, which marks the end point of this object, also covering a yellow square node. The other yellow square node points away from the first one, so the end of the stitches are in a straight line too, and you can see that the stitches are made underneath the point of the star of the design.
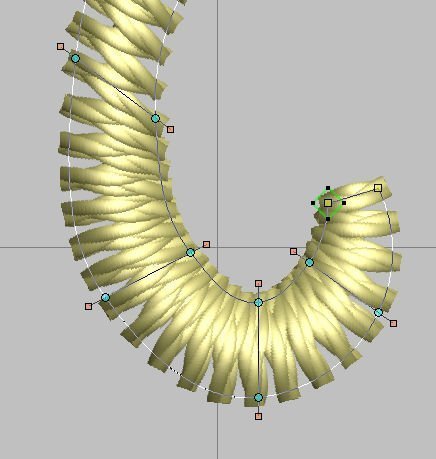
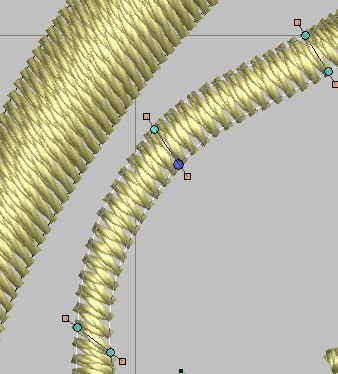
The light blue round nodes are for curved lines. You can add them by right-click on the edge of the object, as much as you need adding these. Sometimes you need more nodes for finer tuning.
The straight lines, with orange nodes at both ends, are the stitch angles, to change the direction of stitches. This design is ready-made, so the angles are good as they are, but sometimes while changing the entire shape of an object, you will need to adjust stitch direction too.
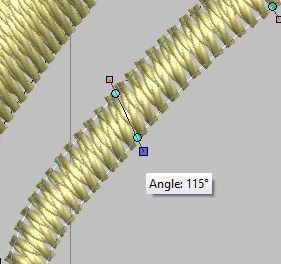
Click and drag one orange node of the stitch angle, or just click to see the degrees of the angle at that time. The node you’ve clicked on turns blue: this tells you that you have last used this node. That happens with every node you touch: the last used node turns blue – something to remember.
and there it is: changed the stitch direction of that part of the object. If you want to change stitch direction for more parts of the object, just click and drag these nodes. You can use both nodes (top and bottom) of the stitch angels, if that’s required. If the change is not satisfactory, use ‘Undo’ and try again.
If you want to edit a curve, click on a light blue node and drag this away from the object. Immediately – while clicking – this node turns dark blue: that means it’s active. You can see that part of the line – while dragging – shows to where you are changing it…
and as soon as you release the node, the stitches are adjusted. That’s how wonderful V8 works.
To make an object smaller, but with the ‘new’ curve retained, I have pushed the opposite light blue node towards the first node.
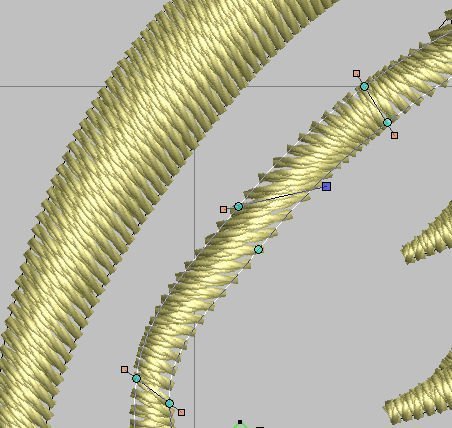
When object lines are too long – when making S-turns in curved lines – all you have to do is to click on a line between nodes to add a new node. The line is interrupted, as it were, making smaller sections. Clicking on the line with the left mouse button gives you a new yellow node for square/right lines, clicking with your right mouse button gives you a new light blue node for curved lines.

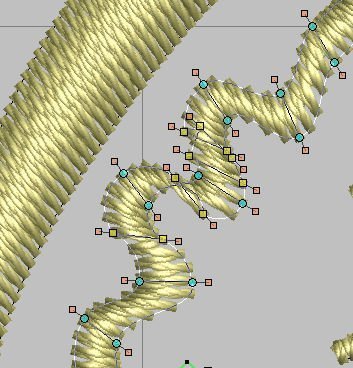
I want to make curves, so I’ve added a lot of light blue nodes. With every new node, a new stitch angle is added too, to be able to change stitch direction with every ‘section’.
To remove a node, just click on one, and use ‘Delete’ of your keyboard. Sometimes you don’t need as much nodes as there are, of you’ve added too much to handle. You will have to remove every node separately, and also click and Delete the stitch angles per piece. Of course you can use Undo again, but then you will have to go back to undo all, while sometimes you just want to delete a particular node.
I have made a wavy pattern, pushing and pulling nodes and stitch angles to see how that looks. Not to great, for the stitches are not neatly arranged. To do that, I would have to zoom in much more, and adding more nodes and perhaps stitch angles. The way it shows now on the picture tells me there is not a lot I could do to make this better, but it is just for practice, to see what happens when you add or remove nodes and stitch angles.
To practise square corners too, I have added nodes by left clicking. This gives the object angular curve. If you already have (added) light blue nodes for regular curves, you can change the node into a yellow node for square lines, by clicking with the cursor of your mouse on one node, and use the Space Bar of your keyboard. The round node switches to a square node. That is a fast way to change from round to square.
Want to reverse that? Use undo, or click on a node and again on the Space Bar of your keyboard. If you cannot click on the node underneath the green square (start point of that object) or the red cross (end point of that object), move this to the side, click on the node and move the green square/red cross back over the node.
The start- and end points can be easily be moved to another place of an object: sometimes it makes more sense to start or finish at a different spot, after changing an object. But most of the time I will leave them where they are, because V8 has calculated that that’s the best spot.
Done changing all with a particular object? Use the TAB key of your keyboard, and the next object is selected with nodes and stitch angles. A next object is what V8 chooses as next, in a logical order of embroidery. If you have edited a group of objects, with the TAB key, the next group will be selected. Always click on the outline of an object, otherwise you cannot select and use nodes etc. Clicking on the stitches will not change anything.
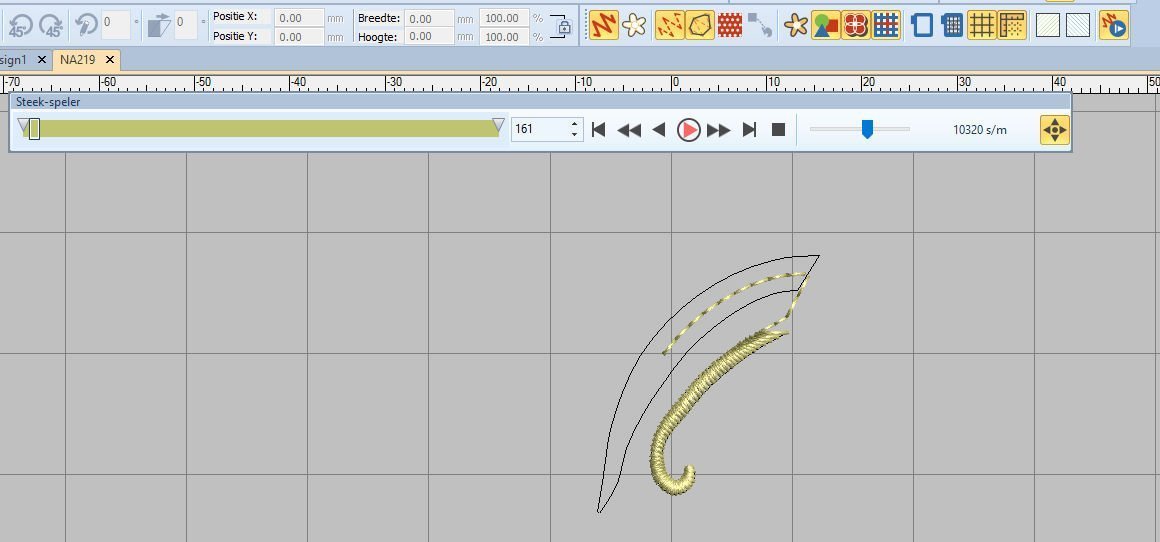
Use TAB to ‘walk’ through all object. If you want to see what the next object will be, use ‘Stitch Player’; it will show you the sequence of embroidery. Set the speed to low to get an idea how it works.
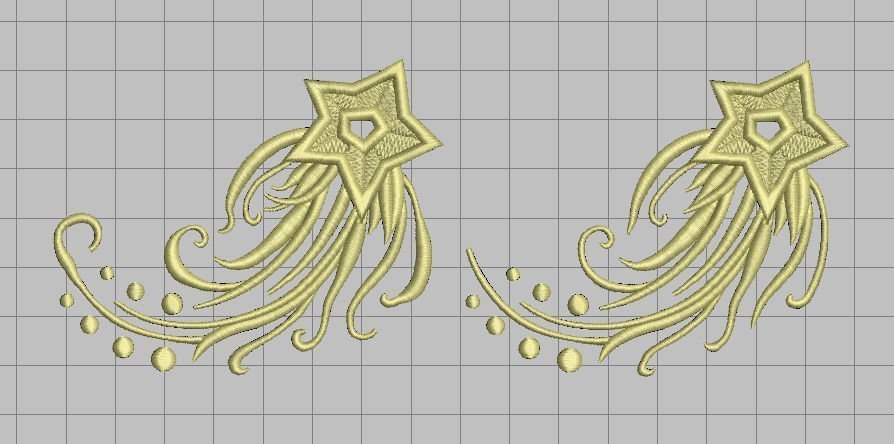
I have changed the design, added more curls and extended some objects, just for the fun of it. Then I have used the original design, copied and pasted it next to my edited design to see the changes. Sometimes they do not show a lot, but you can see the differences. The edited design is on the left, the original design on the right. It helps to see both designs next to each other,
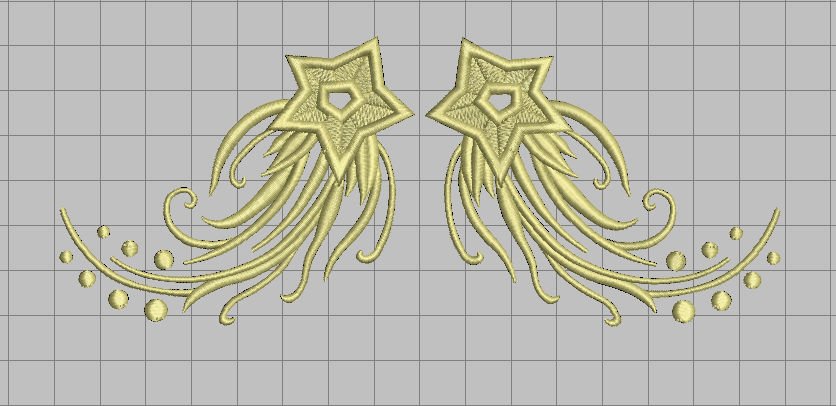
To make a new design, I want to use copy and paste, mirror etc. So I’ve copied and pasted the design first, mirrored it (Mirror X) and placed the pasted design to the right of the original.
The I’ve copied and pasted both designs, mirrored them (Mirror Y) and placed these above the first two. Now I have four designs, placed opposite of each other.
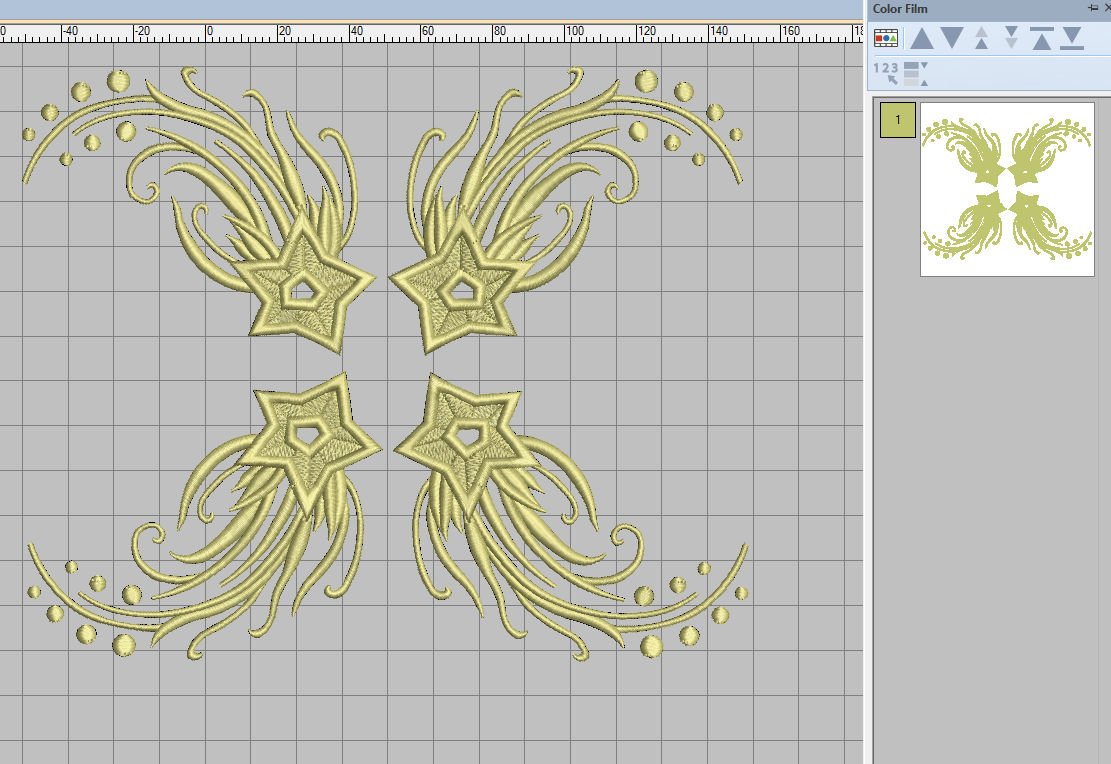
In the docker ‘Color Film’ you can see that this design is grouped, because all objects are of the same color/thread.
Grouping or ungrouping is not just to be able to edit a design, but also for coloring each object. If part of the design is grouped and you want to change colors, again go to ‘Toolboxes’ (left toolbar), Arrange and use ‘Ungroup’ if you want to change setting per object. Ungroup as much as needed: you will be able to even change/edit the smallest part of a design if you can select it separately. If multiple objects are selected at once, ungroup some more.
When selecting an object or group of objects, pink lines surround every object, as long as the icon ‘Select’ is activated. Sometimes there are no pink lines with selected objects: the mentioned icon is then probably not used, you’ve selected via the box in ‘Color Film’, or you’ve clicked on an empty place of your workspace.
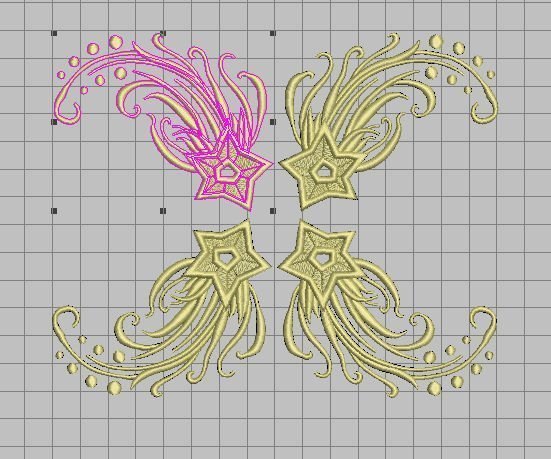
If your objects are grouped, ungroup them. I can now change colors of each separate design (star with swirls).
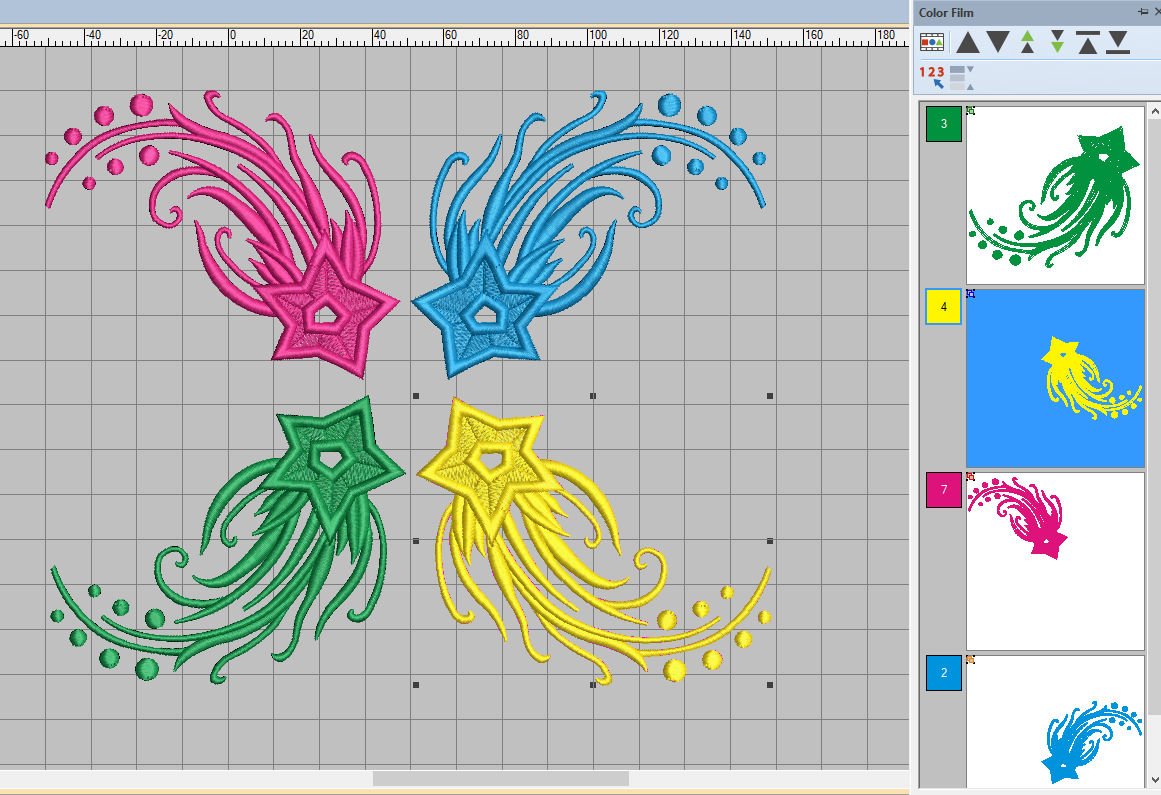
Add more colors with ‘Color Palette’ toolbar (use the Plus), because there was just one color because of the original design. Select a star with swirls, and click on a color of the Color Palette. Use four different colors to get a colorful design. Check ‘Color Film’ to see each star with swirls in a different box.
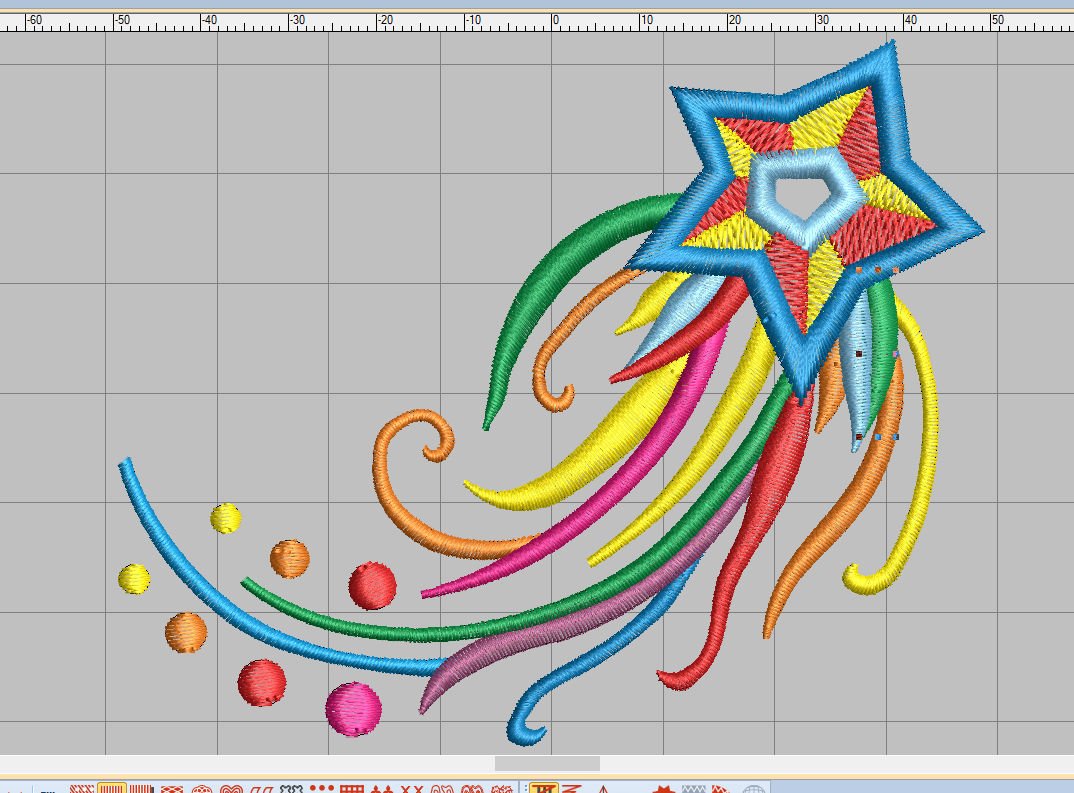
And just for fun, I have ungrouped the entire design, and changes each object into a different color. Sometimes you just need to see it up close, or check the boxes with Color Film.
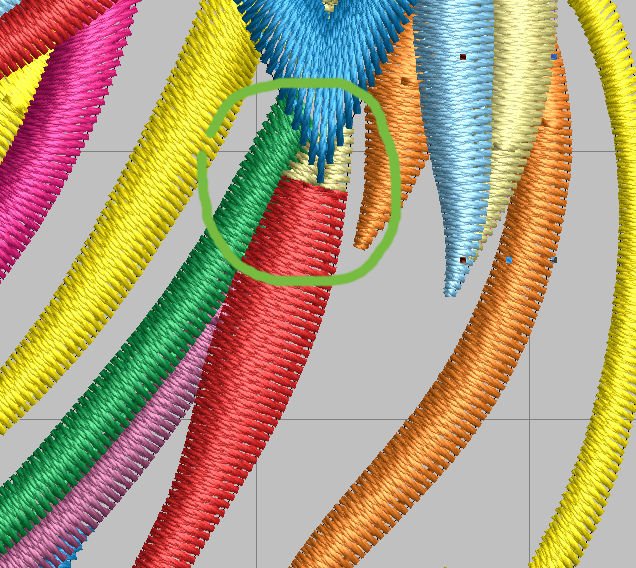
I had to enlarge/zoom in the view of the design at some part, because I thought I’d changed colors at the entire length of a swirl, but two small pieces, right under the star, were not changed. So don’t assume everything has changed color, always check.
I have saved both designs with new colors, under a different name, for future use.
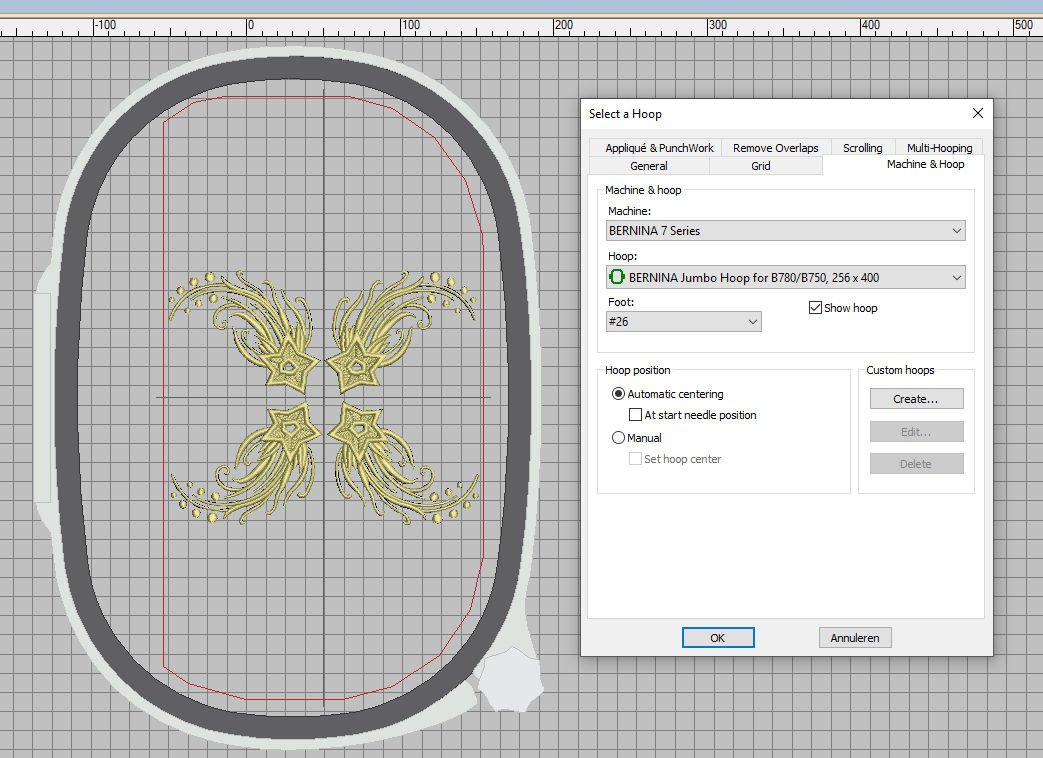
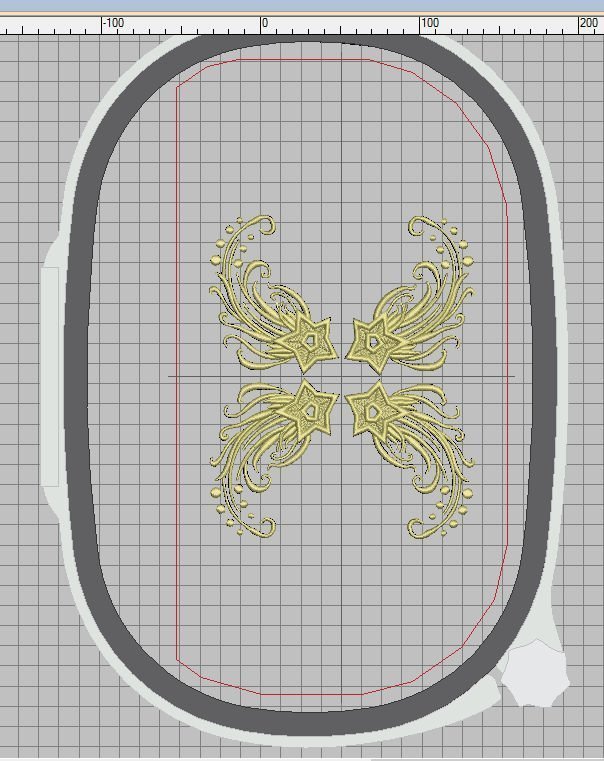
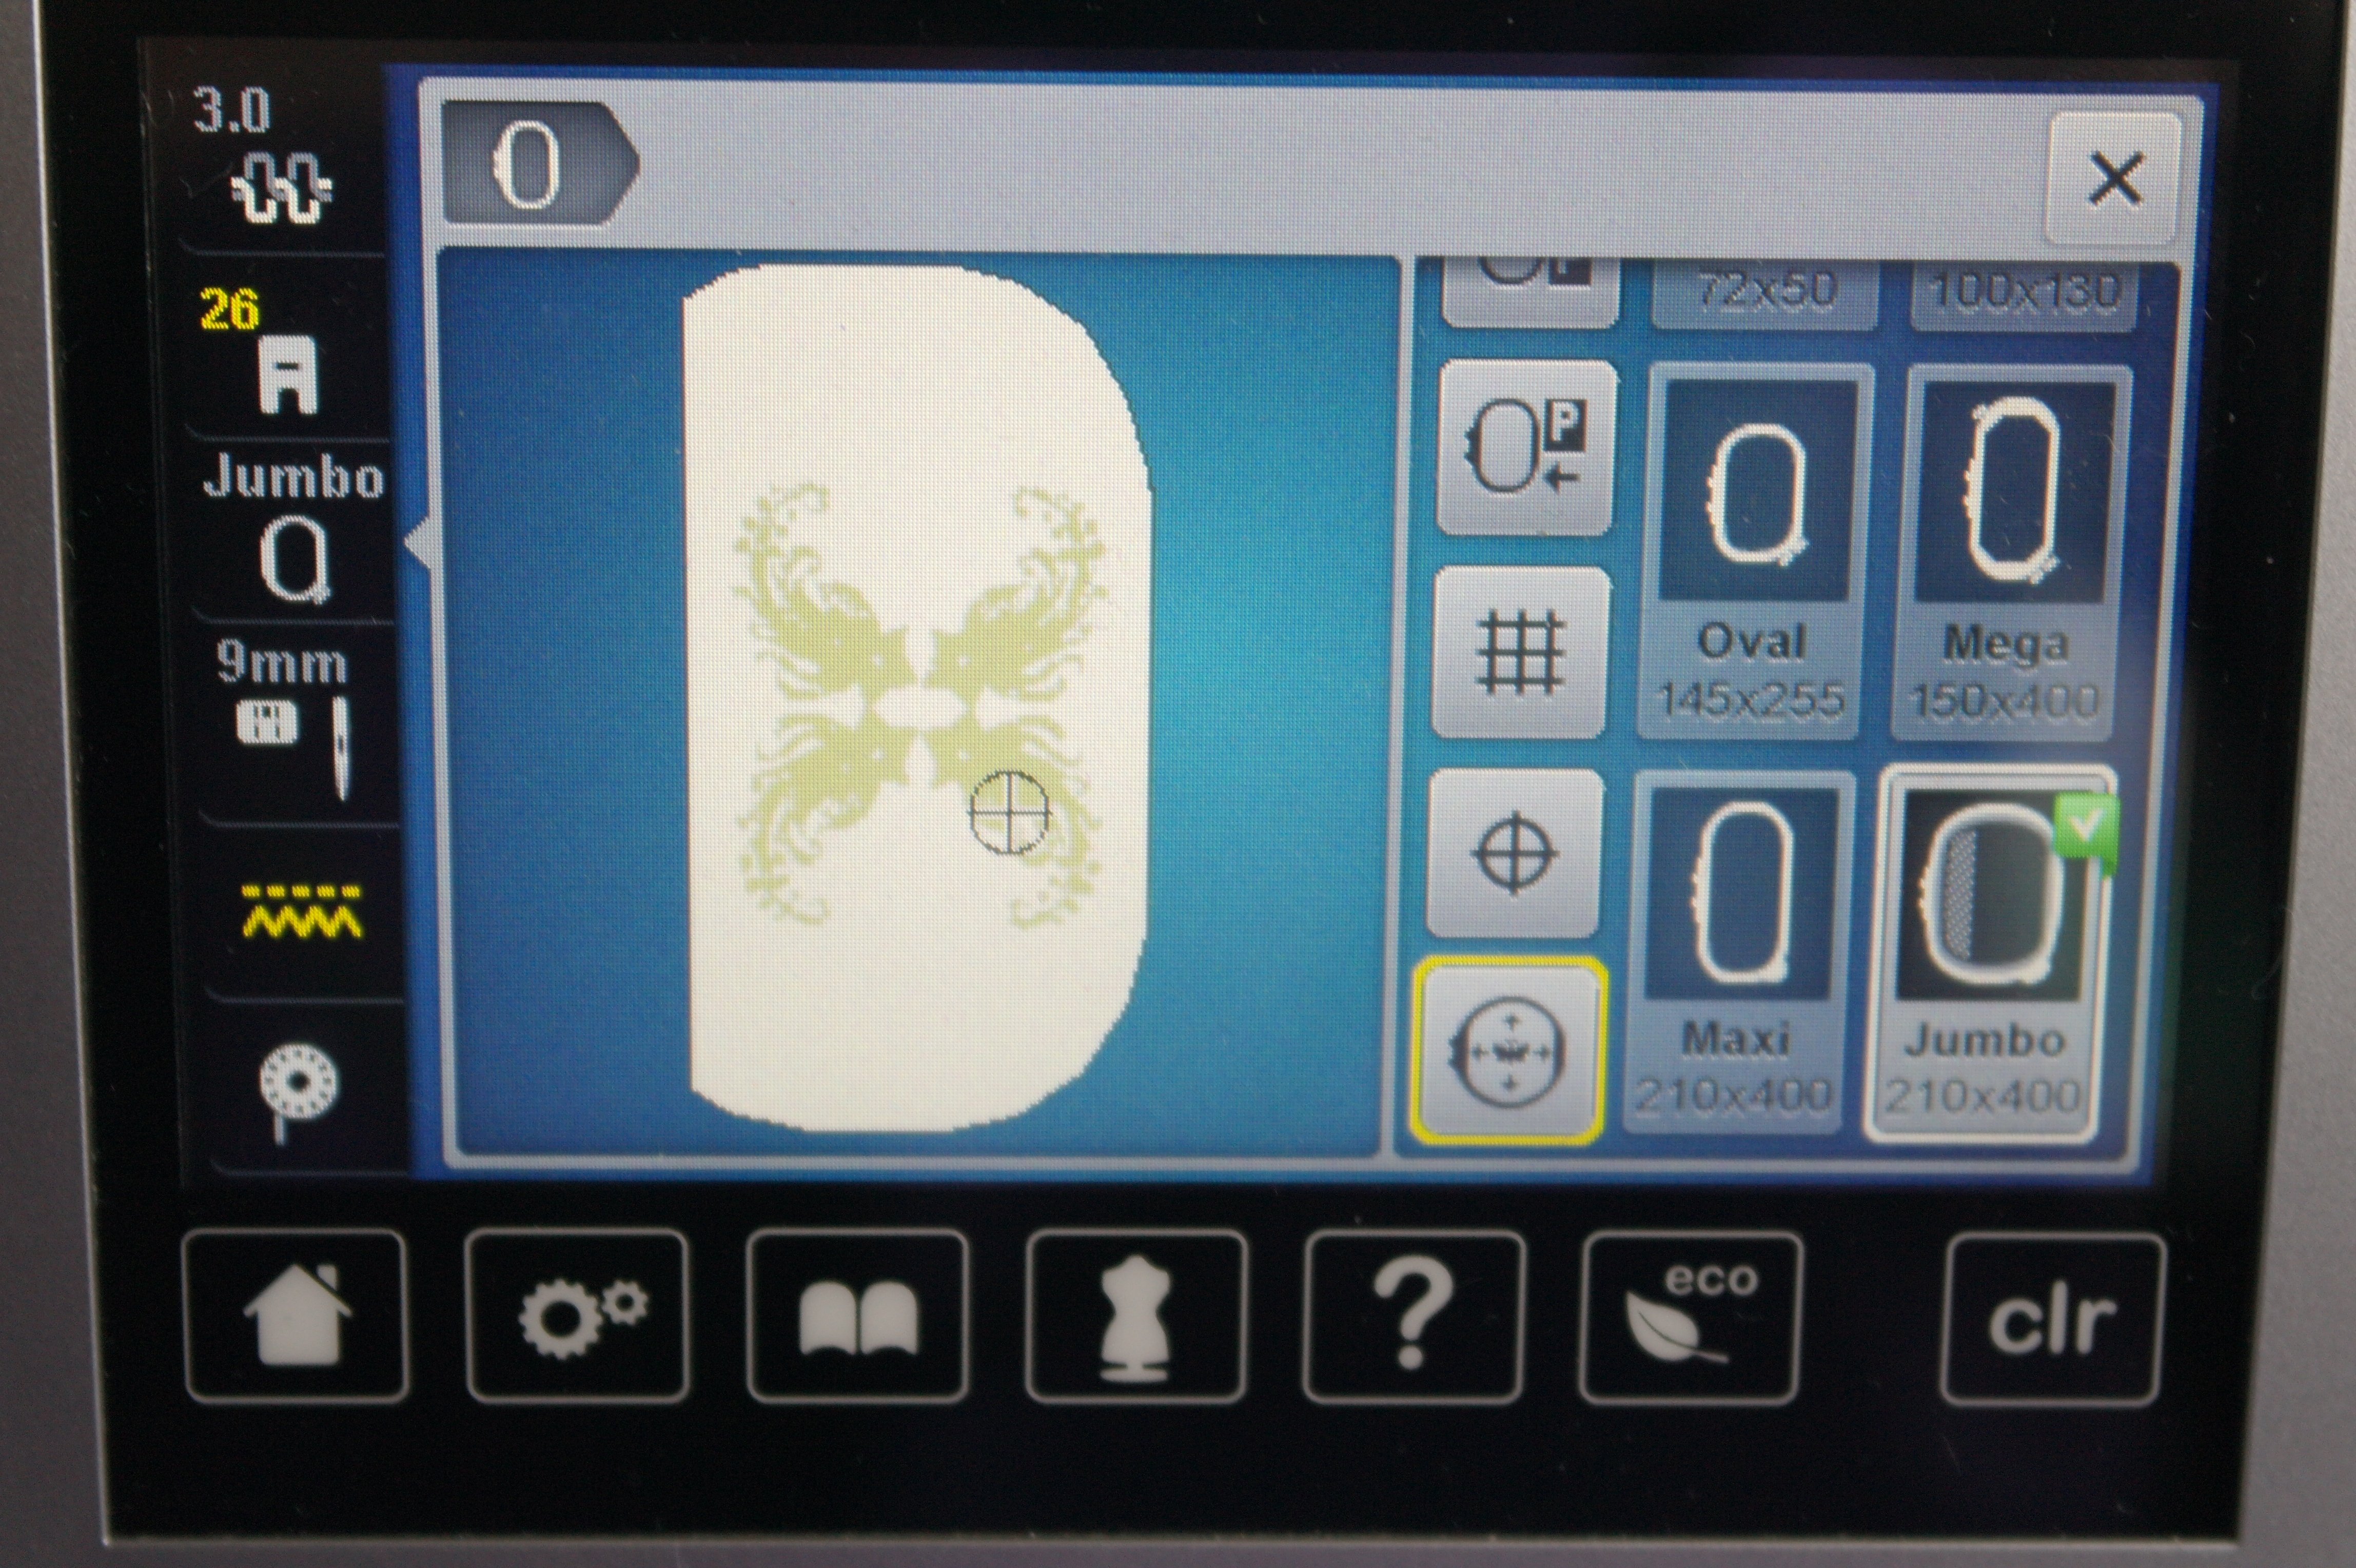
ack to the original one-color design, choosing an embroidery hoop. The Jumbo Hoop will do, since my design is large (201.9 w, 169.3 H). I have selected this hoop, selected the Embroidery Foot #26 too, and checked the box for ‘Automatic Centering’ with ‘Hoop position’.
Did you notice an empty space, left on my embroidery hoop? That’s because my BERNINA 770QE cannot use that part of the hoop, due to the space to the right of the needle. I can use the Jumbo Hoop, as long as the design stays within the red boundary lines. If you are working with a BERNINA 8-series, you can use the total width of the Jumbo Hoop. But still the design is too large: it touches the red lines right now, and my B770QE won’t allow that.
So I have rotated the design 2 x 45° (use ‘Rotate Left 45°’ or ‘Rotate Right 45°), and now it fits, because the width of the design was narrower than the height.
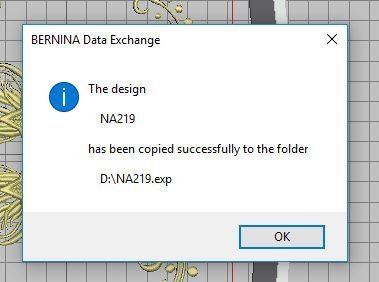
It is time to transfer the design to my USB stick: I have used ‘File’, ‘Write to Card/machine’, used ‘EXP’ and it has been copied successfully to the folder.
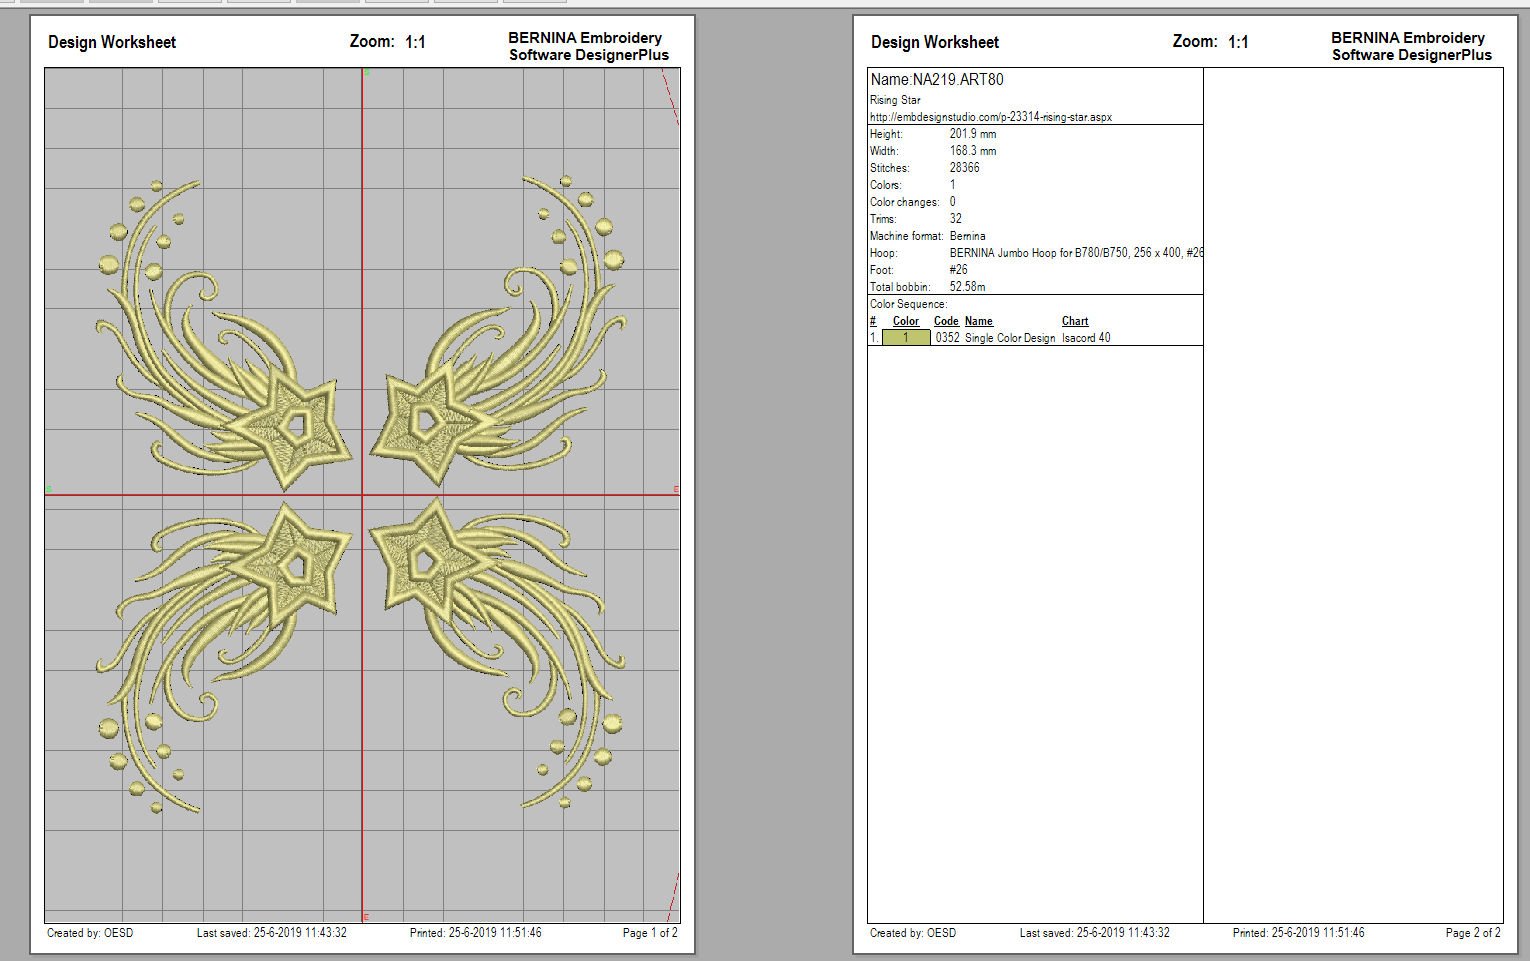
To have a printed copy of the design, with info about stitches, used threads etc, I’ve prepared a Design Worksheet via ‘File’, ‘Print Preview’ and via ‘Options’ checked boxes to show the info I wanted. I am always keeping these printouts in a folder, for future reference.
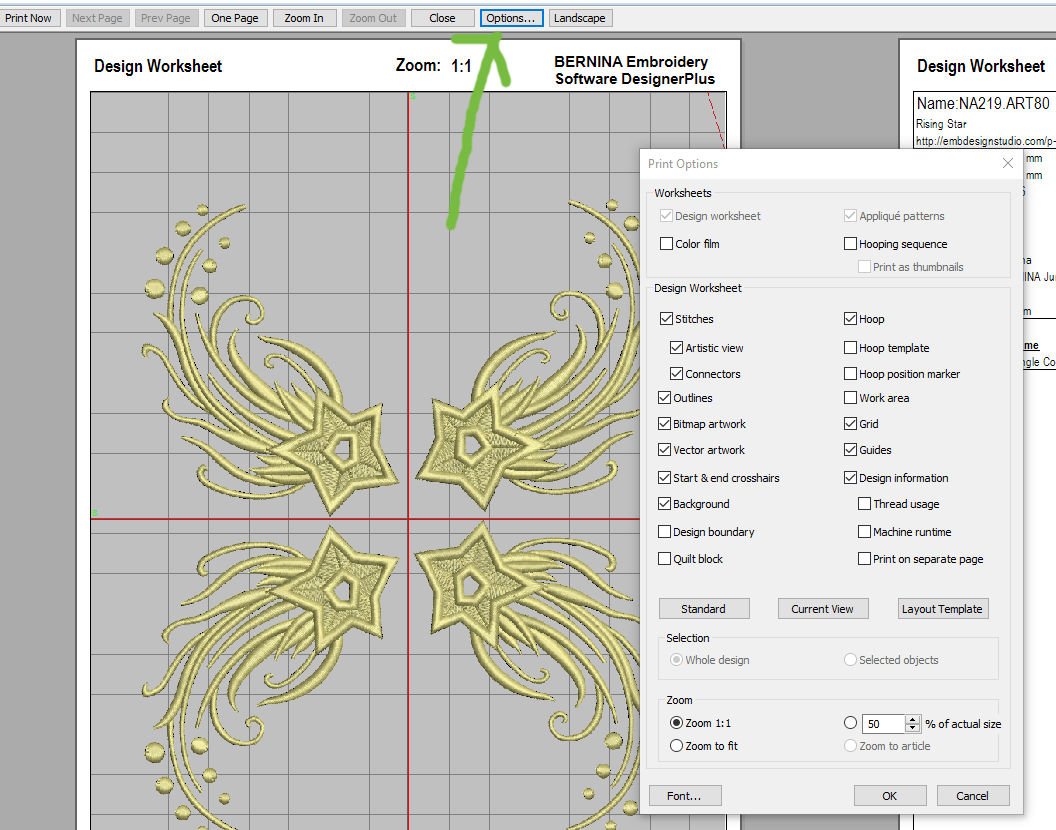
Because I have set the ‘Zoom’ for the Design Worksheet on ‘50%’, I will get 2 printout sheets. When choosing 100%, there will be a lot more. For me the info and the image of the design is more important than the actual size of a design, which you will need if you have to let a design being embroidered on an exact place of your material.
Here you can see the embroidery design, on the screen of my BERNINA770QE: again, to the left, part of the Jumbo Hoop doesn’t show.

I’ve made a sandwich – a top fabric, polyester batting and a backing – and hooped it all. The embroidery will be made on the sandwich because I want to make a pillowcase with a quilted front. I’ve checked if all four ‘corners’ of the embroidery design are within the red boundaries.

Checking if all goes well: I’ve matched the top thread = gold color Sulky Rayon 40, and a matching bobbin thread.
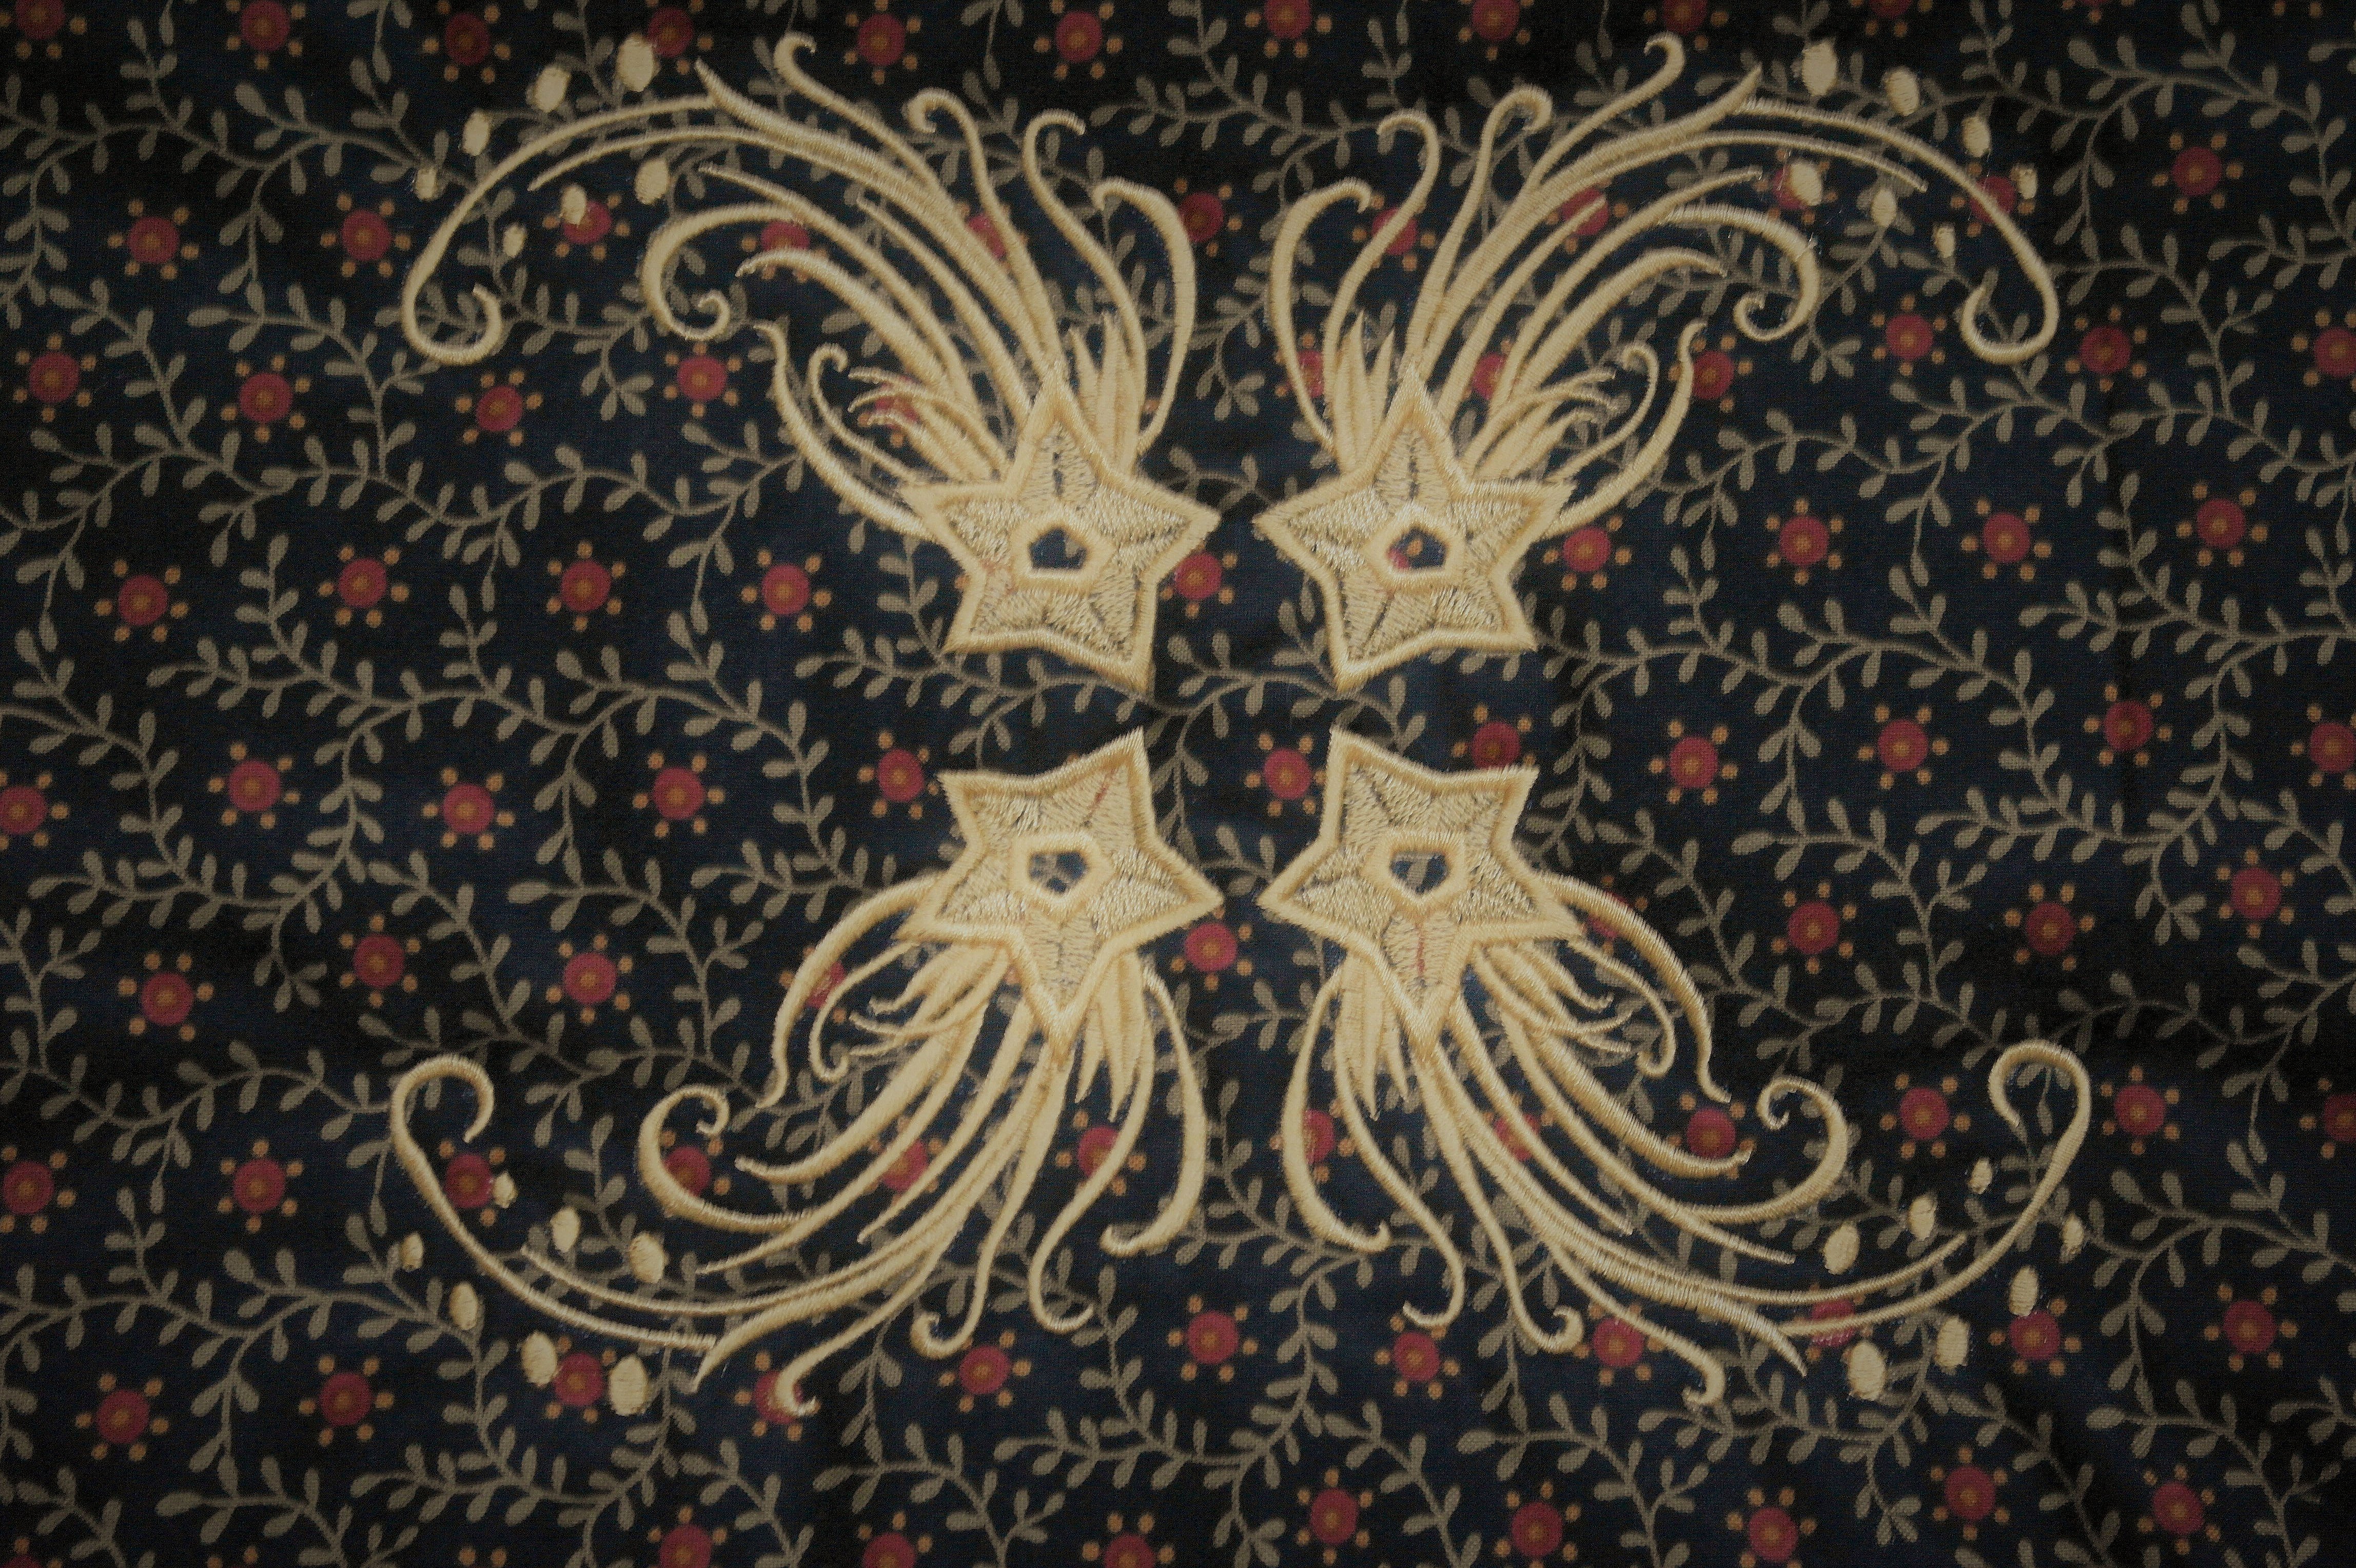
And there it is: the design embroidered in one color/thread. I will use the same top thread for quilting.
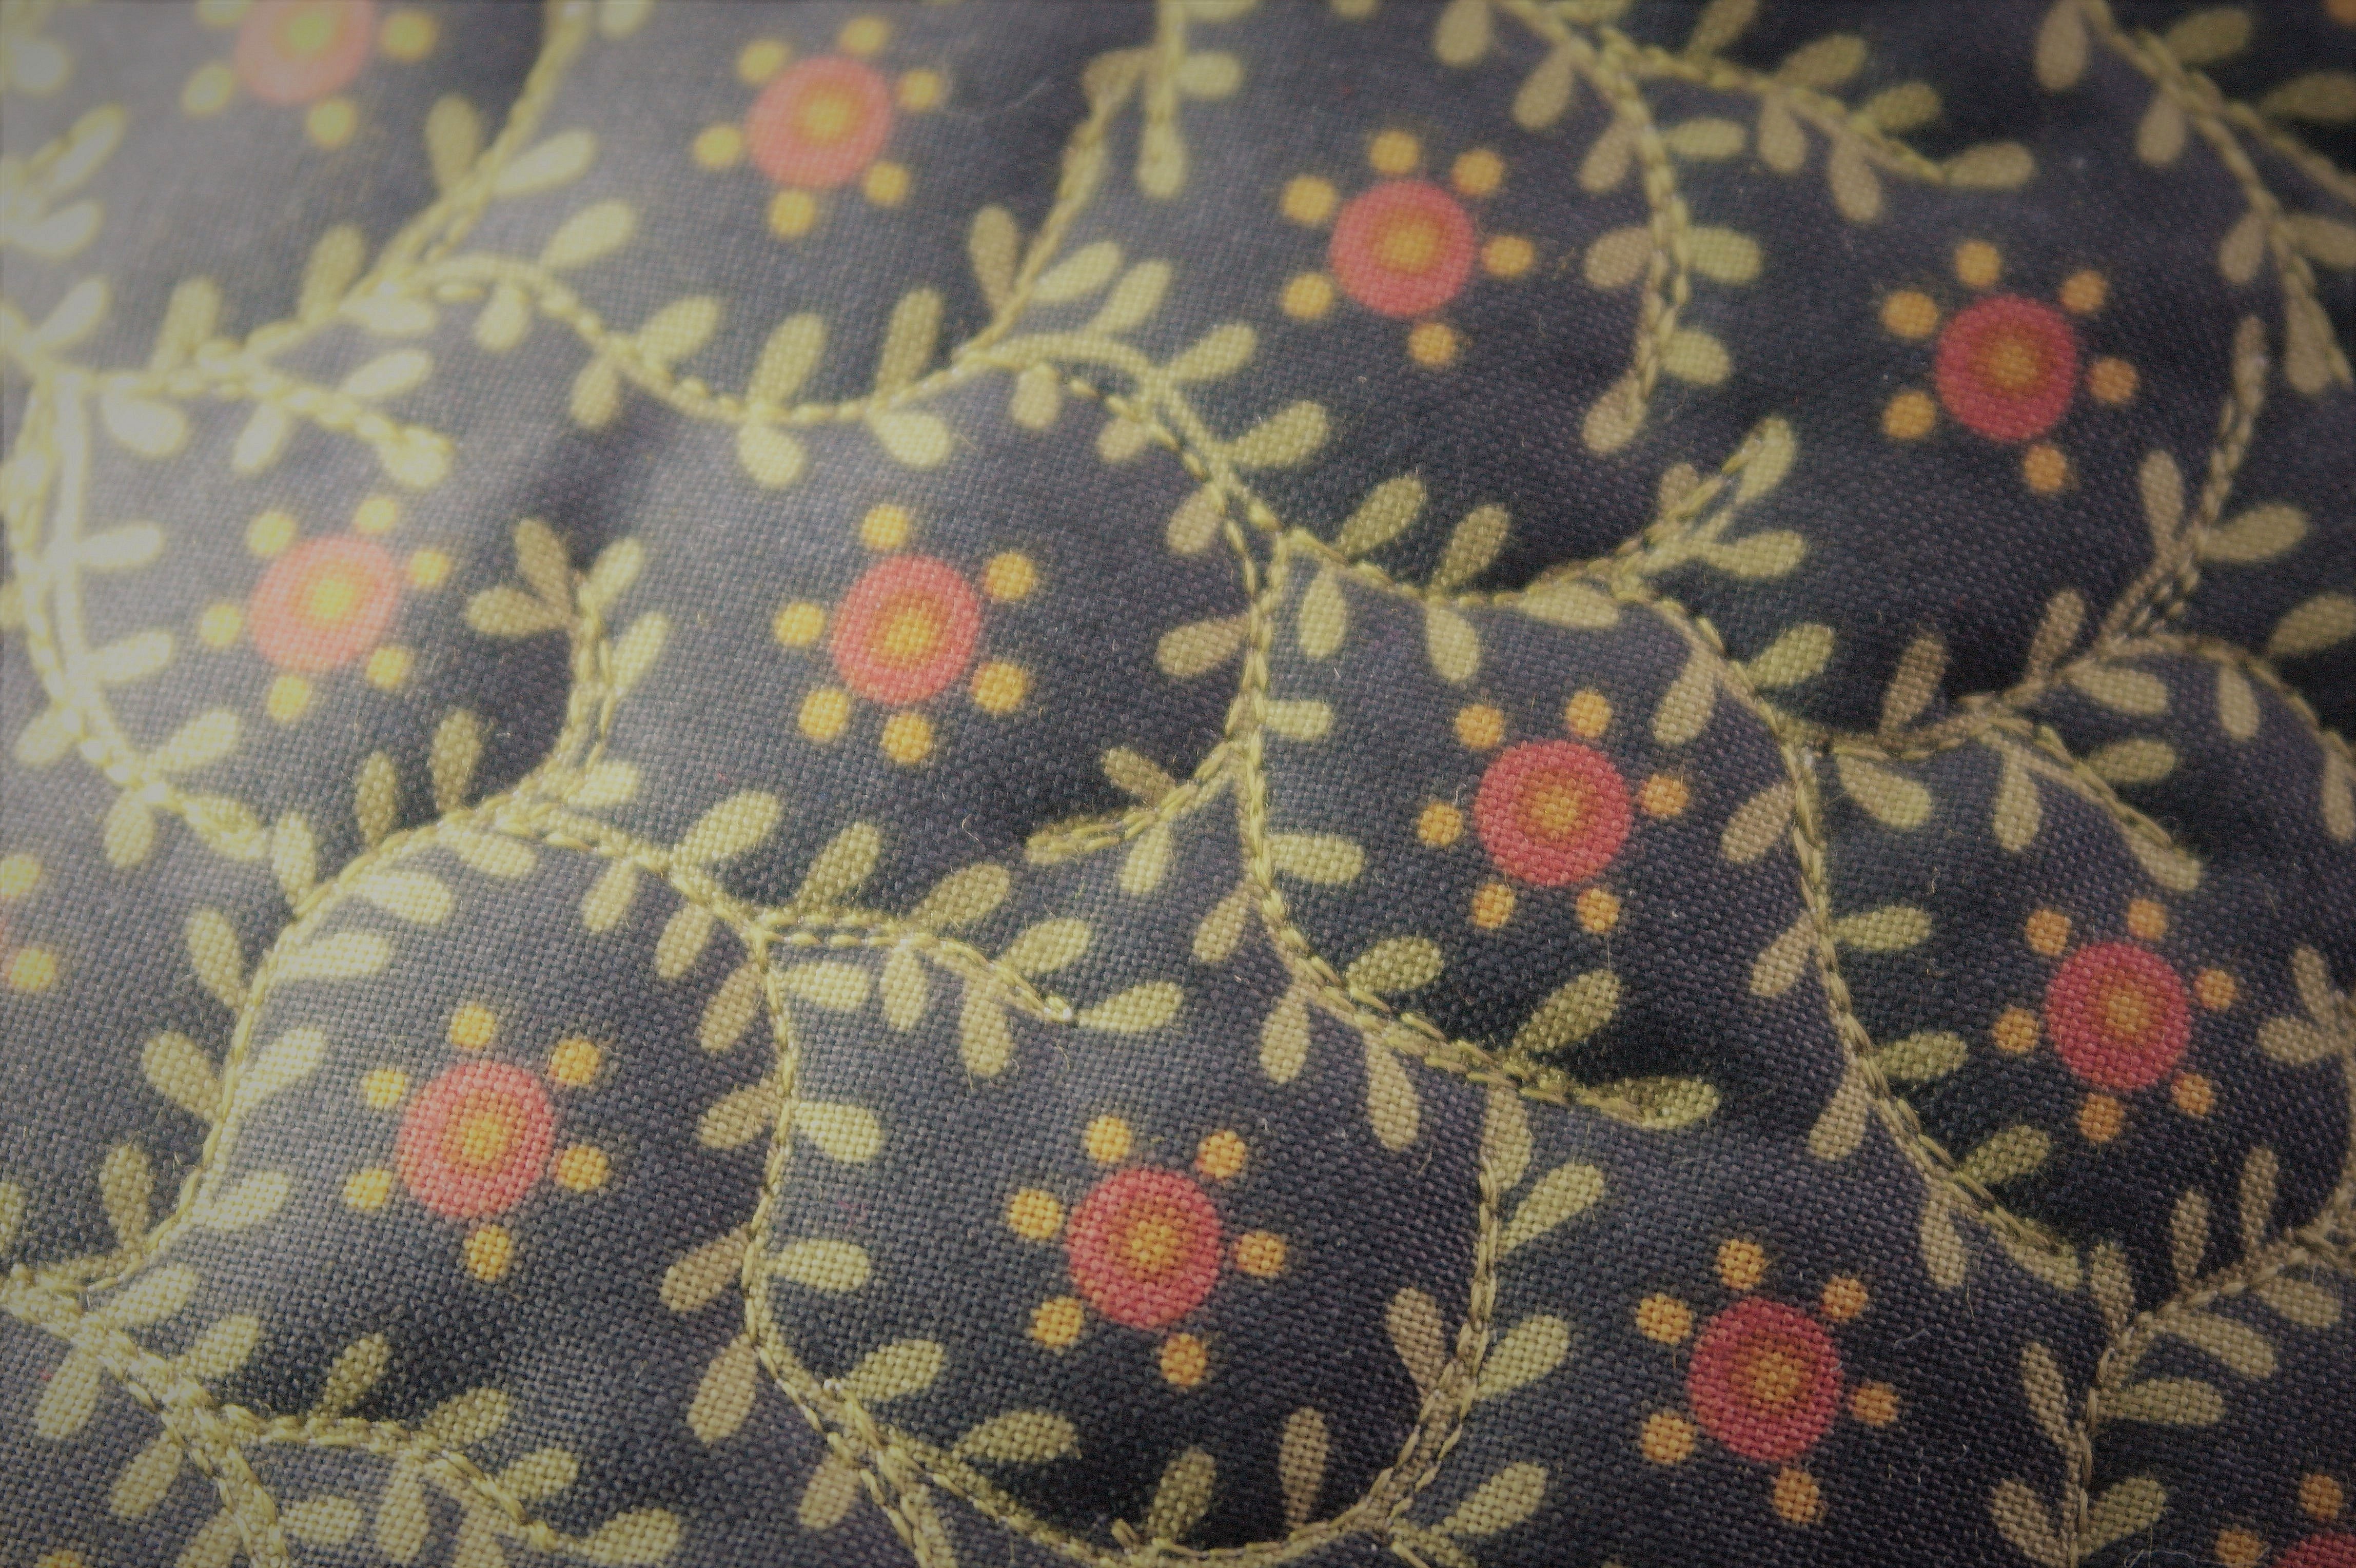
Free motion quilting over the vines of the fabric design, with the BSR: sometimes a print of a quilting fabric is all you need to follow for quilting.
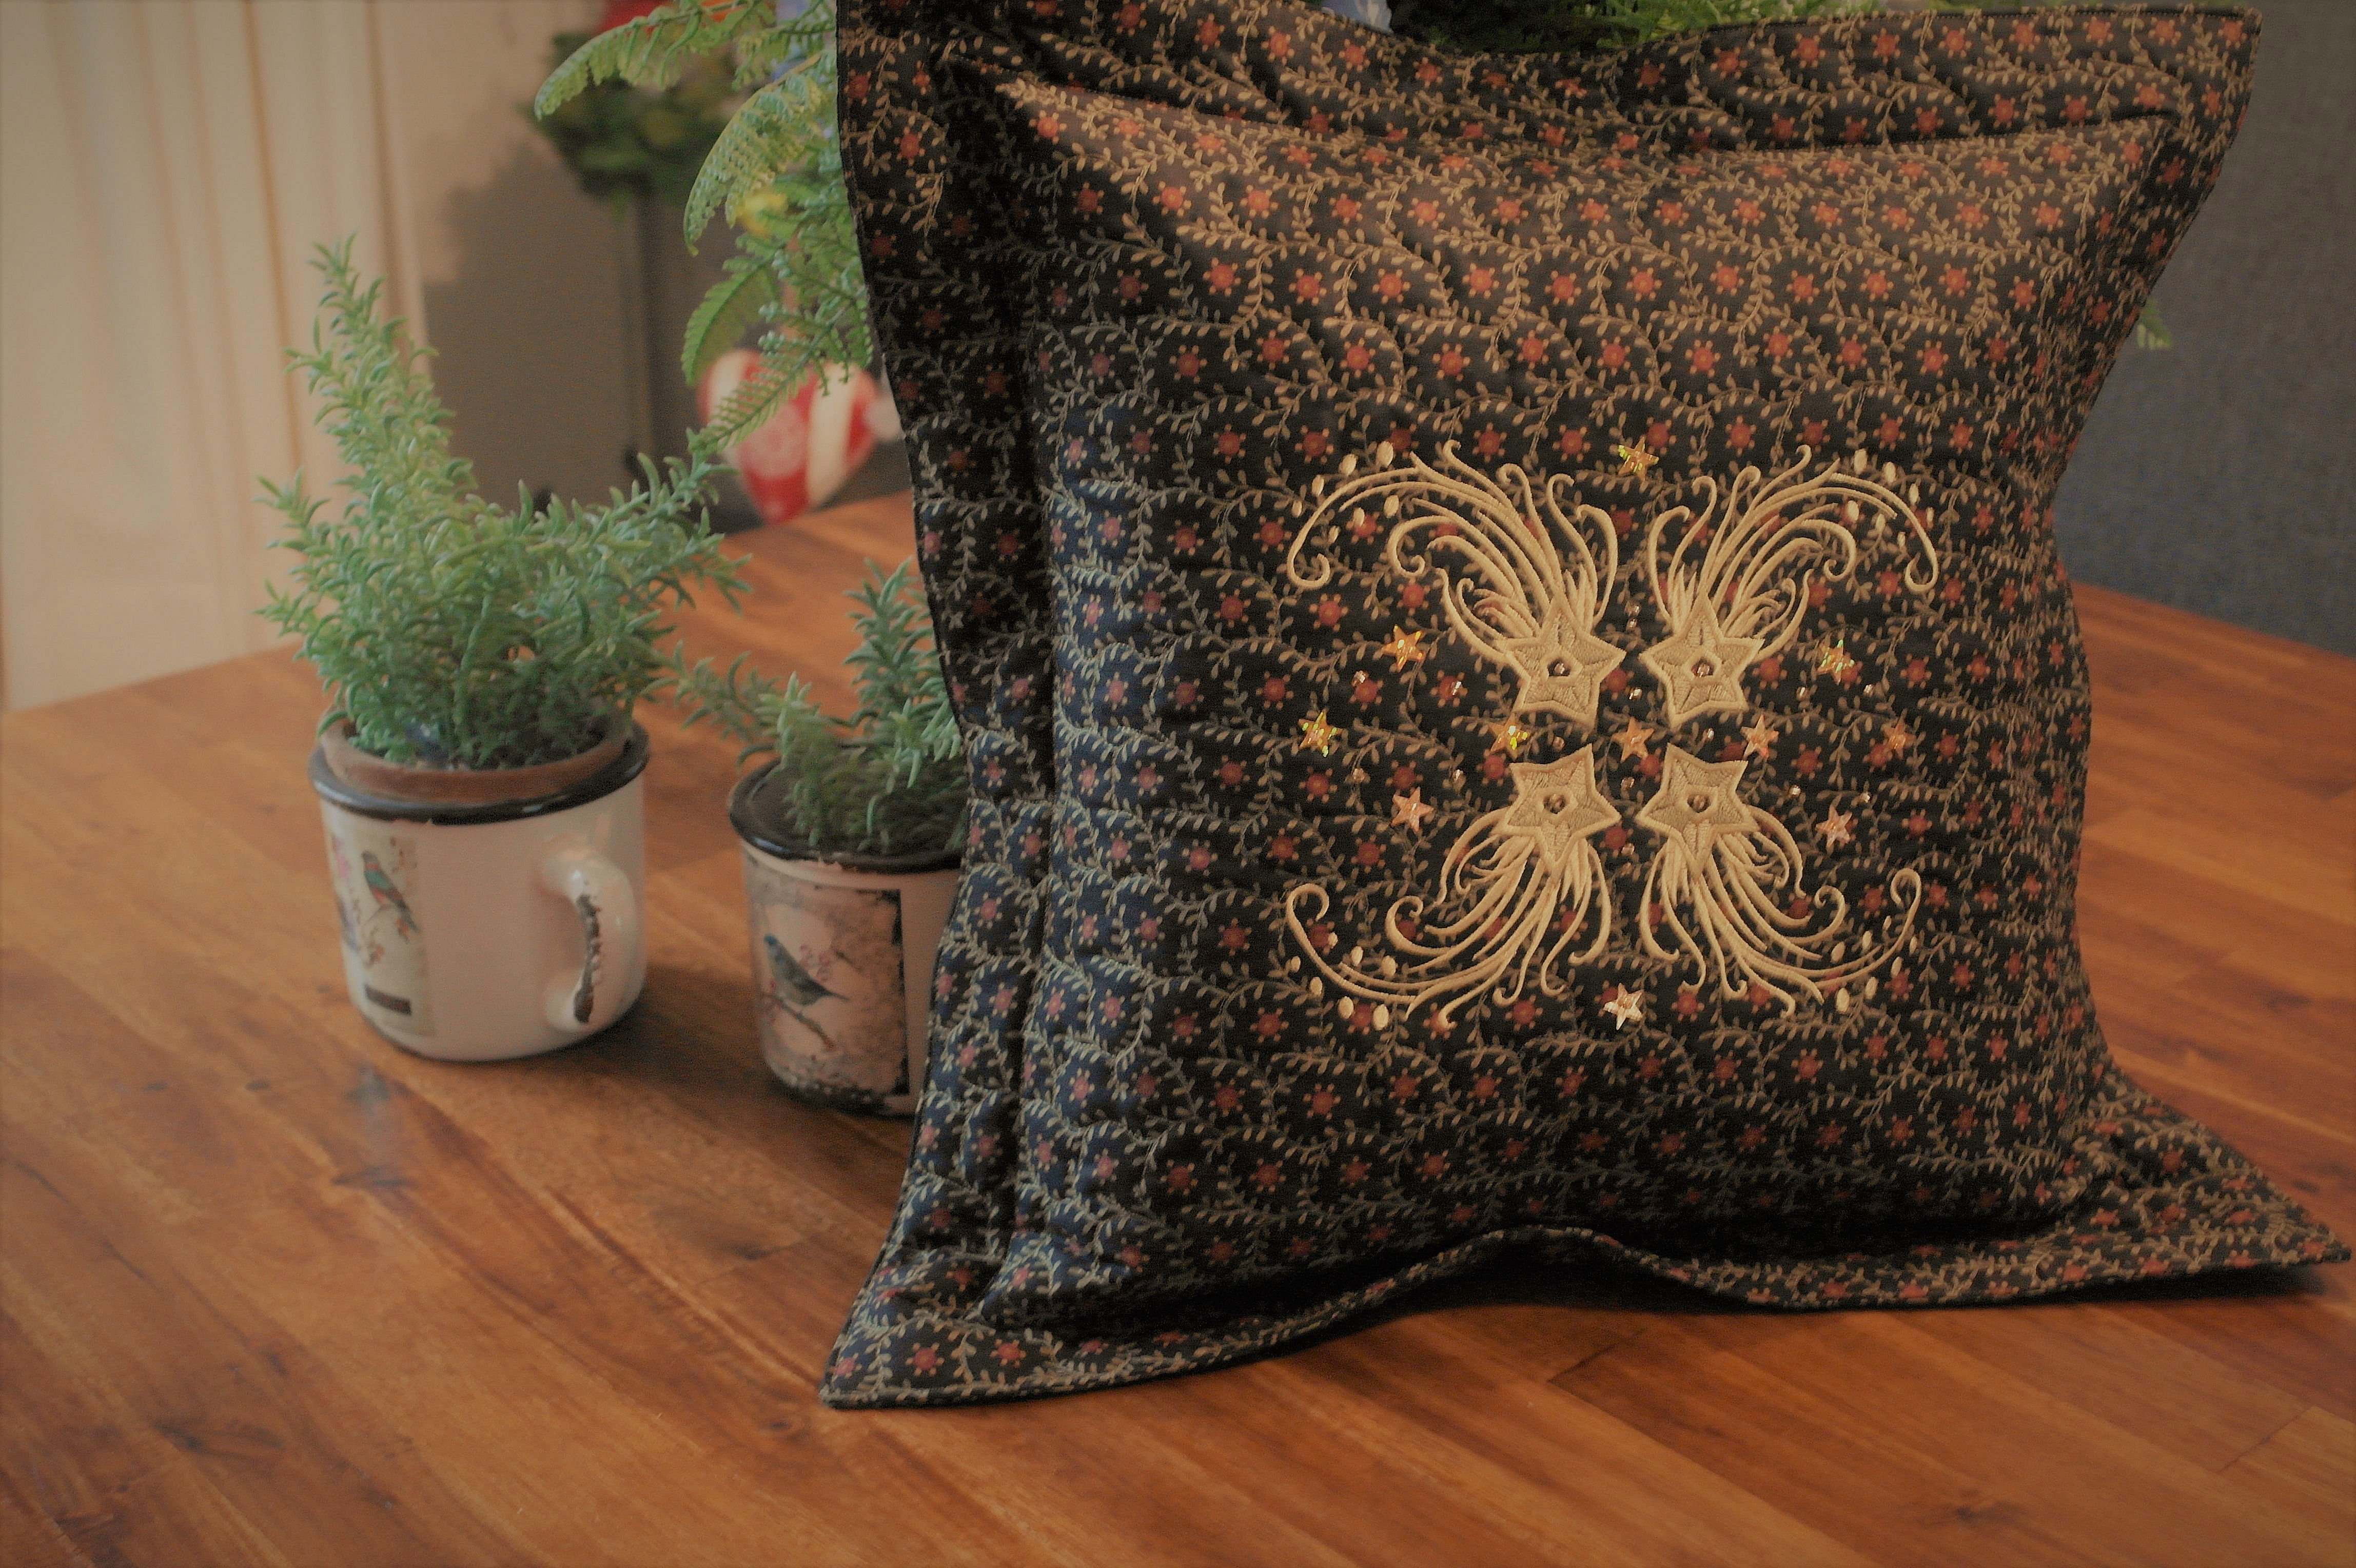
This is the pillow case, with the embroidery. I’ve made this one on commission, and was asked to be sure an extra wide border was added to the pillow case, to make it look bigger.
Next time I will tell you some more about the extensions/formats of files: many users are asking me about this, and so I respond to these questions. See you then!
Happy Stitchinig
Sylvia Kaptein
Sylvia’s Art Quilts Studio
www.sylviasartquilts.nl
[email protected]

Is there a product description page with a list of all the editing features available through this software? I can’t seem to find that anywhere. Thanks so much.
Hi Kathy,
There is so much possible, editing everything in V8: that’s why I have prepared many lessons to explain it all. I don’t think there is a list available with just editing features, but if you follow the lessons, I think you will find many editing features explained.
If you need to know something about a certain feature, perhaps you will find it in a next lesson. If you need to work something out and cannot find the solution, you can ask for me to forward that subject with my lessons, otherwise it may be that it will be handled with a future lesson.
Thanks Annl,
Hope you enjoy it all! Aim to please…
Sylvia Kaptein
Best blogger ever xxx. Adore the sailboat batik too ?