 BERNINA Corporate Blog -
After digitizing an embroidery design, you want to bring it to your embroidery machine for embroidery. And of course, using threads is essential to make a design. You can choose colors/brands while designing, but it’s better to choose threads in advance, while digitizing, before writing the file to your USBstick. I have talked about the Color Palette with lesson 12, but not everything has been discussed yet. With this lesson, the emphasis is on choosing the right threads/brands, and making your own thread charts.
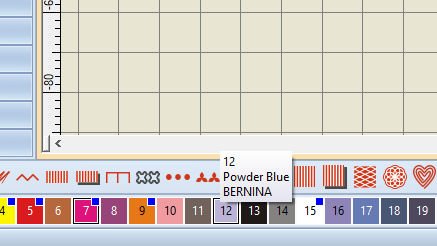
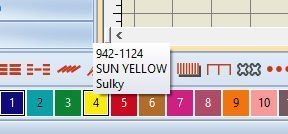
But first a reminder: opening the software, and hovering the cursor of your move above the colors of the Color Palette, default numbers of colors are shown, by number order, from 1 to 47 (and more, visible after clicking on the down arrow next to nr. 47). The name of such a color and ‘BERNINA’ mentioned as a Brand of thread, is given via V8 by default, because of the BERNINA software you are working in. That means it is just a random color and no particular thread: just colors you need to fill objects. The description of the color is for subdividing color names. There are more yellows, blues and other colors, so it will not be sufficient just naming a yellow ‘yellow’. Names like ‘pale yellow’, ‘chalk’, etc. are there to make a distinction between hues.
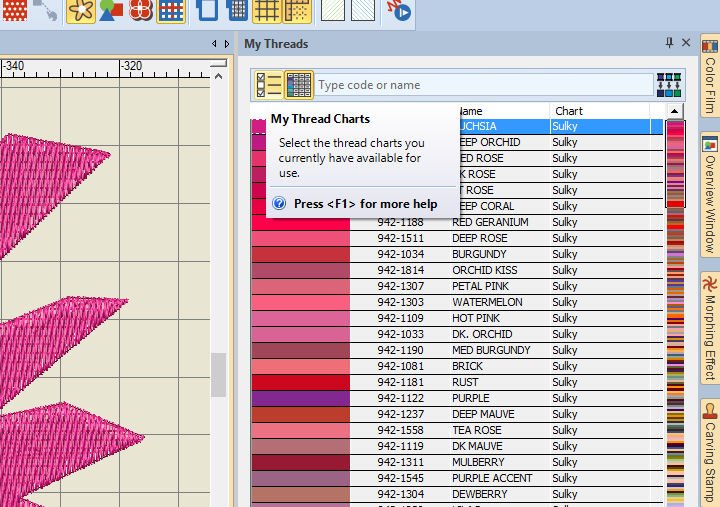
If you want to change the BRAND of threads, because you want to embroidery with thát particular thread, use the icon ‘My Thread Charts‘ with the docker ‘My Threads‘. You can open the docker via the Tab, on the right of your screen. If you don’t see this tab, use the most right icon ‘My Threads/Thread Colors’ of the Color Pallet Toolbar, which opens ‘My Threads’ docker, so you can use the mentioned icon (upper left). Some of this has been explained in Lesson 12
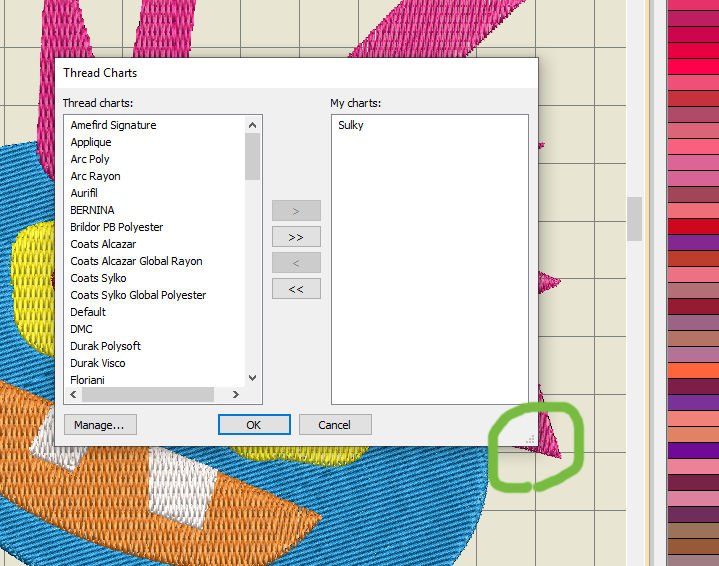
By clicking on the icon I’ve mentioned, a dialog ‘Thread Charts’ opens. If you find this dialog box too small, use the bottom right corner and pull this box to a larger size. You will however not be able to see ALL thread brands at once, because of the large number of them. But it can give a better overview. For resizing the box again, push the bottom right corner back to a smaller size.
As you can see, I have ‘Sulky’ in ‘My Charts’, on the right of the dialog box. That is the only thread I have chosen, because that’s what I am working with all the time. But you can choose multiple thread brands/types, if you want to, by clicking on the left with ‘Thread Charts’, using the first/upper arrow = one arrow facing right, to transfer the new thread to your own ‘My Charts’ list.
Be aware though that – with every thread you are placing to the right – the information about these threads are given in the ‘My Thread’ list. That means you will see a lot of possibilities of colors an threads, each with their own numbers, color name and brand.
If you want to change the colors/boxes with color on the Color Palette into the actual threads you are using, select an object of your embroidery design, click on the color of your choice with ‘My Threads’ list, (or double click) to change the color of the object. The number on the Color Palette will be as it was, but hovering above that color box will give you the new information about the chosen thread/brand.
The only thing with the thread charts in V8, is that they are not always up to date. New threads are frequently added by thread manufacturers, but are not added to V8. This will be the case when an update is available: often new types of thread are added to the already large list. So it could be that the thread you want to use is not available in the (default) list.
In that case, you can make your personal thread chart.
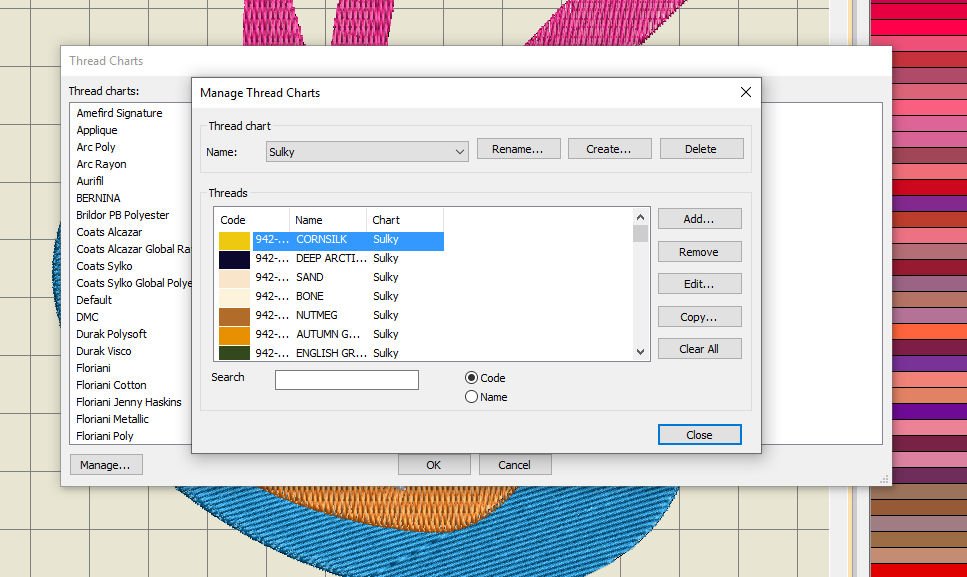
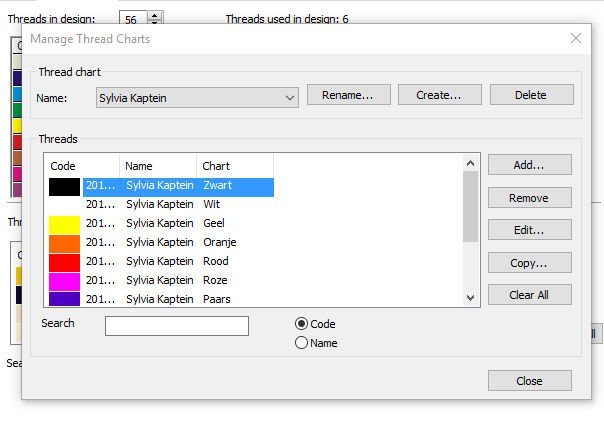
To update/modify the Thread Chart: click on ‘Manage’ with the already opened dialog box ‘Thread Charts. A new dialog box opens ‘Manage Thread Charts’. You can remove threads/colors (why should you? But it is possible), create them, delete them, edit and copy or clear all. You can search by code (the FULL number of a thread (with sulky that is 942-…. – a 3 digit number of the brand itself, a dash and a 4 digit number of the color), or by name (color-name, if you know the exact name, or just a general color name).

Another way of editing fabric charts is by using ‘Thread Colors’ with ‘Design’ on the Menu Toolbar.
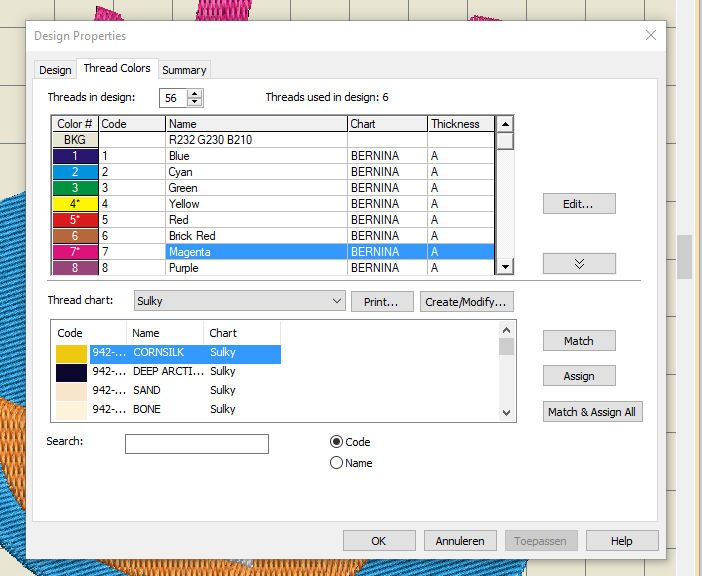
The dialog box’ Design Properties’ opens: click on the Tab ‘Thread Colors’. The threads that are available at that list are all threads of the color palette in number sequence, and particular the used threads with the current design on your workspace (number with Asterix). The last color box I’ve clicked on was ‘Magenta = color 7. That’s why this color information bar is blue.
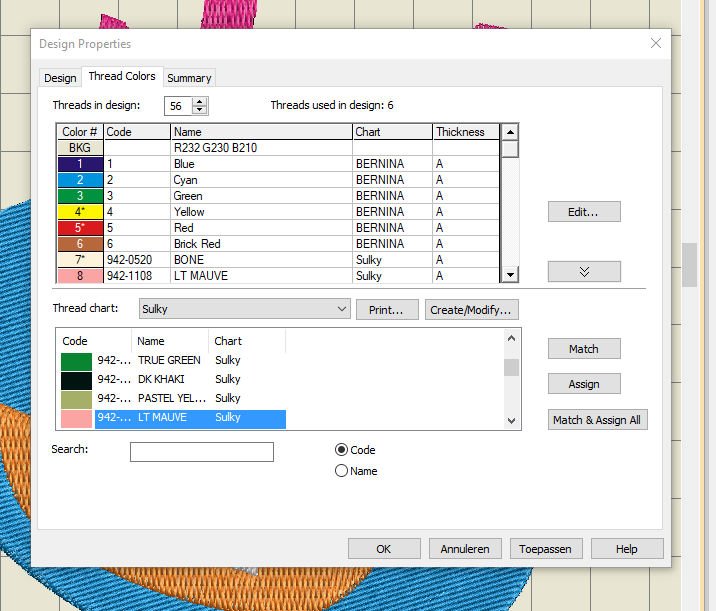
The second blue bar is from the first color in my ‘Thread Chart’, where I have Sulky threads ready to change the default BERNINA colors. By double clicking on a specific color with that chart, the default color changes. You can see the next information/thread info with the ‘Threads in design’ – I’ve changed no. 7 and 8, just to see what happens. Nothing has changed with the design yet, because I haven’t used ‘OK’.
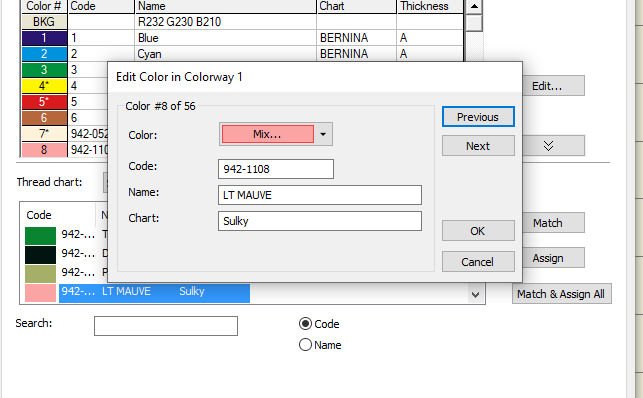 You can also use ‘Edit’ to change a colorway: a dialog box ‘Edit Color in Colorway 1’ opens for you to change the current, previous or next color. It indicates the total amount of colors = 56: the total number of color boxes of the Color Palette at that time. This number can change if you add color, or remove (unused) colors from this toolbar.
So you can see there are more ways than one to get things done. It’s worth the effort to click on all functions/buttons, just to see what’s behind it all. Use OK if you want to set a new color, use Cancel if you want to leave the dialog box without any changes.
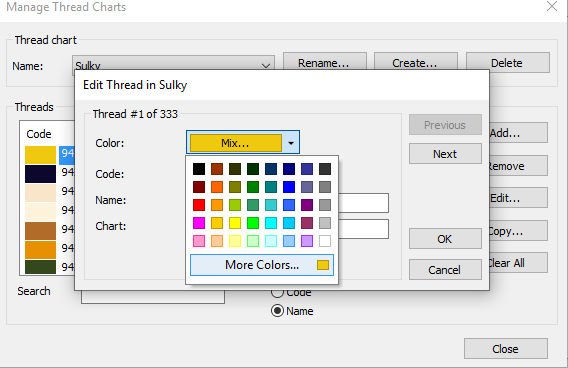
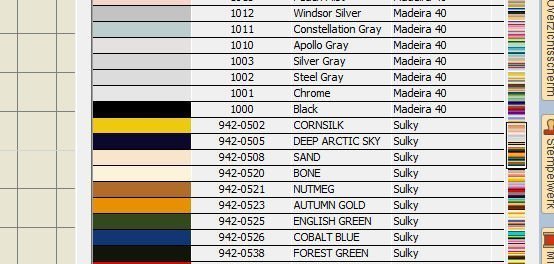
With the dialog box ‘Manage Thread Charts’ from ‘Thread Charts’ still opened, click on ‘Edit’, opening ‘Edit Thread in Sulky’. That’s what it says in my thread Chart box, because I’ve just Sulky Threads in my charts. All the information about the current thread (yellow), is given: the color code (942-0502), the Name (Cornsilk), the brand (Sulky) and on top ‘number 1 of 333’: that’s how much colors there are listed for Sulky threads. By clicking on the down arrow with ‘Color’, a color scheme opens, for you to choose another color.

By clicking on ‘More Colors’ you will get another box ‘Colors’, for choosing much more hues and values of color if you want to (I have moved this box to the side, to see box boxes – just click on the top of a dialog box and shift it, if that gives you a better view on everything). The Tab ‘Standard’ is used, with many standard colors,
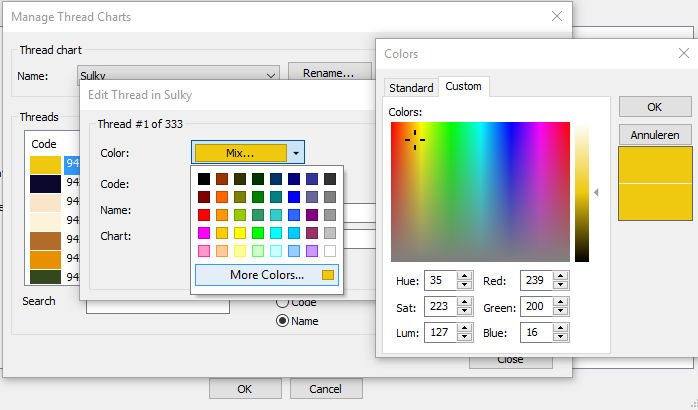 but you can also use the Tab ‘Custom’, to create your own color. You can click on a spot on the ‘rainbow’ box, you can fill out different numbers with Hue, Sat(uration), Lum(inance), or Red, Green and Blue (RGB). The upper box of 2 (yellow at this time) will change, showing you the new color. The lower box shows you the original color. If you have changed the color (showing in the upper box) but want to change it back, just click on the lower box and both boxes will show the same (original) color.
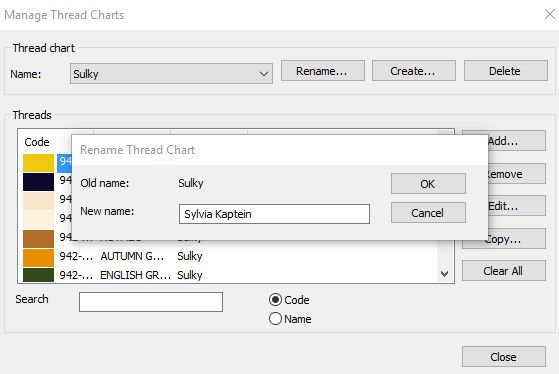 If you want to rename a Color Chart, use ‘Rename’ (to the right of the Name/Brand of the Manage Thread Charts dialog box). This is a way to create your own colors/chart. Be sure to choose a name you can remember well, to be able to find it again amongst all the other names. I have used my own name ‘Sylvia Kaptein’, filling it out with ‘New Name’. Be sure NOT to use OK, if you only want to see what happens. Using OK sets your changes.
Want to create your own thread chart?

Click ‘Create’ for a new dialog box: Create Thread Chart. Fill out the name/your own name for the new chart. Go to ‘Design’ with the Menu Bar, then click ‘Thread Colors, to open ‘Design Properties’. Click on ‘Create/Modify’ to open ‘Manage Thread Charts’, then click on ‘Create’, and fill out the new name/your name for the new thread chart. Use OK to set.
After this, use the down arrow with ‘Name’, and search for the new name/your name on the list: click on this name, to open this new Thread Chart. As you can see, I have added a couple of colors, naming them just by their color (in Dutch, because that’s what I am).

You can add colors (999), remove, edit, copy or clear all. If you want to work with just YOUR Thread Chart, remove all others from ‘Thread Charts’ (icon via docker ‘My Threads’), and add your new chart.
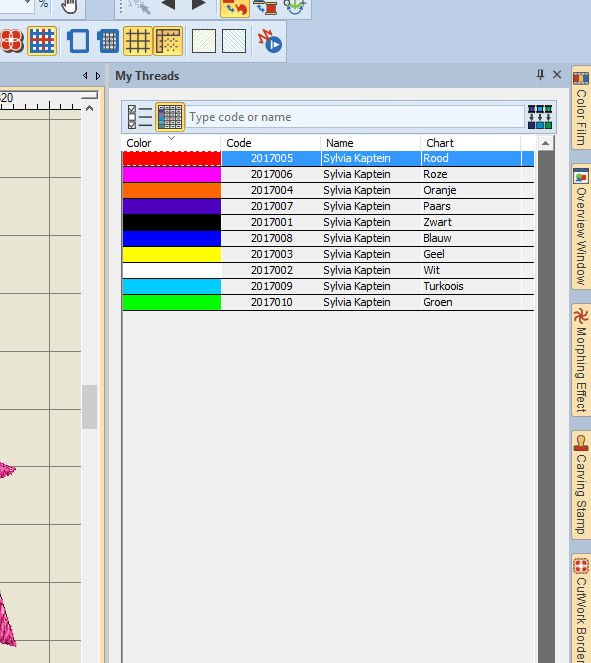
Use ‘OK’, and your chart shows in ‘My Threads’. I just have a couple of colors ready for use, but will add more if I need them.
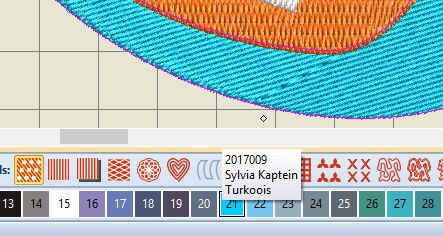
Now I’ve change all colors of my current design, and when hovering above a color box in the Color Palette, it gives me the information from my own Thread List. If a color is used that was already amongst the default 56 colors of the Color Palette, the information changes with that color box. If a new color is used, it will appear at the end of the Color Palette color boxes (use the down arrow next to box 47).
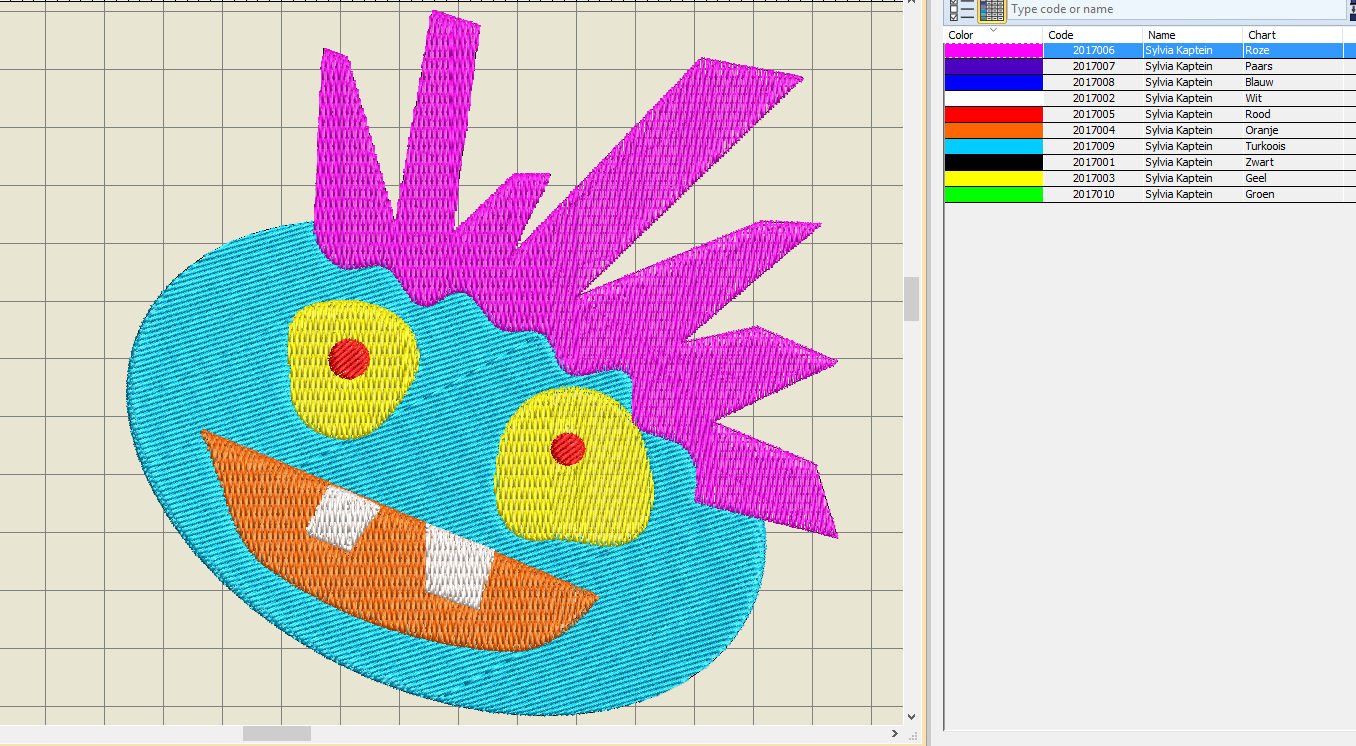
Now the face I’ve made in Lesson 15 has changed colorwise (I’ve added some hair too!).
Next time it’s time for BBQ: I will show you how to add letters to a purchased embroidery design and make an apron for my son who loves to BBQ. See you then!
Happy Stitching
Sylvia Kaptein
Sylvia’s Art Quilts Studio
www.sylviasartquilts.nl
[email protected]

Hi my is jenny i was just wondering if you had a colour chart of Bernina to Hemingworth if so were can I find it . Thank you very muchJenny
Hello Jenny, I dont know about an existing colour chart, but in the program, you can choose the brands you are working with. (see this post here: lesson-12-bernina-embroidery-software-v8-toolbar-color-palette/
If you enter your threadbrand and open “My Thread” it will suggest you the nearest thread colour by your brand for the BERNINA Color. So there is no colour chart needed, since the programm will suggest it for you or you can enter your threads number and find exactly the threads you have at home with ease. Let me know if this already helped or if you need some more infos!
Greetings, Ramona
??
Glad you liked it, Ann