 BERNINA Corporate Blog -
What’s more special than a personalized gift: a (guest) towel, a pillow, enhancing a pocket of a shirt… making it all with V8. The option ‘Monogramming’ is fun to work with –
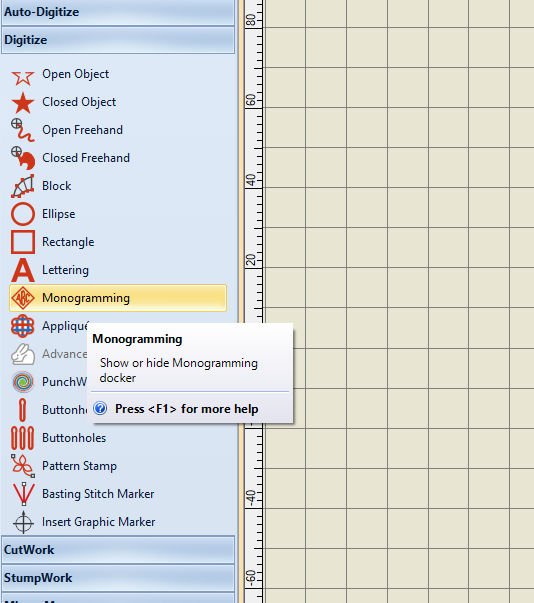
you can find it with the left toolbar: with ‘Digitize’, click on ‘Monogramming’.
What is a Monogram?
A special design (a symbol) made by overlapping/combining one or more letters or graphics, which are the initials of a person or company, for whom the design is made: like a logo, it should be very recognizable. Such a monogram can be used for identification – f.i. knowing which towel is yours. The easiest way to make a Monogram in V8 is by using the available shapes and styles, with borders and ornaments. By clicking on ‘Monogramming’, using the tab ‘Designs’, they will appear.
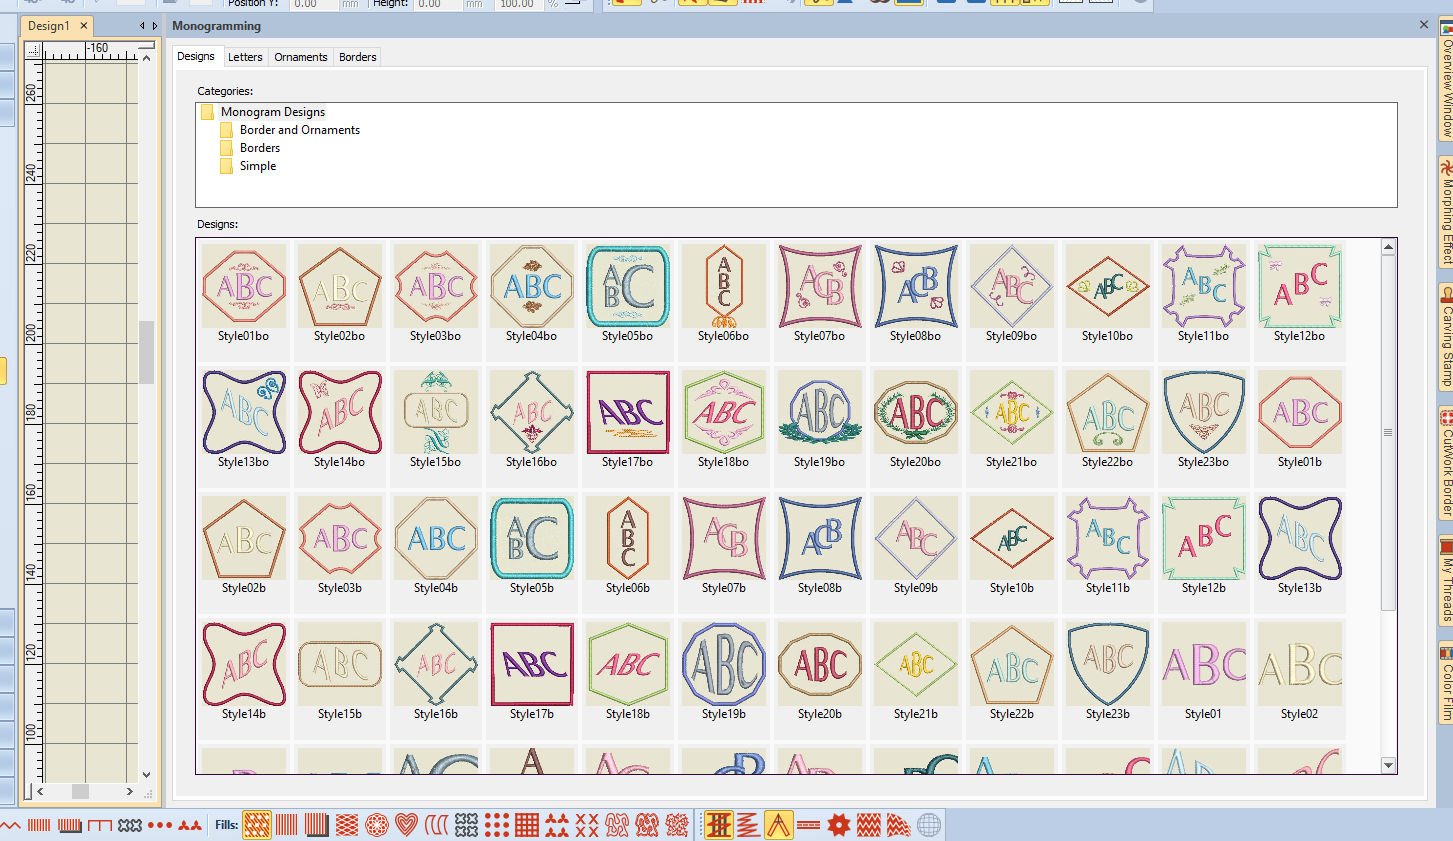
At first you will think there are just a couple of ready-made Monograms with the docker ‘Monogramming’, but if you click and drag the side of this docker, far to the left, you will find there is a lot more! And even then, you can scroll down, to see more designs.
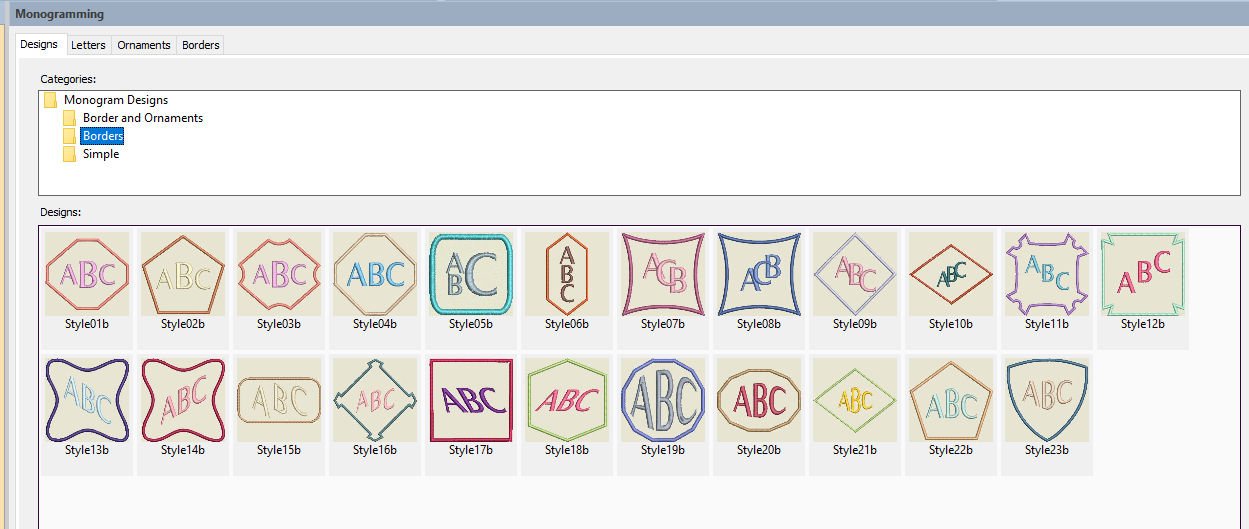
On top with ‘Categories’ you will find a couple of files, : the main file is ‘Monogram Designs’, in with the files ‘Border and Ornaments’, ‘Borders’ and ‘Simple’ are present. The Main file is opened, with the ‘Designs’ box below filled with so many examples. If you want to just open ‘Borders’ for example, click on that file, and the Designs will appear with only borders.
 If you want simple Monograms, open the file ‘Simple’: no borders present.
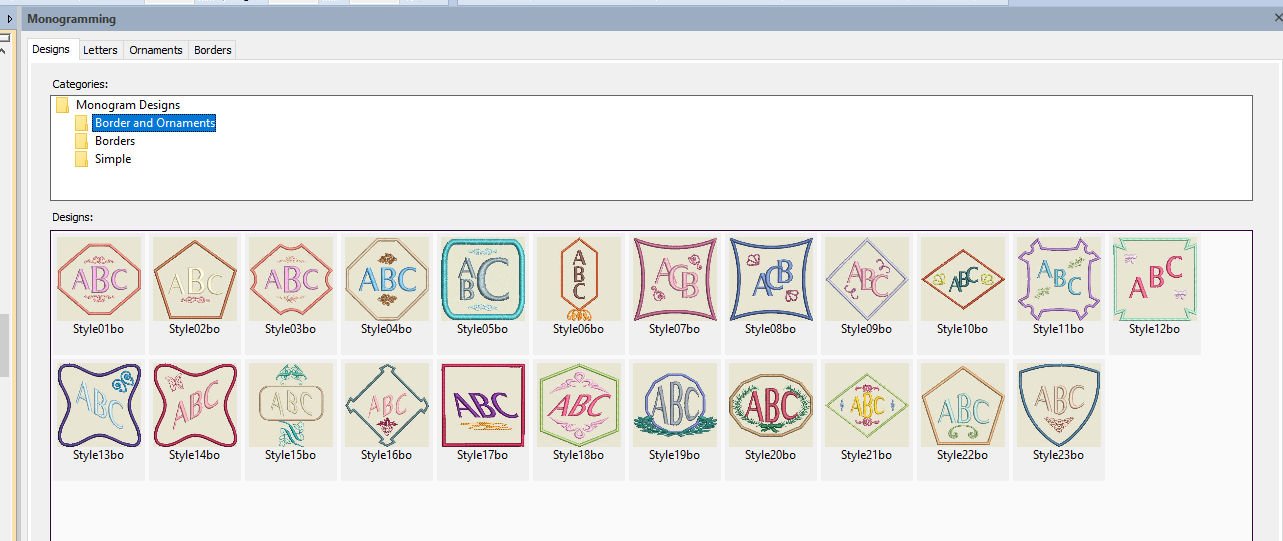
But the most special ready-designed Monograms by V8 are ‘Border and Ornaments’: click on that file and there are 23 different styles with letters, borders and special ornaments.
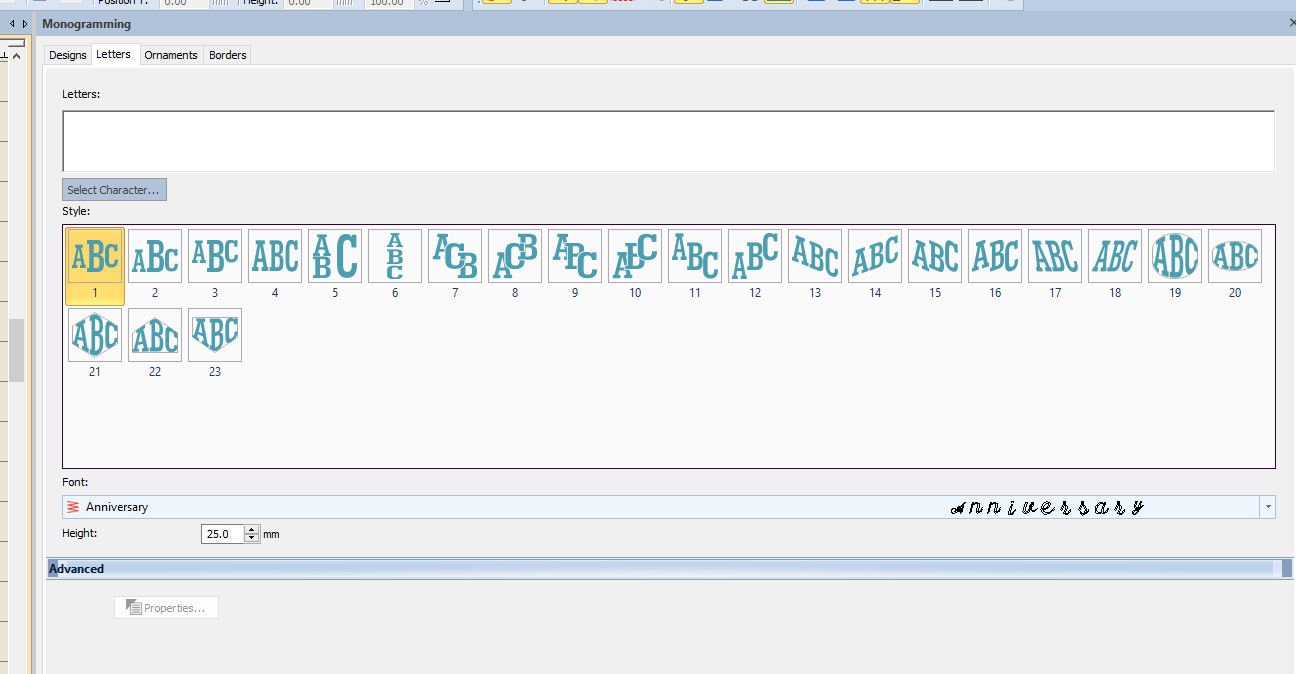
When clicking on the tab ‘Letters’, a dialog box with different settings is opened with ‘Style’: click on the style you want to use. In the first – empty – box, you can type letters for the monogram.
Below ‘Font’, you can find ‘Height’: with this option you can change the height of the letters/characters at that time.
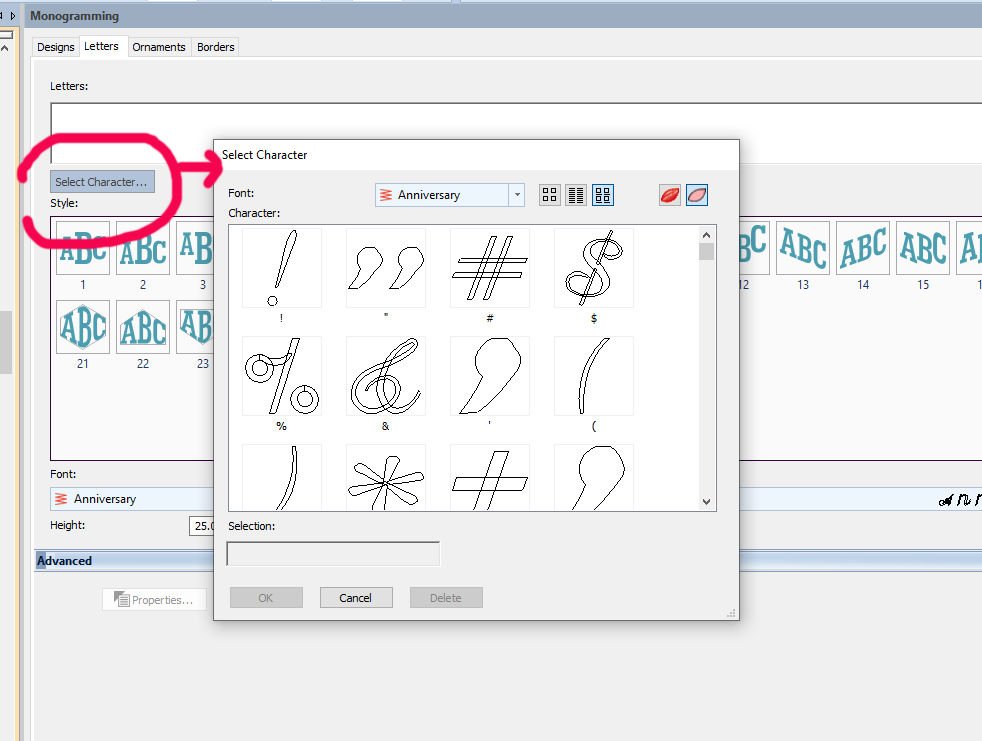
Or, you can even use characters: use ‘Select Character’ and a dailog box opens to choose from a variety.
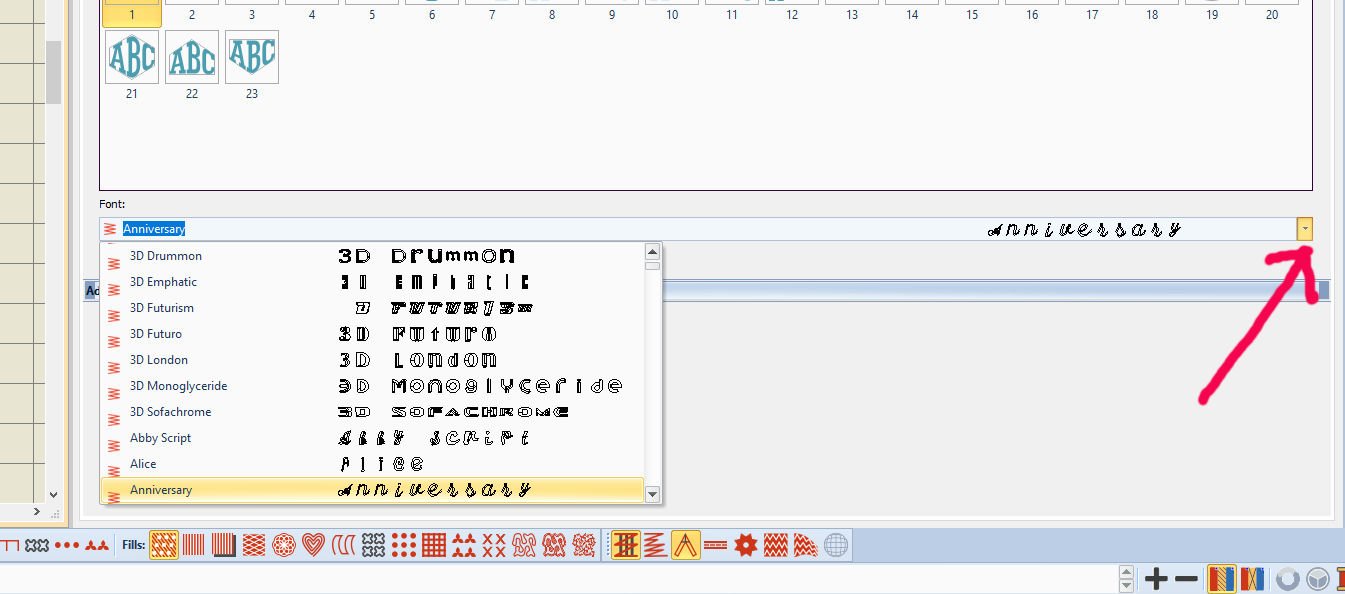
With ‘Font’, below ‘Style’, you can choose from the available fonts in V8, or your own added fonts. Use the down-arrow to the right to find more fonts. But remember: not all fonts you have downloaded and added to V8 are suitable for embroidery. Try them first, before actually making a Monogram.
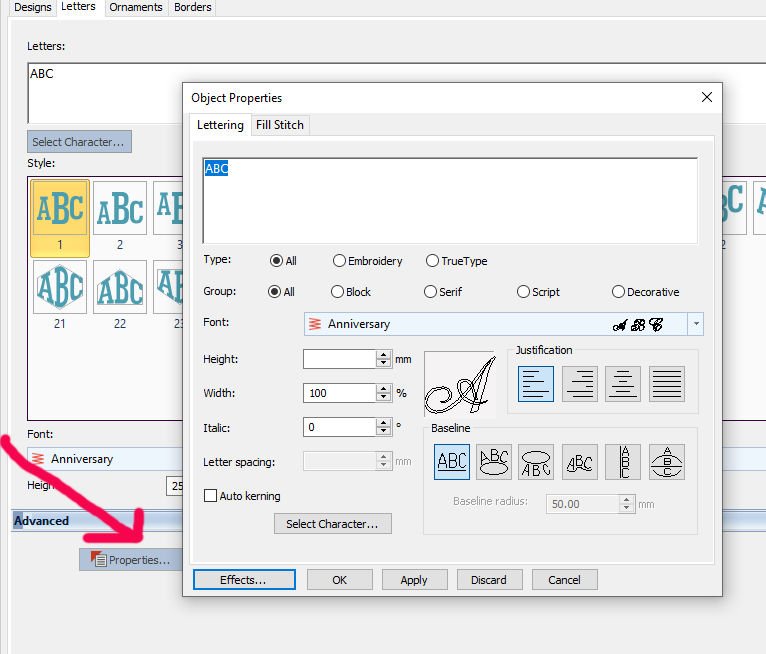
As soon as you have typed something in the ‘Letters’ box, the ‘Properties’ bar with ‘Advanced’, is activated. Click on that bar, a dialog box ‘Object Properties’ pops up, with the Tab Lettering activated. This is the same dialog box which you get when right-clicking on ‘Lettering’ in ‘Digitize’. You can change Type, Group, Font, Height, Width, Italic, Letter spacing, check ‘Auto kerning’, or use another option with this box.

Using the Tab ‘ornaments’, you can add an ornament design, pattern or make a simple or intricate ornament yourself.
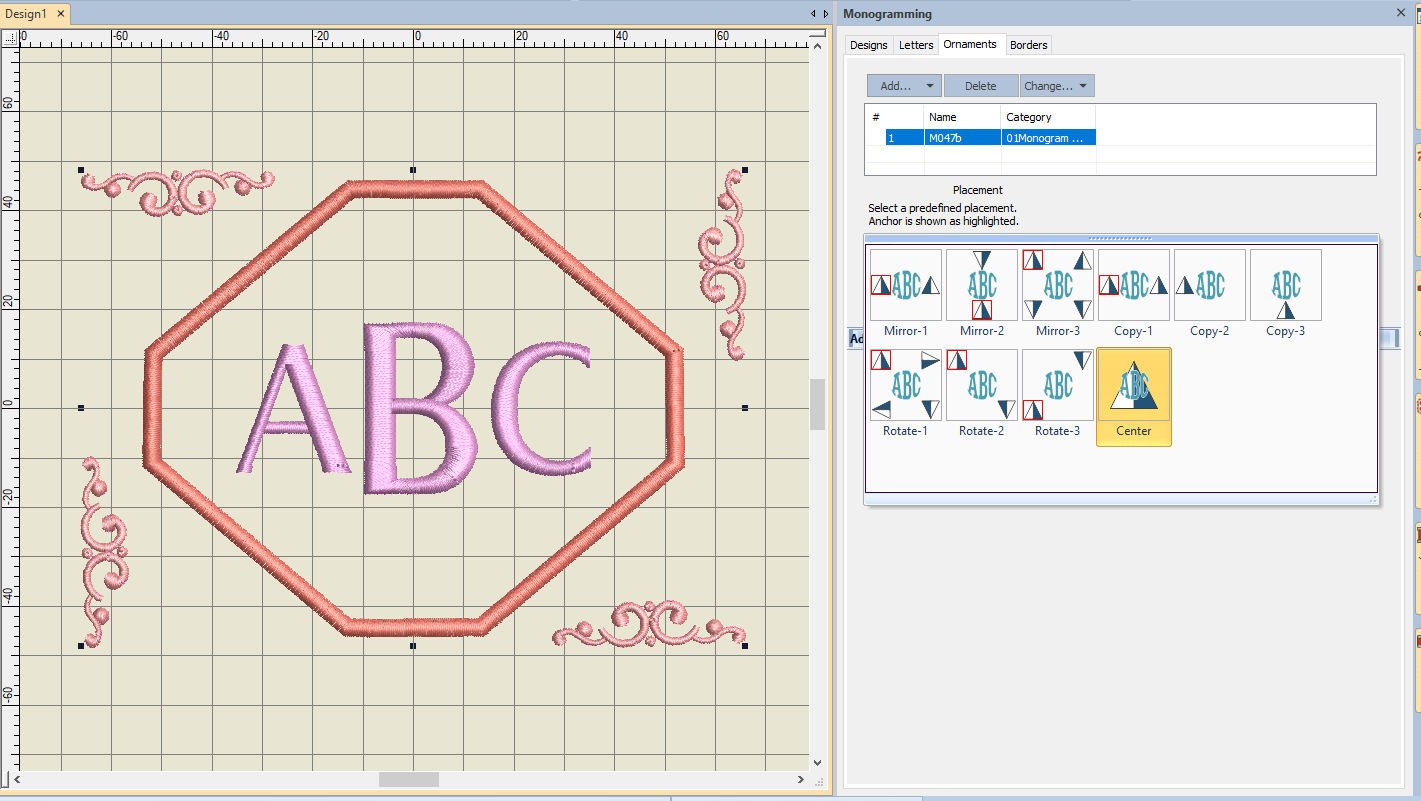
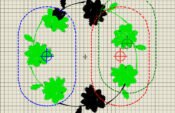
By clicking on one of the predefined placements (with Placement), V8 placed a simple Monogram with a standard setting, using the ornament placement of your selection (that box is yellow in the docker). The ornaments are now placed outside the monogram borders, but you can also choose one with the ornaments inside, or halfway.
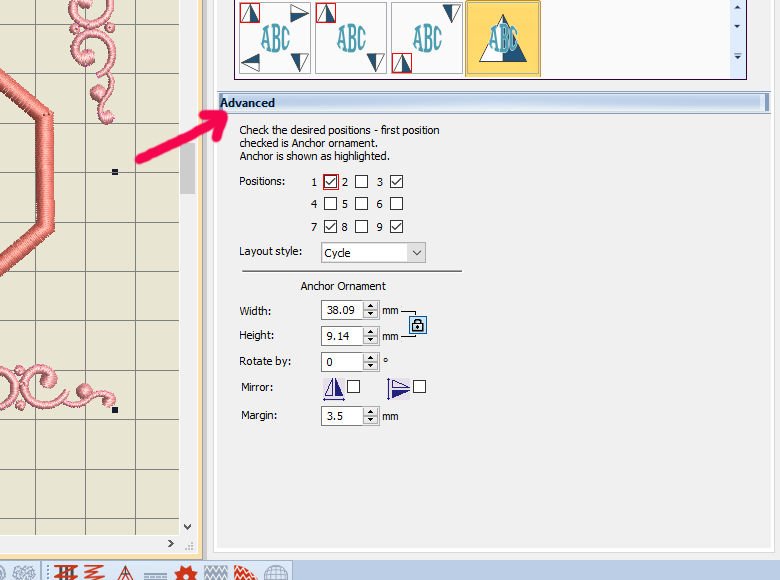
Using the ‘Advance’ option below placement, you can change the Positions, Layout Style and Anchor Ornament = how your ornament is shown: width, height, rotate by, mirror or margin can all be adjusted.
With Positions, the boxes that are checked are the current position of the ornaments. By clicking on another box, or boxes, you are changing these position(s).
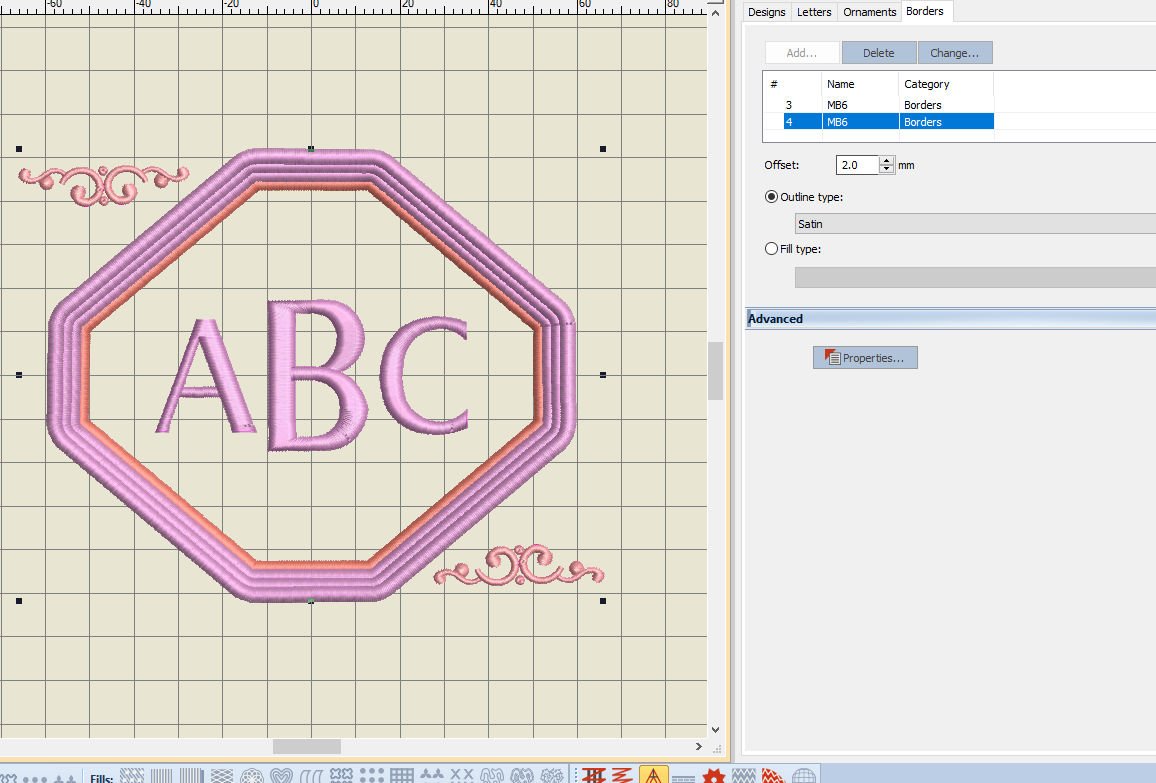
With the Tab ‘Borders’ your can add, delete, change borders, offset them, choose outline type, fill type and use the ‘Advanced’ option to change more properties. I’ve used ‘add’ to multiply the number of borders, by keep clicking on that option: four borders are placed now. I can click on each border to change color, or other properties.
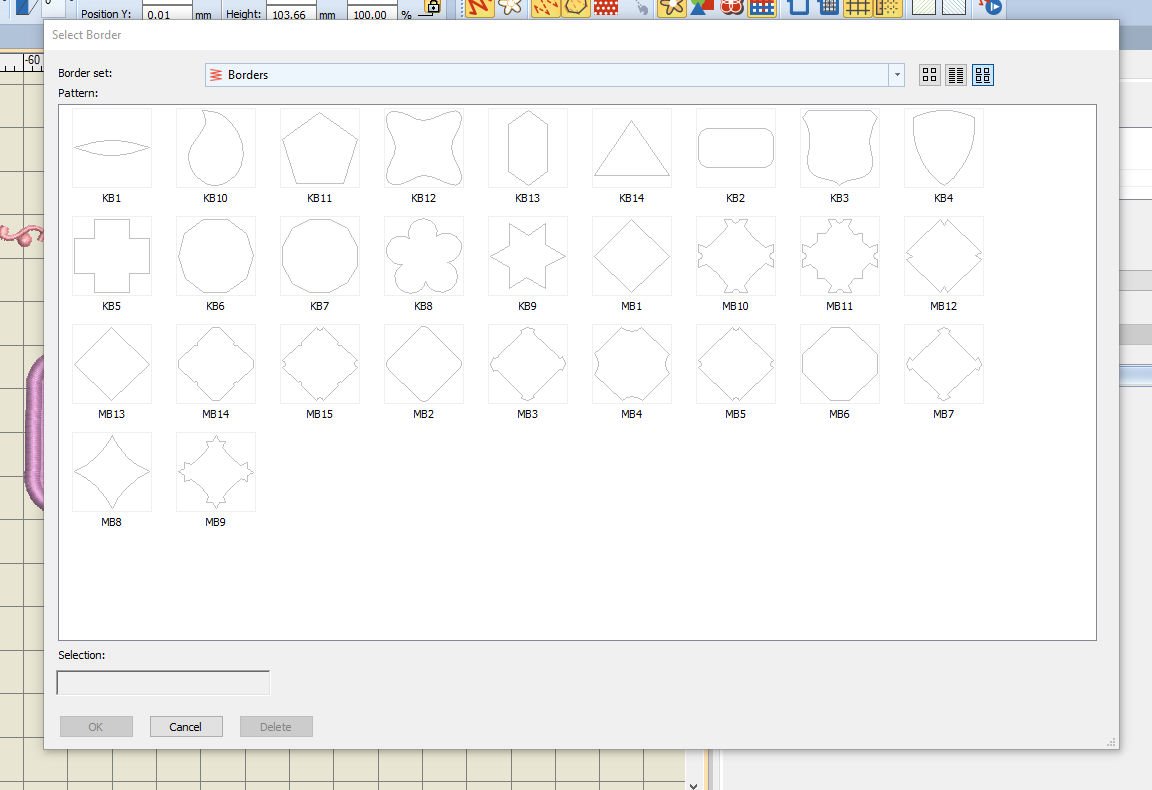
If I want to change – for example – the fourth border = selected blue, and use ‘Change’, a variety of shapes appears: in the first option ‘Borders’ there are 29 options, but when clicking on the down-arrow next to ‘Borders’ you can choose from 15 different ‘Diamond Borders’ too!
Do you want to see the dialog box ‘Select Border’ as large as mine? Just pull on a corner and drag it to a larger position. You can change that back to smaller, by pushing a corner to the center again.
I have selected a shape from ‘Borders’= KB8, used ‘OK’ to set it and voilà: a Flower Shape is set, all borders at once, all the same shape.

Now I just want to change the fourth border: select that border no. 4, and choose a Candlewicking Border with ‘Outline Type’: looks great already. Possibilities are endless!
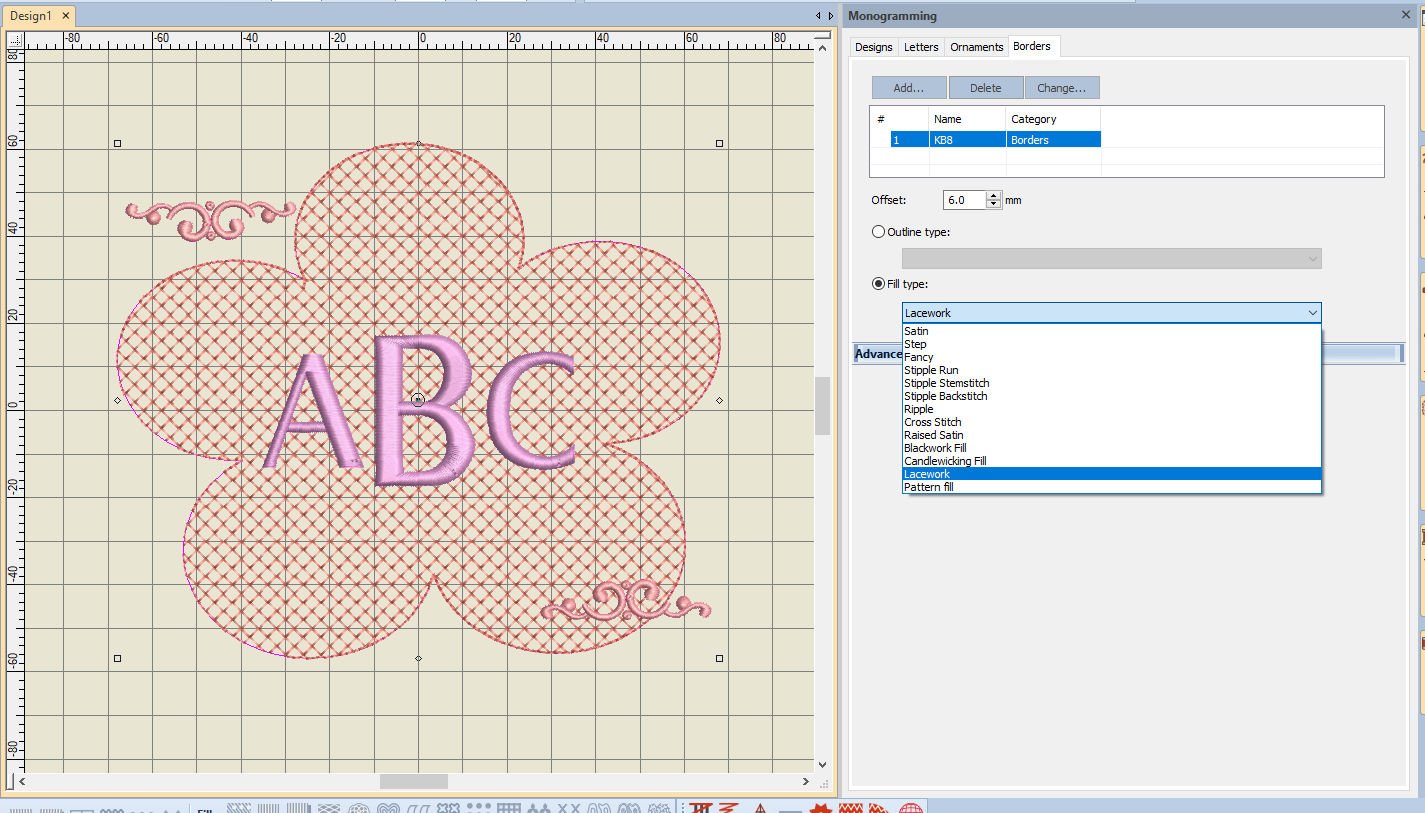
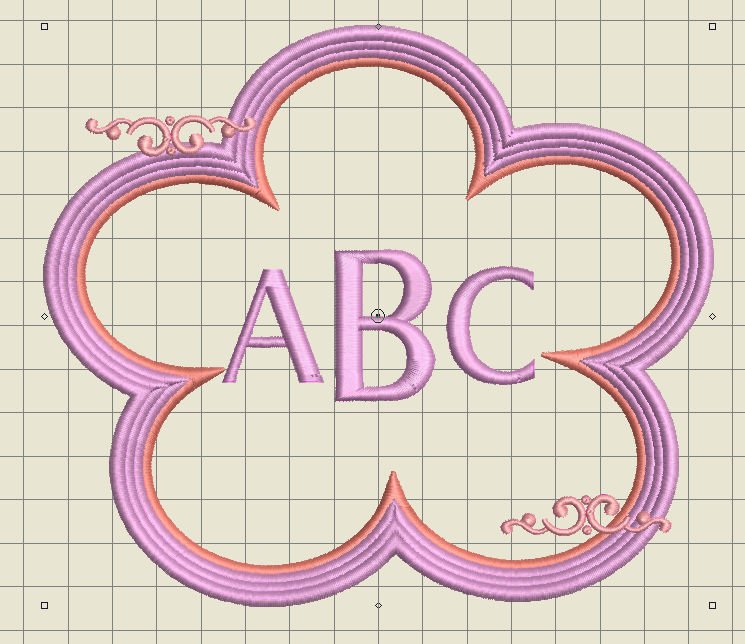
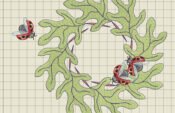
Deleted three borders, and used the box ‘Fill Type’, to fill the background with Lacework: completely different from the last one.
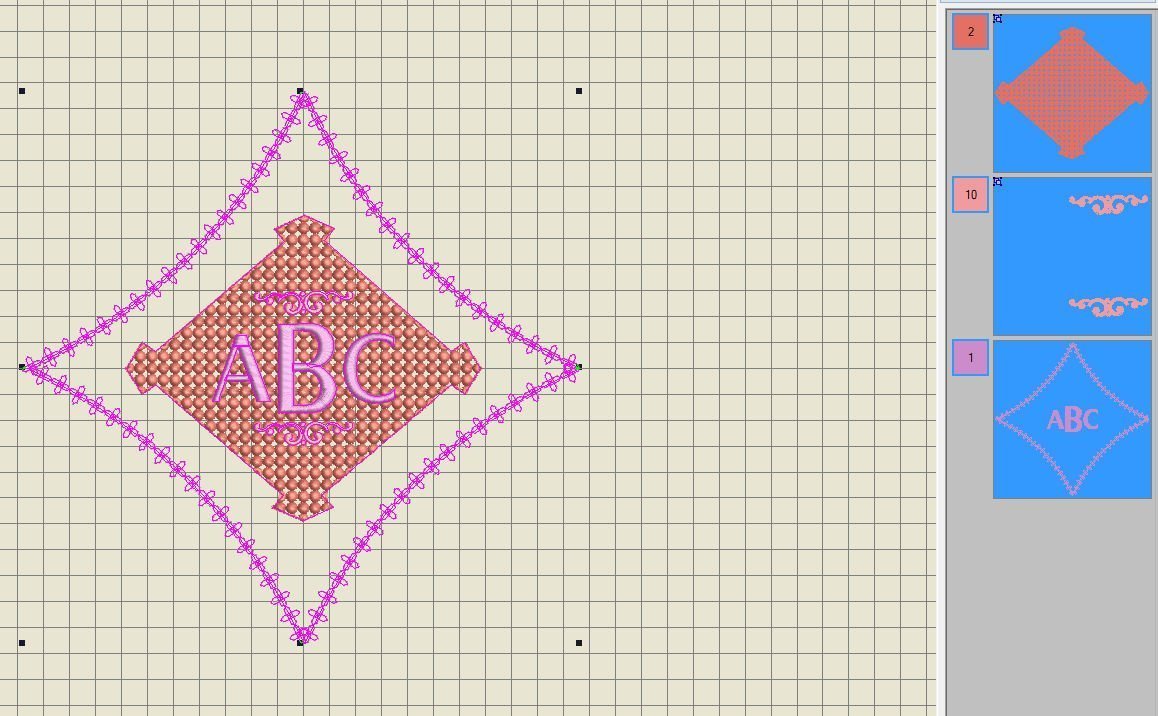
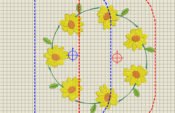
I’ve changed the shape, placed an extra border around it on quite some distance, and changed the ornament placement. This is fun too.
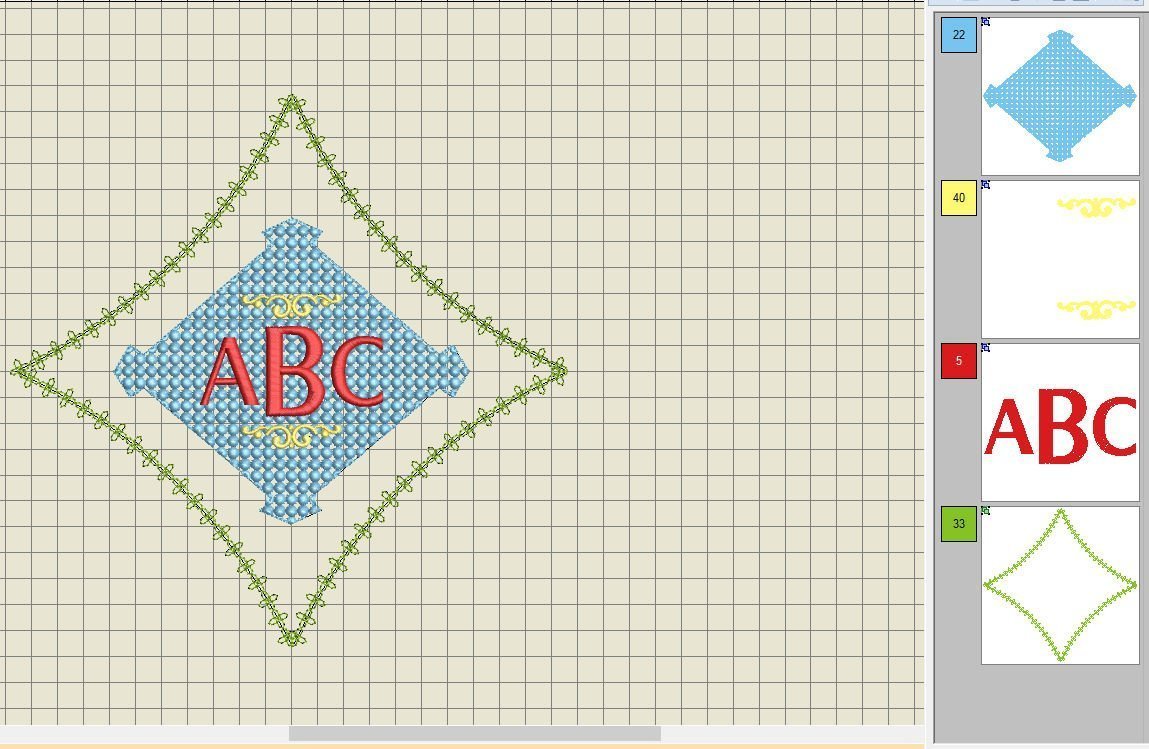
In the docker ‘Color Film’, I’ve clicked on each box, to change the colors into something brighter.
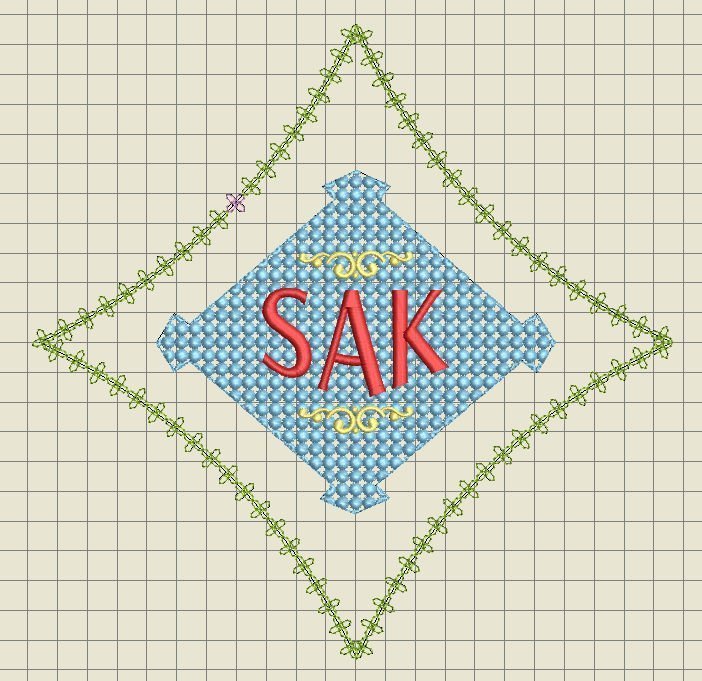
Changing the letters in my own initials (S A K = Sylvia Antoinette Kaptein, which is my (married) name), and this could be my own monogram.
There are so many possibilities to make your own Monogram: I really would like to see yours! Place your picture(s) in the Community of this BERNINA Blog, so we all can enjoy them!
Next time another technique, see you then!
Happy Stitching,
Sylvia Kaptein
Sylvia’s Art Quilts Studio
www.sylviasartquilts.nl
[email protected]

I’m not sure if this is the place to ask, not sure if there is a more advanced coverage of this part of the software; but is there a way to import monogram fonts into this tool? And by that I mean specifically designed fonts where the right, left, and center are designed slightly different for the overall aesthetic of the monogram (usually the middle letter is larger and more decorative). Or is there a different way that the software can handle that? I feel like I must be missing something as I have been importing each letter individually and arranging them by hand…
Hi Ann,
This is what I found on the Internet:
Monogram rules for three letters-
‘Traditionally, the first letters of their first, last (surname) and middle name are used, in that order. For couples, if they share their last name, the last name remains in the middle with the initials of their first names on the left and right side.’
So the the first letter of their surname in the middle is correct, because that is the focus with Monograms, and mostly the largest letter of the three – It’s the letter with which the owner recognizes her/himself. This will change of course if someone gets married and takes (her) husbands name, so the first letter of that name will be in the middle.
If you want to do it your own way, that’s ok: I’ve seen Monograms where people would place the inititals in the order of use, for instance, first letter of first name, middle name and surname. Allthough it should be first letter of first name, surname and middle name… I think if you would explain your embroidery and choice of sequence to the recipient, all will be well!
Have fun, Sylvia
You are STAR ?????. Thank you. At least I know when I’m breaking the rules now ?
Which is fine in this case, as long as you are happy with the result and the recipient understands.
I’ve seen some lessons place the surname initial in the centre of the three letter monogram. I personally find that confusing. But do you know what is generally held as correct? And is there an unmarried, or married, difference – apologies, the question is more about procedure than embroidery…
Wonderful
And with so much possibilities, you want to try them all out!