 BERNINA Corporate Blog -
This lesson is about making leaves with veins: again a couple of users requested me to explain more about this topic in the BERNINA Embroidery Software DesignerPlus 8. The key is: digitize, not automatically, but manually. I will show you a number of options.
- Making a leaf with veins from outlines.
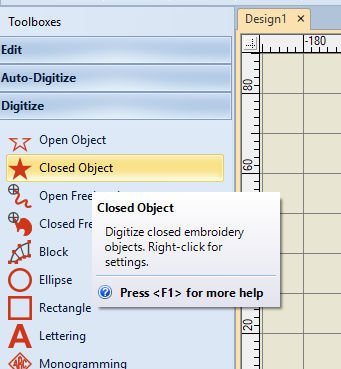
Use ‘Closed Object’ with the Toolboxes toolbar, in ‘Digitize’. Be sure ‘Single Outline’ , Stitches Toolbar, is selected.

Click anywhere on your workspace, and left-click (making sharp corners and straight lines) on a couple of more spots to make a leaf. Don’t worry if the shape is not exactly what you want at this point: we will edit it later. Finish your ‘drawing’ with ‘Enter’ to close the object – you don’t have to click exactly on the first-made node.
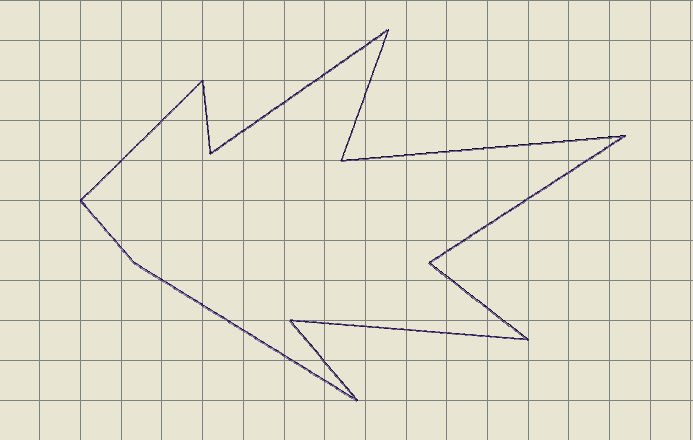
Use ‘Enter’ again to set the Outline Stitch. Now the leaf is shaped as a single outline.

Find the option ‘Open Freehand’ with Digitize in the left toolbar, and draw a vein inside the object/leaf – just click for the first point and continue to drag a line towards the far end, and finish with ‘Enter’. Make smaller side-veins the same way. Don’t worry if the shape of the veins is a bit wobbly: you can edit this via ‘Reshape’ if you want to.
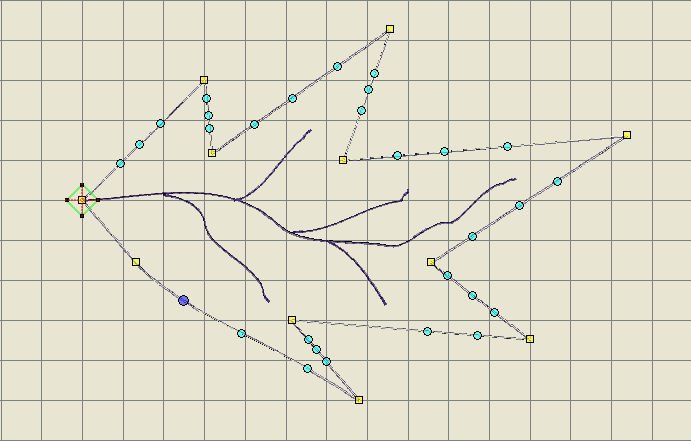
To edit the outlines of the leaf, use the ‘Reshape’ tool: making it more natural instead of too straight. I’ve right-clicked three times on each line, making round, blue nodes, to change the straight lines of each side into curves.
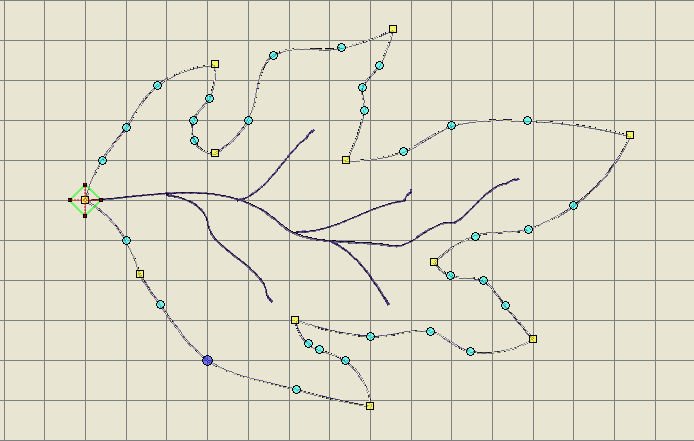
Just pull and push these nodes, to reshape the outlines of the leaf. Much better, isn’t it? You don’t need to add 3 nodes per line: one will do fine, but with more nodes, you can make better curves, going in and out: add nodes whenever you want to.
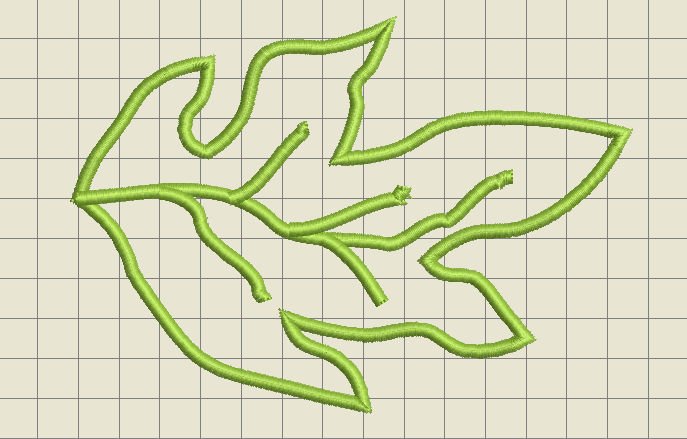
Via the ‘Select’ tool, then ‘Shift’, select the entire leaf with veins: change the outline stitch into a Satin stitch, or any stitch of your choice. This changes the appearance of the leaf with veins dramatically. Change the color for an even more natural look. This is just a rough drawing: edit some more to smooth the ends of the veins is an option.
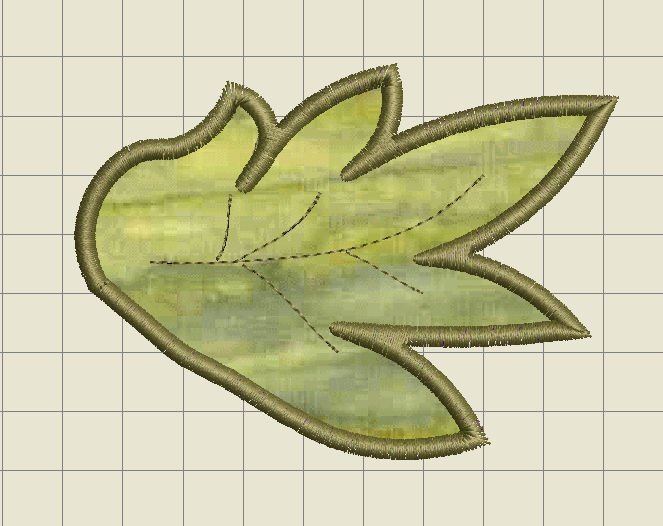
- Making an Appliqué leaf, adding veins.

Open a new tab (File, New), to start a new design. With the left toolbar ‘Toolboxes’, right-click on ‘Applique’ with ‘Digitize’: a dialog box ‘Object Properties’ is opened. Leave the settings for Tackdown and Cover Stitch as they are, but check the box ‘Cutting Line’ with Guidelines: this means will give you 4 different lines with your appliqué design. Use ‘OK’ to set.
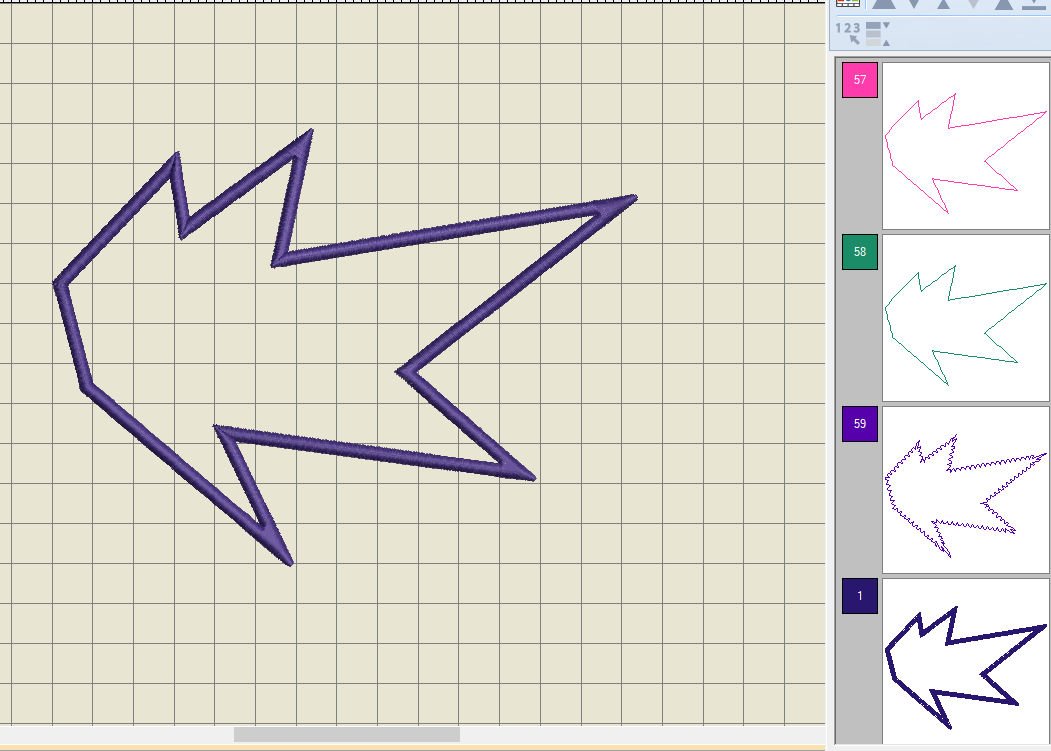
As soon as you have used ‘OK’ te set, you can draw a shape: draw a leaf, and close with ‘Enter’. Use ‘Enter’ again to set the Satin Stitch appliqué. Open de docker ‘Color Film’ . Because you’ve checked the box ‘Cutting Line’, there should be 4 boxes in Color Film, showing you the placement line, cutting line, tackdown line and Cover stitch = Satin stitch (in this case: you can choose from different stitch types later).
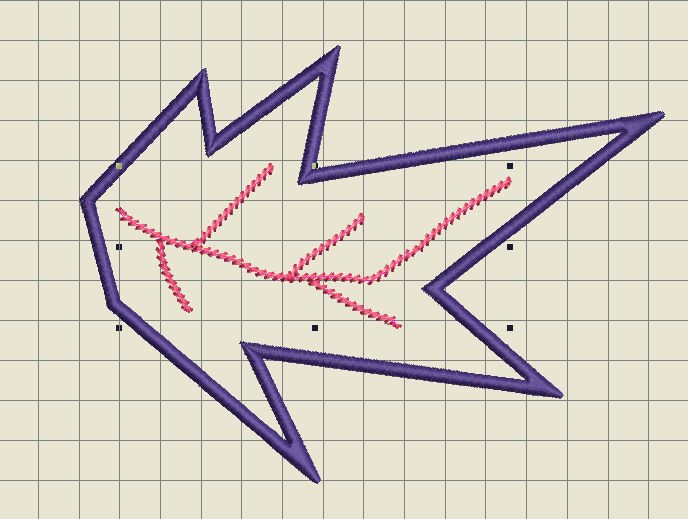
Draw veins inside the leaf, the same way you did with the first leaf (or go back to the tab with the first design, copy the veins = click on the required box in ‘Color Film’, click on the tab with the new/appliqué design and paste, placing the veins on the right spot). Select the veins after drawing, change color and change Outline Stitch (mine is changed into a Stem Stitch Outline).
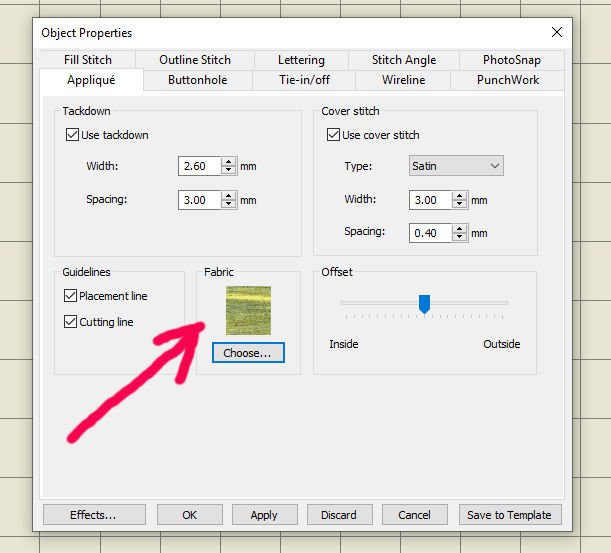
You can add a fabric or color, to mimic an actual fabric to your embroidery: select the leaf, right-click on ‘Appliqué’ again, choose a ‘Fabric’ where it is indicated (there is a vast list of fabrics from Benartex, and solid colors, or you can add fabrics of your own, but that’s for another lesson), by clicking on ‘choose’, and pick a fabric or color. But you will have to do this BEFORE drawing a leaf!
If the color of the veins are the same as the Cover Stitches, they will be placed in the same box, but they have to be made AFTER making the Cover Stitches – check this by using ‘Stitch Player’ to see the embroidery sequence. Last added is last embroidered! If you give the veins a different color, they will be placed in a separate box, and also embroidered the last (if that box is placed last in the row), because they have to be placed on top of the appliqué fabric. Remember that.
If you want to change the shape of the outlines of the leaf, use ‘Reshape’ again: not only the stitches/stitch count will change, but also the applique lines and fabric will be adjusted at the same time. Just pull and push the outlines to a new spot, and see that all is adjusted at once: hurray for V8!
- Making a leaf with fill stitches and outline veins.
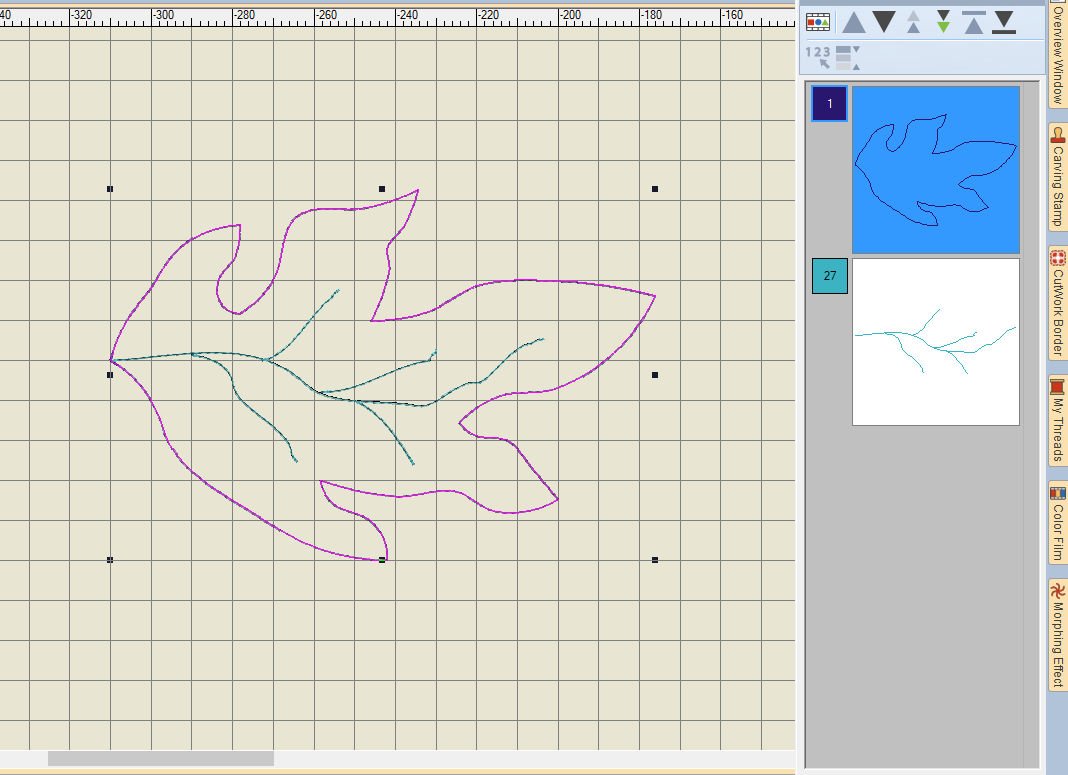
Using the first drawn leaf again (that’s why you are advised to save all exercises under a different name), just with the Single Outline Stitches and the veins. I am going to change the Outlines stitches into Fill stitches, but first I have given the veins a different color, to be sure this gets a separate box with ‘Color Film’ = I am doing this to be able to see the outlines, after changing the stitches for the leaf. Otherwise they are all the same color, which will make the veins invisible, and hard to find for selecting, if you would change color afterwards.
I have clicked on the box of the outlines of the leaf: you can see that this box is blue = selected, and changed the Fill Stitch
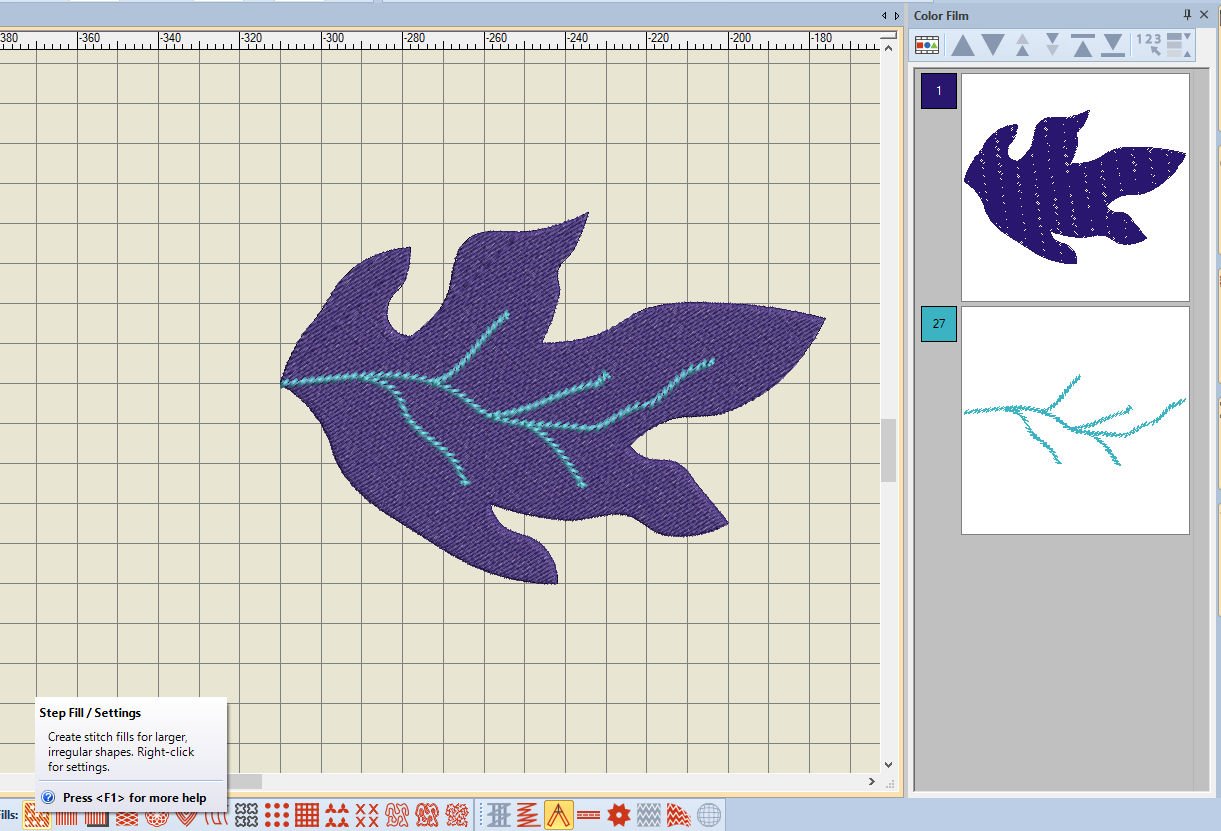
So I have two boxes: one with the leaf, which changed into Step Fill stitches, and one with the veins. Clicked on ‘Step Fill’, Stitches Toolbar, to change the outlines into a fill stitch: and because I have separated the veins, changing them into a different color, they are clearly visible.

If you want the veins protrude into a stalk, you can use the ‘Reshape’ tool and pull the large vein outwards: but move the start point (green square =no. 1) away first, after selecting the veins. Then pull on the vein to stretch it outside the leaf. Place the start point back on the end, and you have a leaf with a stalk (no. 2). You can do this with the previous leaves too.
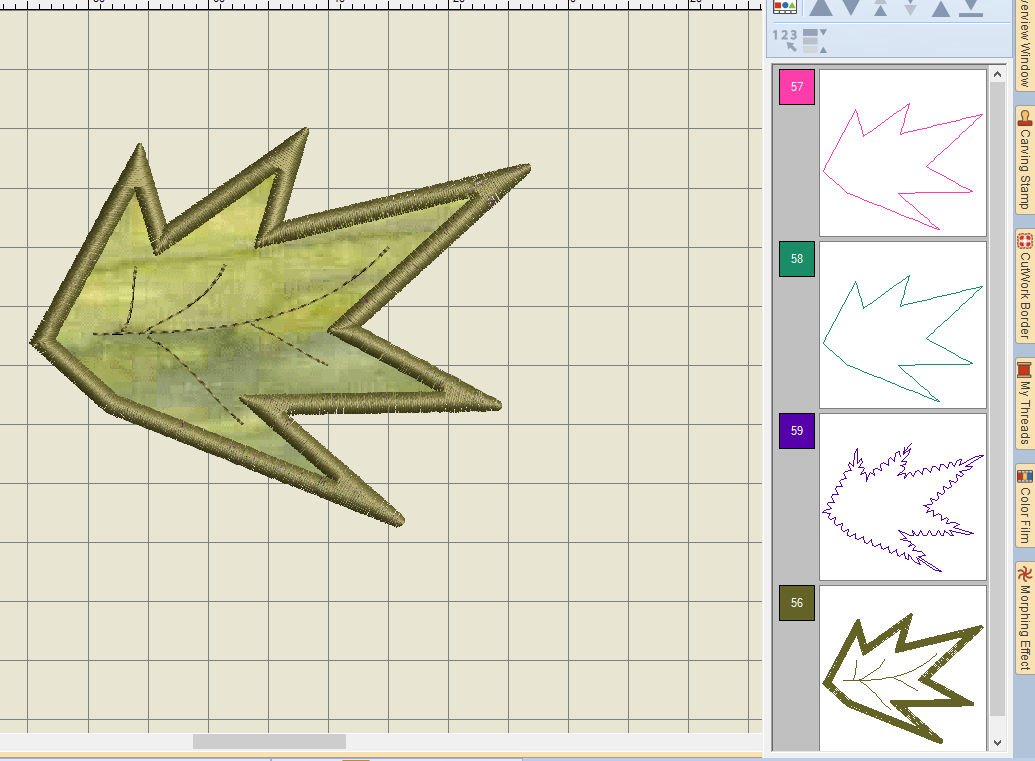
- Making a leaf with veins and 3D effect.
For this option, you will use both dockers ‘Color Film’ and ‘Carving Stamp’. The first is to see the objects of your design, the second to make a vein impression, while having the last edited leaf design still open.

When opening the docker ‘Carving Stamp’ first, click on the ‘pin’ to hold it down/set it. Next open the docker ‘Color Film’ and click on the pin there too. This way they will be placed next to each other: you can make them smaller to be sure there is enough space to see your leaves. If you don’t click on both pins to set the dockers, they will be placed on top of each other, and you will only be able to see one docker at the time.
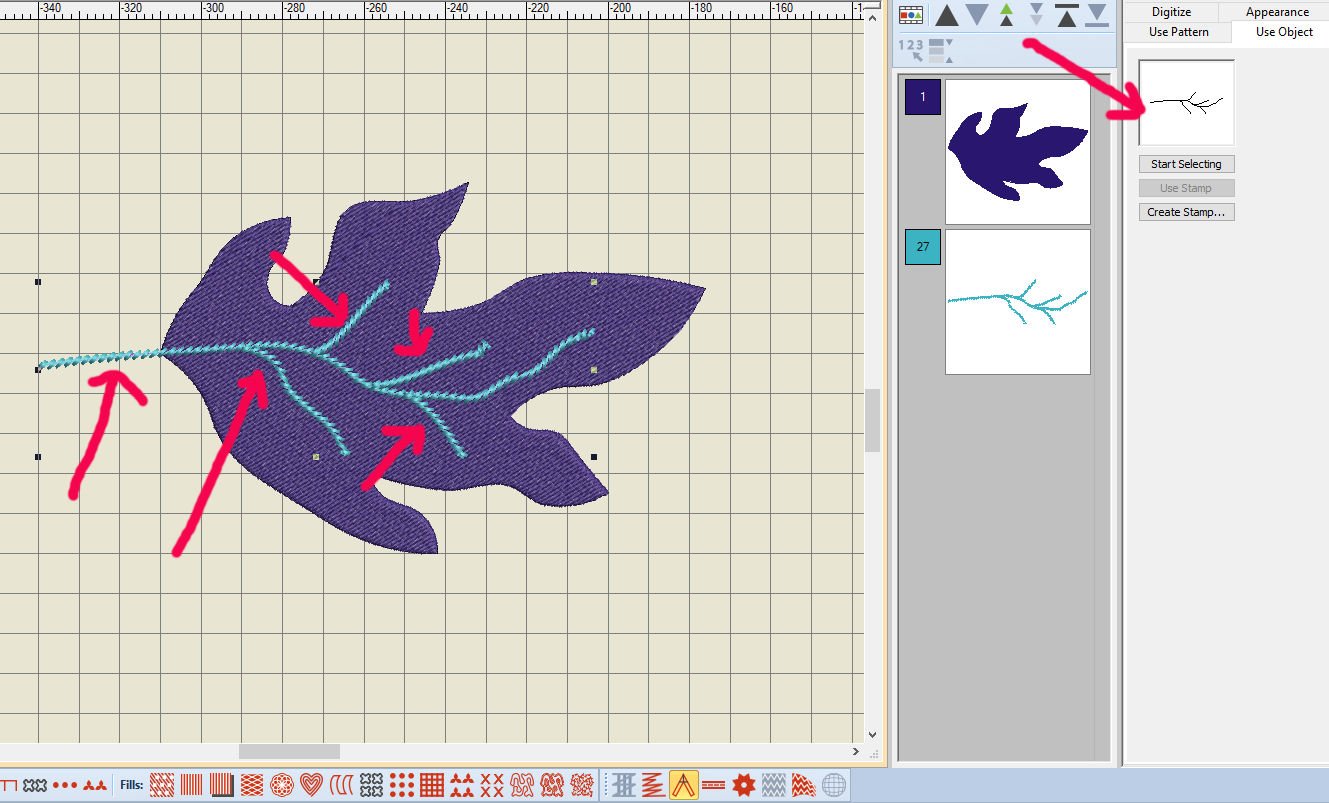
Click on the tab ‘Use Object’ with the ‘Carving Stamp’ docker, click on the veins, while holding the Ctrl key down, until you have selected all veins of your leaf. With every click, you will see a drawing being updated in the box above ‘Start Selecting’. The cursor of your mouse changes into two small, parallel curved lines. As long as these lines are visible, you can select/click on a line to add it to the pattern you are later using as a stamp.

Now the veins are drawn, click on the box of the leaf in ‘Color Film’ to select this object, because that is where you want to place the stamp. The option ‘Use Stamp’ is activated now (before it was grayed-out).
Click on ‘Use Stamp’ and hover the mouse over your workspace: you will see a line-image of the veins you’ve just selected for a stamp (all 5 parts in my case) as one figure. That means you can place this somewhere – and the place for it is right where the original veins are.
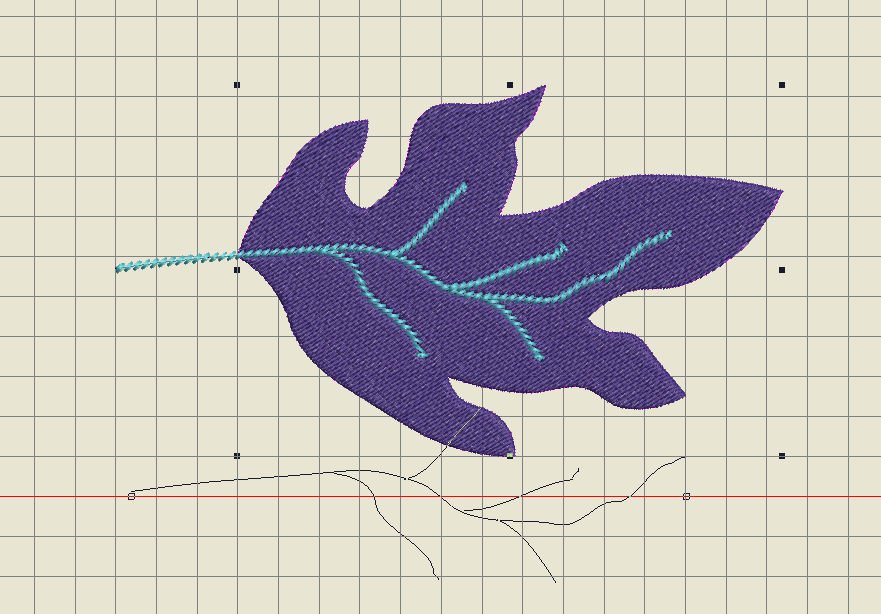
Click on the start point of the vein: as long as you don’t click again, you can rotate the vein by moving the mouse around, to place it wherever you want, to but remember – it needs an object to be placed on.
Then click on the end of the vein, at the top of the leaf, then use ‘Enter’ to set. Be sure to use ‘Esc‘ to leave the ‘modus’ of placing the veins, otherwise you will continue to do so. Be careful not to click on the leaf again, before using Esc, otherwise there will be multiple veins placed on top of each other. I have placed the new 3D veins slightly offset, to show you where it is. Can you see it?
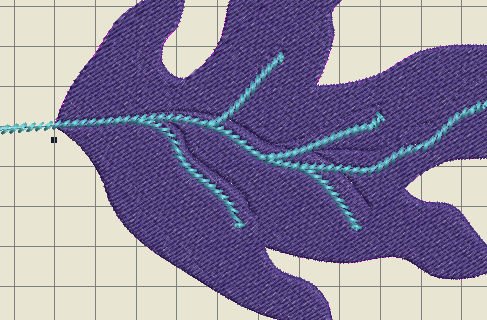
To make the indentations of the veins more visible, I have changed the Fill Stitches into Satin Stitches, and removed the first Stem Stitch veins (clicked on the box in ‘Color Film’, then Delete). Remember: although you have made a stalk at the bottom of the leaf, and selected this with the entire vein, it will not show as a 3D imprint, because there is nothing to be set on, just empty space at that point. The rest of the veins are clearly visible, especially after choosing a different color for the leaf itself.
When not all 3D veins are clearly visible, try changing the angle of the Satin Fills: but be careful, because it could change the visibility of the veins at some other part of the leaf after that – if you want it all to be perfect, you will have to edit much more. This practice is just to show you the possibilities to start with.
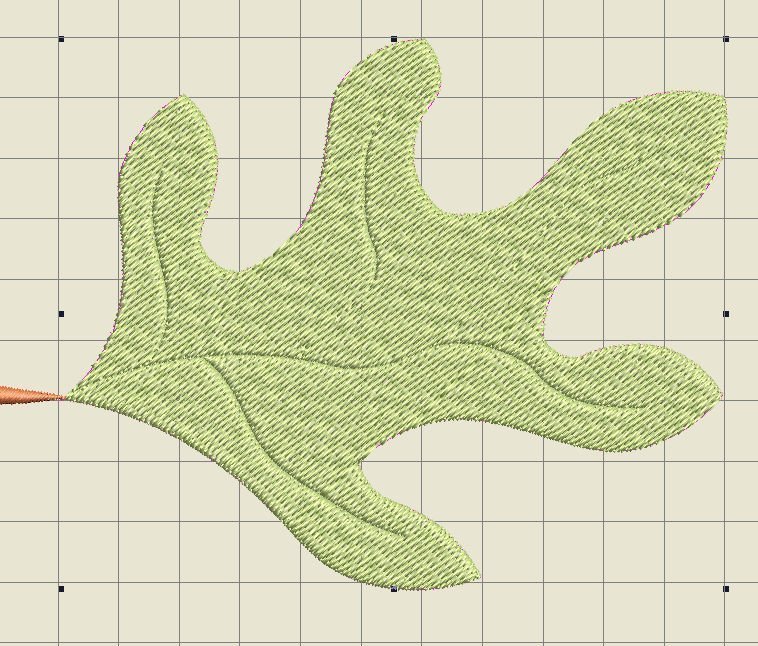
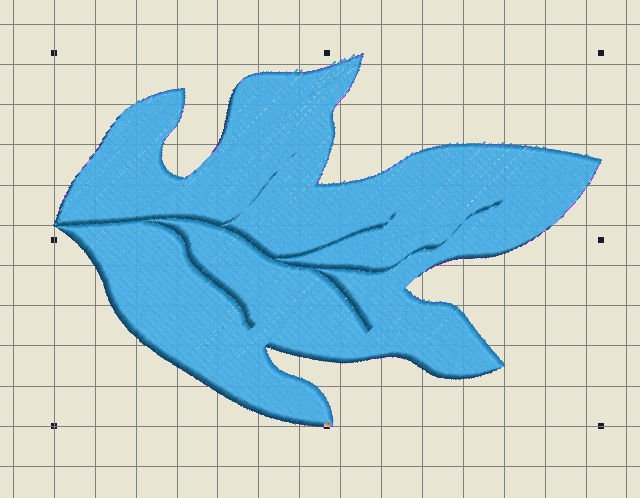
I have changed the leaf, made it a bit different, added a stem/object, changed the colors and used the Step Fill again: just to practice. Sometimes certain indentations are not that visible, but with the actual embroidery you will see them. Try this with different Fill Stitches to see the effect.
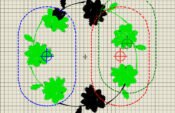
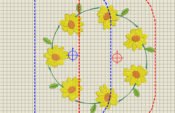
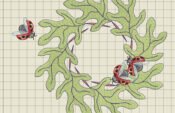
- Next time, I will use one of the leaves of this exercise to make a wreath with kaleidoscope effect.
That is why I have saved them all, with different filenames. If you want to use your leaf for the next lesson, don’t forget to save it.
See you then!
Happy Stitching,
Sylvia Kaptein
Sylvia’s Art Quilts Studio
www.sylviasartquilts.nl

0 Responses