 BERNINA Corporate Blog -
Finished your 6 boats? Lets put them together in a quilt, or make 6 pillows.

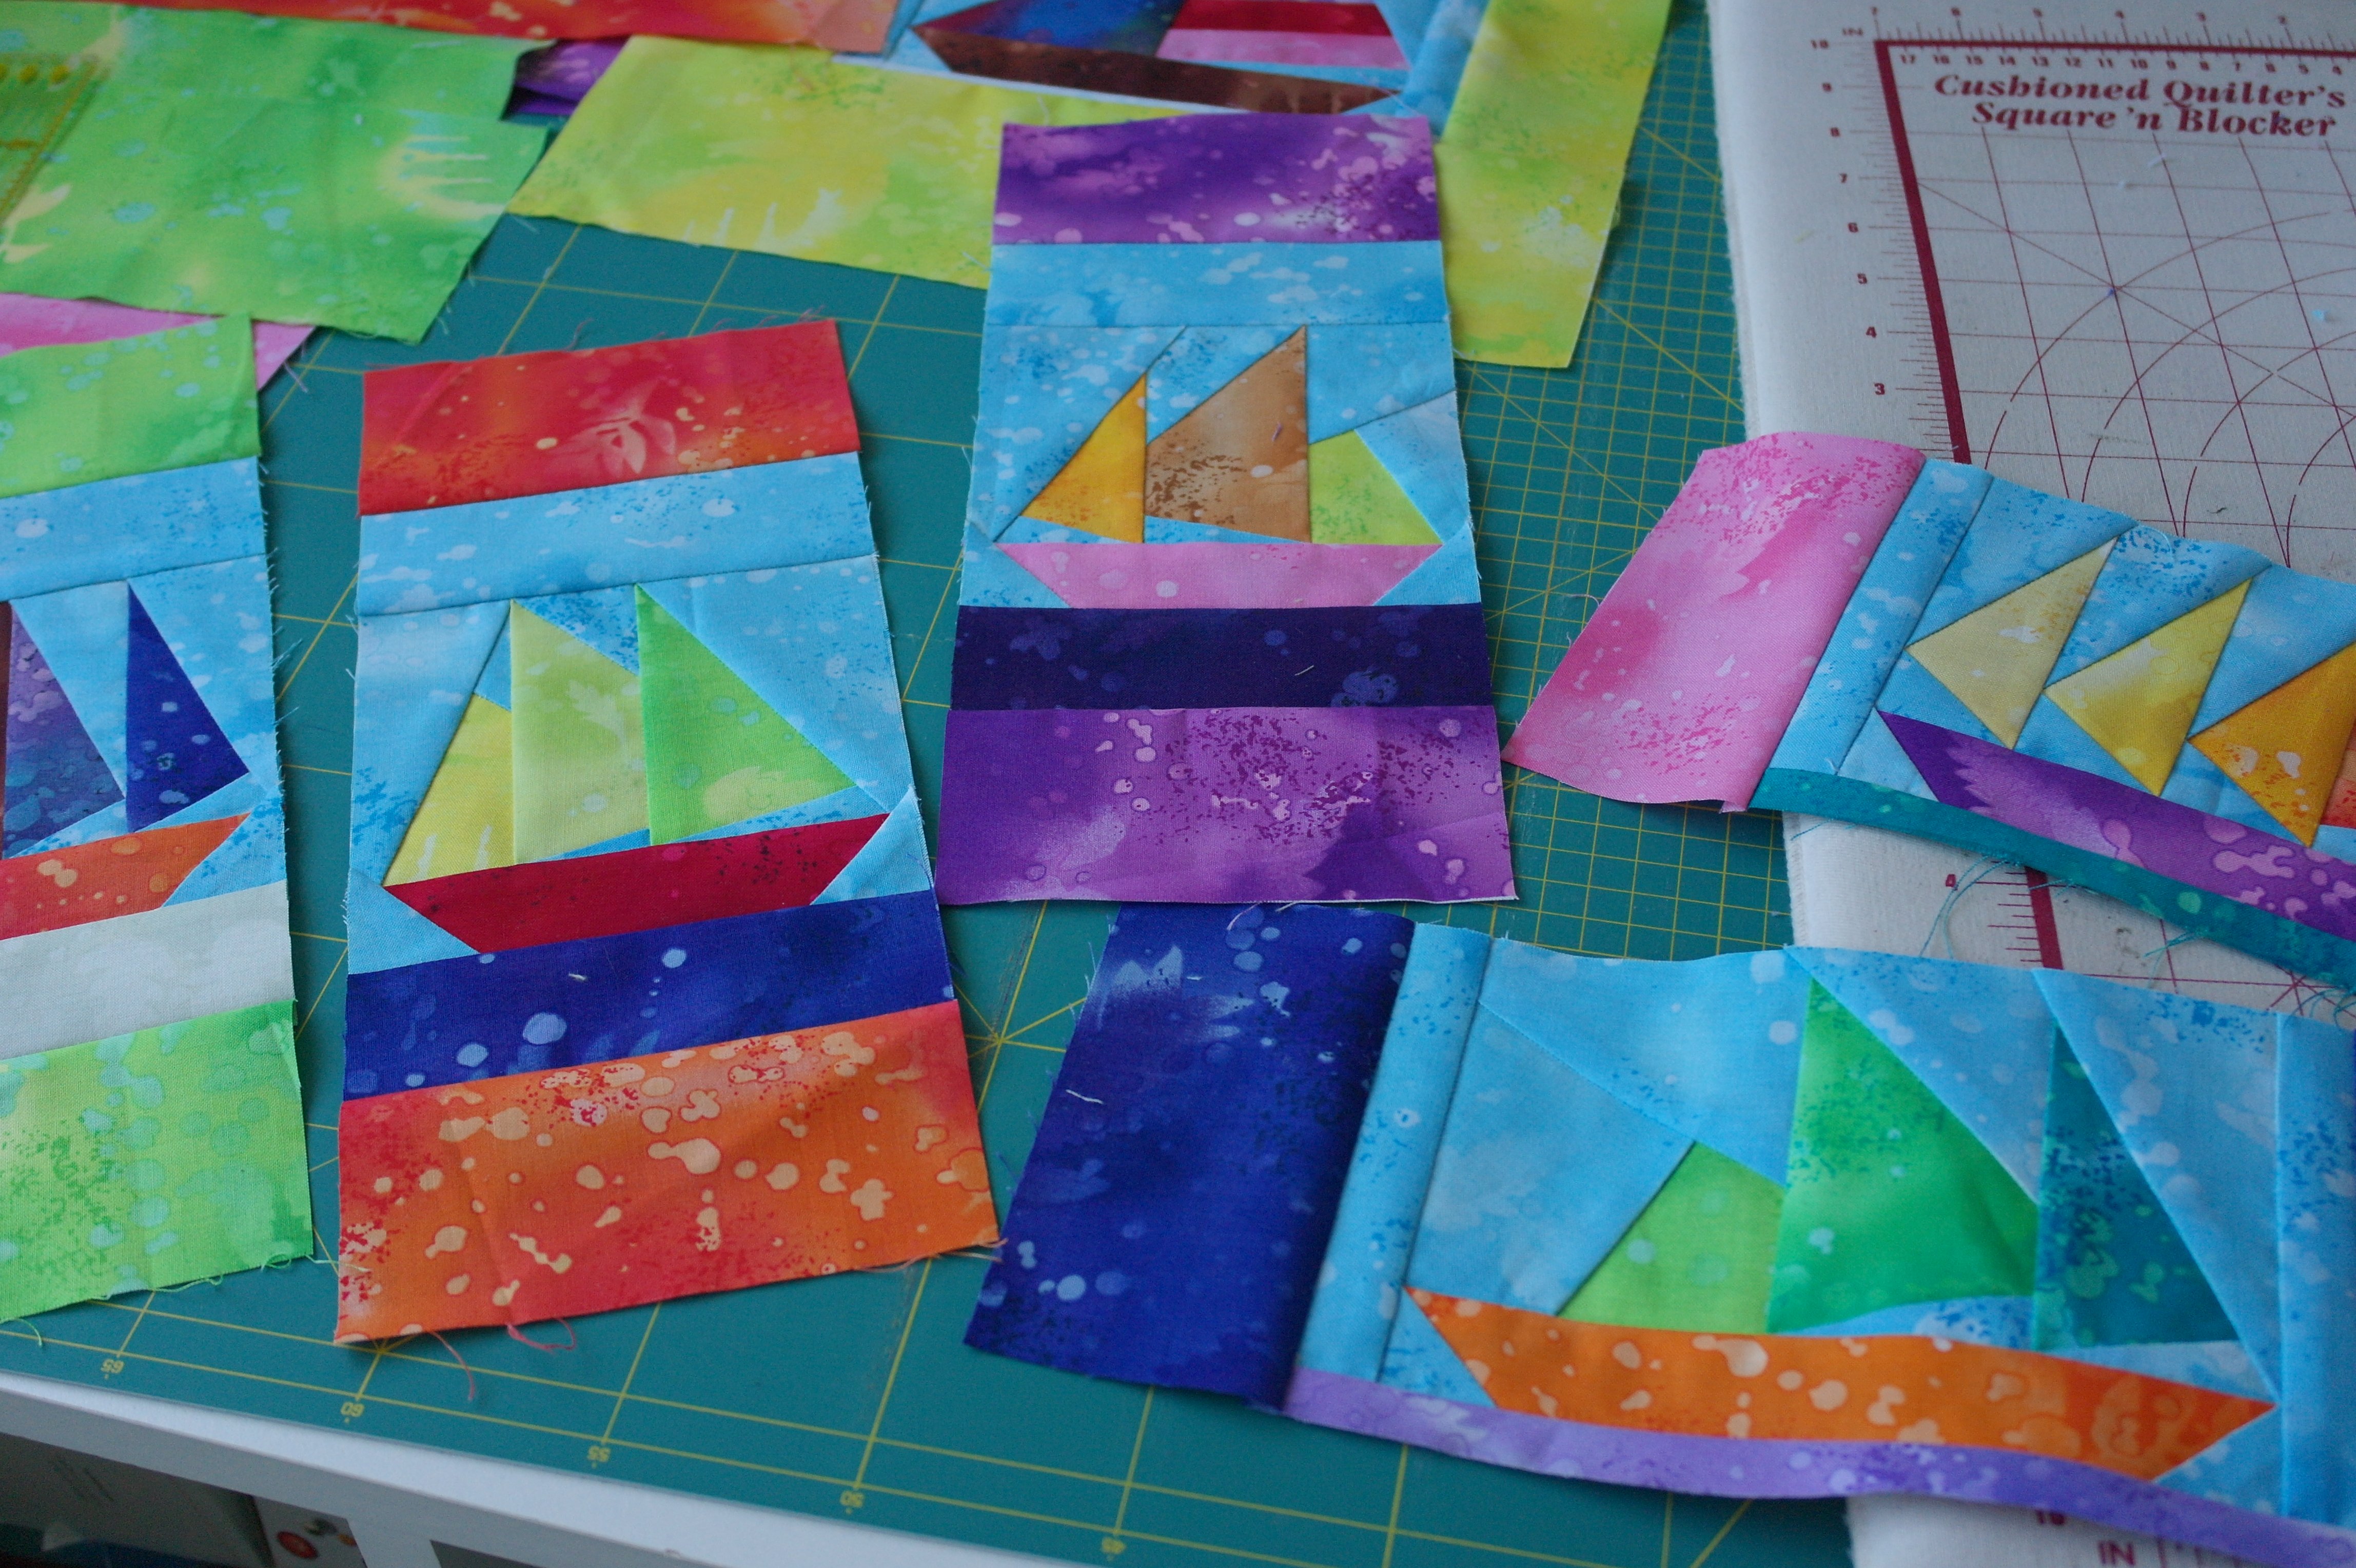
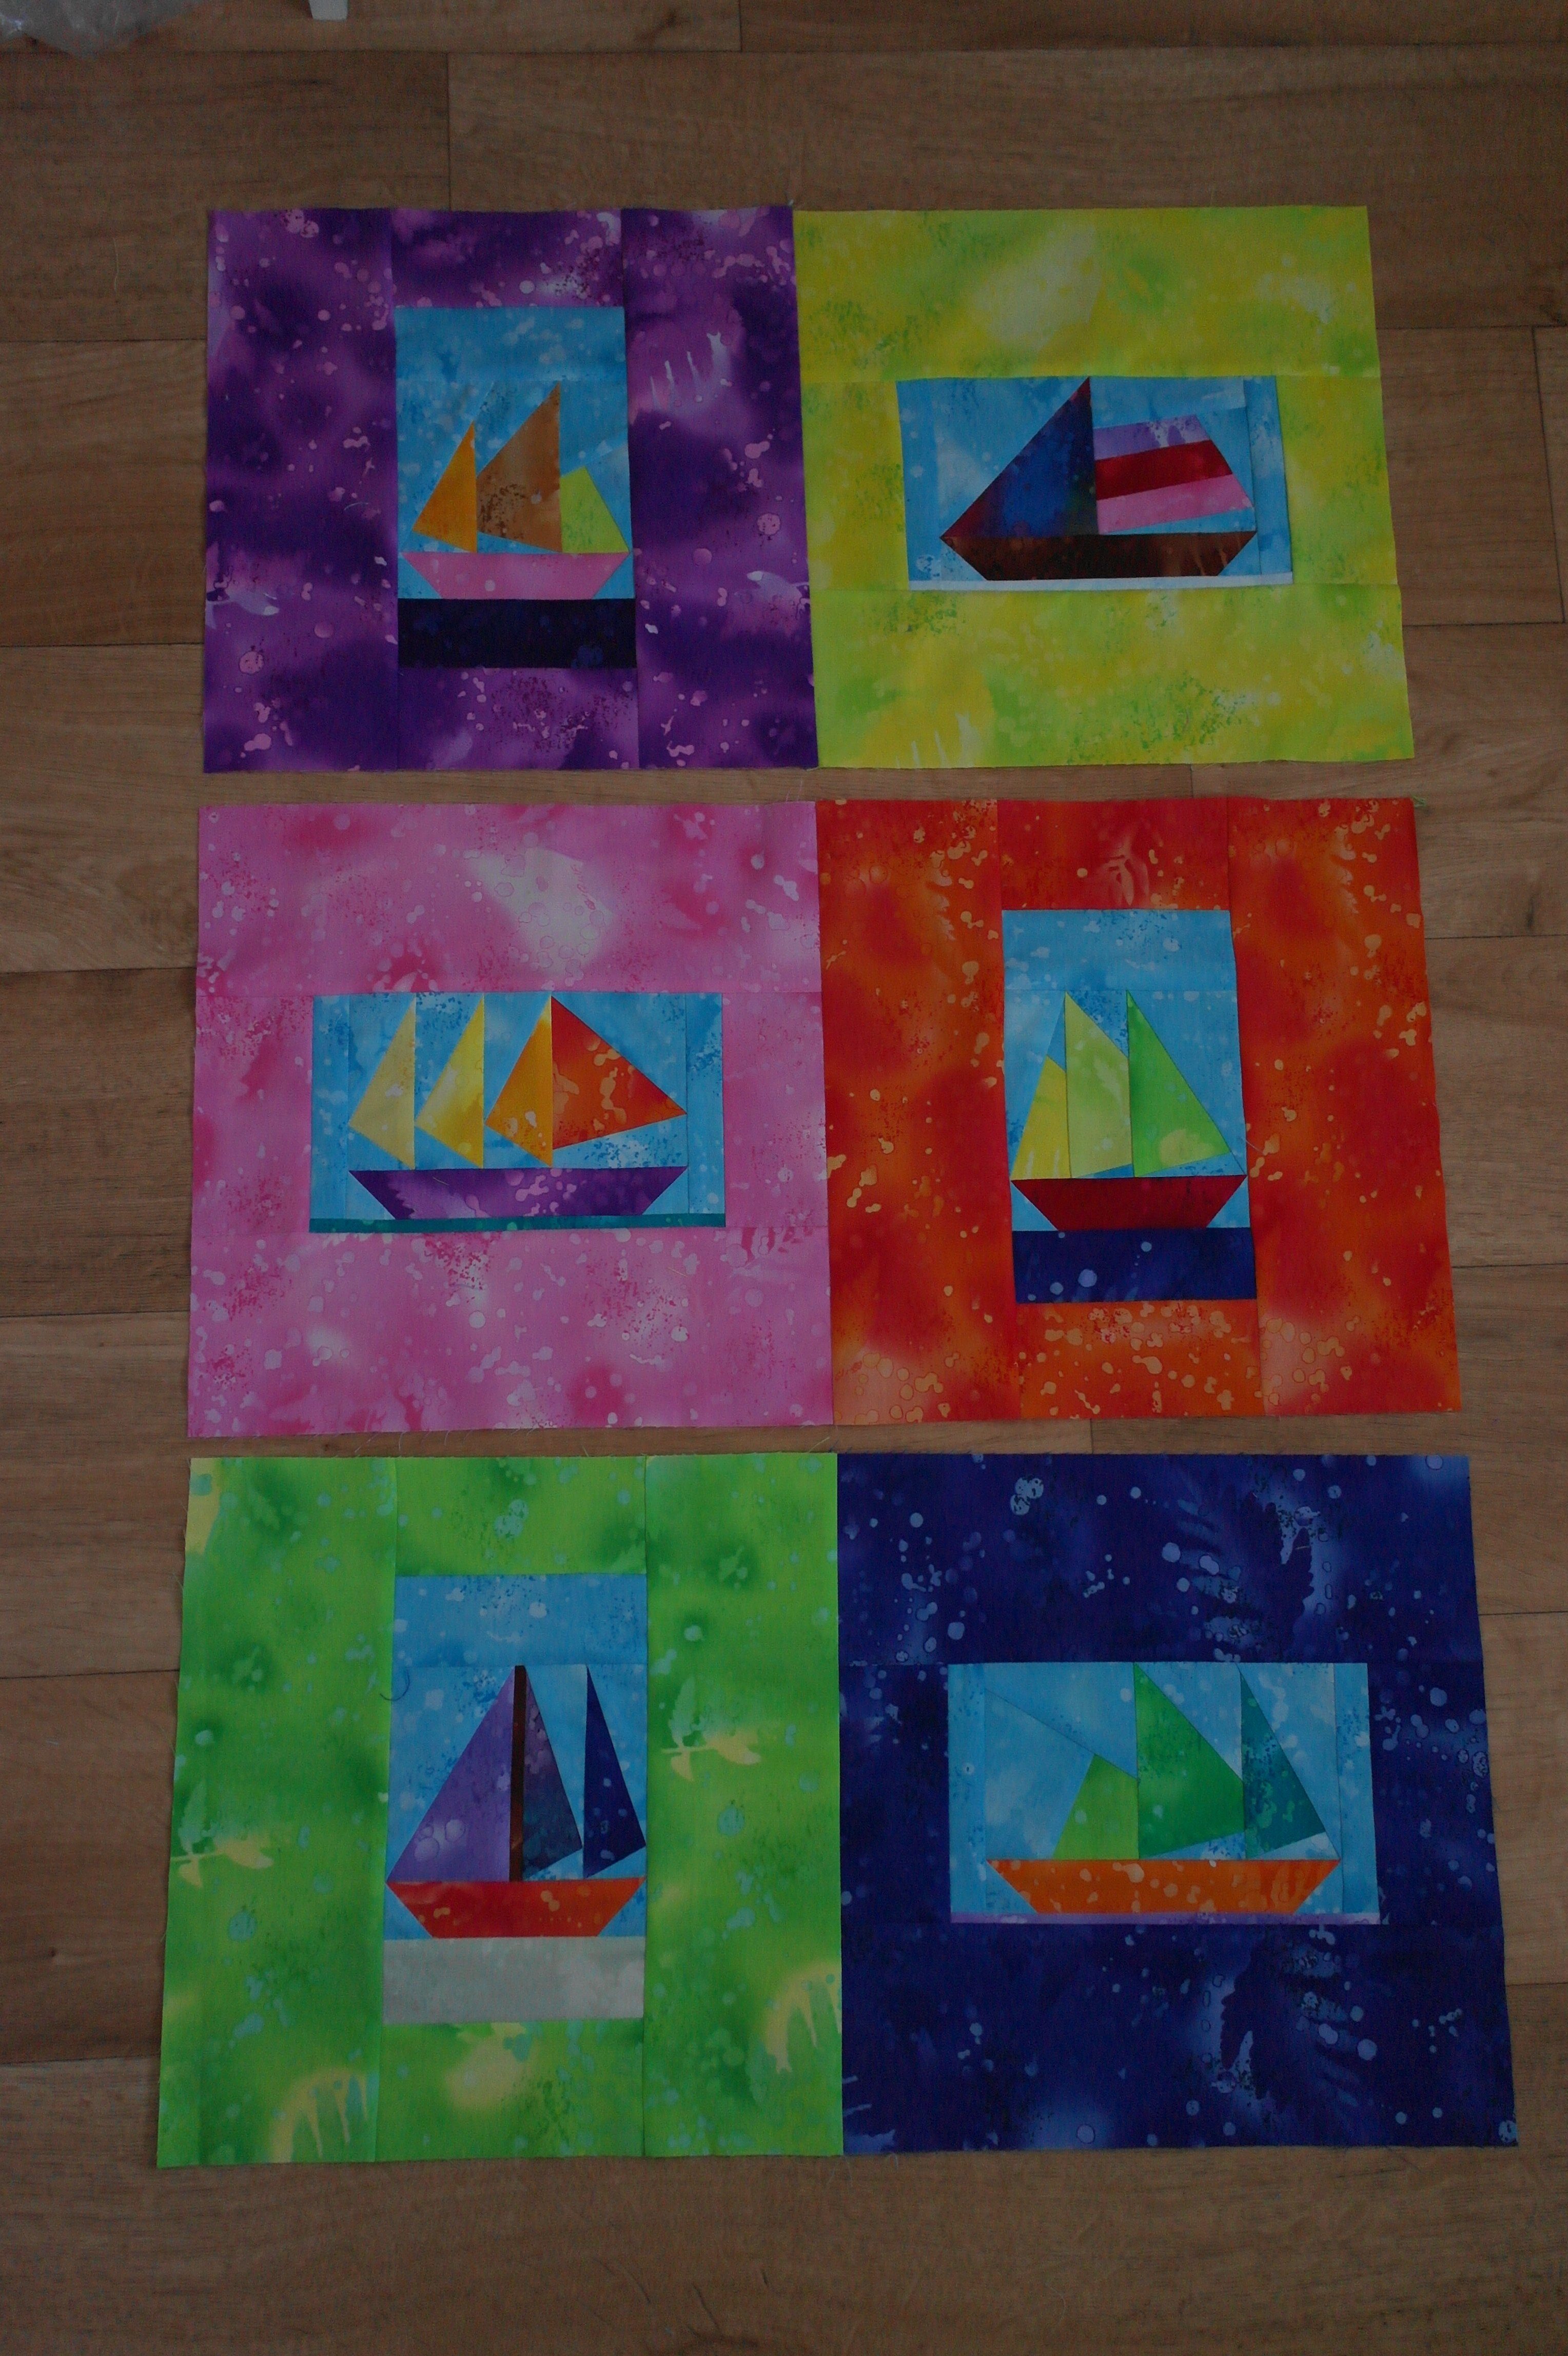
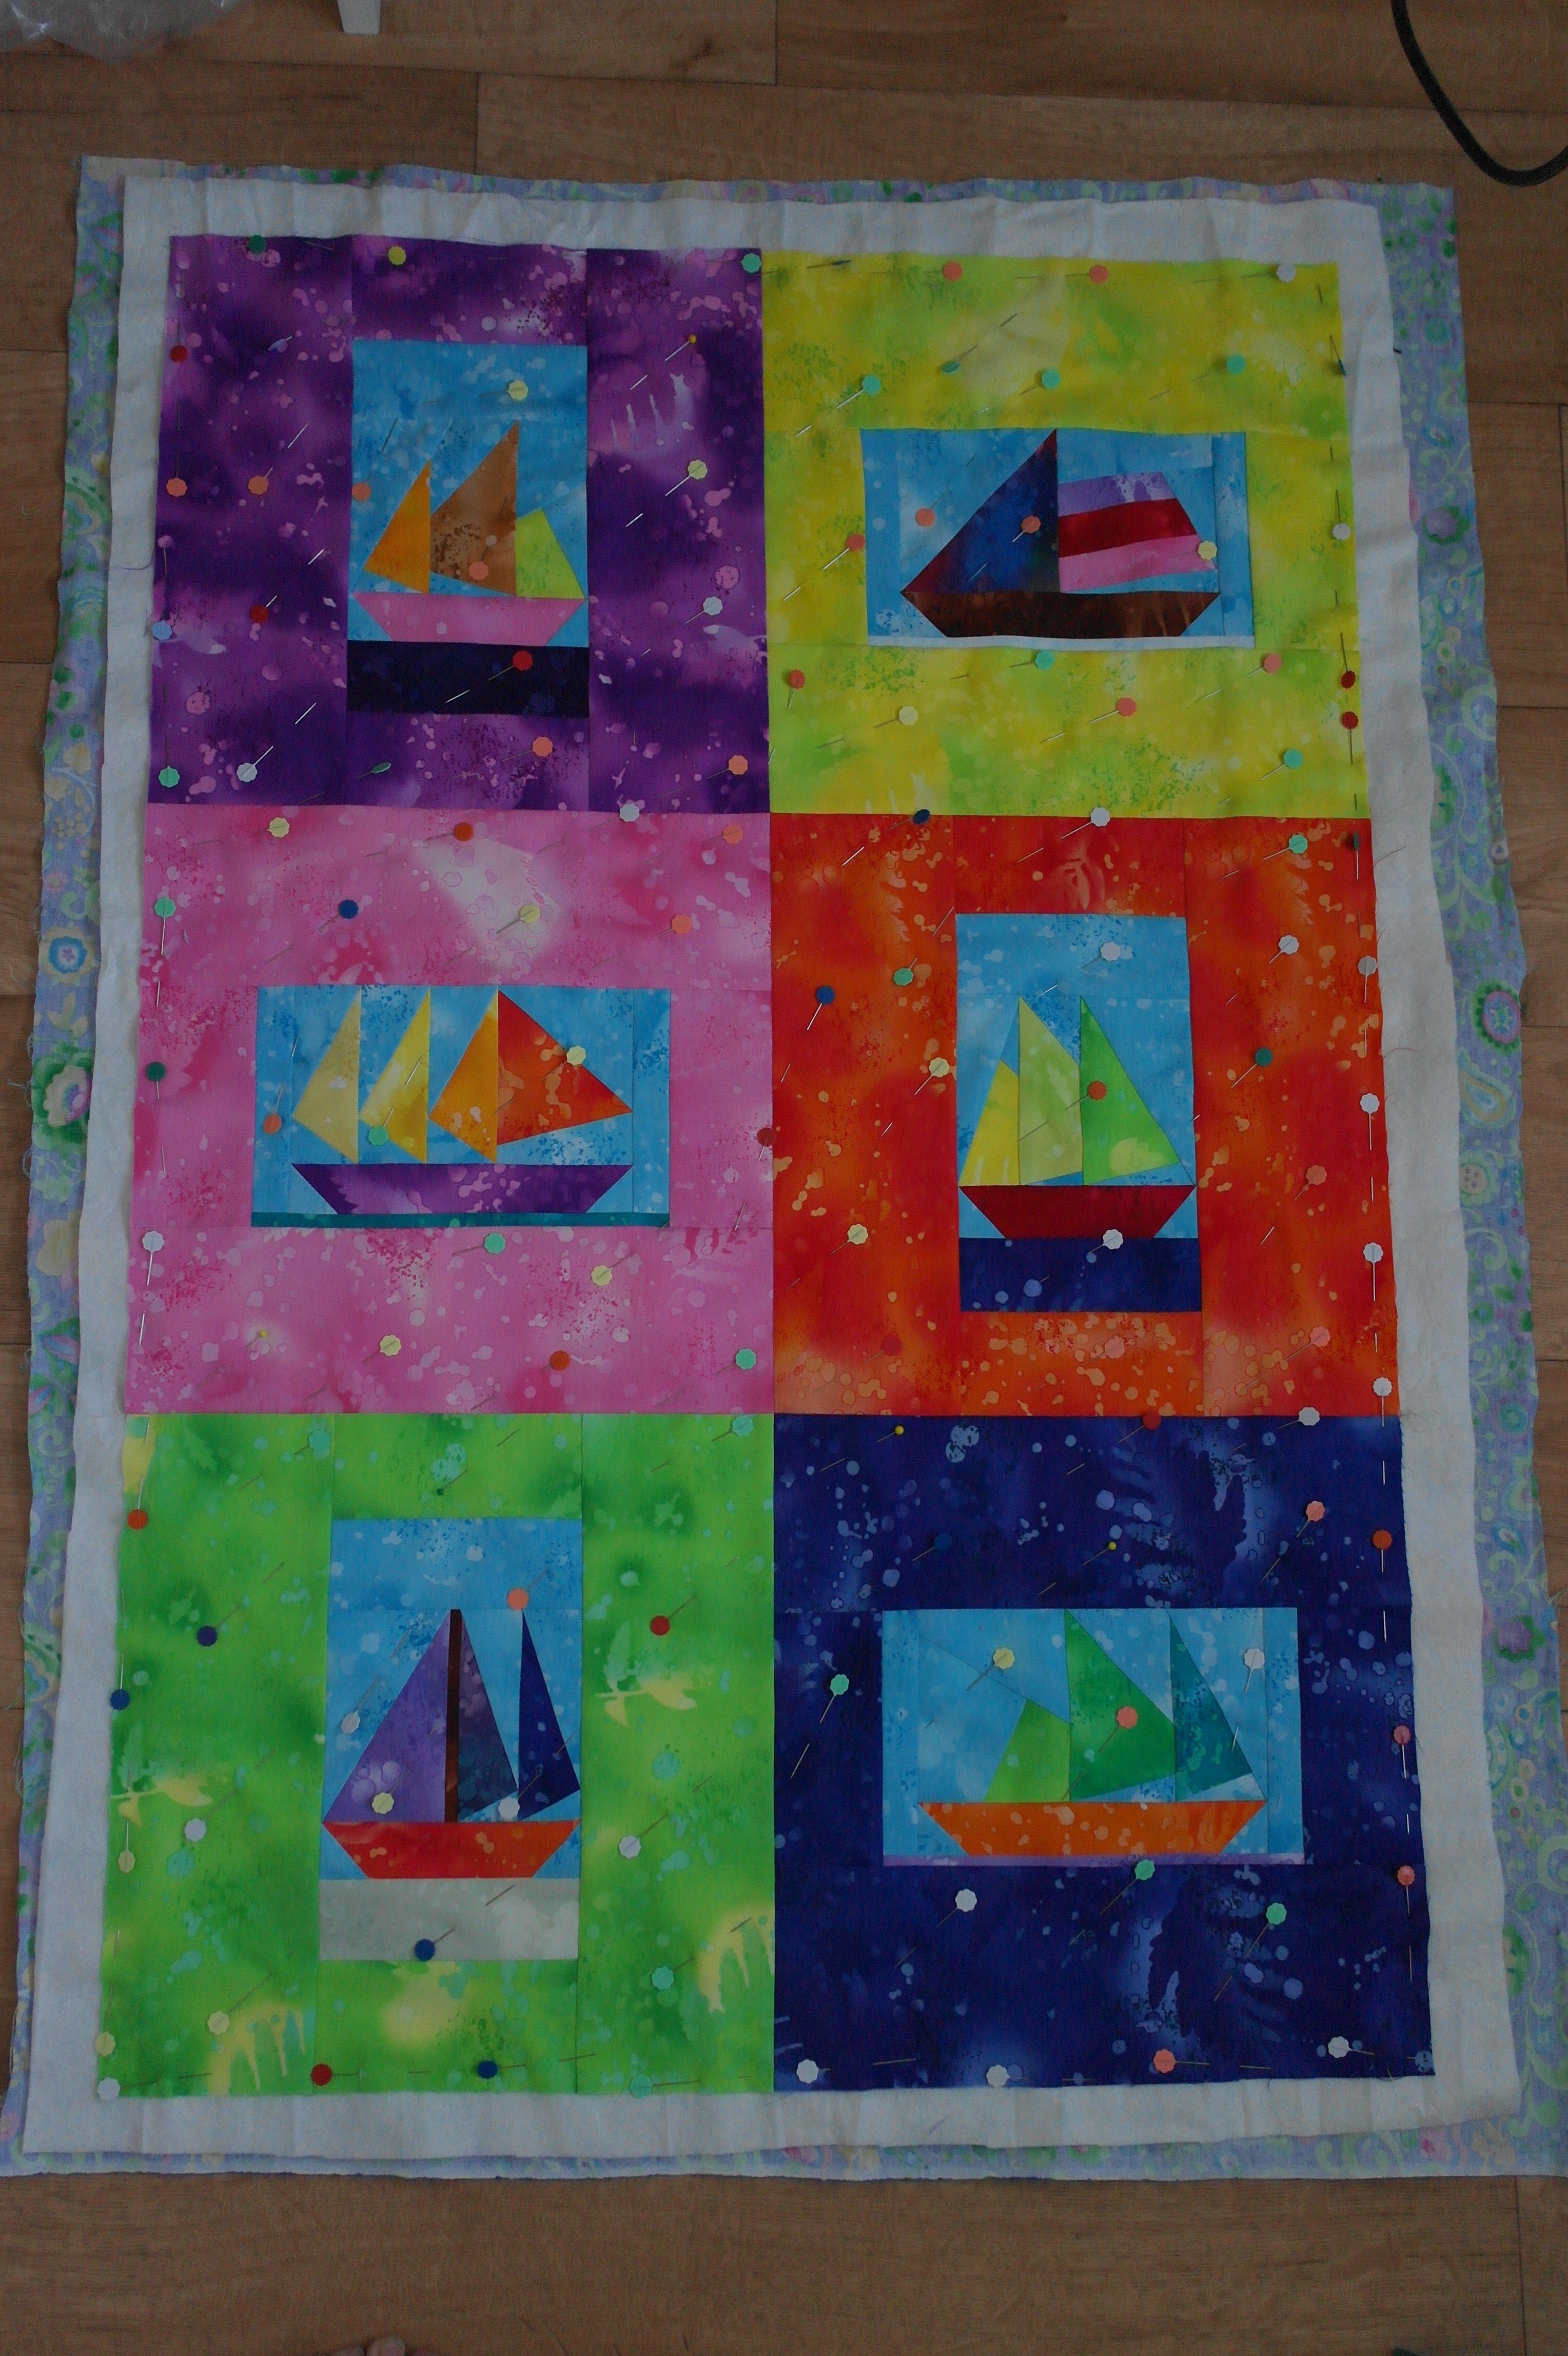
I have placed my blocks on my cutting mat, just to look at them. How shall I put them together? Like this: 3 blocks wide and 2 blocks high? That’s a possibility, but then I’ve decided to place them 2 blocks wide and 3 blocks high, to make a small quilt.
Measuring a block.

Place a block (paper still at the back ) upside down. Measure the following:
- The finished width = the solid line at the top and bottom, should be 20 cm (number top of picture). It’s ok if it is slightly off. There is always a possibility your block has shrunk a bit, just as long as all 6 blocks are of the same size, that’s ok.
- The finished height = the solid line at both sides, should be 12 cm (number left of the picture). If it is slightly off, a couple of mm, don’t worry.
- The width, seam allowances included = long sides of the block, should be 21 cm = finished size + 2 x 0,5cm.
- the height, seam allowances included = short sides of the block, should be 13 cm = finished size + 2 x 0,5cm.

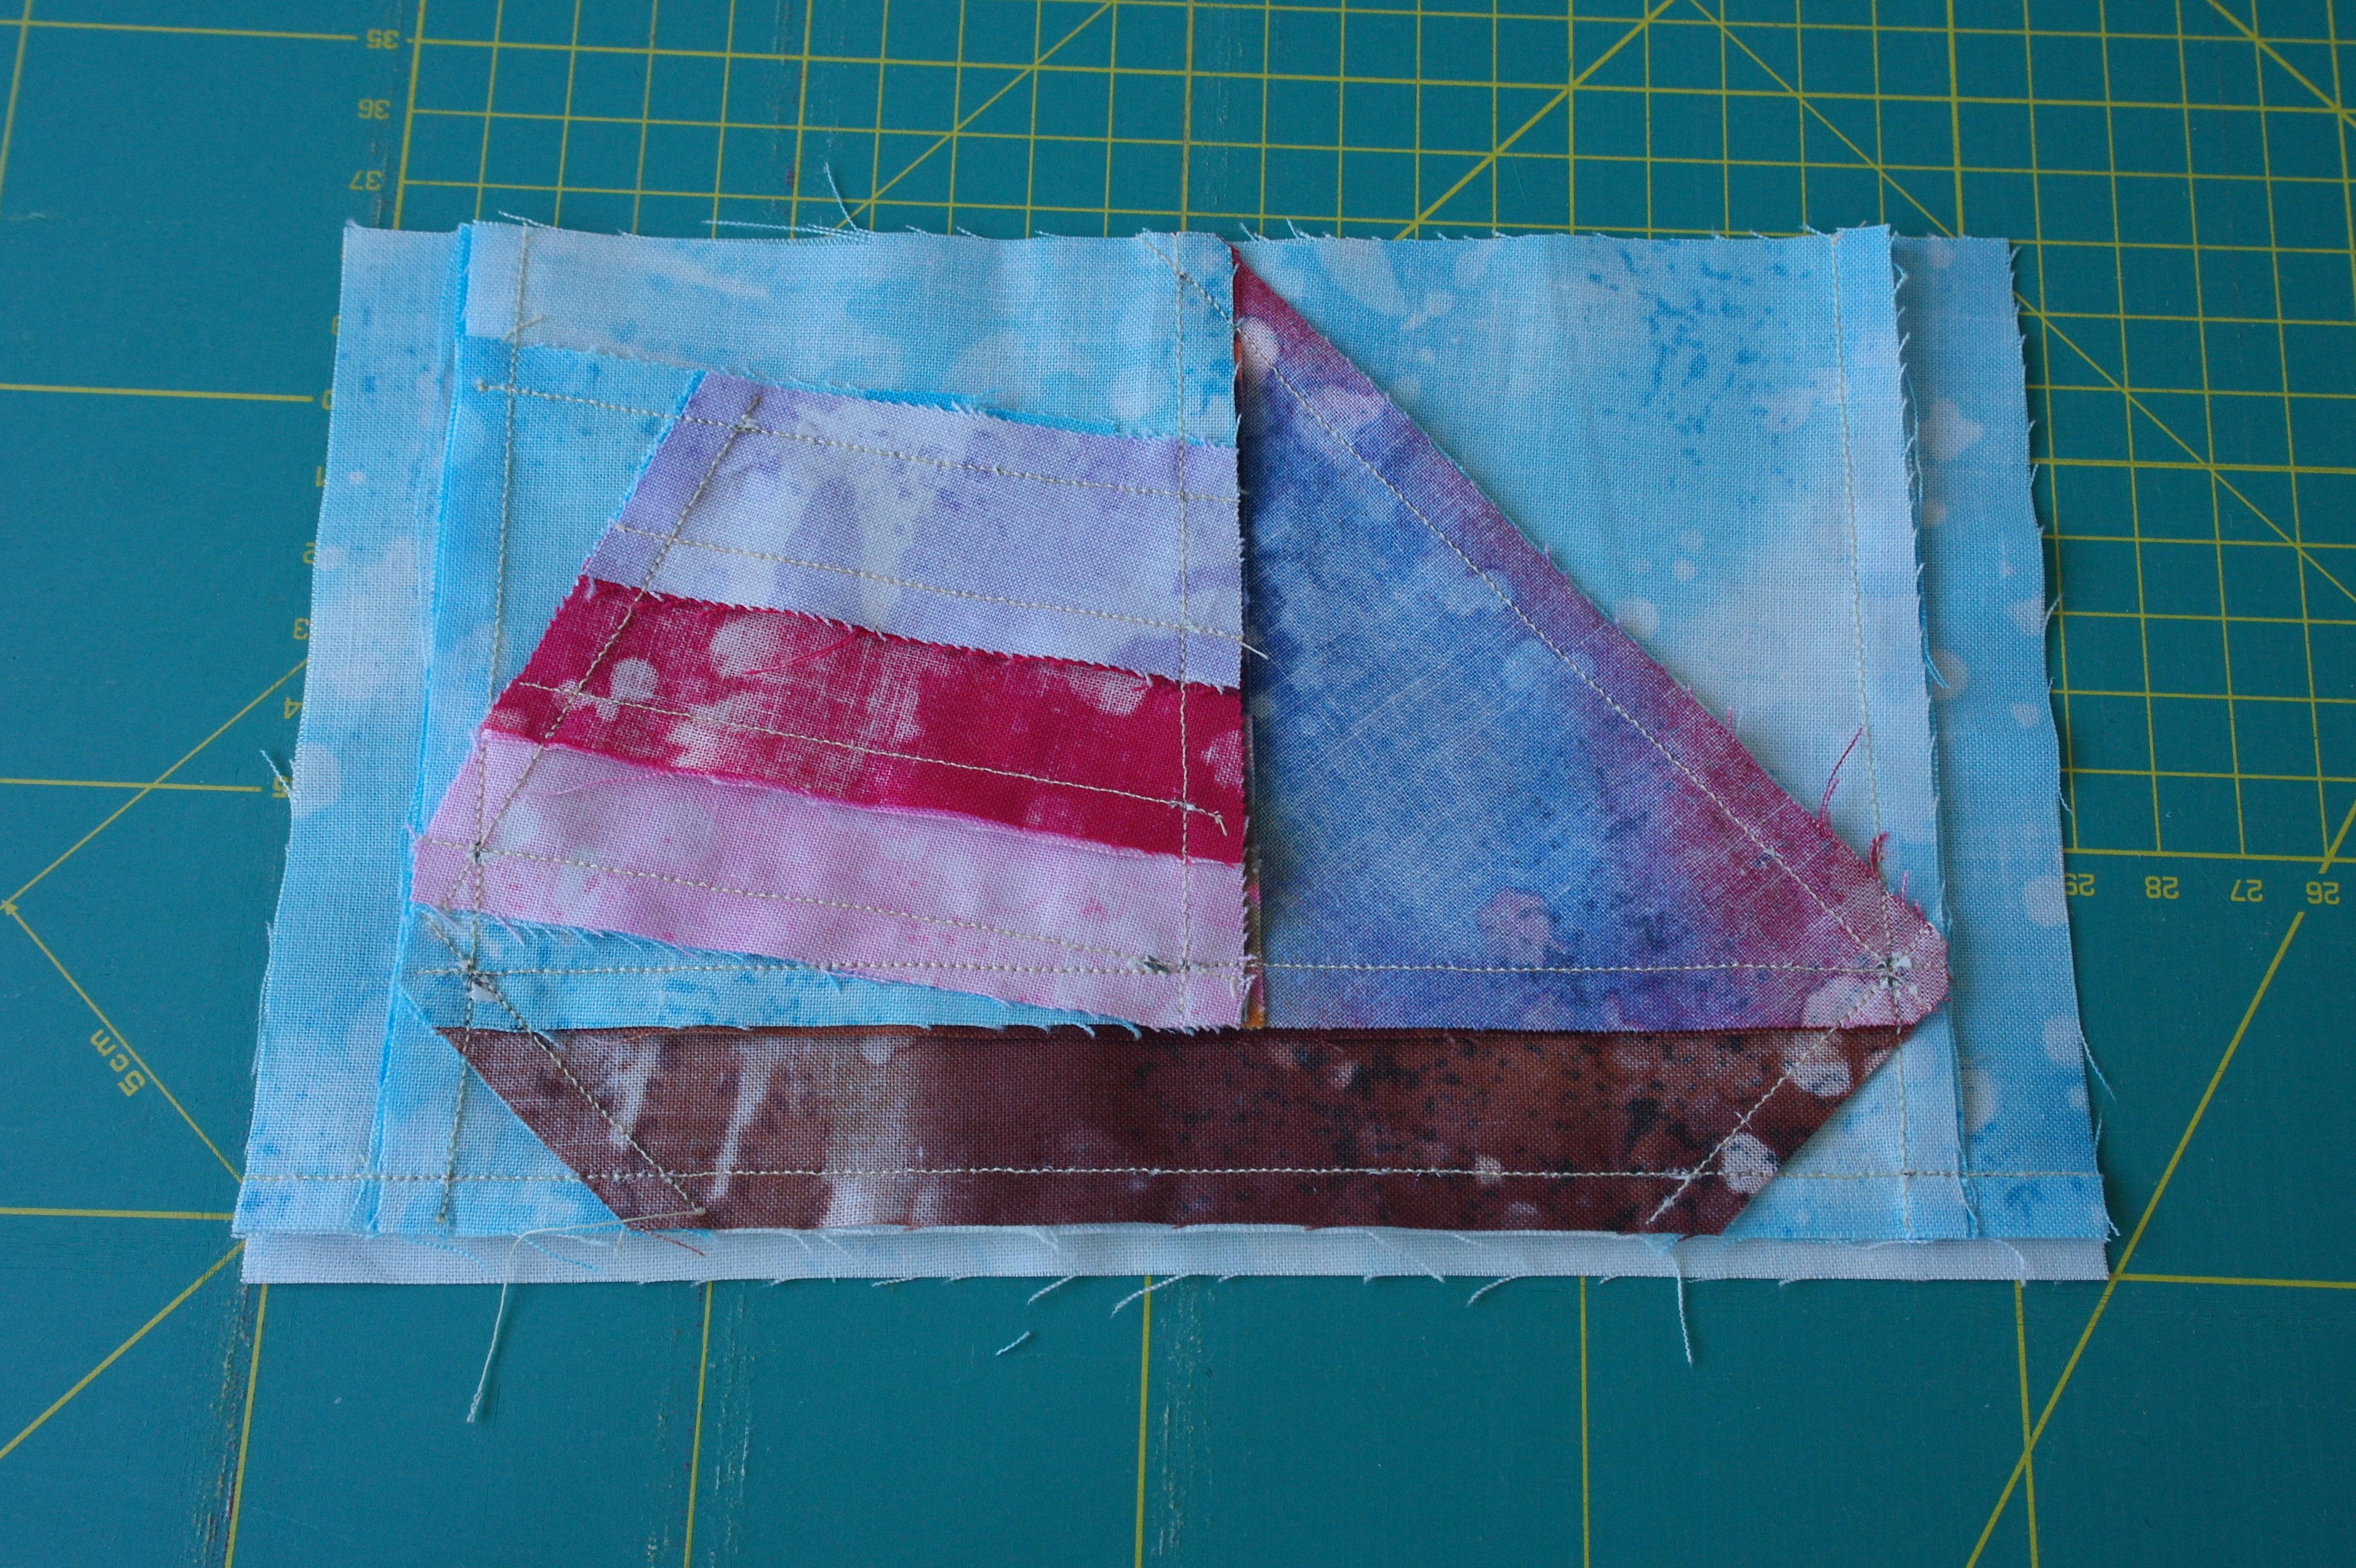
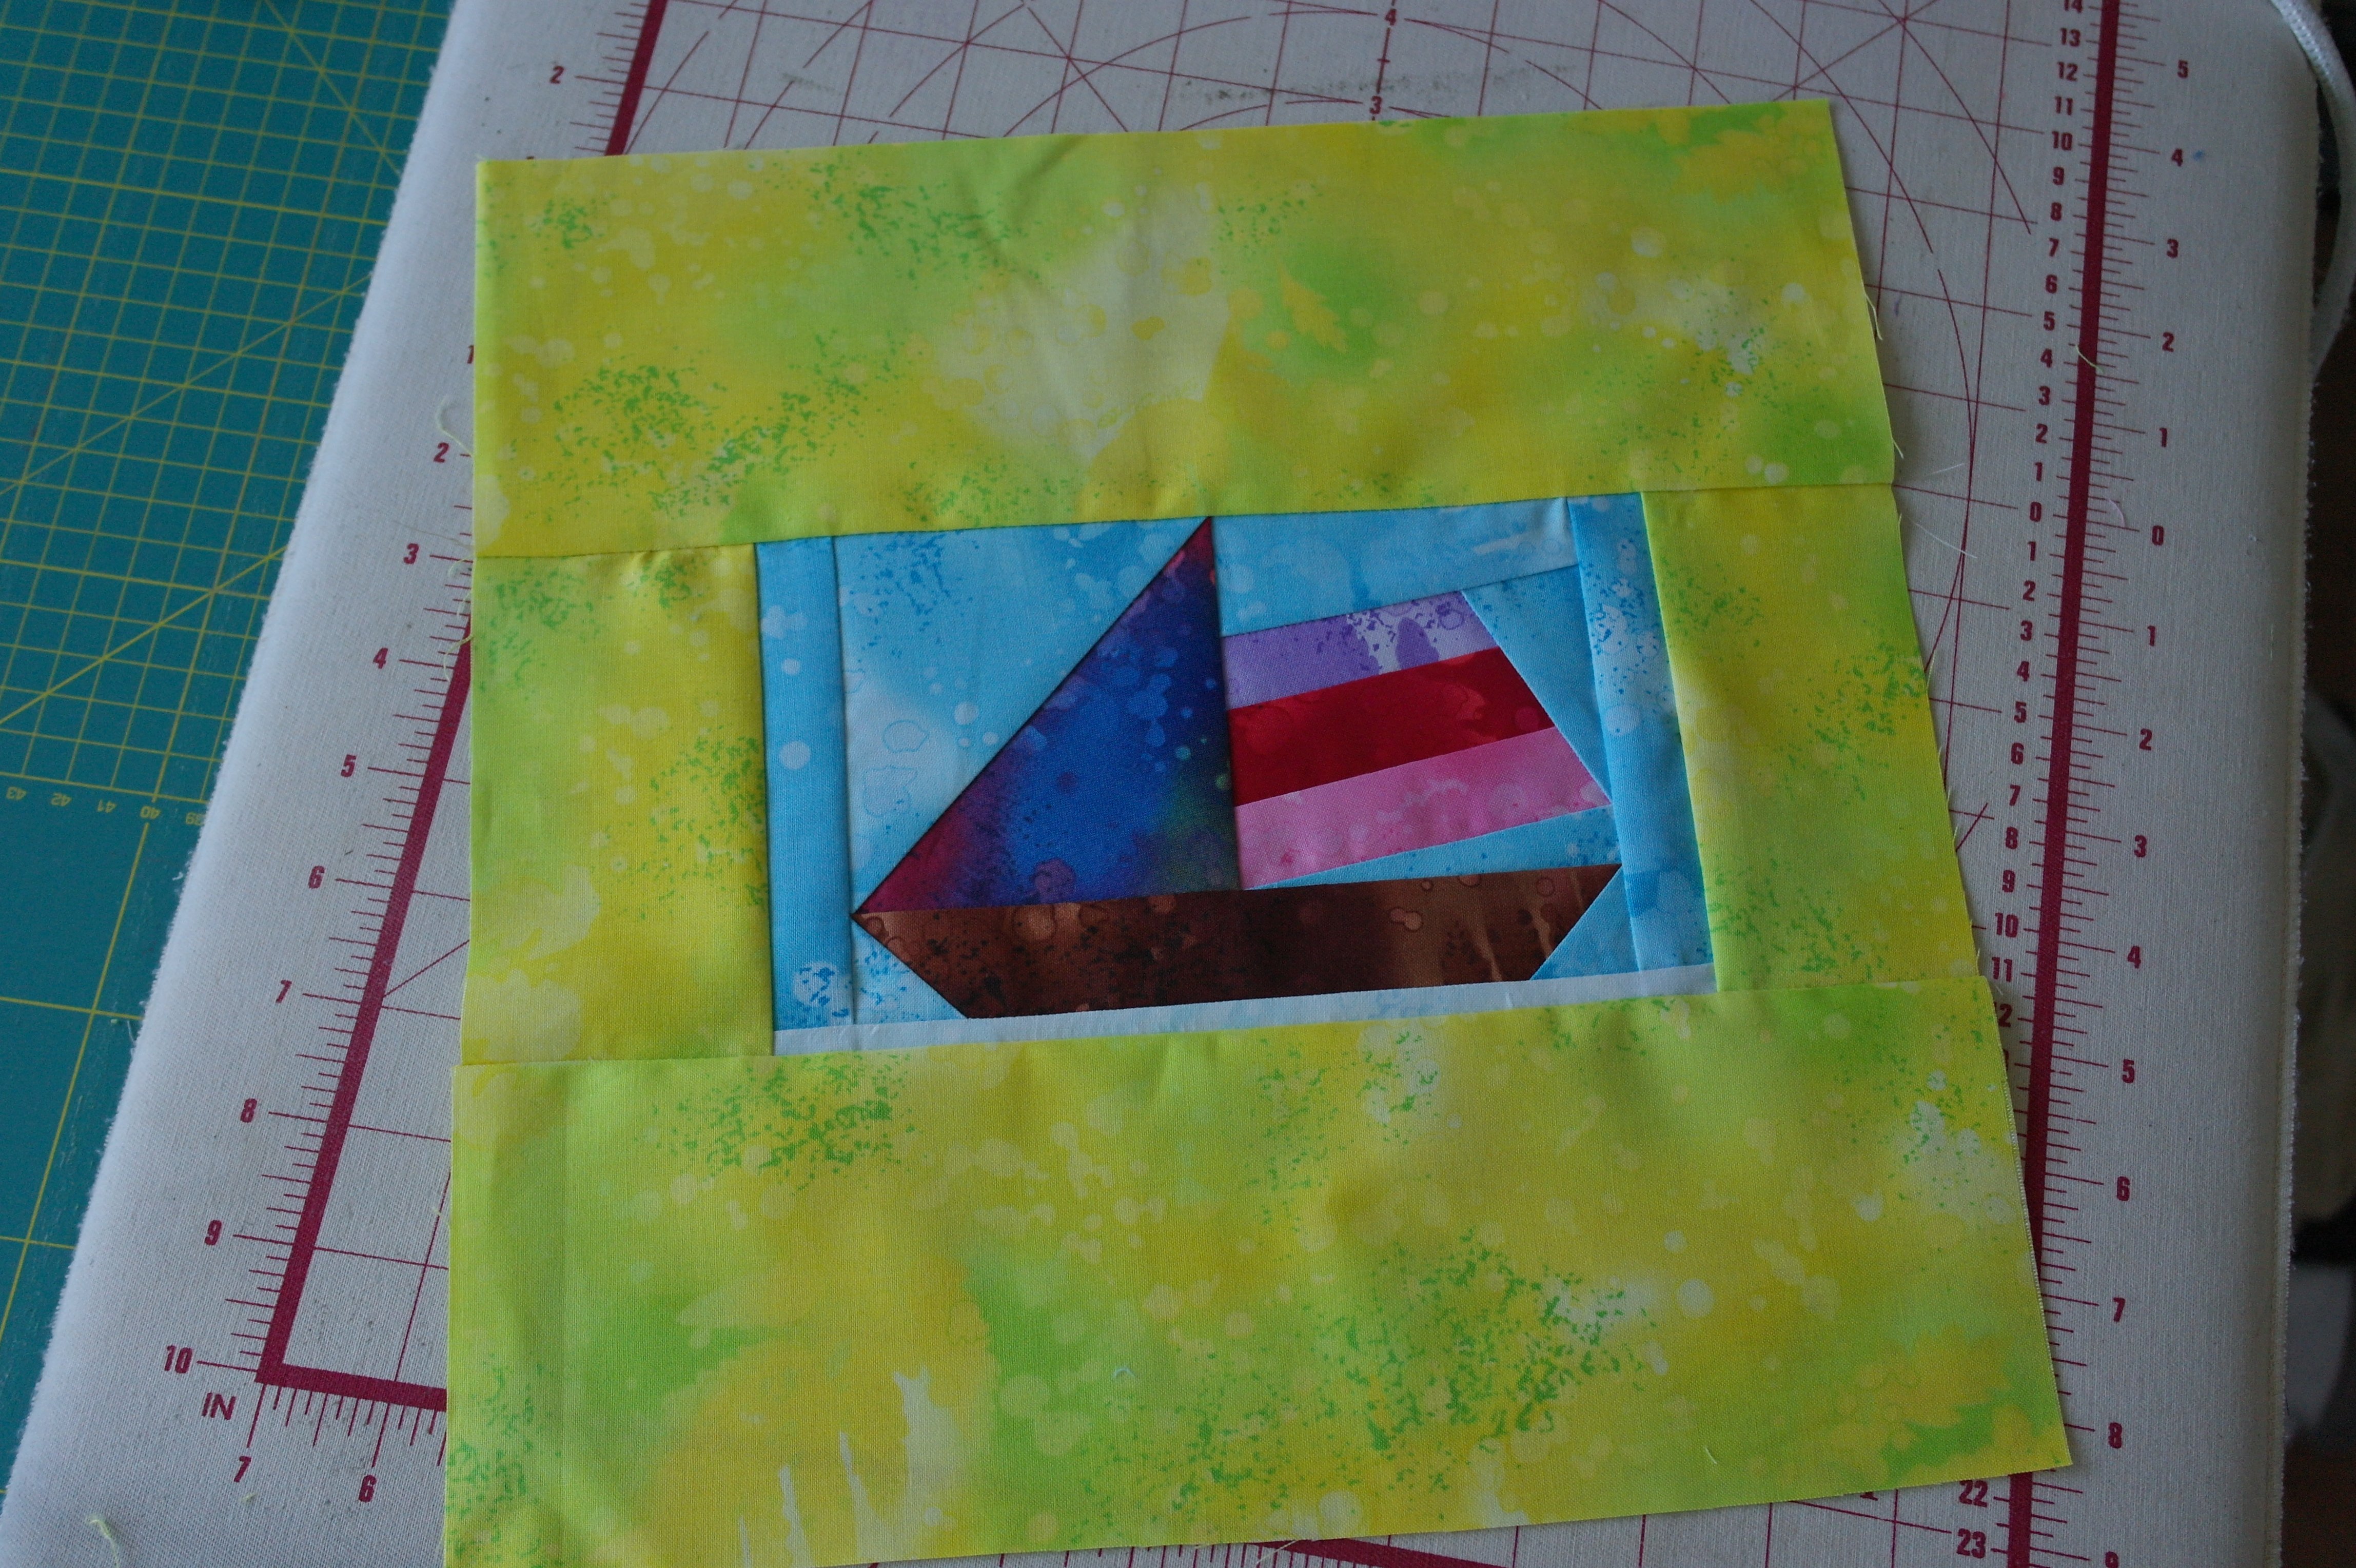
I want to make finished blocks – adding fabrics to each paper piecing boat block , measuring 30 x 30 cm (31x31cm seam allowances included). To do so, fabrics have to be cut: two long strips 11 to 12 cm by 32 to 33/34 cm = oversized. I like cutting strips too large, because that makes it easier to sew them, cutting them back afterwards. Two short strips can be cut too: 7 to 8cm by 14/15 cm: the same here = oversized, but easier to work with.

I will use different colors of my Fossil Ferns for all 6 blocks, each 2 large strips and 2 smaller strips. I will use my quilting ruler with centimeters to cut the strips: the picture above shows I have cut the larger strips 11 by 32 cm, but to be sure, cut them slightly larger!

Now, the paper can be removed from behind the blocks. Tear in REVERSE order: start with the last sewn number, and work your way back to no. 1.
This is how the blocks at the back looks, after the paper is removed. No more sewing lines: measure the block if it is still at the right size. Remove paper from all 6 blocks.
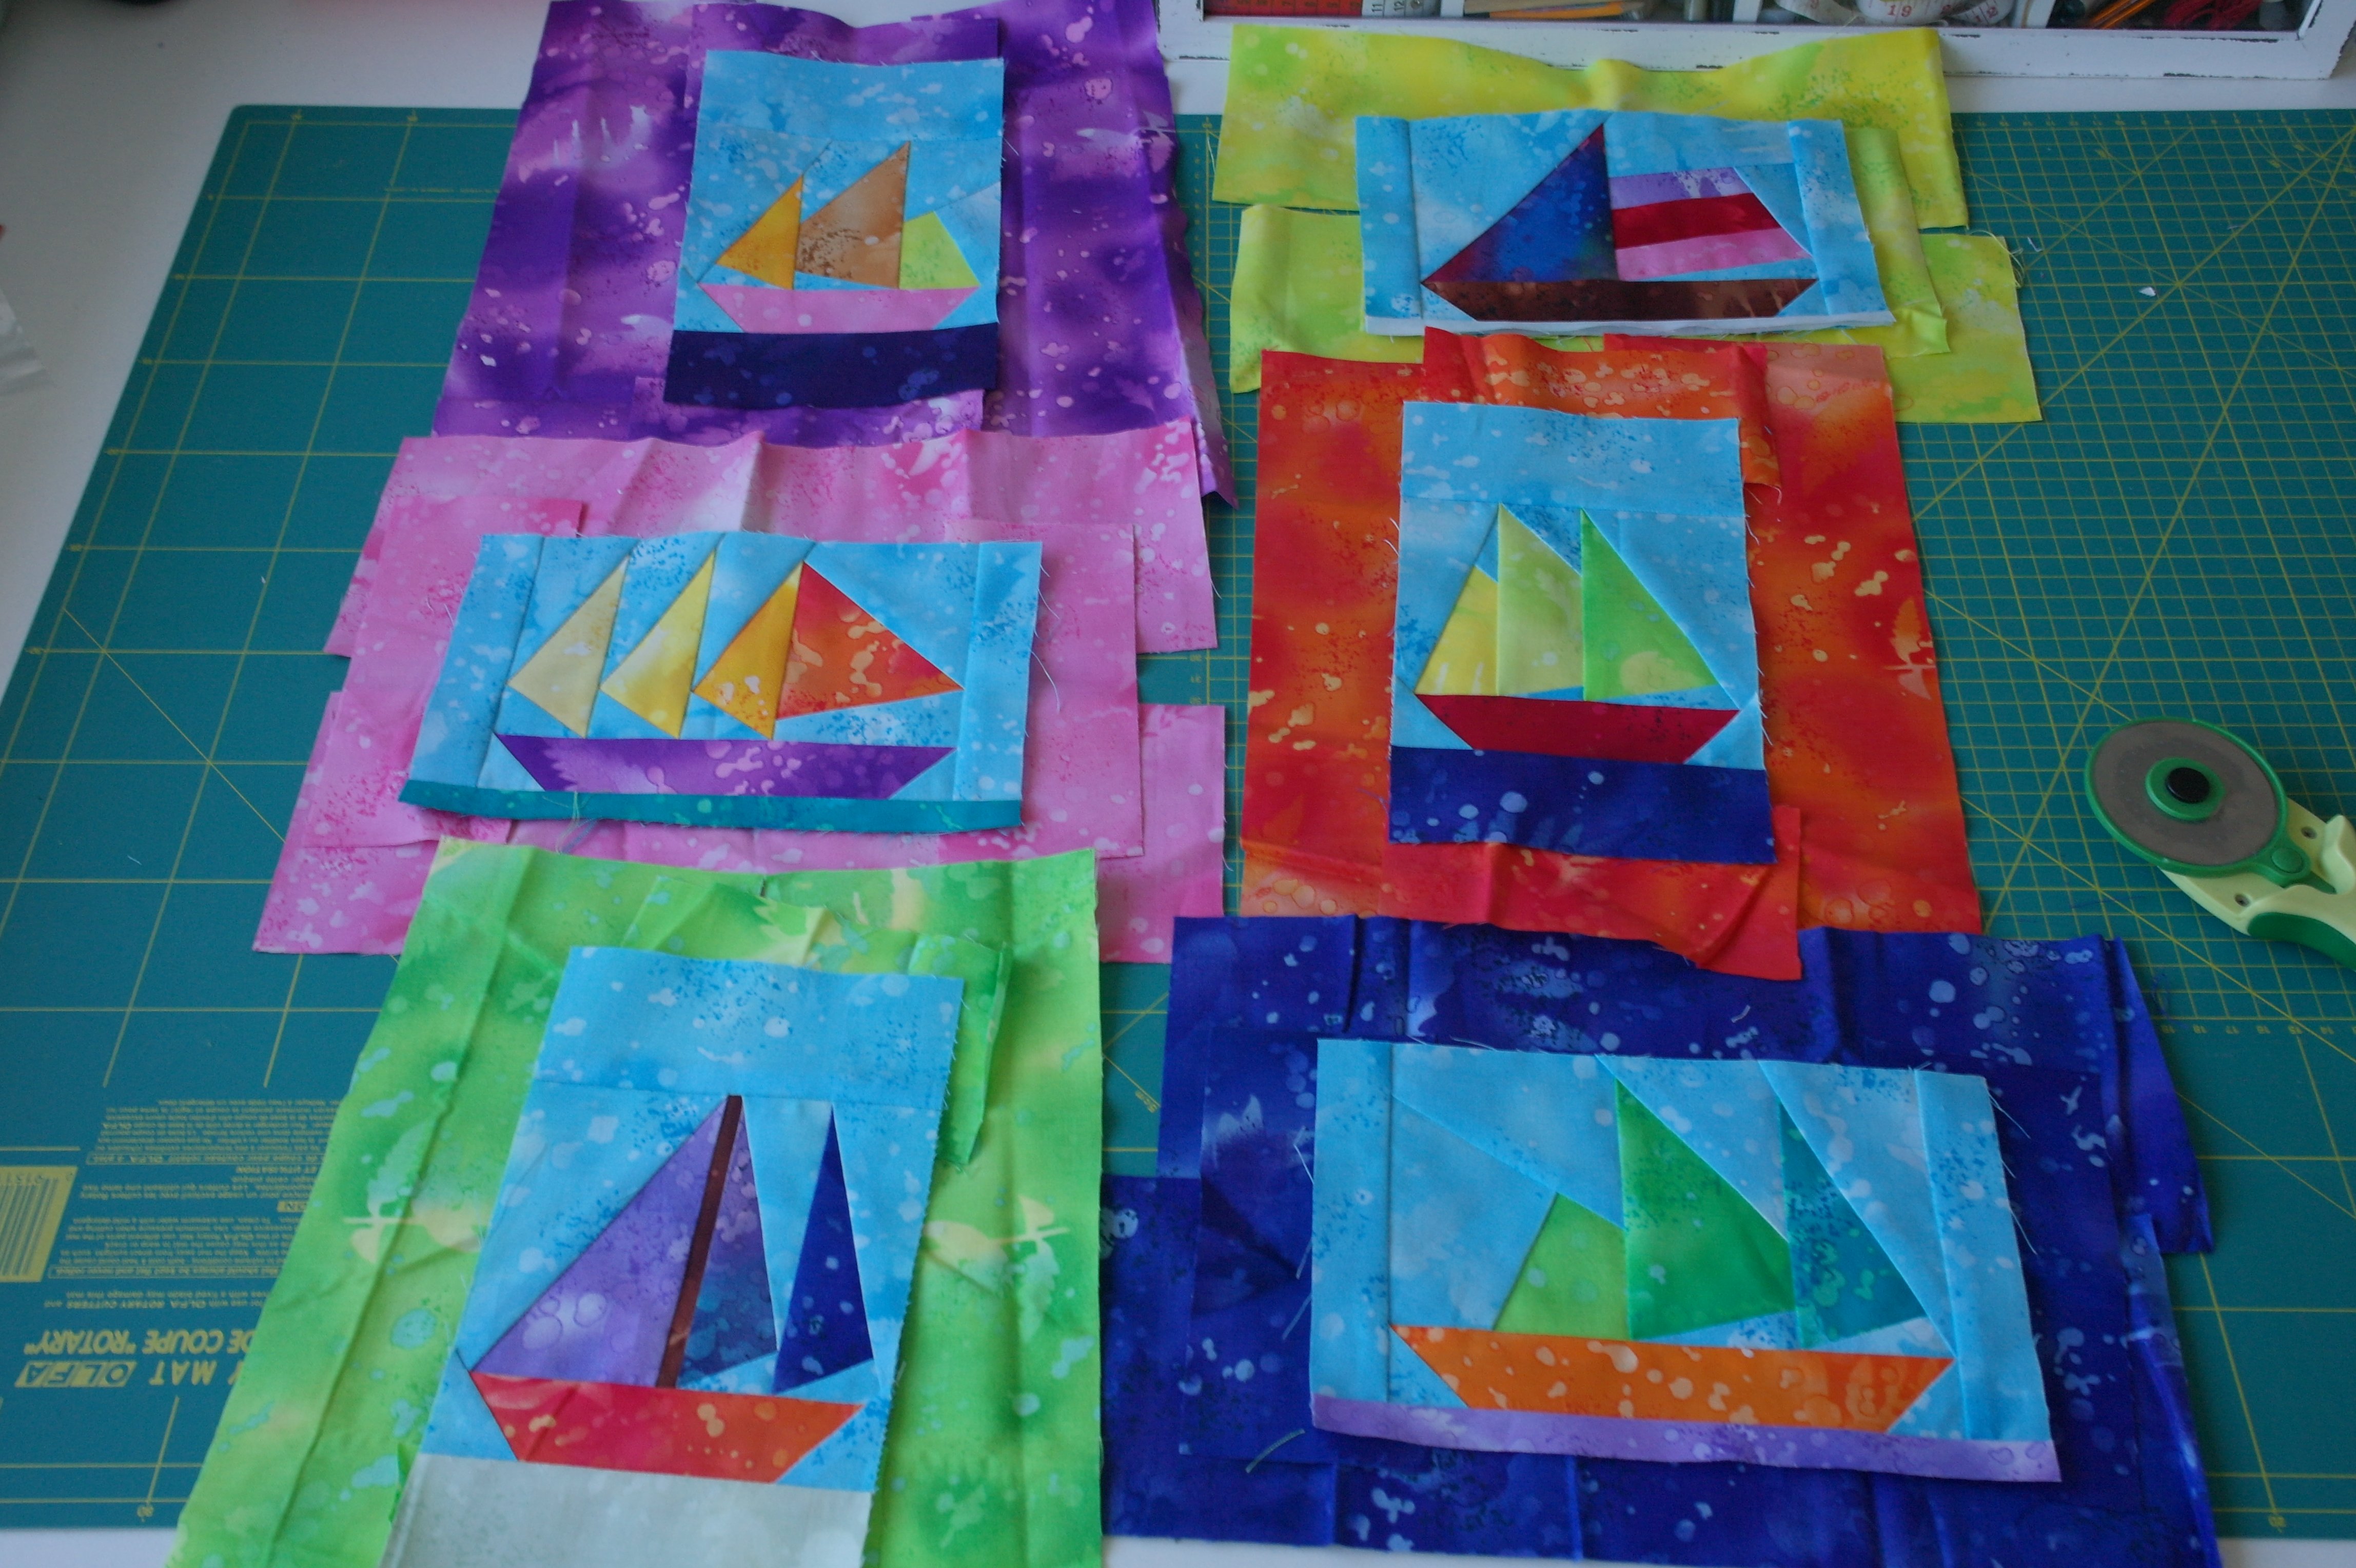
And this is how I want to assemble my quilt: all fabrics are cut and the blocks placed on top of the fabrics. A bright and fresh group, with Fossil Ferns! As you can see, the longer strips of fabric for the horizontal boats are placed horizontal too, and for the vertical boats the strips are placed vertical. This way all blocks will be square.
Sewing the strips to the blocks.
The short strips can be sewn onto the sides of the boats, whether they are placed horizontal or vertical. After cutting them straight, the longer strips are sewn to both strip/boat/strip side to get the measurements of 30x30cm + seam allowance per block. If your blocks are slightly larger (or perhaps even smaller): don’t worry. As long as all blocks are of the same measurement, you’ll be fine.
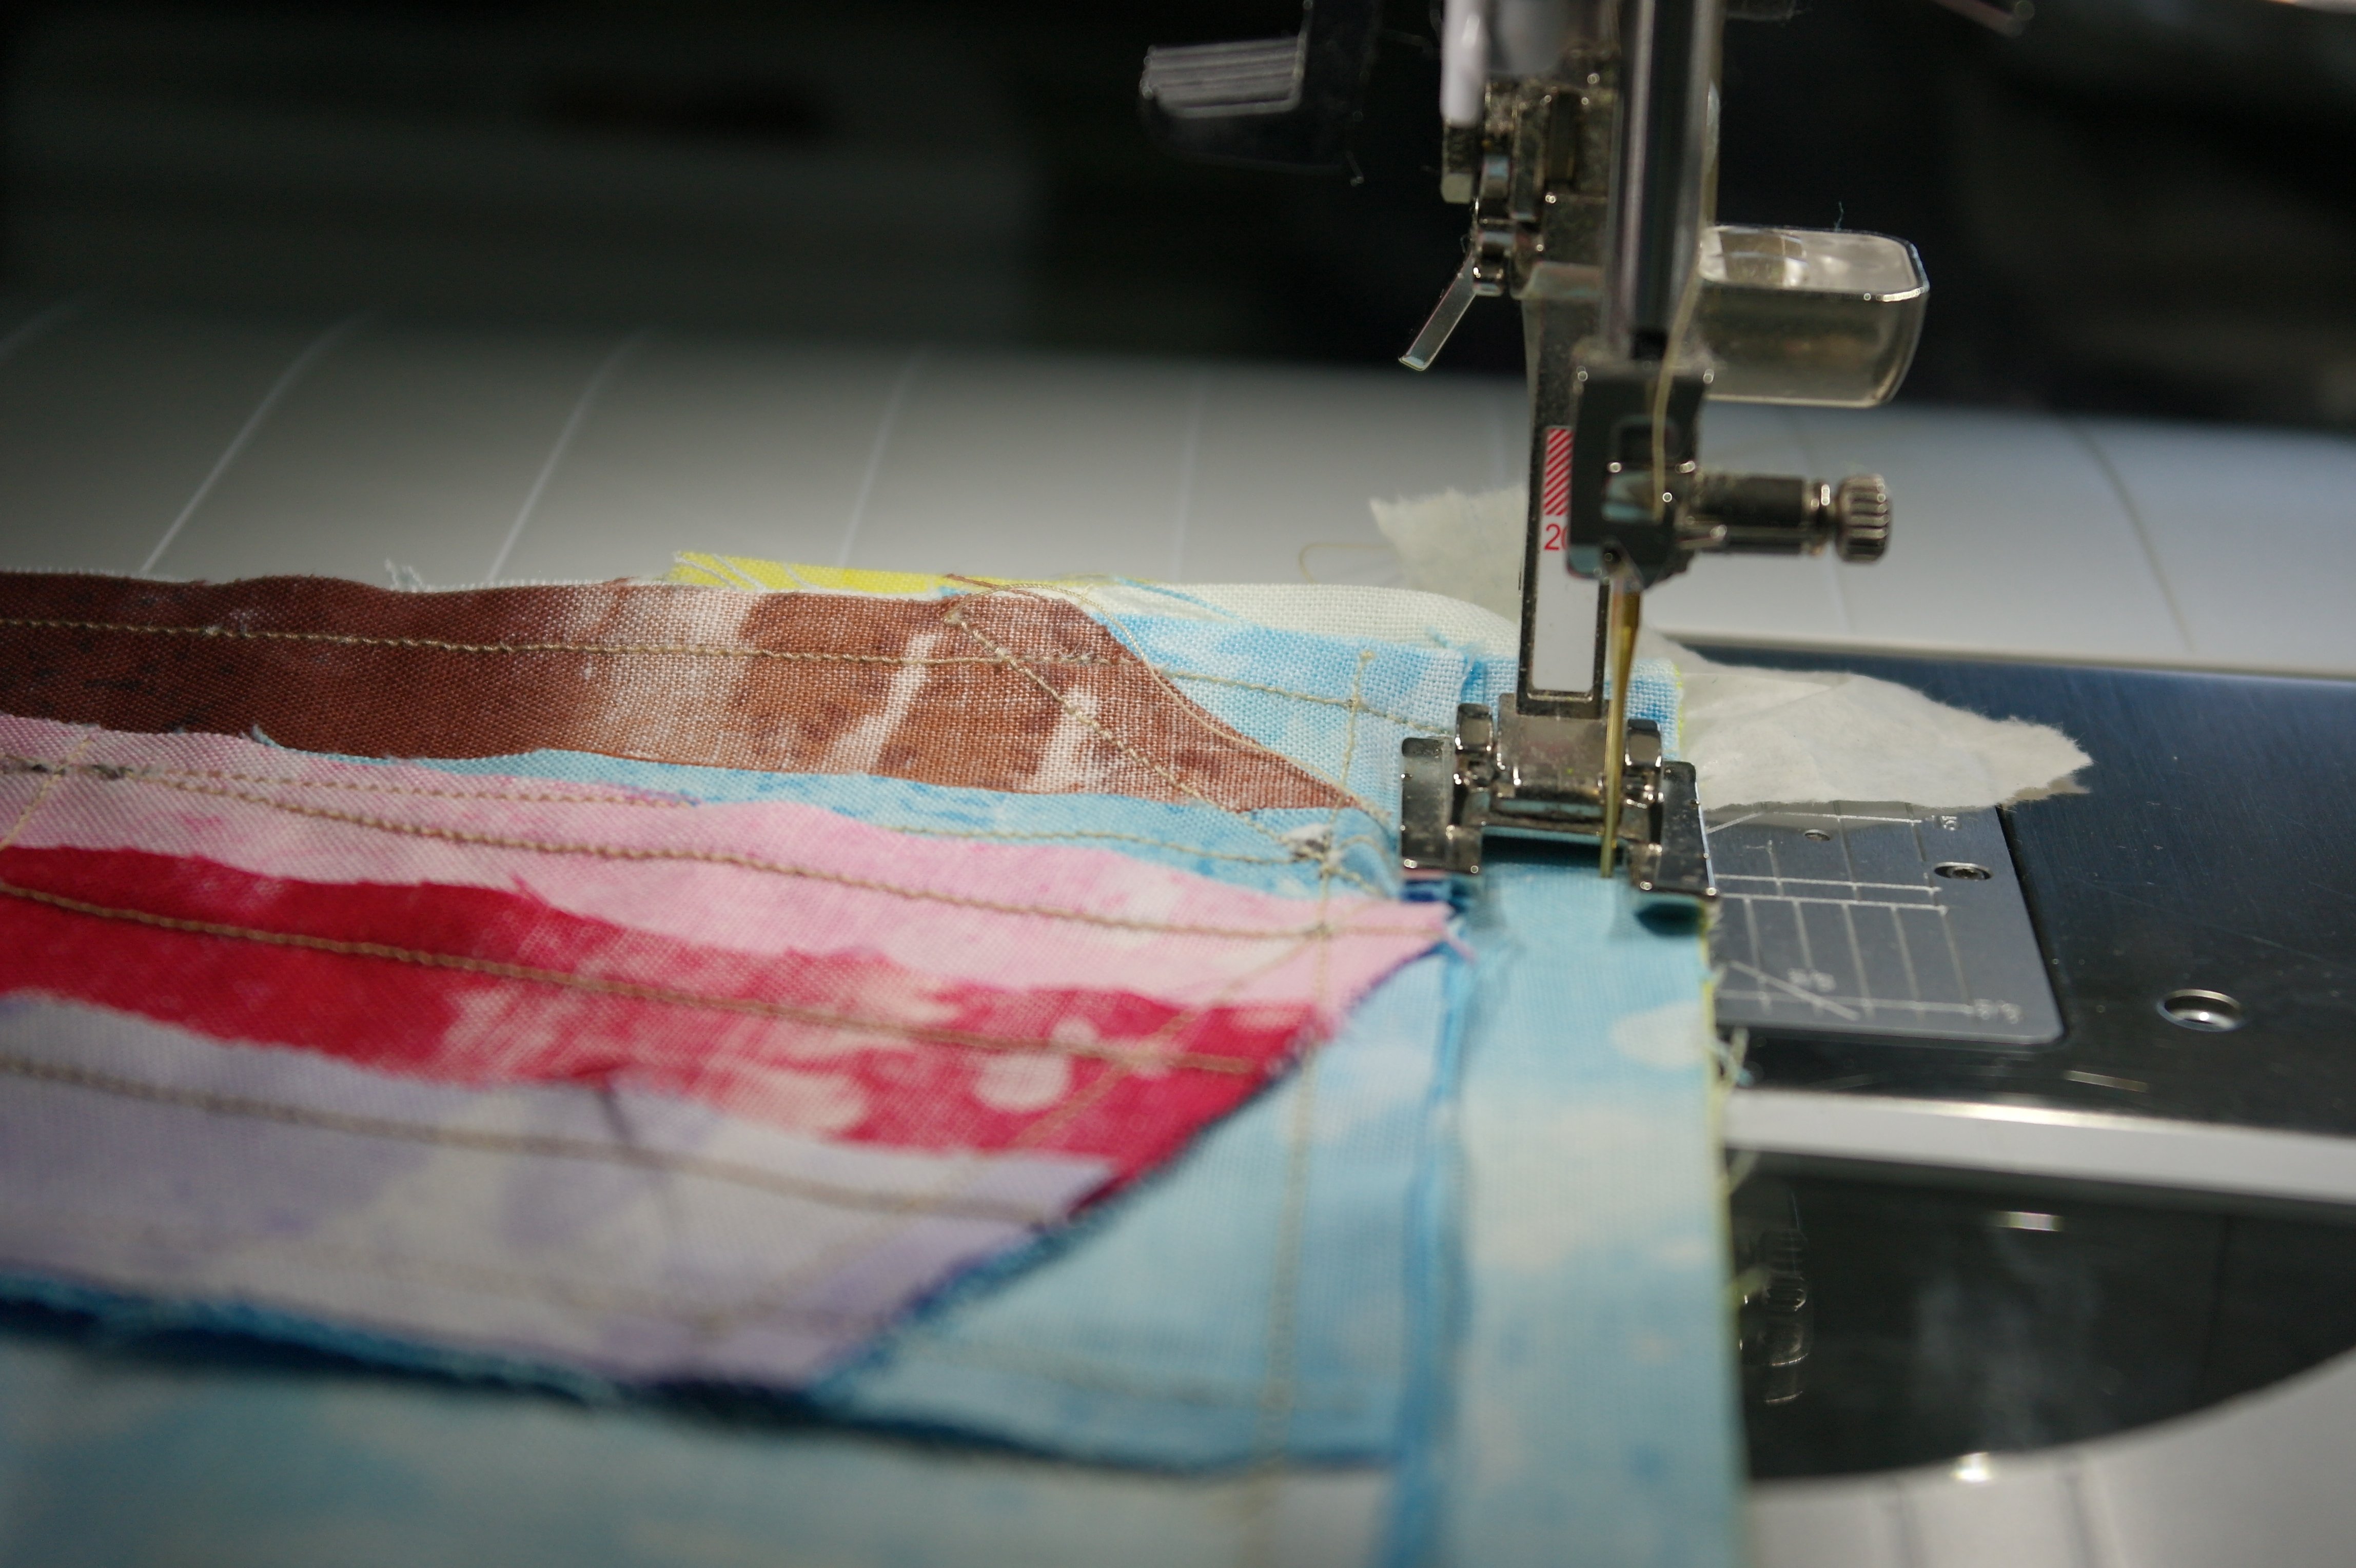
Because there is no sewing line on the back of the fabrics – the paper has been removed – you will need to work at the right edge of the presser foot, while the needle ‘follows’ the imaginary sewing line. That means the distance from your needle to the edge of presser foot should be 0.5cm for this project.
Changing the position of the needle.
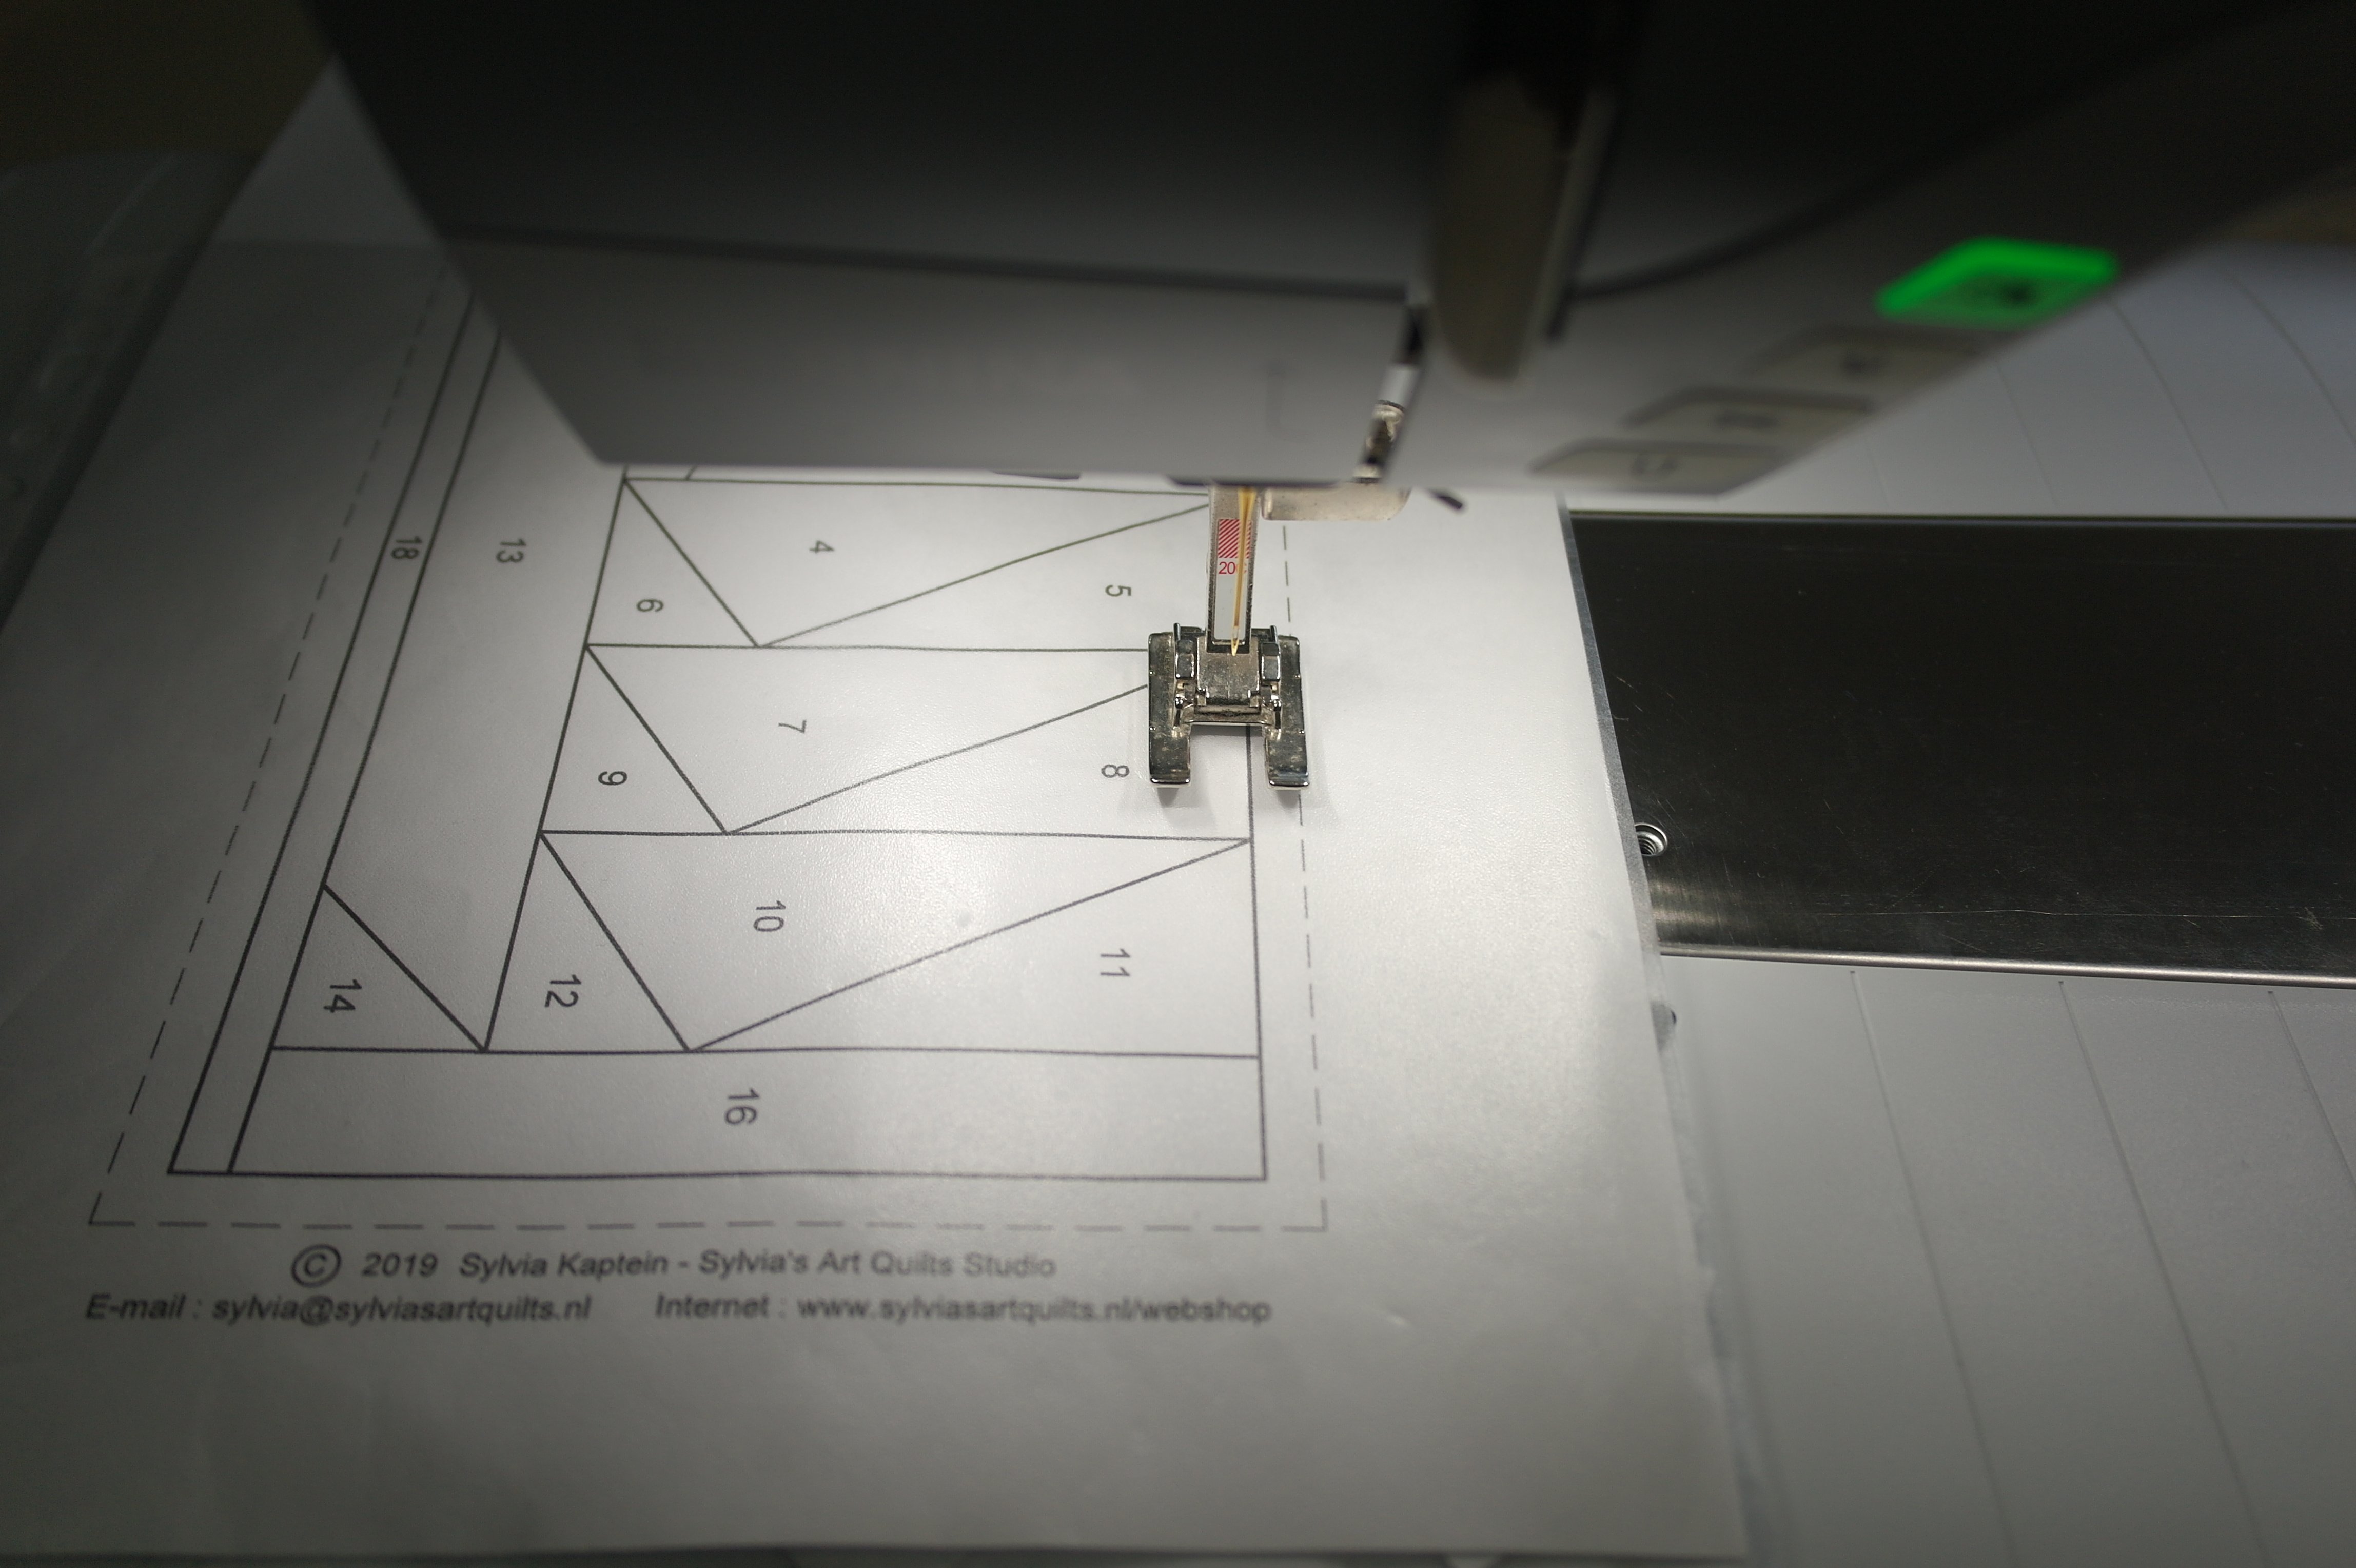
If you don’t own a special presser foot, which gives you a 0,5cm seam allowance, while the needle is in the center position, and you can use the inner or outer side of the presser foot a guidance, you can change the position of your needle (if you machine offers that option). I want to use Presser foot #20C – which is open, with proper vision to needle and fabrics. But when placing the right side of this Presser foot on the edge of the fabrics, and the needle still in the center, my seam allowance will be much too wide.
This is how that will be: it will give me the wrong size seam allowance. Lowering the Presser foot, following the dashed line with the edge of the foot, places the needle way off to the left of the solid line. I could use the inner side of the Presser foot, placing that on the dashed line, but then the needle is too far to the right.
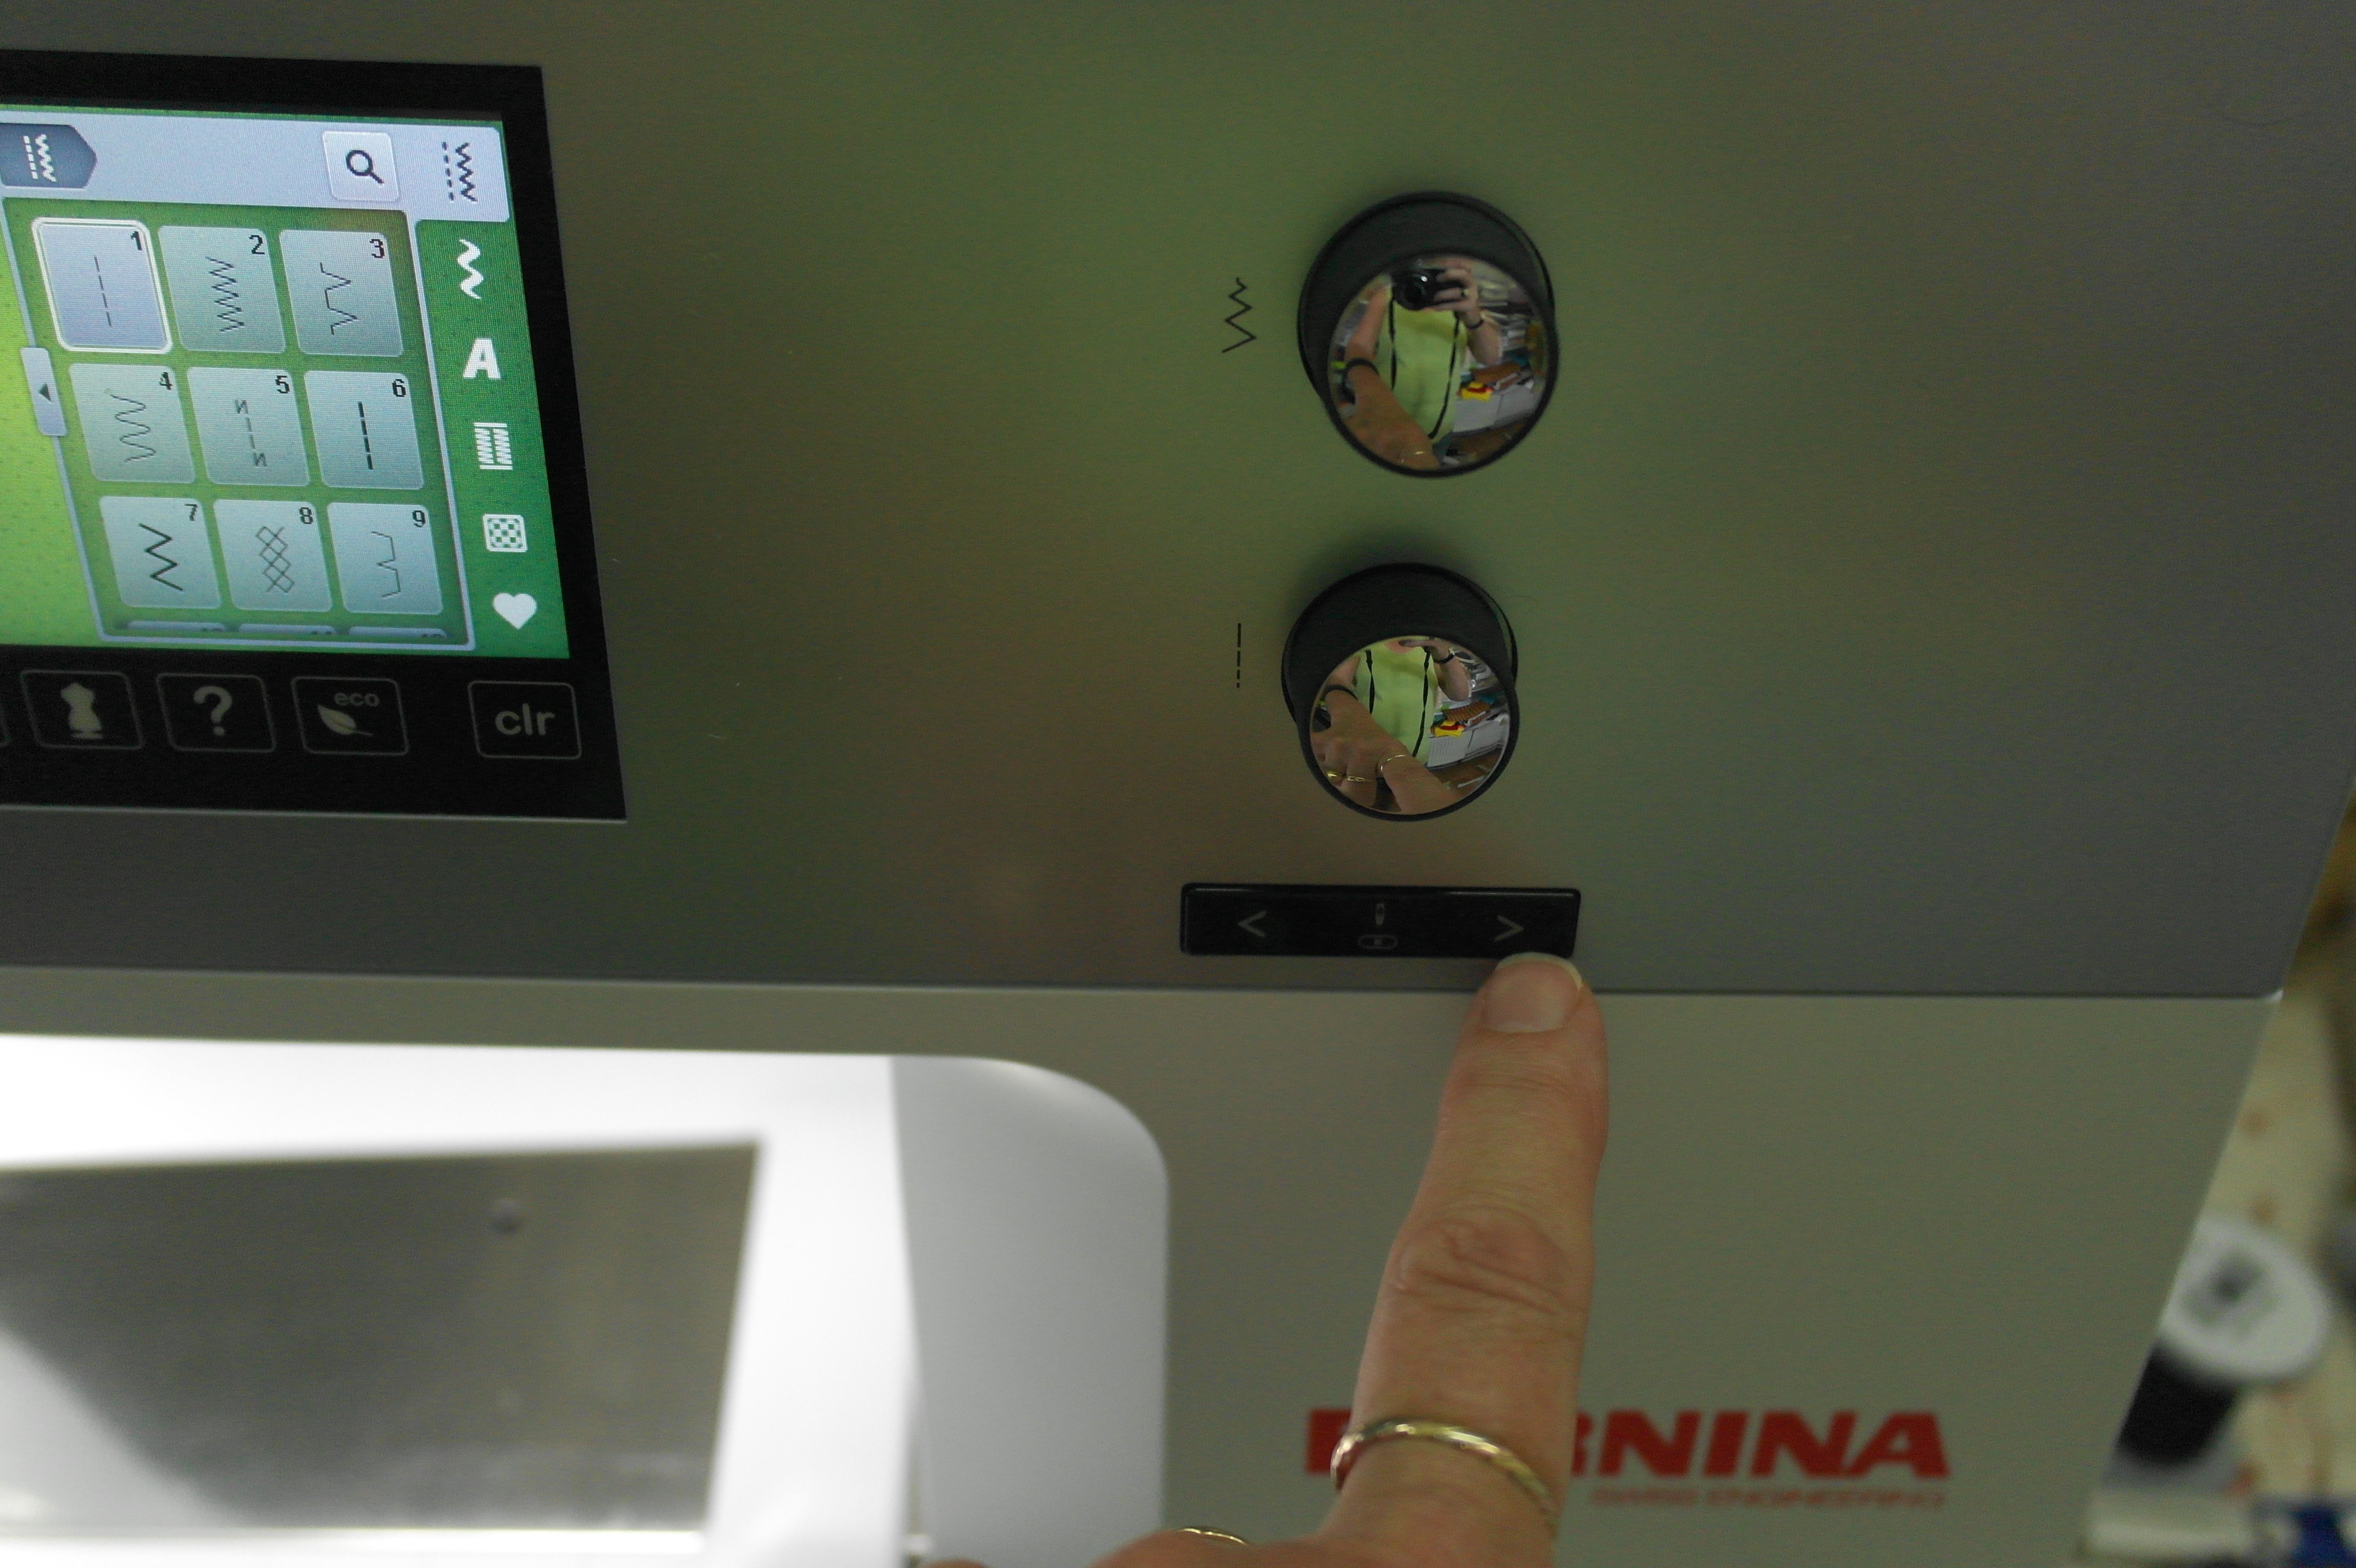
So I have used the option on my BERNINA 770QE to shift the needle to the right. Because this machine offer me to do that in both directions, I can press the right-button 5 times, so the needle almost touches the inner side of the Presser foot. Position 0 is the center, position 5 is far right. I can also shift the needle to the far left, up to position 5. Each click is one position away from the center, or back if you reverse that, by using the other arrow, placing the needle back to the center.
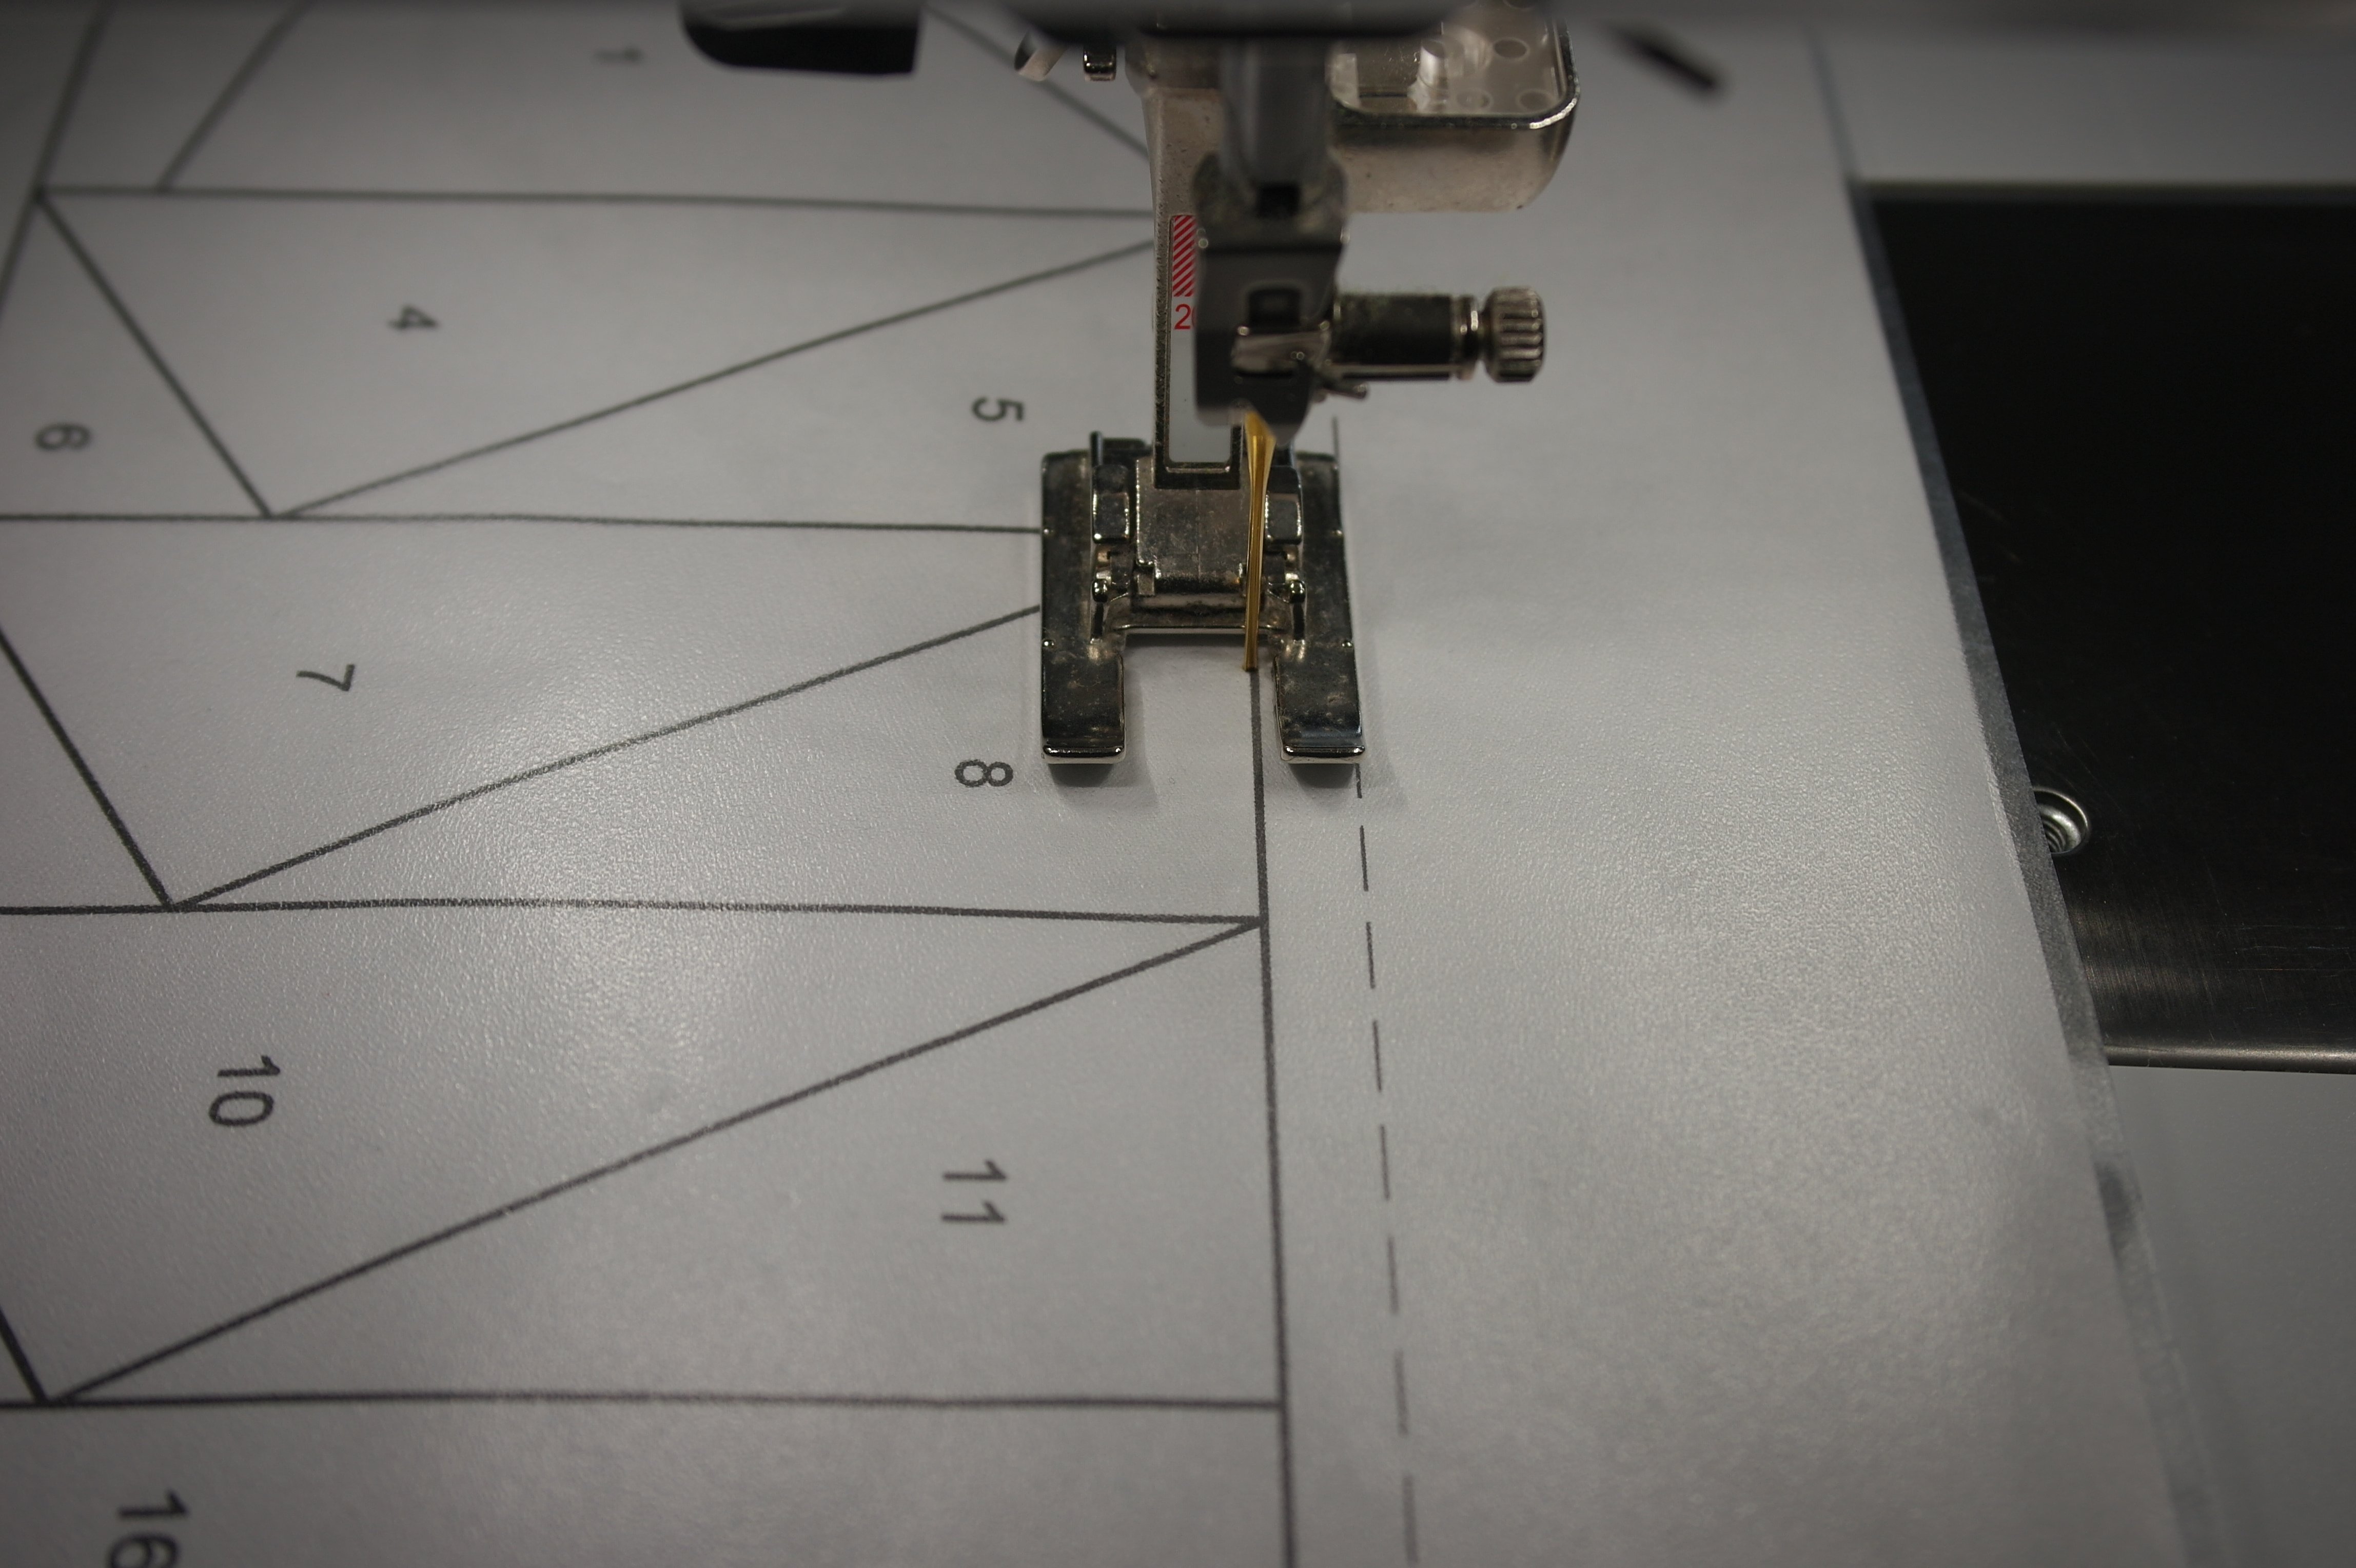
With the 4th click, the needle was in the right position: now I can sew without sewing line, knowing all fabrics and eventually the blocks will be of the right measurements.
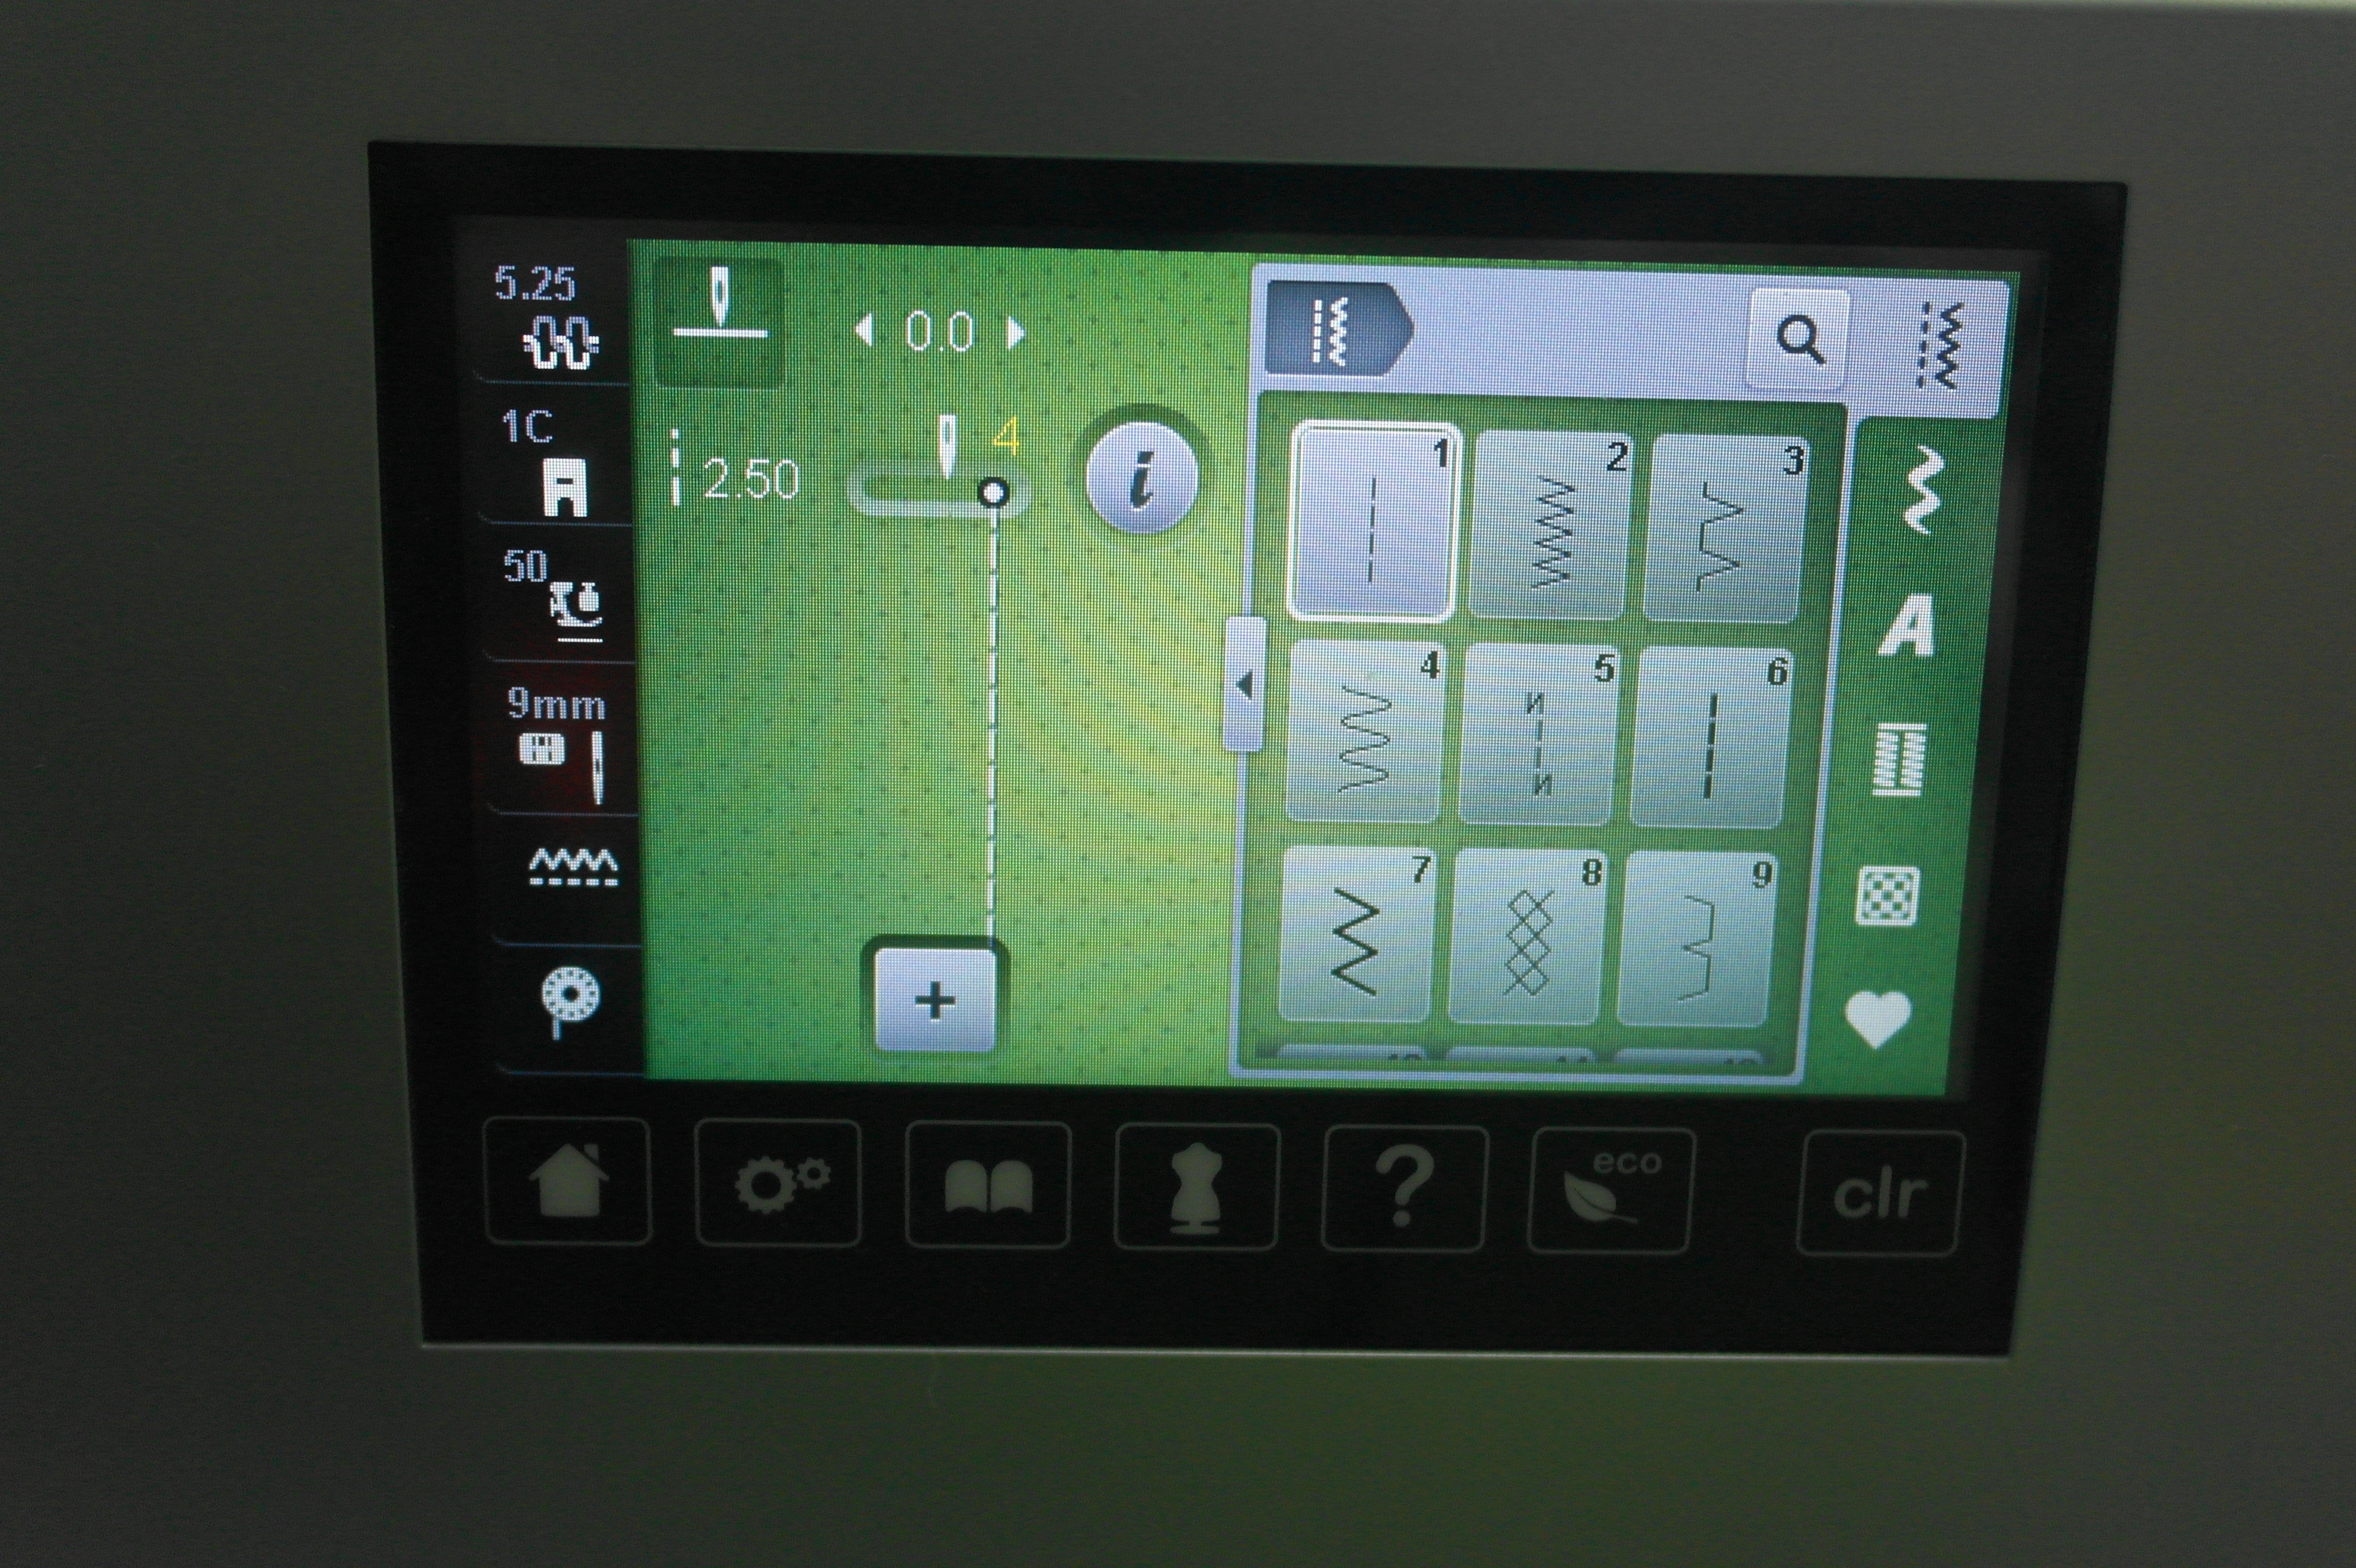
You can see that the needle position is at 4: a yellow number, indicating I’ve changed something. I had to change my stitch plate: from straight stitch plate (just a small hole for the needle), to the zigzag stitch plate (with a large groove for the needle), otherwise I couldn’t shift the needle. The B770QE has a security build-in, to prevent needle breakage if the settings are not right.
You could also use a Patchwork Presser foot with guide: but check if the seam allowance will be 0,5cm (not 1/4 inches!).
Not every machine can adjust the needle position. Check if you can use the inner side of the presser foot to the right of your needle, for a 0,5mm seam allowance. Try different Presser feet until you find one that will get you the right seam allowance.
Advantage or Disadvantage using Presser foot #20C with this project.
- Advantage: Large opening. I can see the needle + the surrounding area. But with sewing a seam allowance of 0,5cm, I will NOT keep an eye on my needle, but on the edge of the presser foot and my fabric.
- Disadvantage: Large opening has not a lot of grip on the fabric. That is why I will always place a piece of pattern paper underneath the beginning of the fabric, to sew on before sewing onto the fabrics themselves. I can tear that piece of pattern paper away after sewing.
- Another disadvantage (but that’s more due of the shifted position of the needle): you CANNOT use the thread cutter of your machine: because the needle is no longer in the center, you will have to cut threads manually.
- Still I’d like to use this presser foot….
Use a machine needle 70/10: you will sew onto (thinner) quilting fabric, not through fabric and paper anymore.

Iron the strips you’ve cut: that’s important to get good results.
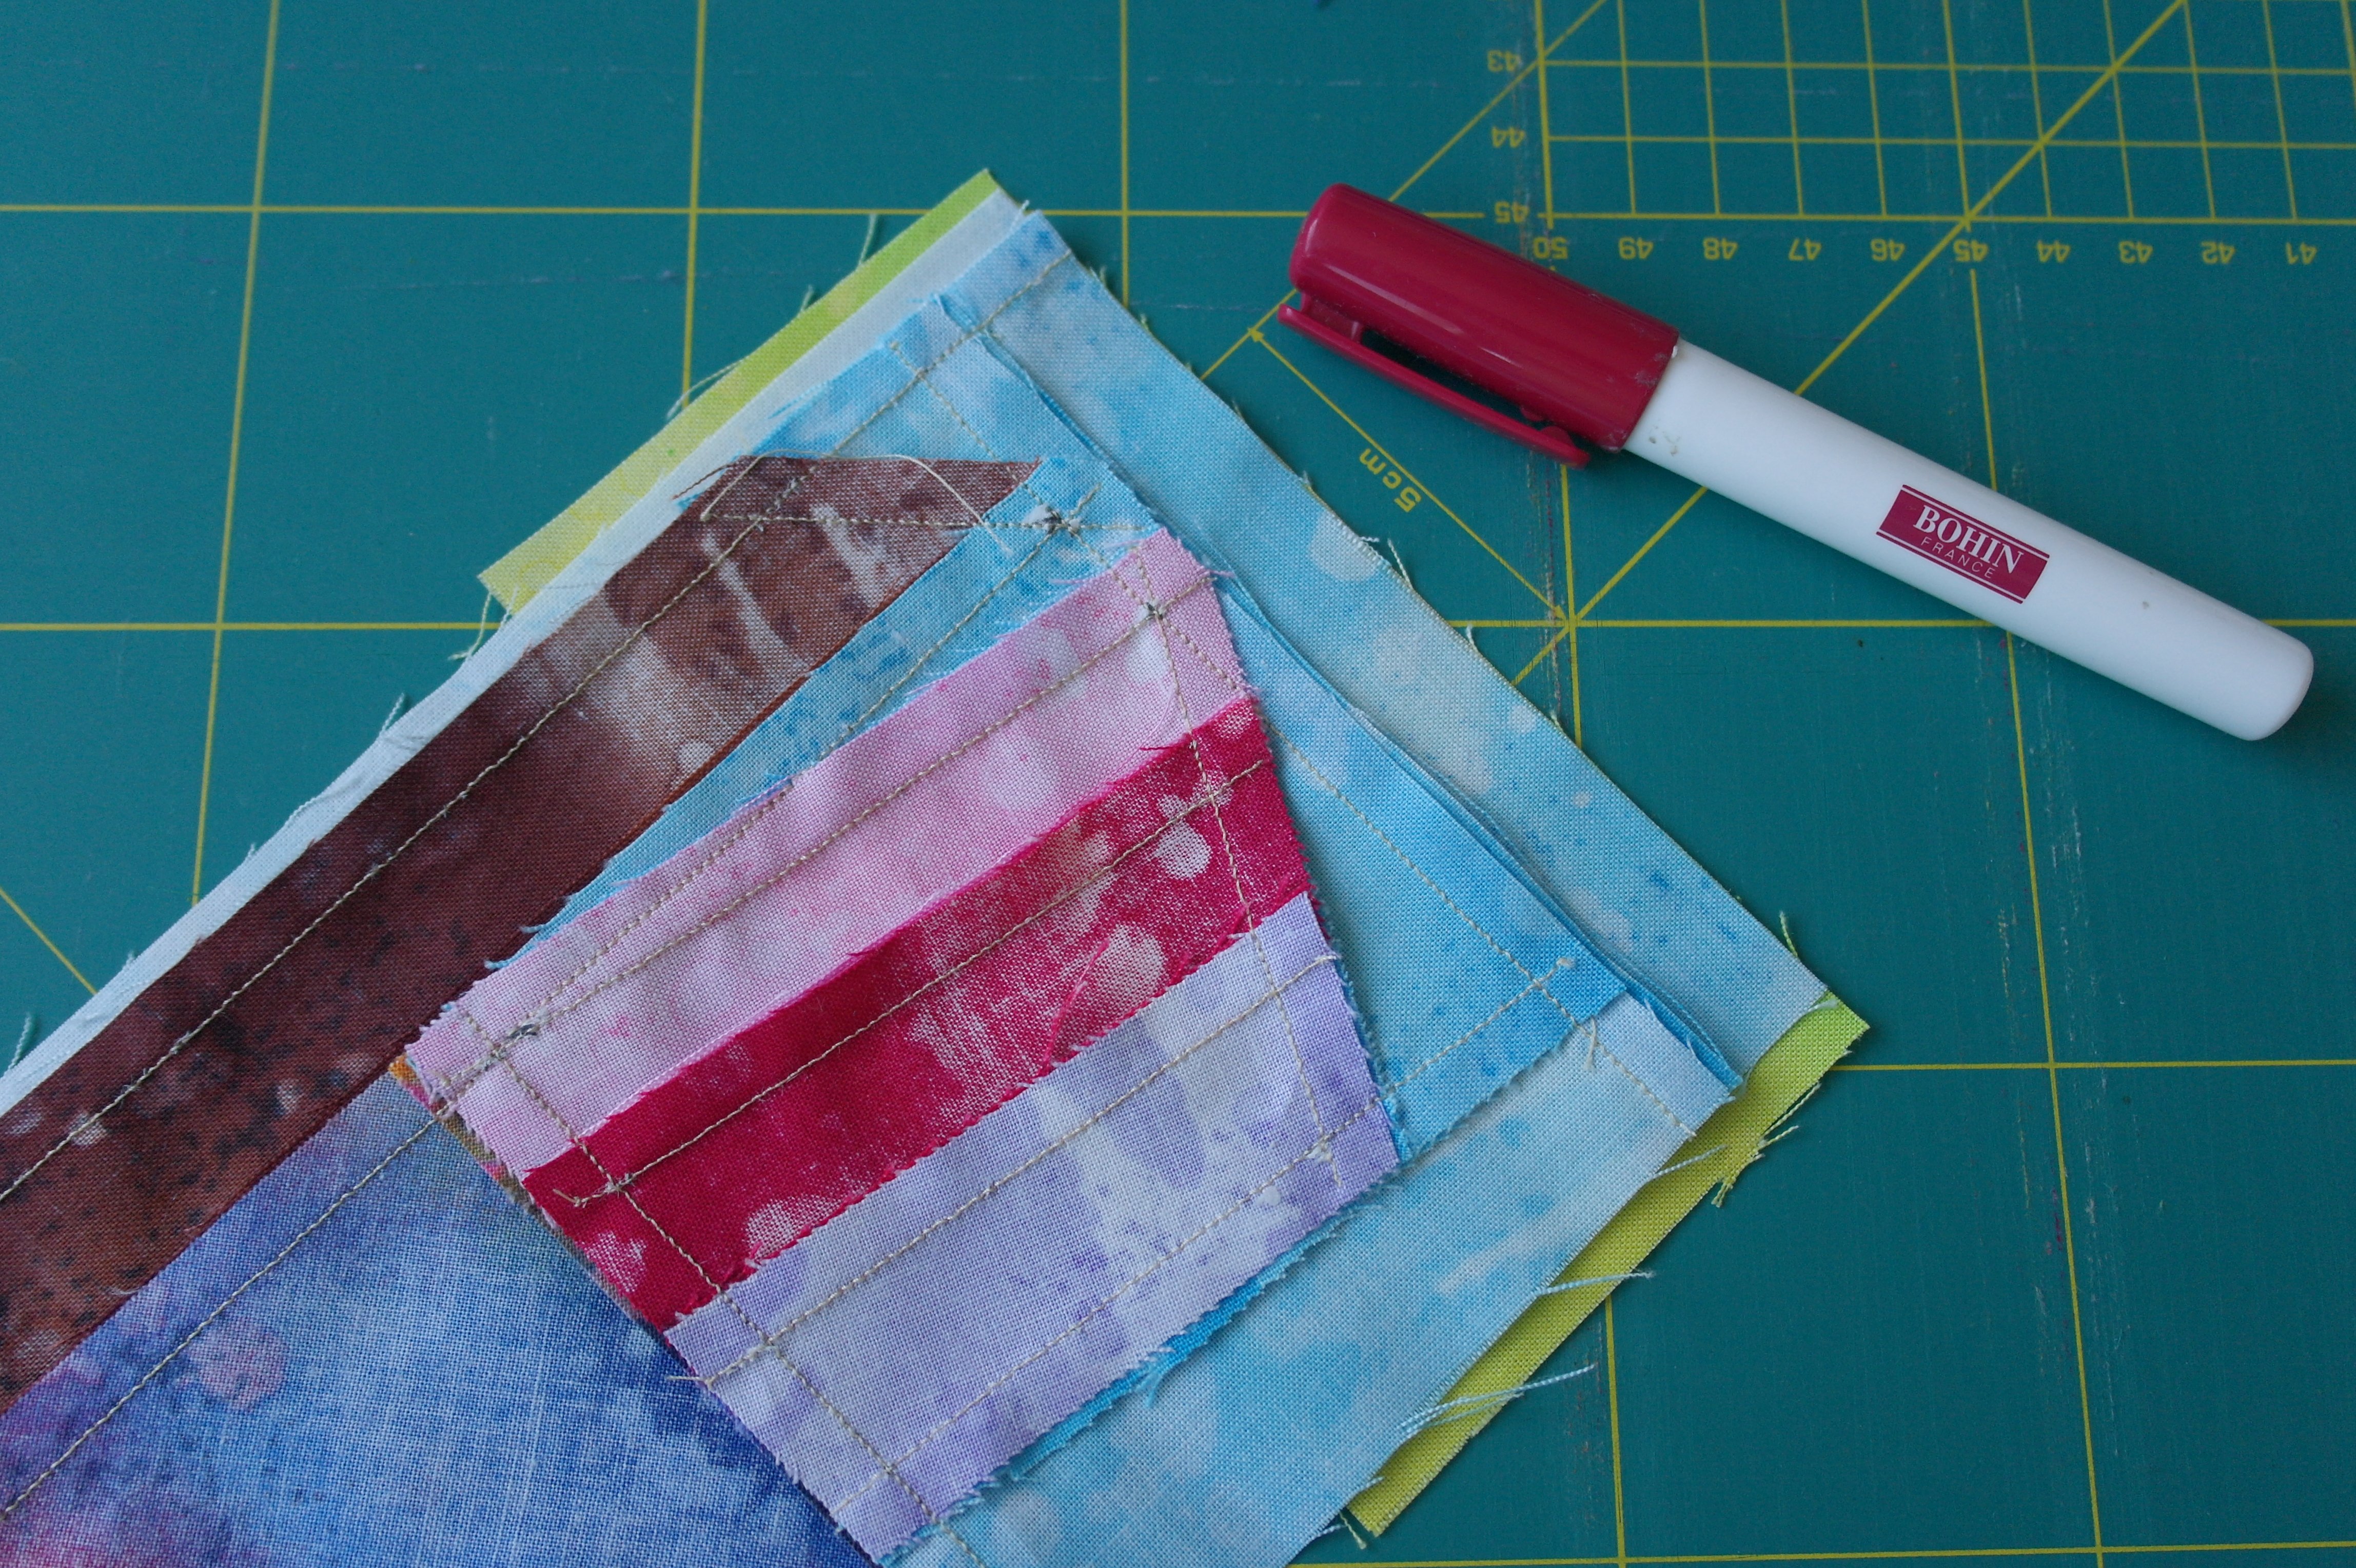
Place the first small/short piece of fabric to the small side of the boat block: I am using my Bohin Glue pen again, instead of pinning. You can see the strip of fabric is slightly larger than the side of the block: that’s how it should be, to work easier. Once sewn on, you will cut it back to the right size.
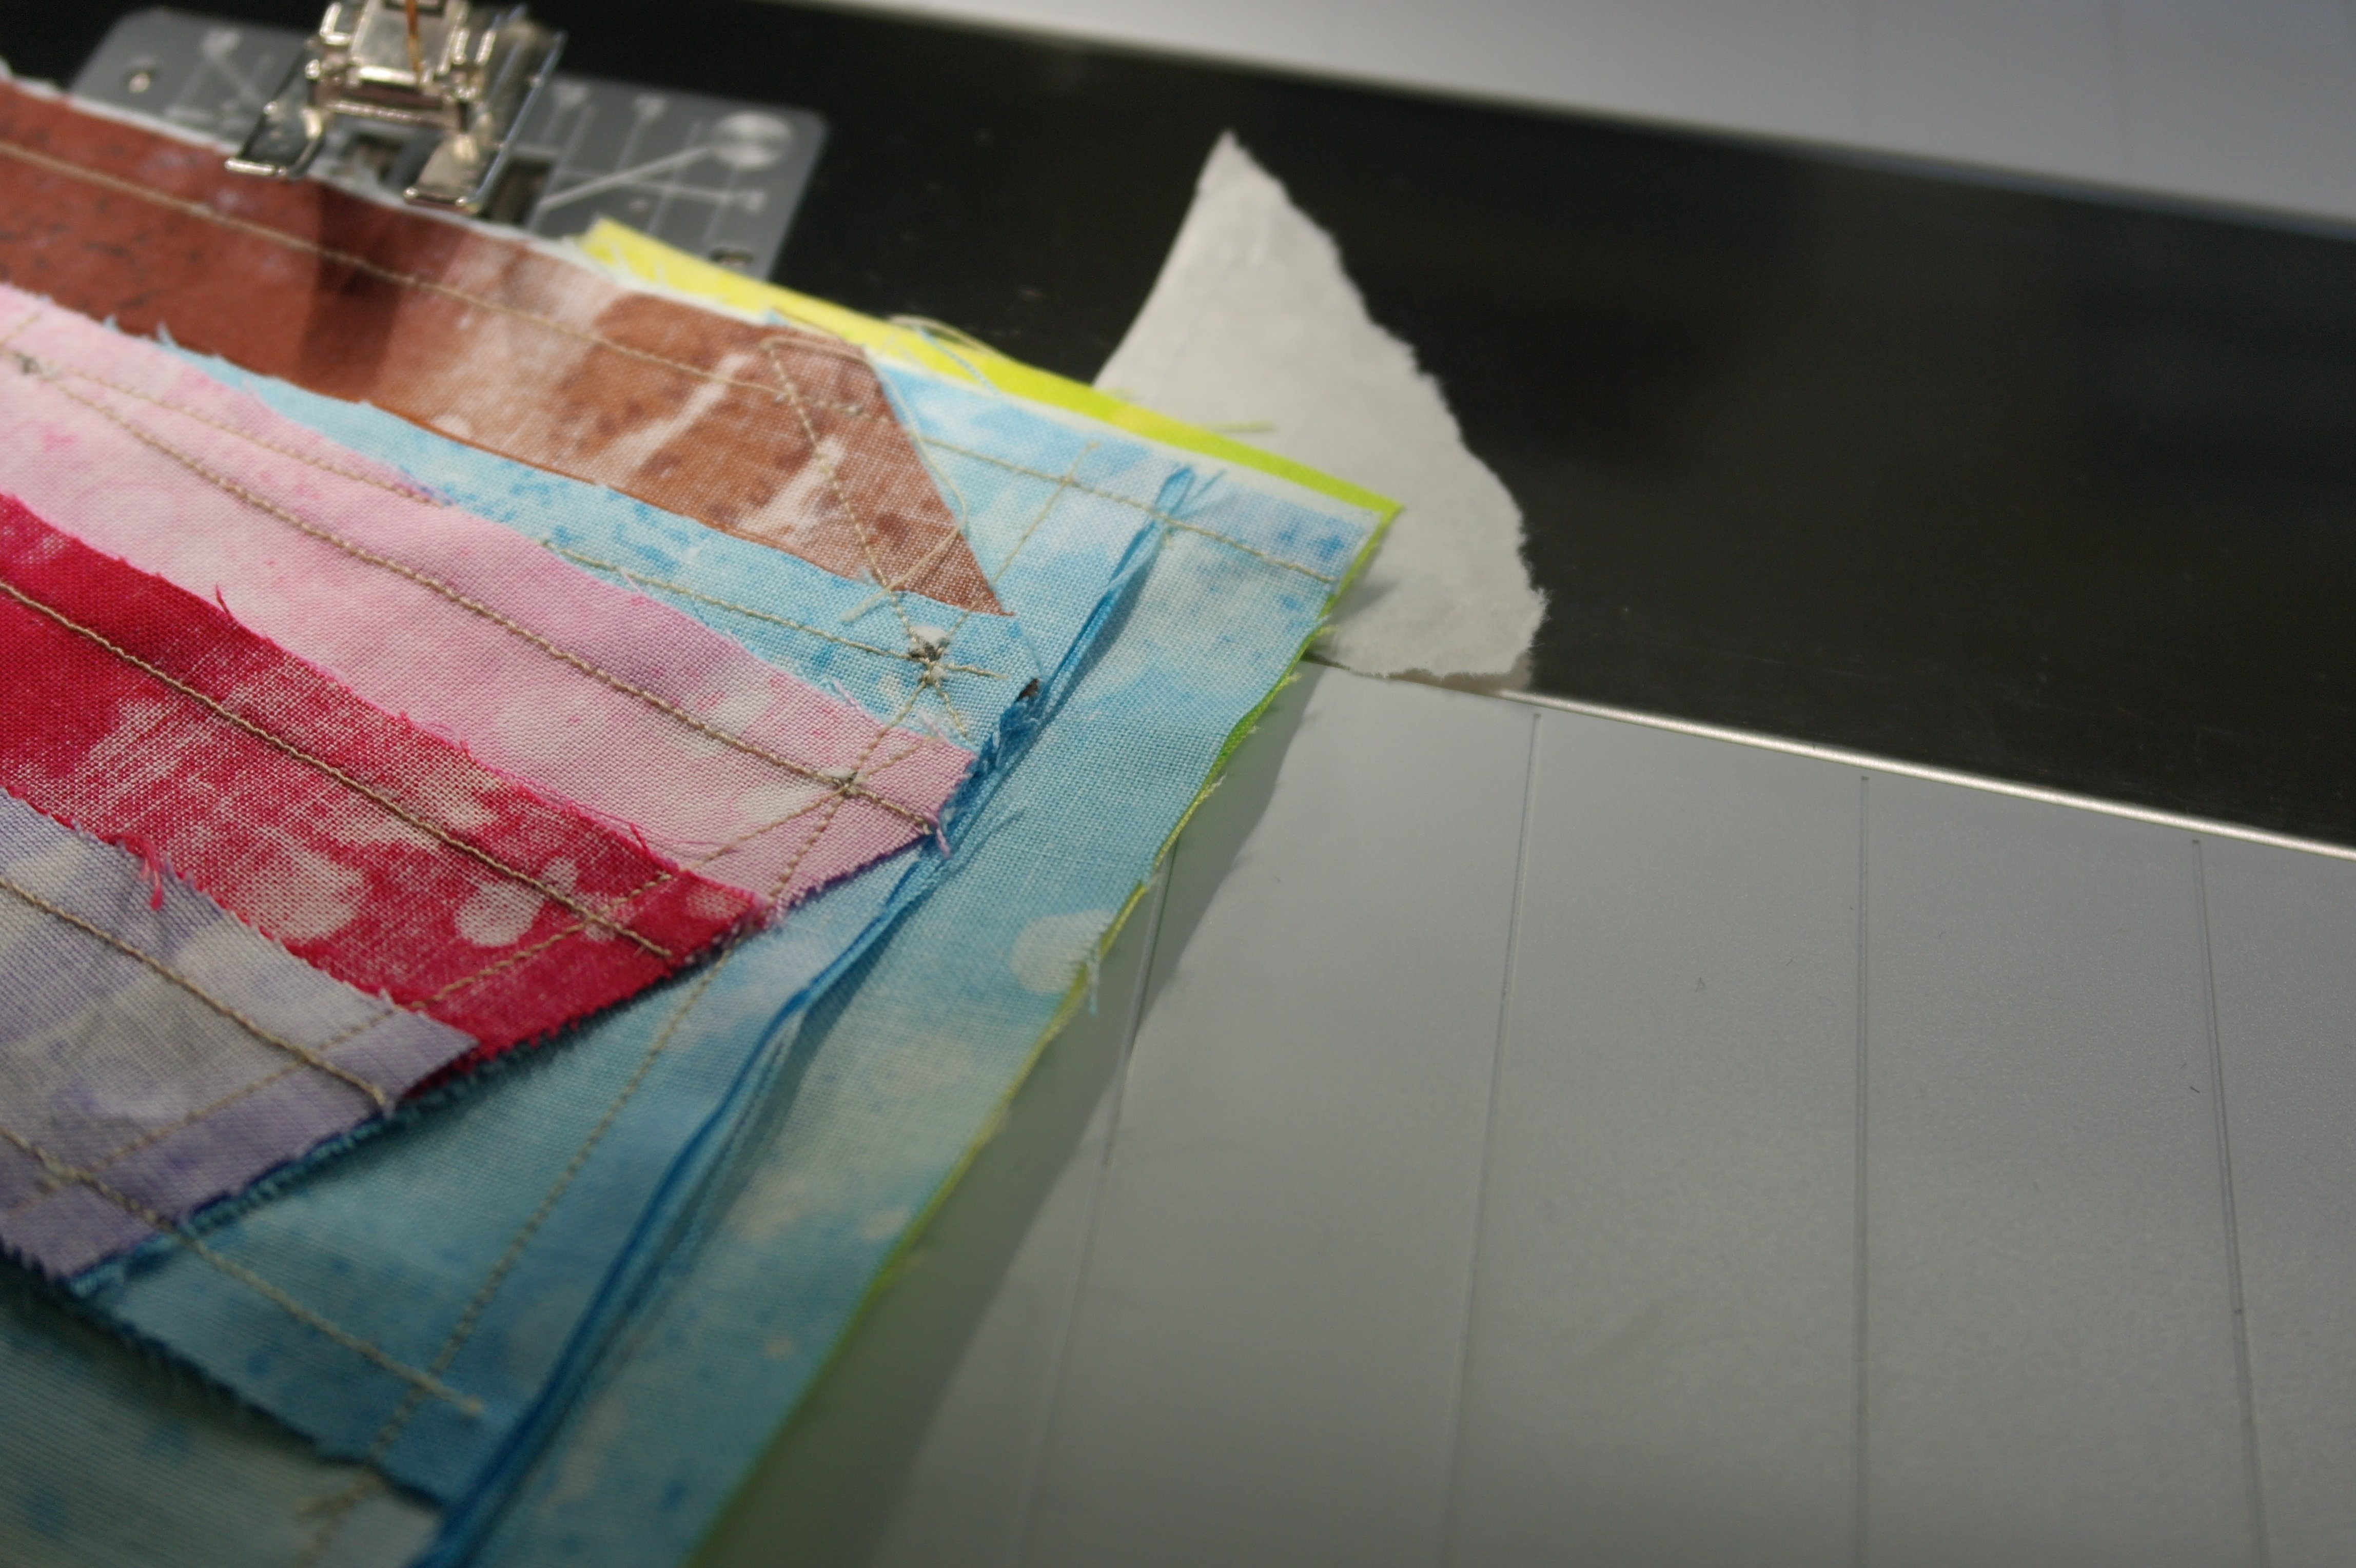
And before sewing: place a piece of pattern paper I’ve mentioned before, under the fabrics,
and sew, needle position on 4 to the right, needle 79/10 and Presser foot #20C, making a seam allowance of 0,5cm.

This piece of pattern paper has done its job: it can be pulled off.
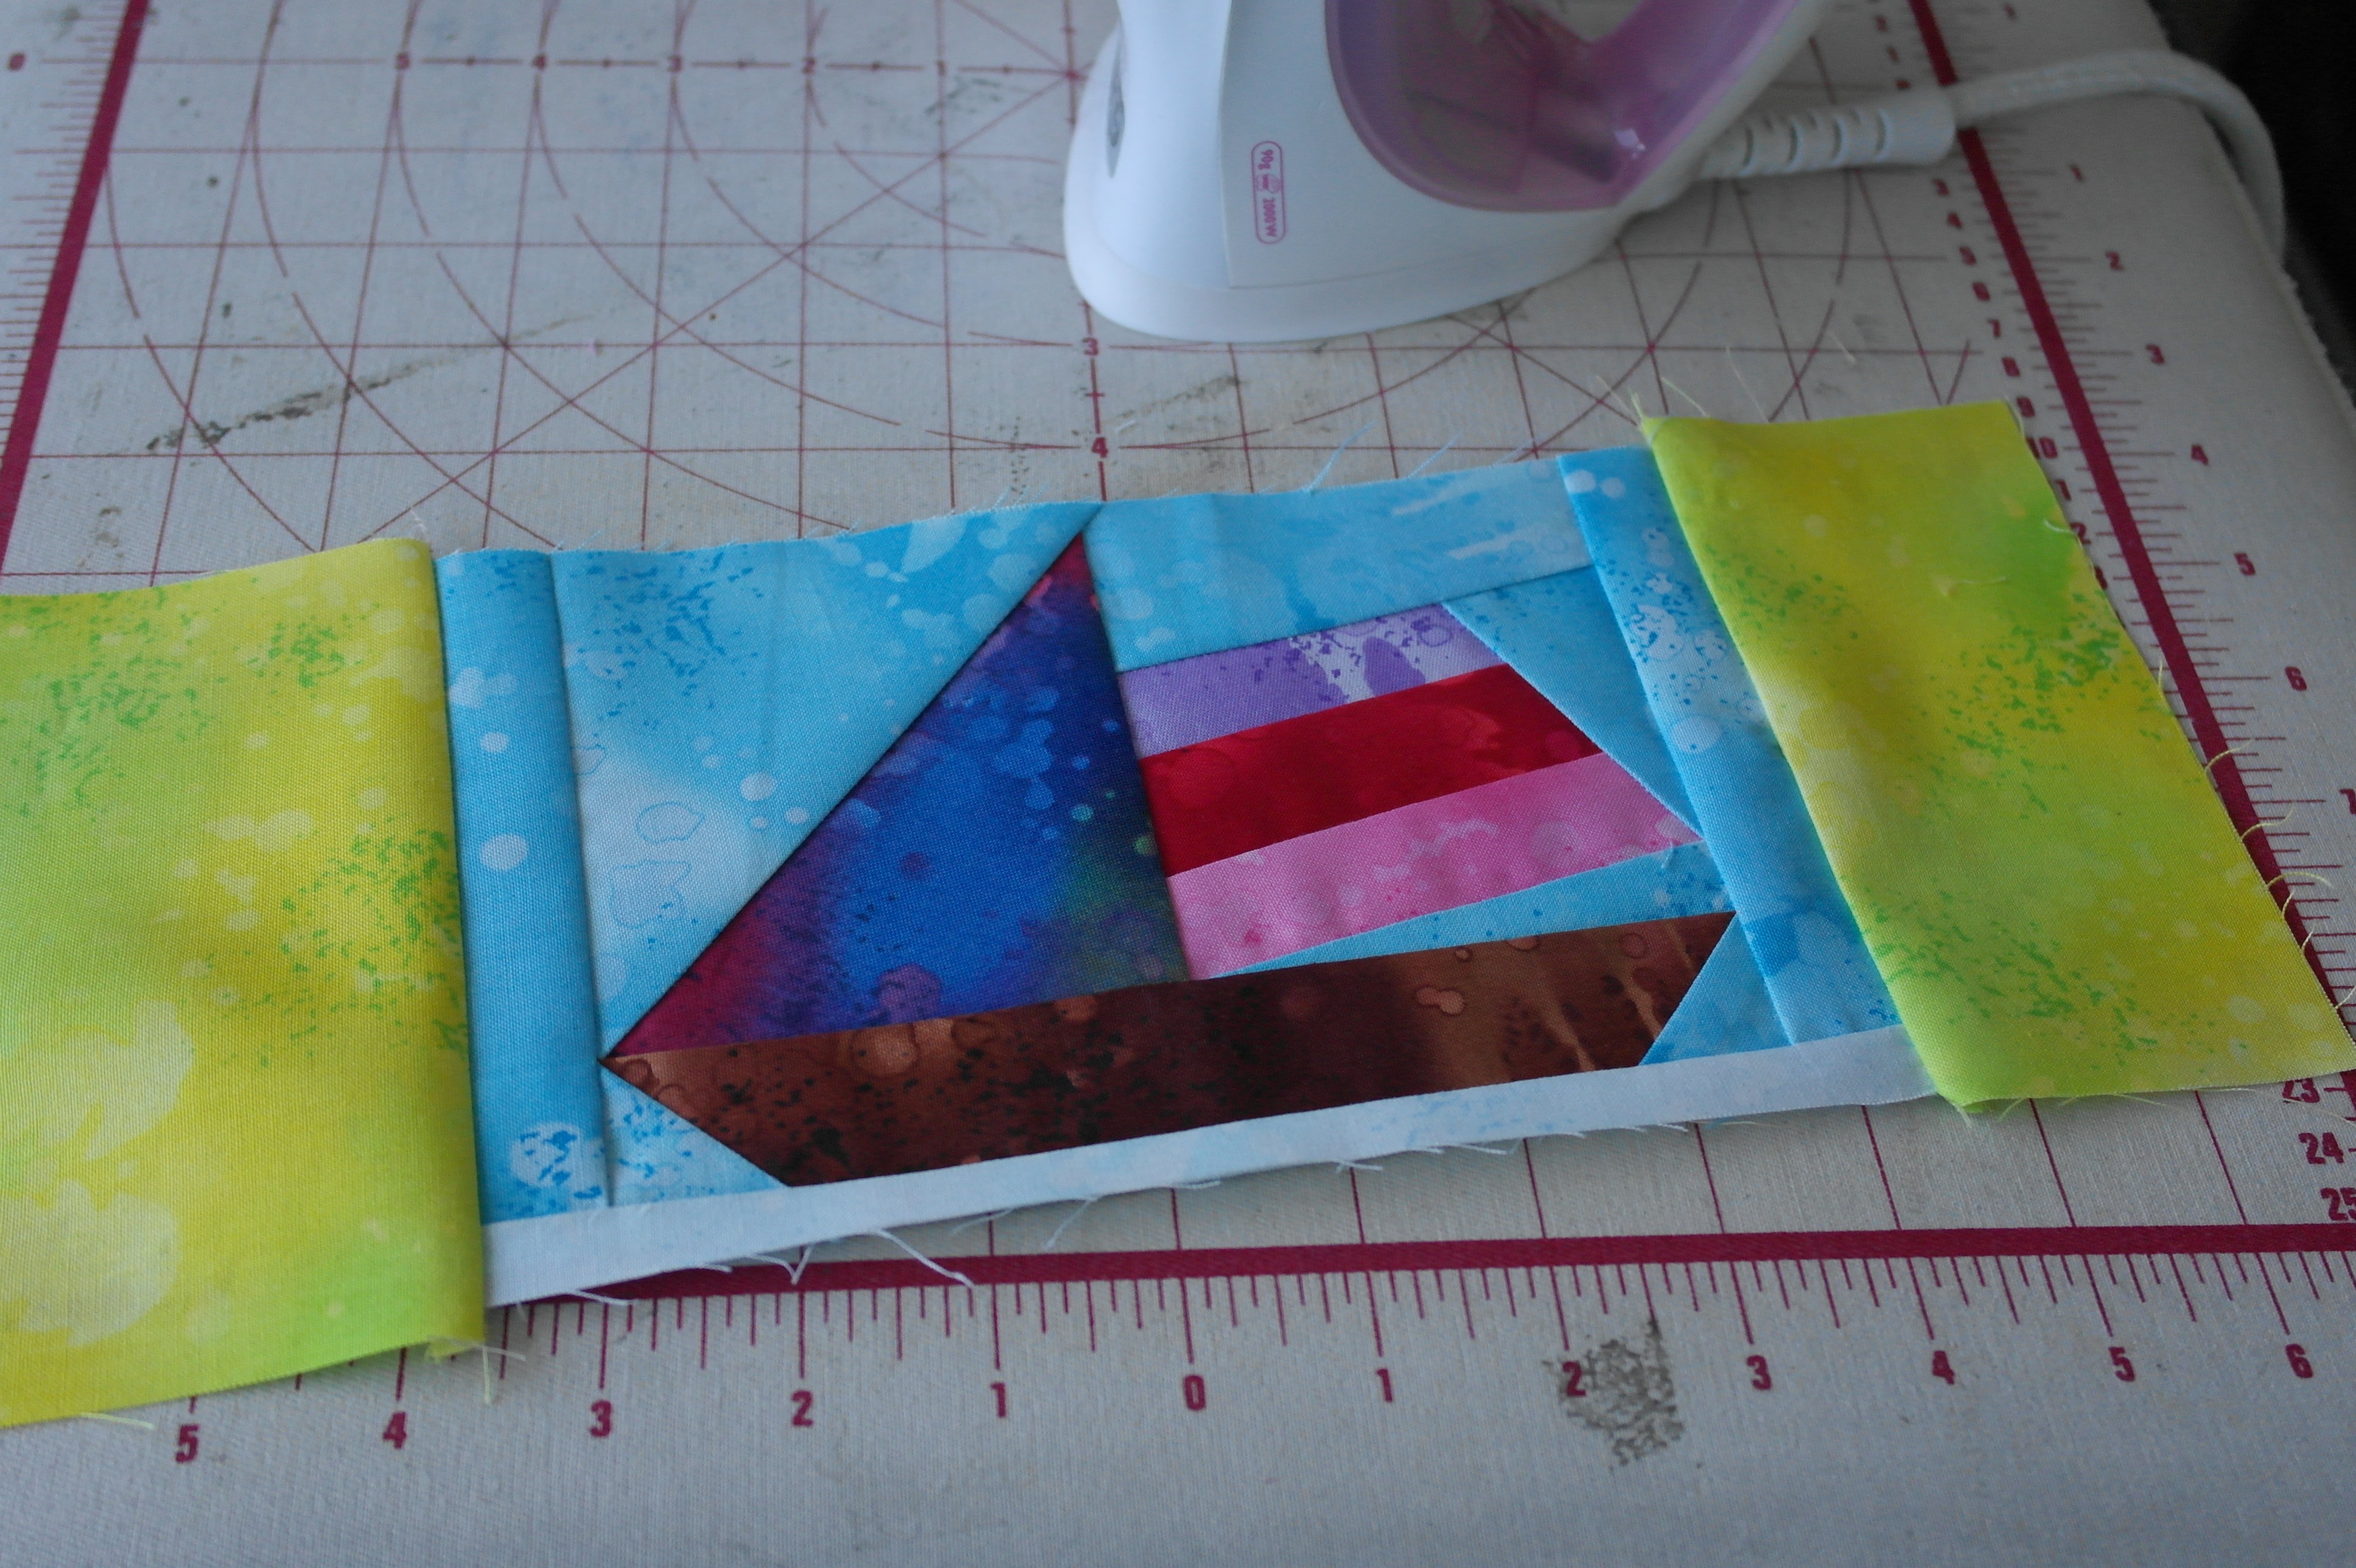
Fold both smaller pieces of fabric you’ve sewn on to the right side, and iron on the right side. All seam allowances are pointing outward.
Place this onto your cutting mat, use the quilting ruler and your rotary cutter to even the sides, at one side,
and also on the other side. By placing the ruler on the second side, you can see that – after cutting it back/even it – the measurement/width of the piece is now 13 cm.
I have sewn on all smaller pieces, and cut all 6 back. Now the long strips can be sewn on.

Be sure the seam allowances are flat: with paper piecing, they have a natural way of falling to a side, because of the sewing sequence. Be sure the seam allowances of the pieces of fabric are all pointing outward.
After the two larger strips are sewn on, you will have a slightly larger size block + seam allowances.
When sewing the larger strips onto the rest, you can find them slightly shorter compared to the rest. If you have cut your smaller strips larger than necessary, that will be the case. As long as the larger strips are 32/34 cm wide, it will be ok, but use the Bohin Glue Pen to flue the strip onto the rest, starting from the center. That way you won’t be left with matching left side and coming short on the other side.
Fold the strips that you’ve sewn on to the right side and iron them . Seam allowances are pointing outward.

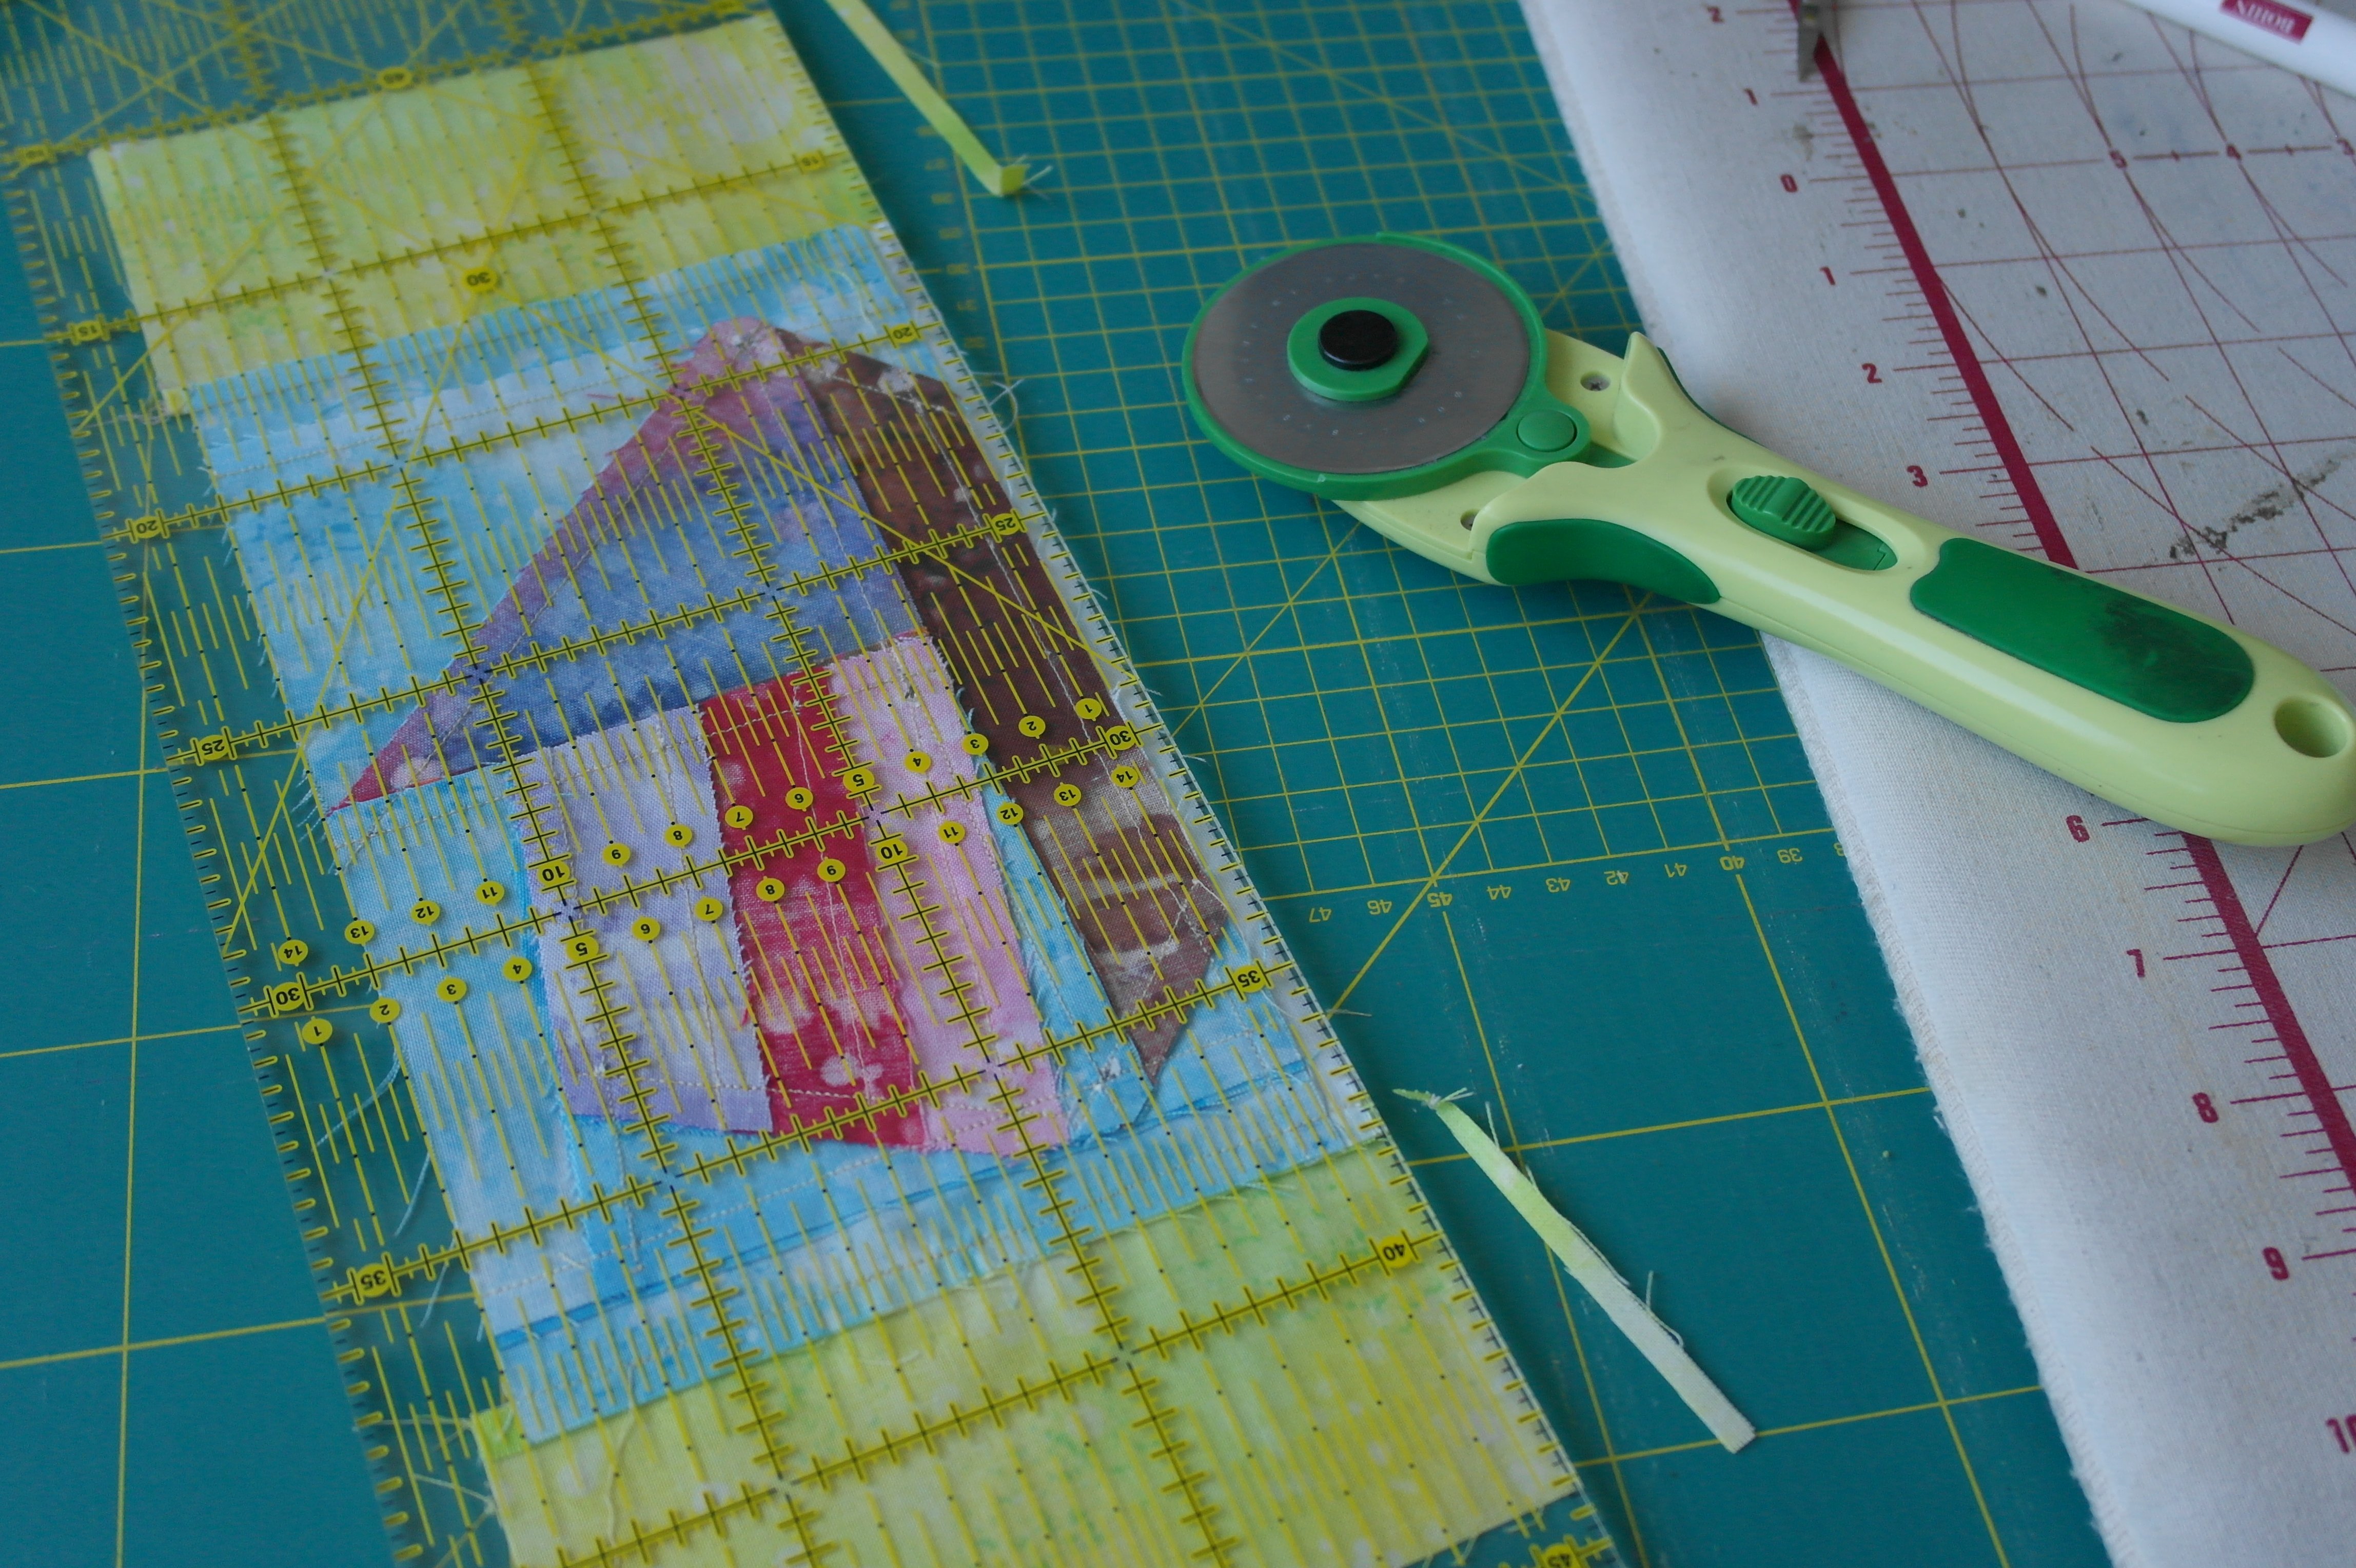
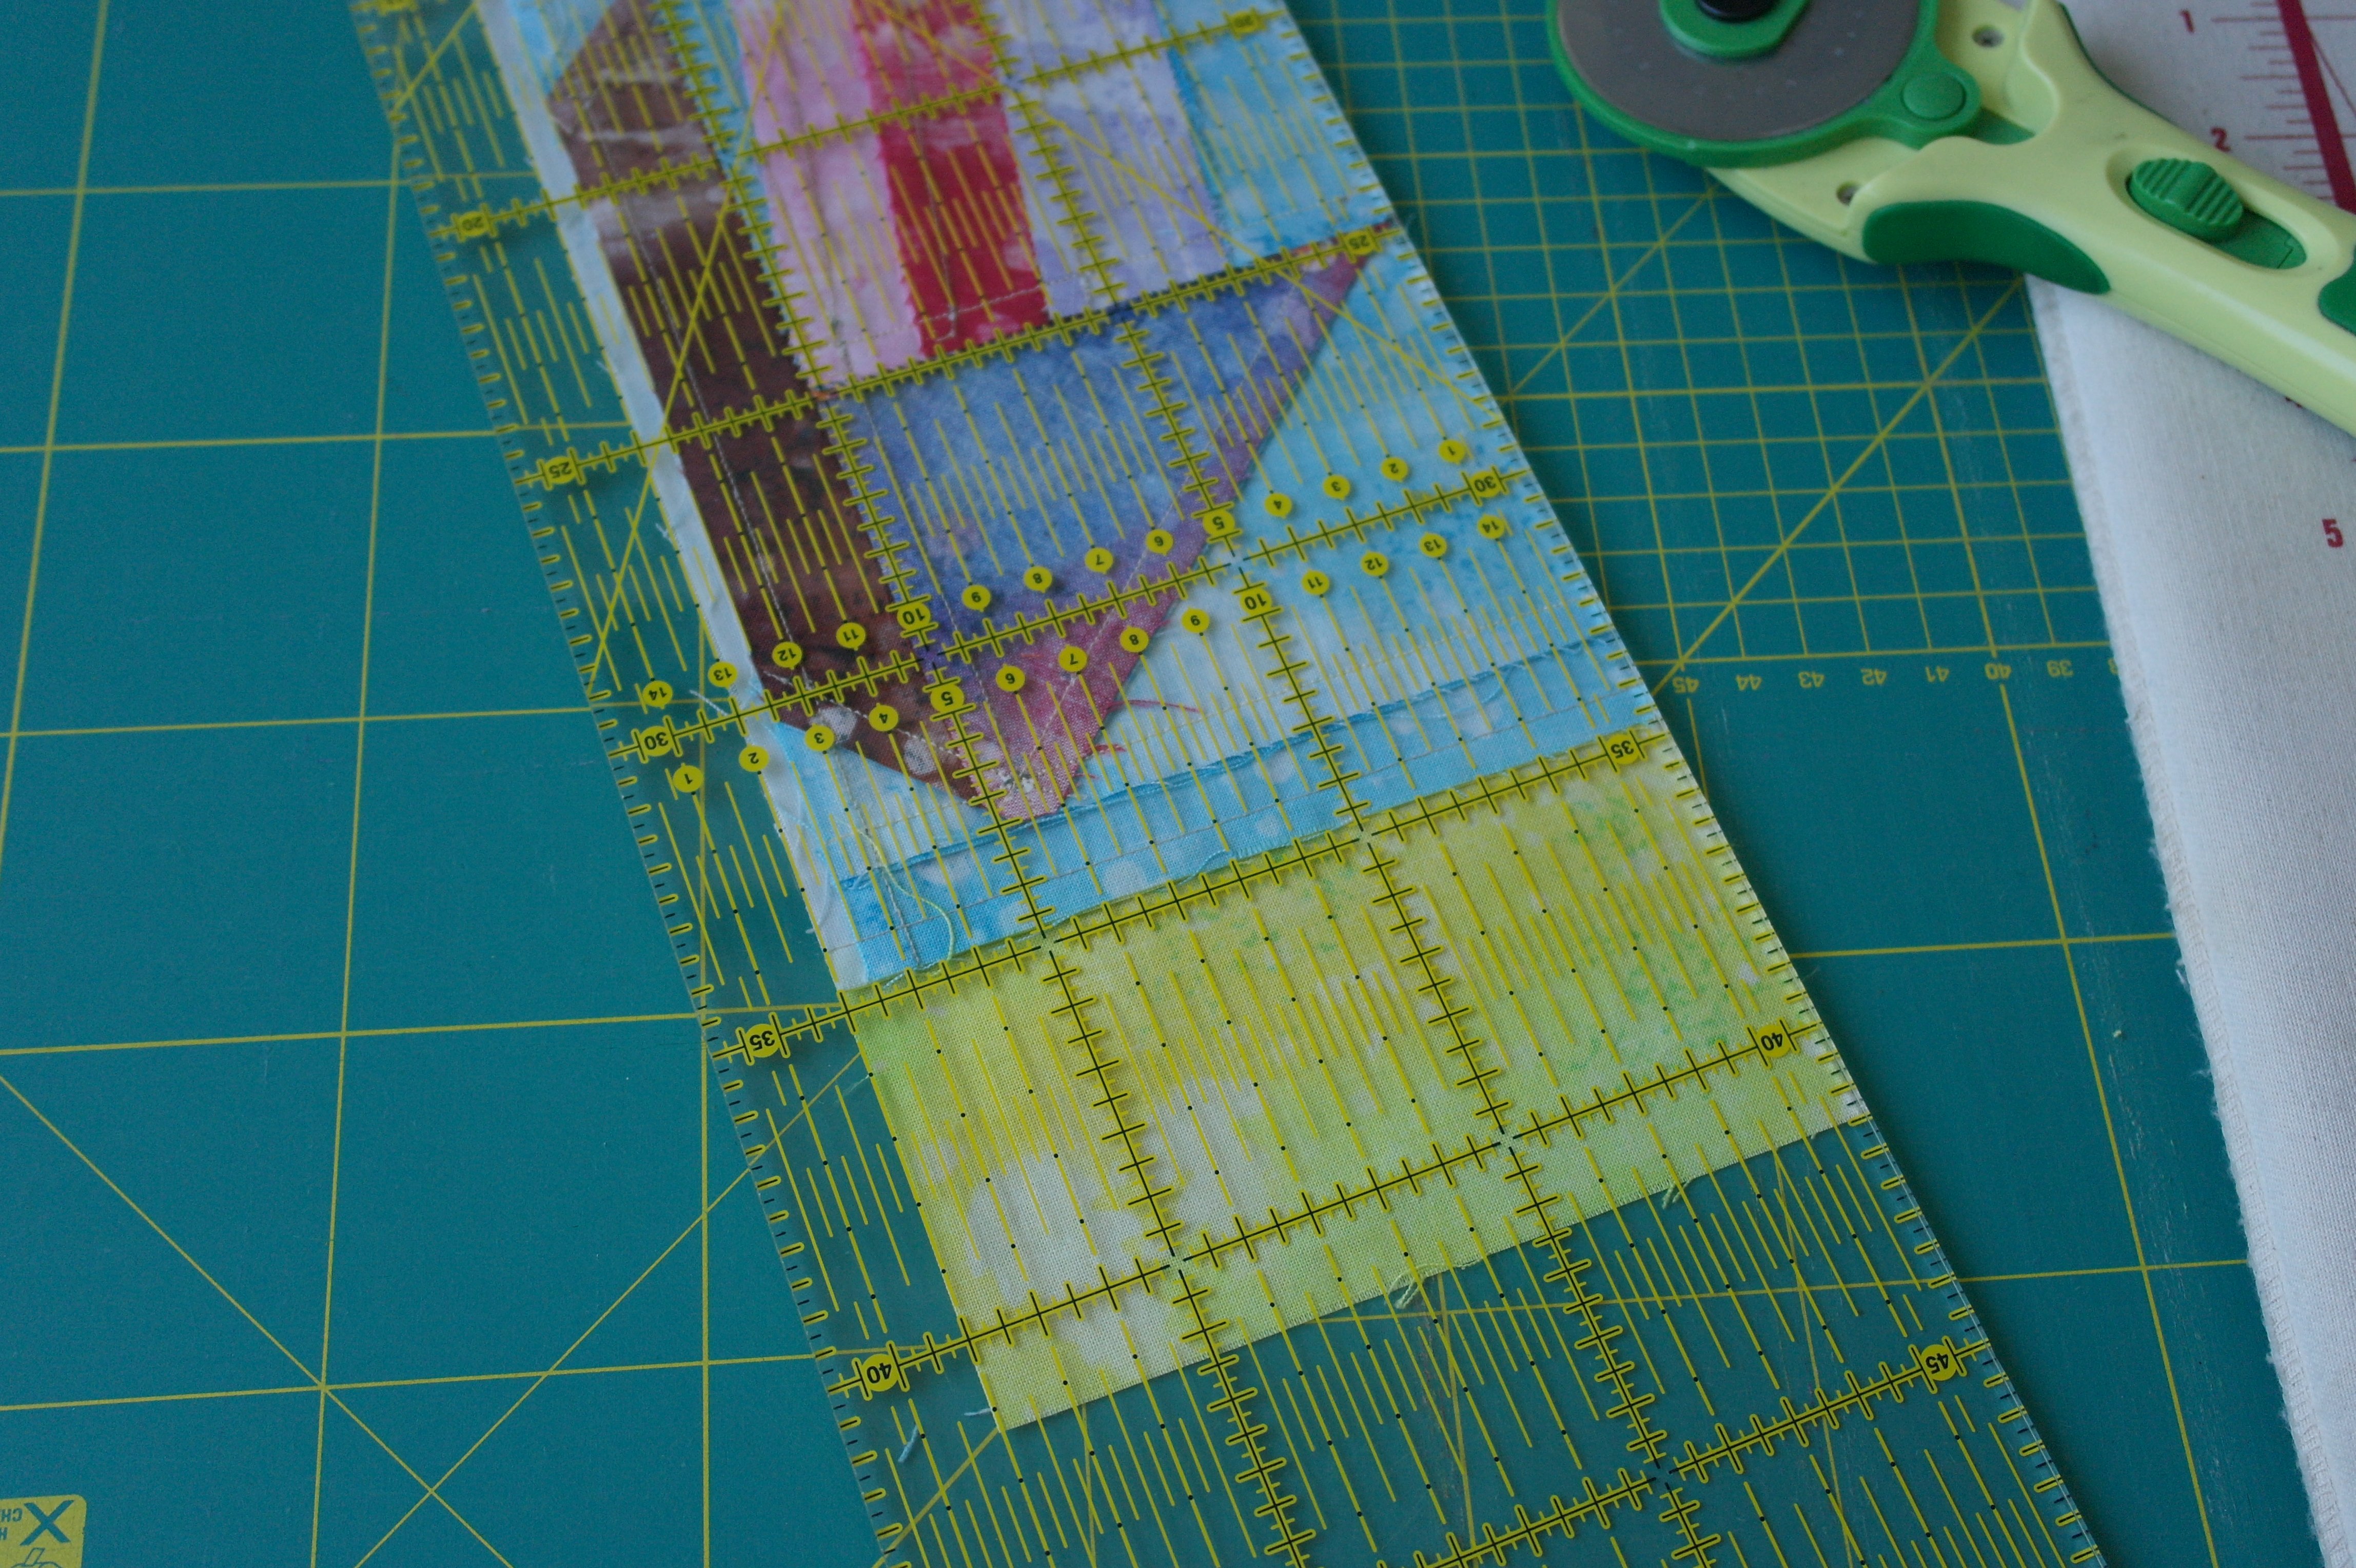
My six boat blocks with fabrics = blocks are ready, for cutting them back to the right size.

I have used the grid of my cutting mat, and of course the quilting ruler and rotary cutter to cut the block back to 31x31c = finished size + 2 x 0,5cm seam allowance. My cutting mat is 60 x 90 cm, and has that grid. If you don’t own such a cutting mat, or have one without this fine centimeter grid, cut a template 31x31cm, and use that to cut your block to the right size.
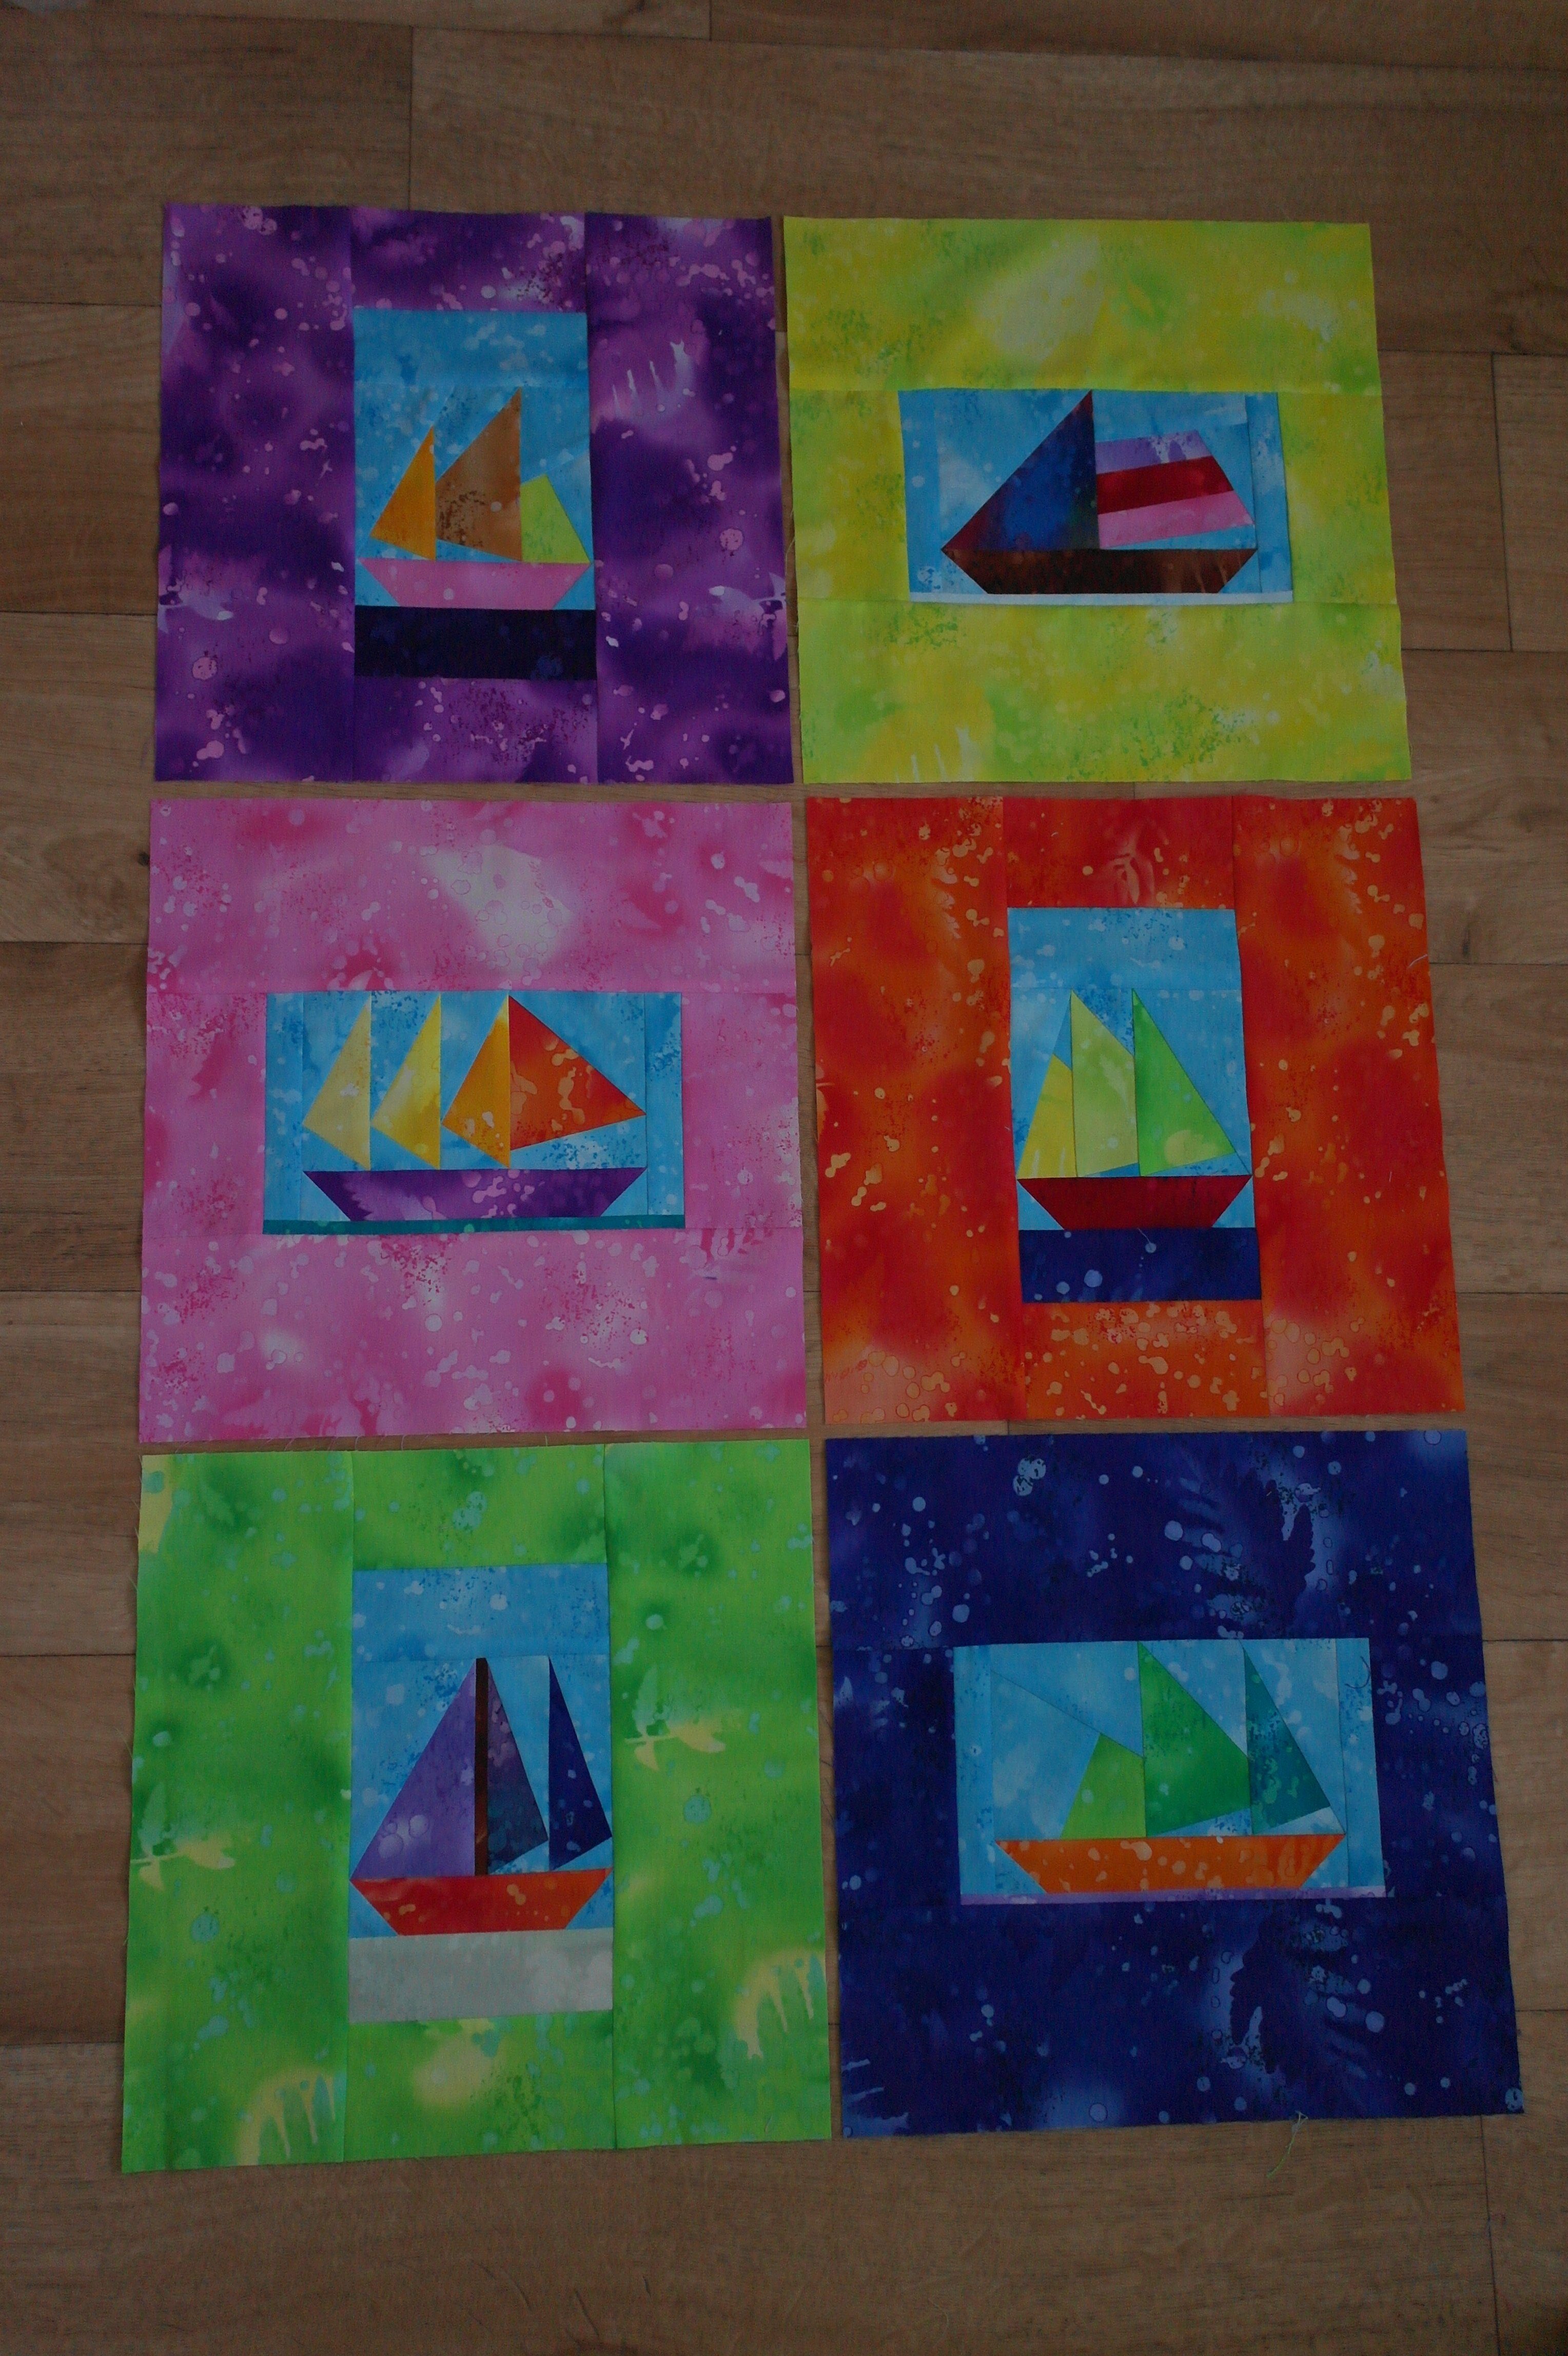
Now they are all cut back, and placed in the order of assembly, for making my quilt. If you want to make 6 seperate pillow cases, just quilt them separately. *
Making the quilt.
I will sew the blocks in rows, two by two, using an exact seam allowance of 0,5cm again. It should all match.
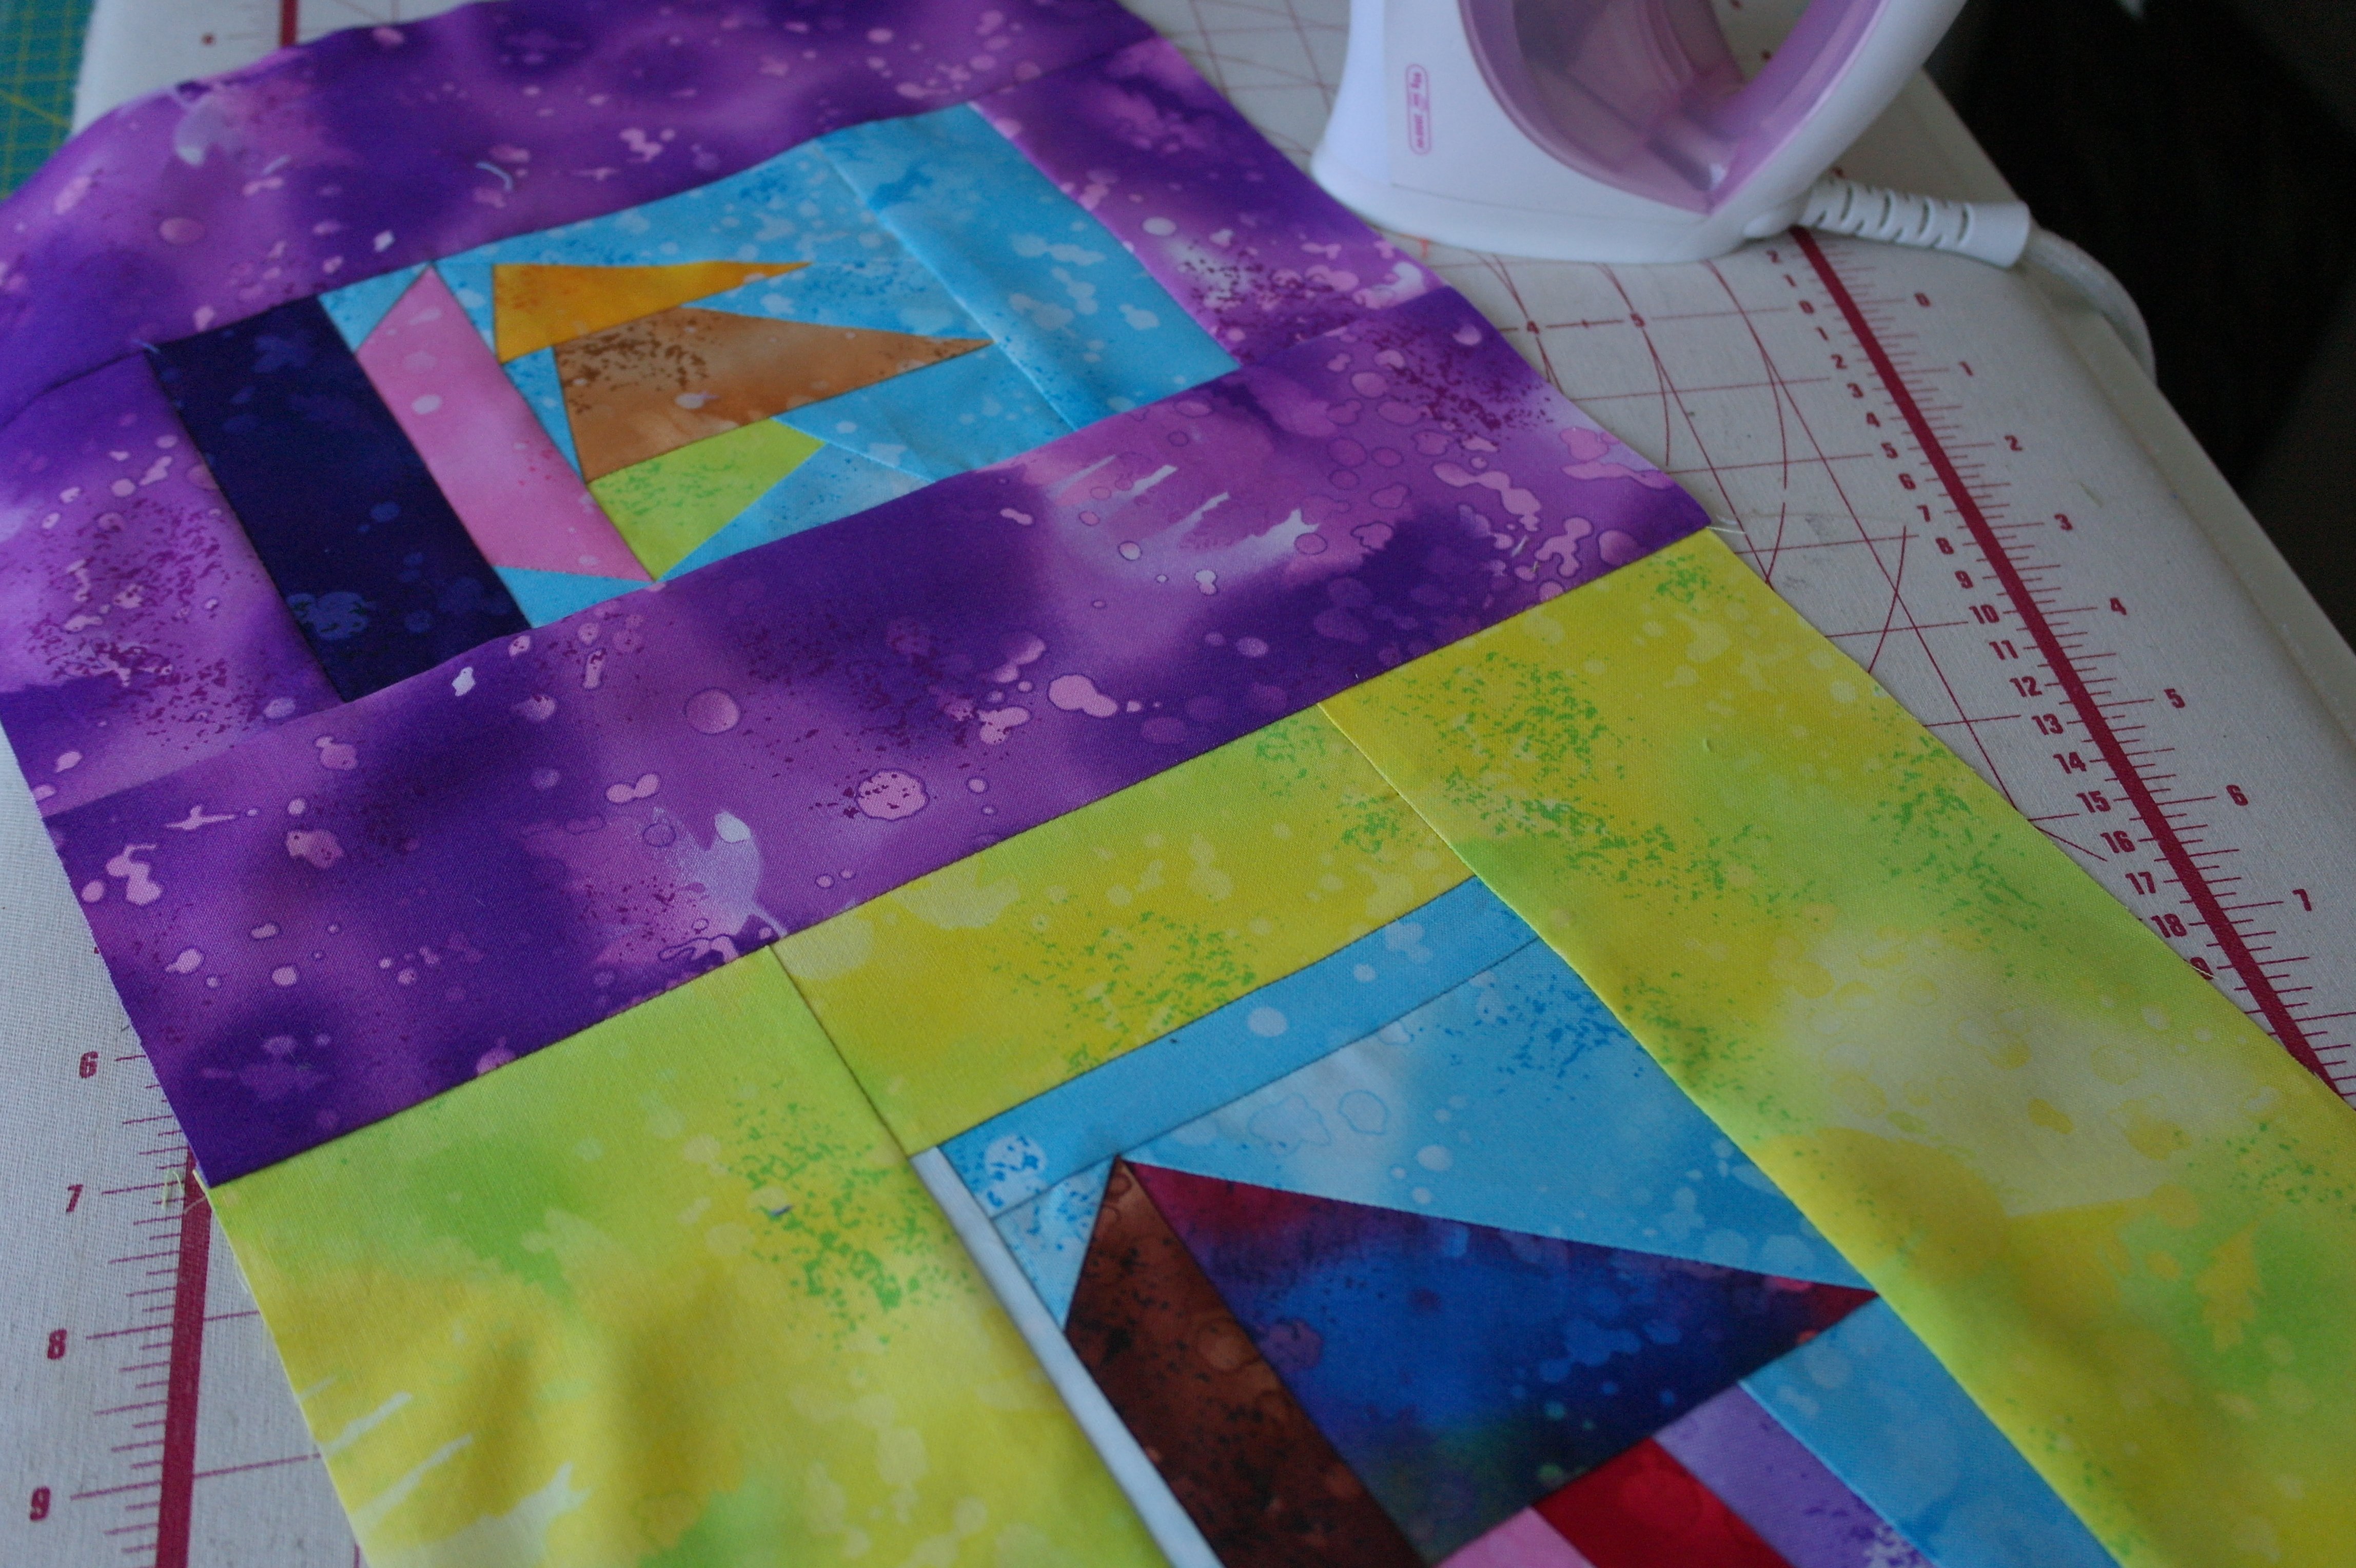
I’ve ironed the seam allowance towards the large strip of each block. If you do that with each row, the seam allowances will point away from each other at cross points. With my blocks row 1 I’ve ironed them to the left/large strip, row 2 to the right and row 3 to the left again.
Sewing the rows together: you will see that interlocking seam allowances gives you a matching intersections.

Holding it like the picture, one seam allowance points to the left, and one to the right. If you’re worried the seam allowances will change direction when sewing, just place a bit of Bohin Glue inside them, to glue them onto the seam allowance. It will hold that position while sewing.
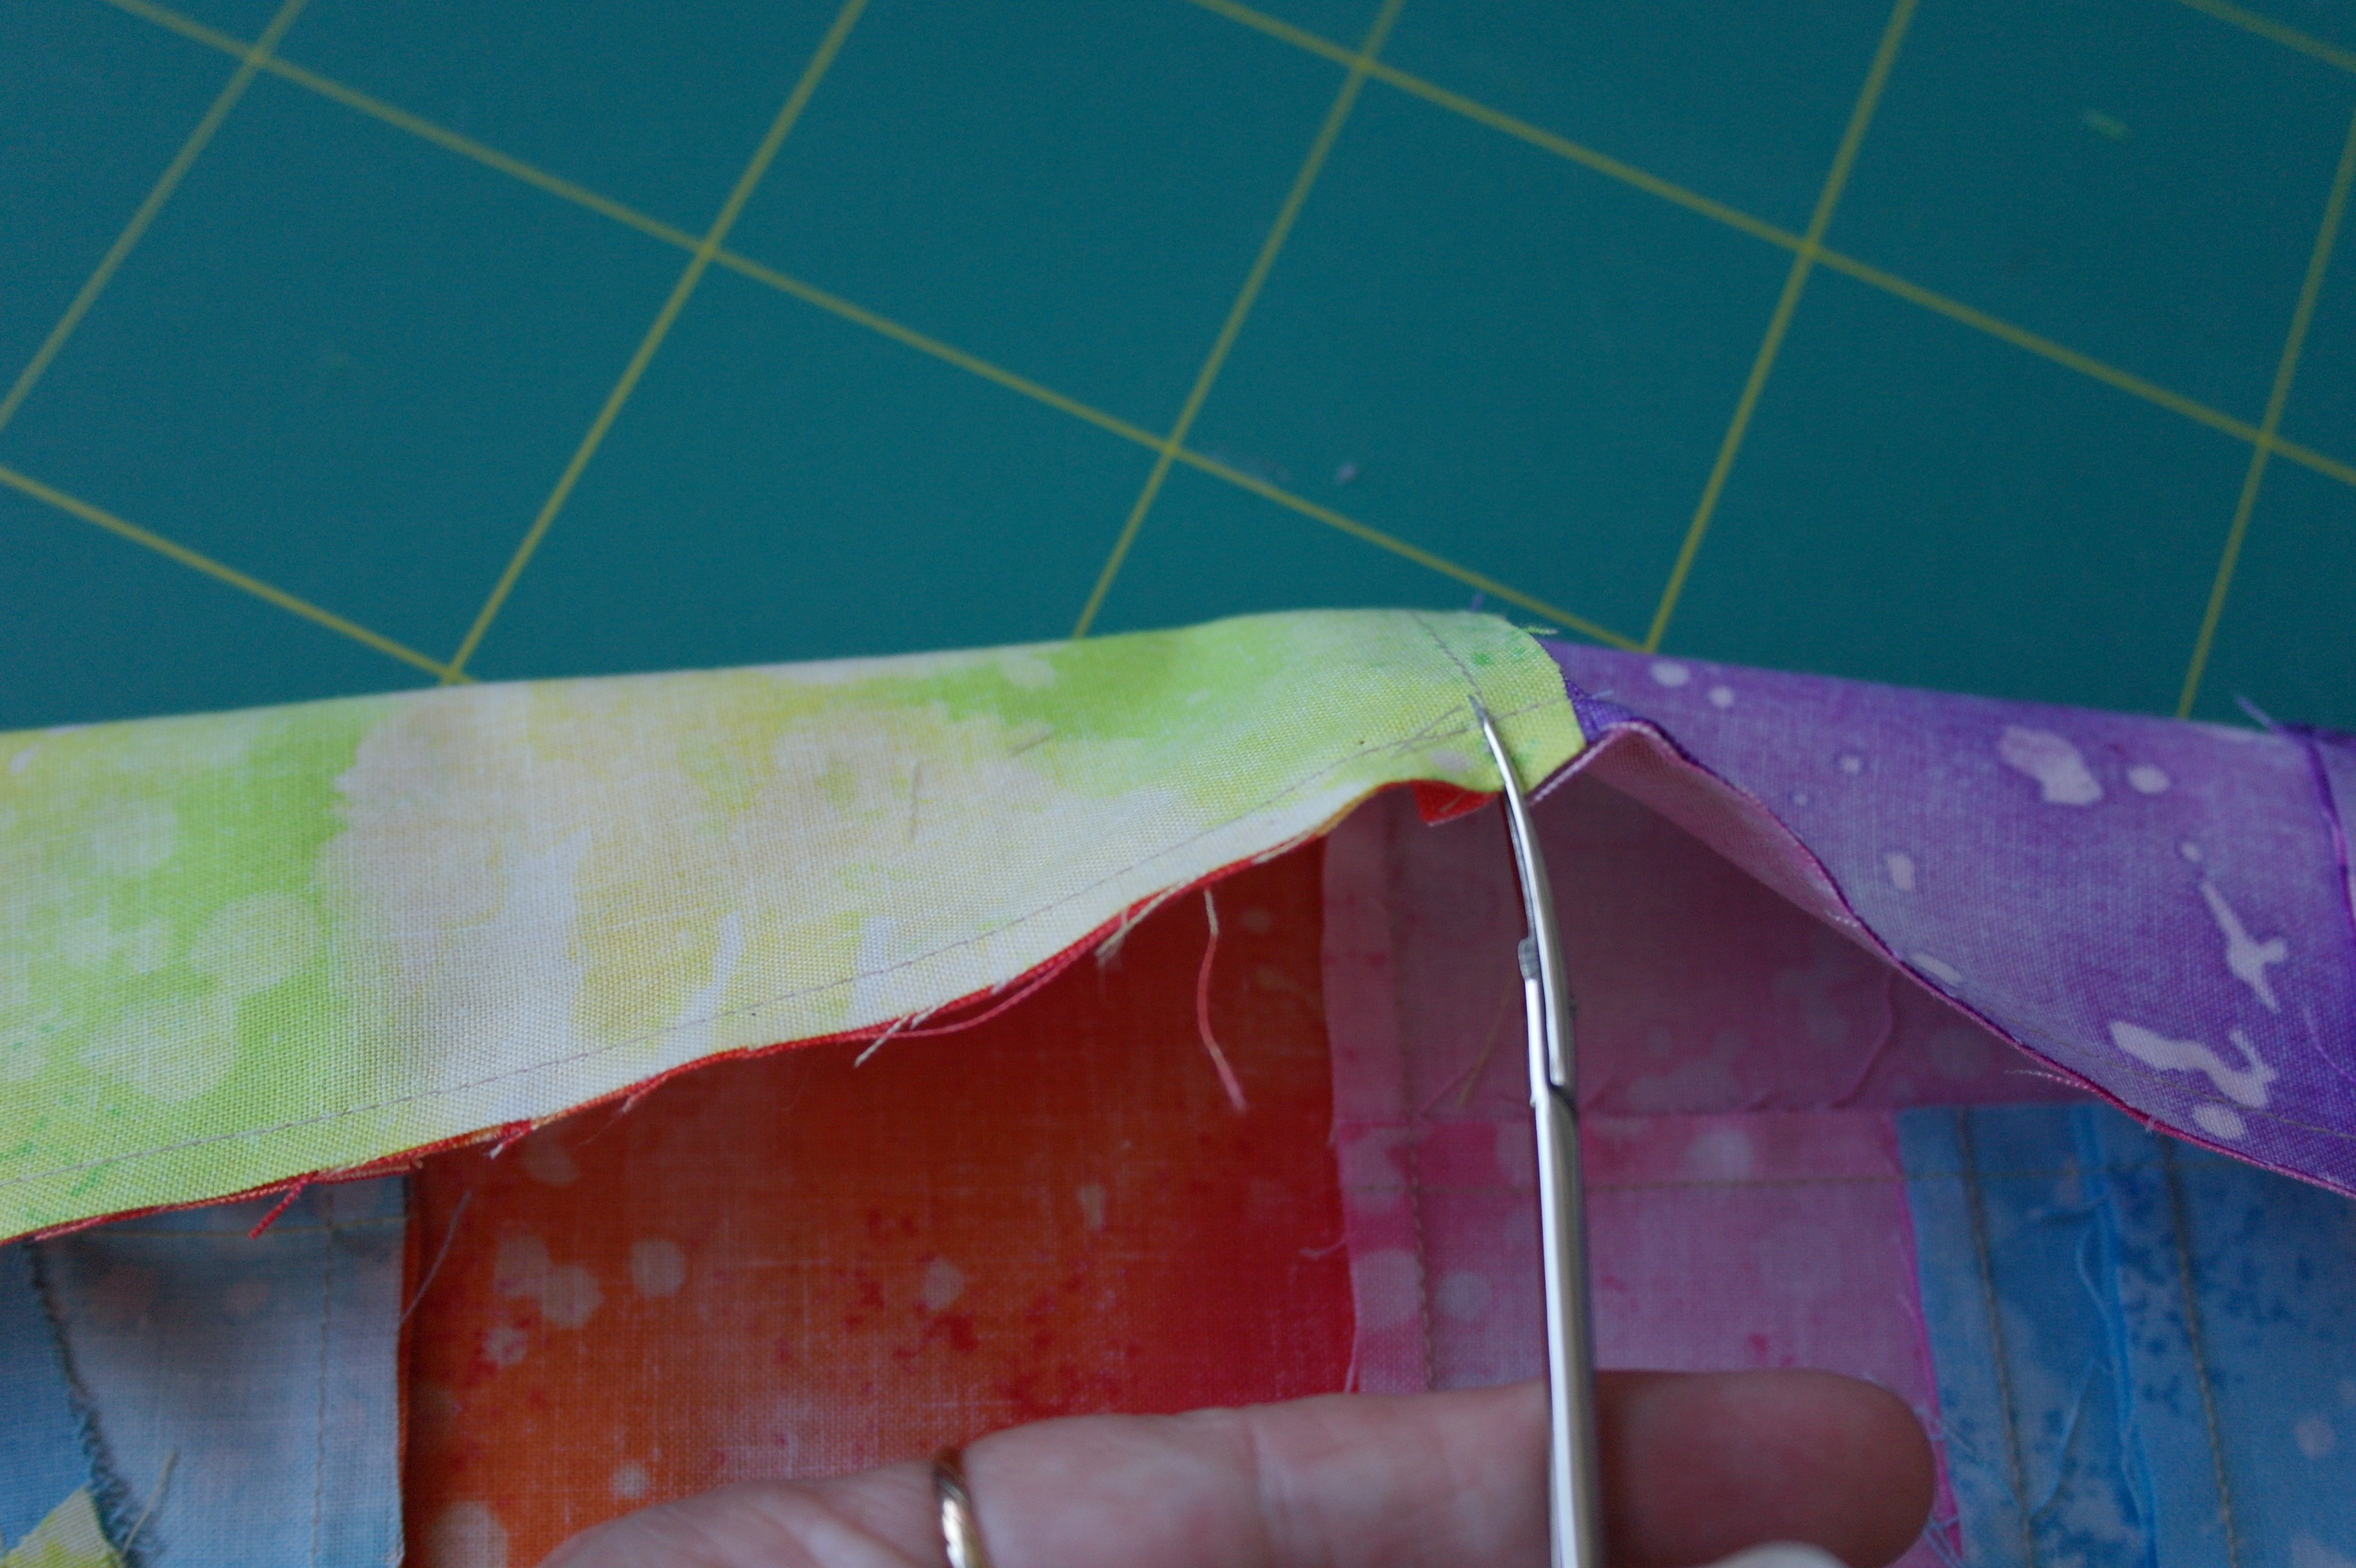
After sewing, cut into the seam allowance on the intersections: BE CAREFUL not to cut too deep. Just until the last stitch/row of stitches. If you don’t want to cut, unravel the stitches up to the last stitch on the intersection.
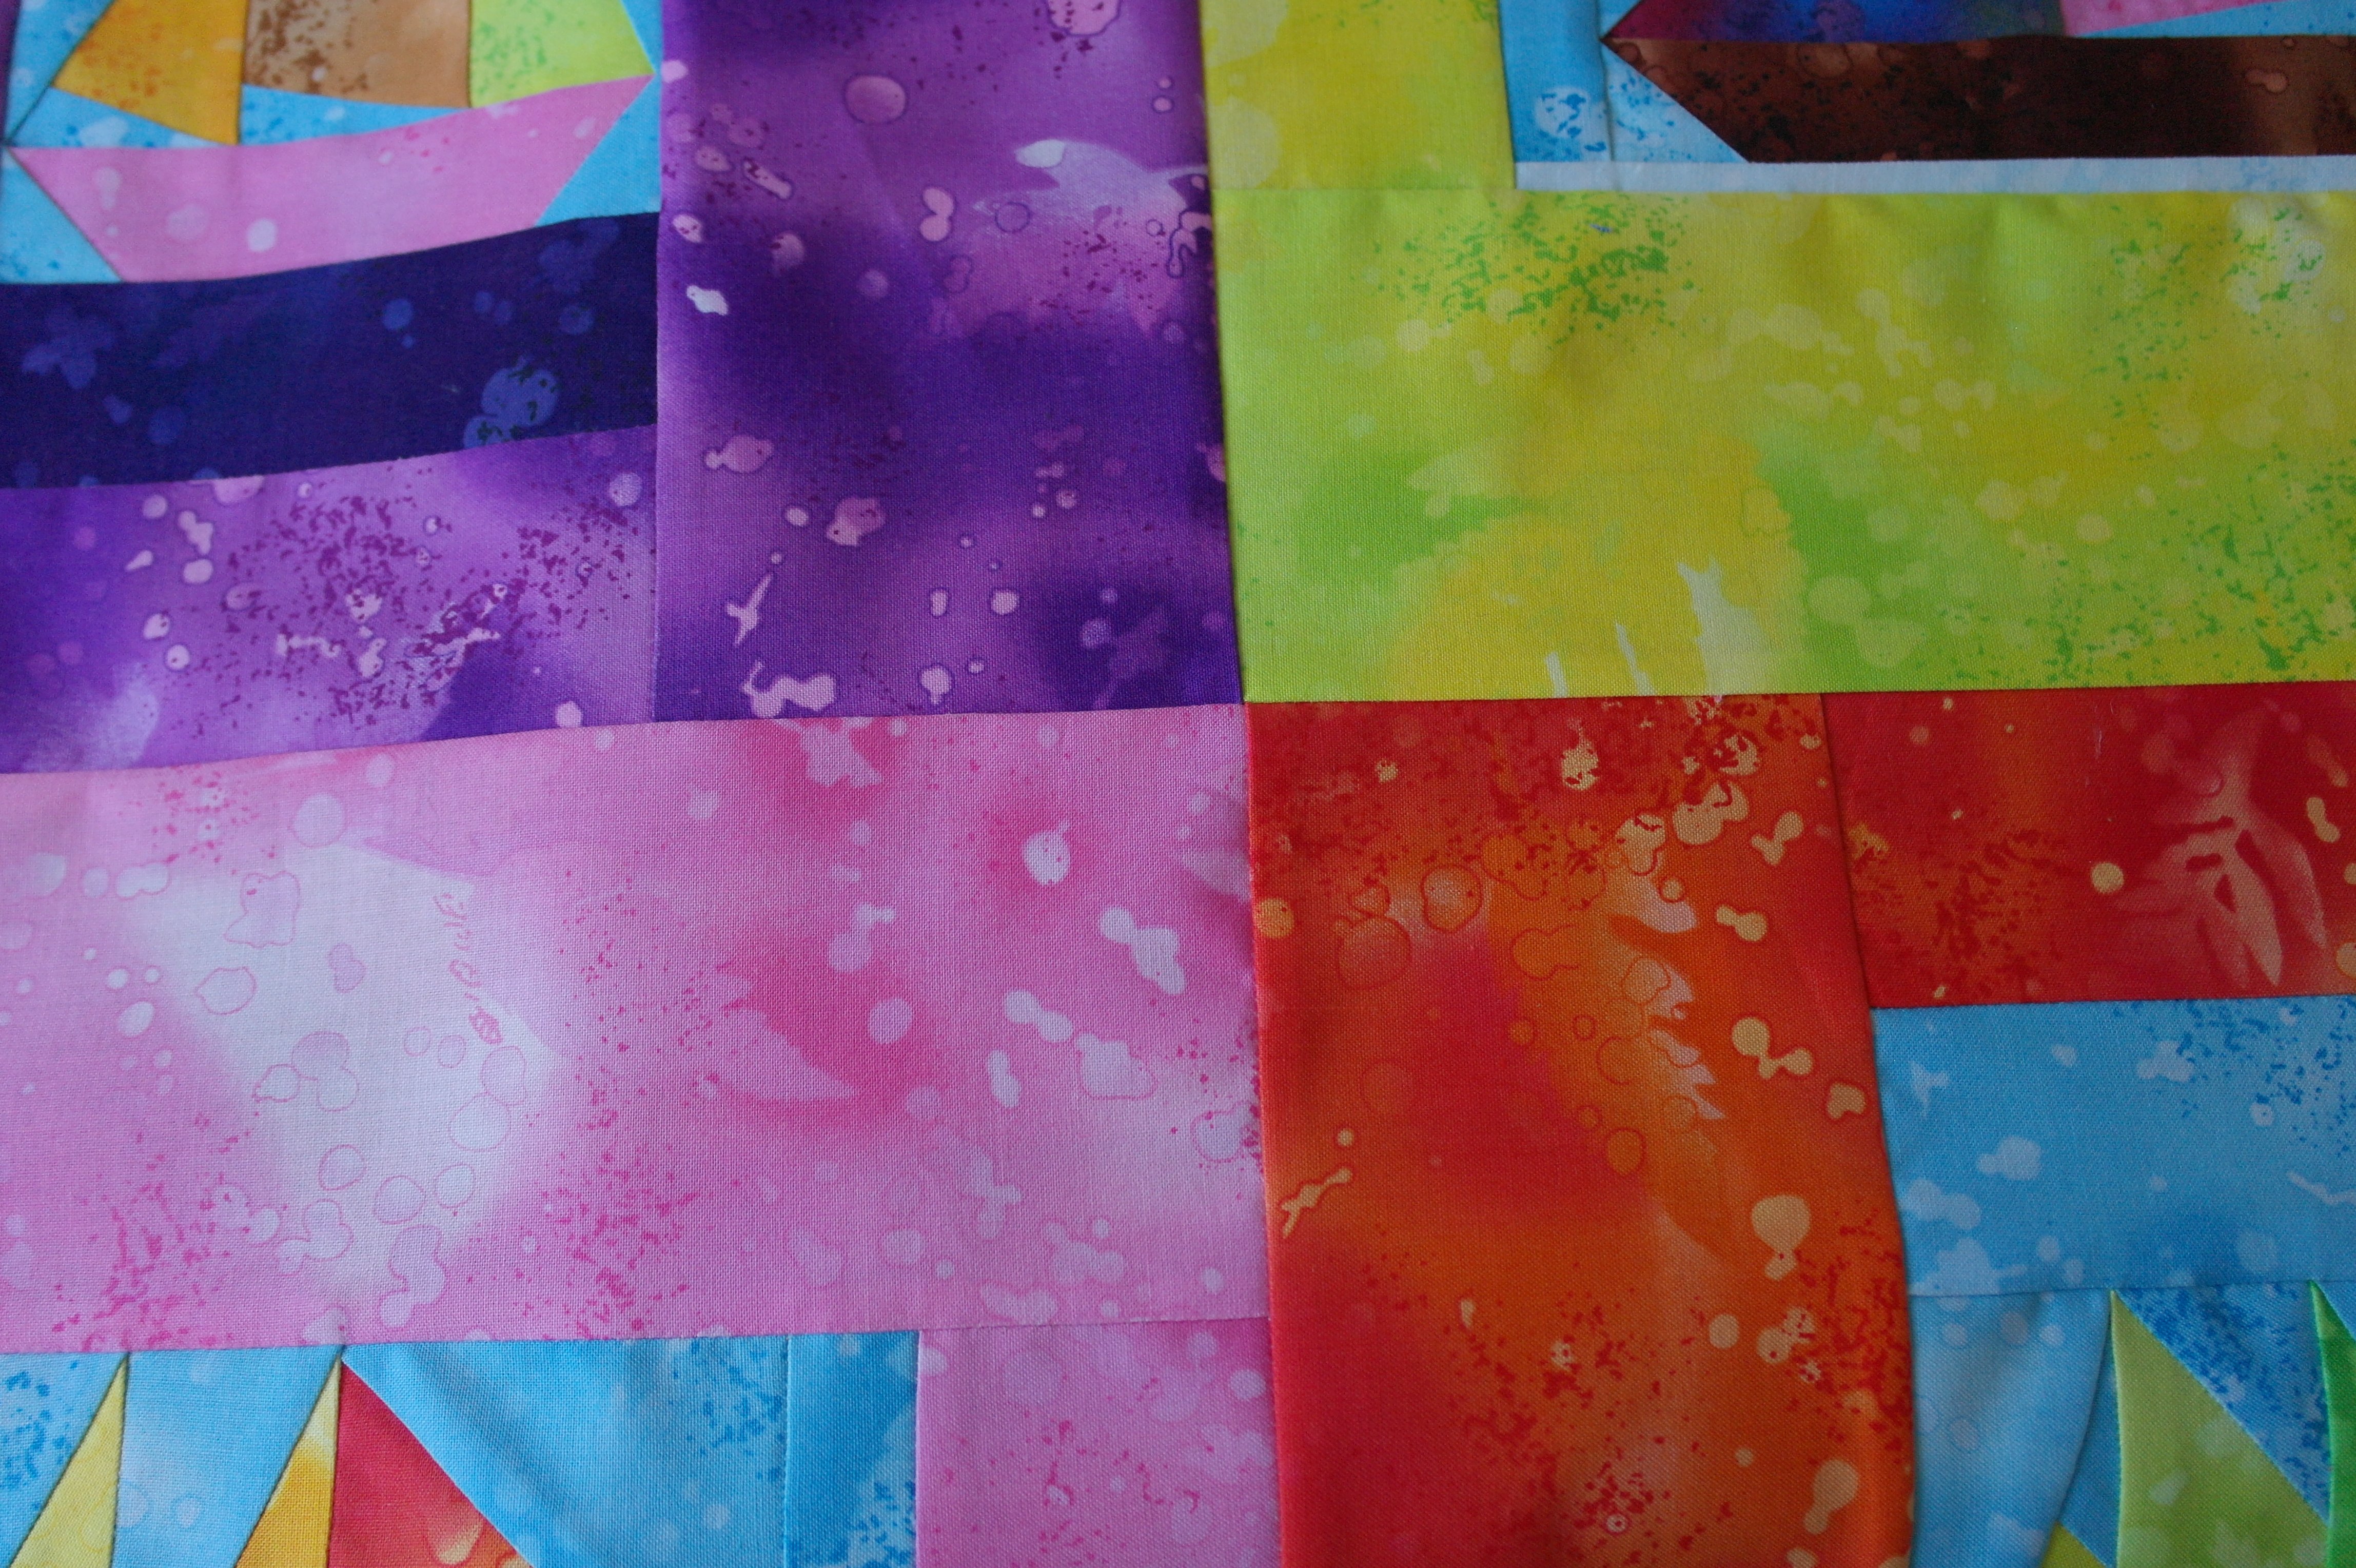
Now you can see that my intersections match,

Because I have cut into the intersection, I was able to point the seam allowances of the larger pieces outward, which means they are facing opposite sides. If you don’t touch the intersection anymore, this will hold.
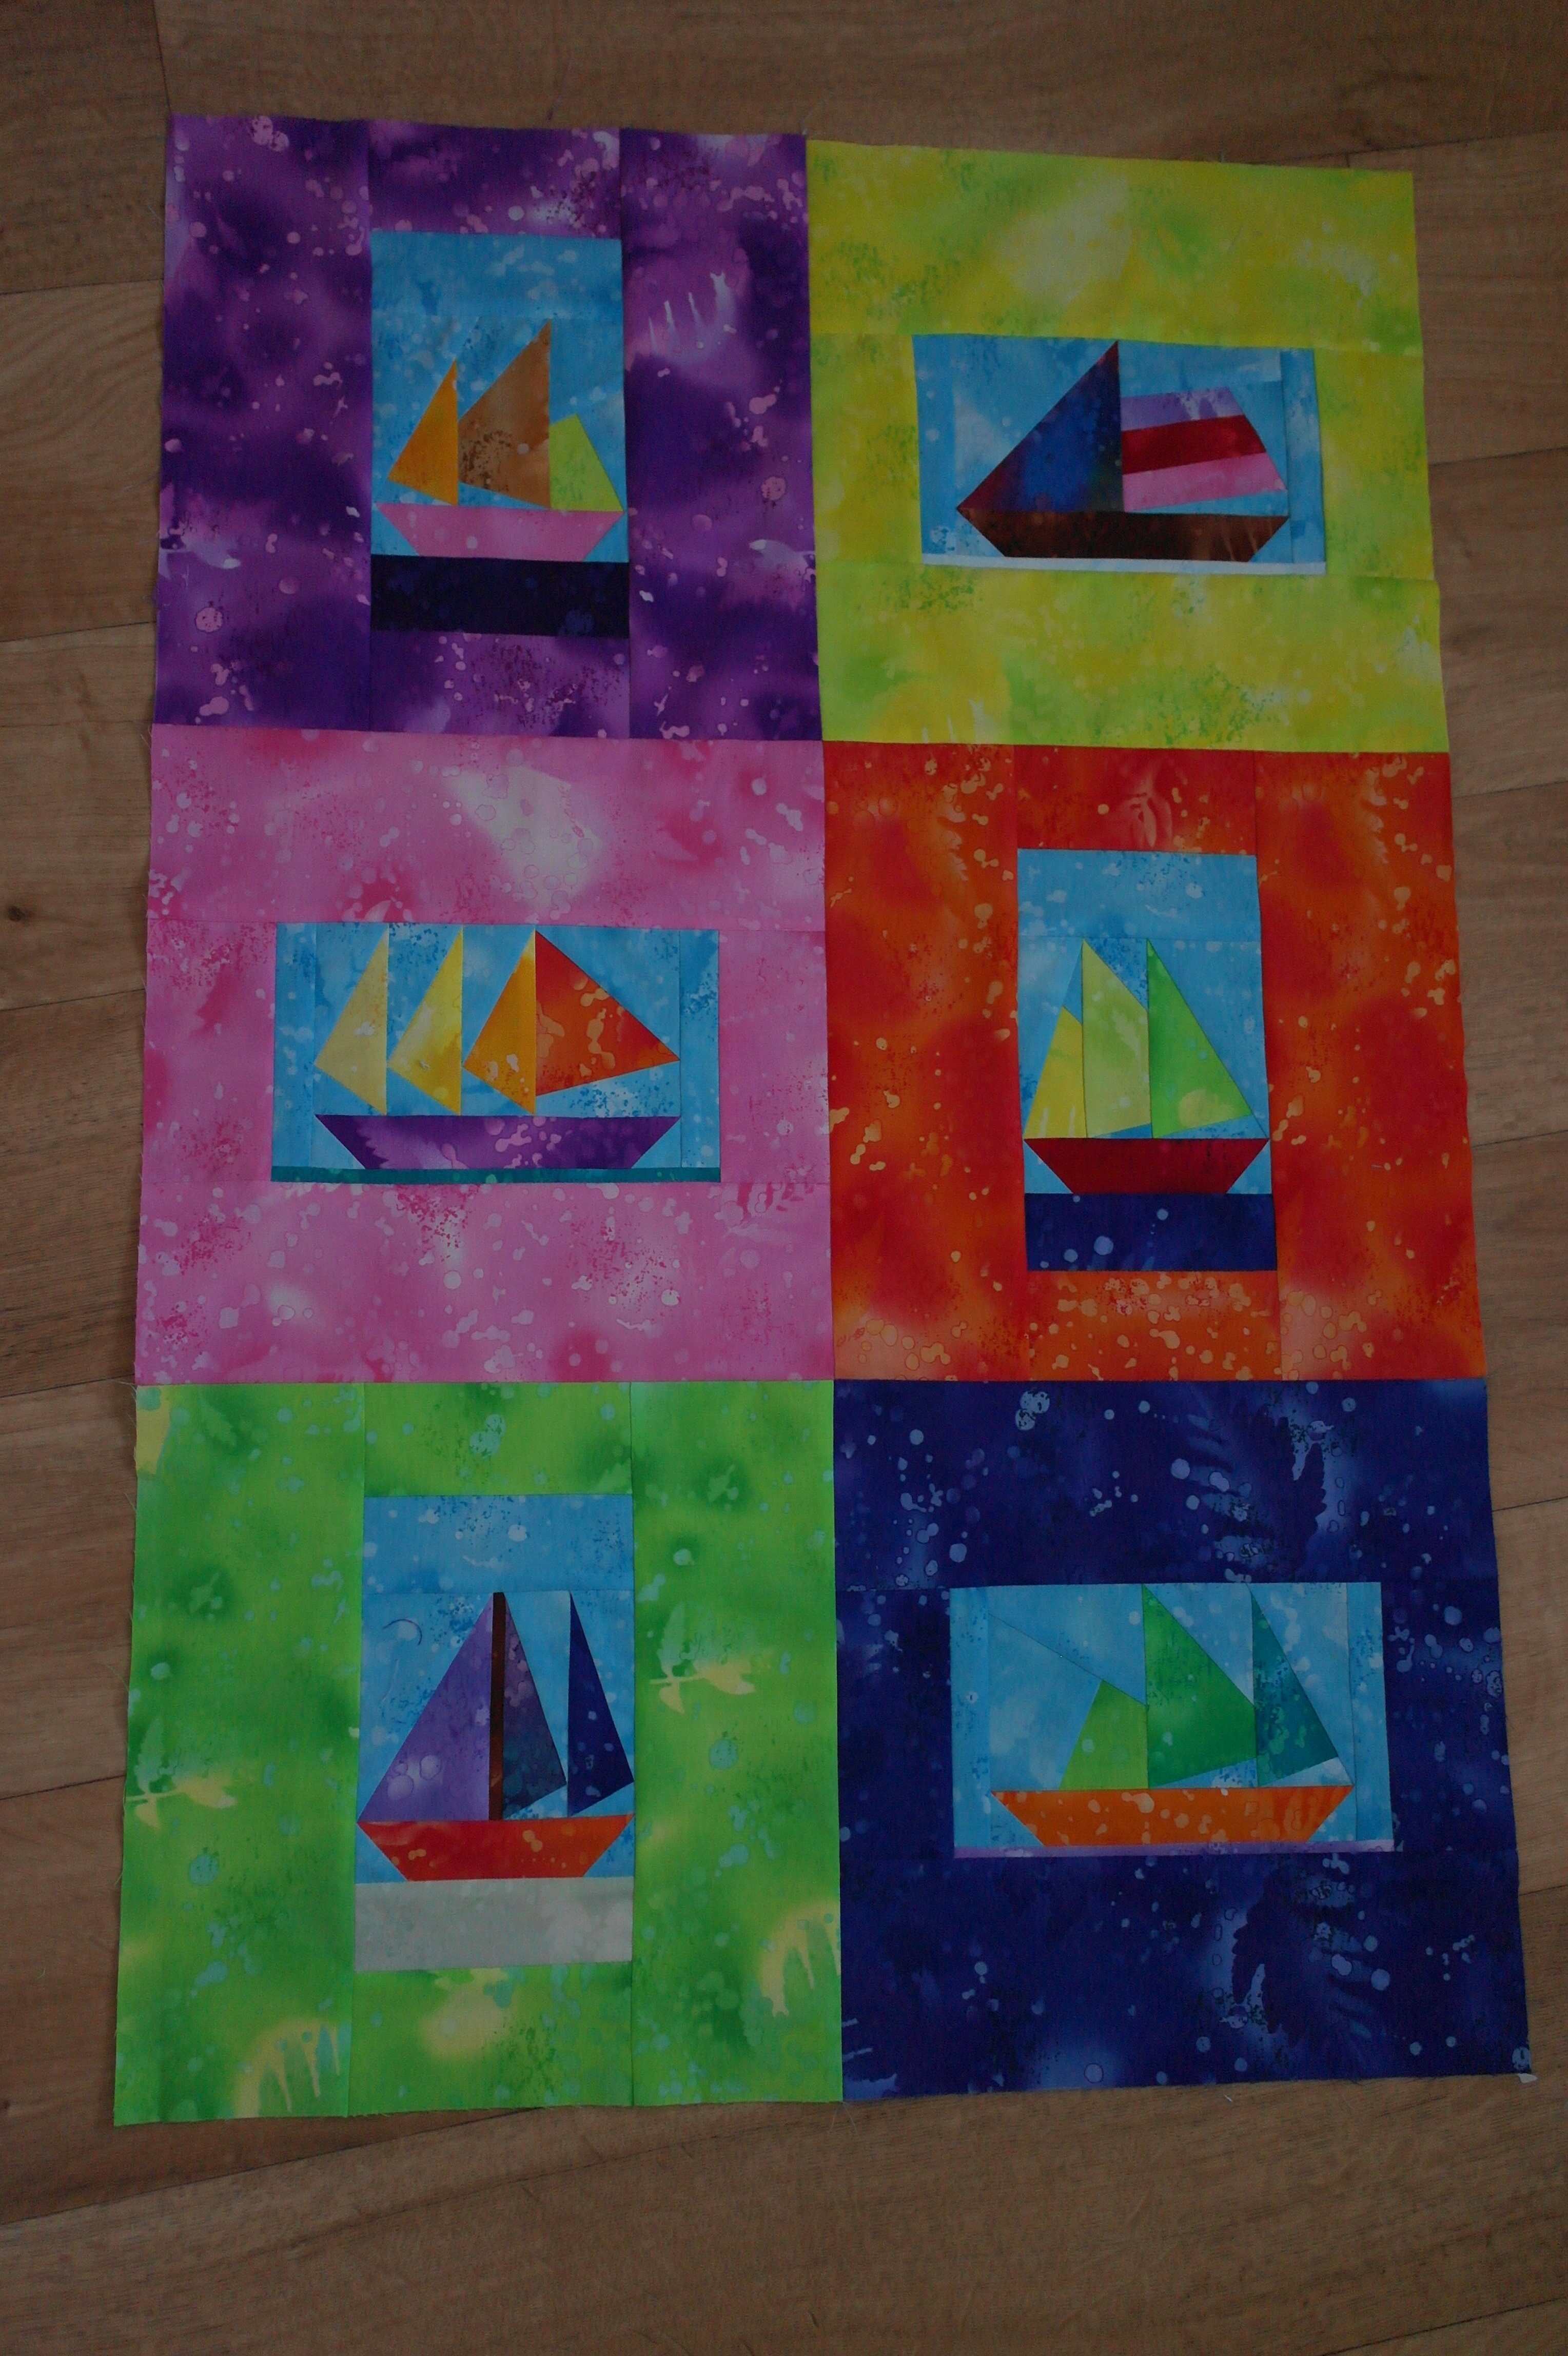
The top/front of my quilt is ready.
Quilting it all.
I’ve made a sandwich: top, batting 100% bamboo, and backing fabric. For the last two I needed pieces of aprox. 65/70 x 95/100 cm. Both will protrude, but that’s the extra I need in case I want a wider binding.
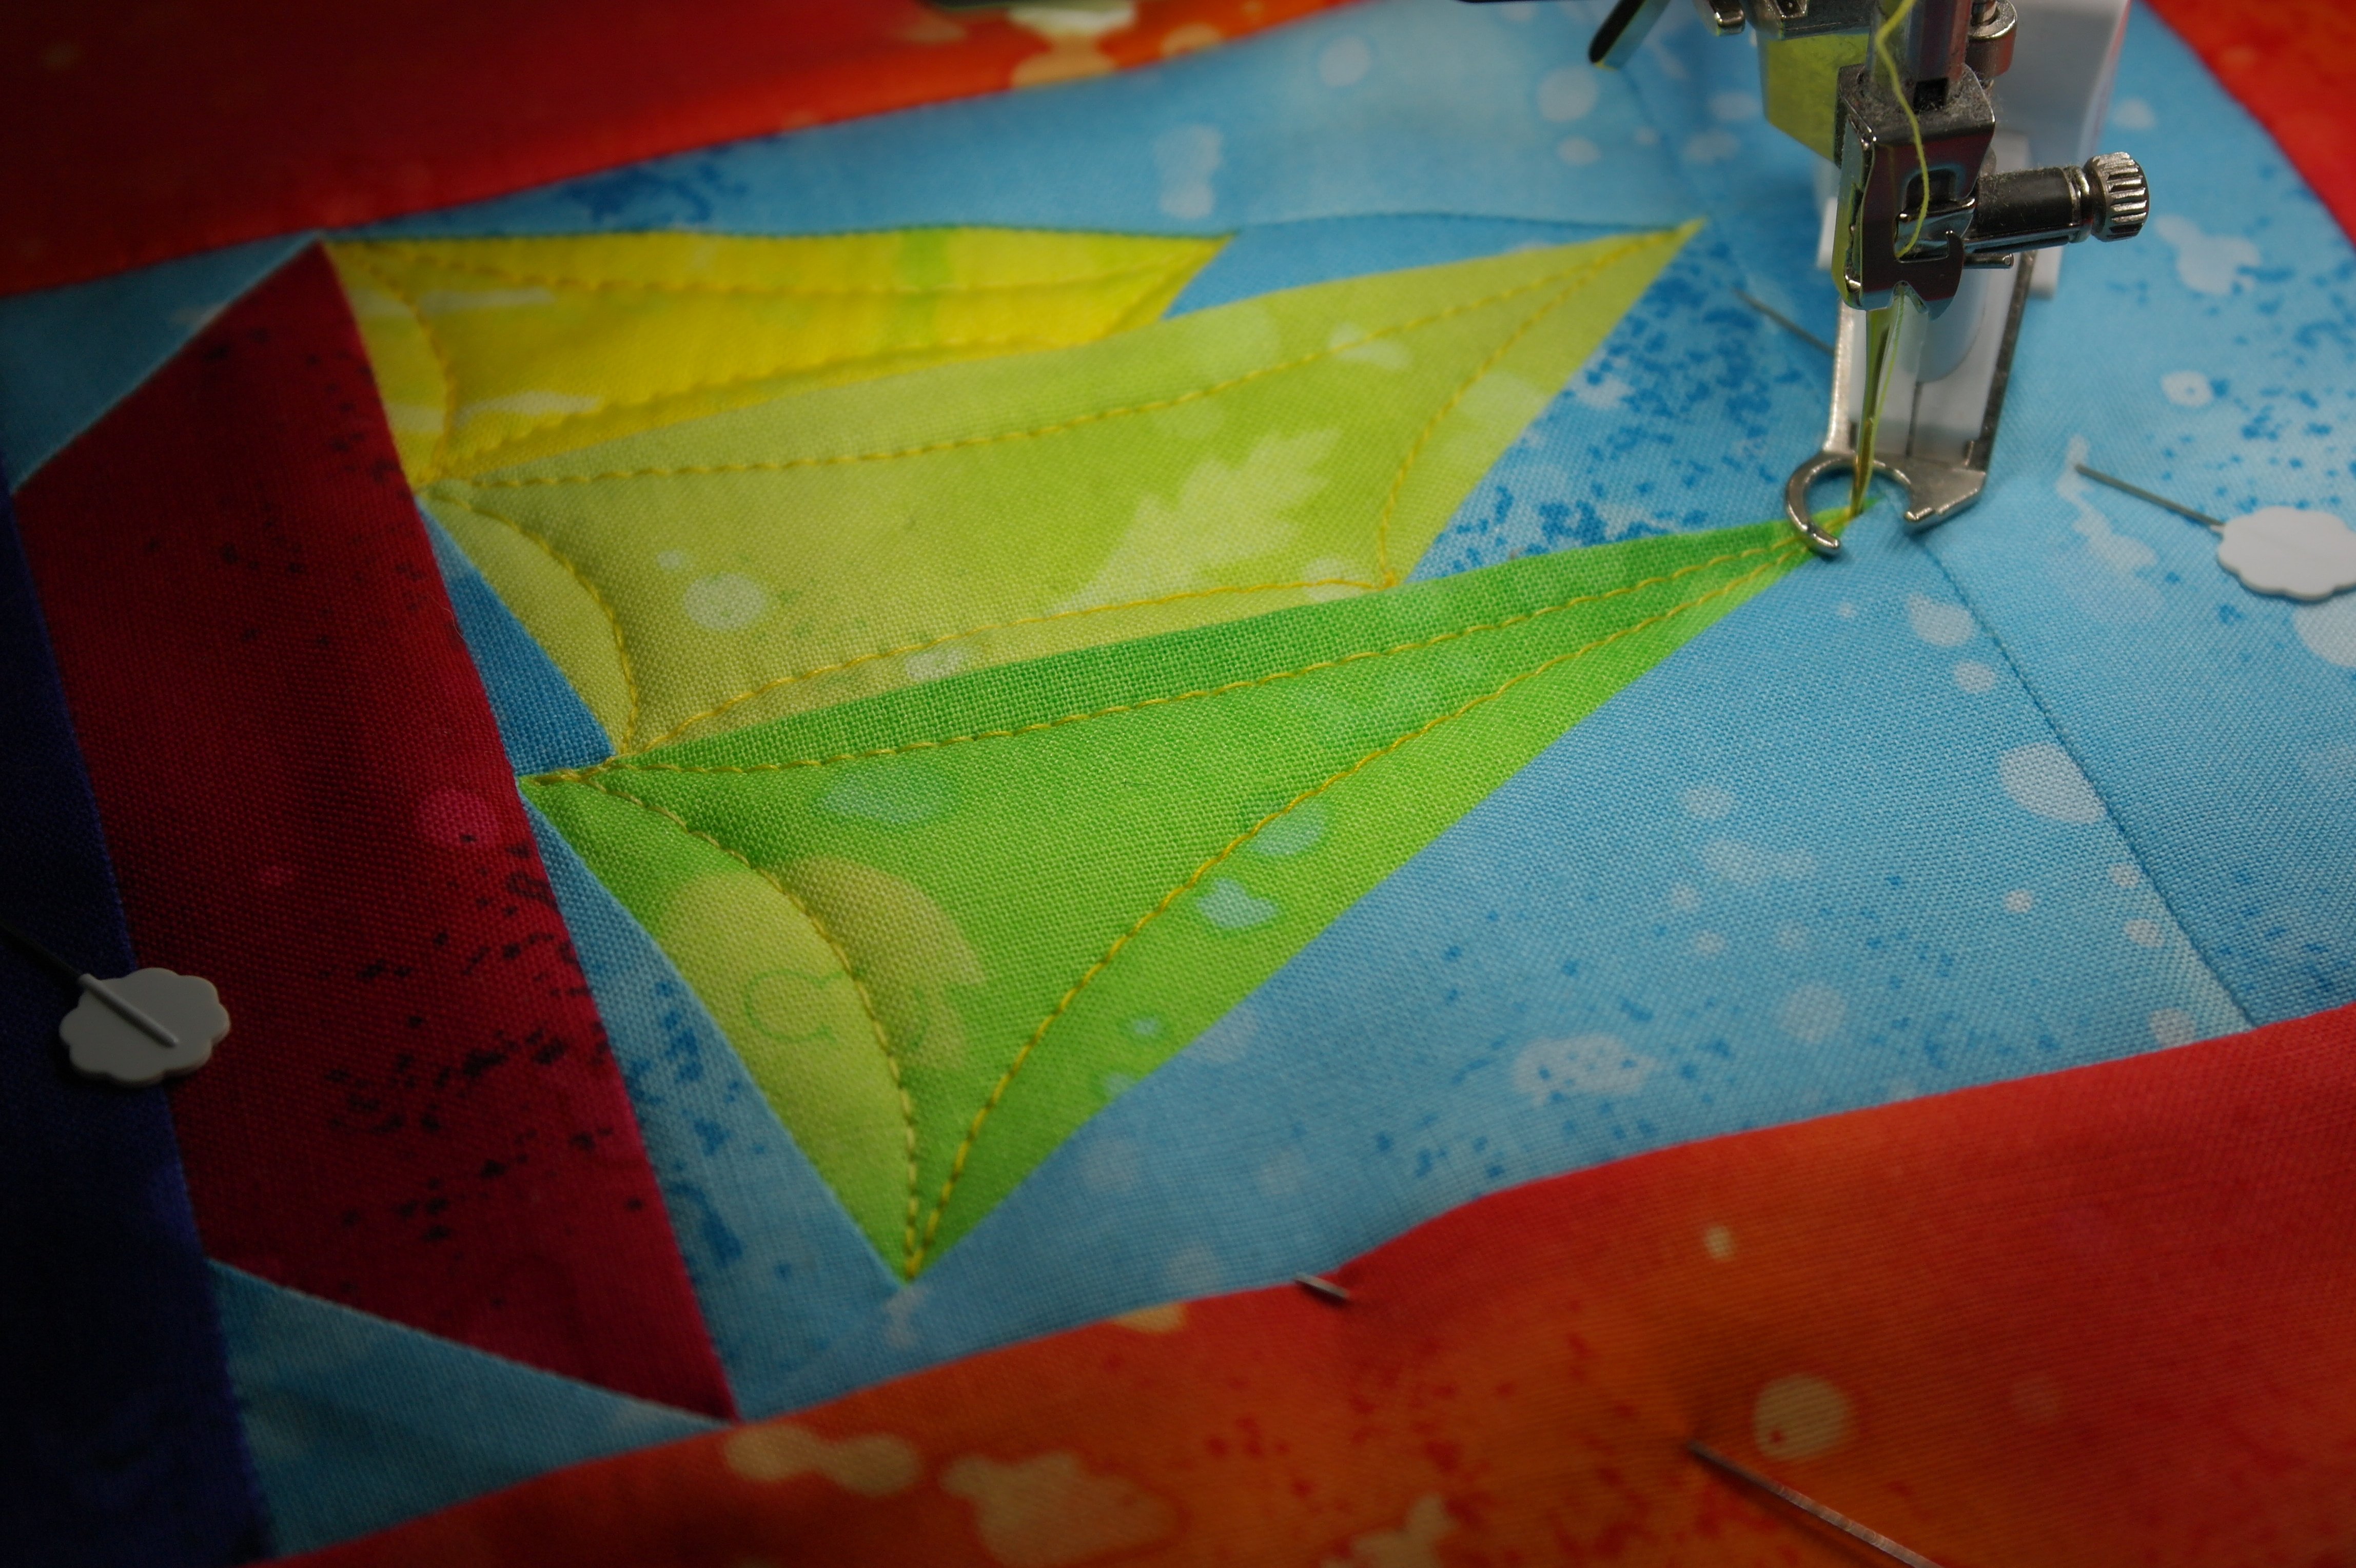
I’ve quilted free hand on my B770QE with the BSR, emphasizing the sails of the boat,
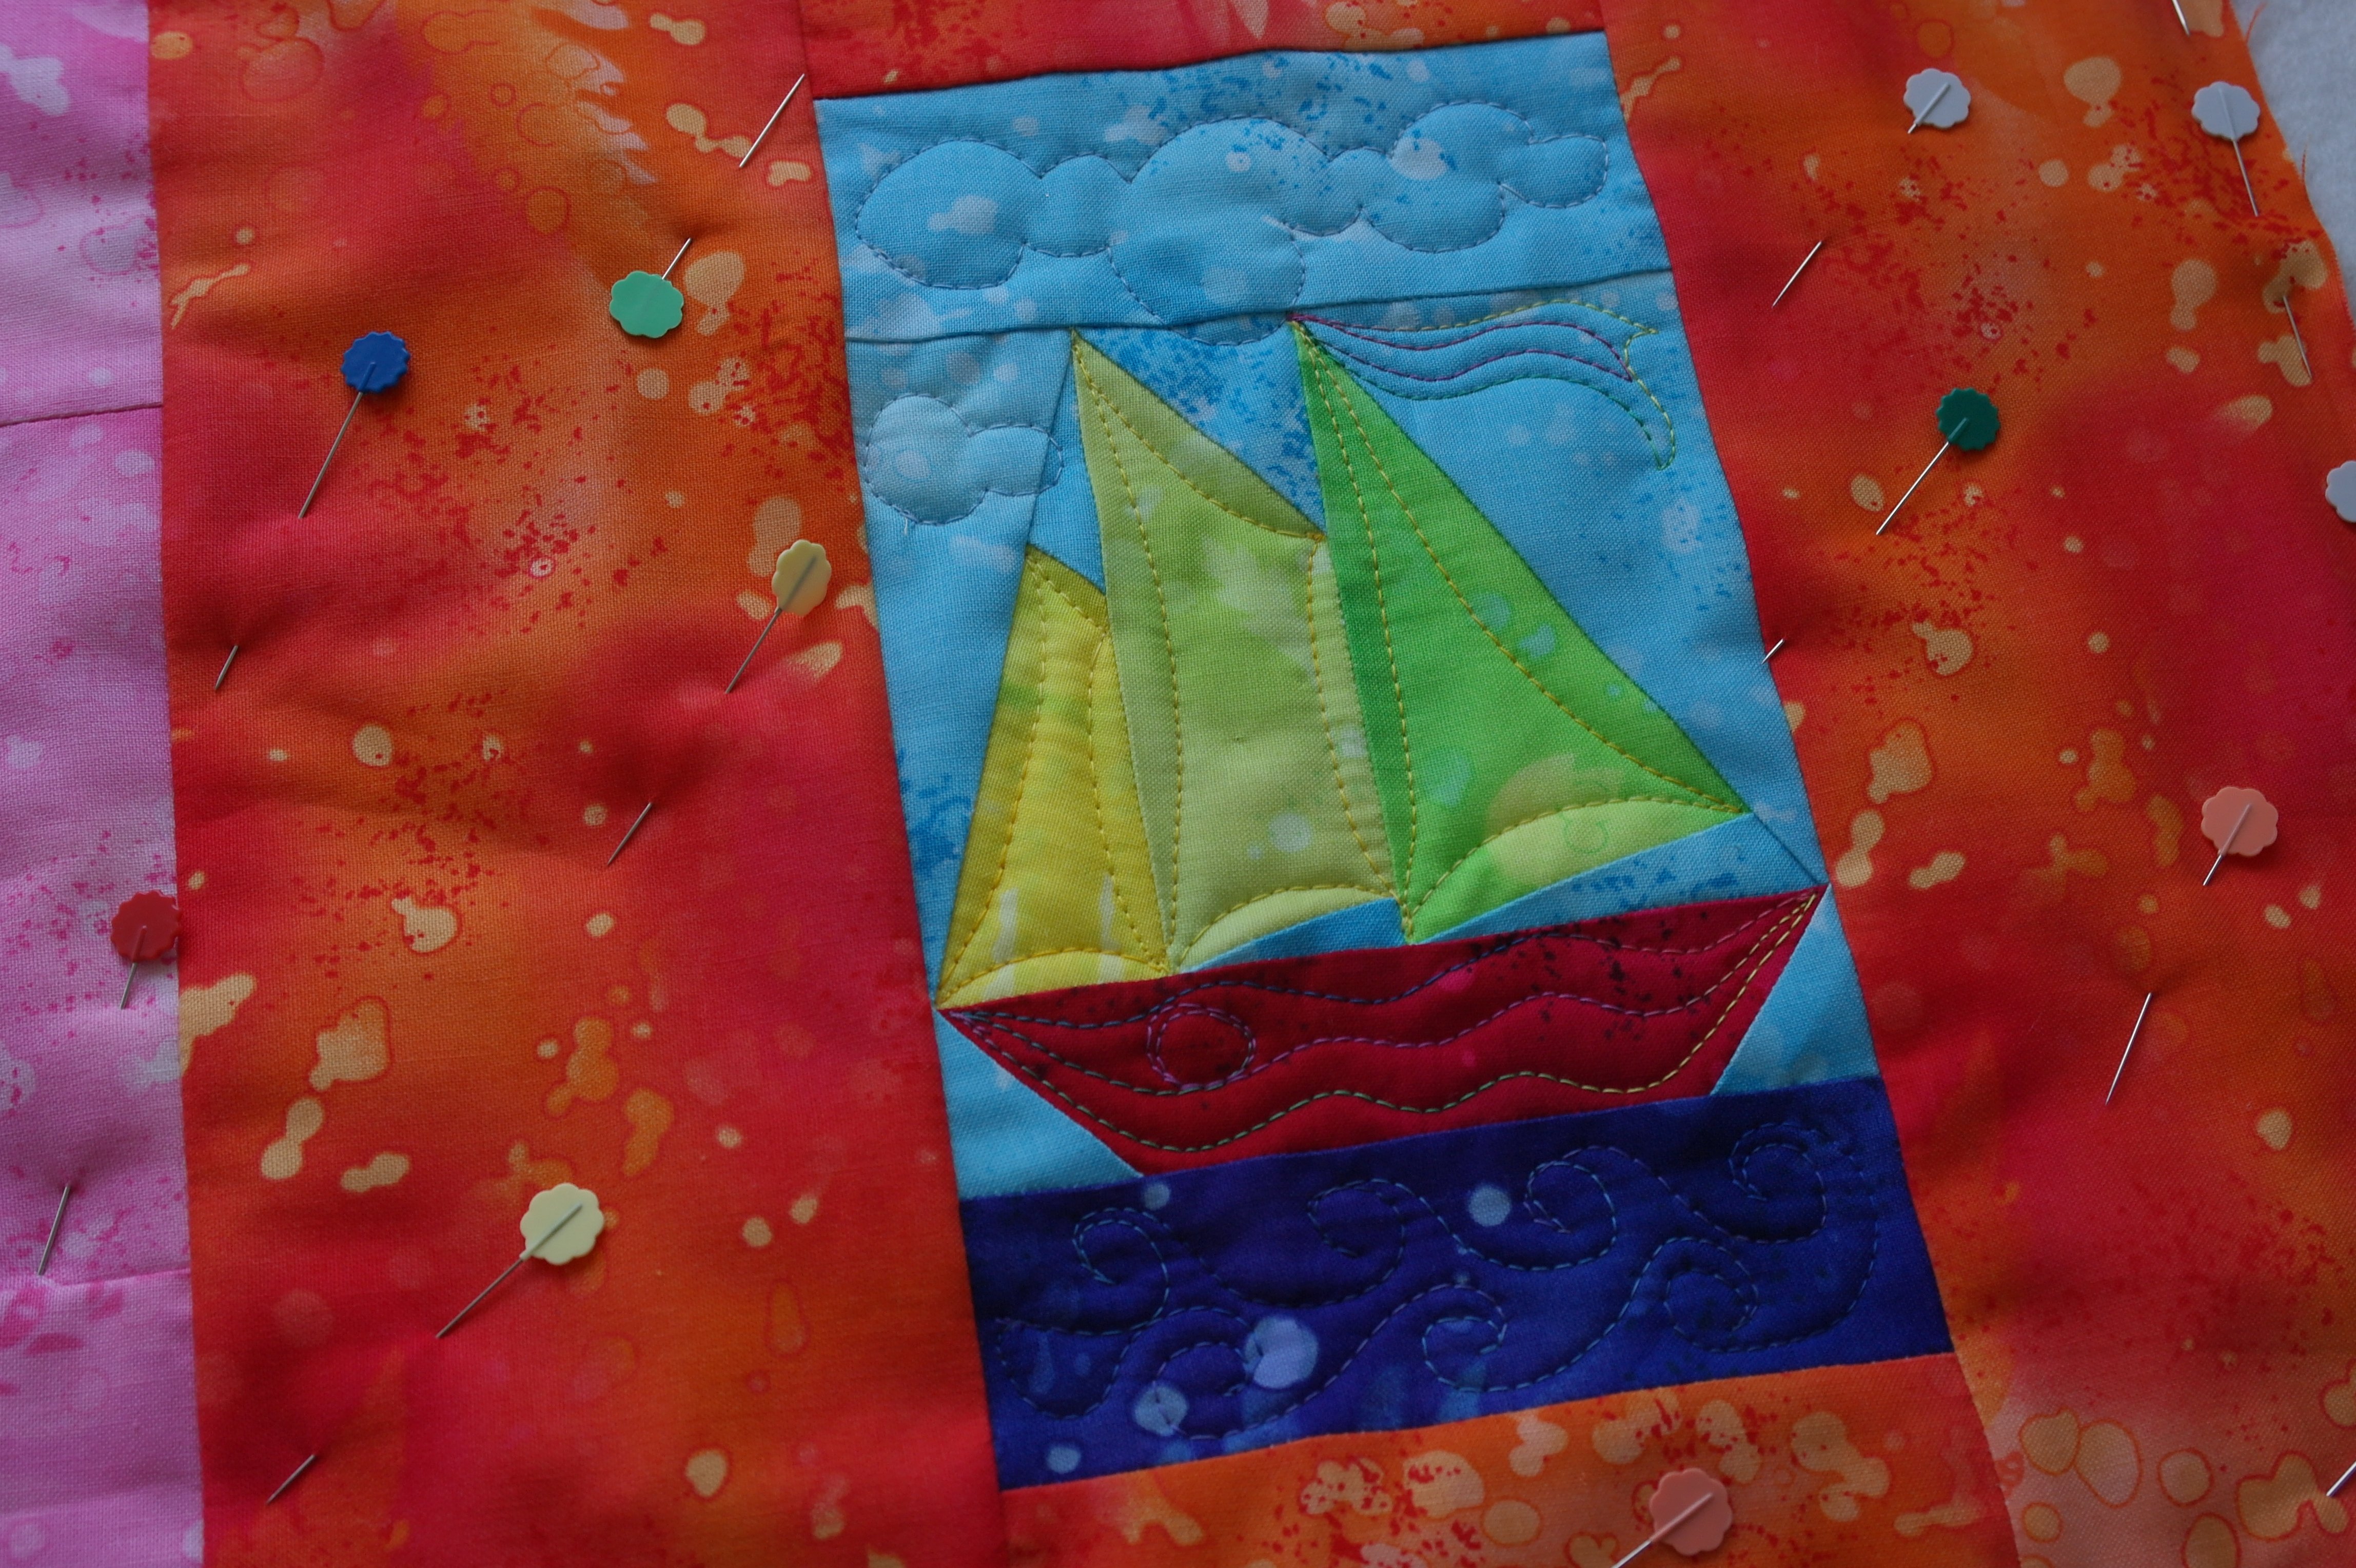
and other features, such as clouds, flags, waves,
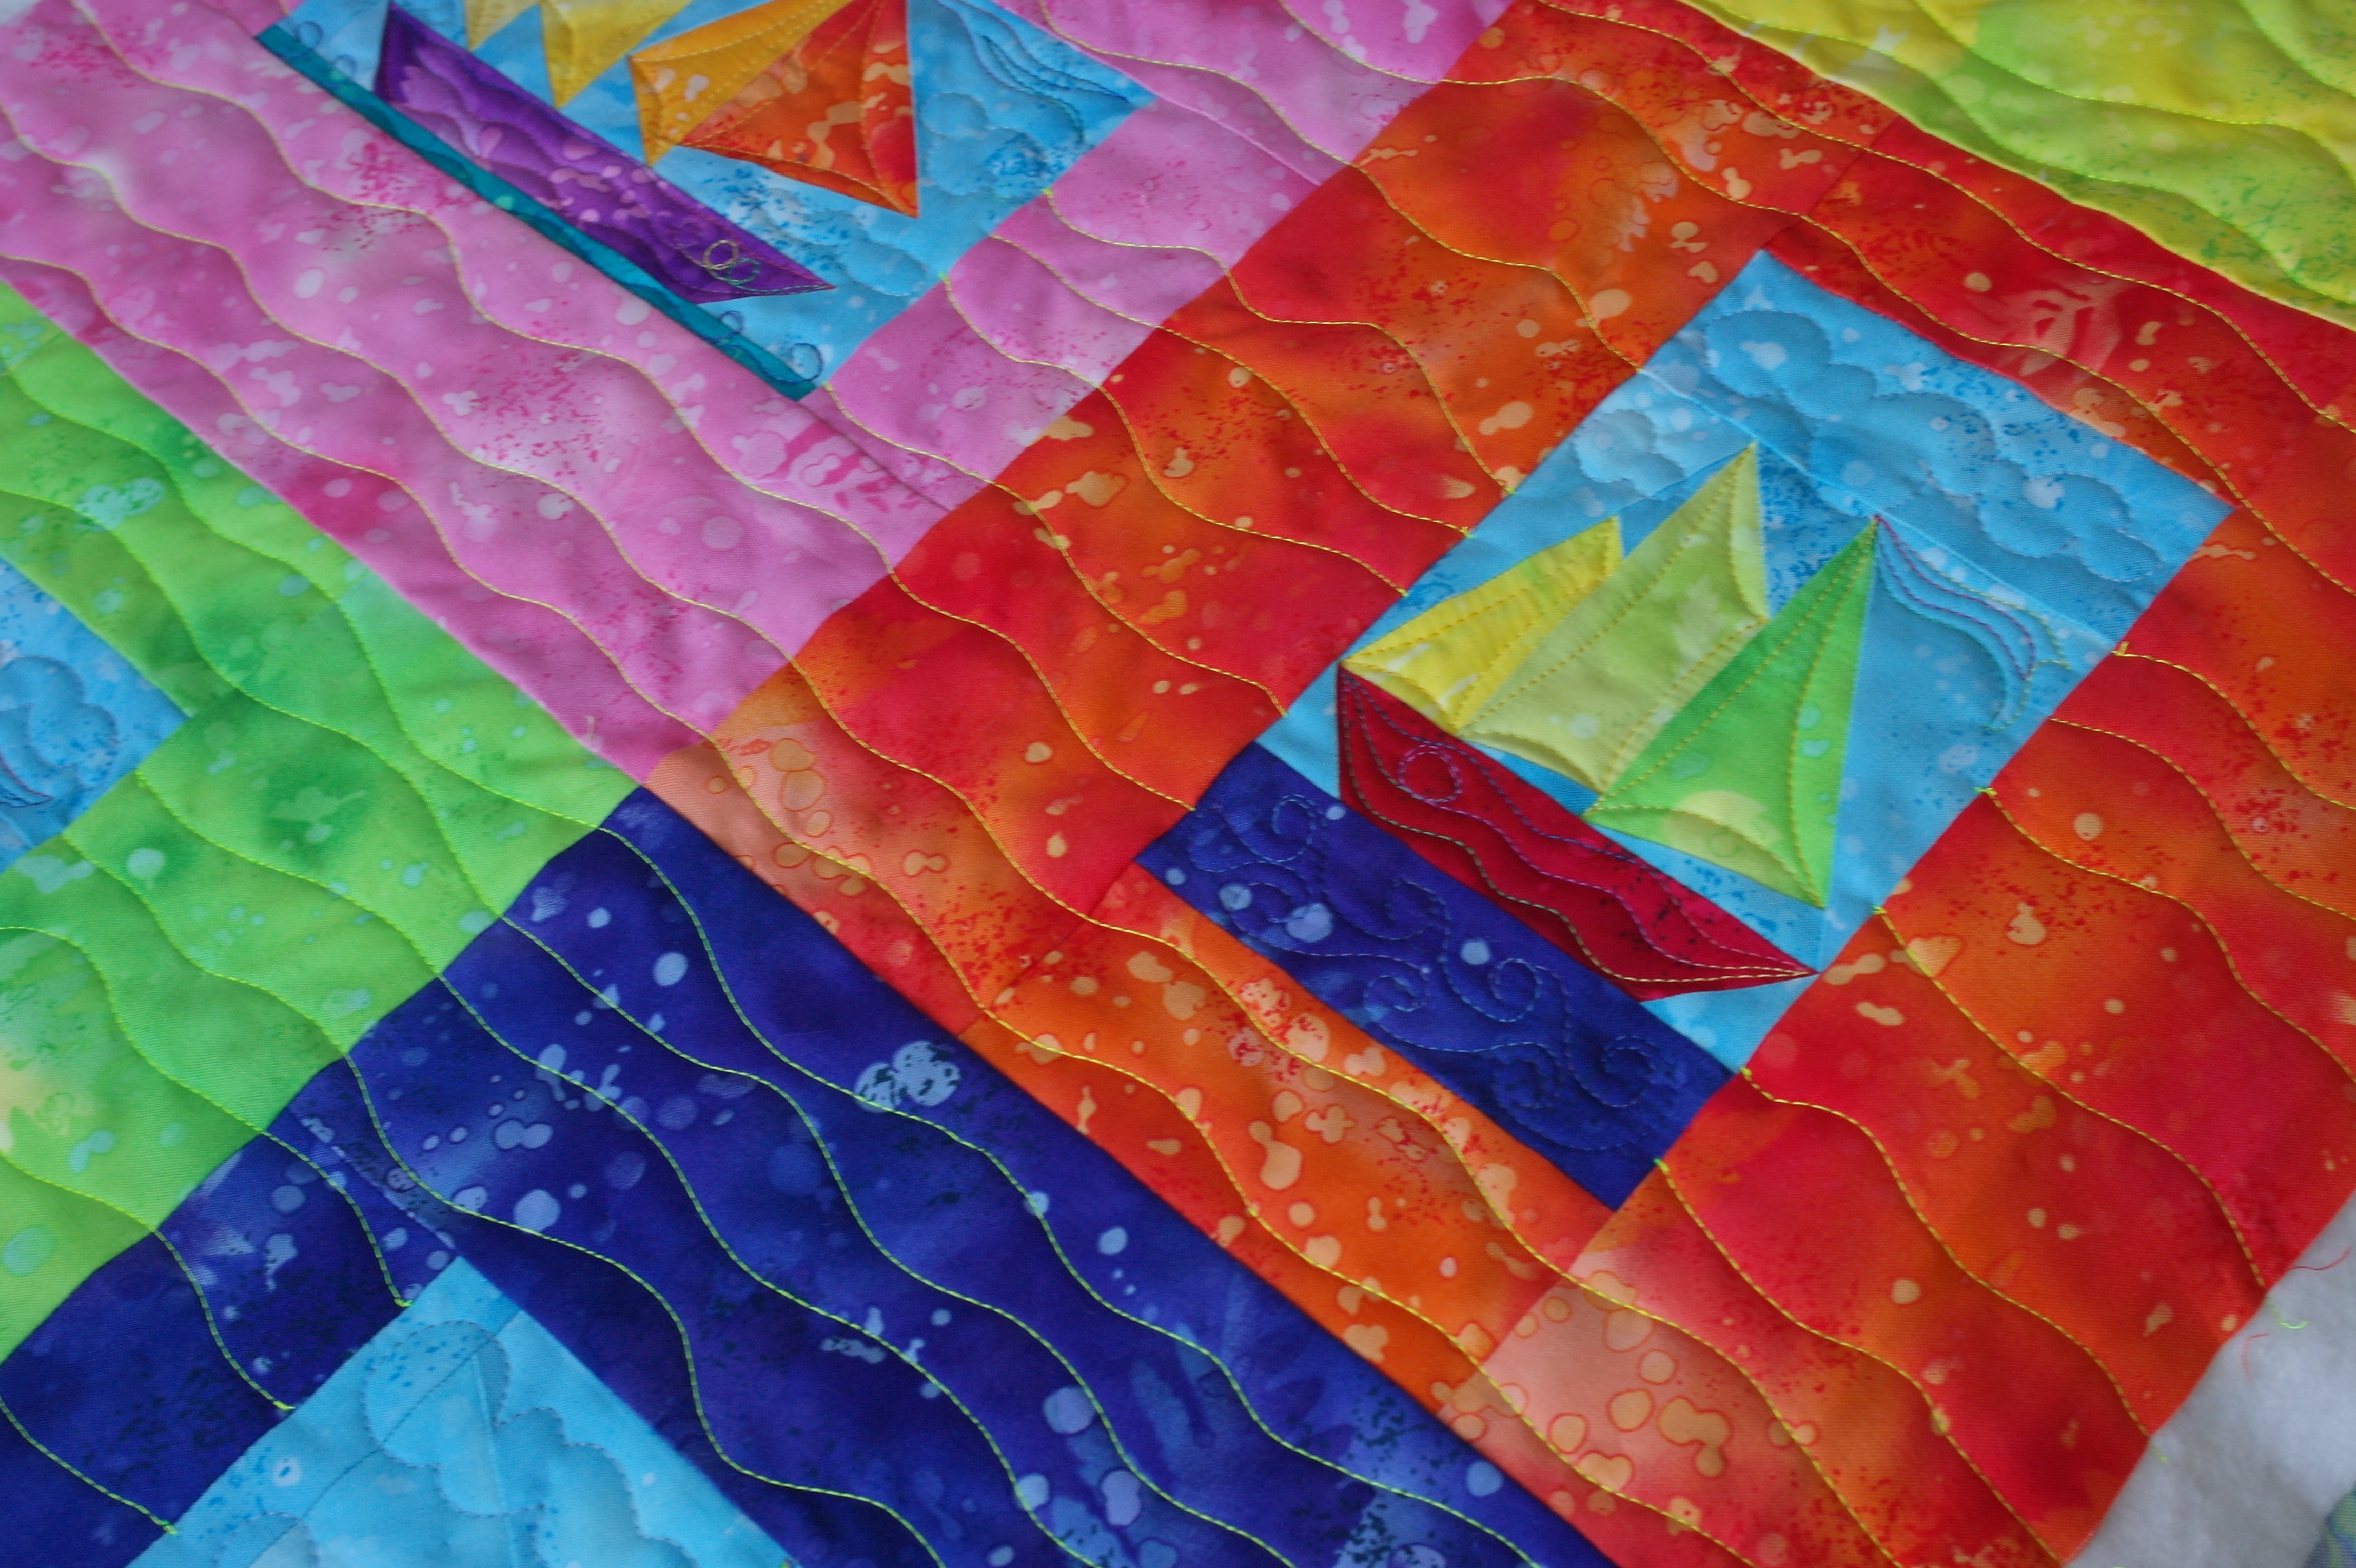
and large waving quilt lines on top of the blocks, with a neon yellow top thread. I like the way that stands out.
How much quilting is done, is entirely up to you. It depends of the time you want to spend on quilting, or what you want to show: I wanted the patchwork and the bright colors of the Fossil Ferns stand out, so not to much quilting is done.
I’ve cut the sandwich back after quilting, to the right size + seam allowances = 61 x 91 cm.
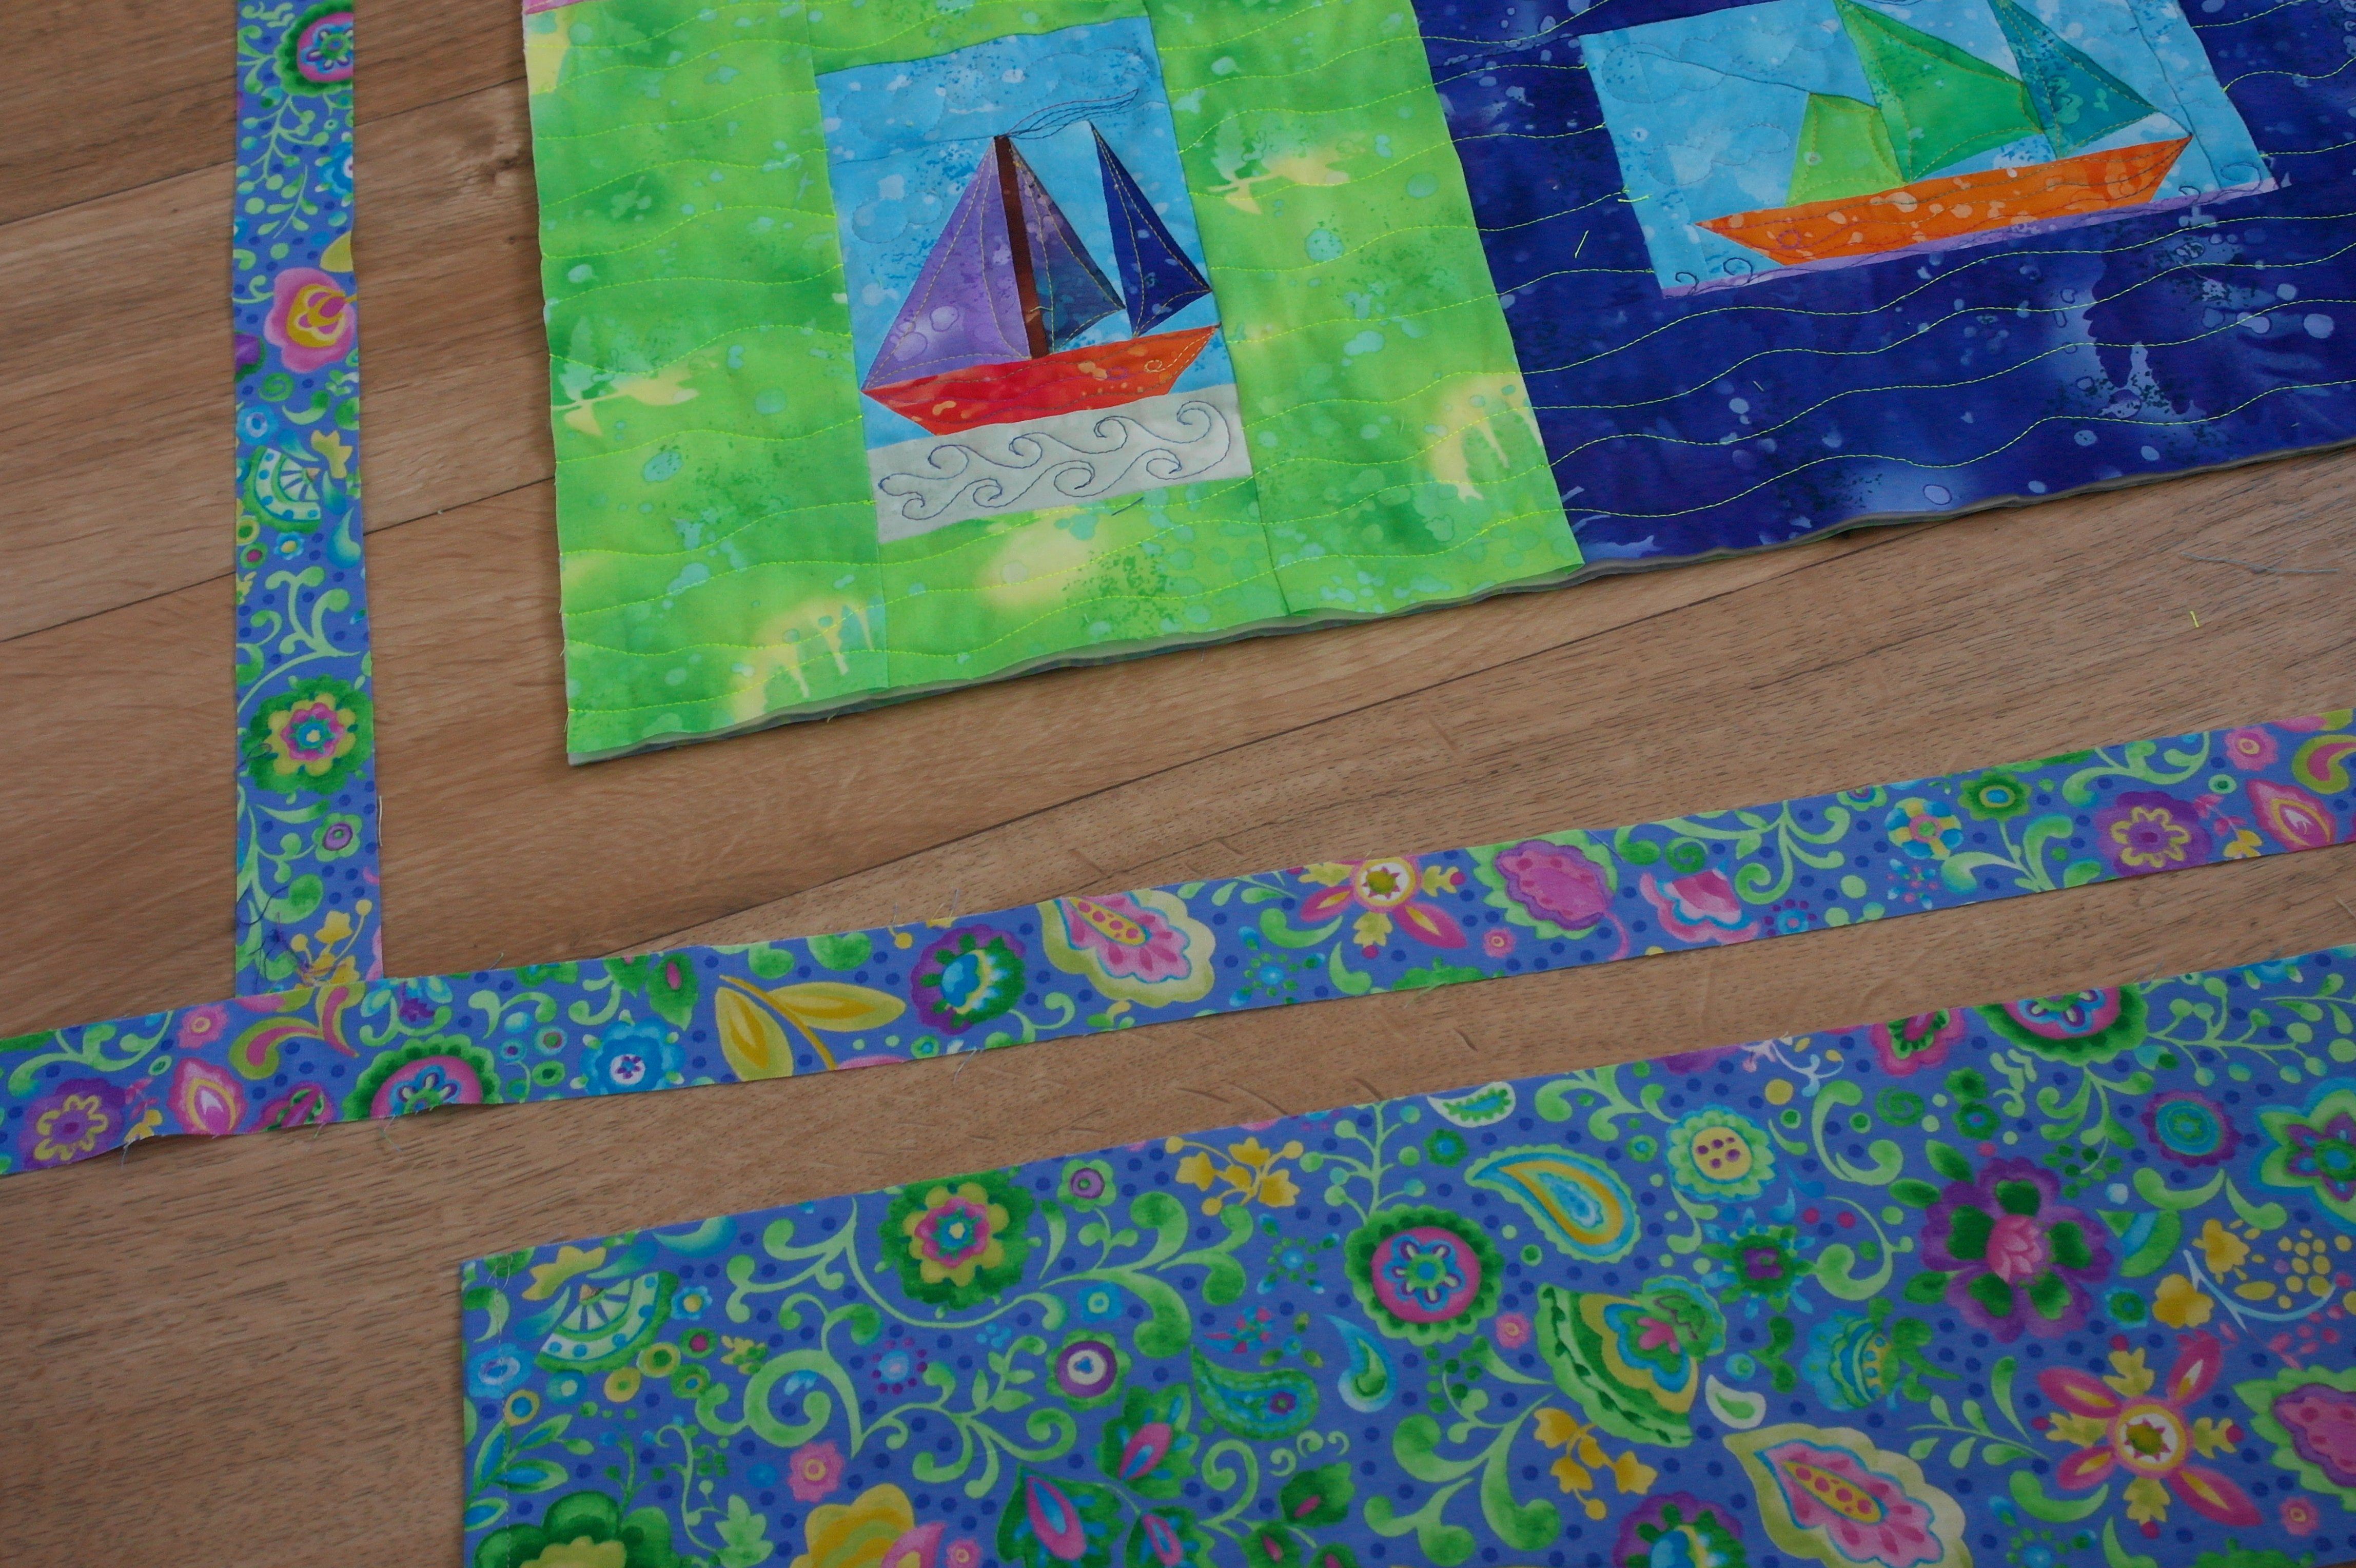
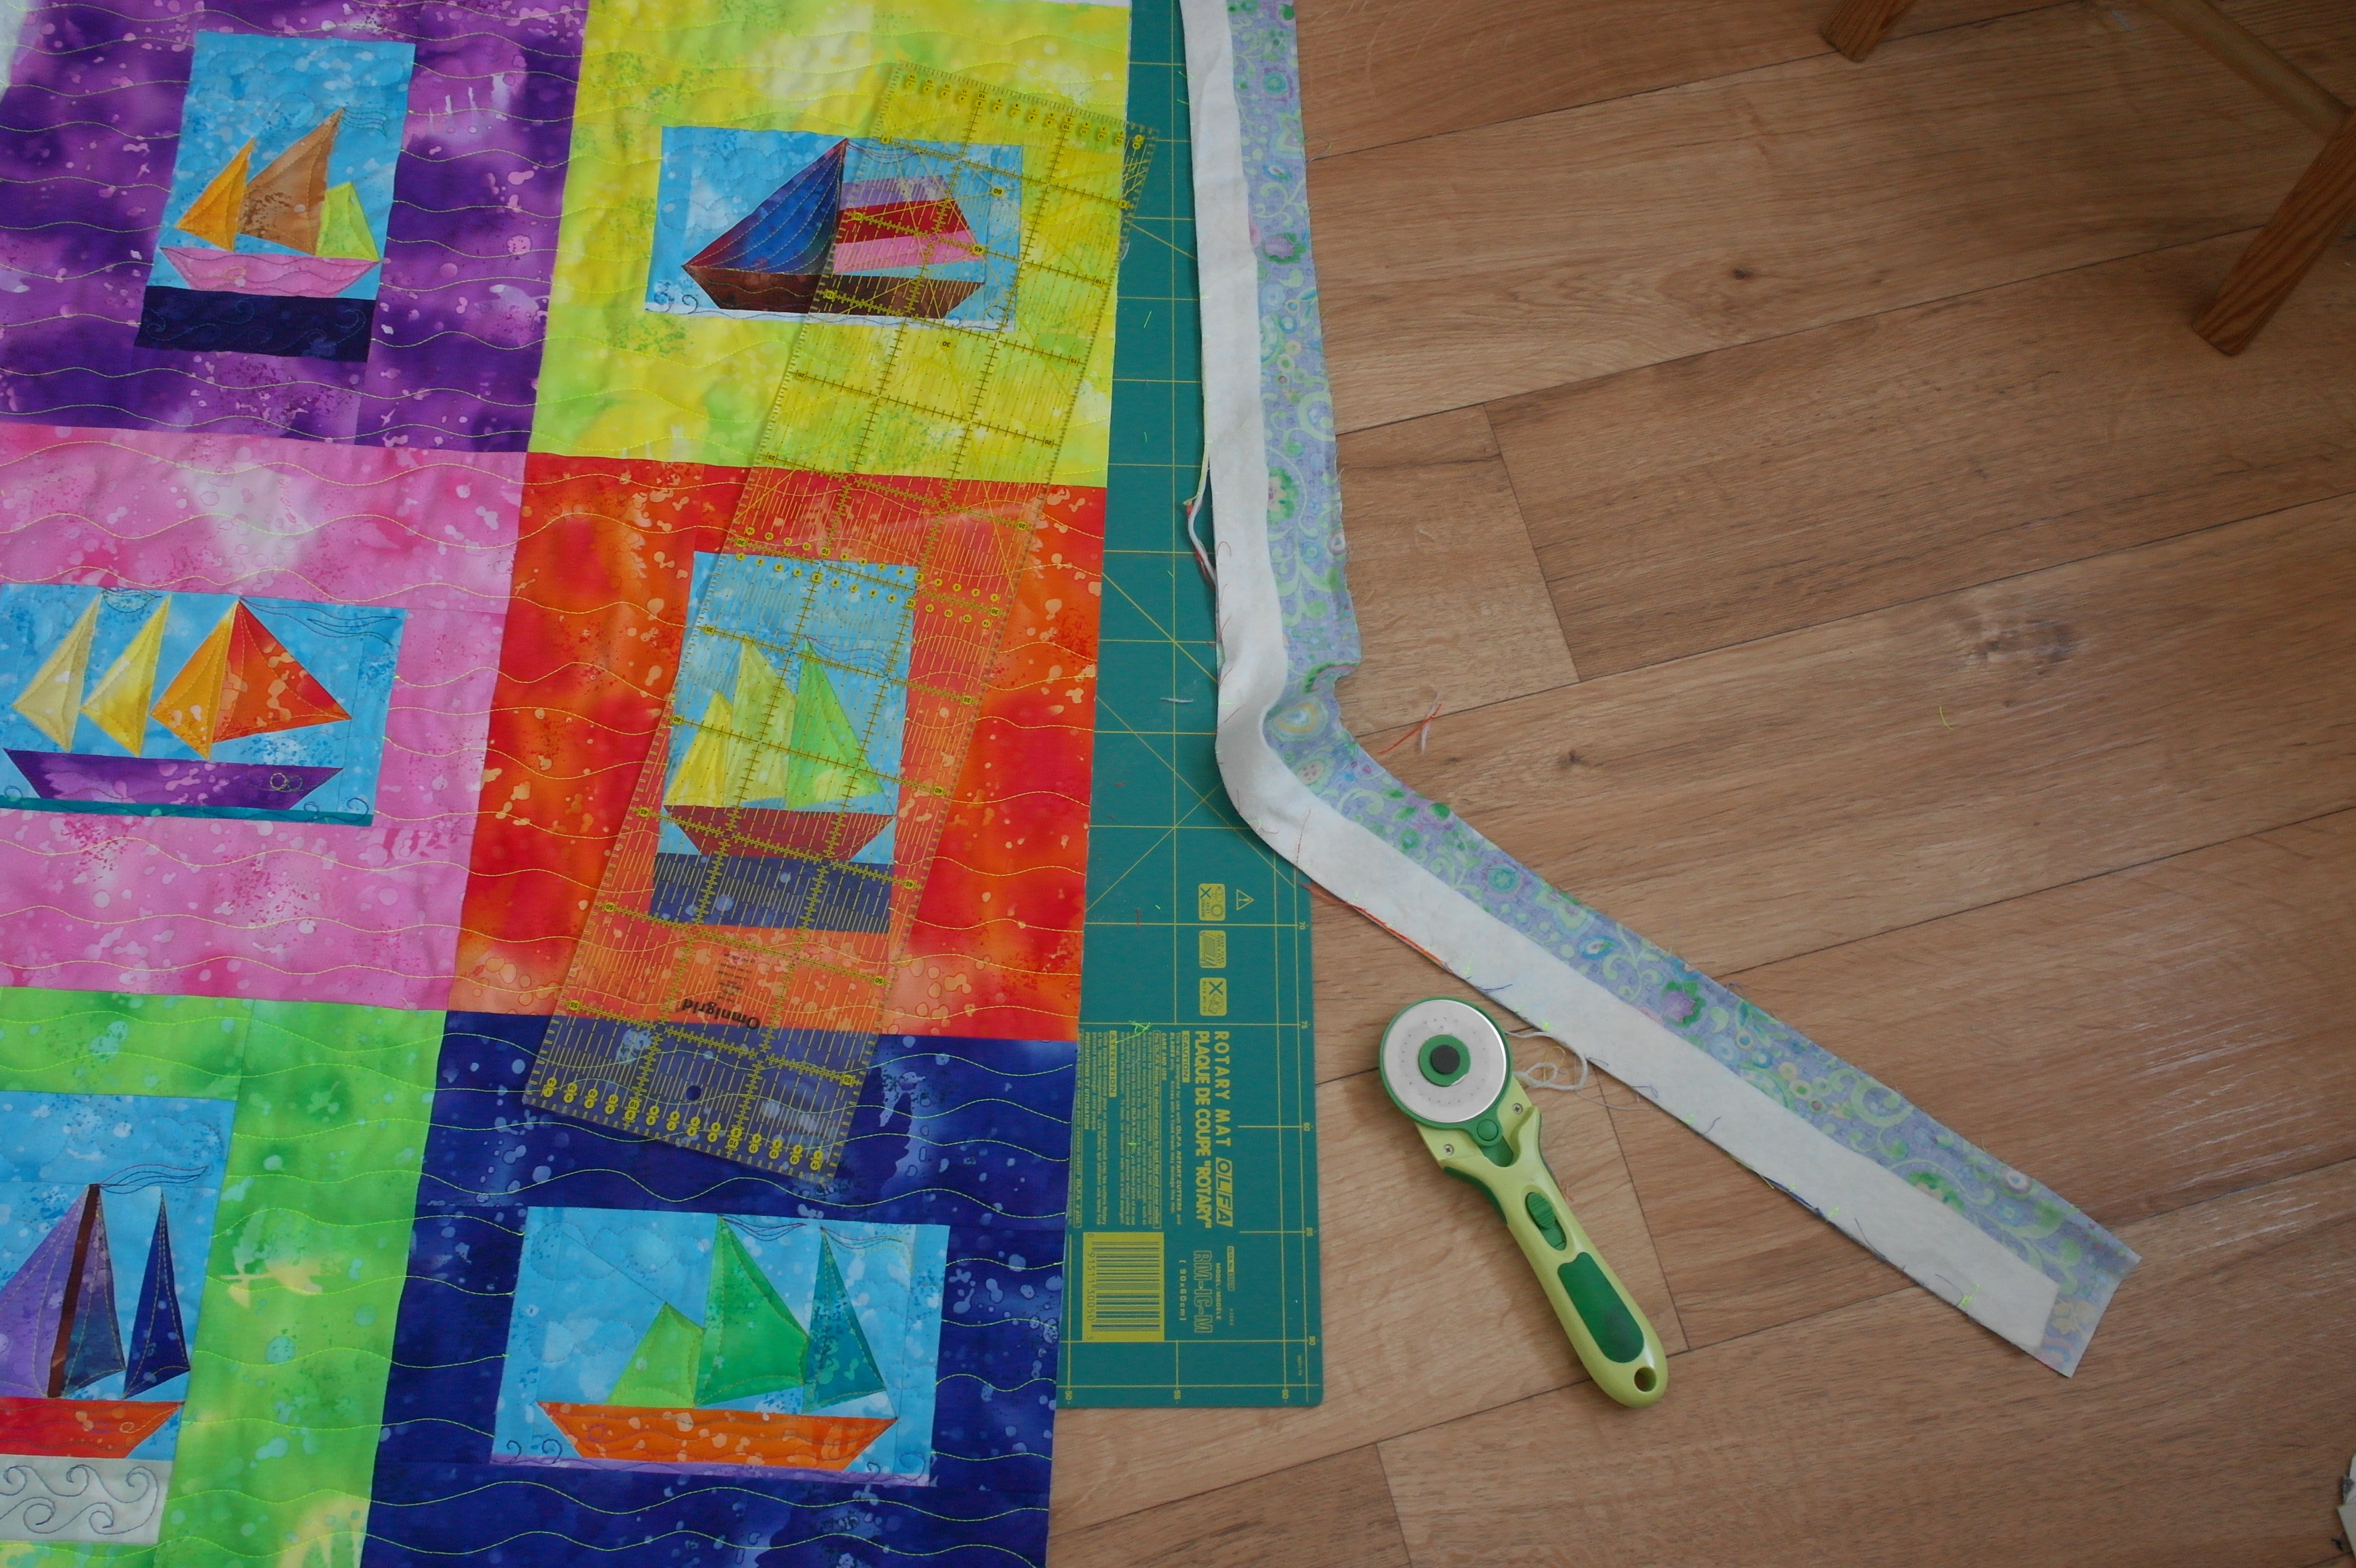
A long strip of fabric is required for the binding. I’ve cut strips – 4 cm wide – 2 x the height of the quilt plus extra, and 2 x the width of the quilt plus extra. You can sew strips of fabric together too, to get one strip of aprox. 3.25m. That will be enough for all sides. You can use different colors from Fossil Ferns, but I’ve used the same fabrics as I’ve used for the back of the quilt: it is a bright colored fabric, Juliana blauw. All colors I’ve used in the blocks are there too. If you want to order this fabric via my Webshop, use the red link: you will need 1 m of the width = 2 pieces of 0,50m. (I am offering them by half a metre = 2x).
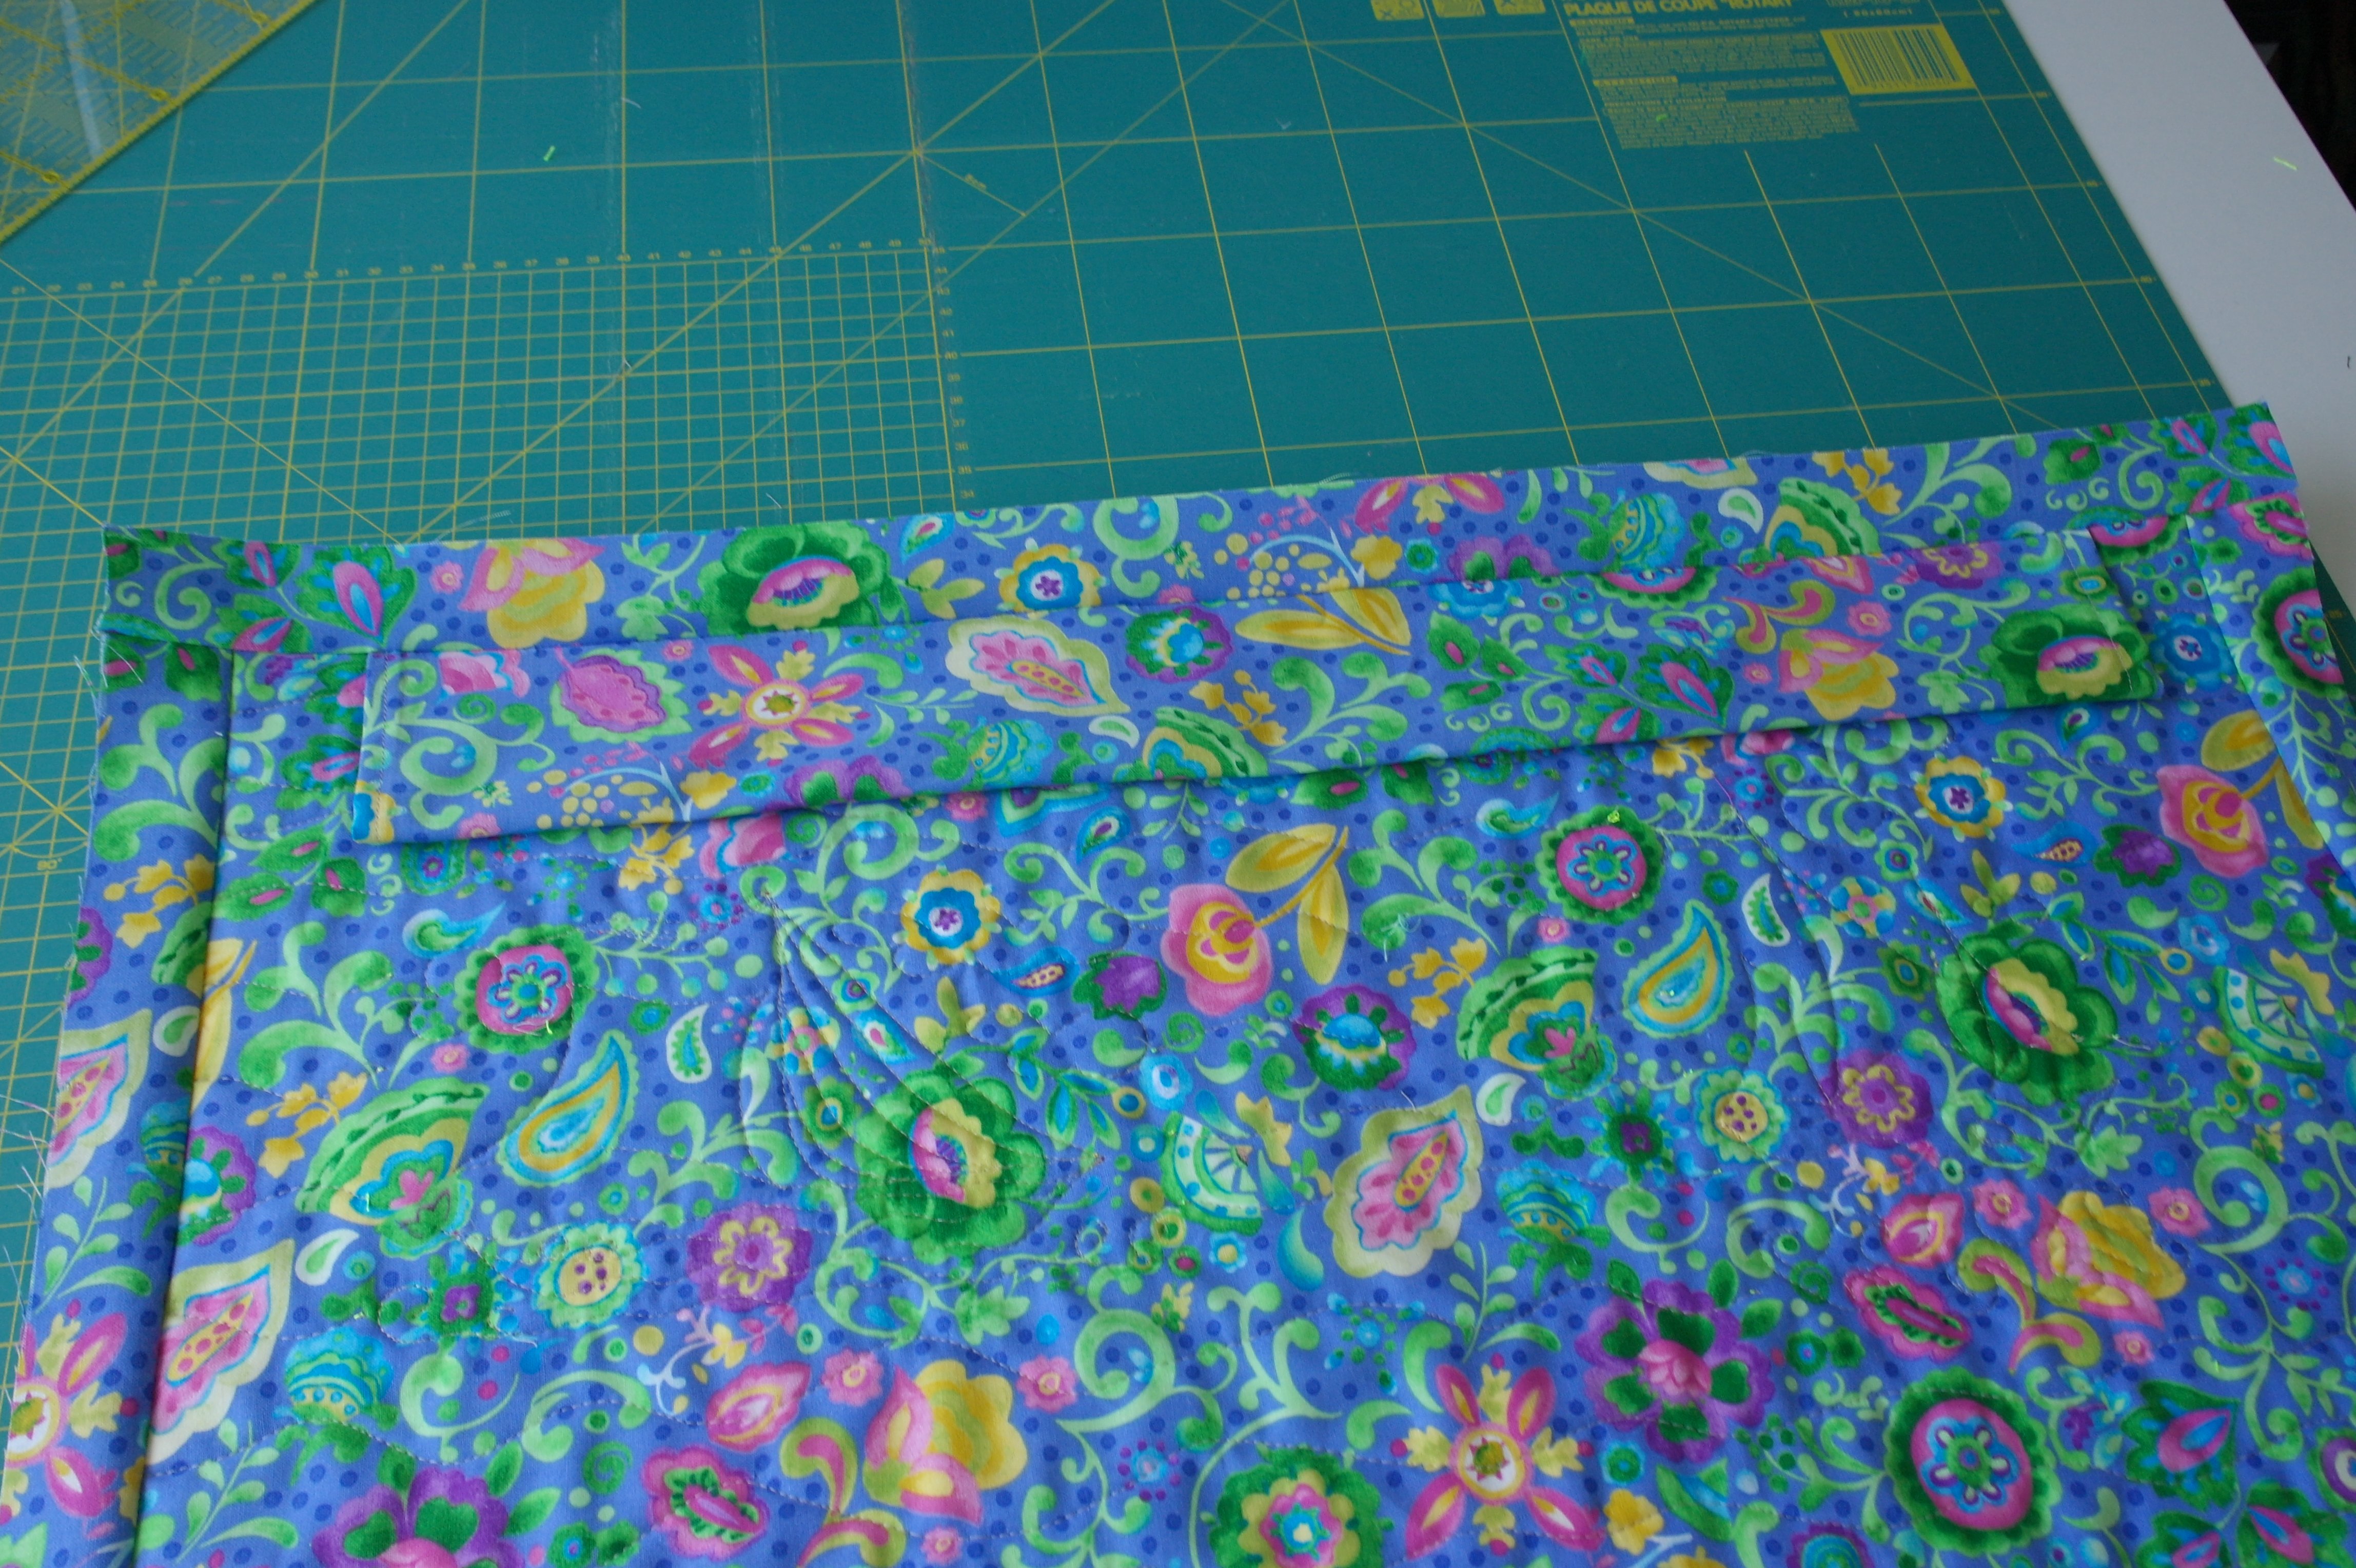
With sewing the binding to the back first, I’ve caught the sleeve also: pinned that first on top/back of the quilt, that saves me time. And YES, I am sewing the binding from the back to the front, to be able to sew it all with my sewing machine. I don’t have to hand sew anything, except for the lower piece of the sleeve.

Placing my signature left/front is something I am always doing: this way it tells everyone they are looking at the original quilt, my own design.

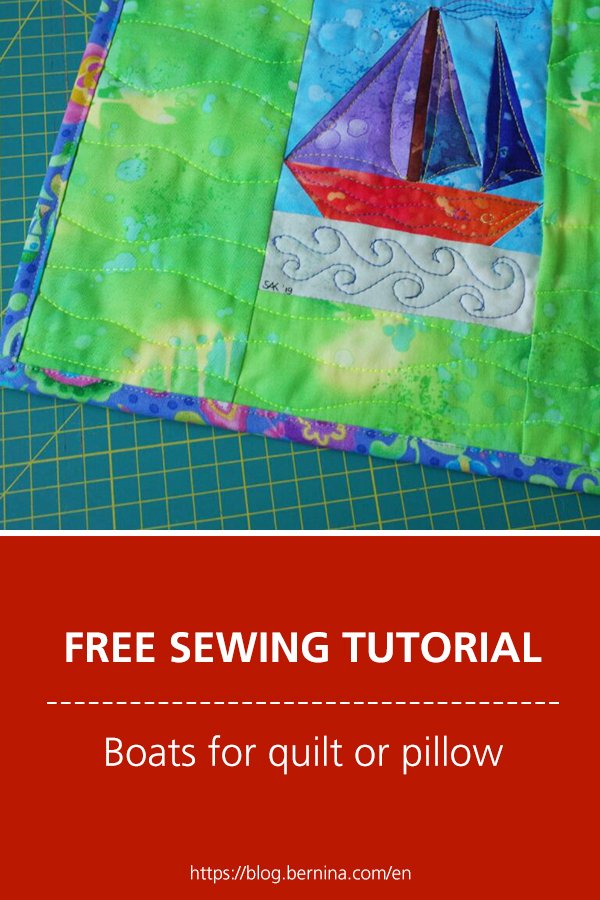
And this summer project with 6 boats is ready: a bright and colorful projects with Fossil Fern fabrics.
I would love to see your version of this quilt: please upload your picture/story to the COMMUNITY of this BERNINA Blog, so we all can admire your work?
Hope you had fun making these boats. Until a next quilting project!
Sylvia Kaptein
www.sylviasartquilts.nl
*If you want to make pillow cases out of the 6 boats, make blocks the same way for a measurement of 30x30cm + seam allowances. Quilt them separately, adding a back to make a case. You can fill it with loose filling, or use a inner pillow, 30x30cm.
Hi for some reason I didn’t receive all the boats, just the sixth pattern. love the quilt thank you
Hi Margaret,
Just check this BERNINA Blog: all 6 boats are available for download with 6 Blog posts. Type ‘BOAT’ with ‘search’, and you will find them.
Have fun making them!
Sylvia