 BERNINA Corporate Blog -
Because of questions from BERNINA Embroidery software V8 users (also on my to-d0 list for a future Blogpost), with this post I will show you how to rotate your embroidery hoop in V8. It is fast and easy.

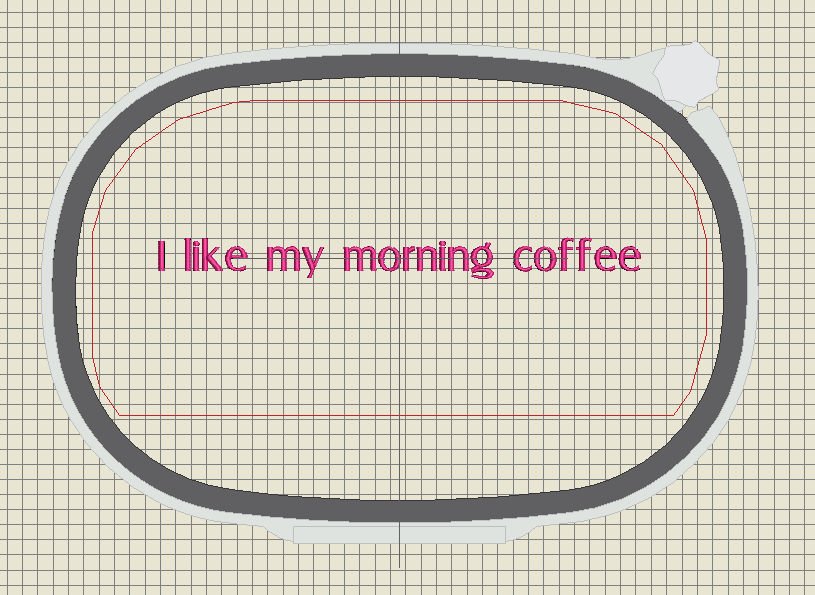
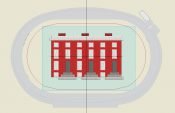
Normally the embroidery hoop of your choice is placed vertical on your workspace in Embroidery Canvas: that’s because that’s how it is actually done with mounting it on your embroidery module. So what you see on your screen is how it is actually placed.
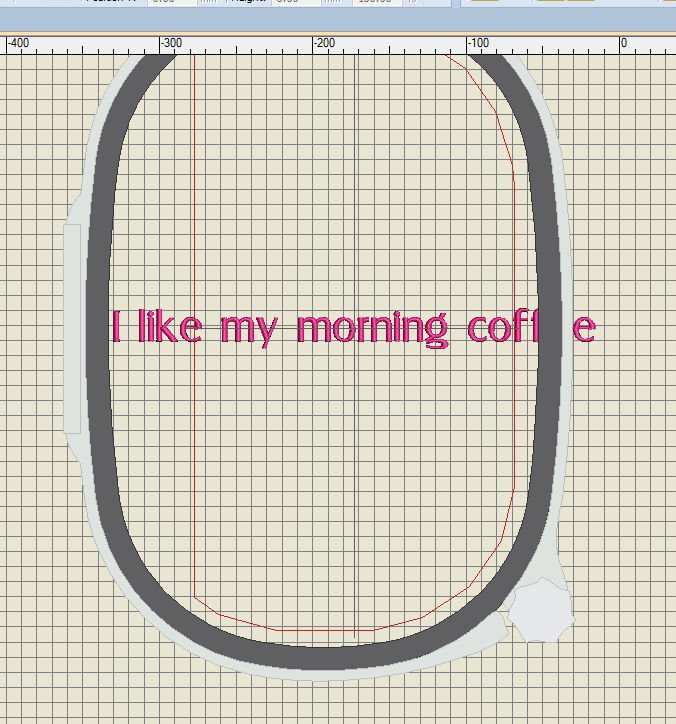
If you have designed a wide embroidery design, it will not fit in the hoop, within the (red) safety boundaries, which can be seen at the picture above. My text won’t fit this way.

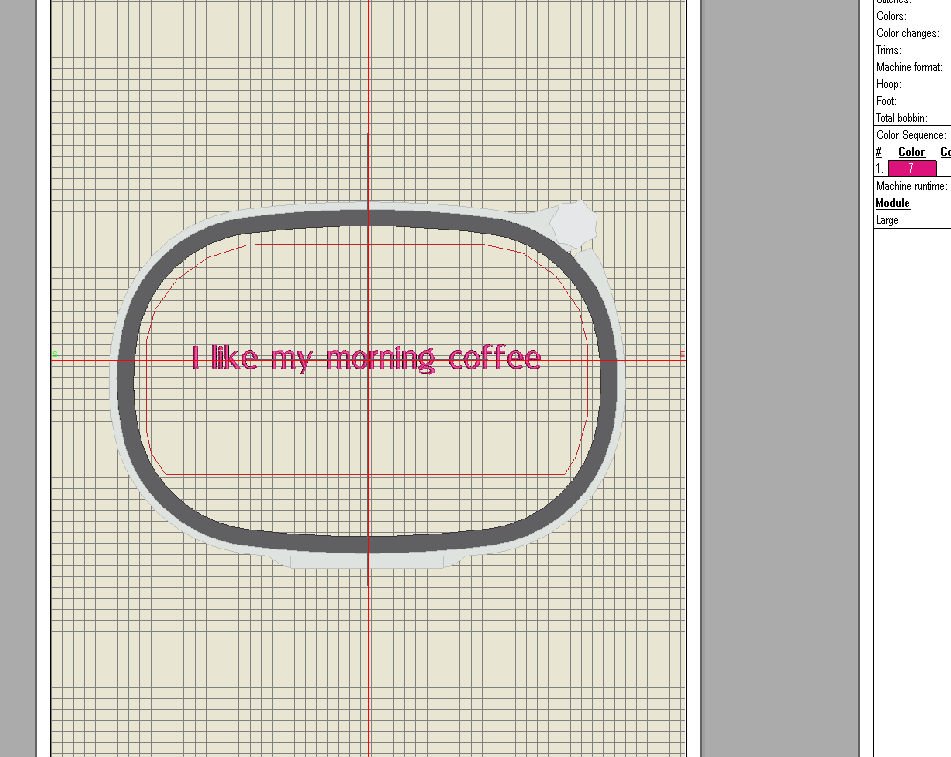
Most of the times you will select the design, and rotate it (2 x 45° to the left or right, or by filling out ’90’ via the icon ‘Rotate’, all options are available with the Transform Toolbar). Now the design/my text is well within the safety marge. But if I want to edit it, I have to ‘look around the corner’, as we say in the Netherlands, I have to tilt my head to see if the adjustments are carried out well, or I have to rotate the text/objects back to horizontal, edit them and rotate them again to vertical. Too much work…
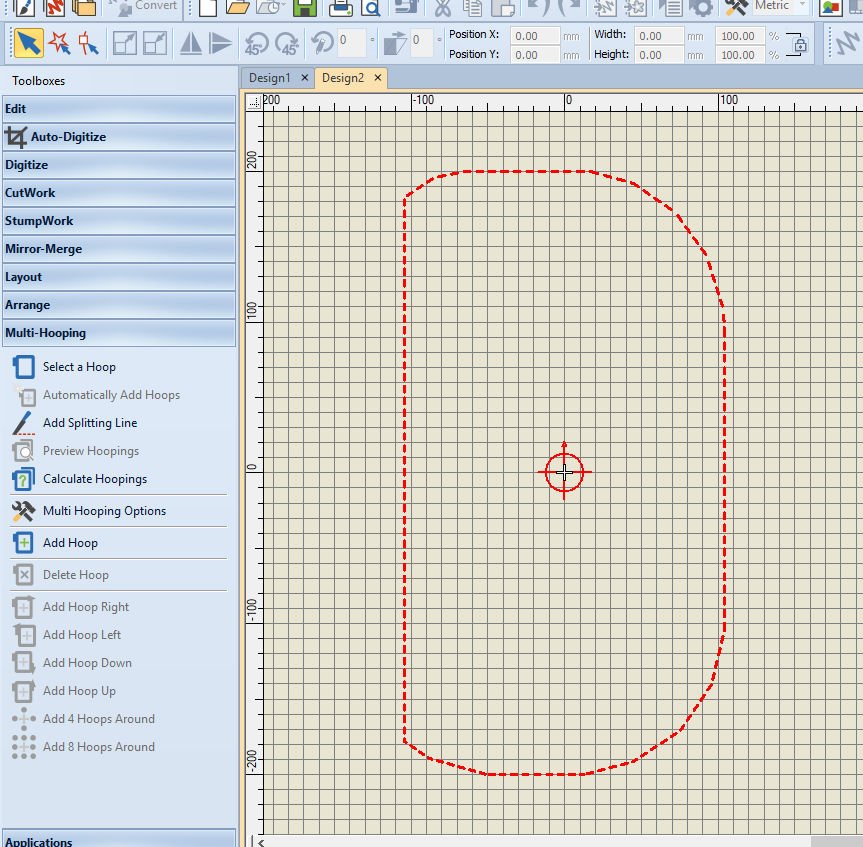
Better to rotate the hoop itself, which is no common knowledge. To do so, I have opened a new tab with just the ring (for practice purposes only, because my text is already with the first tab), click on ”Multi-Hooping’ with the left toolbar (Toolboxes). A different kind of hoop is showing: red dots with a center cross hair circle.

Click on the red dotted lines (the hoop itself) to select the hoop. Immediately, all rotation icons are activated in the Transform Toolbar.
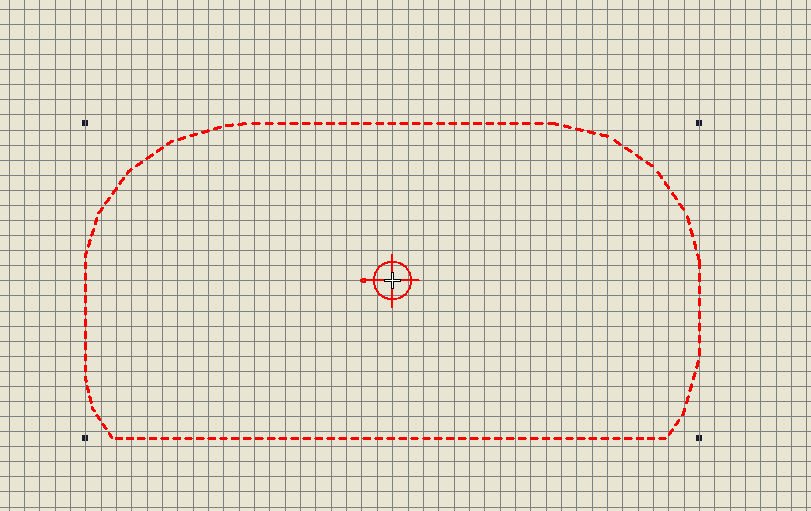
Click twice on 45° (left or right – click twice for 90°)), or fill out ’90′(for 90°) with the rotation icon, to move the hoop to a horizontal position.
Leave ‘Multi-Hooping’by clicking ‘Edit’ with the left toolbar, and your embroidery hoop turns back to ‘normal’, only now it is placed horizontal.
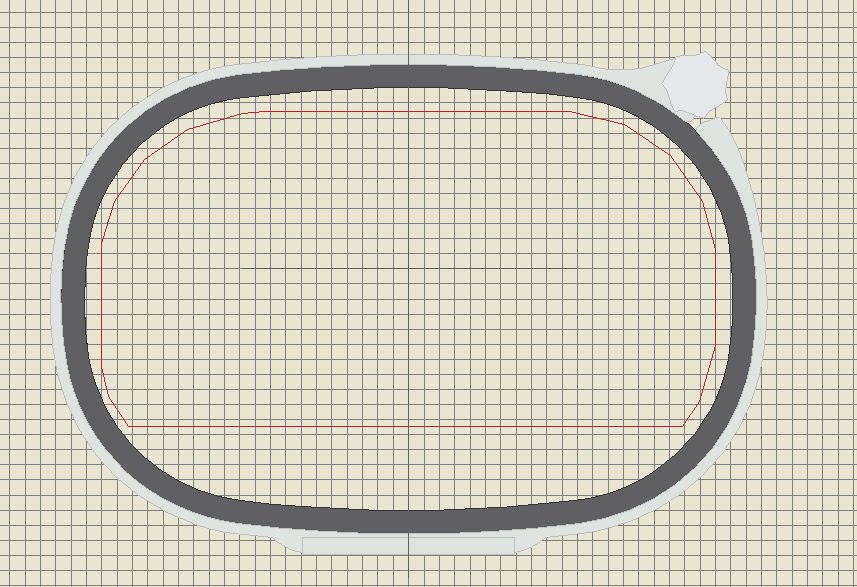
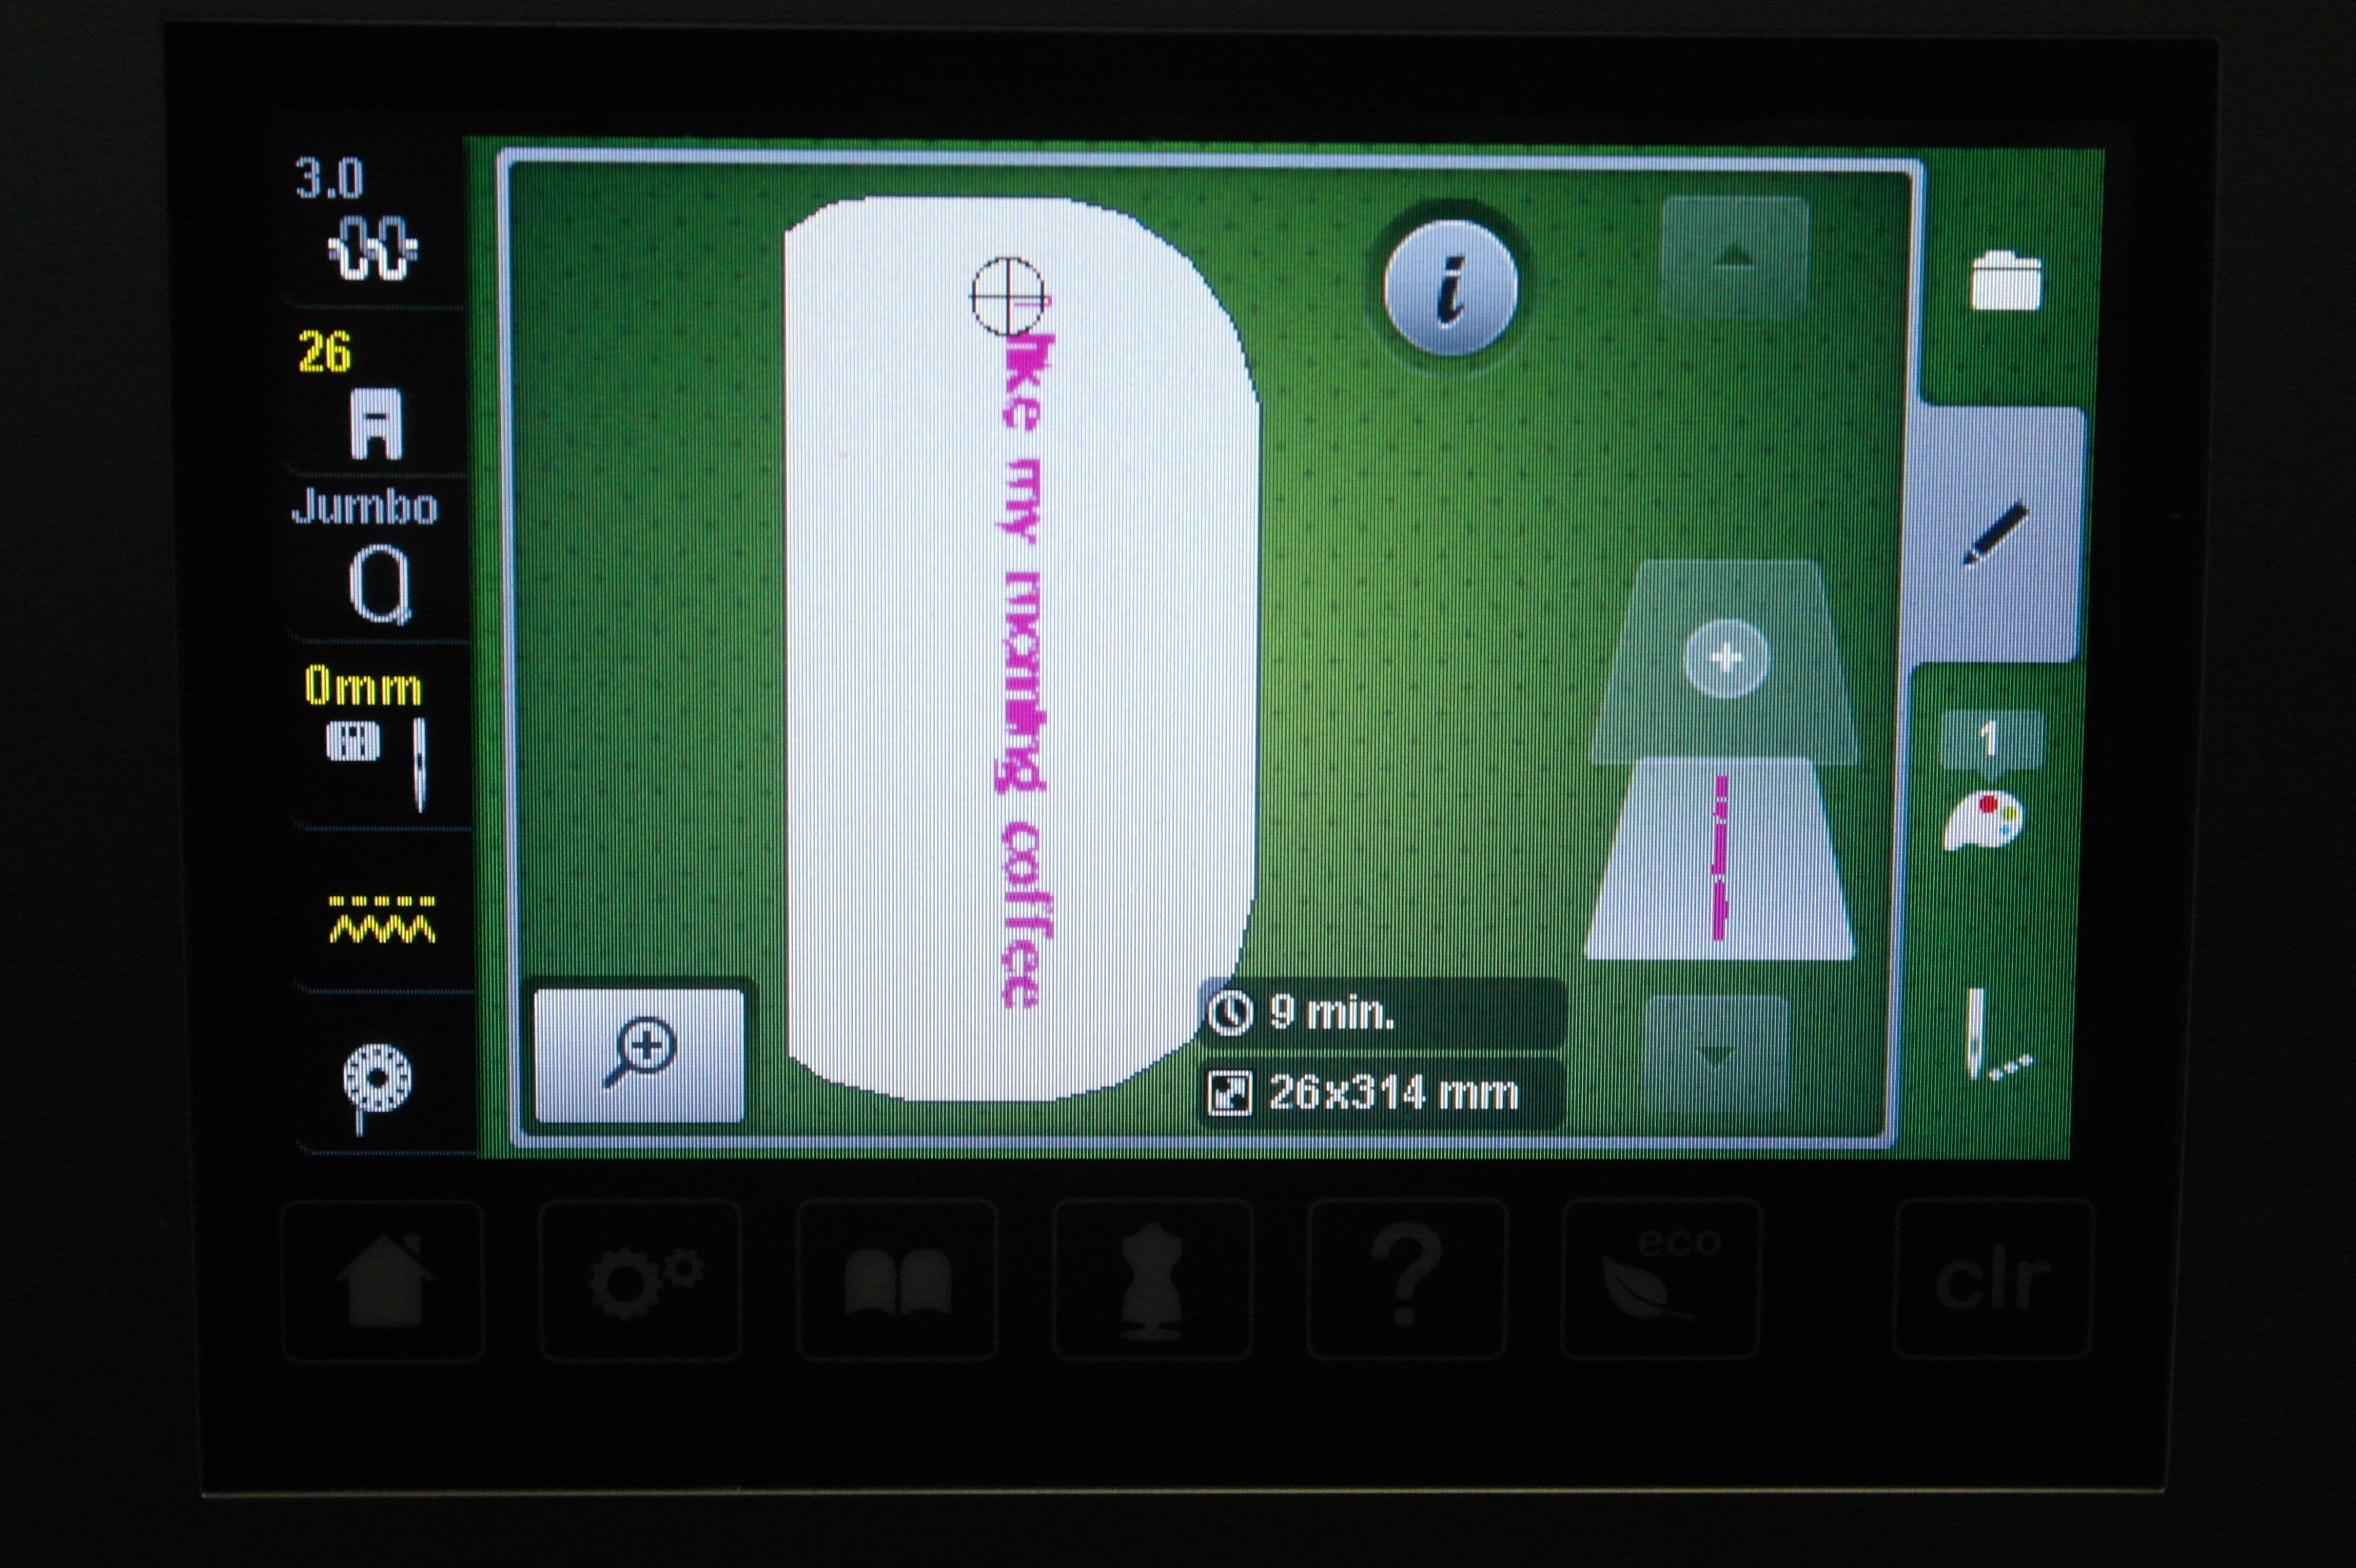
My long text/sentence fits just fine, and I can edit it also horizontally, which is much easier than vertically.
Using ‘File’, ‘Print preview’ shows the horizontal placement of the hoop and the text/design. I have set the size to 30%, to have the Jumbo Hoop placed on one sheet of paper. If you want to print/view it on actual size, fill out 100% – you will se that the picture of the Jumbo Hoop will not fit on one page, but needs multiple ones.
Just to be sure, I wanted to check the way the Jumbo Hoop will show up on the screen of my B770QE (my (embroidery)machine). I have inserted an USBstick in my computer, used ‘Write to Card’ and transferred the file to my machine. And there you have it: it comes out all right, placed vertically which it normally does, so there is no change there, just on the workspace of the Embroidery Canvas in V8, for your convenience.
Sometimes V8-users are discovering these little tips, because not all of these can be found in the Reference Manual. They will be discovered on the way, while trying things or sometimes by accidentally when working om something else. At least now you know!
Next time a different topic: see you then!
Happy Stitching!
Sylvia Kaptein
Sylvia’s Art Quilts Studio

THANK YOU! Sew helpful. 🙂
Hallo Silvia, ergens heb ik een overzicht van jou gedownload beginnend met les 1 in 2017 van de Embr. Software V8.Dat overizcht heb ik geprint en probeer daar ook de blog lessen bij te vinden. Dat gaat goed tot les 26, dan zou het moeten zijn Fonts invoegen, maar ik zie alleen 26. Multihooping. Kun je me helpen.
The red dashed line of the hoop did not turn into the hoop when I clicked on Edit in the toolbar 🙁