 BERNINA Corporate Blog -
Sometimes an embroidery design – created in the BERNINA Embroidery Software V8 – requires more dramatic effect. There are many options to do so: one of them is Blending. Easy and fun to do.
Blending is great tool: an option in V8 to make shades, perspective, 3D and different effects in color, by mixing two layers with embroidery objects. The blending effect is achieved by duplicating the object and use ‘Color Blending’ and ‘Travel on Edges’ to both layers: they are grouped after this.
There are two different Color Blending effects, according to the BERNINA Reference Manual:
- linear stitch spacing = first two Profiles. 1st = effect Upper layer from right to left, , 2nd = effect Upper layer from left to right.
- curved stitch spacing = last two Profiles. 3rd = effect Upper layer from outside to inside, 4th effect Upper layer from inside to the outside
You can create Color Blending effects with objects, filled with Straight Stitches, Satin Stitches or Fantasy Fills, or line objects made from Satin Stitches or Blanket Stitches.
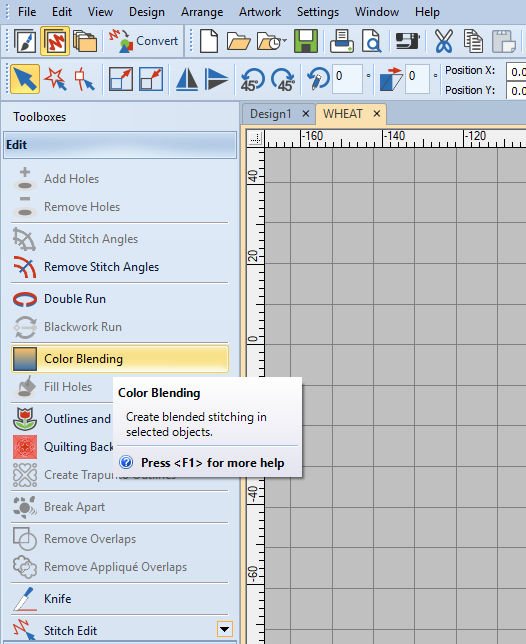
You can find Color Blending with the left toolbar ‘Toolboxes’: go to ‘Edit’ and click on the Color Blending option. Be sure an object is selected on your workspace, to activate this option.
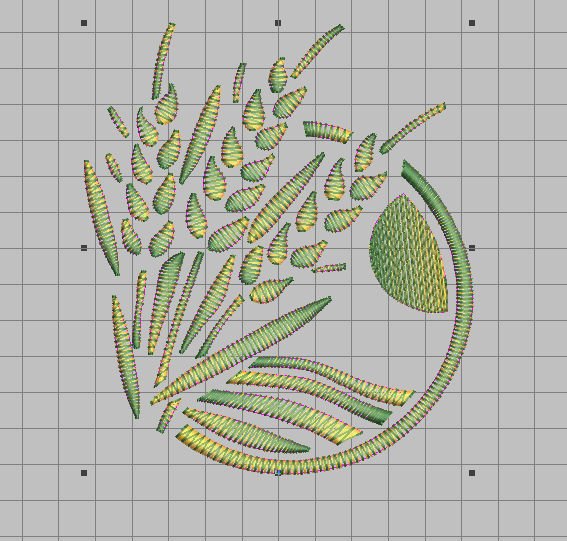
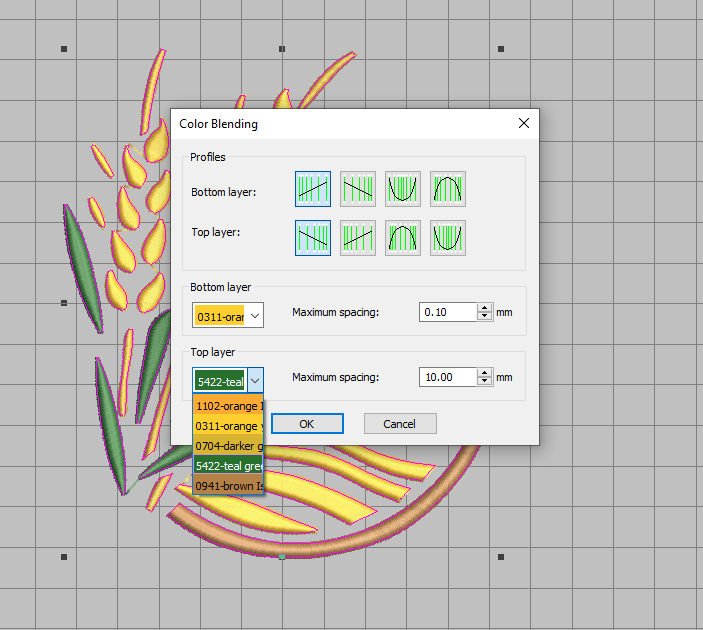
The embroidery design I am using to practice, is the same which is mentioned in the Reference Manual: WHEAT.ART80. I’ve found it in the BERNINA Embroidery Library, and placed it on my workspace. Clicking on ‘Color Blending’ and a dialog box pops up. om zo het borduurontwerp te kunnen zien).
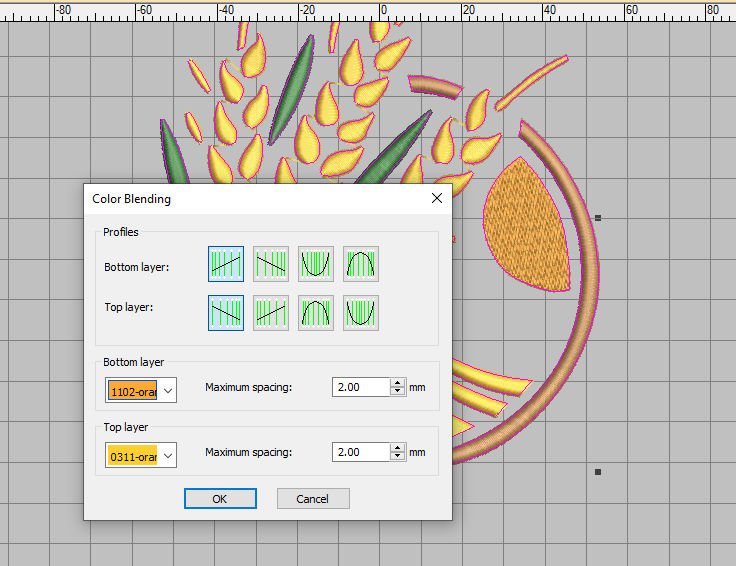
There are several options:
- Profile with bottom and top layer – click on the box of your choice. Either click on a box of the top row (Bottom layer) or the bottom row (Top layer), by clicking on one, the corresponding option with the other row is selected at the same time. The effect for each of the 4 options is different, about placing the Top layer, which gives you the final effect.
- Bottom layer – pull-down menu for changing color, by clicking on the down arrow to the right. Choose a color for the first layer.
- Bottom layer – maximum spacing – change the number in the box for mm or use the up or down arrow on the right, to change the number in the box.
- Top layer – pull-down menu for changing color, by clicking on the down arrow to the right. Choose a color for the first layer.
- Top layer maximum pacing – maximum spacing – change the number in the box for mm or use the up or down arrow on the right, to change the number in the box.
Adjusting spacing is done by changing the values/numbers, using ‘OK’ to set the effect. The number of stitches will be drastically reduced, depending on the profile of your choice, because there will be just 2 colors and the spacing is quite different than with the original design. .
Remember that your changes/editing will be ‘remembered’ by V8. Change it back to default settings? Save each design under a different name, then change the settings back, before closing V8.
Let’s practice!
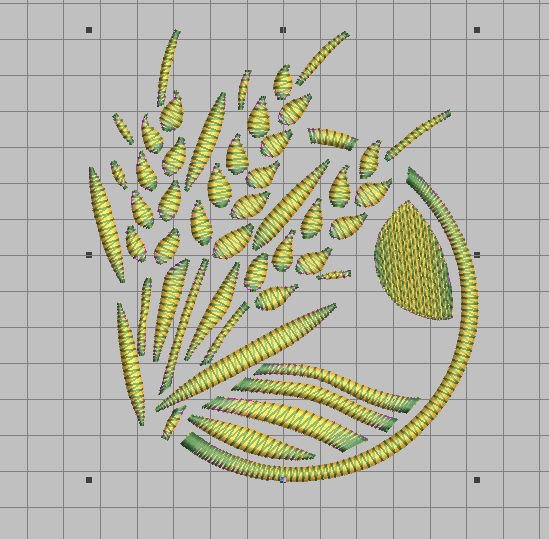
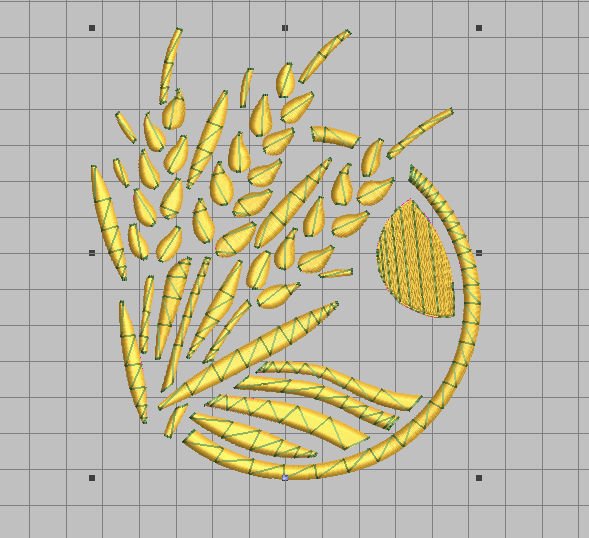
To achieve a 1 on 1 effect (equal distribution of two colors): Change Profile to option 1. Choose a green color for Bottom layer, maximum spacing 2.00mm, and for Top layer a light orange color, maximum spacing 2.0mm. Use ‘OK’ to set,
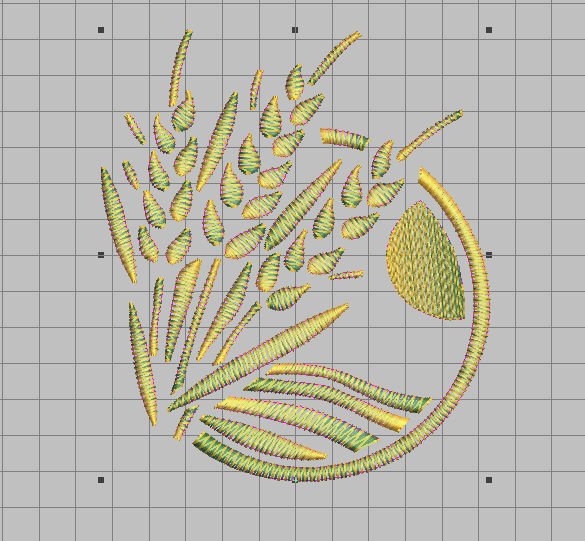
and look: a wonderful blending. The yellow comes out a bit more, because it is a bright and strong color. There are just two colors now, the other colors from the original design are turned off.
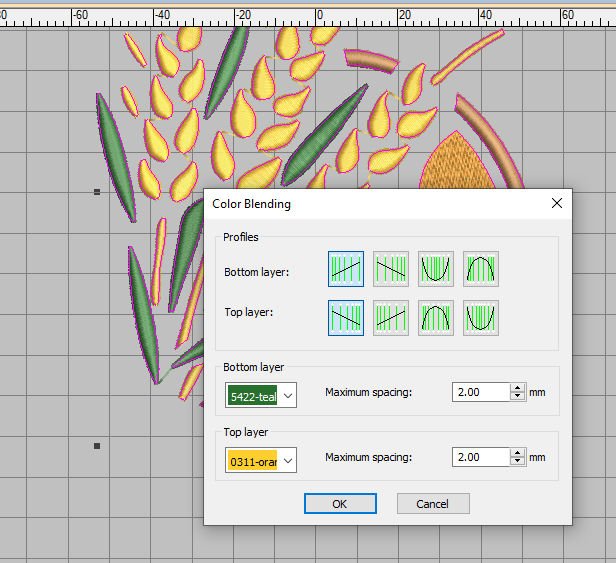
Next, I’ve switched the colors; Bottom layer light orange, Top layer green. Now the green seems to be dominant. You can see that both colors are interchanging, from one side to the other the first ‘changes’ into the second. That’s because I’ve used the 1st profile.
Look what you get when choosing the 3rd profile – the color changes are more centered, working their way outward to both ends of objects.
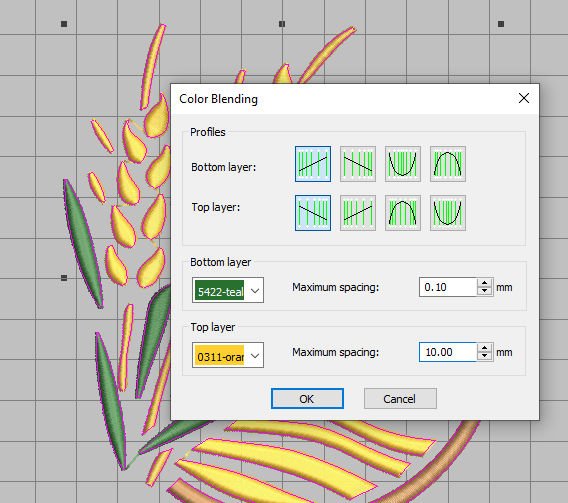
Now let’s try something else. Profile 1st option, minimum spacing (0.10mm) for the Bottom Layer, which is green, and maximum spacing for the Top Layer, which is light orange. Use ‘OK’ to set.
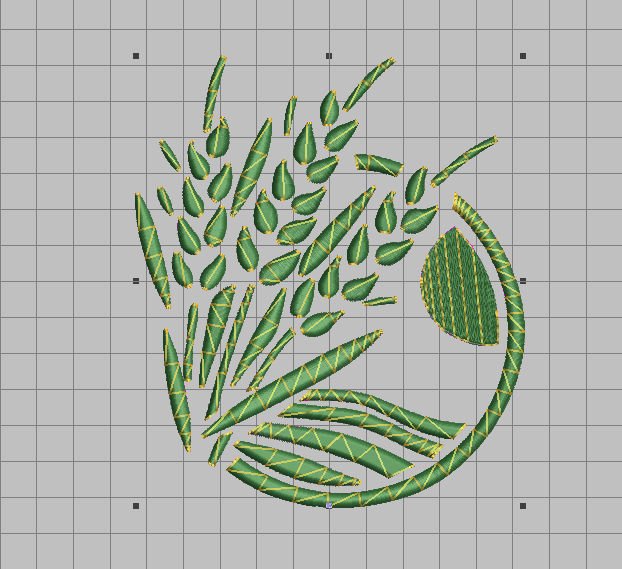
The Green is now the main color, with light orange accents. If you want to save this setting, save it with a different file name, for later use.
Now change colors. You can use ‘UNDO’ to go back to the previous settings. Keep the rest of the settings, and use ‘OK’.
Yellow is the dominant color now, and green just an accent.
Adding colors.

To be able to use more colors, you have to add colors to the Color Palette – you can only use the colors from the original design at first, because they are available at the Color Palette, bottom of your screen. Just use the + to the right of the Color palette = Add Palette Colors to be able to choose from different colors for Bottom Layer and/or Top Layer.
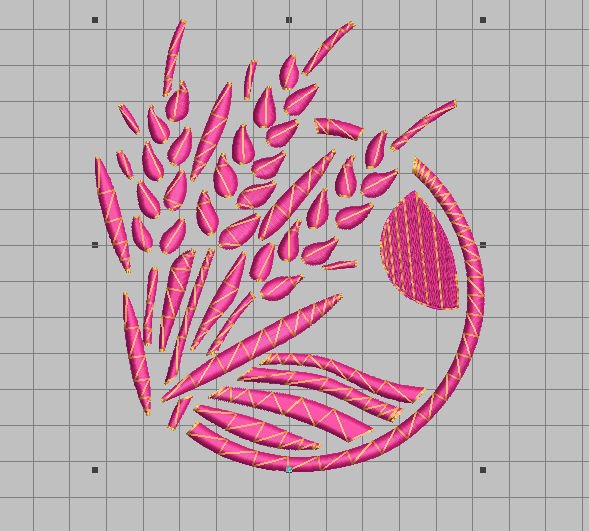
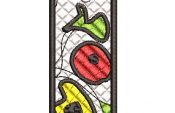
Now these colors will show up with the color options for Color Blending. You can add as much as you want, even choose colors/threads from ‘My Threads’. I have used a Magenta as dominant color.
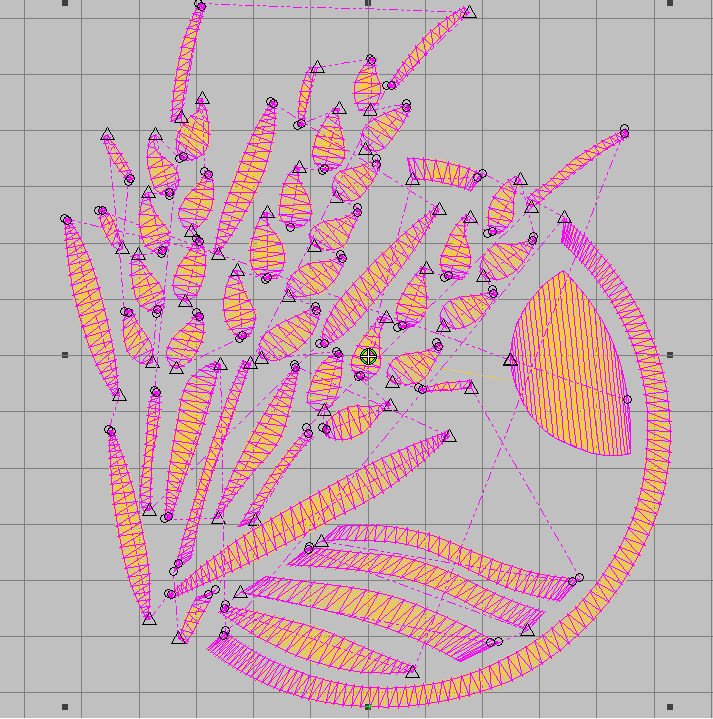
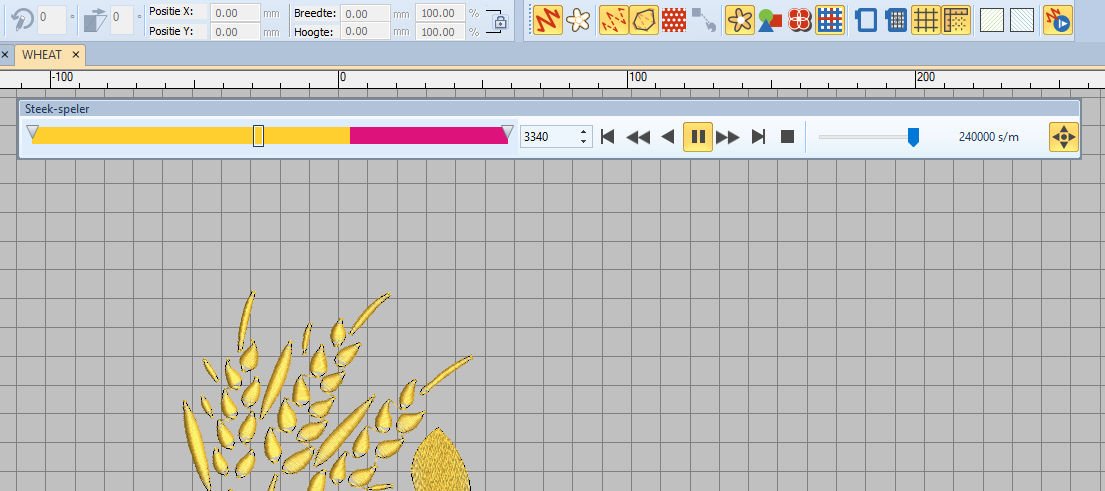
Deactivate ‘Show Artistic View’ to see how everything looks with all settings. This gives you better insight about settings, and sequence of embroidery.
In the docker ‘Color Film’, a lot of boxes are showing: yellow and magenta interchanging. That means that – if you will bring this design to your machine as it is – every object will be embroidered separate: first yellow, then magenta.
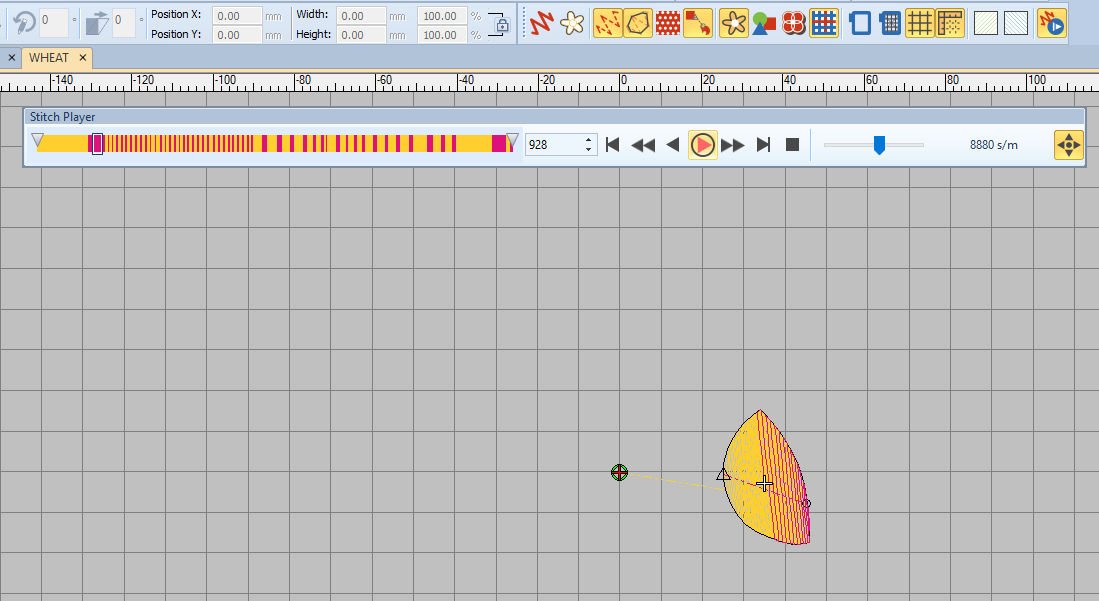
Checking ‘Stitch Player’ shows that too: the row of colors, left, shows many changes with yellow and magenta. This is not how I want to embroidery, because I will have to change colors for each object. My machine will cut threads and tie in/tie off at every change of color. That’s time consuming, so…
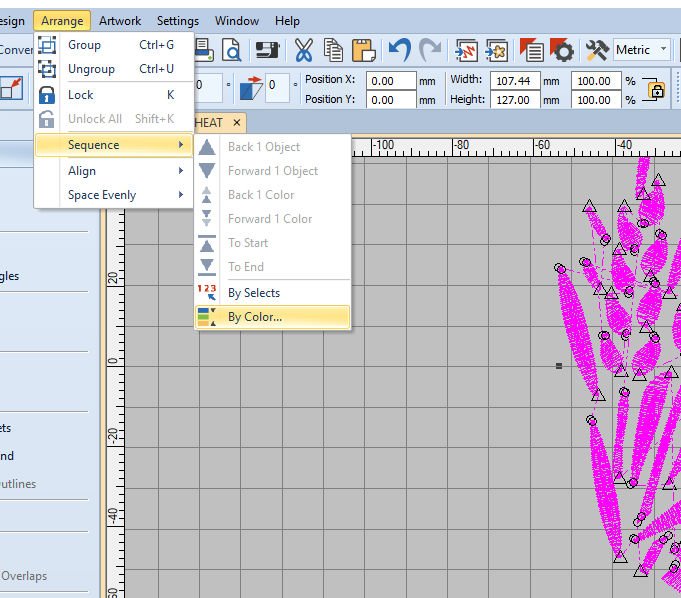
V8 can do better than that. Select the design. Via ‘Arrange’ (Top toolbar), then ‘Sequence’, and ‘By Color…’ to change embroidery sequence.
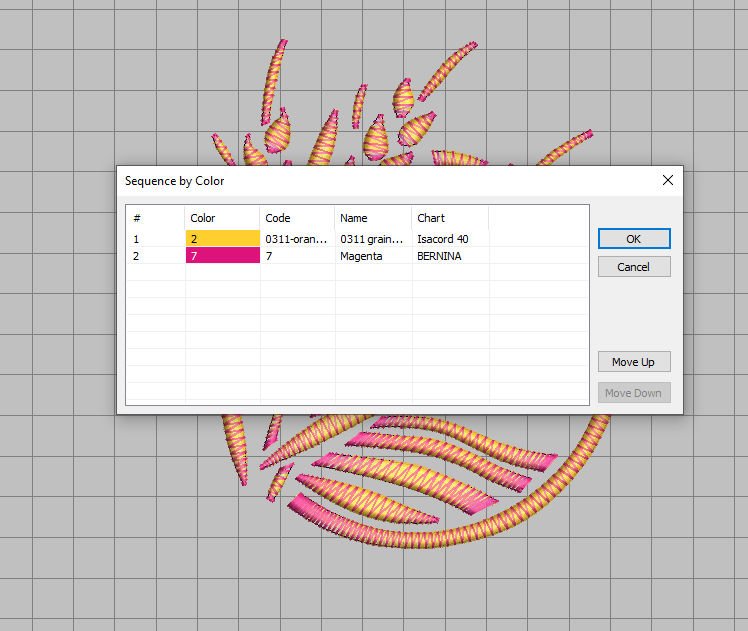
A dialog box ‘Sequence by Color’ shows that just two colors will be used, but now all objects of the first color will be embroidered before the next color can be used.
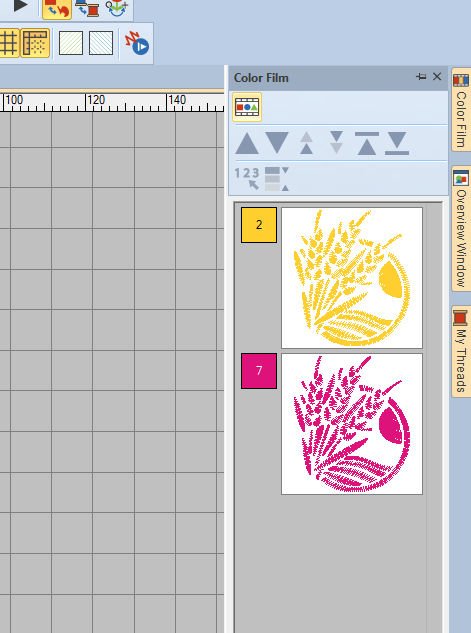
Checking the docker ‘Color Film’, and just two boxes are available: yellow is the first color = Bottom Layer, magenta is the second color = Top Layer.
Both colors are arranged according to embroidery sequence: Stitch Player will show this, It’s quite an improvement.
Practice a lot, with different colors and settings. This will improve your skills, and gives you more insight about Color Blending. Next time Part 2 of this feature in V8: see you then!
Happy Stitching
Sylvia Kaptein
Sylvia’s Art Quilts Studio


0 Responses