 BERNINA Corporate Blog -
Paper Piecing is a favorite patchwork technique, which many quilters prefer. It is often much easier to make sharp points, especially if they don’t have to meet in the seams. The trick is also to cut the fabrics large enough to cover the entire section of a Unit, including seam allowances and some extra. This works fine, as long as the Unit is straight, like a rectangle or square. But what if the Unit is asymmetrical, and the ‘next’ section is larger than the previous one?
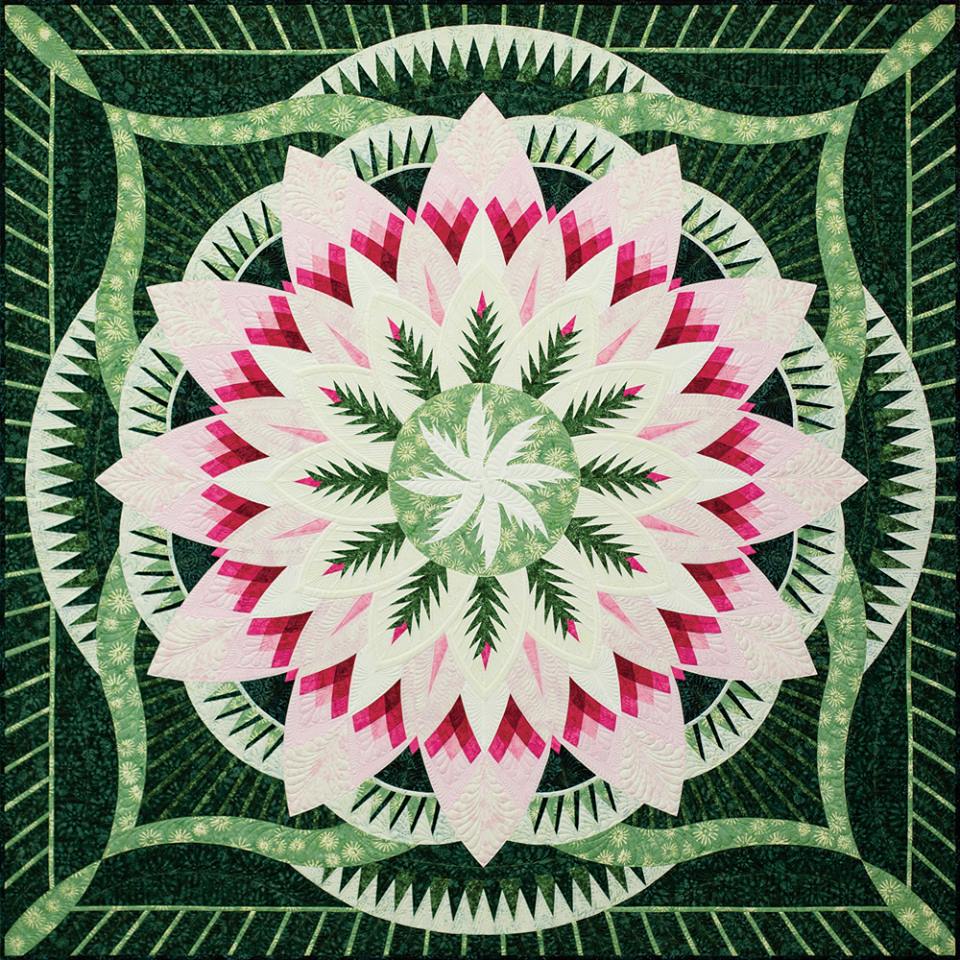
At this moment I am working via my BERNINA 770QE, to make the Dinner Plate Dahlia – a pattern by Judy Niemeyer, which you can order by clicking on the link. It is a Technique-of-the-Month pattern, including Units that are asymmetrical, curved,with different effects. The directions are extensive, with step-by-step drawings, so it should be easy. The fabrics are cut via a template layout sheet, which makes each piece of fabric large enough to cover the required section.
But still it is sometimes difficult to place the fabric the right way.
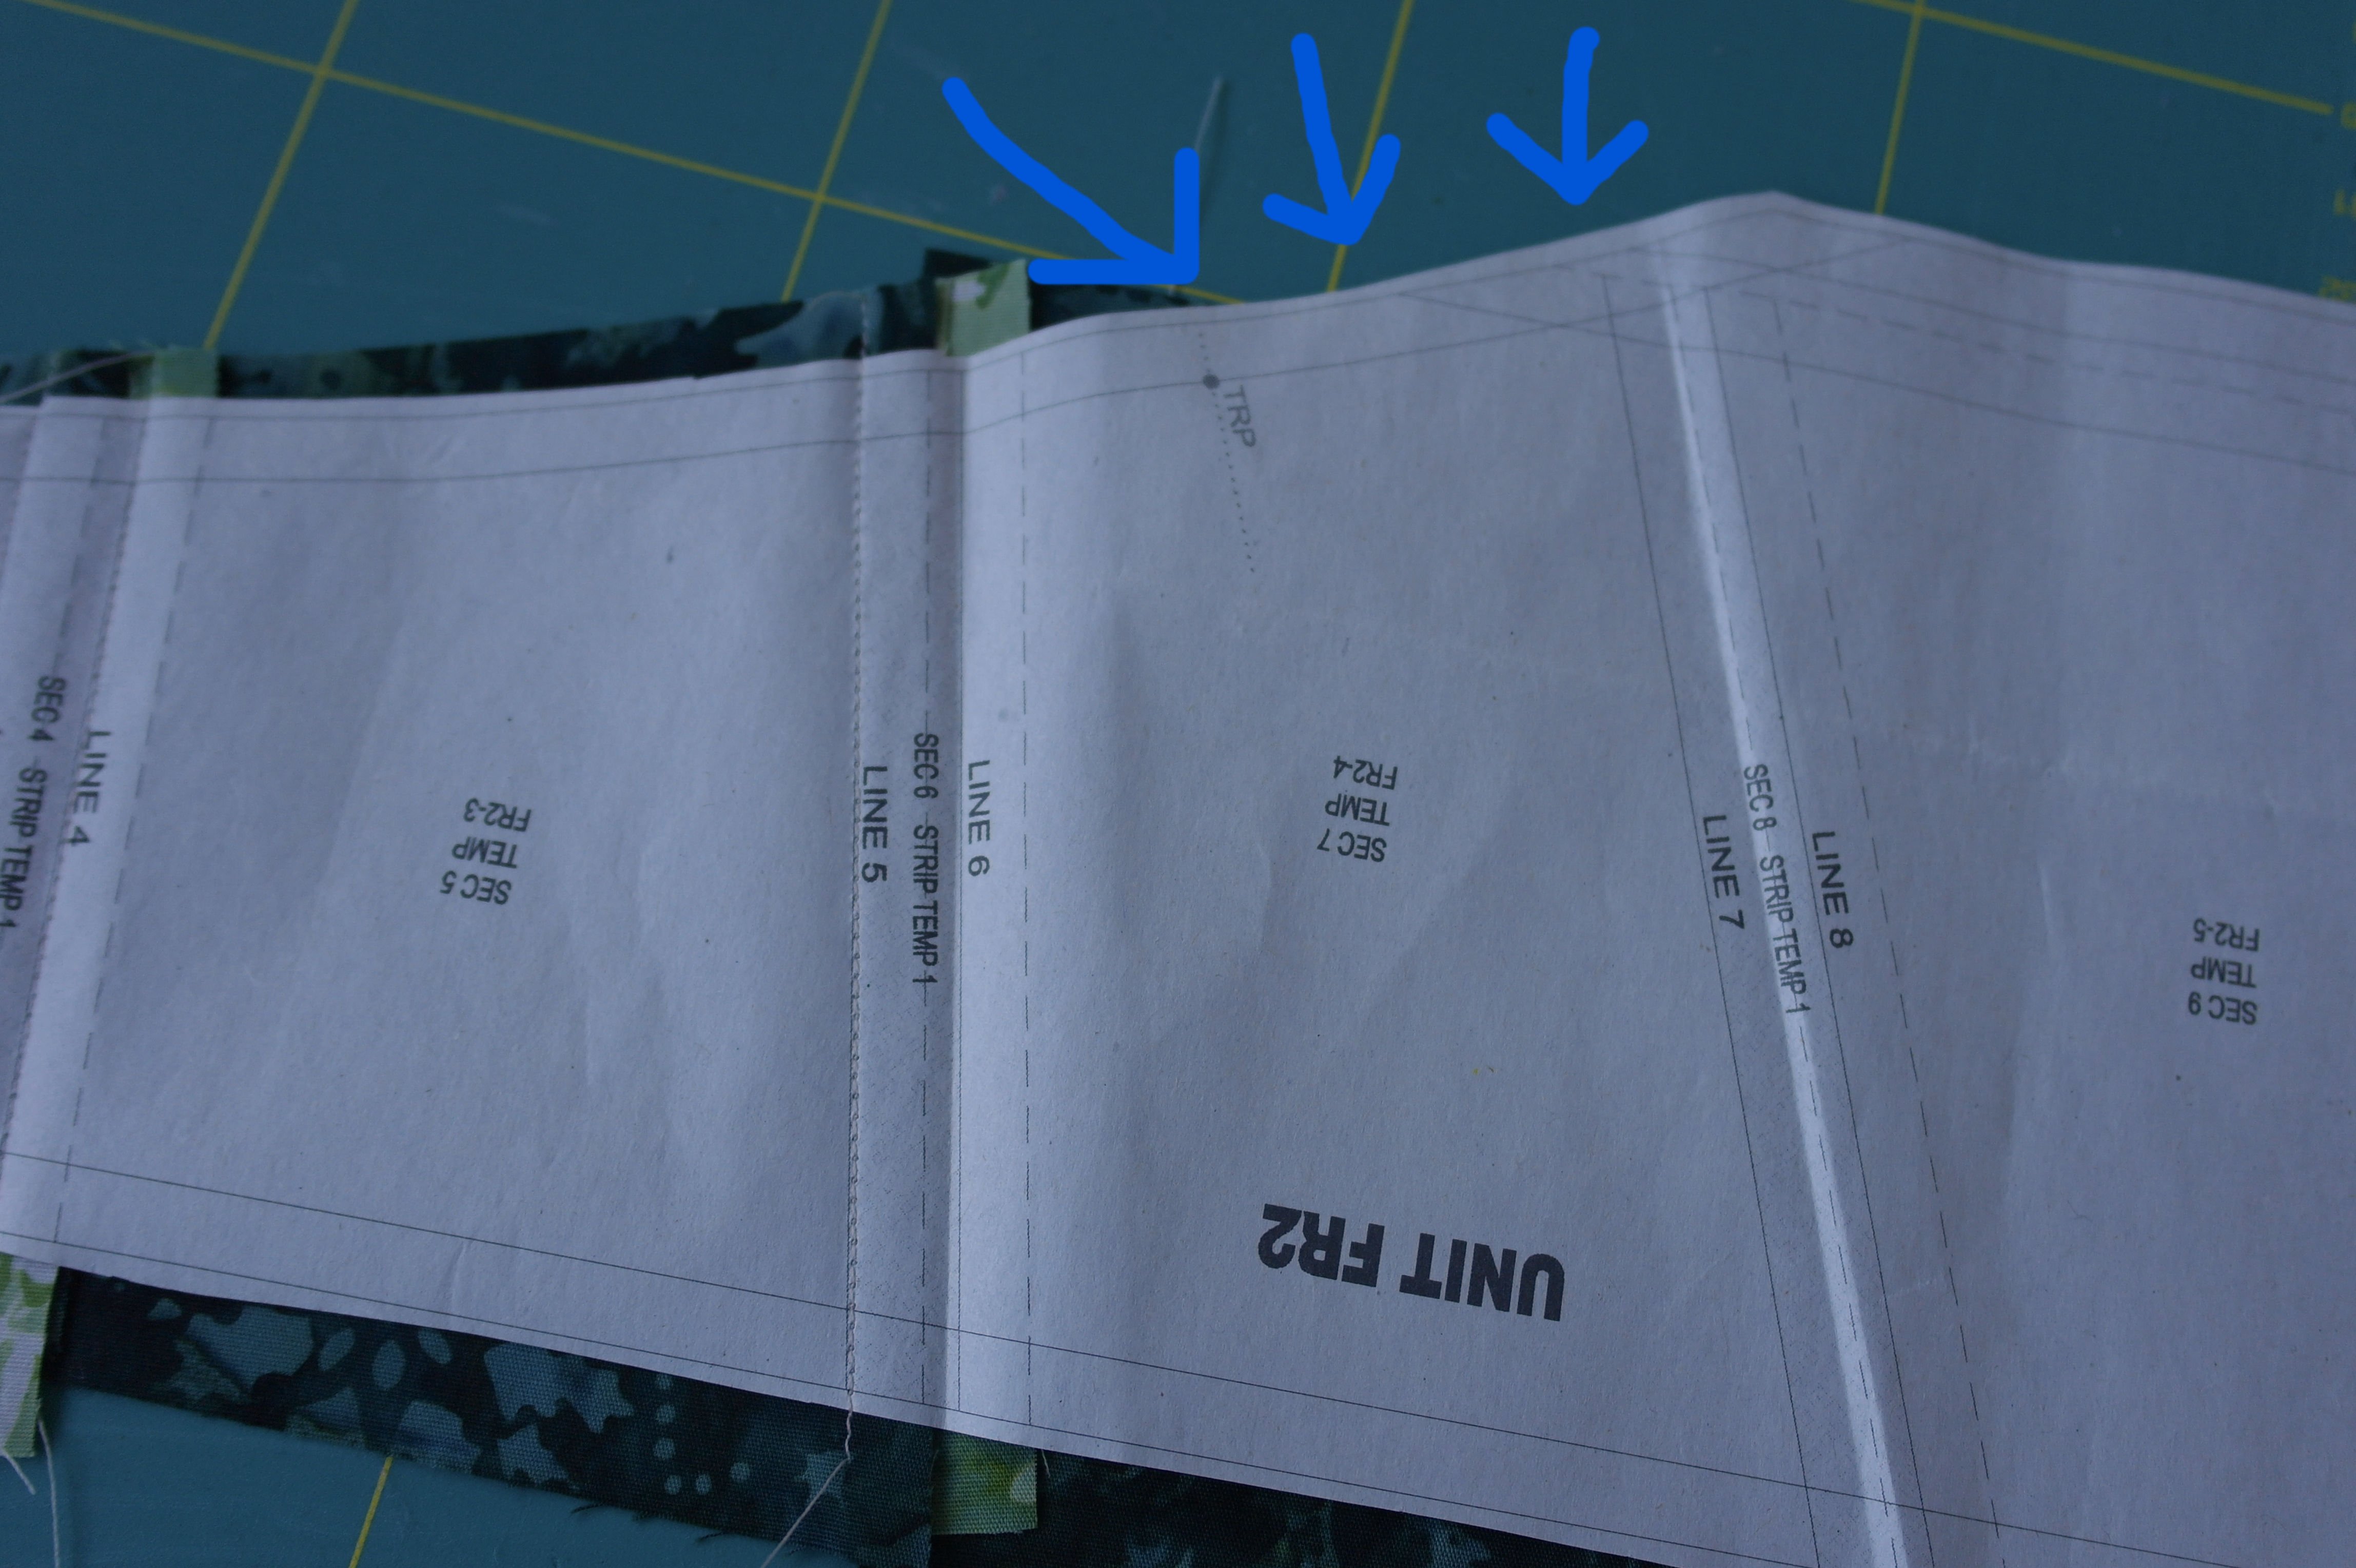
This is such a Unit, I am working to complete it at the moment. Some fabrics are sewn onto the paper foundation: the solid line is the sew line, the dotted line indicates where the end of the seam allowance of each fabric should be, using the Add-a-Quarter ruler, folding template and rotary cutter. The Unit goes ‘UP’, so it is important to place the fabric the right way. Each next fabric is wider than the previous one: the paper templates are numbered, as are the sections, and by stacking each fabric for the Units, keeping it in that order while sewing, ironing and cutting the seam allowances back, nothing should go wrong.
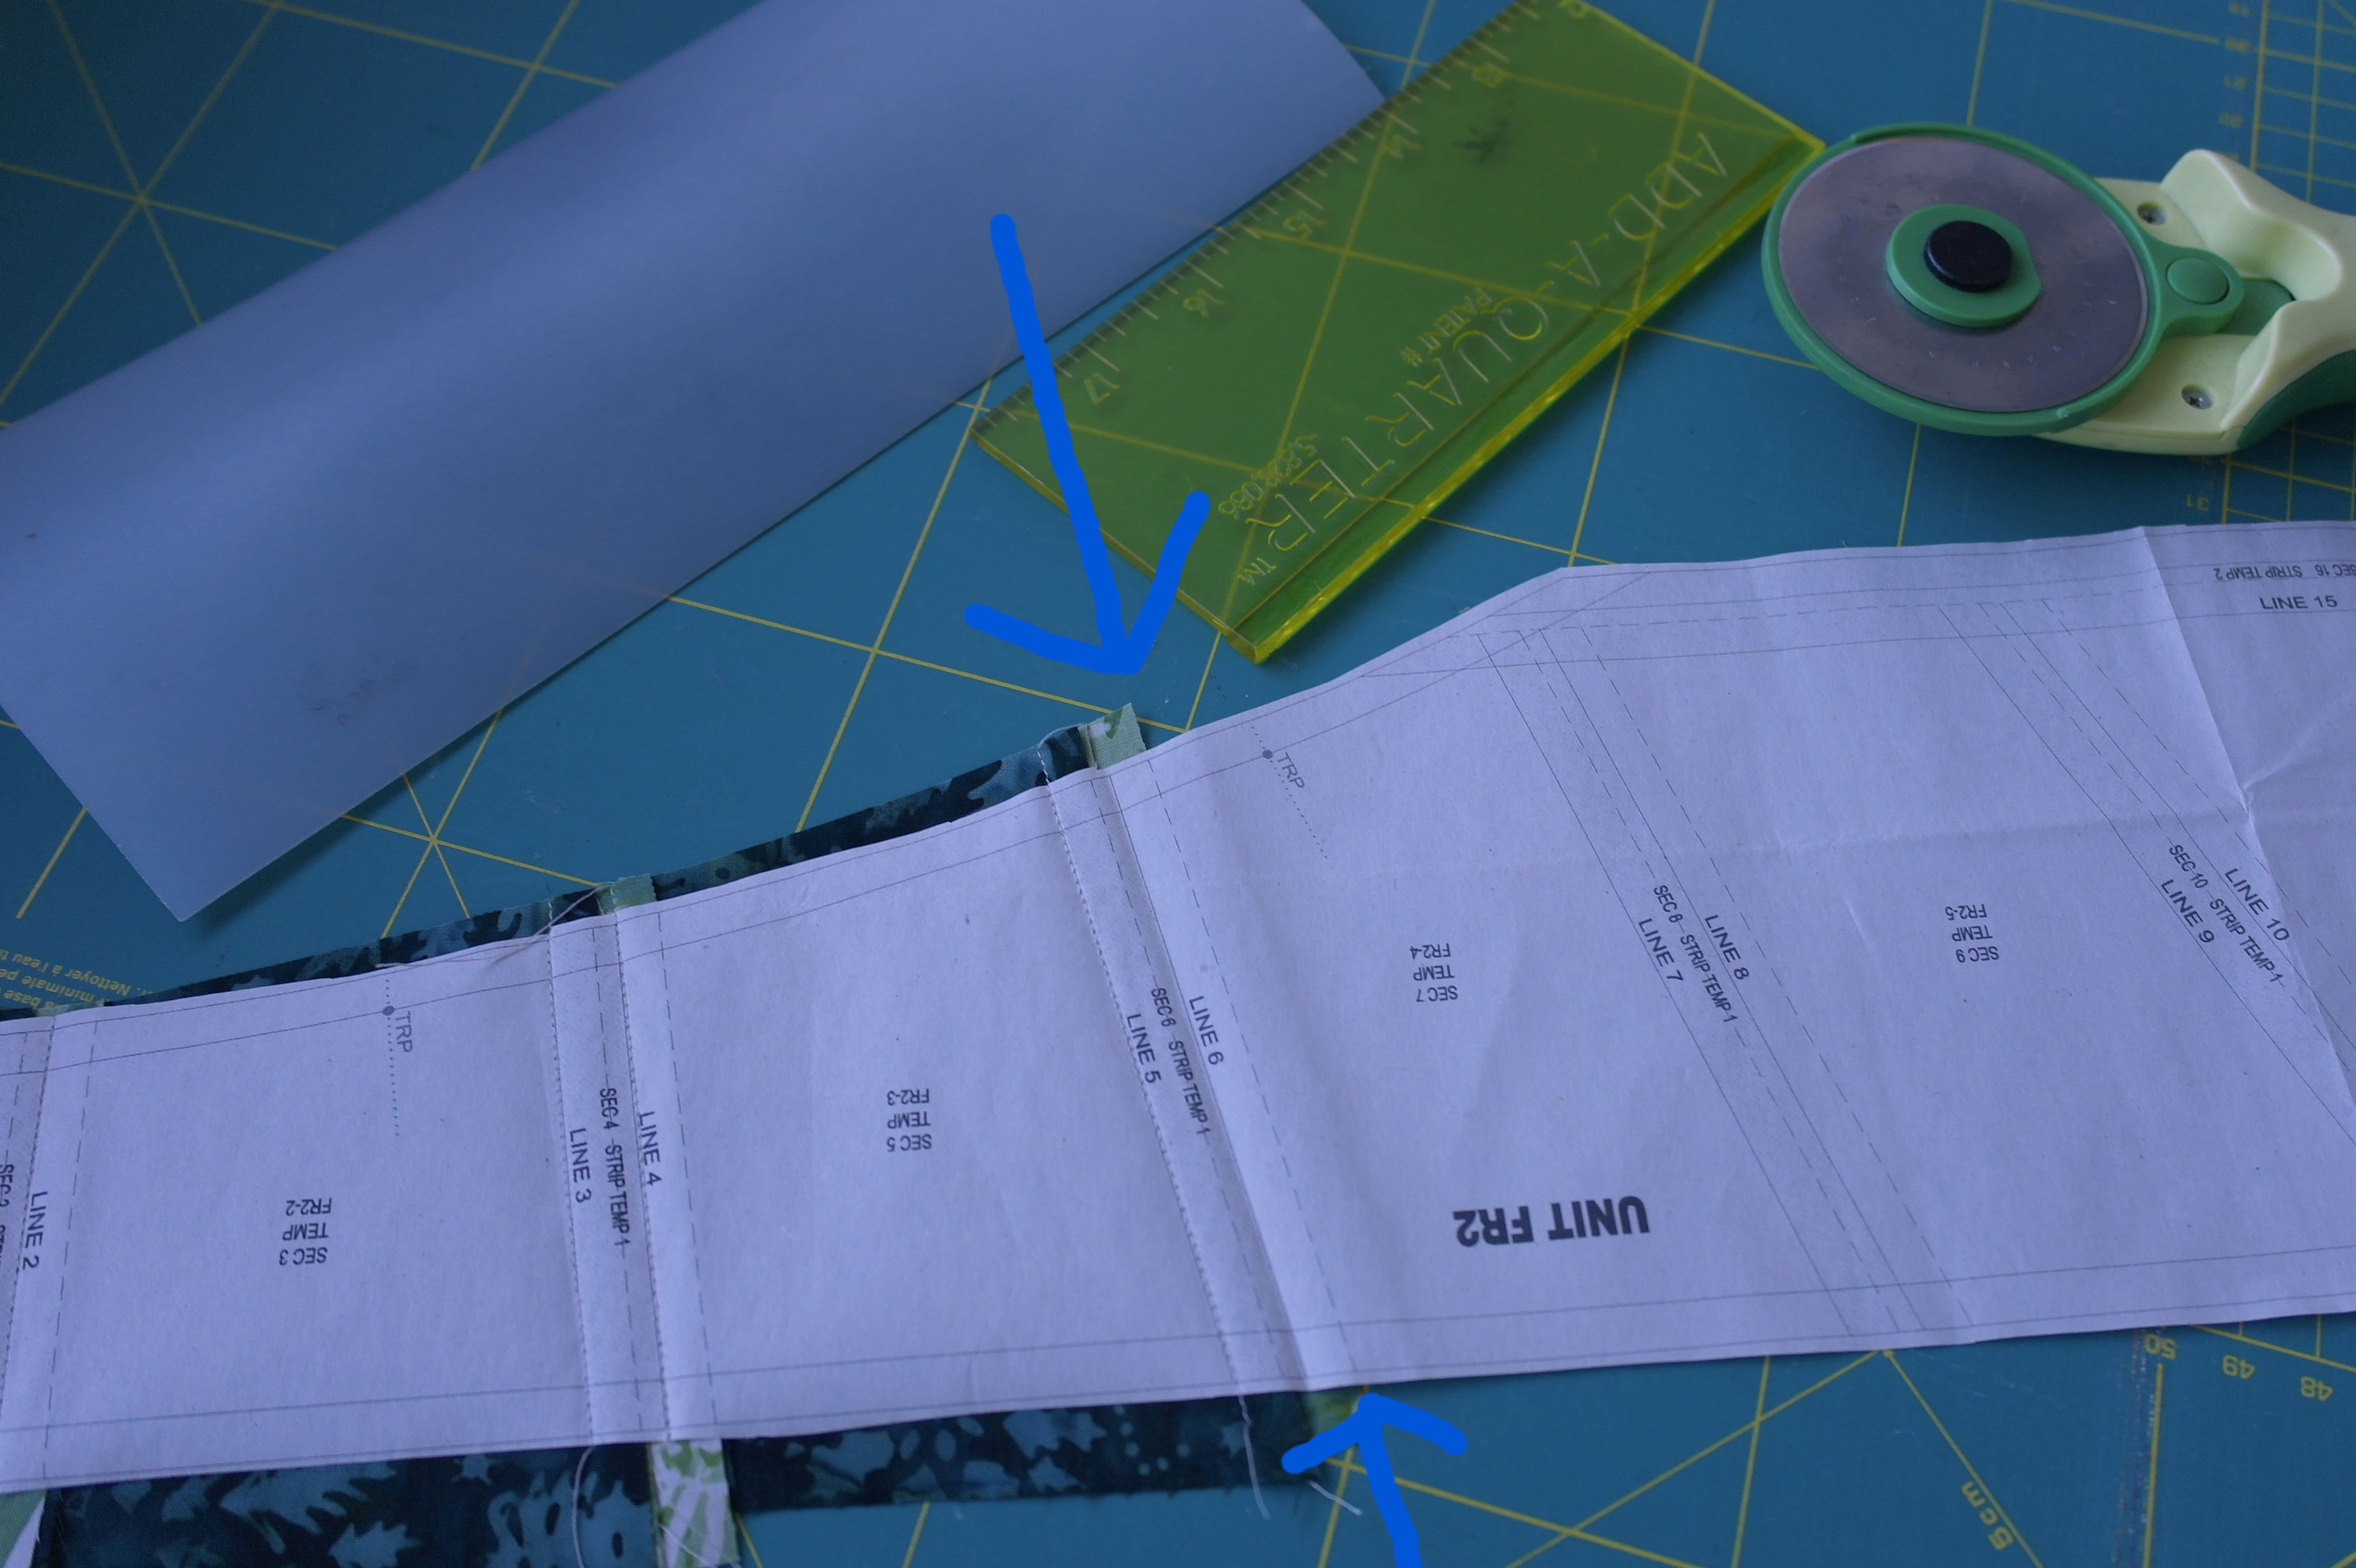
The seam allowances are cut back to 1/4 inch, so the next fabric can be placed right on this seam allowance (blue arrows), underneath the dotted line. I have cut back the excess fabric on the top and bottom of the Unit, leaving a small extra. (The Unit is placed upside down to show the curved side better).
The straight side is easy to work along: just be sure the fabric is placed beyond the paper Unit. But the other side is a bit more confusing. Luckely the paper templates are showing how to place the fabrics (this is clearly visible when you are making this quilt) but still it is important to position the next fabric a certain way.
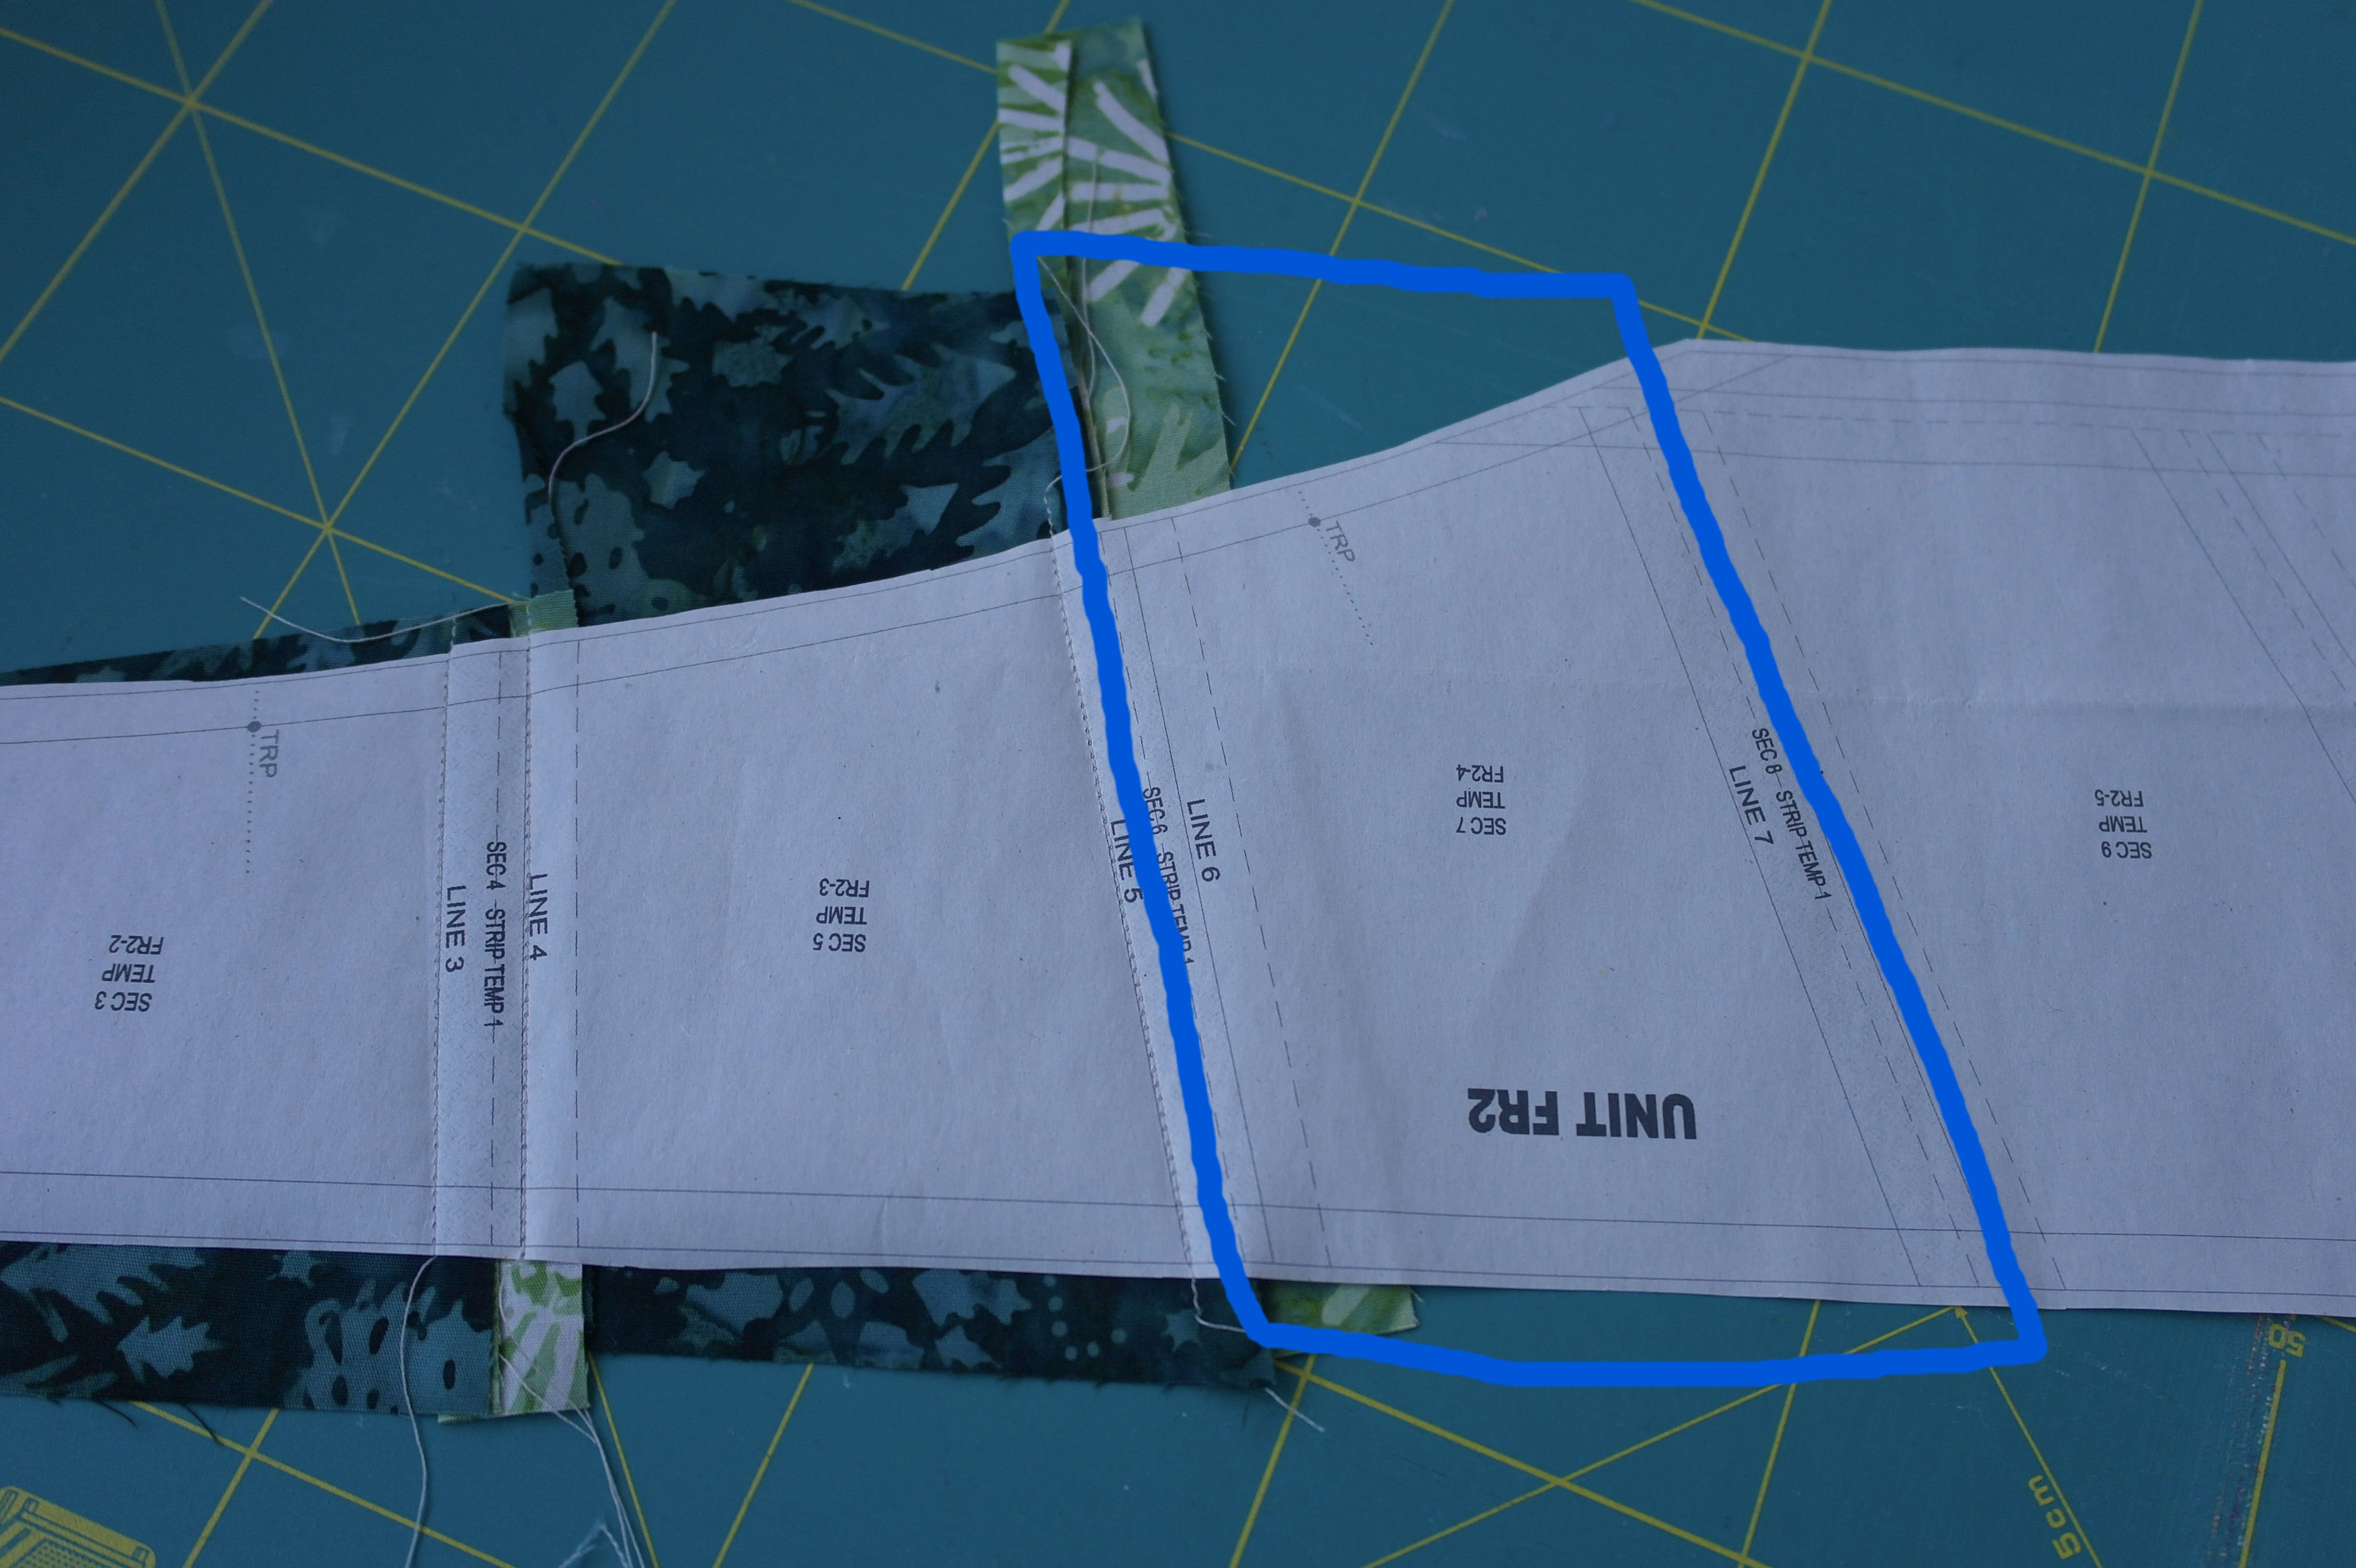
If you would place the next fabric to far underneath the straight side of this Unit (whith other Units, if can be different), the fabric protrudes from the straight side, but there is almost nothing visible at the other side.
If you would sew the fabric this way onto the Unit, and fold the fabric back to the right side, it will be too short, which the blue arrows are indicating. Because the paper unit goes ‘UP’, the fabric should protrude on that side too….
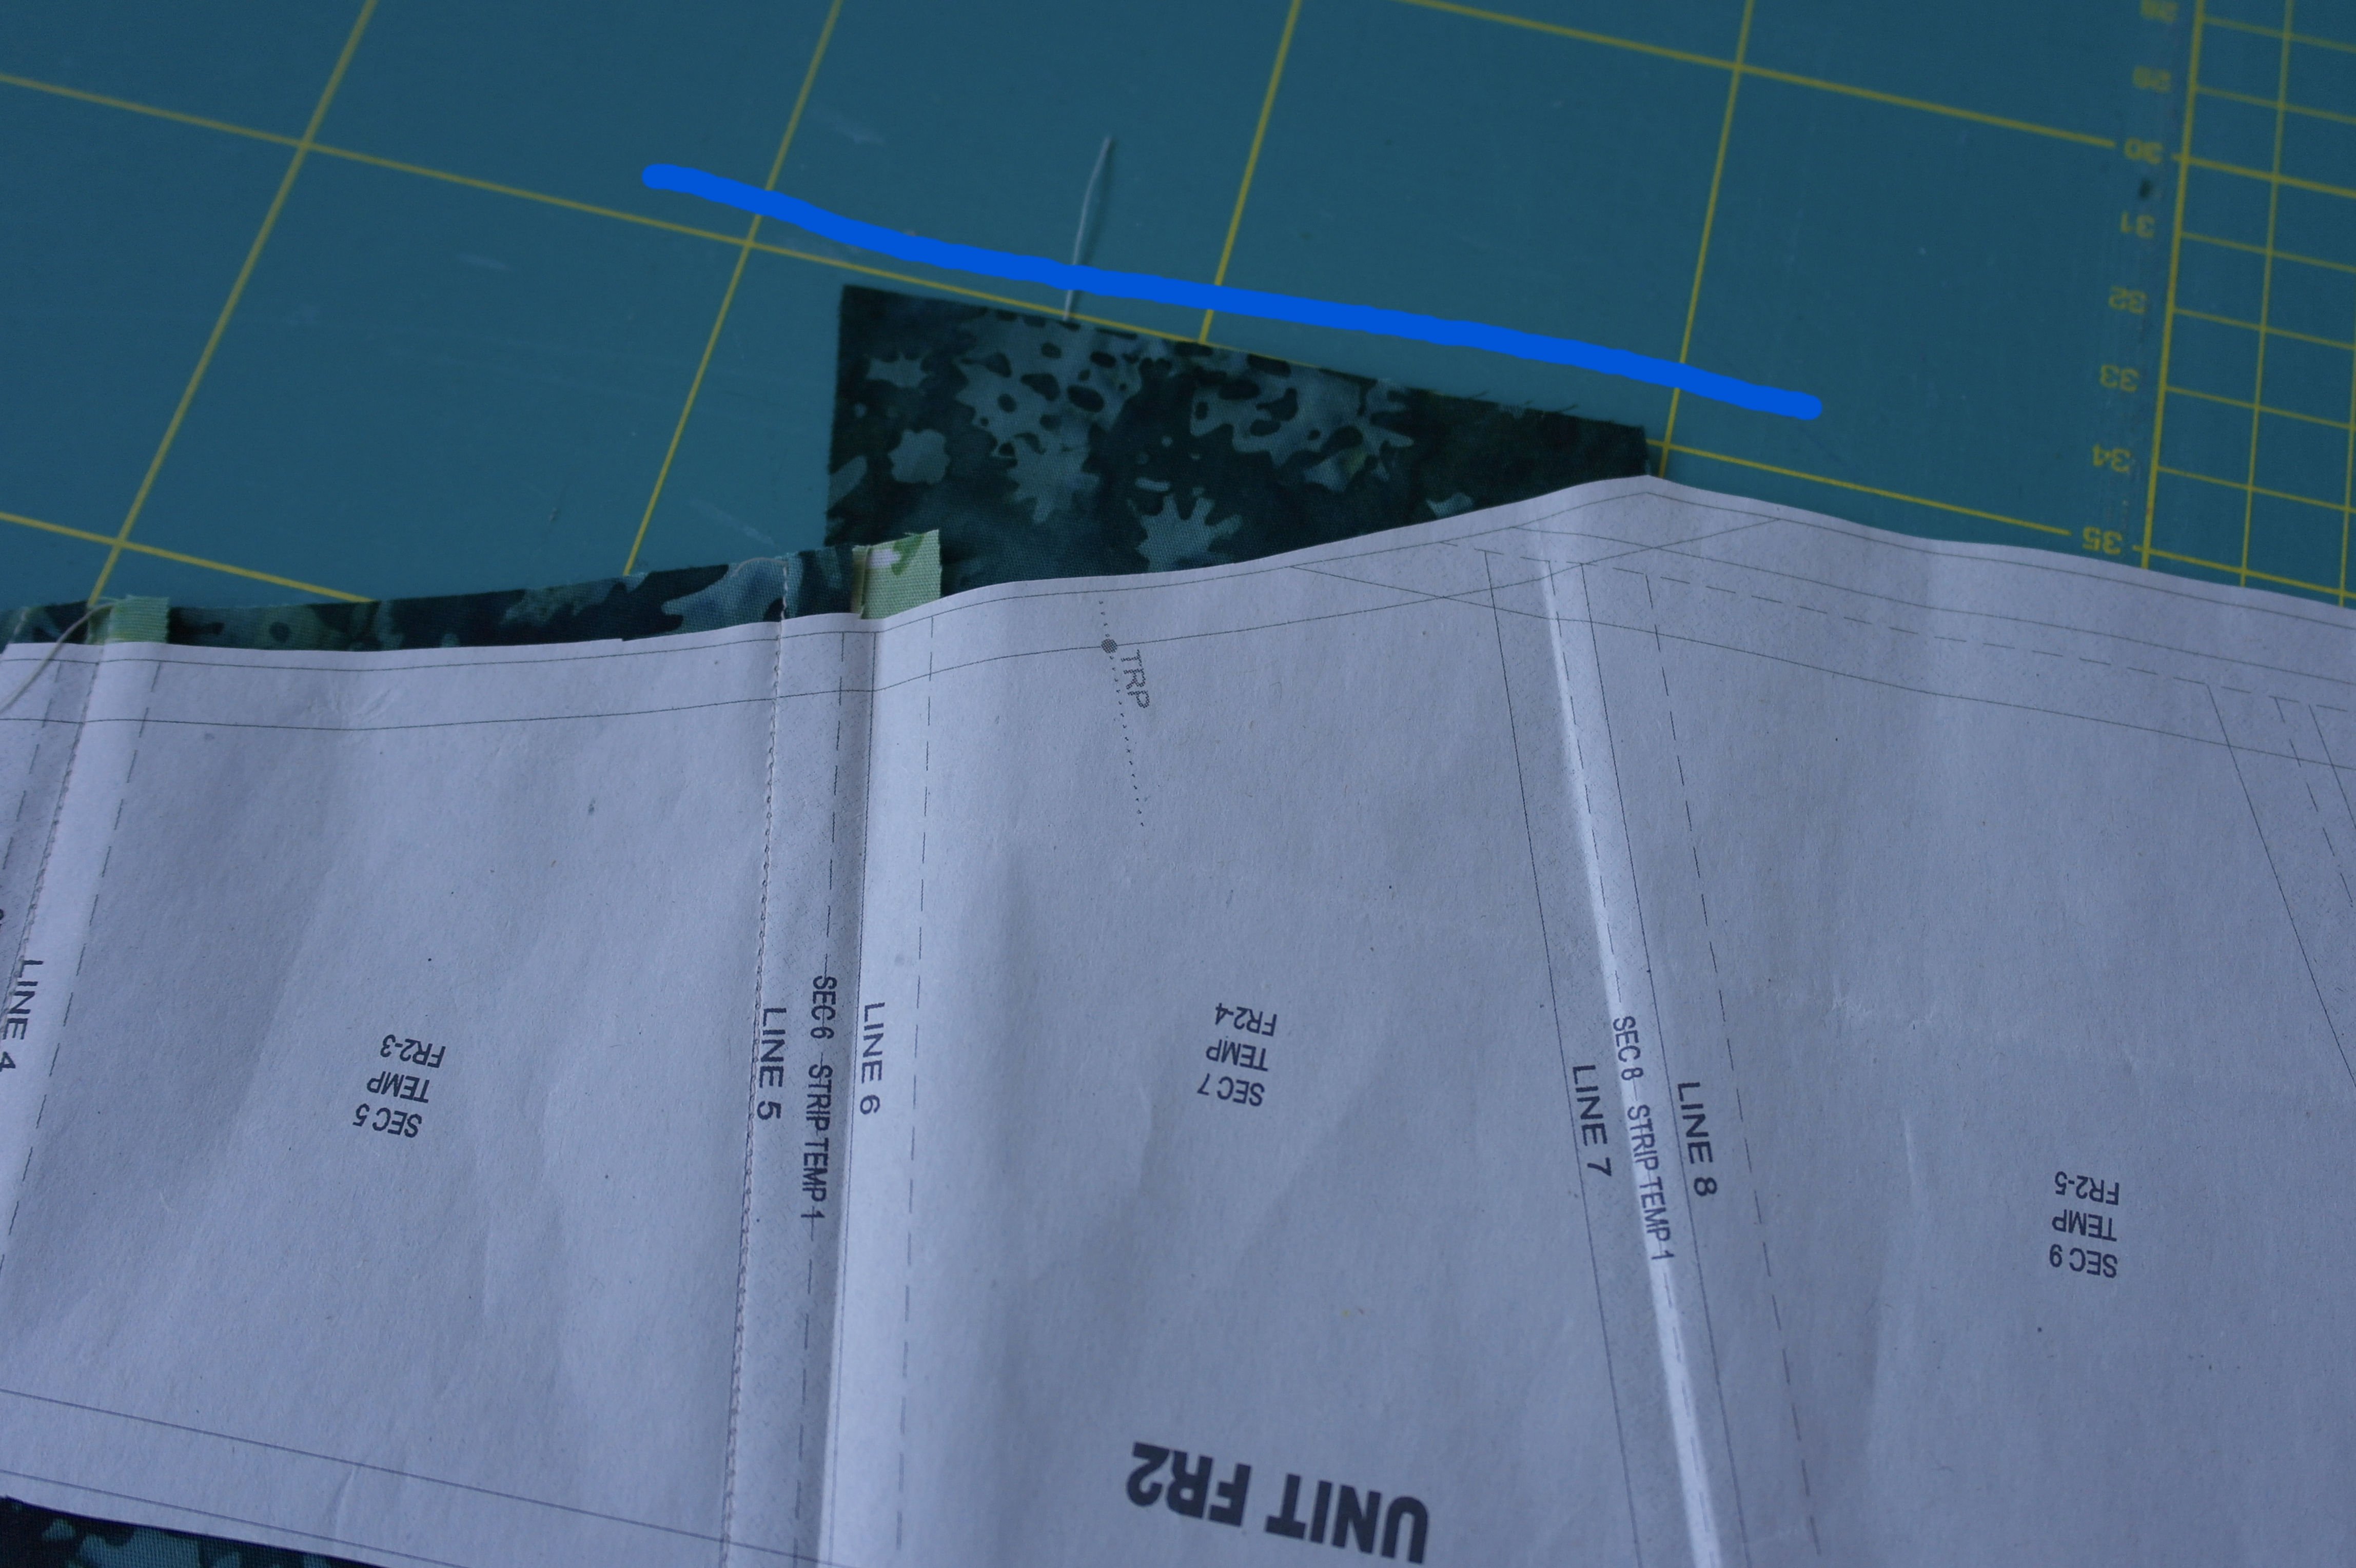
which means you will have to place the fabric higher, and beyond the edges of the Unit. With the blue line, I am showing you that the way I have placed it now, is the right way.
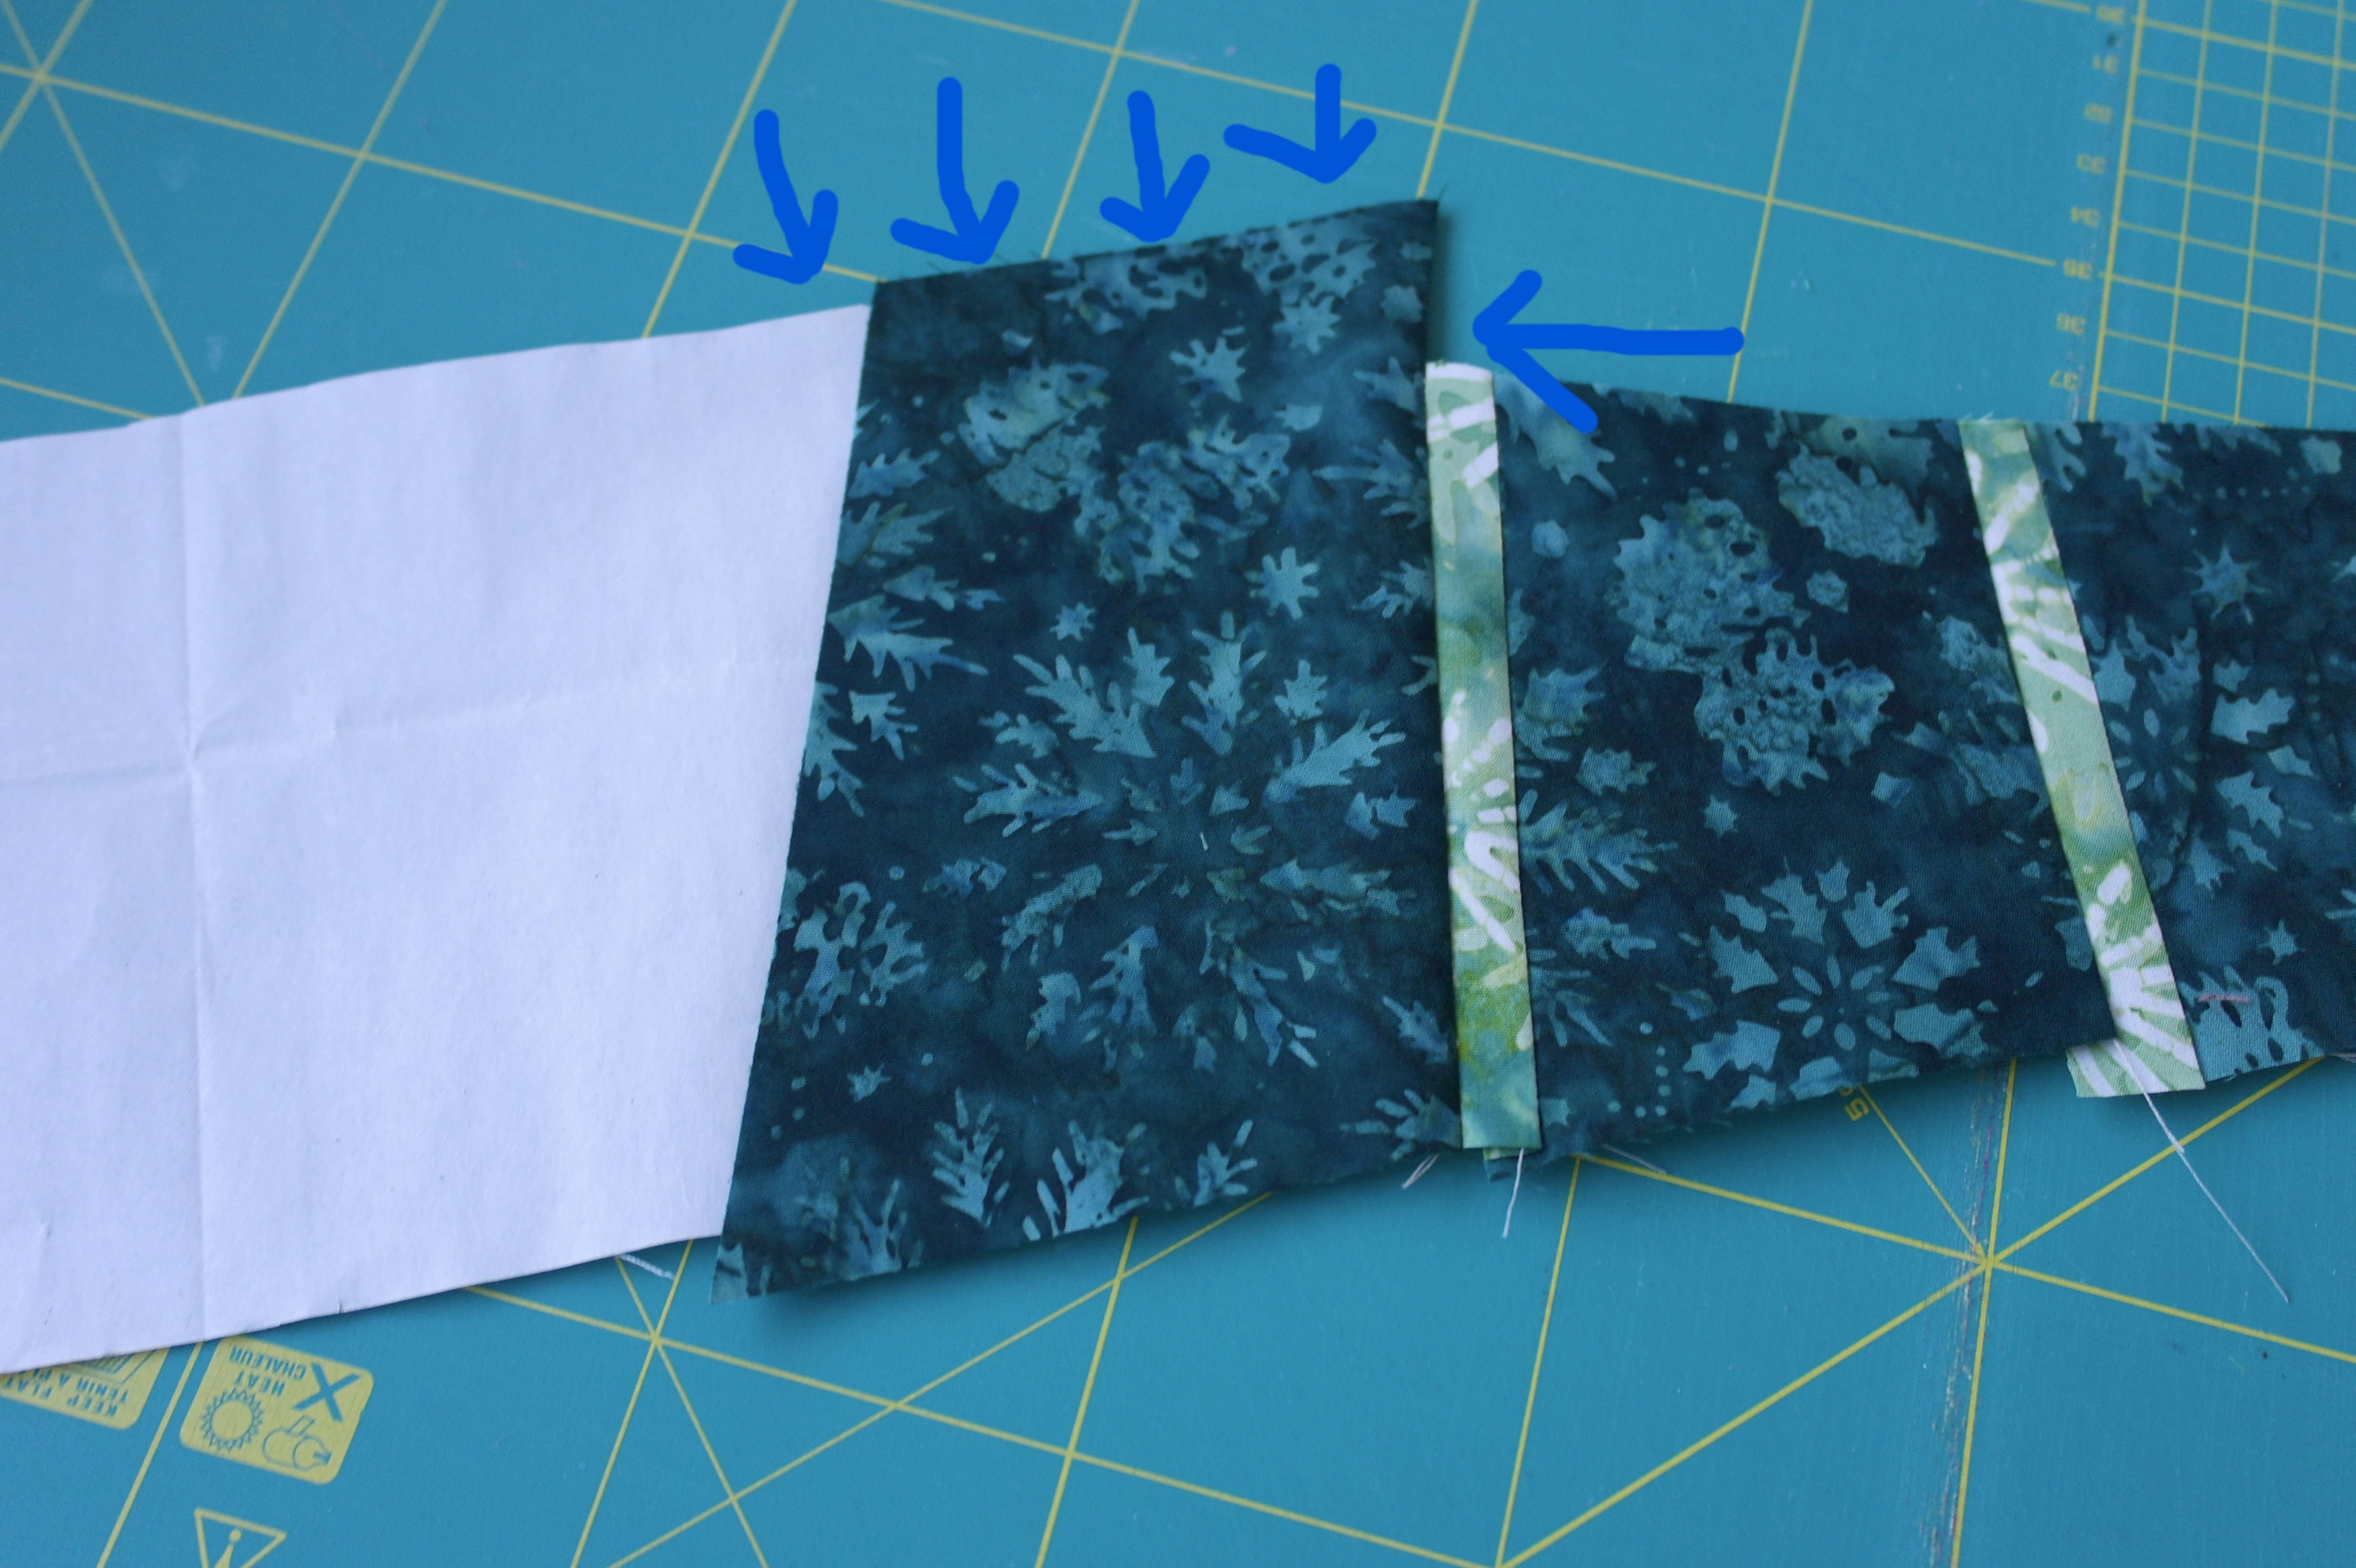
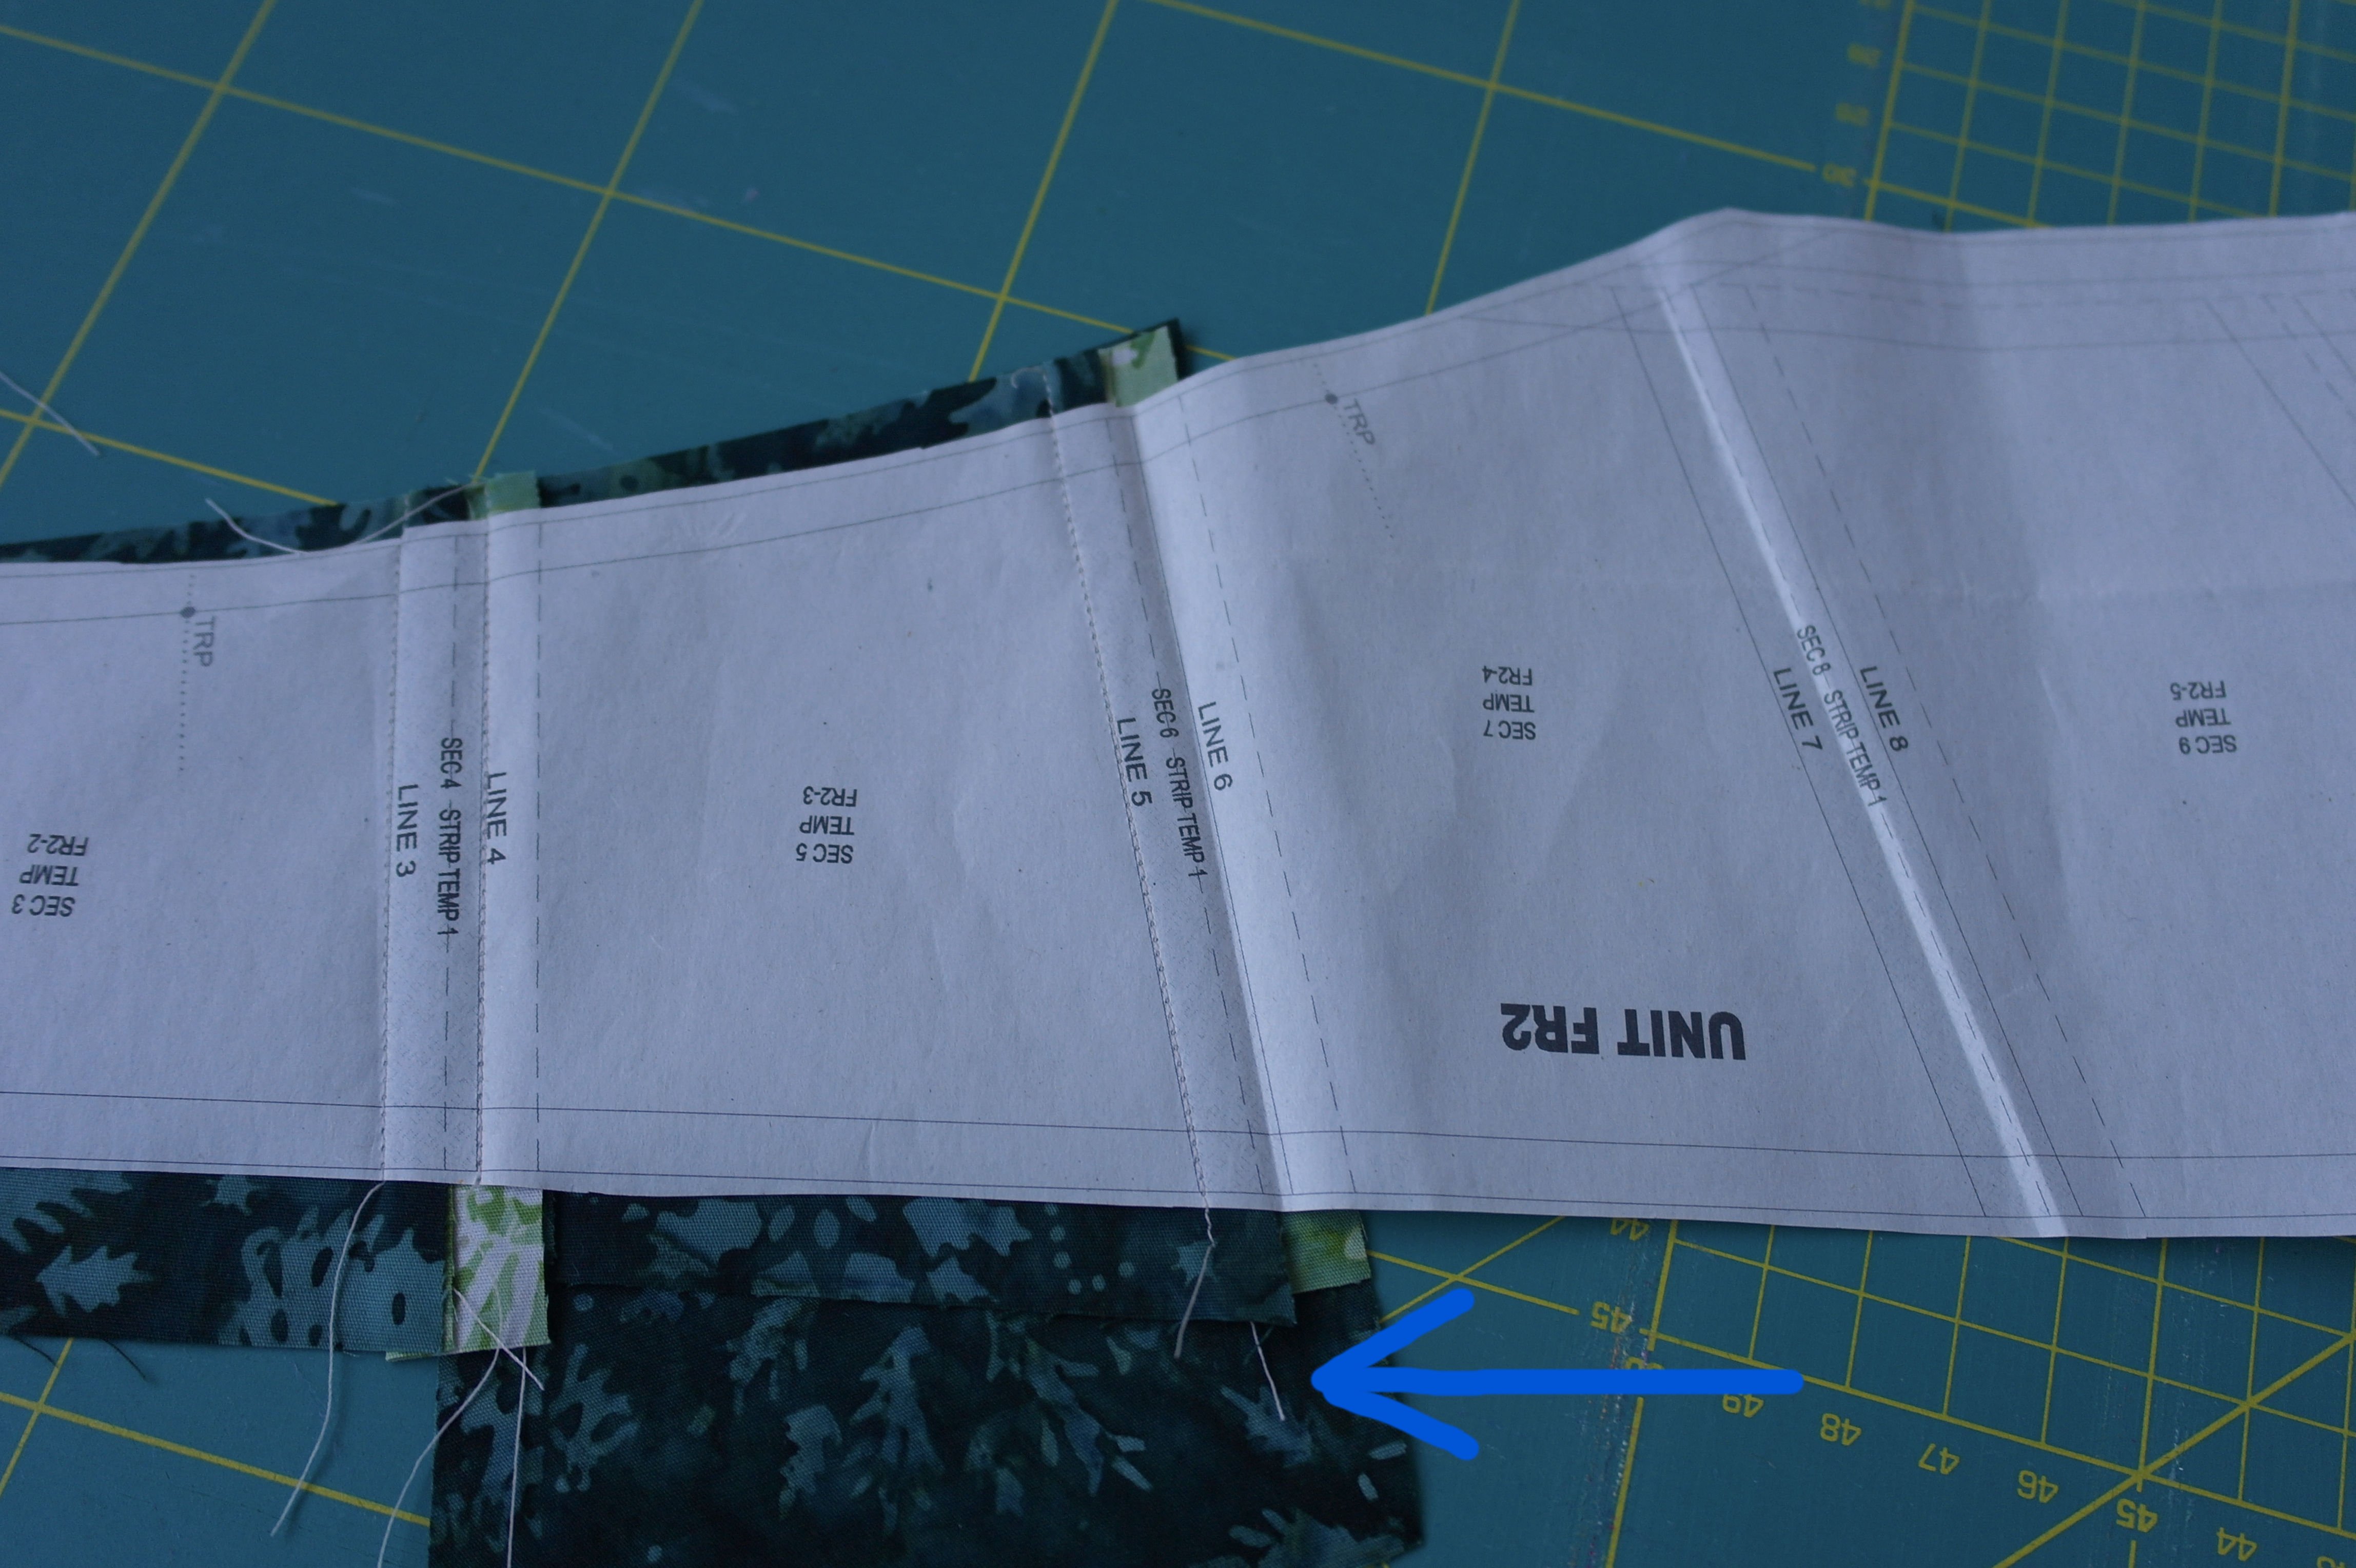
Folding the fabric to the right side, shows you that it covers the entire sections. Don’t mind how it is shaped to the upper side right now, because that will be cut back when the entire Unit is covered.
Be sure to check how the fabric should be placed with each asymmetrical unit, cut these fabrics larger than necessary, if that works for you. Now you know how it is done, so you don’t have to rip stitches all the time anymore.
Happy stitching!
Sylvia Kaptein
Sylvia’s Art Quilts Studio
0 Responses