 BERNINA Corporate Blog -
Four weeks ago we started a great adventure together with quilters from all over the world. And WOW!! So many awesome rows started to show up on Instagram, Facebook and on the BERNINA project page. How did you do? Did you manage to finish the row? And more important, did you had lots of fun along the way?
Today it’s time for the second part of the Sugaridoo BERNINA quilt along! Are you ready?
Are you new here?
If you’re new here, welcome! On the 28th of November we kicked off a super fun quilting project. We started a quilt along, where thousands of quilters from all over the world are making the same quilt. Every four weeks a new part of the pattern, a new row, will be released. After 12 rows you will have a quilt of 70 x 90″.
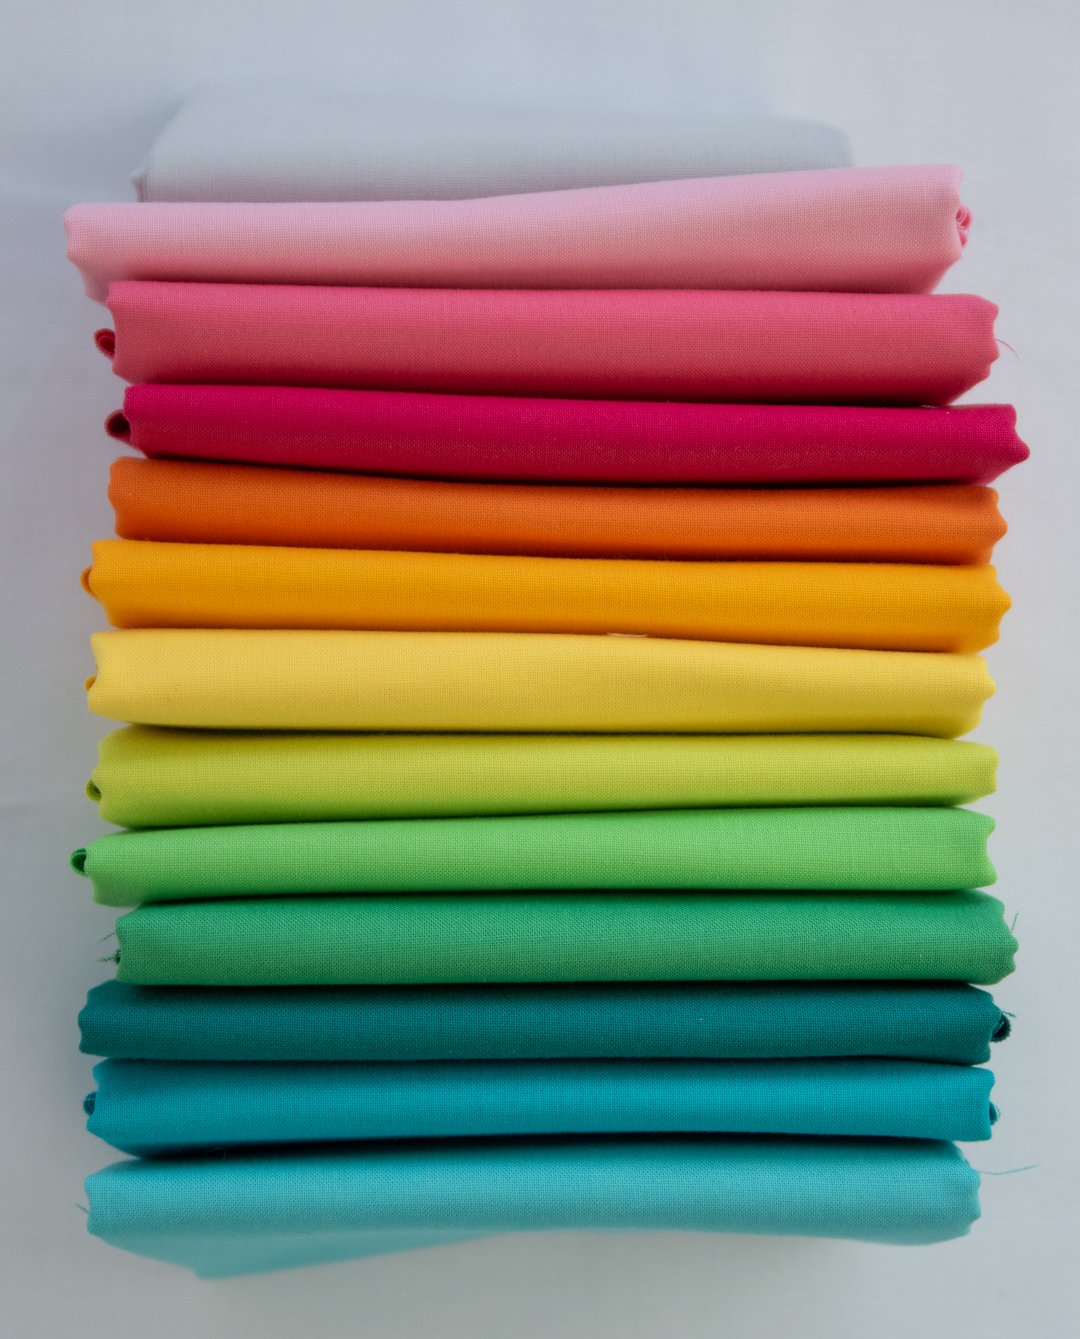
Even though we started four weeks ago you can still join us! You will have enough time to catch up. There are also still fabric kits available for this quilt along. You can make the quilt in rainbow colors on silver fabric, in rainbow on white fabric or with blue fabrics. Of course you can also pick your own fabrics or use what you have in your stash.
On this page your can find all the links to previous blog posts about this project. Hop over to this blog post to read all the general information about this quilt project. And also read this one to learn more about the materials we use and the fabric requirements.
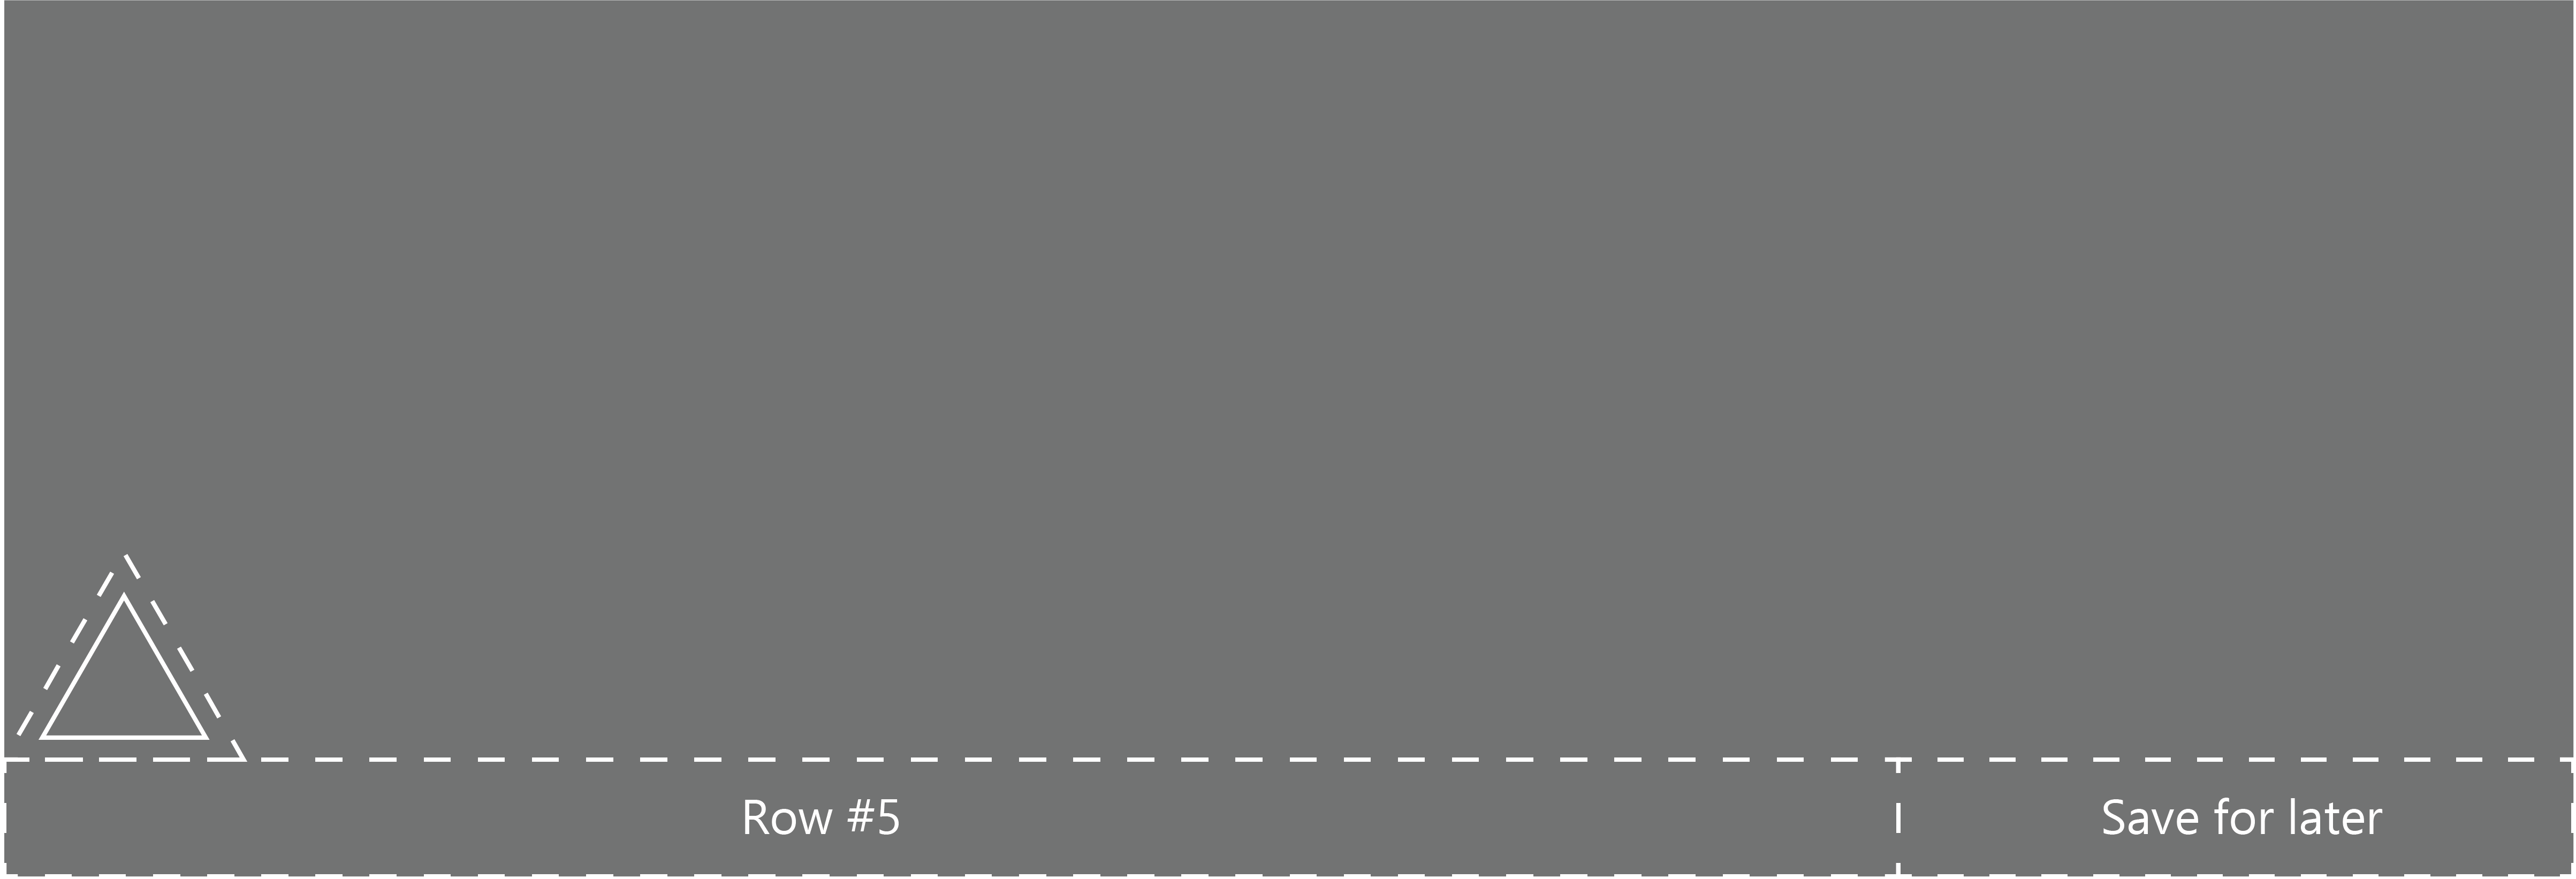
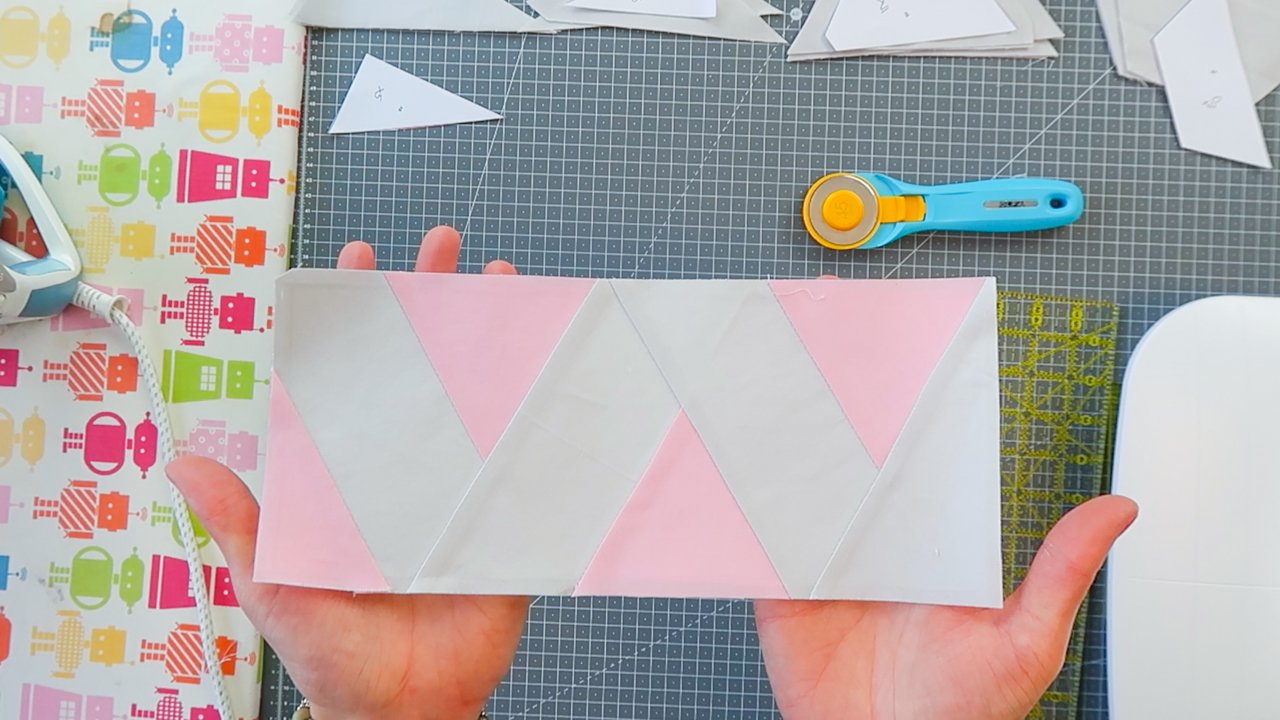
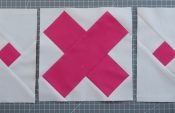
Row #1 ‘On point’
We are moving through the quilt in random order, to keep the final design of the quilt a surprise for as long a possible. Last week we made row #5 of the quilt and today we are making row #1. Here it is. We are making triangles today!
In this row ‘On Point’ we are going to use foundation paper piecing with freezer paper. Never did foundation paper piecing before? Or no clue what freeze paper is? Don’t worry, I’m going to explain every step in detail.
Fabric + Material
For this row you will need to print a PDF pattern, you will need some freezer paper and of course you’ll also need fabric.
Did you order a kit for the quilt along? Than you’ll use the light pink fabric called ‘Medium Pink’ for this row if you are making a rainbow quilt. Or ‘Capri’ if you’re making a blue quilt. We will make one of the triangles in accent color, so also get your accent fabric out. And of course your need your background fabric.
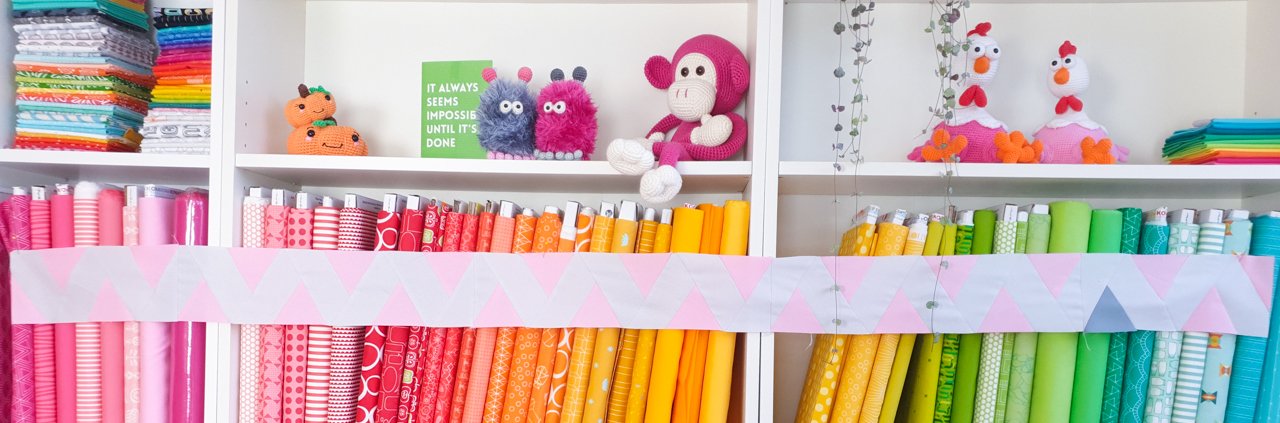
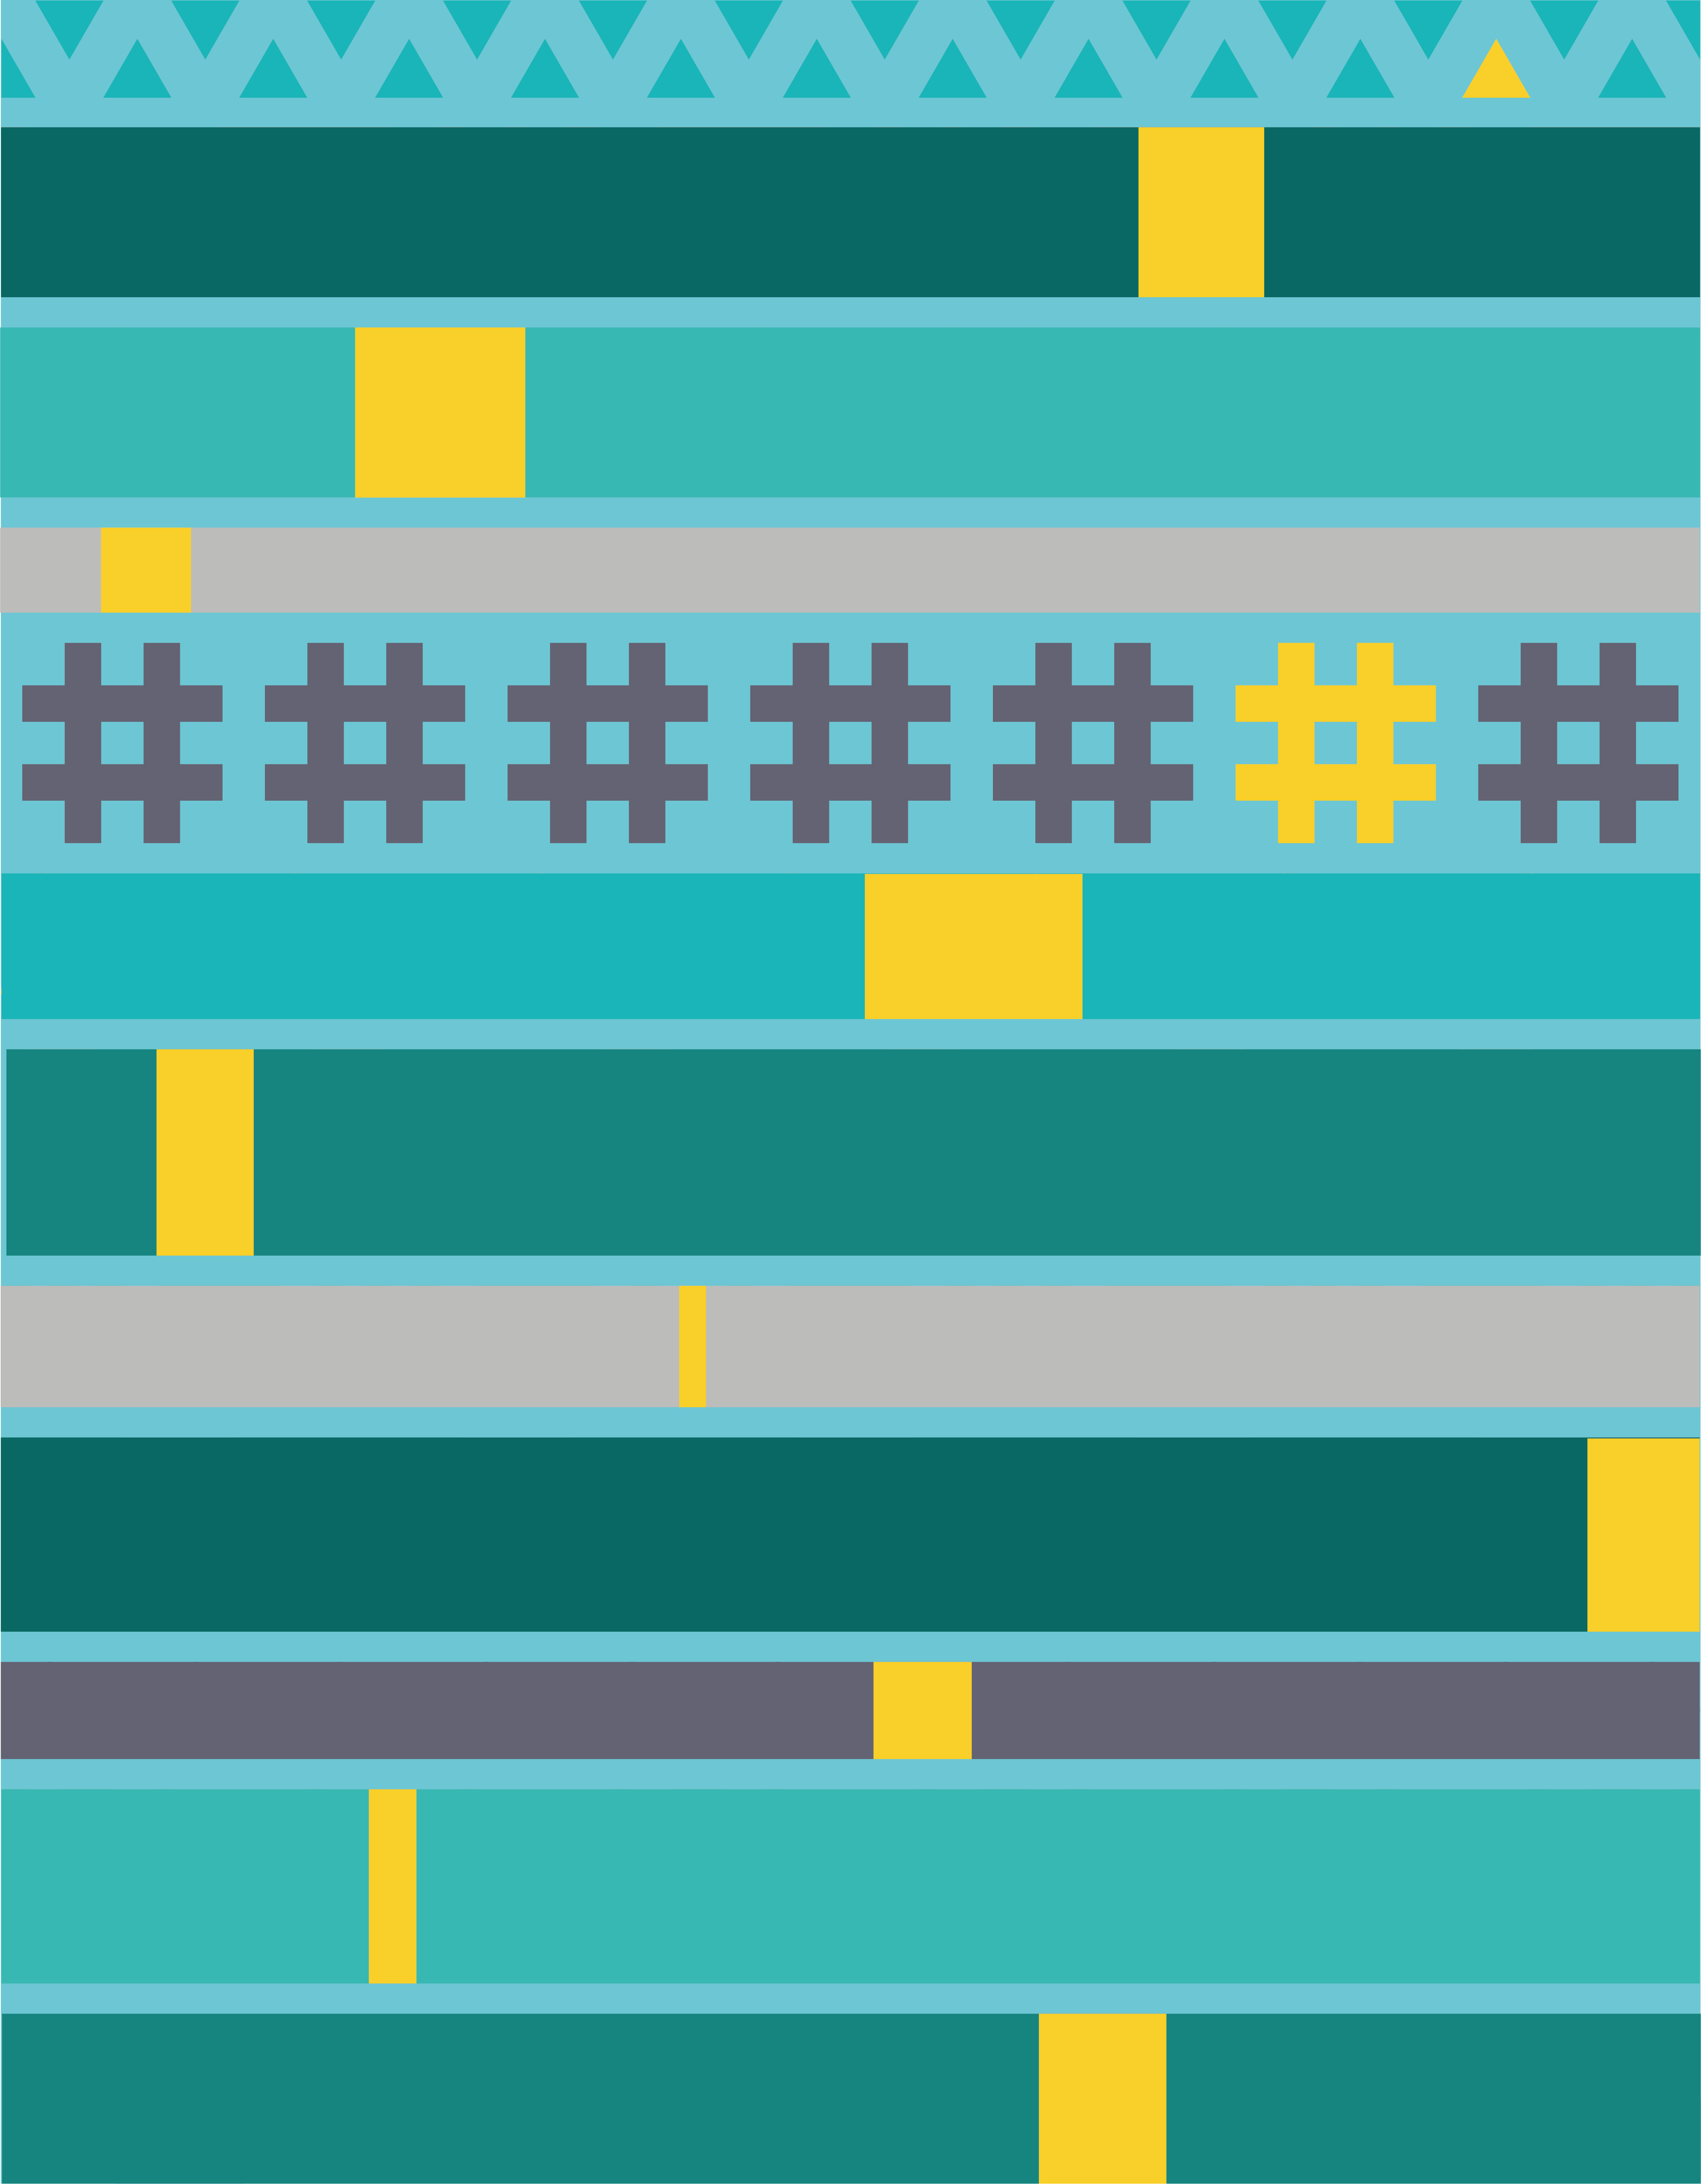
For those of you who want to play with the location of the accent color in each row, or add extra accent colors or just want to get a little more insight in the layout of the quilt. Here is a schematic of the rows and the placement of the accent colors.
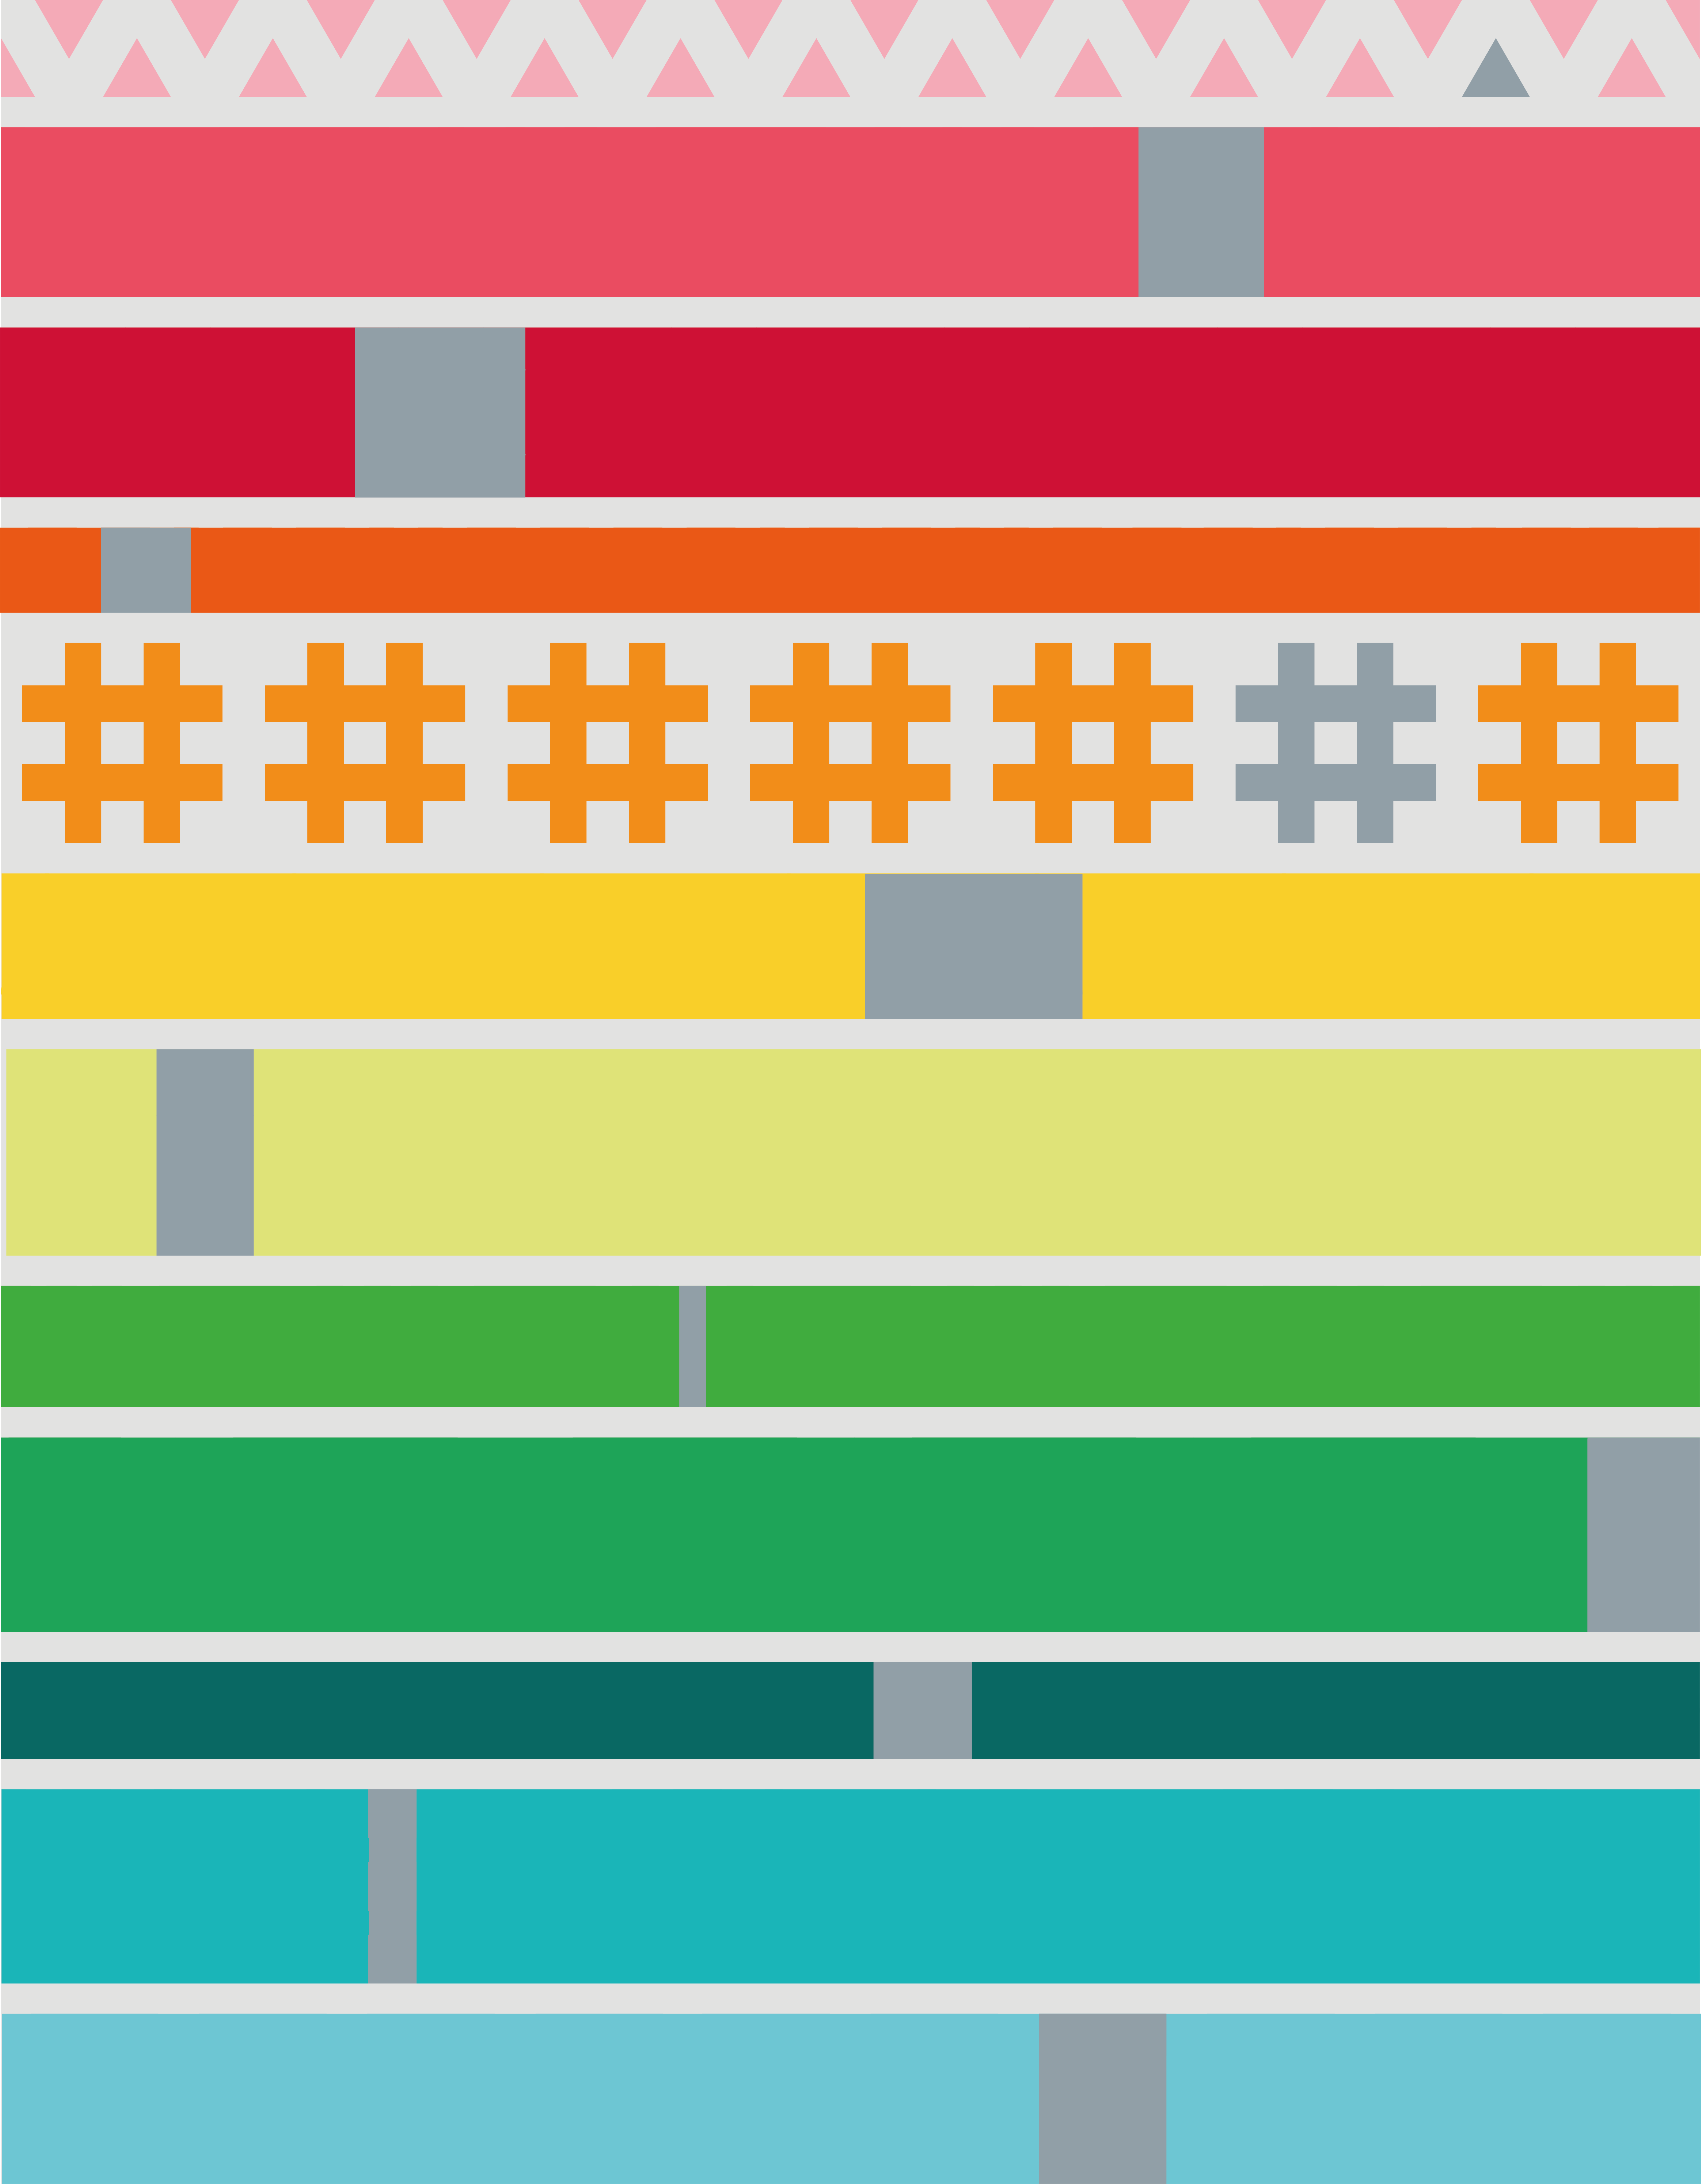
And this is what the schematic of the quilt looks like for the blue fabric kit.
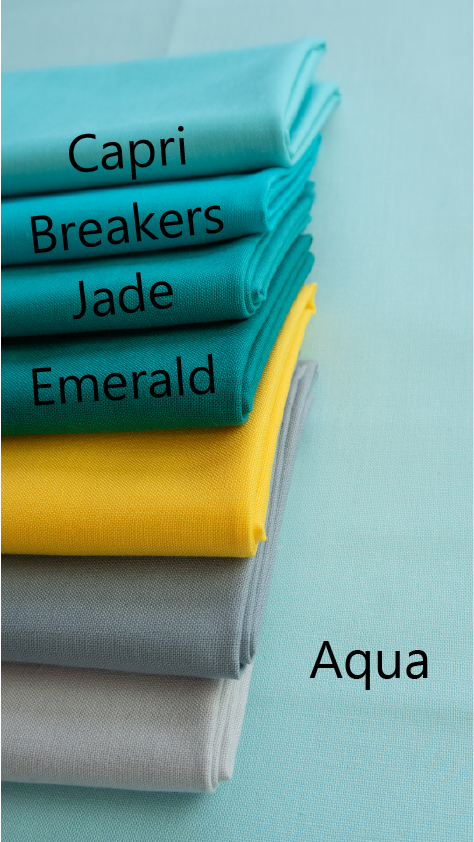
For everyone with a blue fabric kit, these are the names of the blue fabric from light to dark: Aqua (background), Capri, Breakers, Jade and Emerald.
You will need the following to make this row.
- Main fabric: 8 inch
- Accent fabric: very small piece
- Background fabric: 10 inch
- Freezer paper
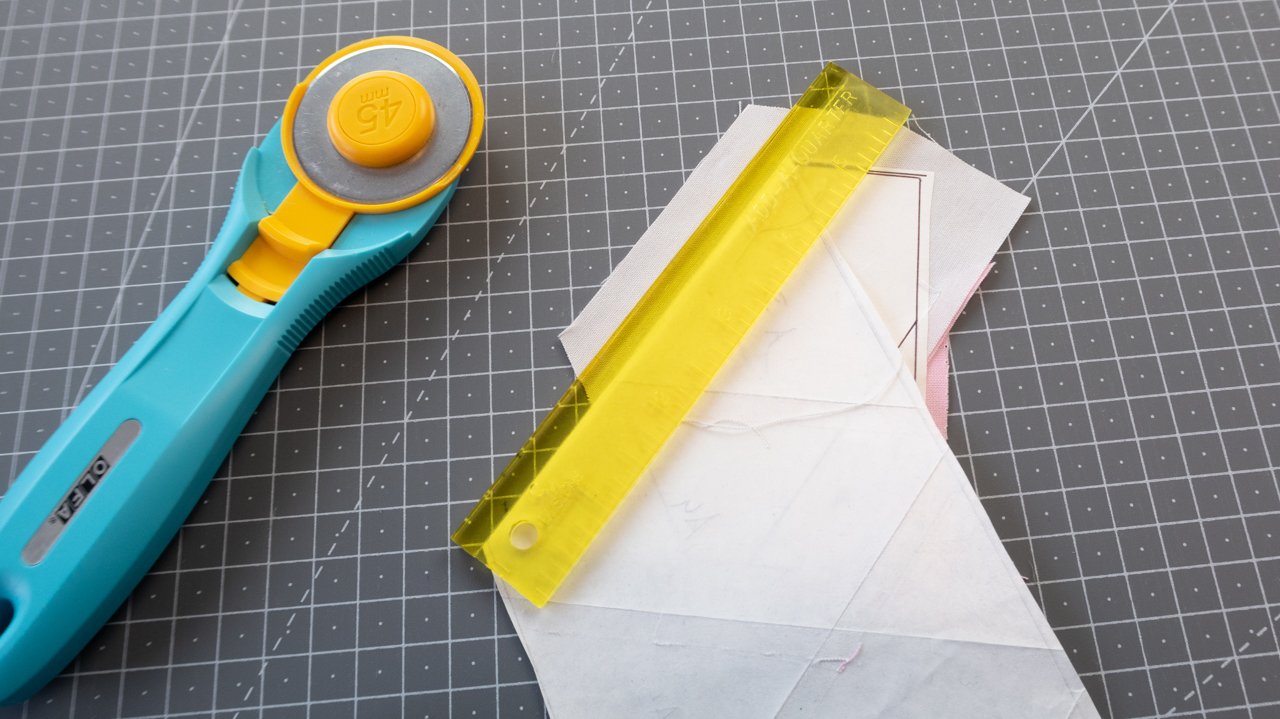
- Add-a-quarter ruler (it’s super handy to have this ruler, but if you don’t I’ll show you how you can use a normal inch ruler as well)
- Inch ruler (12 x 6 or 24 x 6 inch both will be fine)
- Rotary cutter
- Cutting mat
- Iron + ironing board
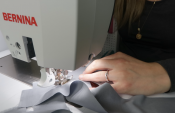
- Sewing machine with a 1/4″ foot, I’m using the #97 patchwork foot
- Thread (I use thread in the color of my background fabric)
Pattern
Here are the links to download the patterns that you need this week. Go ahead and print them true to size. Select ‘do not scale’ of set your printer settings to ‘scaling: 100%’. To check if you printed the pattern the correct size, measure the height of the row, that should be 4 inch.
QAL Part 2 – Row #1 ‘On Point’ Pattern
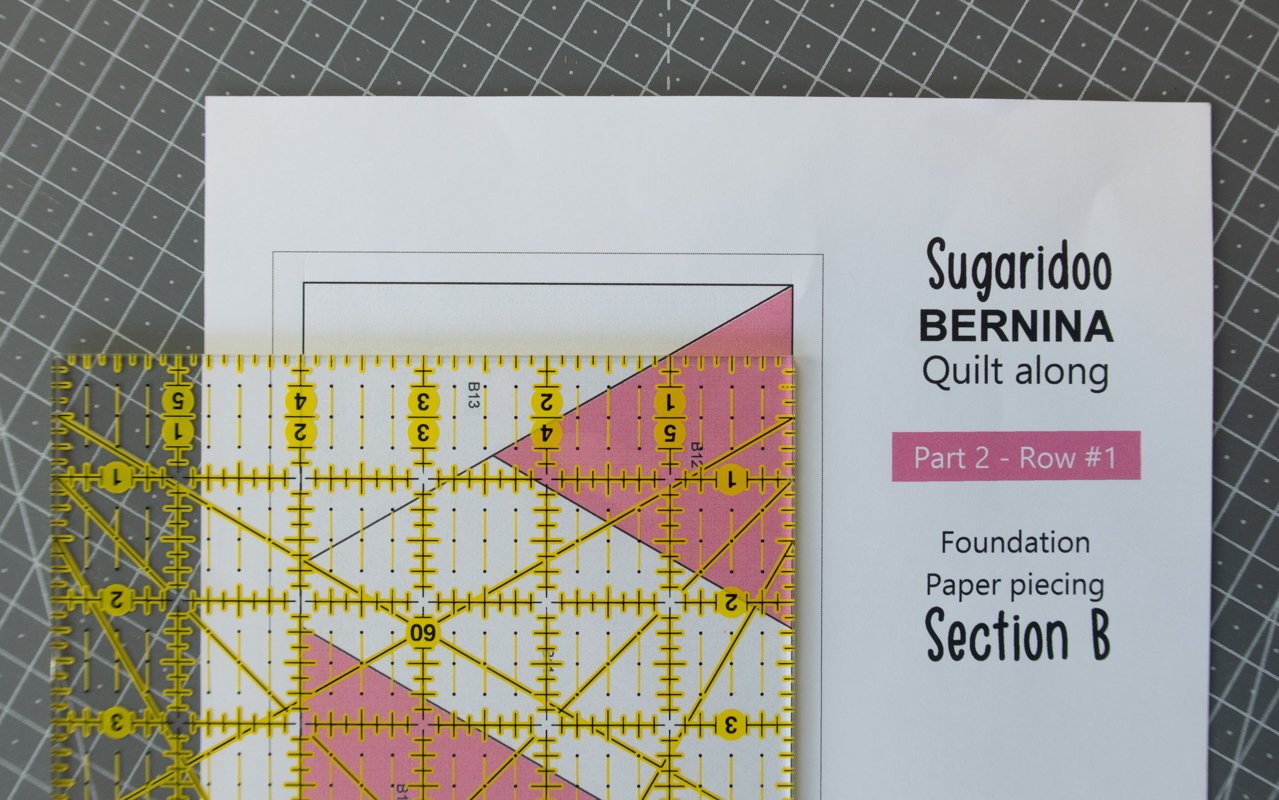
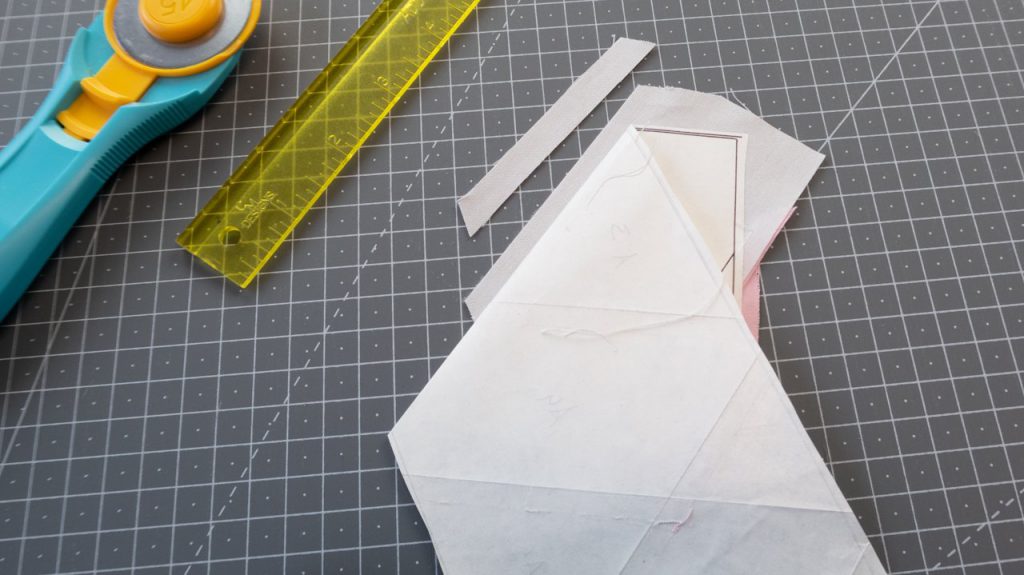
Assemble section B by cutting over the dotted line and taping the two pieces together.

Now take a piece of freezer paper and transfer section A and B to the freezer paper. Place the glossy side of the freezer paper down. You draw on the ‘paper’ side of the freezer paper.
You only need to make one pattern for Section A and one for Section B. The awesome thing of working with freezer paper is that you can use is multiple times.
I like to use a pen instead of a pencil to transfer the pattern. In the next step we are going to fold all the lines of the pattern and pencil tends to smudge a bit. You don’t want that on your fingers and on your pretty fabric (talking from experience here.. whoops!)
Cut around your pattern piece with a little bit less than a 1/4 inch. Now you can fold your freezer paper over the lines of the pattern, paper side to paper side. Folding this on forehand will help a lot when we start sewing.
Repeat this for part B as well, and that’s it. That is your pattern finished.

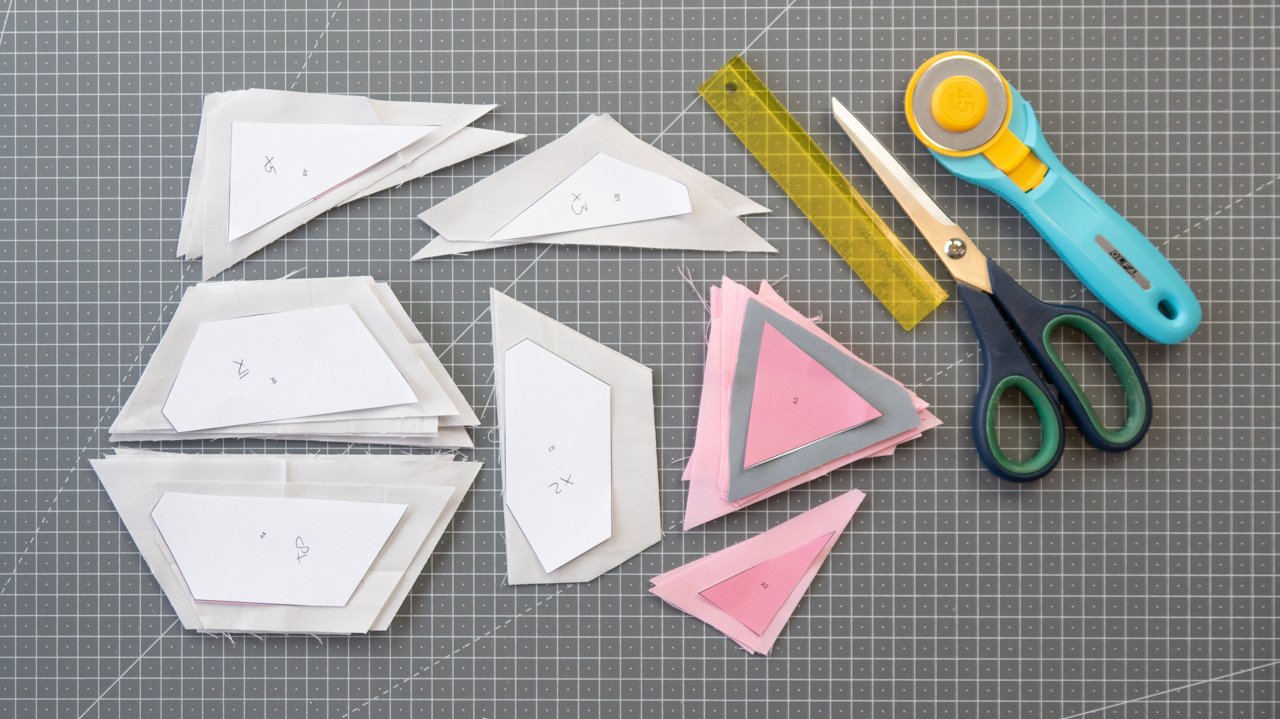
Cutting
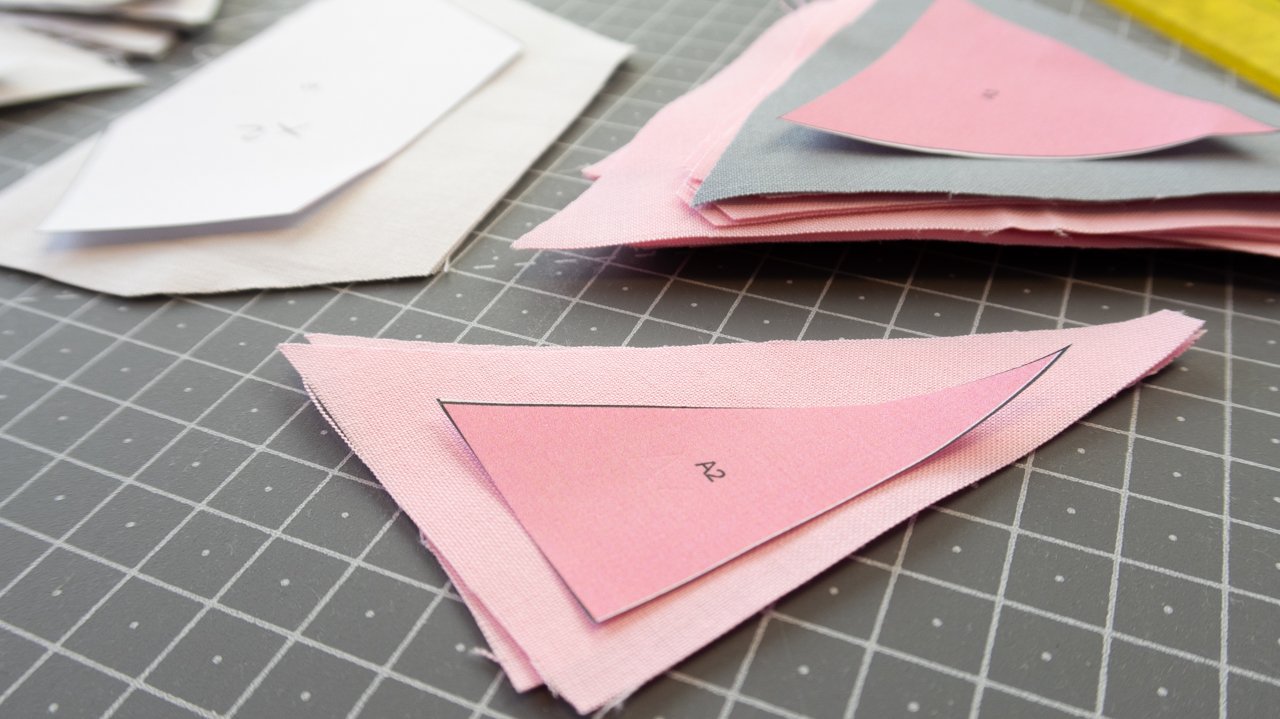
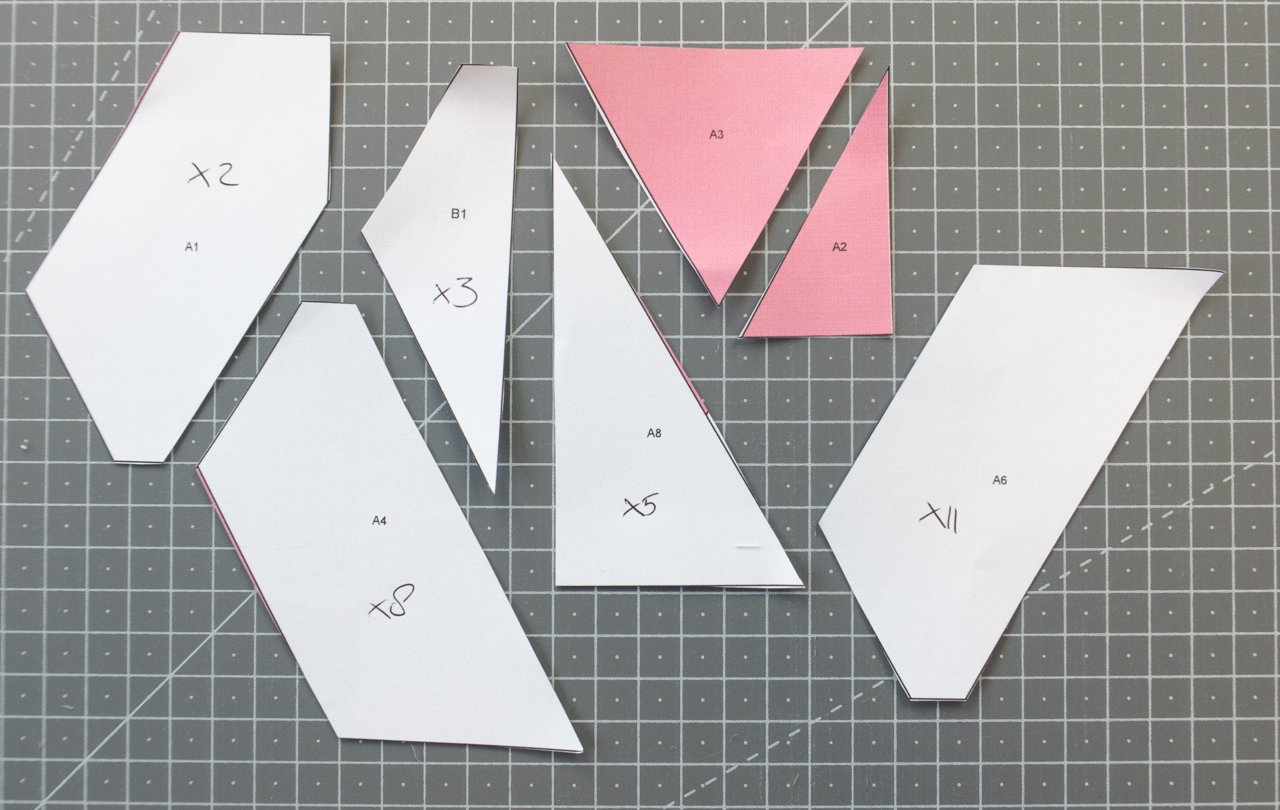
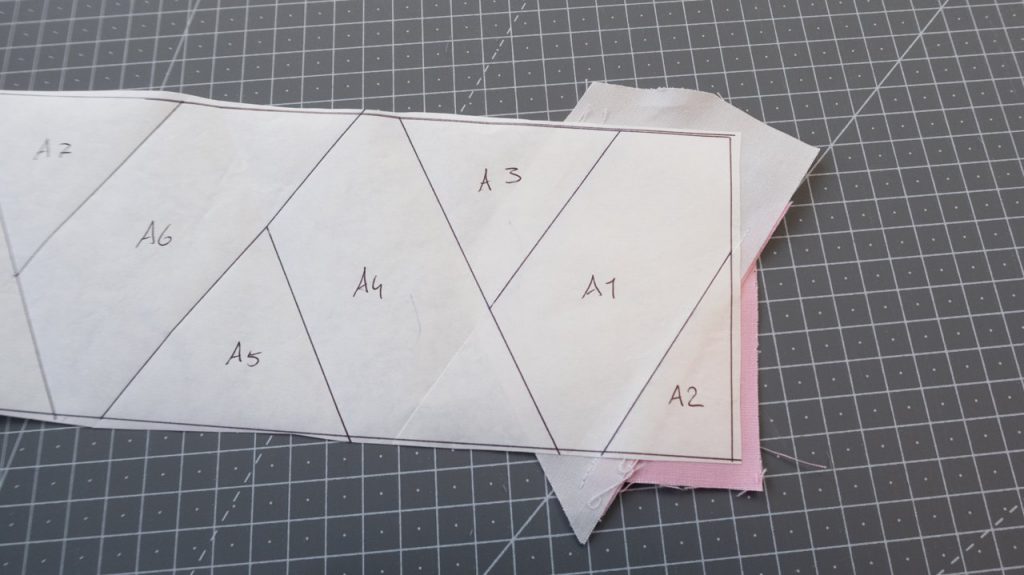
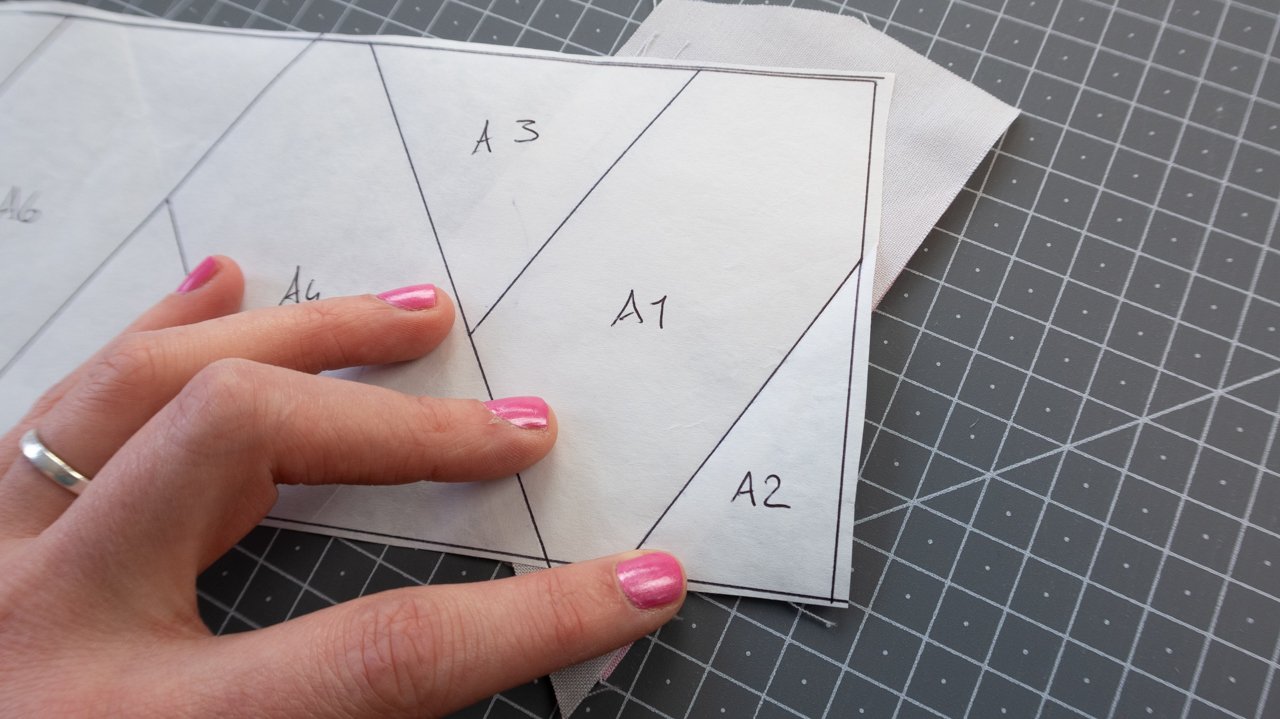
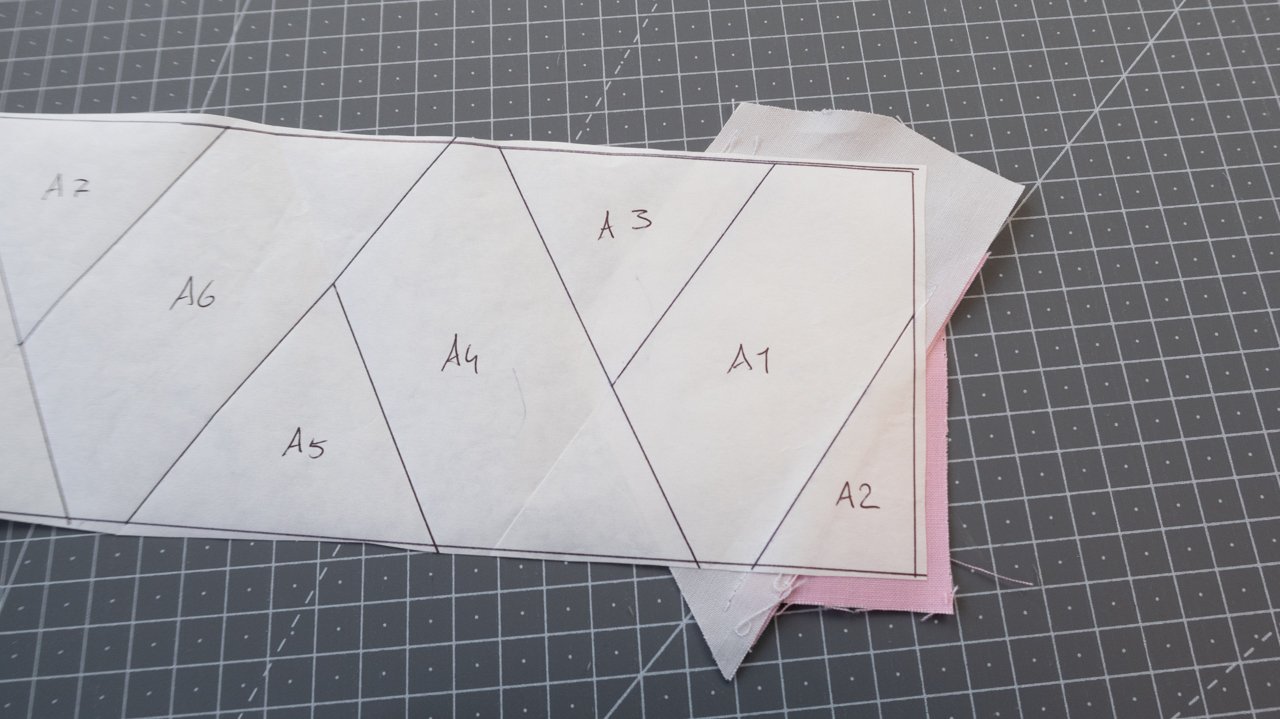
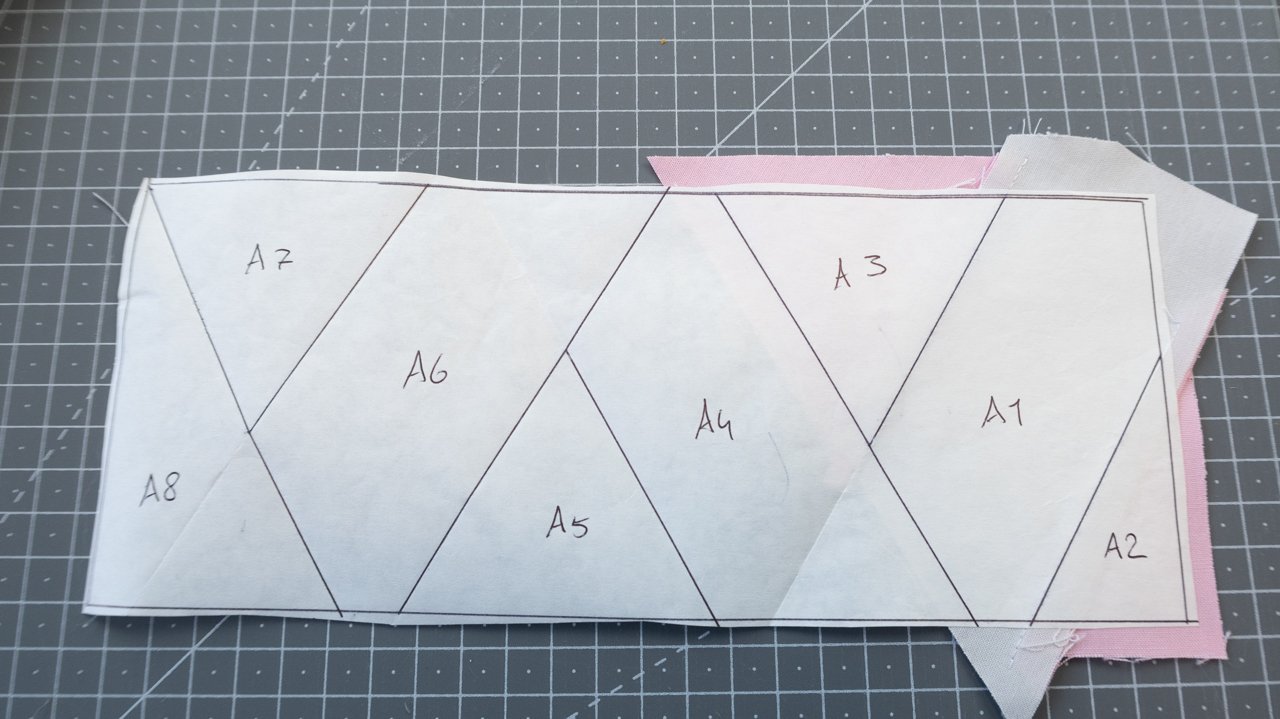
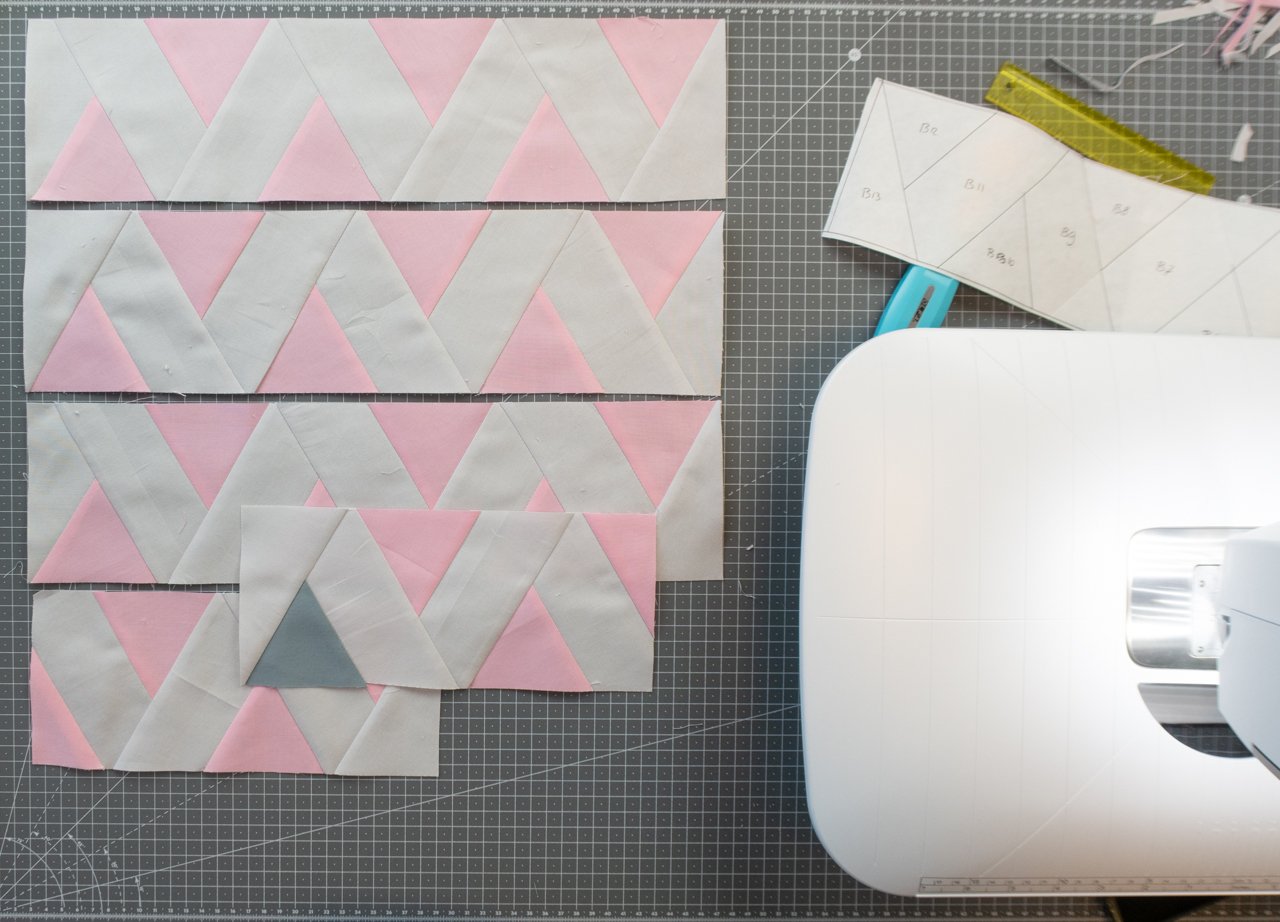
We will use the printed pattern as templates to cut our fabric. Go ahead and chop it up. You will only need pieces A1, A2, A3, A4, A6, A8 and B1 as templates. The other remaining pieces have similar shapes.
I wrote on my template pieces how many times I need to cut each of them, as stated the list below.
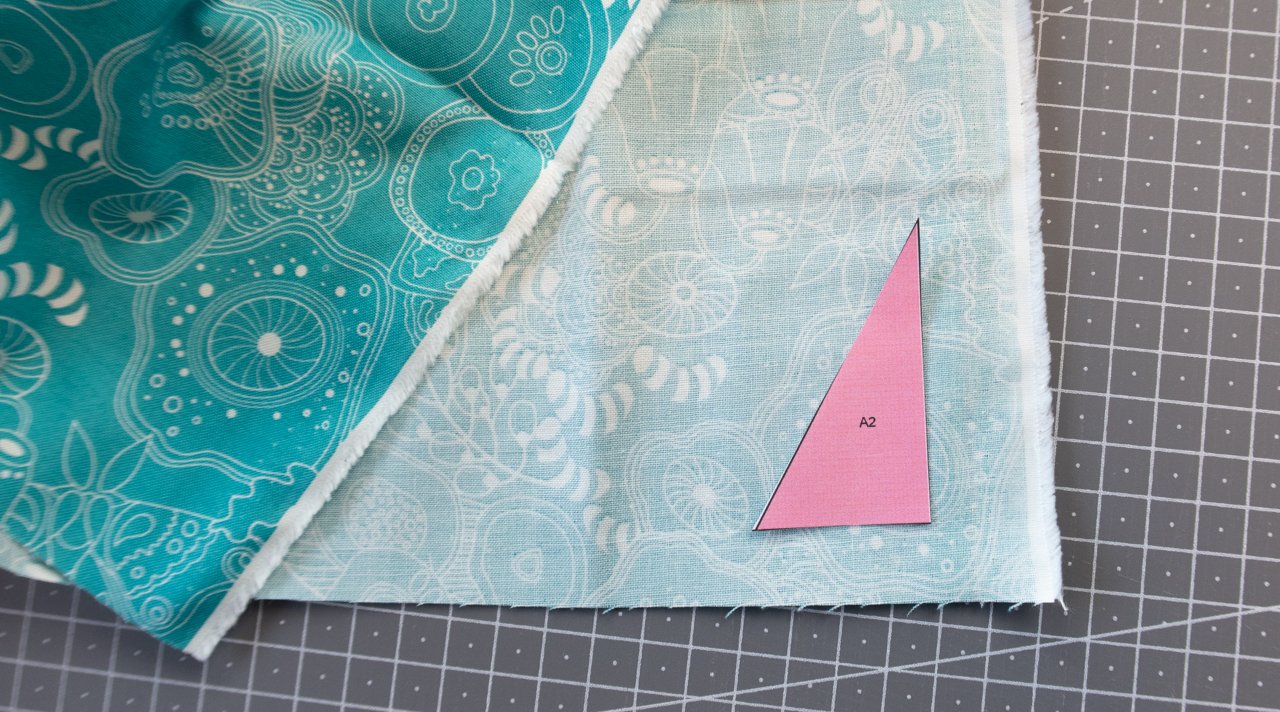
When you use solid fabrics, you don’t need to pay attention to the front or backside of the fabric. But when you use a print fabric you will put the pattern/template piece on the back of the fabric. Just like in the picture below.
This is the list of what you need to cut. You can cut your fabric piece by piece, or watch the video for this row to see how I’m first cutting strips and then cutting my pieces.
- Main fabric (Medium Pink)
- 23 x piece A3
- 2 x piece A2
- Background fabric (Silver)
- 2 x piece A1
- 8 x piece A4
- 5 x piece A8
- 11 x piece A6
- 3 x piece B1
- Accent fabric (Titanium)
- 1 x piece A3
In the cutting scheme below you can find how you can fit all the pieces on your fabric. You don’t need to cut your fabric exactly as sketched out here, but it gives you an idea of how the pieces fit on the fabrics from the kit.
The dotted lines represent a seam allowance that is a little bit bigger than 1/4 inch. I always like to cut my pieces for foundation paper piecing a little bit bigger than needed.

Cutting scheme for main fabric Medium Pink
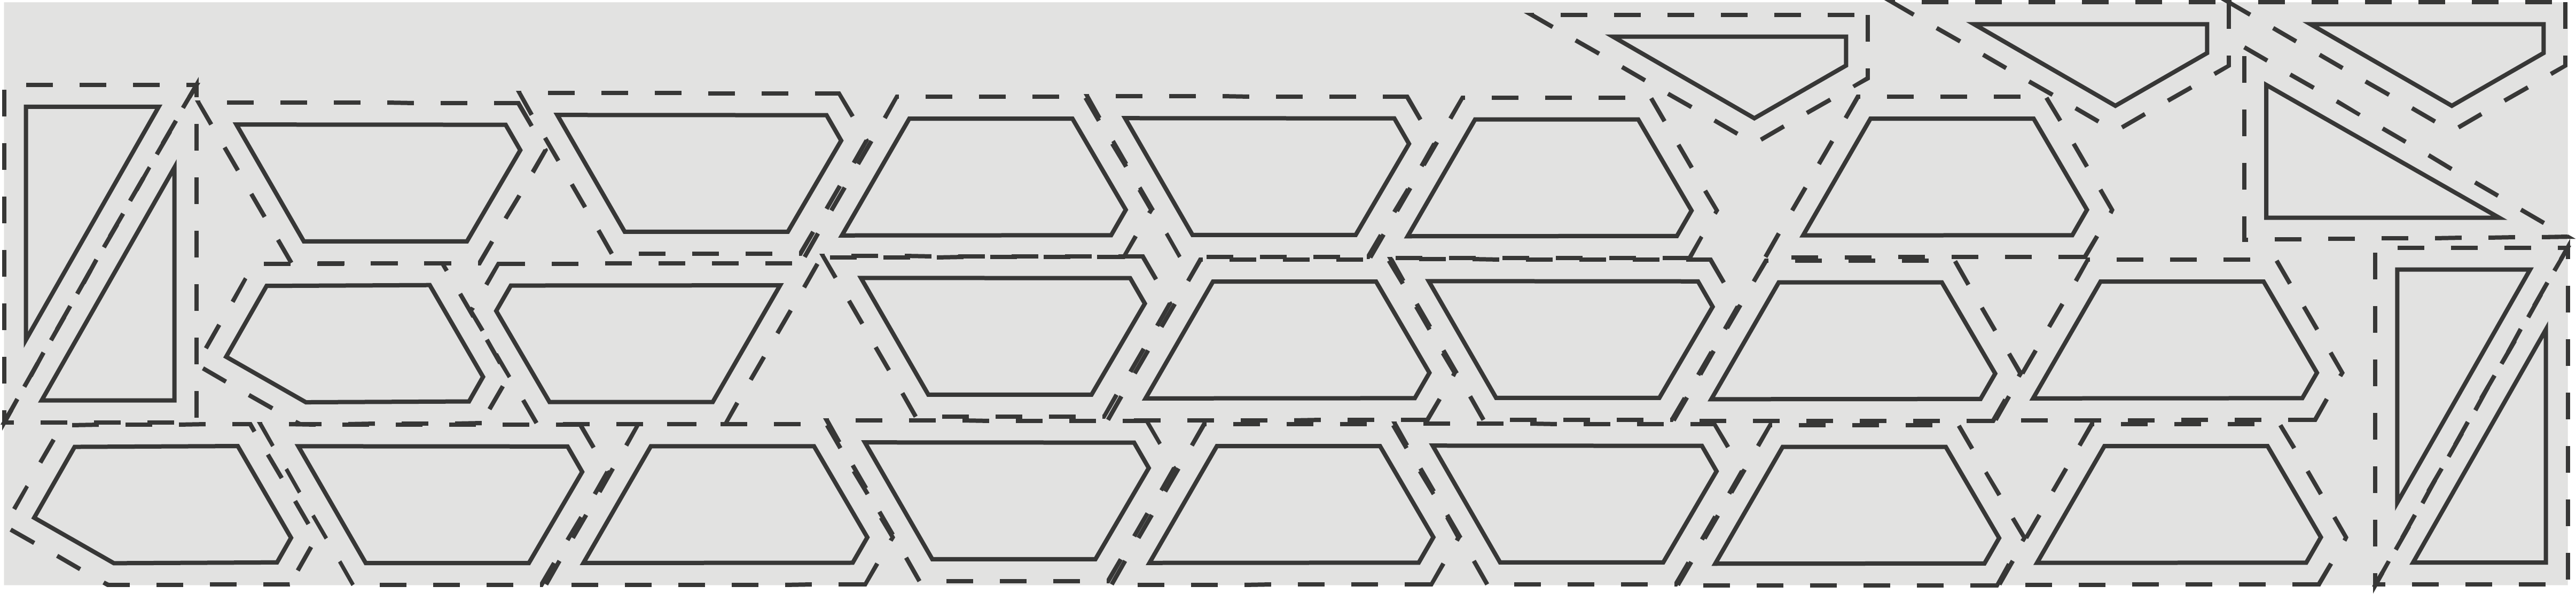
Cutting scheme for background fabric Silver
Cutting scheme for accent fabric Titanium
These cutting schemes can also be downloaded as a PDF: Cutting schemes for QAL part 2 – Row #1 [Rainbow]
Here you can download the cutting scheme for the Blue fabric kit: Cutting Schemes for QAL part 2 – Row #1 [Blues]
Foundation paper piecing on freezer paper
We are going to use foundation paper piecing to make row #1. In the video for this row I’m going over all the instructions to do foundation paper piecing on freezer paper.
If you’re experienced with paper piecing and prefer to do paper piecing with a different method, feel free to do so. The results of making these patterns on foundation paper piecing (like tea bag paper) of freezer paper will be the same.
If you’re a new quilter or if you’re new to foundation paper piecing. Don’t feel overwhelmed, just take it step by step. I’ve written out all the steps of the process and in the video you can watch me do it with you. Take you time, I’m sure you’ll get the hang of it after trying it a few times. And at the end of the row you’ll be so much more experienced then you are now.
Let’s start sewing!
Make sure to have your iron plugged in somewhere close to your sewing machine, we will be using it a lot today.
The first steps are the hardest. You can always start with some scraps to get comfortable with this method.
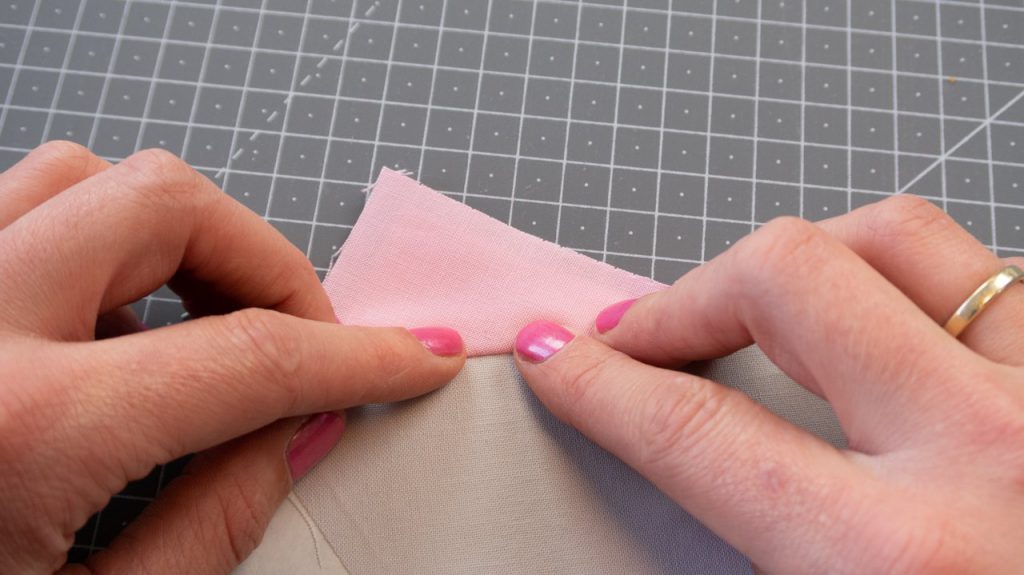
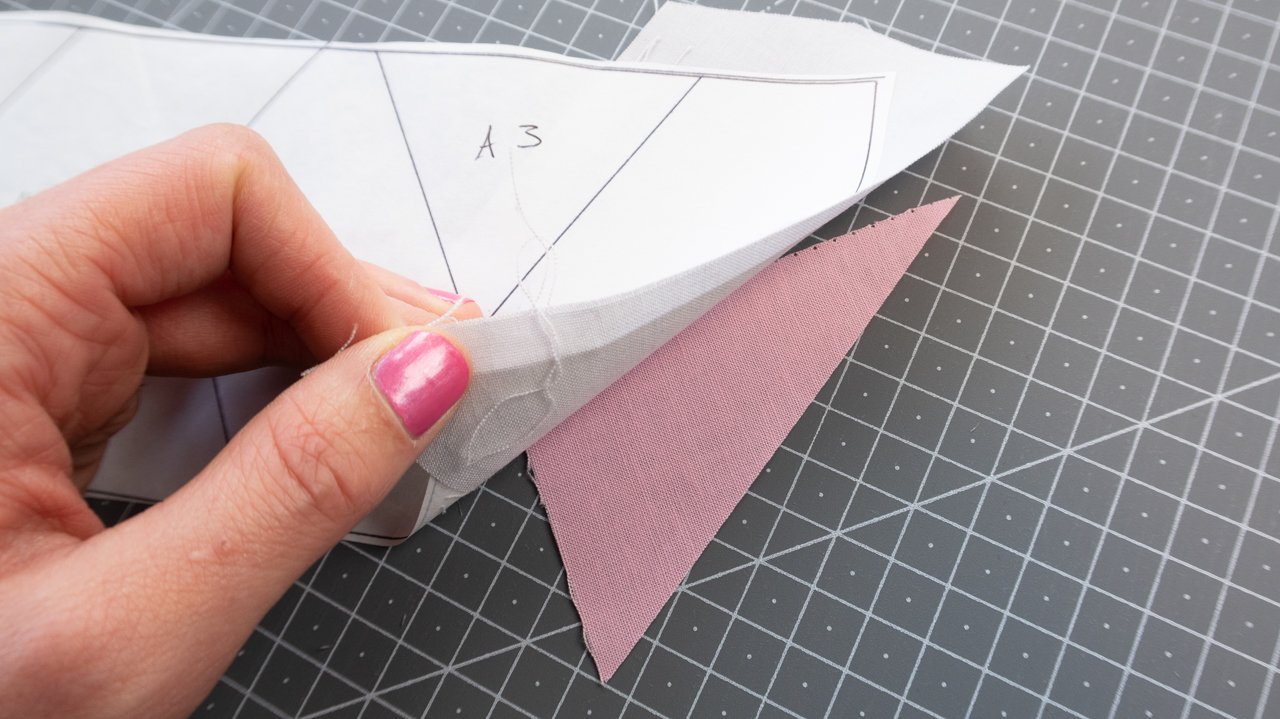
- Place piece A1 with the wrong side up on your ironing board. Place your freezer paper on top of it, making sure that piece A1 on your pattern is within your fabric piece

- Fold back the paper on the fold to piece A2.
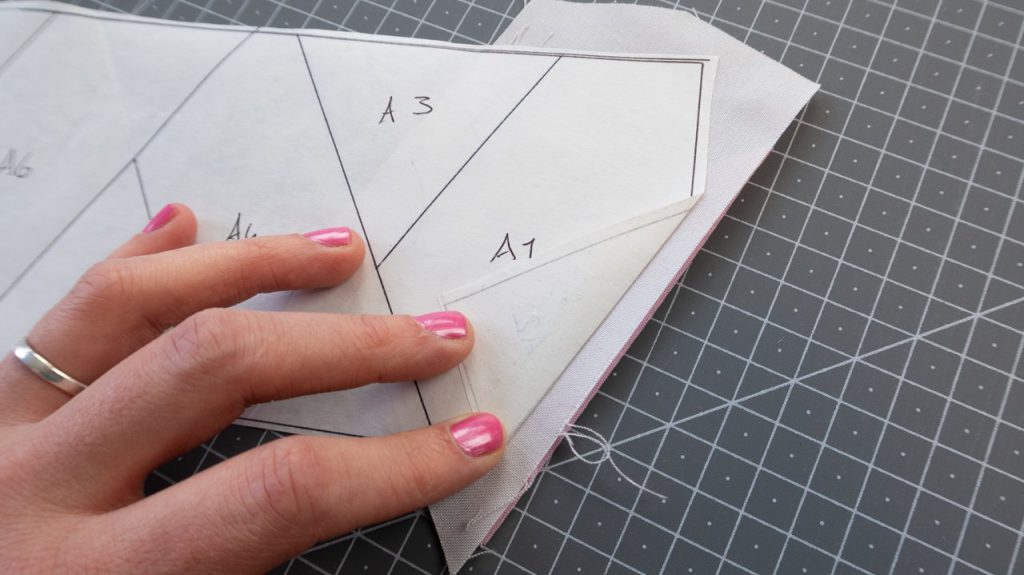
- Place piece A2 with the right side up under piece A1. So A1 and A2 are now with the right sides together.
Tip: Here is a little trick to make sure that your piece is in the right position every time. Make sure that piece A2 is underneath piece A2 on your pattern that you have folded back. You can see how I check this in the video for this row. When it is under piece A2 on the folded part of the pattern, it’ll turn out in the correct position after you sew and press open piece A2.

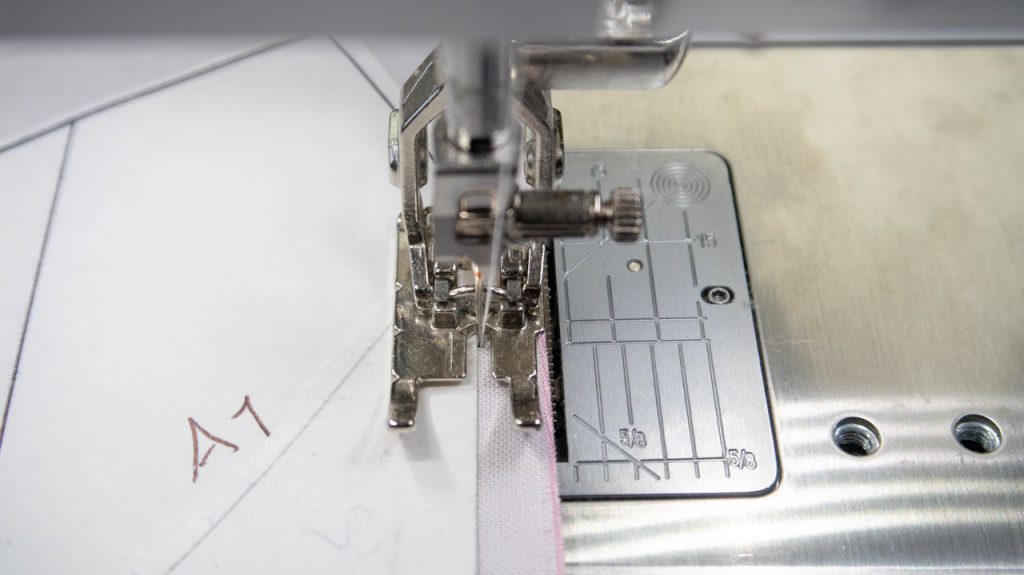
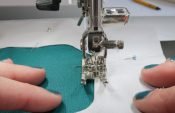
- Now you can sew along the fold. Try not to sew through the paper 😉
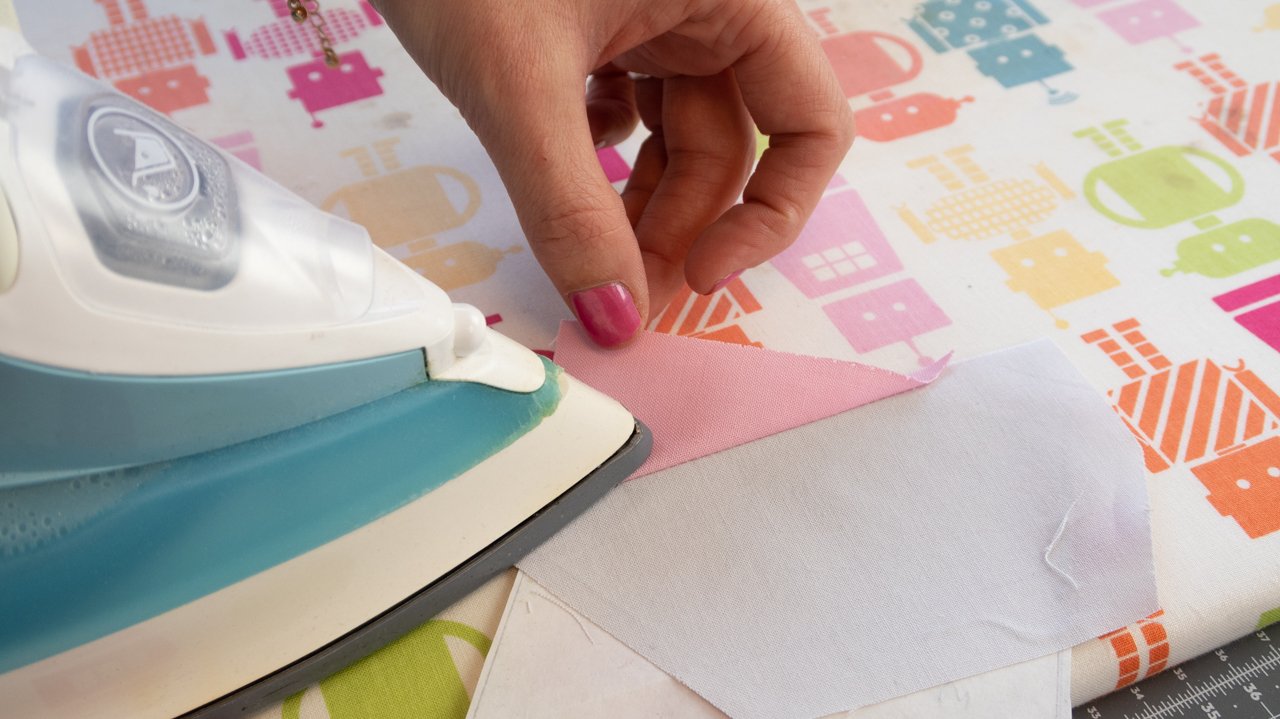
 In the picture below I pealed the freezer paper back a little to show you the seam. You should leave the paper attached to the fabric and just fold the paper open.
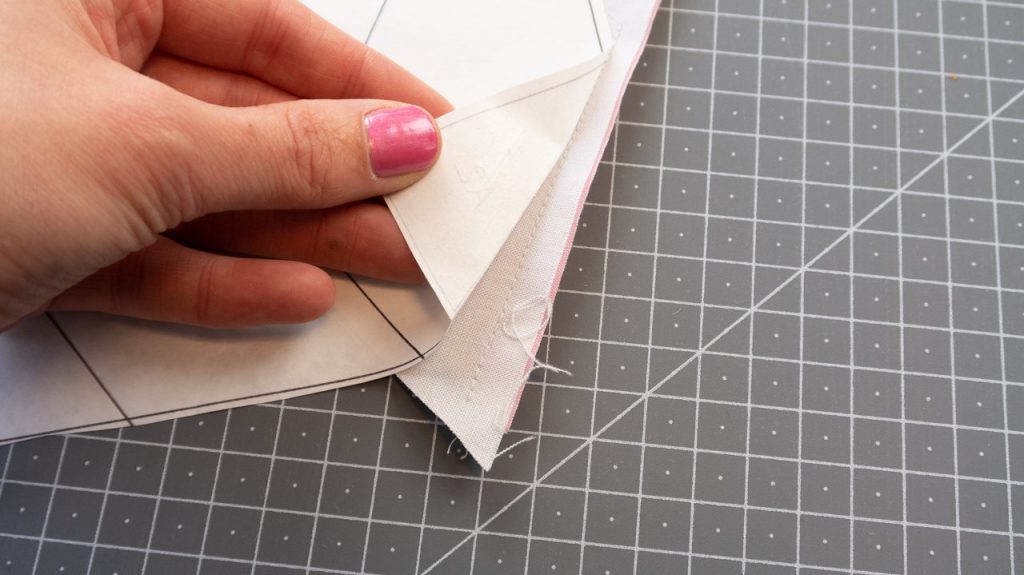
- Fold the paper open, and fold the fabric open. Finger press the fabric and then give it a press with you iron to stick the paper to piece A2.
Tip: Make sure not to touch the glossy side of the paper with your iron, that will make the paper stick to your iron.

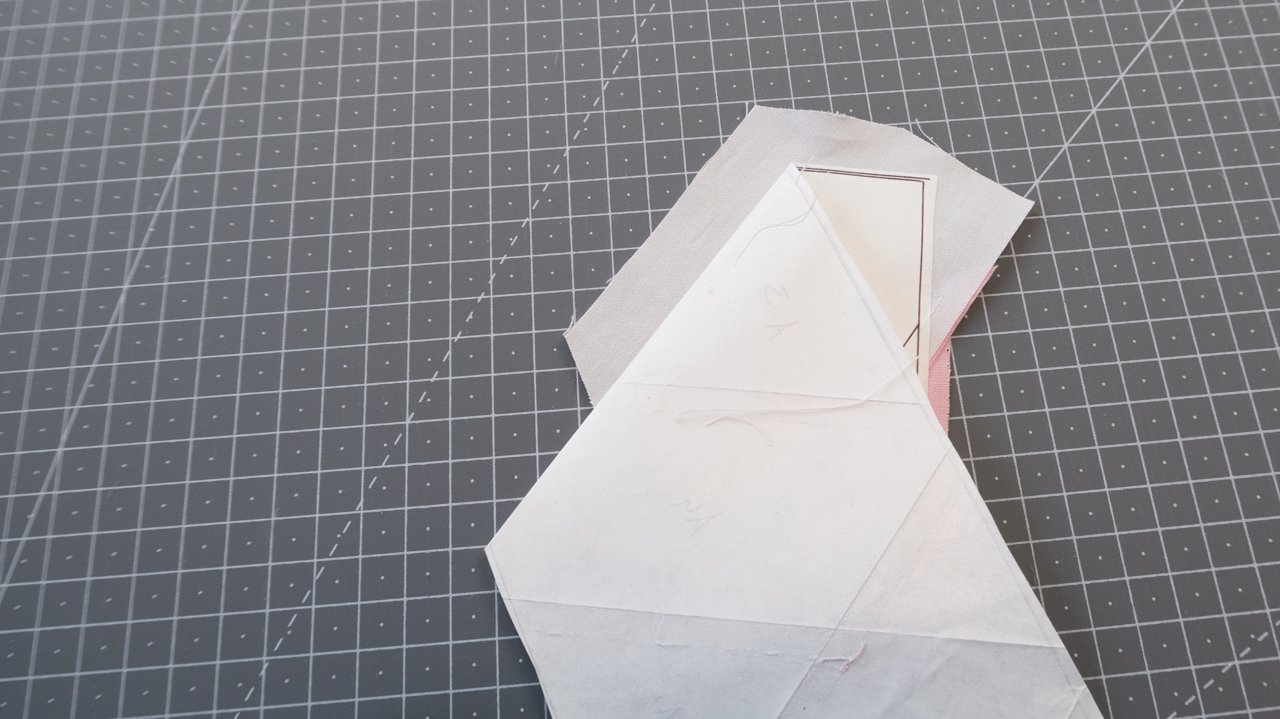
- Fold the paper back on the line towards piece A3

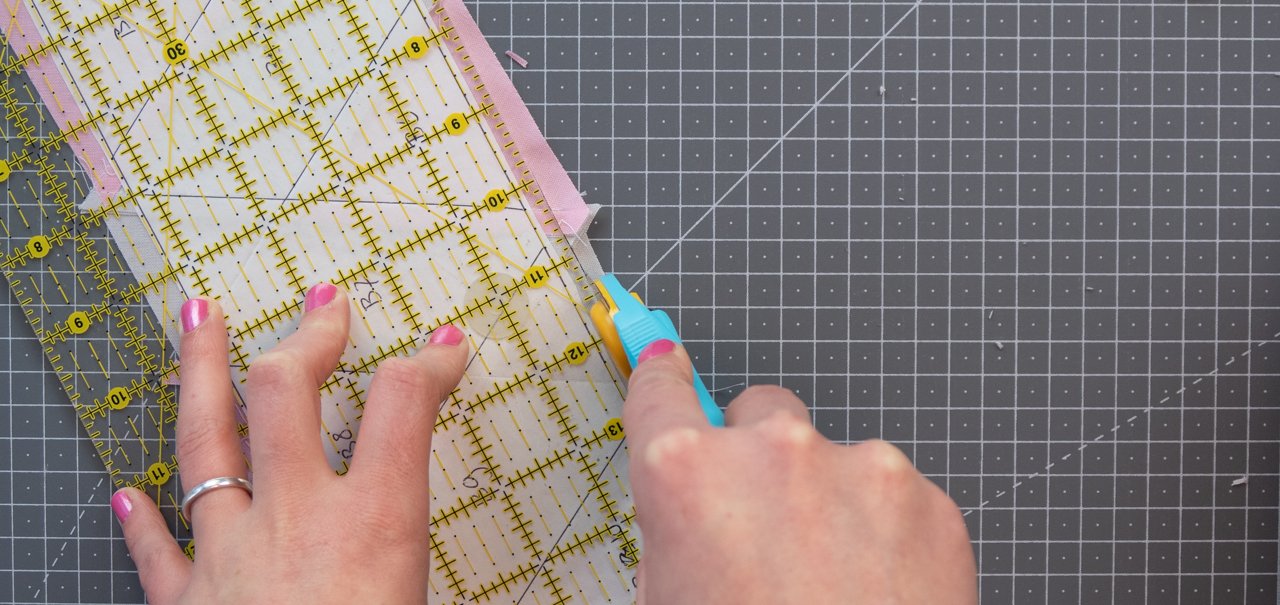
- Take your Add-a-quarter ruler, or your normal inch ruler, and place it with the 1/4 inch mark on the fold of the paper. Trim off any access fabric.

- Place fabric piece A3 under A3 piece on your folded back pattern. Position it like you did in step 3. (If you’re a bit puzzled at this point, check out the video for this row, or my other video on the freezer paper technique)
- Now sew along the fold in the freezer paper and there you will have your third piece added!
- Fold the paper open, fold the fabric open, finger press it and the iron the fabric to the freezer paper. Give everything a good press from the back of the freezer paper.


You can now continue adding pieces A4-A8 by repeating steps 6 to 10. The steps are the same for all the pieces you are going to join, no matter their shape or size.
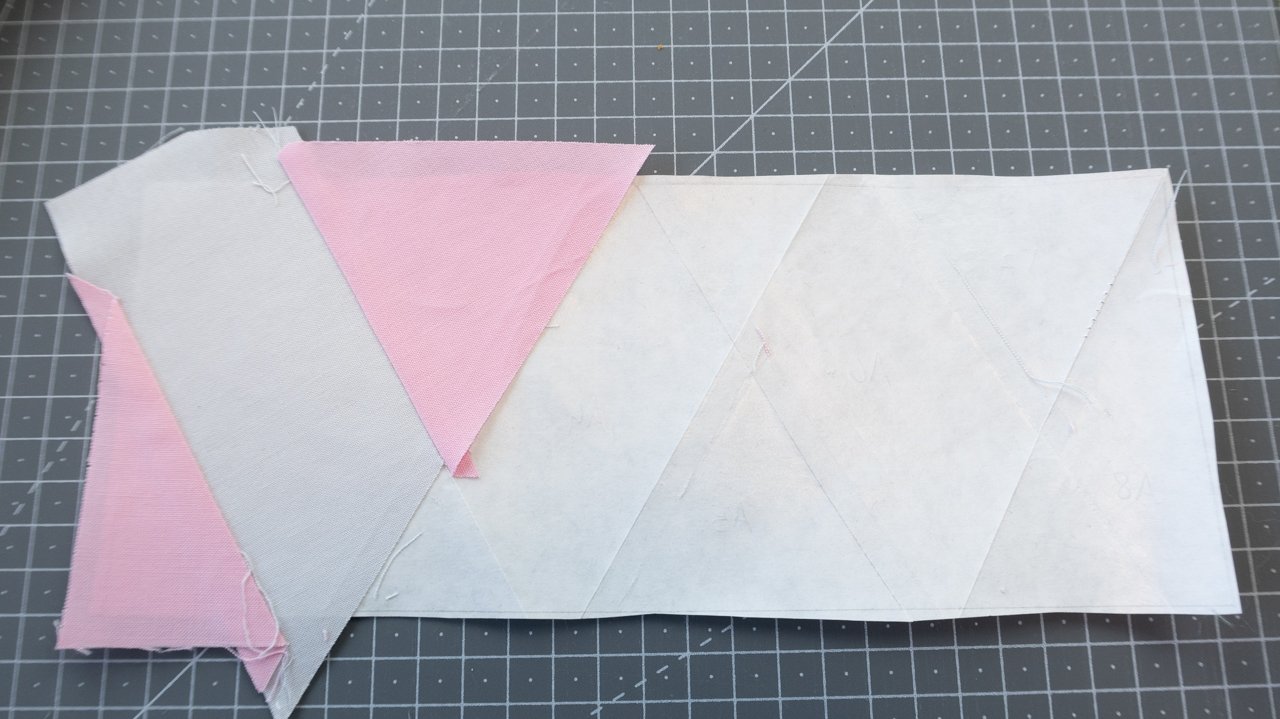
Squaring up your section
When you finish you first section you are going to square it up. Cut all around the pattern piece leaving a 1/4 inch on all sides. This is the reason why you should cut your freezer paper pattern with less than a 1/4 inch, so you don’t have to cut through paper.
Peal away the freezer paper aaaand you’re done with your first section! Now you can repeat all these steps and make another Section A. But with this second one you will make piece A7 in your accent color.
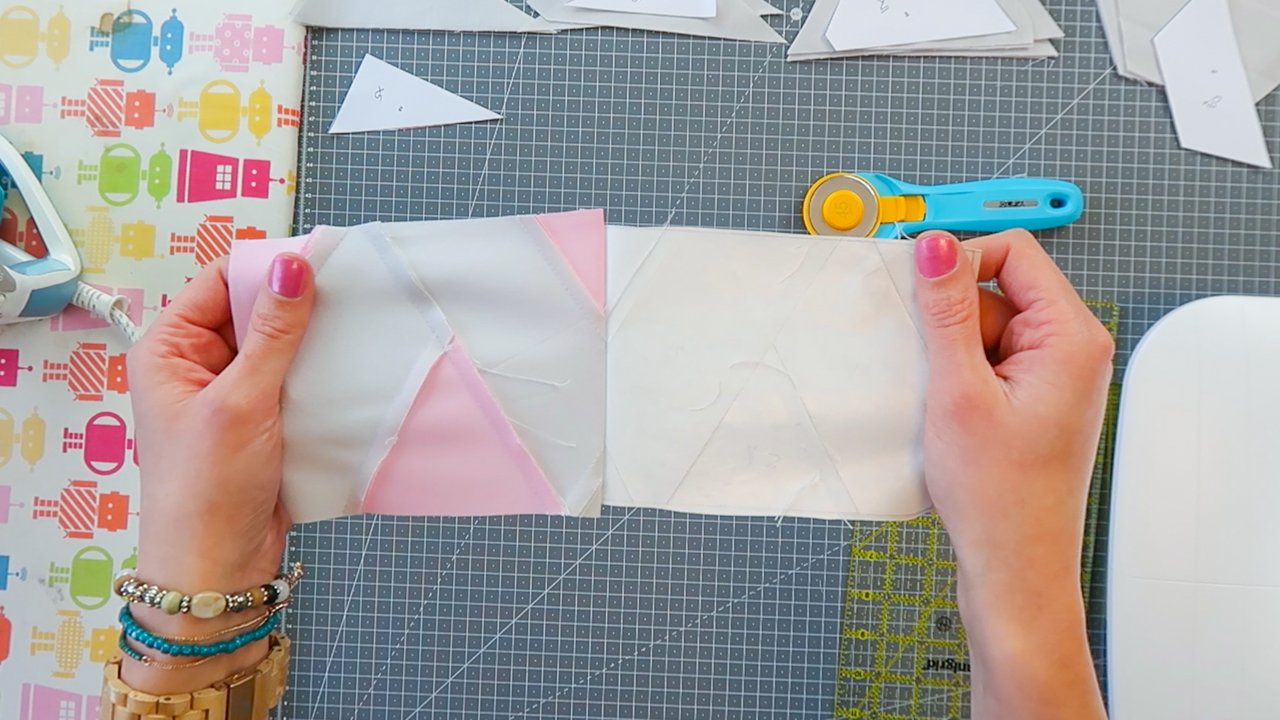
After finishing both Sections A, you can make three times Section B. Make sure to square up the sections before you peal away the freezer paper.
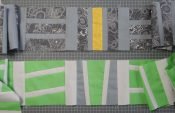
Putting the row together
Now you’ve finished two times Section A and three times Section B you can put the row together. We cut our sections with a 1/4 inch seam so we can put them together using our 1/4 inch foot like I explained in last weeks post.
First sew Section A with all pink triangles to section a Section B.
![]()
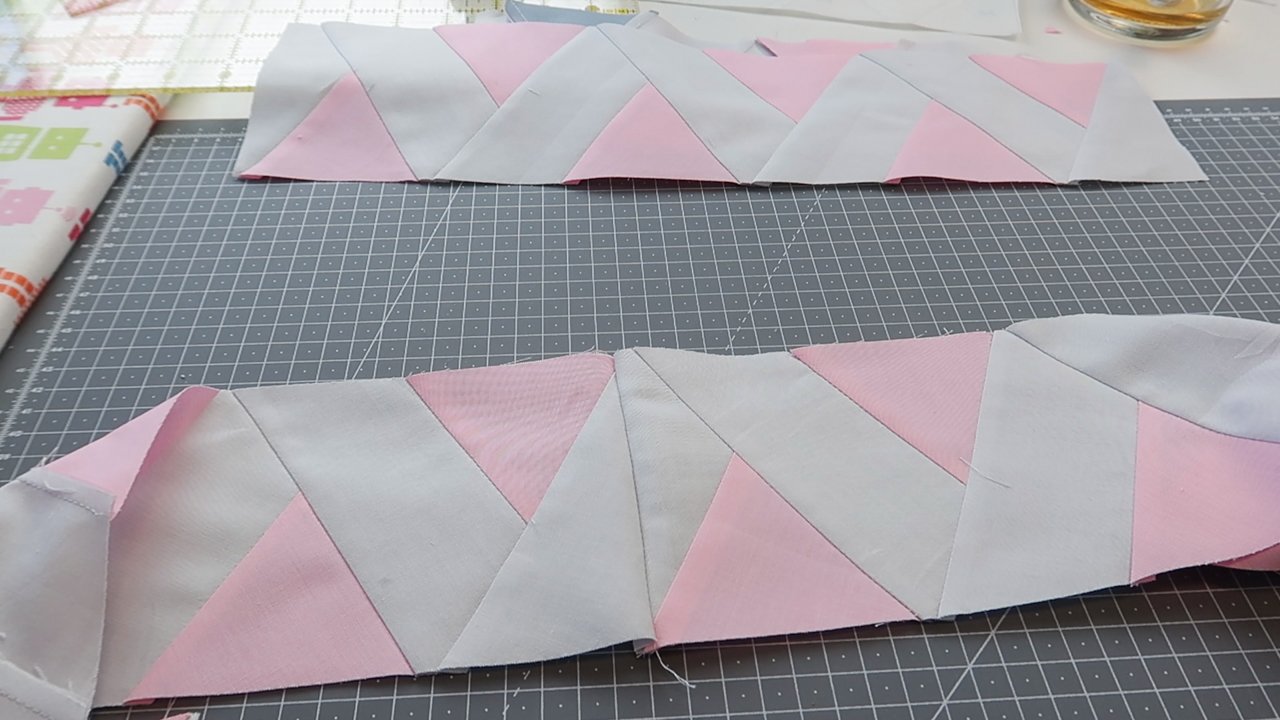
Then add another Section B
![]()
And another Section B
![]()
And finally add the Section A with the accent fabric. And your row is done!
![]()
Whoohoo! You made it!
Yayy you’re done! That is the second part of our quilt along, row #1 finished! Did you like the freezer paper technique? I hope you enjoyed it and maybe learned something new. I think you can be super proud of yourself for showing up and making this second part of your quilt. 10 more rows to go! The next one will be up in four weeks from now on the 23th of January.
If you have any questions about this row, feel free to ask them in the comments below this post. Or hop over to the Facebook group. Next week I’ll be hosting a live Q&A about this row in our Facebook group to help you get started.
See you next year!
Irene
On Point
Irene, you are a genius! I have never liked paper piecing, until you showed this method. Thank you.
Row 2
Soo thrilled to finally understand paper piecing! Its not perfect but done ☺ I did put the grey in different spot but not sweating it
Three rows completed, had to wait for freezer paper to attempt ‘on point’. Think I need to look at how the colours work together!
Three rows completed, had to wait for freezer paper to attempt ‘on point’, quite pleased with my first efforts at making a quilt. Think I need to look at how the colours work together!
On point is done. Found out when finished that my printer wasn’t printing to correct size. I should have checked it before sewing:( I will have to make do for now as I don’t have enough fabric to redo the row.
I learned so much with on point! No longer afraid of paper piecing!
I love this Bernina QAL! ?
Month 2 row 1 was an easy one! Love paper piecing for the accuracy!
Just finished part 2 row 1. Did not receive my freezer paper yet, so I did it using paper piecing method
This is a great paper piecing method!
This was the first time I did paper piecing and was very happy with your tutorial explaining this. It was fun learning this technique. ?
That was fun!
what is the finished length supposed to be?
79.5”
From my view point paper piecing is not beginner rated. Also mine turned out way too long and I made sure of the 4 inch pattern while printing.
Your terrifically detailed explanations are greatly appreciated. Thank you
I have made my December row. I have done quite a bit of paper piecing, but the freezer paper method was new to me. Perhaps I was tired from the holidays, but, despite clear instructions, I did each section my old way, by sewing on the paper! Finally, on my last section, I did it correctly! It is a great way to paper piece when you have repeat patterns. So , finally, I made my pretty pink row, and am very happy with it! HAPPY NEW YEAR!
I wanted to increase the size (width) of my quilt to fit my bed. My question: Will I be disqualified for the BERNINA give away?
I hope not. Nobody is perfect. And time zones play a part as well.
[caption id="" align="alignnone" width="4032"] Part 2 complete with a bit of a variance. Loved this paper piecing method. Will use it again. I am having fun in this group. Listened to the Spotify list that was created for this group.[/caption]
I have really enjoyed this row too….and learnt that for me cutting the pattern out, then cutting a piece of fabric as a temple with the slightly larger than 1/4” seem allowance for fabric worked for me.
I also realised when cutting, that i had to flip the ‘A’ template for the end of the row, as i have directional fabric! Irene Sytema Staal thank you for excellent tuition again! Xxx
What is the finished length of this row? Mine is shorter than row 5- is that right?
I am so enjoying paper piecing with freezer paper that I tried designing and sewing my own block. It is based on one I saw by Nancy Mahoney, but much more basic than the more complicated one that she designed. Because I was just playing, I didn’t centre the dragonflies in the centre, but I am pleased with the result.
Hey Irene, the row turned out to be smaller than the first row. I exactly followed all instructions in your blog. What happened?
We are going to trim off the ends of the hashtag row to 70.5″. This one is supposed to come out to 70.5″. I don’t think it quite makes it. I calculate 70.25″, so I’m planning to make larger pieces for the end pieces (one background rhombus and one triangle), and then my row can be trimmed to the 70.5″.
Here is my completed Row 1. I have been wanting to learn paper piecing, thanks for teaching me this technique using freezer paper!
My two finished rows. I am using fabrics from my stash, except for the background, which I purchased. I really enjoyed the freezer paper piecing.
Finished this row; excellent directions made it so easy. For some reason, it ended up to be a little bit shorter in length than Row 5 Hashtags. I don’t think I will do anything about it now; will even everything up when all the rows are completed.Thanks Irene.
This row came out shorter than the first row we did. I printed pattern and it measured 4 inches. Are we going to add a order? Did I make a mistake?
Row 1 was so much fun. It was my first time paper piecing! I am so glad I purchased Irene’s tree tree house pattern!
I have found that in order to obtain the 4-inch scale for the pattern, I need to increase my printout by 110%. The problem is when I increase to that scale the bottom of the diagram is chopped off and I am not getting a complete printout. Would you be able to make the top and bottom margins smaller? I am unable to do this with adobe acrobat. It is possible that the European A4 paper would work, but I would like to avoid buying paper for 3 pages, which might or might not work.
Hi Debra, I am using letter-sized paper in my printer (8.5 x 11″) and my pattern printed perfectly. I saved the file to my computer first, then opened it from my computer and printed it “actual size” and it printed exactly the right scale. Maybe this will work for you? Sorry that you’re having difficulty with it. Printing can be so frustrating depending on your device.
Mine printed out fine, both at work and at home. It will print perfectly 4” if you set the scale to 100% or actual size, whichever your option is.
Debra,
I sent my printer paper to A4 but still used plain paper and it printed to 4 inches. Hope it works for you too.
I have just finished this new row, I’ll just have to be careful on my margins, 8km not used to inches and was a bit short on some pieces but it should be ok when it will be sawn in the end. Enjoy !
That looks great Valérie! You’re so quick 😀
Hi Irene! I also spotted the issue with piece A5-it should be A8-correct??? Thanks Valerie for mentioning this already!
Hi Elizabeth, yes that’s correct. It was a little typo, I corrected it in the article. Thanks!
Hello
I think I have spotted a mistake in the cutting scheme, if I’m not mistaken, we should cut 5 times A8, not A5. It is right on the first picture with all the pieces but wrong in the list after. Maybe I’m wrong but it doesn’t seem logical otherwise ?
Yes true! It has been changed in the article, everything should be correct now 🙂
Well this looks challenging but fun. I’ve never attempted anything like this before. I think I’ll have a practice on scraps first!
Yay! Yes it’s so much fun. Take your time and practicing a little bit with scraps is always a good idea. ~Irene
Yes! I am sooo excited!!!
Whoohoo! Can’t wait to see how all the rows turn out