 BERNINA Corporate Blog -
Dear community,
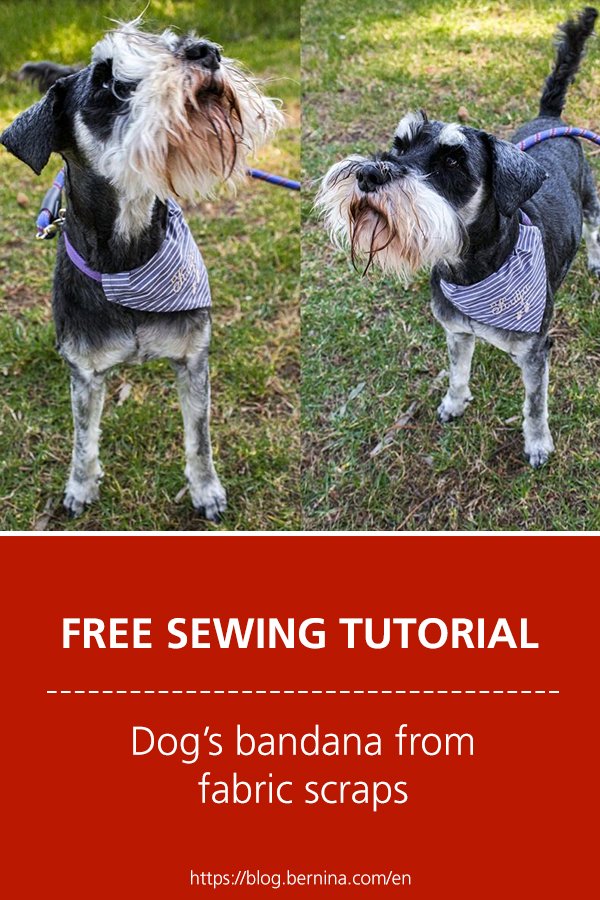
in this blog post you can find easy instructions for turning fabric scraps into a bandana to gift your pet.

Turn fabric scraps into a bandana to gift your pet
I love to gift my family members handmade presents.
I’m sure that like me, many of you feel our pets are just as much a part of our families as our human relatives. They too deserve a handmade gift!
What is great about the gift in this tutorial is that you can use up some of your left over fabric pieces!
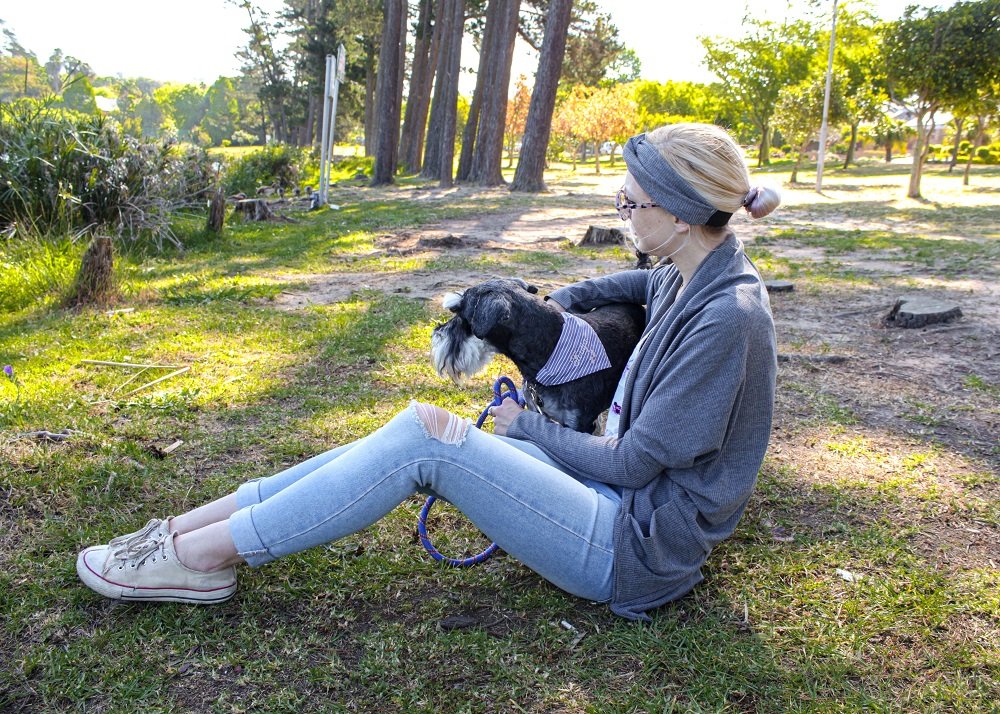
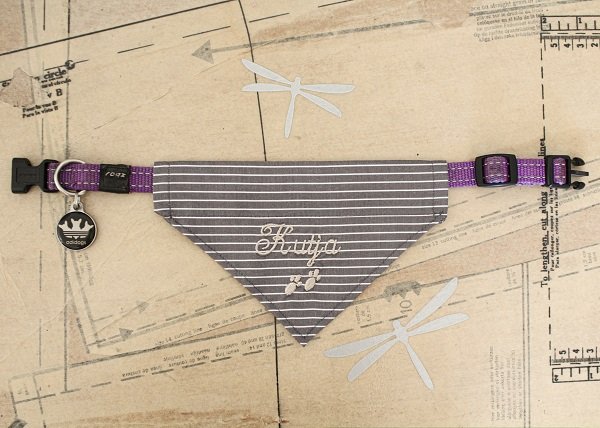
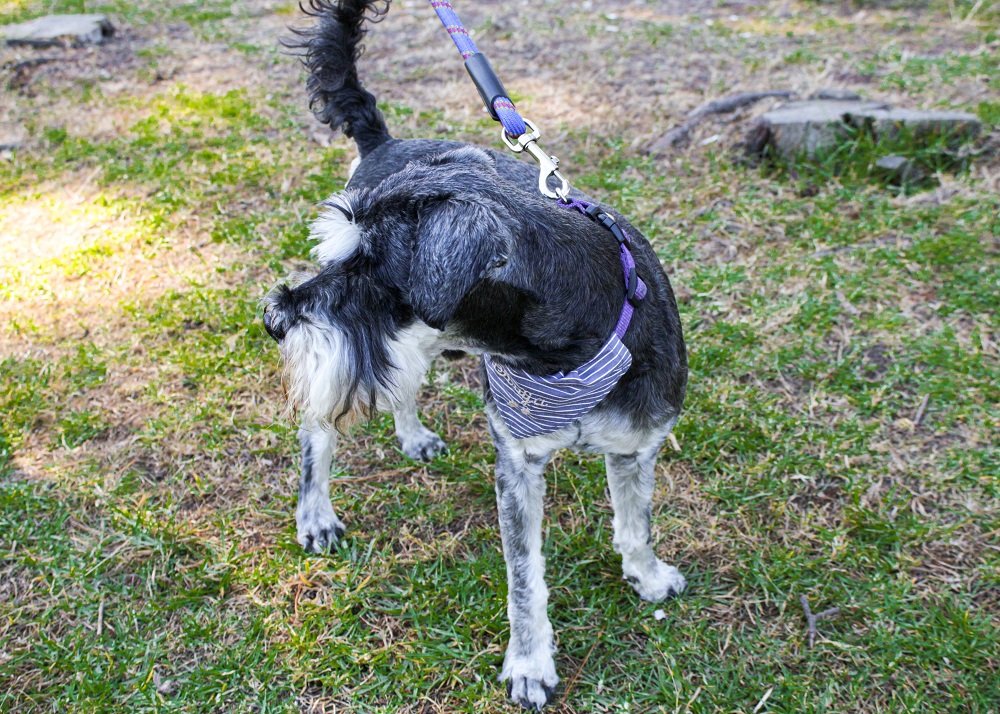
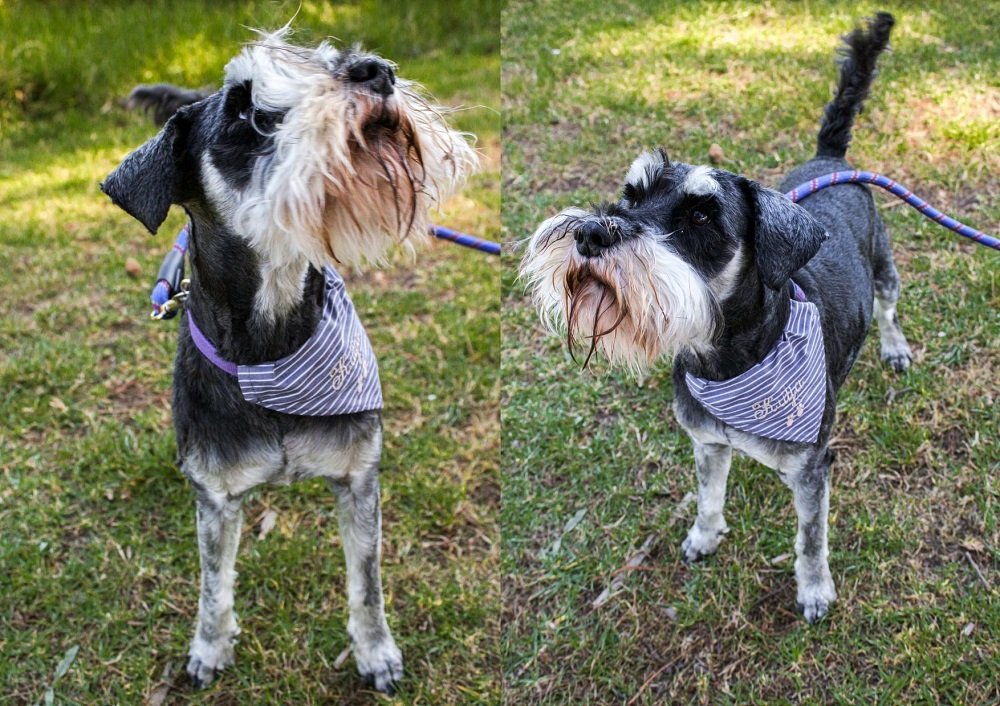
I often make things for my dog Kutja (pronounced: Kutcher) such as jackets for winter, a dog bed and now a personalized bandana. I’ll share with you the pattern I made up and you can adapt it to fit your pet’s collar.
The bandana doesn’t have to be exclusive to dogs, it can be for any pet that wears a collar.
What will be needed:
- Sewing machine
- Embroidery Module
- Overlocker
- Minimum 25cm x 20cm fabric offcut
- Embroidery Stabilizer
- Bandana Pattern (refer below to download)
- 3-4 matching threads
- Contrasting embroidery thread
Pattern
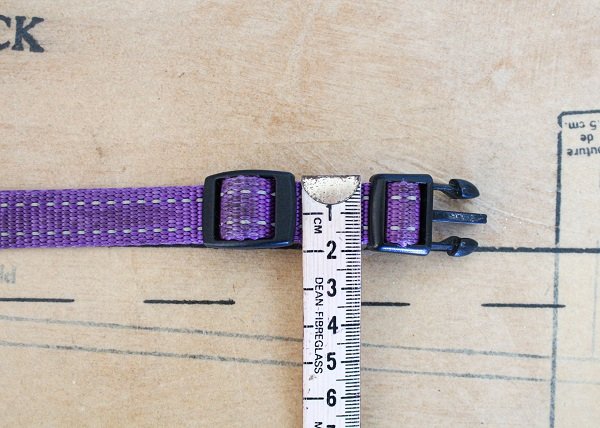
Measure the width of the slider on your pet’s collar.
If it is up to 2cm then you can use this pattern: Medium Pet Bandana
If it is bigger or a lot smaller, use this pattern: Diy Pet Bandana Pattern
Add on to the pattern the width of the slider x 2 + 1cm
Eg. If the slider width is 4cm: 4cm x 2 + 1cm = 9cm to be added to the pattern.
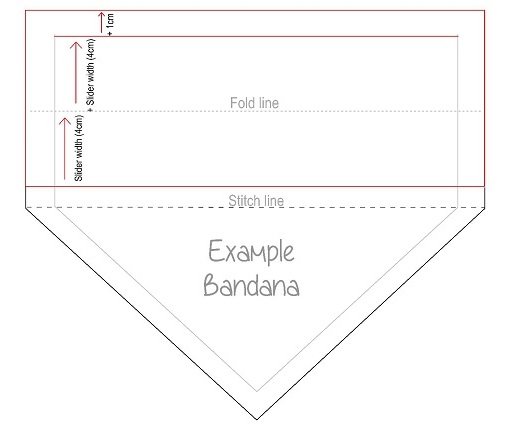
Extend the seam allowance on the sides and draw in the Fold line.
Steps
Embroider
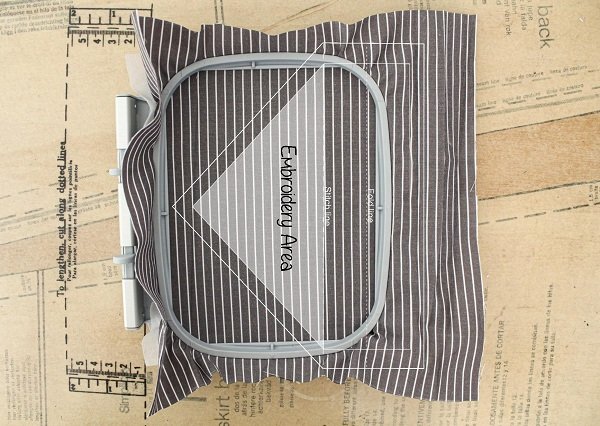
- Place your piece of fabric in the Embroidery hoop.
I used a tear-away stabilizer under my cotton fabric.
Use the pattern to help with the placement of the embroidery.
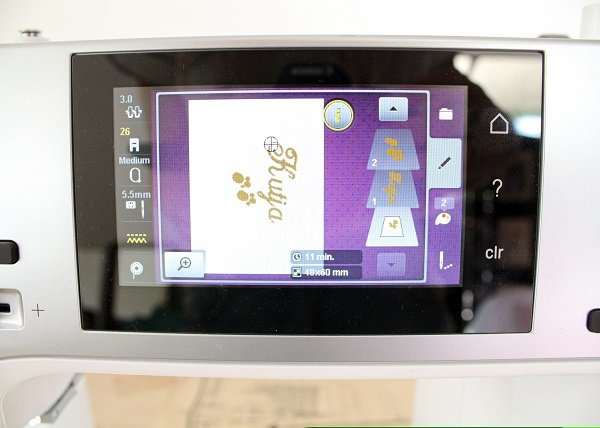
- On your screen, work out the correct placement for the embroidery design.
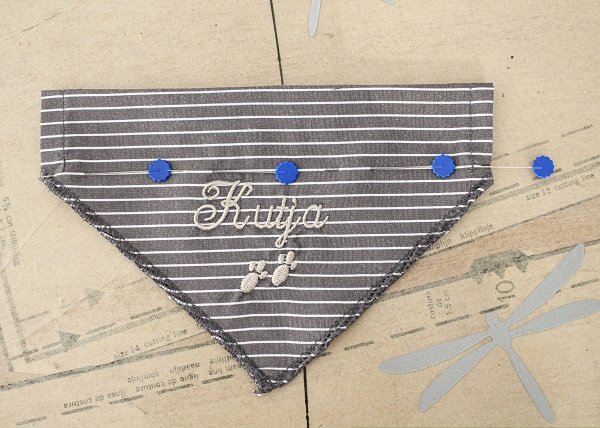
I went with my dog’s name and a paw print design.
(Bear footprints Digitized by Igor Denisov)

- Enjoy a cup of coffee while your machine creates the embroidery.
Always stay nearby your machine to supervise.
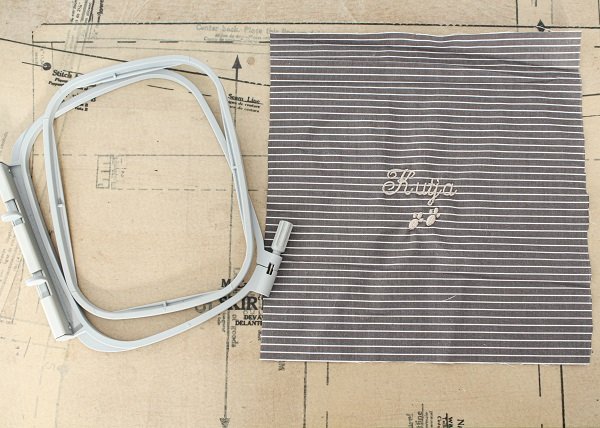
- Once your machine has completed the embroidery, remove the fabric from the hoop.
Remove the stabilizer from the fabric.
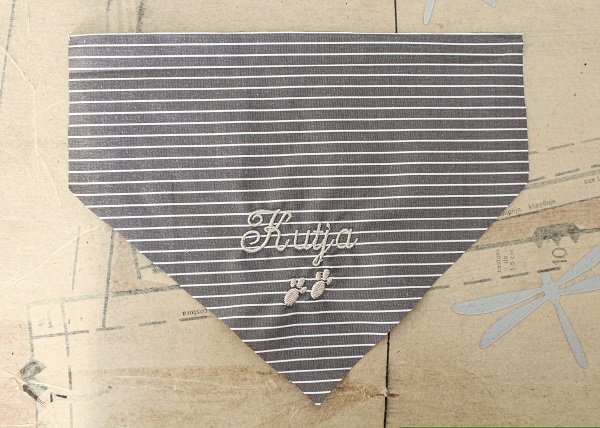
- Use your pattern to cut out the bandana.
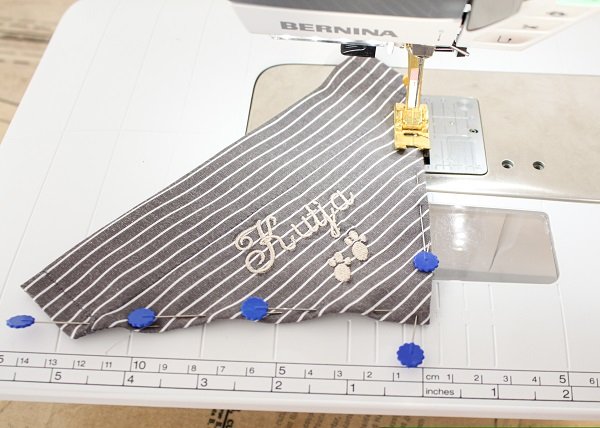
Overlock
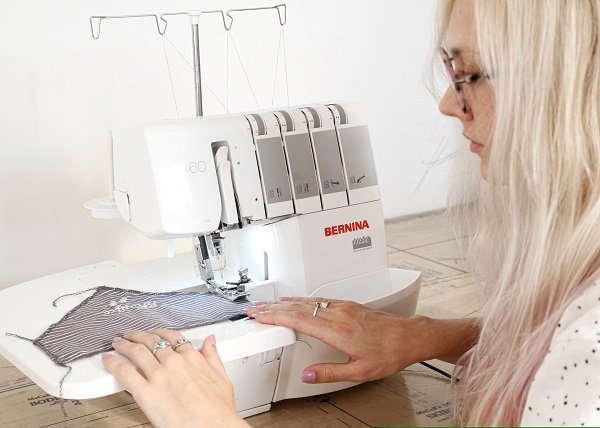
- Overlock around the bandana.
I used the 3-thread overlock stitch.
Sew
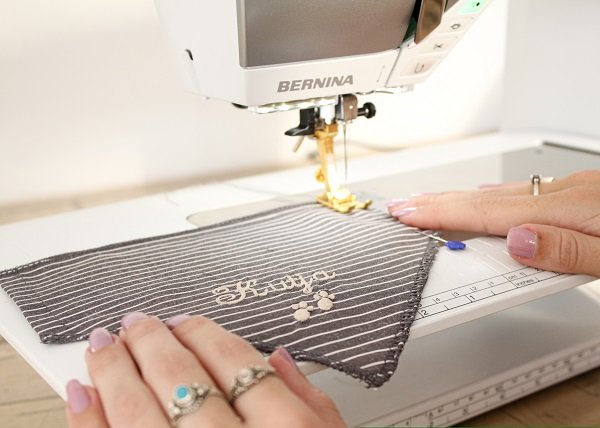
- Fold the two sides of the bandana in 1.3cm and sew in place.
- Fold the top of the bandana over along the fold line and stitch in place.
Refer to the pattern for the fold line and stitch line.
- Fold the angled edges of the bandana in by 1cm and stitch in place.
Finishing off
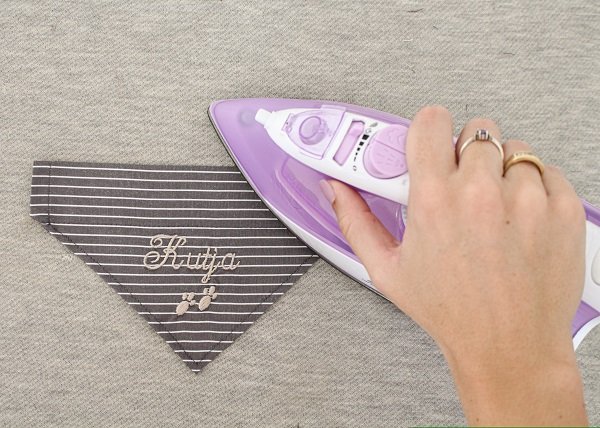
- Give the bandana a press.
- Feed your pet’s collar through the bandana.
Tips
- If you do not have enough fabric you can sew the bandana together in 2 pieces.
On the pattern, cut along the stitch line. You will have a rectangle and a triangle.
Add a seam allowance to the top edge of the triangle as well as the top and bottom edges of the rectangle.
Then at step 8 join the rectangle to the triangle. - I have found that a soft/light-weight woven fabric works best but feel free to experiment with a knit fabric.
- When using a lead, the bandana will likely sit on your pets chest. When not using a lead, the bandana will likely sit on your pets back.
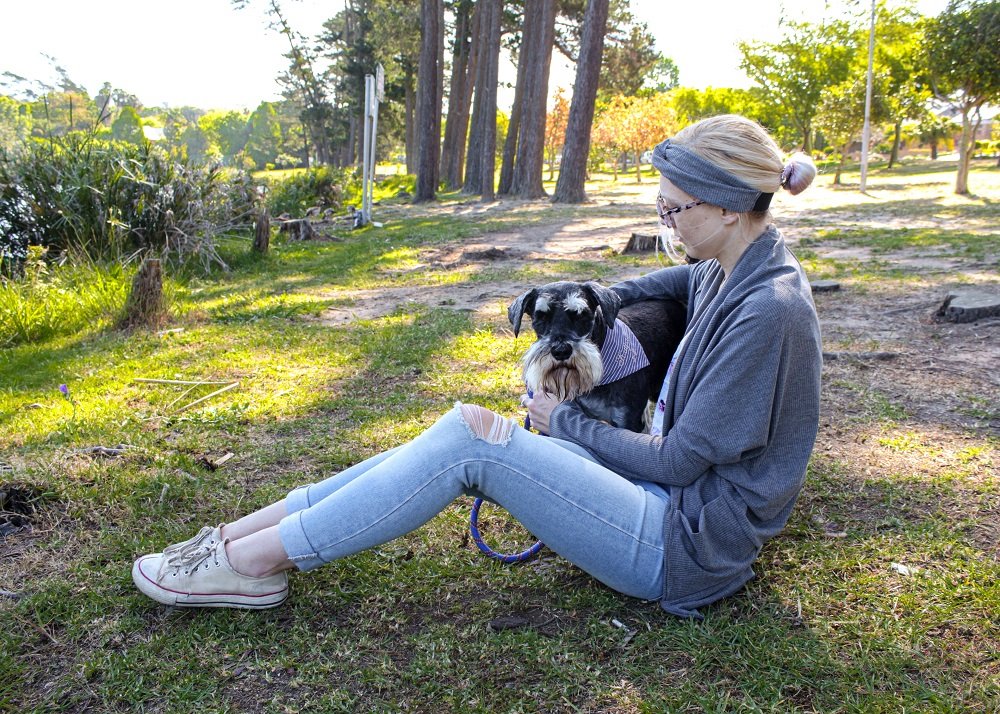
I would love to see your pet wearing the bandana you make, please feel free to share with me!
Instagram
Facebook
Merry Christmas
-Hannah-Rose

0 Responses