Let’s make a Butterfly, with embroidery and CutWork via V8 and your embroidery machine. With the previous lesson(s), the Butterfly was converted and edited; wings and head connected to the body, and saved: I have named it ‘vlinder.ART80′, (Dutch name for Butterfly). This file was opened in Embroidery Canvas, for editing via CutWork.
I have connected all objects to be able to cut the four gaps in the wings, making holes. The Butterfly itself has to be edited for CutWork. To do so, select the entire Butterfly, then click on ‘CutWork’ in the left Toolbar (Toolboxes). I have placed the docker ‘CutWork’ to the right, and used the ‘pin’ to set it. There is nothing visible in this docker yet.
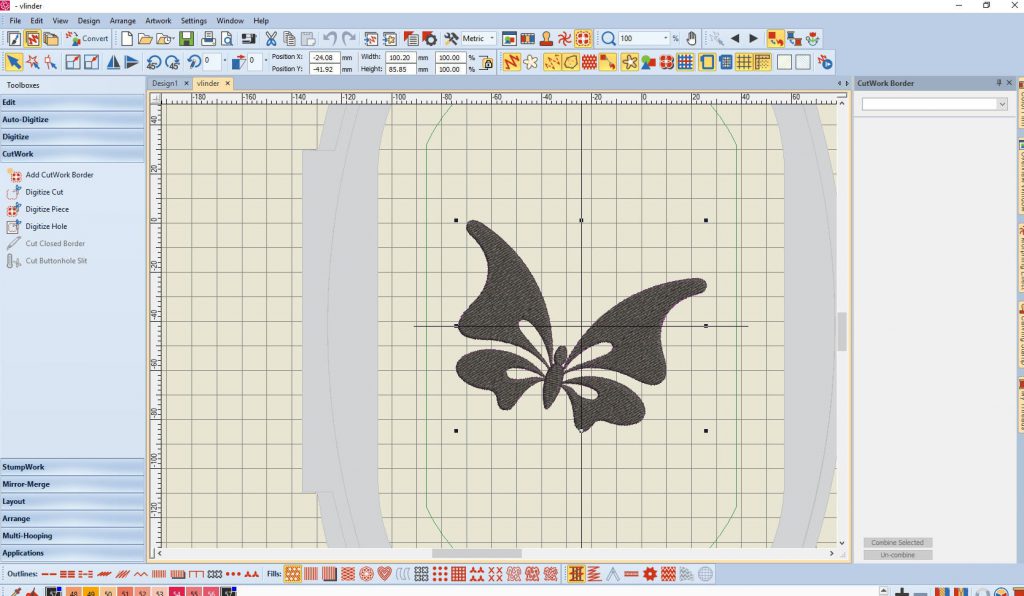
At the moment, the Butterfly has embroidery stitches only, so I have to add cut lines. Because of selecting the entire design, the option ‘Add CutWork Border’ is activated in the left toolbar.
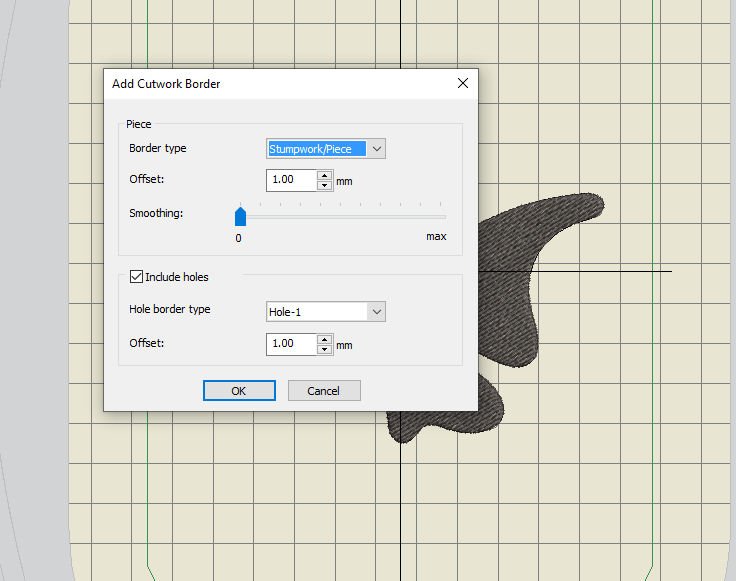
Right-click to open the dialog box ‘Add CutWork Border’. A border type can be chosen, for cutting the butterfly along the edges, but I want to make holes too, cutting the gaps in the wings.
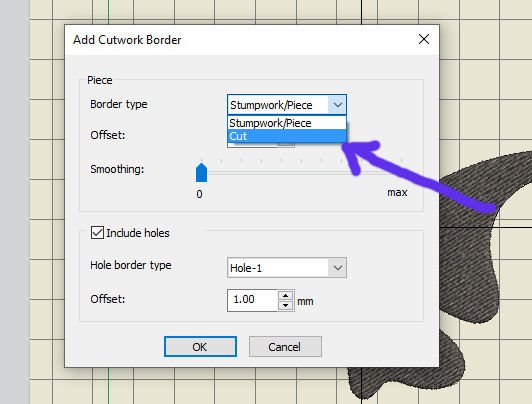
Let’s start with the outer edges. With ‘Border Type’, click on the down-arrow, and choose ‘Cut’. (Choose ‘Stumpwork/Piece, when you actually want to make Stumpwork, adding wire in the edges to get a 3D embroidery). For now I just need to cut, after the embroidery is done.
With ‘Offset’, you can change the default setting of 1.00mm. This is the compensation of distance for cutting the edges, from embroidery to the actual edge of the cut-out. Because I am making the Butterfly, using Embroidery Felt, I want to have an extra edge around the embroidery, so I will change the setting to 2.00mm.
With ‘Smoothing’, there is a slider to change settings. By default the slider is set on ‘0’. Change this, depending on the selected shape. It adapts to the actual shape. Sliding it to the right, up to ‘max’, the shape is less exact, becomes blurry. That could be interesting, but for my Butterfly, just keep it as it is.
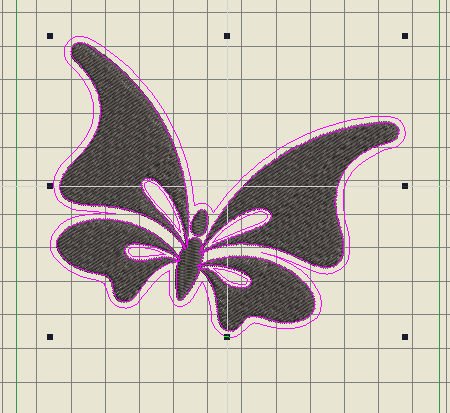
The image above shows you what happened after I’ve used ‘OK’, with the new settings. The cutting edges are following the shape of the butterfly, and the gaps are perfect holes (also with compensation, the same as with the edges). Pink lines are cutting lines, because the butterfly is still selected (otherwise they are black). I have to admit, I have enlarged the gaps in the wings with ‘Reshape’, before making the CutWork borders, because they were actually too small. You can always go back, edit and make a CutWork border again.
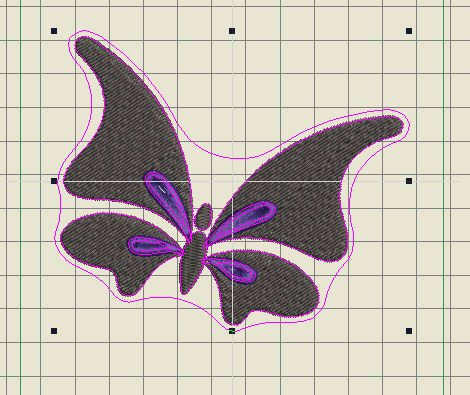
This is how it looked, when ‘Offset’ is at ‘Max’: the cut-out doesn’t follow the edges of the butterfly anymore, and the holes in the wings are not large (they have to be edited), because there is too much compensation. Not a great shape.
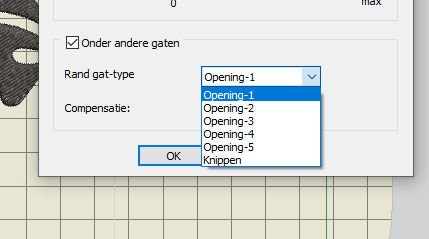
Changing gaps to make perfect cut-out holes in the wings, can also be edited in a different way: with the same dialog box ‘Add CutWork Border’, check ‘Include Holes’- and choose ‘Cut’, clicking on the down-arrow with ‘Hole border type’. Don’t change the Offset (now 1.00mm), because you don’t want to leave large edges around the gaps of the wings because of their (small) size. If you don’t change the size of the gaps, there will be nothing to cut – cut lines will be too close together without any positive effect.
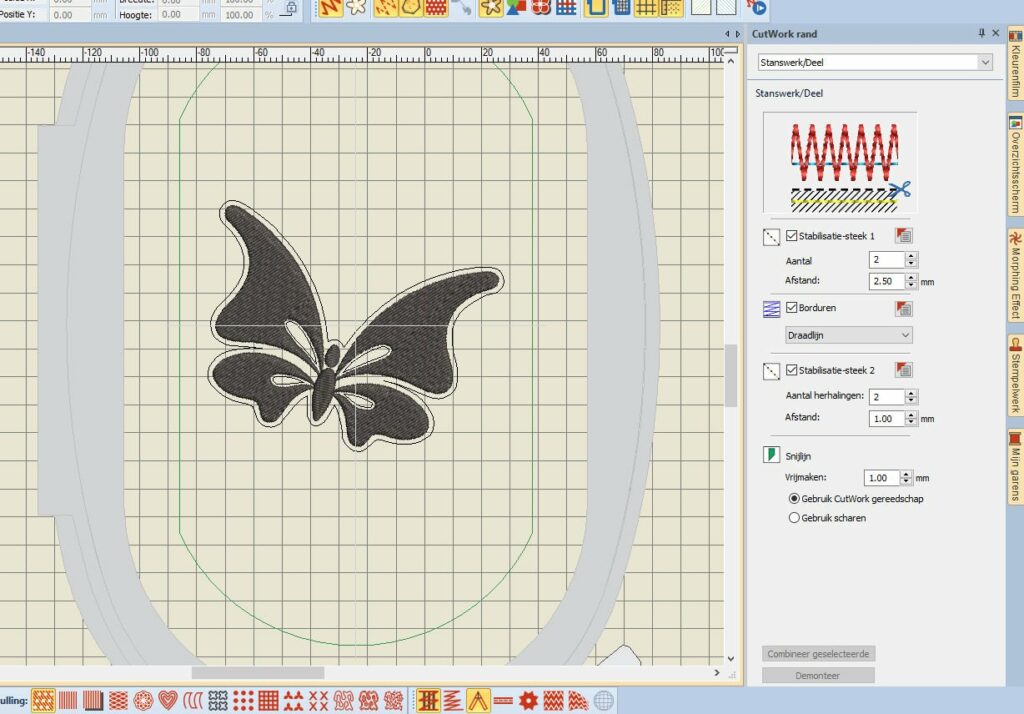
Using ‘OK’, wait for it, and there it is: a perfect CutWork butterfly. Click anywhere on your workspace outside the embroidery design and the docker ‘CutWork Border’ is filled with information about settings (before it was empty), even while the butterfly is not selected. Remember, the results with your butterfly can be slightly different, depending on your editing. If the holes are not perfect, enlarge them with the reshape tool.
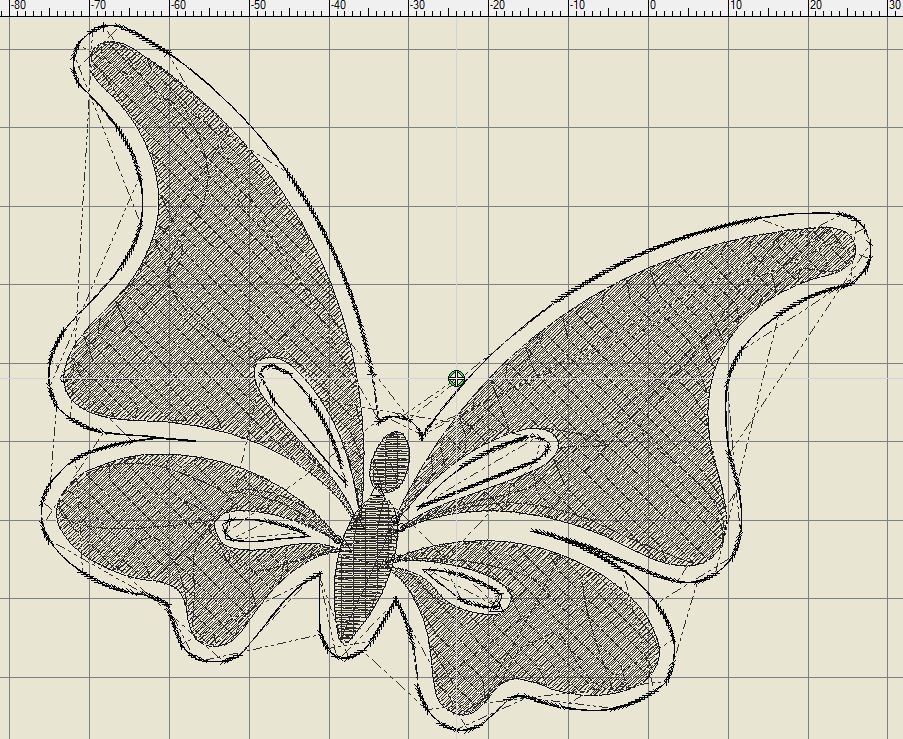
For a better view of the cutting lines, I have deactivated ‘Show artistic view’. You can see thick and thin lines around the edges and inside the holes. The thick lines are places where the knife of your CutWork tool will cut twice, in different directions, depending on the placement at the time of cutting = one of the directions (1,2,3,4) of the knife.
When you take a look at the CutWork tool, a rim with four digits is present: this is for positioning the knife. There will be cuts in four directions: at 0°, 45°, 90° and 135°, in other words position 1,2,3 en 4. Because the knife doesn’t cut ‘in the round’, it has to be turned in different positions to cut out all. That means cutting again, coming back on the same spot as the previous position, will occur. After all four positions are completed, the cut-out is ready.
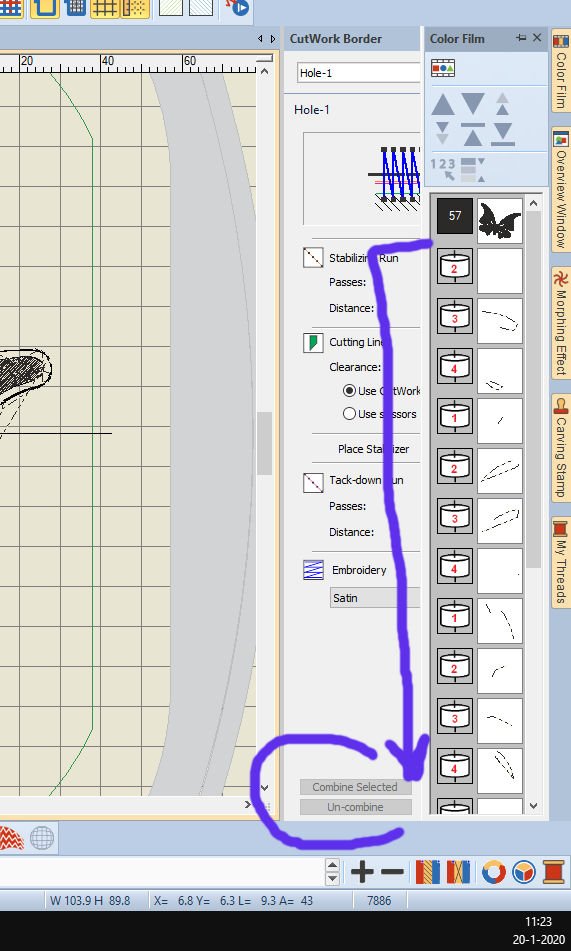
When checking the docker ‘Color Film’, the embroidery with thread is done first, which makes sense, because you want to complete that before cutting. Below the Butterfly, multiple boxes are indicating the cuts, each with their own number 1, 2, 3 and 4. The embroidery machine will stop after each cutting number, for you to turn the CutWork tool to the next number. If you would leave it like this, there is a lot of turning to the right number, going from 1 to 2, 3 and 4, and back again to 1, 2, 3, and 4, etc.
Better is to combine the number of cuts, reducing to 1 x position 1, 1 x position 2, 1 x position 3 and 1 x position 4.
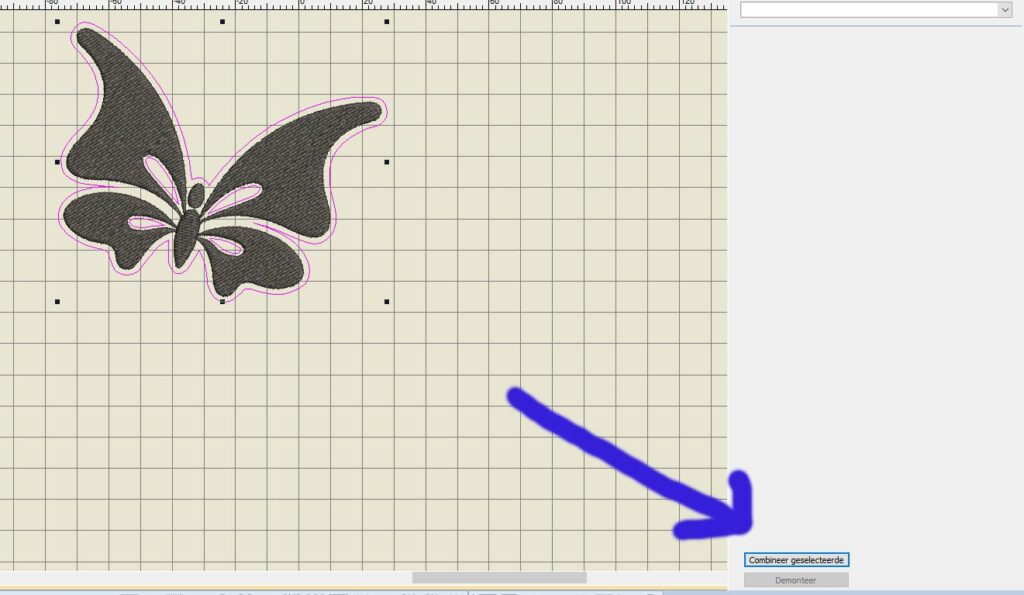
I’ve changed the selection of the butterfly: selected just the cut lines (they should turn pink/red, indicating they’re selected. If you’re having trouble just clicking on these lines, zoom in), and noticed that the button ‘Combine Selected’ in the docker ‘CutWork Border’ was activated. Clicking on that button, combines ALL cutting actions, to end up with just 4 cuts in total: direction 1, 2, 3 and 4.

Now go back to the docker ‘Color Film’, to see there are 5 boxes left: 1 for the embroidery of the butterfly, and 4 boxes for cutting, each with their own position.
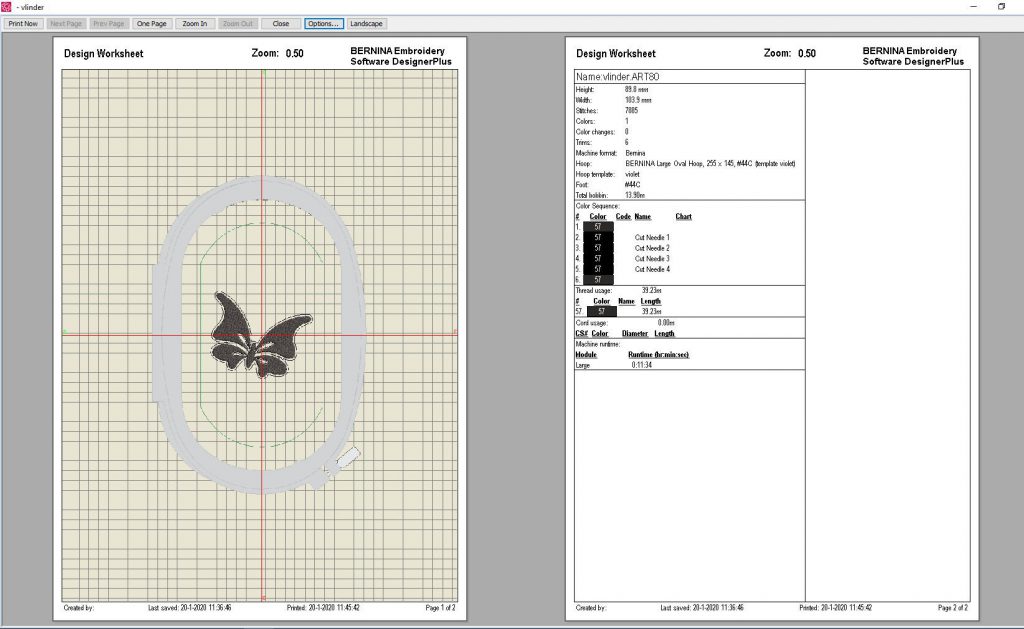
You can use ‘Print preview’ – setting 50% of the actual size – to show details, with only 4 cuttings.
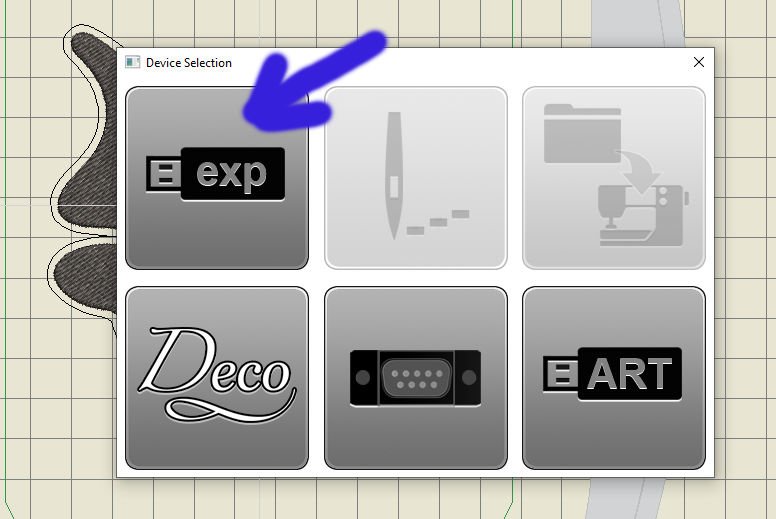
I have saved my design (again, different name, to keep the original Butterfly), and transferring it to my USB stick, placing the design on my machine B770QE with embroidery module.
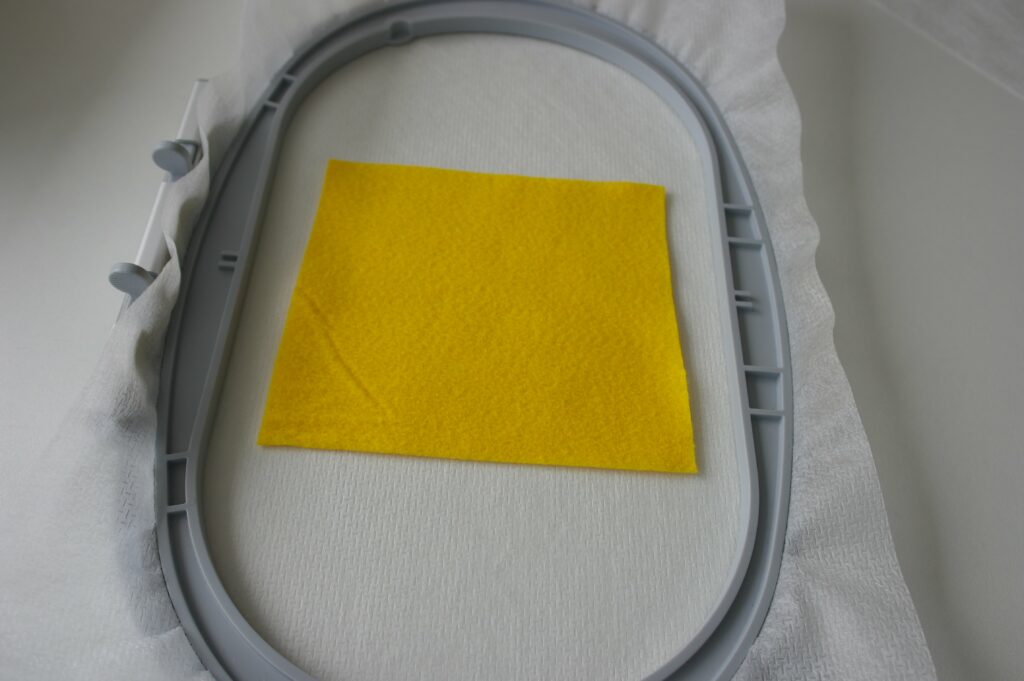
A Mesh – cut-away stabilizer) was hooped (Large Oval Hoop), with Embroidery Felt on top, floating. I have used Sulky Rayon 40 for top thread, and DecoBob/Wonderfil in the bobbin, with the embroidery foot #26 on my machine.
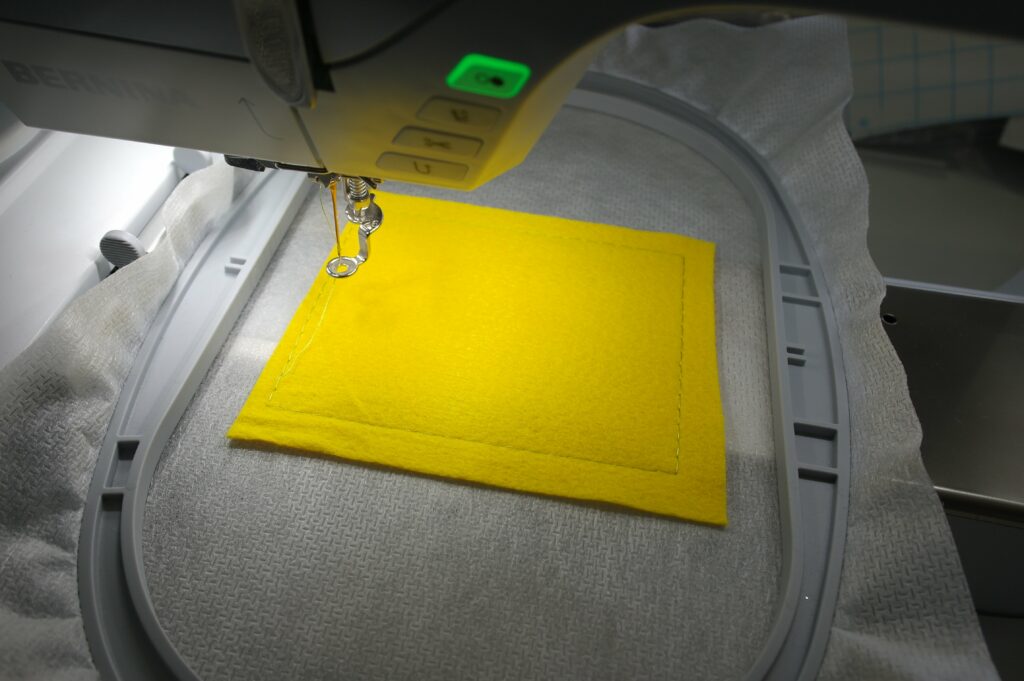
First, stitches are made to secure all layers, before the actual embroidery. You can use a spray glue to connect both materials, but I am not a fan of glue with embroidery. Often the glue builds up, and sticks to the needle, distorting the embroidery. By making these first stitches, the felt cannot shift during embroidery.
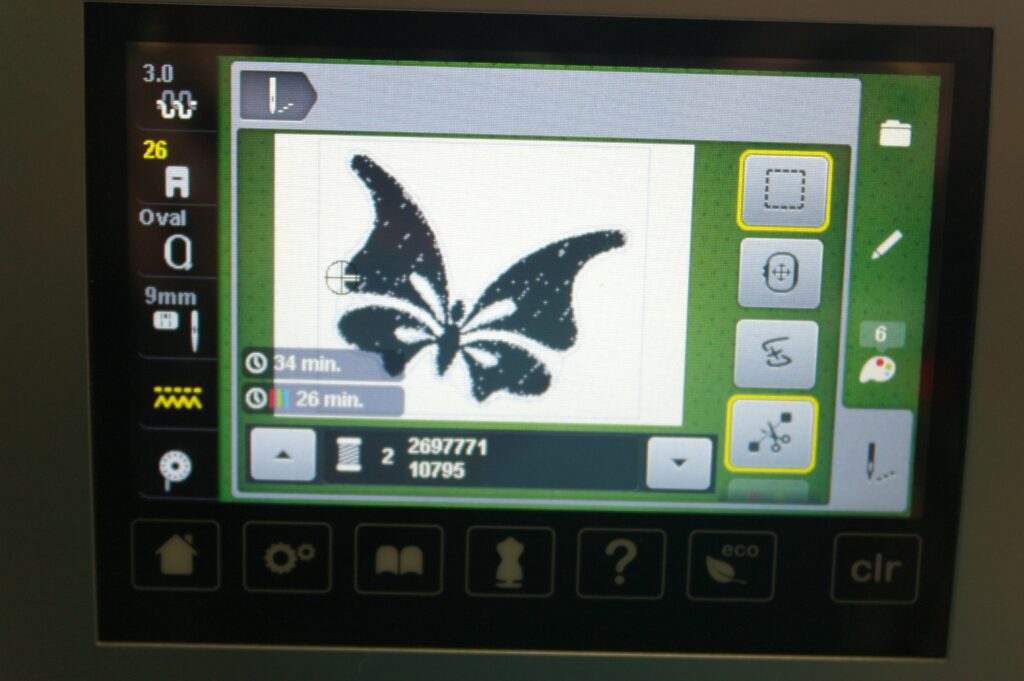
The display on my machine shows a yellow rim around the option ‘Basting stitches’. Other options are ‘yellow’ too, indicating the default settings (which are always white) are changed: I have selected embroidery foot #26, and lowered the feed dogs. I had to change the stitch plate into the actual ‘0mm’ (straight stitch) plate too.
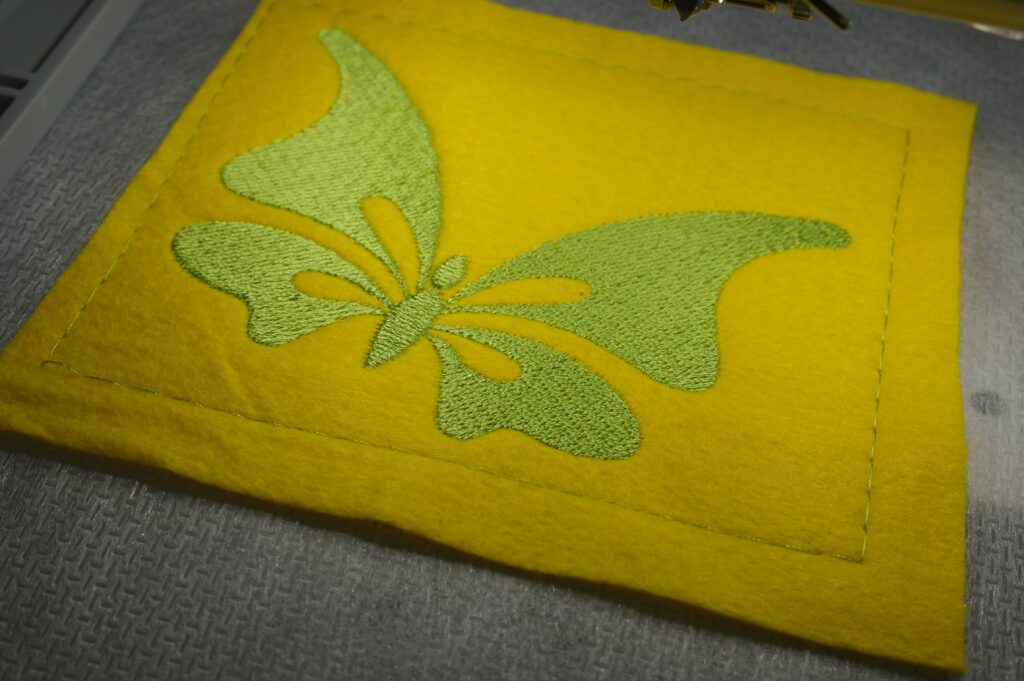
I’ve embroidered the butterfly, which turned out just fine.
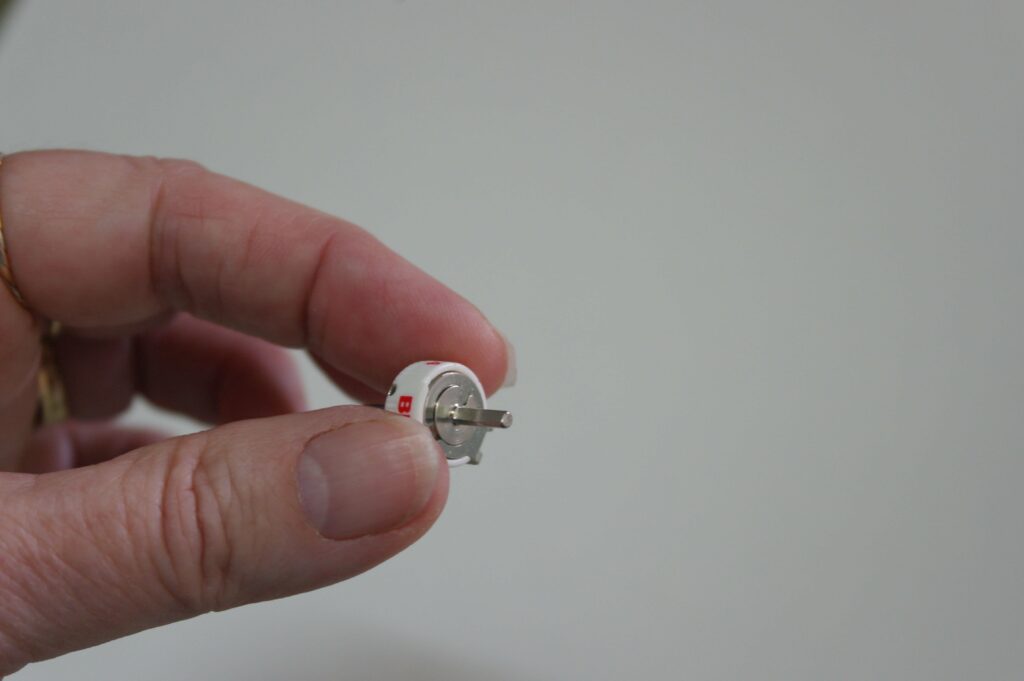
Now it is time to set up the CutWork tool, and activating Foot #44C (this foot can be pre-set while choosing the right embroidery hoop, with hoop settings in V8, before saving your design. Foot #44C was added to the list, with the last Update for V8 (November 2019)). The picture above shows the knife of the CutWork tool.
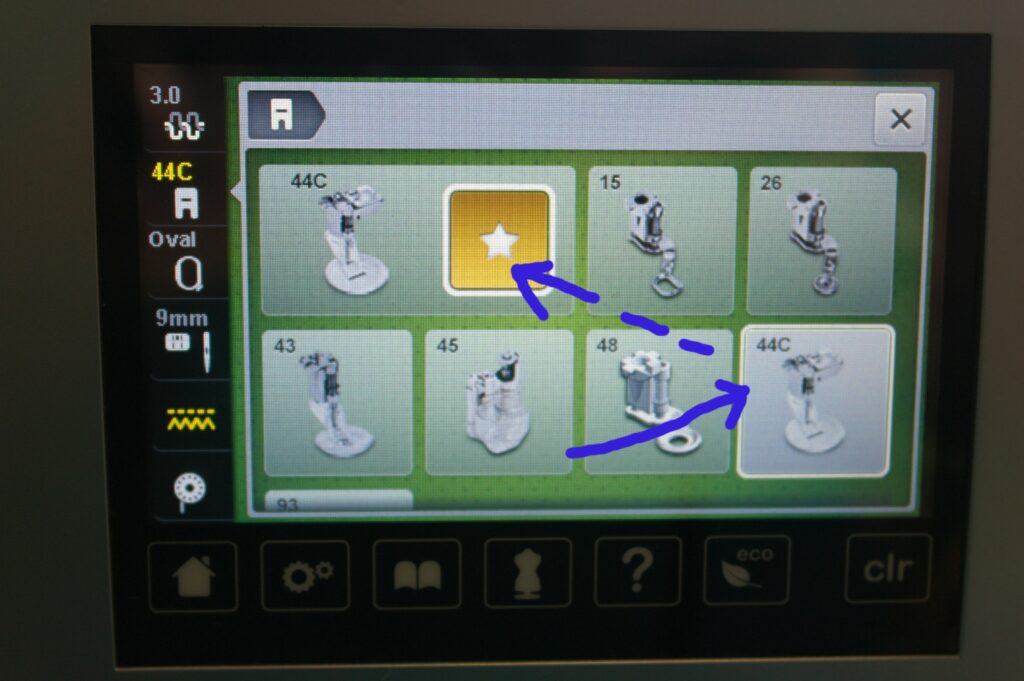
If you don’t change the settings on your machine, it won’t work. You will have to select foot #44C via the display, for it to show up as ‘used foot’.
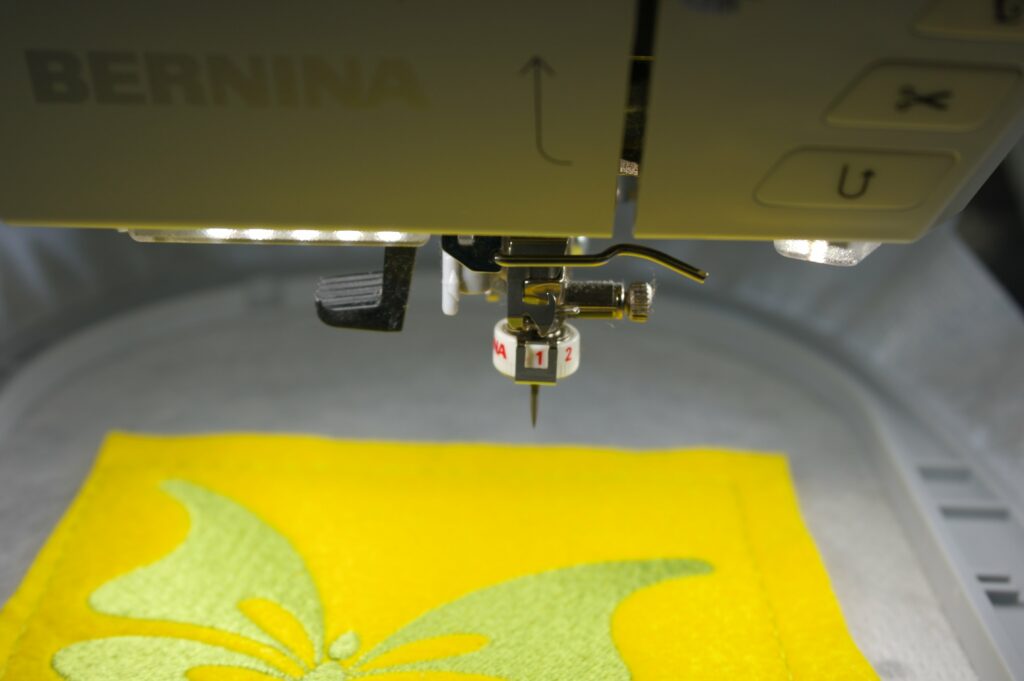
The picture above shows that I have set up the presser foot #44C, with number 1 in the small metal window = position 1.
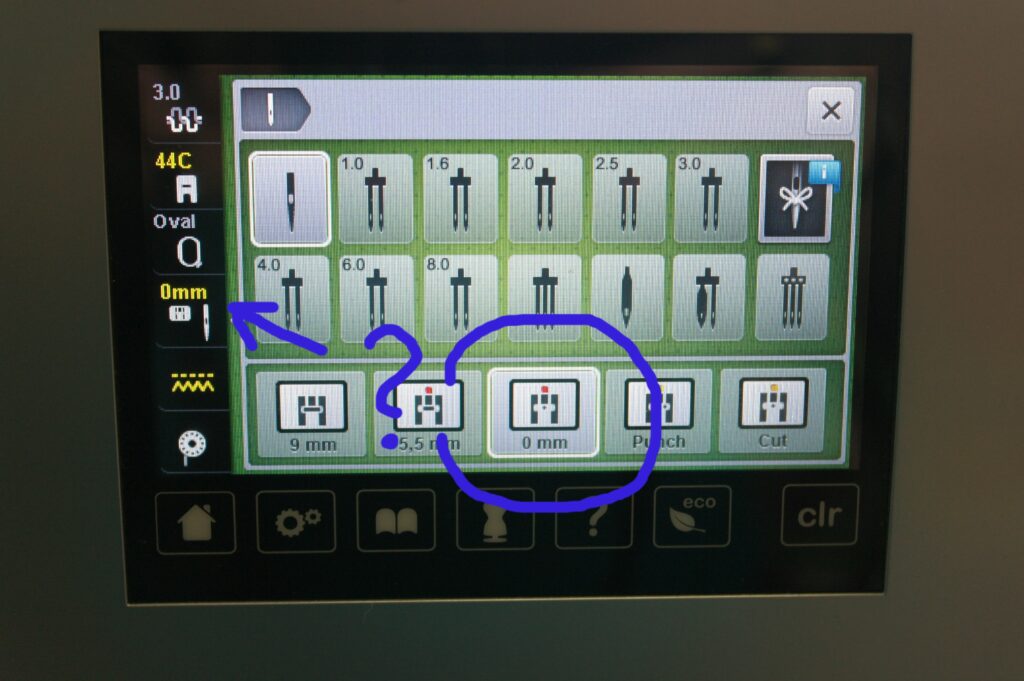
Before sewing, you have to indicate the Straight Stitch plate again: not as ‘0mm’, but as ‘Cut’ plate. Although both plates are the same ‘0mm’ plate – you don’t actually have to change plates, because the 0mm plate was used for the embroidery), nothing happens when you still have the ‘0mm’ plate activated on your machine. It needs to recognize the CutWork tool and settings. Before changing the plate into ‘Cut’, my machine would not cut, but gave me a warning.
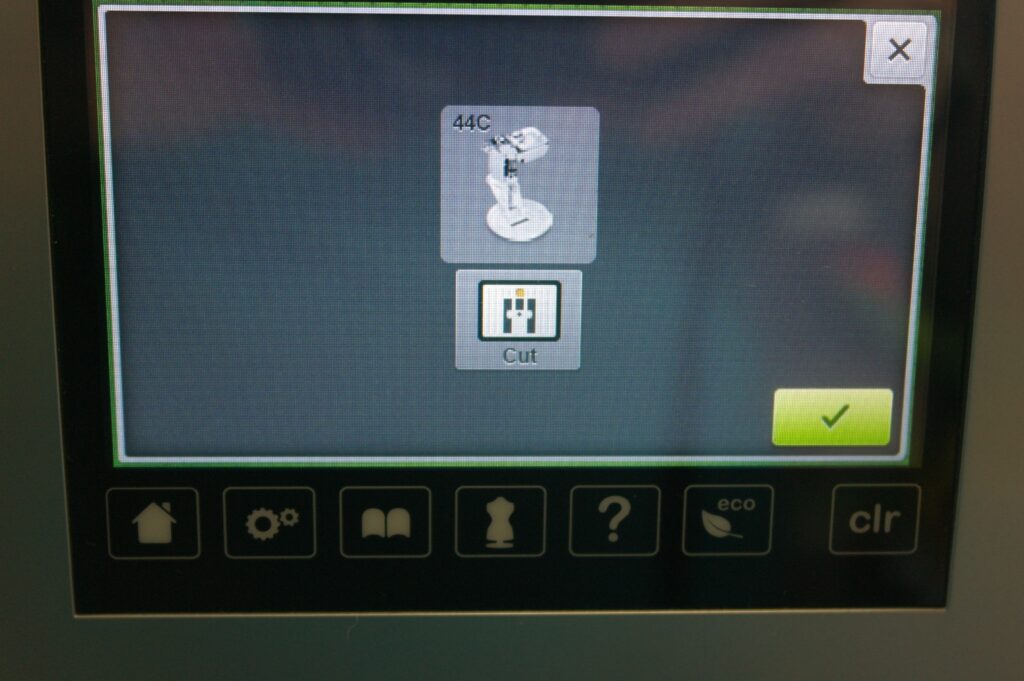
This was the warning on the display, indicating not all settings were done for cutting. The icon on top is for letting you know, presser foot #44C must be selected. The icon below is for the right indication of Stitch (Cut) Plate, which was not selected at that time.
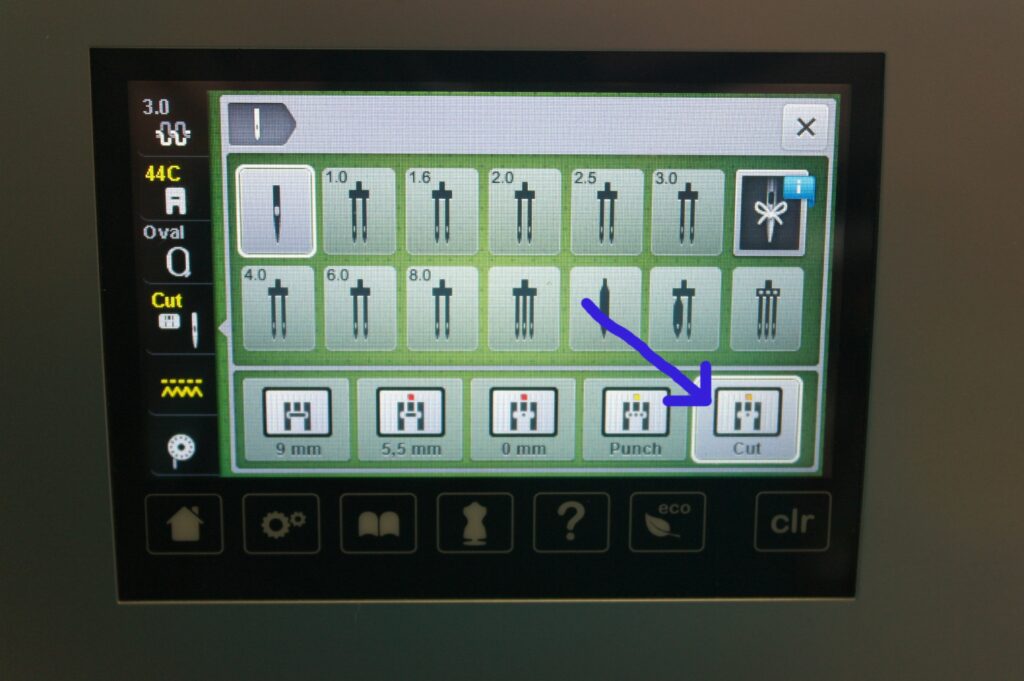
The necessary settings are done. The left of the display shows changes have been made.
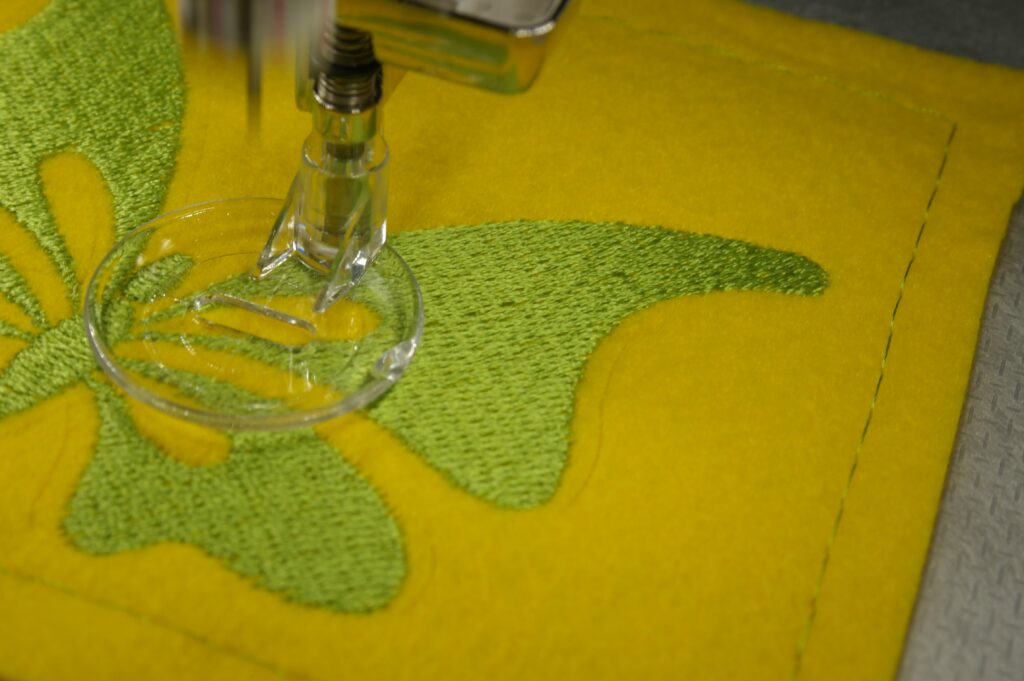
The actual cutting with the CutWork tool: first step 1, different places along the edges AND inside the wings. The machine stopped after each step, for me to turn to the next number: 2, then 3 and finally 4. I like the fact that there is still a lot of yellow felt visible along the edges, and even inside the wings, after cutting.
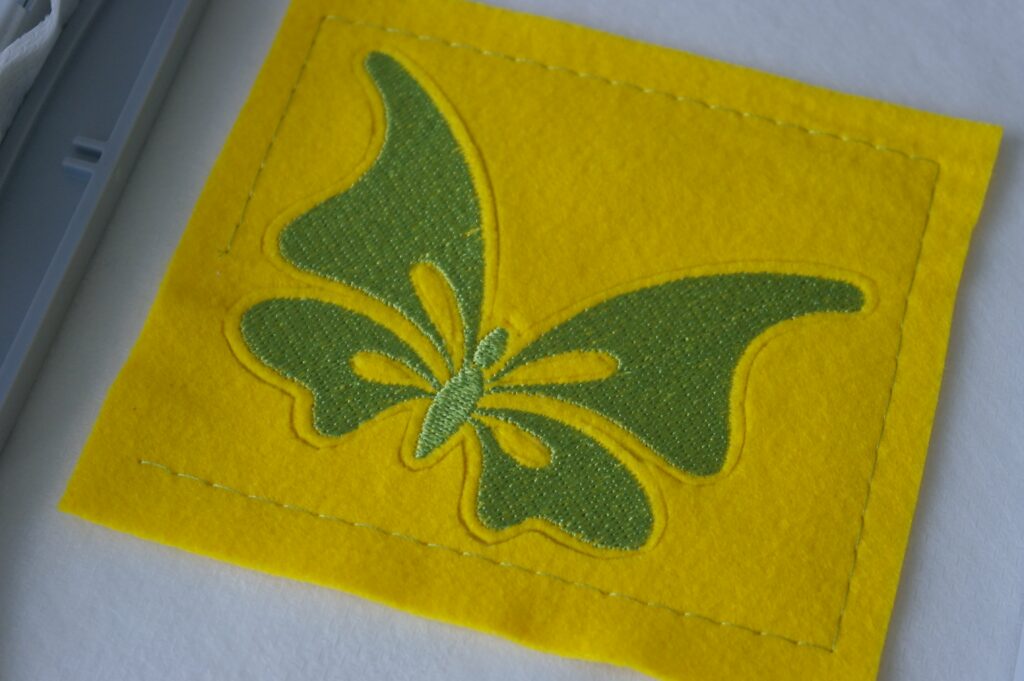
This is how it looked after cutting: the knife went through all layers, through the Felt and the Mesh.
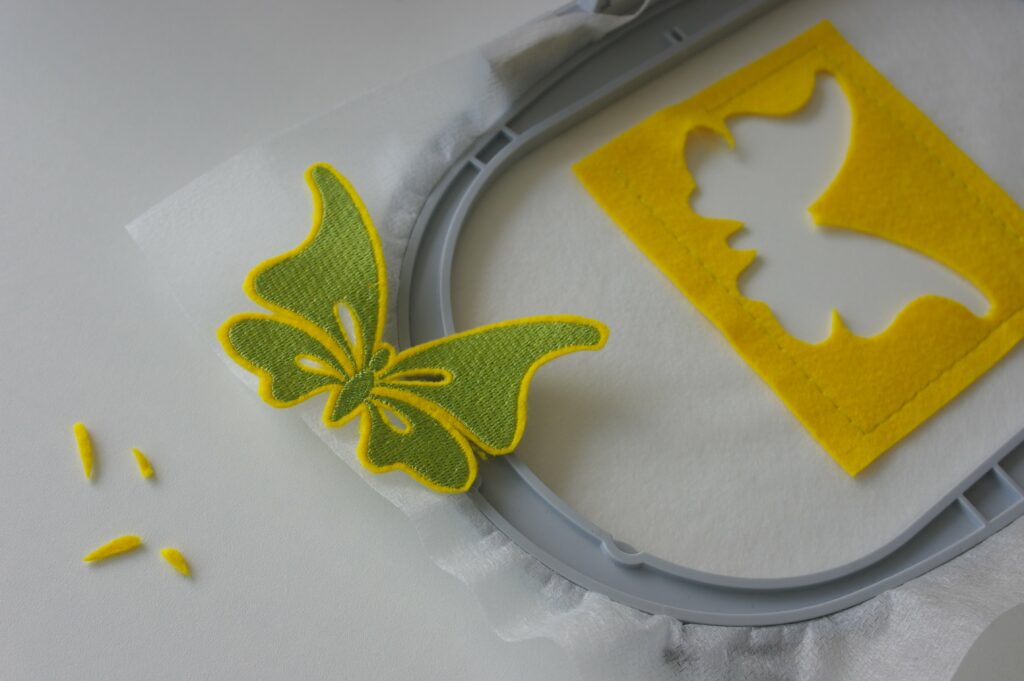
I have pushed the Butterfly out of the felt, even the small pieces from inside the wings. Now I have two beautiful Butterflies: one with the green embroidery, and another one = a negative, just from yellow felt. You can use that too, so don’t throw it away. Find a different project and use the ‘waste’ of your embroidery. After all, the shape of the Butterfly is neatly cut out.

The back looks good too, which is not really important if you use this butterfly for appliqué. But the way I will use this and two more butterflies, will leave some free – I will only attach the Butterflies to a pillow, securing them just in the center, to get a 3D appearance.
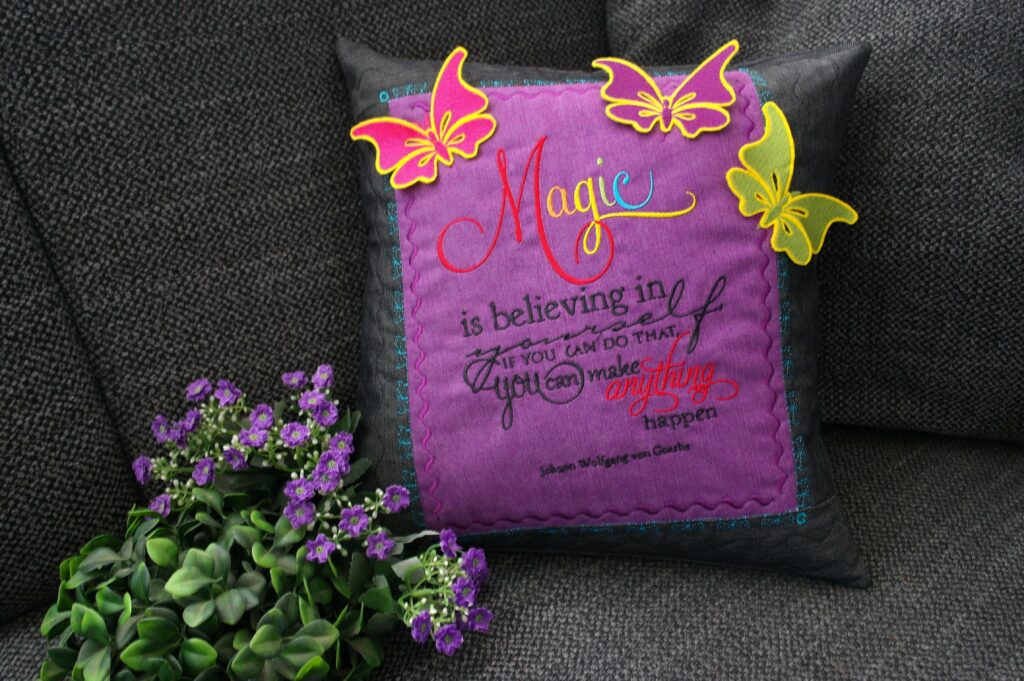
Three embroidered and cut-out Butterflies for my new pillow ‘Magic and Butterflies’, with a special text. Doesn’t this look great?
TIP: ready with cutting? Don’t forget to clean the machine. There will be a lot of lint, depending on the used material. With embroidery felt, lint has been building up inside the bobbin case, underneath the stitch plate.
What a wonderful option to use in both V8 and with your embroidery machine. I love to see your project, please show it in the COMMUNITY of this BERNINA Blog!
Next time another option with CutWork in V8. See you then!
Happy Stitching!
Sylvia Kaptein
www.sylviasartquilts.nl
 BERNINA Corporate Blog -


That’s really lovely.
Thank you, Ann. It’s just a way to show what to do with cut-outs. You can use them for appliqué too, on a quilt, or make a postcard.