 BERNINA Corporate Blog -
Did you know it is Embroidery month?!
I love to make projects with my embroidery machine because there are so many options and it is a great to combine it with other hobbies like sewing and quilting. And I really like to show you some of the options in the upcoming couple of months.
Did you know for example that you can make really nice appliques with your embroidery machine? It’s a really fun and quick way to make a design.
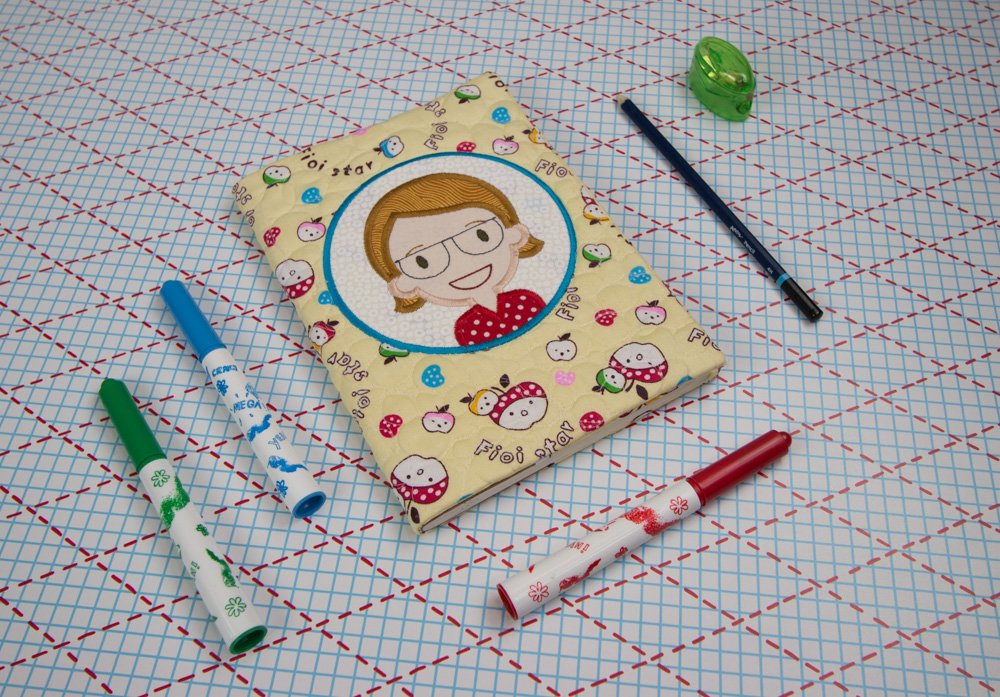
This is a design from the collection ‘Meet the Family’ and I have used this application to make a book cover. I think this would make the perfect gift.
In the video below I show you how this application is made, so can take a look for yourself! I‘ll post videos monthly so don’t forget to subscribe to my youtube channel to get notified first!
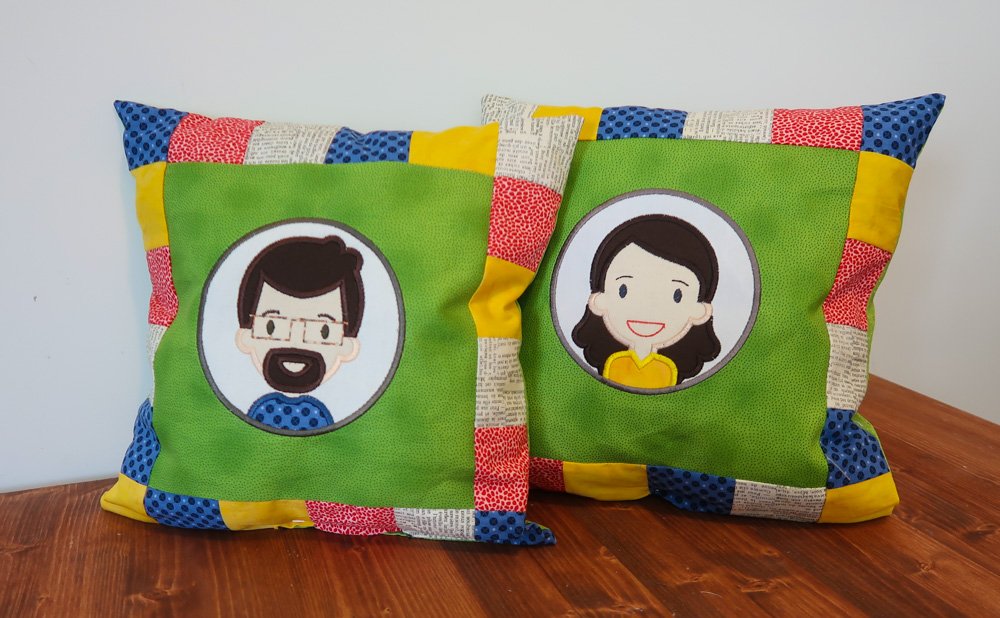
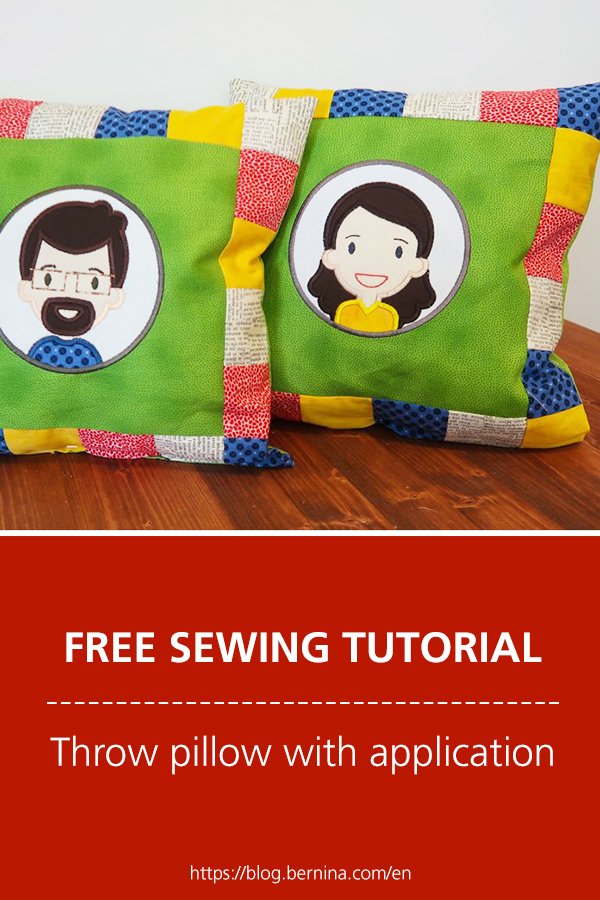
Another option is to create really cute pillows. Today it’s Valentine’s day and for this occasion I made this cute couple inspired by my twin sister and her husband. Want to make similar pillows yourself? Than check the pictures below, go to our website www.keperandtwill.nl to see all our various options.
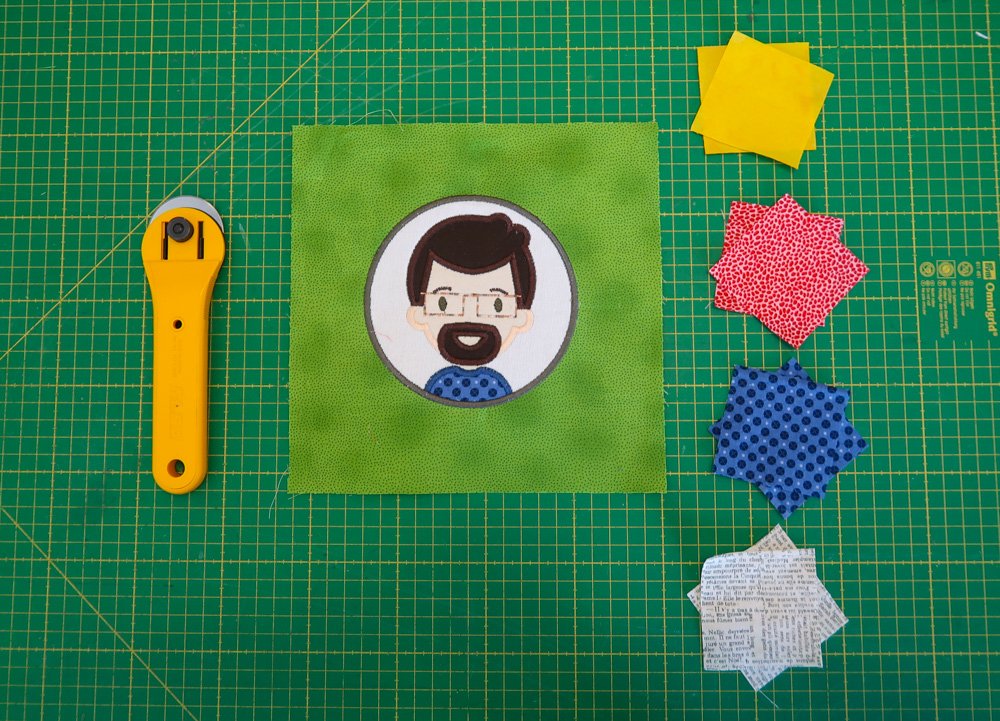
I started with making the application on a square of 25 x 25cm. After I made the application I’ve trimmed the block so it measured 23 x 23 cm. For the border I used 20 squares of 6,5 cm each, this includes 0.5 cm seam allowance. I used 4 different colors so therefor I made 5 squares from each color.
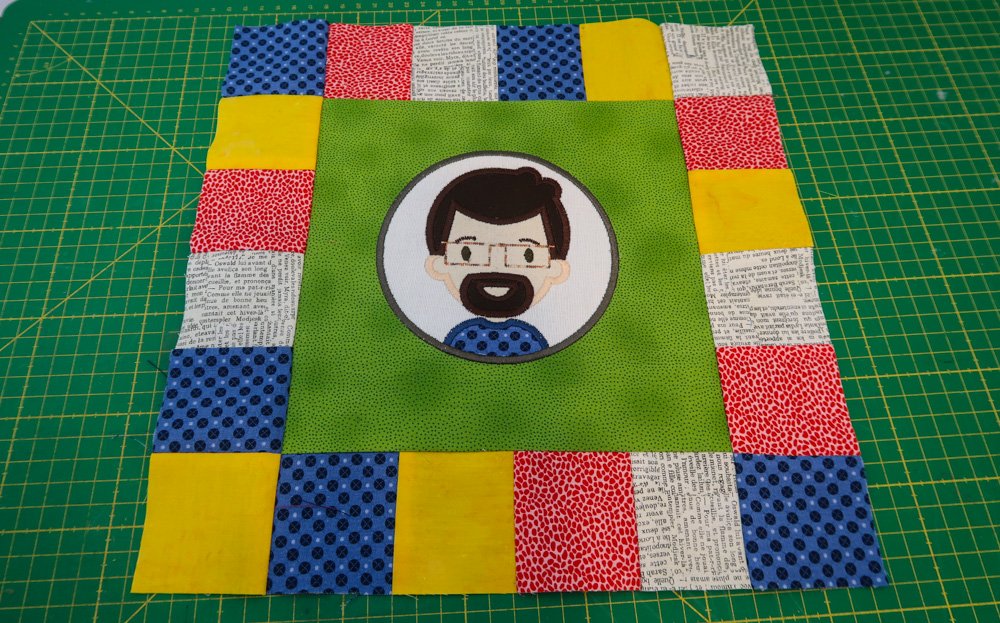
I placed the squares at random. I mixed them until I had a combination I liked :-)For the horizontal borders you take 4 squares and sew them together into a row. Repeat this step until you have two borders of 4 squares. And for the vertical borders you sew 5 squares together into a row, and you also repeat this step so that you have two vertical borders.

Now you can assemble the front section. First you sew the horizontale borders on to the square with the application. After that you can sew on the vertical borders.
Your pillow is almost done! Place the fabric for the back piece (33cm x 33 cm), right side together. Then put it on your front piece and sew them together. leave an opening to turn the pillow to the right side.
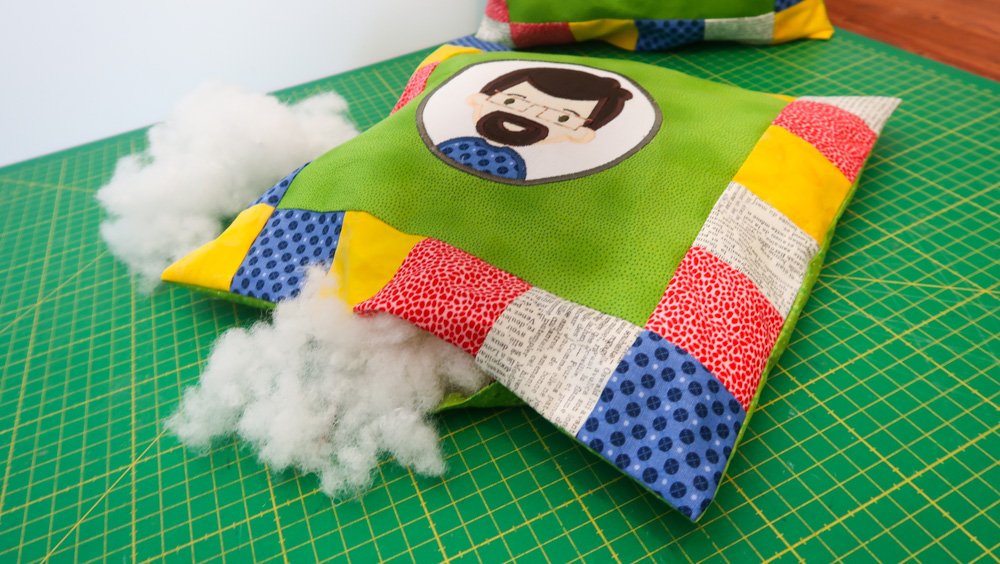
Turn and stuff your pillow. Now you can close the opening, I did this by hand.
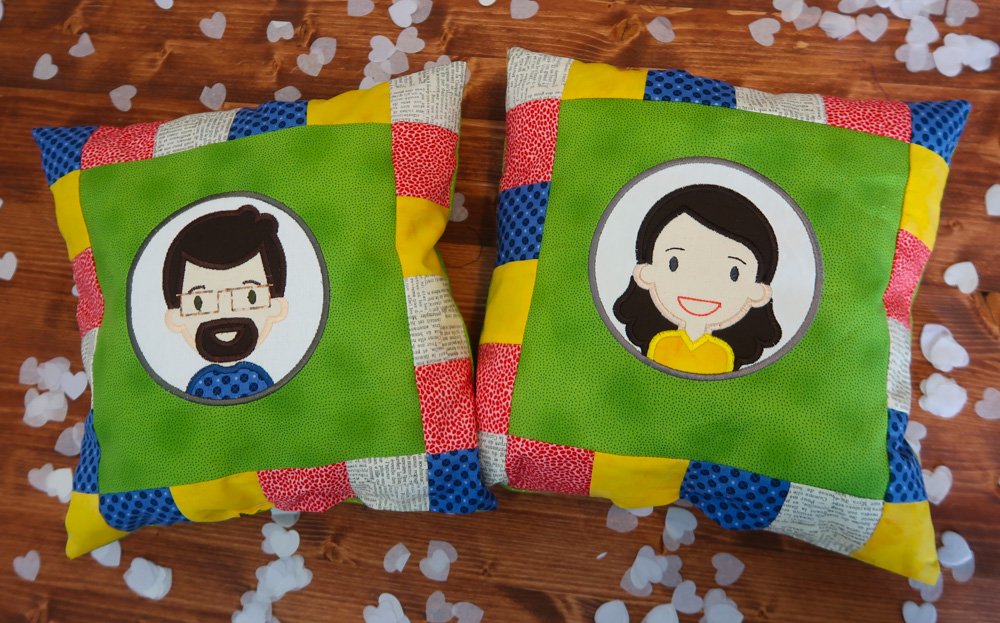
And your cute pillow is done! With all of these happy colors Spring can start!
Hope to see you the next time!
Monique
Want more inspiration? Follow me on social media.


0 Responses