 BERNINA Corporate Blog -
Have you been working with CutWork since my last posts? There are more options to use it, preparing to cut fabrics, felt or different materials. Of course you can purchase the extensive BERNINA DesignWorks CutWork software but using this short version is already available. I do own the separate software, and will post about it at a later date.
Lets see how easy it is to cut out geometric figures.
Creating a patchwork quilt with just one basic shape, CutWork can be used. It is important to calculate the placement of the cut outs, to get as much out of the fabric as possible.
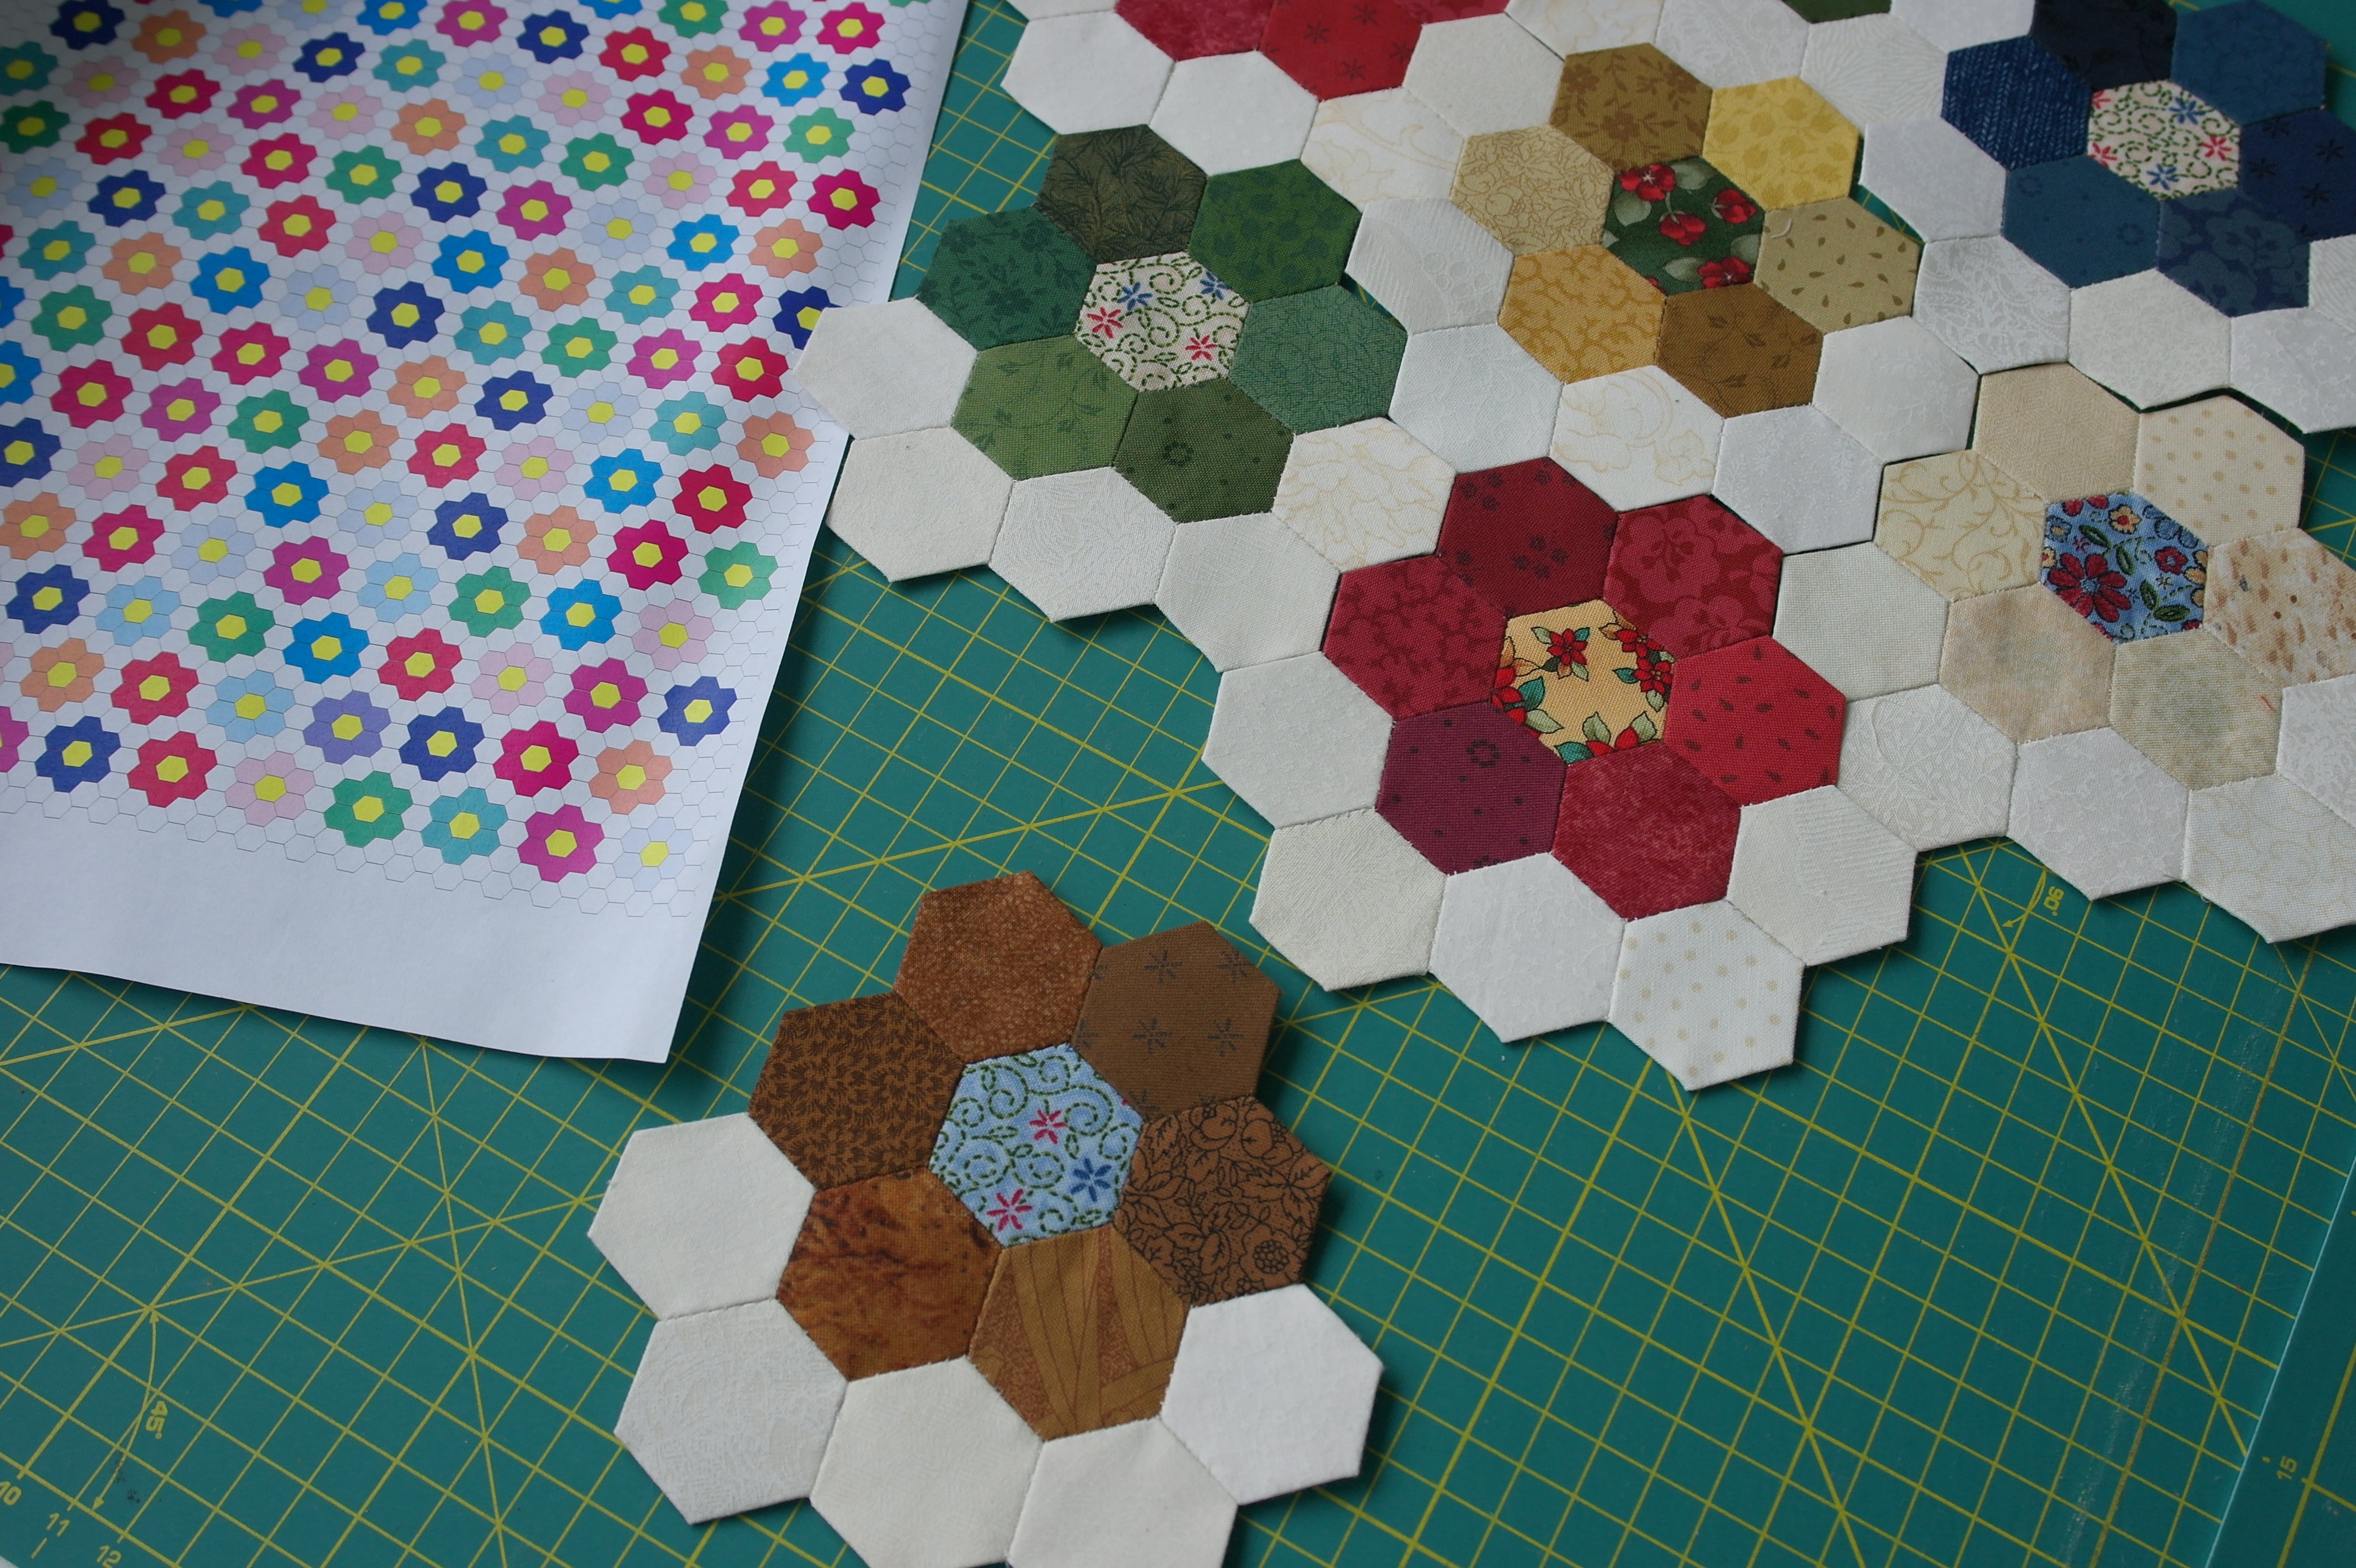
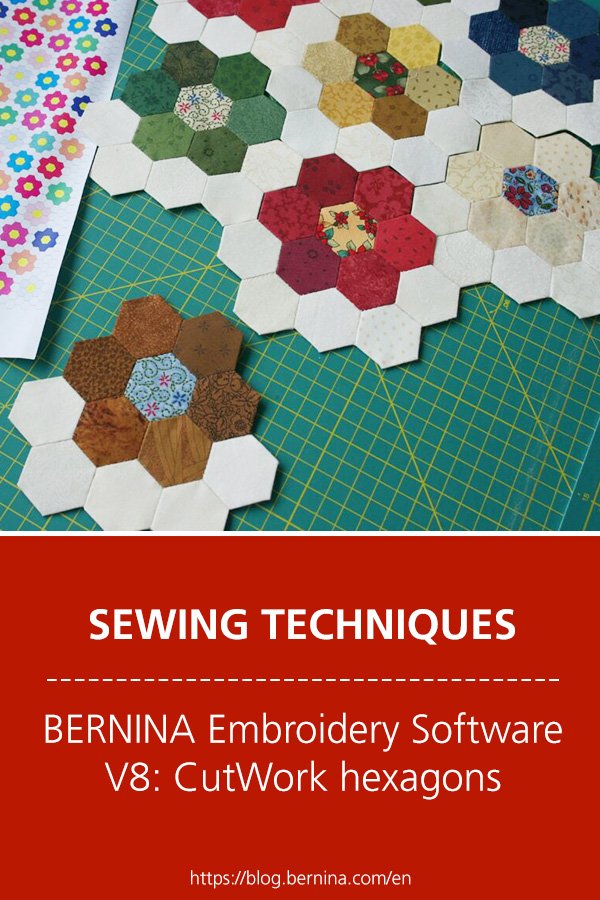
A very popular shape is the Hexagon: there were a lot of requests to show how to design them via V8 and use the CutWorks tool to cut them. This six-sided shape is much easier to cut by machine, to be sure the exact measurements are retained. When cutting by hand, not all sizes are equal, which is necessary to make a quilt, for example a ‘Grandmother’s Flower Garden’ quilt. The origin for making this type of quilt lies back a hundred years: combining colors, turning them into ‘flowers’, and using light/contrasting fabrics to form a path to complete a garden. A huge job to cut it all by hand, and again – no certainty all sides are the same.
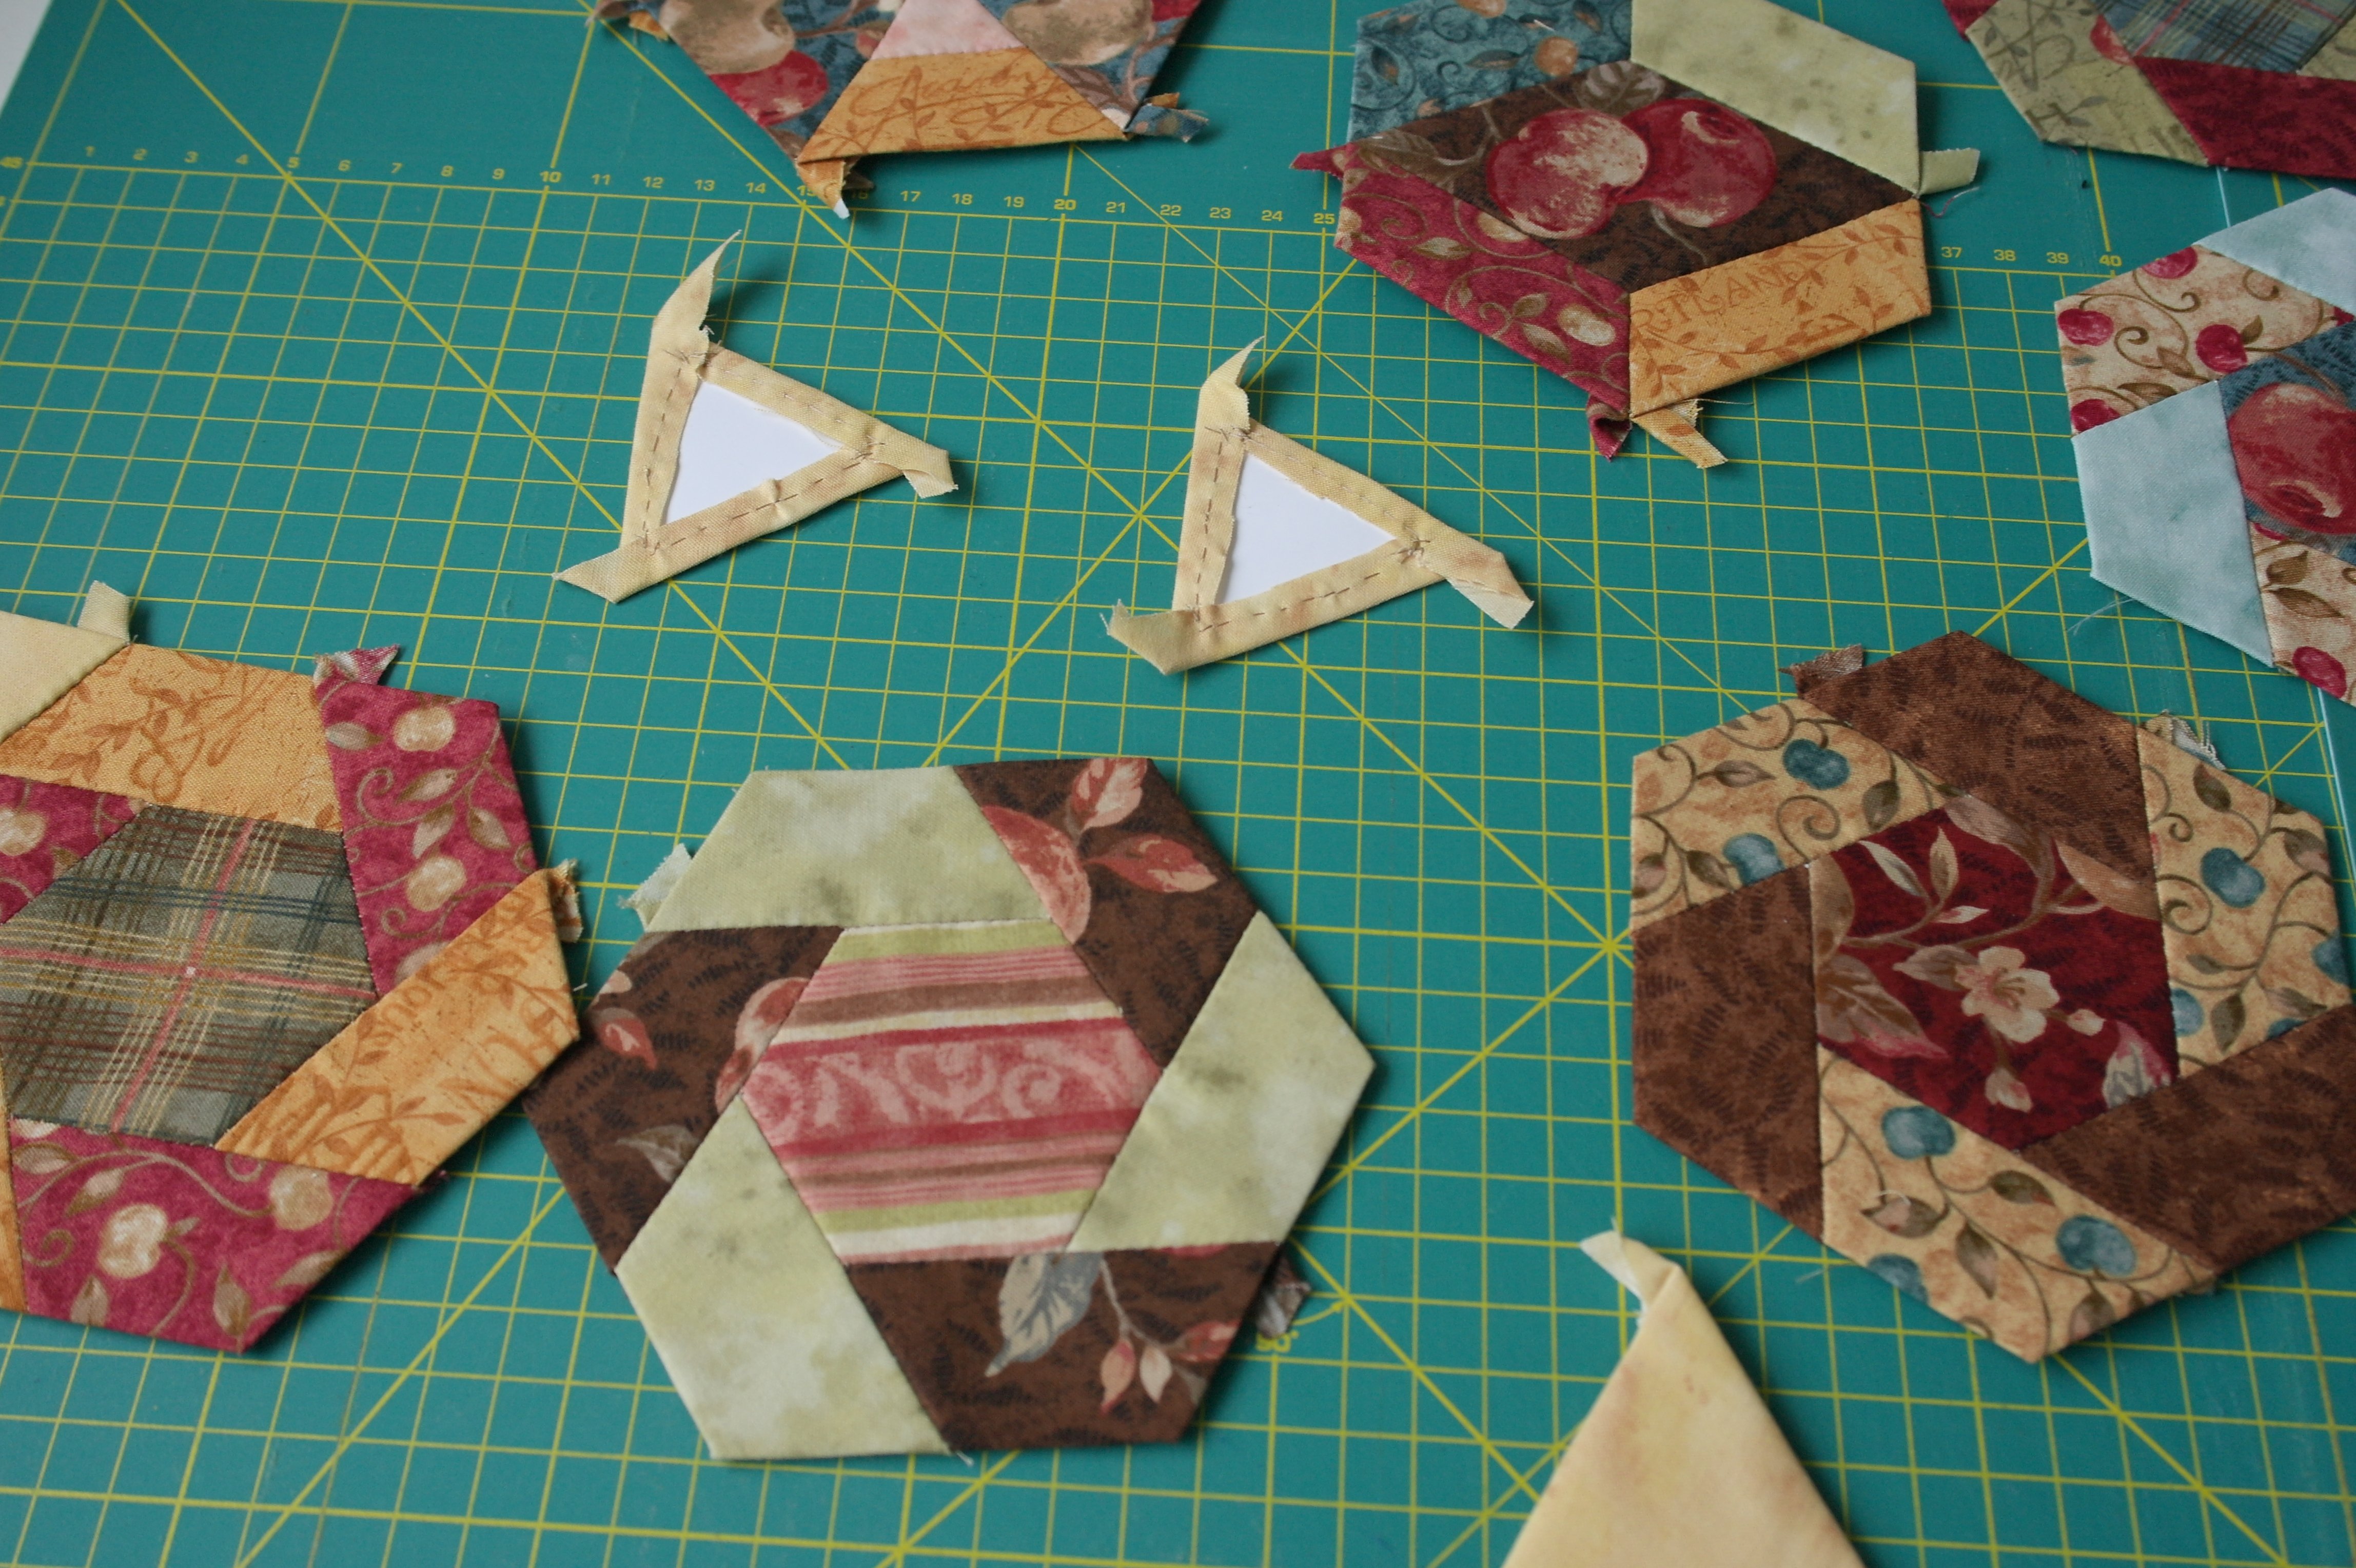
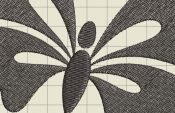
Lots of variations are possible with Hexagons: even working with different geometric shapes to form a larger Hexagon, as shown with the picture above.
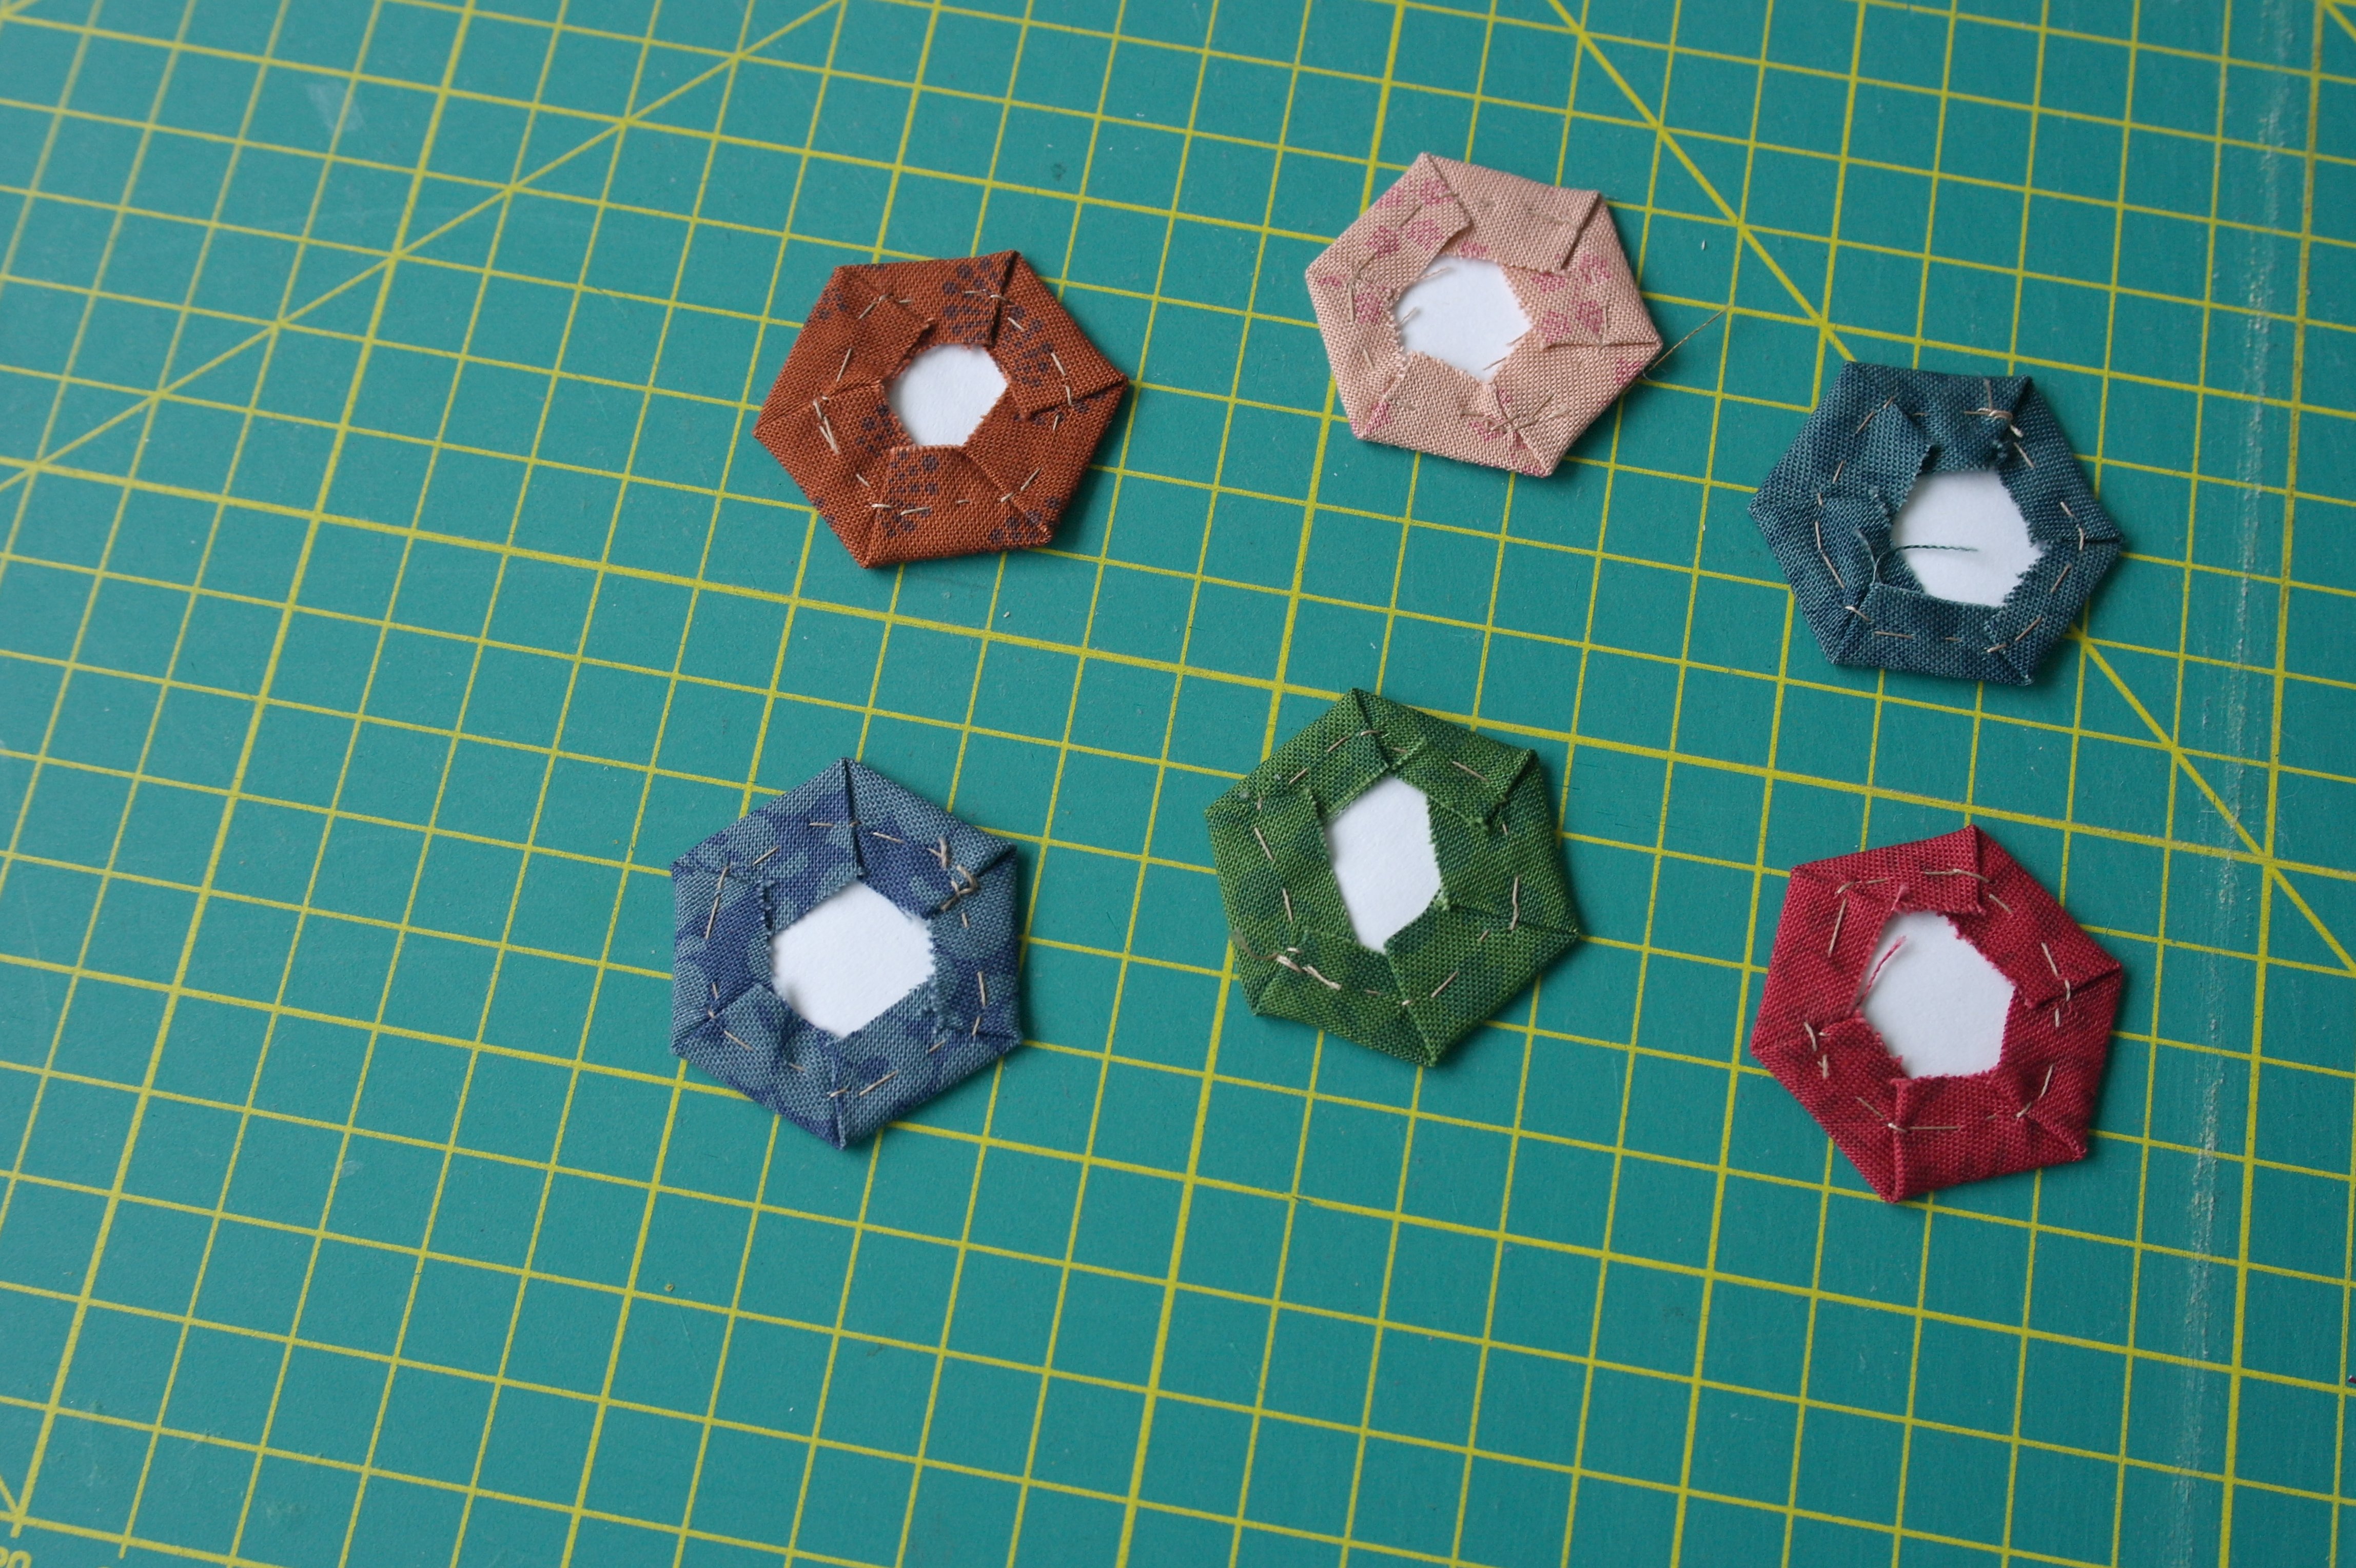
When done by hand, this technique is called English Paper Piecing = using paper templates, which are placed at the wrong side of a quilt fabric, seams folded over and secured by thread (or fabric glue), sewing the hexagons together with a special stitch. Cutting the Hexagons by machine can be much faster and easier, designing them via V8/CutWork and using the CutWork Tool on your machine. You can even sew these Hexagons by machine, using a decorative stitch, after you have removed the paper template and pressed the fabric Hexagons to set the seams.
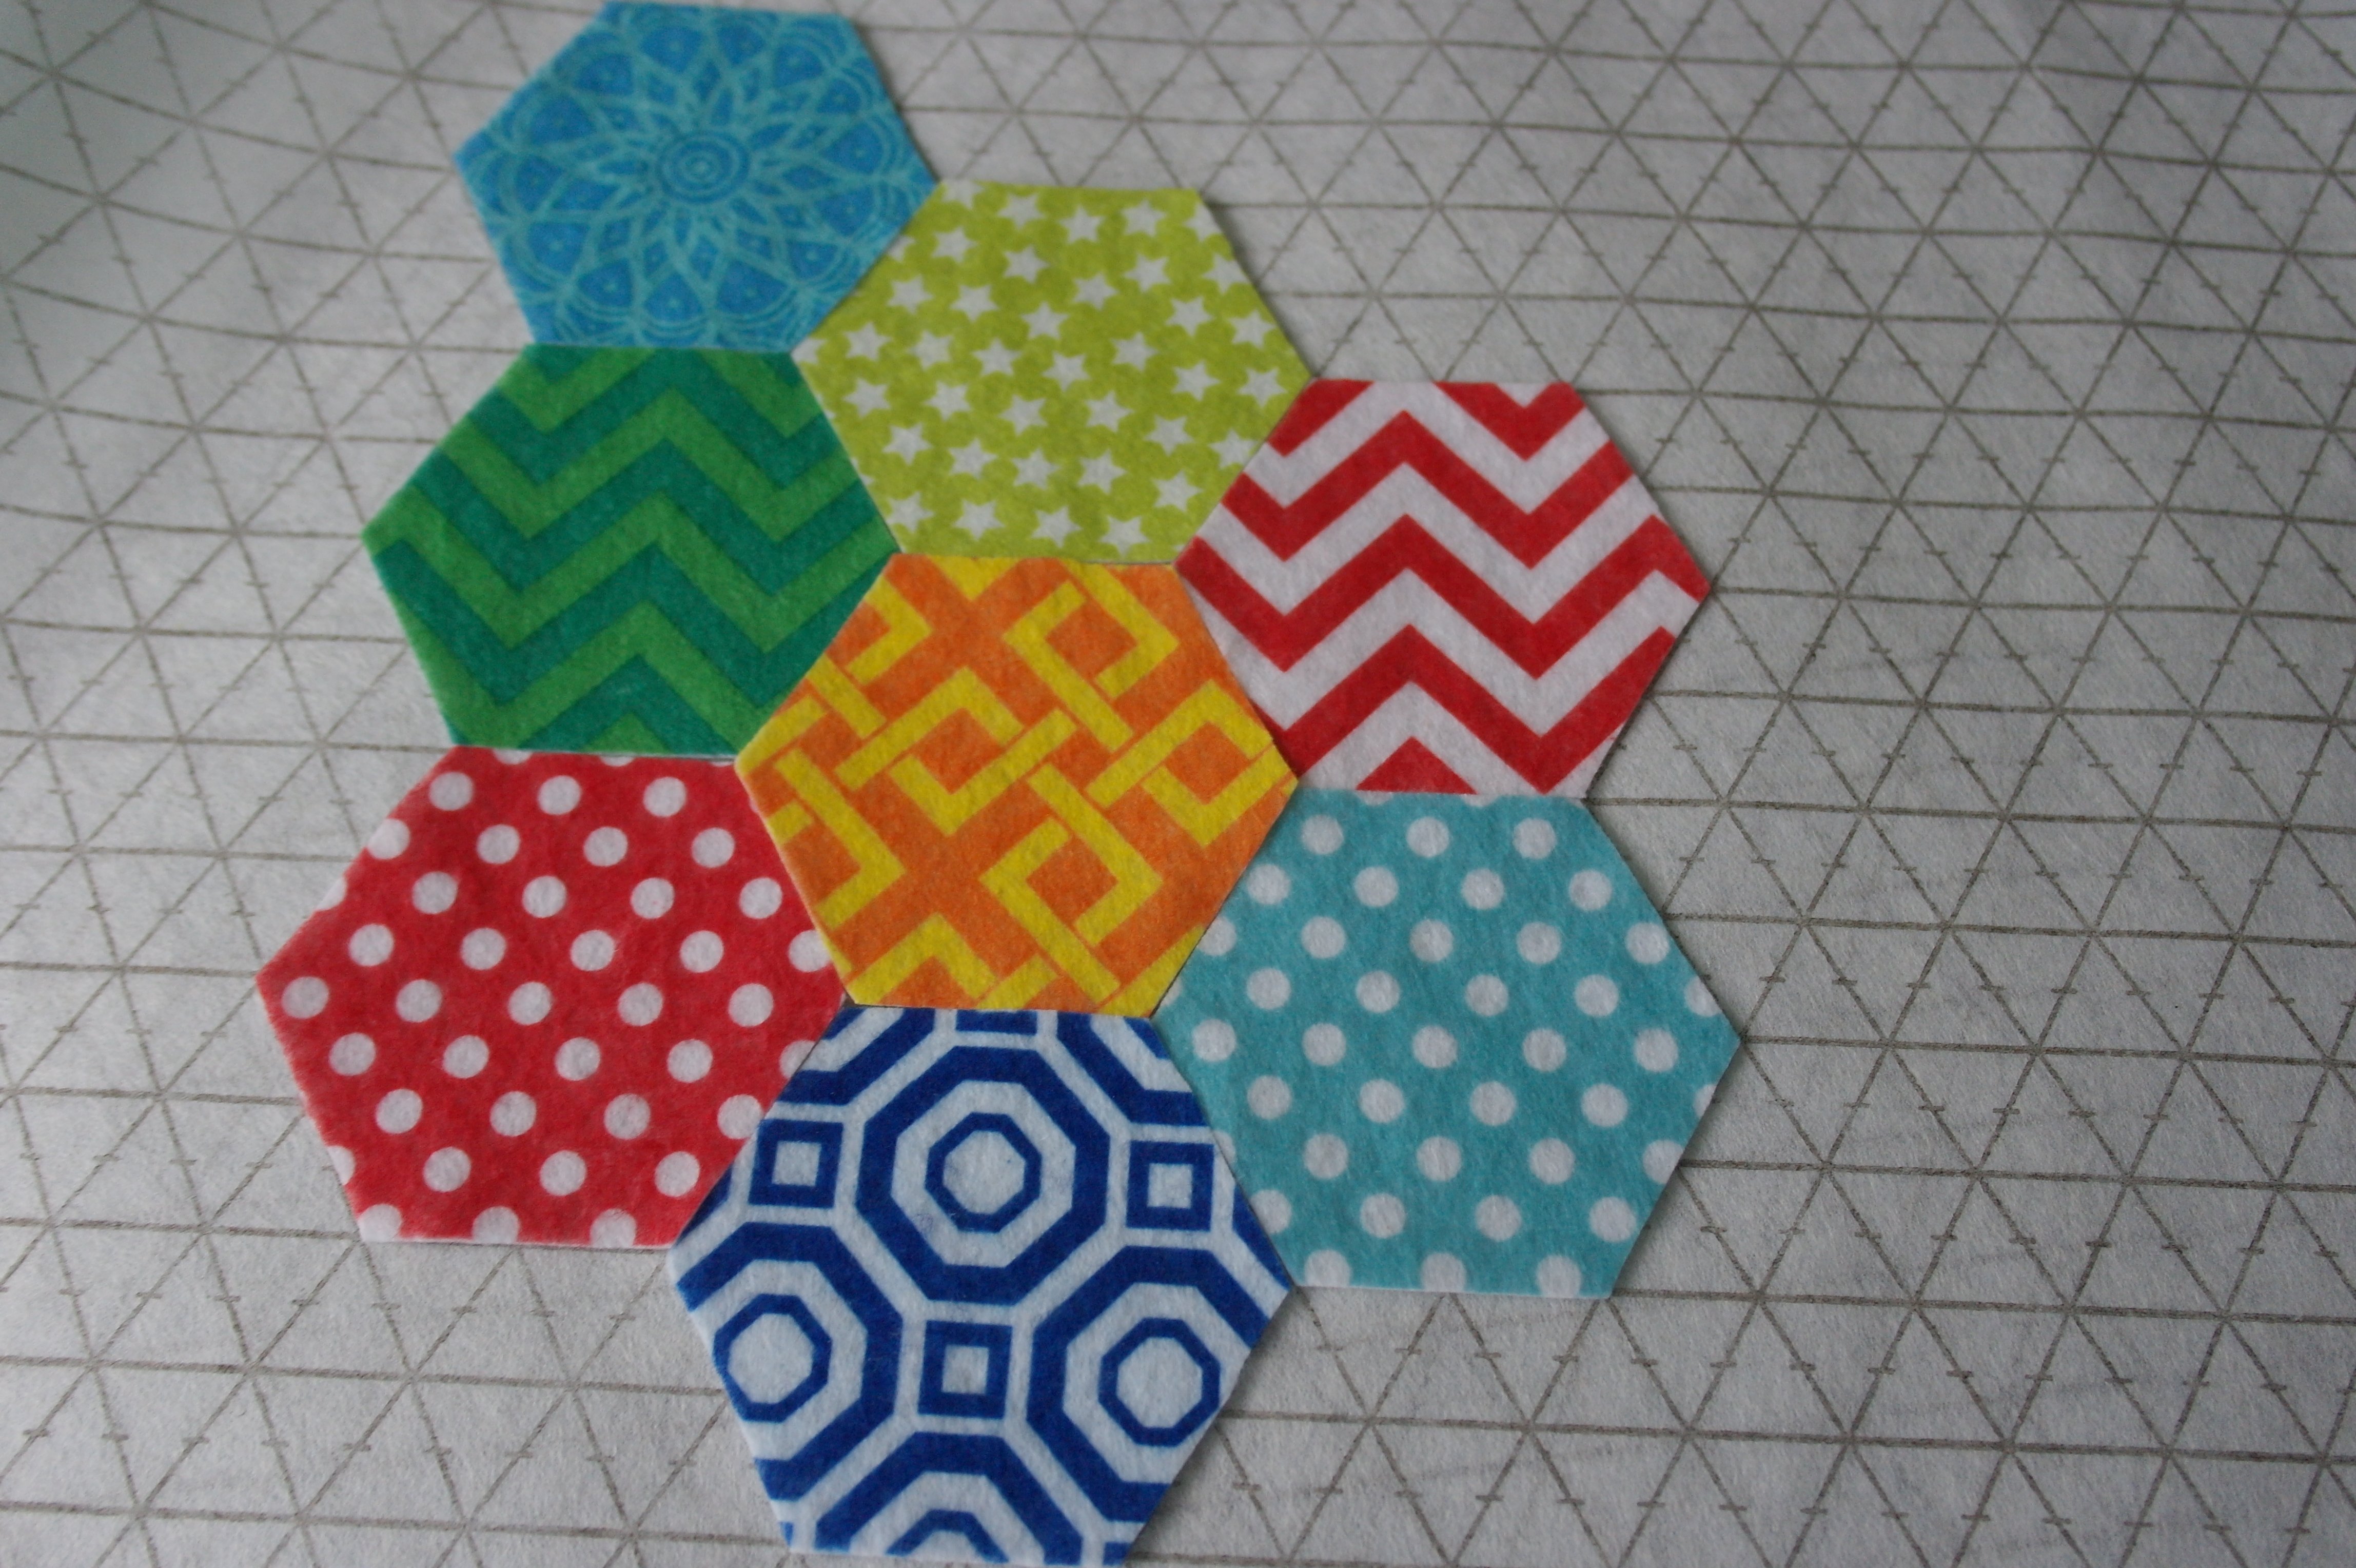
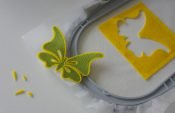
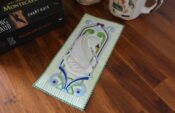
I have cut Hexagons from Soft Felt once, to be placed on Rasterquick Dreieck – there are no seam allowances involved there, because they are placed on this stabilizer at a finished size. Securing them with a tip of Bohin Glue pen,
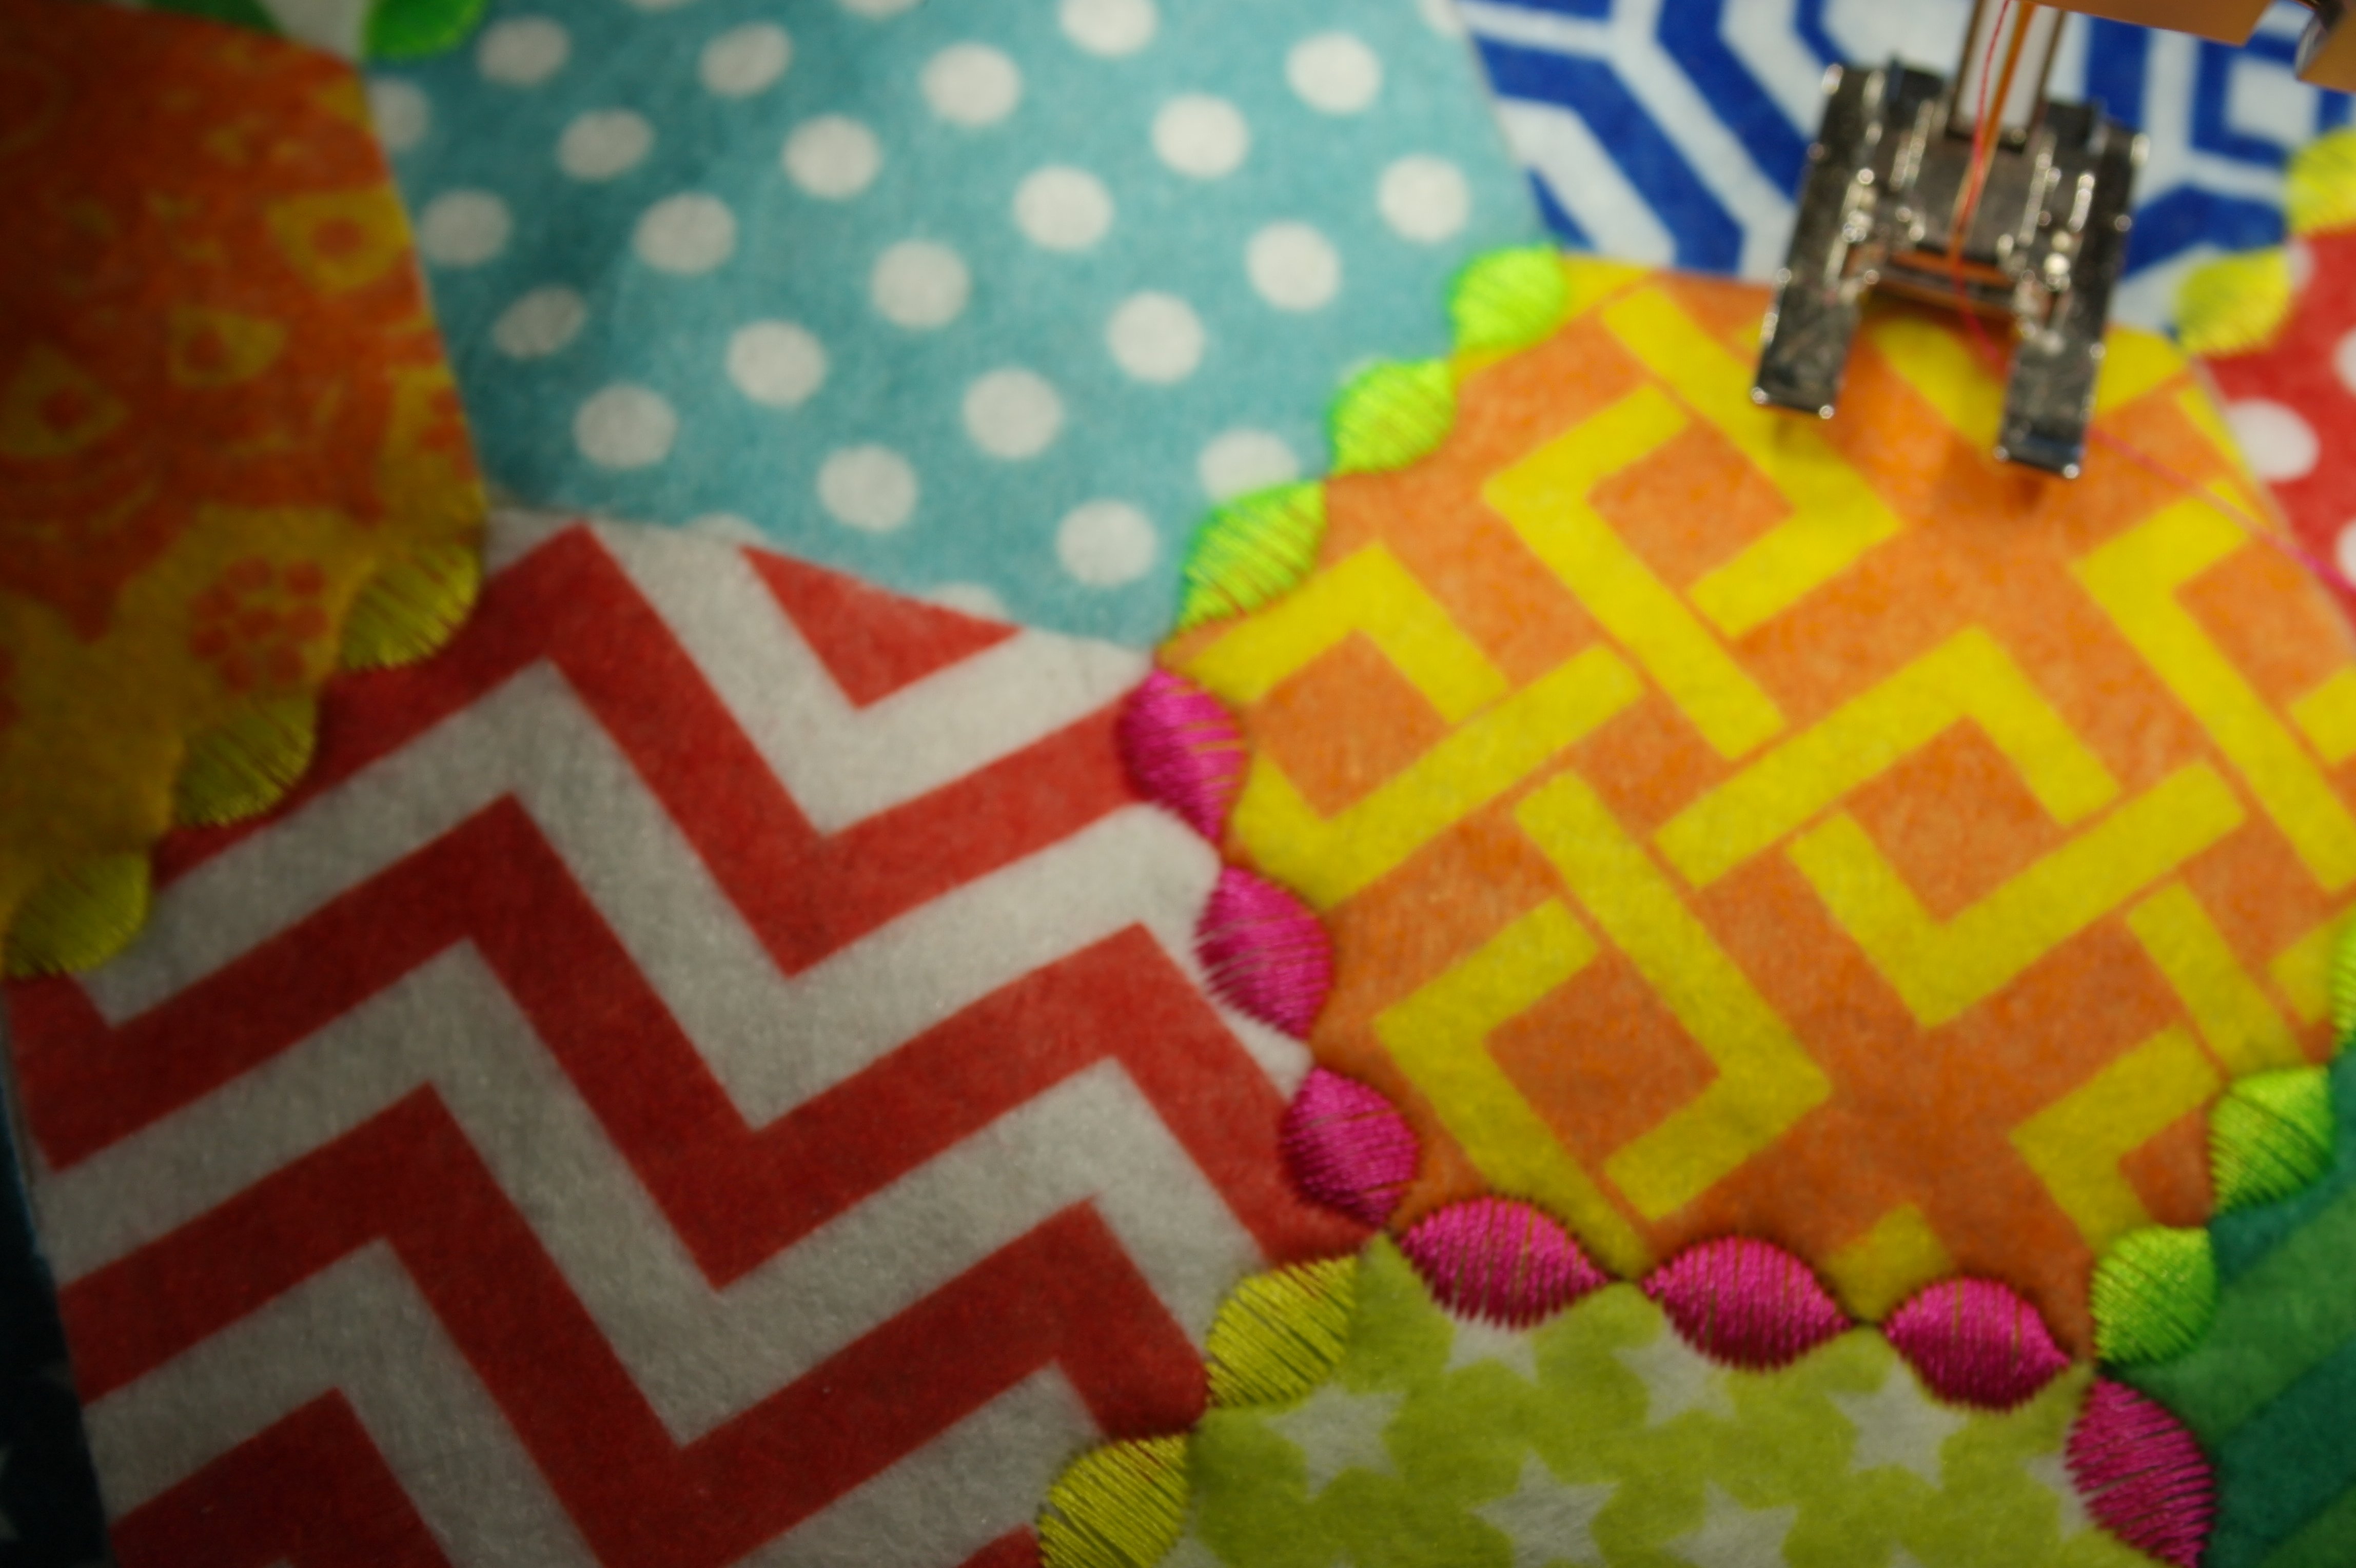
tacking them all down with decorative stitches along all sides. If you want to use these wonderful Soft Felt prints, you can order them via THIS link at my Webshop – 71 one sheets of printed and bright colored Soft Felt. So many possibilities, so little time…
Designing a Hexagon.
It is important to know how a Hexagon is constructed. You can use a ready-made, purchased paper template to calculate the size, adding seam allowances around all sides to get the measurements for cutting. But if you don’t need a paper template, placing the cut-outs from fabric or felt on Rasterquick Dreieck, or cutting just the fabrics for English Paper piecing, you will need to know how to draw it.
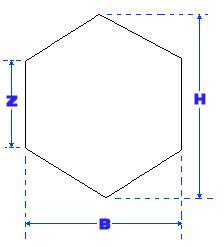
How do you measure a Hexagon? Most commonly by measuring one of the six sides (Z) in inches. Paper Piecing templates, ready for direct use, purchased from an American brand, come in bags of 25, 50, 100 or even more pieces. The size given is the measurement of one side (picture above).
The BERNINA Embroidery Software V8 however, uses a different way of measuring: via height (H) and width (B), which can be done in either inches or millimeters, depending on your settings. It is important to remember how to position a Hexagon, to know which measurement is referred to in V8: the software places it on point, not on a side. This gives you an idea how to calculate the size in V8.
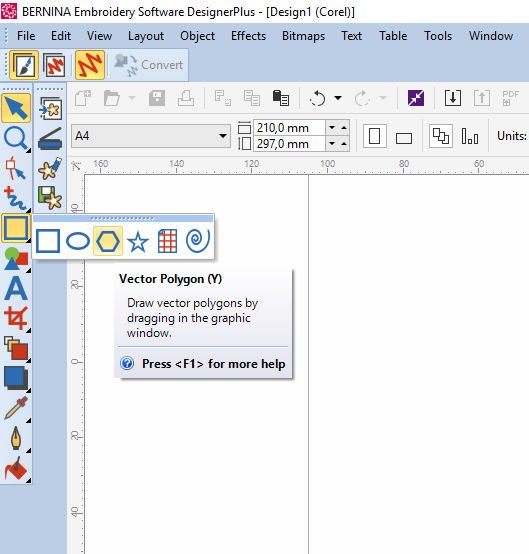
It al starts with drawing a Hexagon in Artwork Canvas. Click on the down-arrow, next to the square = Vector Polygon.
 Placing it, enlarging to a certain size (it doesn’t have to be the right size yet): a polygon is formed. If you want an balanced shape, each side the same, use the Ctrl key, then release. Now you see a Pentagon, with black nodes.
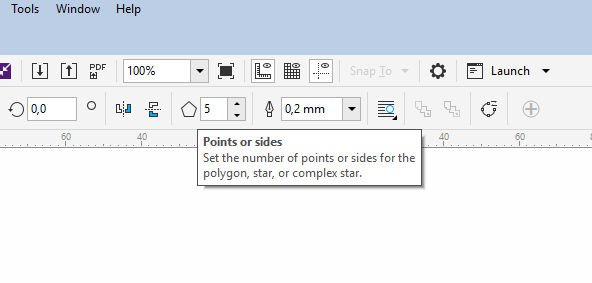 To turn it into a Hexagon, use ‘Points or Sides’ with the toolbar above, and replace the number 5 with a ‘6’ in the box next to it, or use the up arrow.
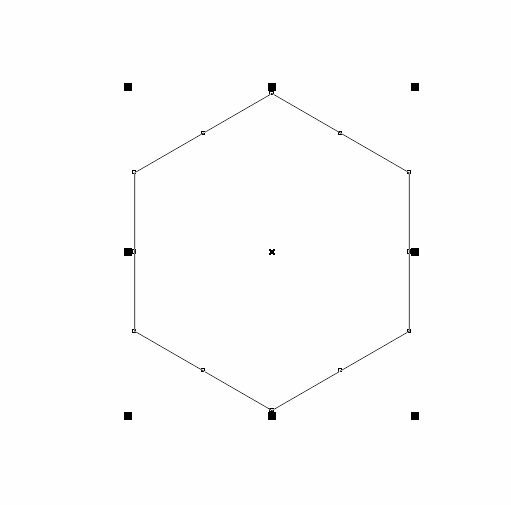 The Pentagon has turned into a Hexagon. A fast and easy way to change polygons.
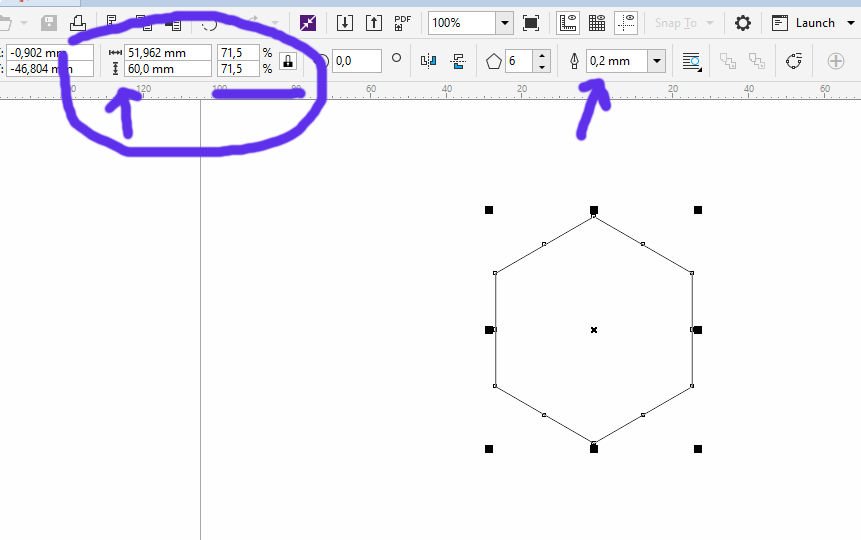
With the Hexagon still selected – black nodes visible – check the measurements. Mine are set 75,302mm en 88,106mm*: the ‘lock’ is opened, meaning you can change height and width separately. Click on the lock to close it, and change just one setting to enlarge the entire shape. I have enlarged my Hexagon height to 6cm = 60,00mm (or 60,0mm as it shows in the box), closing the lock before changing the height. The Hexagon is resized, 71,5% of the previous size of my first drawing and the right size for my project. The lines are 0,2mm thick, which is ok for converting.

With the hexagon still selected, convert it to the Embroidery Canvas, where it is placed with as an outline object. This Hexagon is the base, to convert to CutWork.
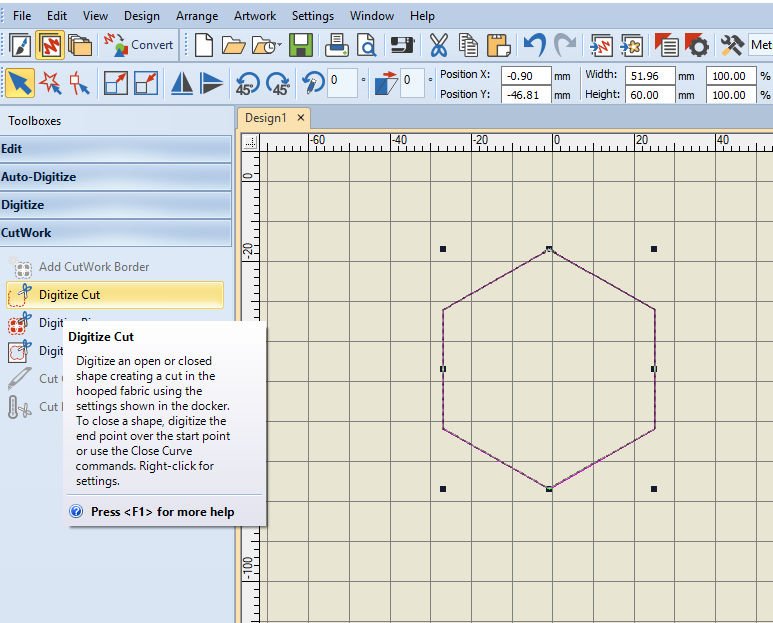
Check if the Hexagon is still selected, go to ‘CutWork’ (left toolbar ‘Toolboxes’) and click on ‘Digitize Cut’, because you only want to use this shape to cut without embroidery.
Click to point/set all 6 corners – be very meticulously. You can zoom in, using the Zoom bar or the scroll wheel of your mouse. Each click should be placed exactly on top of a corner, placing a small square to set it, last click on the first square to close the figure and use Enter to finish: all cuts are made. The more accurate your placement is on the corners, the better the shape will be. If you are slightly off, the angles of the Hexagons will deviate.
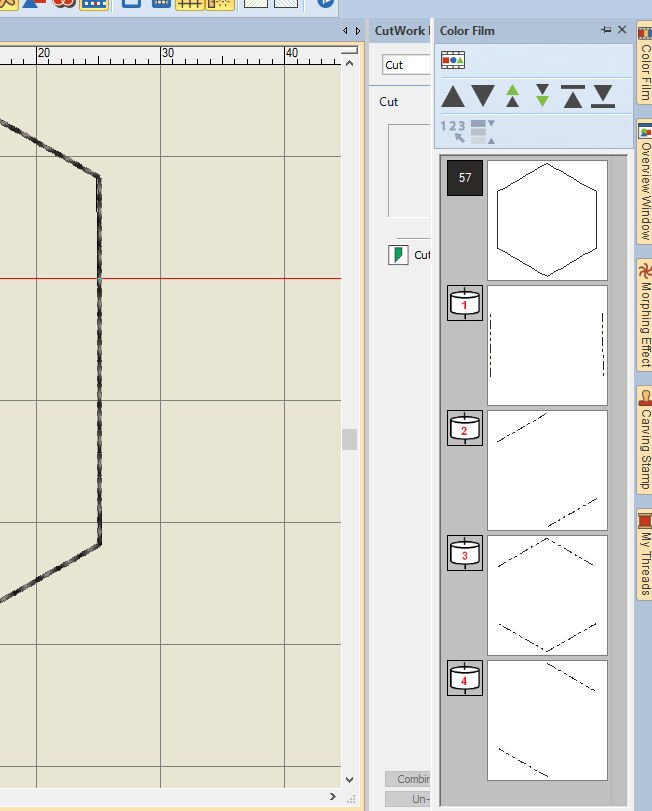
Click on the docker ‘Color Film’ to see if the basic shape/outlines is visible, and four boxes with each a direction for cutting. If you are using these cut outs for pre-cutting fabric pieces, it is no problem if the angles are a bit off – if the pieces are large enough – seam allowances included – to cover a smaller template. If you do want exact Hexagons, use the BERNINA DesignWorks CutWork software, where much more can be adjusted.
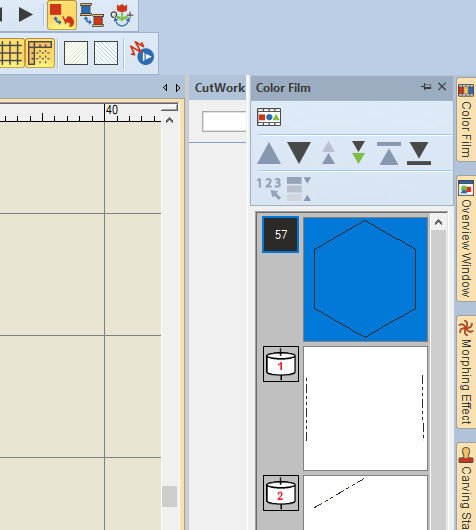
At this point, the first box with the outlines should be removed. I don’t want any embroidery done, just the CutWork. To do so, click on the box = select it, blue background, and use ‘Delete’ to remove it. Four boxes for cutting remain.

I have placed the Jumbo Hoop on my workspace, showing just one Hexagon. I will use this large hoop, to be able to cut as many Hexagons as possible, so I will select the first, copy and paste it as much as can fit inside the ‘secure’ area of the Hoop. As you can see, a red line is indicating the secure area, with a 5 cm area that I cannot use, because of working with my BERNINA770QE. I can use the Jumbo Hoop with that type of machine, but the space between needle and machine is not large enough to use the entire width, so that’s a limitation (the full width can be used with the 8-series).
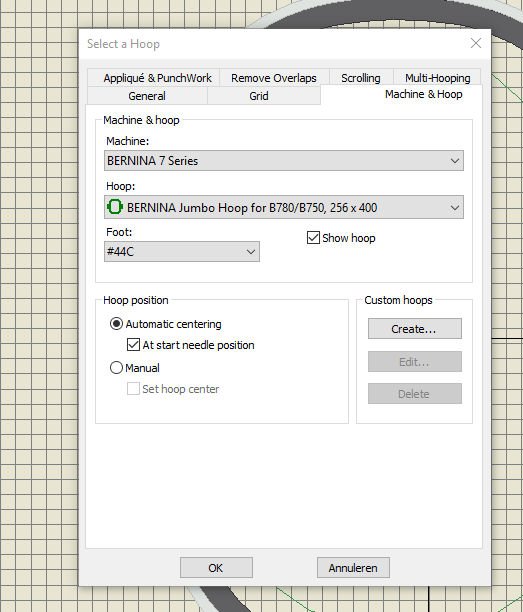
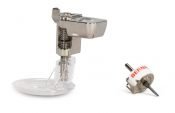
While selecting the right machine and the Hoop, the CutWork Tool/presser foot needs to indicated too: use the down arrow and click on ‘#44C’. Centering the hoop, using OK to set.
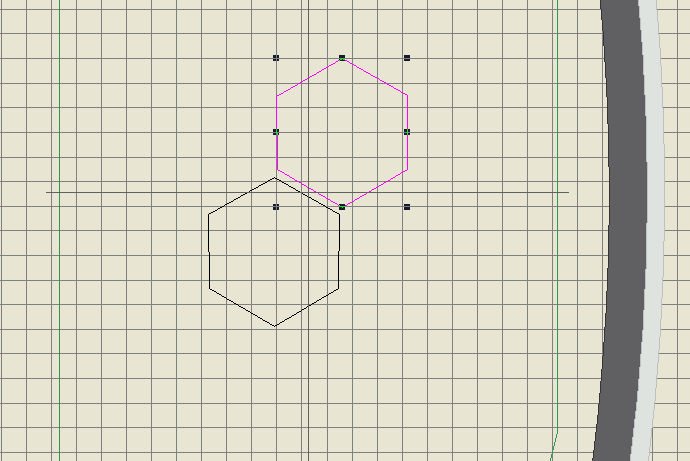
To multiply the number of Hexagons, click, use copy and paste and drag the new Hexagon to a new position. You can choose to overlay the sides, I have chosen to place it a bit away, because I am not sure my Hexagons are drawn accurate with exact angles. I don’t want slight deviations, where the knife of the CutWork tool will have to come back to cut some more. BE CAREFUL: with copy and paste, the second Hexagon could be placed on top of the first: it won’t show, but there will be twice as many cuts if you are not aware of this. Sometimes V8users forget to move the pasted shape, leaving them on top of the first.
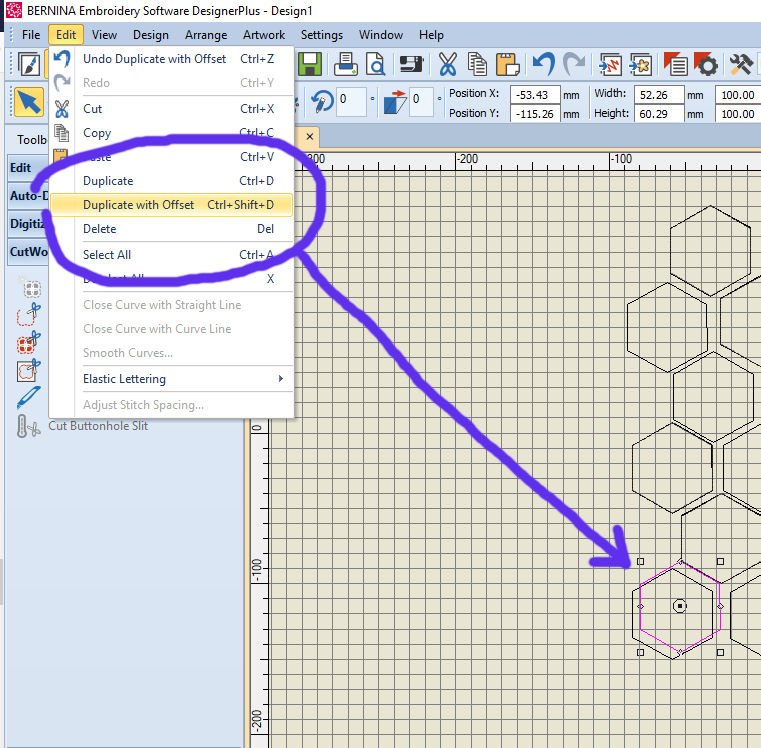
You can avoid that: select a Hexagon, then use ‘Duplicate with Offset’, which can be found at the Menu Bar, Edit, or use Ctrl+Shift+D. A second shape is placed, not exactly on top of the first, but clearly visible. Drag it to the next position.
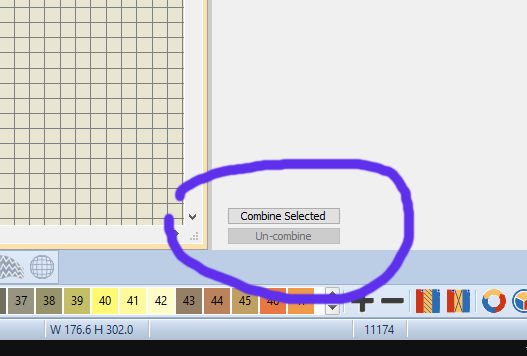
I will fill up the entire Hoop, inside the secure area. I was able to place 17 Hexagons in total. Because I don’t want to have 17 x 4 cuts, I can combine these by selecting all Hexagons, using the ‘Combine Selected’ button, with the docker ‘CutWork Border’ – it is activated when selecting at least 2 shapes.
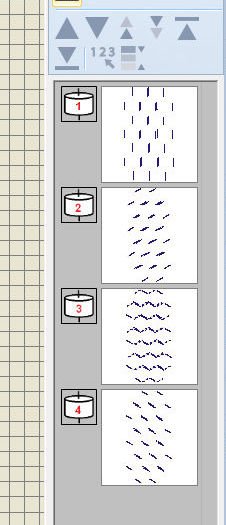
There are four cut directions available: 1, 2, 3 and 4, for all Hexagons. IMPORTANT: never scale a CutWork design when it is on your embroidery machine: use V8 for editing, saving it before bringing the design to your machine.

I have saved this, in a separate folder, wrote it to my USB stick, and brought it to my B770QE with embroidery module.

Now it is time to stack at least 5 layers of quilt fabric, to be able to cut 5 x 17 Hexagons at once. It saves time, cutting through multiple layer. The only stabilizer I’ve used in the hoop is a Mesh, the fabrics are floated.
I have placed some thread on top and in the bobbin, because the machine needs to make basting stitches, to secure all layers. I will use the embroidery foot #26, which will be the only time it is used with this project.

There it is: securing the layers to prevent shifting while cutting. I don’t want to use a (spray) glue, because I need all fabrics separately, non-sticky.
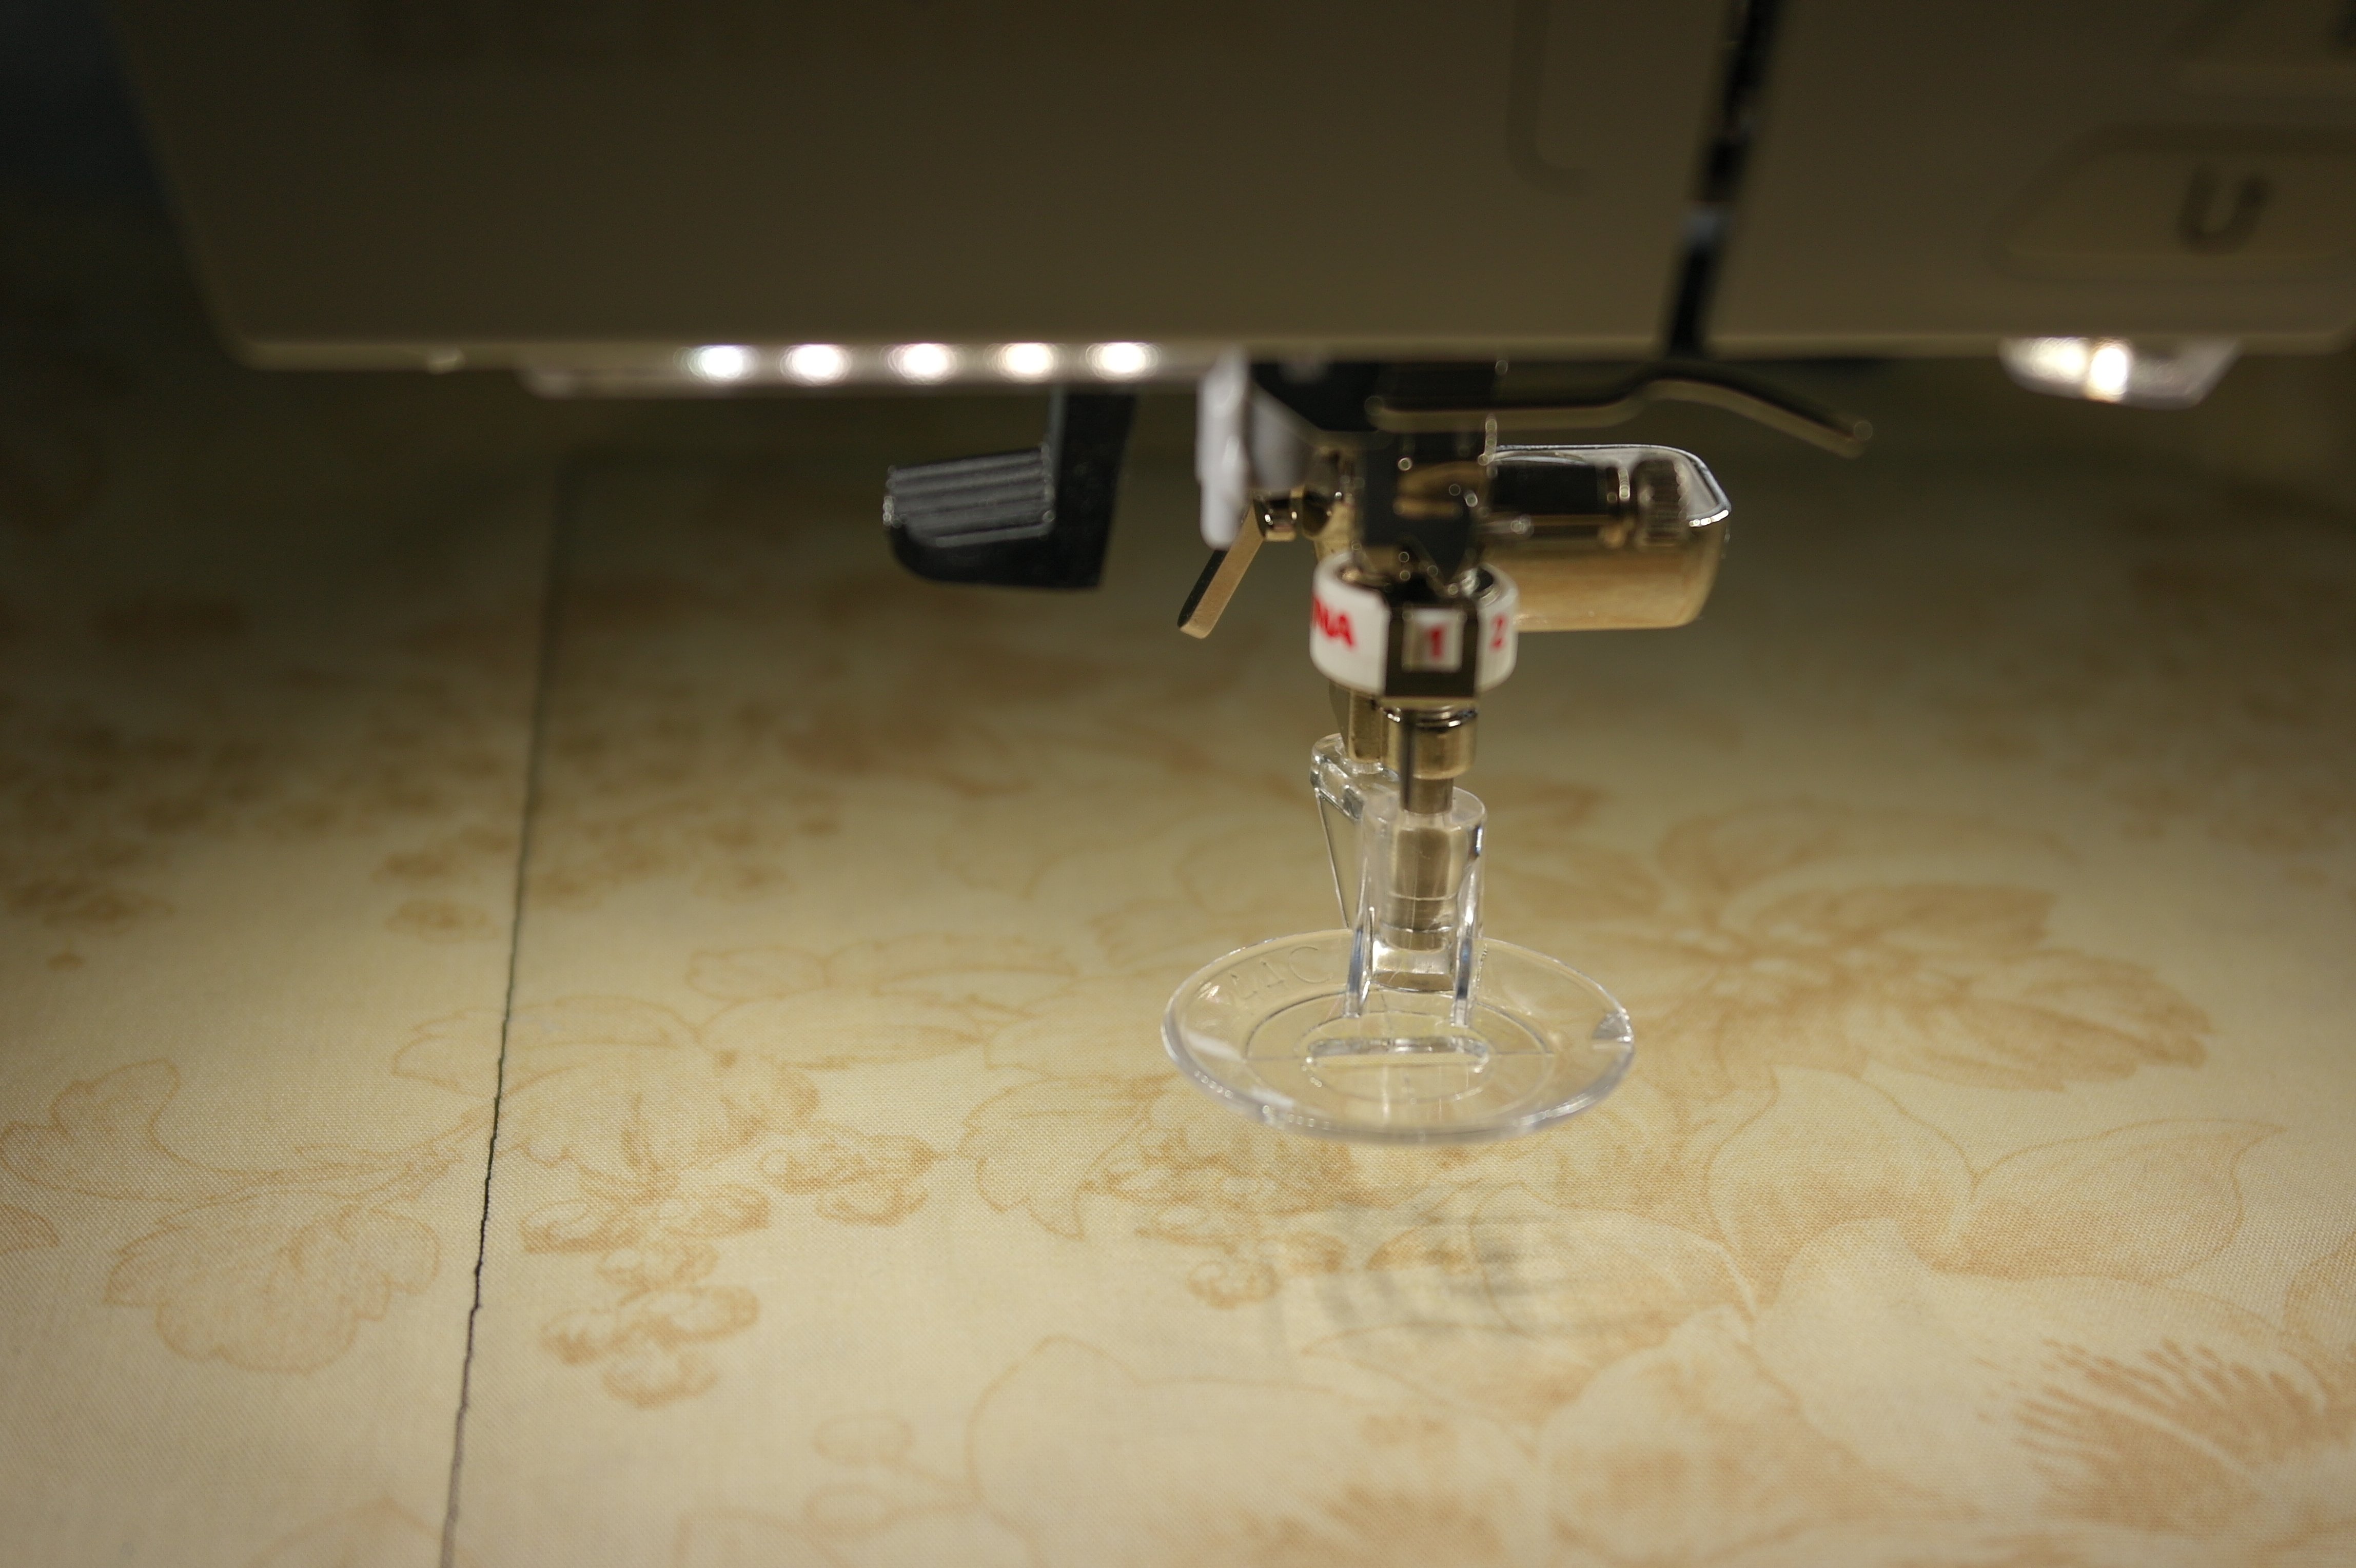
Next, the embroidery foot #26 and threads are removed, and the CutWork foot is in place, setting the adjustment wheel to ‘1’, the first cutting position.
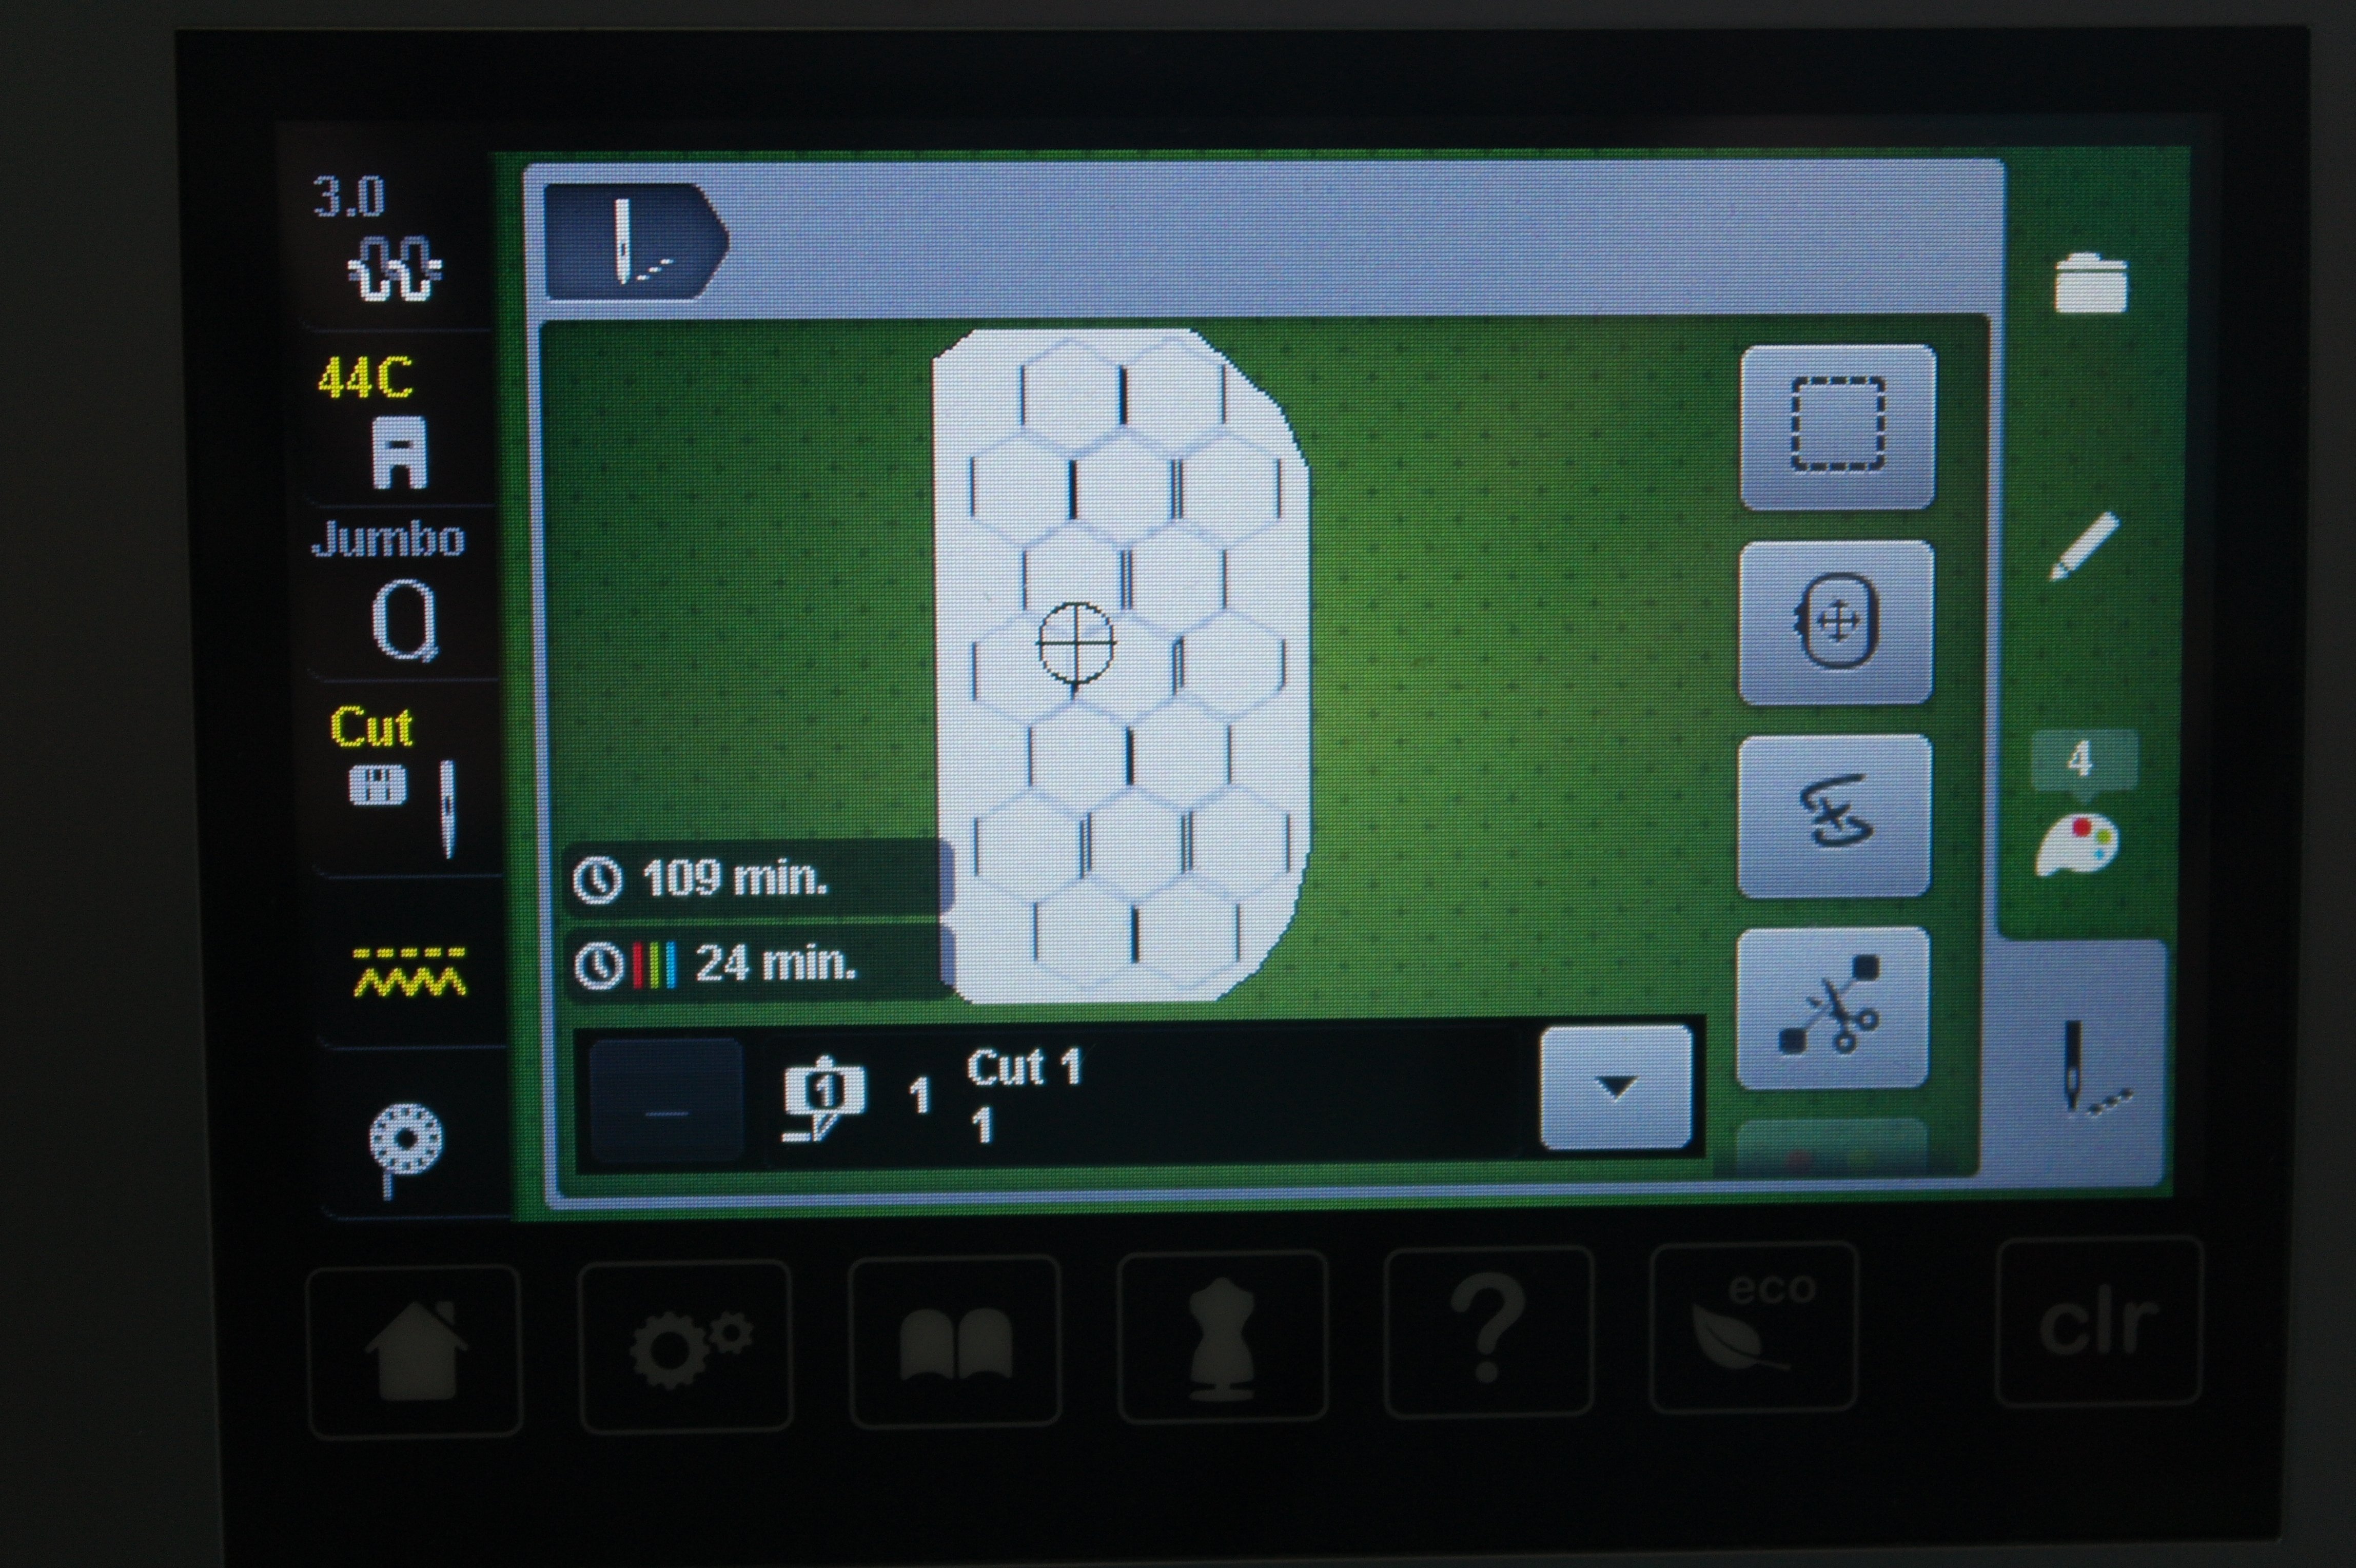
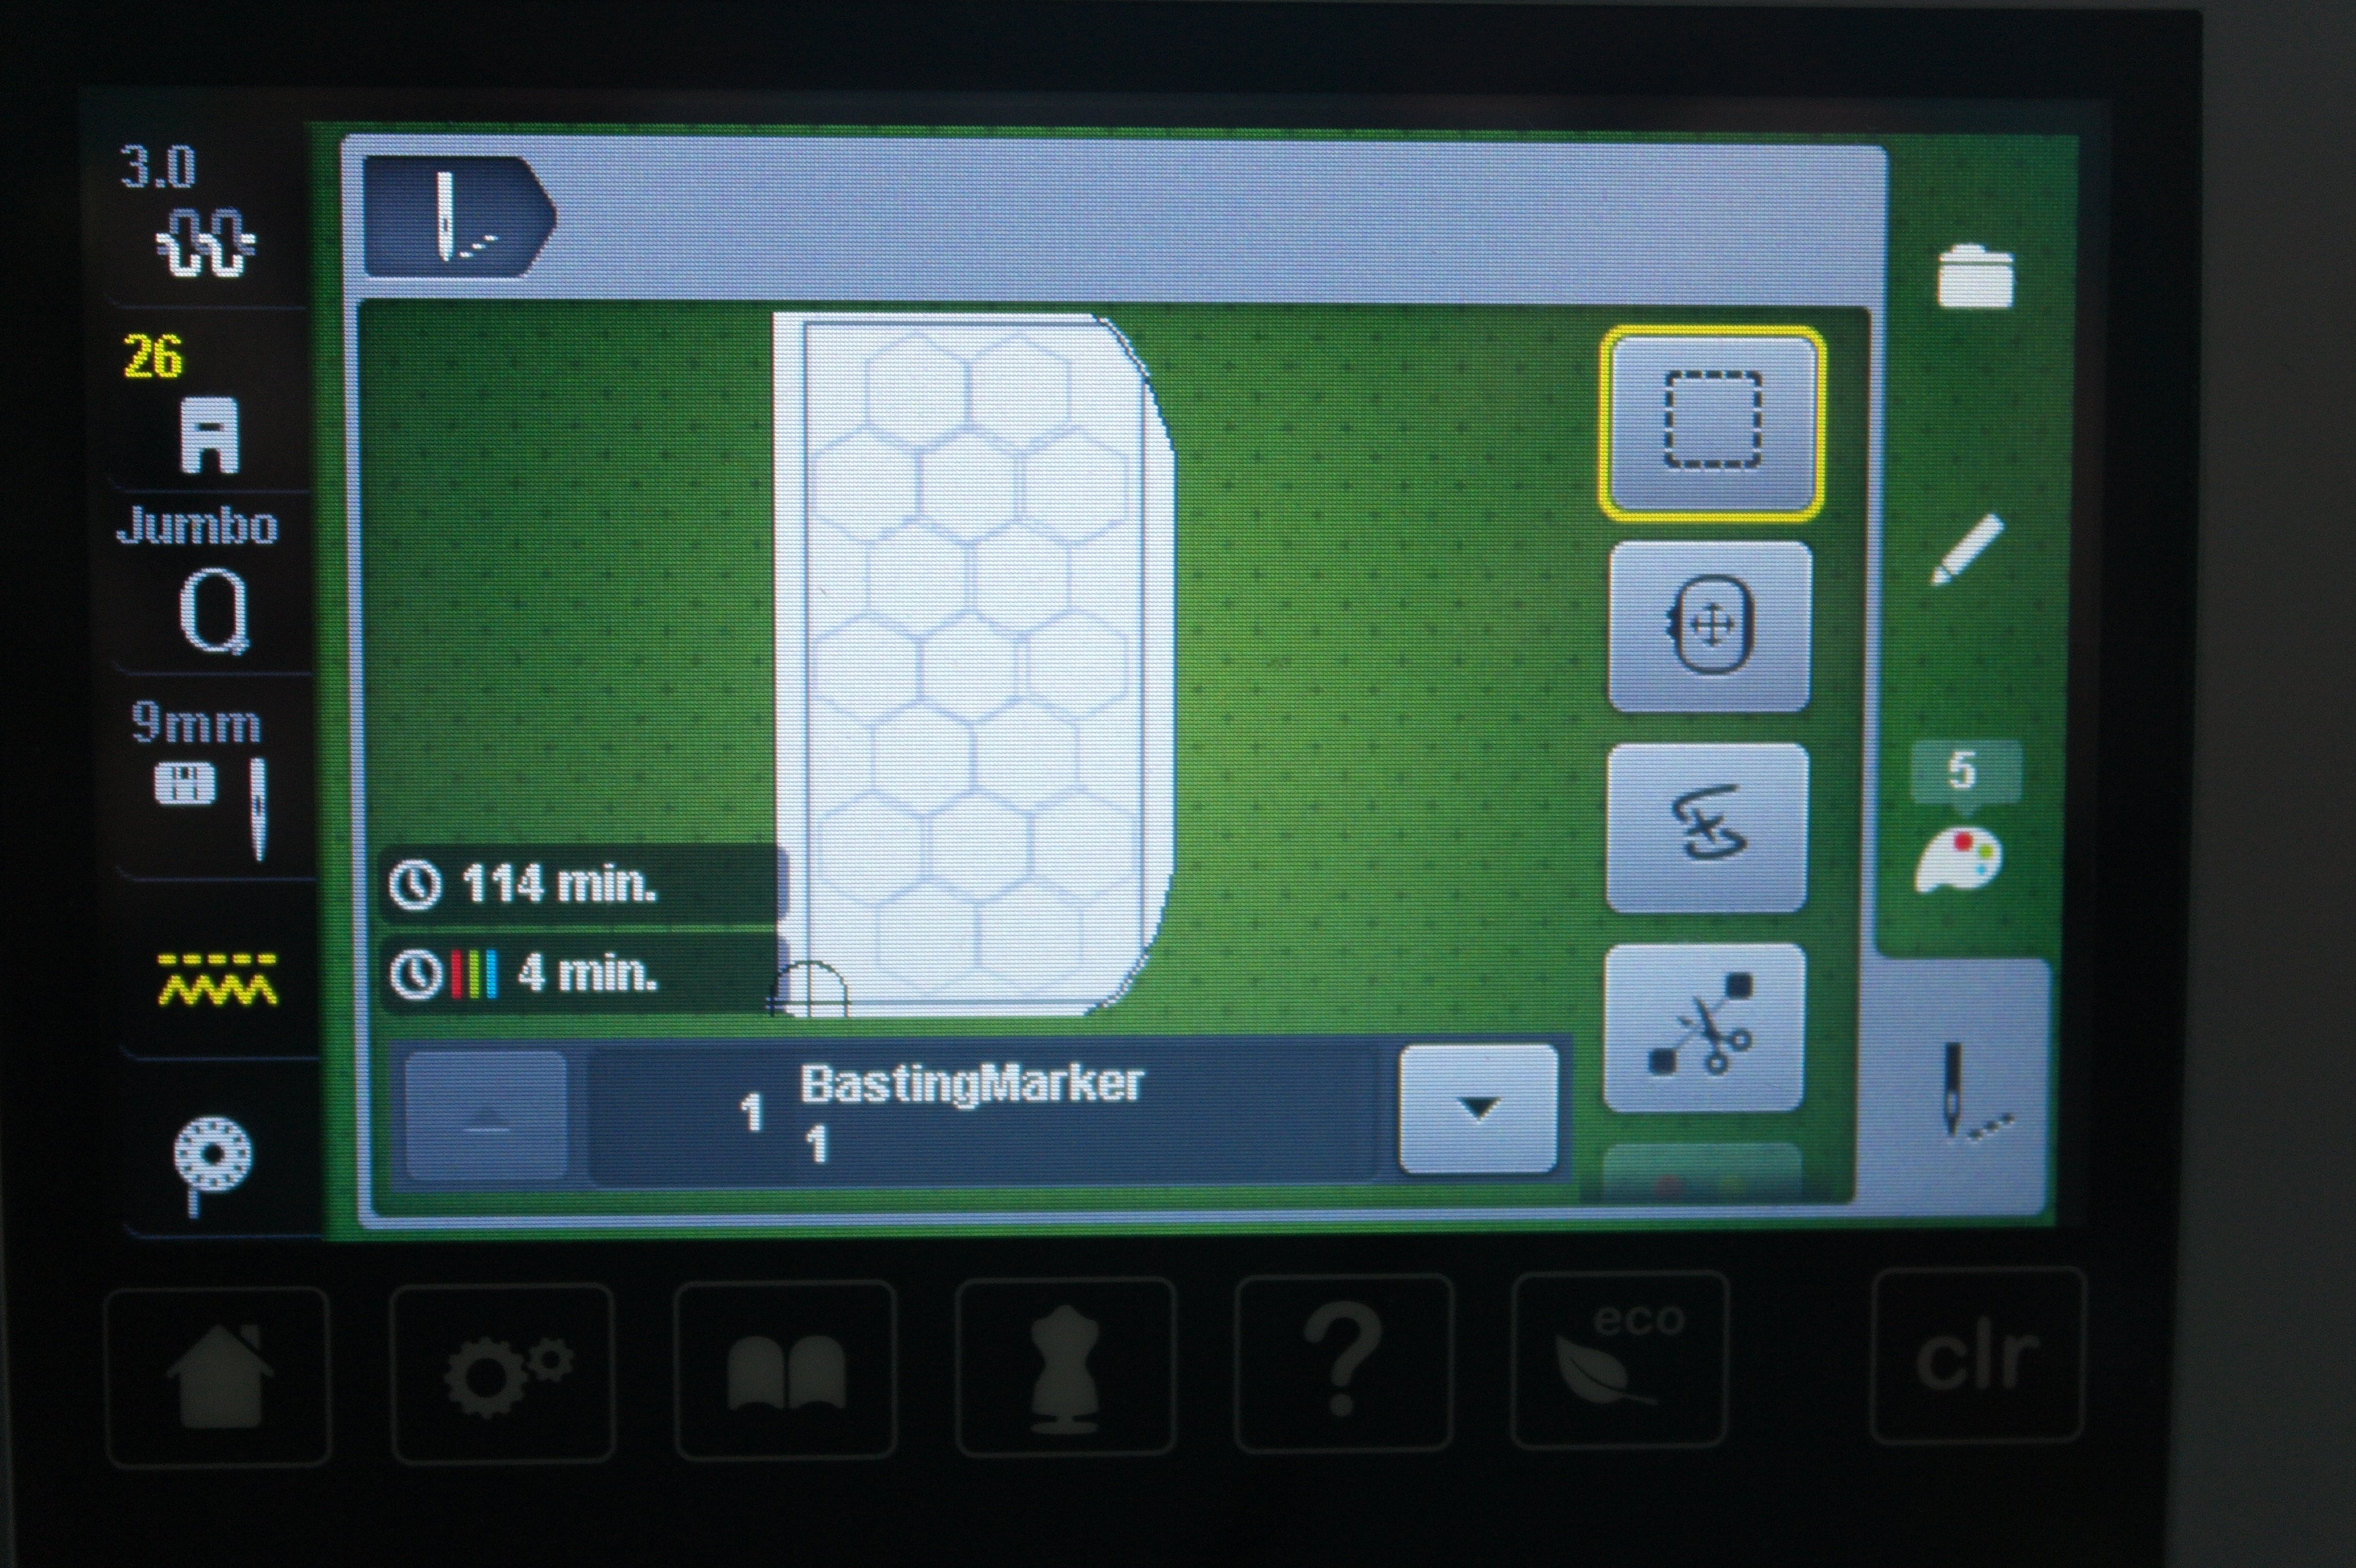
REMEMBER to change settings via the display: not just the CutWork tool should be selected, but also the Stitch plate – even if you are using the ‘0’= Straight Stitch plate, you will need to select the ‘Cut’ plate, or nothing happens. Every cut-position is indicated with colors and numbers on the display, depending on your type of BERNINA machine. The first position is visible on my display, so the first cuts can be made.

They are visible with the picture above, first cuts are all done, but remember, with nr. 2, 3 or 4, more cuts can be made where it already seems to be cut. It all depends on your accurate drawing/digitizing cuts, or the position/angle of the cutline. Sometimes corners/angles are cut twice.
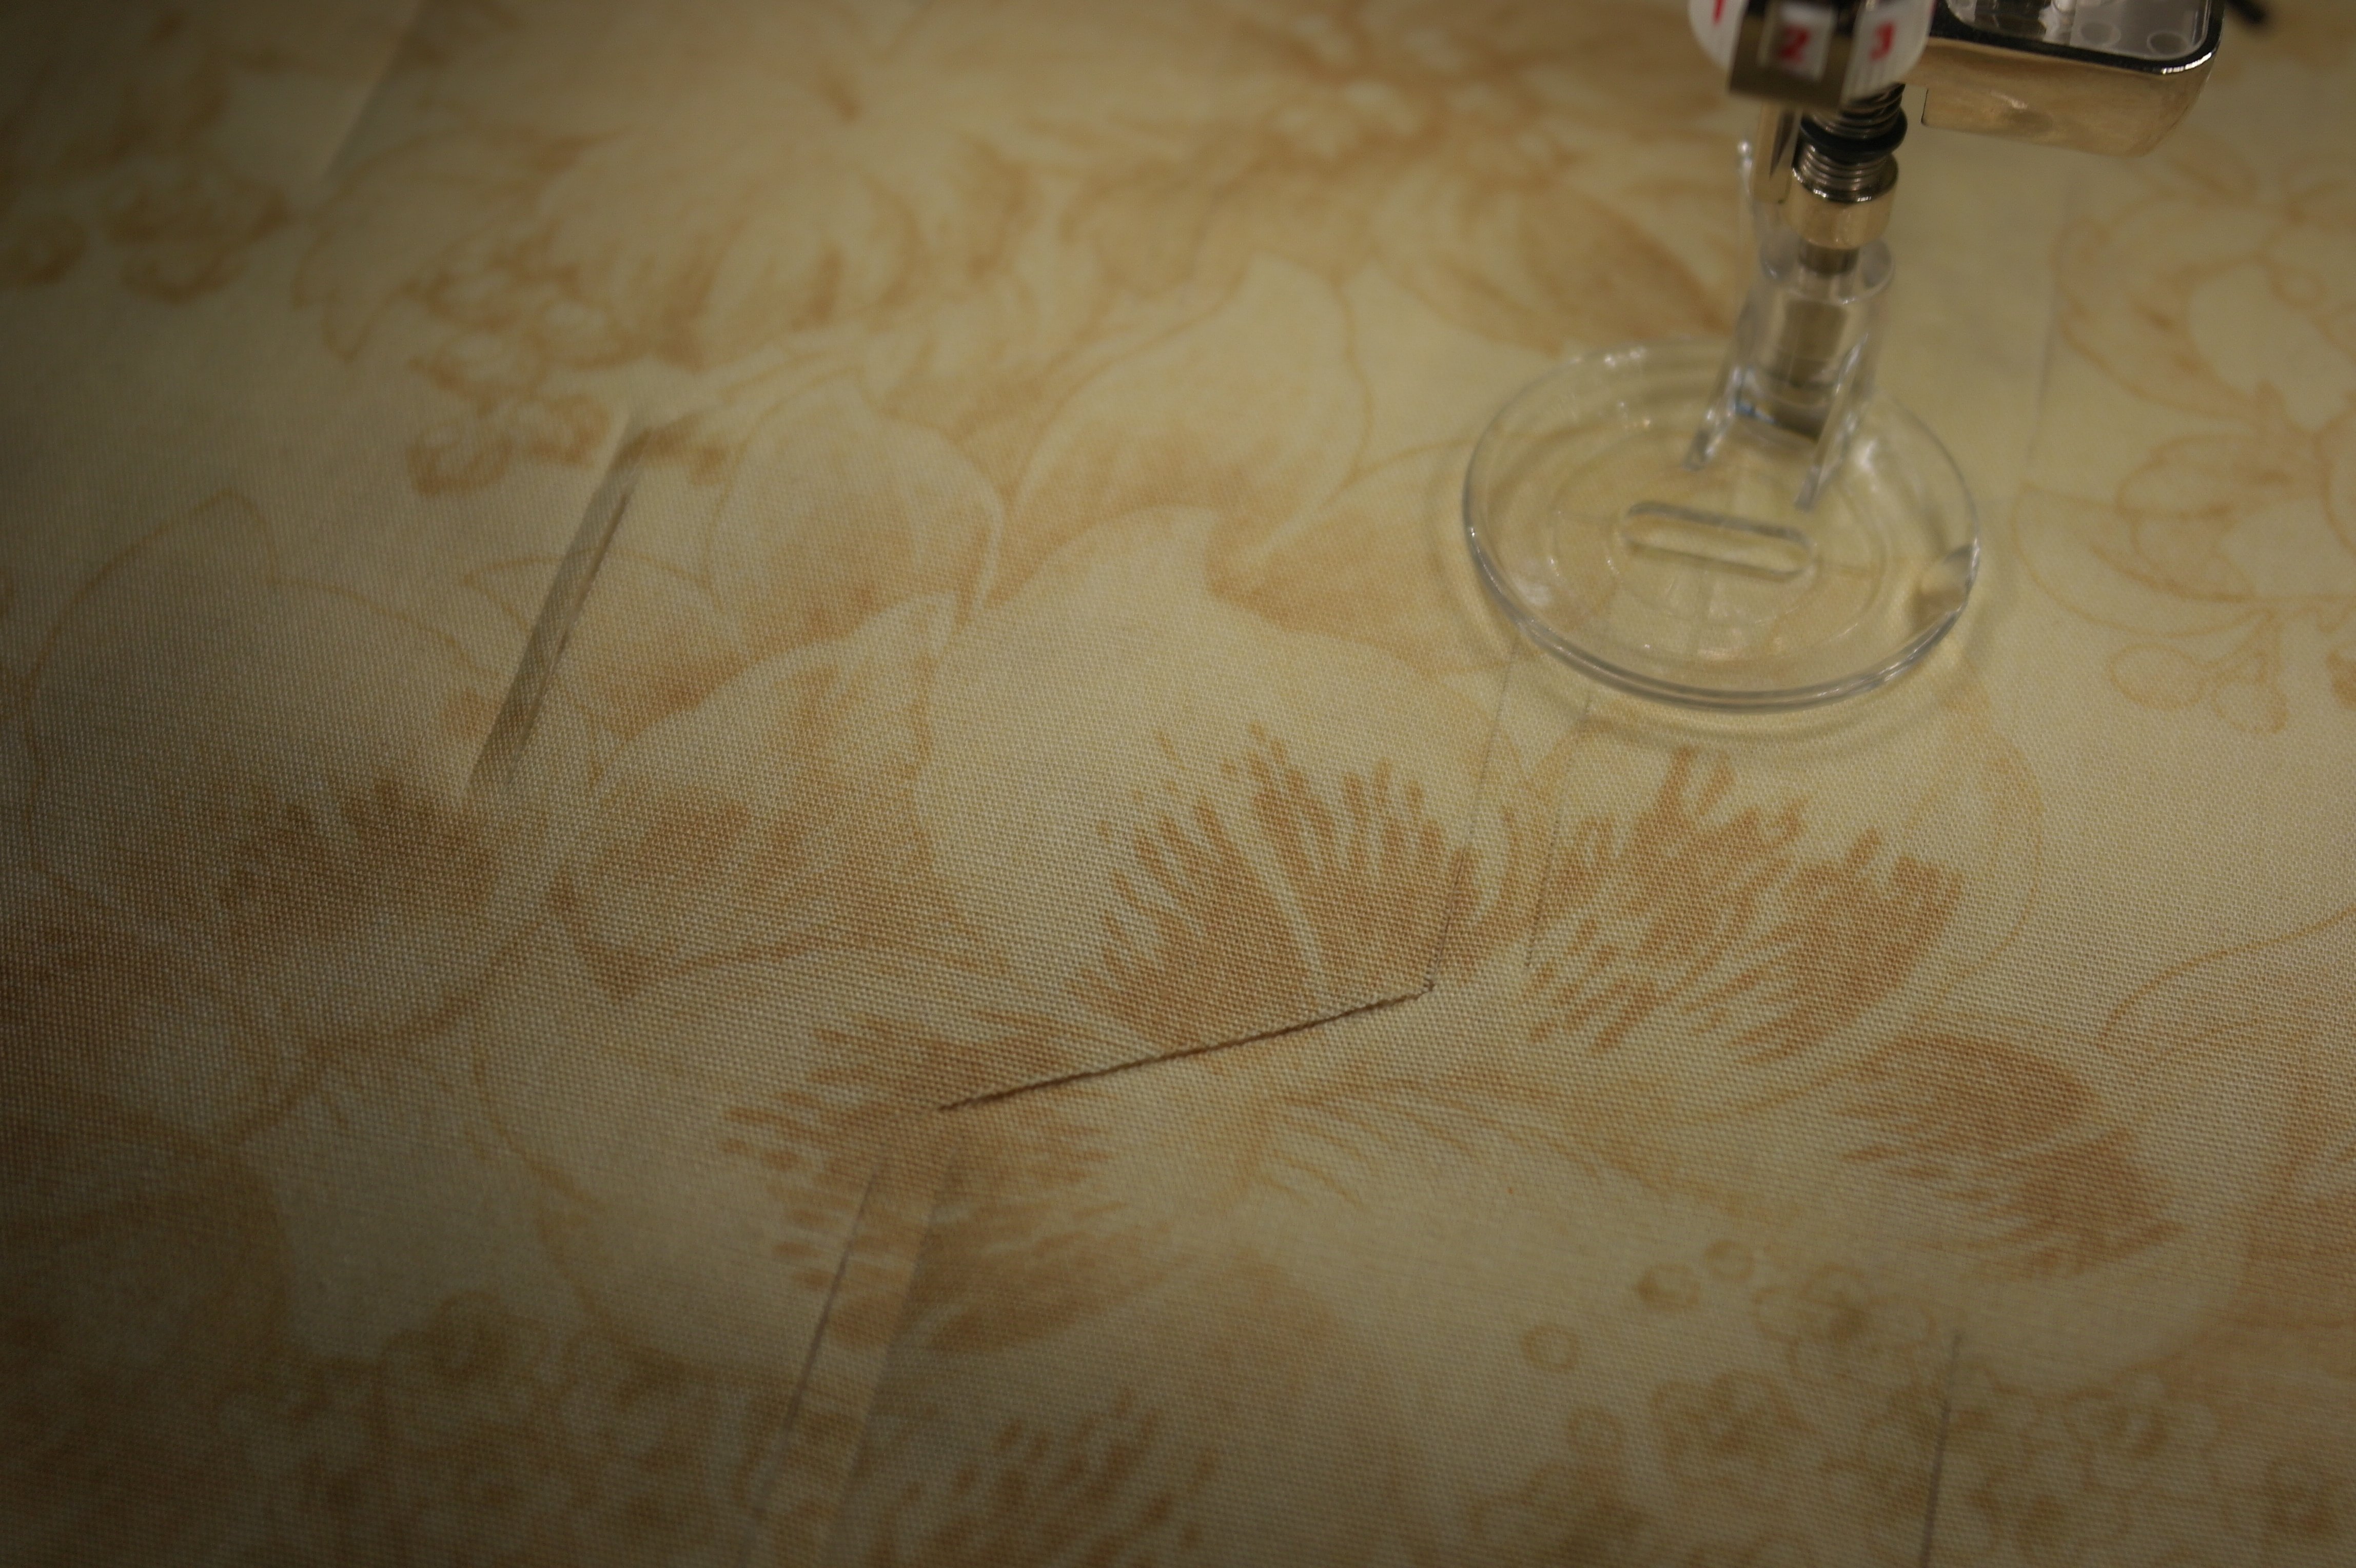
Moving the adjustment wheel to position 2 – the machine stops at this point – new cuts in different directions are made. The preview of these directions can be seen via the Color Film boxes in V8. Again, sometimes extra cuts need to be made: they will be done with the next positions.
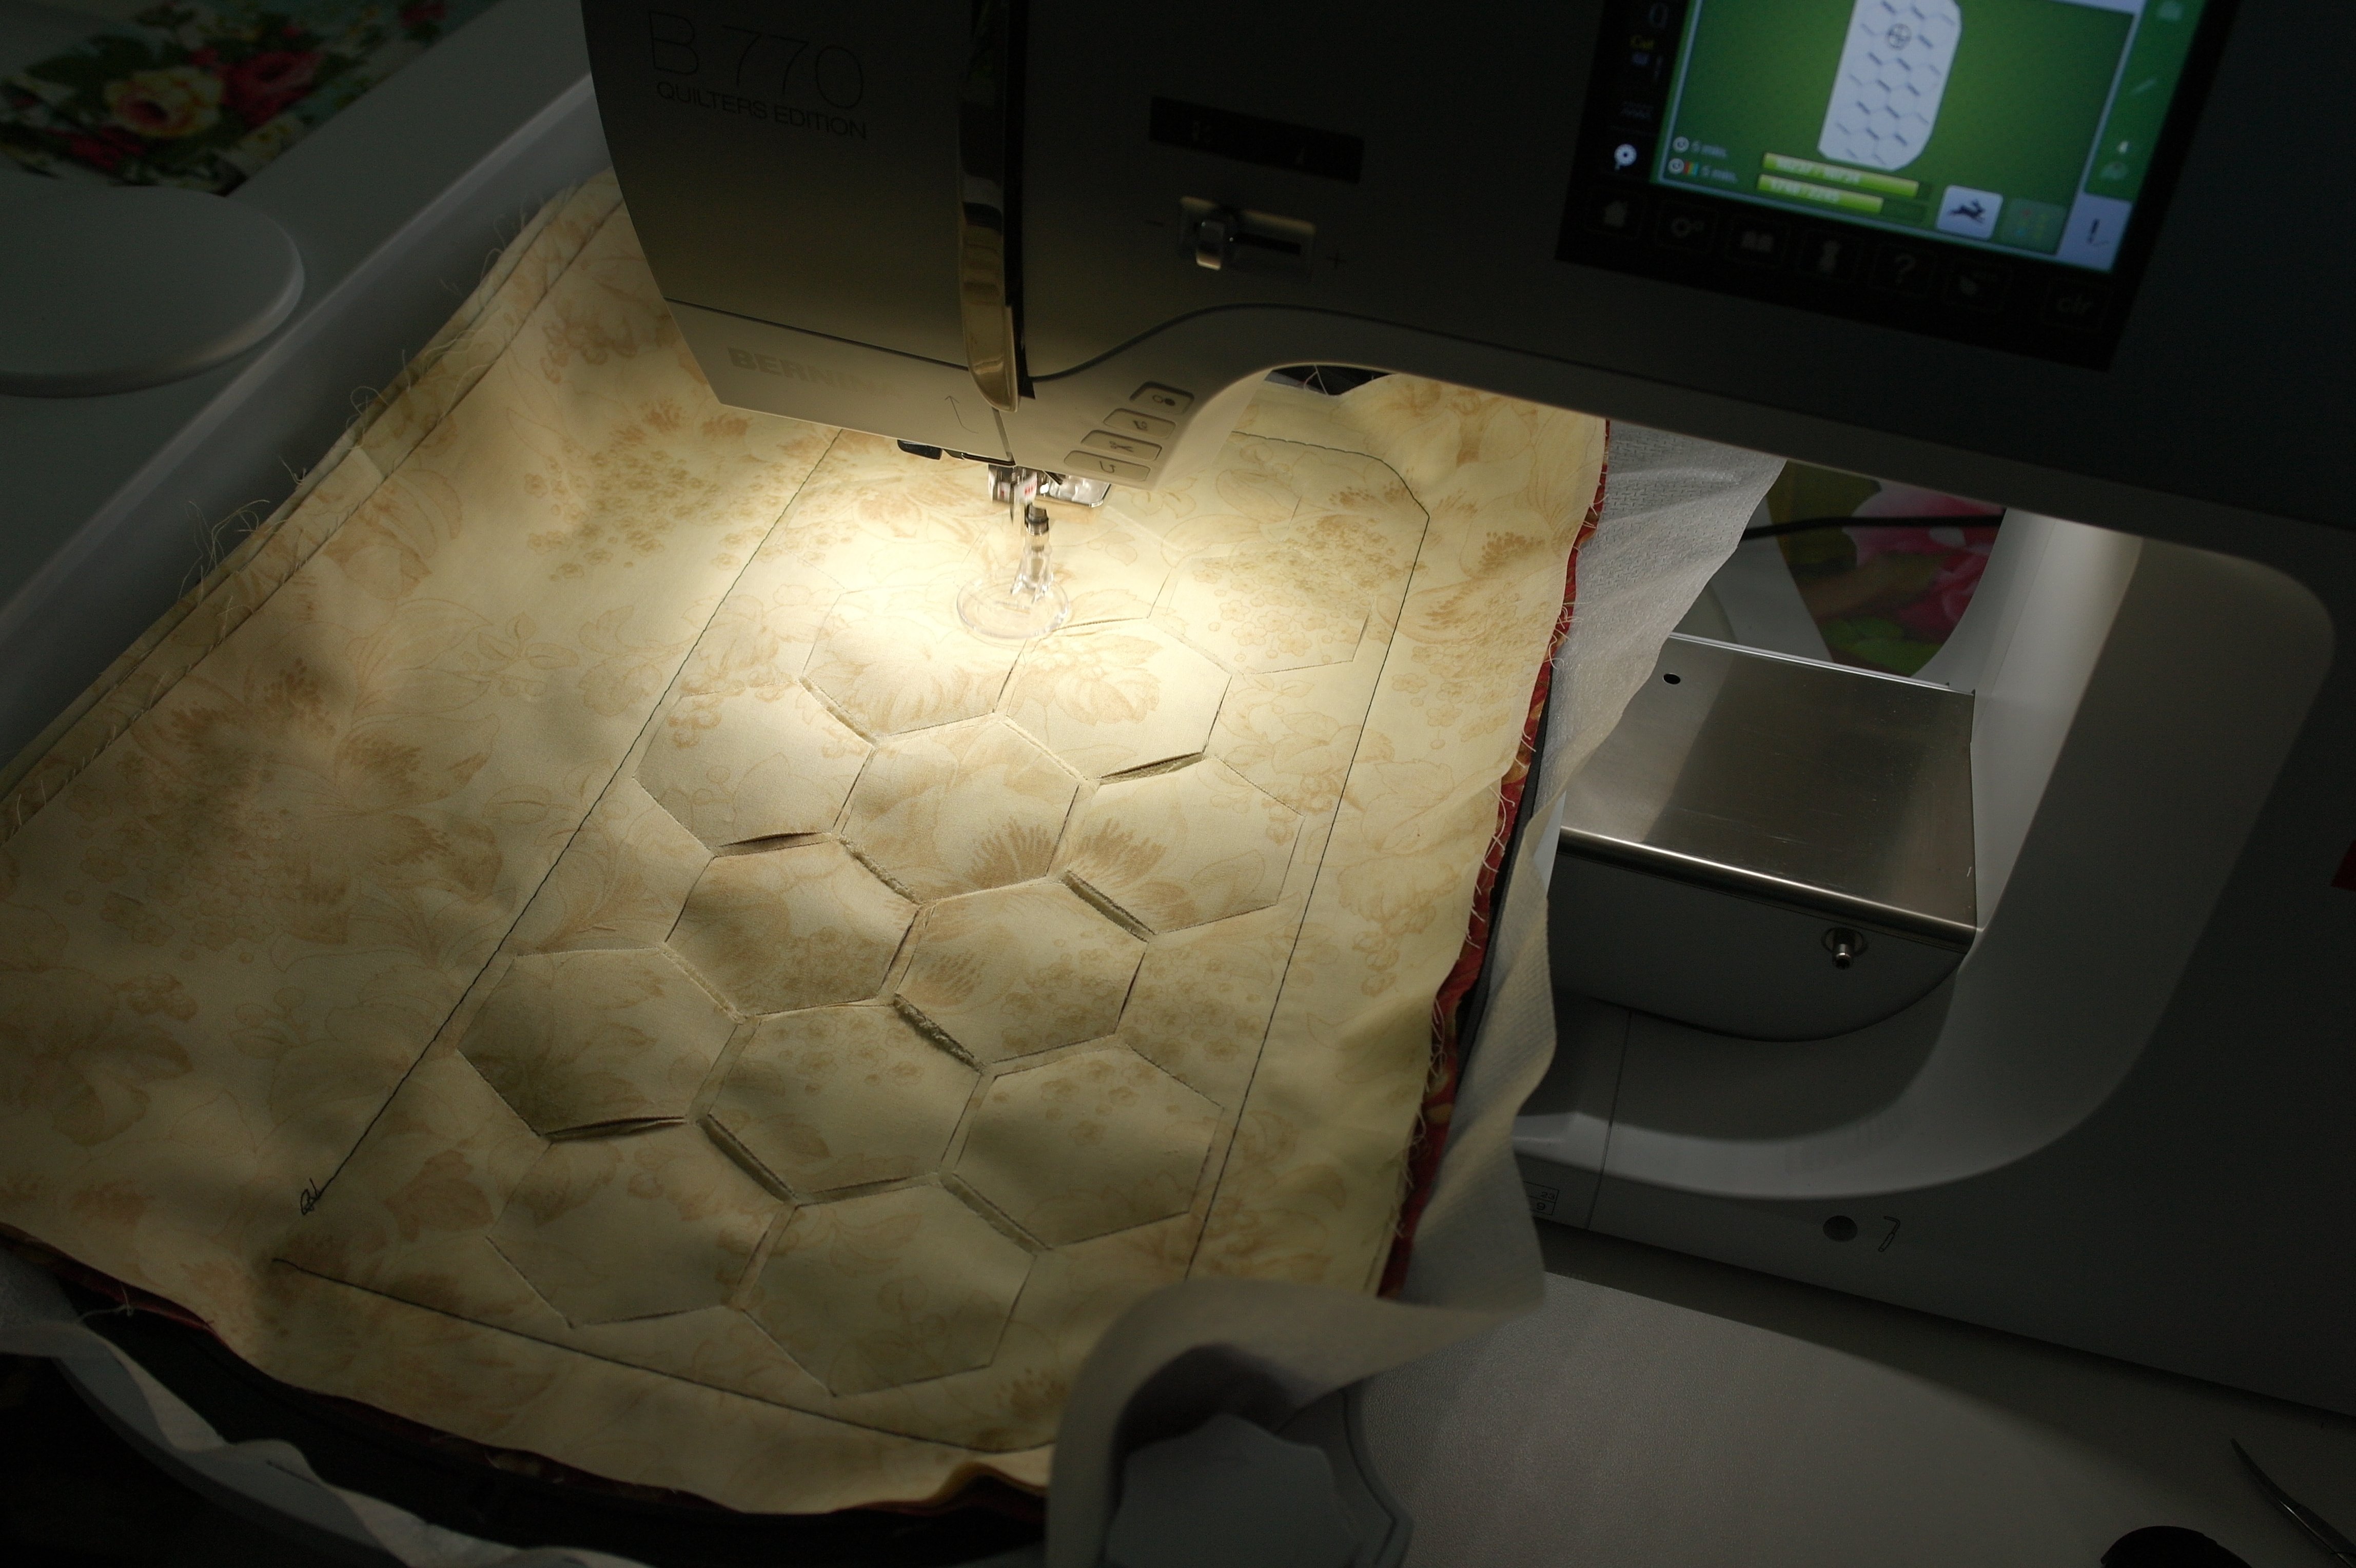
This is how it looks when all Hexagons are cut, but still in the Jumbo Hoop on my machine.
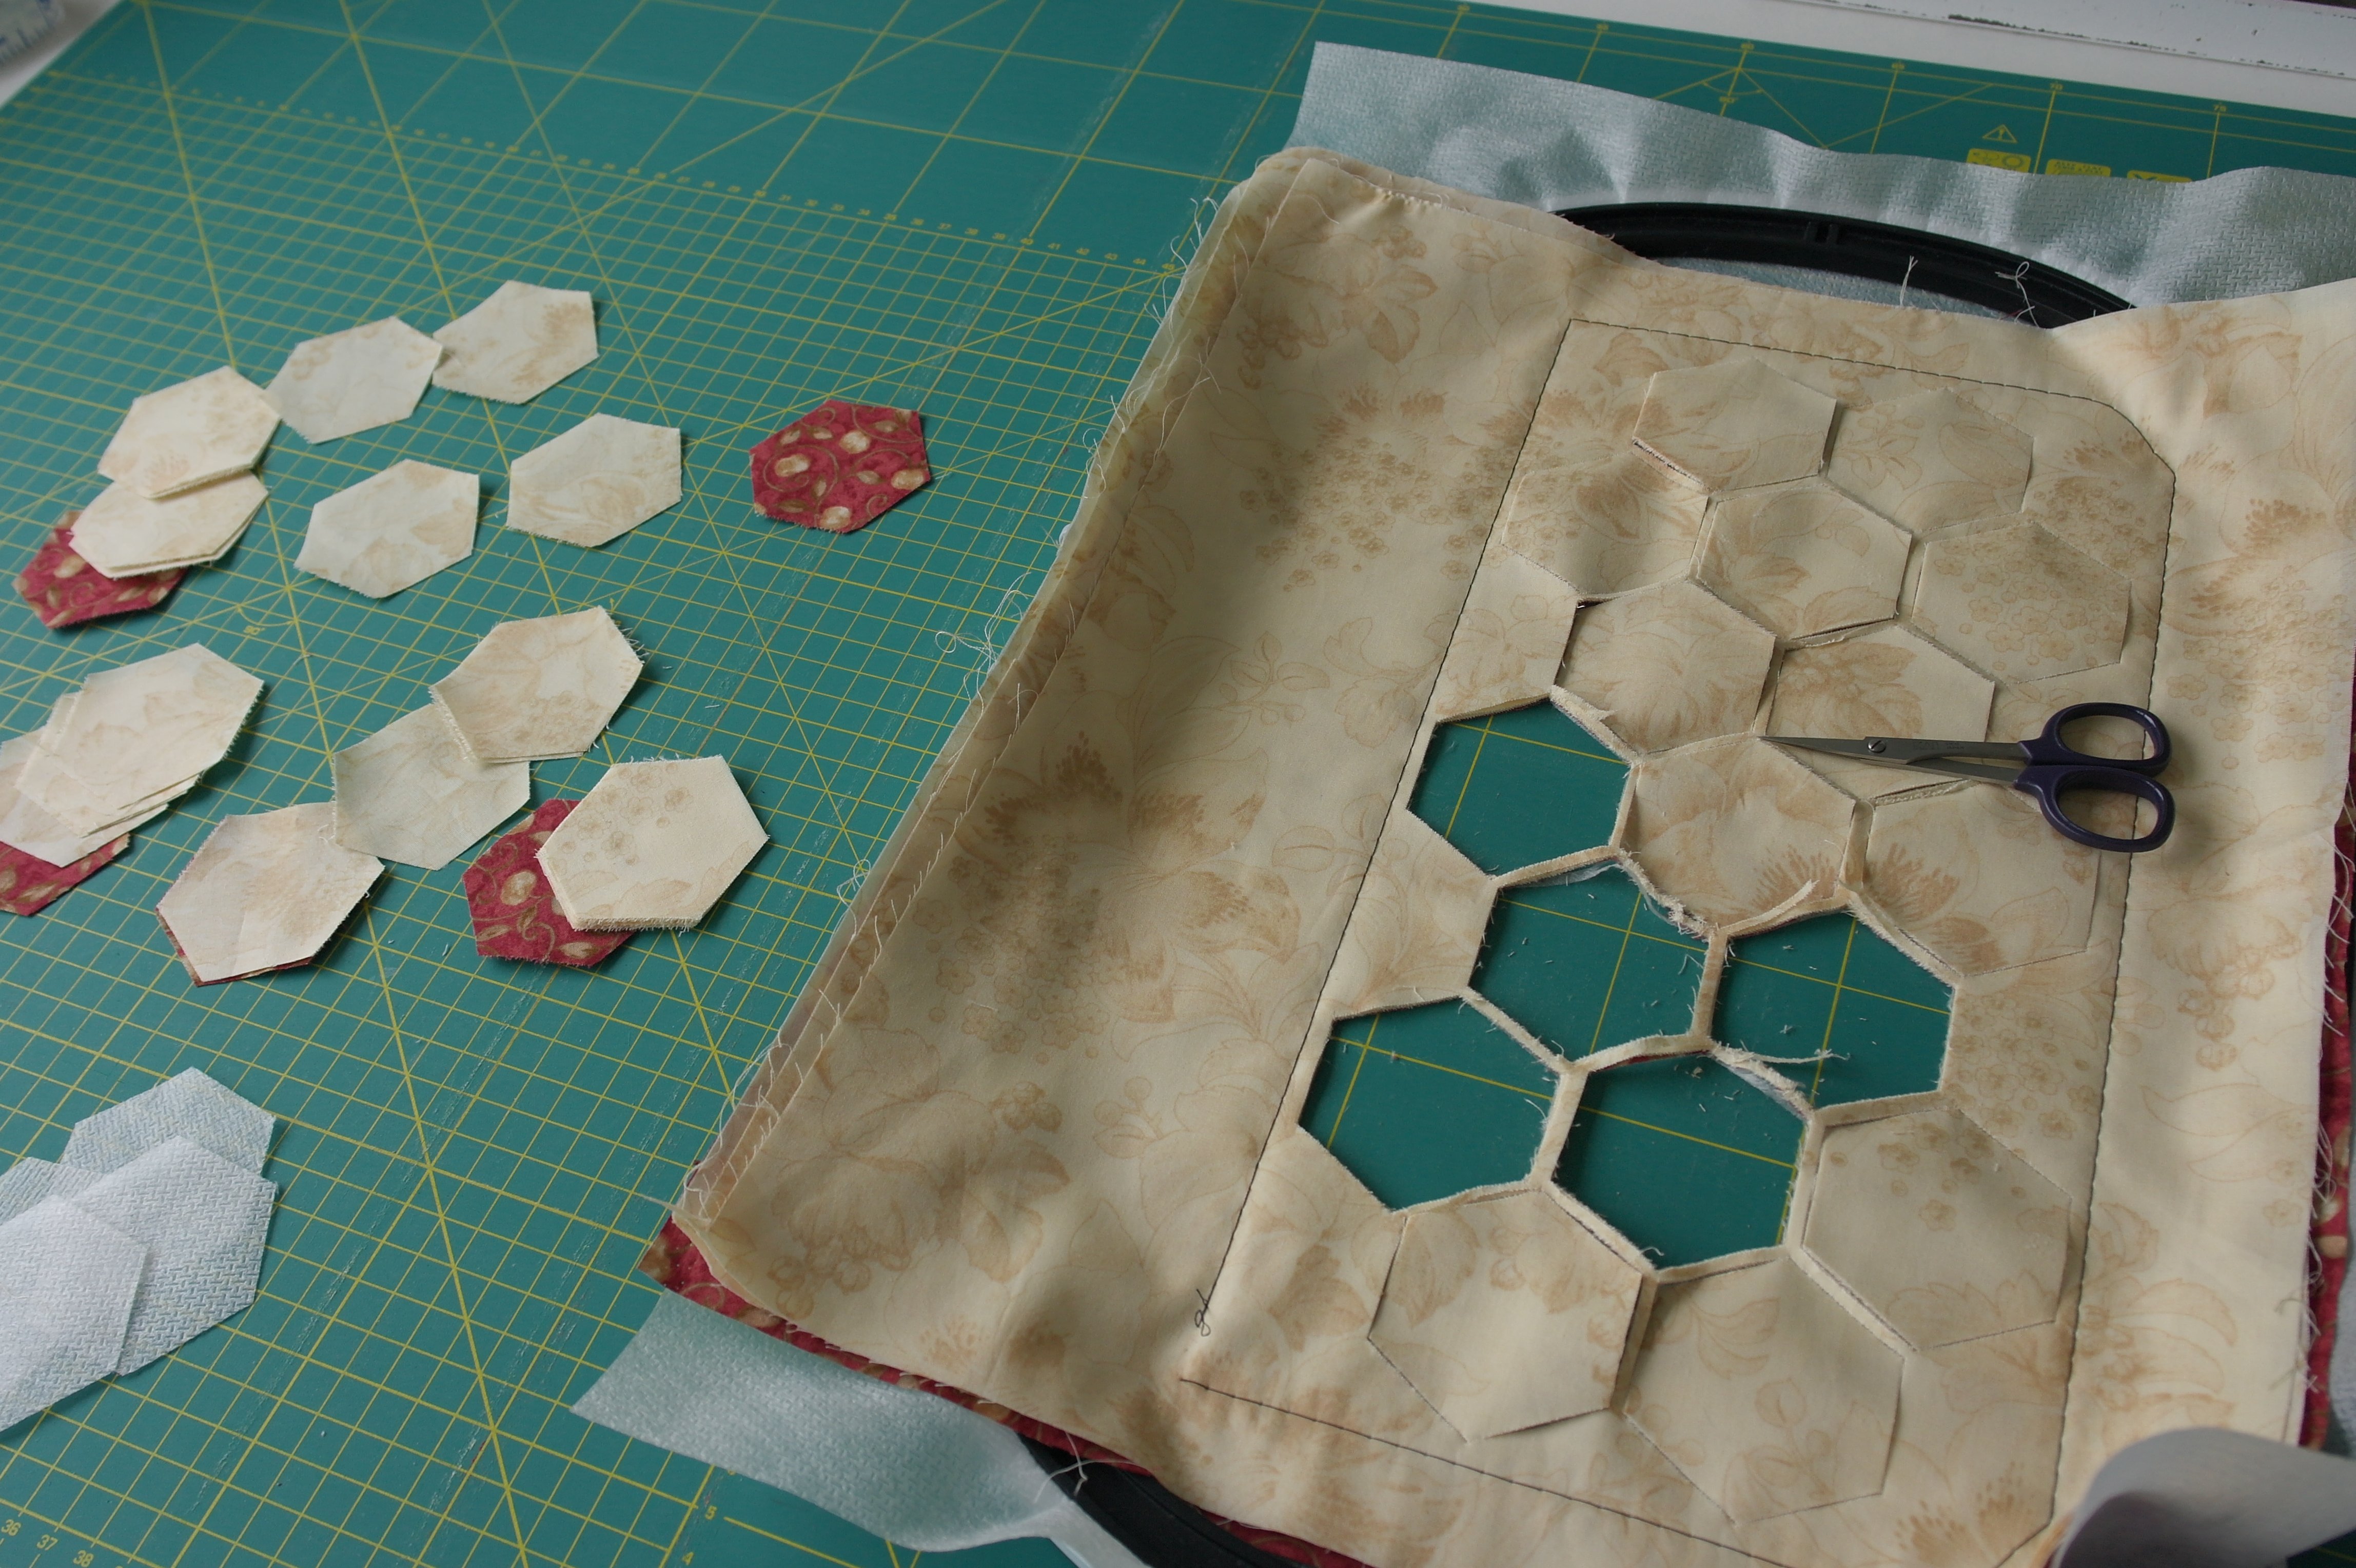
Now I have 85 Hexagons, cut outs from quilt fabrics. A couple of small pieces were not entirely cut – again, it all depends on the exact drawing and digitizing the cuts – so I had to cut a couple of times with my small scissors. Next time I will try to cut through 6, 7 or 8 layers of quilt fabric: that should be possible, although there is a limit to the number of layers the knife can handle, depending on the thickness of the fabrics.
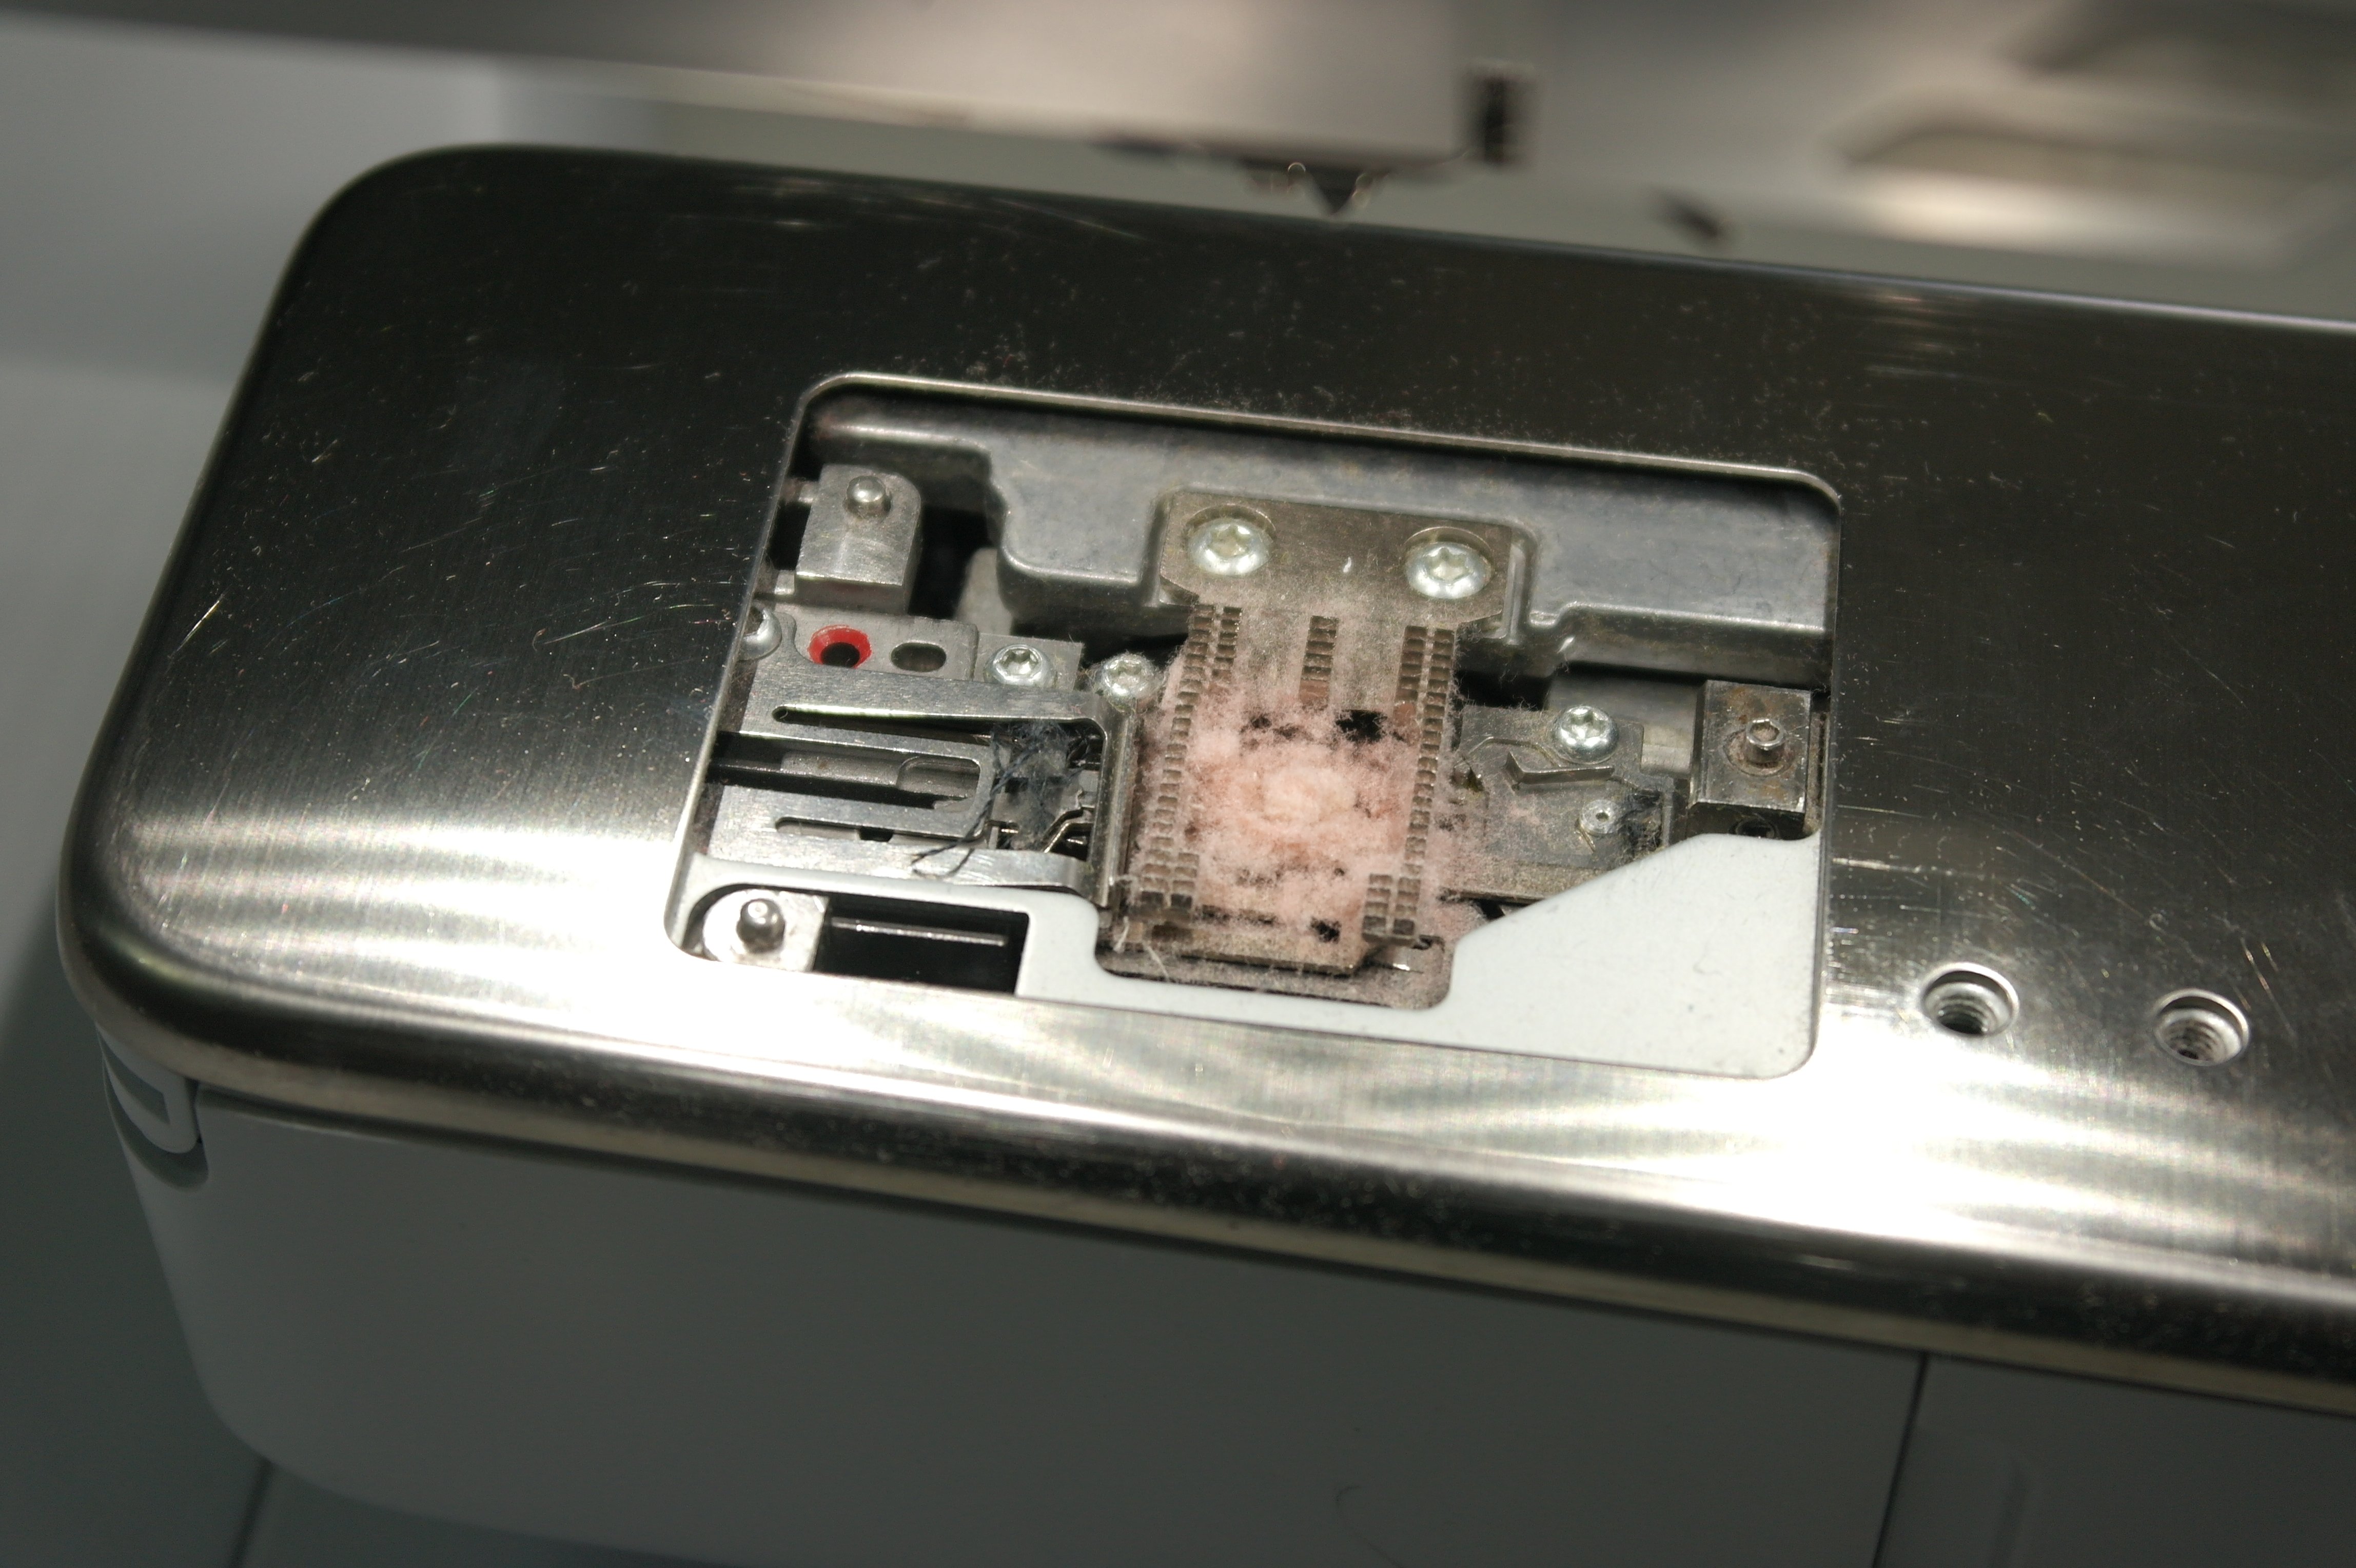
TIP: be sure to clean the spool case afterwards: a lot of lint is left behind – miniscule fibres of the fabric are distorting the system. Cleaning it all is essential, before moving on to the next project.
Hope this and the previous lessons will encourage you to use the CutWork option in V8 and the CutWork tool more often. A new topic in the next lesson: see you then.
Happy Stitching
Sylvia Kaptein
www.sylviasartquilts.nl
*There are commas used to divide whole numbers and decimals, not points as with different settings in the Embroidery Canvas of V8. One decimal is indicated as: 0,00. There are often up to 3 digits visible with the measurements of the polygons. If you want the shape to be a rounded number, for example 2 cm, fill out 20,0, 20,00 or 20,000.
I will try this with the information you have provided. I purchased some extras with the machine and have not used them all. Thanks for all your help.
can bernina cutwork tool use SVG, FCM, Studio, SCUT4 or PLT files? Or do they have to be configured in the Designworks software? Or can they be used directly?
Can the cutwork tool be used with cut files produced by other digitizing software? if so, which file format is needed? My computer is not compatible with Bernina software even with bootcamp (not enough capacity)so I must source cut files from other digitizers or other software that works on my computer, but I hope to get the cutwork tool for my 770Plus.
Dear Pam,
The BERNINA machine can’t read SVG viles, it reads EXP, DST, PES, PEC, JEF, SEW, PCS, XXX. The format for BERNINA embroidery and cut files is EXP.
I do not know if other digitizing software can create this format. The BERNINA embroidery software 9 DesignerPlus can import SVG with CoralDraw and then you can convert it into an EXP file (the software can also export SVG files). But that would mean you need a collegue who can convert the files for you if your computer can’t run the software.
Kind regards, Ramona
So the question remains…. Can the machine use an exp file to cut fabric using the cutwork tool? When you buy a design to use with the cutwork tool (as purchased, without any other software including designworks for cutwork, the dealer says you can do this – buy ready to use cutwork files for Bernina), what is the suffix? EXP? I won’t buy a cutwork tool unless I can get some definitive answers to this question. I know the software I will have, will generate an EXP file. But can the cutwork tool use it or does the machine need some other type of file?
Dear Pam,
I am sorry, I seem to have missunderstood. I thought you were mainly asking because of the svg format.
Yes, the machine and CutWork tool use an exp file to cut fabric on your BERNINA machine. With the EXP you don’t need any additional steps with software! Just put it on an USB stick to transfer to your machine, and you are good to go.
Thank you so much Ramona! Finally a definitive answer. I have passed up the cutwork tool and accompanying foot so many times when it was on sale because I could not get an answer. So glad to know this.
You are very welcome!
Just for embroidery, keep in mind you need exp and bmp file. The bmp file has the color information, while the exp has the stitch information. If you only have the exp on your usb stick, that won’t change anything of the embroidery result, but the thread colors of your machines screen will be wrong. Was a bit startled when that happend to me the first time :).
Since you dont usually have colors with cutwork files, you are fine with only the exp file. Hope I do not confuse anything with additional information 🙂
Hi Hilloah, can you specify what kind of help you need? Perhaps find a local BERNINA group to share info?
If it is software related, or practical tips that you need, you can even try your local BERNINA dealer.
?
Thanks again, Ann. Have fun
Thank you for this lesson.
Very helpful.
Glad to help, Elizabeth. Enjoy