 BERNINA Corporate Blog -
A long time ago, I’ve designed a pattern for a Kaleidoscope quilt, with 9 blocks. I have made that quilt in warm and dark colors, with elaborate quilting by hand. Because I was looking for a fun pattern to make an octagon pillow in red and white, I’ve re-designed one block, changed it into paper piecing. This is available for you to be downloaded for free: click HERE to download the paper piecing pattern.
There are a couple of diagram on this .pdf: upper left the design of the entire pillow, upper right one of the 8 points and two paper piecing Units to print eight times.
Whad do you need to make the red/white pillow?
- Red and white quilt fabrics
- Natural muslin for the inside of the pillow sandwich, approx. 45x45cm
- 100% Bamboo batting for the sandwich approx. 45x45cm
- Fabric for the back (red or white), approx. 50x50cm or a fat quarter
- Papers for Foundation Piecing, or thin printer paper
- Matching decorative thread for the machine (preferably red): I have used Sulky Rayon 40
- DecoBob bobbin thread
- Matching sewing thread for the machine
- Filling
And of course your sewing machine: I will work with my BERNINA770QE and will use a regular patchwork foot. Afterwards the Open Embroidery foot #20C and my quarter-inch foot #97D will be used too. )
Paper Piecing Units.
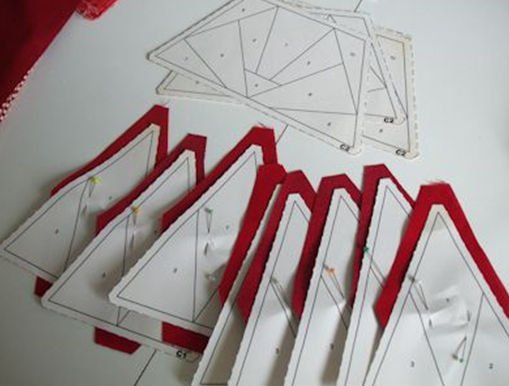
The Paper Piecing will be made with two Units: A and B. Print the .pdf 8 times (use special Papers for Foundation Piecing or thin printer paper): make 8 points via number sequence = working order. The diagrams will show you how to assemble the 8 points to make an octagon.
Pin the first fabric onto section 1 (or use Bohin Glue pen), cut back the seam allowances and sew fabric 2 onto sewing line 1/2.
TIP: als je vaker mijn blogberichten over paper piecing hebt gelezen, weet je dat ik werk met de Add-a-Quarter liniaal, een vouwmal en een rolmes. De werkwijze blijft altijd hetzelfde, of je nu een speciaal daarvoor ontworpen patroon hebt of een ander paper piecing patroon. Je kunt zelf kijken of je de gereedschappen die ik hierbij vermeld heb ook wilt gebruiken, of op je eigen manier gaat werken.
Assembly.
After paper piecing all 8 Units A and B, trim each Unit along the outer edges. Tear the paper away at the back: only the fabric remains. Because there is no sewing line anymore, you will work with your quarter inch foot #97D .
- Join 2 points to make 4 groups
- Join 2 by 2 the groups
- Sew these 2 groups of 4 points together, starting from the center to one side, turn and start again from the center to the other side. TIP: enlarge your stitches to make a Basting Stitch line in the center: see if the 8 points area lining up. If they don’t, it is much easier to rip large stitches. If they match up, sew again with smaller stitches to secure the center.
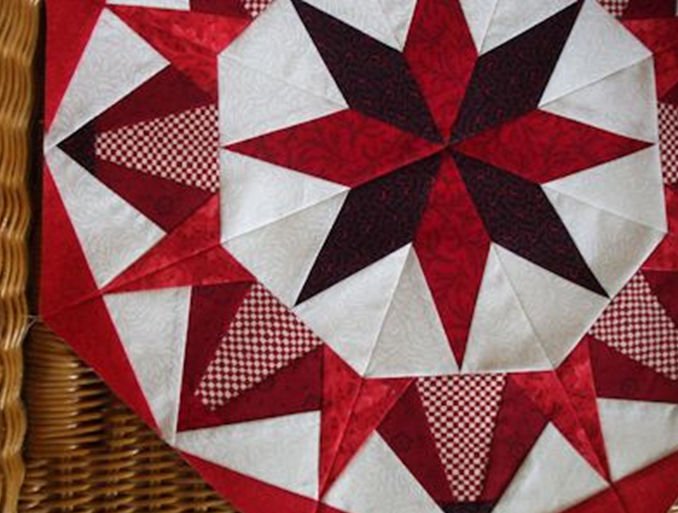
The top of the pillow is ready. To make the sandwich, place the off-white fabric on your table, on top of that the piece of batting. Last the patchwork octagon, right side up. Pin the sandwich to prevent shifting while quilting.
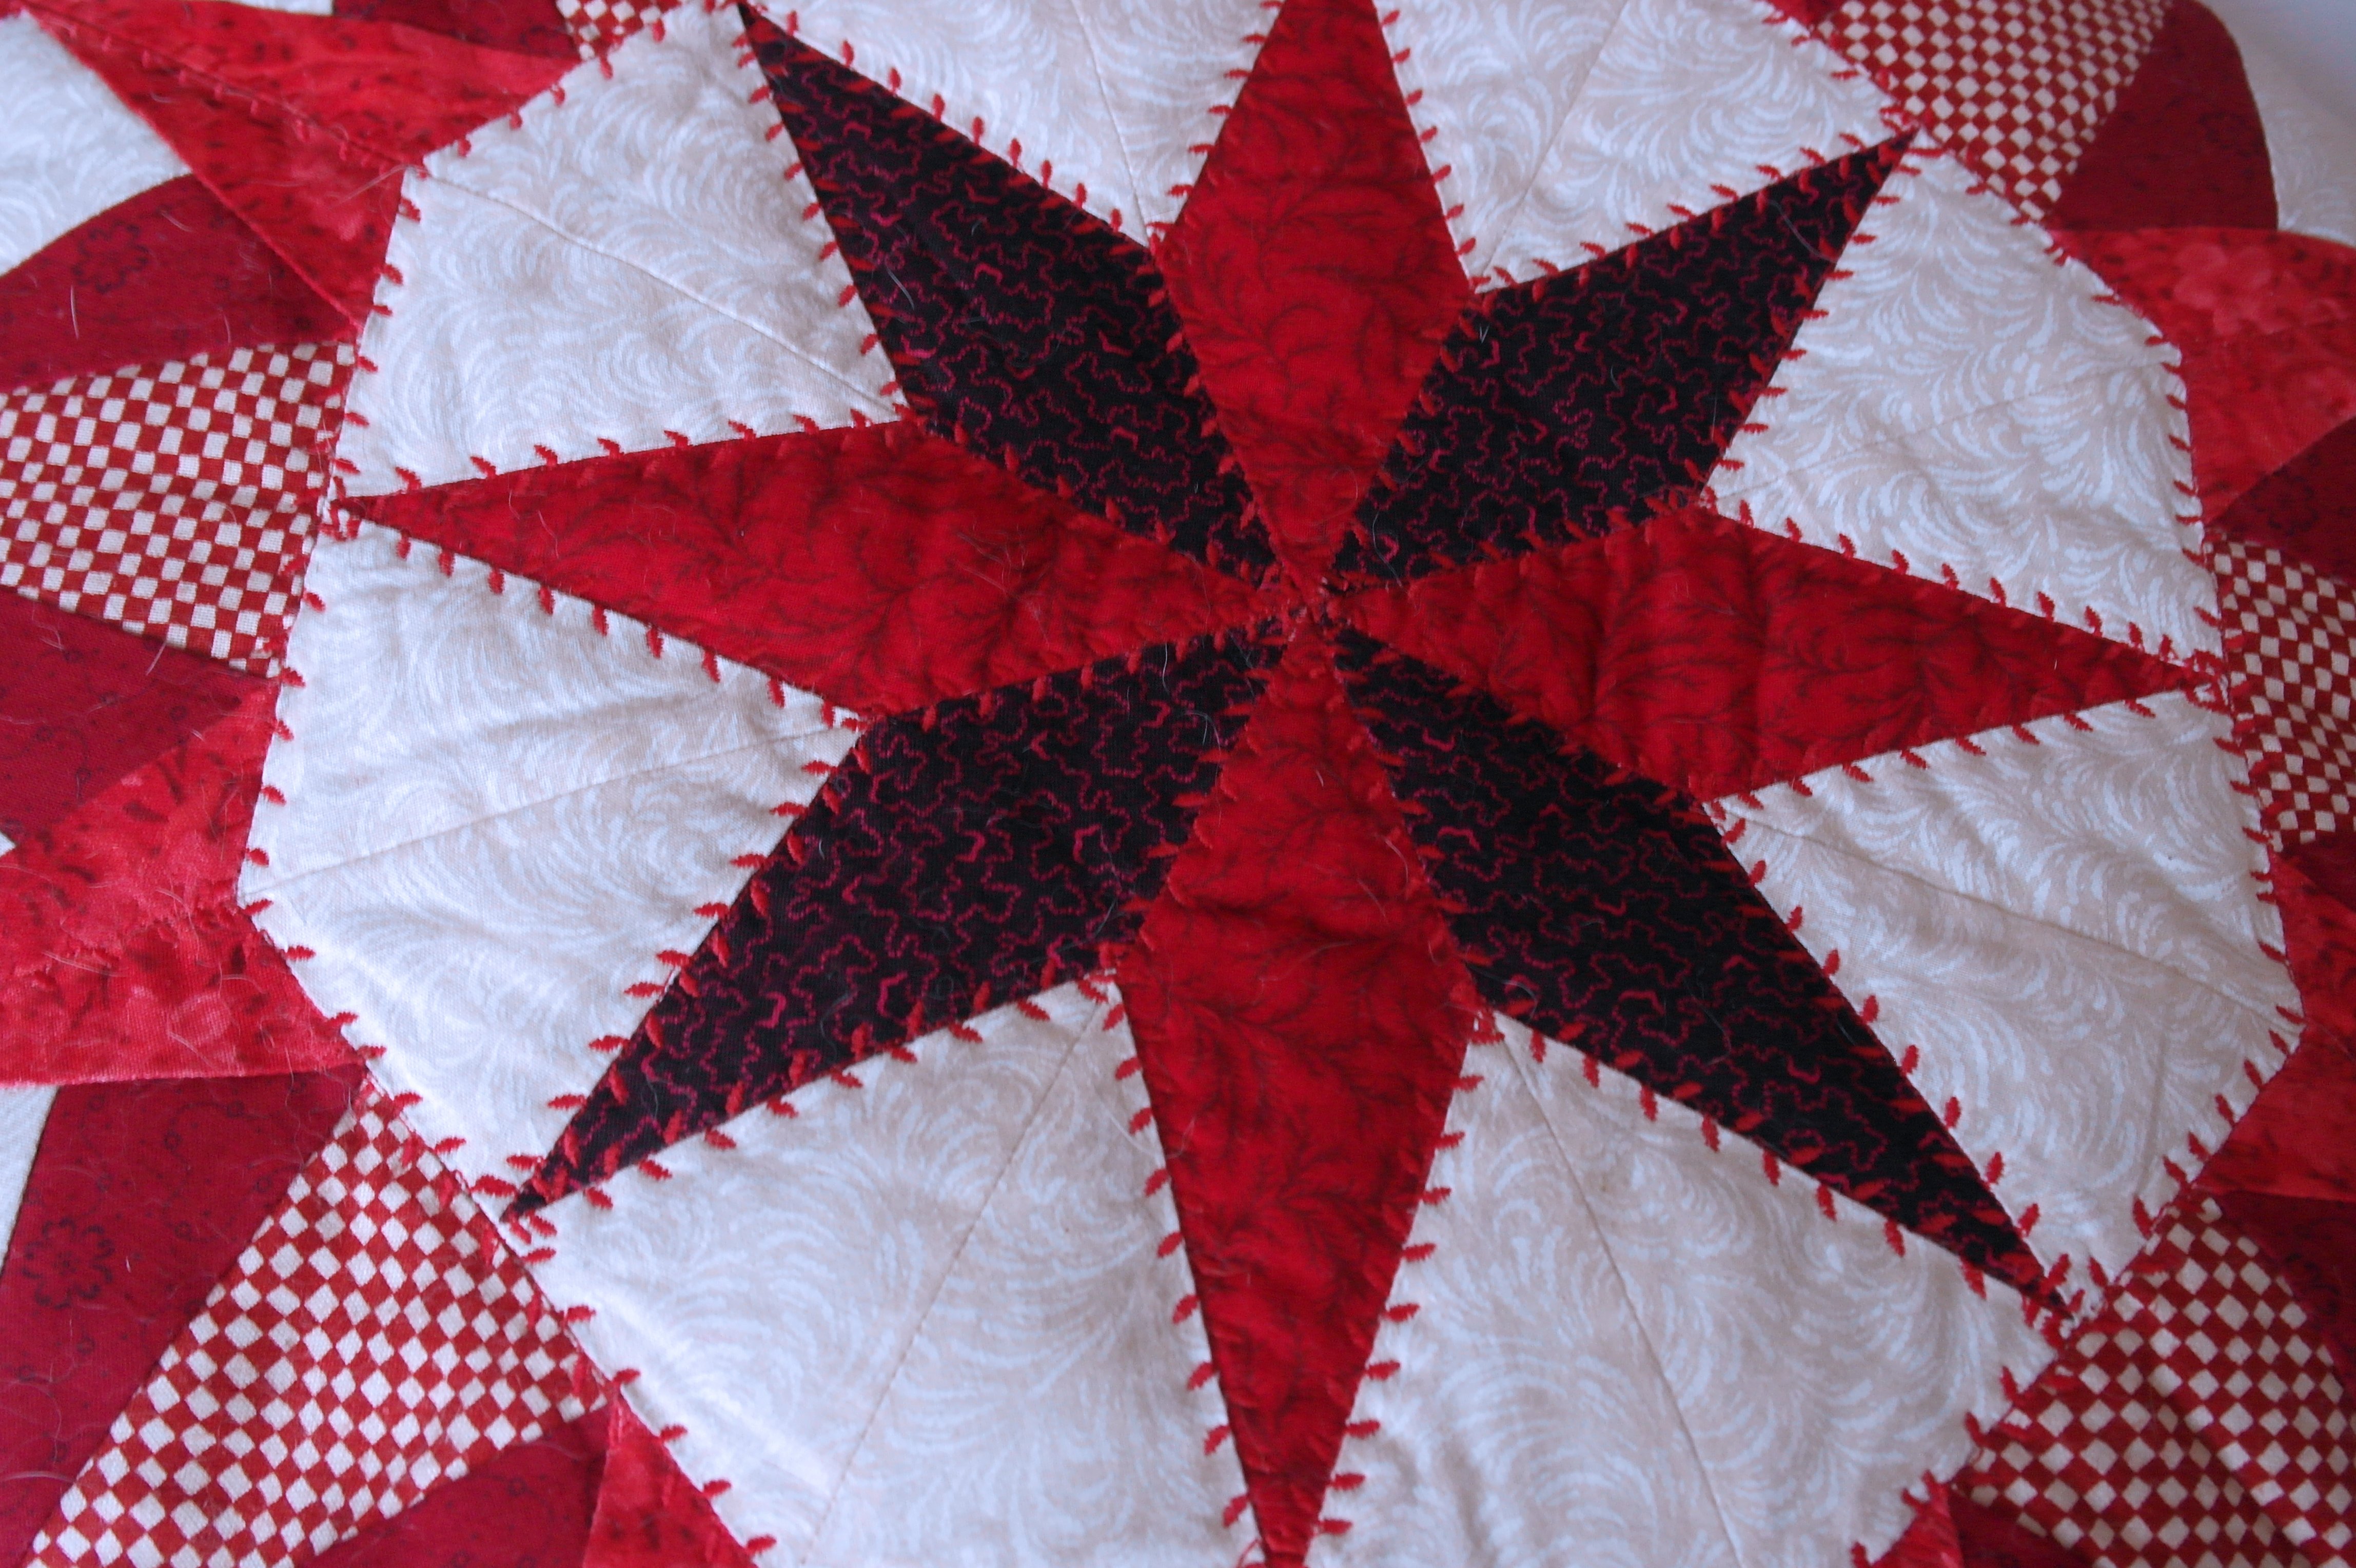
Choose a decorative stitch, use your Open Embroidery Foot #20C to stitch around the pieces of the star and the edges of the octagon close to that.
Quilt the rest the way you want: using more decorative stitches, or free quilting. After quilting, cut back the off-white backing and the batting up to the size of the patchwork octagon.
Cut a piece of backing fabric for the pillow at the same size, place it on your table. Place the sandwich/octagon on top of that, right sides together and sew ALMOST around the octagon, leaving a small opening for turning and filling – hand size.
Turn the pillow, fill it up, as much as possible – even though the pillow will be flat – and hand wet the opening with fine (invisible) stitches.

Isn’t this a nice pillow? It is a suitable size for my wicker chair.
Next time another project: see you then!
Happy Stitching!
Sylvia Kaptein
Sylvia’s Art Quilts Studio


0 Responses