 BERNINA Corporate Blog -
I love giving handmade gifts to my loved ones.
I feel that it shows how much you care about them because you have taken the time to make them something thoughtful. (This is just what I like to do. Any gift that you have put thought in to is also special)
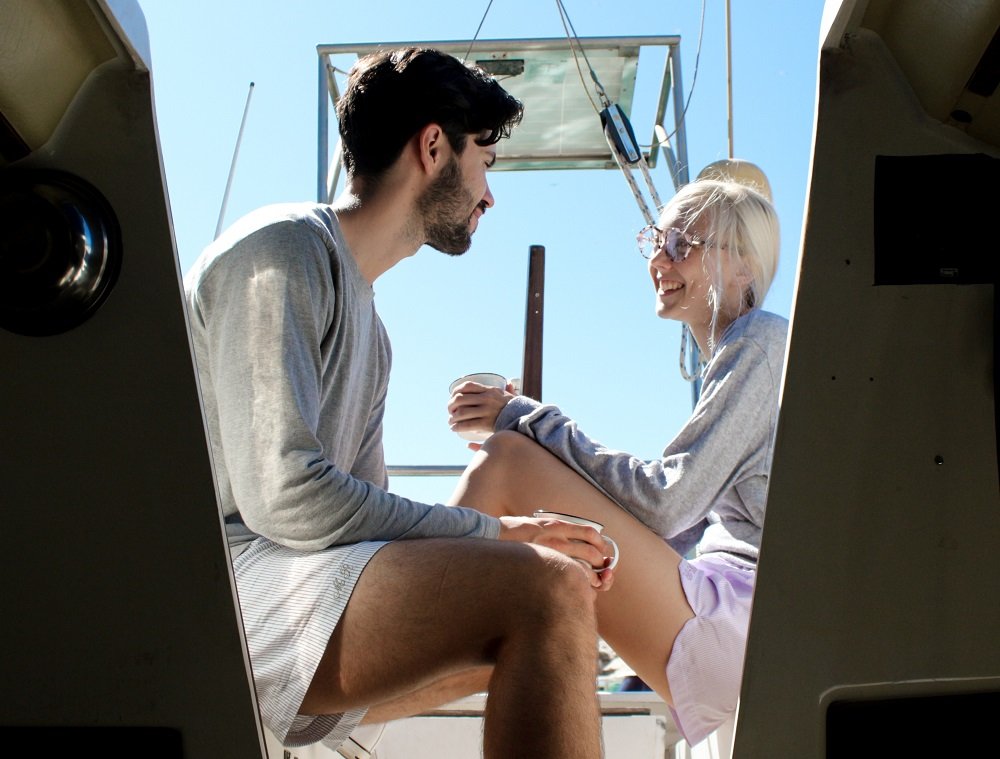
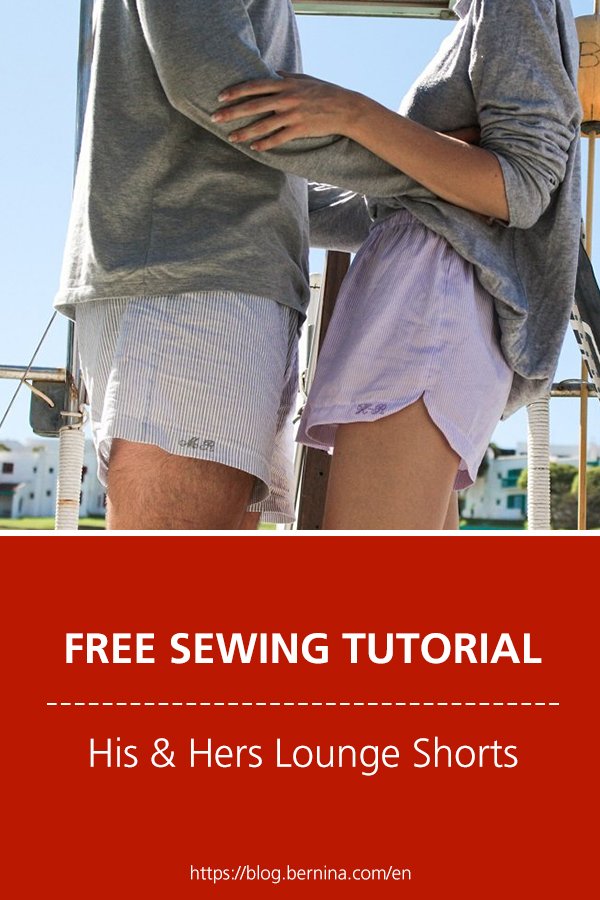
With my boyfriend and my anniversary coming up in March, I wanted to make him something useful. I often make him clothes and other handmade gifts throughout the year. I noticed recently that his wardrobe was lacking in lounging/sleep shorts. So I decided to make him and myself a pair of comfortable shorts with an added personal touch of embroidery.
The Darcy Boxer Shorts pattern by Measure Twice Cut Once was a great starting point as it is a unisex design.
However, there were a few tweaks I made to the pattern so that the shorts would better suit Matt and myself. I’ll share them with you in this post.
We spent the weekend of our anniversary on our family’s little yacht just like we did for Valentines Day in my previous Blog Post.
Due to Covid-19 there was a travel ban and everyone was encouraged to isolate. By staying on the yacht in the nearby holiday town, we got to still experience a holiday without coming in to contact with anyone. The day we got back from our holiday it was announced that our country (South Africa) would implement a 21 day Lock down. I didn’t realize at the time of making our shorts just how much time we would be spending in them!
So if you too are living in isolation, I highly recommend making yourself and family a pair… or a few.
I was able to pick up some fabric to make a few pairs myself before the shops closed for Lock down.
What will be needed:
- Sewing machine
- Embroidery Module
- Overlocker
- Free Pattern: The Darcy Boxer Shorts
- Small/Medium Embroidery hoop
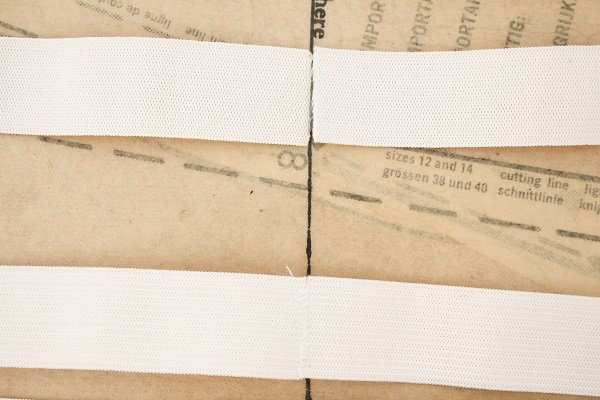
- 3cm wide Elastic (For the mont needed, refer to the Encased Elastic Waistband section)
- 0.5m – 1m of Fabric (Dependent on your size/pattern)
I recommend a light to medium weight woven - 3 small buttons
- Hand sewing needle
- 3-4 reels of Thread to match your fabric
- Contrasting Embroidery Thread
- Embroidery Stabilizer
Pattern Adaptions
Keep in mind that if you want to change the seam allowance or hem allowance amount, do so now. The Seam allowance is 1cm & Hem allowance is 3cm.
Mock Fly
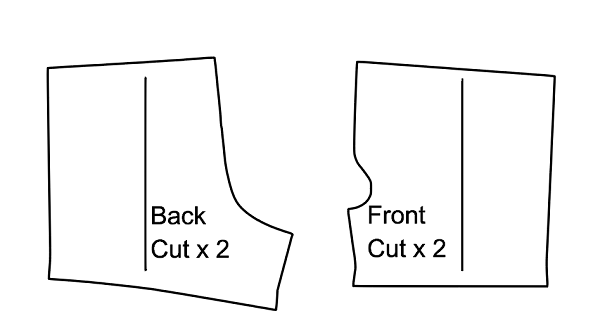
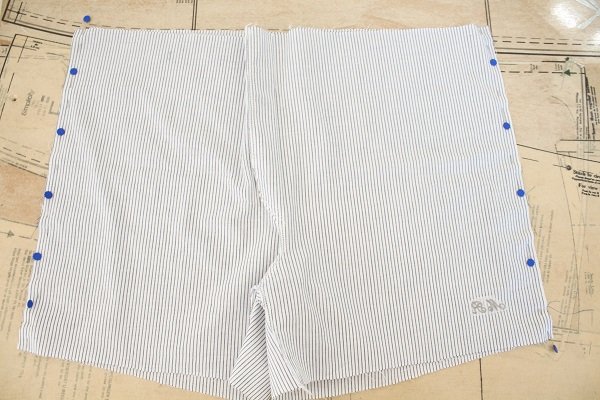
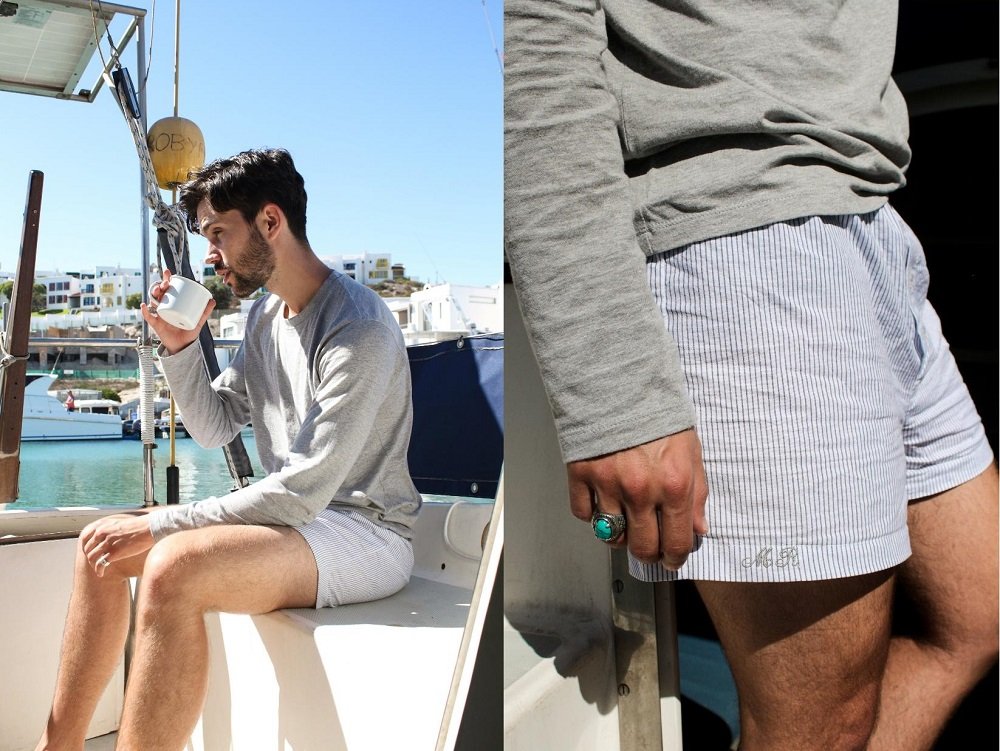
As I wanted to make a mock fly, I used the Left Front piece twice and excluded the Right Front piece.
I also excluded the Fly piece and of course kept the Back pattern piece.
I did this for both mine and Matt’s shorts.
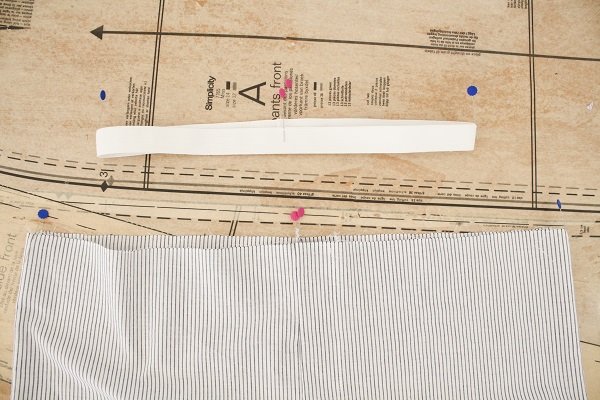
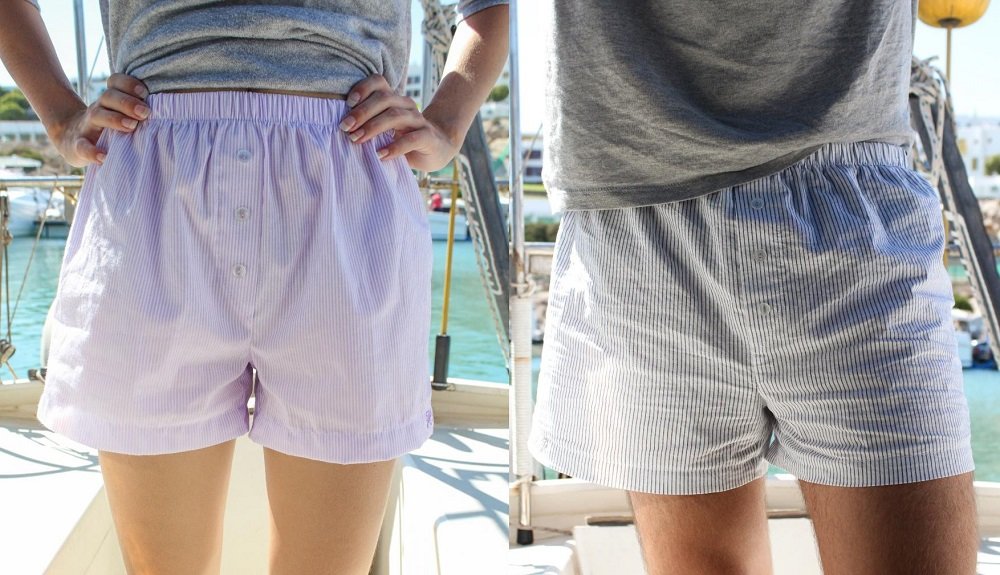
Encased Elastic Waistband
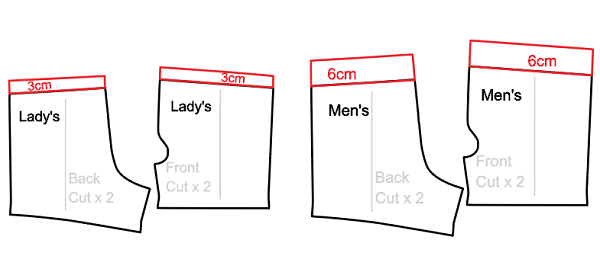
For the men’s version of shorts I added double the width of the elastic (eg. 3cm x 2 = 6cm) to the top of the pattern pieces.
For the lady’s version of shorts I recommend adding just the width of the elastic (eg. 3cm) to the top of the pattern pieces.
However, for my shorts I also added width of the elastic to the top of the pattern pieces as I wanted the shorts to sit above my low waist.
Embroidery
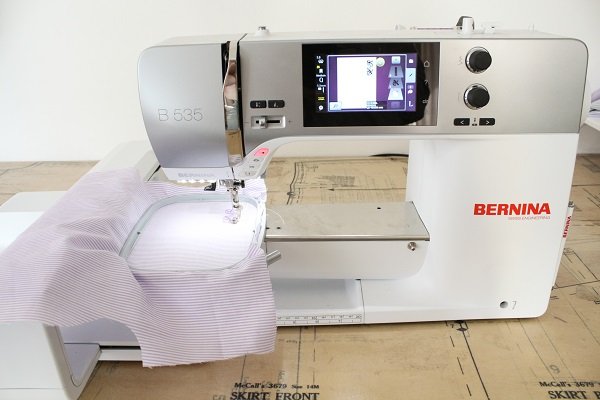
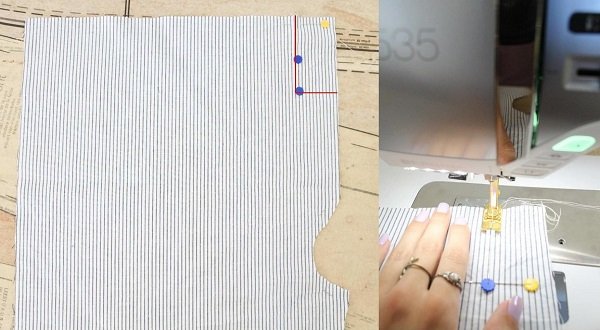
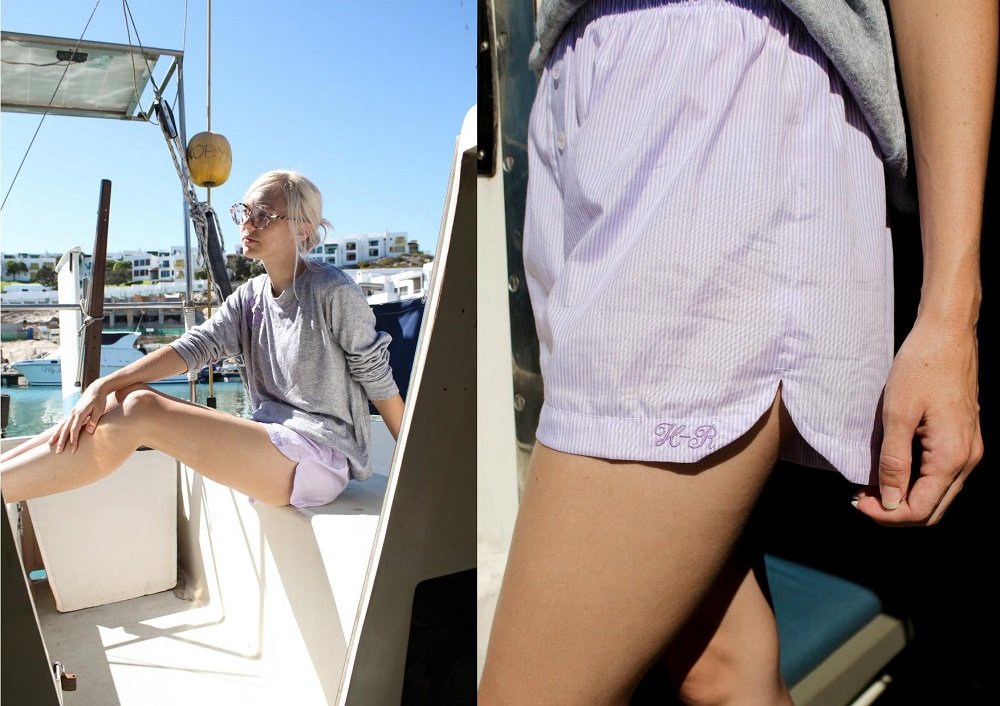
I chose to embroider our initials on the Hem of our shorts. I used a tear away stabilizer under the fabric. I made my embroidery no bigger than 2cm tall so that it would fit snuggly in the Hem.
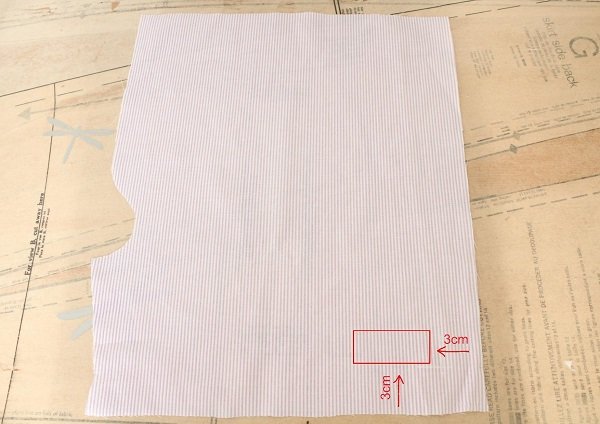 The placement needs to be at least 3cm up from the bottom and 3cm in from the Side of a Front piece.
 I chose to place the embroidery on the Right Front piece of Matt’s shorts and mine on the Left of mine.
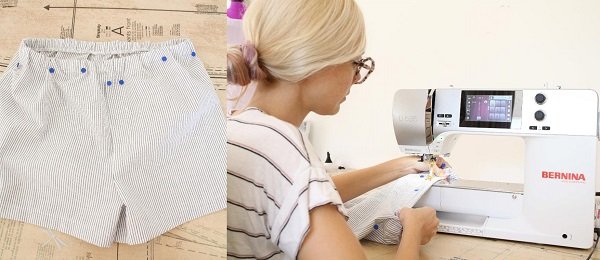
Sewing
Seam allowance is 1cm & Hem allowance is 3cm.
But if you have adapted your pattern, use your chosen Seam allowance & Hem allowance.
Unless otherwise stated, always have the right sides of the fabric together when joining pieces together.
Mock Fly
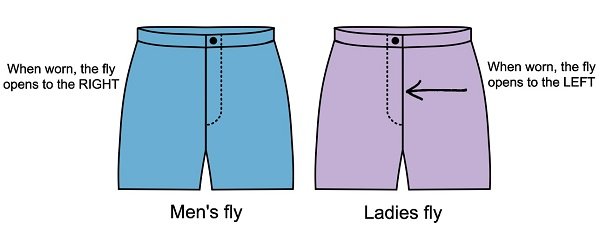 When it comes to the fly, traditionally men have a right opening fly and ladies have a left fly opening.
However, these days anything goes so choose whichever works for you.
I will provide both options in my tutorial. Refer to Blue for the Men & Purple for the Ladies.
- Join the Front pieces together at the Centre Front of the waist.
Sew down the Centre Front the width of the waistband.
For the Men’s shorts: If your elastic is 3 cm, your waistband width will be 6cm + 1cm seam allowance, so the total width will be 7cm.
For the Lady’s shorts: If your elastic is 3 cm, your waistband width will be 3cm + 1cm seam allowance, so the total width will be 4cm.
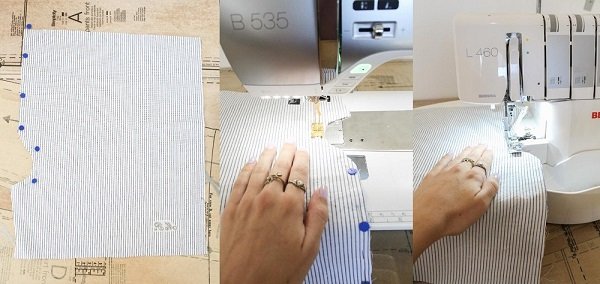
- Match up the rest of the Front pieces and join along the whole Crotch seam, including the fly.
Straight stitch 1 cm seam allowance and then Overlock.
For the Men’s shorts: Start at the Inseam and sew up to the top of the Shorts.
For the Lady’s shorts: Start at the top of the Shorts and sew down to the Inseam.
- Lie the Front piece as flat as possible and press the Fly, creating a crisp fold along the Centre Front
Press the Fly and Seam to the left on the wrong side.
Press the Fly and Seam to the right on the wrong side.

- On the right side, topstitch the Fly in place, follow the curve at the bottom.
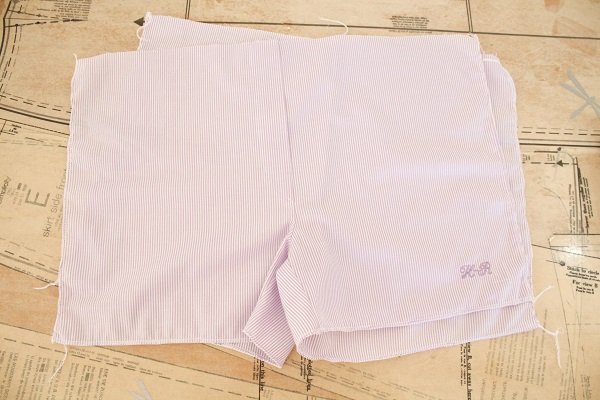
Seams & Hems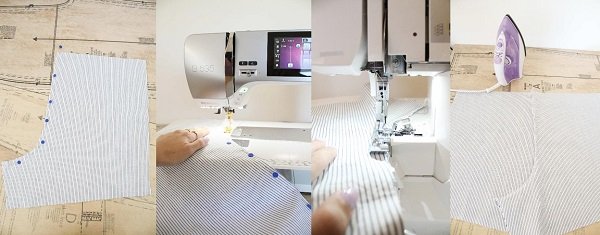
- Match up and join the Back pieces along the Crotch seam.
Straight stitch 1 cm seam allowance and then Overlock.
For the Men’s shorts: Start at the Inseam and sew up to the top of the Shorts.
Press the seams to the left
For the Lady’s shorts: Start at the top of the Shorts and sew down to the Inseam.
Press the seams to the right.

- Now join the Front Piece to the Back piece at the Inseam.
The Crotch seams should be pointing opposite directions where they meet at the Inseam, this is to help reduce bulk at the Crotch join.
Straight stitch 1 cm seam allowance and then Overlock.
Press the seam towards the Back.
- If you are going to do a split hem, skip this step.
Join the Front Piece to the Back piece at the Side Seams.
Straight stitch 1 cm seam allowance and then Overlock.
Press the seams towards the Back.

- If you are going to do a split hem, skip this step.
Sew a normal hem
Neaten the Hem edge with the Overlocker, fold up 3cm, secure with straight stich and press.
Curved Split Hem
For my shorts I did something different, a curved split hem.
- Overlock the raw Hem edges and the Side Seams.

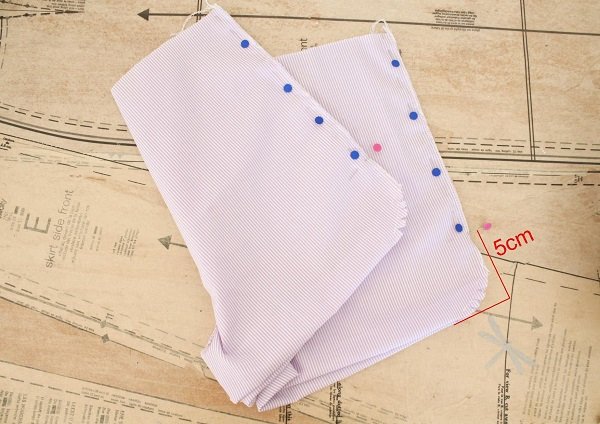
- Fold the hem up 3cm with right sides together and pin at the Side Seams.
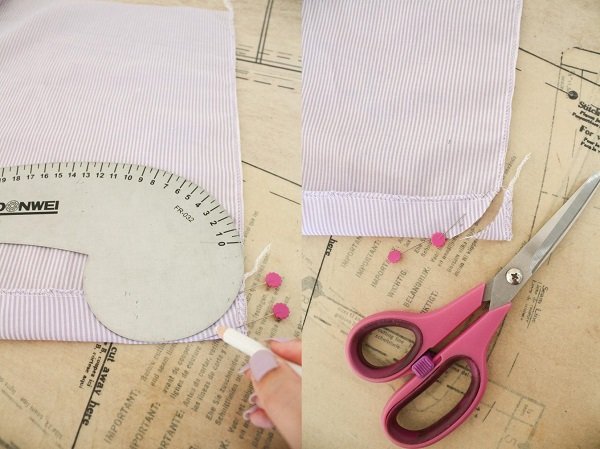
- Using something curved, draw a curved line that tapers to nothing at the Side Seam and the Hem fold.
Pin just in from the line and then cut along the line.
(Use the off cut as a reference for the other 3 corners)
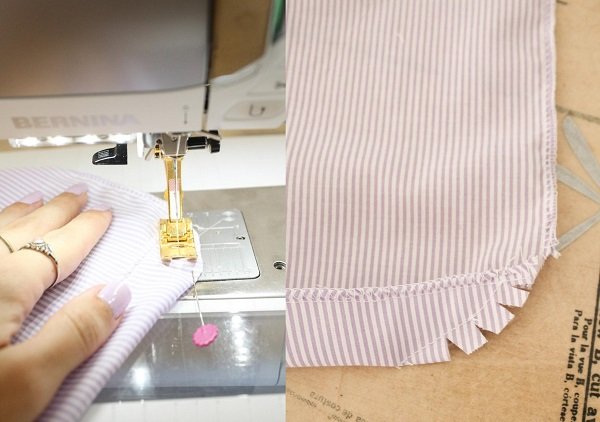
- Straight stich along the curve with a 1cm seam allowance and then nip around the curve to help reduce bulk.

- Repeat for the other side of the Hem and the other leg.
- Join the respective Front and Back pieces at the Side Seams.
Stop 5cm from the bottom of the Hem. (You can do more or less depending on how long a slit you want)
Straight stitch 1 cm seam allowance.
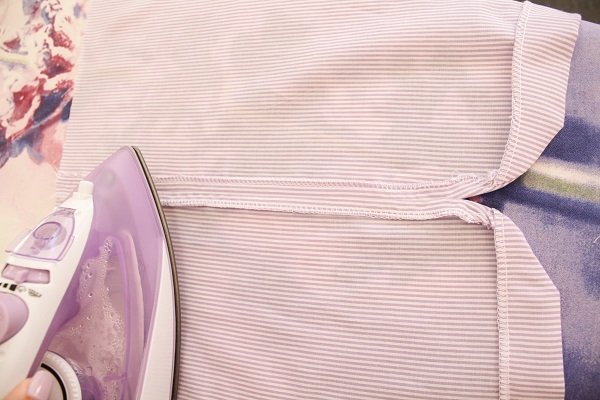
- Turn the hem right side out and press.
Press the Side Seams open.
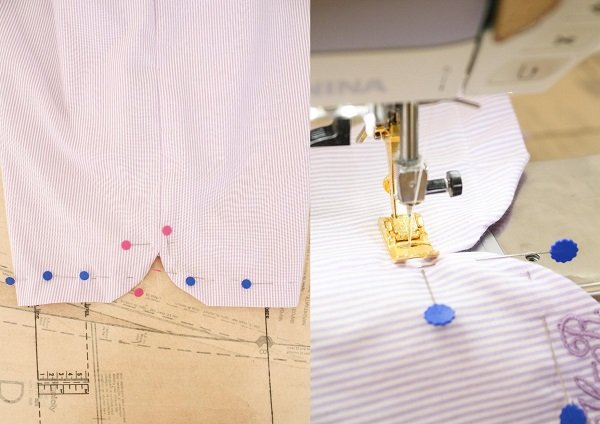
- Topstitch the Hem in place with a 2.5cm allowance.
Start at the Inseam and when you get to the Split Seam, stop 1cm from the Split and continue topstitching around the Split with a 0.6cm allowance. Then continue topstitching the Hem on the other side of the Split Sem.
Give it a press.
Encased Elastic Waistband
With regards to how much elastic is needed the Darcy Boxer Shorts Pattern designer says:
“Measure the opening, reduce by one third and then wrap that length around you before you cut. If you like a firmer or looser fit adjust as necessary. Remember these are boxers, you want them to be comfortable!”
- In the pattern it says to join the ends of the elastic by butting the raw edges together and securely zigzag stitching over the join.
- Divide the Elastic and the top of the shorts in to 4 equal parts.

- Match up the marks and pin the Elastic to the wrong side/inside of the Shorts.
Secure the Elastic to the raw top edge with the Overlocker. Stretch the Elastic to fit the opening as you sew.
- Fold the top of the shorts over, encasing the Elastic then straight stitch along the overlocked edge, securing the elastic in place.
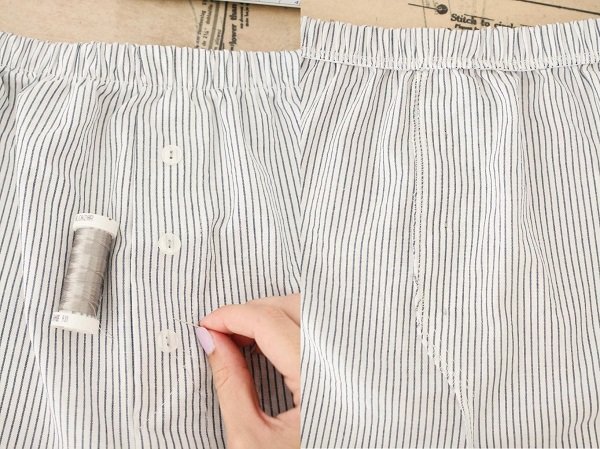
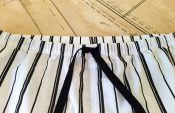
- Then add a button or 3 to the fly.
Make sure to go through all the layers with your needle and thread.
(If you look closely, you can see my stitches on the inside in the second picture)
Tips
- These shorts can be made in woven or knit fabrics.
- You can of course follow the pattern’s original instructions exactly, my way is just a different option. The pattern is very versatile!
I would love to see what you make, please feel free to share with me!
Also tag the pattern designer @_measuretwice or use the tag #darcyboxershorts
Instagram
Facebook
-Hannah-Rose


0 Responses