 BERNINA Corporate Blog -
A great feature with the BERNINA Embroidery Software V8 is Candlewicking: exploring this option is great, because there are many variations to work with.
Candlewicking is a form of white-on-white embroidery, traditionally working with unbleached cotton threads on unbleached muslin. The name is derived from the wick of a candle. Such an elaborate project was made with many variations: traditional stitches and raised stitches combined. Mostly subjects from nature, such as flowers, insects, trees etc. were made. Bedspreads and smaller objects took a lot of time before it was finished, but what wonderful objects they were.
 The bed spread above is entirely made via Candlewicking: how many hours it took is not known, but I can imagine it took quite some time. The cut-out corners are for using this bead spread with a four-posted bed.
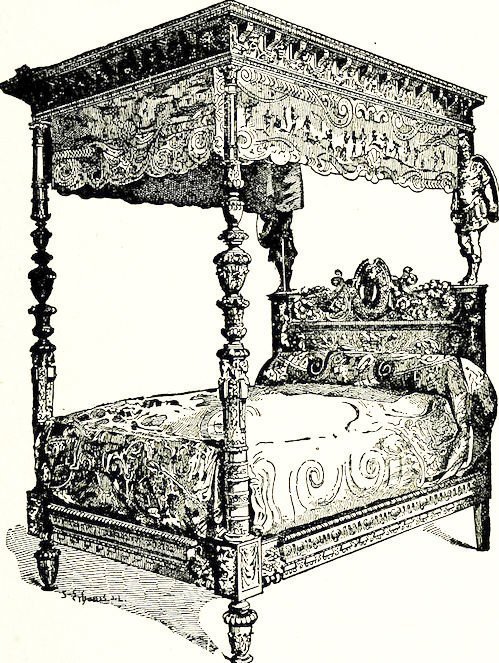
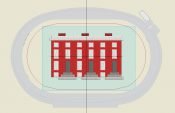
This is such a bed: now you can see how the cut-out corners of the bed spread were necessary to prevent bulk at the corners.

Via V8 you can design your own Candlewicking motifs. The dots of stitches can are embroidered by placing stitches on top of each other, in many directions. You can place them as a border,
but also as a fill, to cover an entire object. I don’t think you will make a bed spread with these stitches, but creating a design for a pillow or another small project is a lot of fun.
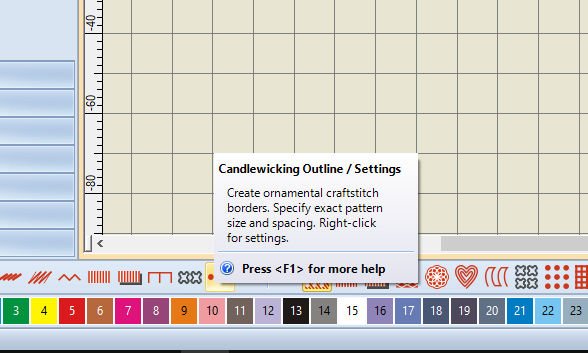
There are two options/icons to be used: Candlewicking outline – use it for borders,
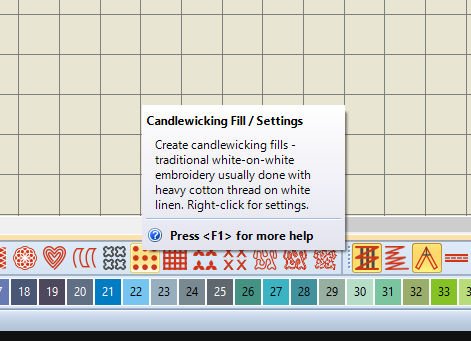
or Candlewicking fill – directly after clicking on one of these two icons, those stitches are activated.
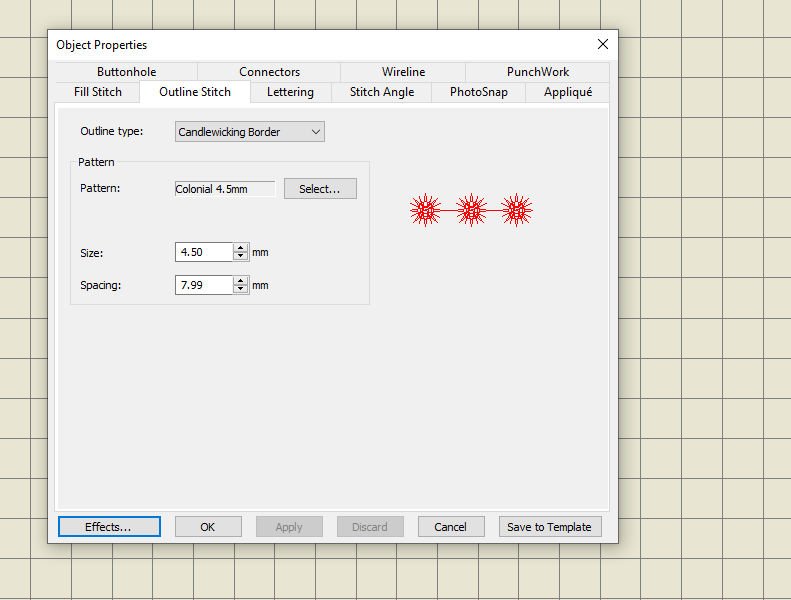
For Object Properties: left click on the icon, to be able to change settings, or even choose different patterns.
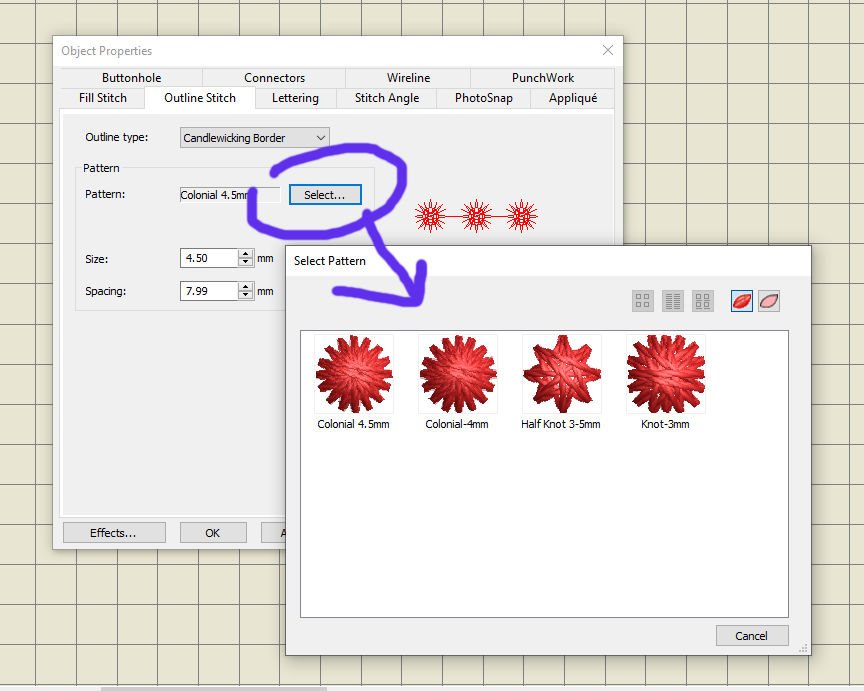
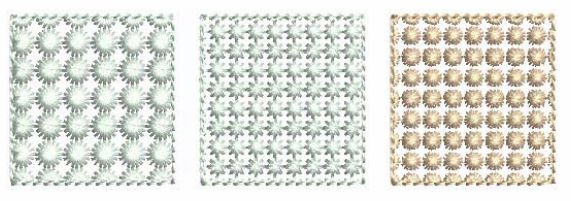
There are 4 different patterns: Colonial 4.5mm, Colonial 4mm, Half Knot 3.5mm and Knot 3mm. Click and select, changing the appearance of the stitches. Remember this will take some time, the more intricate the stitch the more time it will take your embroidery machine to make the stitches. Change size and spacing for more effect.

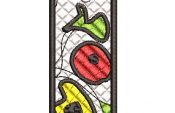
I’ve drawn a line (left toolbar ‘Toolboxes’, ‘Open Freehand’ – using 10mm sized Colonial 4.5mm shapes. Enlarged the image for you so you are able to see how the stitches are made. They are actually stars, where the arrows are pointing to start and finish from one side to the other.
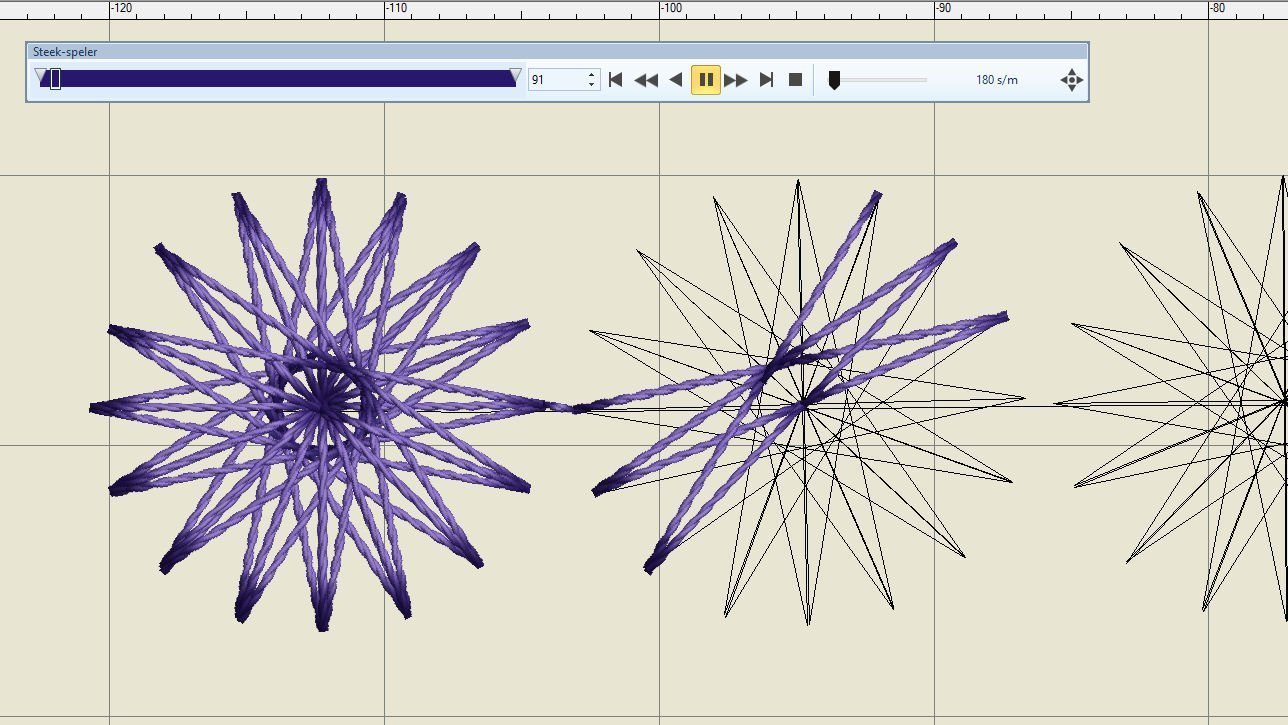
If you want to see how the Candlewicking is made, use ‘Stitch Player’, be sure to play slowly, so you can see how it is done.

I am often zooming in to see my design up close, to understand how it will be made. Making many drawings, changing the stitches gives me insight information which I can use for future projects.
The frame/border I’ve designed it not that large – just 10x10cm, and the stitch count is not too bad also: 1.514. But remember that your machine has to finish each stitch before moving on to the next. It is wonderful to use variegated or multi-coloured machine embroidery threads!

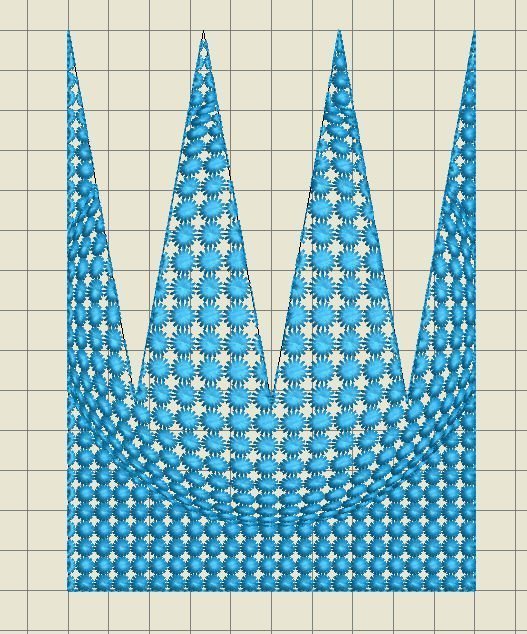
If you want to make a special shape, and fill it with a Candlewicking stitch, use the ‘fill’: the entire object is covered. Notice that at corners and points stitches are adjusted. The crown us just 10 x 5cm in size, but contains 7.486 stitches!
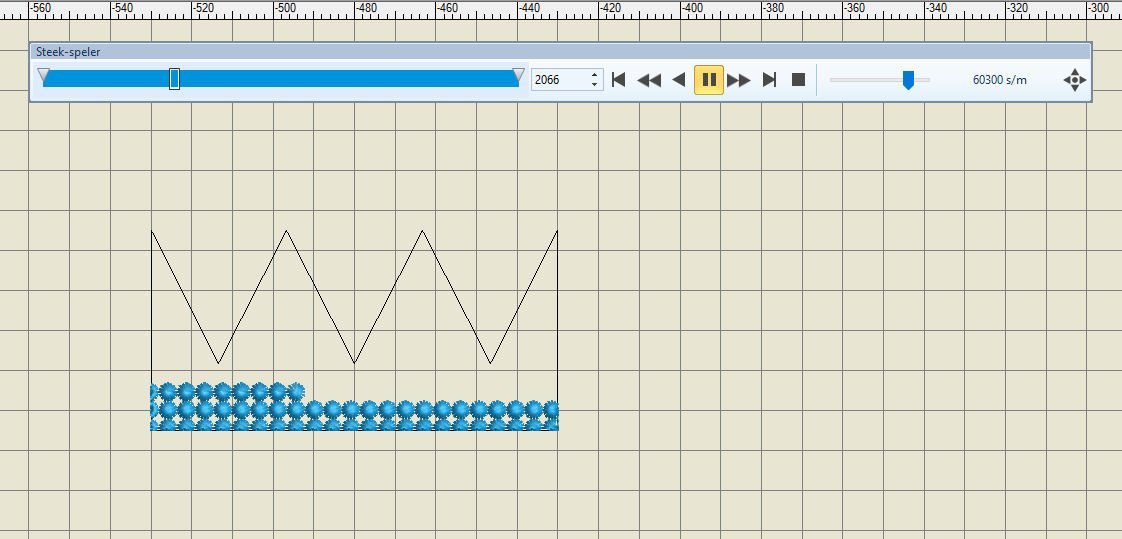
using ‘Stitch Player’ shows you that this crown is build up in rows, from left to right, next row from right to left. So no random pattern, but a special sequence. Sometimes the machine will jump from one side to the next, but rows are connected.
I have stretched the crown: made it much higher, and changed the flat surface into 3D Globe effect: how much fun is this? I’ve used the Reshape tool, the size of the crown is now 10 x 14 cm, with 19.172 stitches!

Changing the size of the stitches – 3mm with the example above – will give you even more stitches: 22.383.
You can imagine that – the denser the pattern, the more time it will take for your machine to finish such a design. Don’t make it too large, just for a small project for a special occasion. Have fun!
Next time another topic: see you then!
Happy Stitching
Sylvia Kaptein
www.sylviasartquilts.nl
Source: Pictures and information about the Candlewicking objects: Wikipedia Commons.

Sylvia, as usual I now have lots of homework to do! ??. You’ve achieved your goal of making us think…. following comments above, there are some wonderful examples here https://www.machineembroideryapplique.com/store
It is really fun working with this option in V8: make the most of it!
Great tutorial thank you. Sarah Vedeler is a designer that uses Candlewicking beautifully. I’m hoping you might consider a follow-on tutorial, possibly partnered with Sarah Vedeler, to talk about some of her tips & tricks with Candlewicking. For example on several of her stunning design collections she’ll 1) distance a row of candlewicking w/o having a jump stitch. Is that approach done successfully simply one at a time, with start/stop secure stitch? 2) such a row of single candlewicks are different sizes. Is that approach simply a version of #1 above where each individual candlewick is set in the SW as a different design ?
This is just a one time topic to explain the basics. From there users V8 can explore the multiple possibilities.