 BERNINA Corporate Blog -
Many blocks with the Sylvia’s Bridal Sampler quilt are fast and easy. But often quilters are not aware of the necessary direction of the seam allowances, to be able to make sections/fabrics fit. It is important to:
- Press the seam allowances in a certain direction
- Be sure the seam allowances with the cross sections are placed in opposite direction
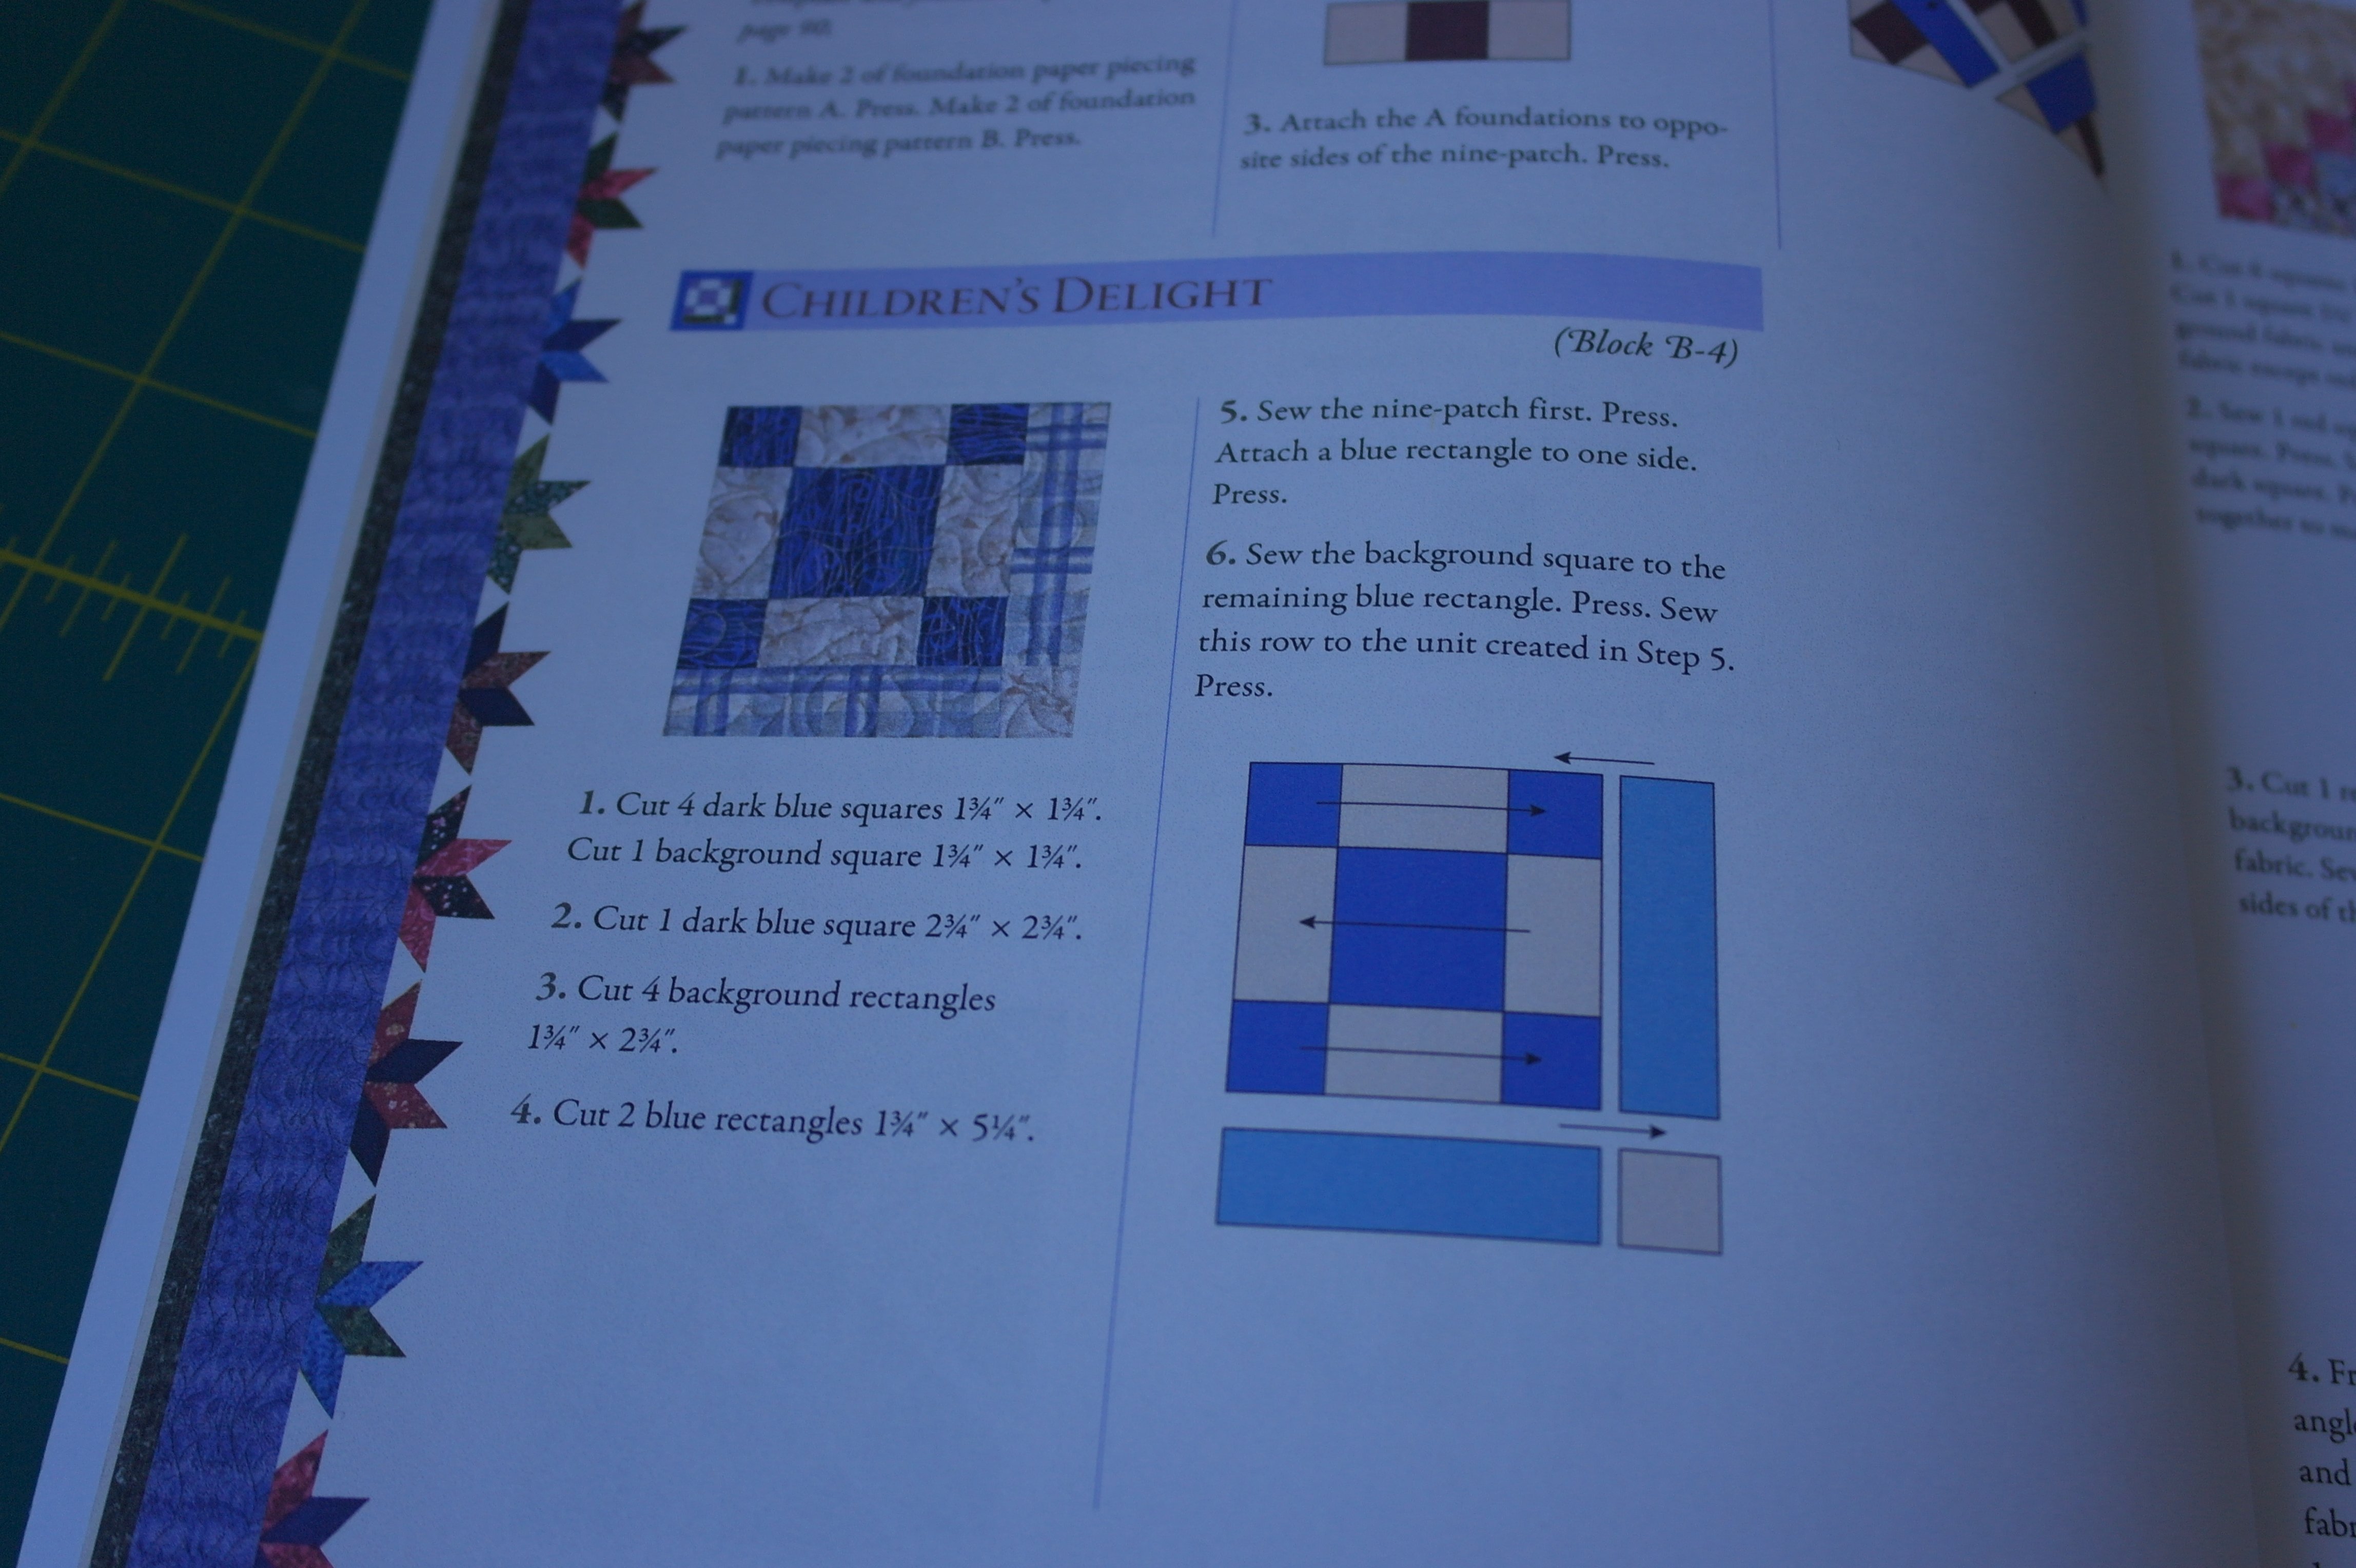
I have been working on Block B-4 (page 24): a simple block, for which I have selected 4 fabrics instead of 3. It is traditionally made, by cutting fabrics, sewing them together. The arrows are indicating the direction of the seams, if you are working via that technique.
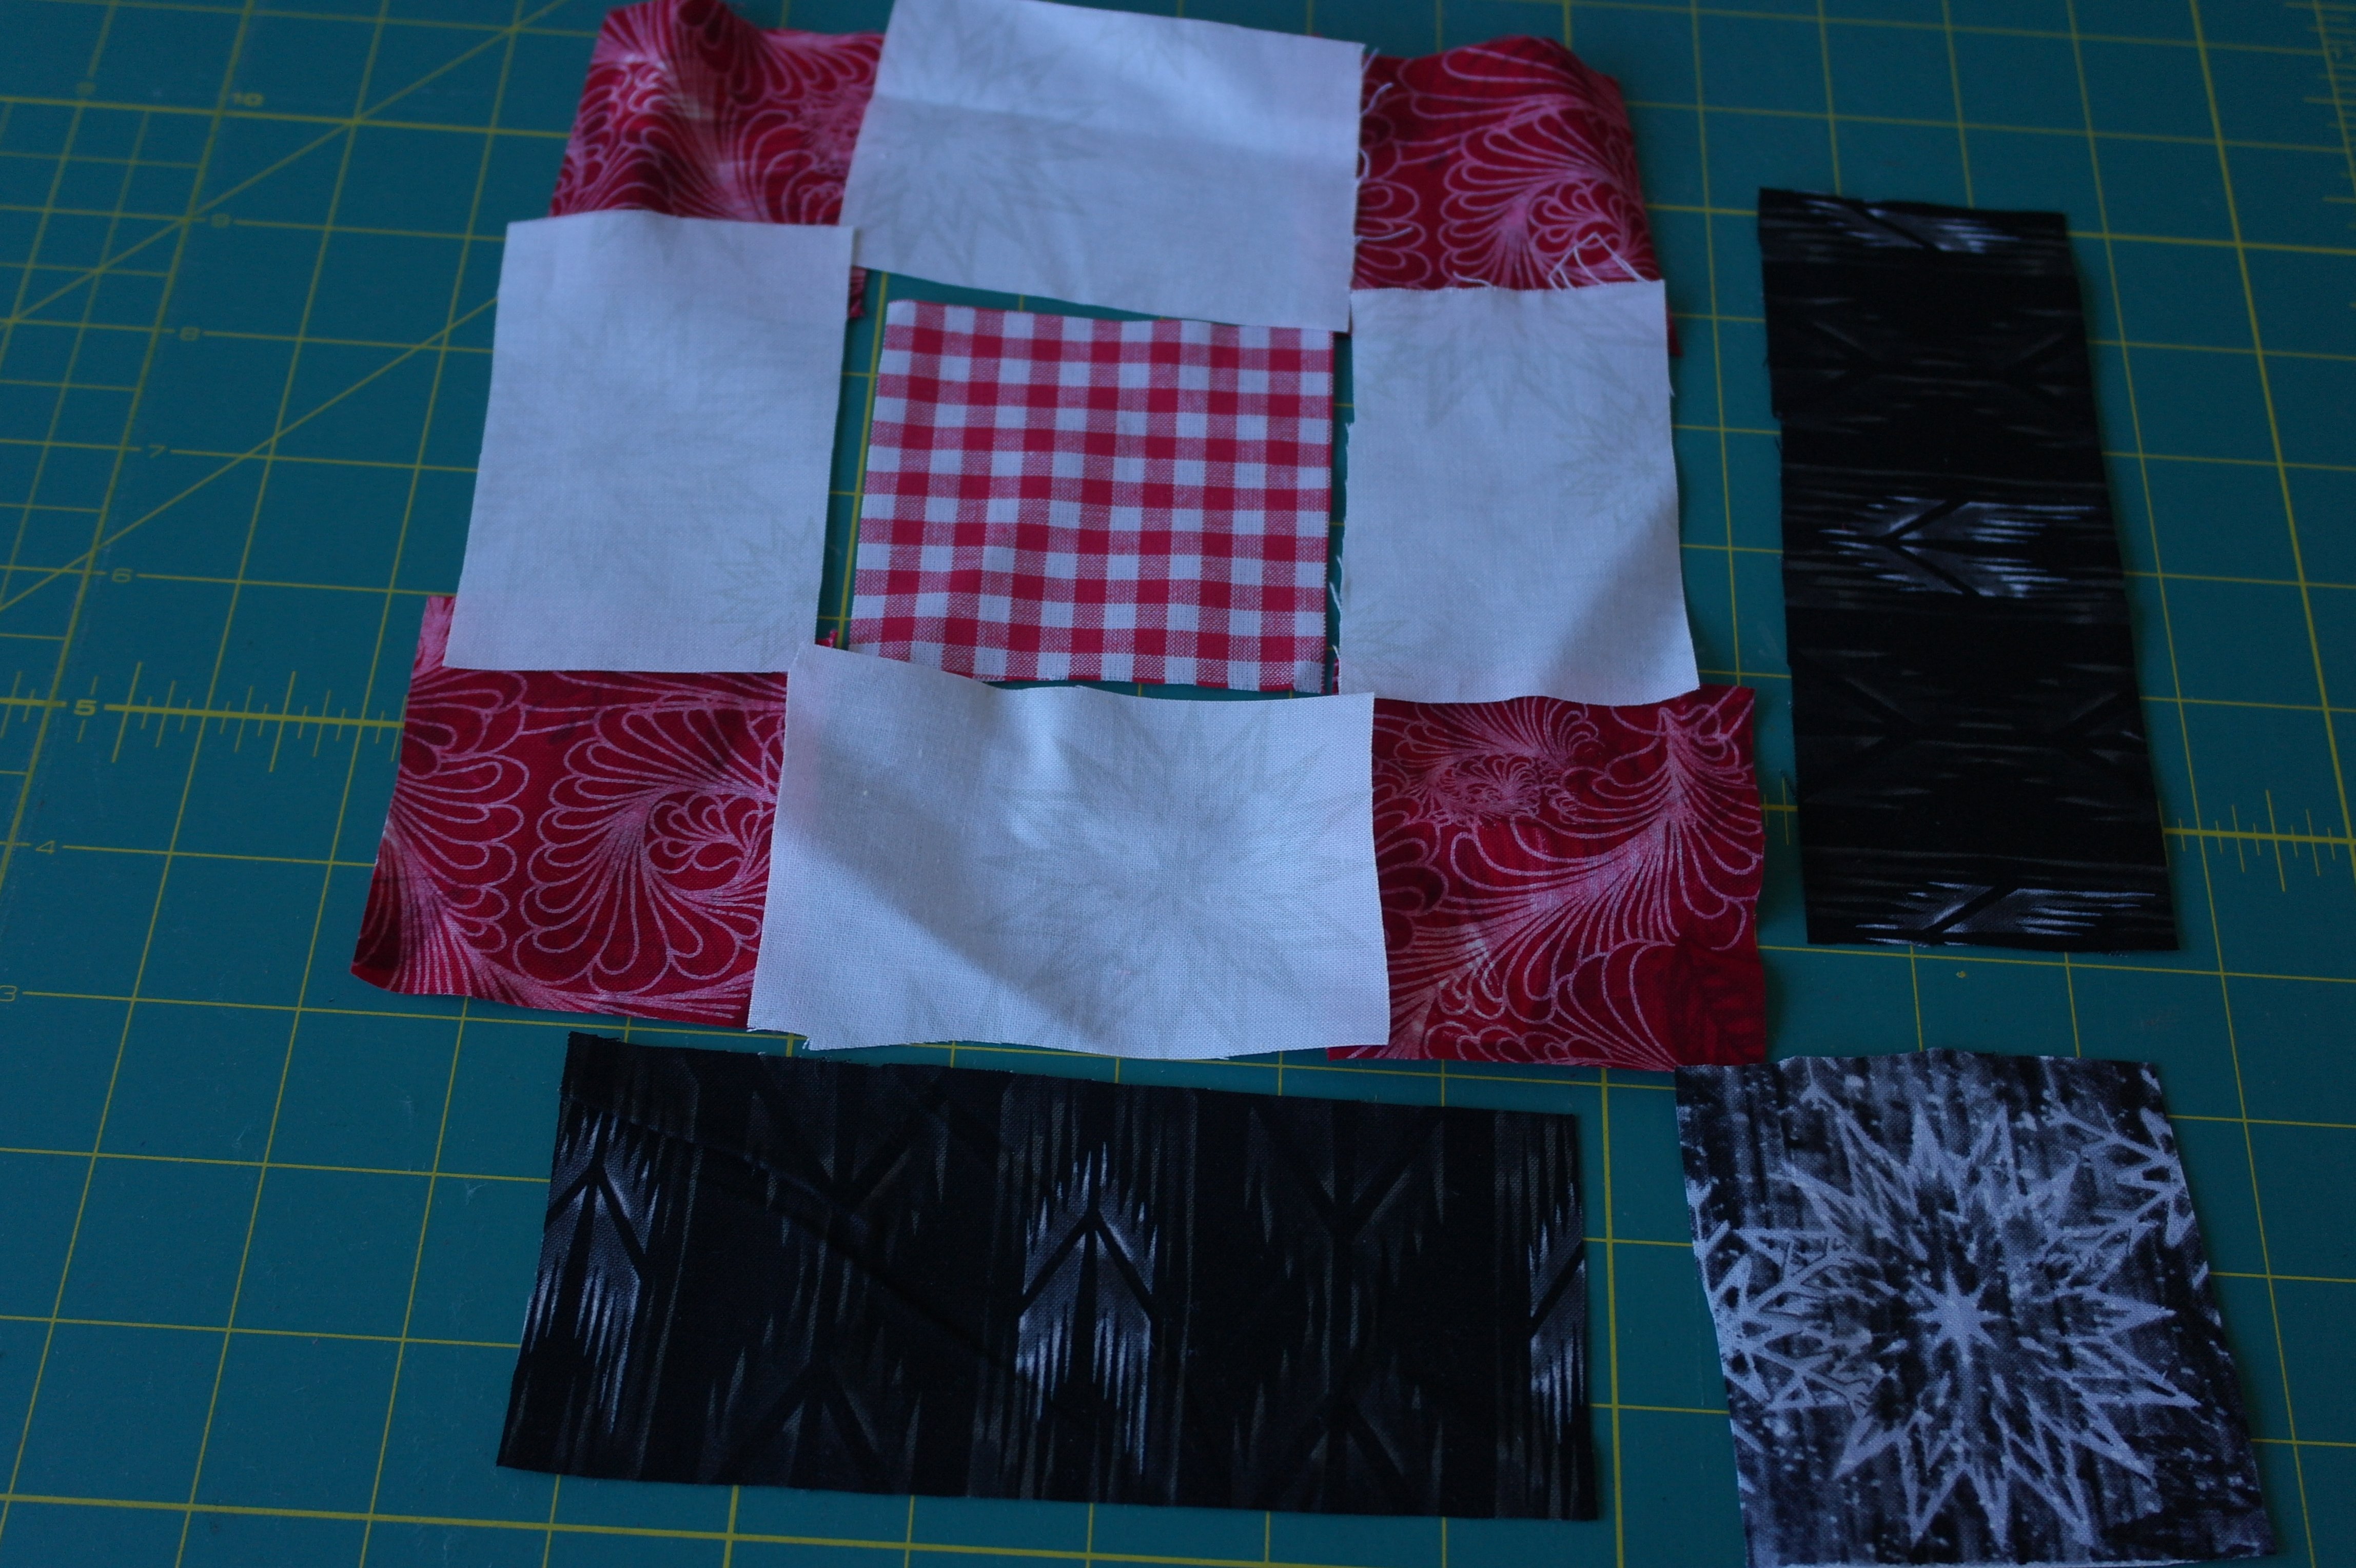
I have selected these fabrics, the square bottom right is different (4th fabric), because I didn’t want to cut a white fabric, as with the original block.
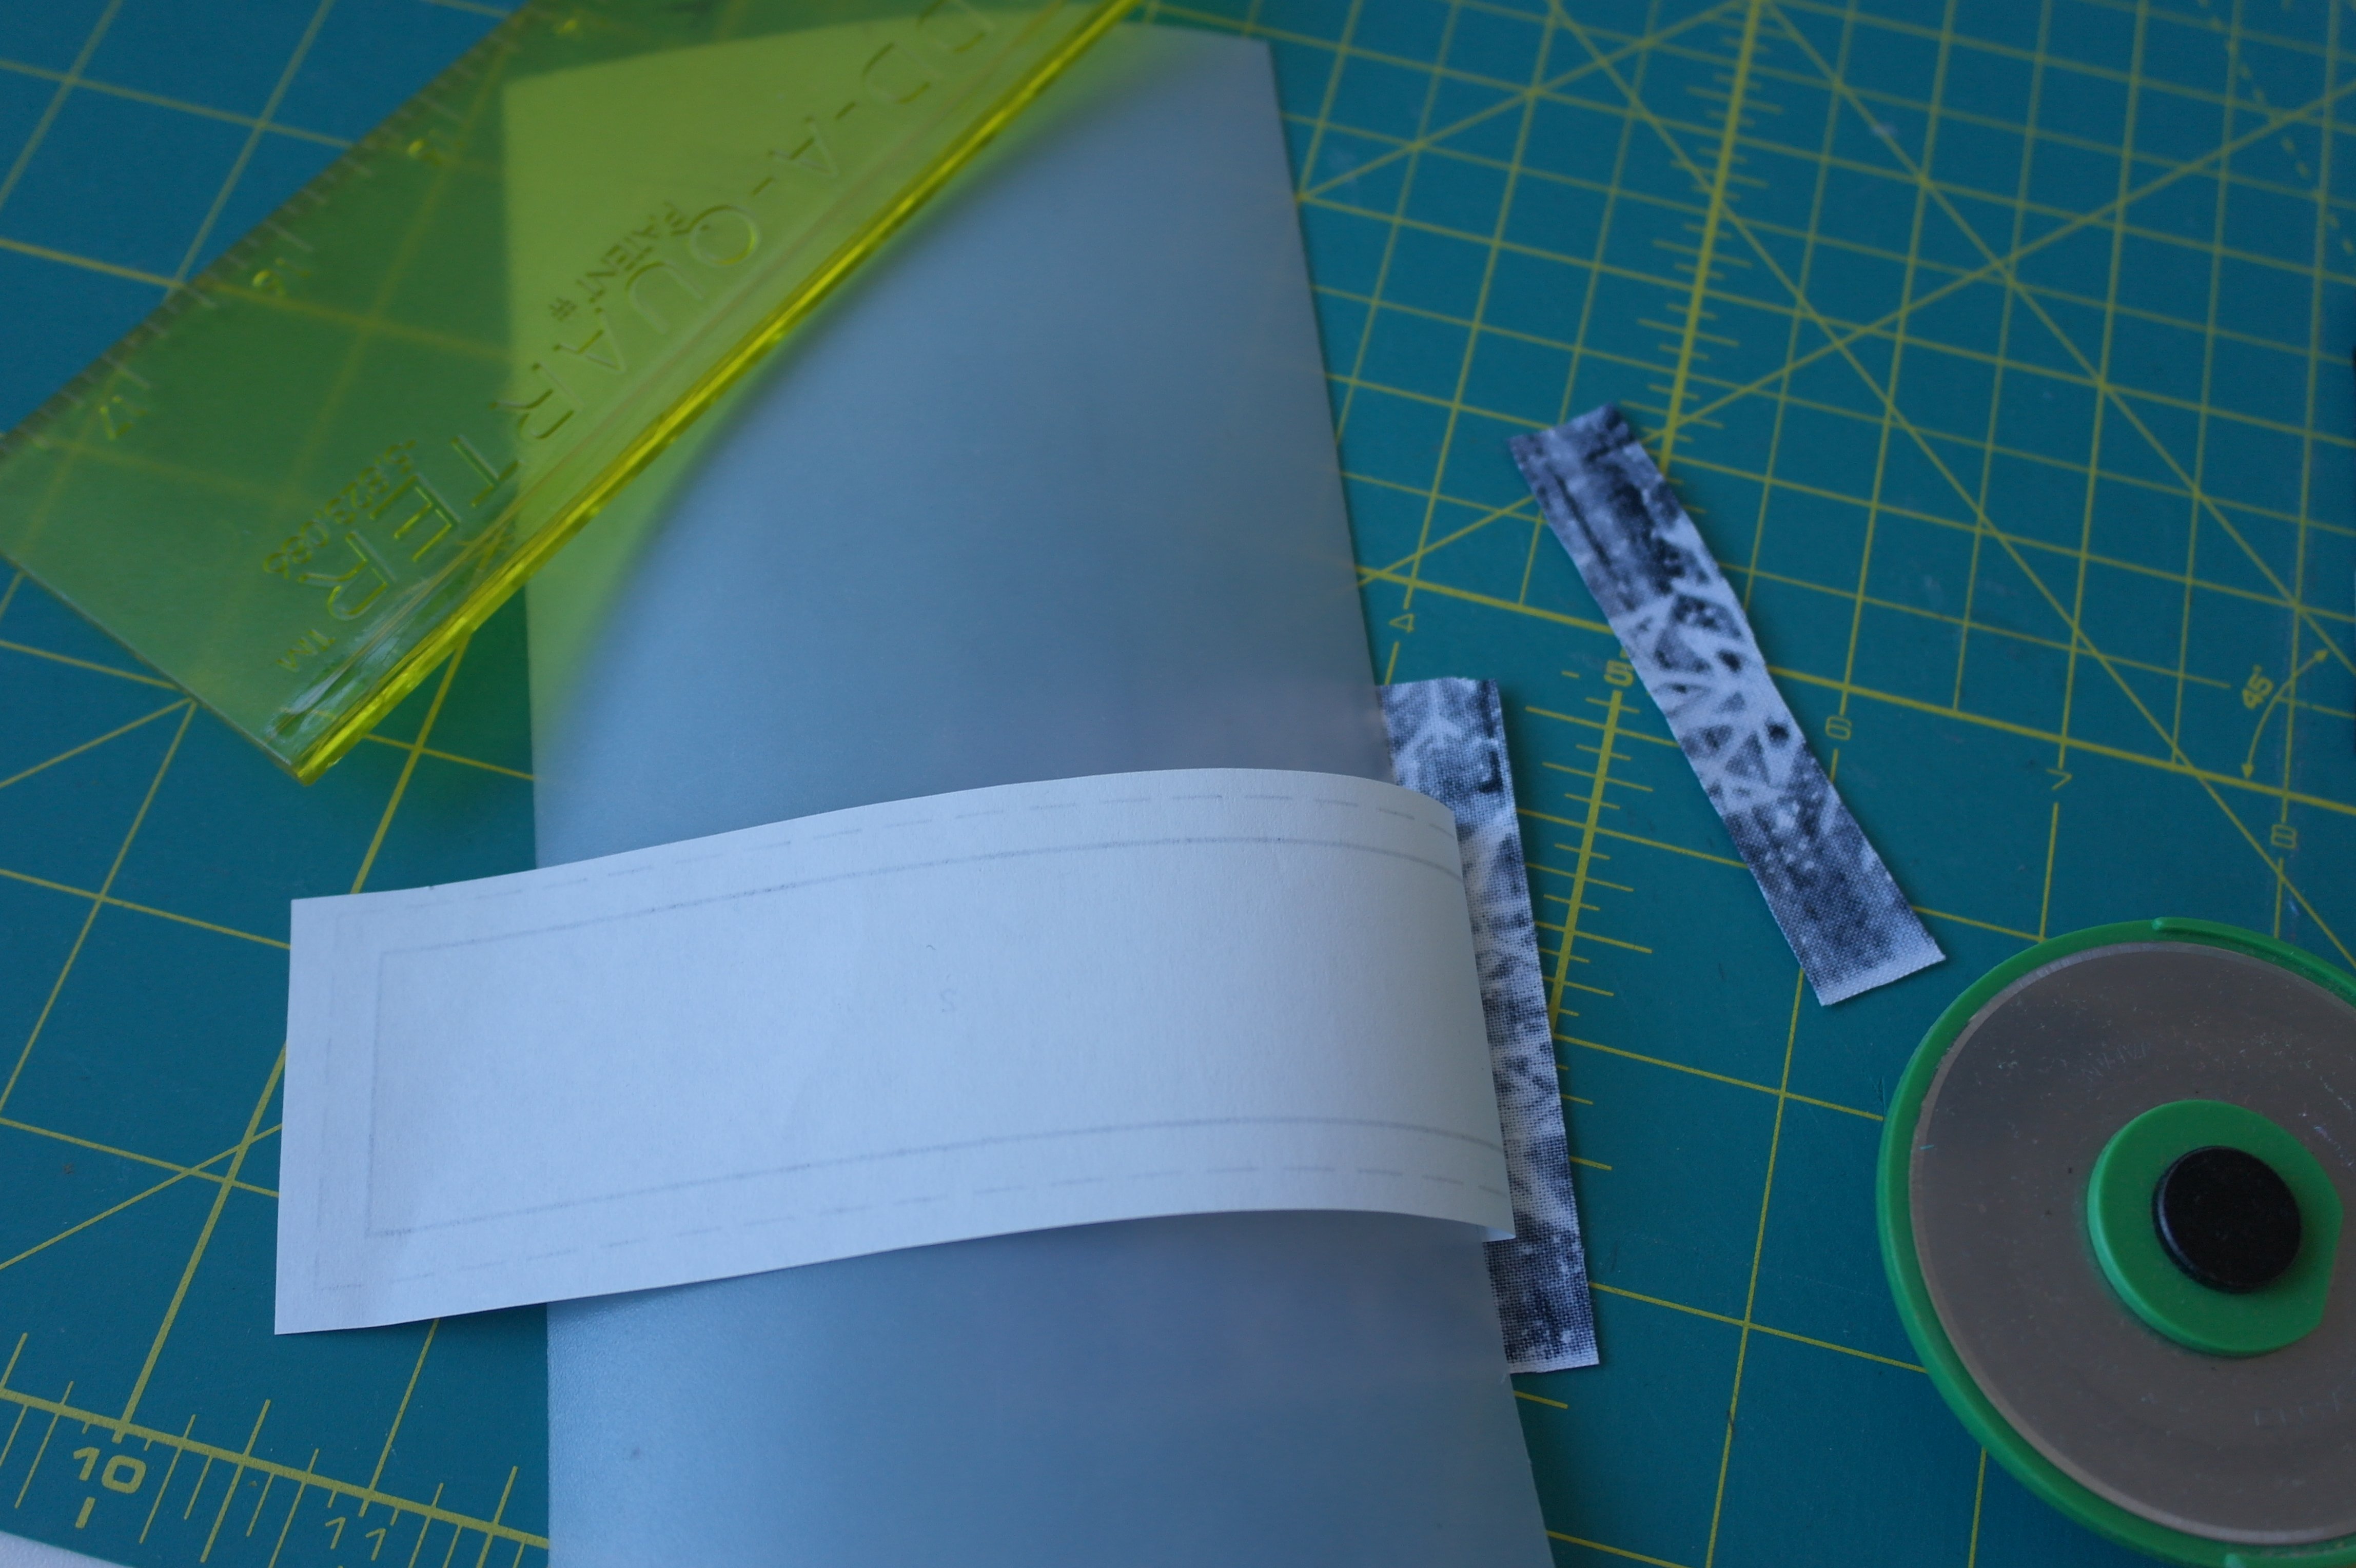
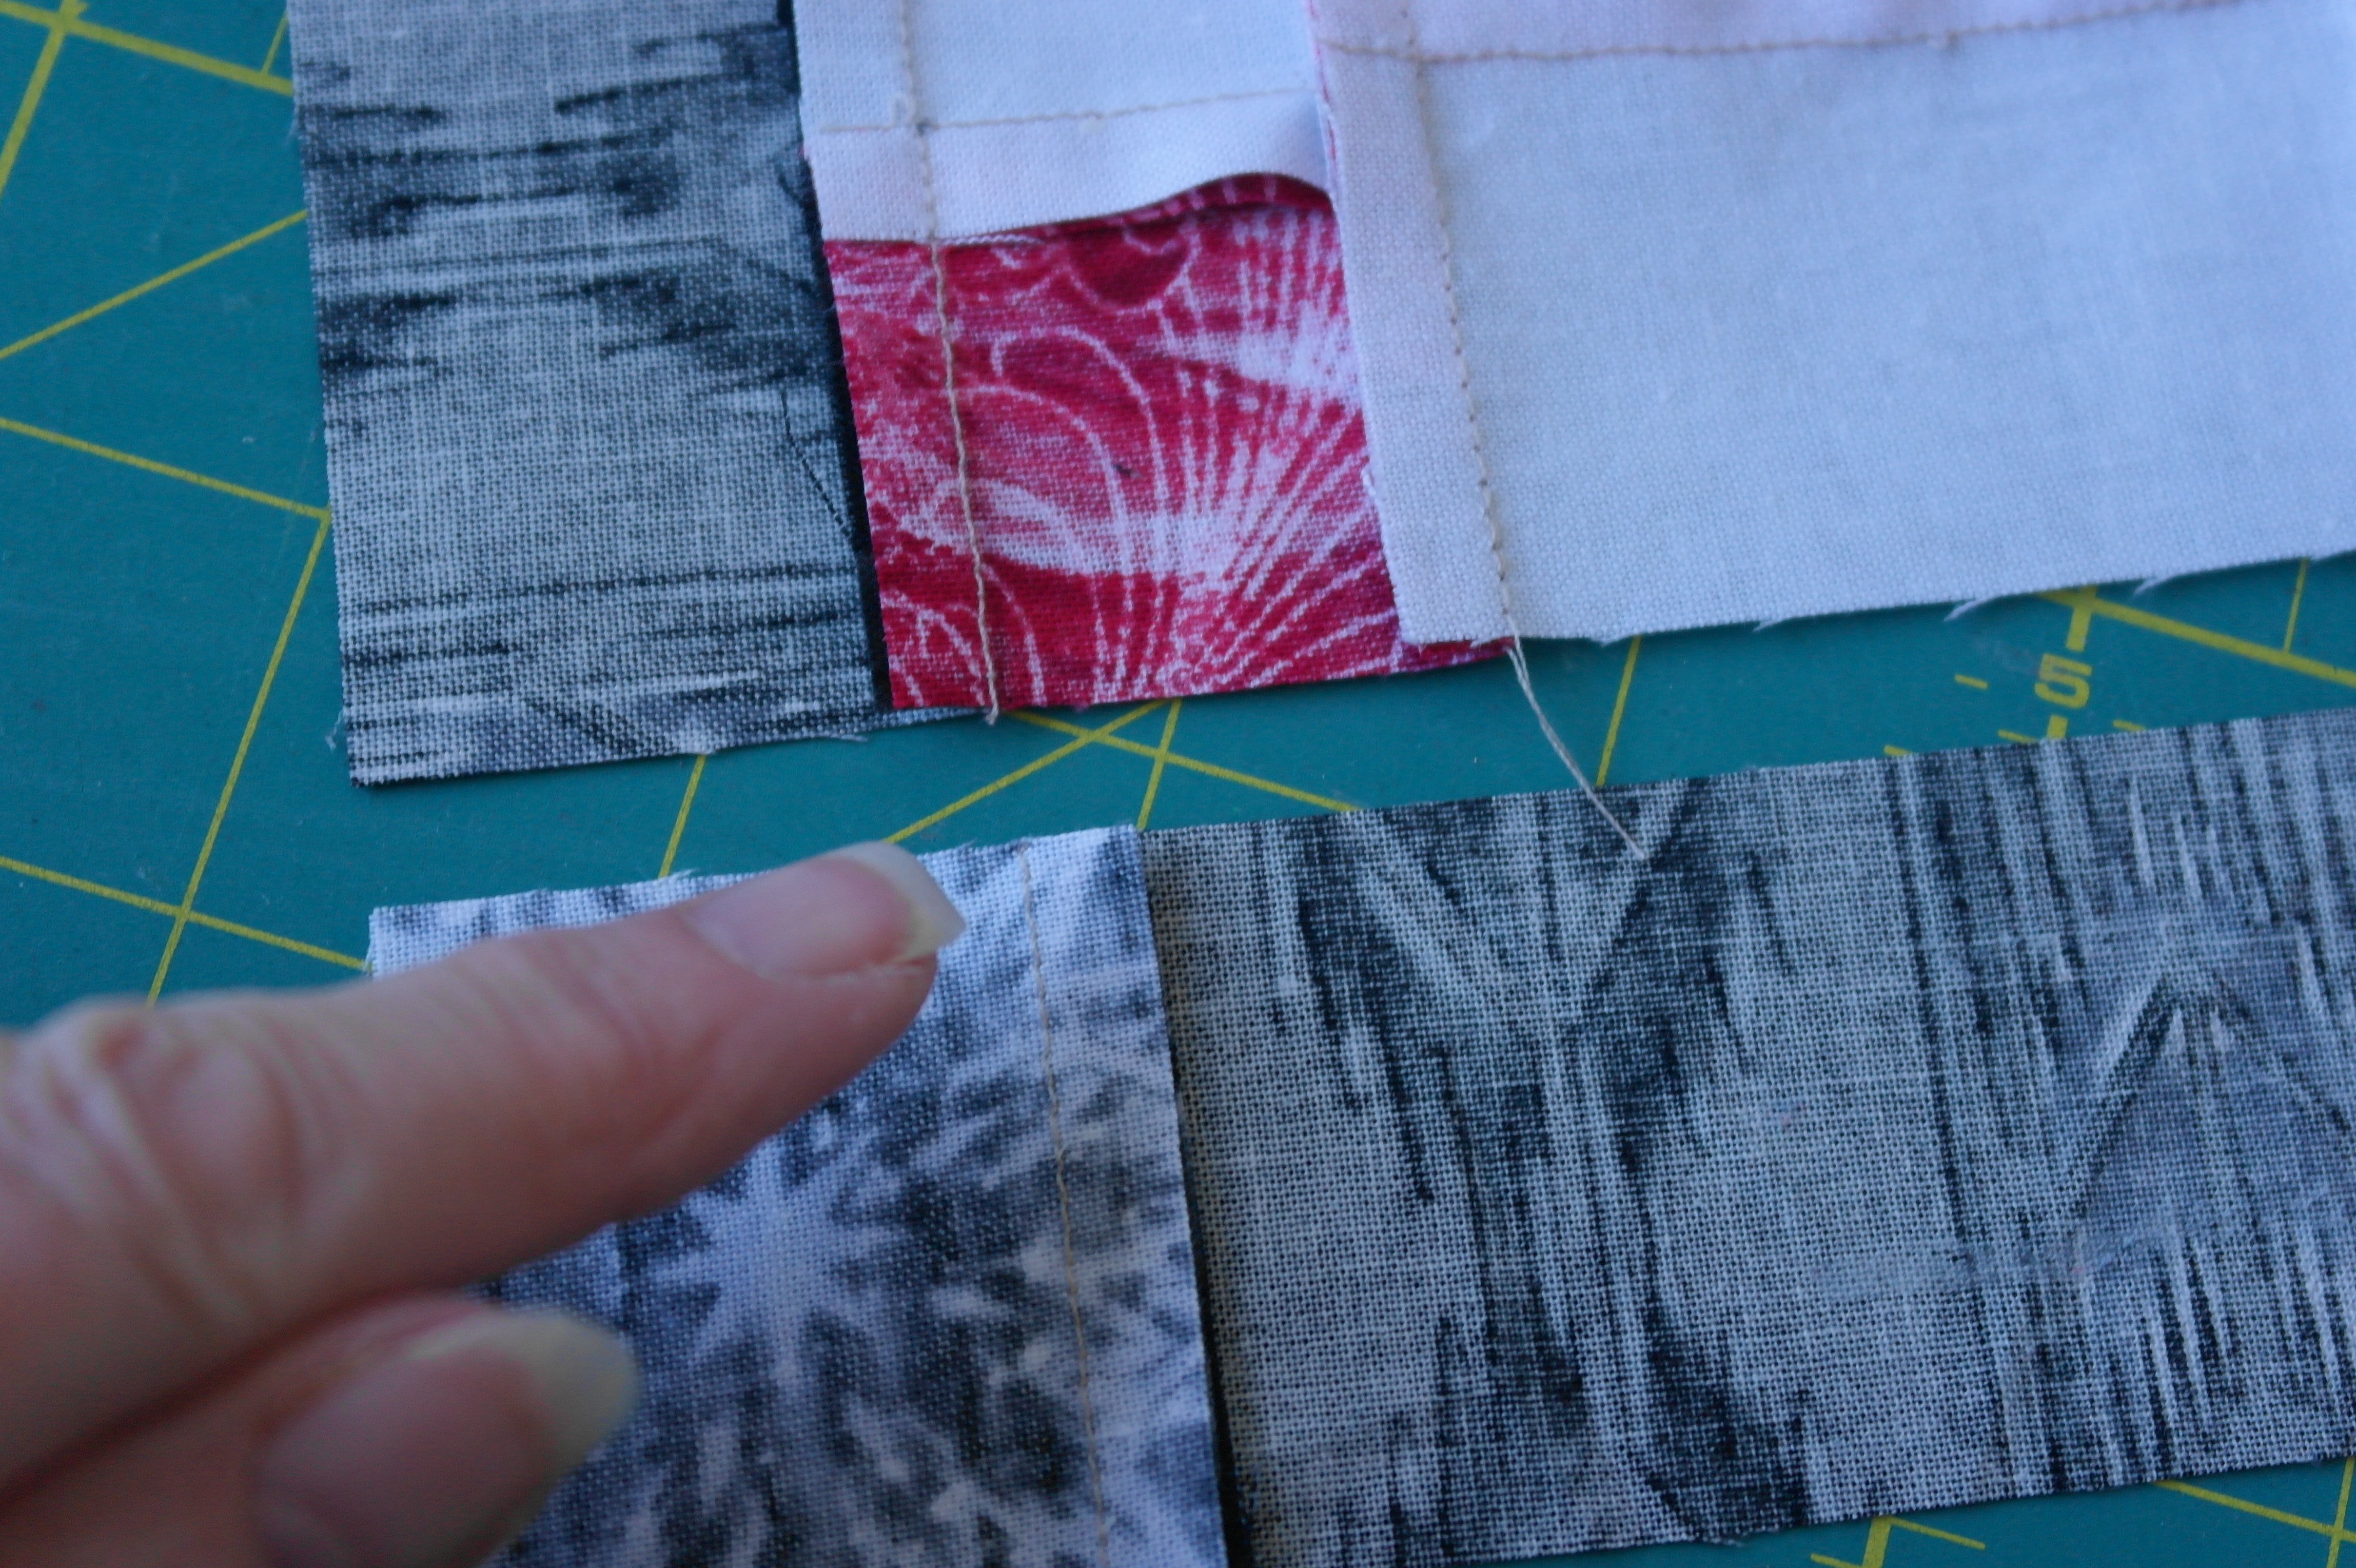
Because I am working via paper piecing (how to change blocks into that technique: see previous posts about SBS), so my order of sewing is slightly different. The picture above shows the first cut with my Add-a-Quarter ruler and folding template, to get an exact 1/4 inch seam allowance.

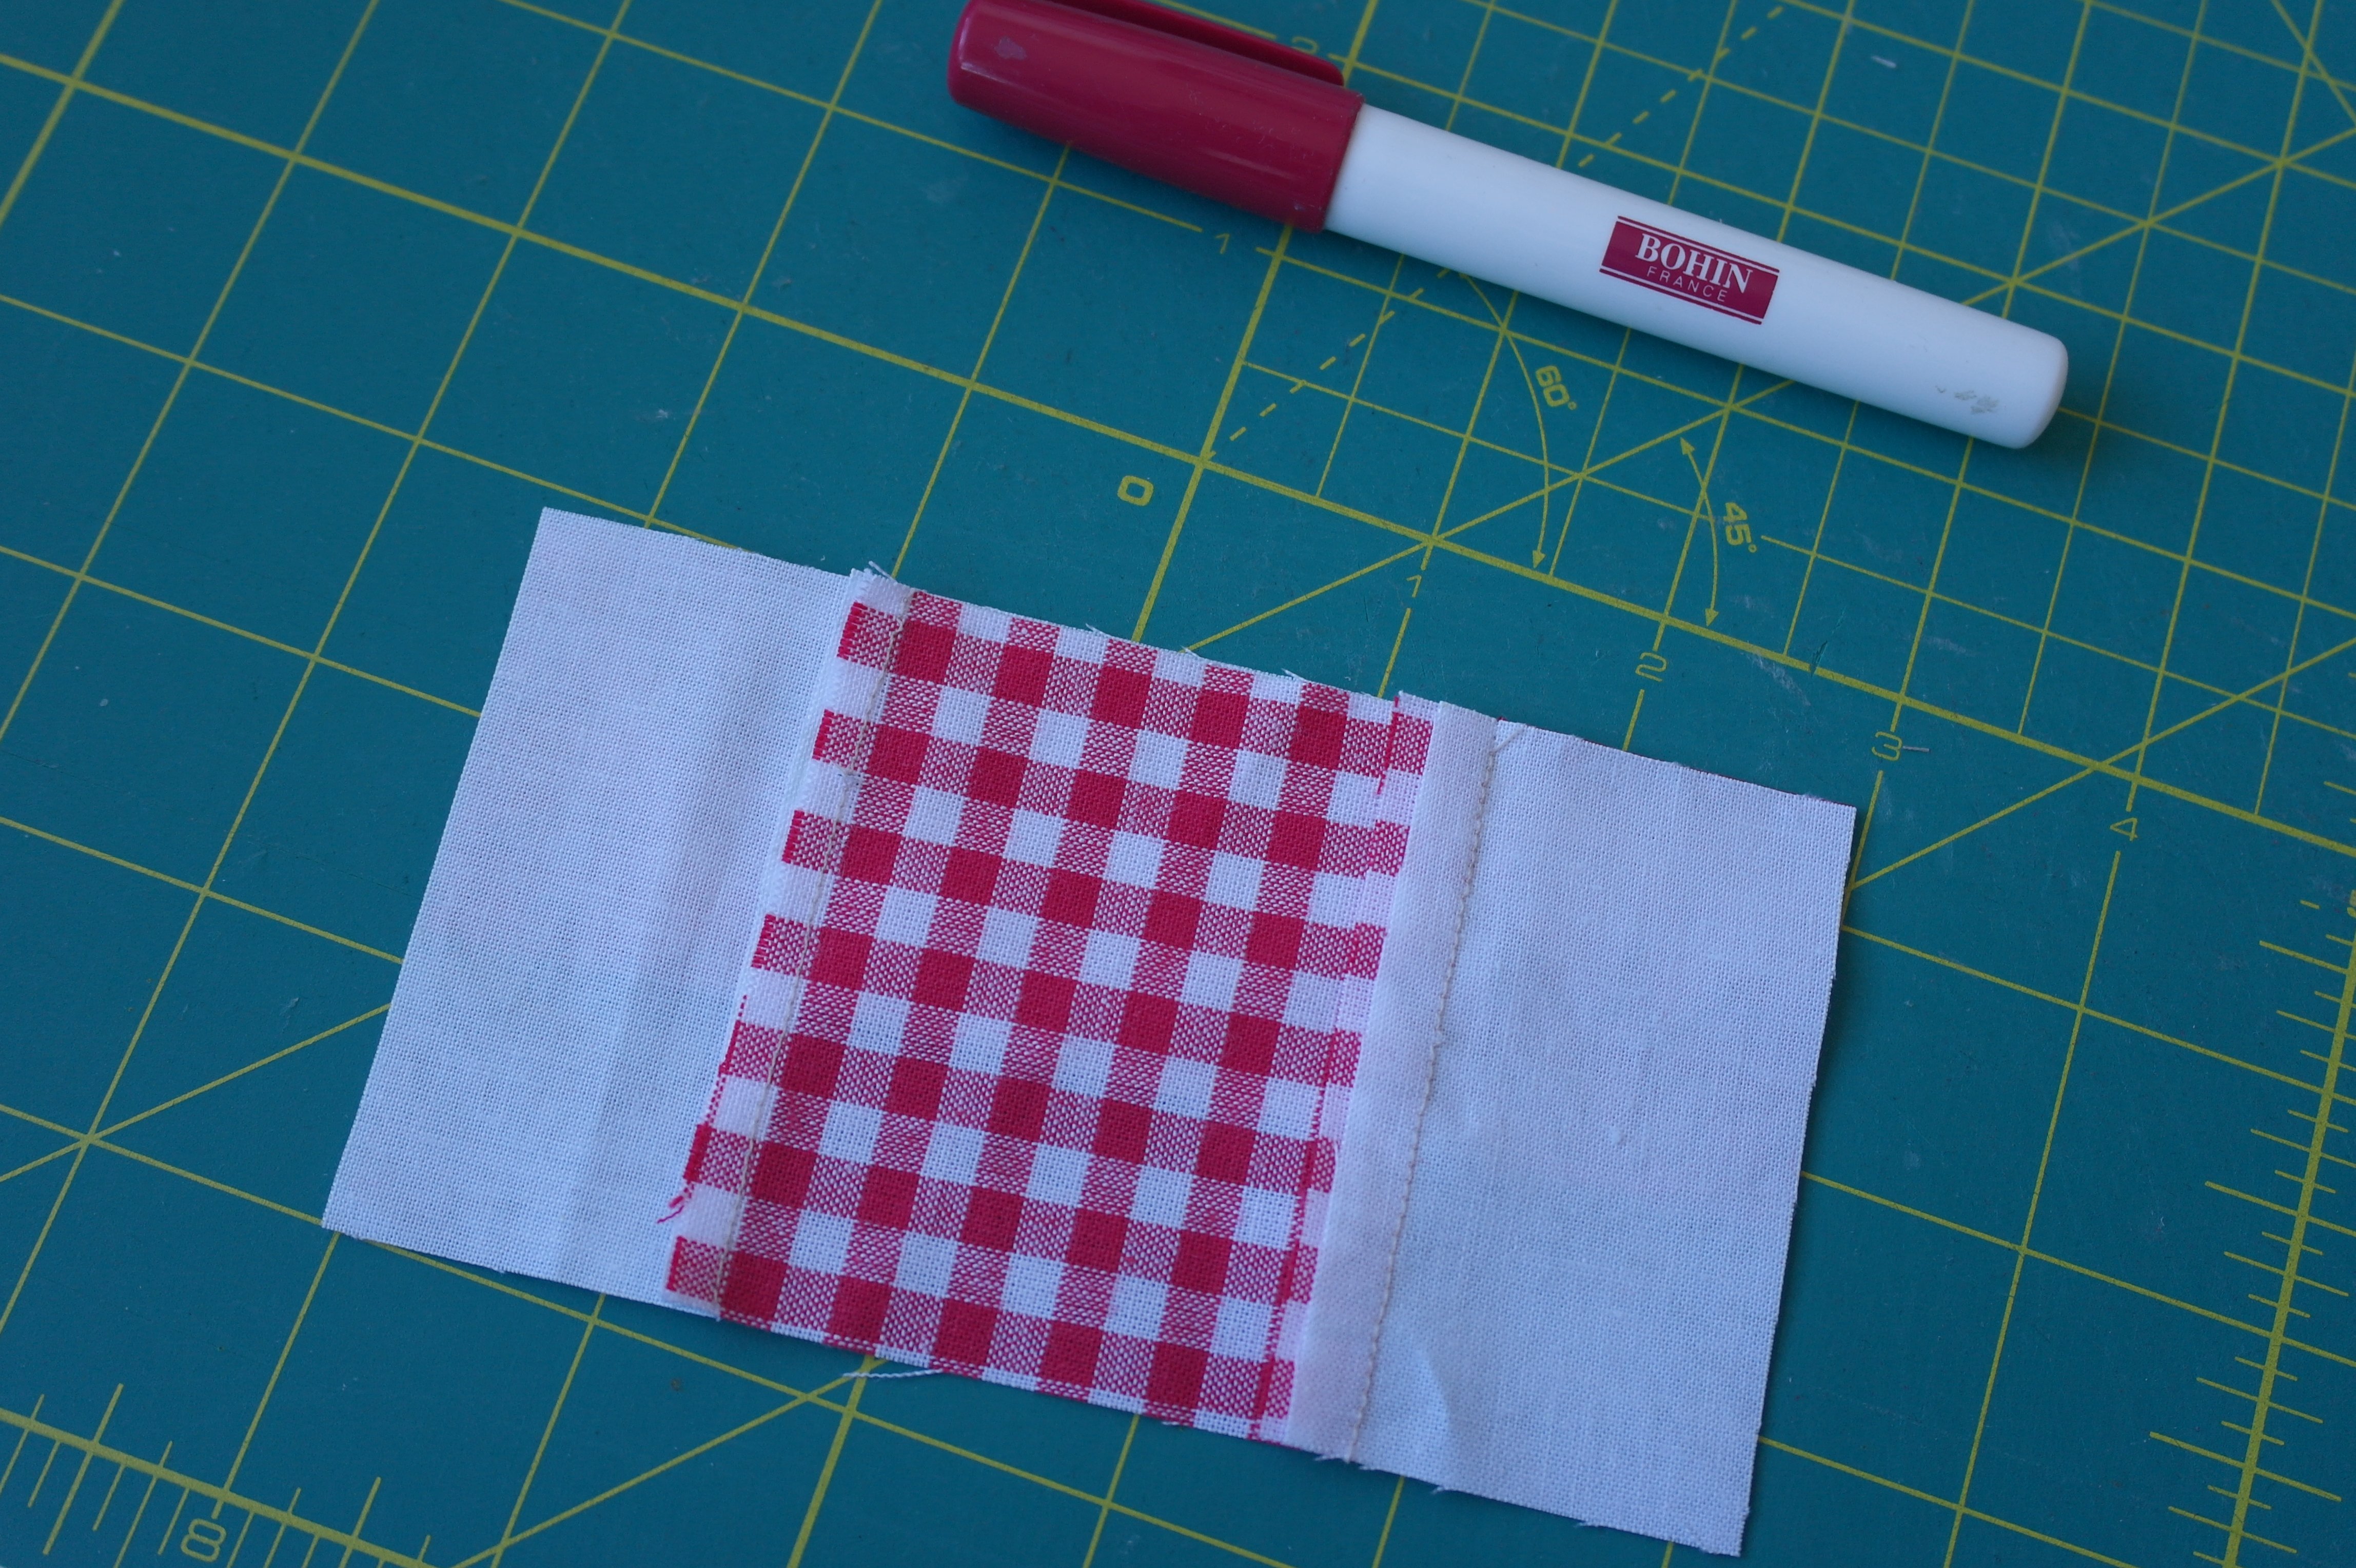
Bottom Unit with 2 pieces of fabric: 1 square en one rectangle. It is important to keep those rectangles straight while sewing them on.

The arrows are showing the direction of the seams, after sewing the Units.
Why is it important to pay attention to the direction of the seams? Because you don’t want wobbly and bulky sections on your block. If you make sure seams are in opposite position with cross sections, the sections will align.
I have glued two Units together (the smaller Unit is at the bottom and not visible here): using Bohin Glue pen to glue the seams, before taking it to my sewing machine.

The upper Units are sewn together: arrows are indicating the direction of the seams. The circle shows you in which direction the seams of the next Units are pressed.
Cross sections: I am pointing to the seams – via the back. Upper Unit seam allowance to the left, lower Unit seam allowance to the right.

After sewing, it is all in place – the cross section is within the drawn circle.

My block at the back: all seams are pressed towards the right direction, the block lies perfectly flat.
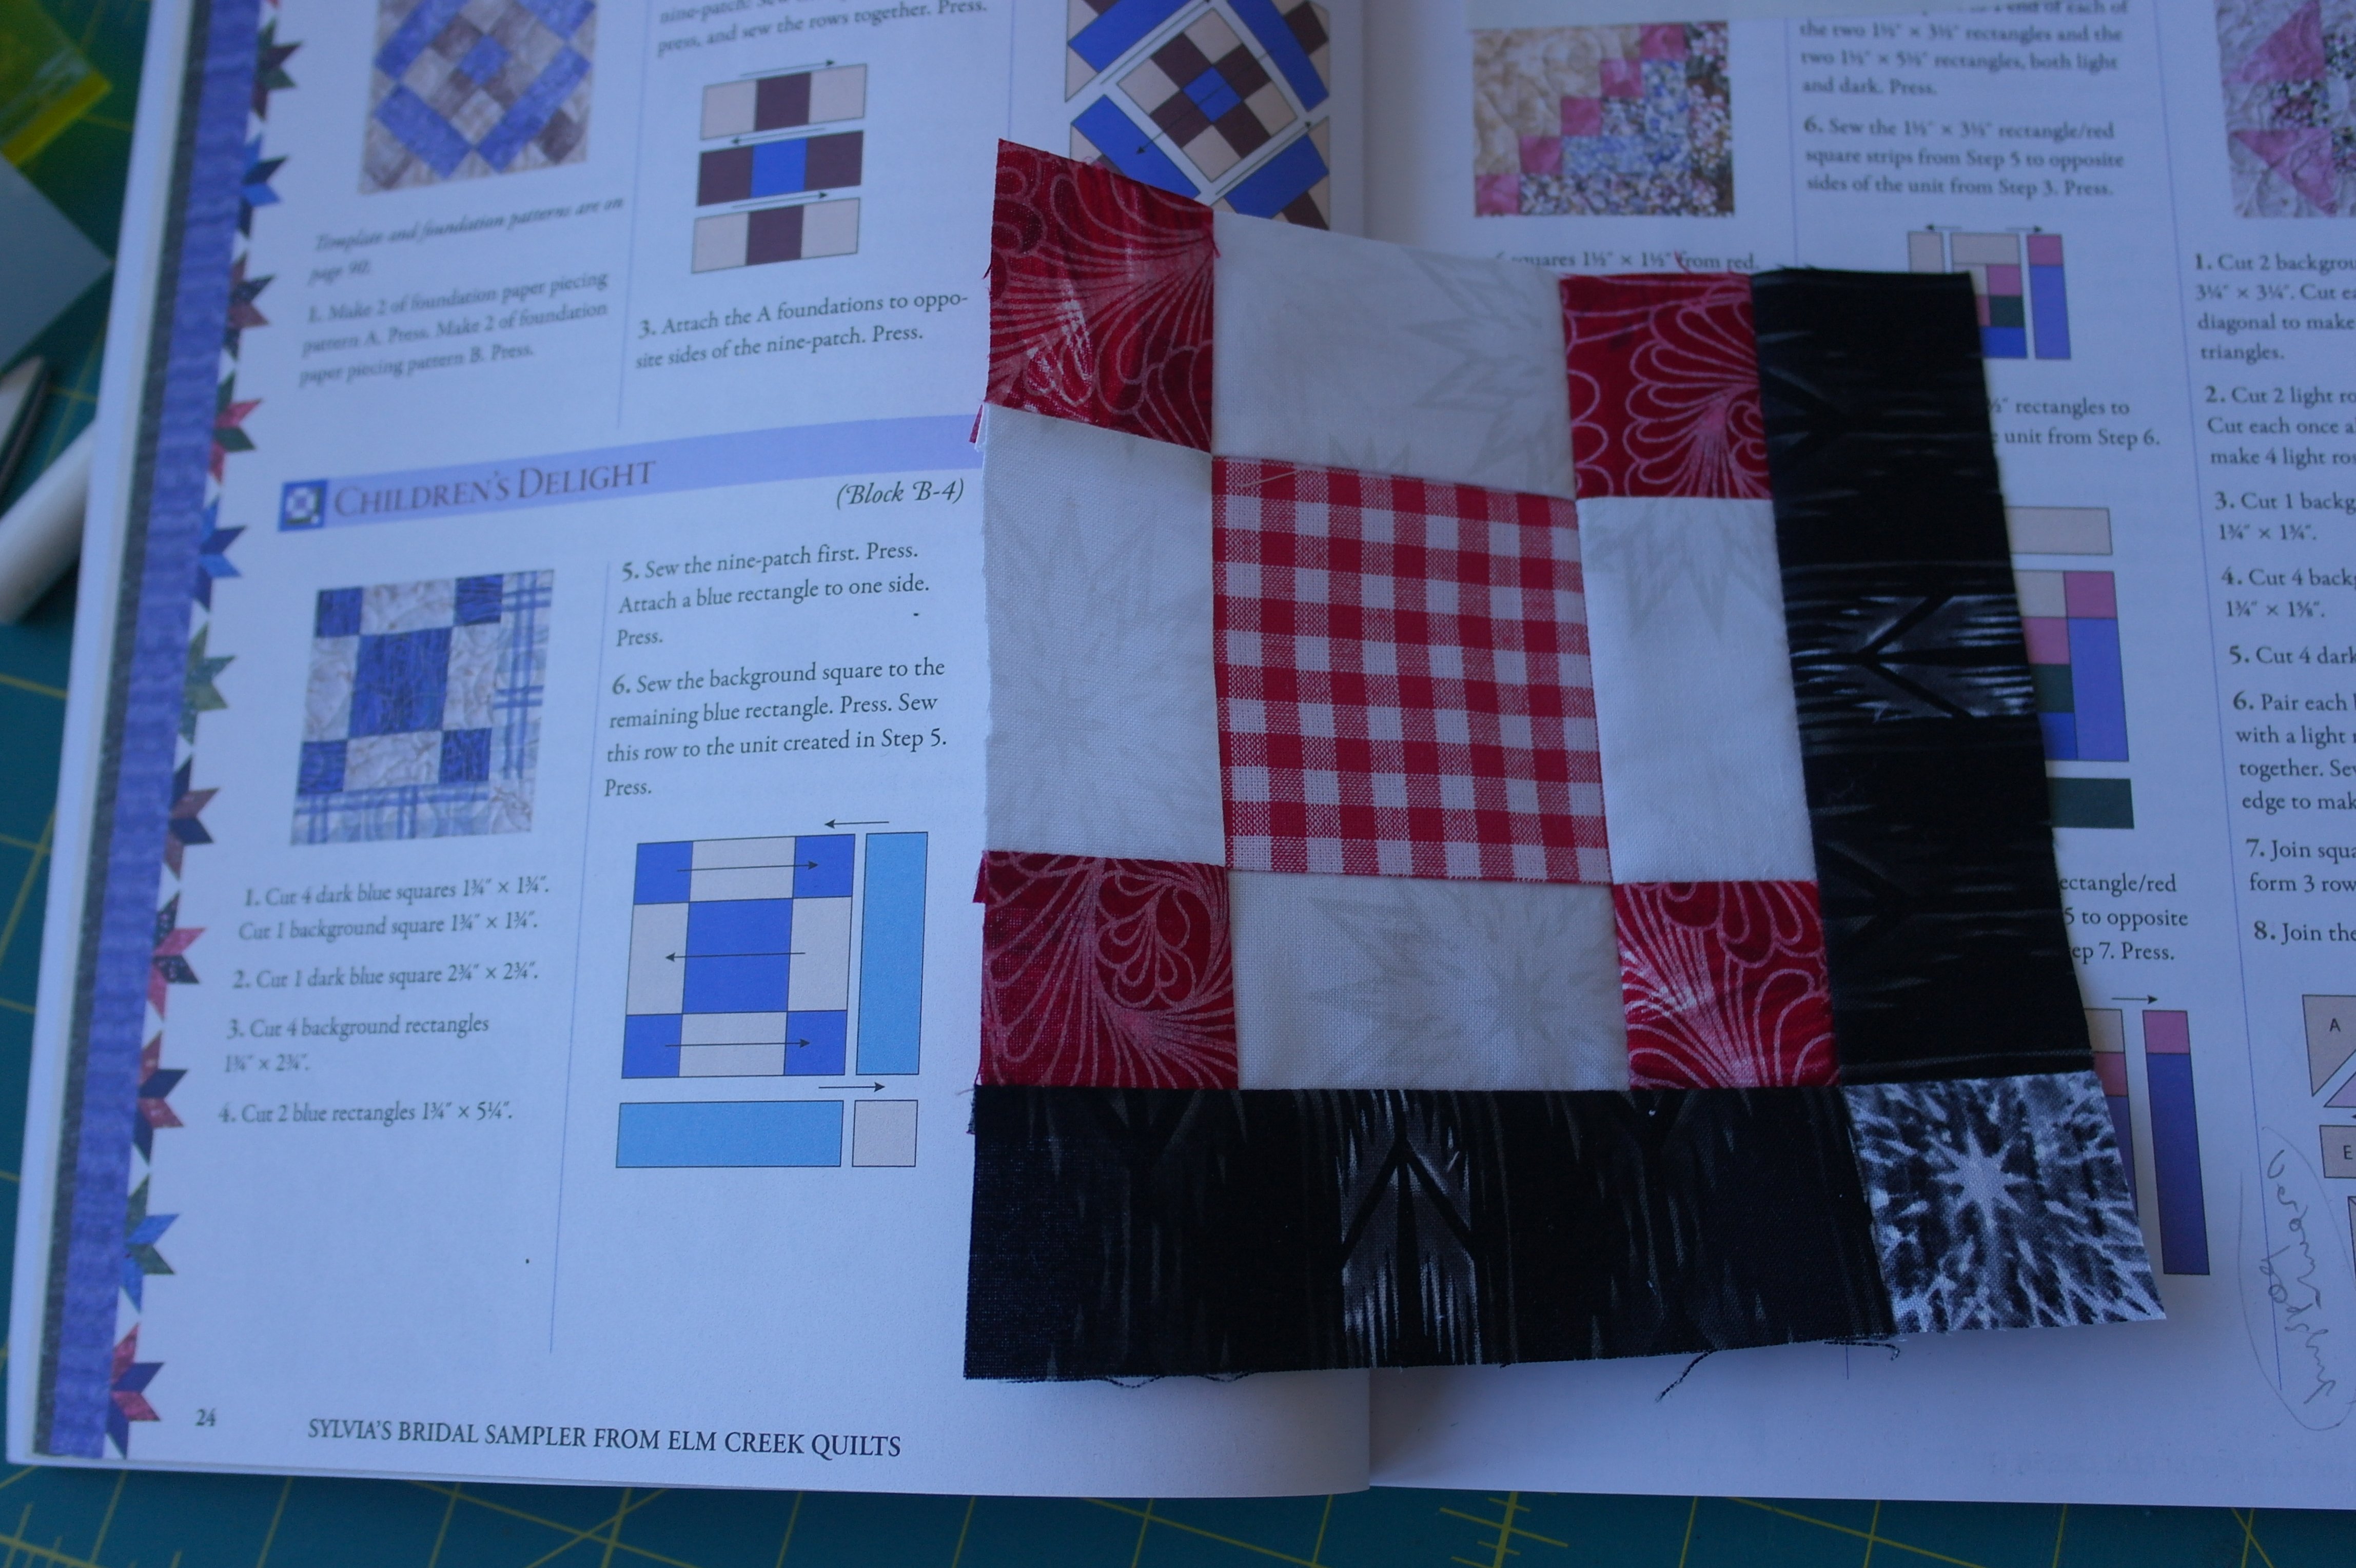
And this is the front: another block ready, placed it with the picture of the original block. Quite different!
Next time more block(s) for SBS – See you then!
Sylvia Kaptein
Sylvia’s Art Quilts Studio


Lovely