How to solve and avoid the problem of thread bunching when sewing
In my many years of working as a sewing instructor, I have found that thread bunching when sewing is a topic that concerns sewers around the world. Newcomers in particular are often affected and look for a solution.
At the moment, people are sewing more than ever before. As well as experienced sewers who are using the time at home to engage in their beloved hobby and who are familiar with and have mastered their machine, there are also many people who are using a sewing machine for the first time. In a series of posts, I want to show you how to avoid common mistakes and achieve successful results. In my first blog post, which you can find here, I wrote about the machine “eating up the material” when you start sewing. This article looks at thread bunching when sewing.
What should I do if “thread bunching” occurs when I start sewing? How can I make sure it doesn’t happen in the first place? I will answer these questions. I will also explain what to do if the gears message appears on the screen and the machine is blocked.
The post is aimed mainly at beginners. Hopefully it also contains some helpful tips for experienced sewing enthusiasts as well.
What should I do if I experience thread bunching?
As “thread bunching” occurs on the underside of the fabric, some people think it is due to the lower thread. They check whether the bobbin is sitting correctly in the bobbin case or even replace the bobbin. This does not usually change the situation. This is because the cause is not usually the lower thread, but the upper thread!
Of course, I assume that the upper thread tension is set correctly. On many models, the upper thread tension is set automatically. However, if you have previously set the tension for special sewing tasks or threads, you should reset it to the default setting. In addition, the correct ratio of upper and lower sewing thread to the needle is important.
Below are some tips that will hopefully help you solve the problem of thread bunching or avoid it altogether. You will find that some tips are the same as in my last blog post on the topic of preventing the machine from “eating the material” when you start sewing. The two topics are closely related to each other.
Tip 1: Is the upper thread threaded correctly?
I showed how to thread the machine correctly in a video in my first post. When threading the upper thread, it is important to raise the presser foot and hold the thread lightly with your right hand while you pass it through the guides along the marked thread path with your left hand.
Check that the upper thread has been threaded correctly in the pretensioner on the top rear of the machine and is not just lying on top of it.
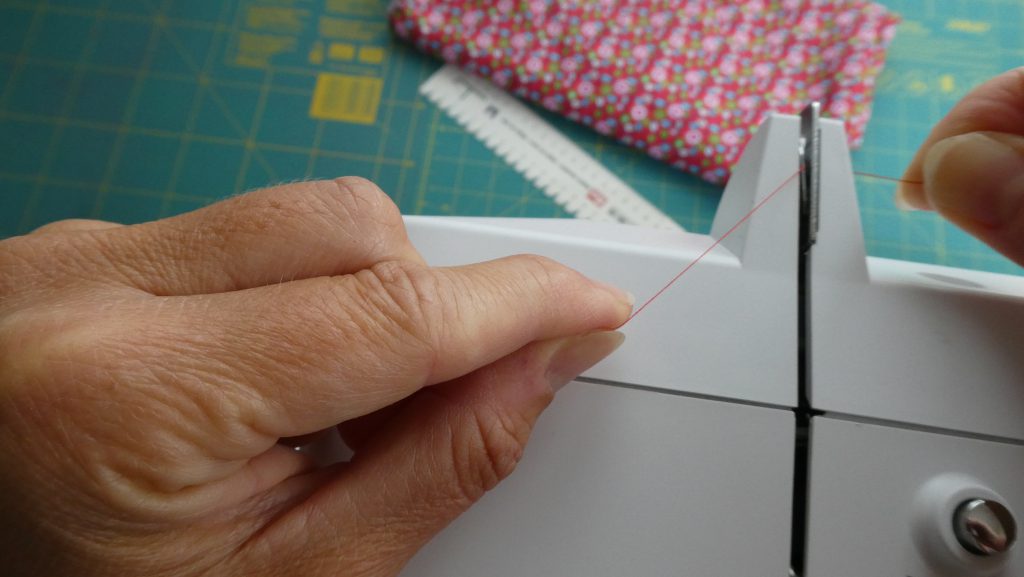
Hold the thread in both hands with light tension.
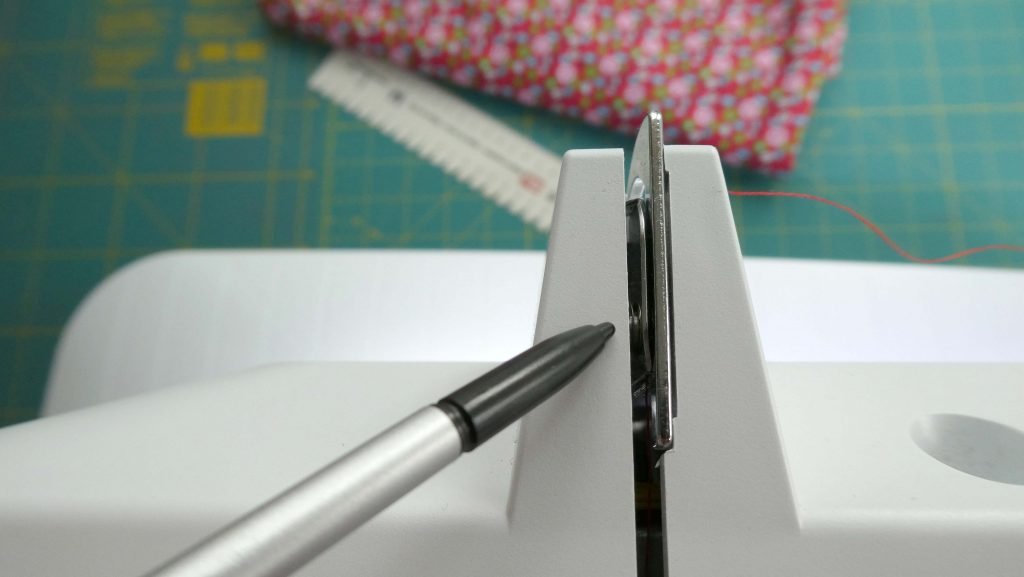
The thread is positioned in the pretensioner.
Also make sure the thread is positioned properly between the tension discs on the top of the machine:
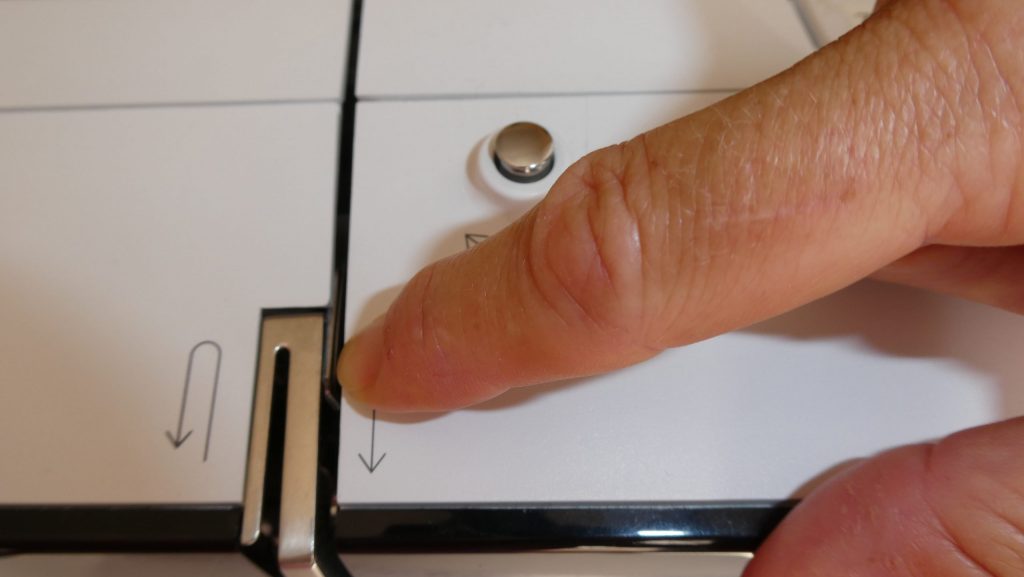
If it is not positioned correctly, it will not have any tension, and will be pulled under with the very first stitch.
In addition, check whether the upper thread is in the thread take-up lever. The take-up lever is the part that moves up and down on the front of the machine:
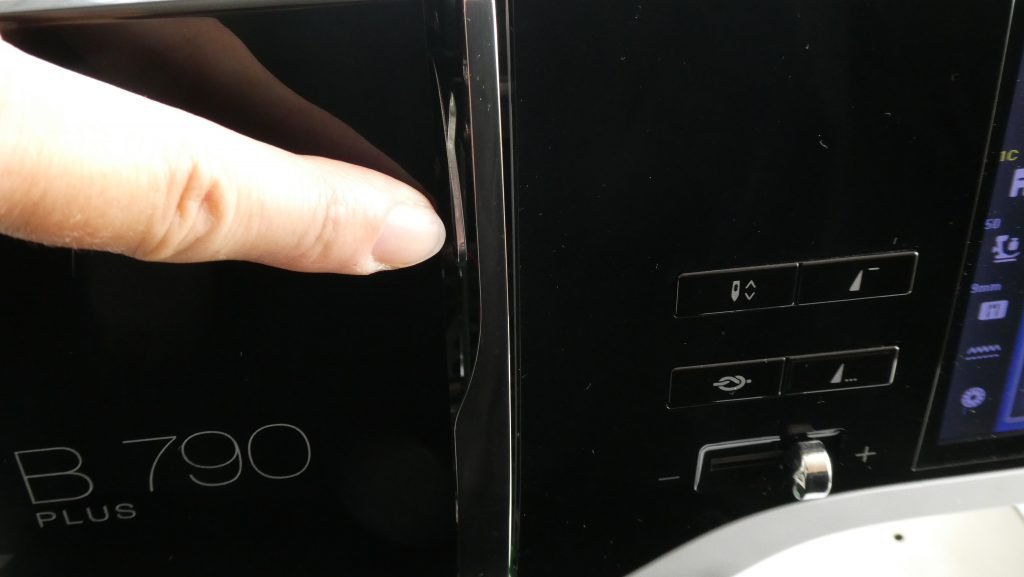
There is also a whole video on the topic of thread tension that you can watch:
Tip 2: Is the presser foot down?
It may sound banal, but particularly when you sew thick fabrics or several layers, you might forget to lower the presser foot. This of course means that there is no tension on the upper thread. The upper thread is pulled under, resulting in thread bunching.
Tip 3: Has the upper thread got caught?
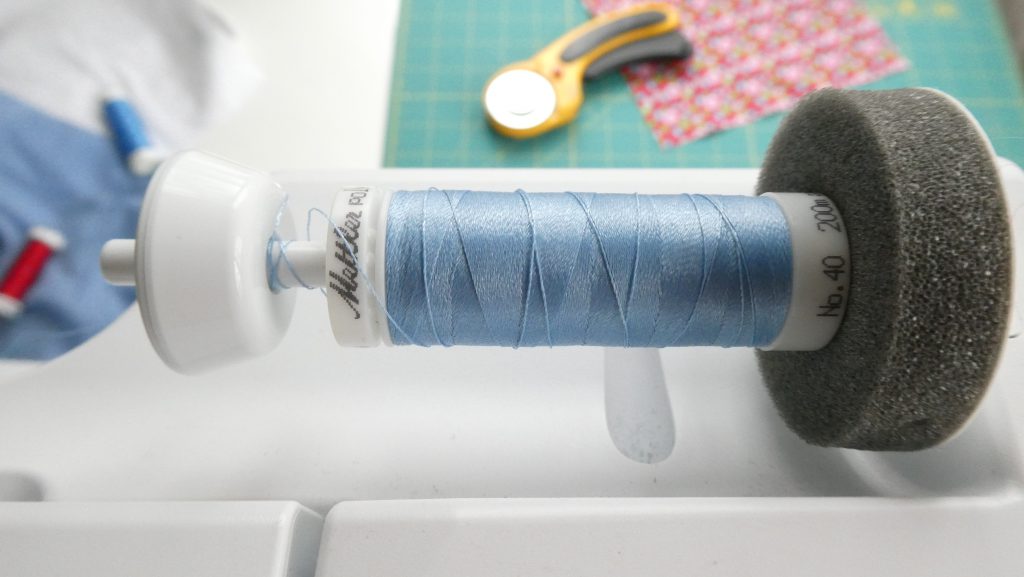
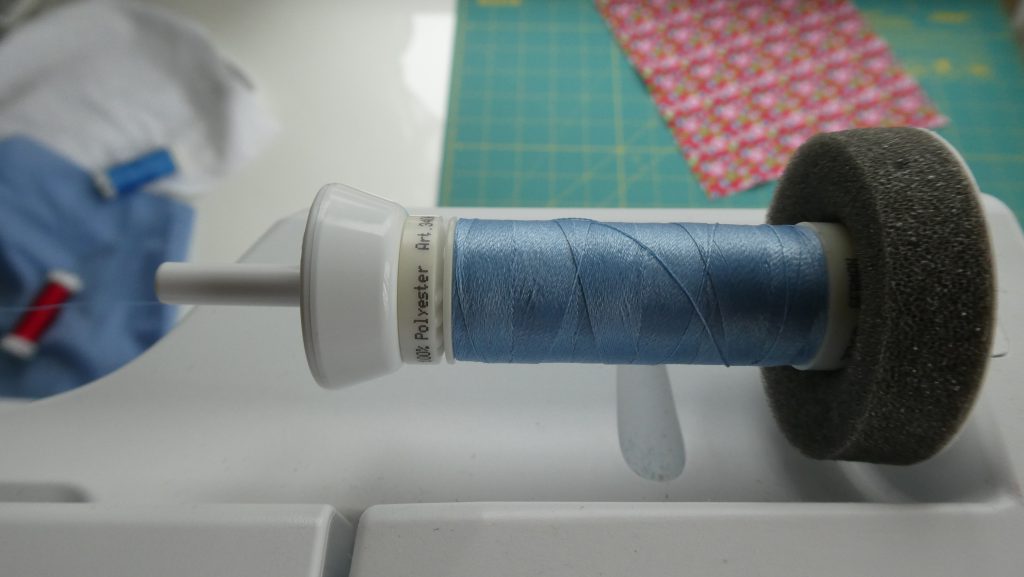
The upper thread may have got caught somewhere. This can happen, for example, if you leave a gap between the foam pad, thread spool and spool disc. Here, you can see how to insert the upper thread correctly using the BERNINA 4 Series as an example:
This is wrong:
This is right:
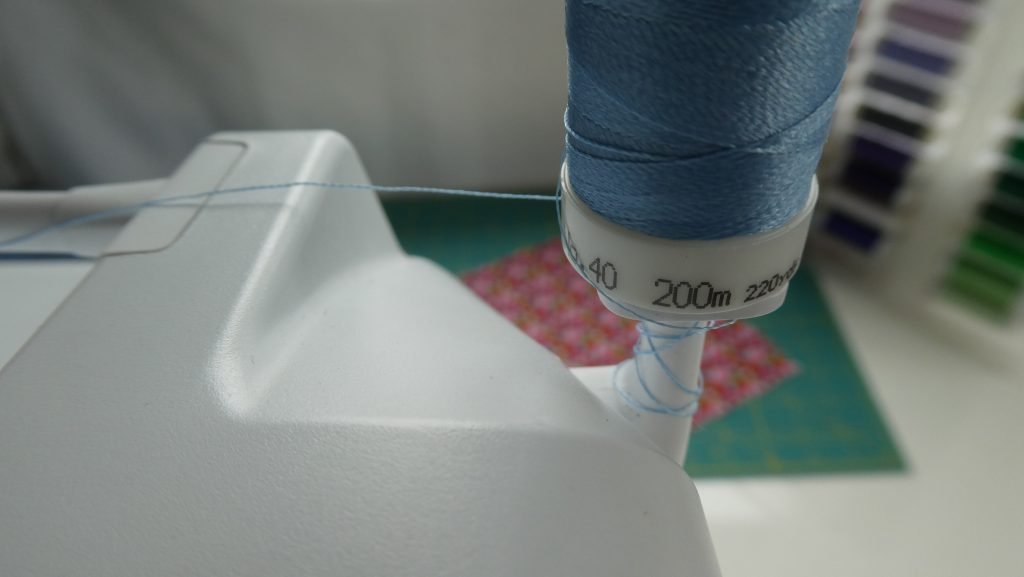
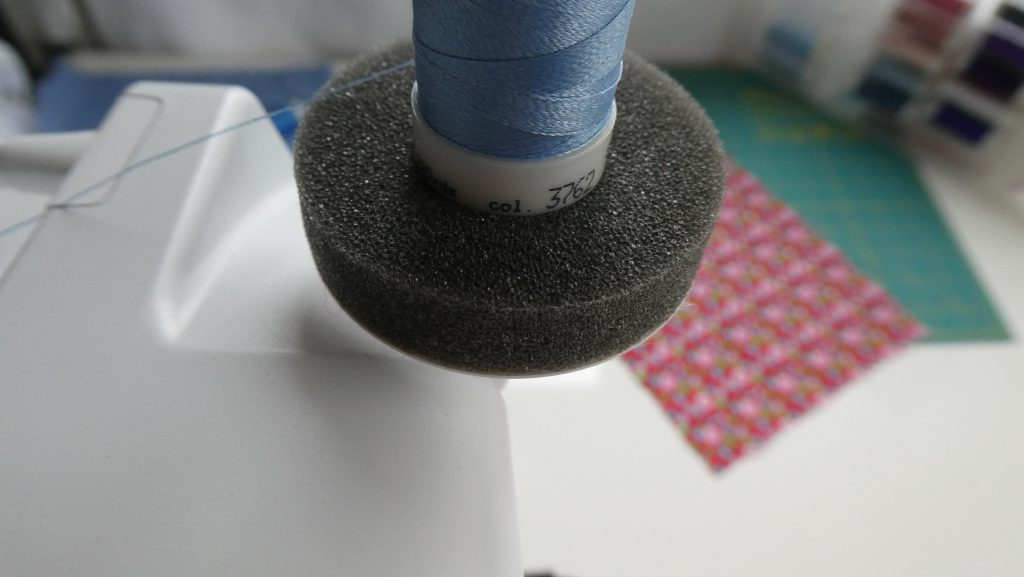
You may also be using the vertical spool holder and have forgotten to put the foam disc underneath. Then the upper thread breaks and you may forget to raise the presser foot when rethreading it so that the upper thread is positioned in the tension disc again.
This is wrong…
…and this is what it looks like when you have put the disc under the spool correctly:
Tip 4: Keep your knees away from the knee lever!
I have also seen sewers touch the knee lifter slightly with their knee while sewing because they were sitting too close to it. If you keep accidentally exerting slight pressure on the knee lever, the presser foot will be raised slightly, causing the upper thread tension to become uneven. So when sewing, and of course when embroidering, keep your knees away from the knee lever!
Tip 5: Possibly switch off the securing stitches (for certain fabrics)
When delivered, BERNINA machines are set so that they make securing stitches when you start sewing. This means that if you press the thread cutter button and then start sewing again, the machine automatically makes four securing stitches on the spot. In the case of thin fabrics, this can lead to the fabric and the upper thread being pulled down right at the edge when you start sewing, causing a jumble of tangled thread.
However, it is possible to switch off the securing stitches in the setup on our newer sewing machines, starting from the 4 Series. To do this, select Setup program, go to Sewing settings, then Program buttons and icons, then Thread cutter. There, you can switch off the securing stitches.
This is what it looks like when they are activated (based on the example of the BERNINA 790 PLUS):

And this is what it looks like after you have turned off the securing stitches:
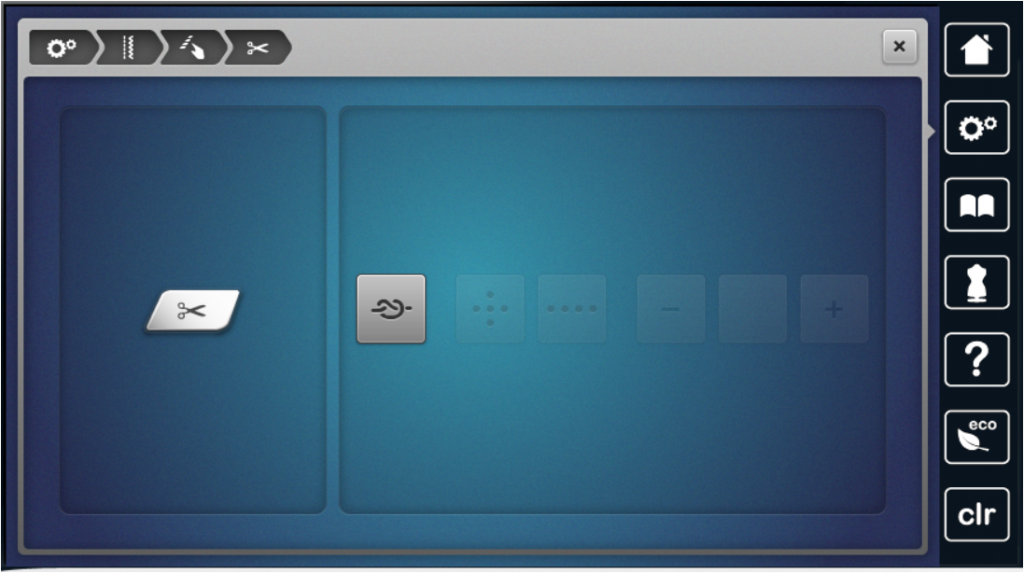
Again, there is a video showing how to do this (using the BERNINA 5 Series as an example):
Tip 6 (for owners of an 8 Series machine): when threading manually, pay attention to the sequence
If you own a machine from the BERNINA 8 Series, you usually thread the needle fully automatically. However, you may want to thread it manually – for example, if you use a double needle or thicker thread. To do this, you first have to press the “Manual threading” icon on the display. Then press the “Automatic threader” button and thread into the needle manually.
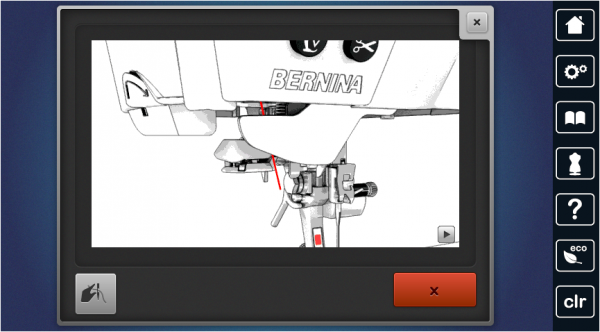
In the tutorial on the 8 Series you can find an animation under the heading “Threading the thread”, “Threading a double needle”.
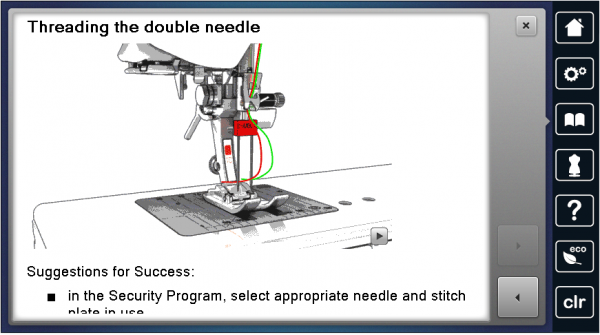
Occasionally, when I am threading an 8 Series machine, I do the threading a little too quickly. So an additional tip for everyone starting for the first time with an 8 Series: you can remove the left cover of the machine using the multi-function tool supplied to see whether the upper thread is really in the thread take-up lever. Old hands probably won’t need to do that.
What should I do if the machine is blocked?
What should you do if the thread is pulled down inside, the machine is blocked and the gears message appears on the screen?
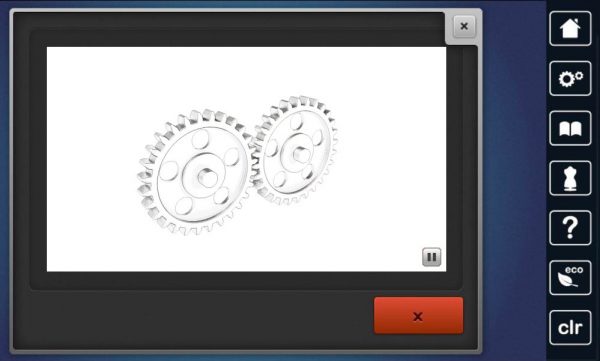
Here are some tips for you:
- Never pull on the fabric or the threads! Pulling could cause sensitive parts, such as the thread cutter, to be damaged.
- If possible, first remove the presser foot and the needle.
- Then use scissors to carefully cut the threads or the fabric above the stitch plate.
- Open the hook area and remove the bobbin case.
- Check whether there are any tangled threads in the hook area. To do this, take out the hook.
- Carefully try to release the blockage by turning the handwheel forward.
- Remove the stitch plate and check whether there are tangled threads under the stitch plate; if so, remove them.
- Replace the hook, bobbin case, bobbin and stitch plate.
- Check if the upper thread has been threaded correctly. If necessary, thread the upper thread again.
You can see how to remove and clean the BERNINA hook on 4, 5 and 7 Series machines in this video:
This brings us to the end of my second post with tips for starting to sew successfully. As mentioned at the start, thread bunching when sewing is unfortunately a problem that many beginners have to deal with. Hopefully, you now know how to solve this problem and make sure it no longer happens. I will keep my fingers crossed that you won’t need any more tips from me about this in the future and I wish you many hours of undisturbed sewing enjoyment.
Best regards,
Mirjam
 BERNINA Corporate Blog -
I’m a new Bernina 475qe owner. Same problem as mentioned below. It was fine the first time but it nests up after a few stitches. Ive rethreaded, clean replaced the needle and nothing works. I brought it to my dealer and it seemed fine. They were able to sew with it. What am I doing wrong?
Dear Nancy,
have you tried it with another thread? Because it seems strange to me that the machine sews at the dealer!
Do you make sure, that the thread is in the pretension as shown in the first two pics?
Best regards
Mirjam
I have a benina chcargo 5 and this is the 1st time it is clogging mybobbin thread i really dont know what to do
Dear Santie,
Could you please explain more about the issue? Did it happen once or does it happen repeatedly? When does it happen? Maybe you have found a moment/material when it happens the most?
What have you already tried or what have you double checked?
Possible issues could be:
– Bobbin is inserted the wrong way
– Upper thread is not threaded correctly (Did you raise the pressure foot when threading?)
– Check the thread tension
– Quality of the thread
– Try a new needle
If your thread bunching happens especially at the start of a seam, here are two things I do in such cases:
– Sometimes, starting too close to the fabric edge can be an issue. Instead of starting at the very edge of the fabric, I start 3 stitches away from the edge, first do 3 stitches reverse, then go forward and sew my seam (instead of forward-back-forward).
– For me, it sometimes helps to hold the ends of the threads for the first few stitches to prevent thread bunching.
If nothing of this helps, then let me know and I will ask our bernette team.
Kind regards, Ramona from BERNINA International
The Bernina useful tips are lovely to see, but dont help with older Bernina models, some tips on the B560 would be appreciated.A big problem I have:- I get a bunch up of cotton, above the needle tension, and thread splits and bunches up. Tried everything and the machine still does this. Not able to remove the Hook case if there are any tangled threads. At times the machine is blocked, having to take it to the Agents is costly.
Dear Marje, my proposal is to try another kind of thread. For sewing we take normally a Polyester thread, like Mettler Seralon. If it is the same, there might be a roughness in the thread paths which needs to be looked at by a dealer.
Regards
Mirjam
It is truly a well-researched content .
Your site needs to fix the privacy/cookies consent page. I can’t tell if I am allowing or blocking the functional cookies because the slider that makes the choice is NOT LABELED. It just slides from gray to red, or red to gray.I think I just blocked all cookies, which I did not intend to do. This is a terrible design.
Dear Donna,
Grey means blocking the cookies, or you can accept all of them by clicking on the red button. Thank you for your feedback, I will forward it to our team!
Best regards, Ramona from BERNINA International
Hi I have just bought the B475 and everything was fine for the first garment but now when I top stitch or understitch the machine needle will do a sudden stutter part way through and then I will get a tangled mess underneath or really loose stitching. I have never had this with any of the manual Bernina’s I have owned. This is my first electronic and most of my clothing I make is topstitched so very worrying.
Dear Caroline,
which kind of fabric are you using? Does the needle size fit to the fabric?
Maybe you have to adjust the size.
Best regards,
Mirjam
Hi Been teaching years with Berninas and know about right needle for right fabric. This is a new machine. First garment was good but didn’t do any top stitching on it. Next couple I have. Moved the needle over two to the left or right and after a short time (I am sewing slowly) the needle jumps (as you can see from the picture) to the side with a glug, and then thread jams underneath. Was topstiching edge a zip and it jumped to the middle of the foot and broke a needle just now. It wouldn’t stop and was hammering the broken needle into the foot. Had to switch the machine off. Also noticed that if I stop in the middle of a seam, the needle goes back into the stitch just made and then goes forward, rather than going forward to form a new stitch. The machine is unusable as it is.
Re fabric it has happened on basic cotton, wool jersey and a waterproof polyester woven.
Dear Caroline,
thank you for the photo and the detailed description!
I would propose to visit your deler and check the machine, because he can find out the reason, why this happens!
Best regards,
Mirjam
Thank you so much! My thread started bunching midway through a piece of work and I thought something must have broken…. but have been putting off calling the engineer as he costs an arm and a leg… then found your blog. Rethreaded the top – I think it had jumped off the moving arm which is hidden a bit so I hadn’t noticed. As you so rightly comment…. I assumed wrongly the issue was beneath around the lower thread but it has just given me a straight normal seam ??
Dear Daphne, I’m so happy that you found my blog article at the right time, helping you to fix the problem!
Best regards
Mirjam
Having read this I thought it was extremely enlightening. I appreciate you spending some time and effort to put this article together. I once again find myself personally spending way too much time both reading and posting comments. But so what, it was still worthwhile!
Dear Samantha,
thank you so much for the commendation! It would be a pleaure for me, when you will read my posts in future :-).
Best regards
Mirjam
Hello, Why are you not showing how to clean the thread cutting area under the stitch plate?
I find this to be a big problem when it has not been cleaned after working on a quilt or garments.
Thank you.
Dear Aileen,
As mentioned in this blog: https://blog.bernina.com/en/2020/06/cleaning-your-sewing-machine-properly-to-make-sewing-even-more-fun/
you can follow the steps in setup.
Best regards
Mirjam
Mirjam I appreciate your videos. I have recurring problem with the needle stuttering when either straight stitching or top quilting free motion. I have set my machine to stop in the needle down position, however sometimes the needle will stutter (momentarily hover up and down in one place) and then the needle will stop in the up position. I have tried rethreading both upper and bobbin threads, cleaning and oiling the machine, changing the needle, etc but on occasion the problem persists. Usually it occurs when I am working on a quilt sandwich, either straight stitching, free motioning or attaching binding, so there is thickness. I recently had my machine service also. The bobbin winder lever is off.
Another problem I have is with shredding threads, usually 100 weight (Superior Micro thread) using their recommended needle 70/10 and Bottom Line thread in the bobbin.
I appreciate any help you can provide. This is very frustrating and can ruin my quilt work. I was told by the dealership not to use the yellow bobbin when I top quilt but I am starting to wonder if that is good advice after watching your videos.
Hello Shann,
Thanks for your feedback. It sounds that you take very good care of your machine.
I am sorry but regarding the stuttering I am not sure what this could be. I would recommend that you talk to your dealer about this. There is a mode – called hammer mode which kicks in when the machine has to work hard to penetrate a thick seam but by machine quilting I am resuming this is not so thick.
I see on Superiors website that they recommend a 70 “topstitch” needle for the micro thread. The eye of the topstitch needle is larger and can stop the thread from shredding.
All the best and I hope you get his sorted.
Mirjam
thanks Mirjam. I am already using Superior’s 70/10 which is why I am frustrated that the thread shreads. Maybe I will try contacting Superior. Normally though, if it shreads, would going up a size in the needle eye help?
Really found this post helpful. Im not a new sewer but do have a new 770QE that is s bit tempremental so it was good to read the post and remind myself not to panic when strange and unexpected things happen.
Thank you so much very useful tips for us beginners