 BERNINA Corporate Blog -
You have almost certainly heard of the BERNINA CutWork Tool. But do you know that it also can be easily used on bernette embroidery machines? For some time, the tool has been available for purchase individually, since there is no special presser foot or extra stitch plate needed for the bernette.
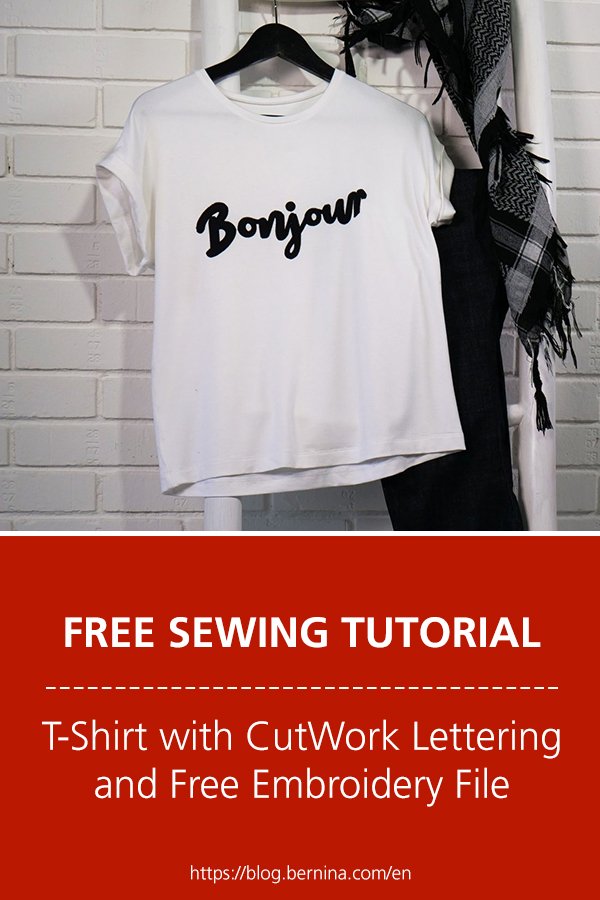
Instructions: Create a T-Shirt with a Free CutWork Design
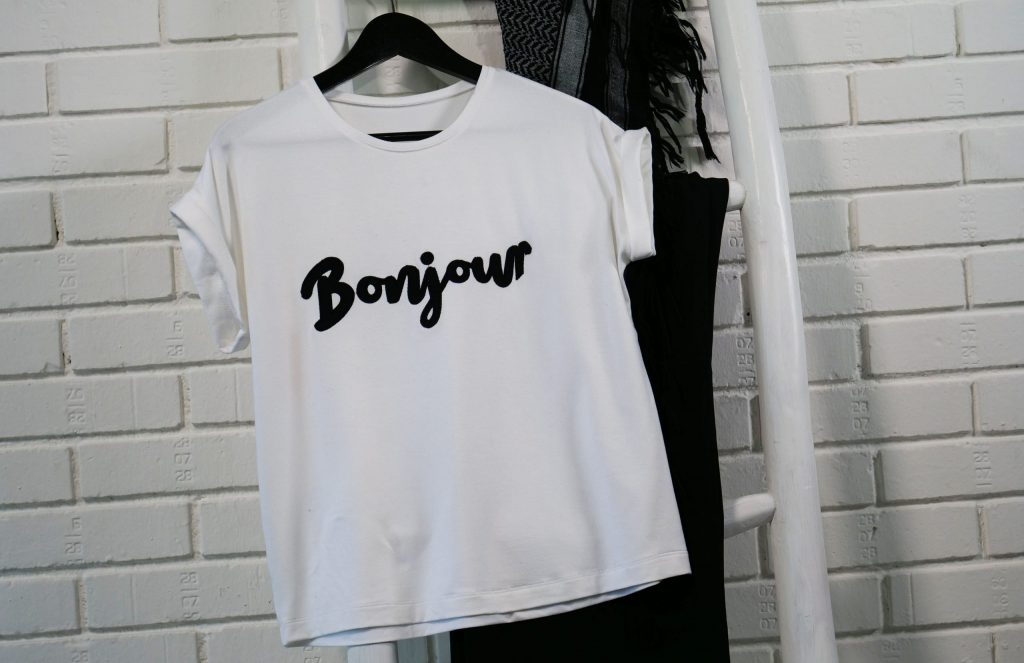
Now it is time to prepare your summer wardrobe, and I am going to show you how quickly you can glam up a simple t-shirt with an appliqué design using the CutWork Tool.
Unfortunately the selection of CutWork patterns is not as varied as with normal embroidery patterns. That’s why I decided to create a pattern in the DesignWorks software and make it available for you to use.
You will need the following materials:
• T-shirt (jersey that is not too fine in a loose fit which makes it easier to work with, which makes inserting it easier)
• Jersey fabric remnants for the appliqué
• Vliesofix (double-sided fusible paper)
• Stabilizers
• Spray adhesive
• Iron
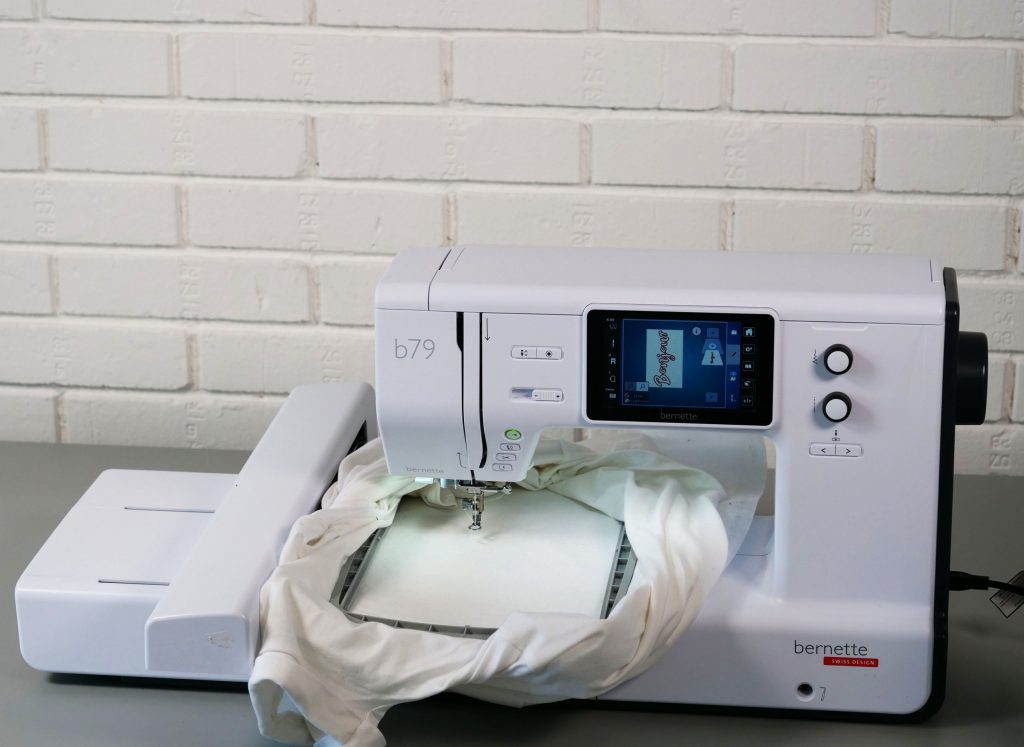
• Embroidery machine, such as the bernette 79 or 70 DECO with the size L embroidery hoop
• CutWork Tool
• Embroidery thread
• USB flash drive to transfer the embroidery files
• Embroidery files “Bonjour_Cut” and “Bonjour_Appliqué”
Download the embroidery file for free
You can download the embroidery file for free using the link below:
You will receive a ZIP file with the download. Unzip this first and save both patterns on a USB flash drive. Important: Each pattern consists of 3 files (.exp, .setup, .bmp) that must all be stored together.
Part 1: Cut out the appliqué material with the CutWork Tool
Iron the Vliesofix onto the appliqué material. Add an additional layer of tearaway stabilizer and insert the material together with the backing into the large embroidery hoop. In order to achieve the best stability, it is best to use a heavier cut-away stabilizer.
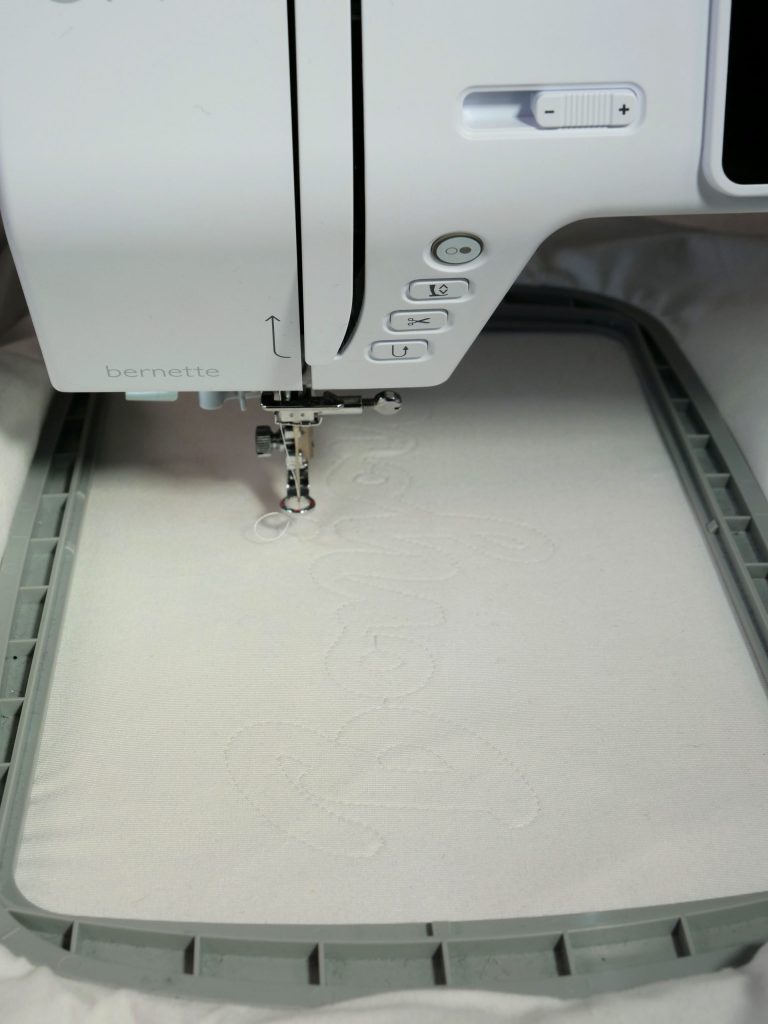
Open the pattern «Bonjour_Cut» on your embroidery machine and stitch the first color – this is a stabilizing stitch that only helps the layers hold together well. Now insert the CutWork Tool where the needle goes. Very important: The knife must be in position 1. If it is not, turn the knife to this position.
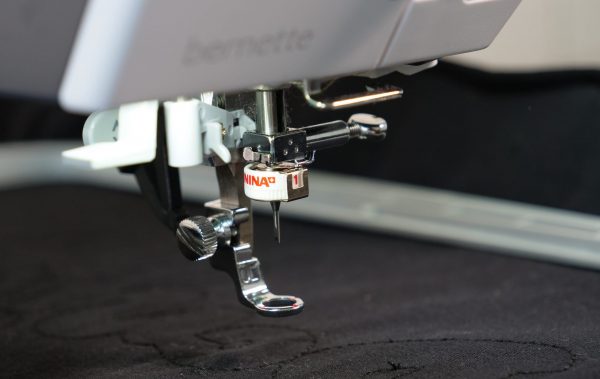
As soon as position 1 has been cut, simply turn the knife and cut positions 2 to 4. Admittedly, the machine’s actions look a little chaotic, but it will work, because the letter will simply release.
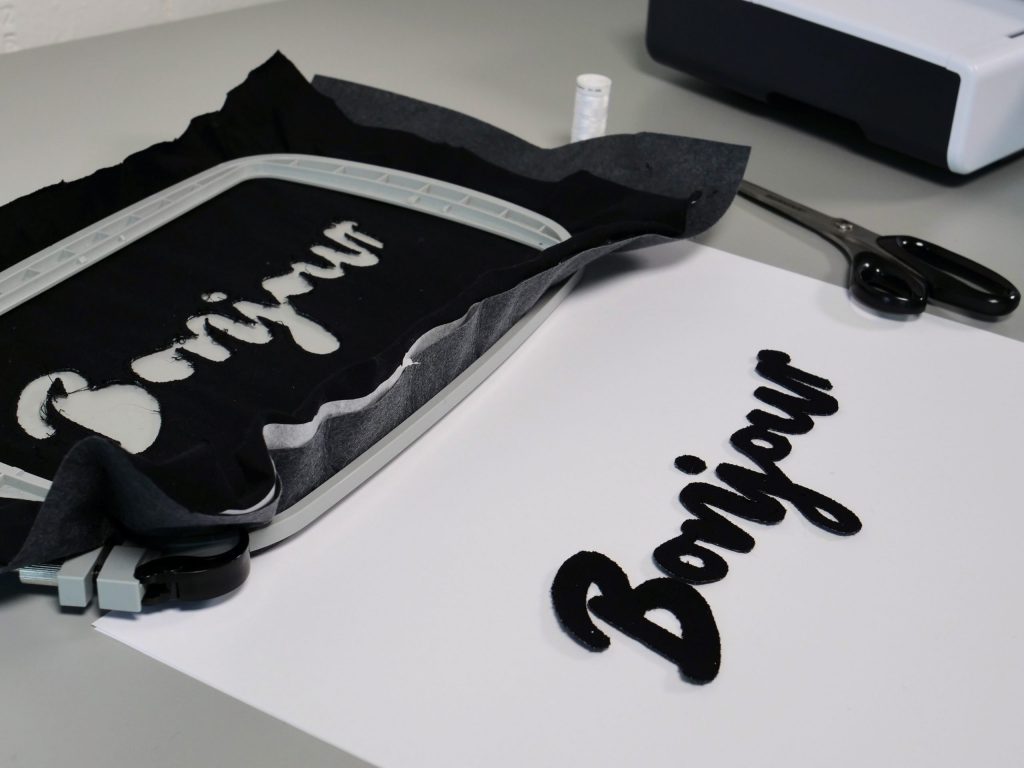
Carefully tear away the stabilizer and also remove the protective paper of the Vliesofix fusible liner.
Part 2: Embroidering the appliqué
Now mark the location on which you would like to embroider the lettering on the t-shirt. This is easiest if you put on the t-shirt and position the cutout lettering on it. Reinforce the t-shirt with the stabilizer for jersey and insert both together in the hoop.
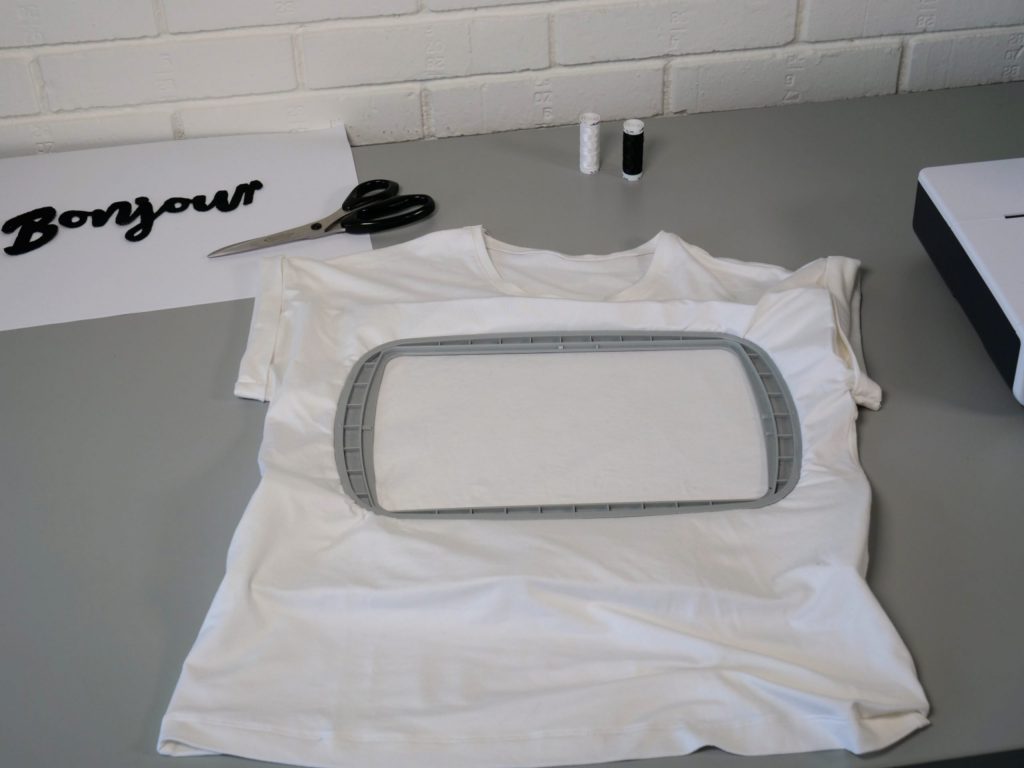
Open the pattern “Bonjour Appliqué” on your embroidery machine and replace the CutWork Tool with the needle.
In the first step, the placement line is embroidered. It is best if you select a thread in the same color as the t-shirt. This helps in positioning the lettering.
Now lay the appliqué material precisely on the embroidered line and iron it firmly.
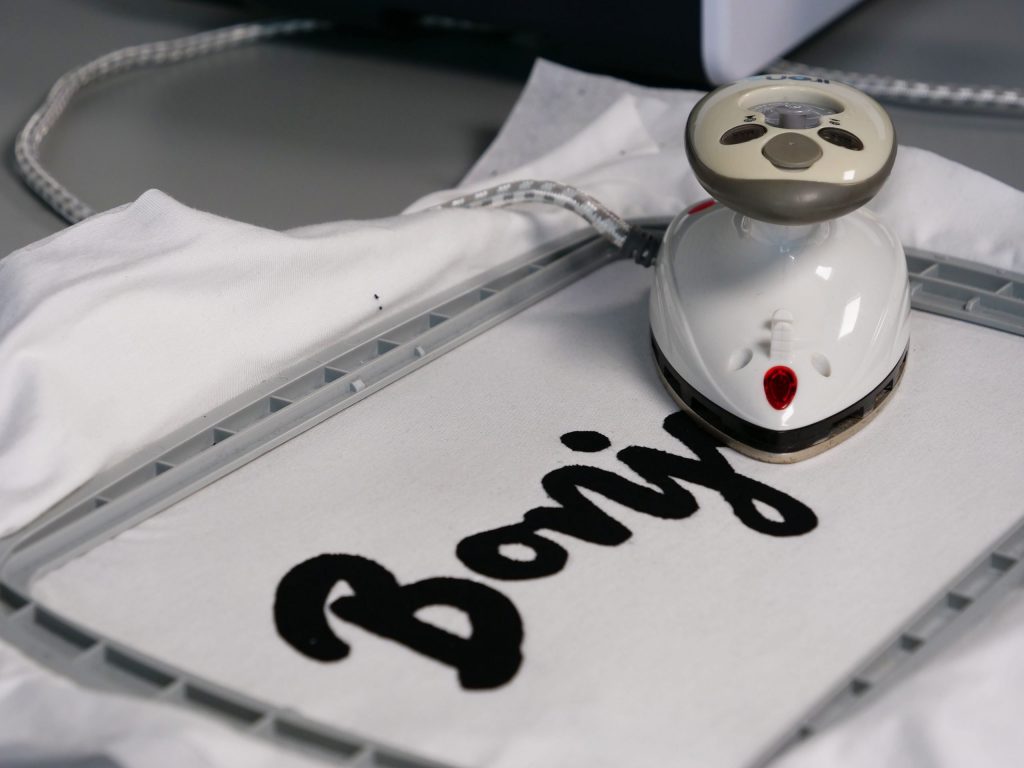
For the next step, the edges are neatened using a satin stitch. For this, I selected the same thread color as the appliqué material. Of course, you can also select a contrasting color if you prefer.


Now I am looking forward to a wonderful summer and this is definitely not the only t-shirt that will be introduced to my embroidery machine!
All the best,
Franziska


Hi Hilloah, how can I help you?