 BERNINA Corporate Blog -
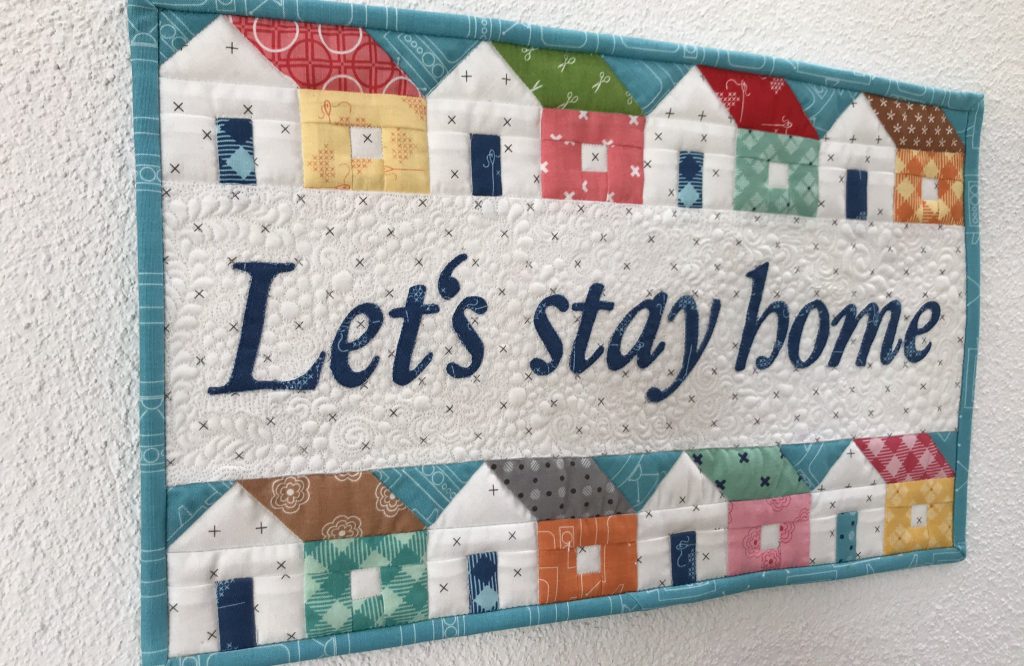
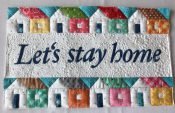
Let’s stay home – and sew a mini quilt
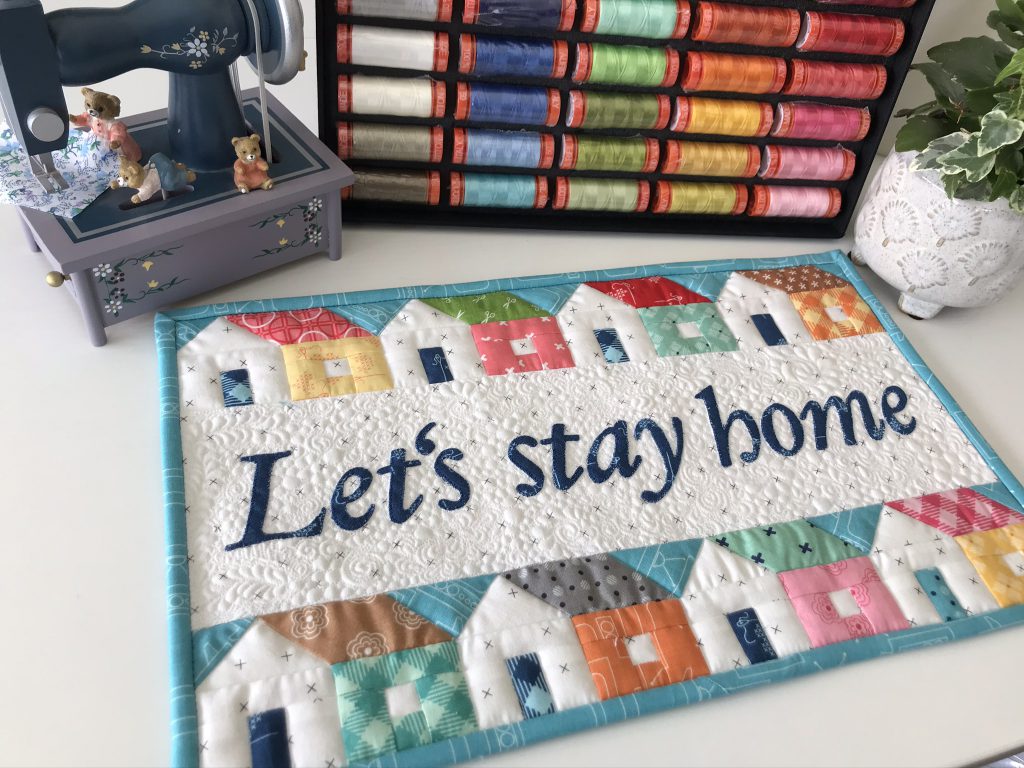
The name of the game at the moment is to stay at home. So let’s stay at home and gather up all our scraps. We can then use these to sew colorful little quilts that make our homes even more cozy and remind us to stay at home.
Download the pattern
You can download the sewing pattern and instructions for this mini quilt as a PDF by clicking on the following link:
Sewing-pattern-Lets-Stay-Home-quilt
I have put together 3 blog posts in which I explain the individual steps in detail. In today’s post, I will show you how to sew the row of houses. In the second post, we will look at how to appliqué the letters and put the top together, and in the third post, we come to my favorite step: quilting.
So to get started, collect your scraps together, download the PDF and let’s get going (but without leaving the house :-)).
Material for the row of houses
- Cotton fabrics in different colors (scraps are fine)
- PDF with pattern and instructions
- Sewing thread
- Patchwork foot (#37 or #97)
- Straight stitch plate (optional)
Let’s get to it!
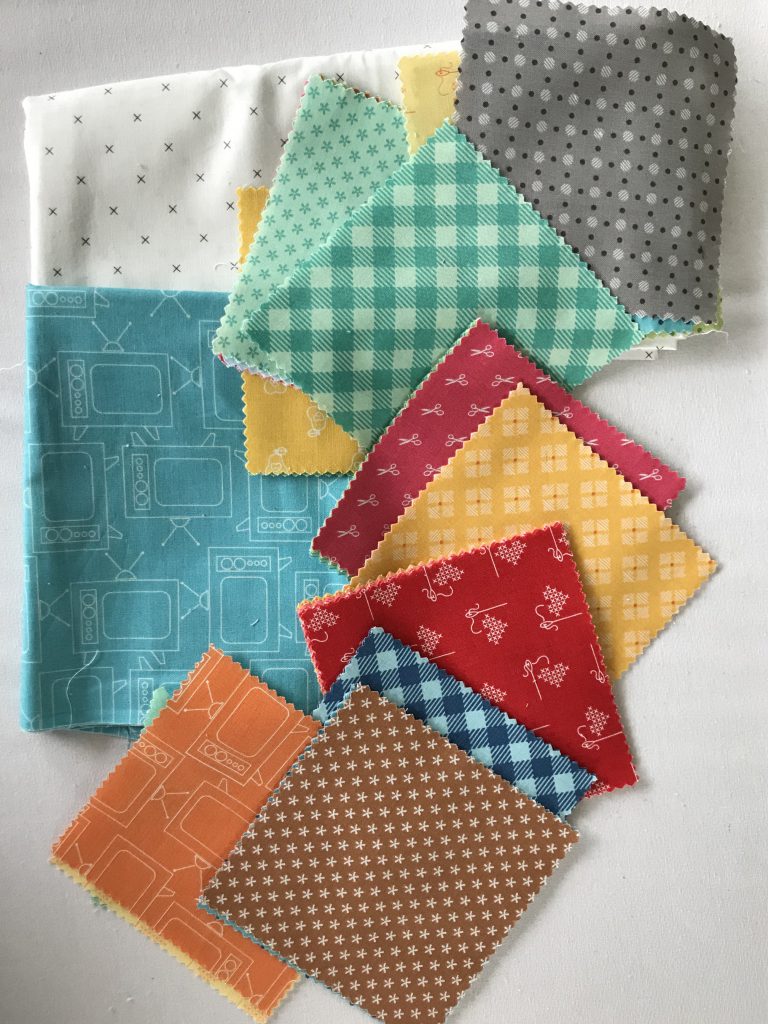
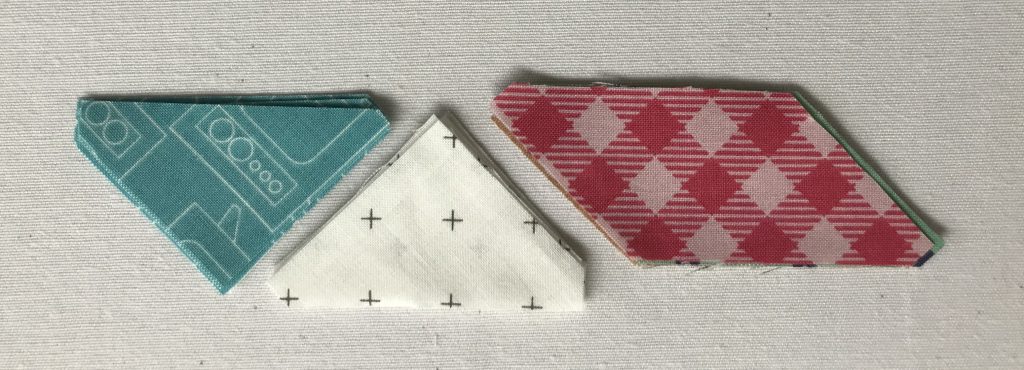
For my row of houses, I chose a charm pack that was already started, that I’ve had for a long time and now finally have a use for. I also had a fat quarter of the blue and white fabrics and therefore decided to make the sky and the fronts of the houses from the same fabrics. However, you could choose a different front or sky for each house. Take your inspiration from your scraps.
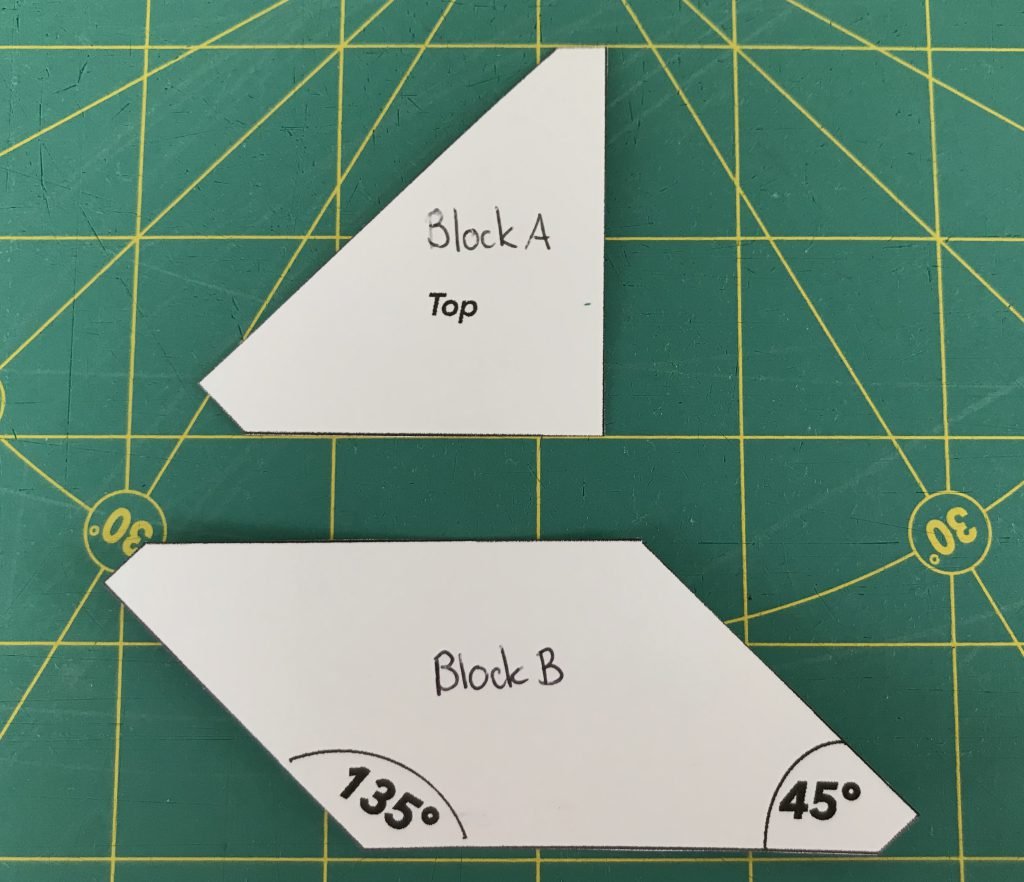
Print out and cut out the templates
I recommend that you put a slightly thicker paper in the printer before printing out the PDF and cutting out the templates. Then you can just cut out the shapes and use them as templates. Otherwise, you can always transfer the shapes onto paperboard.
When printing, make sure that the size is set to 100% or original size and has not been adjusted. Measure one of the shapes on the sheet to make sure it matches the specified size.
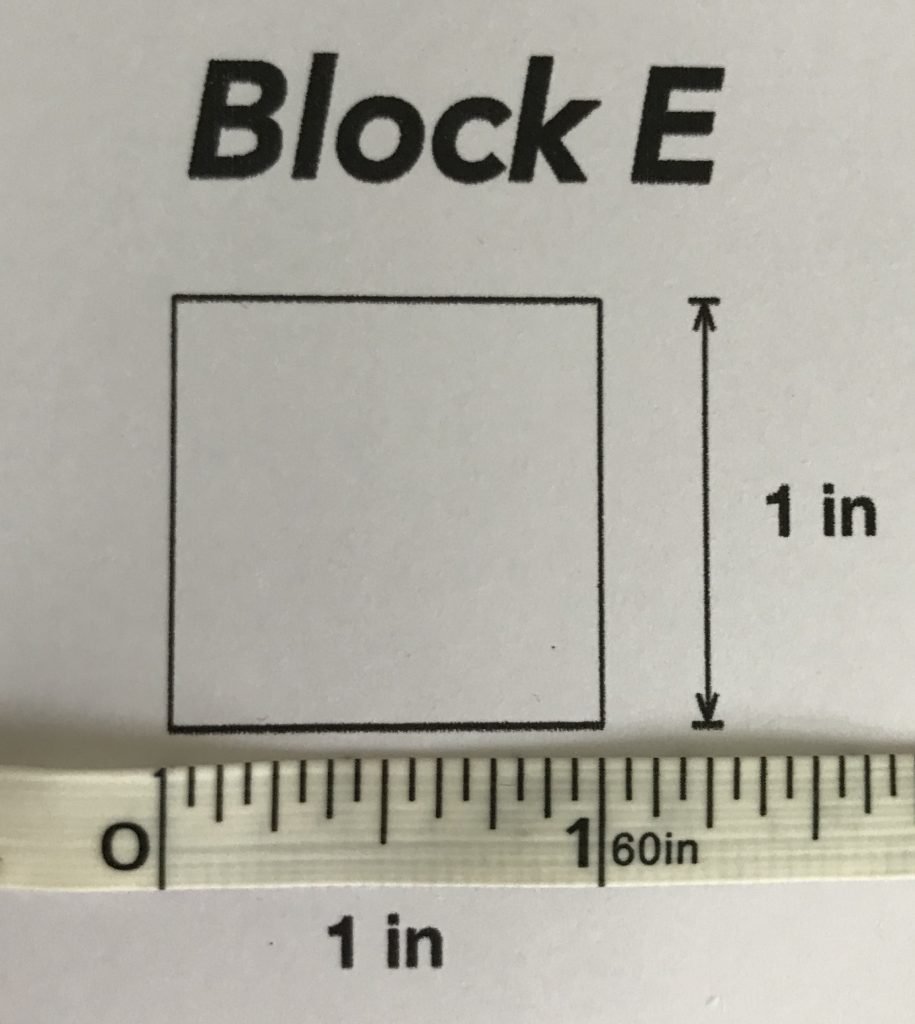
Next, cut out the templates and label them. Blocks A and B already have the so-called dog ears cut off so that everything fits together nicely when they are sewn together.
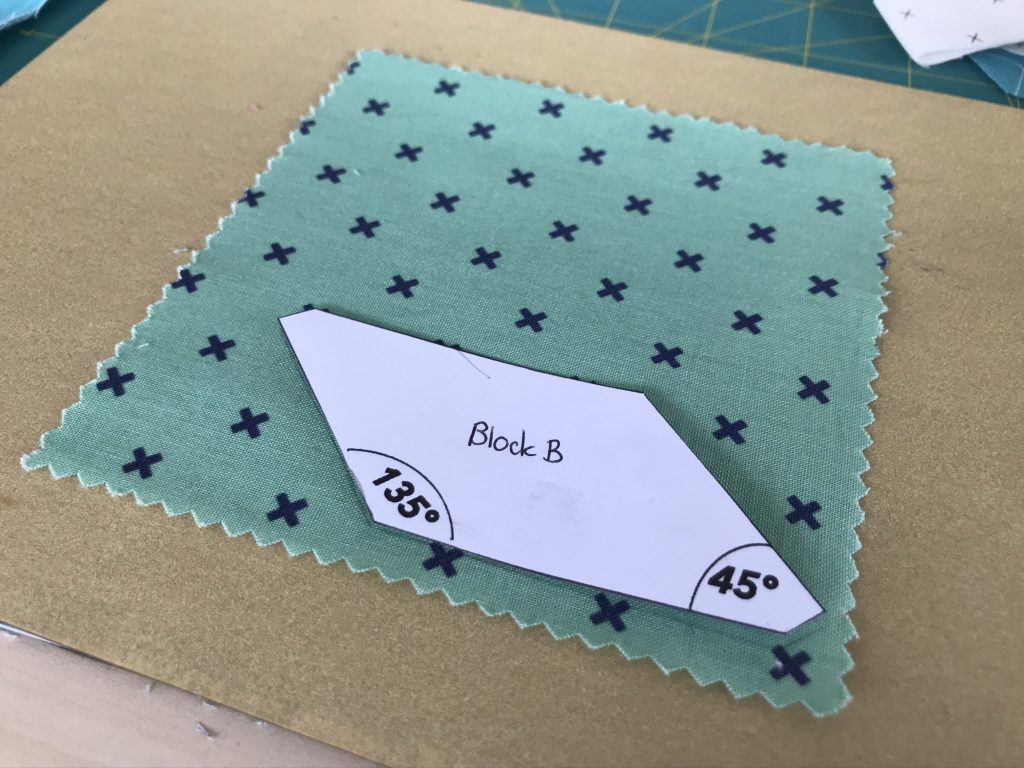
Cut out the fabric pieces
People who are experienced at using a rotary cutter can now place the template on the desired fabric and carefully cut the fabric around the template using the cutter. I personally often choose the slightly slower method of first transferring the template onto the fabric and then cutting it out with scissors. To stop the fabric from slipping when tracing around it, I have stuck a very fine sandpaper onto a small board. When the fabric is placed on the board, it always stays in the same place during tracing and doesn’t slip around.
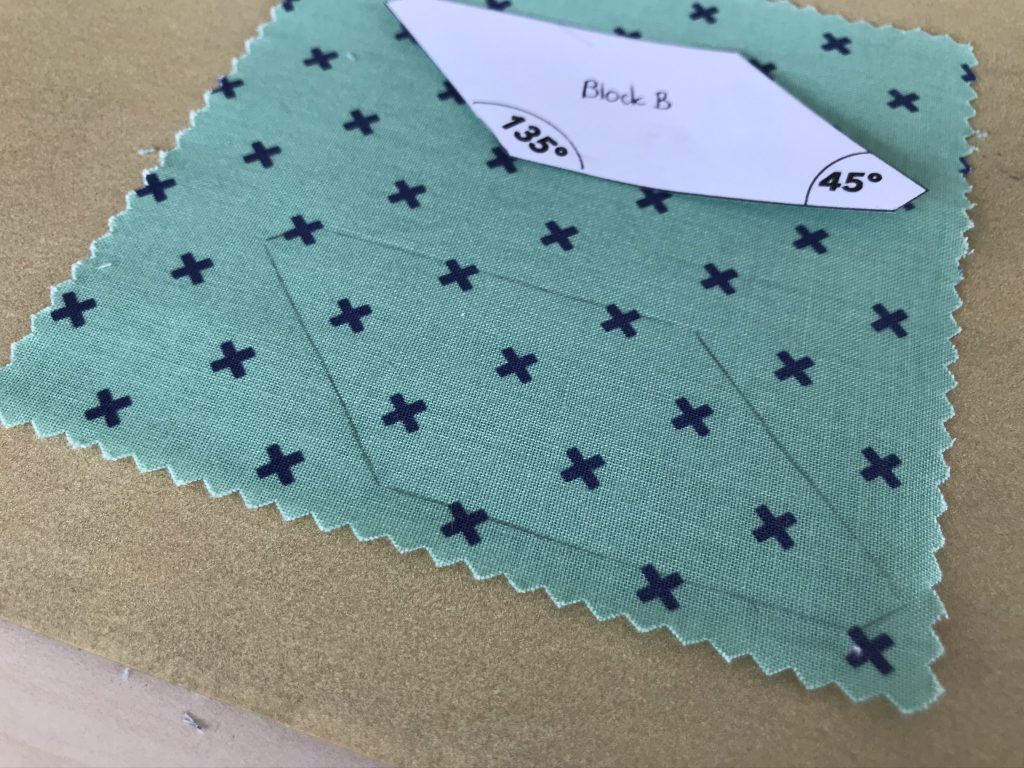
The instructions show you how many pieces of each color and block you need to cut out, so that you have enough for one house. If you want to sew a row of four houses, you have to cut out enough blocks for four houses.
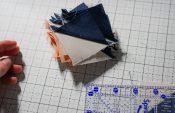
Choose the color combination for your quilt!
I love the next step because for the first time you get an idea of what the final product will look like. Lay out your cut out pieces and play with the color combinations until you are happy with how it looks.
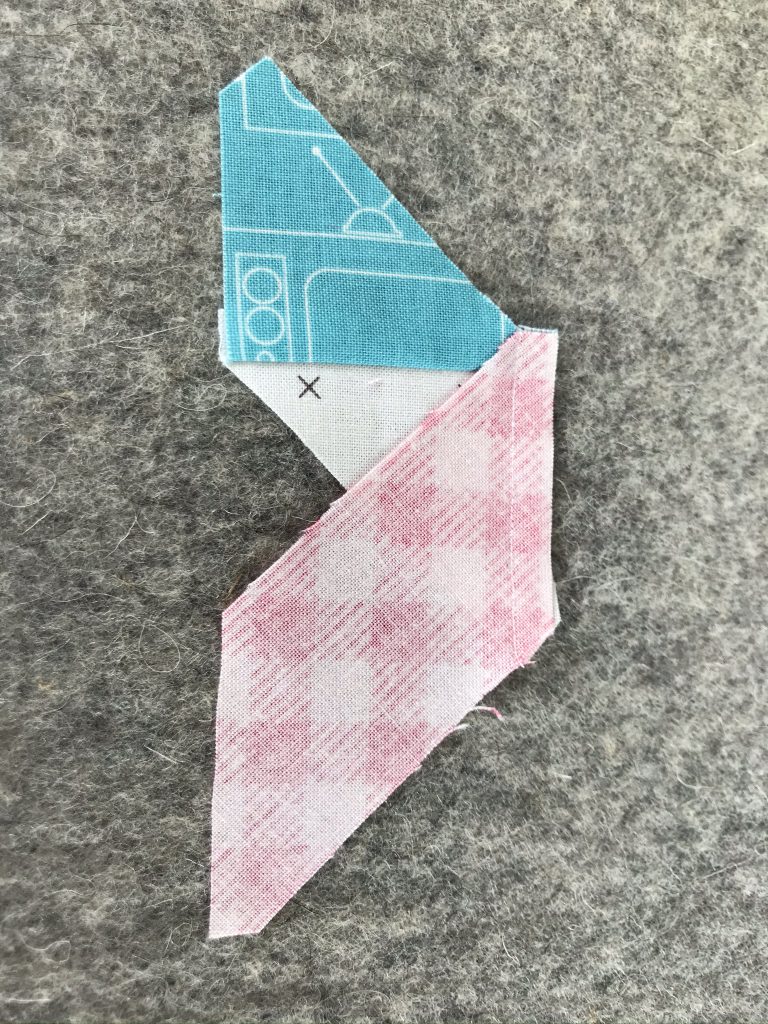
Eagle-eyed sewers might have already noticed that an additional sky triangle is needed (at the end of the row). In the instructions, this is referred to as an “extra”.
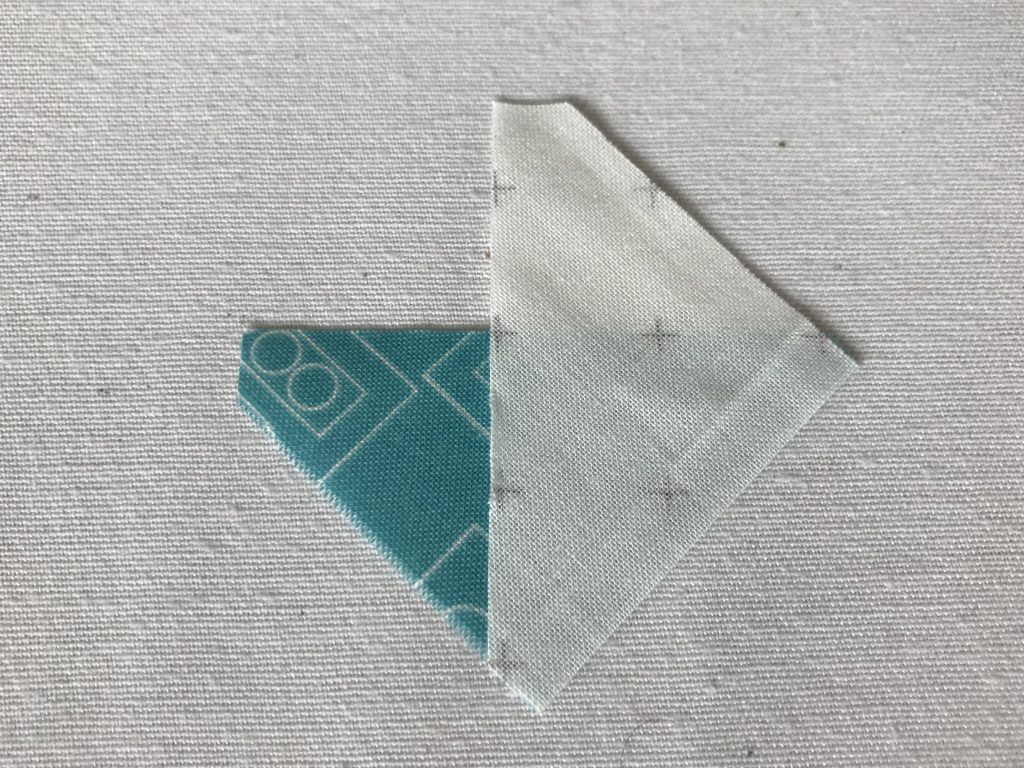
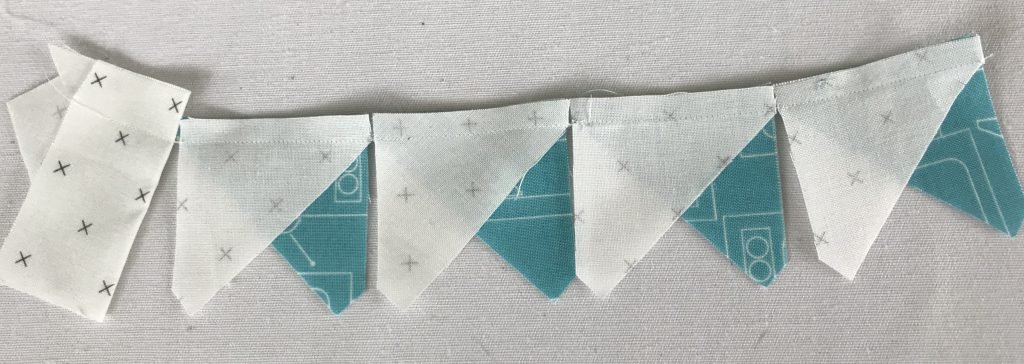
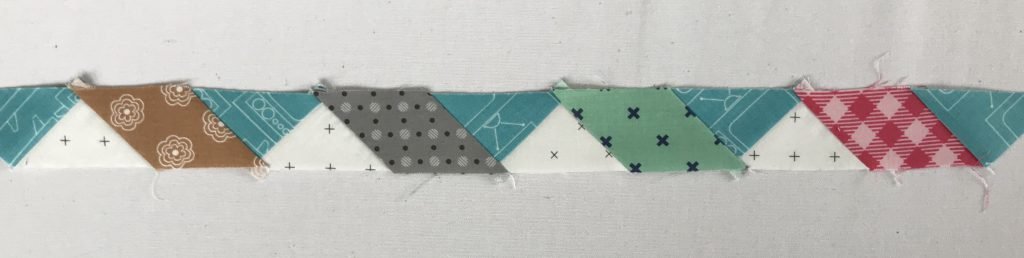
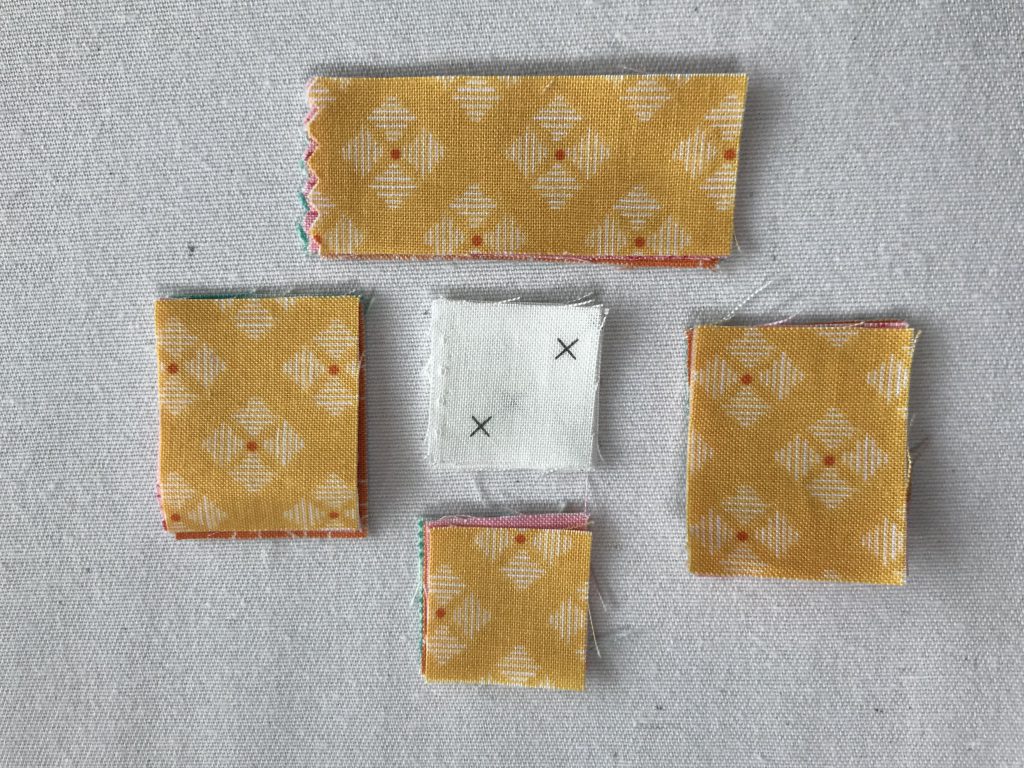
Instructions, Step 1: Sewing the roofs and sky
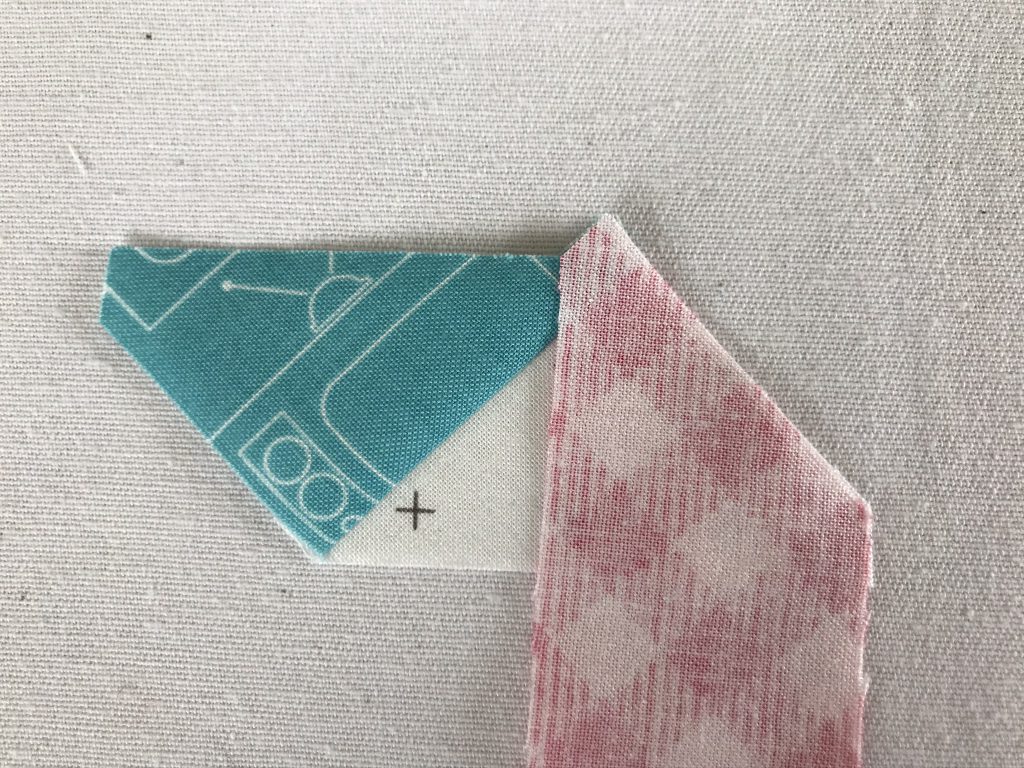
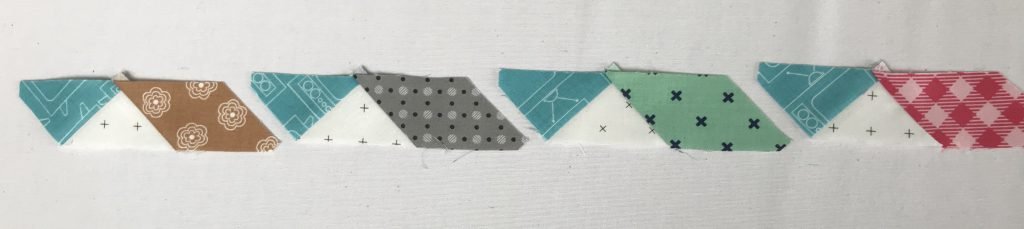
We are now ready for Step 1 of the instructions. First, we sew the roofs of the houses and the sky together in a row. All the sky triangles, house front triangles and roofs are laid out next to each other:
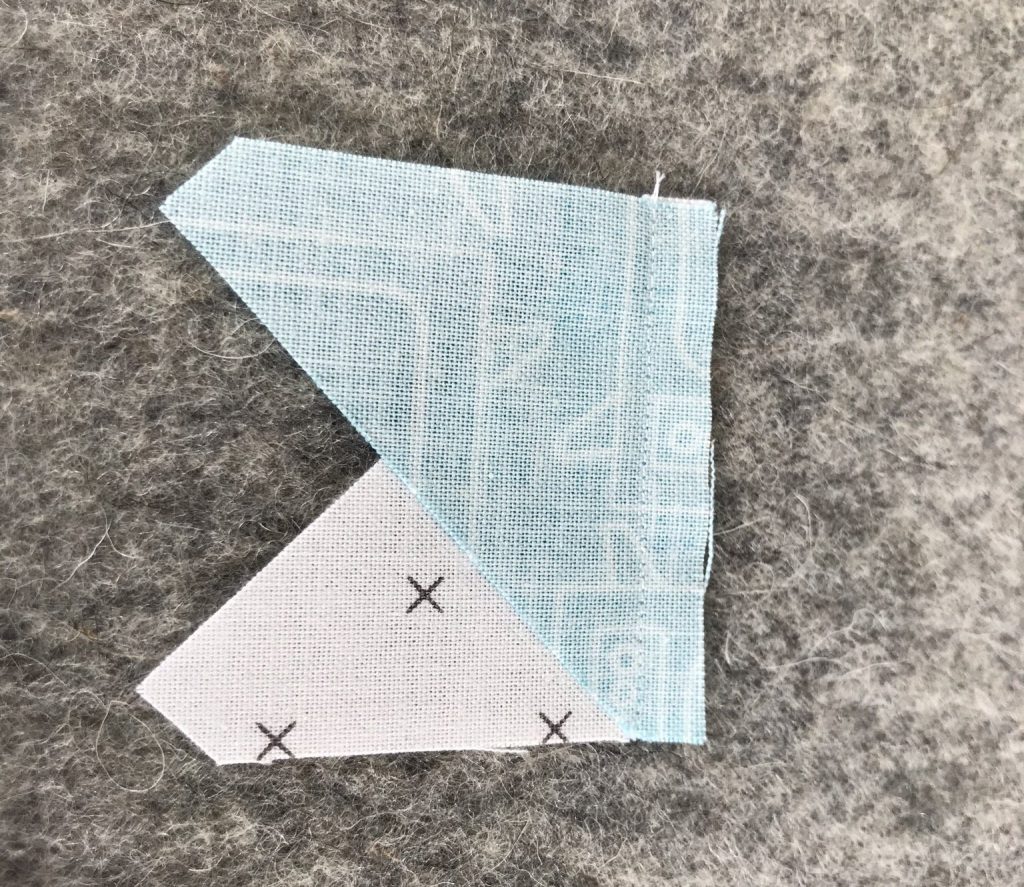
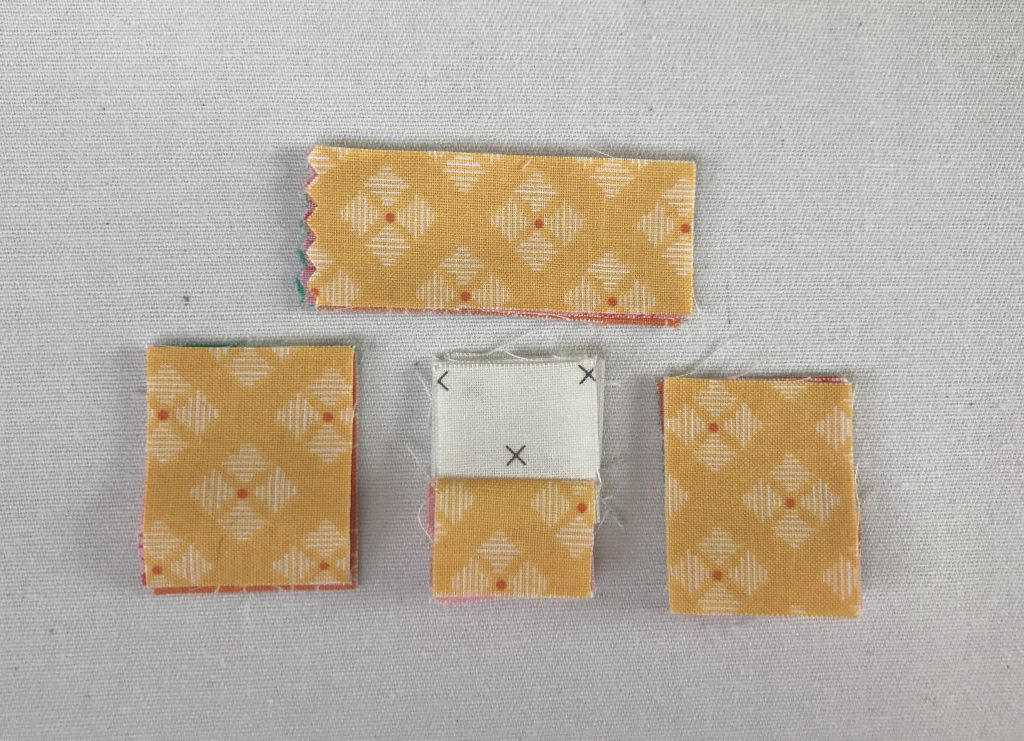
First we sew the triangles together. Place a white triangle onto a blue triangle with the right sides together and line them up. Due to the cut off dog ears, they fit together perfectly:
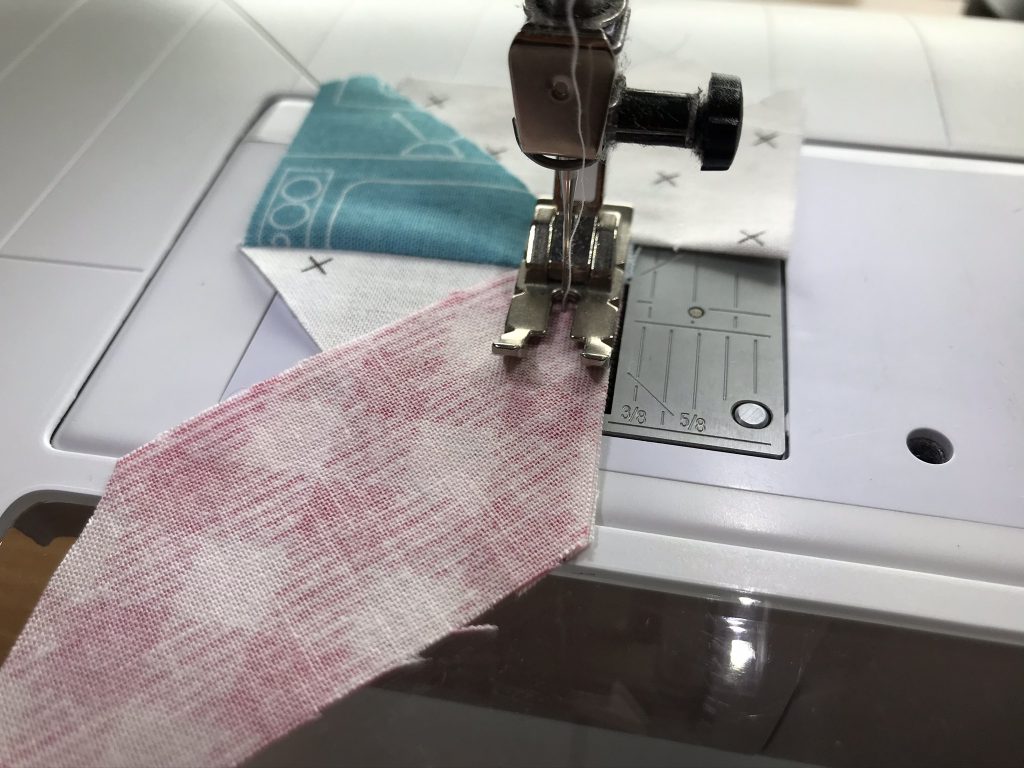
Sewing machine settings
I set up my BERNINA 350 as follows: I attached patchwork foot #37, inserted a new universal 80 needle, threaded it, reduced the stitch length to 1.5 mm and inserted a straight stitch plate.
The straight stitch plate is optional but is very efficient at preventing the fabric from being pressed into the stitch plate. If you don’t have this stitch plate at home, first sew a few stitches on a scrap of fabric and then continue sewing immediately.
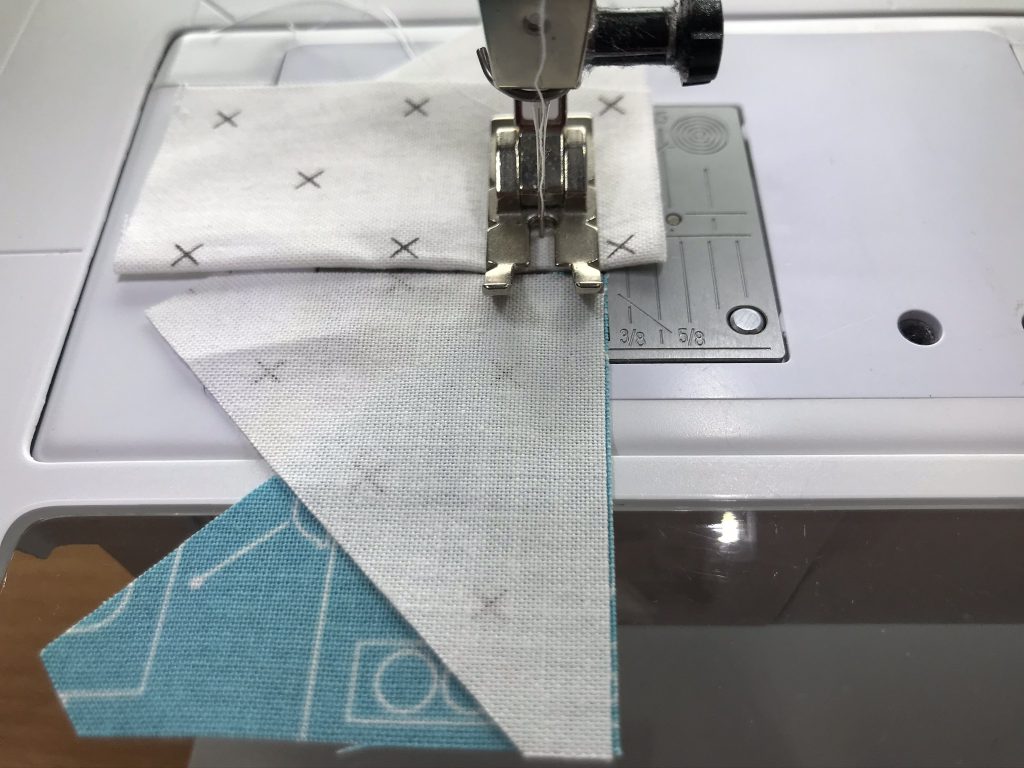
I reduced the stitch length because these are very small pieces of fabric and I never sew securing stitches (by reversing) when sewing pieces together.
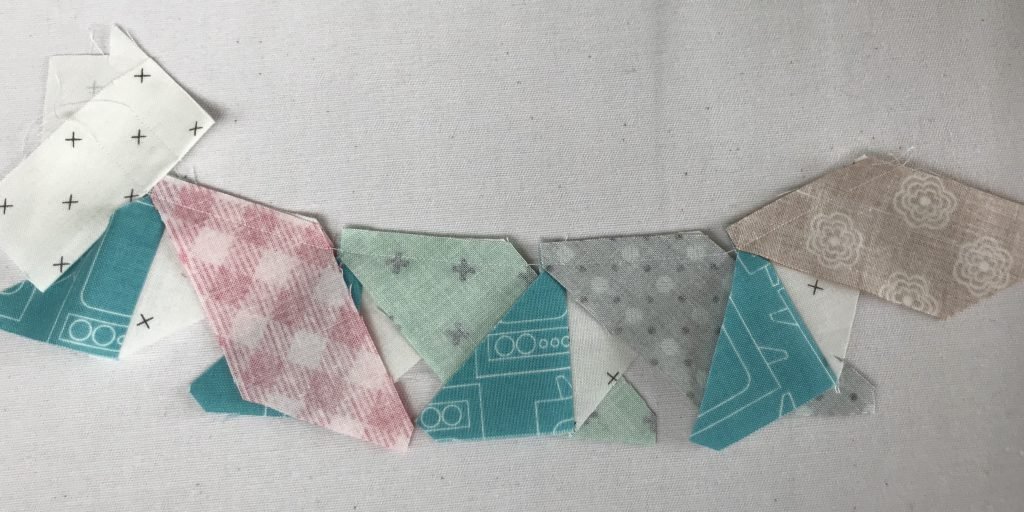
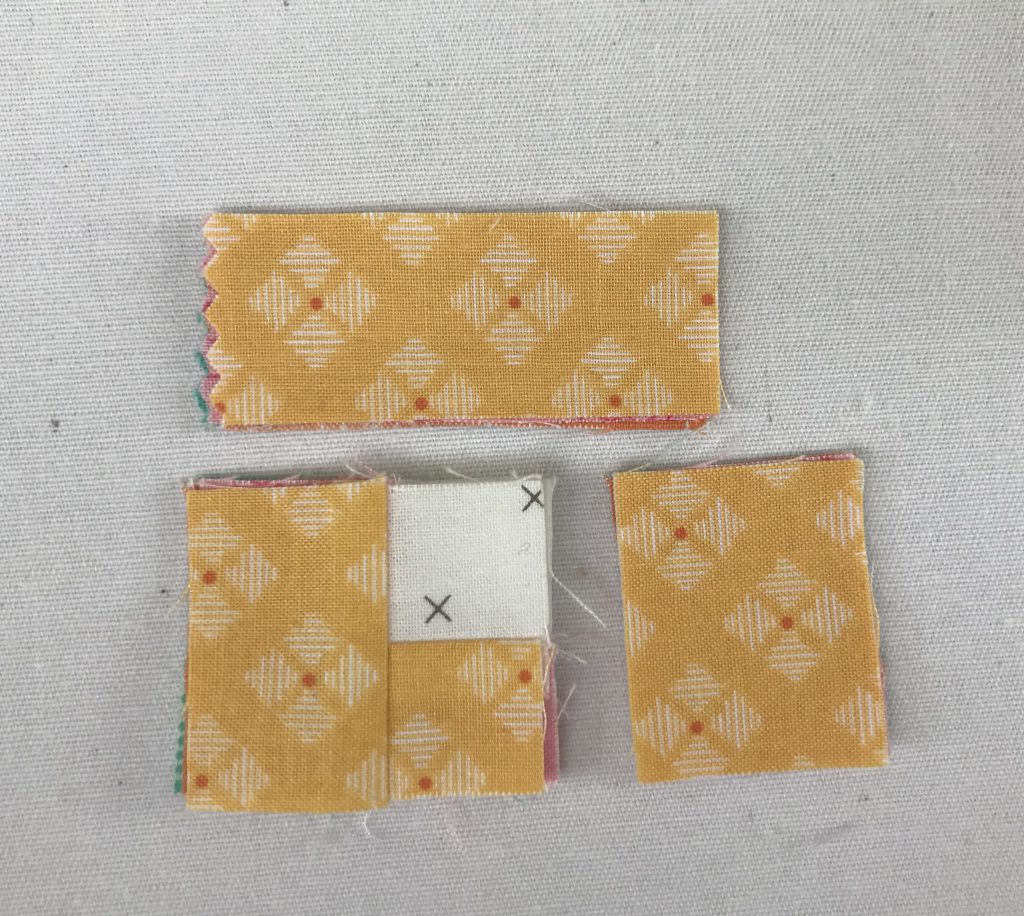
Chain piecing and pressing
Once you have sewn the first piece, get the next one ready, place it under the foot and sew it together immediately.
To do this, operate the knee lever, raise the foot slightly and slide the next piece under. This is called chain piecing. It is a very efficient way of sewing as much as possible in one go.
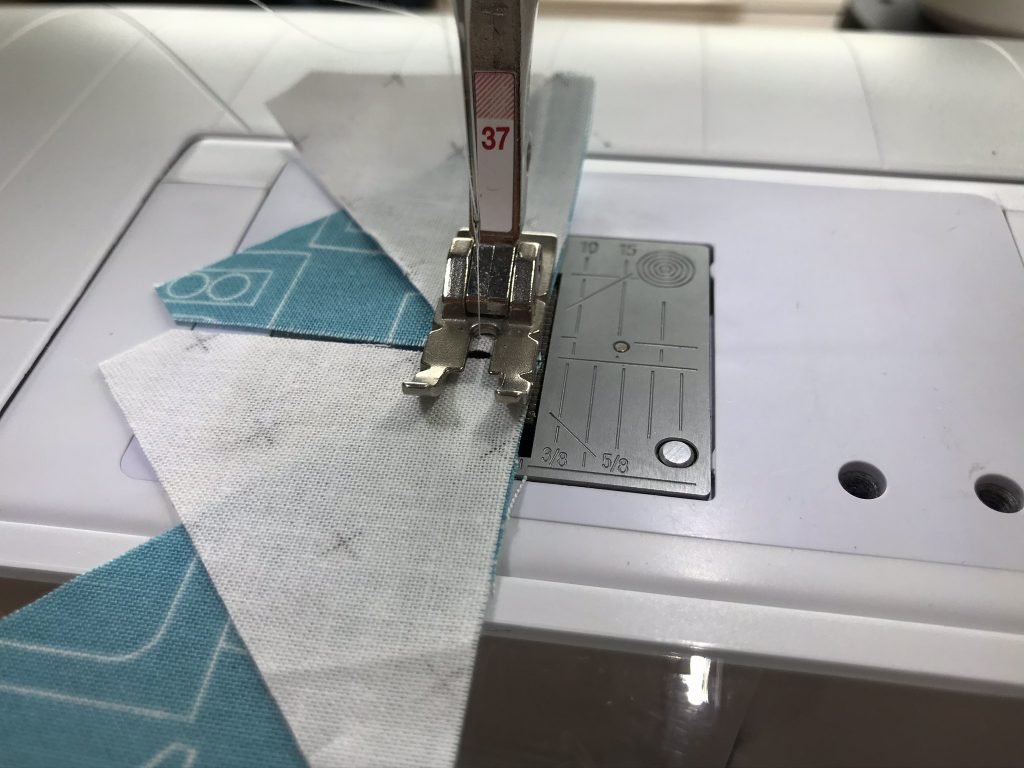
When you have finished, take the chain and cut the individual pieces apart.
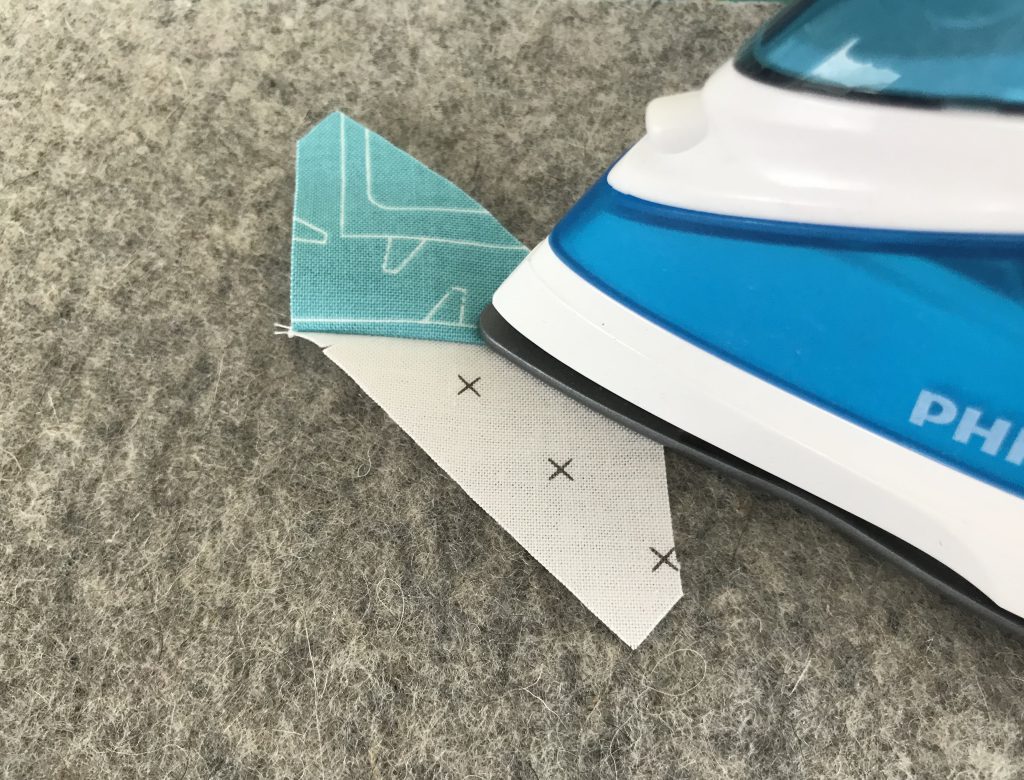
Now it’s straight to the iron. The same process always applies: first set the seam, fold over and then press to the dark side. I am happy to show you how to do this:
I place the piece on an ironing mat with the dark fabric on top. Now I put the iron on the seam and set the seam for 1-2 seconds.
Then I fold over the top fabric piece. The seam allowance is automatically folded towards the side of the darker fabric. Now I place the iron back on and press (not with force, just using the weight of the iron). If you want, you can also use steam. Never “iron” by moving the iron back and forth, just press. If the iron is moved too firmly, the fabric pieces become distorted and then no longer match up.
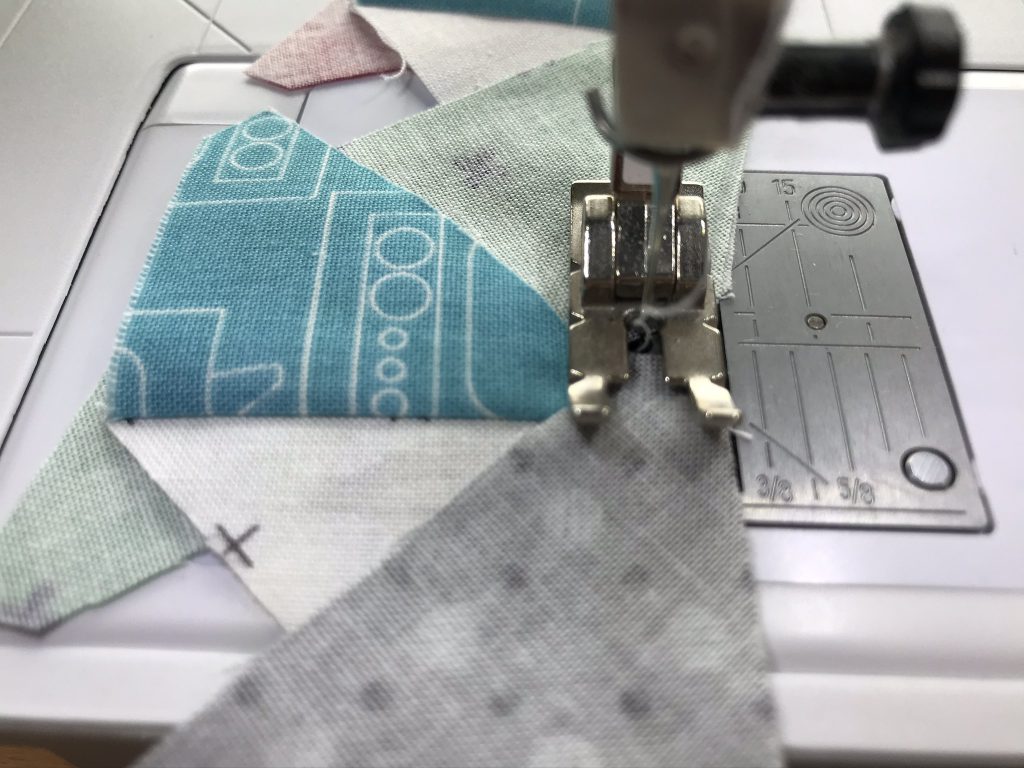
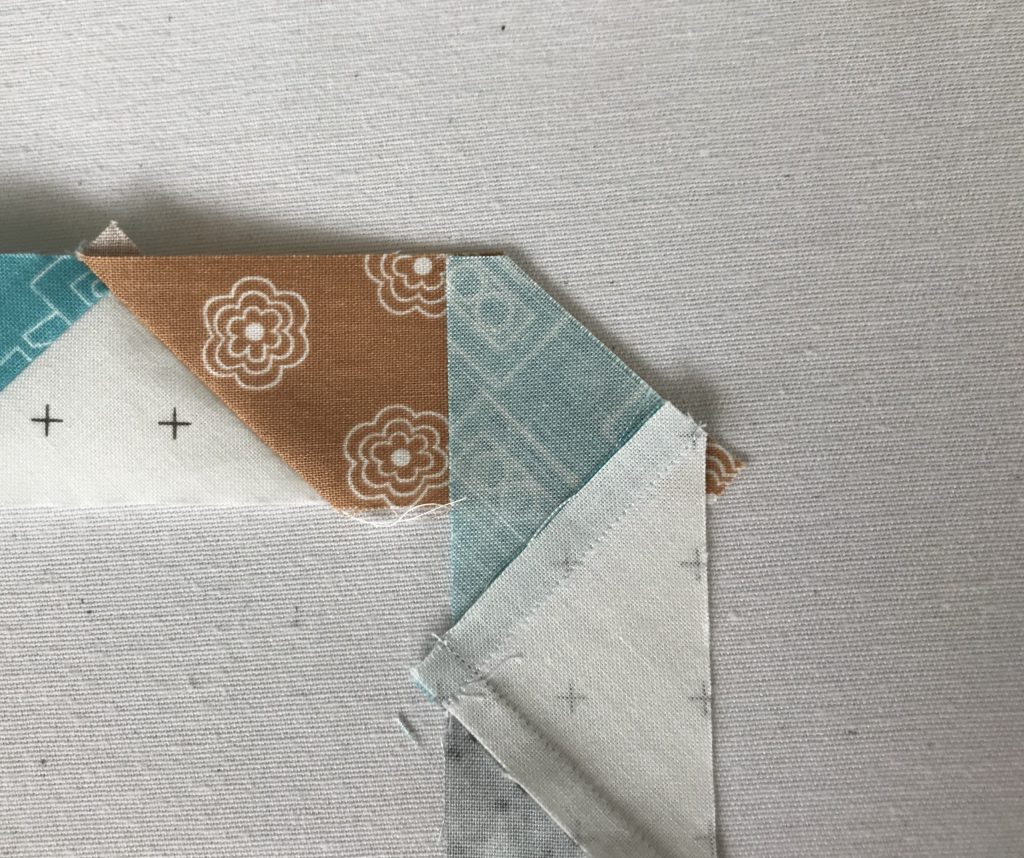
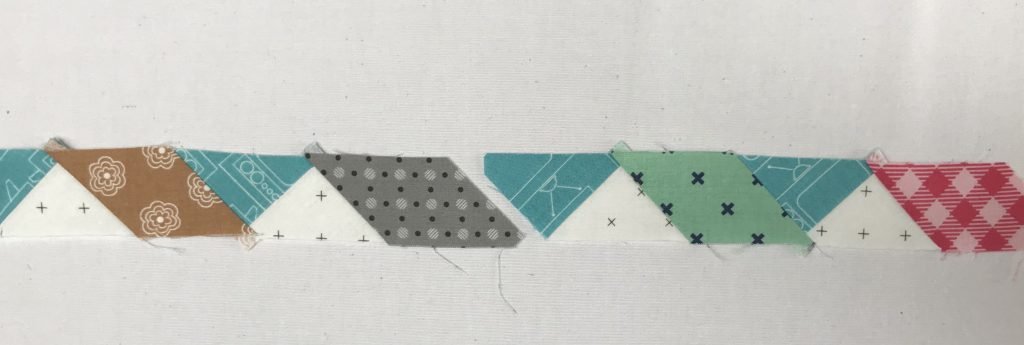
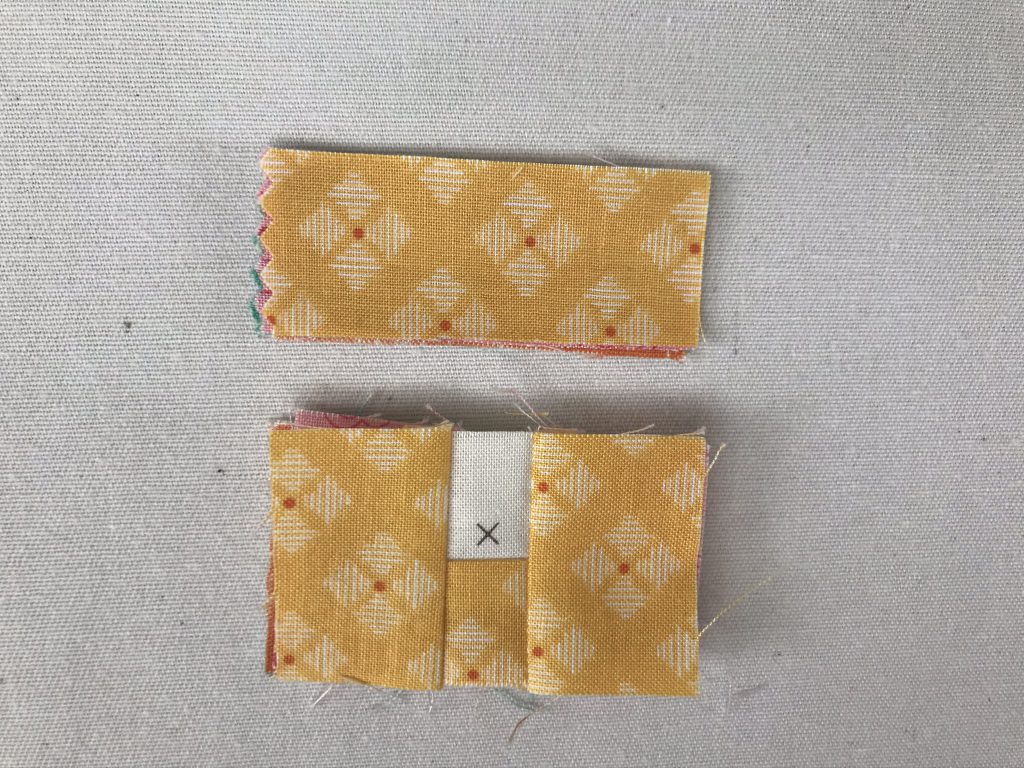
Sew the roof
Place the finished pieces in position next to the roof pieces. Now sew the roof on.
To do this, place a roof piece onto a previously sewn piece with the right sides together and line it up.
As in the first step, all the roofs are sewn on one after the other:
The chain piecing is a bit more complicated this time because the fabrics overlap slightly under the foot, but with a little patience, it works without any problems.
Remove the chain from the machine and cut the individual sections apart.
When ironing, place the piece on the ironing pad with the roof material on top. Then proceed exactly as before. First set the seam, then fold over and press. Ironing the seam allowance to the side of the darker fabric prevents the seam allowance from showing through the white fabric and becoming visible.

Instructions, Step 2: Sewing the houses together
Lay out the four house elements in the correct order and sew them together in a row.
To do this, take the first two elements, place the right sides together, line up and sew them together. Get the third and fourth elements ready and sew them together in the same way:
Iron the seam allowance onto the roof side and lay out the two parts again.
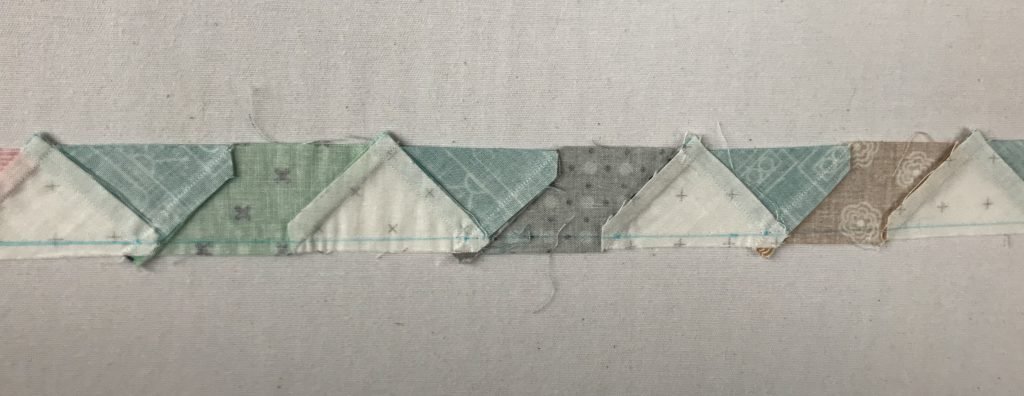
Place the two parts with the right sides together and sew them together to form the row. Finally, sew on the extra triangle at the end of the row. The top row is now finished:
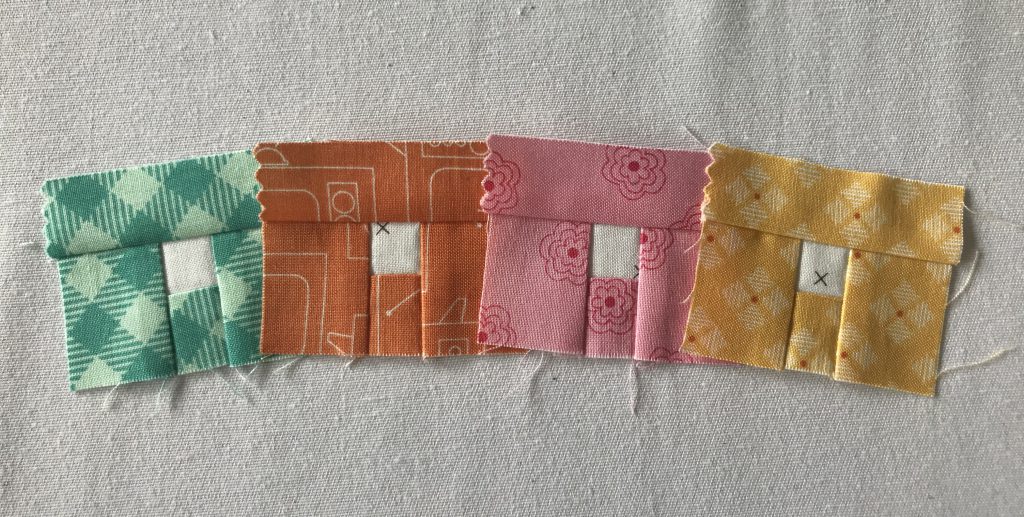
Instructions, Step 3: The house fronts and doors
In Step 3, we sew the house fronts to the doors. Place all the required pieces next to each other and position correctly.
First the door is sewn onto the left house front. Place the pieces with the right sides together, sew and press. As before, the seam allowance is ironed towards the door (darker fabric):
Now sew the right house front onto the door in exactly the same way:
Finally, sew on the top house wall and press the seam allowance down towards the door. The house fronts are now finished:

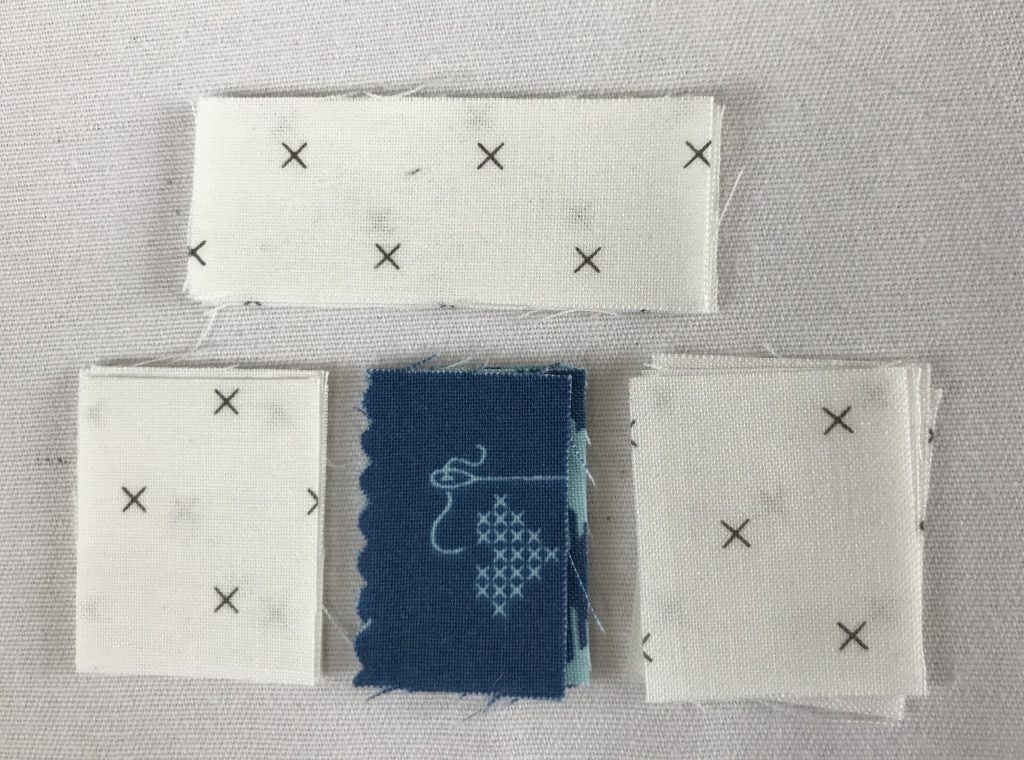
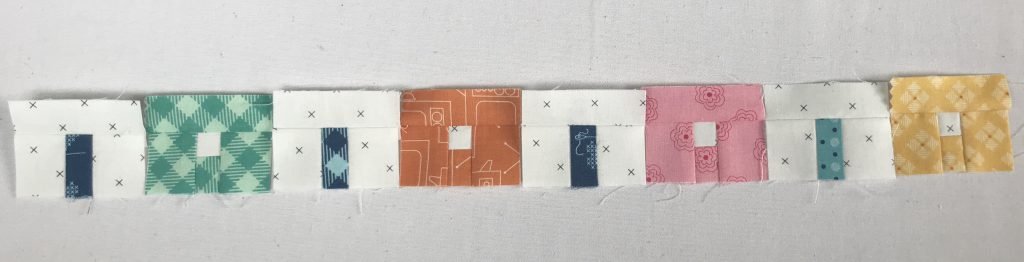
Instructions, Step 4: House sides and windows
In Step 4, we sew the side of the house to the window. Once again, place all the required pieces next to each other and position correctly.
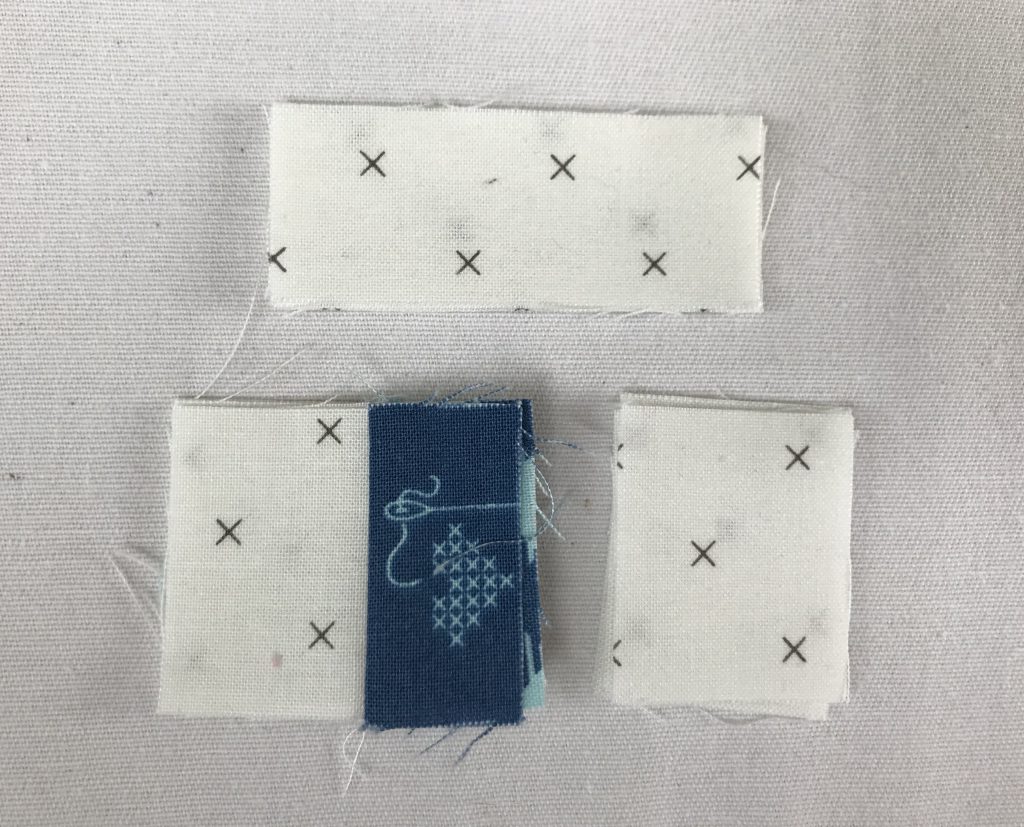
First, sew together the window and the bottom wall. Place the two pieces with the right sides together, sew and press. By now you already know which way to iron the seam allowance. Exactly, towards the darker side!
Now sew on the left side of the house and press:
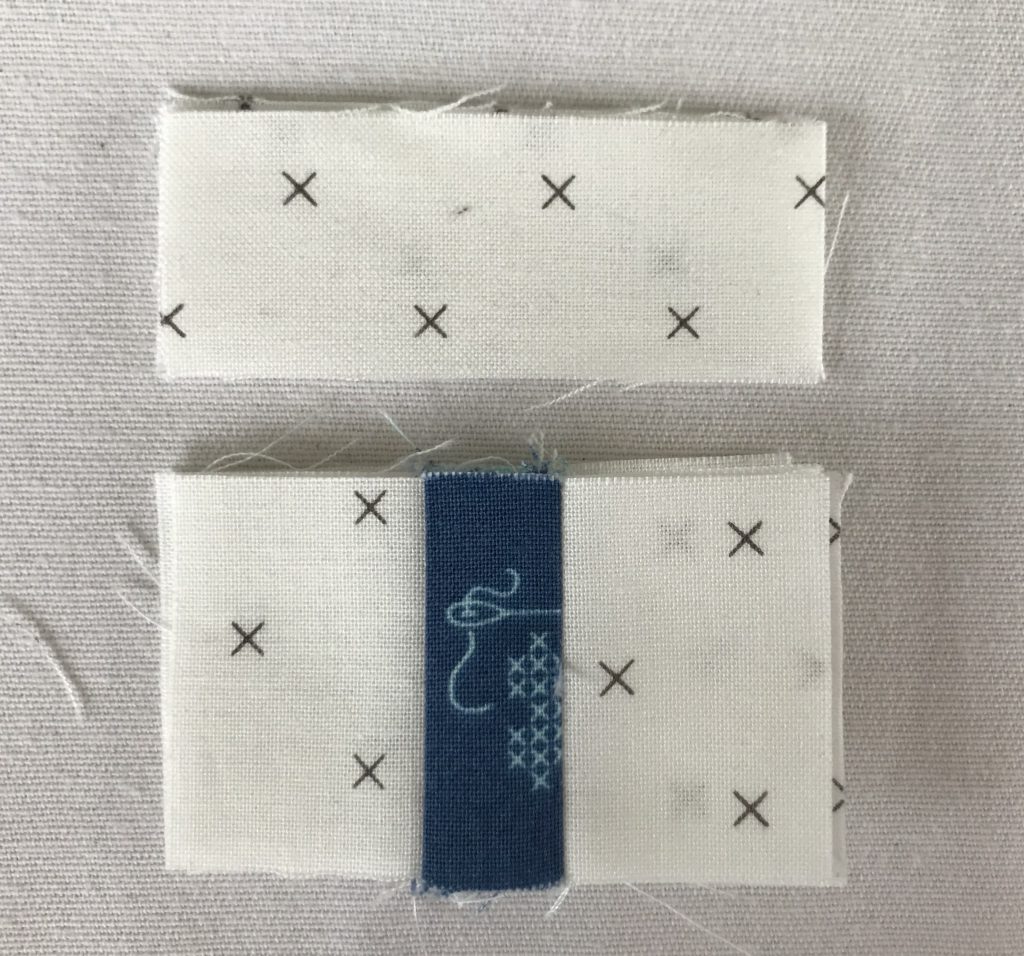
Then sew on the right side of the house and press:
Finally, sew on the top house wall and iron the seam allowance upwards towards the house wall. The house sides are now finished:
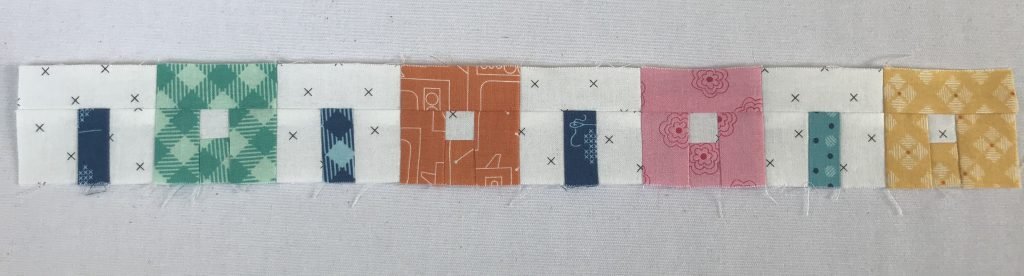
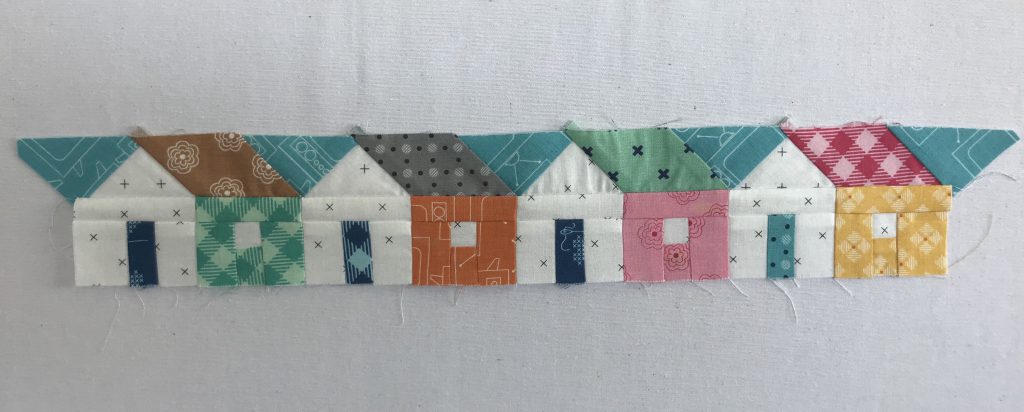
Instructions, Step 5: Sewing the bottom row together
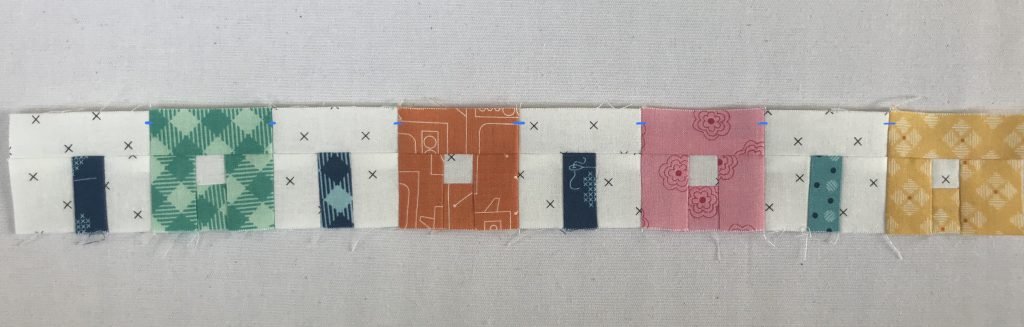
In Step 5, the bottom row is sewn together. To do this, lay out the house fronts and side walls in the correct order.
Take the first two pieces, place them with the right sides together and line them up. Because the seam allowance was ironed downwards on the house front and upwards on the house side, the seam allowances can be positioned perfectly with your thumb and forefinger. This results in more accurate seams than when working with pins.

As described in Step 2, sew the entire row together and press well towards the dark side (house sides). The bottom row is now finished:
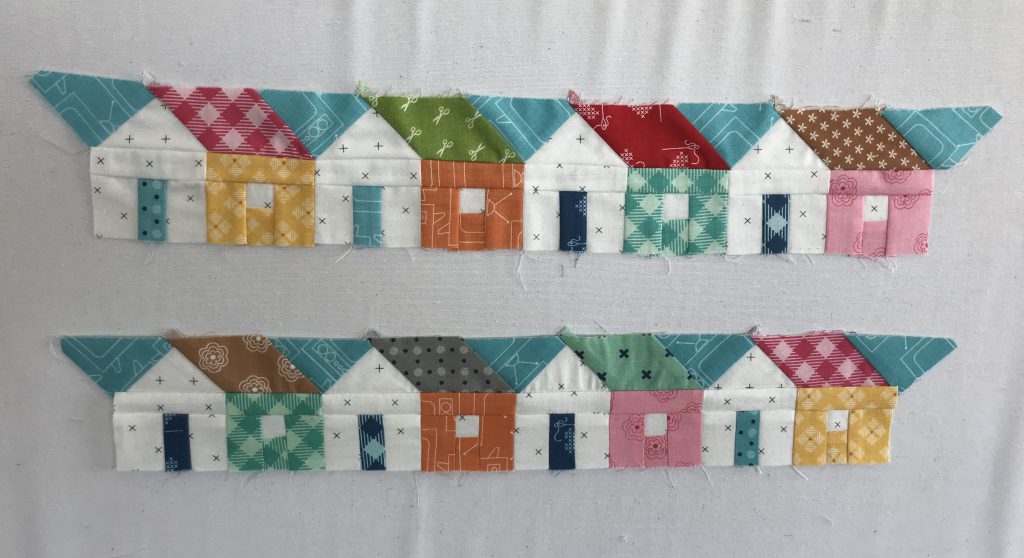
Instructions, Step 6: Sewing the two rows together
Now comes the most challenging step, as the two rows have to be sewn together and the seams should more or less match up. I have some tips for you on how to do this without too much frustration.
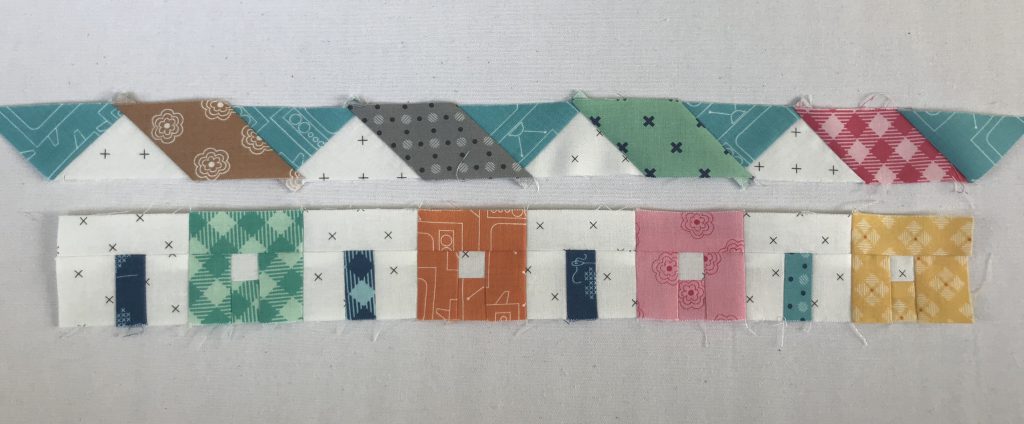
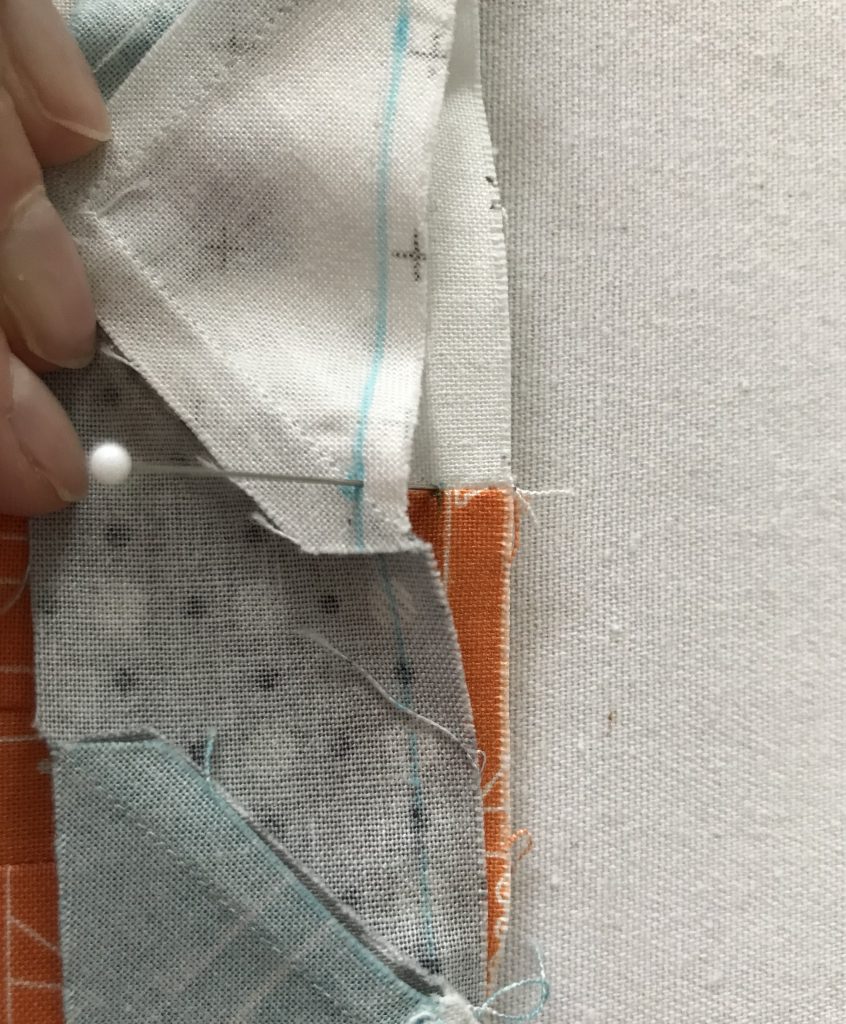
First, we establish the sewing line that we will eventually sew along. This is often less than ¼ inch from the edge and should be drawn. To do this, turn the top row over so that the reverse is facing you. Mark the three points where the seams intersect using a water-soluble pen or chalk:
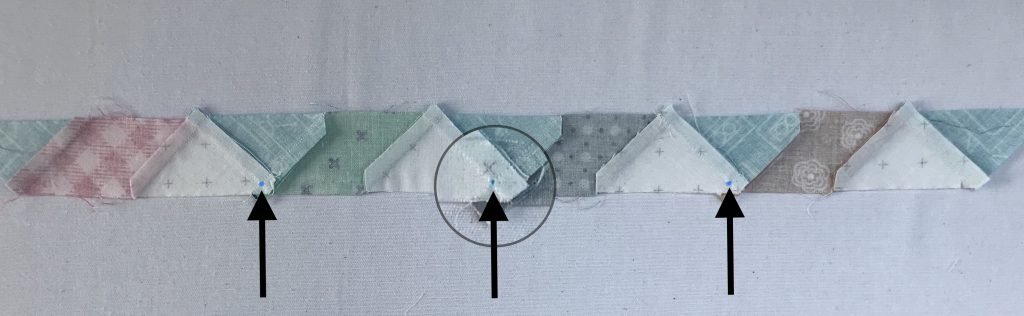
Then connect the points with a ruler, making sure that the row is nice and straight. This is your new sewing line.
For the bottom row, on the fabric face, make a mark at all the seams ¼ inch from the top. Once again, use a water-soluble pen or chalk for this.

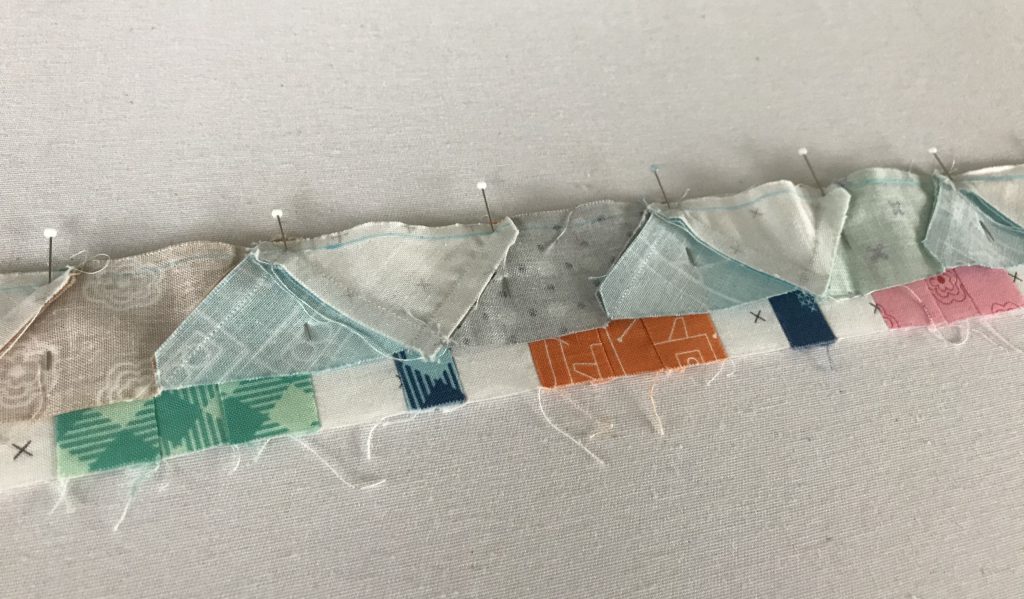
This time we do use pins. But the markings make this easier. Place the top row onto the bottom row with the right sides together and insert the first three pins at the marked points where the seams intersect. Insert them precisely into the center of the cross on the top layer and into the marking on the bottom layer.
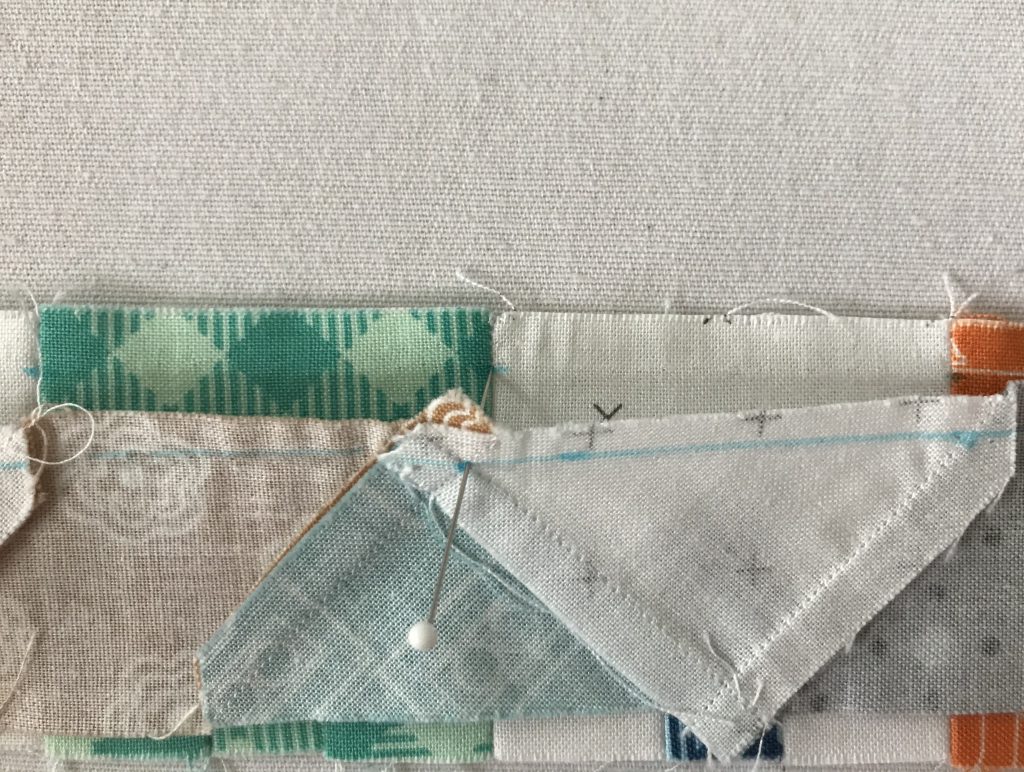
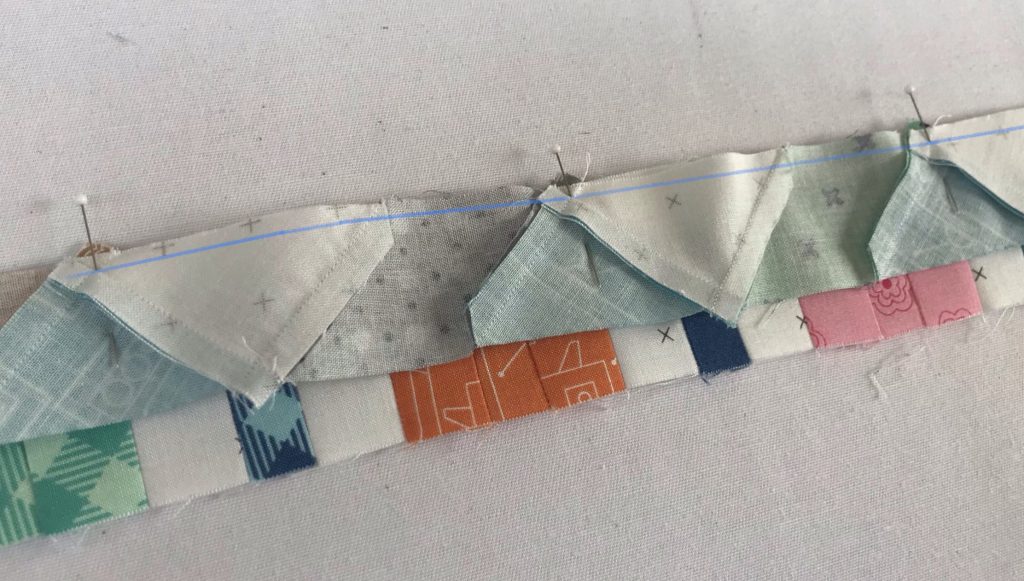
Four more pins are then inserted as follows. A pin is inserted on the top layer at the intersection of the seam and the sewing line and on the bottom layer as usual at the marking. The bottom layer may protrude slightly. That is fine; there is no need to make any adjustments.
When sewing, make sure you sew precisely along the marked sewing line. You should therefore completely ignore the width of the foot and concentrate on the sewing line. For the first pass, I set the stitch length to 5 mm. That way, I can quickly unpick the seam again if I’m not happy with it. Since I’ve been doing this, I’ve only had to unpick a seam once. So it seems that this approach takes some of the pressure off :-).
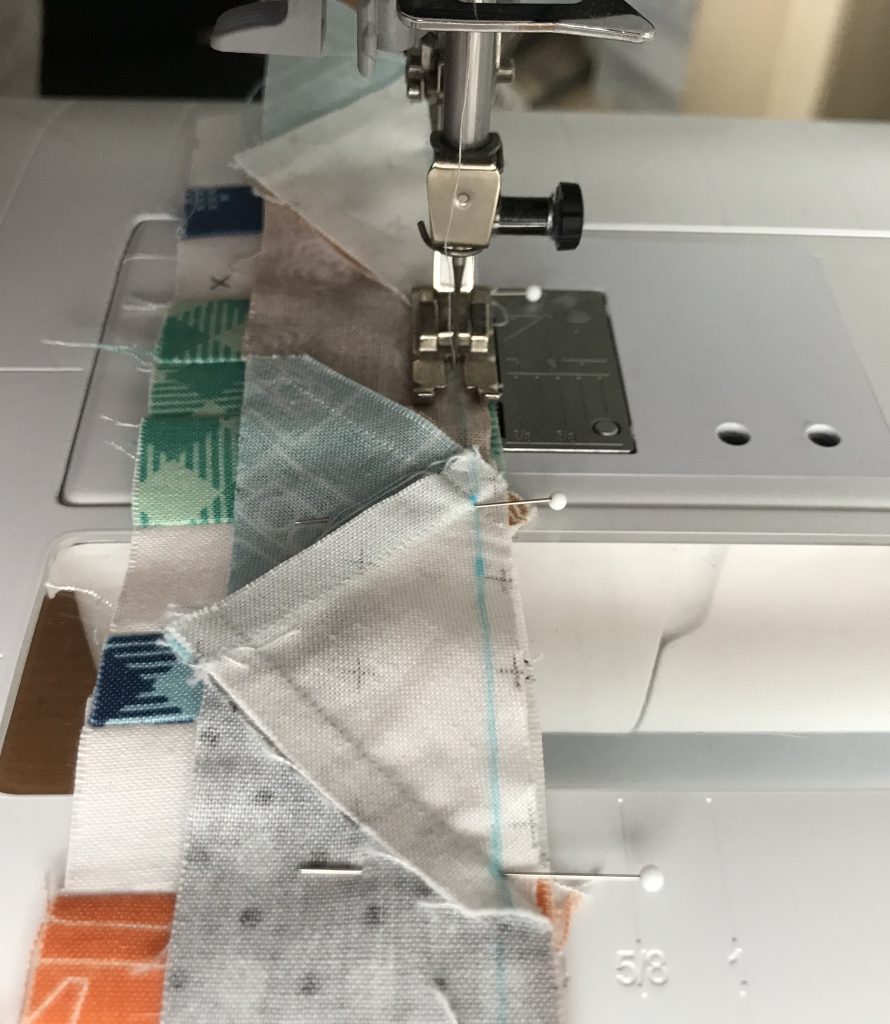
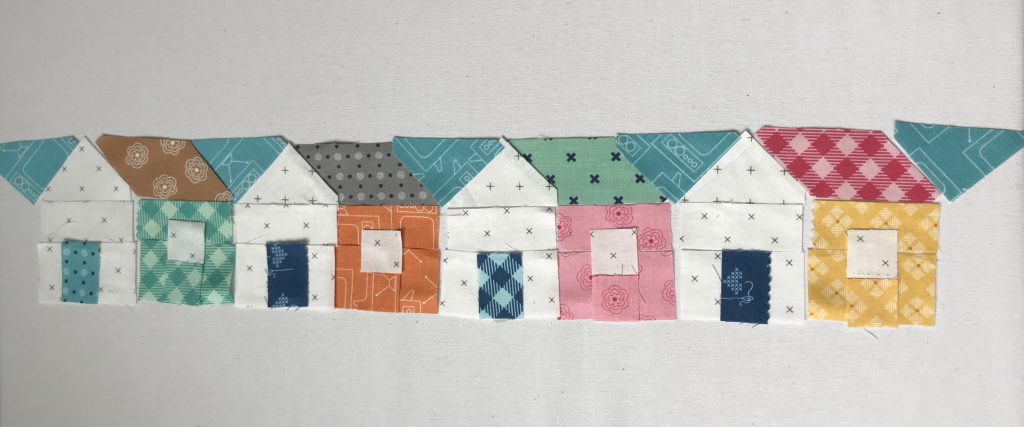
If I’m happy with the seam, I sew over the same seam again using a stitch length of 2 mm. I iron the seam allowance towards the underside of the house. Finally, press everything well from the front – and your row of houses is finished.
Congratulations!
As it went so well, you can now sew the second row of houses in exactly the same way.
Don’t they look great? I will show you the next stage of our project next week. The second part will come out on Friday, June 19. Until then, stay at home and stay safe.
Best wishes,
Karin


Thank you for sharing this. It’s going to be my next project
This is a very nice project, but I cannot find the templates for the blocks. Please help me. Thank you