 BERNINA Corporate Blog -
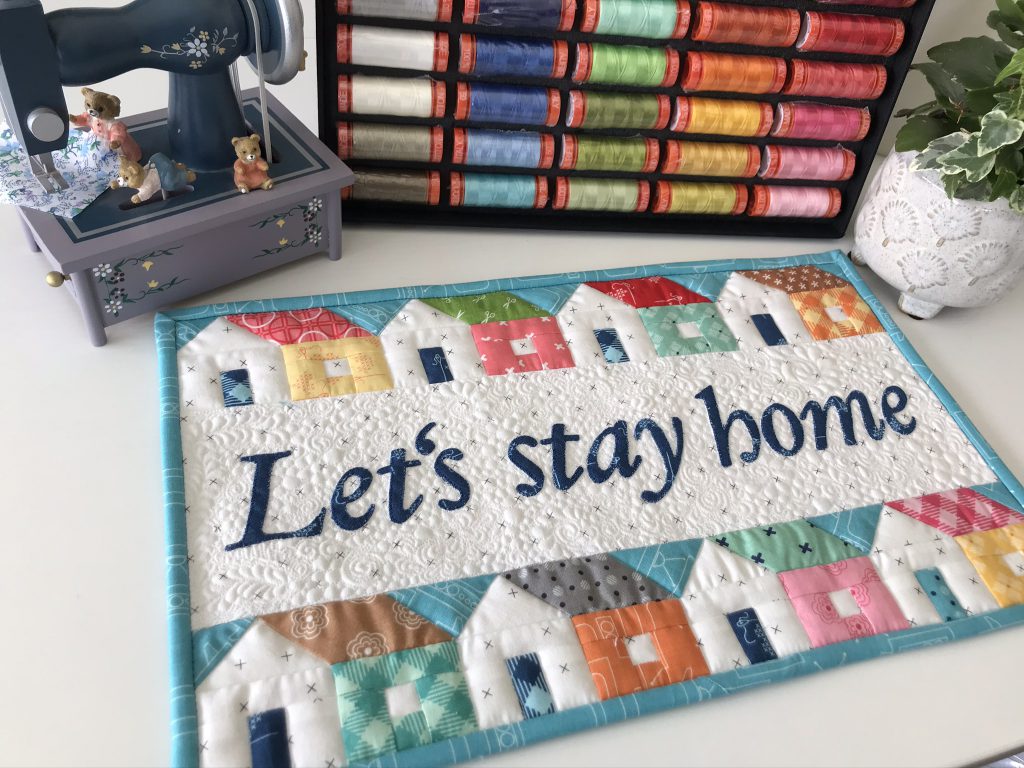
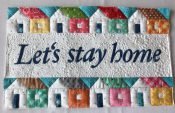
We are sewing a mini quilt and this is part two: appliqué
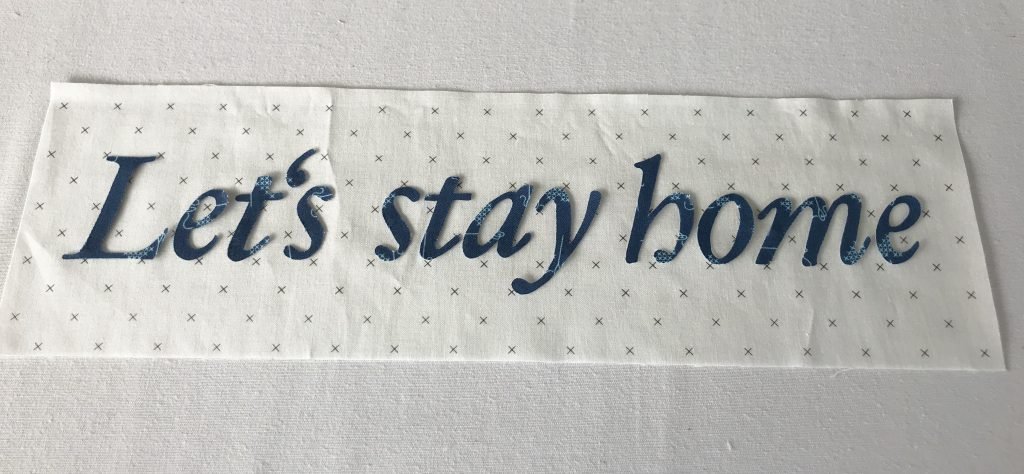
A week has passed and it’s now time to do the appliquéing. In the last post I showed you how to sew the row of houses and today, we come to the lettering.
Appliquéing has fascinated me for a long time, but also often pushed me to my limit until I learned to use various tools to help me. These help make appliquéing a more fun, even relaxing, activity that produces a great result.
The materials we need today are:
- Scraps of fabric for the letters and the background (13 cm x 42 cm)
- PDF with the template
- Sewing thread
- Vliesofix (Steam-a-Seam, Wonder Under….there are plenty of other well-known brands)
- Totally Stable from Sulky or fusible stabilizer 322 from Vilene
- Open embroidery foot #20
Free download of the appliqué template
First, download the PDF with the template and print it out. You can download the template as a PDF here:
“Let’s stay home” appliqué template
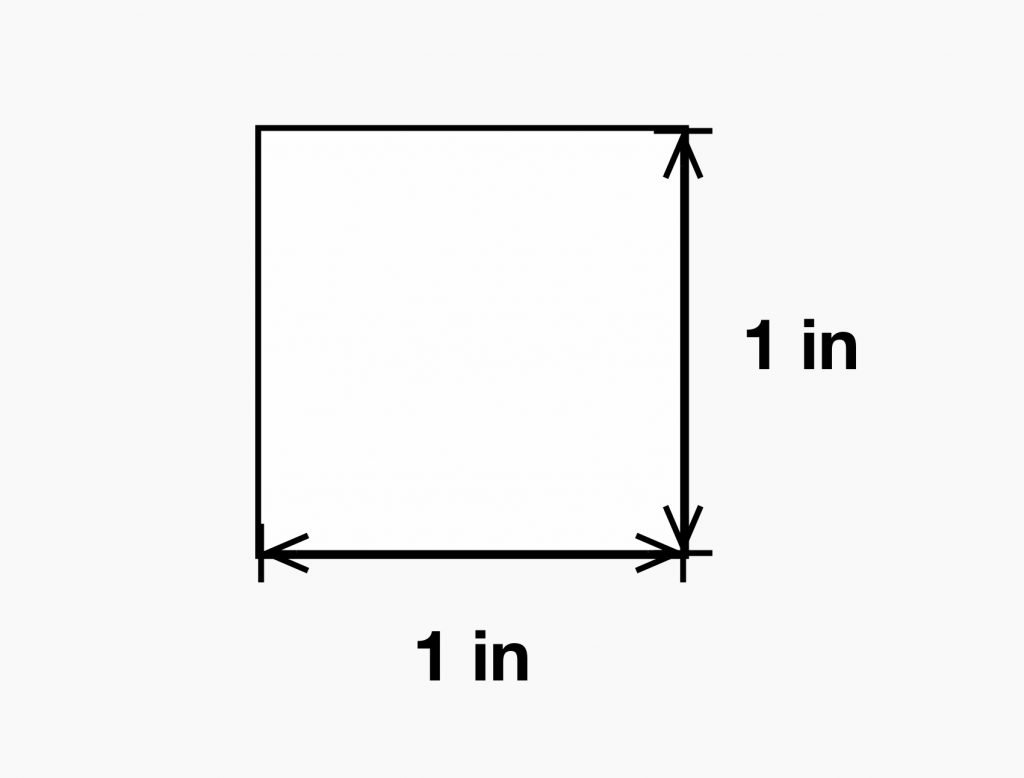
When printing it out, make sure that the size is set to 100% or original size and has not been adjusted. Measure the test square on the sheet to make sure it matches the specified size.
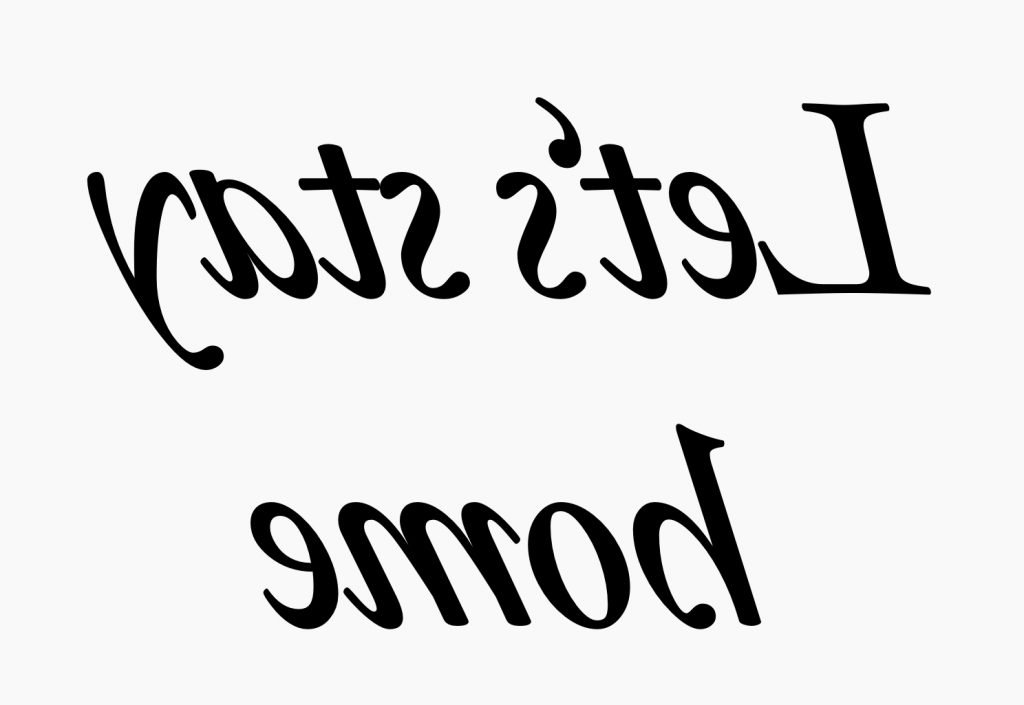
For the appliqué, we need the letters, which are reversed. You can find these on page two of the PDF.
As we are drawing the letters on the back of the fabric, they have to be reversed so that they appear the right way round on the front of the fabric. Sadly, I can’t count how many times I’ve cut out letters, only to find that they turn out the wrong way round…
I have finally learned this lesson :-).
Preparing the appliqué
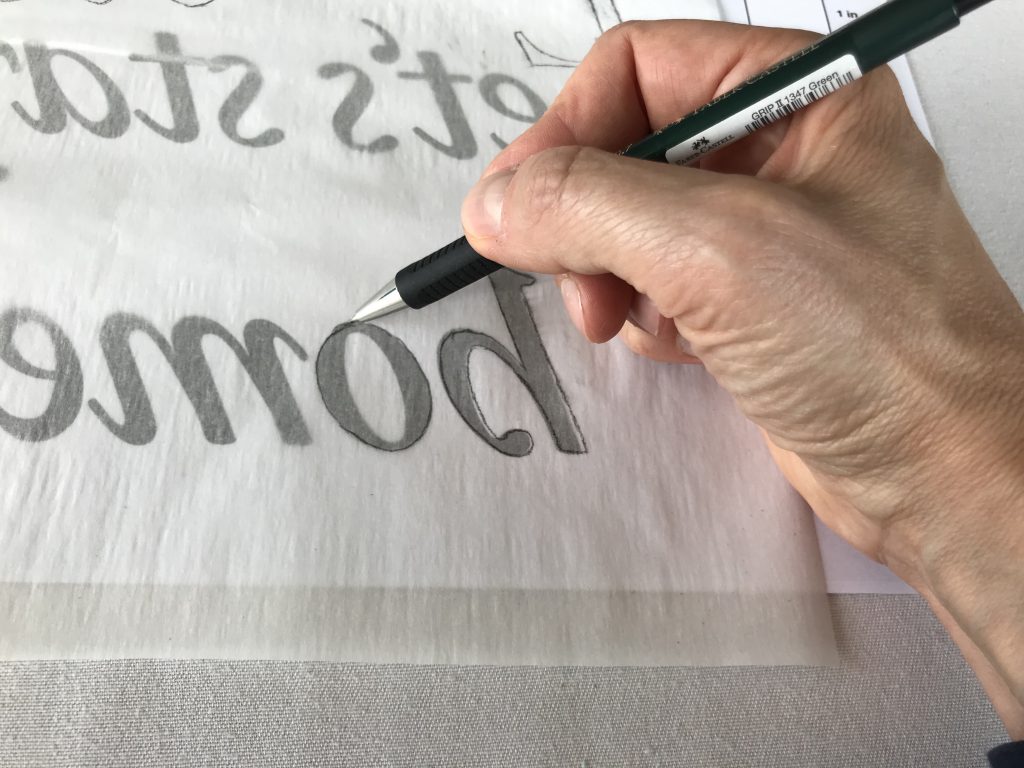
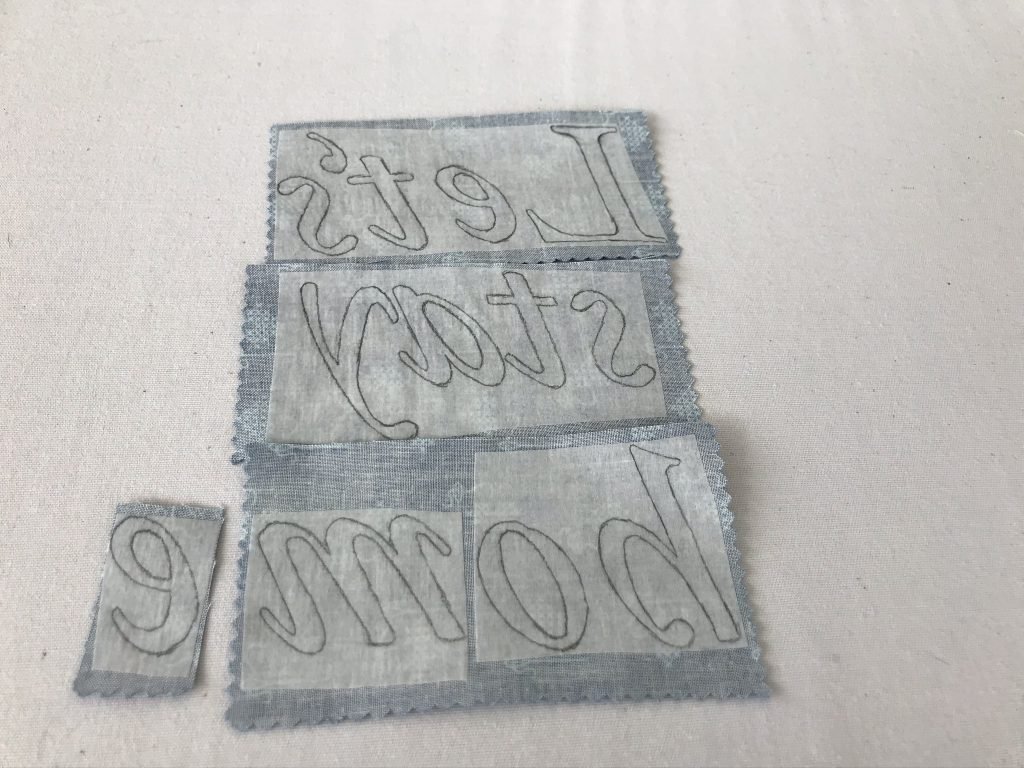
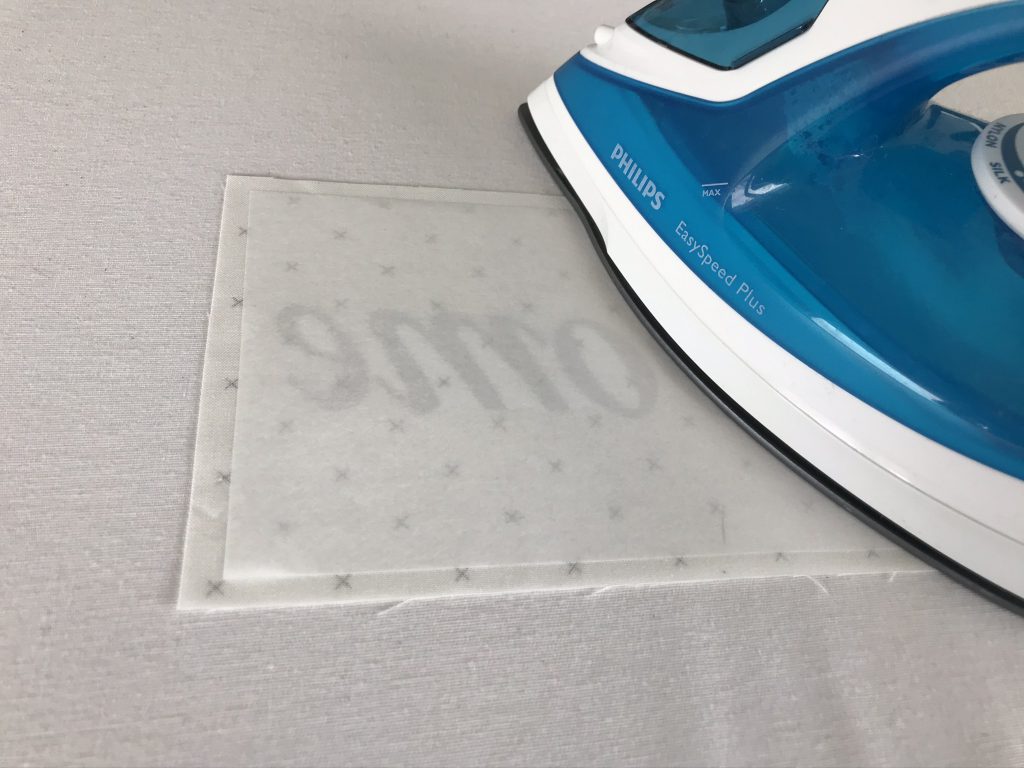
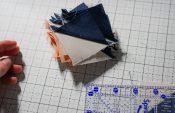
Take the sheet and place the Vliesofix (Steam-a-Seam, Wonder Under) onto it. These stabilizers always have two fusible sides. One side is protected with backing paper and we now trace the letters onto this paper. So, place the stabilizer onto the template with the paper side up and trace the letters. If you want to use different fabrics for the letters, make sure you leave some space between the letters when tracing.
Then roughly cut out the stabilizer to fit the fabric you are going to use for the lettering. I collected all my dark blue fabric scraps together and cut out the stabilizer pieces so that they would fit onto them. As you can see, I put the stabilizer onto the back of the fabric and made sure that the stabilizer did not stick out over the edge of the fabric.
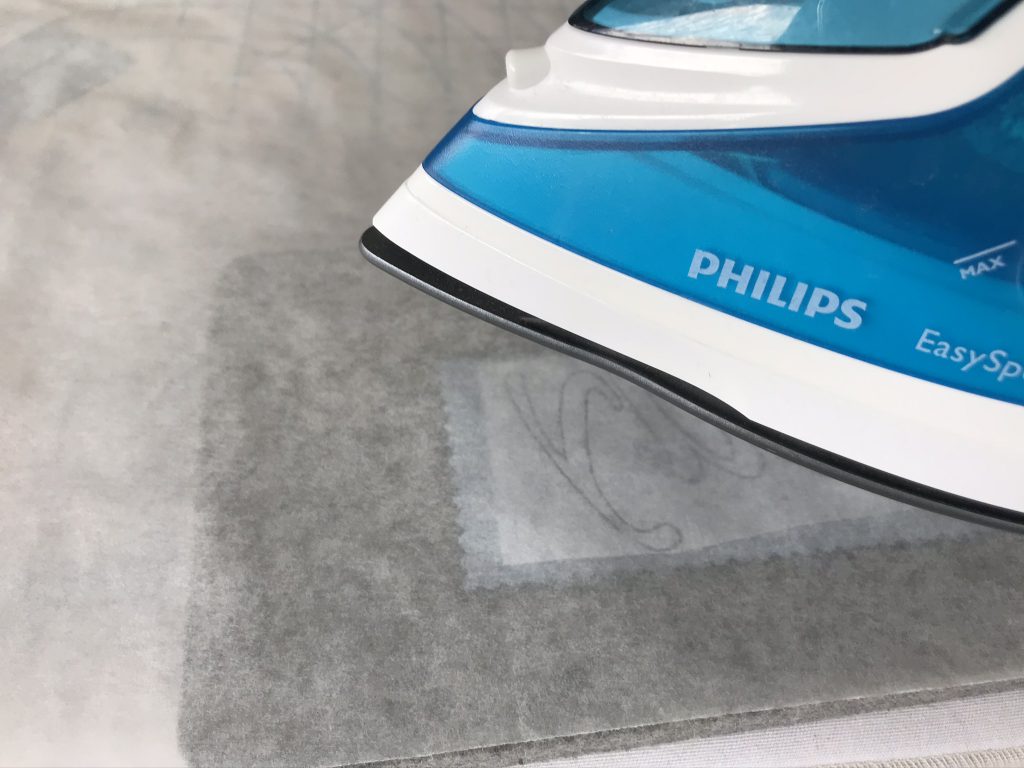
The next step is to iron the letters onto the fabric. To stop any adhesive or pencil marks from getting on the iron, I put a piece of baking parchment in between. When ironing the letters on, make sure you follow the instructions for your stabilizer. They are all slightly different.
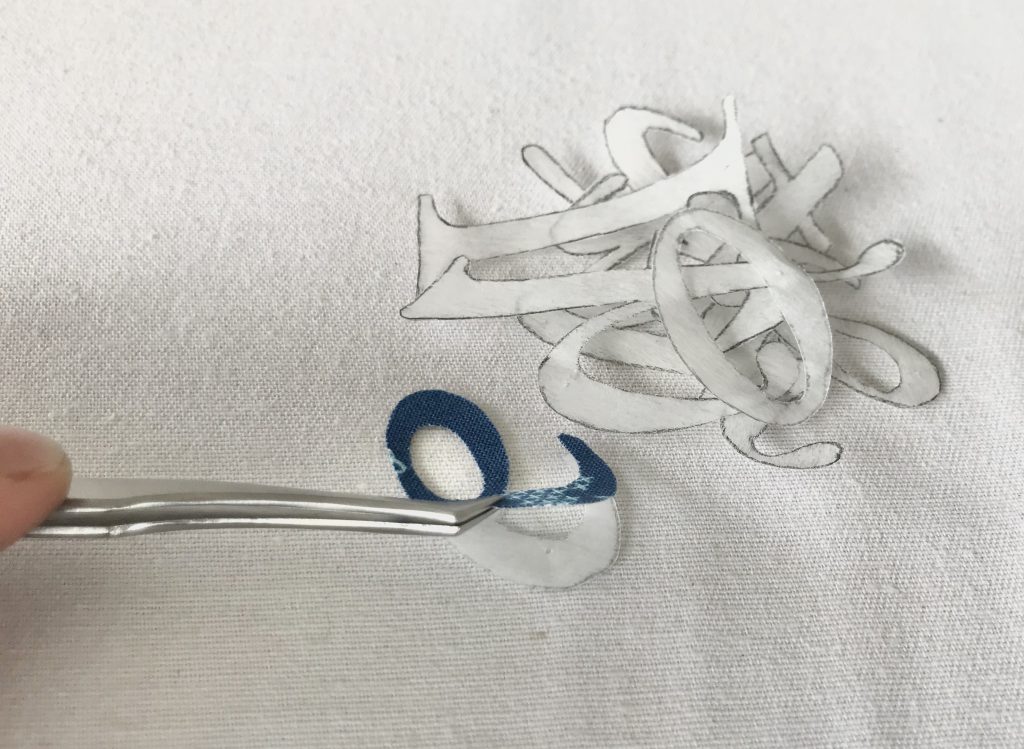
Once the stabilizer is adhered securely onto the fabric, cut out the letters using a good pair of scissors. Finally, remove the paper from the back of the letters. Make sure you only remove the paper and that the layer with the adhesive stabilizer remains on the fabric.
After all that hard, finicky work, it’s time for a short break. Take a deep breath and breathe out, give yourself a pat on the back and on we go.
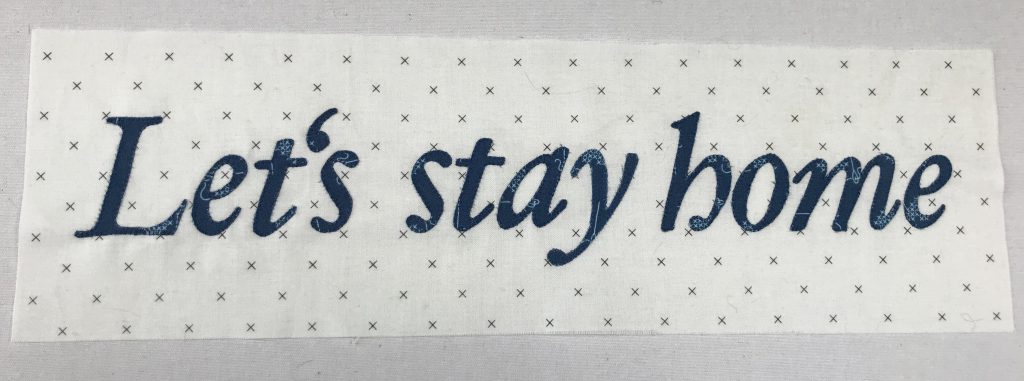
Cutting out the fabric and laying out the letters
We now cut out the fabric that we are going to appliqué the letters onto.
For this, we need a rectangle measuring 16.5 in x 5 in (in cm, approximately 42 cm x 13 cm).
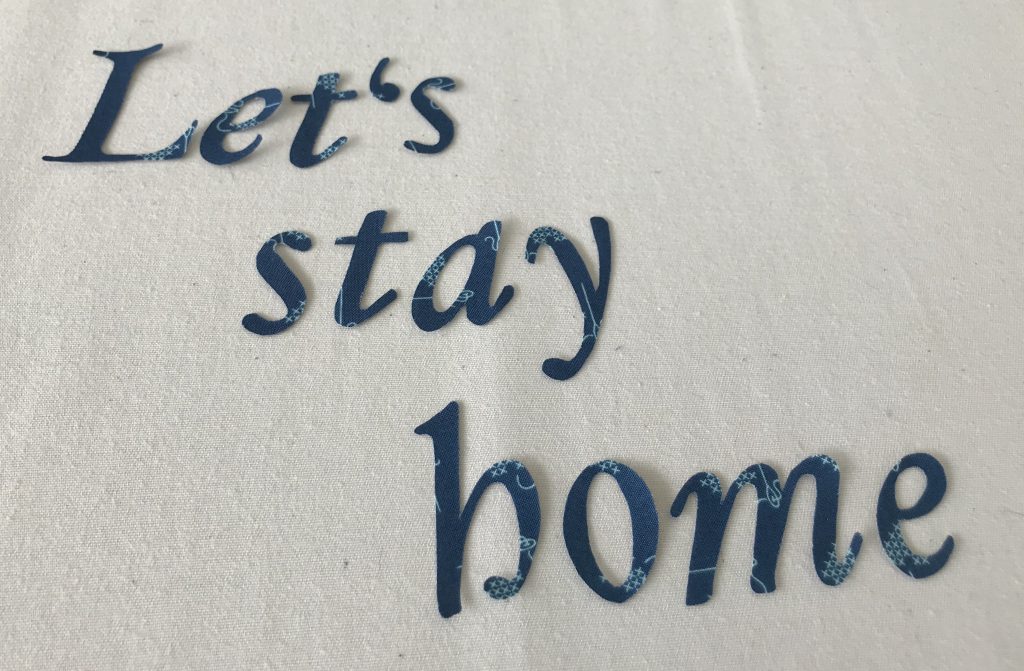
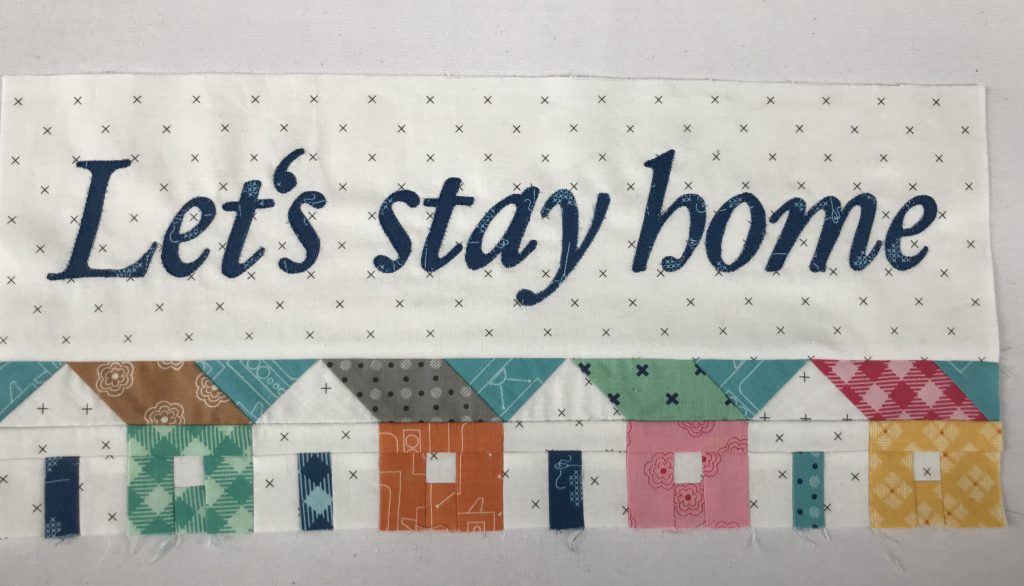
I chose the same fabric that I used for the house fronts. Iron the rectangle carefully and leave it on the ironing mat. Place the letters onto it, moving them around and trying different positions until you are happy with the result.
The front page of the PDF shows the correct layout of the lettering. This can help you when positioning the letters.
When you are happy with the letters, carefully place the baking parchment over them and iron them on.

Next, we have to stabilize the fabric even better so that it does not move or get distorted when appliquéing.
For this, we use a fusible stabilizer which can be removed and torn away with no residue at the end. For my project, I used Totally Stable from Sulky, but you can also use Vilene stabilizer.
Cut the stabilizer slightly smaller than the rectangle, approx. 16 in x 4.5 in (in cm 40 x 10 cm), and iron onto the back of the fabric rectangle.
Appliquéing on the sewing machine
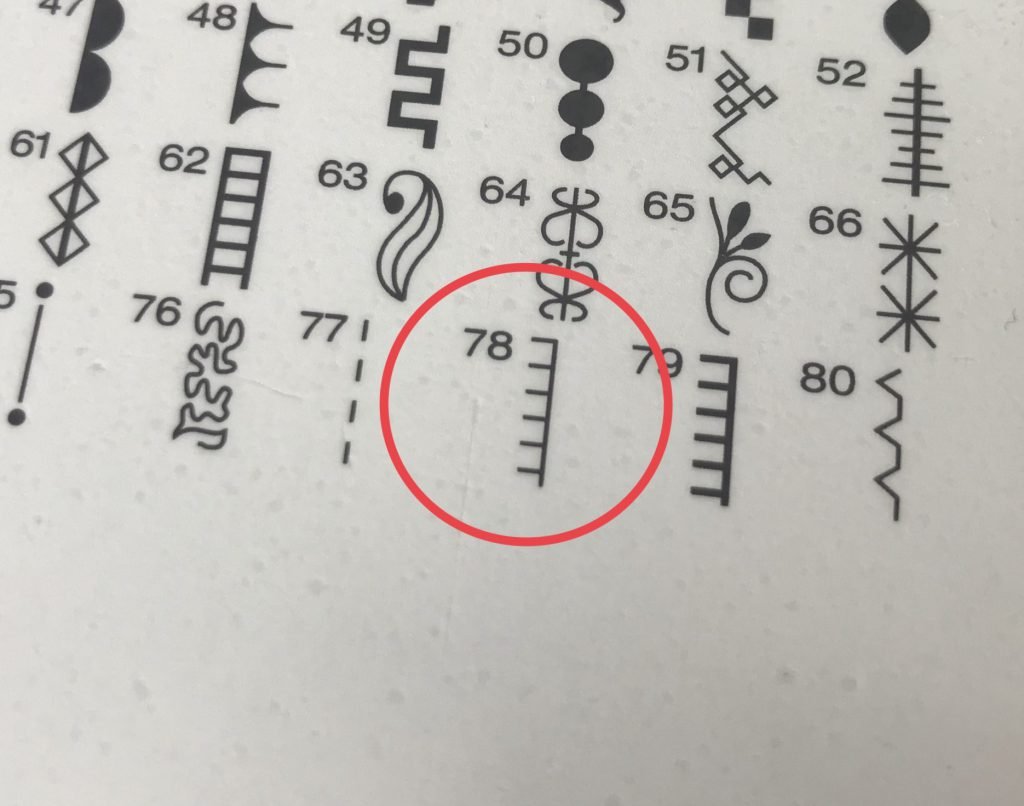
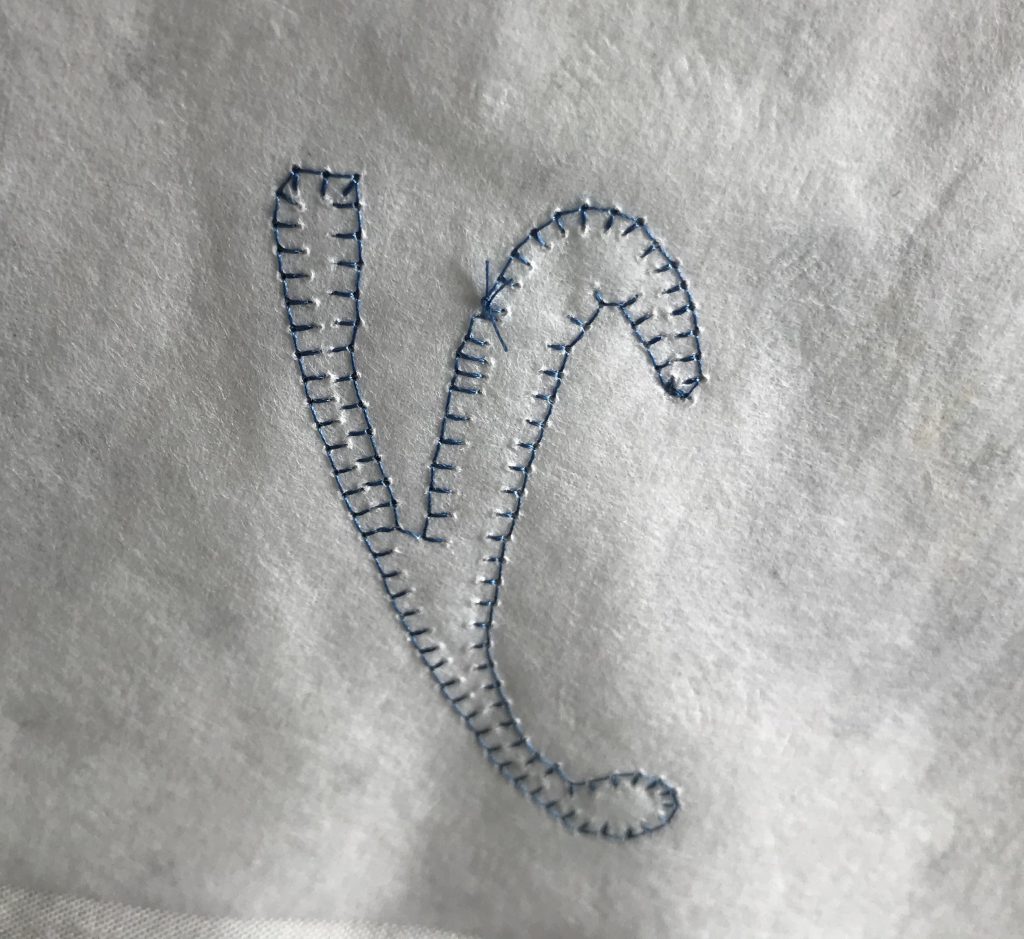
We are now finally ready to appliqué the letters with the sewing machine. I set up my BERNINA 350 PE as follows. I attached open embroidery foot #20, inserted a new universal 70 needle, set the needle stop to down, threaded up with thread matching the letters, inserted the normal stitch plate again and selected blanket stitch (#78 on my machine). I reduced the stitch length to 2 mm and the zigzag width to 1.5 mm.
I LOVE blanket stitch. For me, sewing with blanket stitch is like a dance in 3/4 time: 1-2-3… 1-2-3… an interplay between the hands, the knee lever and the foot pedal. But maybe I should explain where this comparison comes from:
Blanket stitch is made up of three stitches. Stitch 1 goes forward, stitch 2 goes to the left and stitch 3 goes to the right again. Stitch 1 always runs along the edge of the appliqué, while stitches 2 and 3 pierce the appliqué and secure it in place.
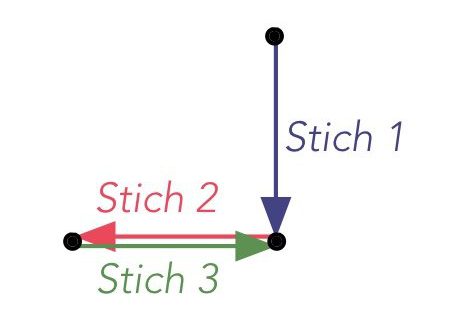
The dance only really begins when curves and corners come into play.
But let’s start with a straight line: put the appliqué under the foot and carefully and deliberately place stitch 1 next to the appliqué. The open embroidery foot makes positioning extremely easy, as you can always see exactly where the needle is.
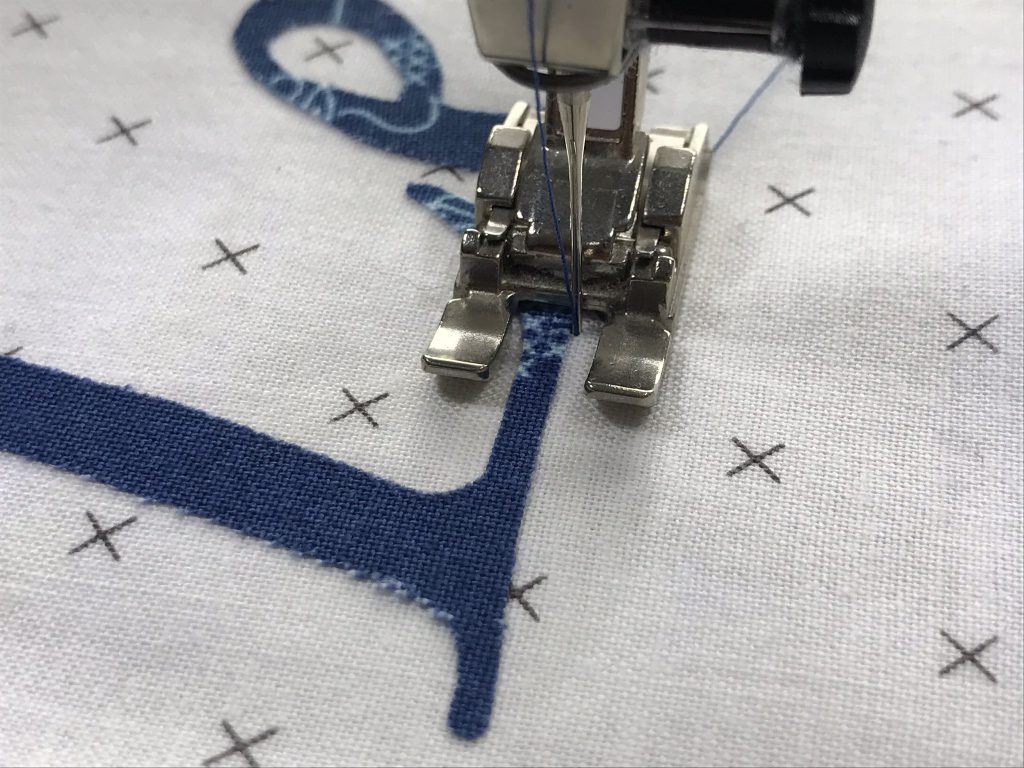
Once you have sewn stitch 1, you can just carry on sewing in a straight line. Always make sure that you sew stitch 1 next to the appliqué.
When you come to a corner, you have to stop after stitch 1. The needle remains in the fabric, you can raise the foot with the knee lever and turn the sewing project. In the image below, you can see how I turned the foot slightly. Now you can sew stitches 2 and 3 so that they pierce the appliqué:
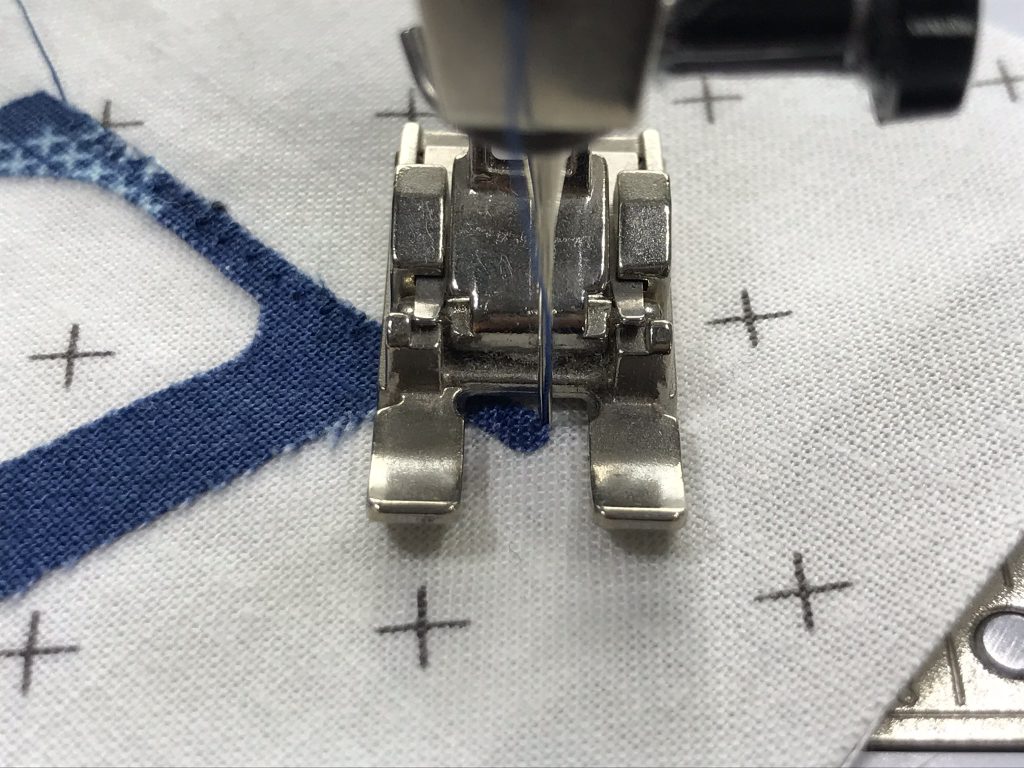
Once you’ve sewn stitch 3, turn the foot very slightly and sew stitch 1 again. You have to make sure the needle goes in exactly at the top of the curve.
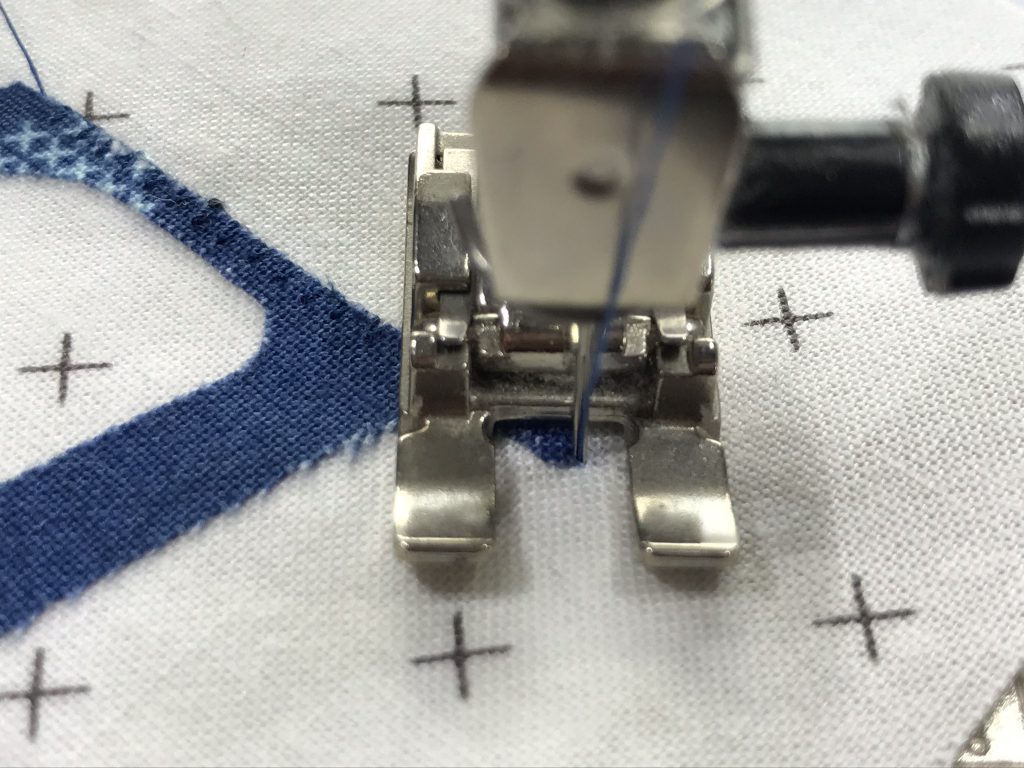
Stop again, turn the foot further so that stitches 2 and 3 pierce the appliqué again:

So the dance continues, around corners and curves, whereby you can always turn the foot after stitches 1 and 3.
What seems uncoordinated and complicated at first (just like when you first learn to dance the waltz :-)) is pure harmony in the end. If a stitch does go completely wrong, you can undo it using the handwheel.
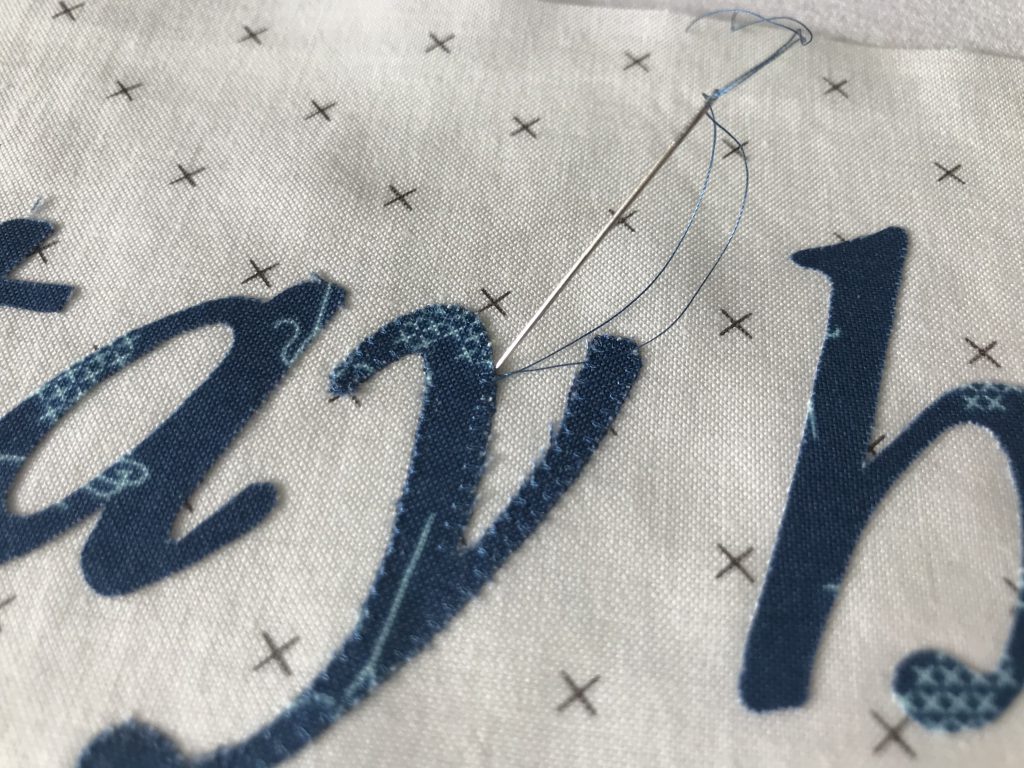
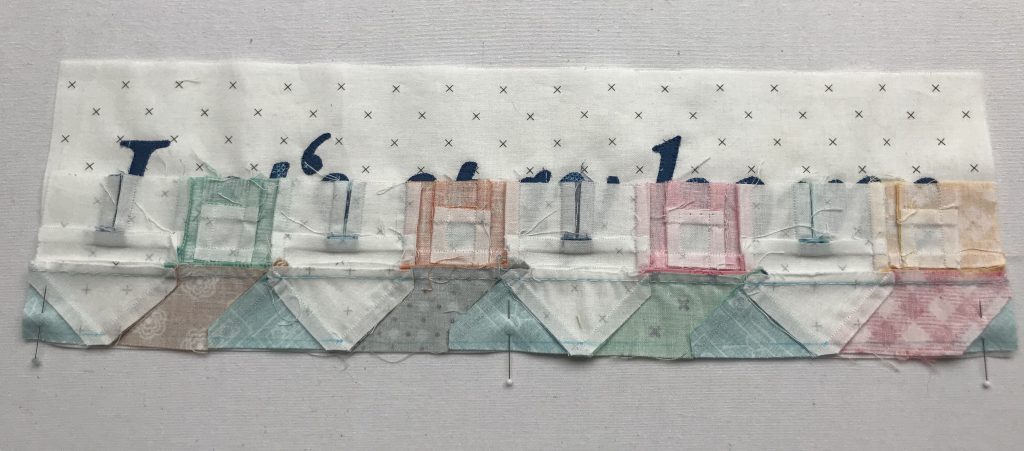
Each letter is appliquéd individually. If possible, try to sew the last stitch precisely on top of the first stitch. Then cut the threads so they are long enough and secure them as follows: bring the two upper threads to the back with a needle, tie them to the lower threads and cut them fairly short.
When all the letters have been appliquéd, you can carefully tear off the stabilizer around the letters. Iron everything well.

Completing the top
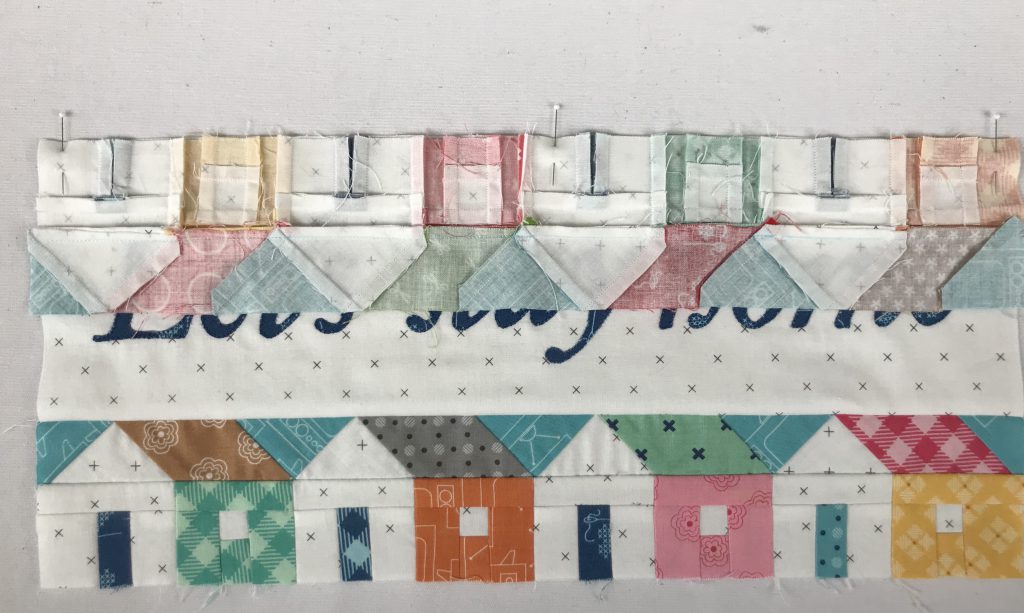
The last step in today’s blog post is to complete the top. To do this, take the rows of houses that you sewed last week and lay them out above and below the appliquéd fabric. Trim the sky triangles that are sticking out at the edges.
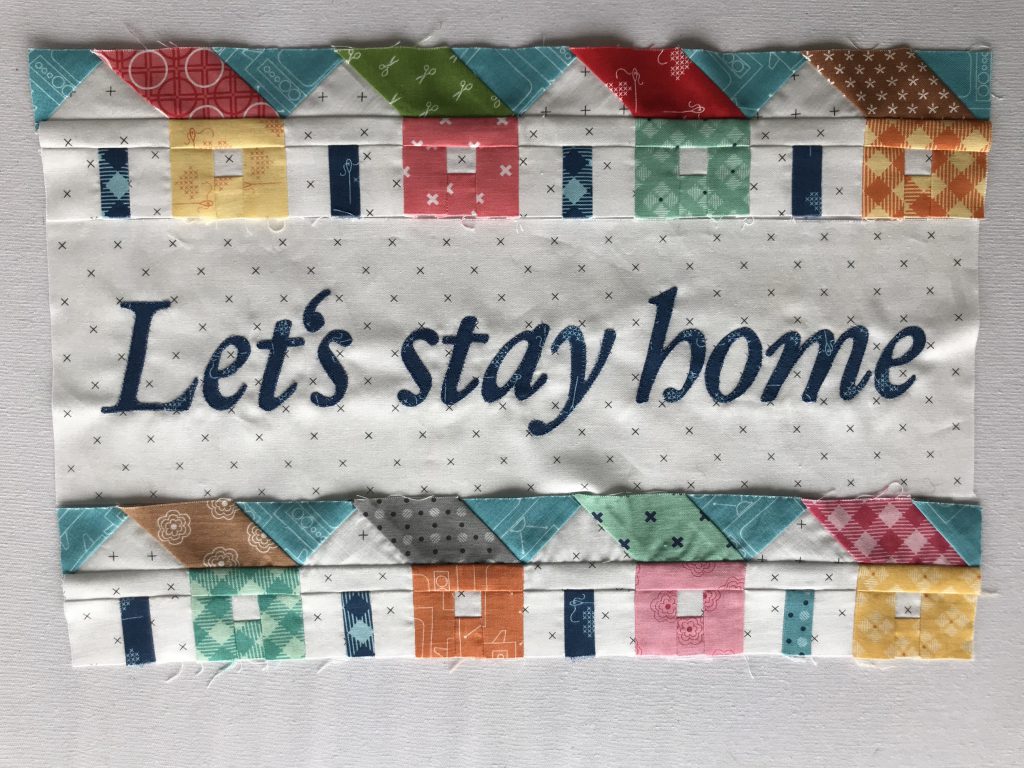
When sewing on the bottom row of houses, be careful not to cut off the top of the roof. The seam should run right along the top of the house.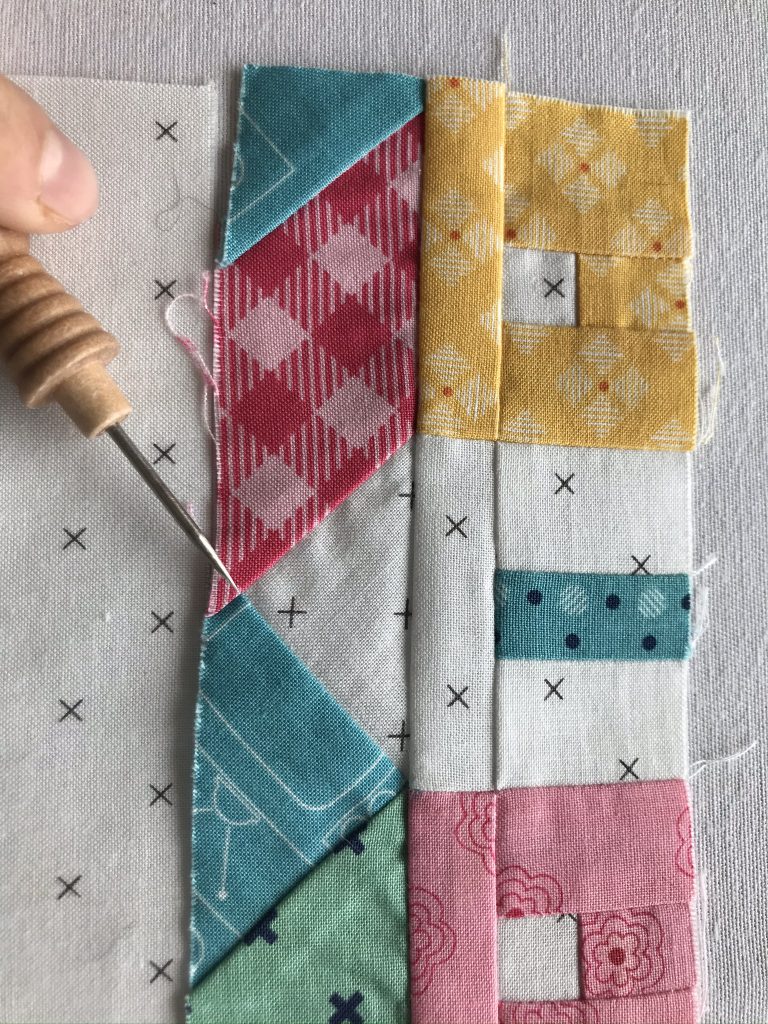
To do this, draw the sewing line on the back. I explained how to do this in the first blog post. Place the bottom row of houses onto the appliquéd fabric with the right sides together, pin together and sew it on along the sewing line.
For once, do not iron the seam allowance towards the darker side, but towards the middle.
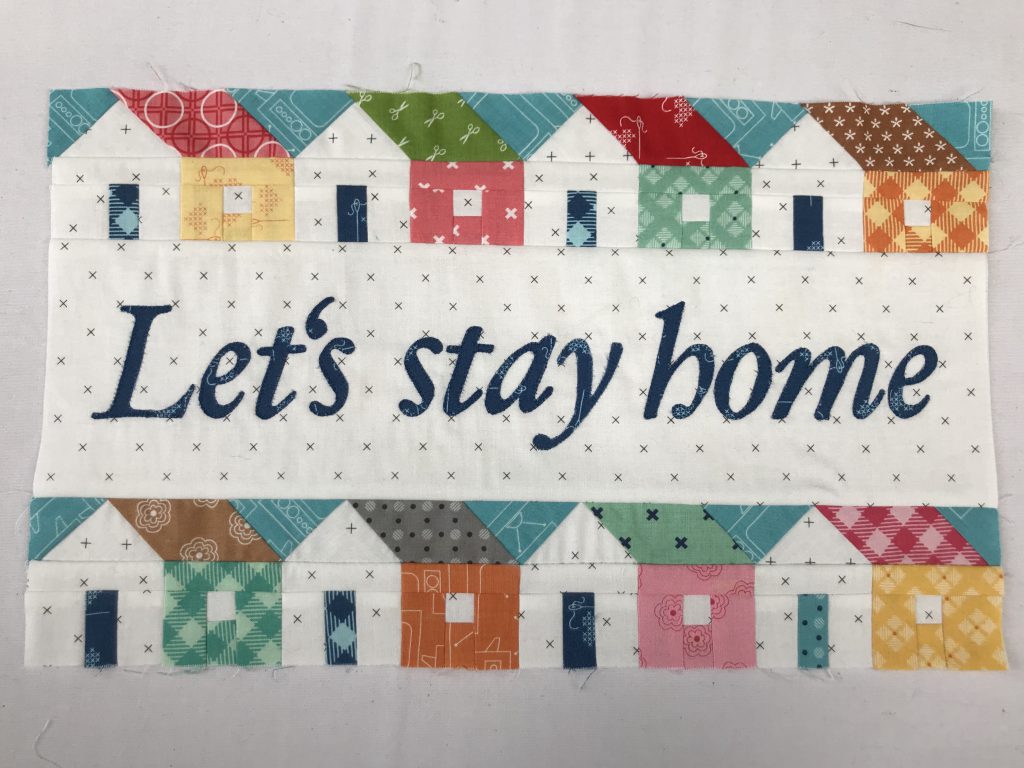
Place the top row of houses onto the appliquéd fabric with the right sides together, pin together and sew on with a ¼ inch seam allowance.
Once again, iron the seam allowance towards the middle. Iron everything well from the front, and the top is finished.
I hope to see you again next week
That’s it for part two. We’ll carry on next Friday.
In the third and final part, I’ll show you how to make a quilt sandwich and how to quilt it. I’m really looking forward to it and until then, I hope you have a happy, healthy week.
Best wishes,
Karin


0 Responses