 BERNINA Corporate Blog -
I took a look inside the Mettler thread box and I found a gorgeous set of multicolor thread. I thought I could sew decorative stitches on an apron with Mettler Poly Sheen Multi
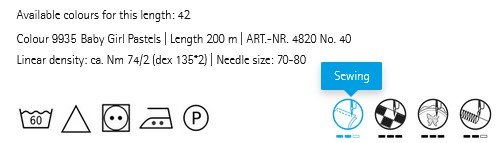
So you wonder if the embroidery thread is suitable for sewing? Yes, in the information below, you can find that it can be used for embroidery and quilting as well as for sewing and overlocking.
 You can find dealers on the Amann-Mettler site.
Preparing my project with Mettler Poly Sheen Multi:
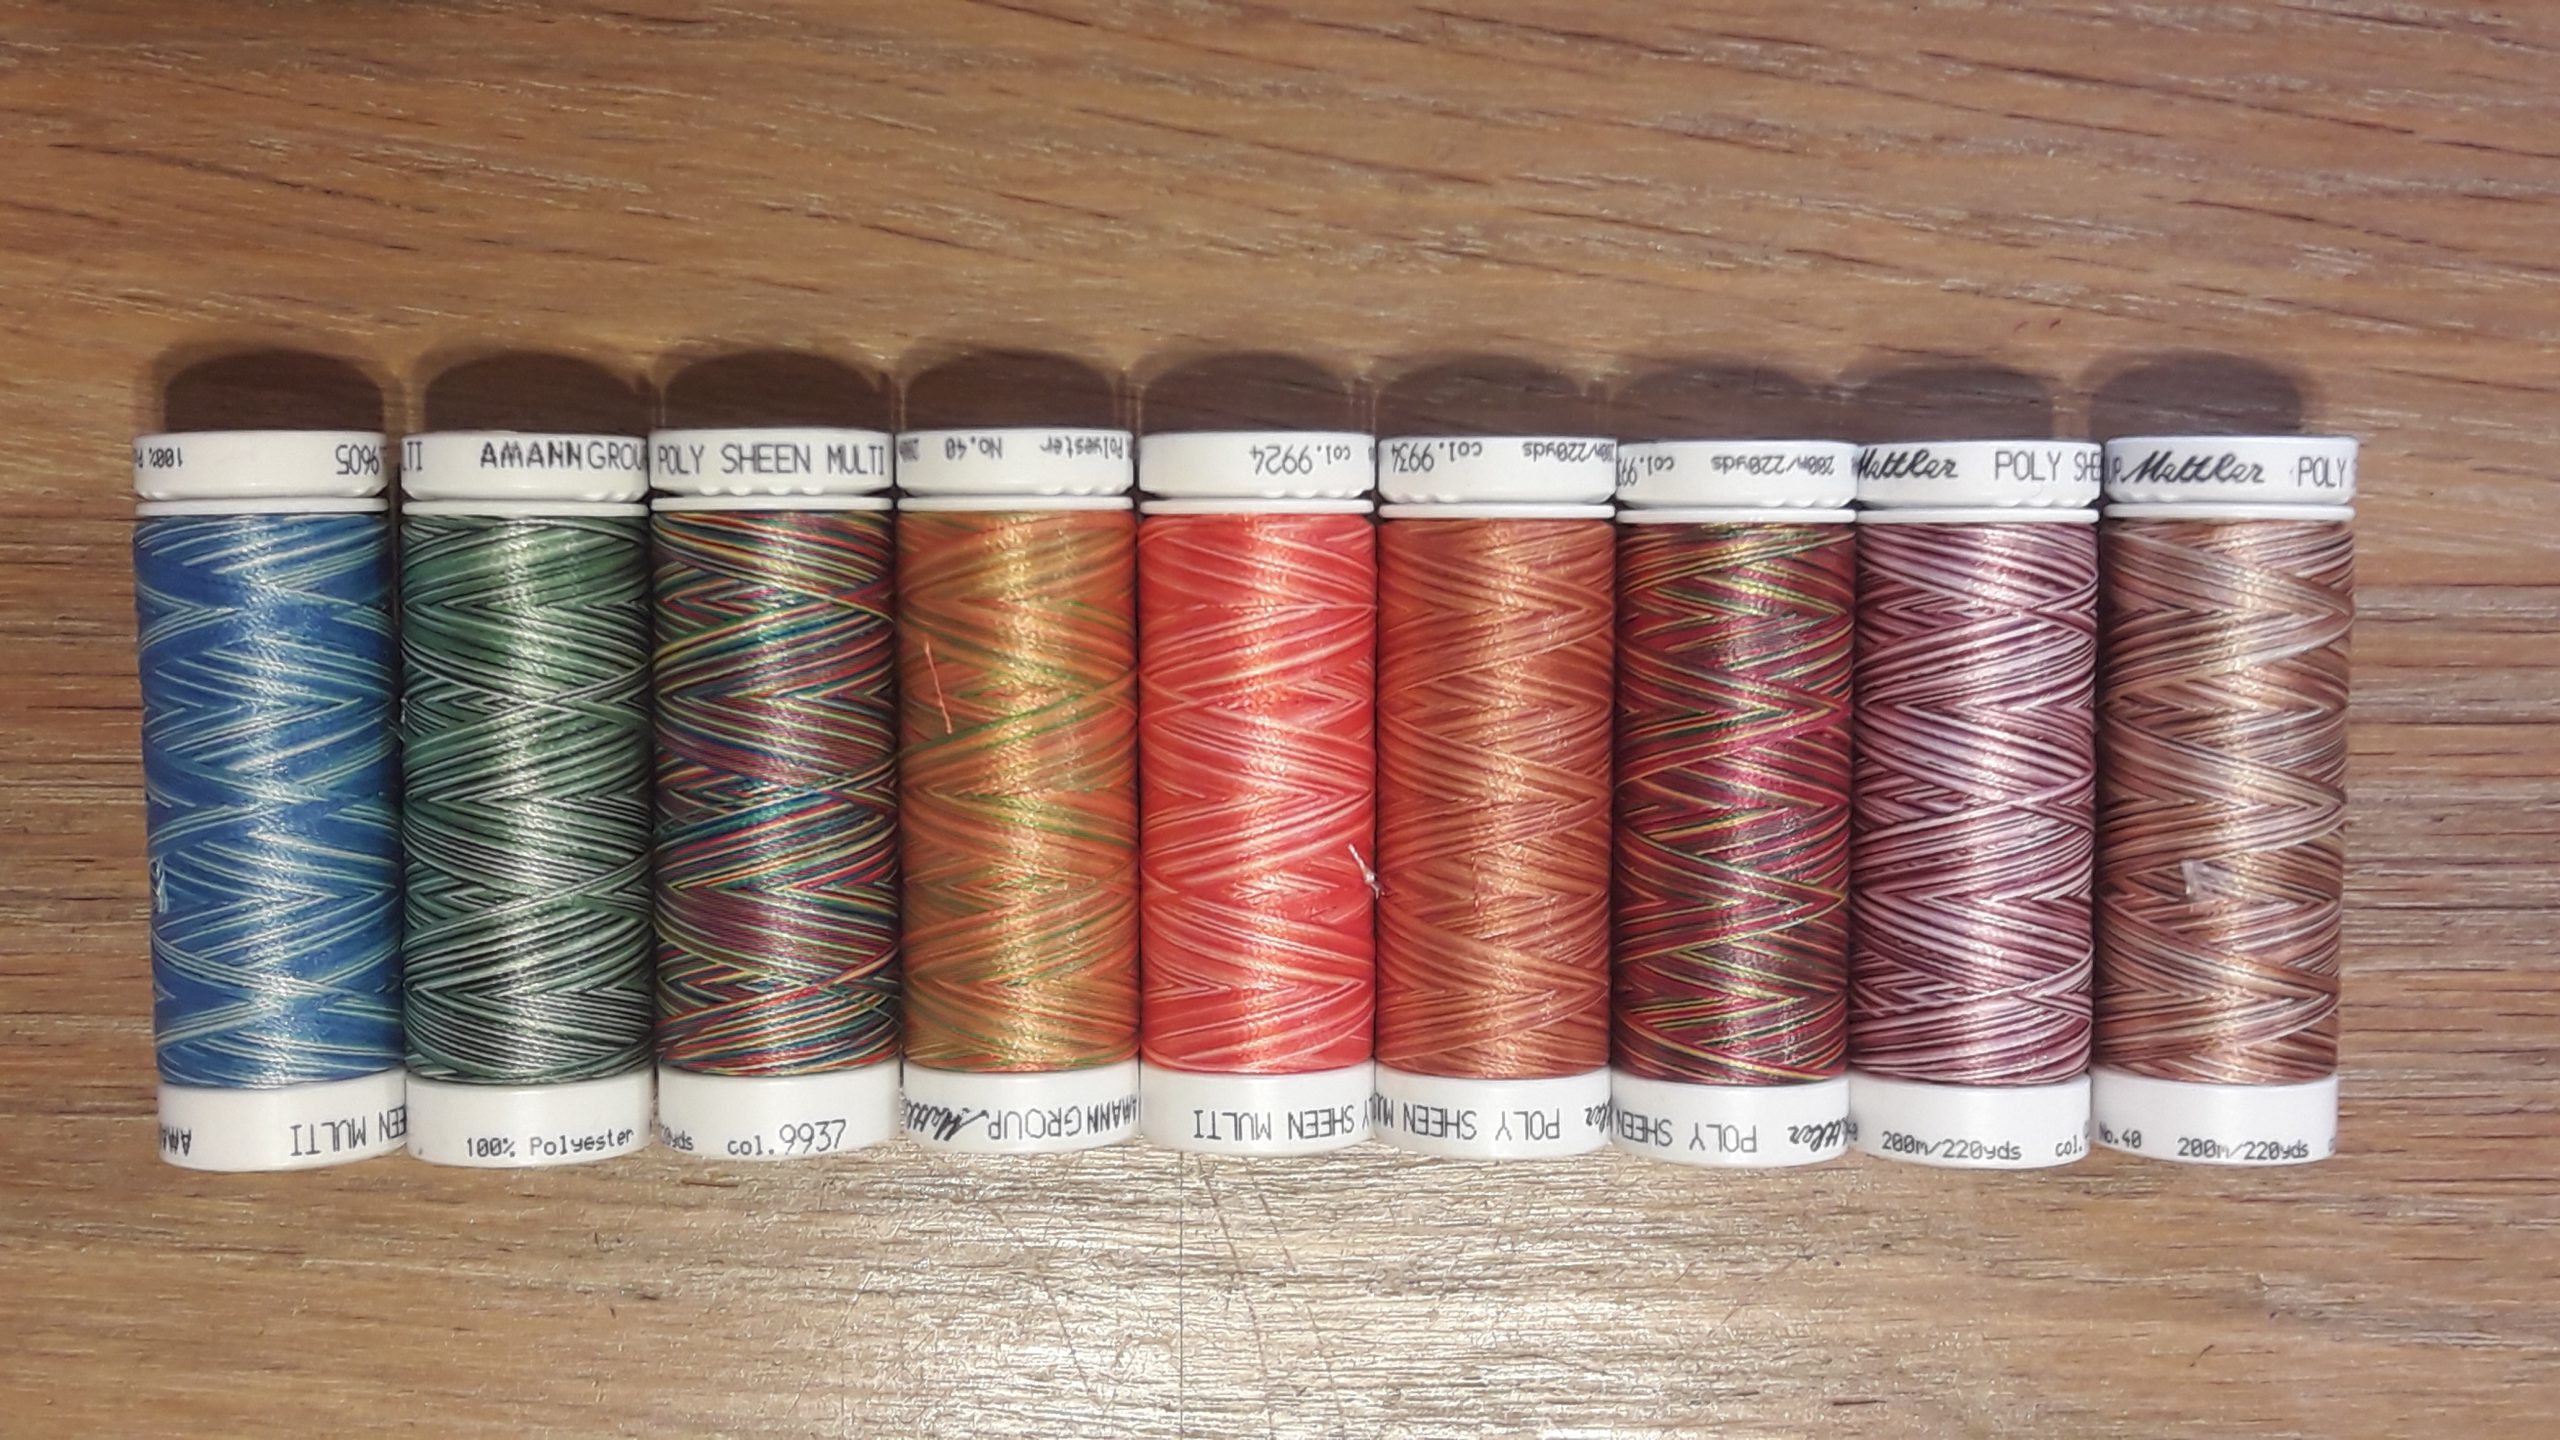
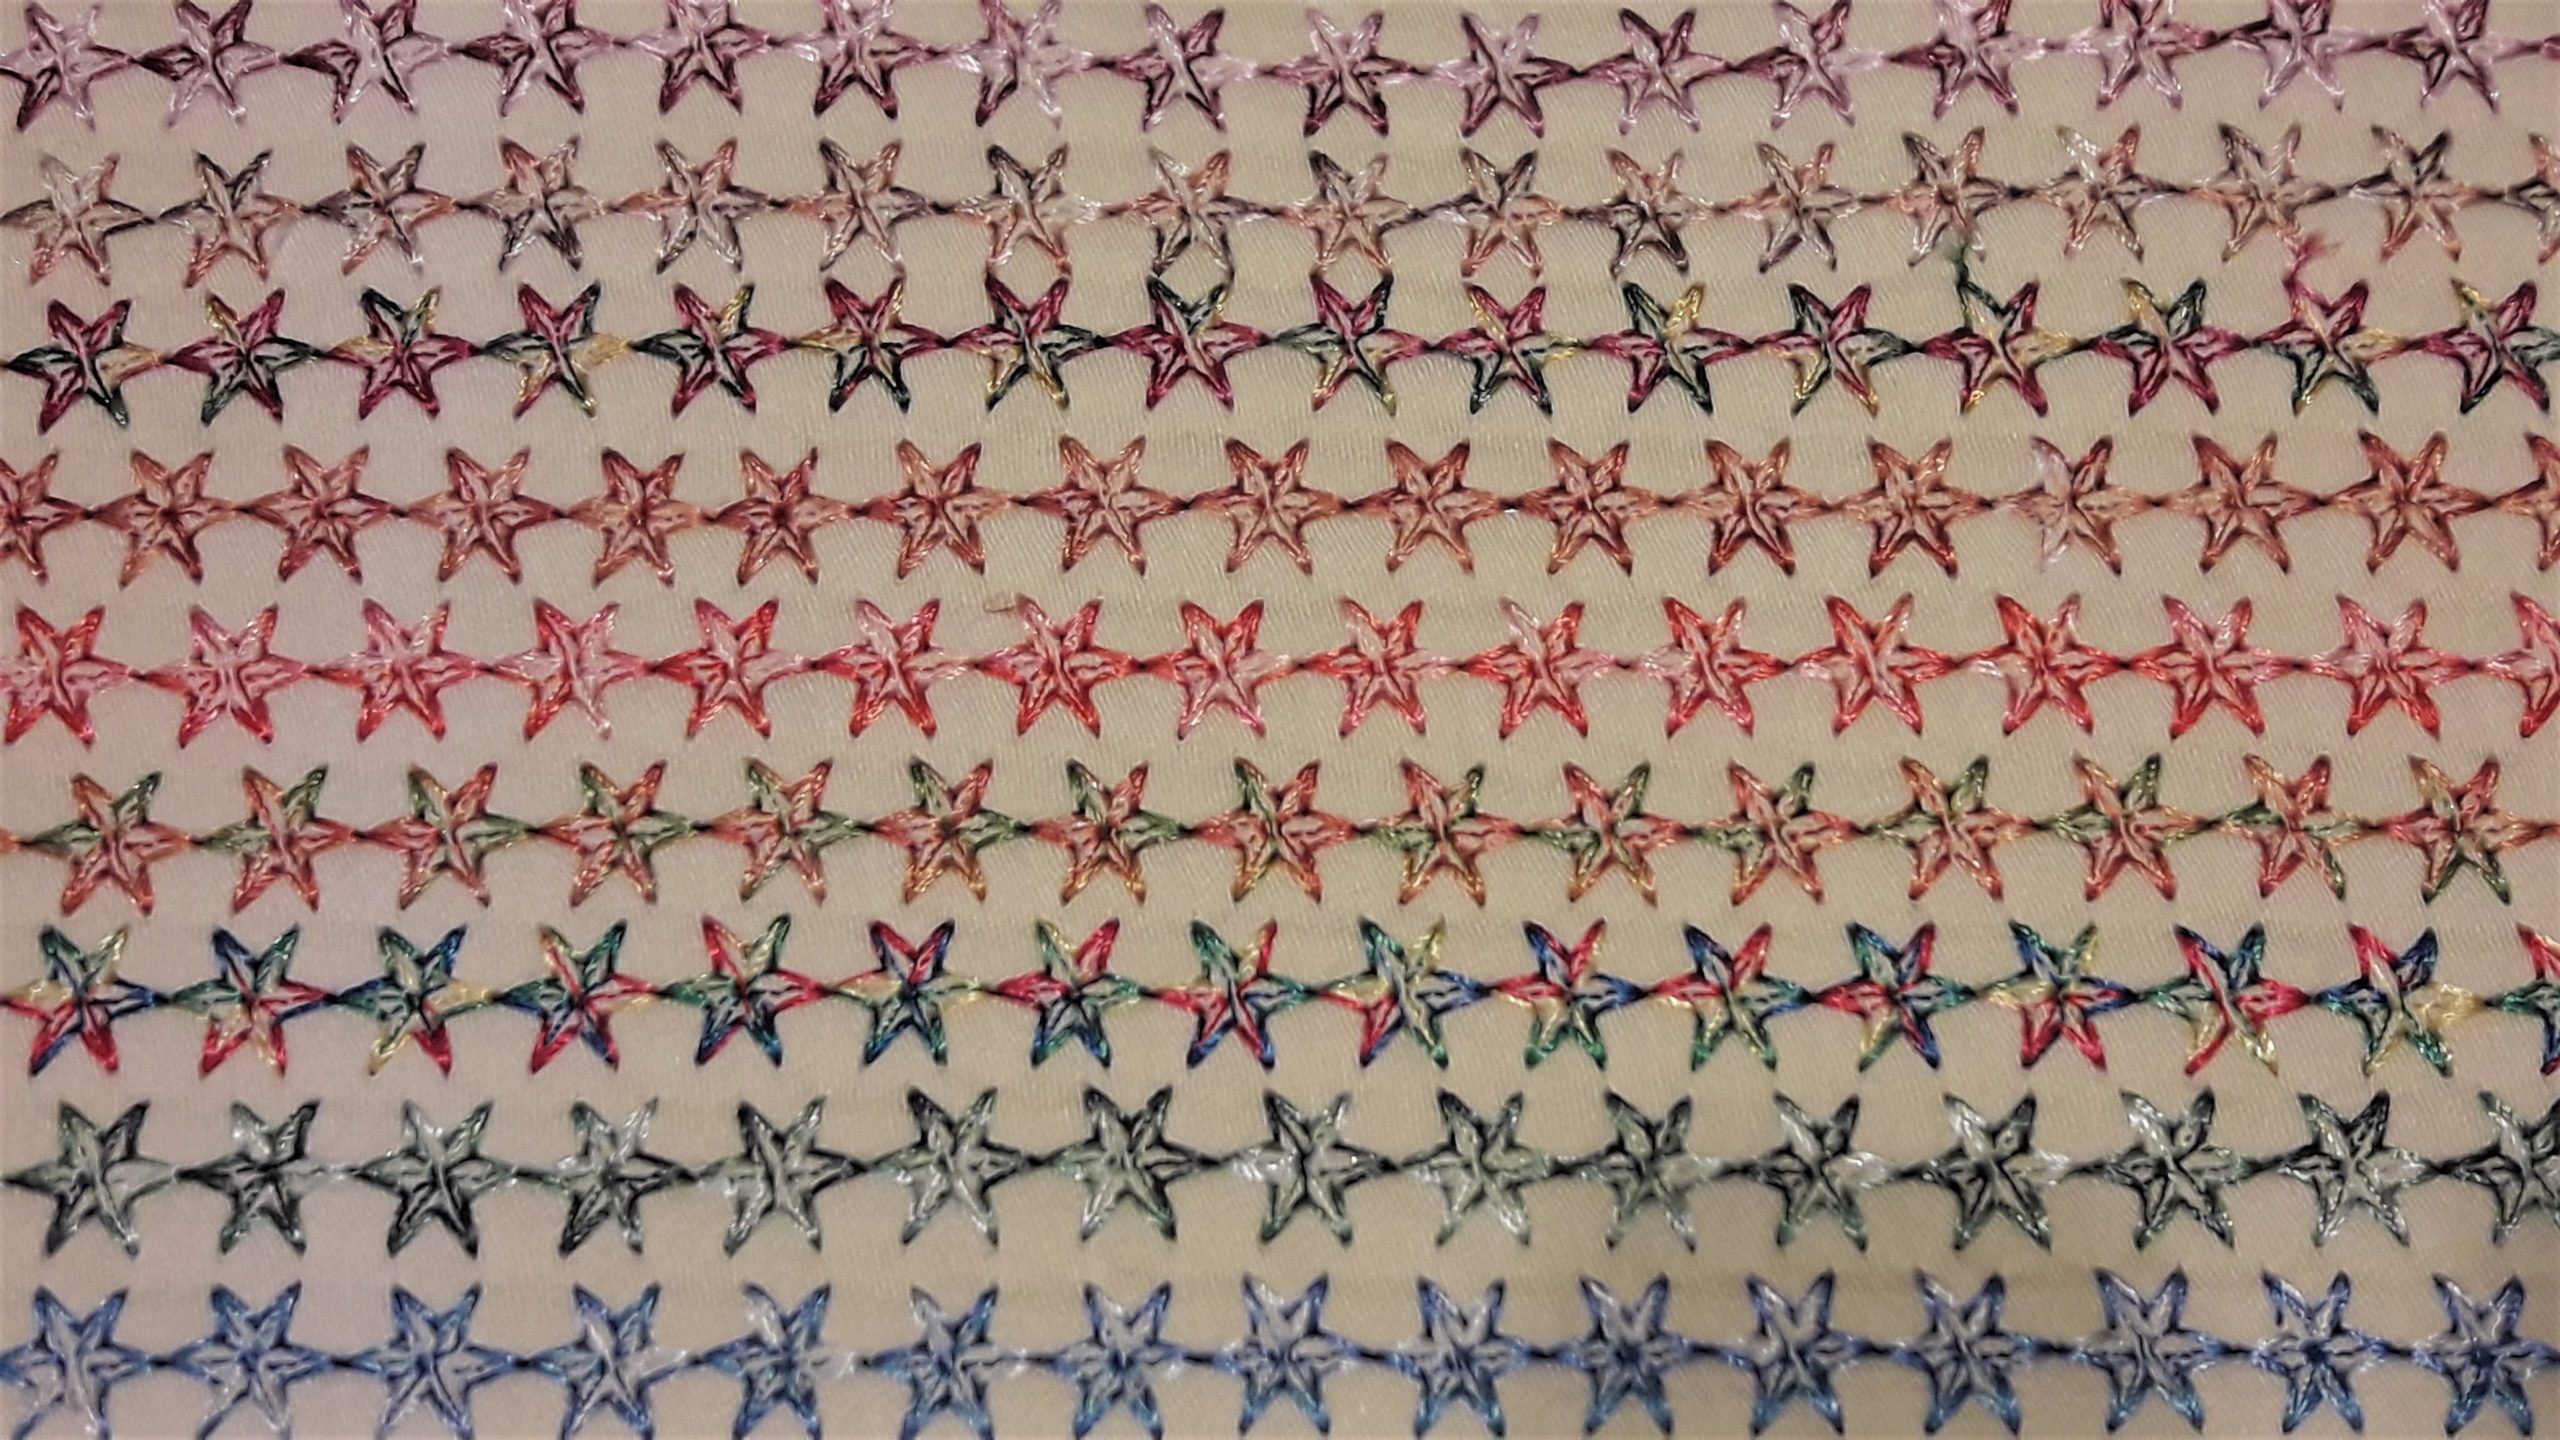
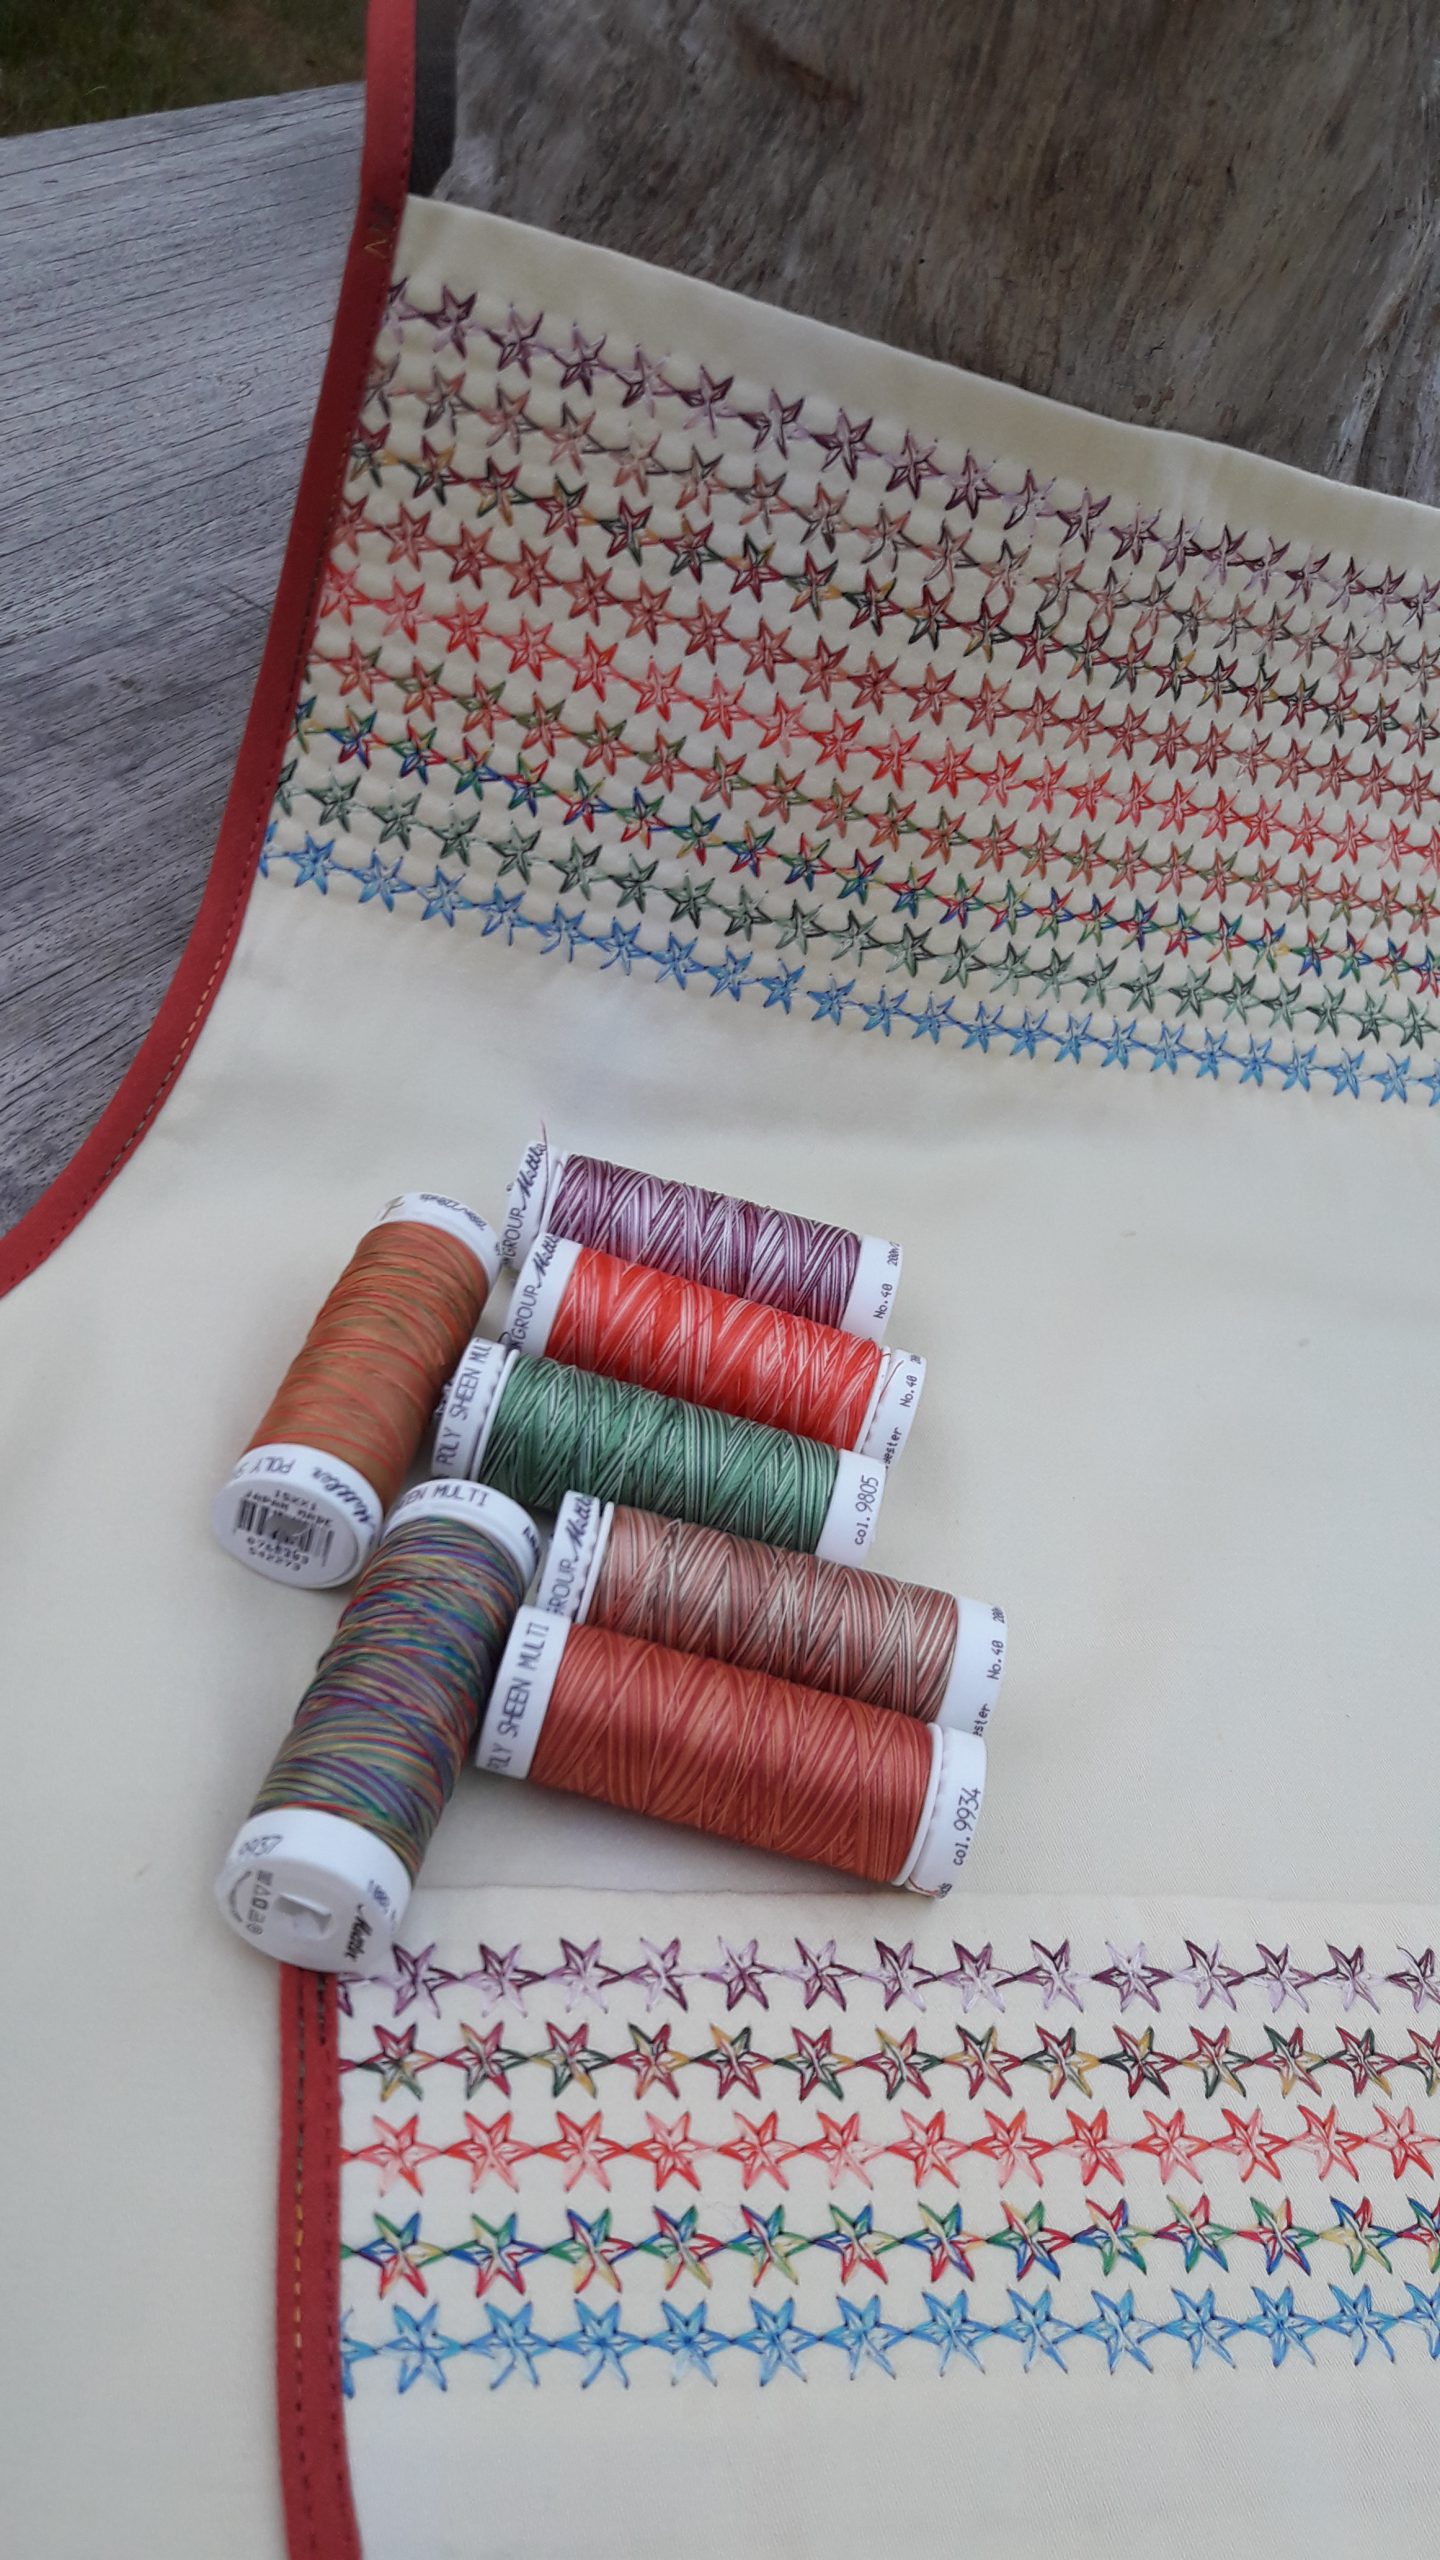
The Poly Sheen Multi thread is available in 42 colours and I chose 9 of them for my apron. The selection was based on warm colours and not too contrasting shades. I placed them in the order I wish to use them:
To choose a decorative stitch in my BERNINA 710 I started a test. This is a darker thread, but it also has the variegating colours.
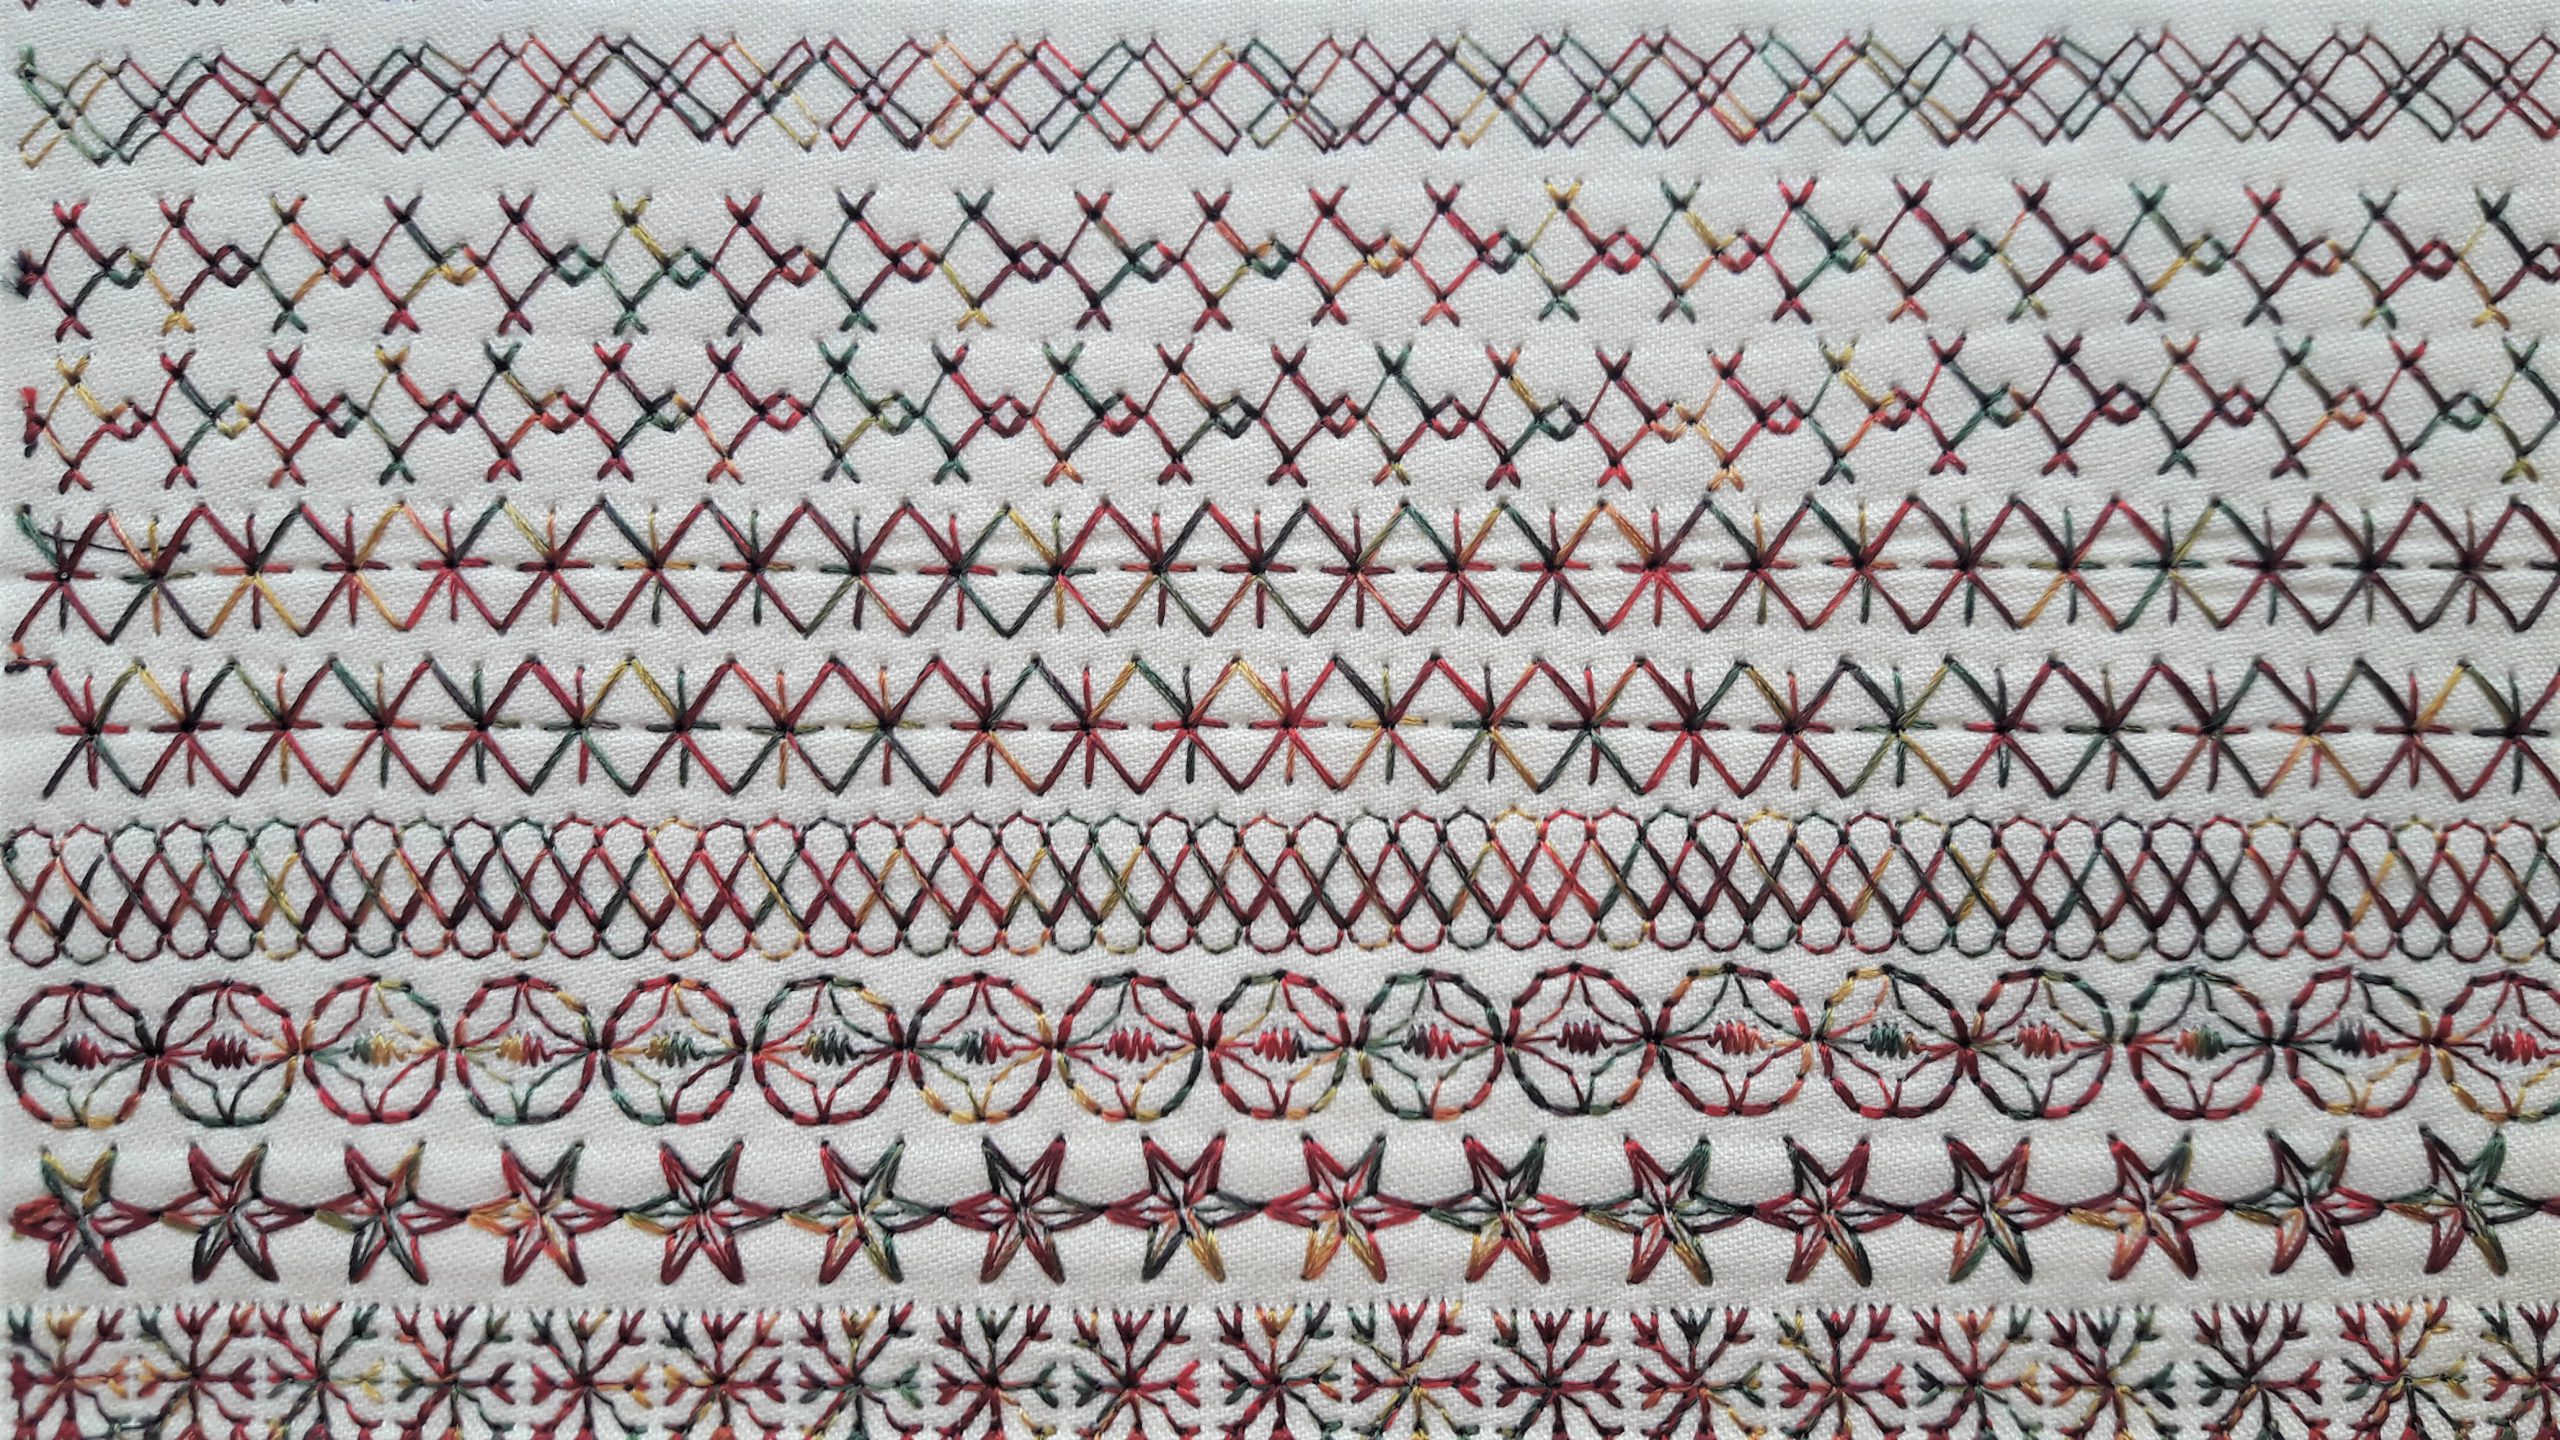
My choice is the stitch nr 604, the one with the stars. They are nicely filled and will show the different colours in the thread.
So, let’s start to sew decorative stitches:
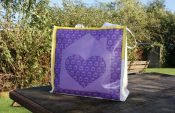
I want to make an apron, with a pattern I already used (simply took a goodfitting apron and copied it). I cut a piece of fabric slightly bigger in the area where I will sew the decorative stitches. This will give a neat border on both sides, after cutting out the pattern. A single layer of stabilizer will prevent constriction. An extra 12 cm is folded to the back as backing and I will sew through both layers.
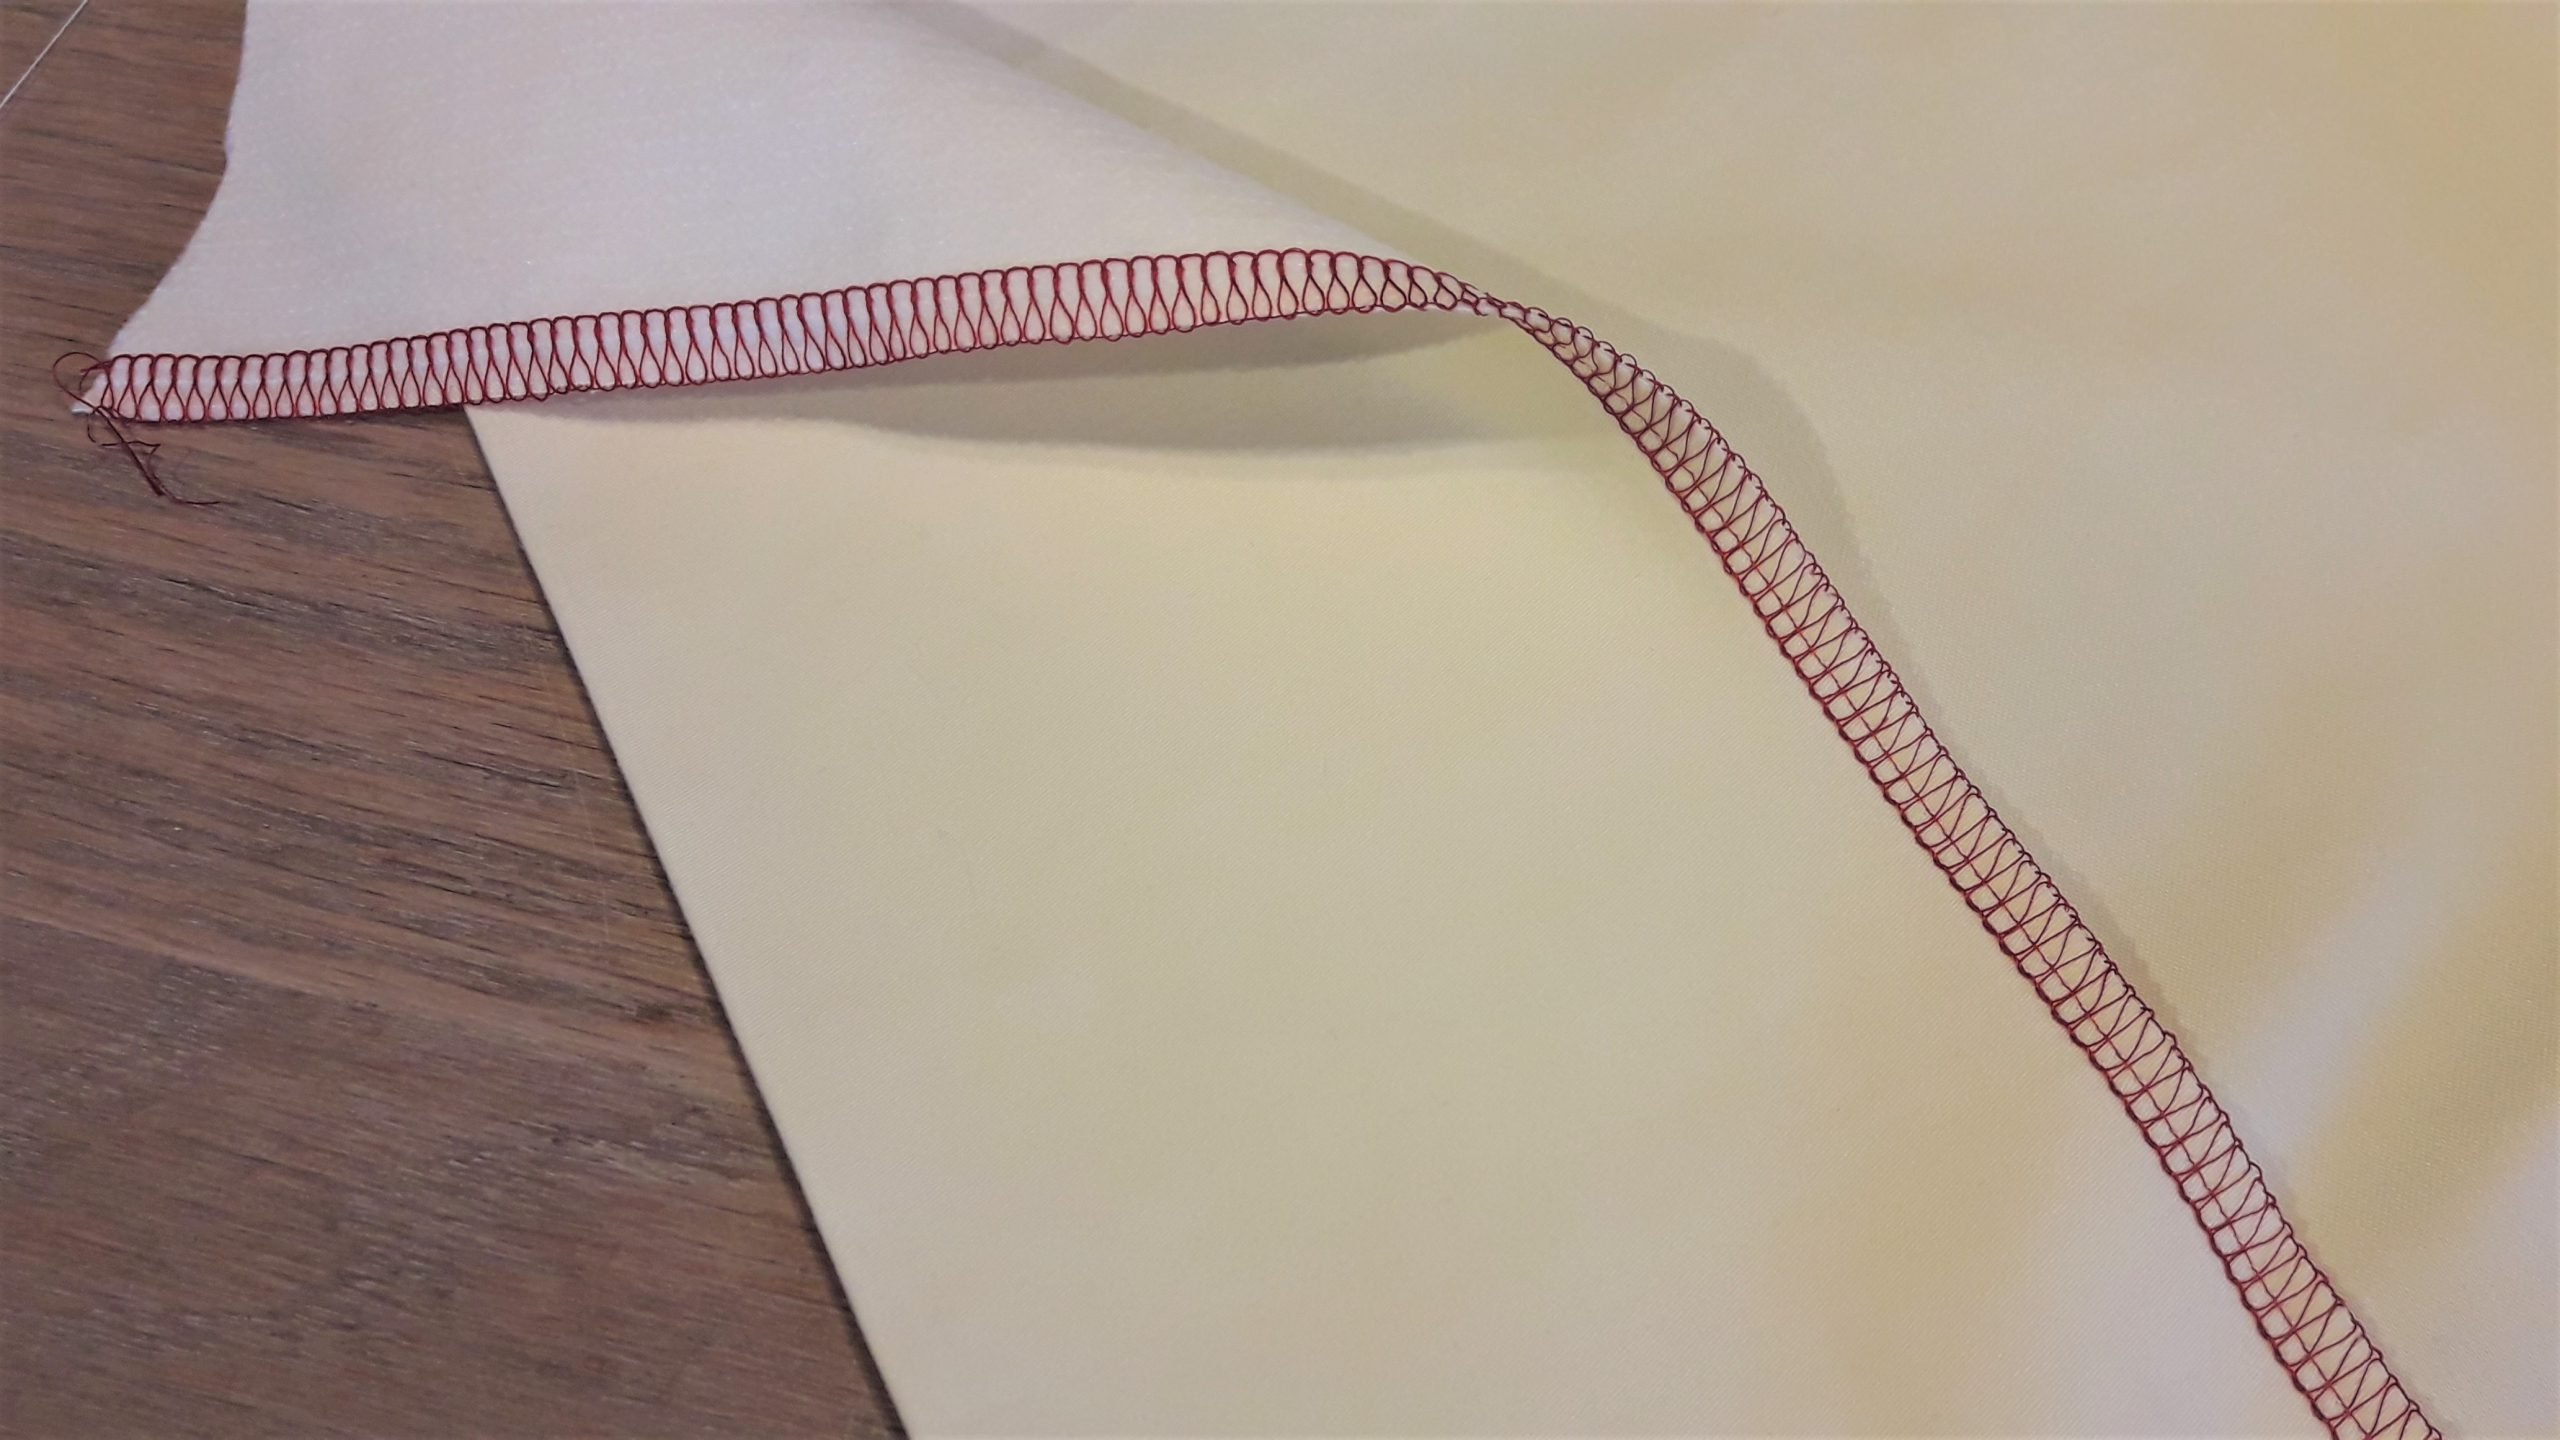
With the overlocker BERNINA 460, it is easy to make a nice finish to the edge of the fabric in a contrasting colour.
Straight lines are drawn with a fabric marker and some are sewn with Mettler Transfil invisible nylon thread.
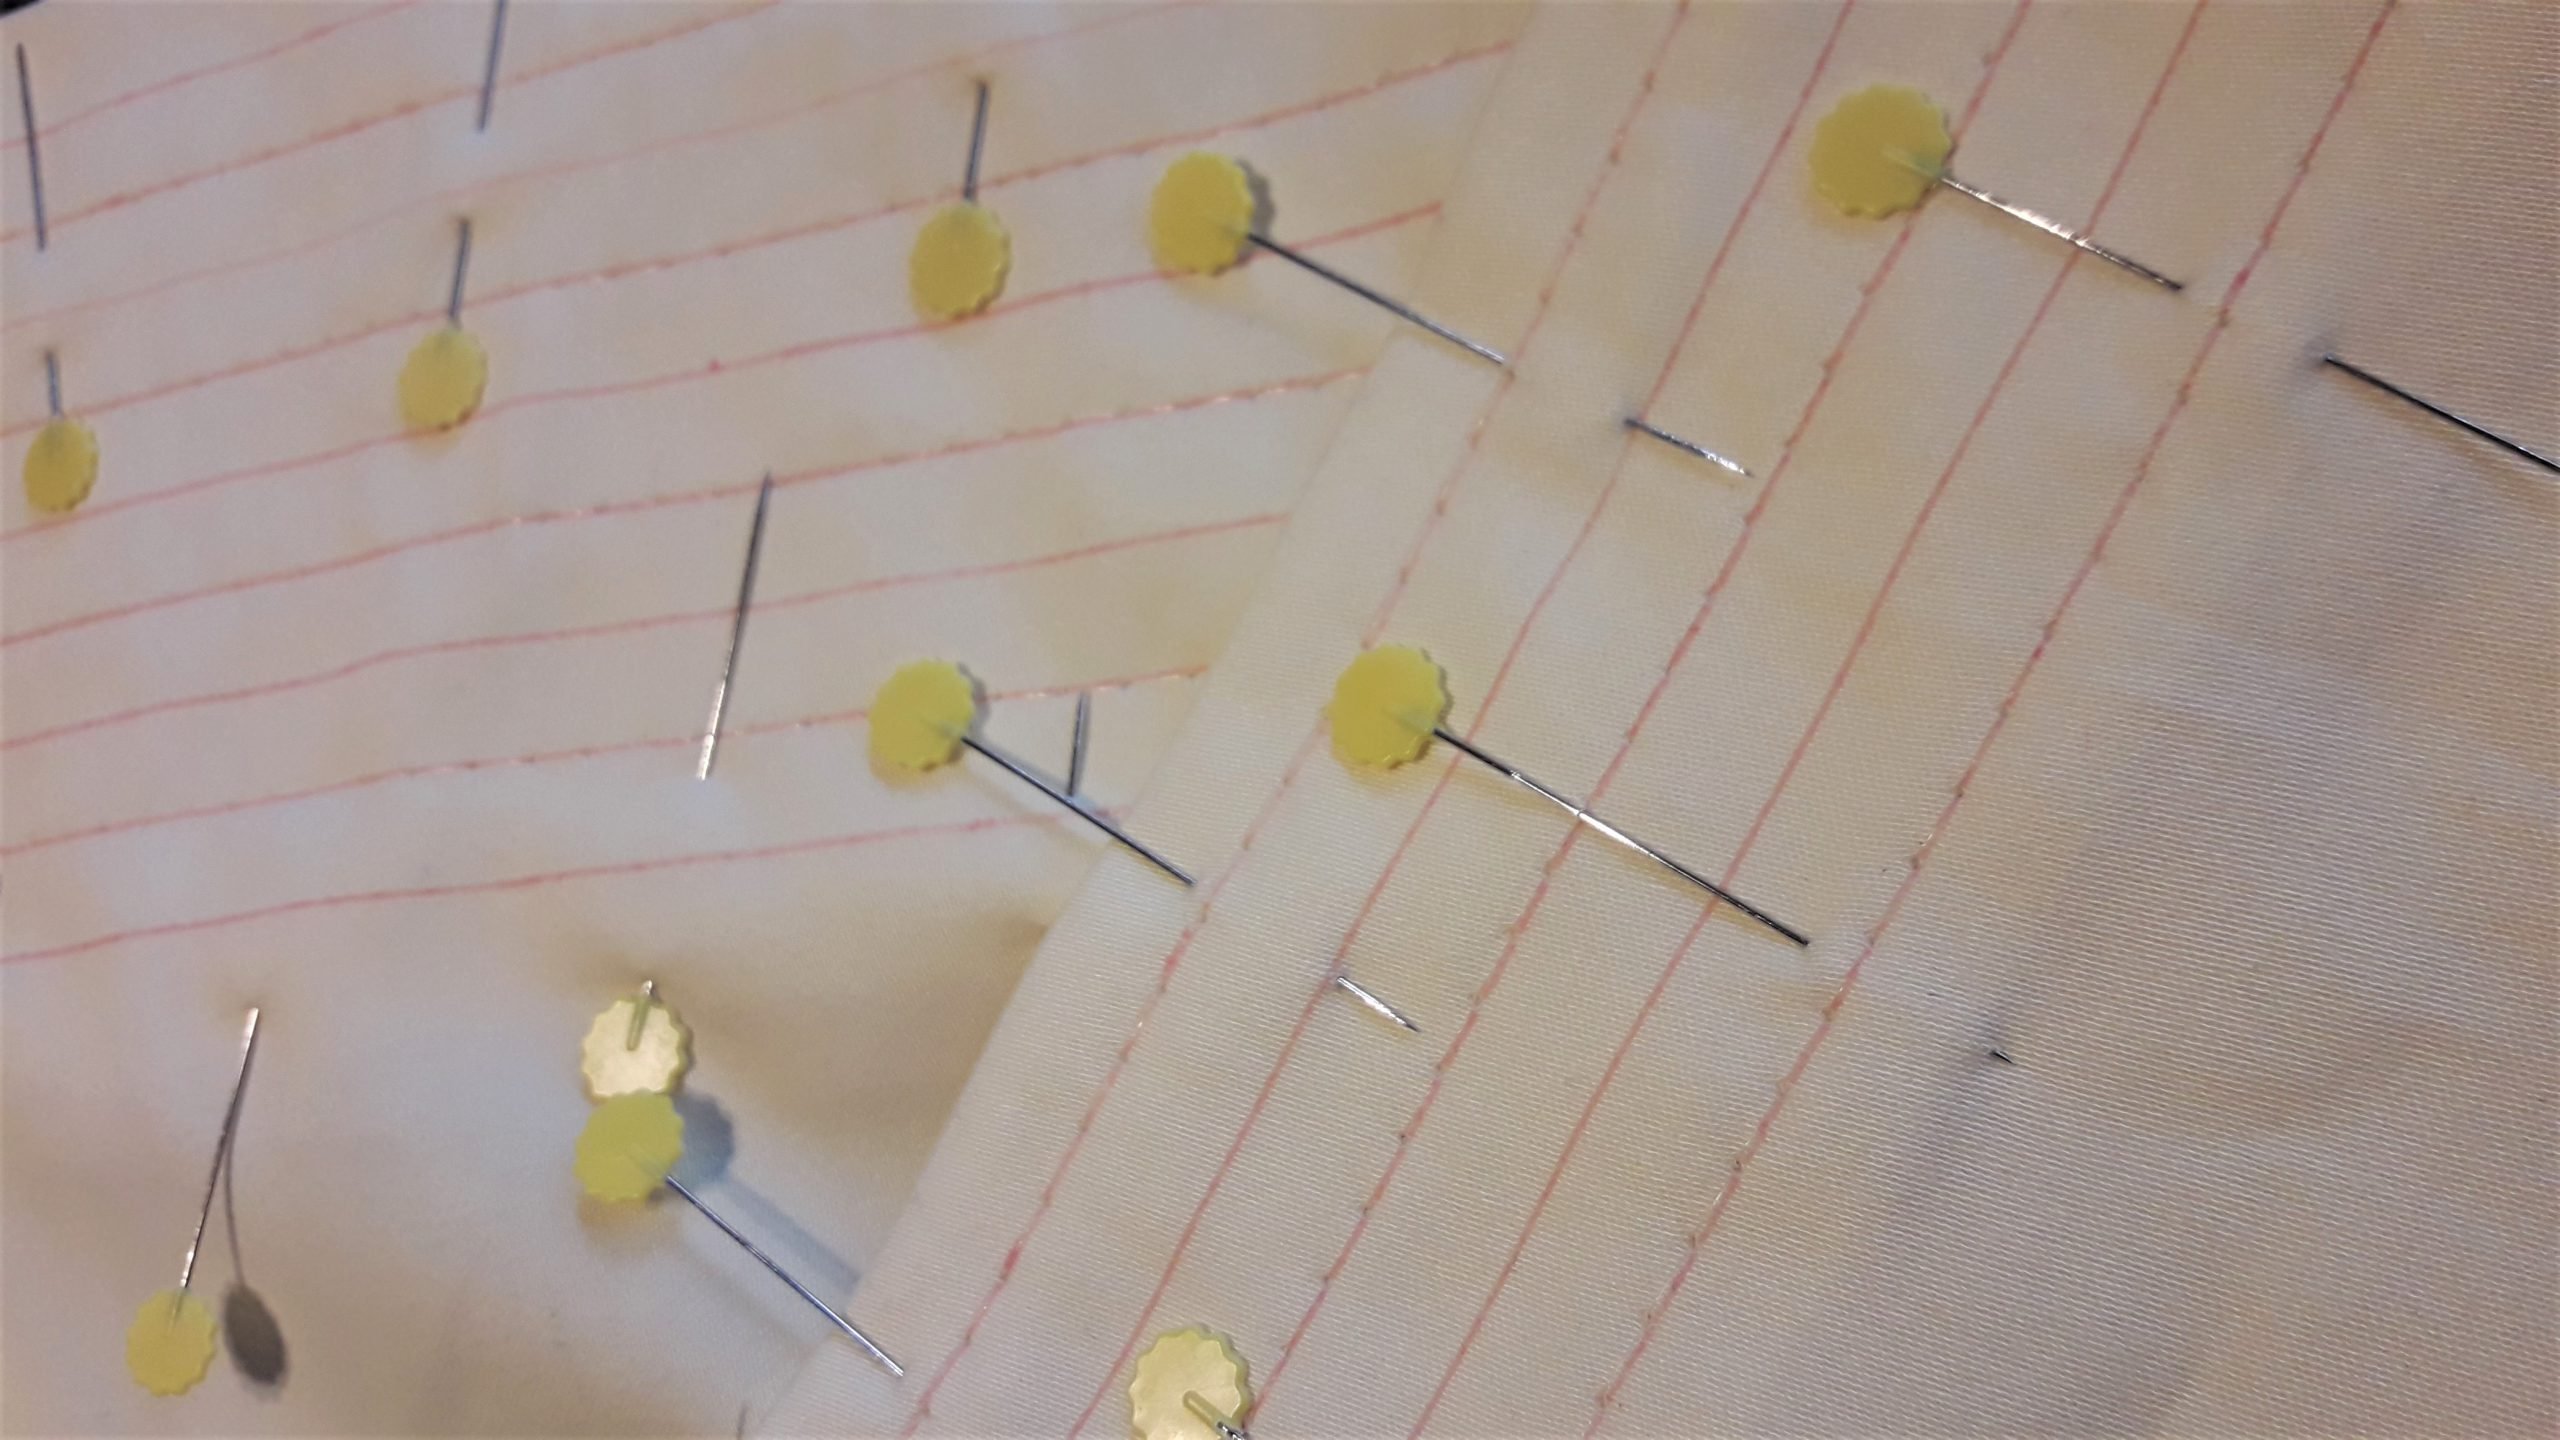
I can start sewing now! By using the open embroidery foot nr 20 I have a good view on my work.
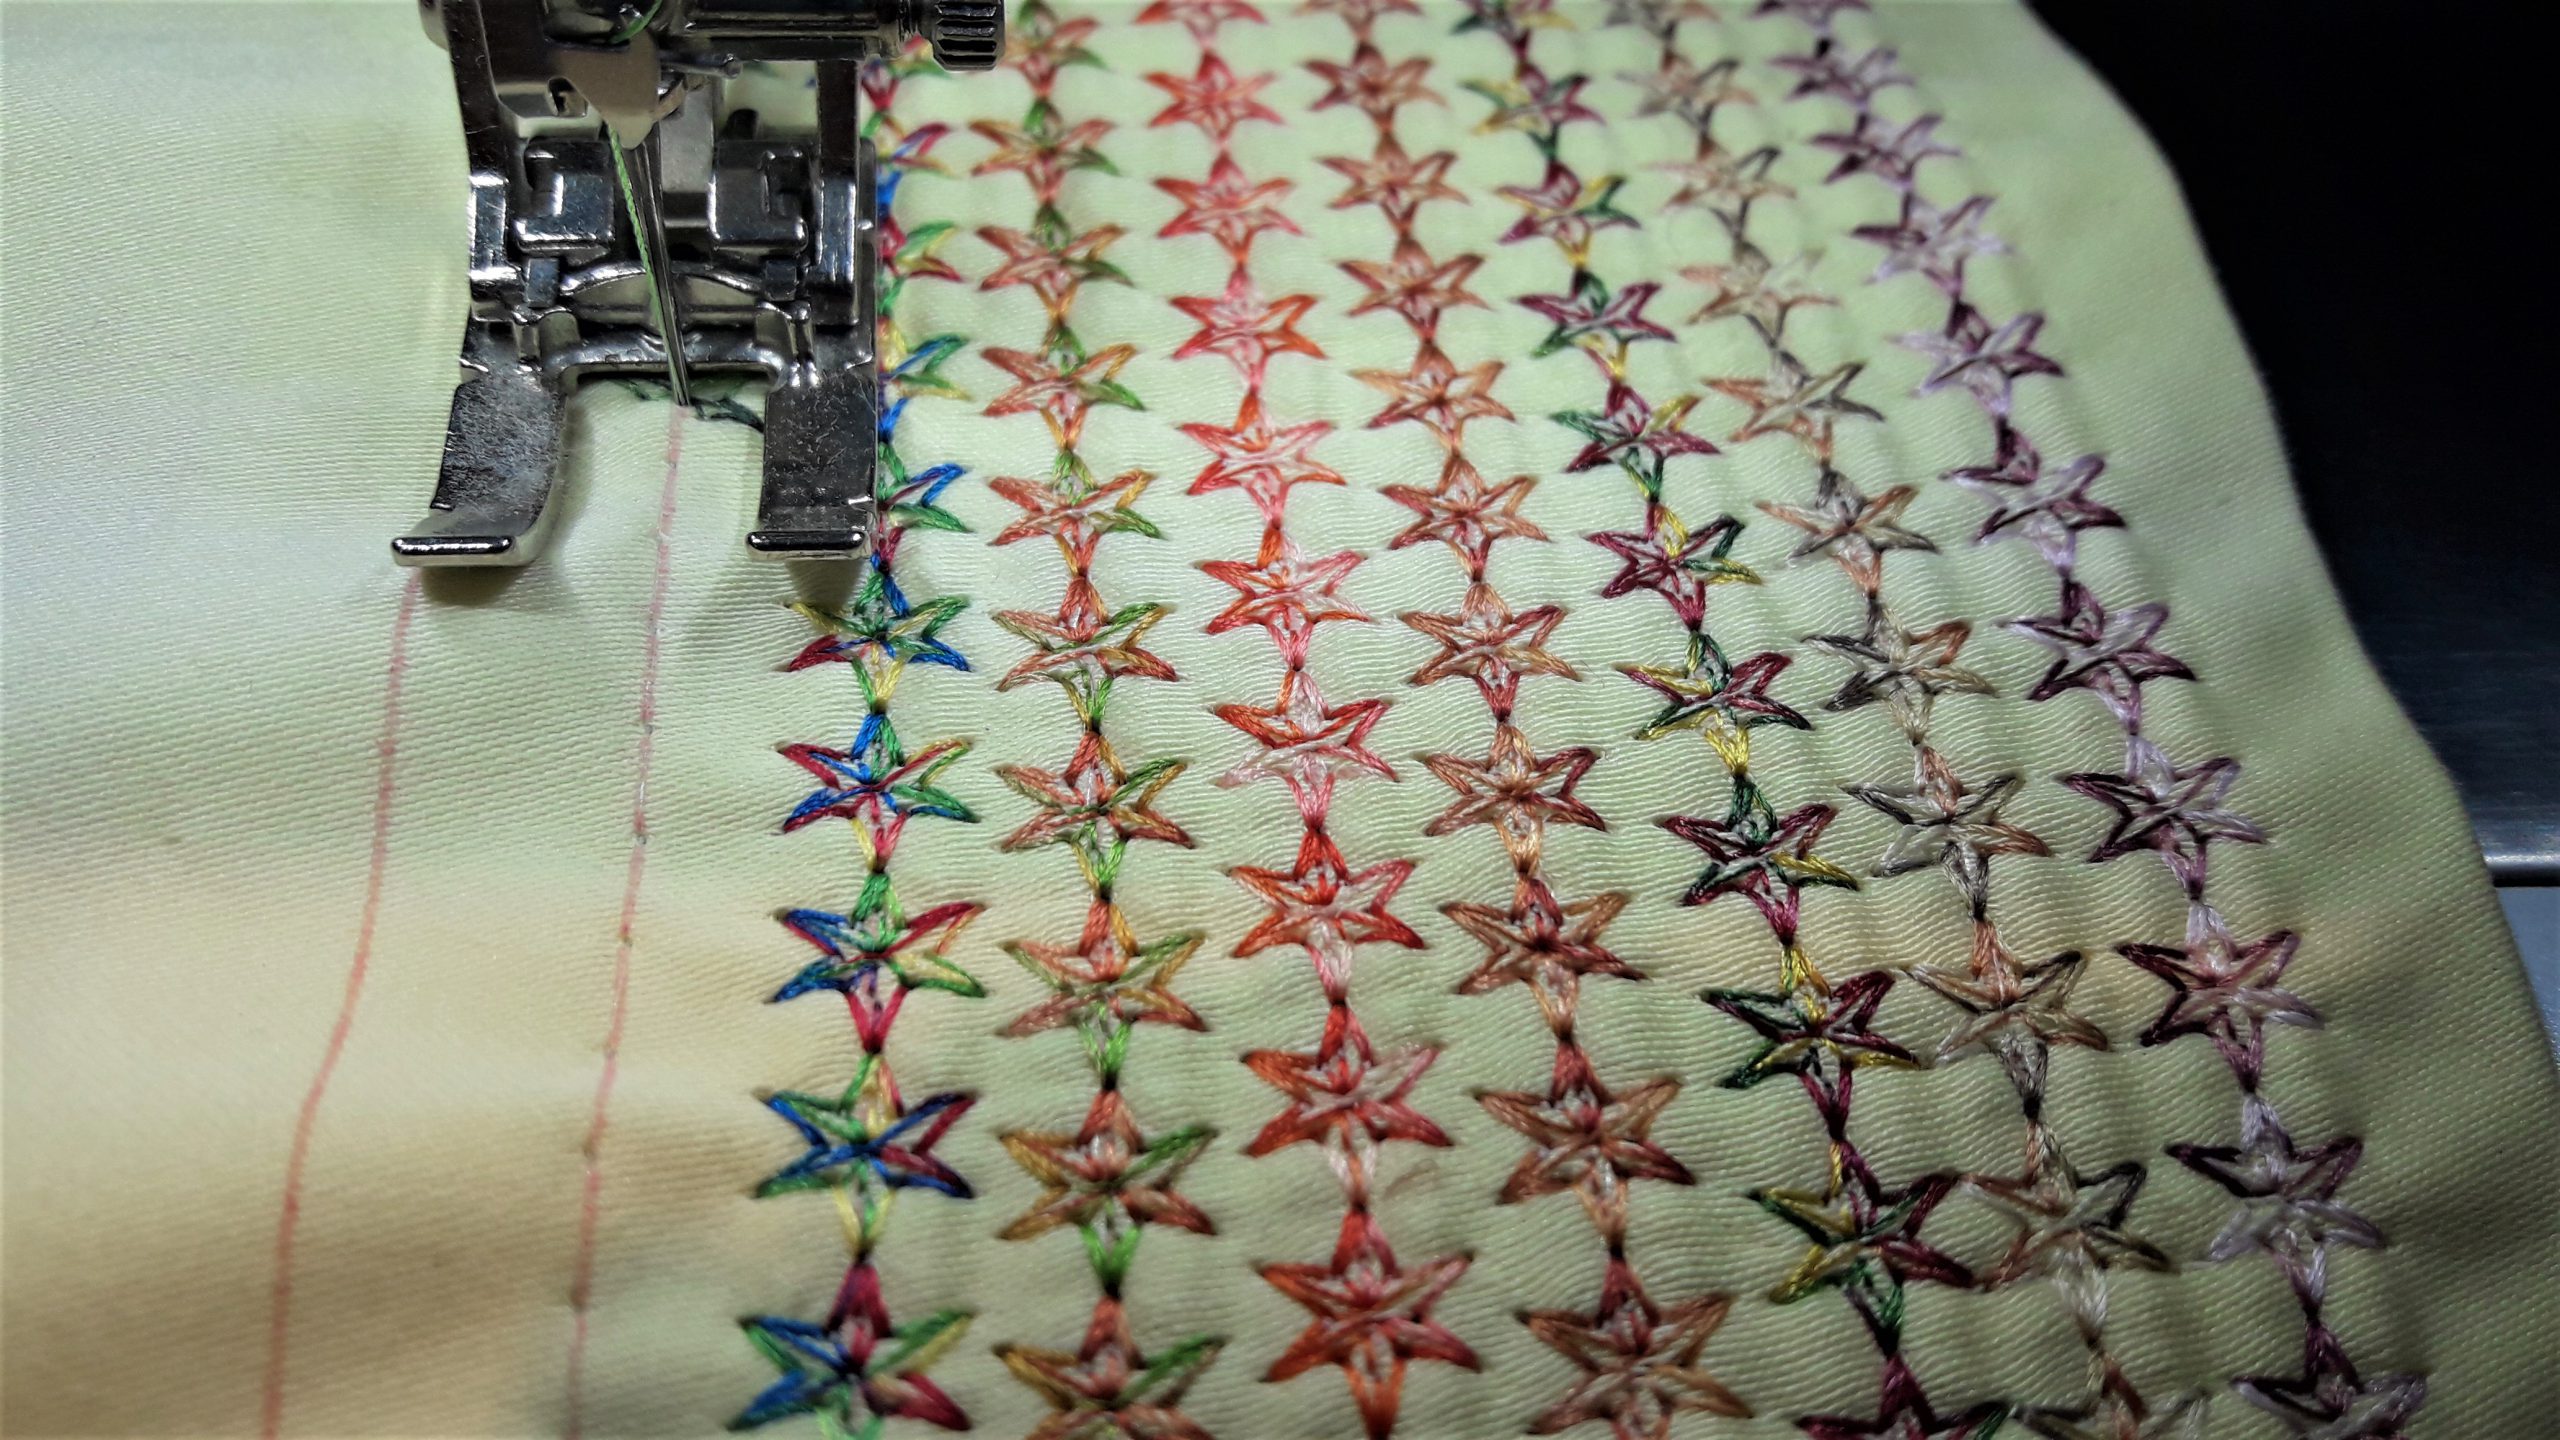
This is what makes me happy today: nice straight lines of stars in all these bright and beautiful colours.
Finishing the apron:
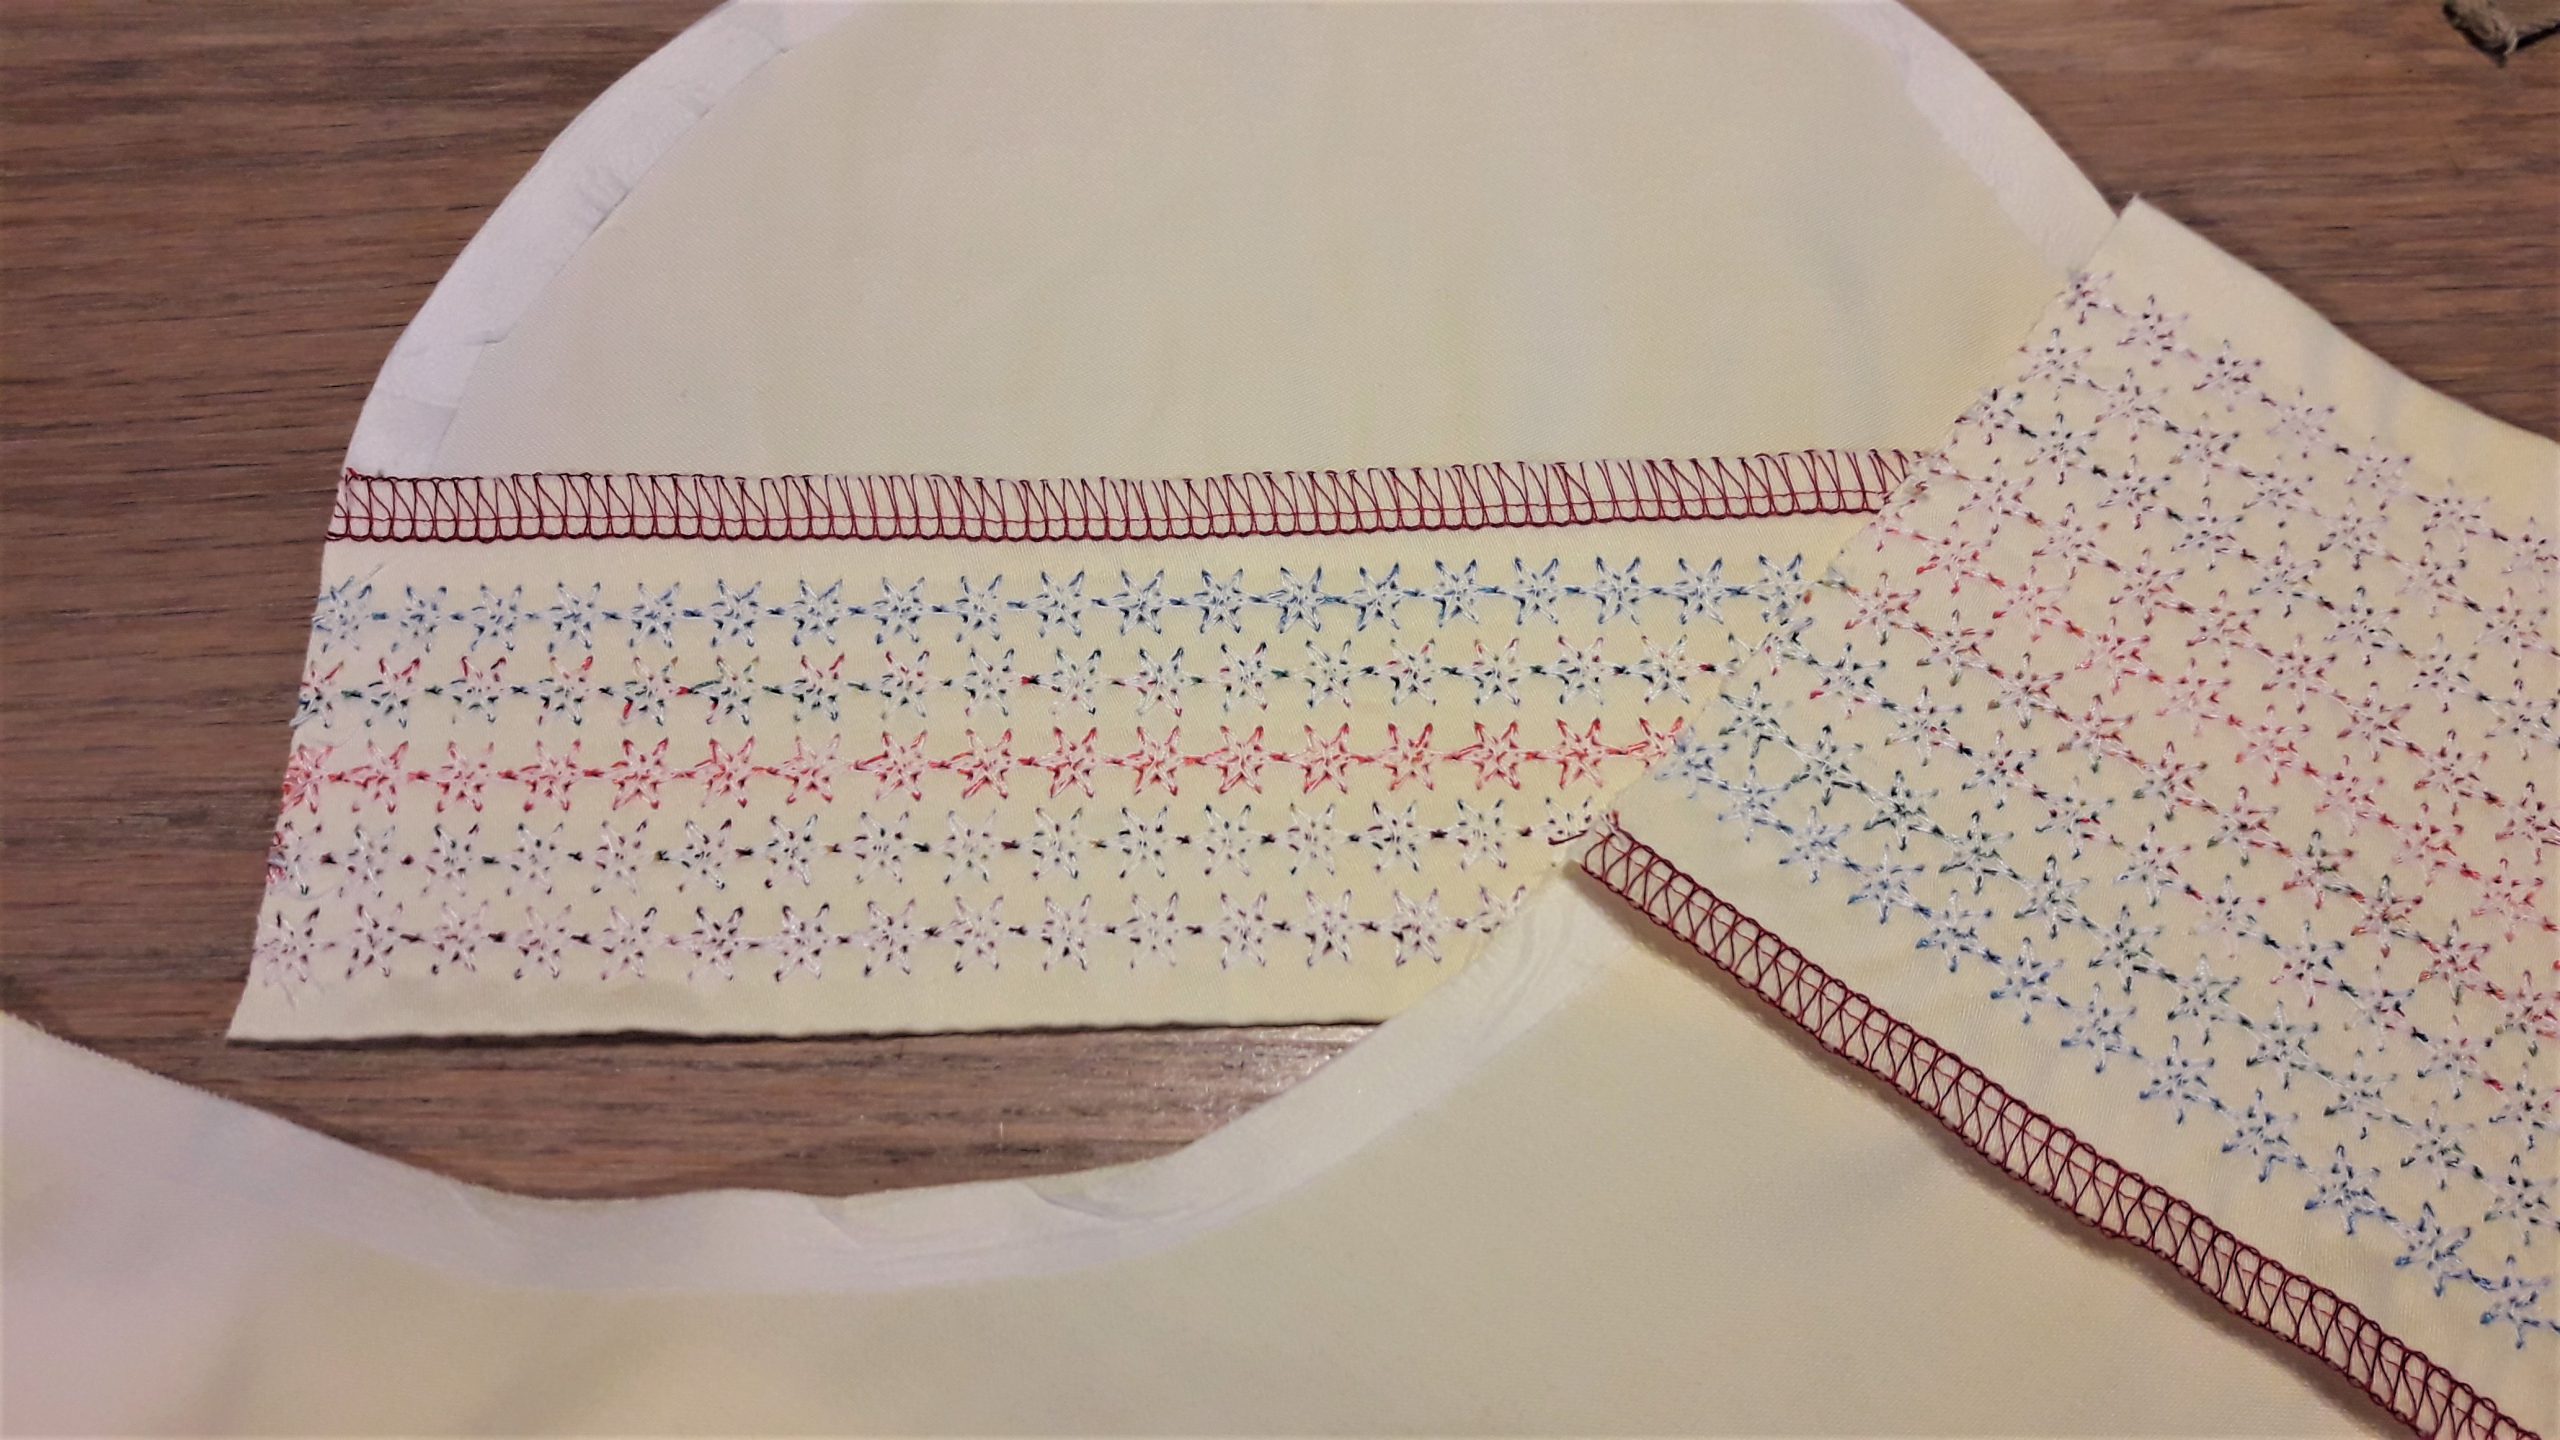
After finishing the decorative lines of stars, I cut out the exact pattern.
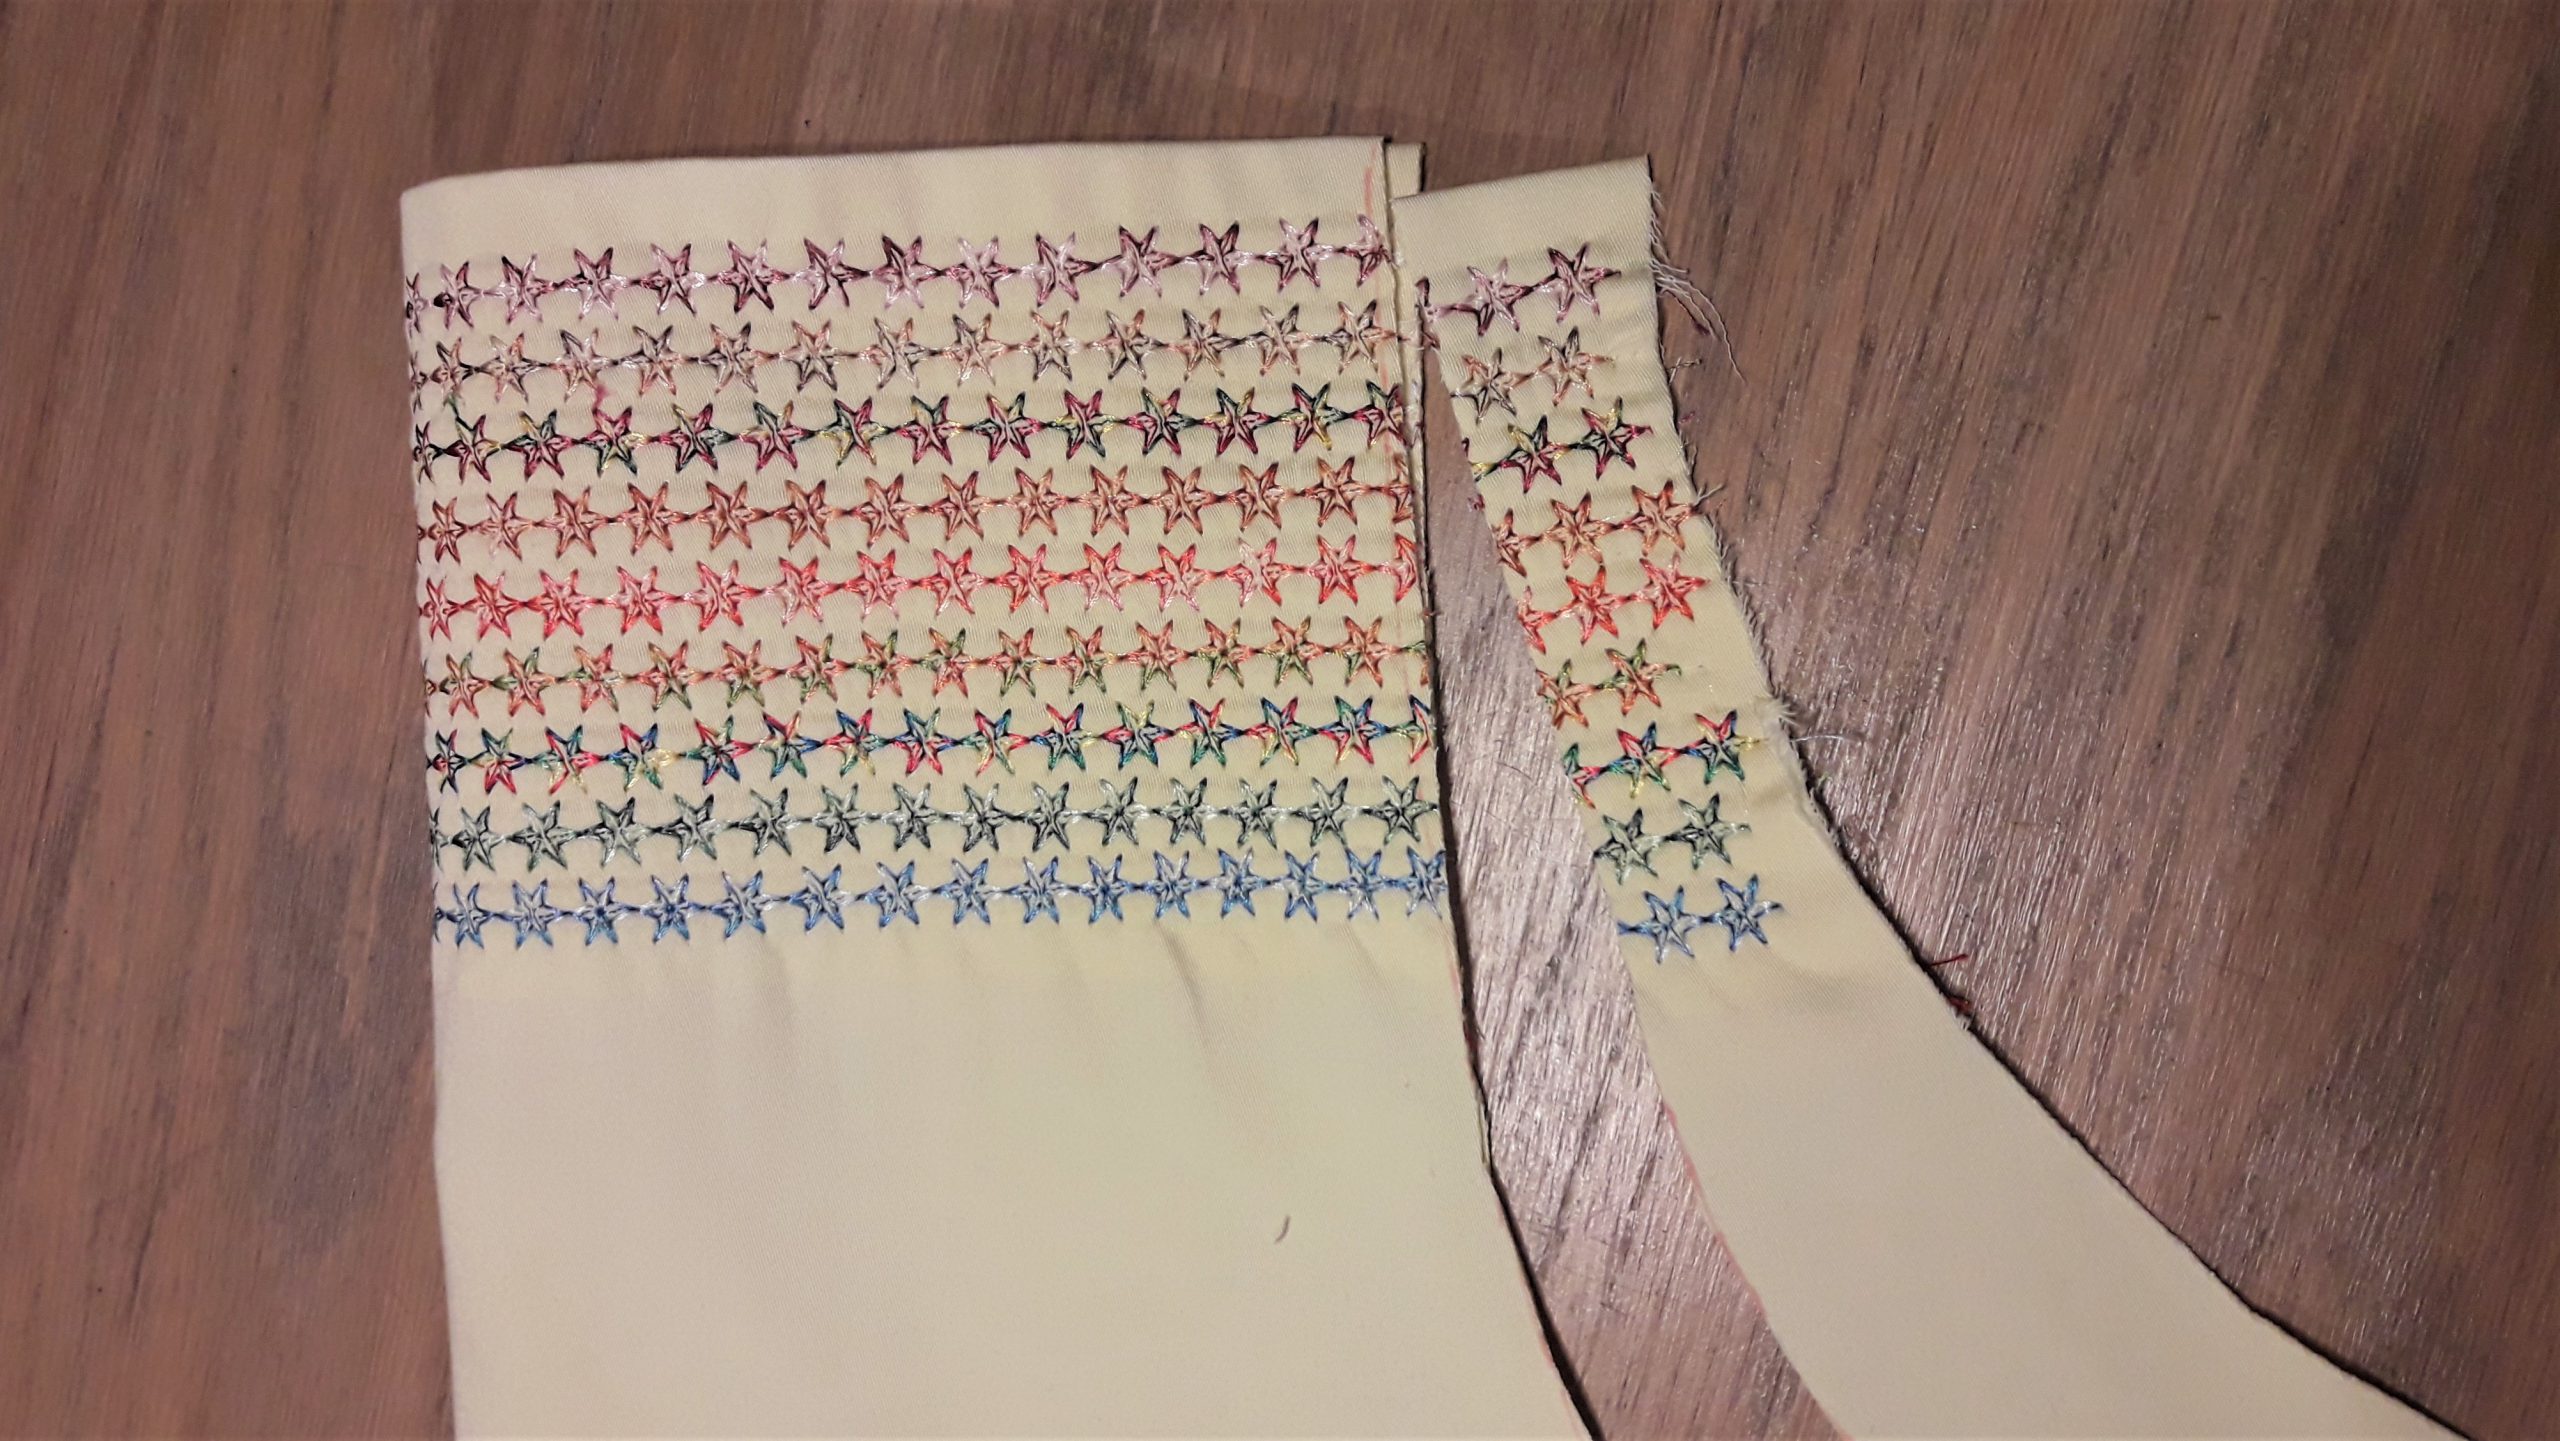
No seam allowance at the curved sideline. I overlock the sideseams to fold over once (I don’t want thick seams for the biastape that I will use later on). Ironing the seams helps to stay in place and I pin them in the corners.

Stabilizer tape helps to keep the curved lines for pocket and apron flat.
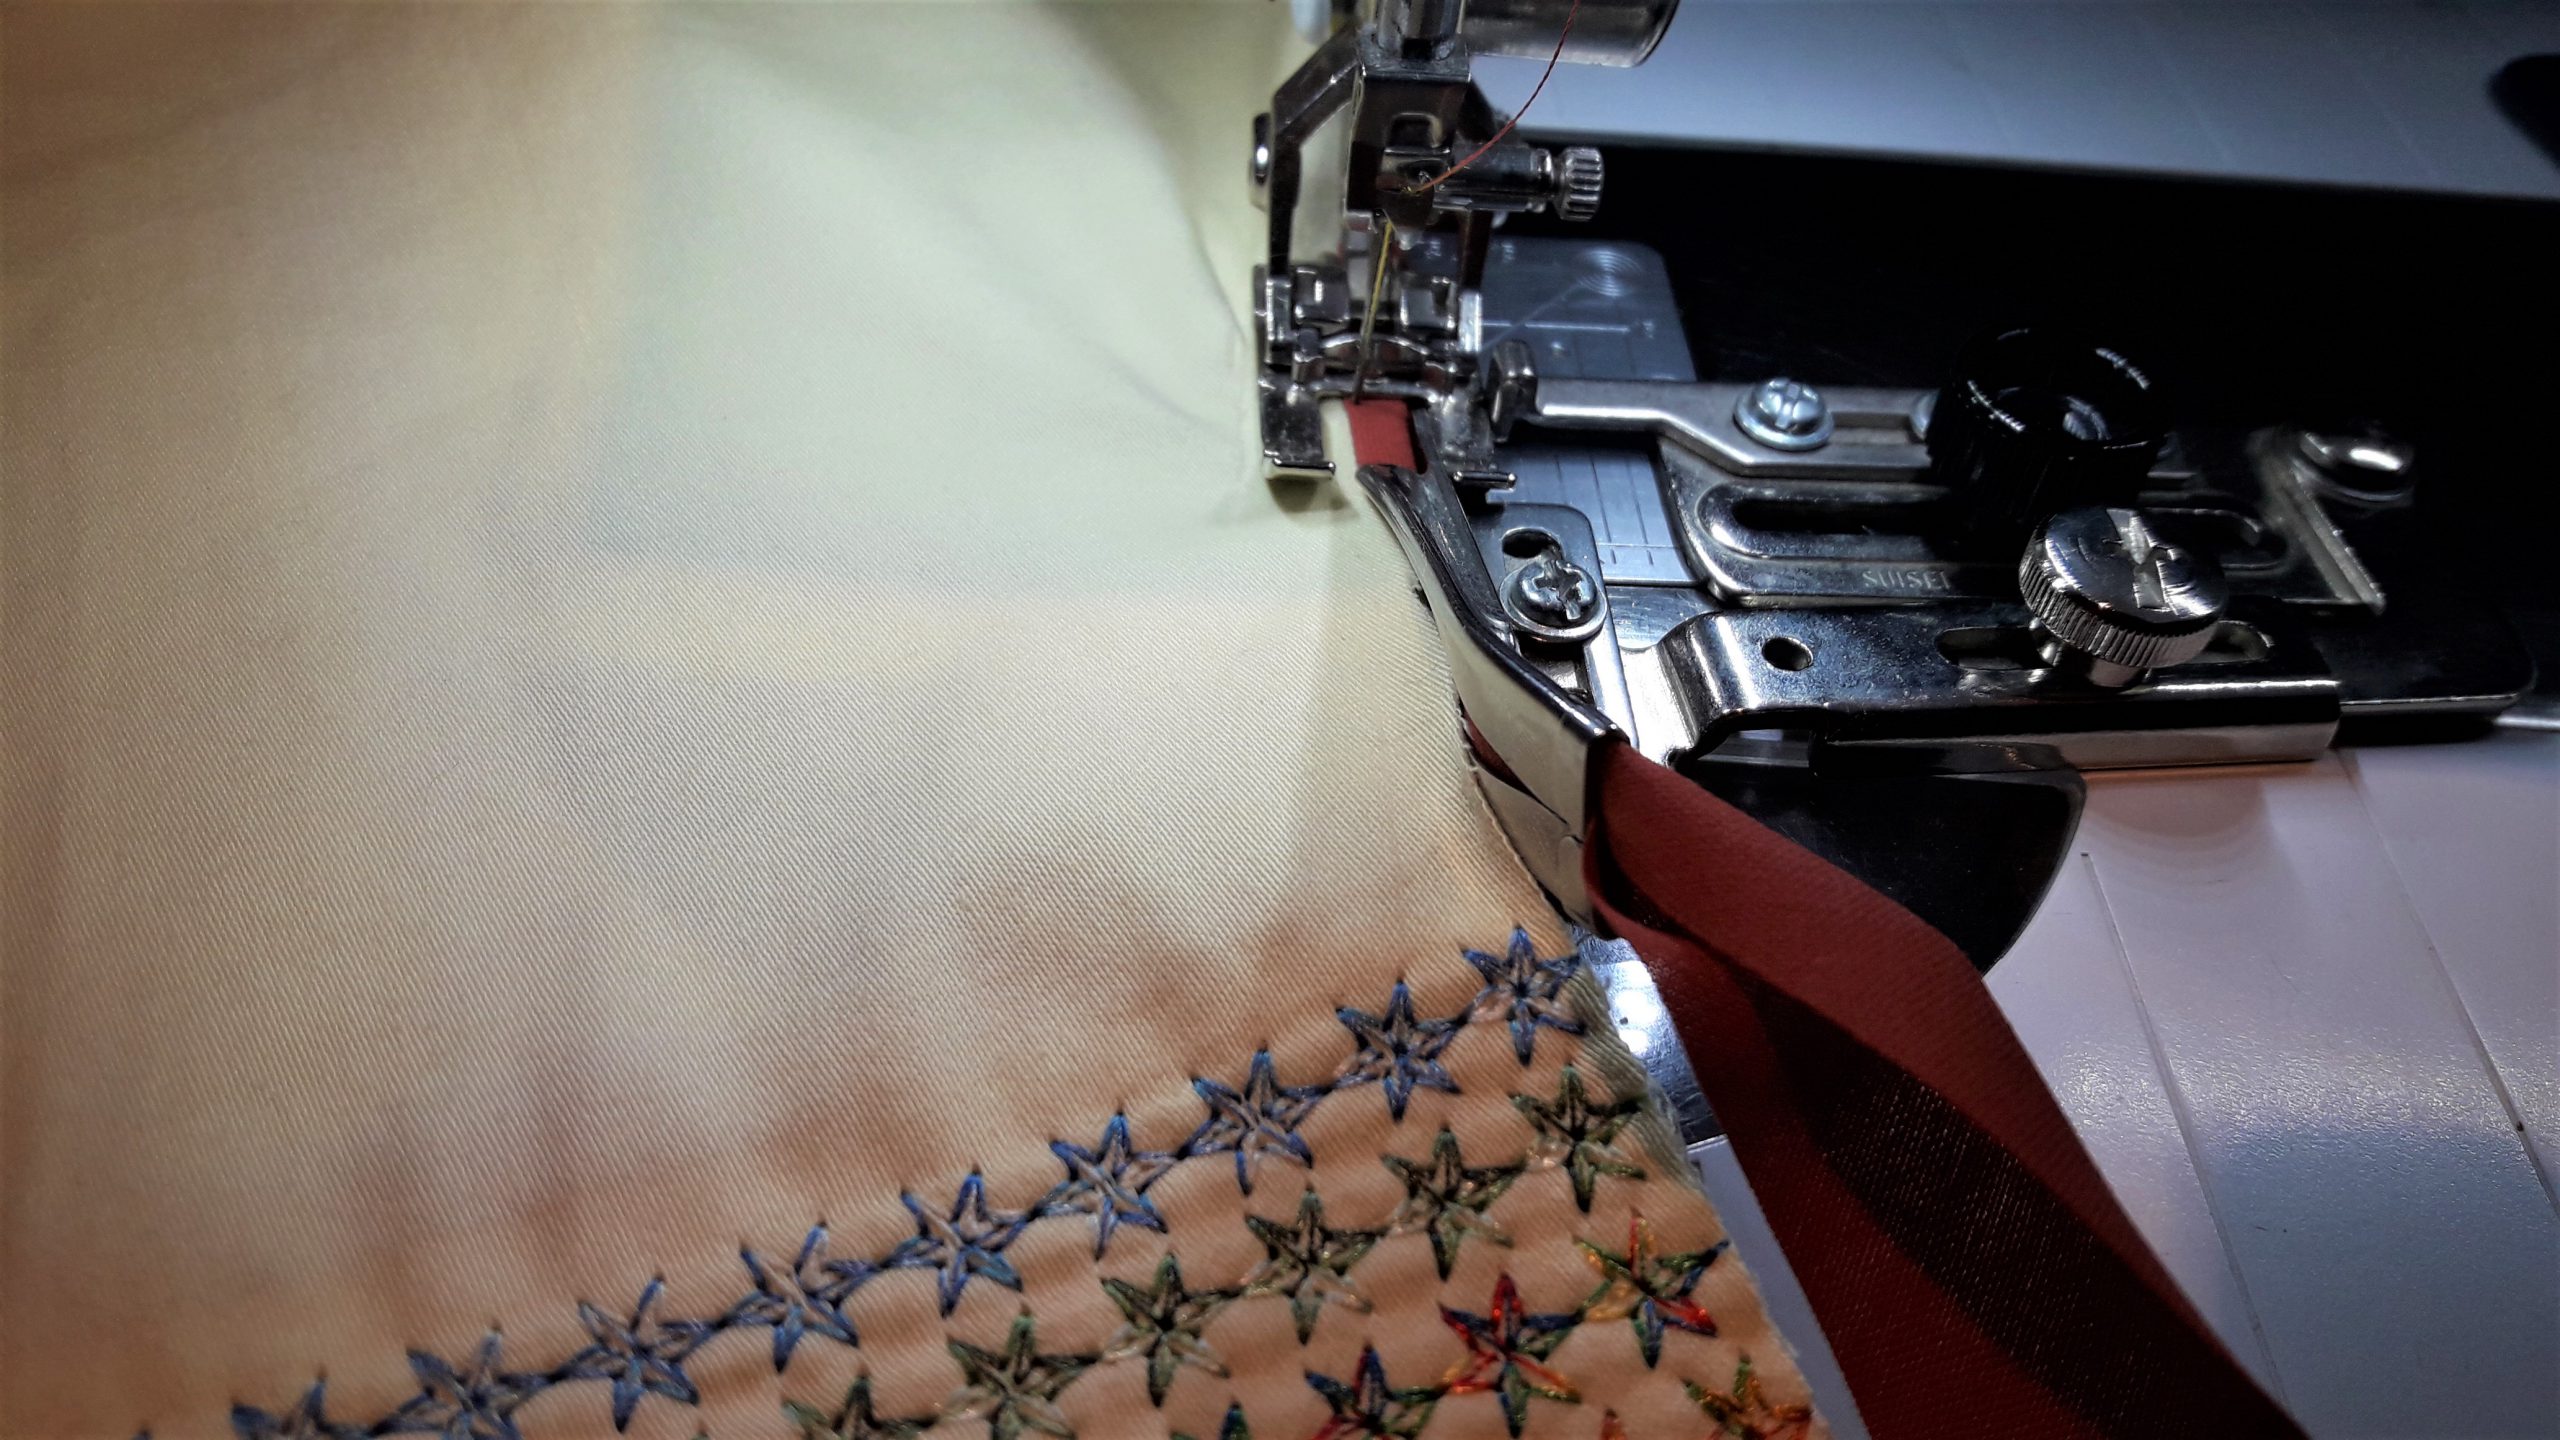
First I stitch the biastape to the pocket, pin it to the apron and sew it with the edgefoot nr 10 . Very useful to follow the pocket!
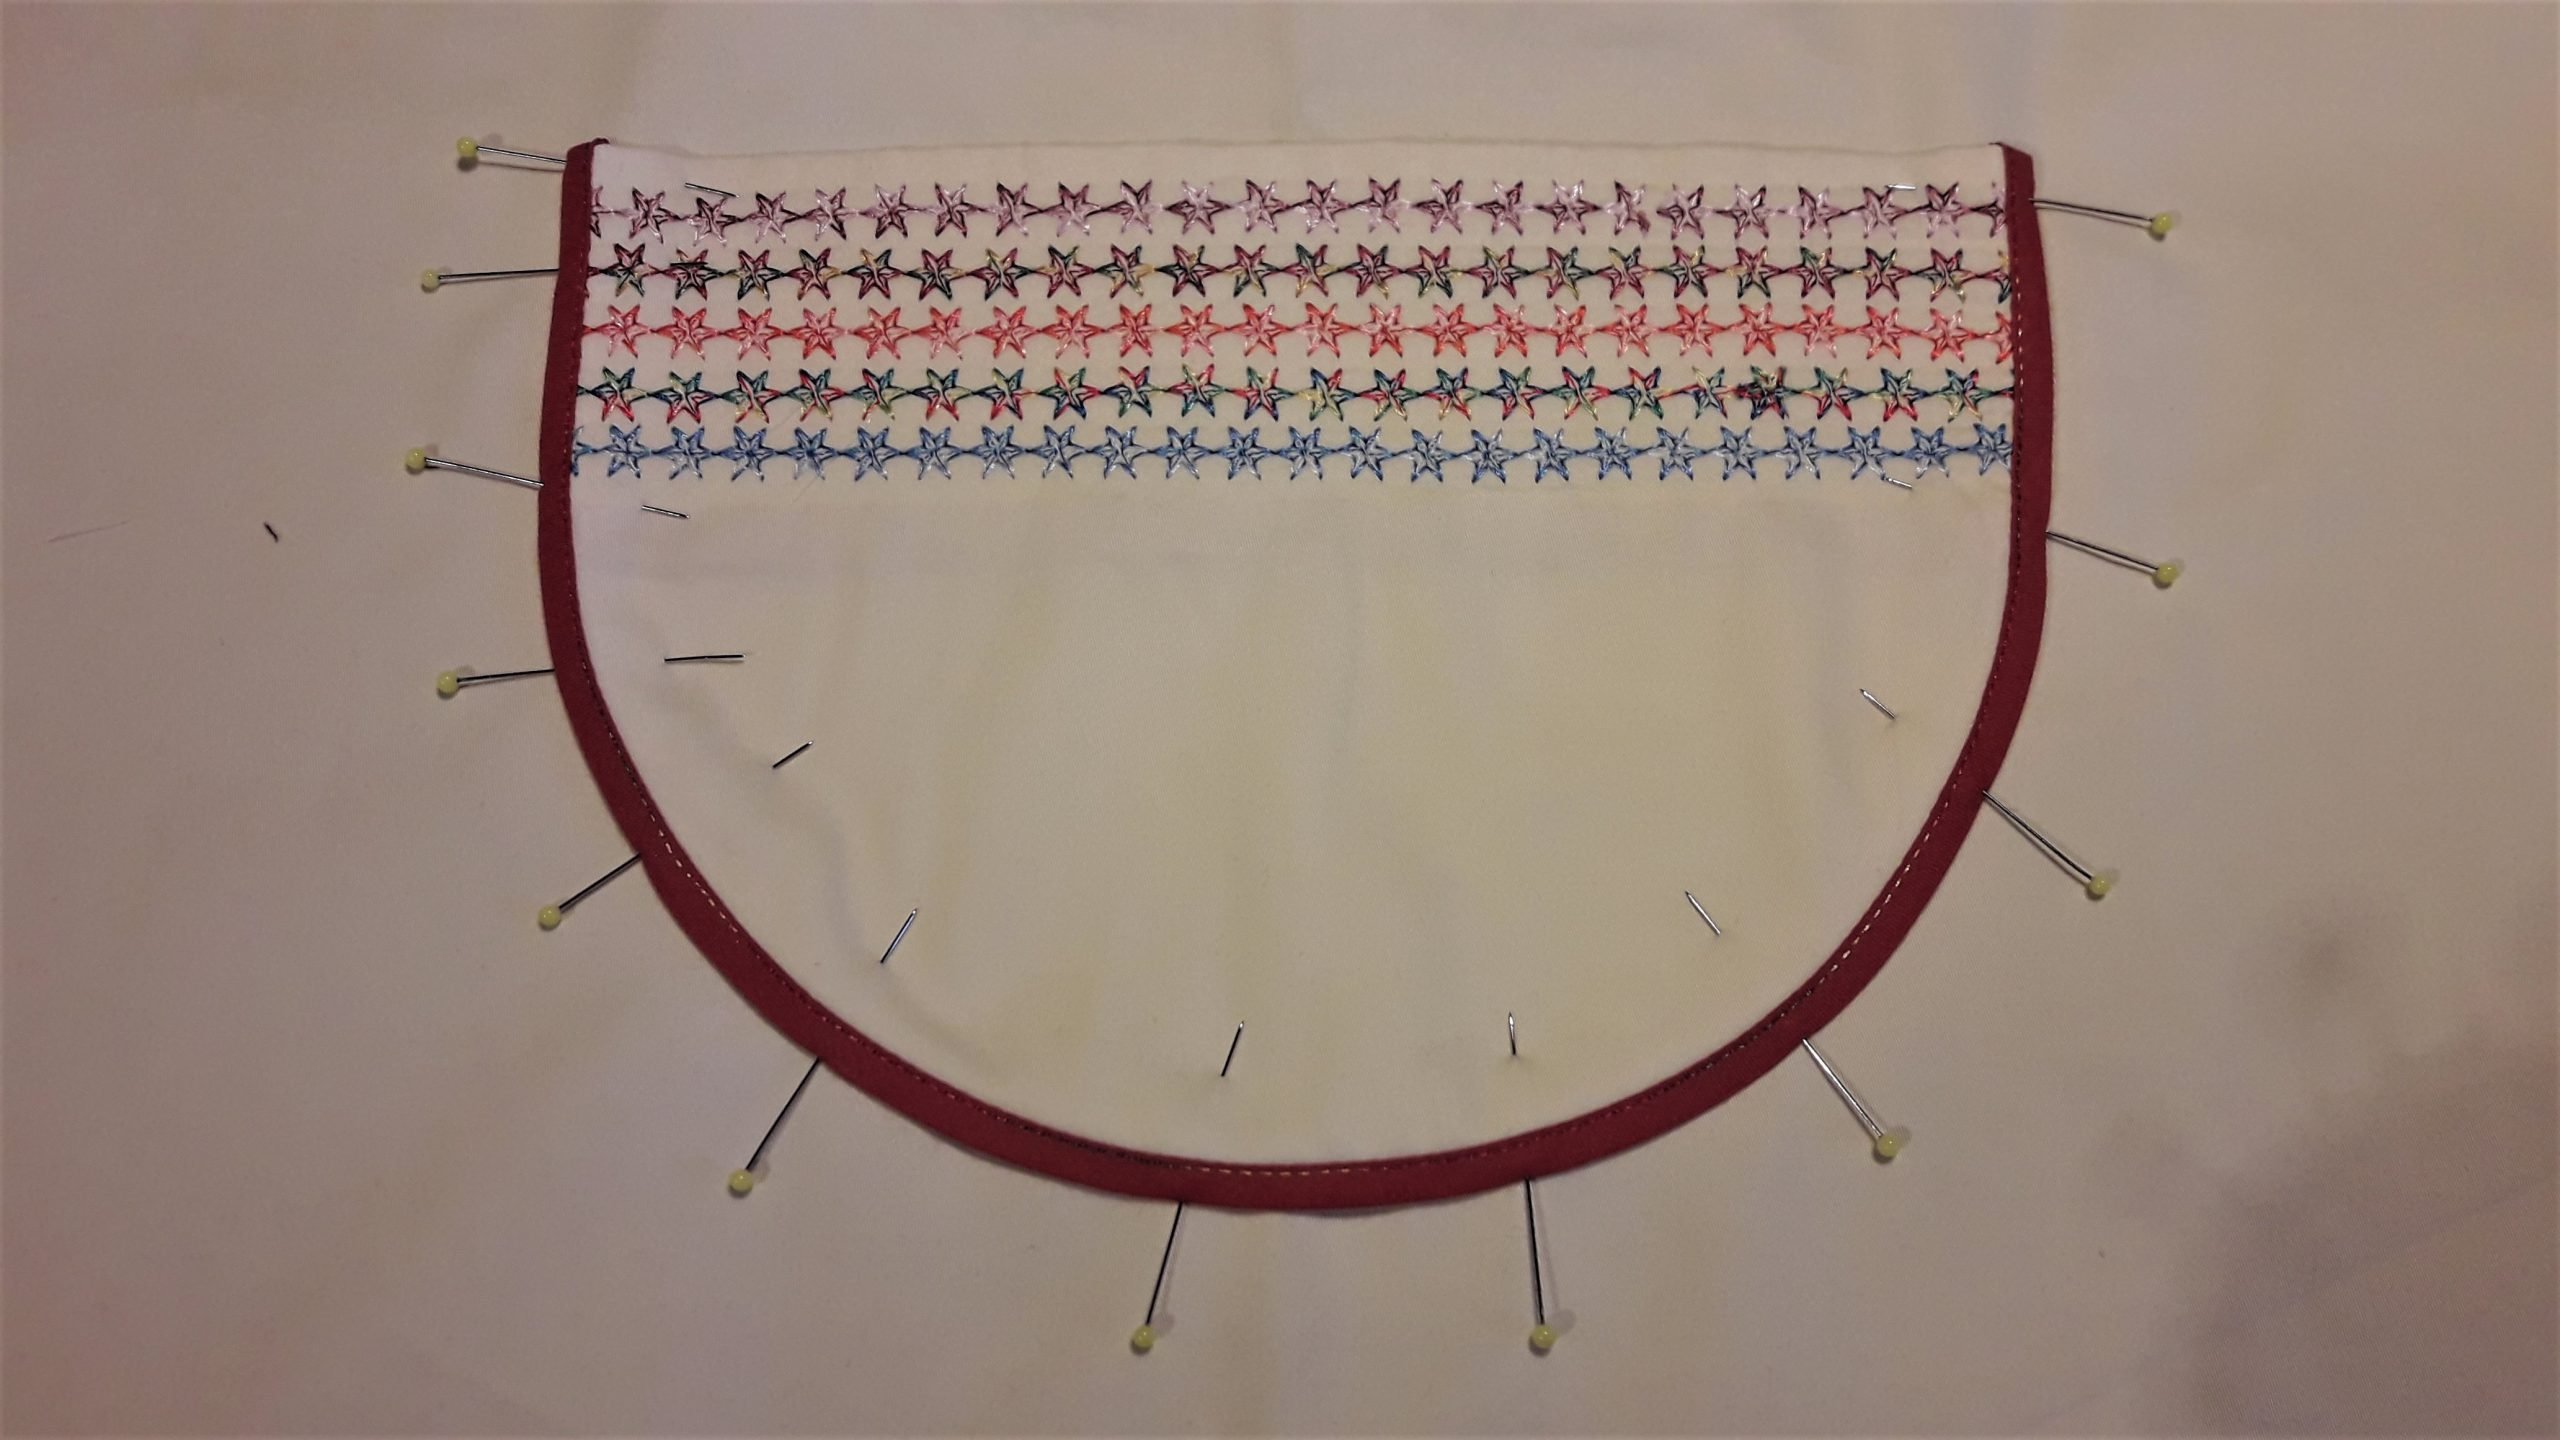
It’s time to stitch an extra tape for neckopening and ribbon to give extra firmness.
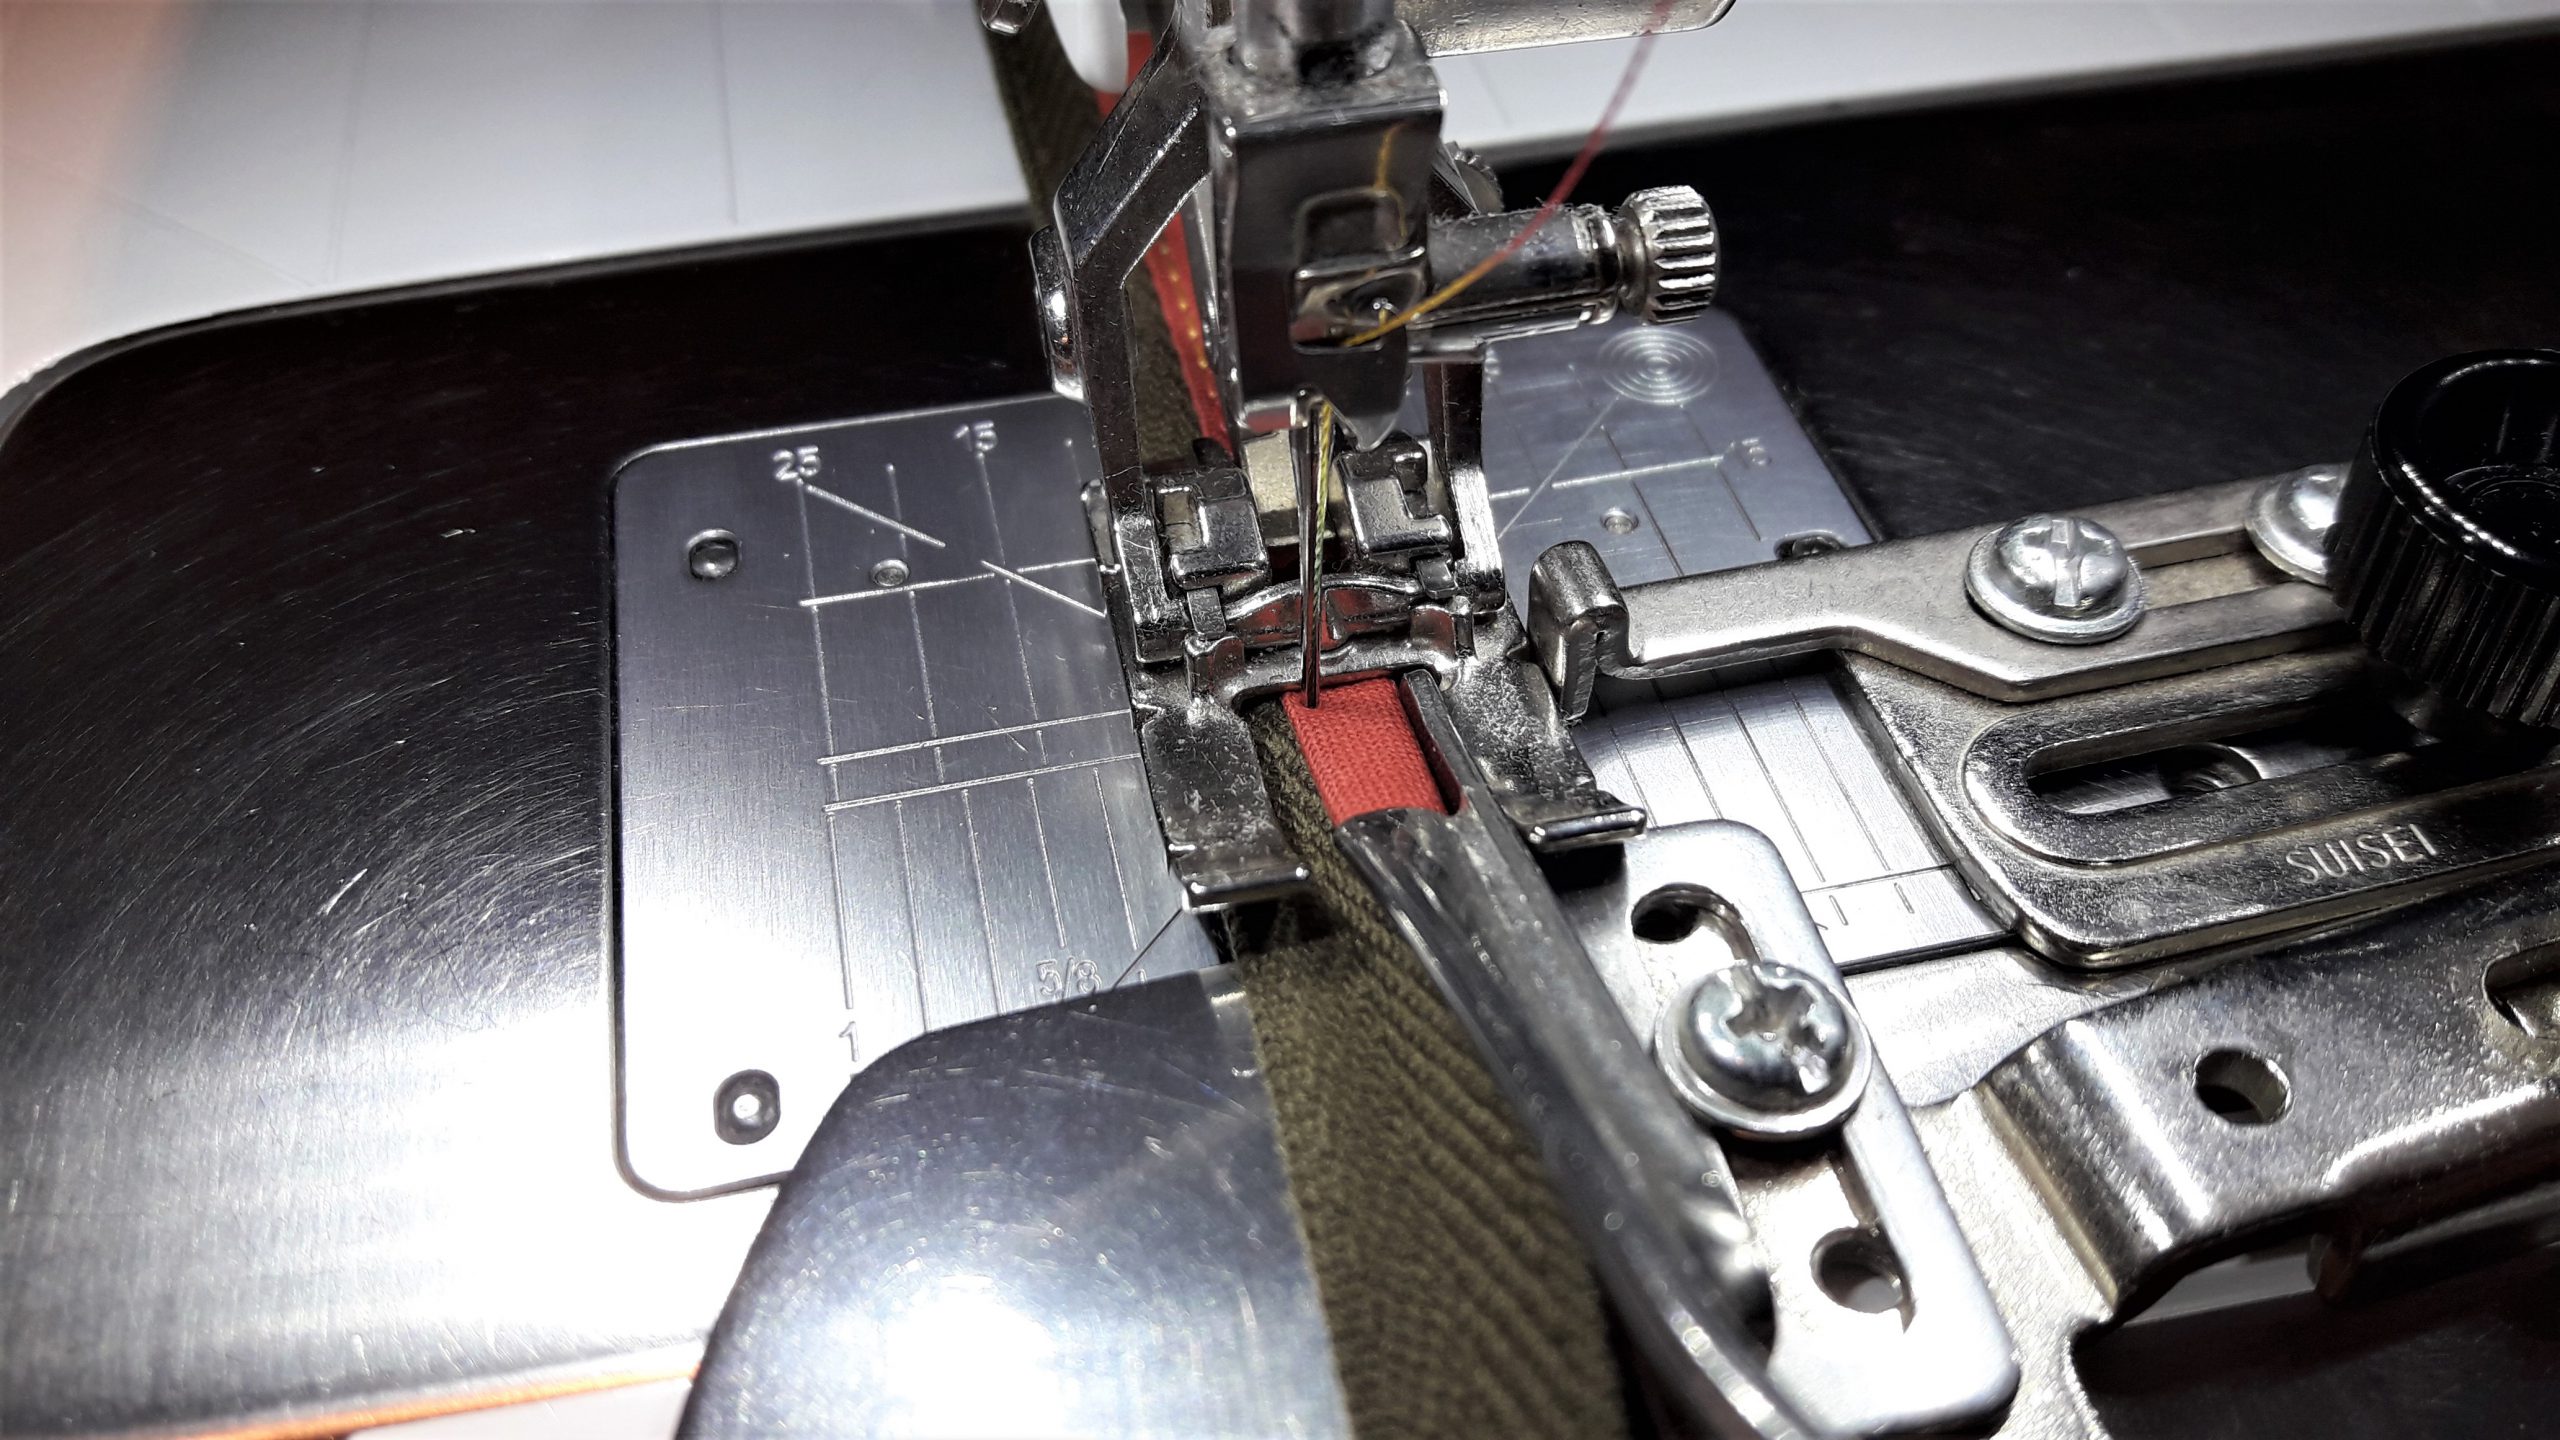
I attach the bias tape with bias tape accessory nr 87.
I like the combination with open embroidery foot 20 on my 9mm machine. Always in combination with dual transport.
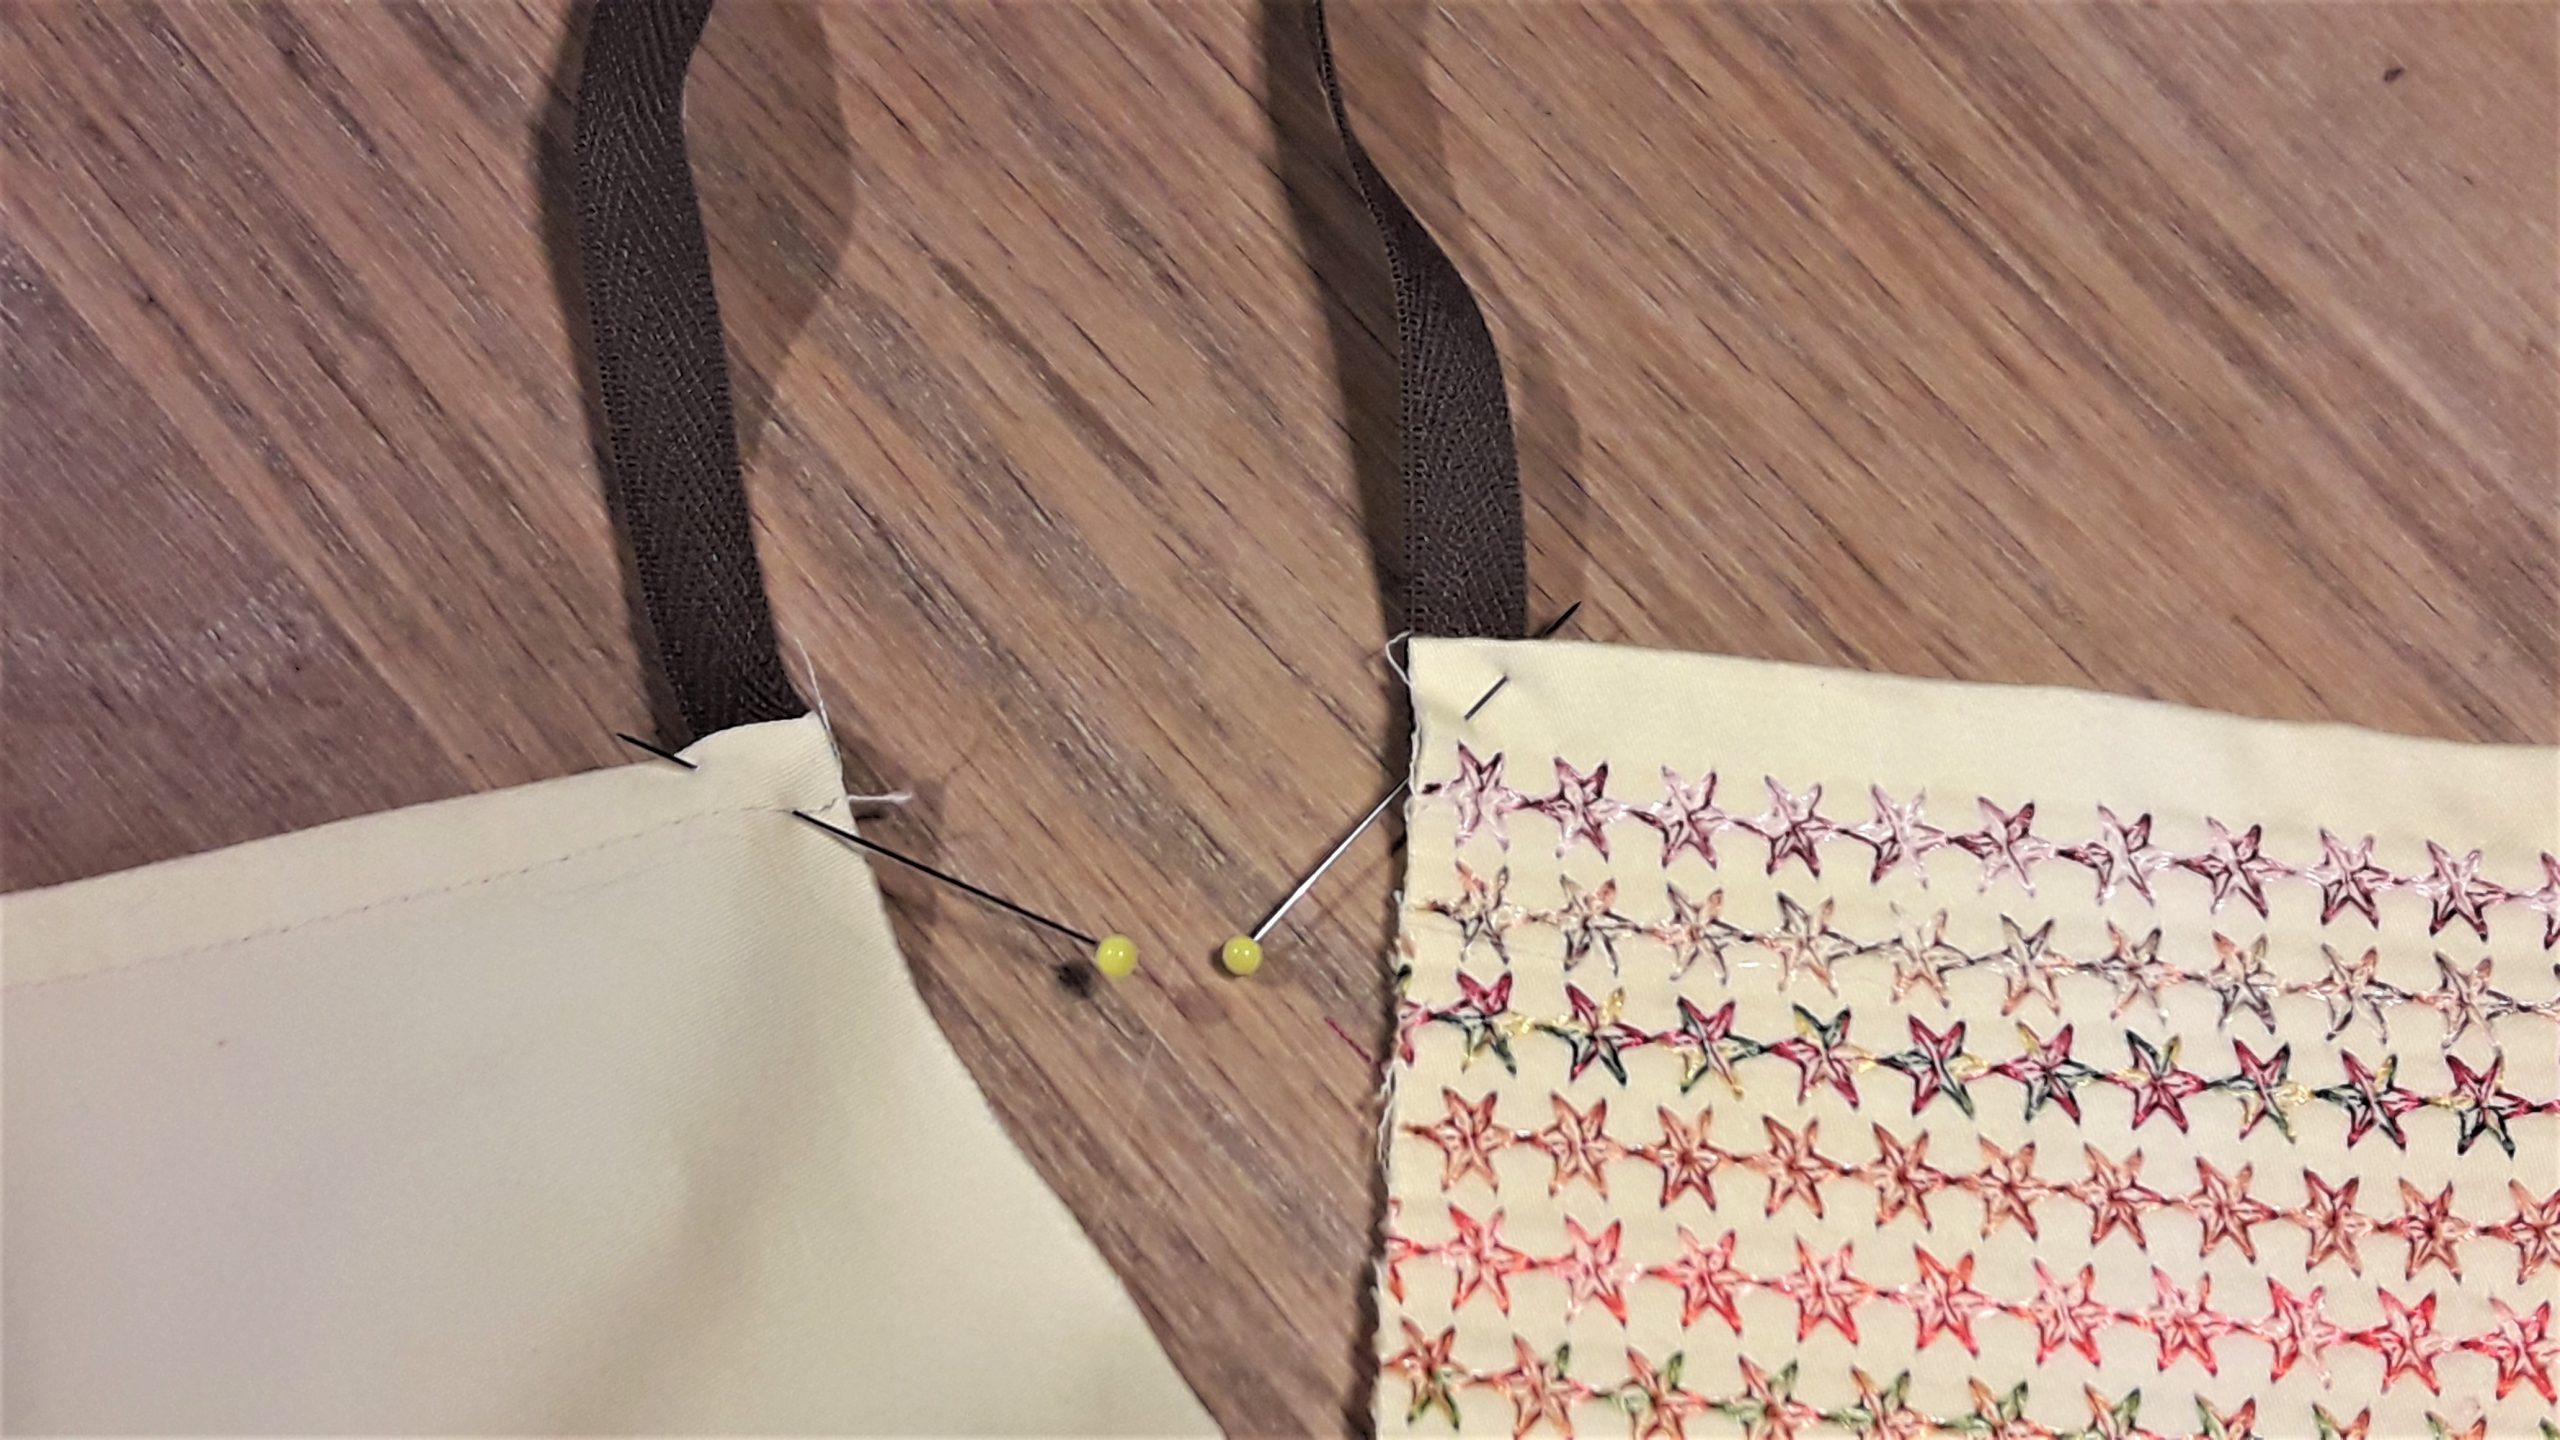
And after stitching over the tape, I go on for the apron, over the neckline and till the end. For the length of the ribbons to tie the apron, I measured 65 cm and for the neckline 47.
Easy to tie a knot in the end of the biastape to prevent fringing.
My apron is ready and I like it a lot!
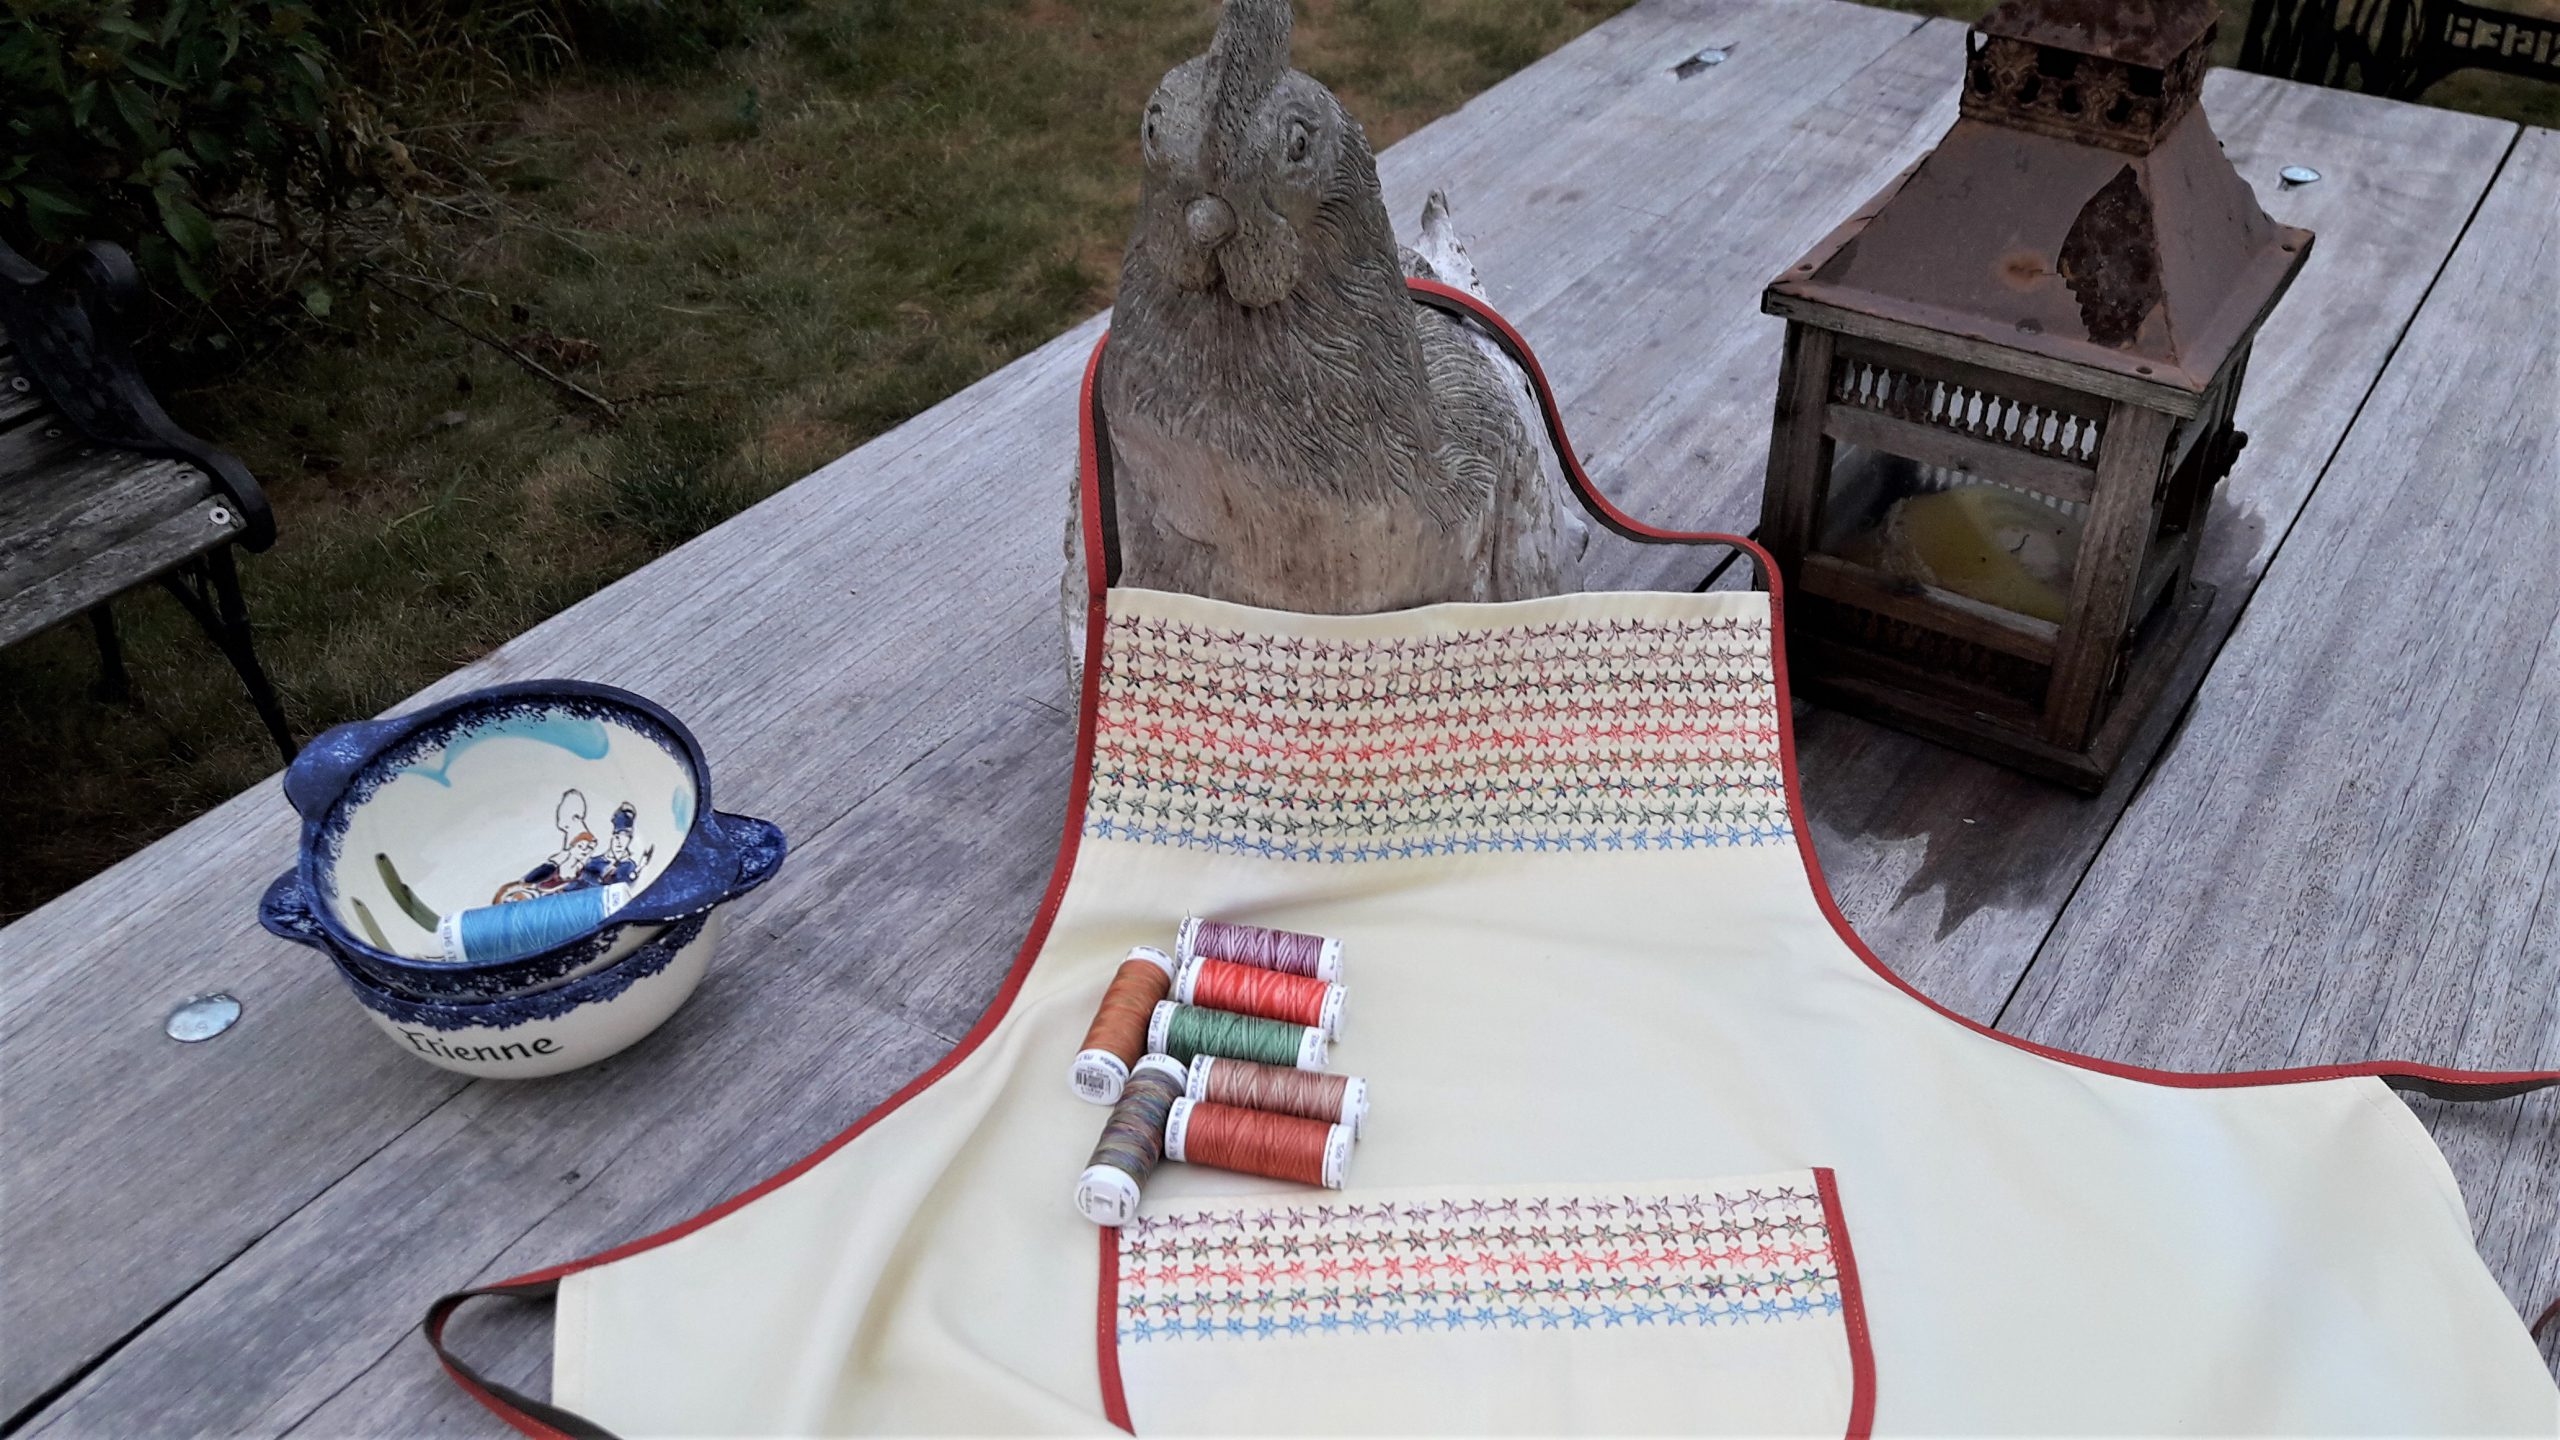
Sunny, bright colours in the kitchen, that’s what I like.
Would you try to sew decorative stitches on an apron with Mettler Poly Sheen Multi Curious about your ideas!

0 Responses