 BERNINA Corporate Blog -
Part 11 of the quilt along, it is time to make row #2! This row will combine some traditional piecing, log cabin style and some improv. 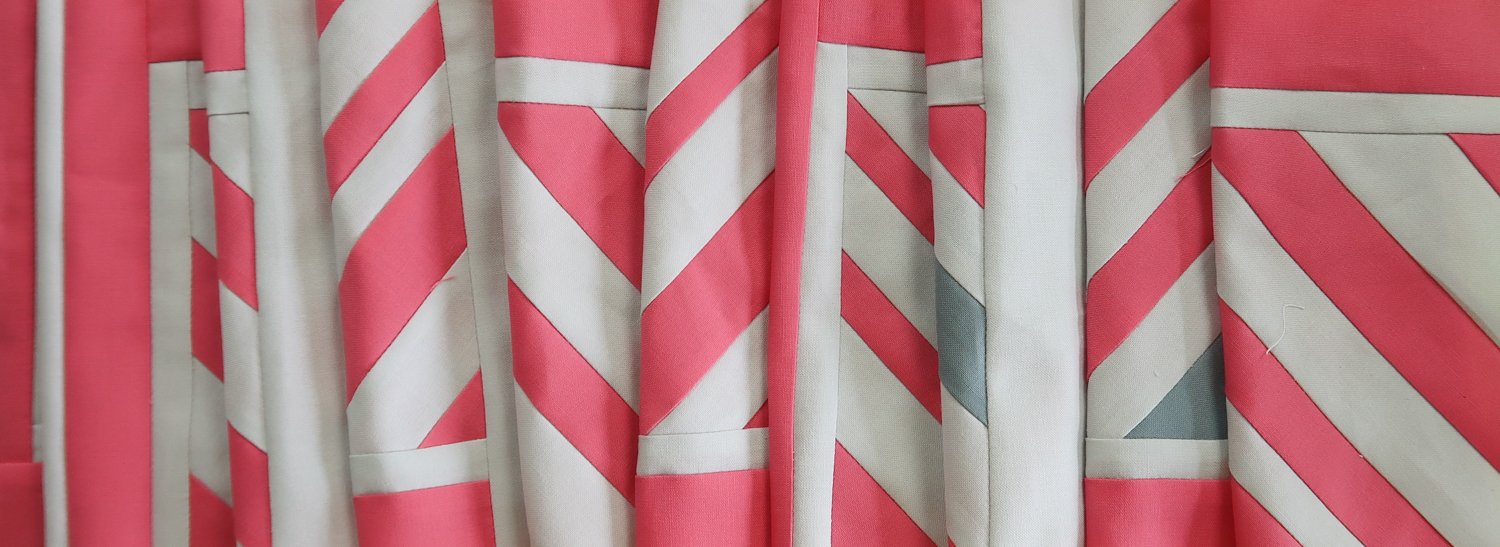
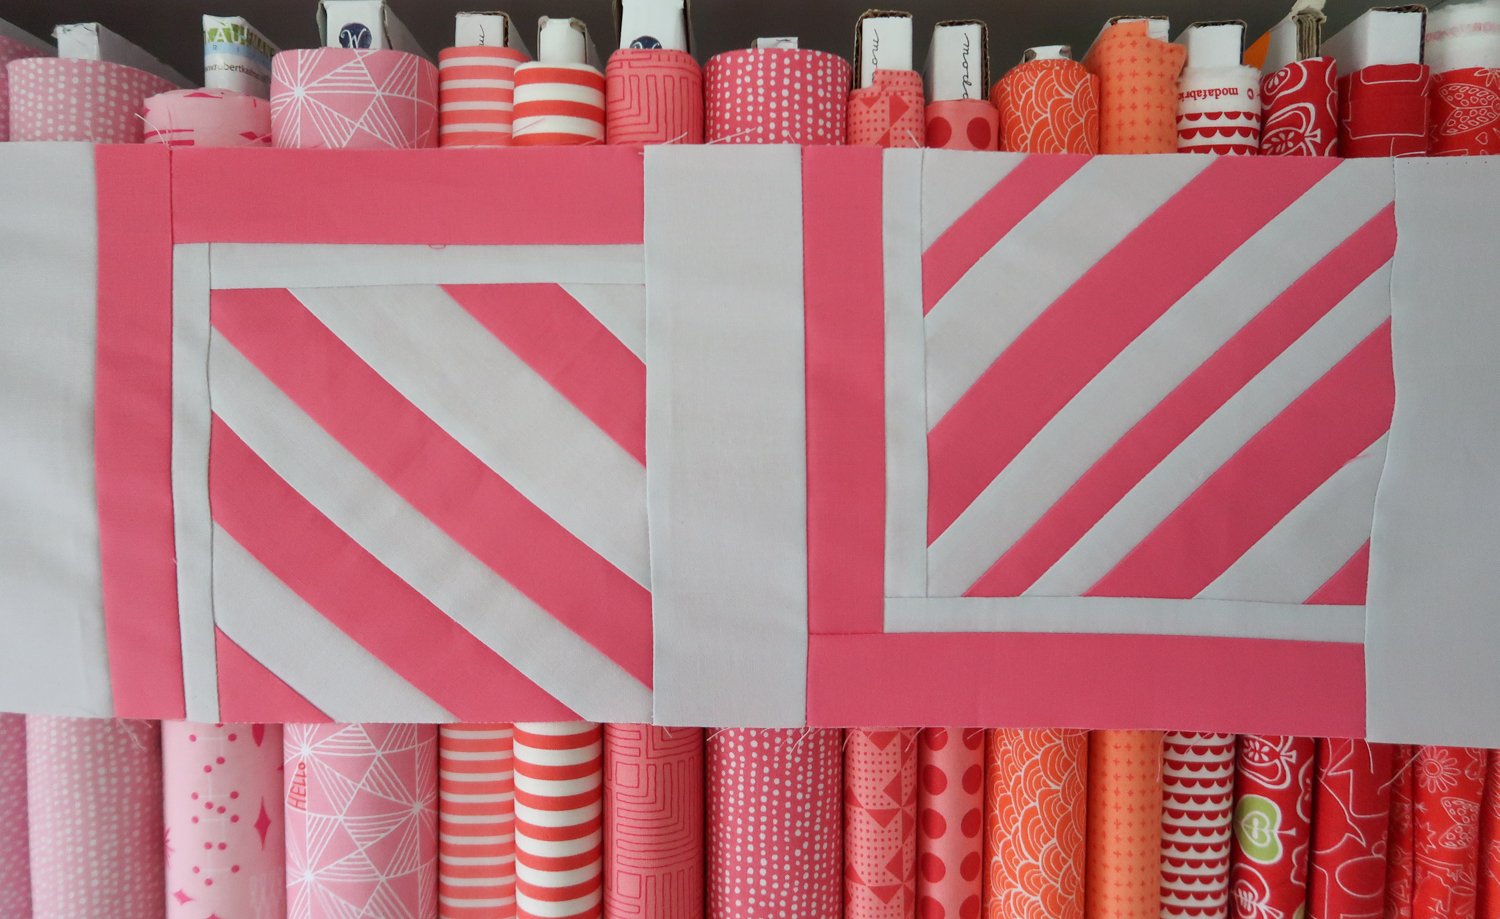
Row #11 ‘Out of the box’
This block is called out of the box. Do you like to follow directions? Or follow your own path and do things your way? This block gives some room for improv. Like with the mowed lawn row you can make your strips straight, vary them in width, or even go for wonky (maybe wavy?) lines. Can’t wait to see what you will make for this row.
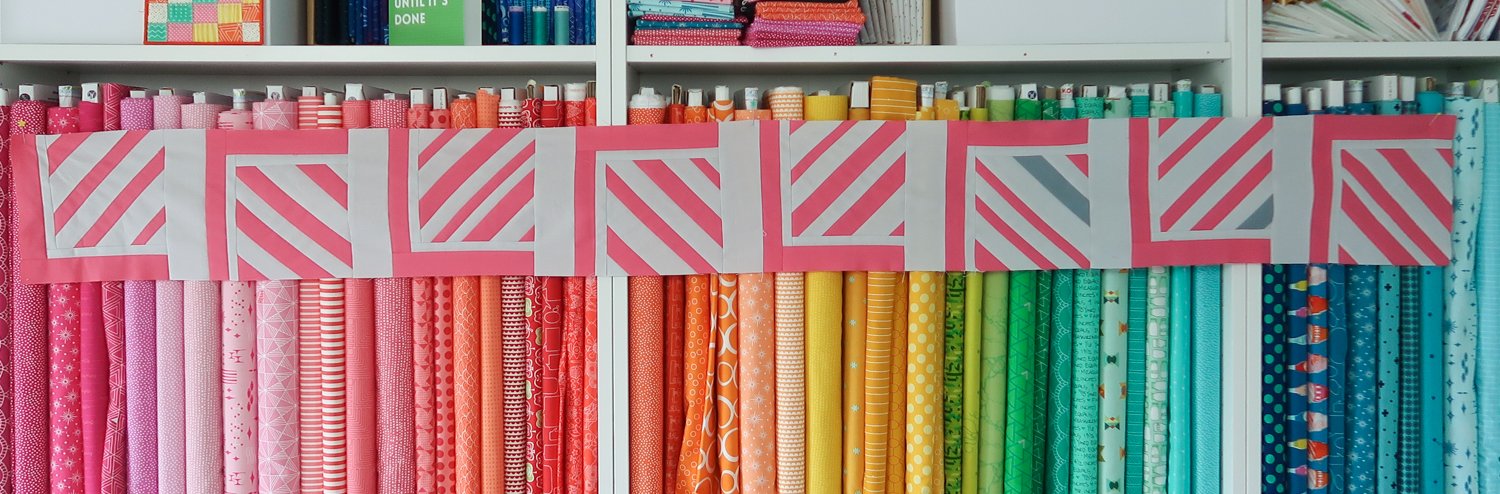
Of course I’m giving all the directions to make the row just like I did in the picture below.
Check out the video below to see all the steps to make this row.
New here?
If you’re new here, welcome! On the 28th of November we kicked off a super fun quilting project. We started a quilt along, where thousands of quilters from all over the world are making the same quilt. Every four weeks a new part of the pattern, a new row, will be released. After 12 rows you will have a quilt of 70 x 90″.
Even though we started eight weeks ago you can still join us! You will have enough time to catch up. There are also still fabric kits available for this quilt along. You can make the quilt in rainbow colors on silver fabric, in rainbow on white fabric or with blue fabrics. Of course you can also pick your own fabrics or use what you have in your stash.
On this page your can find all the links to previous blog posts about this project. Hop over to this blog post to read all the general information about this quilt project. And also read this one to learn more about the materials we use and the fabric requirements.
Fabric + Material
Did you order a kit for the quilt along? Than you’ll use the pink fabric called ‘Camellia’ for this row if you are making a rainbow quilt. Or the blue fabric called ‘Emerald’ if you’re making a blue quilt. We will make a few of the strips in accent color, so also get your accent fabric out. And of course your need your background fabric.
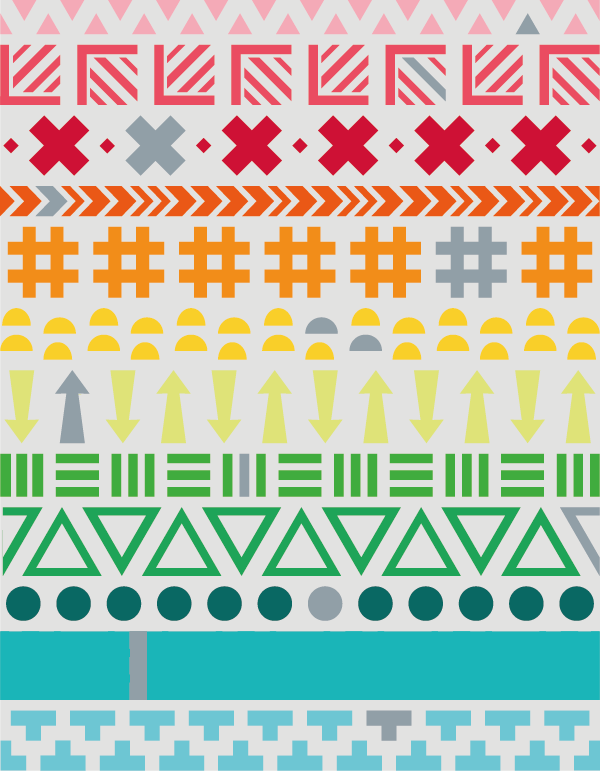
For those of you who want to play with the location of the accent color in each row, or add extra accent colors or just want to get a little more insight in the layout of the quilt. Here is a schematic of the rows and the placement of the accent colors.
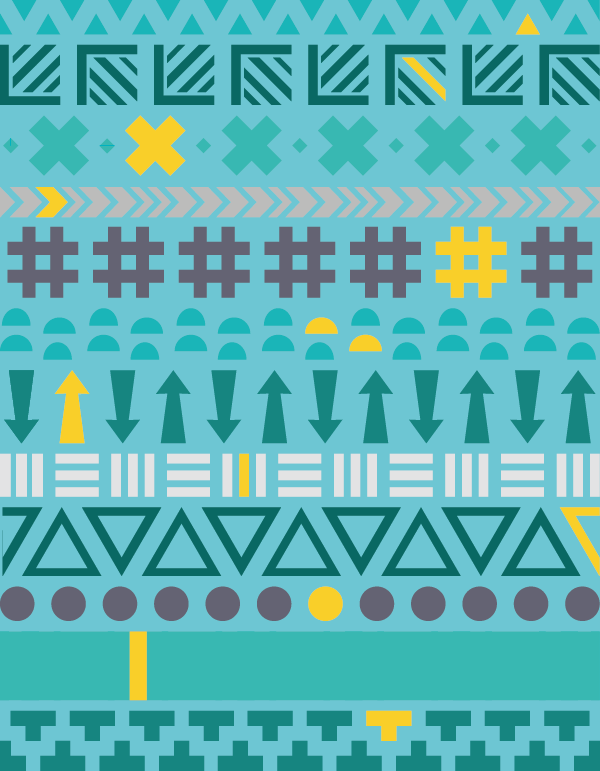
And this is what the schematic of the quilt looks like for the blue fabric kit.
You will need the following to make this row.
- Main fabric: 17 inch
- Accent fabric: fabric for a few strips
- Background fabric: 20 inch
- Inch ruler (12 x 6 or 24 x 6 inch both will be fine)
- Rotary cutter
- Cutting mat
- Iron + ironing board
- Sewing machine
- Thread (I use thread in the color of my background fabric)
Cutting your fabric
All the measurements below include a 1/4″ seam allowance.
Main fabric (Camellia)
- 3 x a strip of 1 1/2″ x width of fabric
- Cut 2 strips up in 4 pieces of 7 1/2″ and 2 pieces of 6 1/2″
- Cut 1 strip up in 4 pieces of 6 1/2″
- Cut the rest of the fabric in pieces of about 11″ x 12″ (From this we will cut strips for the center parts of the blocks.)
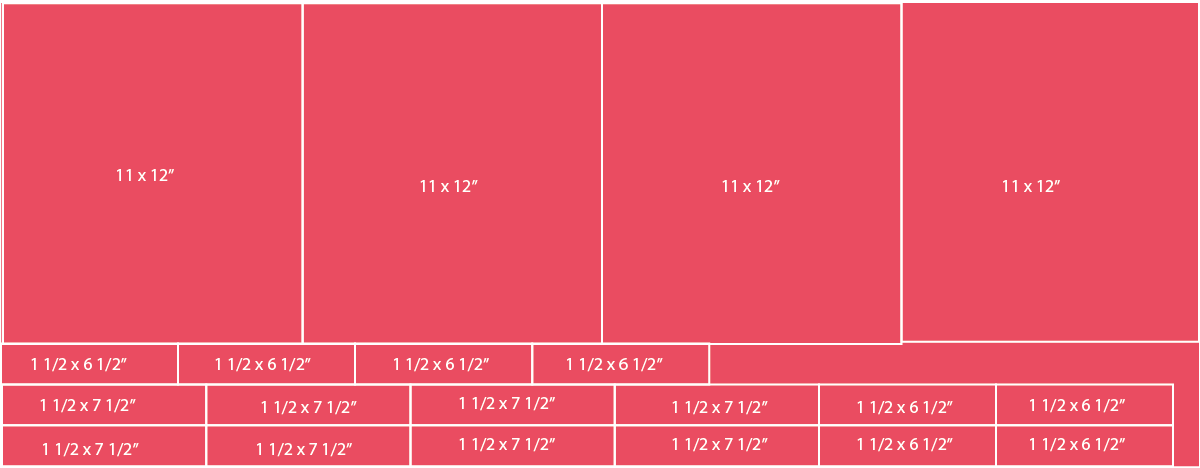
Cutting scheme for main fabric Camelia
Background fabric (Silver)
- 3 x a strip of 1″ x width of fabric
- Cut 1 strip up into 7 pieces of 6″
- Cut 1 strip up into 1 piece of 6″and 5 pieces of 6 1/2″
- Cut 1 strip up into 3 pieces 6 1/2″
- 2 x strip of 2 1/2″ x width of fabric
- Cut into 7 pieces of 2 1/2″ x 7 1/2″
- Cut the rest of the fabric in pieces of about 11″ x 12″ (From this we will cut strips for the center parts of the blocks.)
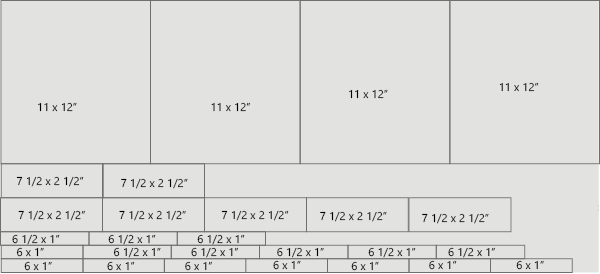
Cutting scheme for background fabric Silver
Accent fabric (Titanium)
- 1 or 2 x a piece of 11 x 1 1/4″ (or 11 x 1 1/2″ or 11 x 1 3/4″)

Cutting scheme for accent fabric Titanium
These cutting schemes can also be downloaded as a PDF:
Cutting schemes for QAL part11 – Row #2 [Rainbow straight version]
Here you can download the cutting scheme for the Blue fabric kit:
Cutting Schemes for QAL part 11 – Row #2 [Blues straight version]
Let’s get started
Everything in this row will be sewn with a 1/4″ seam allowance. All measurements below are including seam allowance.
In total we will make 8 blocks. The complete blocks measure 7 1/2″ x 7 1/2″.
We will start by making the middle section of the blocks. The center parts of each block will measure 6 x 6″.
For the middle sections of the blocks we will make one long strip of tilted strips. Like in the illustration below.

This is where the improv or no improv option comes in. You can cut your strips all at the same with, or vary in width.
You will need to cut strips of 11″ long. I went of the following widths of my strips:
Pink: 1″, 1 1/4″ and 1 1/2″ wide strips (all 11″ long)
Silver: 1 1/4″, 1 1/2″ and 1 3/4″ wide strips (all 11″ long)
You don’t need to cut all the 11 x 12″ pieces in to strips right away. You can start cutting and sewing, and continue cutting as you go. Then you won’t be left with a lot of unused strips when you’re done.
Sewing those strips together
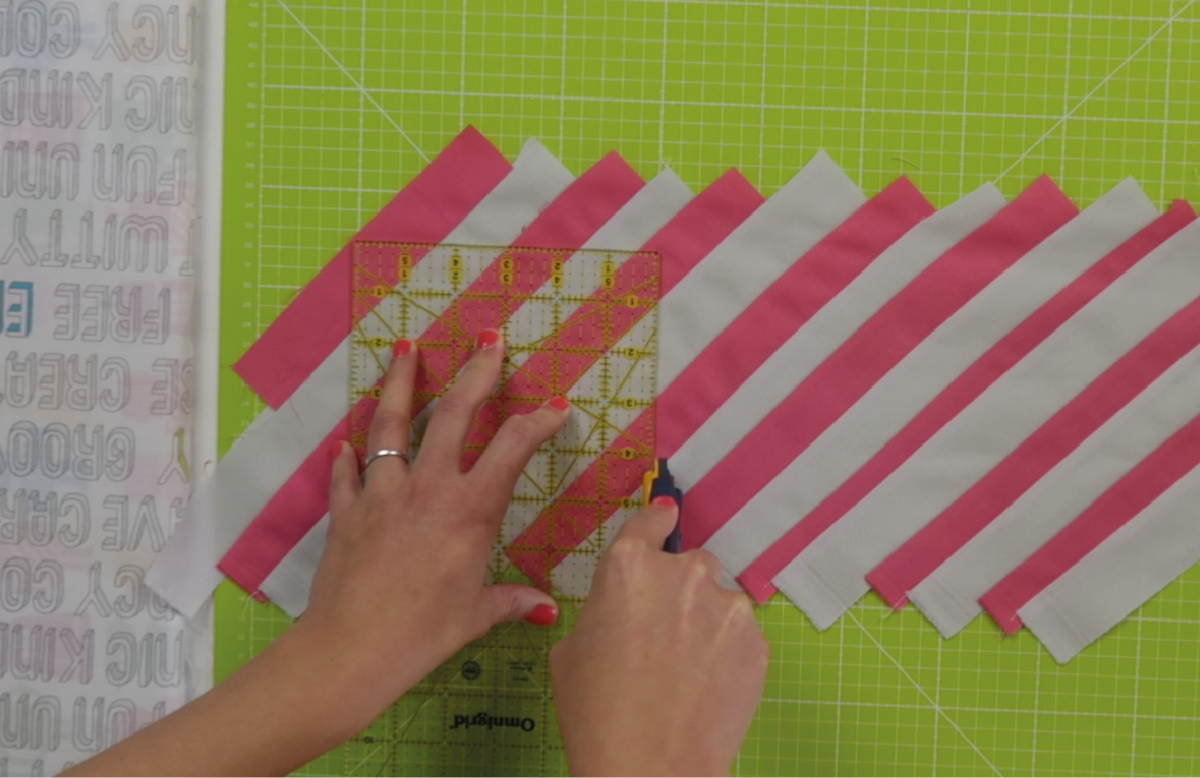
I recommend first checking the video to see how I approached sewing the strips together like this. The image below sums it up:

The strips need to be place along the 45 degree angle line on your cutting mat. If you don’t have such a line on your mat, you might want to make one using some washi tape or masking tape.
I placed my ruler on the left side or my mat as a guide. I marked the height of 6 inches with two pieces of fabric. You need to make sure that the strips that you are going to sew stay above the upper line and under the lower line.
Start adding strips, alternating in color. When you’ve pieced together enough strips, you can start cutting of the first 6 x 6″ blocks:

Sew an accent strip, or a few accent strips somewhere in the row. It’s doesn’t really matter where you place them.
Then just continue adding strips until you can cut of a 6 inch block again. Continue until you have 8 blocks of 6 x 6″.

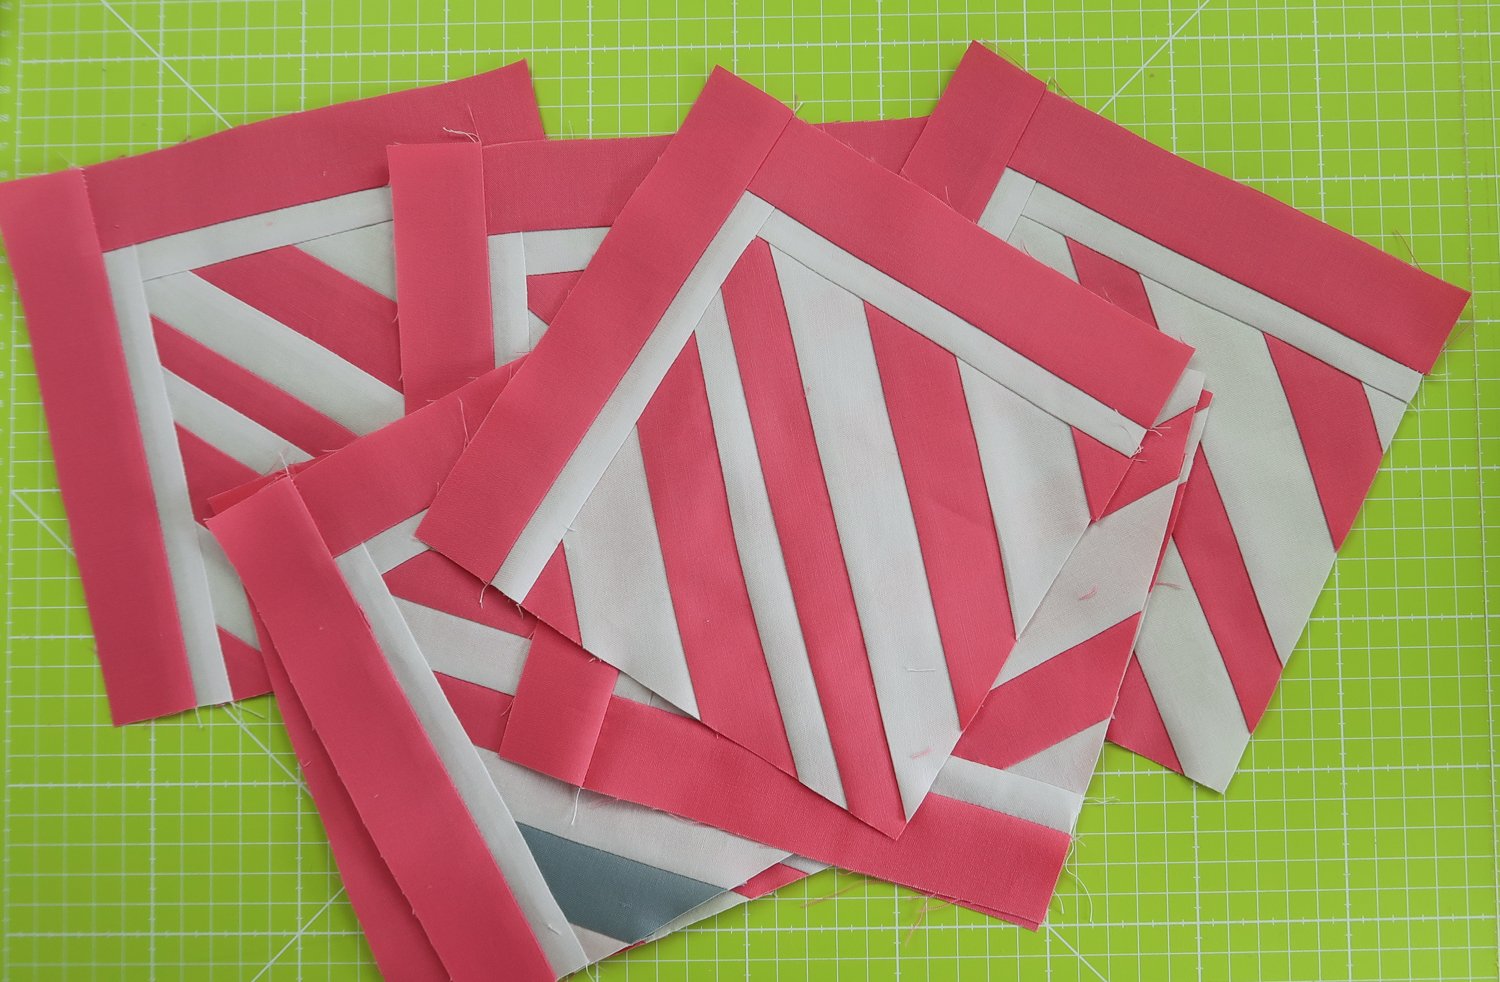
When these are done it is time to add the outer strips on two sides of the block. Sew them to the block in this order:
- background fabric 6 x 1″ to the bottom
- background fabric 6 1/2 x 1″ to the left
- main fabric 6 1/2 x 1 1/2″ to the bottom
- main fabric 7 1/2 x 1 1/2″ to the left

And then your out of the box blocks are done!
We’re almost there! Now you only need to sew the 7 1/2 x 2 1/2″ background strips in between the blocks. I’m alternating the direction of the blocks, you can play with that and make your own lay out. Or look at the illustration below to see how I placed the blocks in the row:

Start the row with a block and end the row with a block. There are 8 blocks, and 7 pieces of sashing. I’ve placed the accent fabric in the 6th block from the left.

Tadaaaa! There it is! 😀
Happy quilting!
Irene
Maine Coast USAI really enjoyed mixing log cabin blocks with strip squares. I loved making this combo row. ❤️ It’s my favorite traditionally-pieced row in the #sugaridooberninaqal
The document here has a wrong heading inside – says its QAL part 10 Row #10 – https://blog.bernina.com/en/wp-content/uploads/sites/4/2020/09/Cutting-Scheme-Part-11-Row-2-Rainbow.pdf
I’m so happy! I love this block. One more to go!!!! Yaaaayyyy!!!!
up to the last row now
One more done. My angles are all running left to right in my squares, but I am calling it done. One more to go!
Only 1 row left. This has been a fun quilt along.
Wow, this one turned out beautifully!
I added in some pieced curves
Wow! I’m not that brave!
Love the wavy piecing!!
Out of the box done. 1 more row to go. I can’t wait to put it all together and see the finished result. Thanks Irene and Bernina!
Amazing Row…I opted to use a foundation for the strip sets, I wasted so much fabric trying to keep the rows on a 45 degree angle. But I think it came out ok! One more row to go – then I have to even them all up, add sashing, etc. Gonna miss Irene when this is over…I hope she does another QAL. I wasn’t able to make use of her discount for her PP class, short on funds – wish she would extend it? SMILE Have a great day all!")
")
I love this row! I am enjoying the whole quilt!
but I do still find the paper piecing challenging! This has been fun!
my favourite row so far!
I’m concerned. When I cut the 11 by 12 pieces of background, I ‘ll literally have nothing but a little scraps left. Is this correct?
Another fun row! Thank you for all your tips for making it go smoothly, Irene! This has been such a fun quilt-along.
Very nice, another exciting row.
Fun qal!
Yay! Can’t wait to get started! This has been a fun and challenging quilt learning new techniques. You really do a great job teaching with your printed directions and also the videos.
Thank you for all the challenges. They have made me use my brain during this pandemic!
Awesome block! Thanks for such clear instructions. Fun! Making these today!
I like it! It will be just as is no improve this time for me!
Very neat, this block is a fun one to play with!