 BERNINA Corporate Blog -
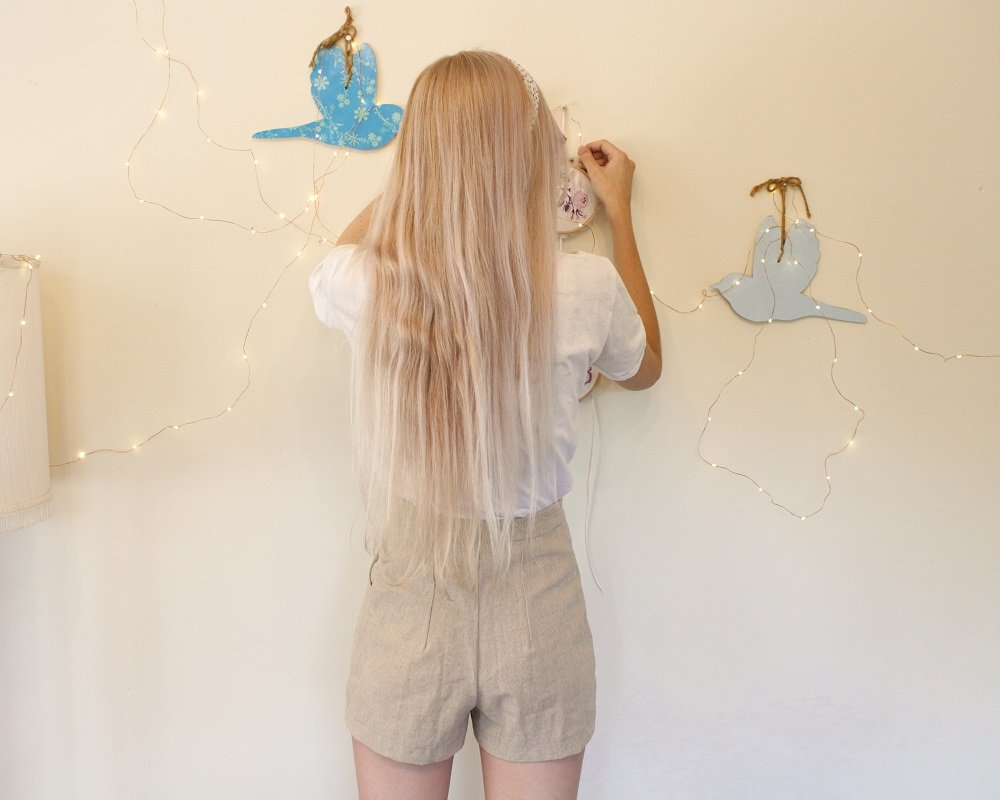
I’ve learnt that high waist garments best suit my figure. With it being Summer and lockdown in South Africa, I have been wearing various versions of high waist Darcy Shorts and Stellen Tees.
I wanted to make myself a pair of more tailored shorts for when I need to venture out to run an errand. However finding a good fitting pattern isn’t always easy (finding a good fitting ready-to-wear version is even more challenging).
I came across a free wide leg trouser pattern that looked like it would work perfectly as a shorts pattern. I made a few other adjustments to the pockets to better suit my choice of fabric and style.
This is what I love about making my own clothes, the freedom to create something unique and to be able to take an existing pattern and adapt it to suit my needs.
It is important to remember that you are not restricted by what patterns are available. You have the amazing ability to create! Not all adaptions have to be major, start off small and work your way up.
If you are ever stuck or confused about a new technique you want to try, don’t be shy to look it up. The internet is a fantastic resource and I’ve found that the sewing community tends to be friendly and helpful.
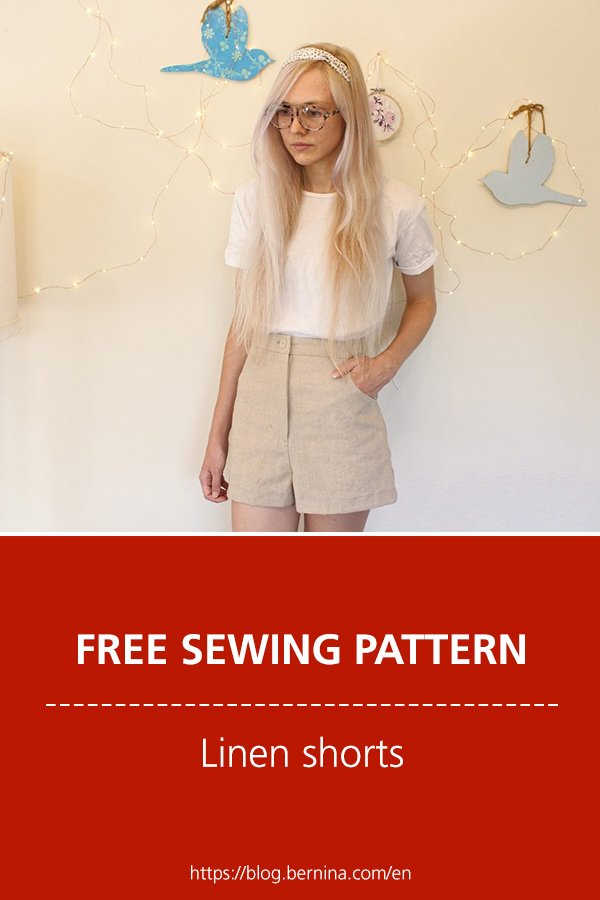
Ideas and tutorials for your next sewing adventure
Subscribe to the BERNINA Blog Newsletter
If you love to sew you don’t want to miss the chance to receive the latest content from our authors directly into your mailbox.
Sign up for the blog newsletter
What will be needed:
- Free Wide-Leg Pants Pattern
- Sewing machine
- Overlocker
- Button-hole foot (I used #3A)
- Zipper Foot #4
- Optional: Blind Hem foot #5
- Medium to heavy weight woven fabric (cotton twill, linen, corduroy)
Approximately 1m – 2m
(Quantity dependent on your altered pattern & size) - Optional: 40cm lightweight woven fabric for Pockets
- 3-4 Threads to match fabric
- 1 x 2.4 cm Button
- 18cm trouser or dress zip
(don’t worry if you only have access to a longer zip, it will be shortened when assembling the fly) - Optional: 30cm Mid weight iron on Fusing/Vilene
- Ruler, Tape & Paper Scissors
Steps for sewing linen shorts
Pattern
If you need assistance with how to download the free pattern, follow the steps in this downloadable document: Guide to download the free In The Folds pattern
The steps below show how I altered the Wide-Leg Pants Pattern to better suit my style.
I made them in to free downloadable documents so that this blog post isn’t too long and overwhelming with information. Just click on the document’s name to open it.
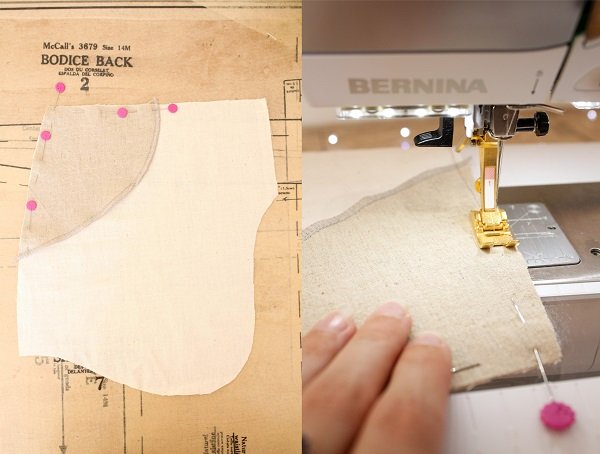
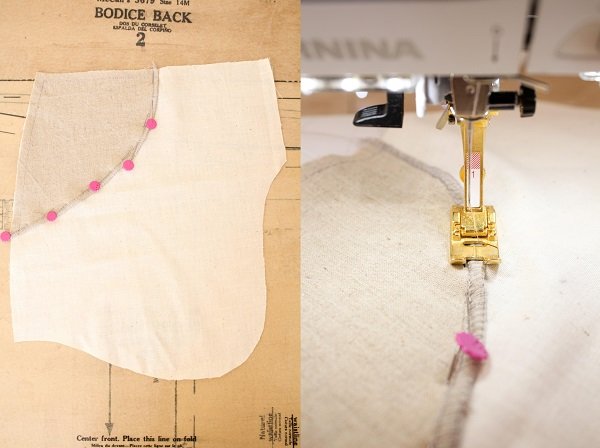
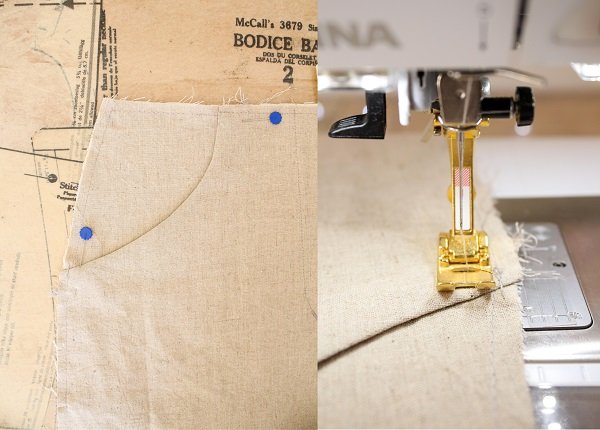
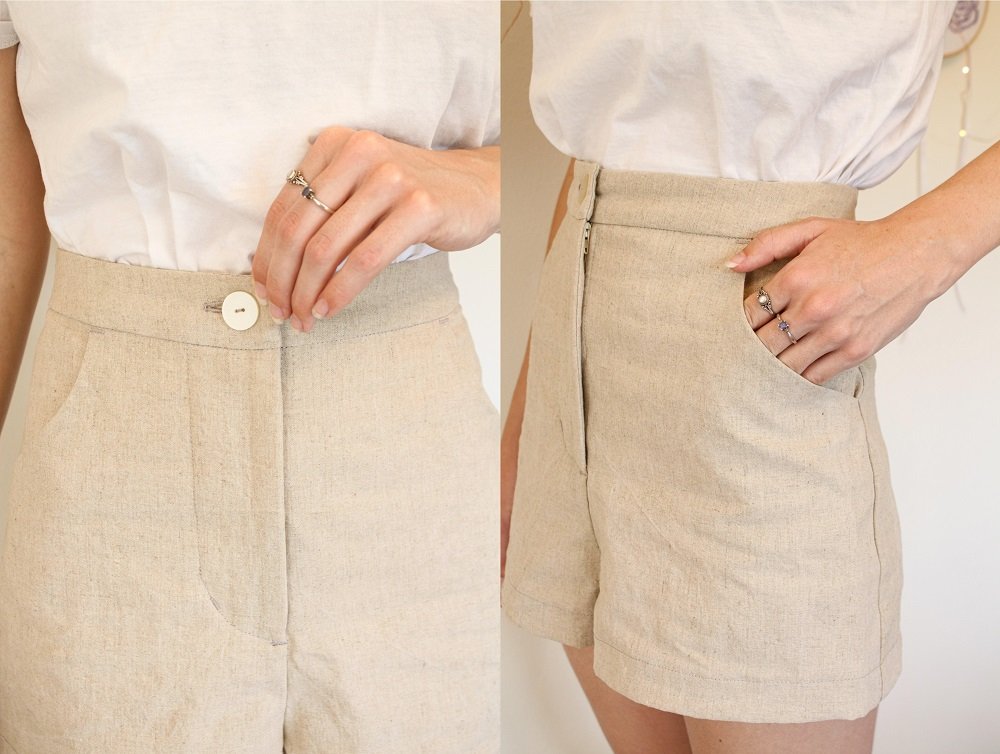
Front Pocket Shape adjustment
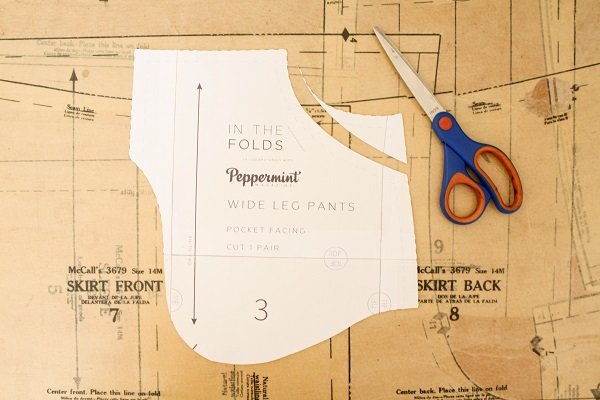
I adjusted the shape of the Front Pocket opening so that I could more easily put my hands in the Pockets.
The steps can be found here: Front Pocket Shape adjustment
Front Pocket Facing

If I was to make my pockets in the same fabric as the rest of the garment, the end result would be a bit bulky.
Therefore I chose to make my pockets in a more lightweight fabric.
However, I didn’t want this lightweight fabric to show, so I drafted an insert for the pocket bag to be made in the same fabric as the garment.
The steps can be found here: Front Pocket Facing
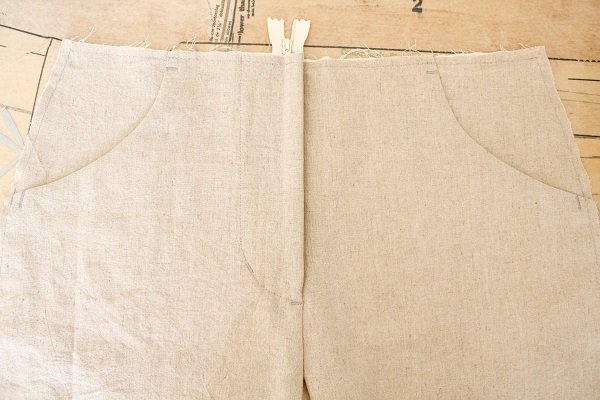
Trousers to Shorts
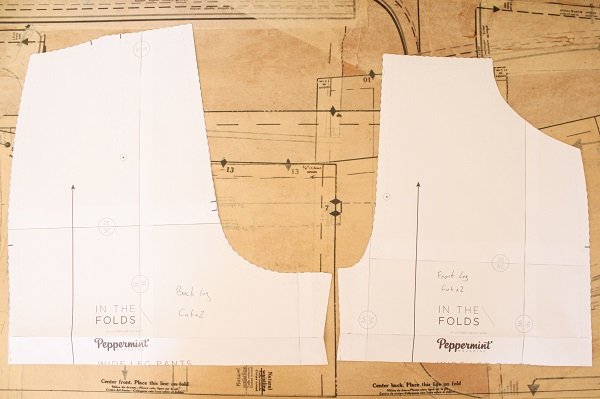
To see how I shortened the Trouser pattern to a Shorts pattern, click here: Trousers to Shorts
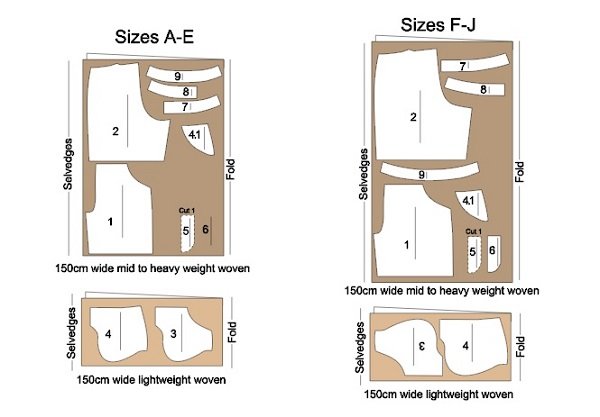
Pattern layout
Based on the above adjustments to the pattern, I have drawn some suggested pattern layouts.
These are based on the suggested pattern layouts from pages 9 & 10 of the downloaded Instructions.
Sewing linen shorts
I recommend following the instructions supplied by the pattern designer (remember to download them with the pattern).
Instead of repeating the same steps here, I am just going to share some tips and suggestions.
Front Pocket Insert
I would suggest doing these steps for the Front Pocket Insert before step 1 of the Pattern’s Instruction Booklet.
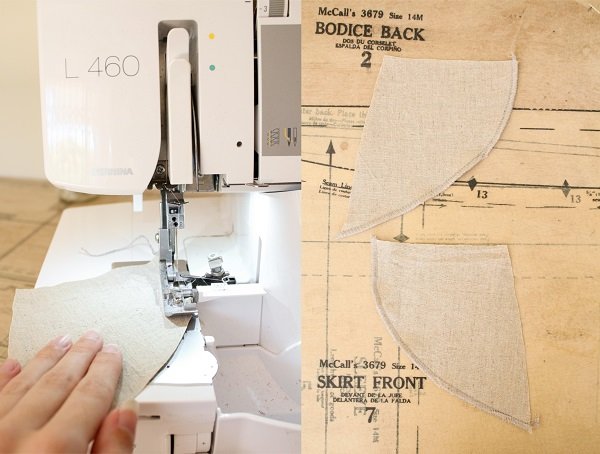
- Overlock around the curved edge of the Insert piece.
- Place the Insert on top of the Pocket Bag (right side facing up)
Pin along the top and side edge and stay stitch in place.
- Pin along the curved edge.
Secure in place with zig zag stitches.
- Repeat for the other Pocket Bag
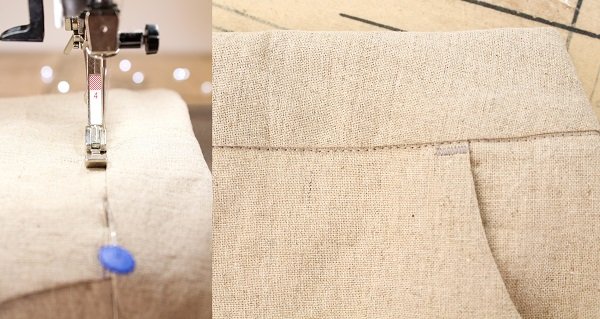
Bar Tack at Pockets & Fly
I would suggest doing these steps for the Bar Tacks between step 20 & 21 of the Pattern’s Instruction Booklet.
Bar Tacks are used to help reinforce areas where there may be addition stress.
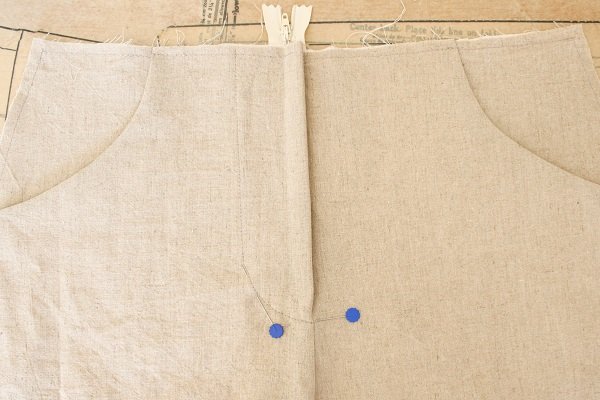
- Mark out on the fly where to sew the Bar Tacks.
Under the base of the zip where the topstitching meets the Centre Seam is a recommended place.
The other is where (if you choose) you secure the fly shield to your trousers, usually along the topstitched curve. Don’t do this bar tack too high or it will be challenging to get in to your garment.

- Use a narrow & short zig-zag stitch.
- Carefully stitch where you made marks on the Fly.
Try make the length of each Bar Tack the same.
- Where your Front Pockets curve to meet the side seam and waist, make a mark 1.2cm in from the raw edge.
Stitch your Bar Tacks in the same direction of the edge.
- Try make the length of each Bar Tack the same as you did on the Fly.
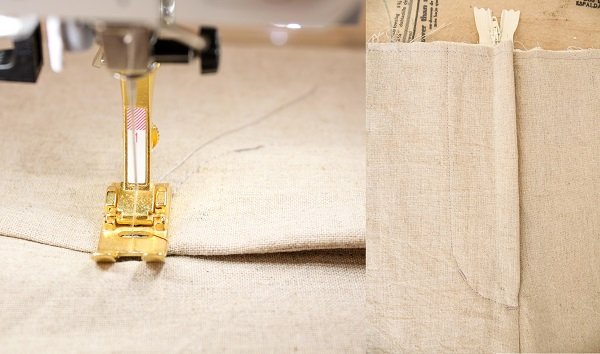
Stitch in the Ditch
This would be step 33 of the Pattern’s Instruction Booklet.
The goal of ‘stitching in the ditch’ is to create a nearly invisible row of top-stitching while securing the Waistband Facing underneath.
To help you achieve this, I recommend using a Zipper Foot or Blind Hem Foot.
Zipper Foot #4:
Have the needle as far over to the right as possible.
Gently pull the fabric to reveal the ‘ditch’ and try stitch as close to it as possible without stitching on the actual Waistband.
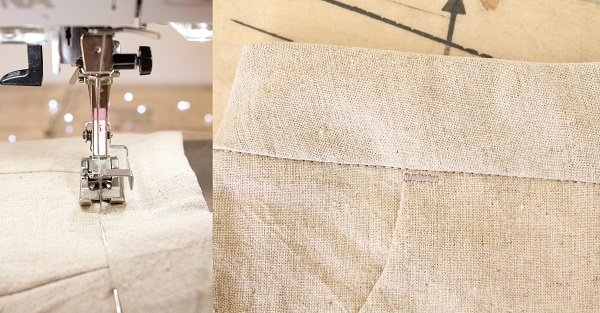
Blind Hem Foot # 5:
Have the needle 1 or 2 notches to the left. You don’t want to break the needle by stitching in to the middle plate.
Place the middle plate in the ‘ditch and stitch.
I prefer to use this foot as it seems to give the neatest result.
Buttonhole
This would be step 36 of the Pattern’s Instruction Booklet.
I’m going to share how easy it is to make buttonholes with the B535 & the automatic Buttonhole Foot #3A.

- I like to use Buttonhole #52.
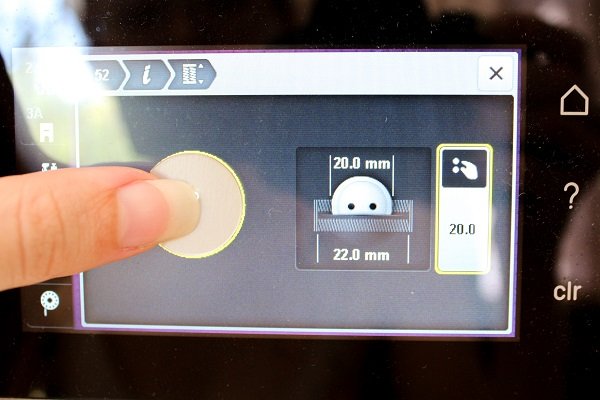
- I love that I can programme the size of the button and the machine will know how big to make the buttonhole.
If I am unsure of the button’s measurement, I can place the button on the screen and adjust the circle to match my button.
This way I end up with perfect sized buttonholes every time.
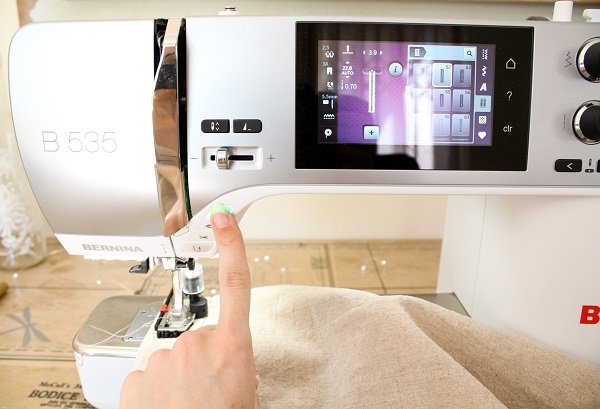
- Place the garment on the machine under the foot and press the green button.
Sit back and let the machine stitch for you. You don’t need to use the foot pedal or back-stitch.
The machine will do the buttonhole for you.
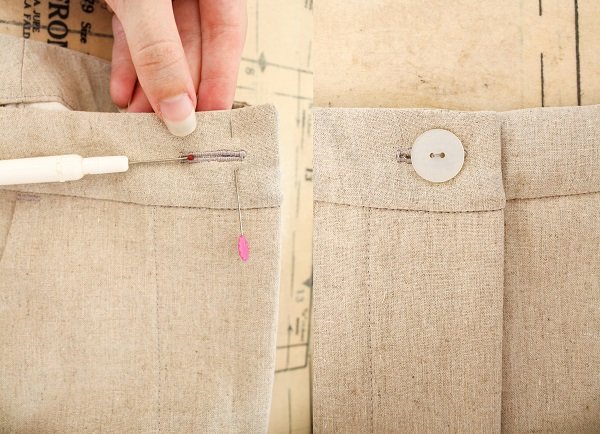
- Once the machine has finished stitching, remove the garment and open the buttonhole with an unpicker.
To prevent myself from accidentally cutting through the end of the buttonhole, I place a pin just in from the end.
Then it’s time to stitch on the button.
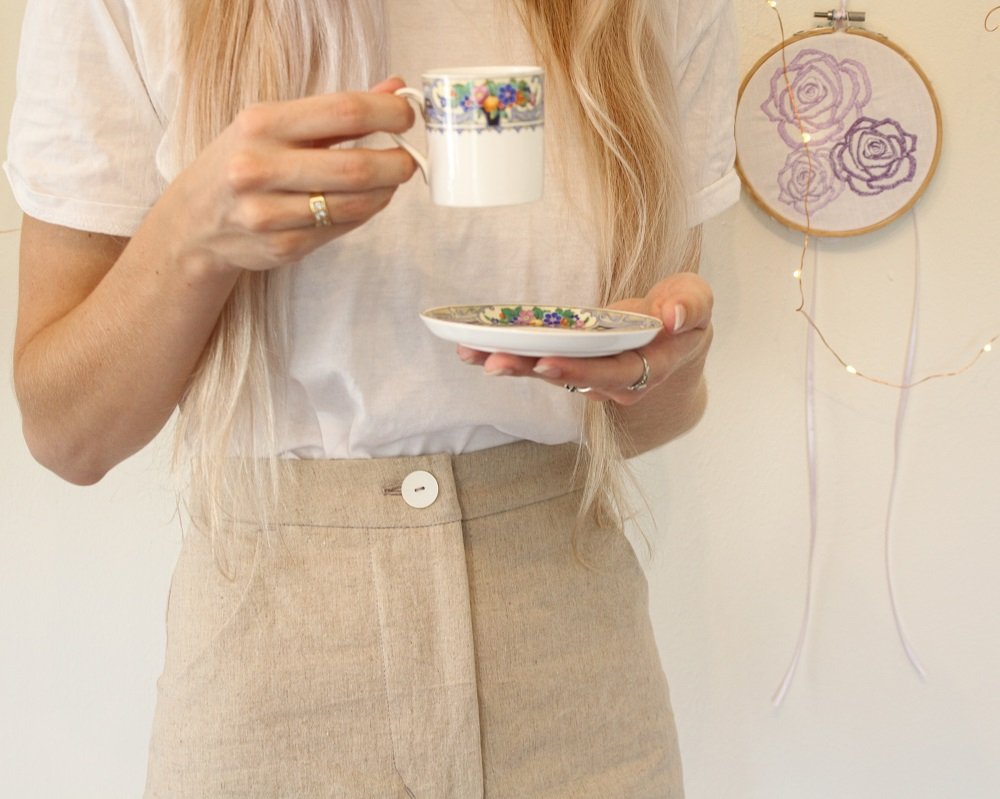

All clothing items I am wearing are made from free patterns.
-The tee is the Stellan Tee by French Navy.
It is my favourite tee pattern and I’ve made a blog post about it before, check it out here
-The headband is a pattern I made up, for a tutorial check out the blog post here.
Skip down to the Headband section.
For this dotty headband, I cut two 40cm x 7cm rectangles which included 1cm seam allowance.
Tips:
- For reference: I made a size A.
To better fit my short torso, I needed to lower the waistline by 2cm at the back to prevent the fabric from bunching.
To make the garment better followed the curve of my back and fit my waist, I also removed a total of 3cm at the Centre Back seam. - You add a simple patch pocket or 2 on to the back.
I hope you found my tips helpful.
I would love to see the shorts or trousers you make, please feel free to share with me!
And remember to tag the pattern maker @inthefolds
-Hannah-Rose


Love it!
My sewing machine is Bernina and I am so happy to find this web page, I have struggled for a month for making a linen shorts for my husband, I have searched whole internet and could not found help. If this page would help me finally, I will be really appreciate. I need the pattern, he is 36 inches waist.
Hi Hannah 🙂
Oh that’s awesome! I hope you enjoy the other post’s available on the blog.
If you are looking for a pattern for a pair of casual, elasticated waistband shorts, you can find a free pattern in my blog post: His & Hers Lounge Shorts.
https://blog.bernina.com/en/2020/03/his-hers-lounge-shorts/
Otherwise, I have used patterns from Freesewing.org.
They have 2 free men’s trouser patterns that can be shortened: Theo trousers and Charlie Chinos
https://freesewing.org/designs/theo/
https://freesewing.org/designs/charlie/
Linen can be used for pretty much any sewing pattern for a garment to be made with woven fabric.
I hope that helps 😉
What size zipper will I need?
Dear Rebecah,
18 cm or if you dont have one that size, a longer one. It will be shortend in the process 🙂
That is correct, thank you Romona 🙂
No problem 🙂
Do you think it’ll work with jeans denim fabric?
Hi Neta
Yes and I think it will look gorgeous in denim! 🙂
I personally would choose a medium weight denim just for comfort preference.
However the pattern designer suggests medium to heavy weight fabrics.
You could pair it with a metal zip & metal button for a real jeans look 😉
Where will I find the pattern sizes please…..not sure what sizes ABC etc are. Thanks for the pattern
Hi there 🙂
You can find the size chart on page 3 of the downloadable Instruction Booklet.
Alternatively on the designers website: https://inthefolds.com/sizing-chart
I hope you have fun making a pair! 😉
Hi, I have tried in all respected areas to download the shorts pattern. Can you help me…I have two Facebook groups. One is for Bernina Software and one is for the new 890 and other Sergers. I would like to use these patterns to do classes for the serger group, but also tell my embroidery group as I do all interesting items. These patterns from what I read have many variety of patterns that would really be a nice group teaching. But we in America and Europe need to be able to do this..So can you please help me..I sure thank you..Joann JustLearningBerninaV8Software and LetsSerge with Bernina.
Hi Joann
Please note that I shortened a Trouser Pattern to make these shorts.
I have provided in the above article the steps to download the pattern as well as how I altered the Trouser Pattern to a Shorts Pattern.
But I’ll put all the necessary documents here for you to download:
-How to download the Trouser Pattern:
https://blog.bernina.com/en/wp-content/uploads/sites/4/2021/01/Guide-to-download-the-free-In-The-Folds-pattern.pdf
-The link to the Trouser Pattern:
https://inthefolds.com/wide-leg-pants-pattern
-How to alter the Trouser pattern for Shorts:
https://blog.bernina.com/en/wp-content/uploads/sites/4/2021/01/Trousers-to-Shorts.pdf
I hope that helps,
Hannah-Rose