 BERNINA Corporate Blog -
Threadpainting on Sheer Fabrics
My Own Space
Sitting here in my sewing room reminds me how much I appreciate my own space! My sewing room/studio is in a state as I am busy creating all sorts of interesting sea creatures. In order to do that I need a lot of machine embroidery threads, fabrics and my design tools! These cover almost every surface in my studio!
Why Sheer Fabrics
In a previous blog, I showed you the quilted underwater scene. It cannot stay on my design wall for another two years therefore I decided to fill it with wonderful creatures! I still want to keep the transparency of water so I used sheer and water-soluble fabrics.
One must first do research into colours and threads to use. This is not my first under the ocean scene therefore I made use of some of my filed designs. The colours are not the same as the ones I used before. The new creatures look completely different.
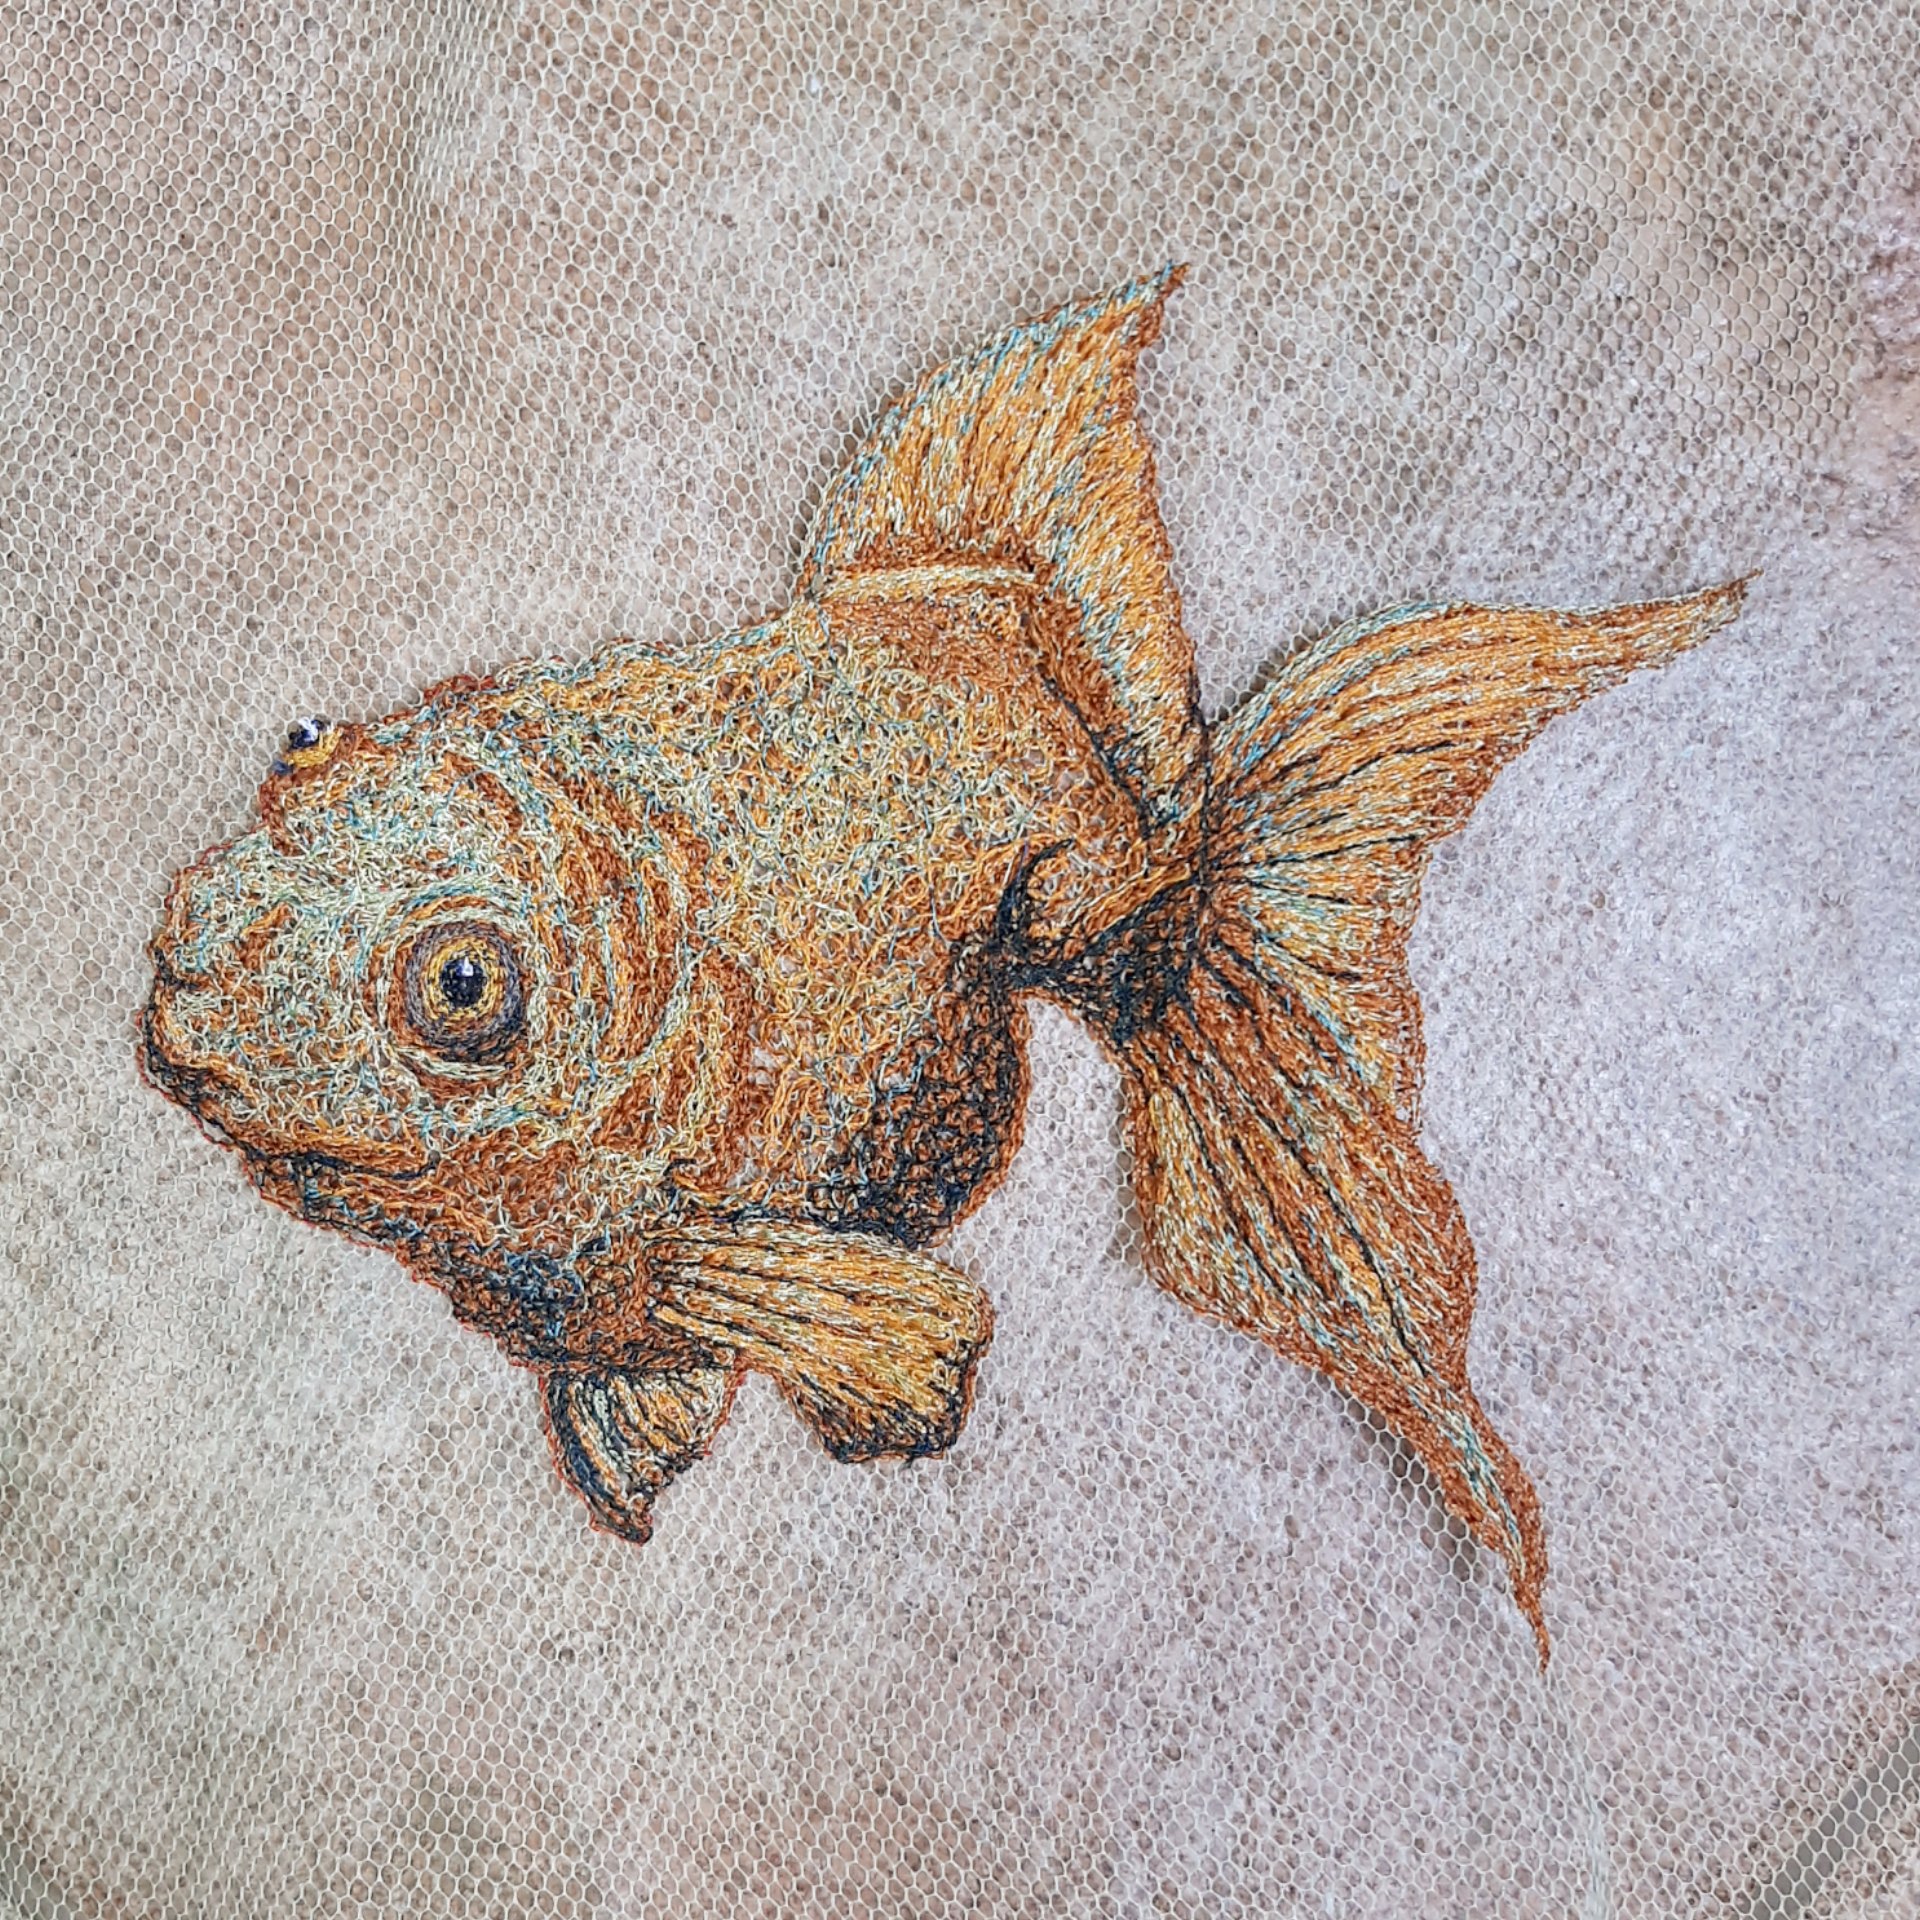
Thread-Painted Fish
Materials used to create the fish
In order to create the fish on sheer fabric, you will need
- lots of machine embroidery threads in many different colours
- sheer fabric (tulle)
- two layers of Avalon Plus
- your design
- a very strong embroidery hoop
- a good imagination!
- and of course your sewing machine with the feed dogs dropped
How to create it
- Start by sewing the outline.
- Cover most of the area in a stippling stitch in the colour that is most prominent (usually the darkest colour)
- Highlight the areas that need highlighting in threadpainting.
- Leave the eye(s) for last.
- Soak out the Avalon Plus and allow to dry.
- If it is on tulle, cut out carefully and sew onto the background by hand.
Don’t Over-embellish
I am having so much fun with this under water scene but of course, one has to know when to stop. It is so easy to over embellish this sort of scene. There has to be open spaces for the eye to rest before it travels to the next interesting creature or plant.
No Quilting!
This underwater scene was quilted first and then embellished. Working this way, means that once the embellishing is done, the quilt is complete. Mine is still a work in progress but you can follow me on Facebook, Tilly de Harde Textile Artist and Instagram #tillydeharde to see more on this!
I would love to see a video of the making of your fish.
Hi Judy, I put a short clip of me doing the finishing touches to the fish on #tillydeharde (Instagram)if you would like to go there. I will be starting with online classes soon so keep an eye out for that. I advertise on Facebook as well as privately via email.
Eileen
Tilly, what a nice project!
Thanks Bea! I really enjoyed creating this little critter!
Well done Tilly it is beautiful , looking forward to seeing the next sea creature
Thanks Jenny! The next one will probably be the sea turtle. It’s lovely to create these little projects between other ones that sometimes take up a lot of time.
Tilly the fish looks so real and you make it sound so easy to do. Looking forward to your next article.
Thanks Frances! If you sit down and do it, you will find that it looks more intricate than it really is. Such fun! The next one will more than likely be the sea turtle so keep watching this space!