 BERNINA Corporate Blog -
 This February I wanted to show my Overlocker some love!
I started blogging for Bernina in 2017 and as part of my contract I received the amazing L460 Overlocker. Almost 4 years on and the machine is still going strong!
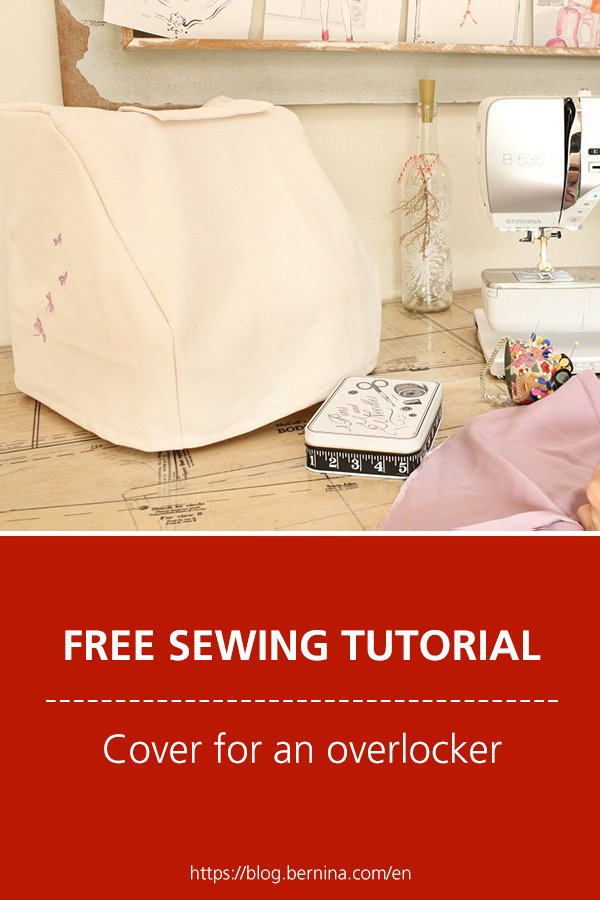
These days my machines are always out on my sewing desk at the ready and need to be covered to protect them from dust. Even though I used them all the time, there’s always dust that blows in and wants to settle on my machines.
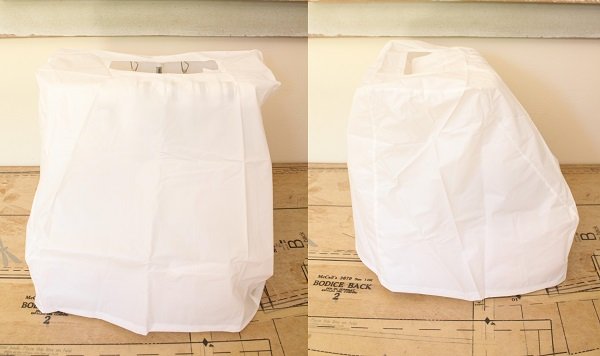
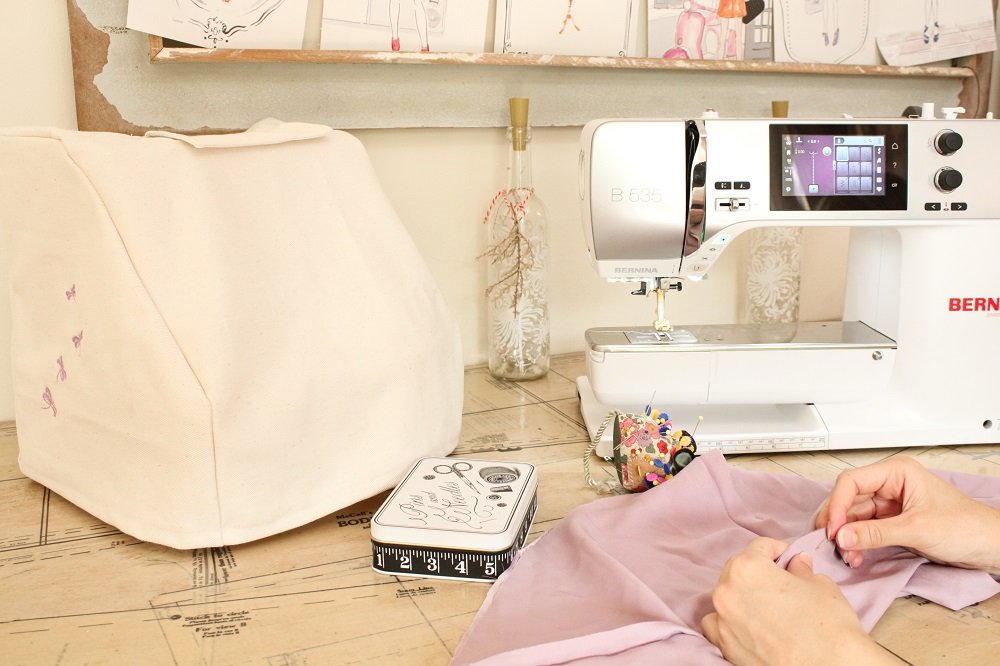
I was fortunate that my B535 sewing machine came with an awesome Bernina cover but it’s time my overlocker got a cover that was just as nice.
When I received my L460, there was a white plastic type cover that came in the box. I decided to use this cover as a pattern for my new custom cover.
Ideas and tutorials for your next sewing adventure
Subscribe to the BERNINA Blog Newsletter
If you love to sew you don’t want to miss the chance to receive the latest content from our authors directly into your mailbox.
Sign up for the blog newsletter
What will be needed:
- Sewing machine
- Overlocker
- Plastic Overlocker Cover
- DIY Overlocker Pattern
- Optional:
-Embroidery Module
-Embroidery Hoop
-Embroidery Foot #26
-Embroidery Thread
-Tear-away Stabilizer - 1m mid weight woven fabric
- 3-4 threads to match
- Pattern paper & paper scissors
Steps
Pattern
 I’ve compiled a downloadable document with the steps I took to make a pattern from the plastic Overlocker Cover that came with my L460.
If you don’t have a pattern, try draft your own!
I would suggest creating similar shapes to the pattern I used.
Sewing
Using the pattern I made, these are the steps I followed to sew up my Overlocker Cover.
I used a cotton twill fabric from my stash. I wouldn’t recommend using a heavier fabric as you don’t want the cover to collapse around your machine.
My fabric is actually sturdy enough that it holds itself up.
You could use a lighter weight fabric but not too light that it will move around in a breeze and not do its job of keeping dust out.
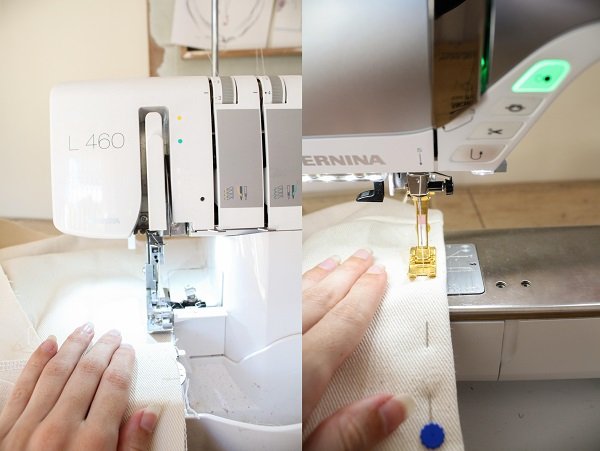
Embroidery
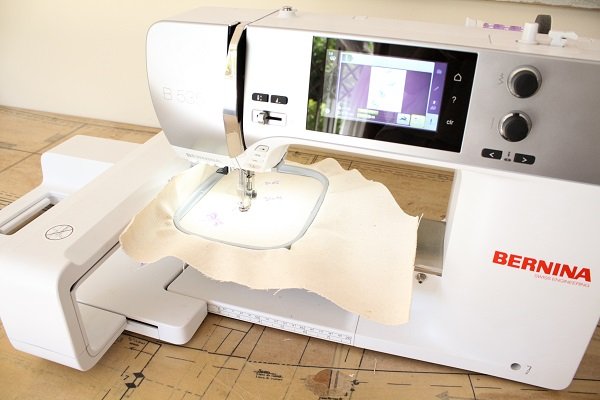
- If you want to add embroidery to your cover, now is a good time.
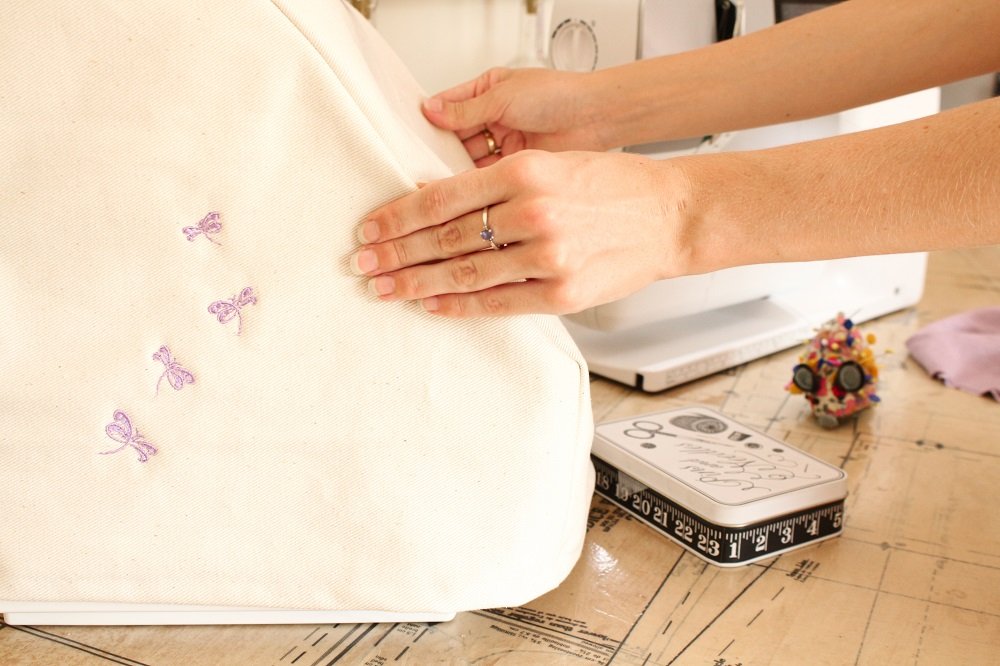
I chose to embroider on one of the side panels.
You can embroider just about any part of the cover and embroider as much of the cover as you want.
I used the Medium Hoop with my B535 embroidery module.
The embroidery design I used is “Blue Dragonfly” design digitized by Igor Denisov.
Secure the Facing & Flap
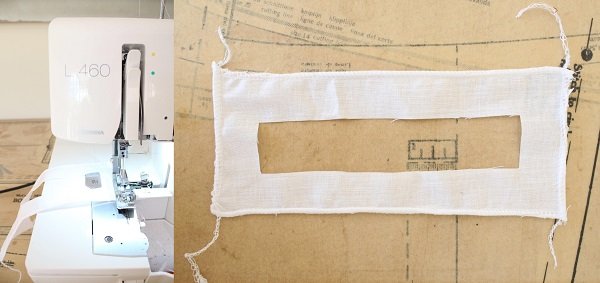
- Overlock around the Handle Facing.
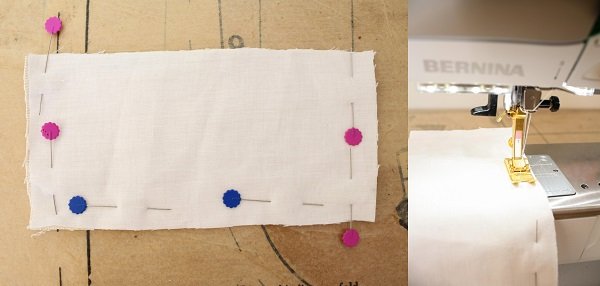
- Place the right sides of the Handle Flap pieces together.
Using a 1cm seam allowance, sew around 3 sides, leaving one of the long sides open.
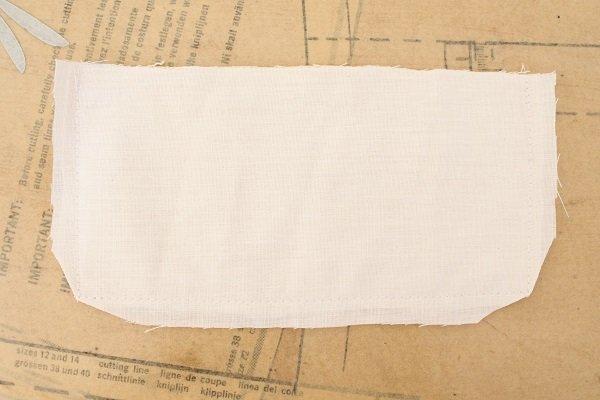
- Trim around the 2 stitched corners.
Turn the Flap right side out, use something pointy to carefully turn out the corners.
- Press and then topstitch around the 3 sides you just stitched.
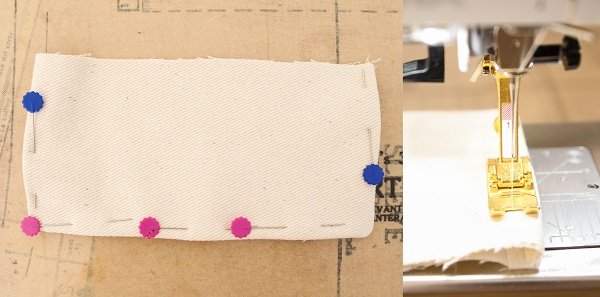
- Place the Handle Flap on the Opening of the Main Panel.
Line up the raw edge of the Flap with the raw edge of the Opening.
I placed the Flap pointing towards the Back of the Main Panel. This way when the cover is sewn up and the Flap is closed, it will fall towards the front. This is opposite to the original plastic cover. I would recommend doing what is most comfortable for you.
Stay stitch the Flap in place.
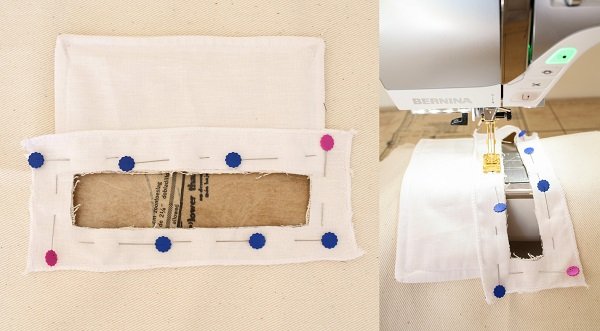
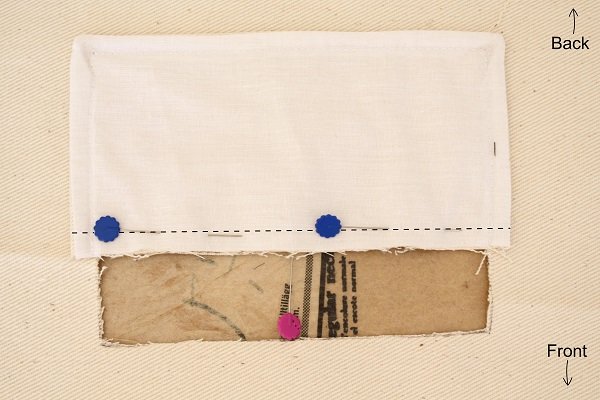
- Place the Facing right side down on top of the Opening.
Stitch around the Opening with a 1cm seam allowance.
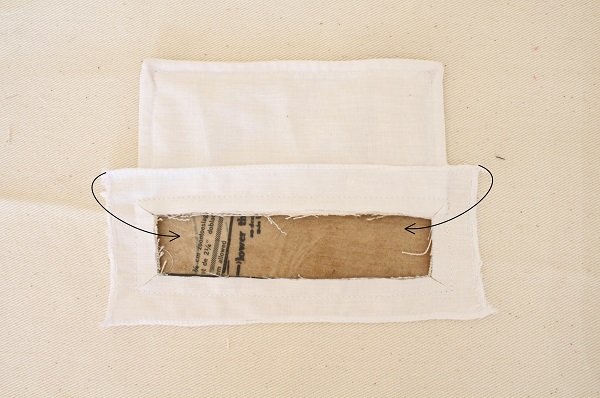
- Snip at the corners being careful to not cut in to the stitching.
Turn the facing through the Opening.
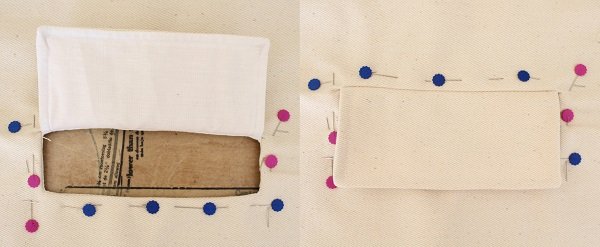
- Press and then pin the Facing in place.
Topstitch around the Opening. Stitch 1cm – 1.5cm away from the edge, enough to catch the Facing below.
Move the Flap out of the way as you sew.
Assemble the Cover
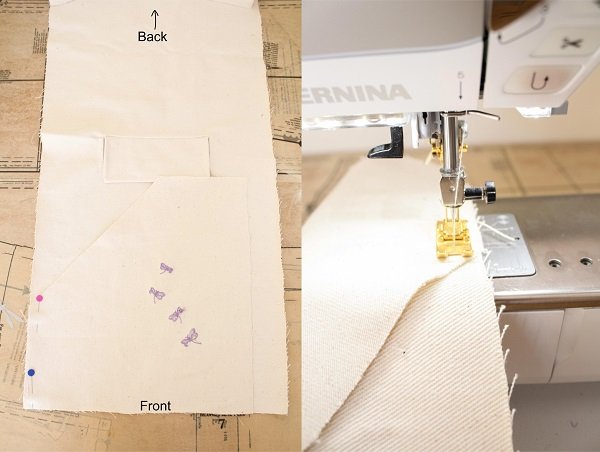
- Join the Side Panels to the Main Panel.
Start with the Left Panel:
-Lay the Main Panel down with the right-side up and the Front edge closest to you.
-Place the Side Panel with the right-side down on top of the Main Panel.
(Line up the Base of the Side Panel with the Front edge of the Main Panel)
-Pin the short side of the Side Panel to the Main Panel as in the picture.
-Sew along the edge you just pinned with a 1cm seam allowance.
-Each time you come to a corner, stop 1cm from the corner.
Place the needle down and gently turn the Side Panel so that the next edge lines up with the Main Panel.
-Continue sewing this way until you finish stitching the whole seam.
Repeat these steps for the Right Panel except you’ll be sewing in the opposite direction.
Start with the Back edge of the Main Panel closest to you and pin the long side of the Side Panel to the Main Panel.
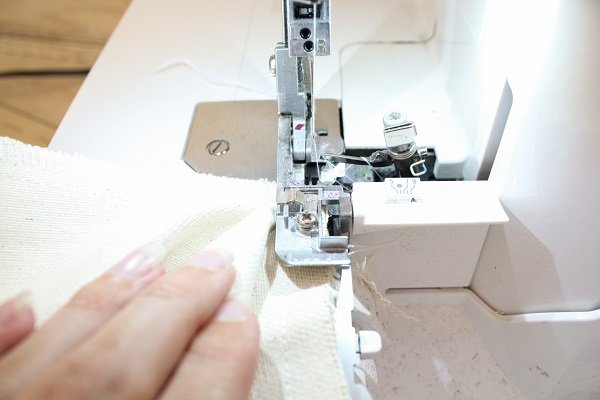
- Overlock the seams you just sewed.
Don’t overlock the whole seam in one go. Rather overlock each straight edge at a time, stopping and starting again at each corner.
You can thread the “tails” in to the overlocking stitches to prevent it from unravelling instead of just cutting them off.
Finish off
- Overlock the raw edge of the base.
Fold up, press and sew the 1.5cm Hem.

Tips
- You could colour block by making each piece a different colour.
- Embroider as much of the cover as you want or add subtle amounts of embroidery in key places.
- Add pockets on the sides to store the power cord and foot pedal.
- Add a pocket on the back to store the extension table.
I would love to see what you make, please feel free to share with me!
Instagram
Facebook
-Hannah-Rose


Nice tutorial if you have the original cover. However, it would be even more helpful if you could provide an actual pattern to print out with the sizes of the pieces drawn. I don’t have the cover for my very old (20 year???) serger.
Absolutely love this tutorial. Just what I need. Thank you sew much!
Thank you for this tutorial. I just made a new overlocker cover using my leftover wedding dress material 🙂 I’ll so excited to throw away my plastic cover that was falling apart and have a memory of my wedding in my sewing room. Some things to note: In step 6 the flap attaches to the “right side” of the fabric. At step 8 it was tricky to figure out what corners I needed to snip and how the facing was meant to go back through the hole. Also before step 10 I overlocked all the bottom hems first to make it a bit easier.
Hi Sarah
Oh how special! I would love to see a picture if you want to share some here…
Thank you for the feedback 😉
-Hannah-Rose
thank you for more great projects.
Thank you Margaret 🙂
I appreciate that you read them.
Hi I like this project and will make one for my overlocker to replace the plastic one – thanks for sharing
Hi Sally
That is awesome!
I would love to see how you customise yours.
Please feel free to post a pic here in the comments or tag me on social media if you use Facebook/Instagram 🙂
Happy sewing!