 BERNINA Corporate Blog -
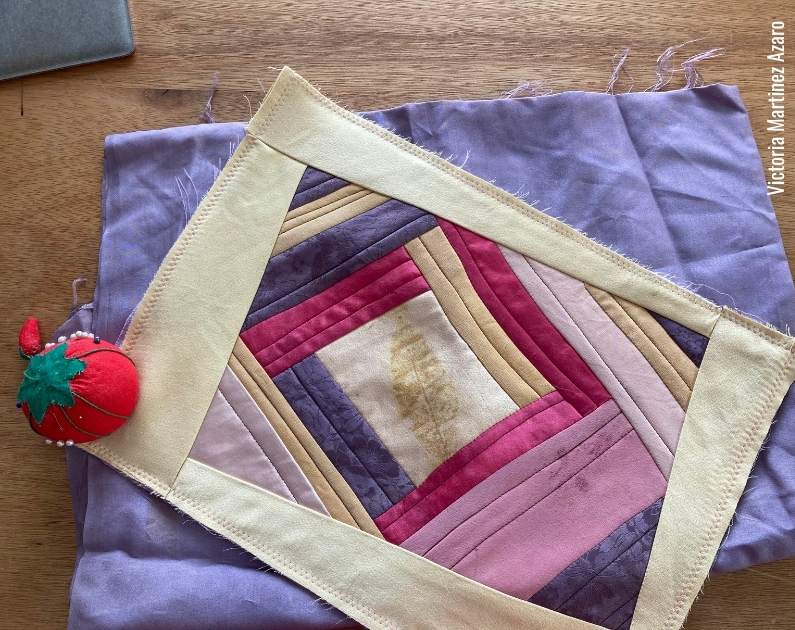
Hi there! I am super excited to share with you how to make a silk pillow cover using fabric scraps. For this tutorial I will be using the mini quilt that we created by quilting silk scraps.
Quilting with silk is super satisfying and in this case I have created a mini quilt using scraps of naturally dyed silk. This allowed me to match the colors carefully and to create a little quilt that is meaningful to me. So now I wanted to transform this beautiful quilt into a pillow so that I can use it in my living room and enjoy it with the family 🙂
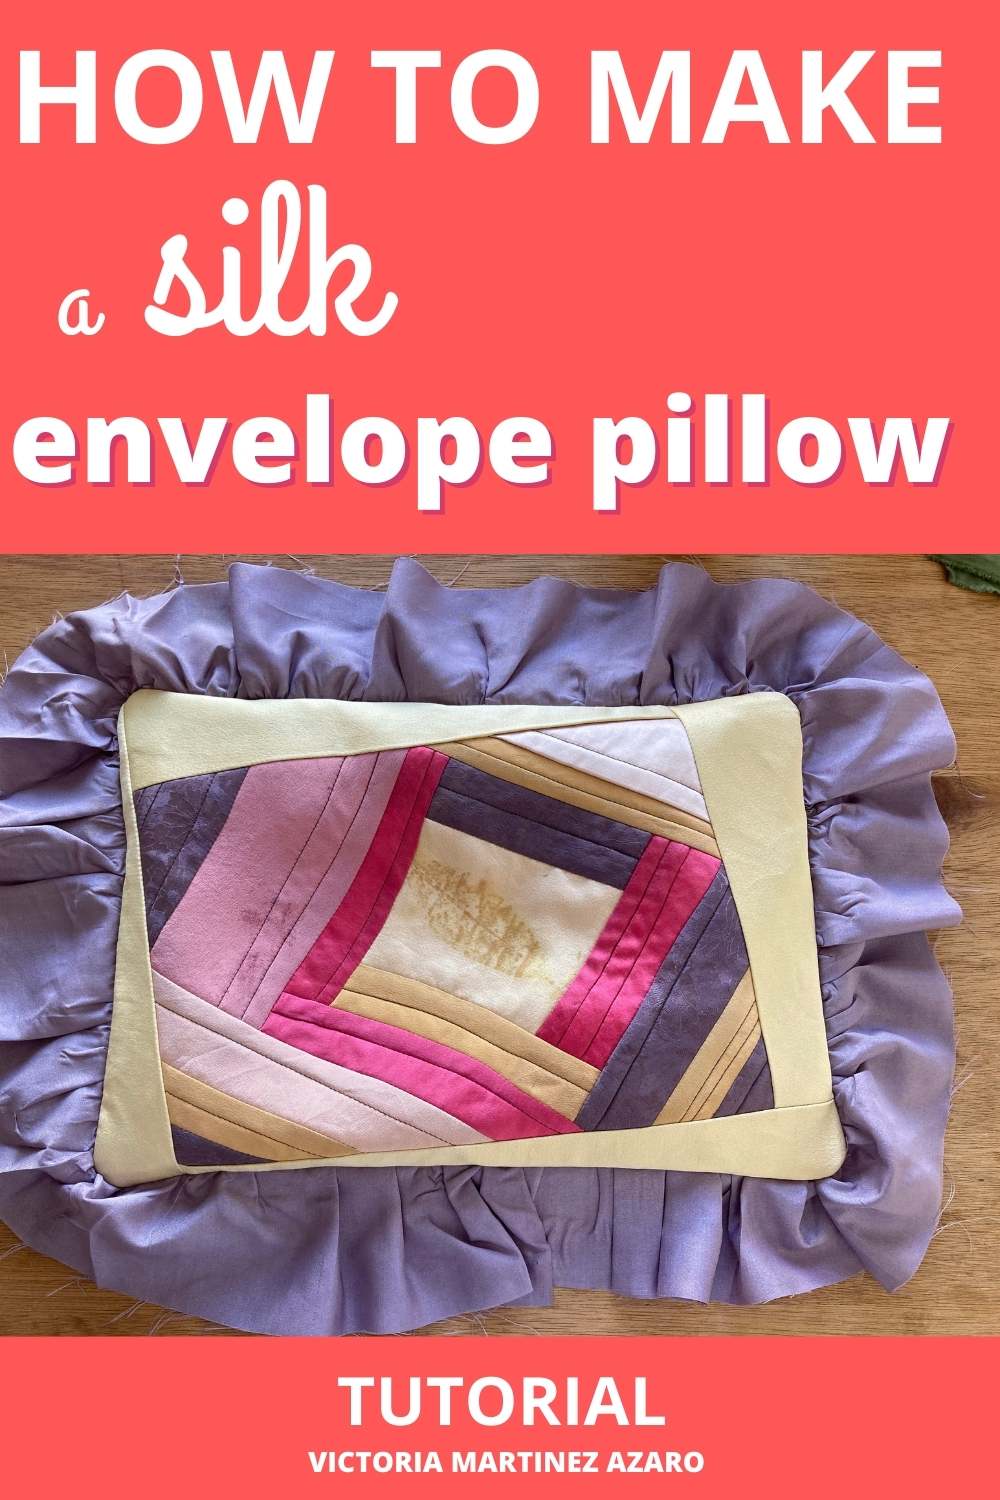
How to make a silk envelope pillow tutorial
Materials and equipment
- Mini quilt (Check out the mini quilt tutorial here)
- Fabric for the lining and for the back of the pillow
- Sewing machine (I use a Bernina 475 QE)
- Regular sewing threads
- Rotary cutter
- Cutting mat
Step 1: Sewing the quilted top
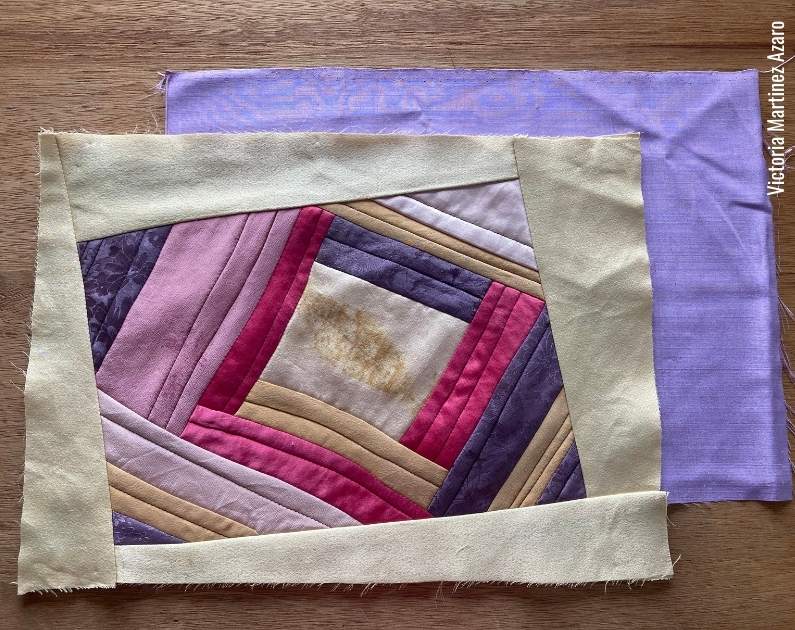
Place your mini quilt on your working table. Cut a piece of fabric the same size as the quilt. This will be the lining for the pillow cover.
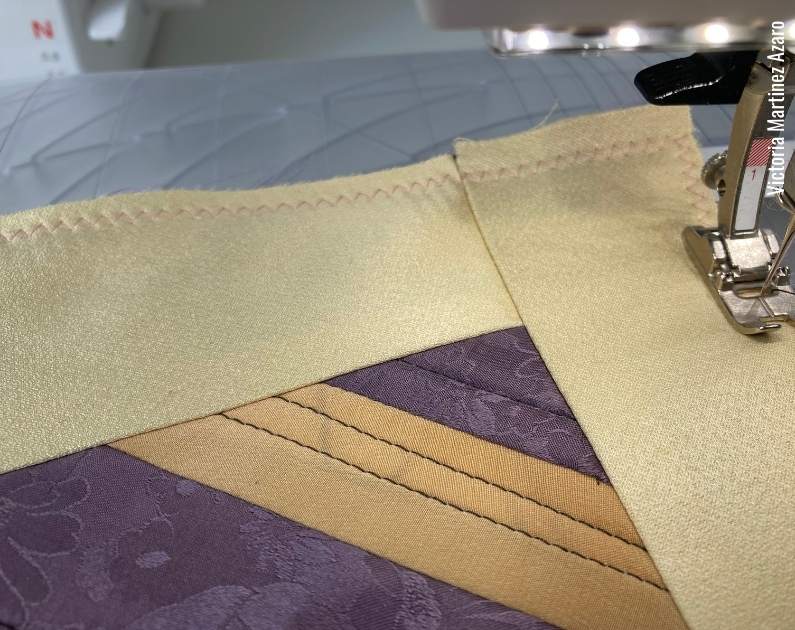
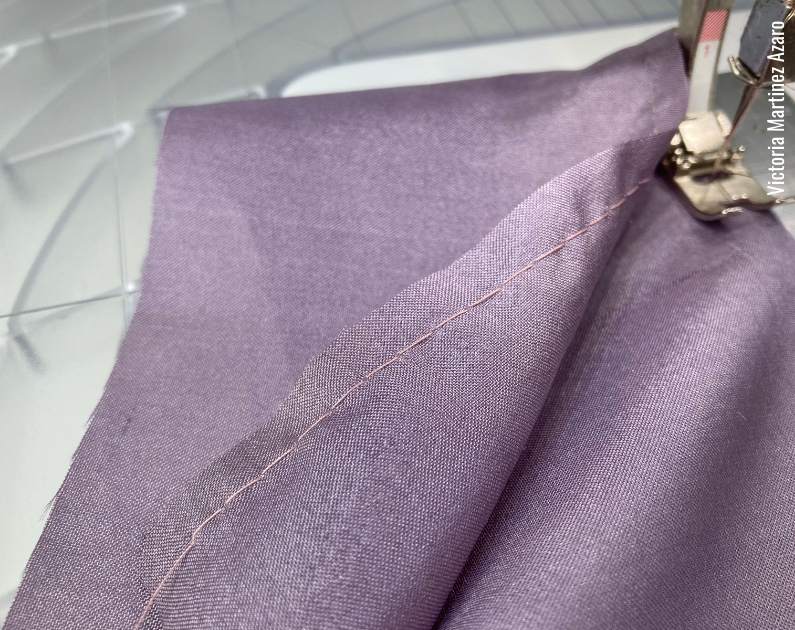
Using a zig zag stitch sew the lining to the quilted piece. If you have an overlocker/serger you can use it for this step, however the zig zag in your regular machine will work well as well.
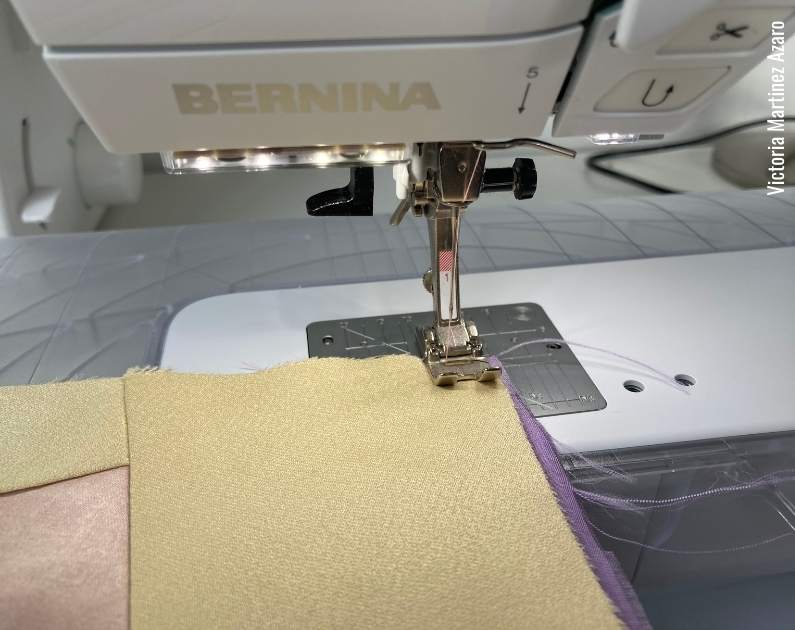
Sew all around the quilt pivoting the sewing needle in each corner.
This is how the quilted top with the lining should look like once they are sewn together.
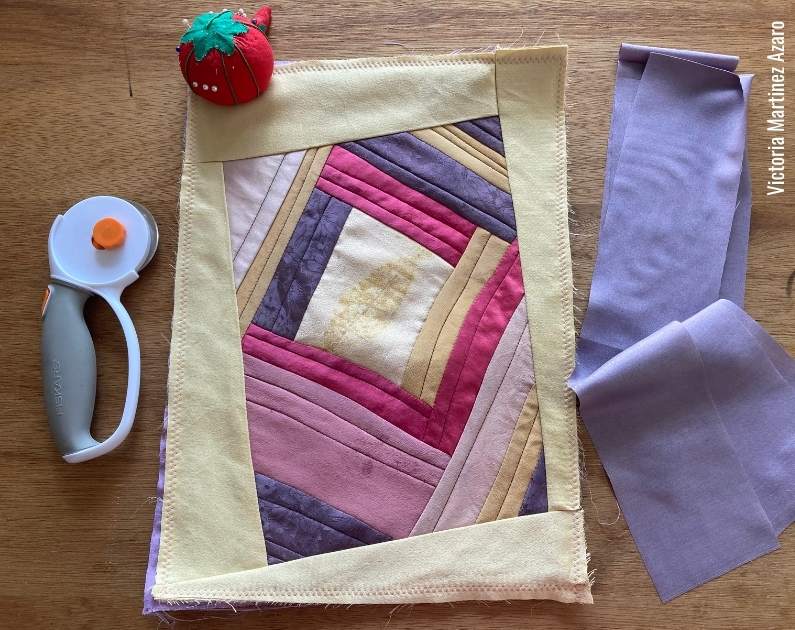
Choose a fabric for the back. In this case I have chosen the same fabric as I used for the lining which is also 100% silk (I had this silk in my fabric stash and it’s not naturally dyed).
Step 2: Making ruffles for the pillow
The next step is to choose a matching fabric for the ruffles. I chose another 100% silk fabric which I have hand dyed using cochineal. Go here for more information and tutorials about natural dyeing.
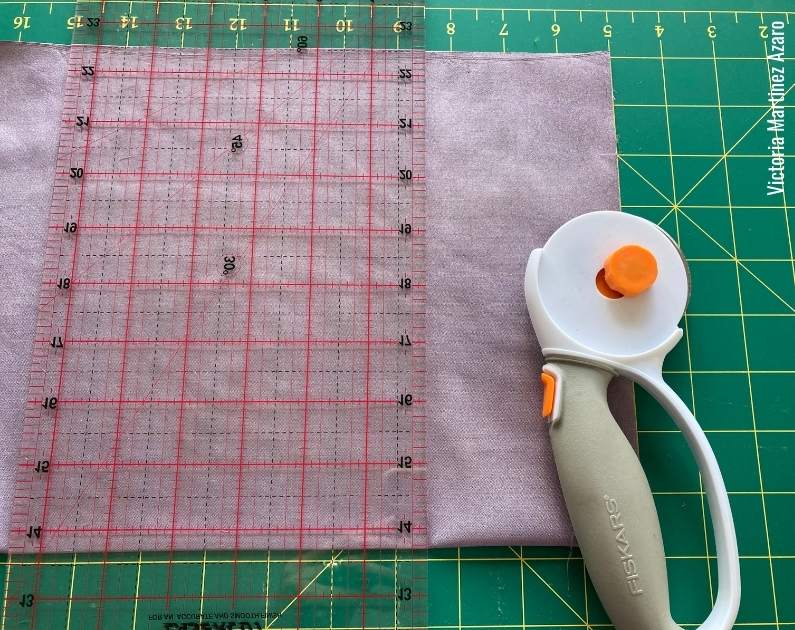
Measure the perimeter of the quilted top. The strips length should be 3 times longer than the perimeter of the quilted top.
Cut strips of 3 1/2 inches or 9 cms wide.
I like cutting my strips using a rotary cutter and a cutting mat. Fold your fabric 3 or 4 times within itself and place on the mat. Using the ruler, make sure you are cutting the right width. This method is quick and super easy.
Place all your strips on your working table by the quilted top.
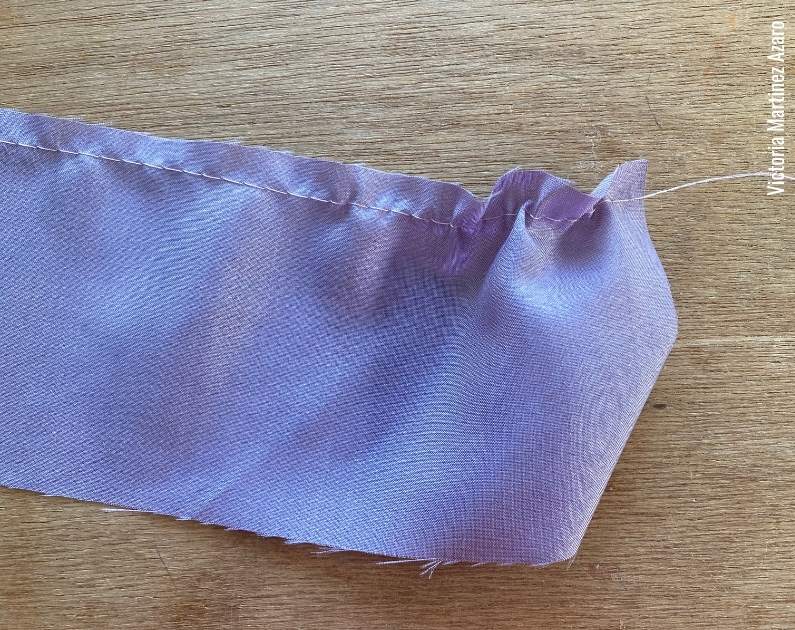
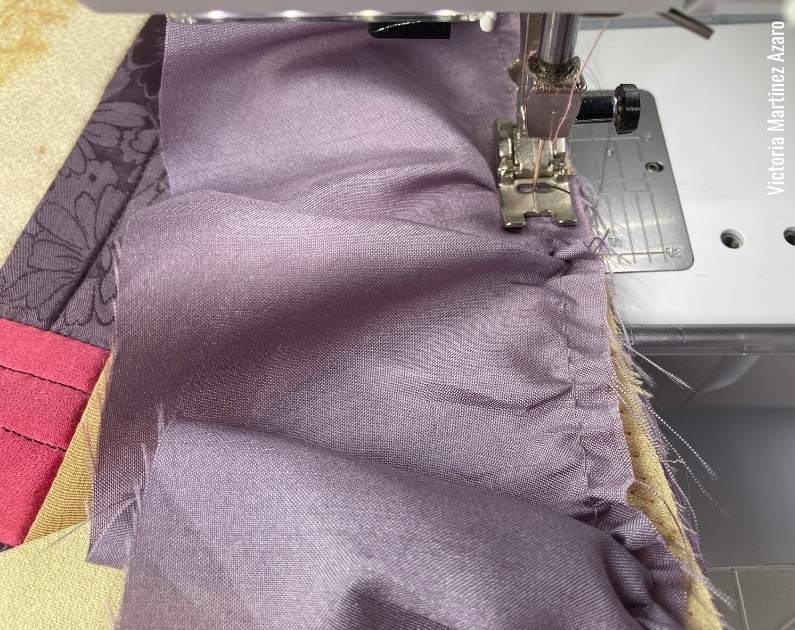
Sew a basting stitch using the longest stitch size in your sewing machine. When you finish sewing each strip make sure you leave a long thread hanging at the end. Don’t back stitch the beginning or the end of your basting sewing line.
Sew the basting line 1/4 inch or 6 mm form the edge.
Pull one thread on one end of the strip. this will create a gathering effect. Repeat this gathering process with all strips of fabric. Make sure that the gathering is even thropughout the strips of silk fabric.
Step 3:
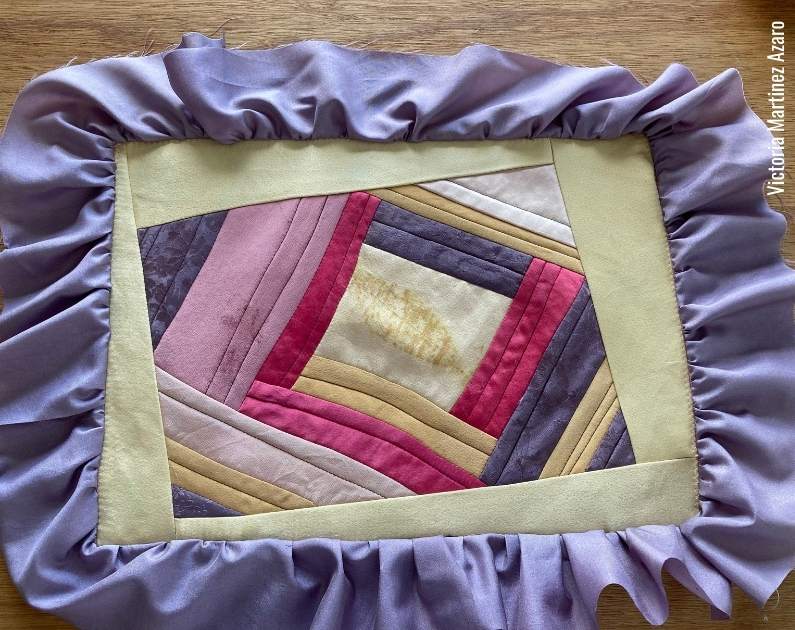
Pin the gathered strips around the quilted top.
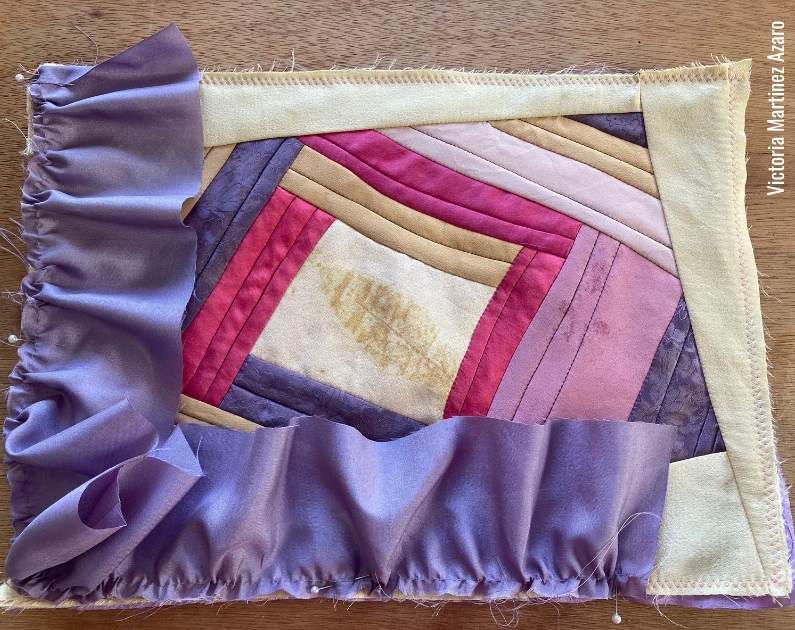
When you reach the end of a gathered strip simply fold it back and overlap it with the next gathered strip.
Keep pinning the gathered strip all around the quilted top.
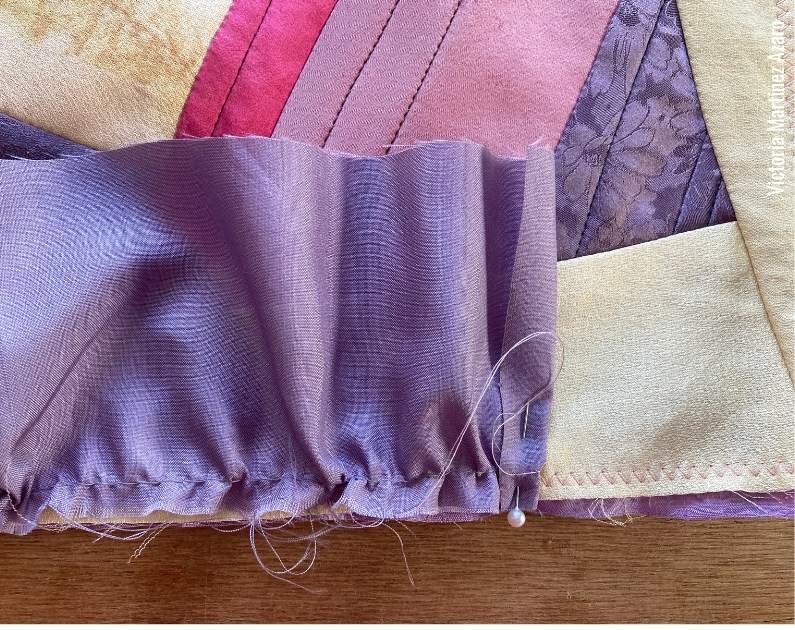
Sew the gathered strips to the quilted top. Make sure that the sewing line is just under the gathering sewing line that you sewed when you did the basting stitch. This basting stitching will be removed later.
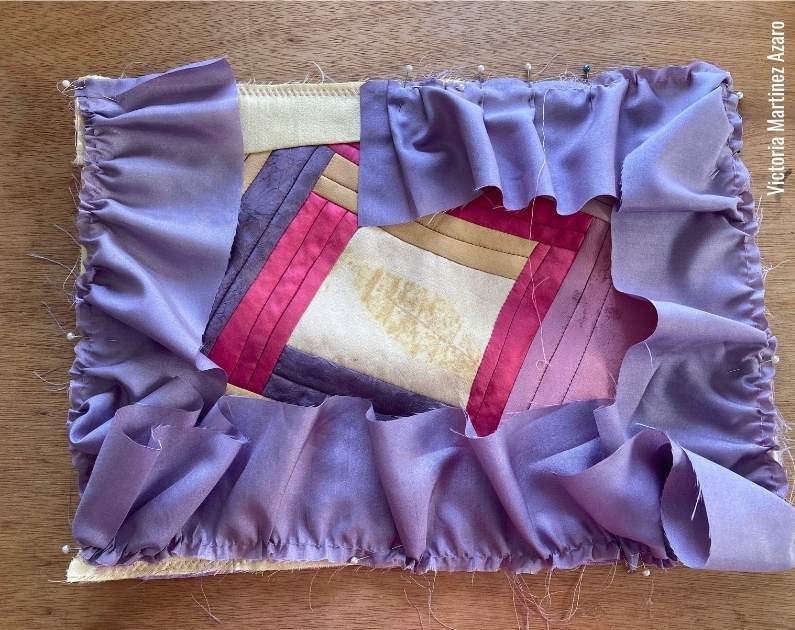
This is how the quilted silk pillow top should look once the ruffles are sewn in place.
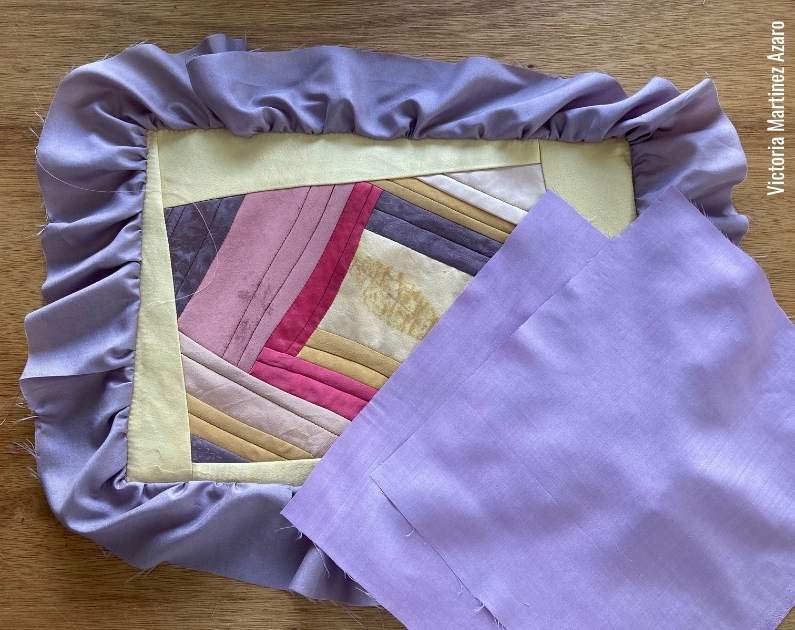
Step 4: Making the silk pillow
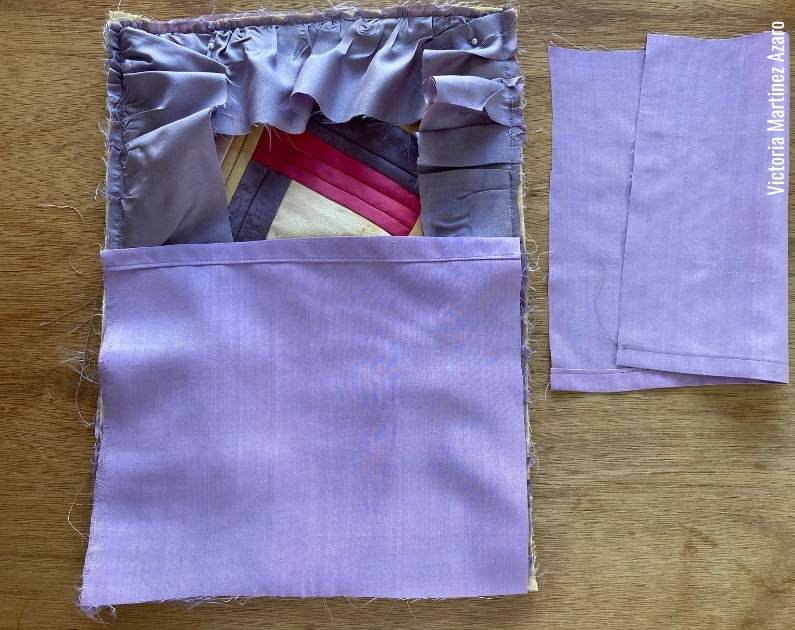
Cut 2 back pieces. These should measure the exact same width as your quilted pillow cover and 3/4 of the length.
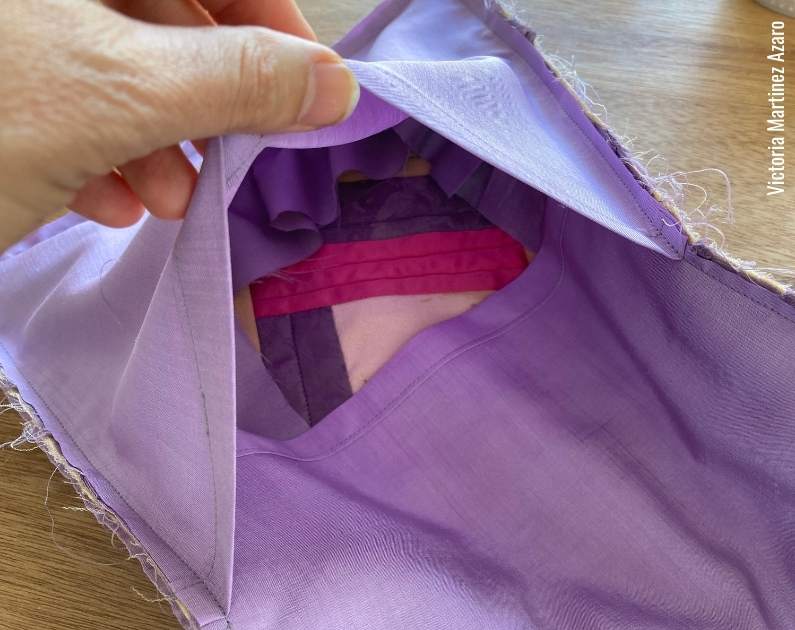
The idea of the envelope pillow is to create an opening in the middle so that you can place the pillow insert and also remove the insert in case you need to wash the pillow.
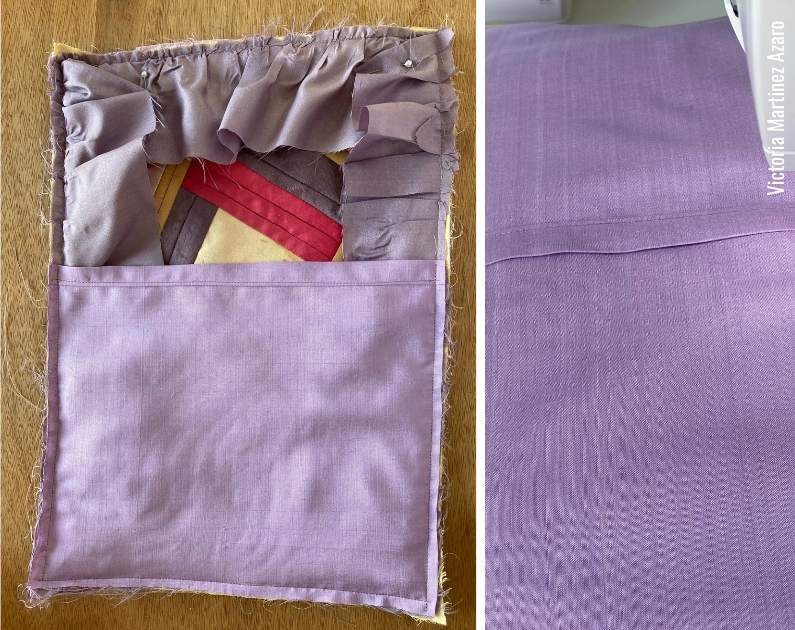
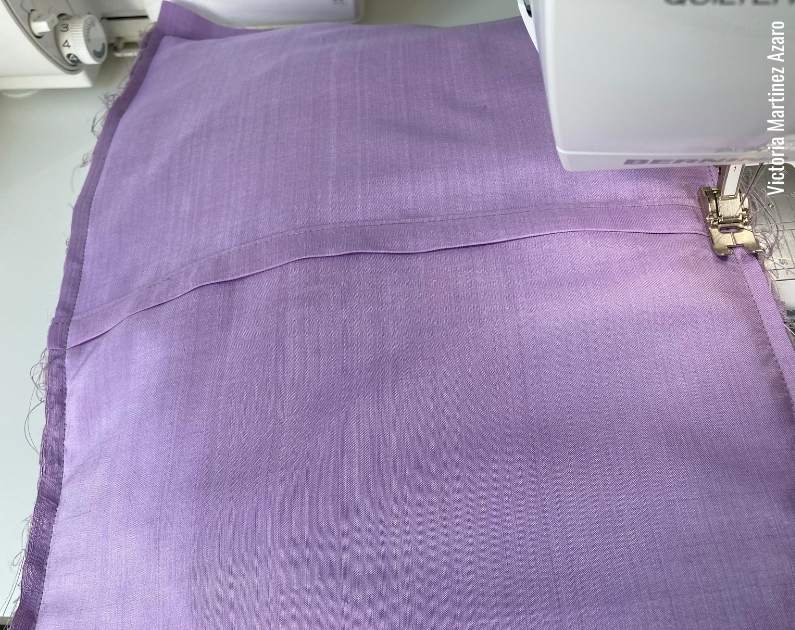
Fold the top edges of the back pieces twice and sew a hem.
In the illustration below you can see how the top edges have been hemmed and they are now prepared to be attached to the pillow top.
Place one back piece on top of the quilted pillow top side edges touching.
Pin in place and sew.


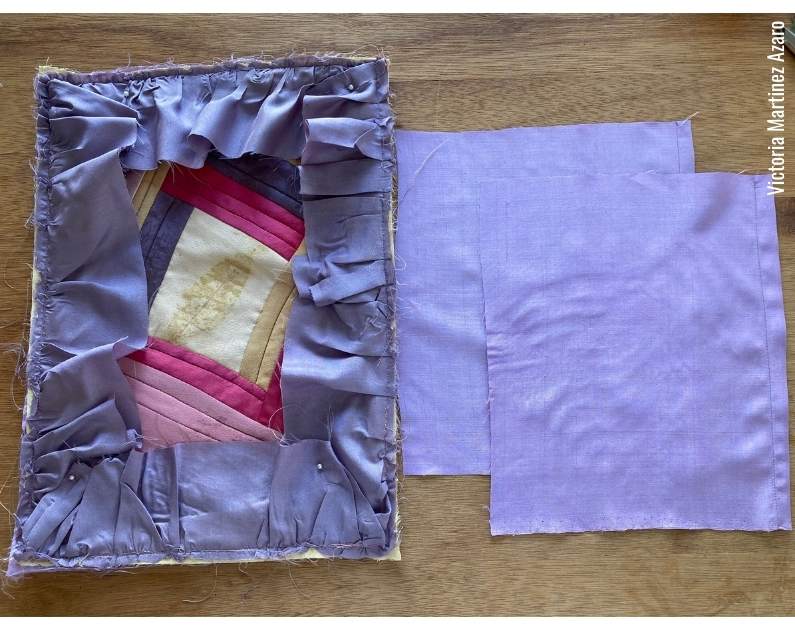
This is how the pillow will look after the first back piece has been sewn.
Sew the second back piece following the same method.
Step 5: Finishing the silk pillow cover
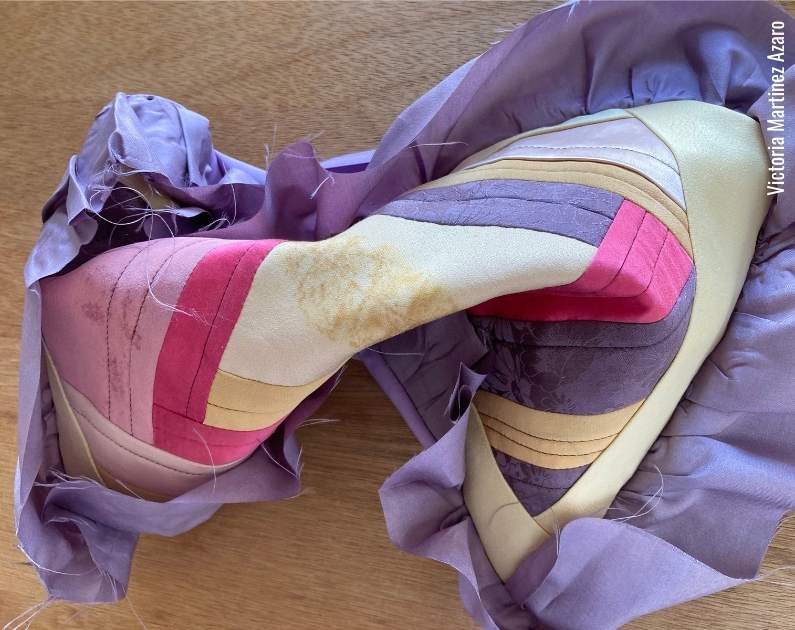
Now its time to turn the pillow inside out through the middle opening. Be sure to clip the corners first.
Optional: At this stage you can overlock/serge all around the pillow edges or zig zag for a neater finish.
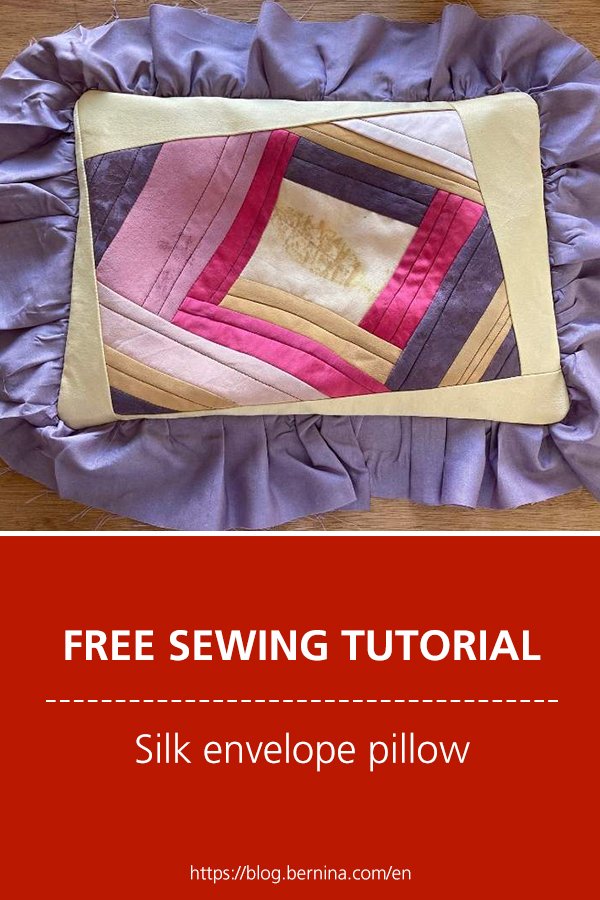
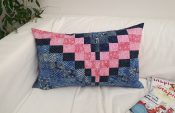
This is the finished silk pillow top cover…

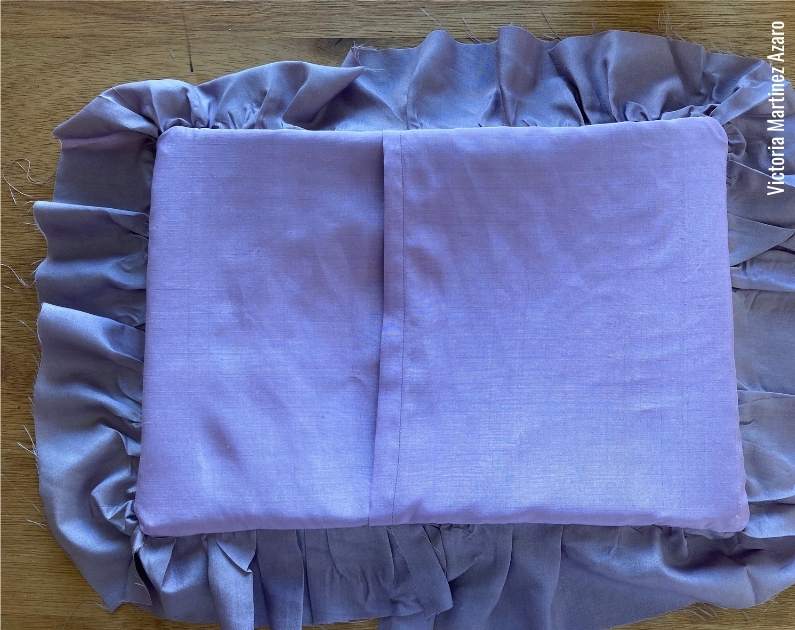
and this is the finished silk pillow back.
I hope you have enjoyed this tutorial. If you are passionate about making beautiful fabric crafts using repurposed fabric check out these other tutorials:
- How to turn a fabric collage into a pillow
- How to make a book cover using applique
- How to repurpose an old napkin into a hair clip holder


0 Responses