 BERNINA Corporate Blog -
Embroider a lion with fringes with this free file: Lion with fringes 10 x 13
Instructions in this blogpost will help you.
Are you interested in how to digitize the file in the BERNINA embroidery software V8?
I wanted to find out, after seeing a fringe project on the internet. I was very curious how it could be made.

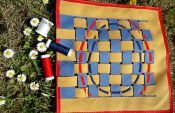
The finished project.
The free download embroidery file (EXP, PES, HUS, SEW eand XXX): Lion with fringes 10 x 13
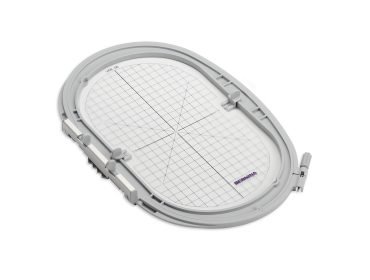
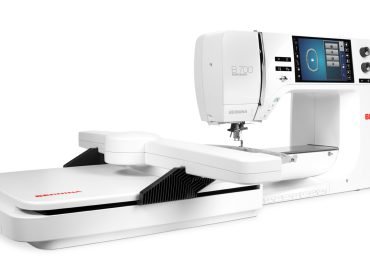
I embroidered it on the BERNINA 700 and used the Large oval hoop
How to digitize the clipart?
In the BERNINA borduursoftware DesignerPlus V8 you have a wide range of possitiblities.
Let’s do it step by step 🙂
Select a useful clipart, at first choose a royalty free picture (with good contrasts, clear shapes, suitable for fringes, like a flower, an owl, a lion).
I chose this cute little lion:

Clipart lion
After digitizin it looked like this:

The lion with fringes digitized
At first you draw a line around the head.
Set up as a wide satin stitch (I chose a 7 mm wide satin stitch and it seems to me it is a minimum width).
Remove the underlay (find the setting in ‘Object Properties’ and hit ‘Effects’).
Copy the circle and change to a triple outline: short stitchlength 1,5 mm.
Position the circle against the inner border of the wide satin stitch.
This circle is meant to keep the fringes in place once the project is finished. If you didn’t have them, your fringe stitch would be pulled away as one long thread.
To be sure of a steady mane, I copied this triple ouline circle a second time, and made it a tiny bit smaller.
Check to be sure if the fringes are the last embroidery object.
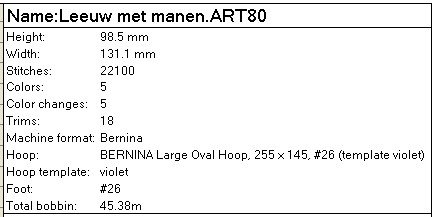
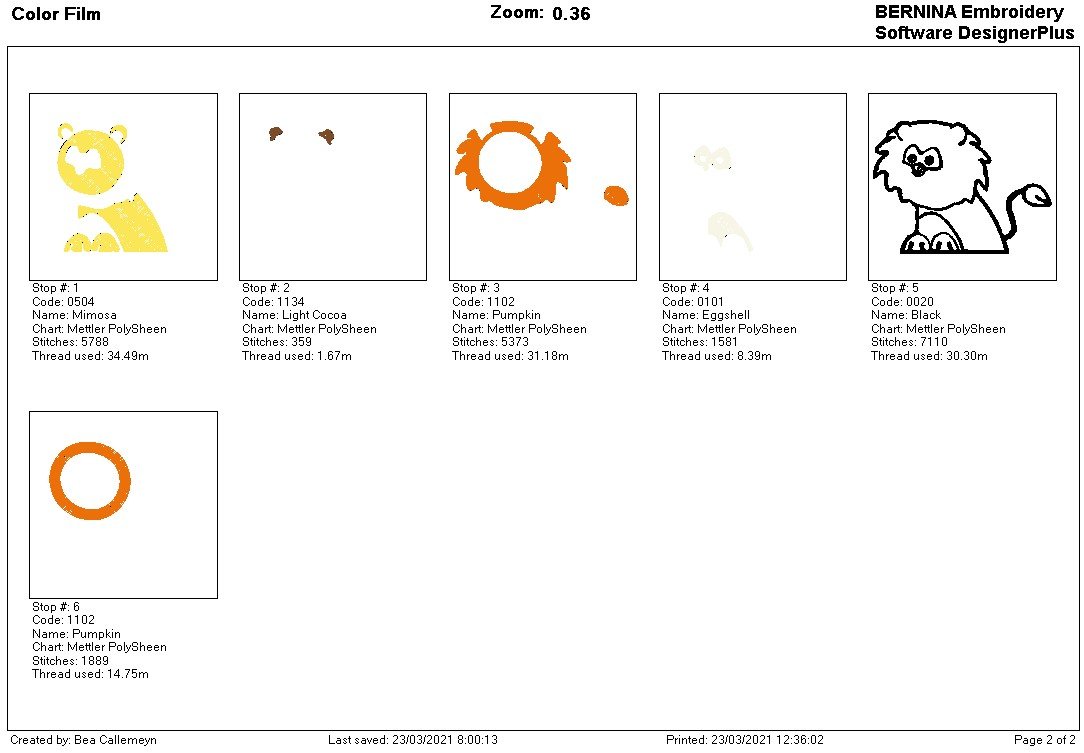
Properties of the free file ‘lion with fringes’:
These are the main properties:
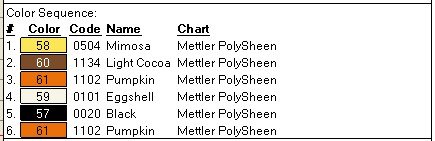
The colors you will need:
The embroidery objects in color film:
Embroider the lion with fringes:
Supplies for a small bag
- Heavy weight fabric 24 x 57 cm
- Rope 75 cm
- The free file, for download click this link: Leeuw met manen
- Mettler Poly Sheen embroidery thread in 5 colors (yellow, mocca, orange, black, offwhite).
- Cut away stabilizer
- Sharp scissors.
Hoop the stabilizer and fabric in the Large Oval hoop.
Embroider the project till Stop #5.
Now change for a contrasting color bobbin thread to embroider the fringed mane. It helps you to find out afterwards where to cut.
After finishing the embroidery, you take it out of the hoop.
The last step in creating the fringes is to cut the contrasting bobbinthread. With a contrasting bobbin thread, it is easy to find out where to cut (I admit my color choice for contrast was not ideal).

Cut the bobbin thread with sharp scissors.
Remove loose threads.
All you have to do now is to pull the loops for the fringes to the right side of the project.

Pull the fringes to the front.
The lion is ready. I finished it as a small bag.
You see it’s not difficult to digitize with fringes. What a fun effect.
The project ’embroider a lion with fringes with the free file’ is finished.
Do you have a plan where to embroider this cute lion? A sweater? As a patch on a hole in a child’s trousers? On a bag?
More than enough possibilities!


I love this Lion! thank you so much
Hi Jan, I’m glad you like it, to be honest, I thought it’s a really cute one too 🙂 . I hope you make a nice project with it. Thanks for your comment!