 BERNINA Corporate Blog -
Andrea from Quiltmanufaktur and author for the German BERNINA blog is your guide for this fantastic quilt-along over the next 12 months. Together, you will sew classic patchwork blocks and combine them into a sampler. The completed quilt will be traditional, yet modern! The next part has been written and we are delighted that you join this quilt project.
Dear patchwork fans,
welcome to the first part of the Old Block Quilt-Along. Together, over the next few months, we will be sewing an old block sampler, i.e. a quilt made up of different traditional blocks.
I am very happy that you are joining me!
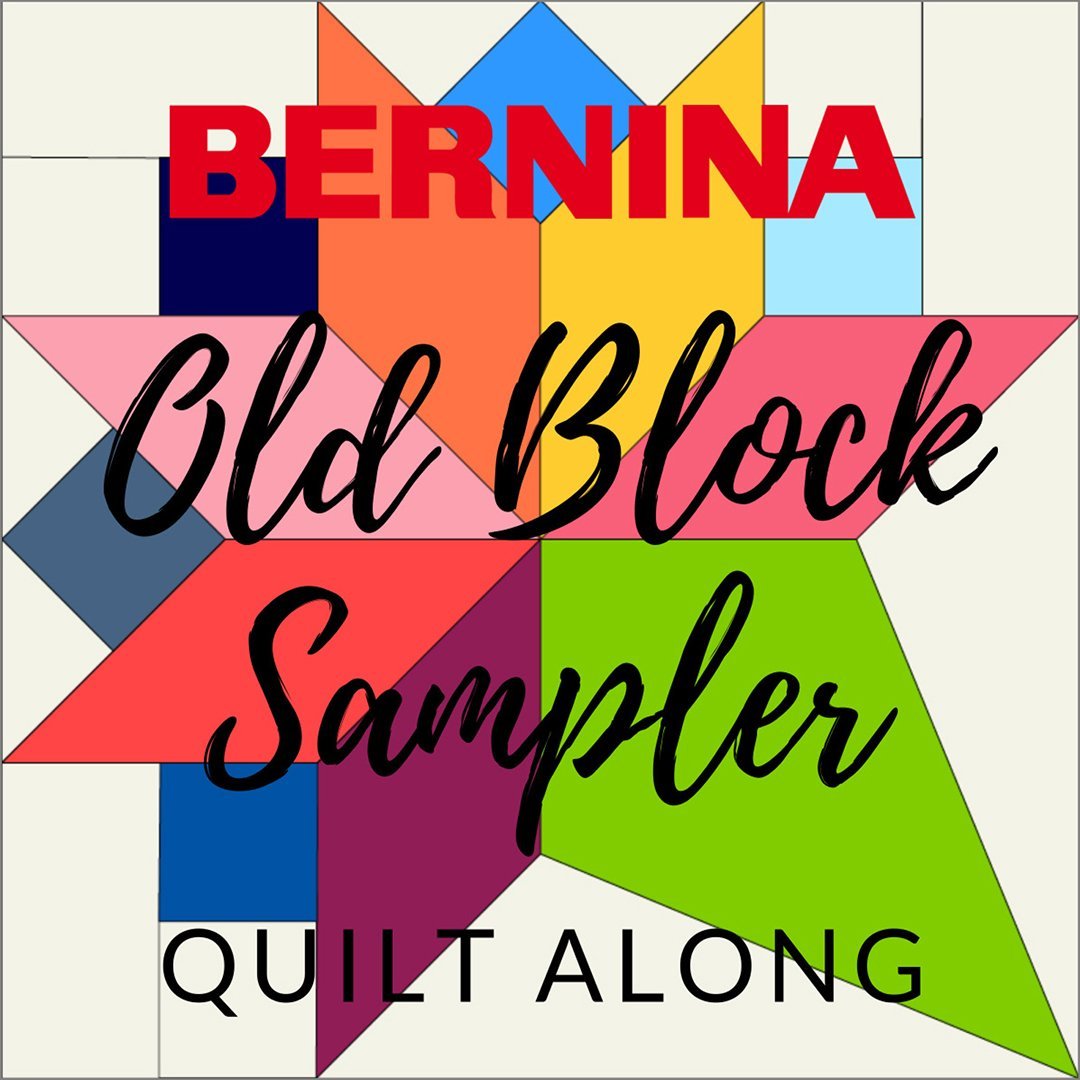
Feel free to use the logo on all your channels!
What is this quilt-along about?
I will show you a wide range of beautiful old patchwork blocks that you don’t see very often, in a loose chronological order, here on the BERNINA blog. You can then sew them yourself. At the end, I’ll show you how to turn them into a patchwork sampler.
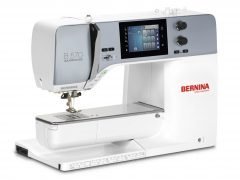
The quilt-along is taking place on the German and the English BERNINA blog. At the end, prize draws will be held for both German-speaking and English-speaking participants for the chance to win a BERNINA 570 QE ! Isn’t that great?
You can join the quilt-along at any time. All the posts will remain permanently available at the following link:
Old Block Quilt-Along – overview of all the posts
In the first post, which appeared last week, you will find information about our joint project:
Old Block Quilt-Along – who’s in?
What’s in today’s post?
Today is the start of the quilt-along. We are going to take a closer look at the fabrics you can use and we’ll also dive straight in and sew the first patchwork block! Are you ready?
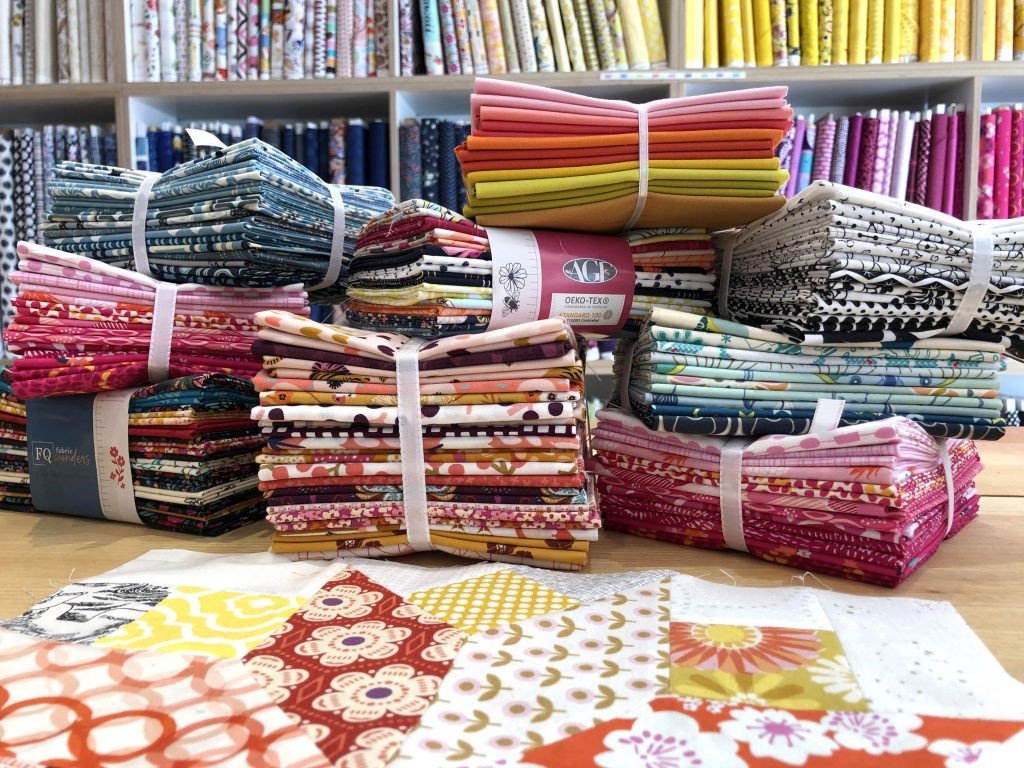
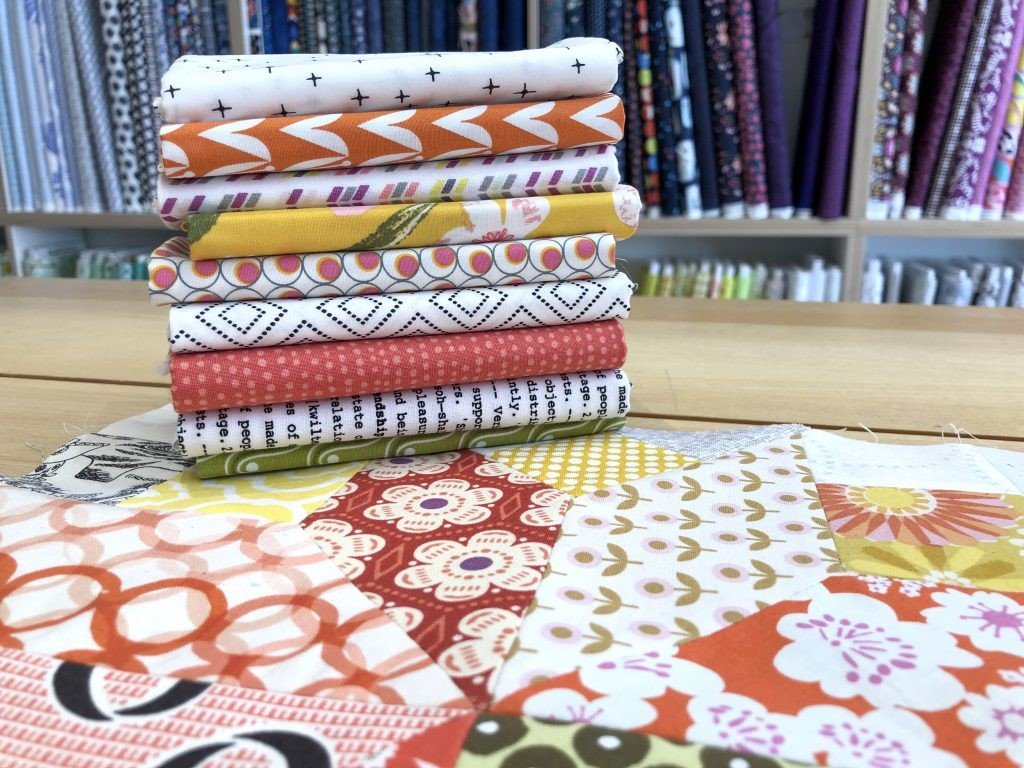
Materials for the Old Block Quilt-Along
I recommend that you use around 18 to 20 different fat quarters for the designs. That is about 4.5 m / 178 inches to 5 m / 197 inches of fabric. The amount is calculated generously, which also means there is enough for the odd cutting mistake.
For the background fabric, I would also recommend around 4.5 m (177 inches) of fabric (for a width of 110 cm). It sounds like a lot. But you will see that, due to the various techniques we are going to use together, there is also quite a bit of waste. Any material that is not needed for the quilt top can be used on the back. At the end of the quilt-along I will share some tips and tricks with you.
Basic information on the patchwork blocks
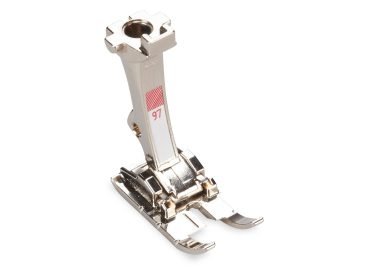
The seam allowance is 1/4″. I recommend that you use an inch foot for sewing, for example the Patchwork foot # 97 from BERNINA.
Set the stitch length to a maximum of 2.5 mm.
If, like me, you work with different fabric colors and prints, it is advisable to use a neutral thread color. By neutral, I mean a light beige or light gray. This goes best with the different colors of the fabrics.
You don’t have to pre-wash the fabrics. It is enough to steam iron them before cutting. And here’s a tip: If you spray the fabrics with spray starch before ironing, it makes your cuts more accurate.
I recommend that you always iron the seam allowances open where possible.
We are sewing the “Brides Bouquet” patchwork block
That’s enough preamble, let’s get started!
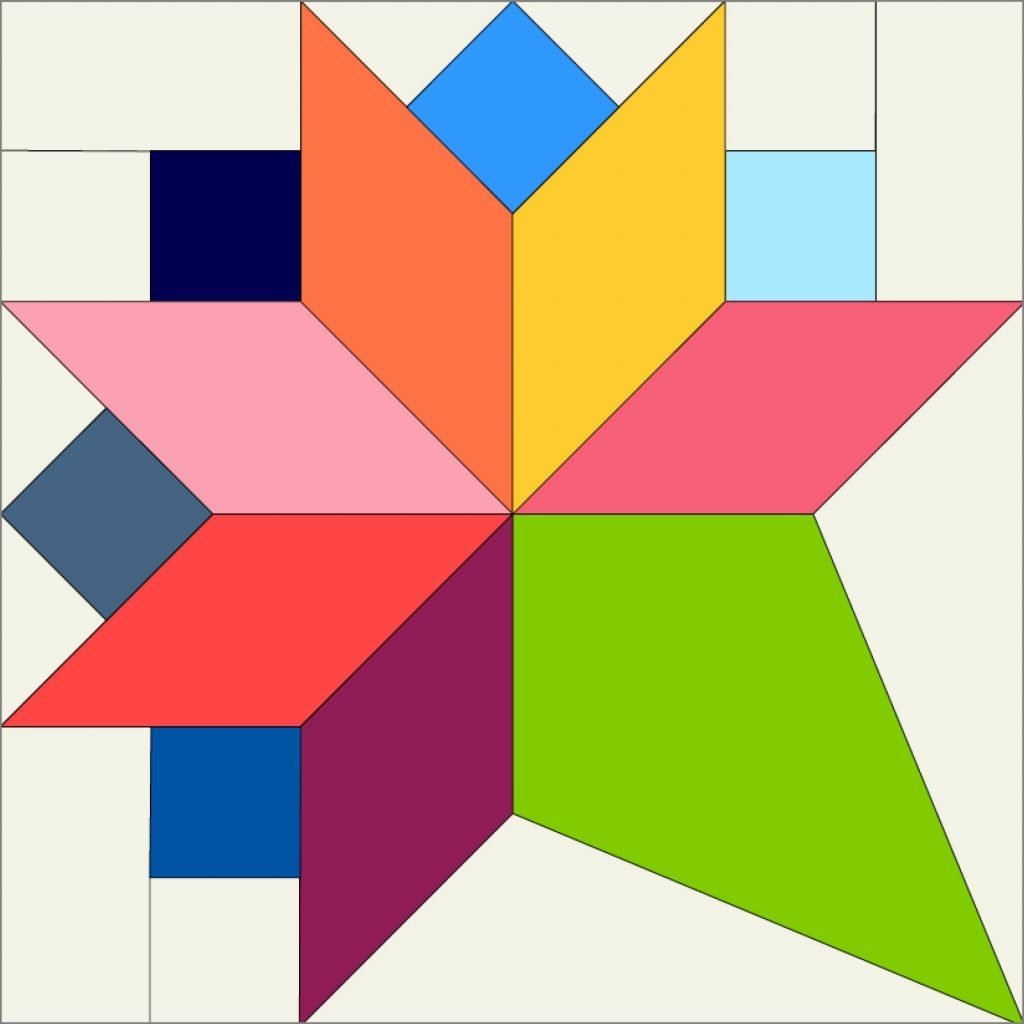
The first block for the Old Block Sampler is the Brides Bouquet (also known as the bridal bouquet or nosegay). This block was first mentioned in the early 1930s. You already know the design, as it is the background for our quilt-along logo:
I saw this patchwork block on a Pin on the Pinterest board of the American Legacy Quilt Index.
Rose Lea Alboum, who founded this website, has made it her mission to compile patchwork and quilt designs from the late 19th and early 20th centuries from various print media. At that time, patchwork block designs were disseminated in newspaper articles. The site provides a real wealth of examples of beautiful old patchwork blocks – you should definitely take a look!
It presents a small challenge, as the block is made using so-called Y-seams! Don’t panic, I’ll take you through the process step-by-step.
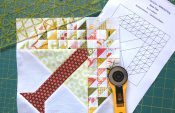
Download the patchwork templates
For cutting out, I have created two PDF documents to download:
- The first is a coloring sheet. This allows you to try out colors and designs for this block first to see what they look like.
- The cutting templates are on the second PDF.
With the second document in particular, you must make sure that “actual size” is selected in the print options, otherwise the templates will not be the right size! When printing out the template, do not make any size adjustments in the printer dialog box, such as “Fit to page” or similar, but print in the original size. However, you do have to check the format, since US and European A4 are different sizes. In order to check if the print size is correct, you can measure the side of H which is 2.5¨including sewing allowance. If it didnt print correctly, you will have to adjust your print options. The next block will have a print size check square included.
Here are the downloads:
Brides Bouquet ‘coloring sheet’ PDF download
Brides Bouquet templates PDF download
Cutting out the pieces for the Brides Bouquet patchwork block
When you sew the block, the size at the end should be 12 1/2″ (including the seam allowance).
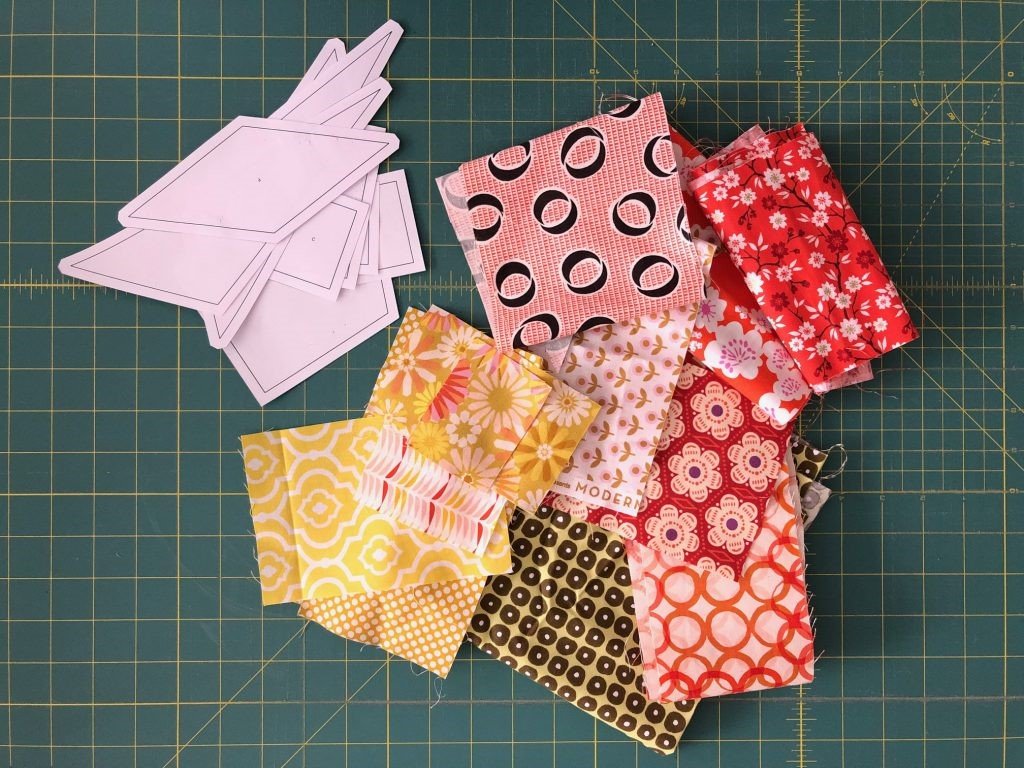
Once you have printed out the templates, cut them out along the outer, dashed lines. Then choose suitable materials for the individual pieces of your block.
I suggest pinning the templates onto the back of the fabric. Then transfer the outlines onto the fabric using a thin marker. Remove the template and cut the piece out. This allows you to cut out accurately, which is absolutely essential for precise sewing later on.
You will need to cut out the following number of pieces:
- Template A: 3 x
- Template B: 4 x
- Template C: 3 x
- Template D: 1 x
- Template E: 1 x
- Template F and G are identical! 6 x altogether (see the cutting plan on the printout for the templates)
- Template H: 3 x
- Template I: 1 x
- Template J: 2x

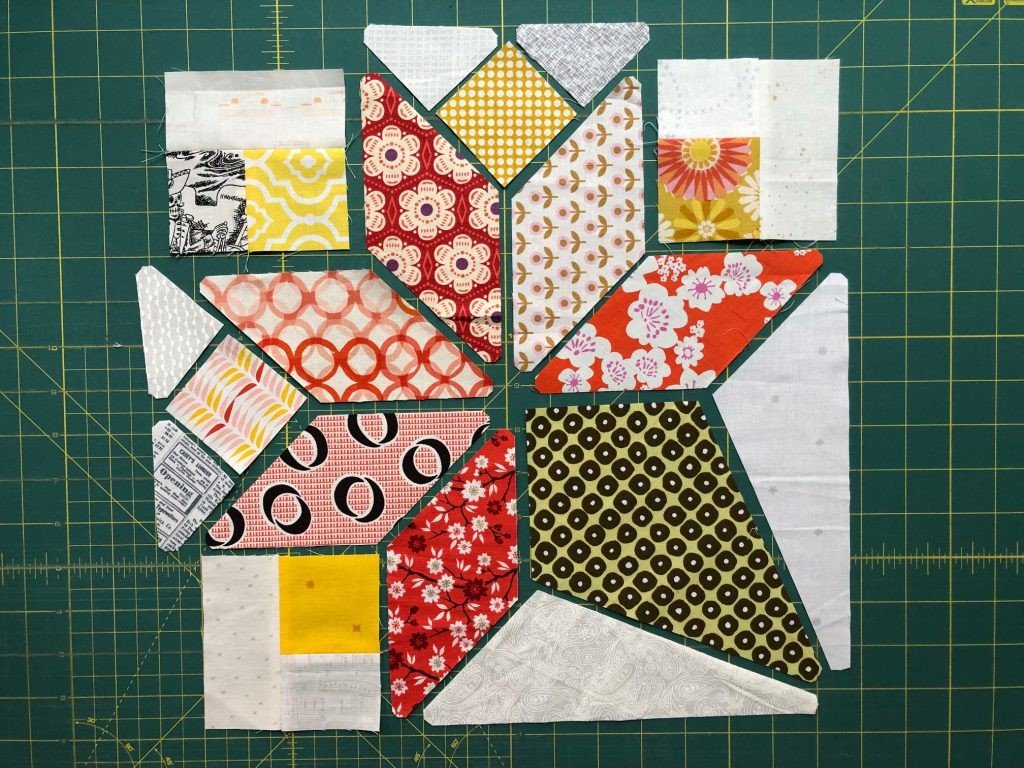
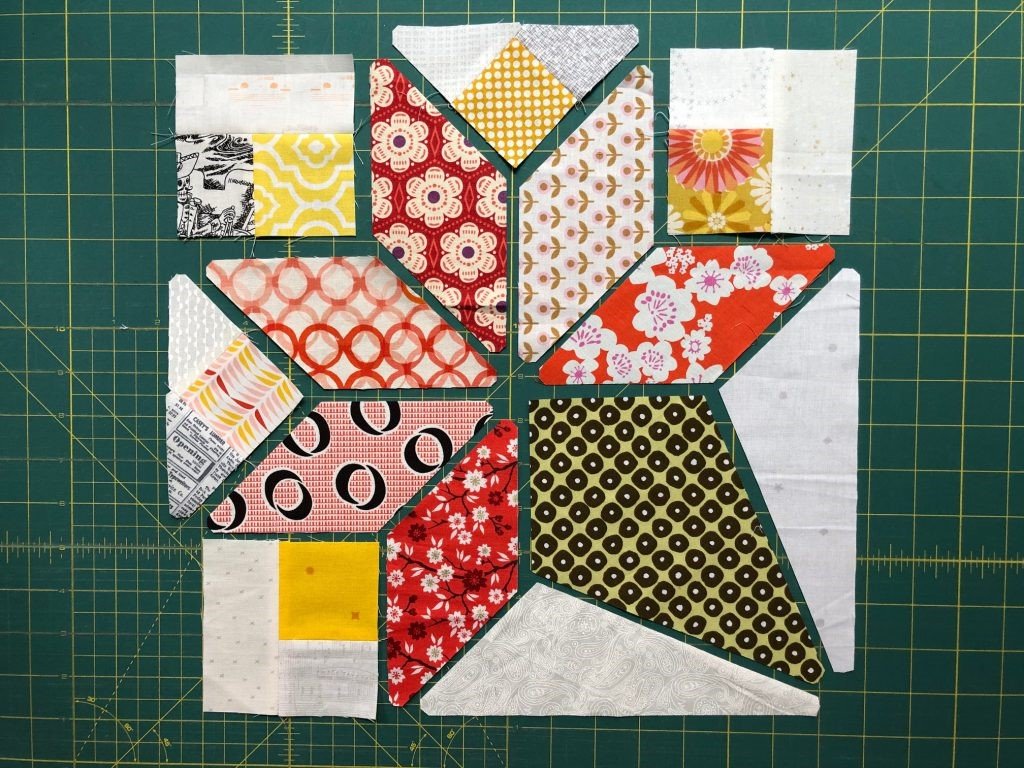
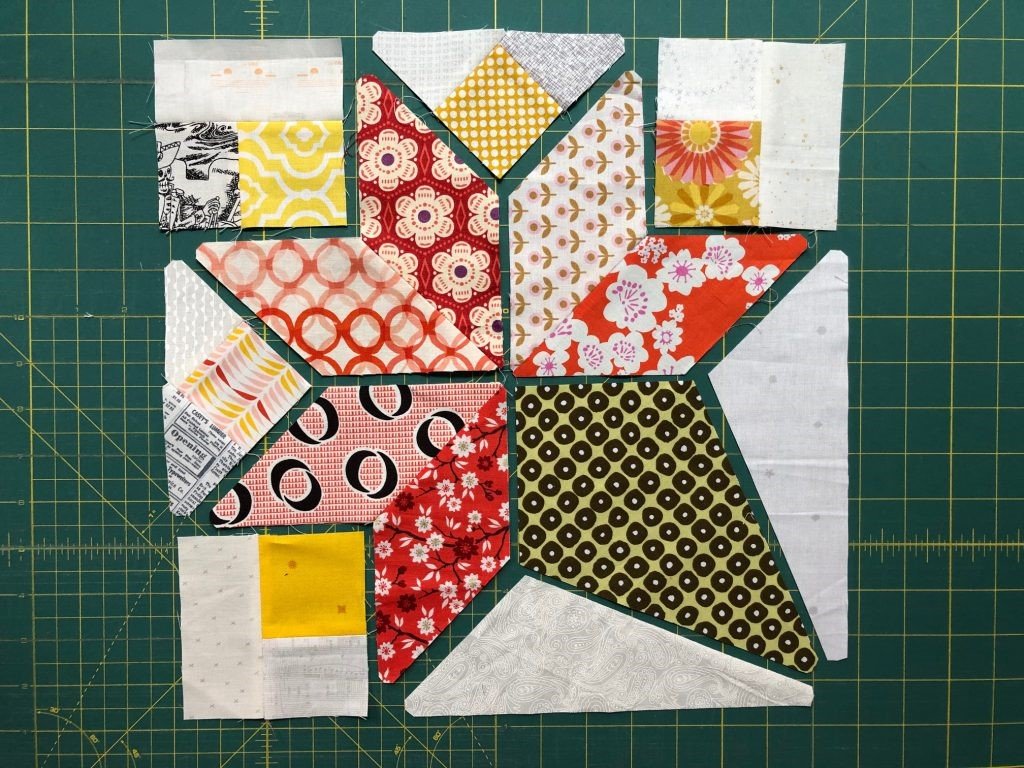
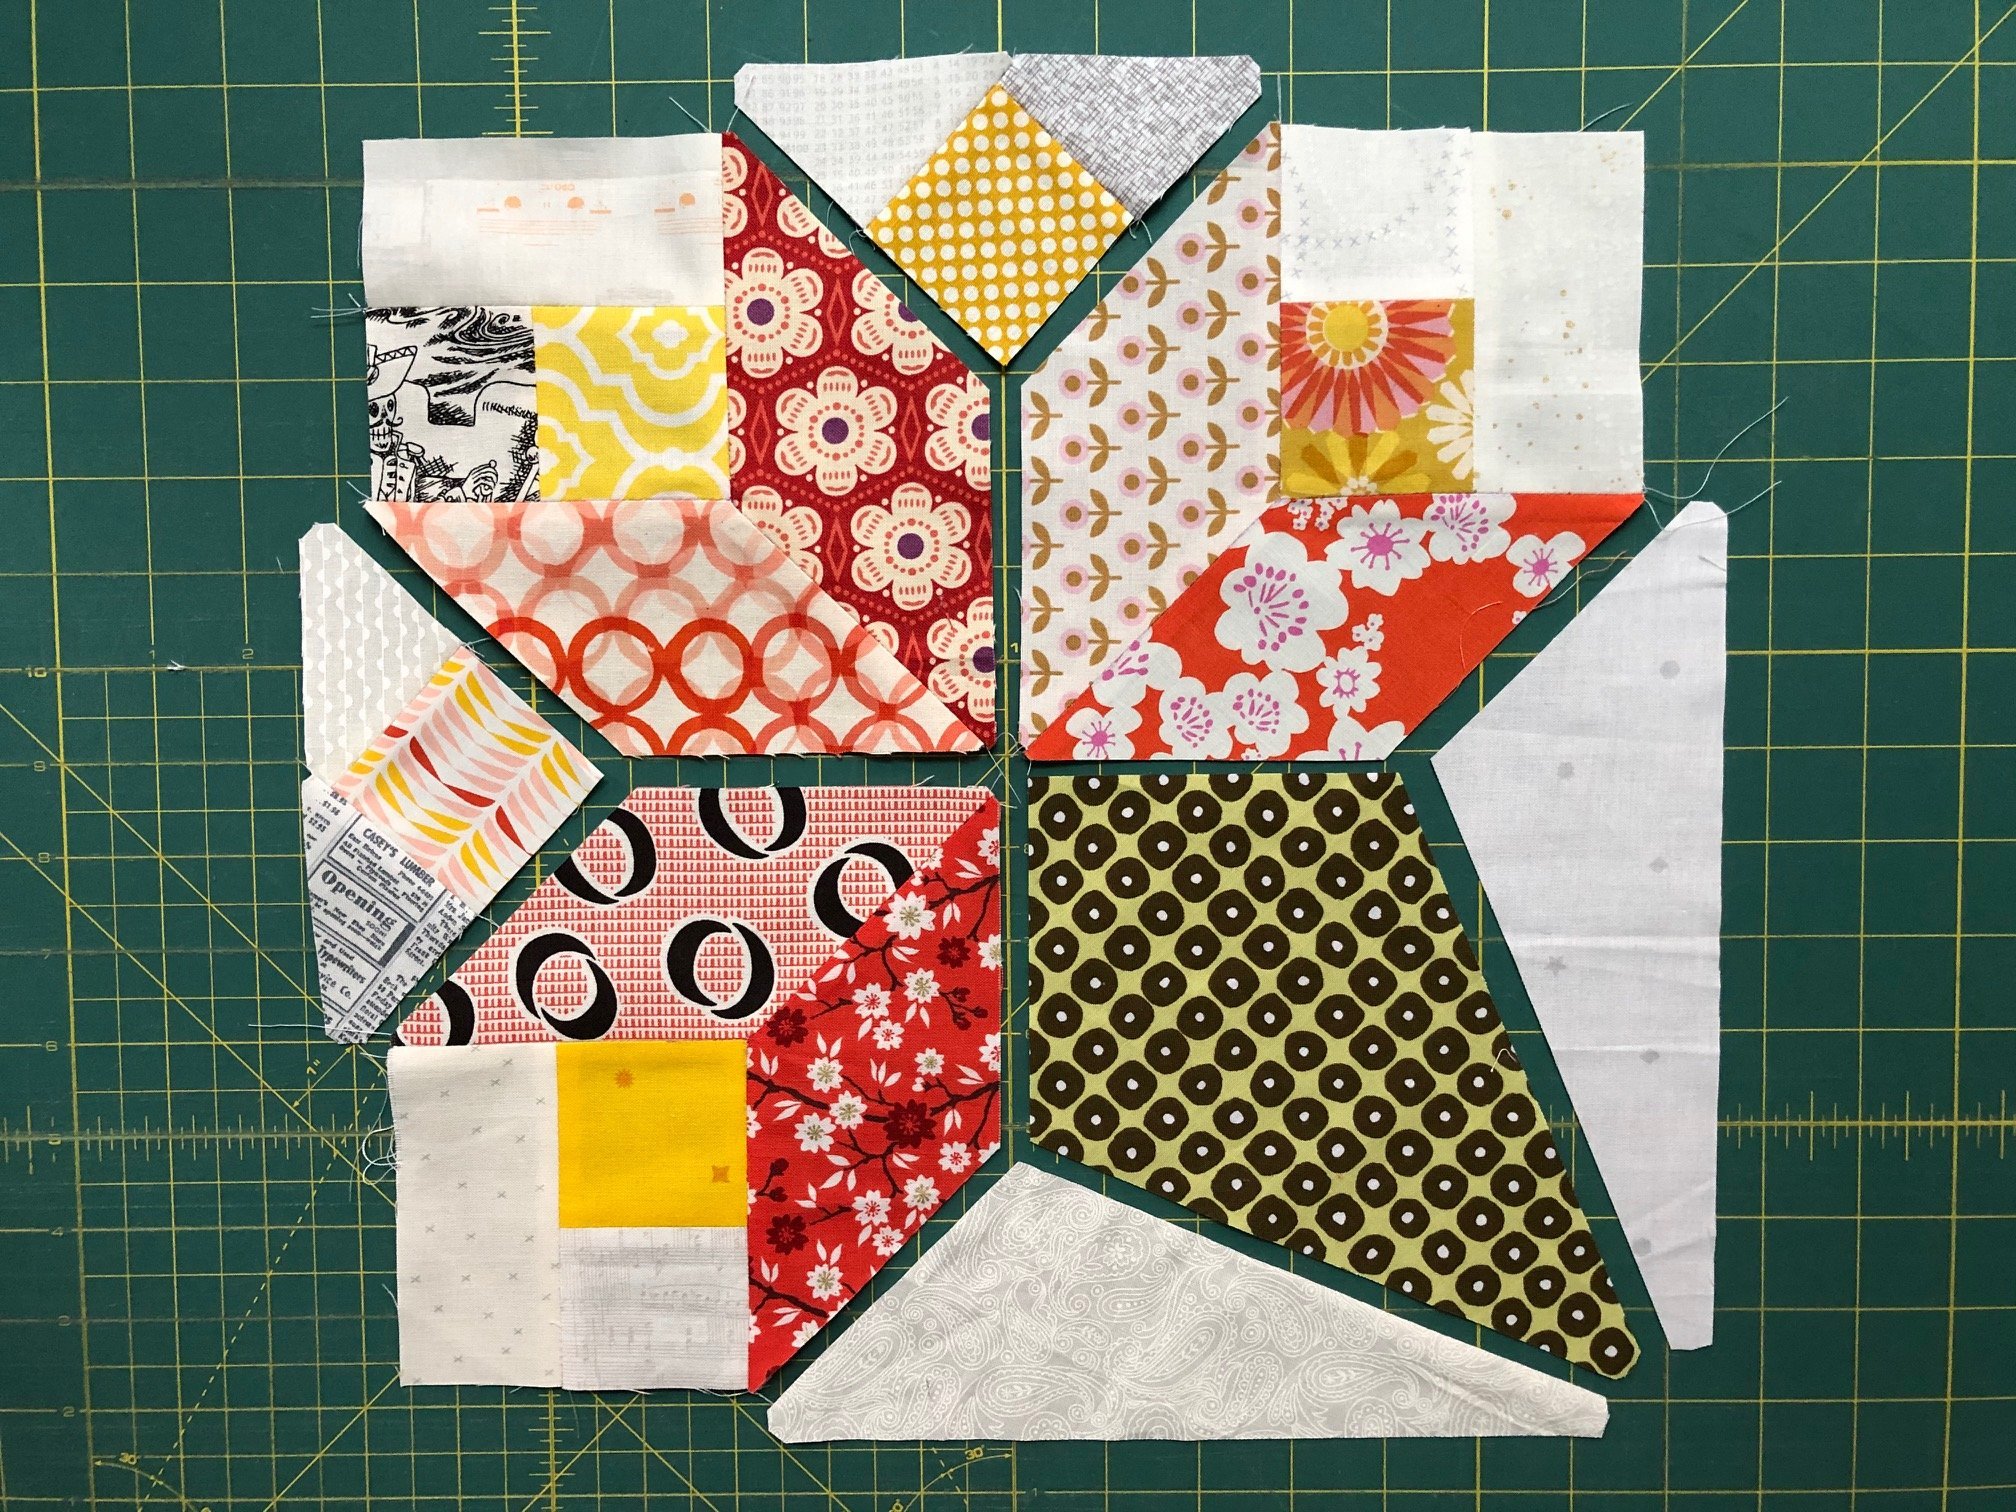
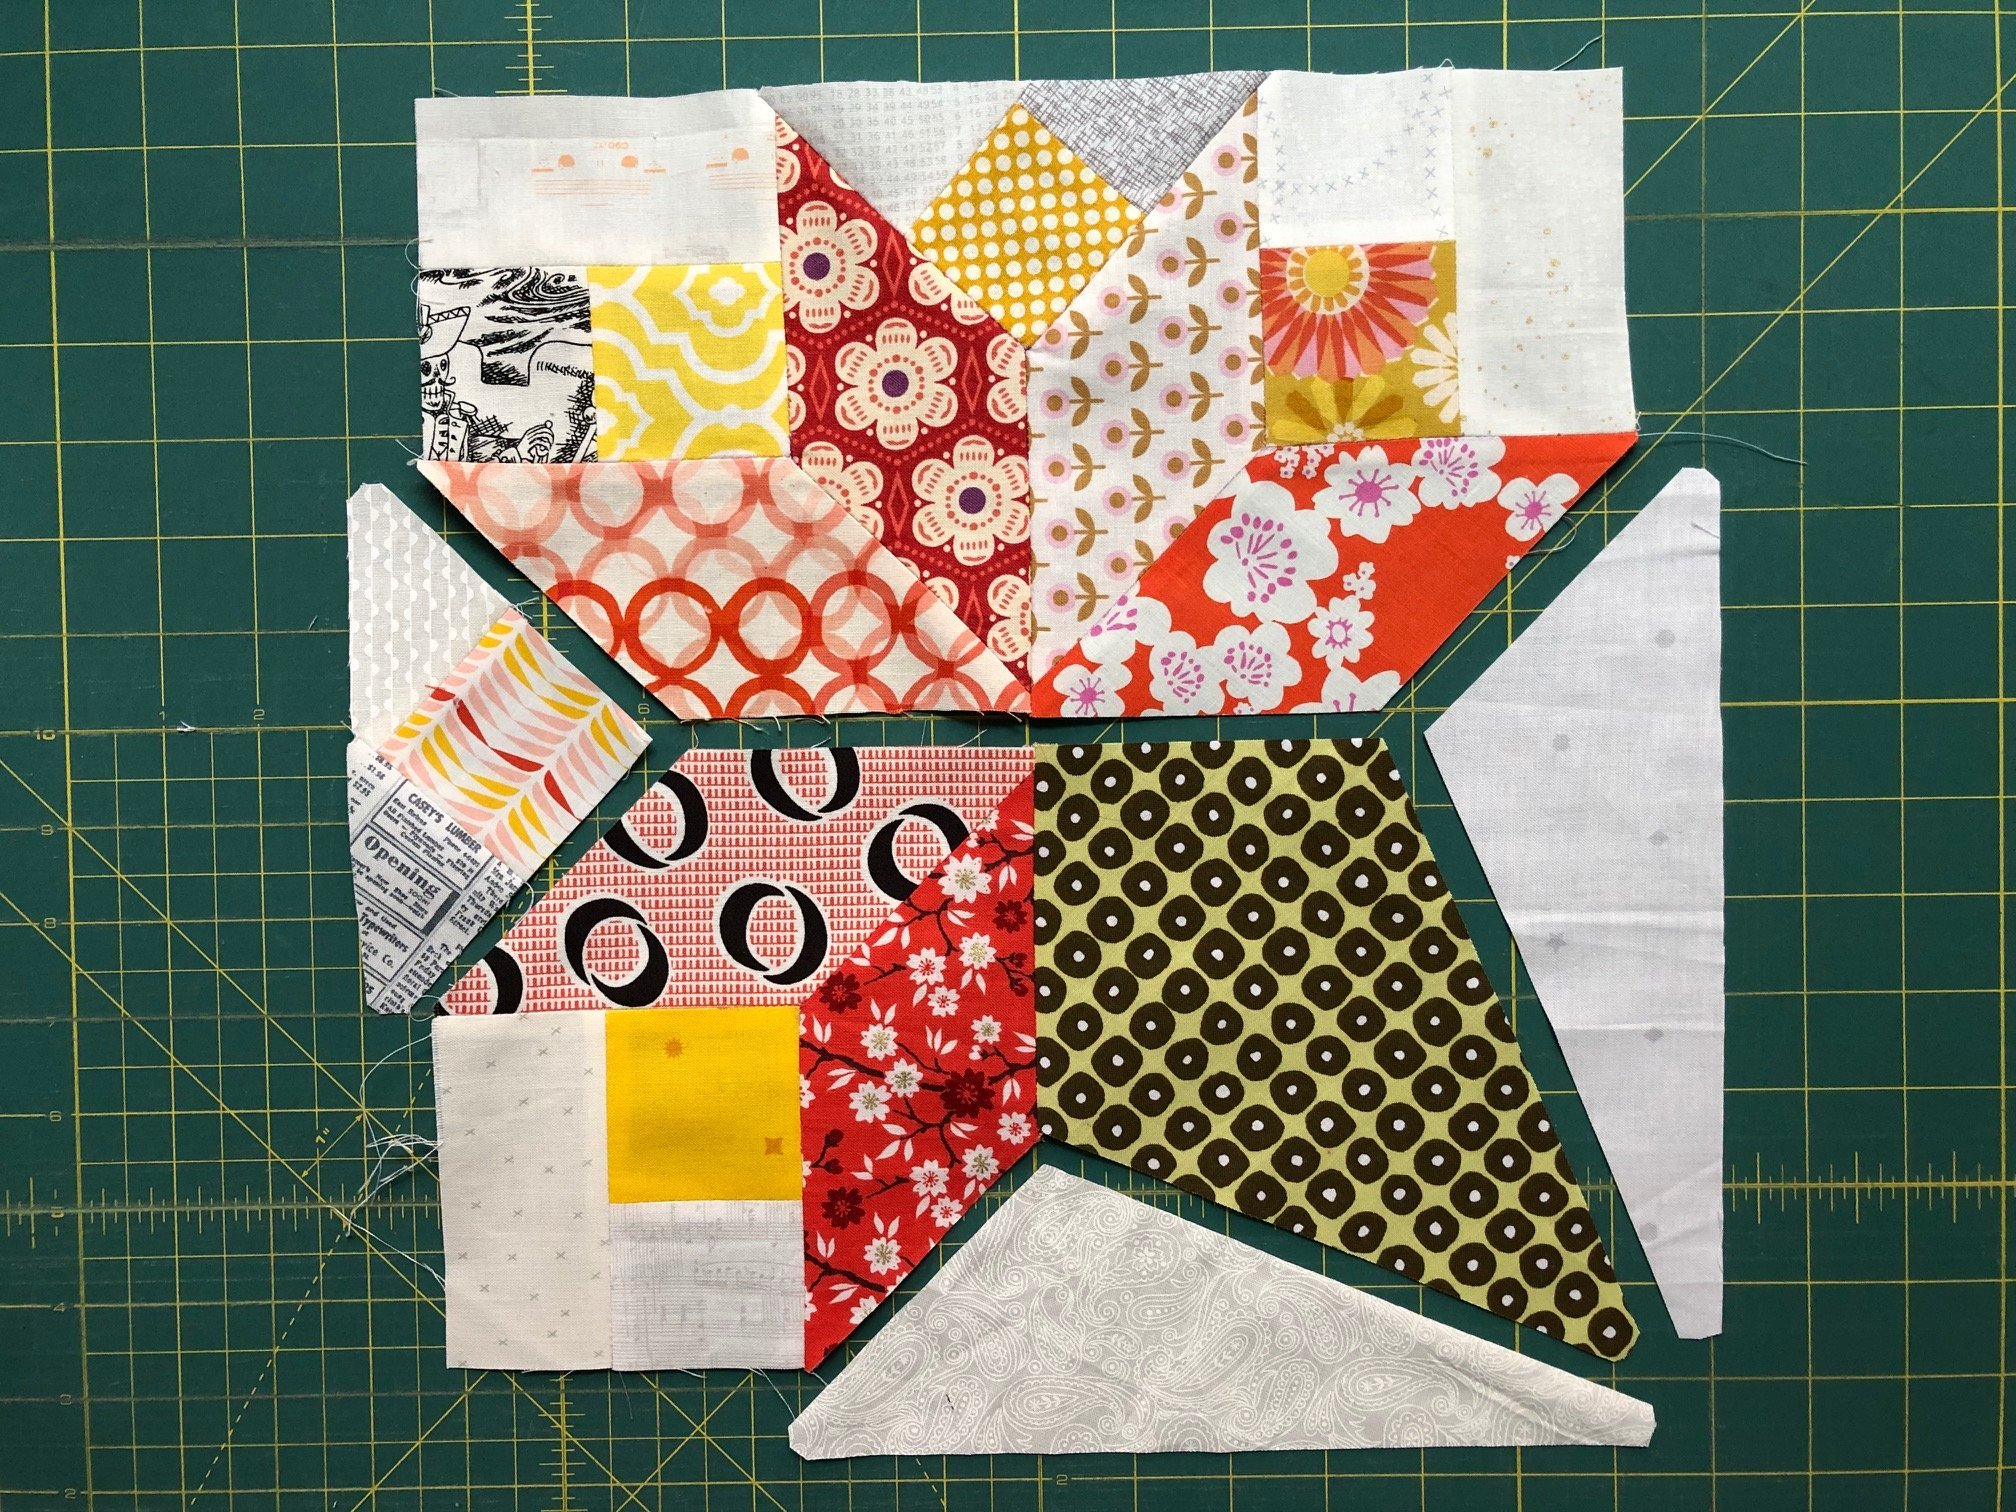
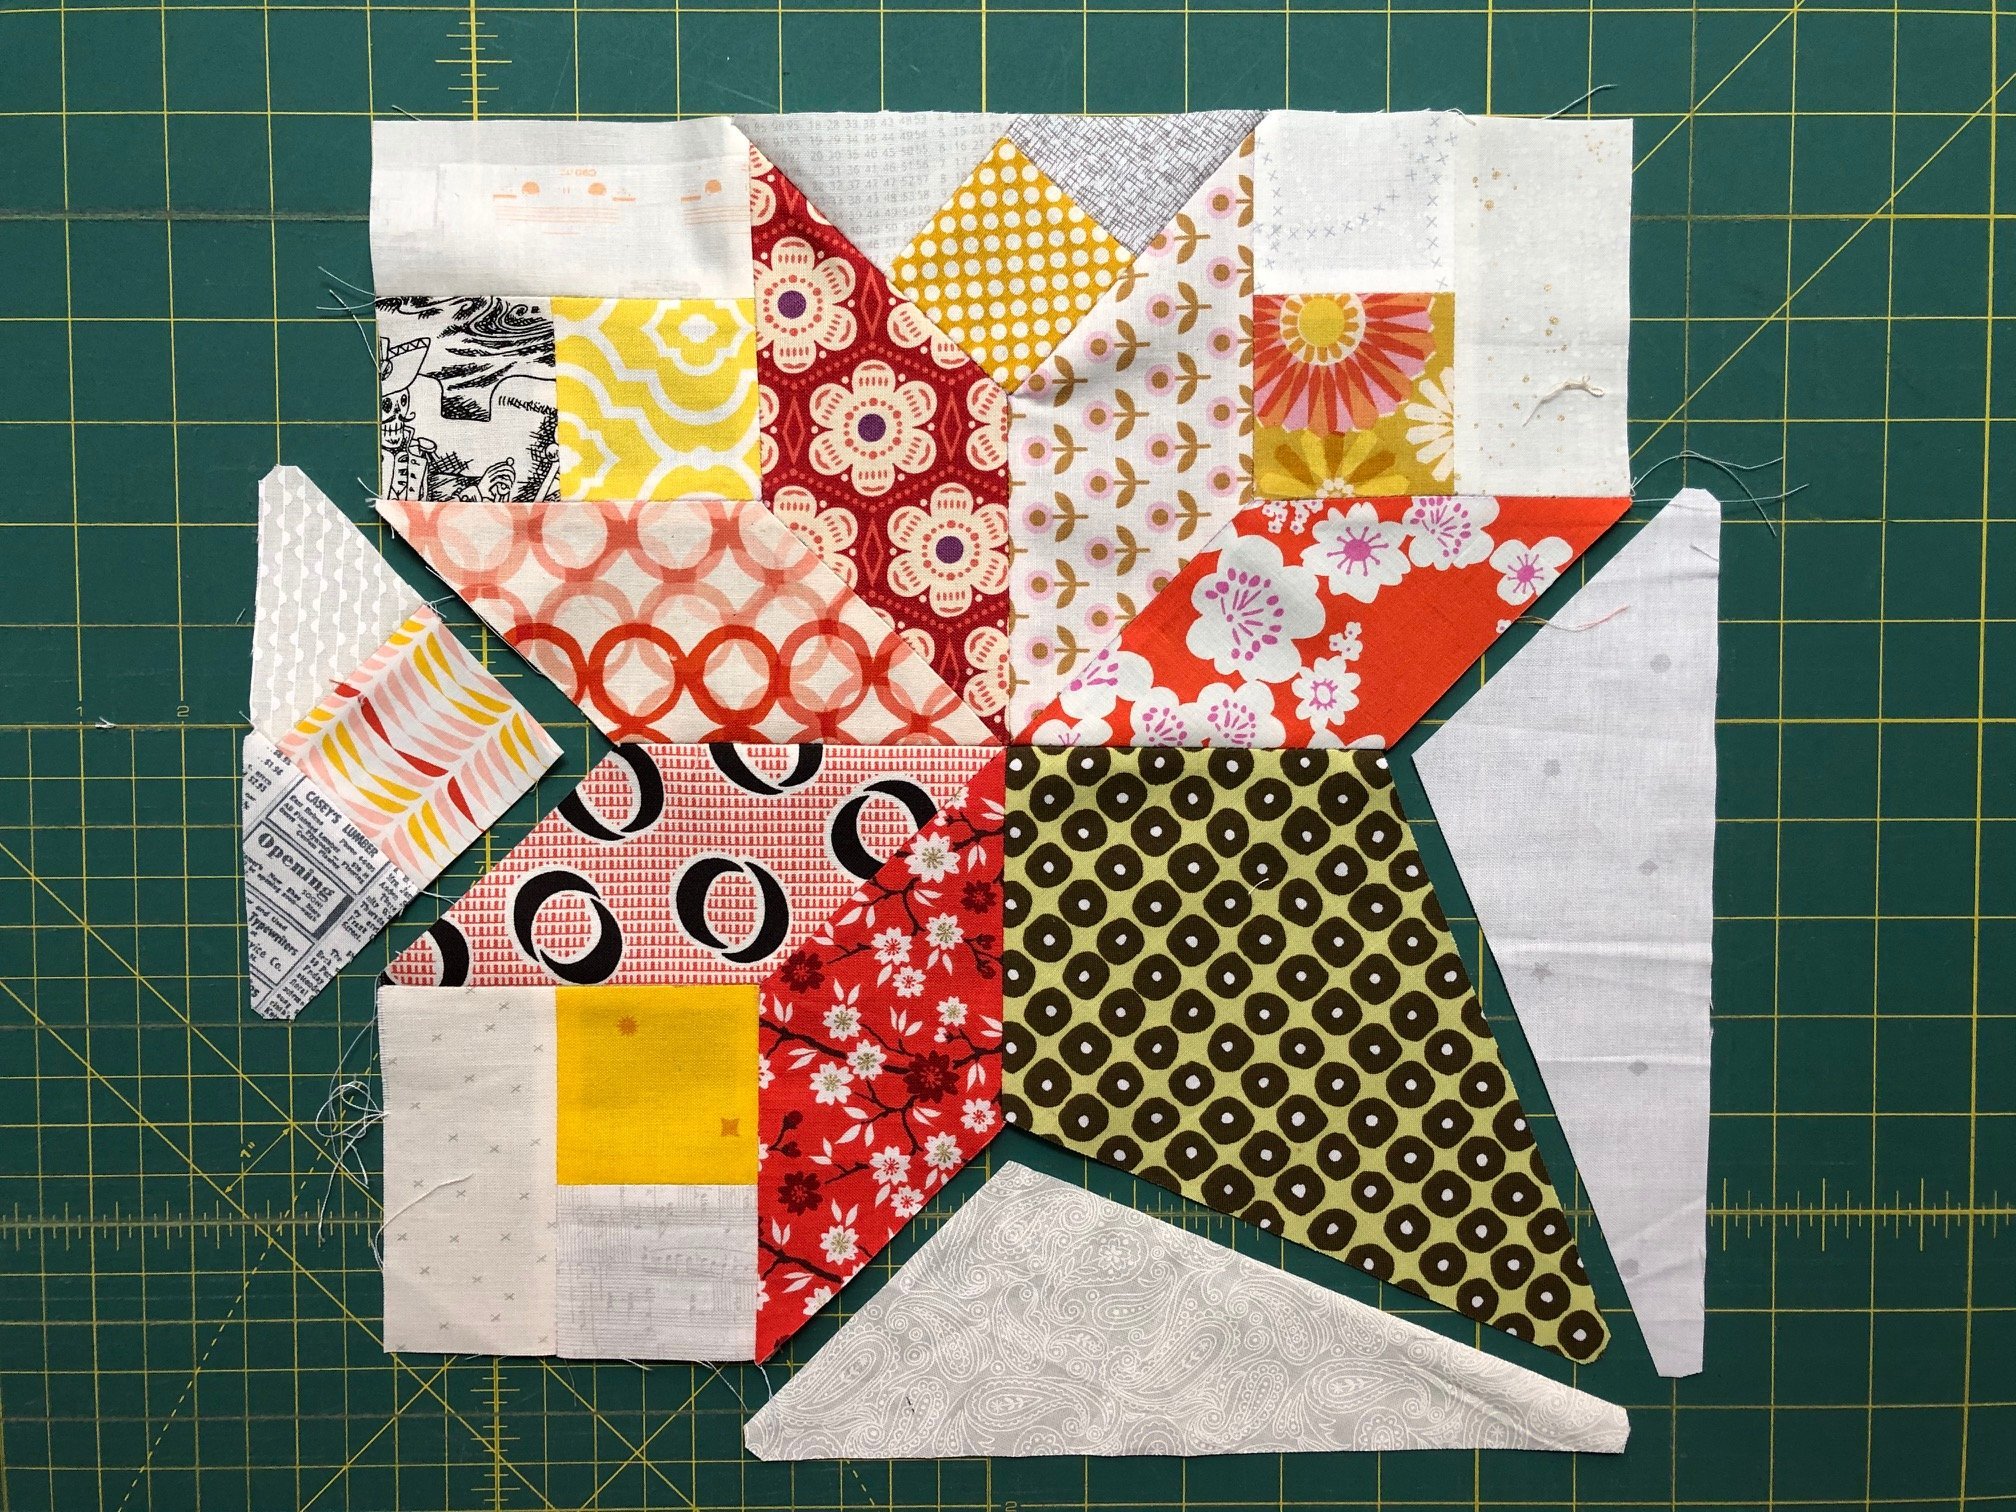
Once you’ve cut out the pieces, lay them out according to the diagram for the Brides Bouquet patchwork block. You can then check again that you like your layout with the various fabrics.
Tip: Take a photo of your layout on your cell phone. This allows you to check at each stage that the layout is correct and the fabric prints and colors are in the right place.
We are sewing the Brides Bouquet patchwork block
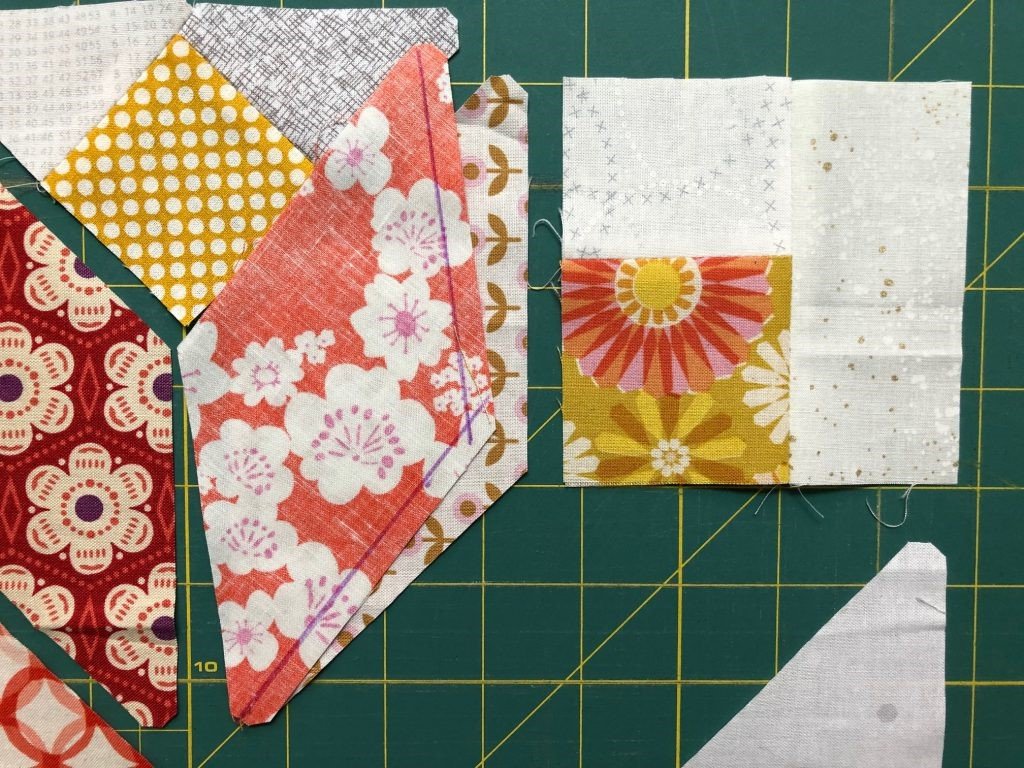
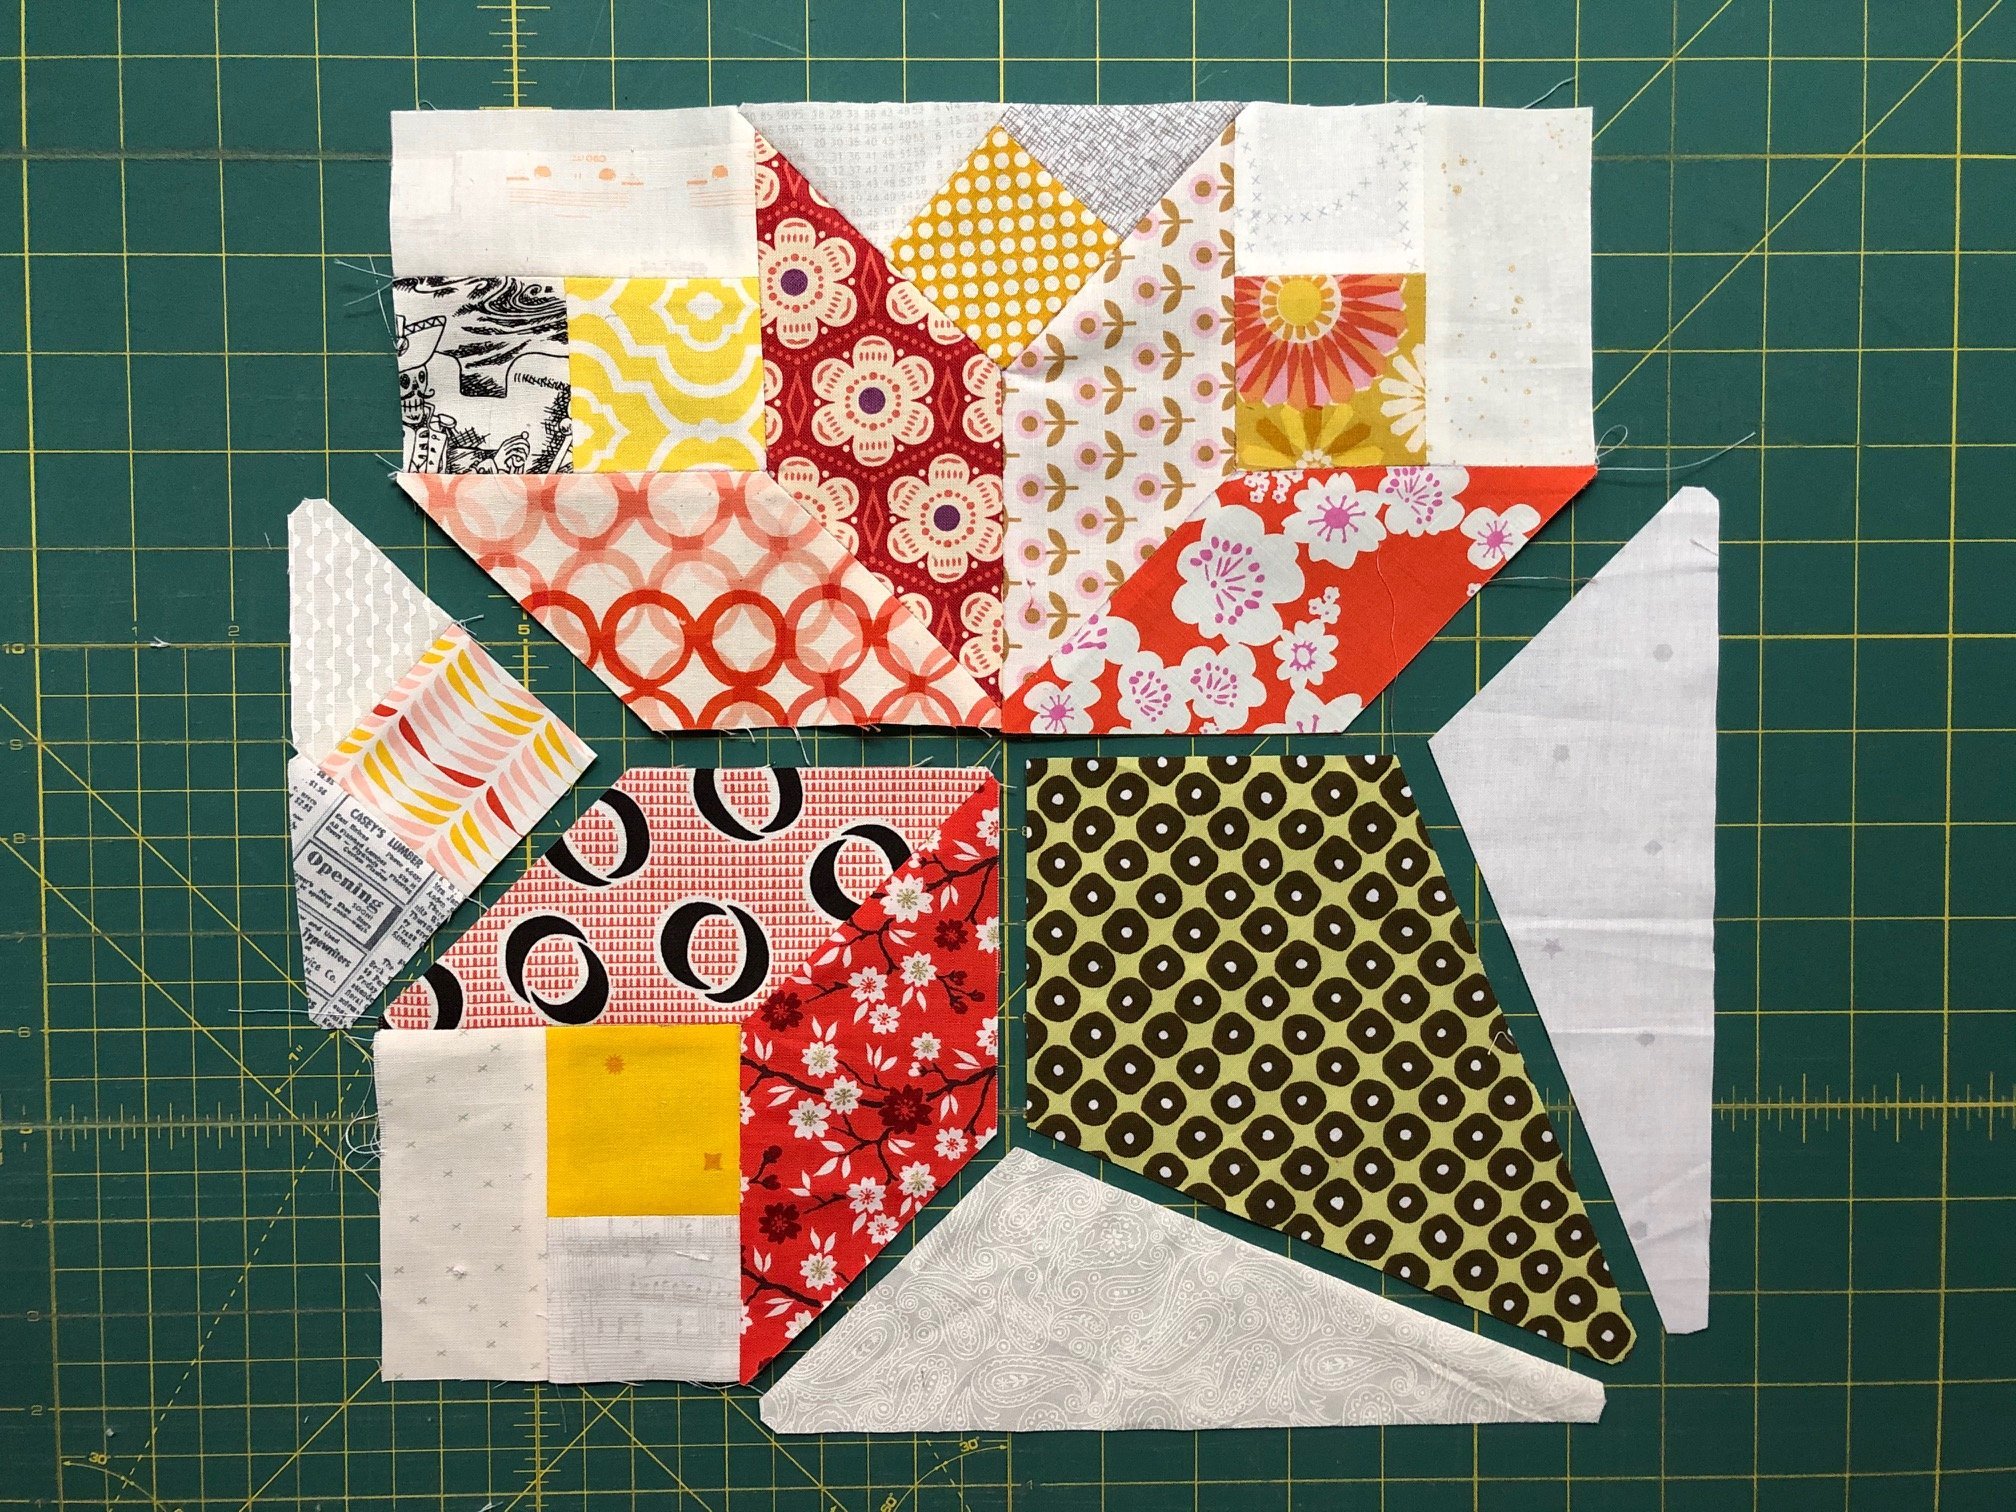
First, I sewed the three outer squares of the patchwork block together. Then I laid them back down where they belong according to the block diagram. I always do this so that I don’t get confused.
The next step is to join the two triangle pieces – each consisting of one square and two triangles – together.
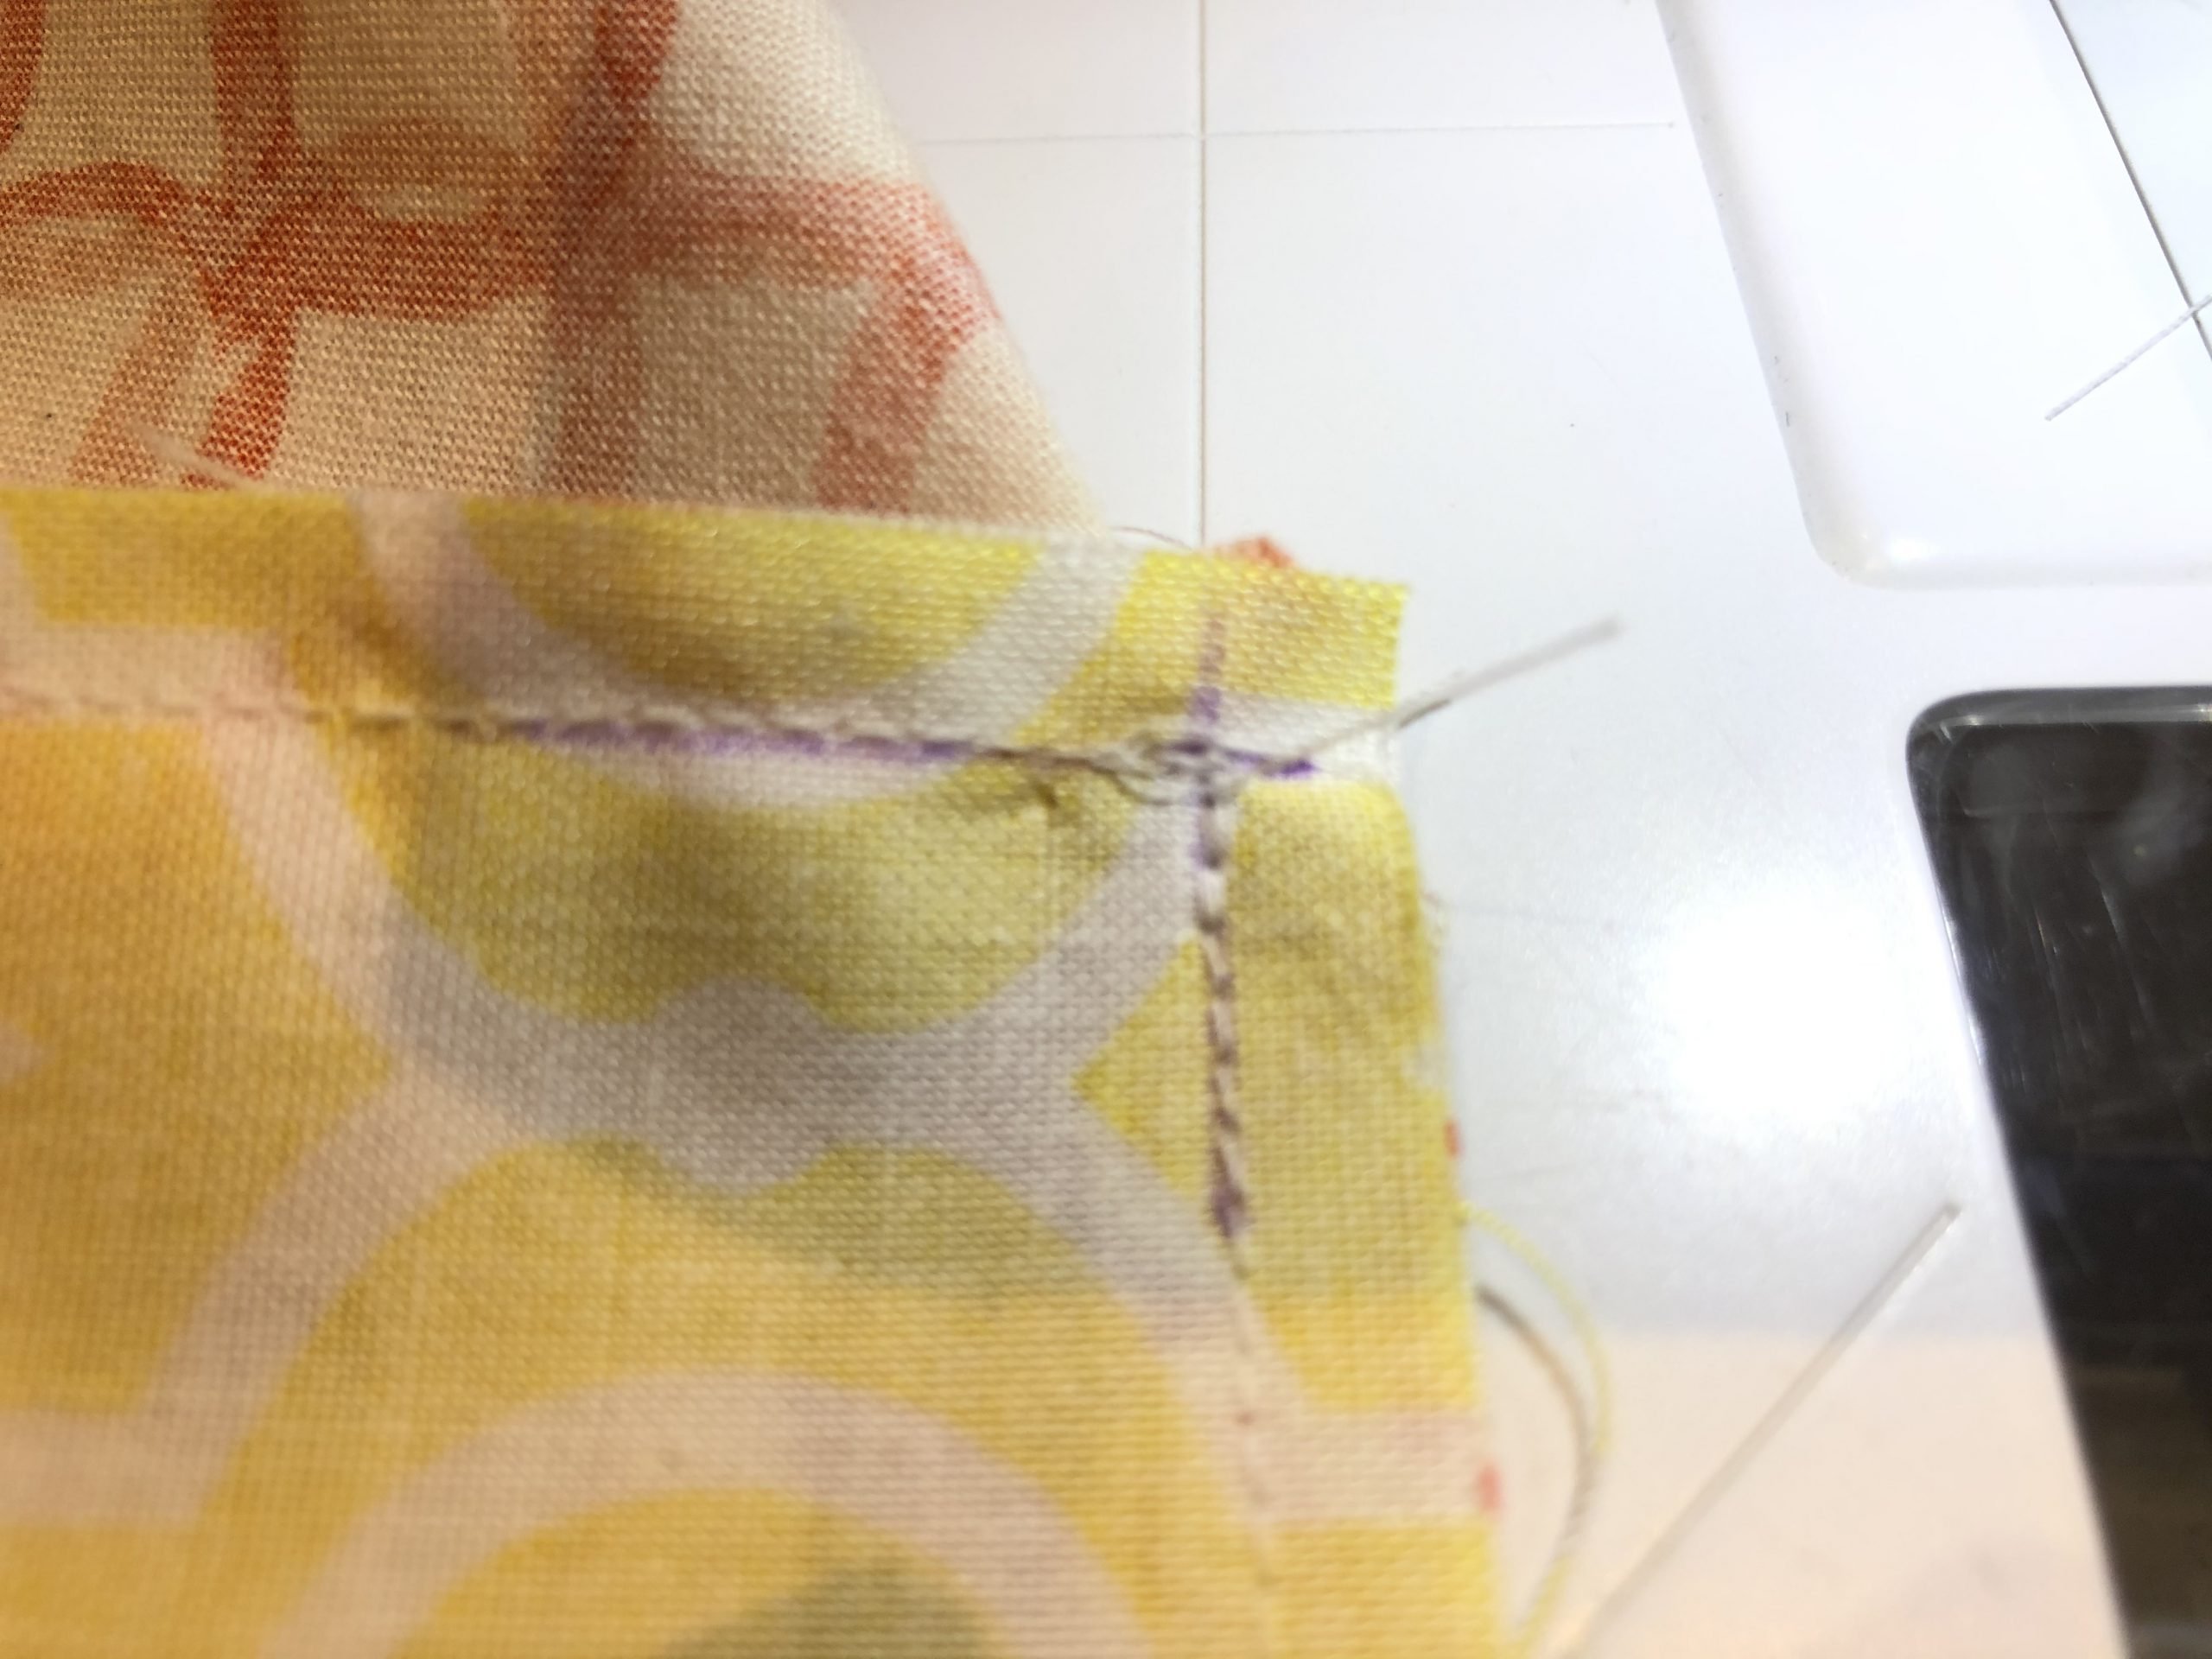
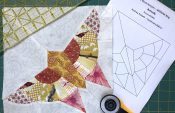
It is now time for the “preparation” of the later Y-seams! As you can see in the picture above, I used a textile marker to draw the seam lines onto the diamond-shaped cut-out pieces. The point where the drawn lines intersect is particularly important. Why? Because you only sew the two pieces you are joining up to this intersection point! Do not sew beyond this intersection point; rather, sew and secure the seam exactly up to this intersection point.
Sew together the other two diamonds in the same way.
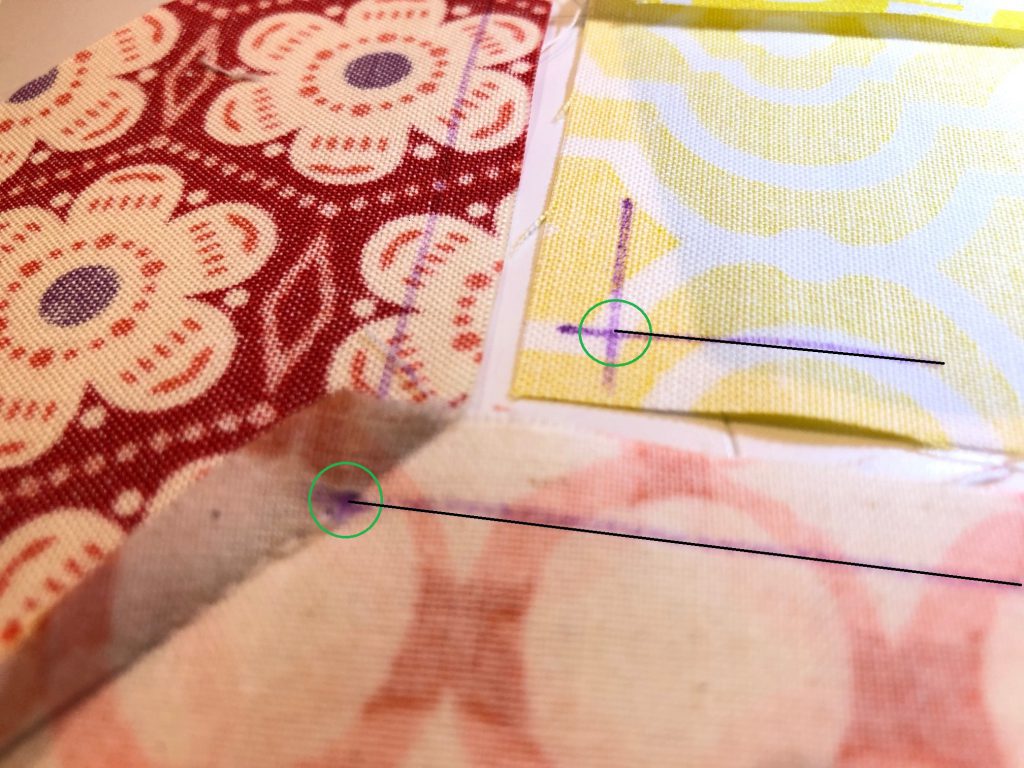
Now sew the square pieces into the diamonds – these are now the ominous Y-seams. To help you position the points of the Y-seam precisely, draw the seam lines onto your square piece. This short indicator line is sufficient, as you can see in my picture above. In the picture, you can also see the point on the diamond that you sewed up to when closing the seam.

The intersection point on the square that you drew before must now be lined up with the intersection point on your diamond piece and pinned. First, sew one seam line up to the pinned intersection point.

Then turn the two pieces so that the next seam line on the square piece can be pinned to the other diamond piece and then sewn together. Here too, the intersection point on the square piece is lined up precisely with the one on the diamond.
Once again, close and secure the seam line up to the intersection point.
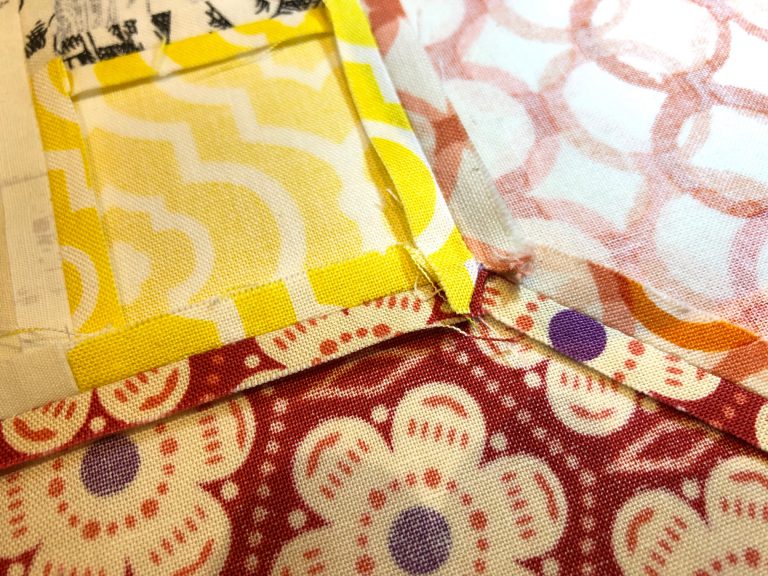
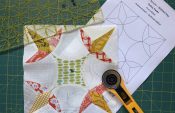
Once you have sewn up the seams, it is best to iron them open. When these Y-seams are ironed open, it creates these pointed overlaps.

And this is what it looks like when you have sewn your Y-seam with pinpoint accuracy. Not that difficult, right?!
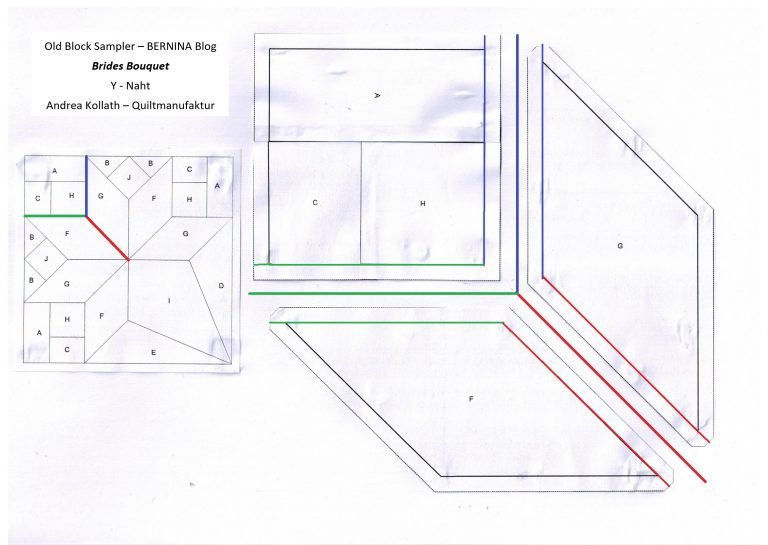
Here again a schematic drawing of what – and where exactly such a Y-seam is created. I hope that the principle is more understandable.
OK, so far so good with your Brides Bouquet patchwork block and the first closed Y-seams!
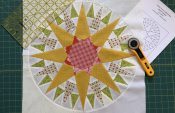
Next, close the seam between the two top diamond pieces. Here too, you first draw the seam line onto the diamond with the intersection point. Then once again close the seam up to the marked intersection point. Sew the triangular piece into position using the same method for Y-seams as described above.
The next step is to close the panel seam of the patchwork block between the bottom left diamond piece and the bottom right “handle” piece. Here too, only close the seam up to the intersection point so you will be able insert the large triangle piece made of the background fabric later on.
Next, close the panel seam between the top and bottom part of your block. Pin the middle so that all the seam lines meet up neatly. Remember to only sew up to the two outer intersection points, as you still have to sew in the small left-hand triangle piece and the large one at the right-hand edge!
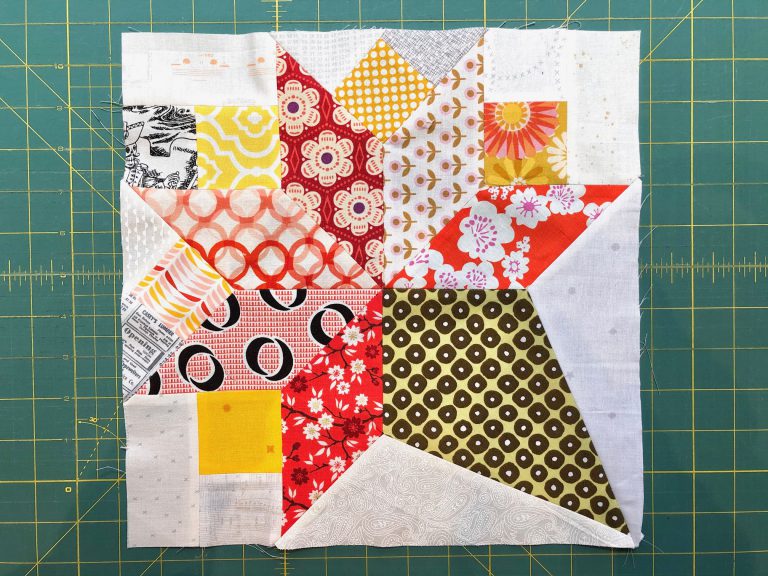
And that’s it!
When you’ve sewn in the last three pieces, your patchwork block is finished! YEAH!
Brides Bouquet is such a nice patchwork block, don’t you think? And it gets quicker and easier to sew with every closed Y-seam. I’m sure you now have the method of sewing these seemingly complicated seams down pat and that you have lost any initial awe.
You can now put this block away safely and get excited about what I’m going to show you next.
Or maybe you’ve got a taste for this stunning block and want to make a few more. That would make a nice quilt!
Show me and everyone else your blocks!
If you are on social media, I would appreciate it if you used the following hashtag: #BERNINAOldBlockSampler
We will then be able to see your work on Facebook and Instagram at the following links:
Instagram: https://www.instagram.com/explore/tags/berninaoldblocksampler
Facebook: https://www.facebook.com/hashtag/berninaoldblocksampler
If you are not on social media, you can still show your blocks by posting them in the community section of the blog! It is important that you select the “Old Block Quilt-Along” as the category. This is what it looks like:
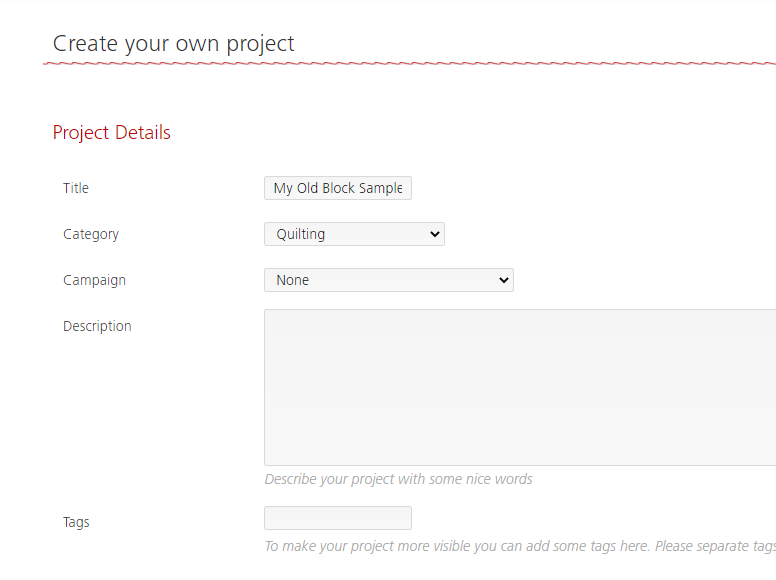
Selection of the campaigns in the community section
In addition to my website, Quiltmanufaktur, you can also find me on Instagram and Facebook.
I’m really looking forward to seeing your blocks!
All the best,
Andrea
I am going to start this project on 12-26-2021 and I will catch up before April. Question I have can I make this at 75 % due to size constraints I have in my sewing area.
Feel free to alter the size if needed! Just remember that with smaller pieces, the blocks will get harder to do and Blocks like the Tulip in Vase, with its thin stems, might be very hard if the stems are even thinner. But since you dont have to do all the blocks to join the raffle at the end, you can leave out blocks like this one!
Happy sewing, Ramona from BERNINA International
When will the next block be published? Will it be possible to email it to me?
Dear Maritha,
We wont email users directly with an update, since you can sign up for the Blog Newsletter and will get notified there. Feel free to register here!
Best regards, Ramona
When do you publish the second block?
Dear Maritha,
Since our author is German, it takes a few days to translate and review the translation before it gets published on the English blog. As soon as its online, you can find it on either the front page, the Old Block QAL Overview or you will get notified by the newsletter! Thank you for your patience 🙂
Best regards, Ramona from BERNINA International
I seem to have trouble posting
Dear Carolyn,
I am happy to hear you want to join the Quilt-Along. Where exactly do you want to post? Do you want to post your block in the community section on the Blog or on facebook/ instagram?
Best regards, Ramona from BERNINA International
I hope I have signed up to do the quilt along properly.
just saw this on face book. I would like to join.
I would love to join.
How do I find instructions for block 2, quilters delight?
Dear Brenda,
Since our author is German, it takes a few days to translate and review the translation before it gets published on the English blog. As soon as its online, you can find it on either the front page, the Old Block QAL Overview or you will get notified by the newsletter! Thank you for your patience 🙂
Best regards, Ramona from BERNINA International
So how do we know where the second block is released? I am seeing it on Instagram for the international group but it does not translate to English.
Dear sewhappy,
As you already have found out, it is first published by the autor in German, since she is from Germany. That is why you can see it on Instagram. As soon as she has finished the German article, our team is working on the translation. This takes a few days until its finished and reviewed. Thank you for your patience, we know everyone is very eager to sew !
Best regards, Ramona from BERNINA International
This is my first quilt-along. I am very excited to get started, and committed to this project. I remember seeing a pattern for this block in a magazine while I was visiting my Gramma many years ago. A great memory.
Dear Carin,
What a lovely memory! I am excited to see how your block is going to turn out!
Me encanta la idea y lo voy a coser y mardar una fotografia y ver el resultado final
Hi, I know Some blog sites make their patterns and release them on both A4 and letter size. The A4 is definitely smaller than letter size.I cannot start the project just yet due to a shoulder injury, but am sorting out fabrics in the ready. 🙂
I am looking forward to how this turns out.
My block ended up at 11 inches square. Can you indicate a size on a piece like J. my J was 2.25 square. or can you put a 1 inch square in the pattern page so we know we are printing the right size. I did not make any changes to the size before printing. Thank you.
Hi, I had fun making this but mine turned out just a tad under 12” ?
Dear Karen, just under 12″ with or without sewing allowance?
If its withouth, in order to sew it together with the coming blocks, you can use a little bit of that sewing allowence to make it 12″. Just make sure you write down or remember that you have to use less sewing allowence on this piece when sewing it to the others at the end of the Quilt Along.
The complete block was just under 12″ once completed and I did include the sewing allowance when cuttings out. I am guessing from others comments that the PDF pattern prints differently on each persons printer therefore a 1″ square would be useful on the next pattern. Perhaps they could make a quick change to the current pattern to include a 1″square so we can have another go, rather than adding a border next year. I’m in NZ so not sure if our A4 is bigger or smaller. I would have though A4 was a standard size worldwide. Thanks for answering so many questions.
Dear Karen,
I assure you that there will be a square on the next pattern, cm/inch or both, however, I cannot change the current pattern at the moment. I got word from Andrea that the piece H is 2,5¨x2,5¨ with sewing allowance included. Hope this will help you to check the printing size!
And you are welcome!
Dear Una, I already contacted Andrea and she will add a square to check the print size next time. This could also be because Europe and US use different sized A4 paper. US is smaller, and that probably has changed the size. I am sorry to hear it turned out 1″ too small. Is it possible to maybe add a little border?
For checking the size for this block, I suggest measuring the pieces wich are on one side of the block, for example the lenght of A and the base of D which together are on the right side of the block. These two lines without sewing allowance should be 12¨ together.
Mine was 11” square, too.
Dear phyllisb, I am sorry to hear yours turned out a bit too small as well. Please consider the suggestions already made in the comments on how to solve the printing issue, how to check the pattern and how you could still use your wonderfull block which is a bit too small. The next block will have a size check square on it in order to check the printing size before cutting out your fabric.
Best reagards, Ramona
I am realy going to try this .. it is beautiful
Straight of Grain does not seem to be marked on the pattern pieces. Your blocks might be more flat and less ‘wavy’ if you look at the block diagram, note the outside edges of the pieces, and mark them ‘straight of grain.’
Let the fun begin. Mine is more of a question, is it possible to add a one inch square to the pages with template printouts? I learnt with the last event that there is a difference sometimes. Thank you.
Dear Fonda, thank you for the feedback, I just answered bunty who wished for the same thing. See my suggestion of how to check if its the correct size there.
Happy sewing! Ramona
quick polite request could the future paper pattern please have a scale on the side so we can double check that the print out size is correct, as this way we shall only find out once the block is ready is there was any error in the printing.
That would indeed be very helpfull, I will forward this to Andrea. For now, try to measure the pieces wich are on one side of the block, for example the lenght of A and the base of D which together are on the right side of the block. These two lines without sewing allowance should be 12¨ together.
Hope this helps, Ramona
I’ve just measured both pieces as recommended and they measure a bit over 11.5 “ without seam allowance so there is an error with the PDF when printed.
Dear Karen,
I suggest you check which format your printer uses, since A4 in Europe and A4 in US are not the same size. Or maybe your printer makes it smaller because he leaves a border around it, so check if it prints the full size without a border. If these suggestions dont work, use the scaling option when printing and increase the percentage over 100%
This is a bit of trial and error, so you will have to print, check, adjust the scale, print again.
If you have enough sewing allowance, you can use it to adjust your block to 12″. Just sew it together by using less of the seam allowence then you do with the upcoming blocks. You might want to write that down or make sure to remember to adjust your first blocks seam allowence when you sew all your blocks together next year.