 BERNINA Corporate Blog -
Andrea from Quiltmanufaktur and author for the German BERNINA blog is your guide for this fantastic quilt-along over the next 12 months. Together, you will sew classic patchwork blocks and combine them into a sampler. The completed quilt will be traditional, yet modern! The next part has been written and we are delighted that you join this quilt project.
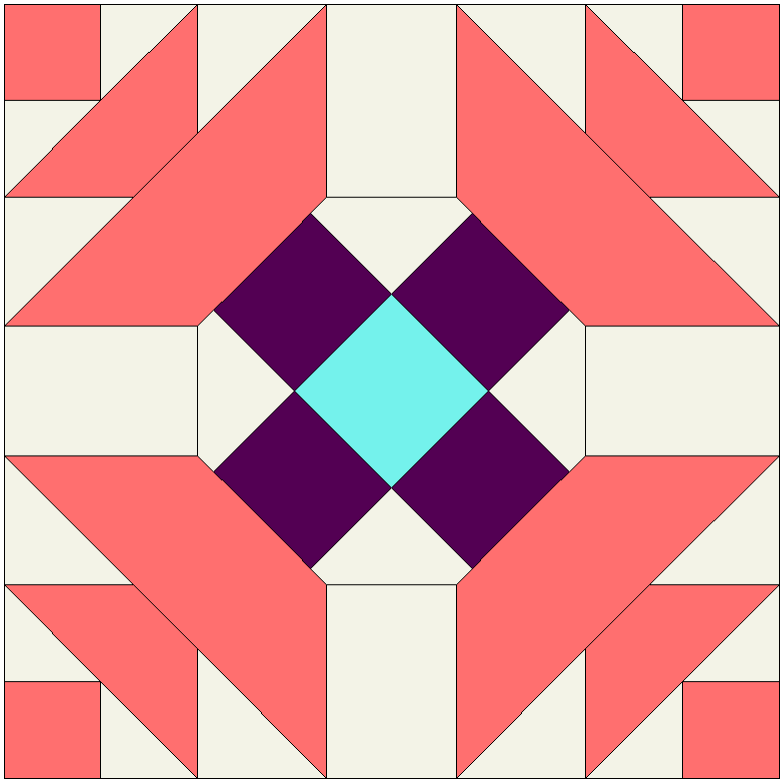
Here it is, the latest block for the Old Block Quilt-Along! Today we are climbing the steps of the altar with the “Altar Steps” block:
This block was similarly published by Prudence Penny (alias Bernice Reddington) in the “Seattle Post-Intelligencer” in 1920.
There is a block called “Steps to the Altar” that looks completely different, but Nancy Cabot wrote something fitting about that block, that also applies to our block: “Here is another of the blocks expressing a religious motif. Since ecclesiastical interpretations in quilting are characteristically picturesque, it is only natural this quilt design should be striking as well as dignified. The arrangement of the completed blocks does much to create an illusion of ‘Steps to the Altar'” (Source: “The Quilter’s Album of Patchwork Patterns: 4050 Pieced Blocks for Quilters”, Jenny Beyer, 2009)
Barbara Brackman, the quilt historian, published a nice anecdote on her blog about Bernice Reddington: The Patchwork Zoo
We are sewing the “Altar Steps” patchwork block
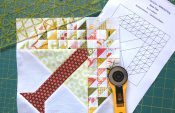
After the last patchwork block, “Mill and Stars”, which was quite easy to sew, today we are bringing you a slightly more complex block! You already have experience sewing Y-seams, and this will come in useful again because the middle section of this block is sewn in using this technique. How? I’ll show you again in the illustrated instructions! As usual, read through the instructions with the pictures carefully first, before you start cutting out.
Download the patchwork templates
This time, there are again only pattern templates, no FPP templates.
For cutting out, I have created two PDF documents to download:
- The first is a coloring sheet. This allows you to try out colors and designs for this block to see what they look like.
- On the second PDF you will find the templates for the block.
On the PDF with the templates, I have put a control square with a side length of 1 inch so that you can check whether your printout of the templates is the right size. It is important to set your print options to “Actual size”.
Here are the downloads:
Cutting out the pattern pieces
You will need to cut out the following number of pieces:
- Template A: 4 x patterned fabric
- Template B: 8 x background fabric
- Template C: 8 x background fabric
- Template D: 4 x background fabric
- Template E: 4 x background fabric
- Template F: 4 x patterned fabric
- Template G: 4 x patterned fabric
- Template H: 4 x patterned fabric
- Template I: 1 x background fabric
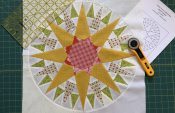
Sewing the “Altar Steps” patchwork block
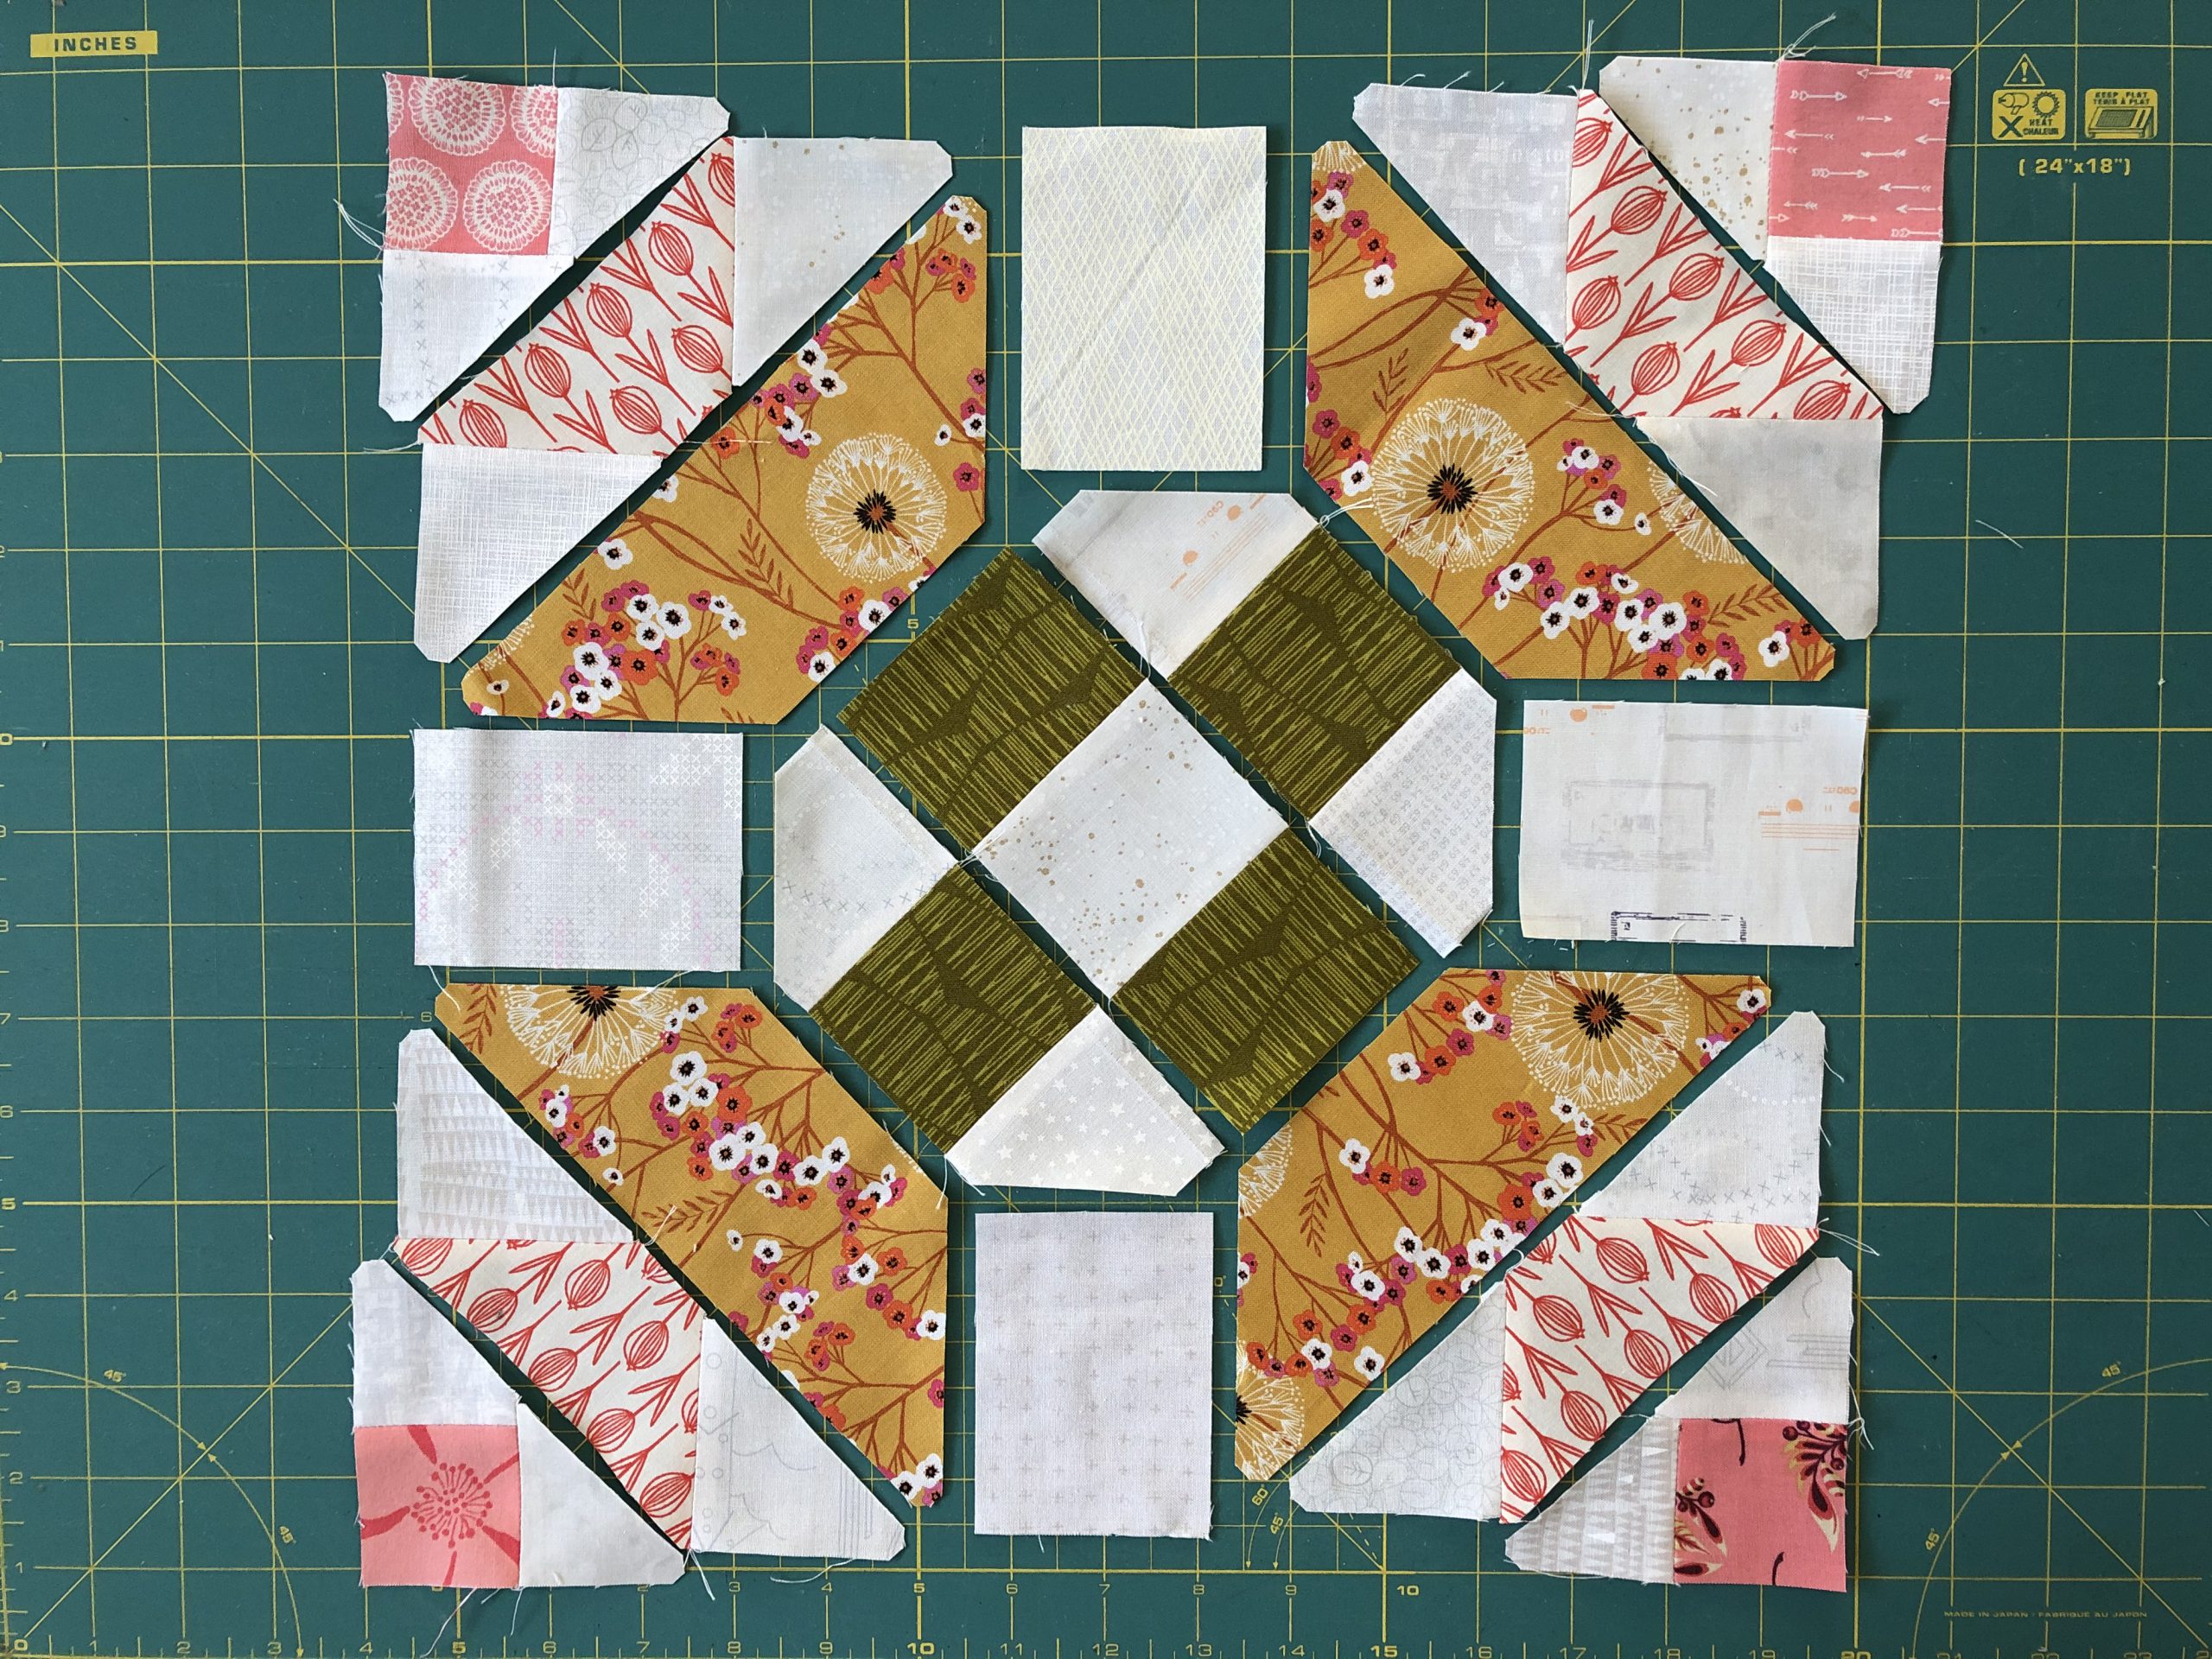
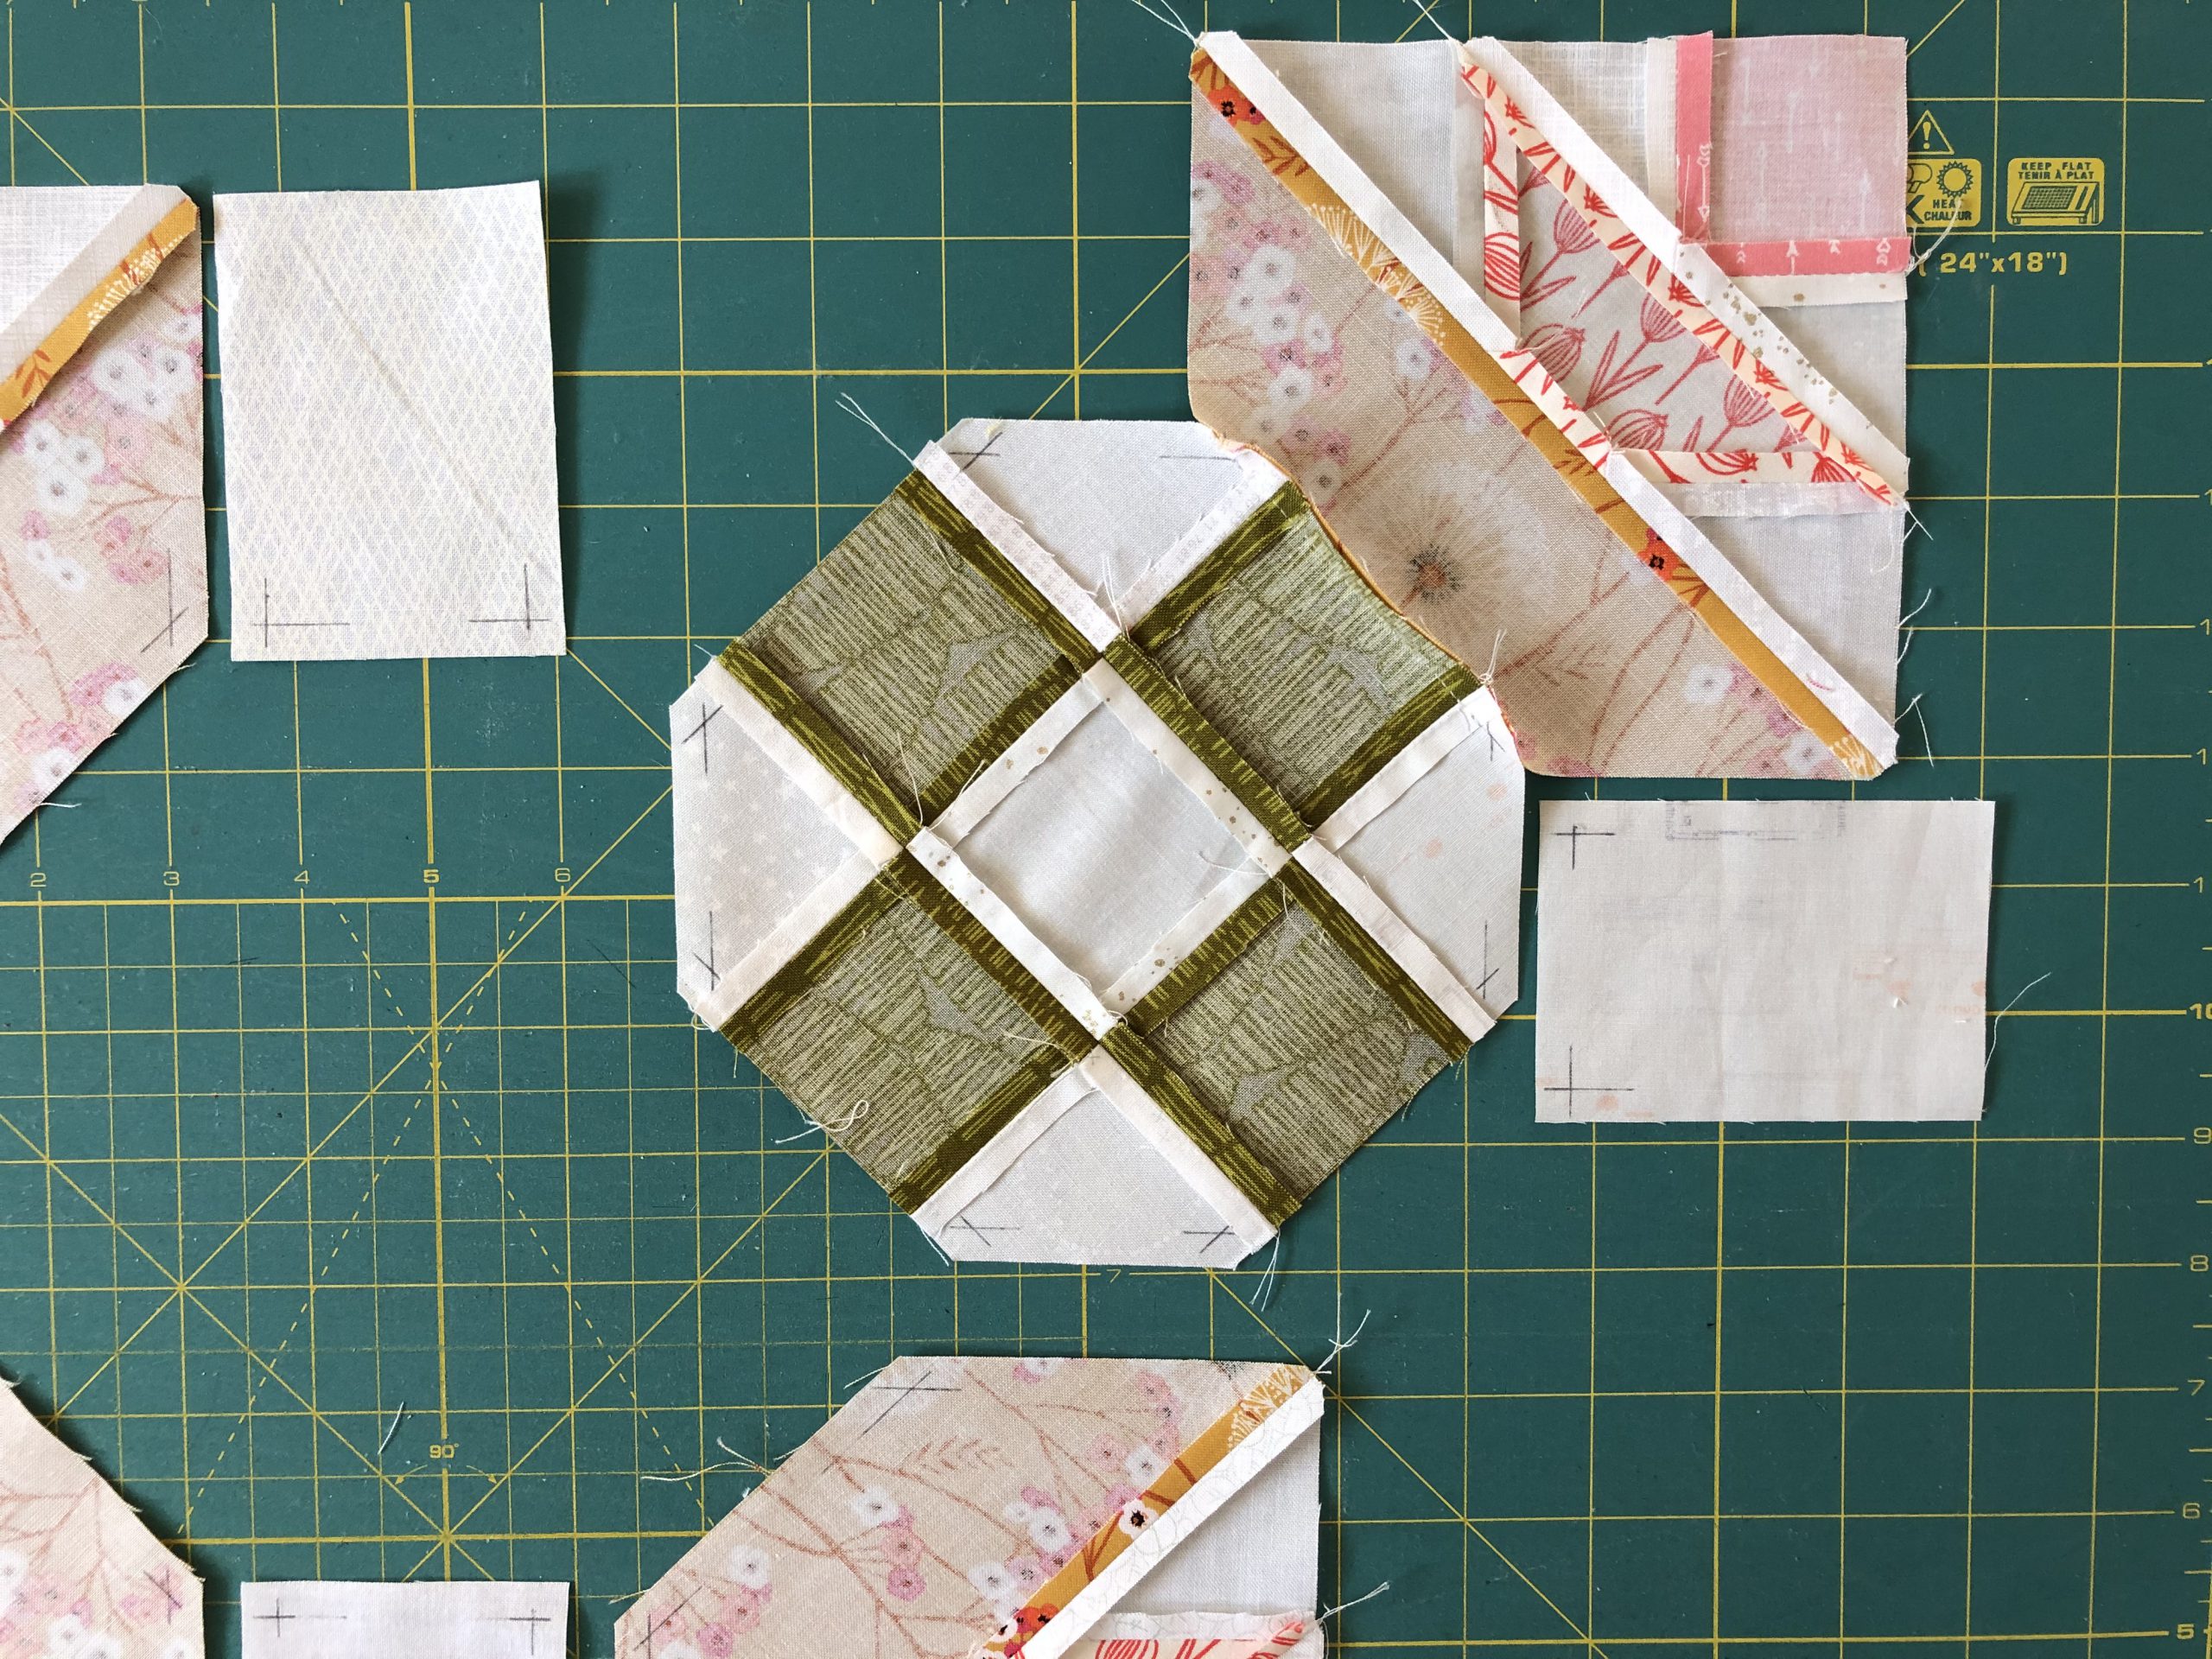
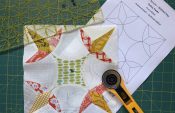
As always, I start by laying out the individual pattern pieces. The block looks more complex at first than it actually is. It consists of four identical segments in the corners, the connecting strips in between and an octagonal middle section.

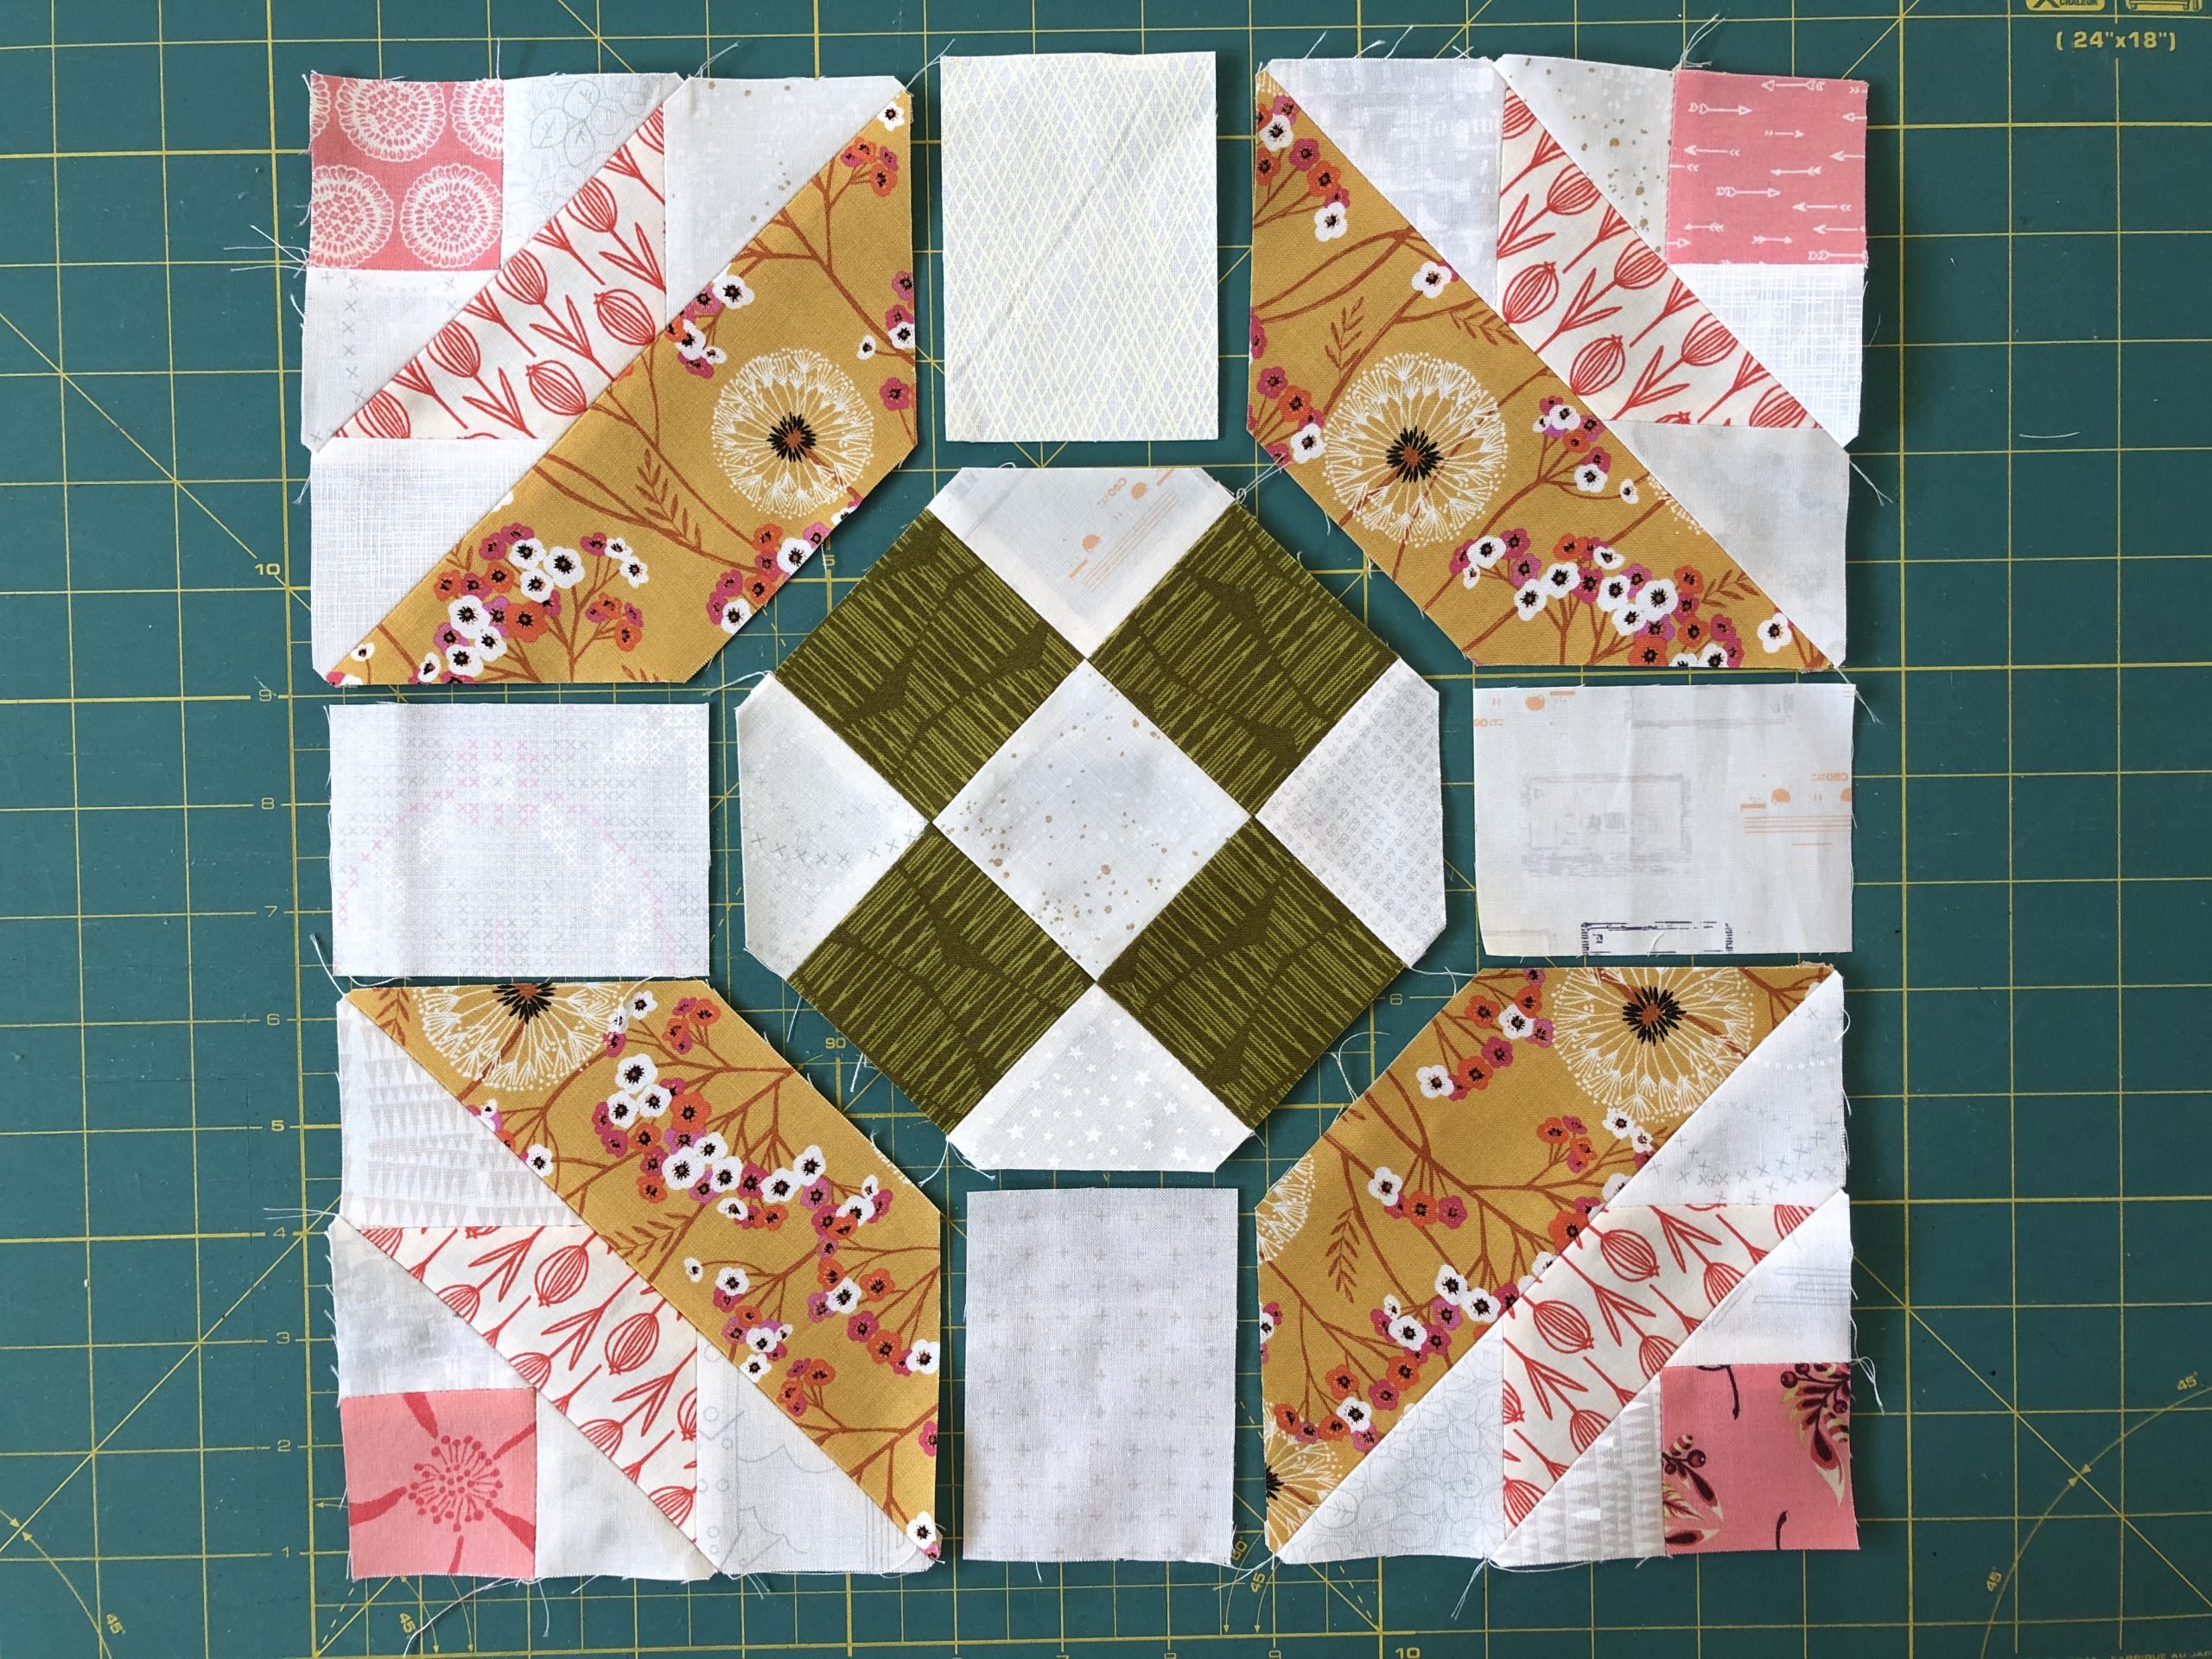
The individual pieces for each of the segments are first sewn together. The first step is therefore to sew together the four identical corner segments with their different triangles in each row. You can also work the middle section in the same step.
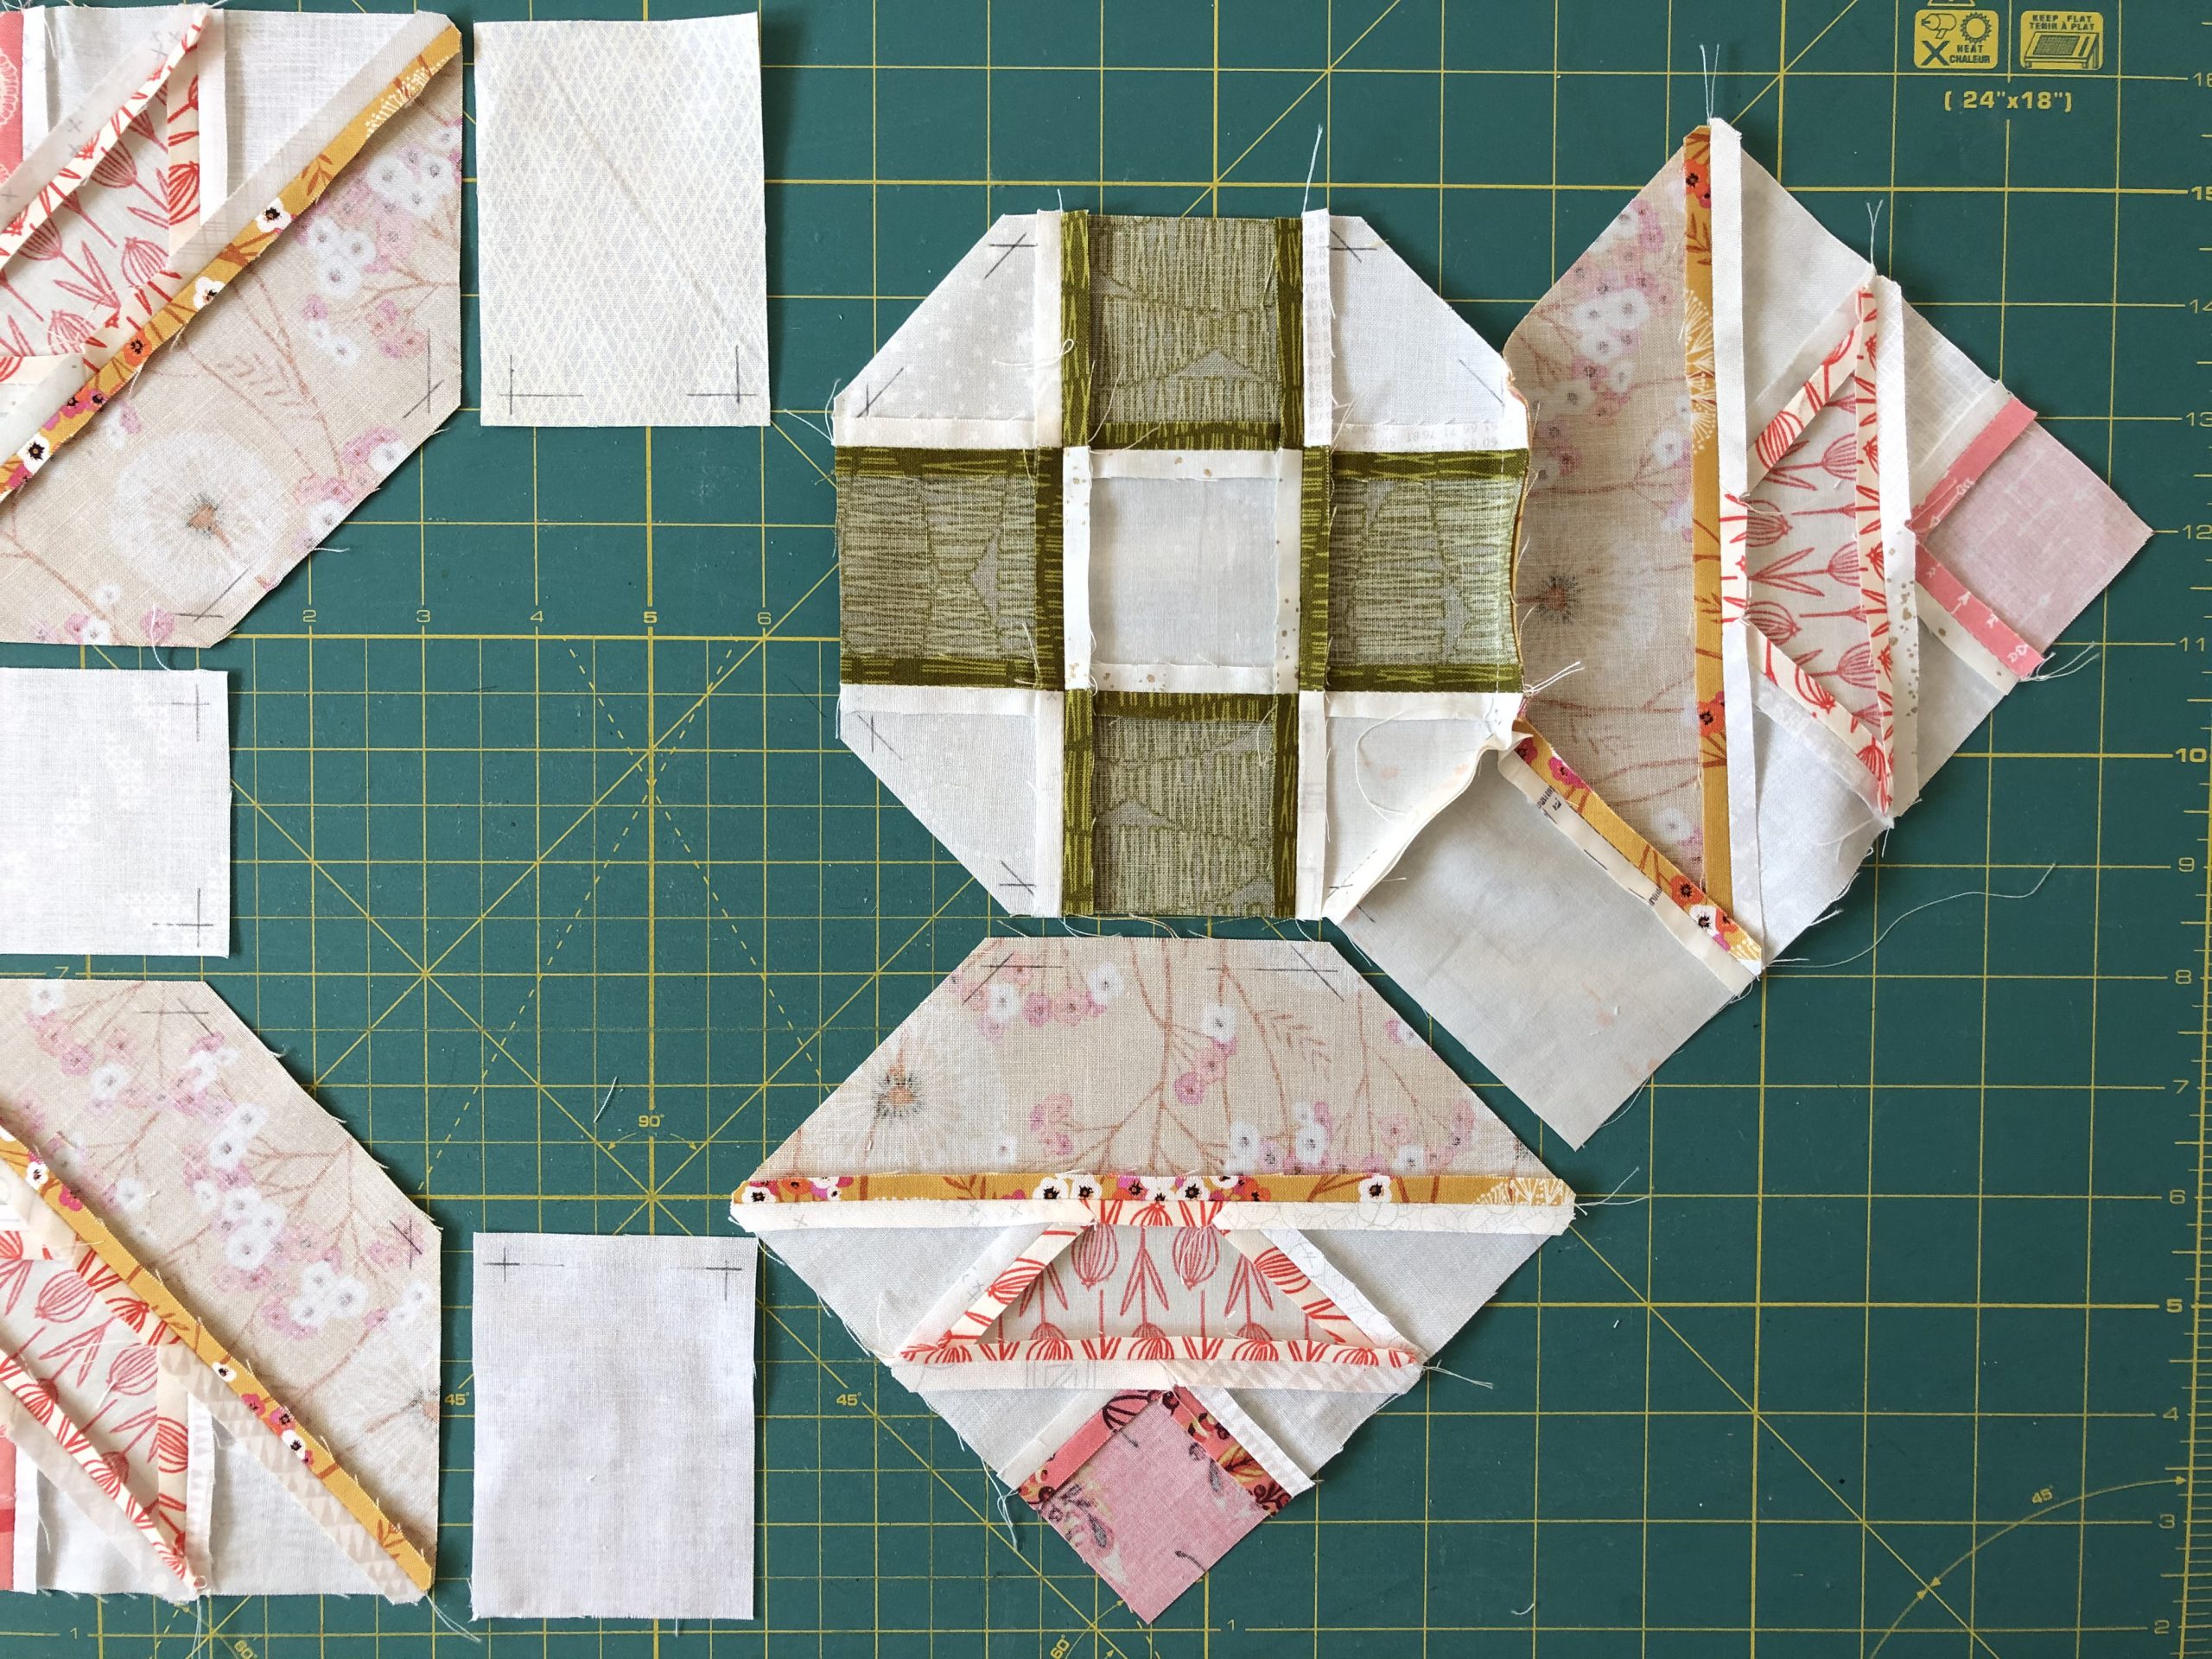
Then sew together these 5 individual sections.
Now it gets a bit more complicated again. If you are already proficient at closing Y-seams, you can skip the explanation below. As shown in the picture, mark the respective corners on the back of the individual pieces of fabric.
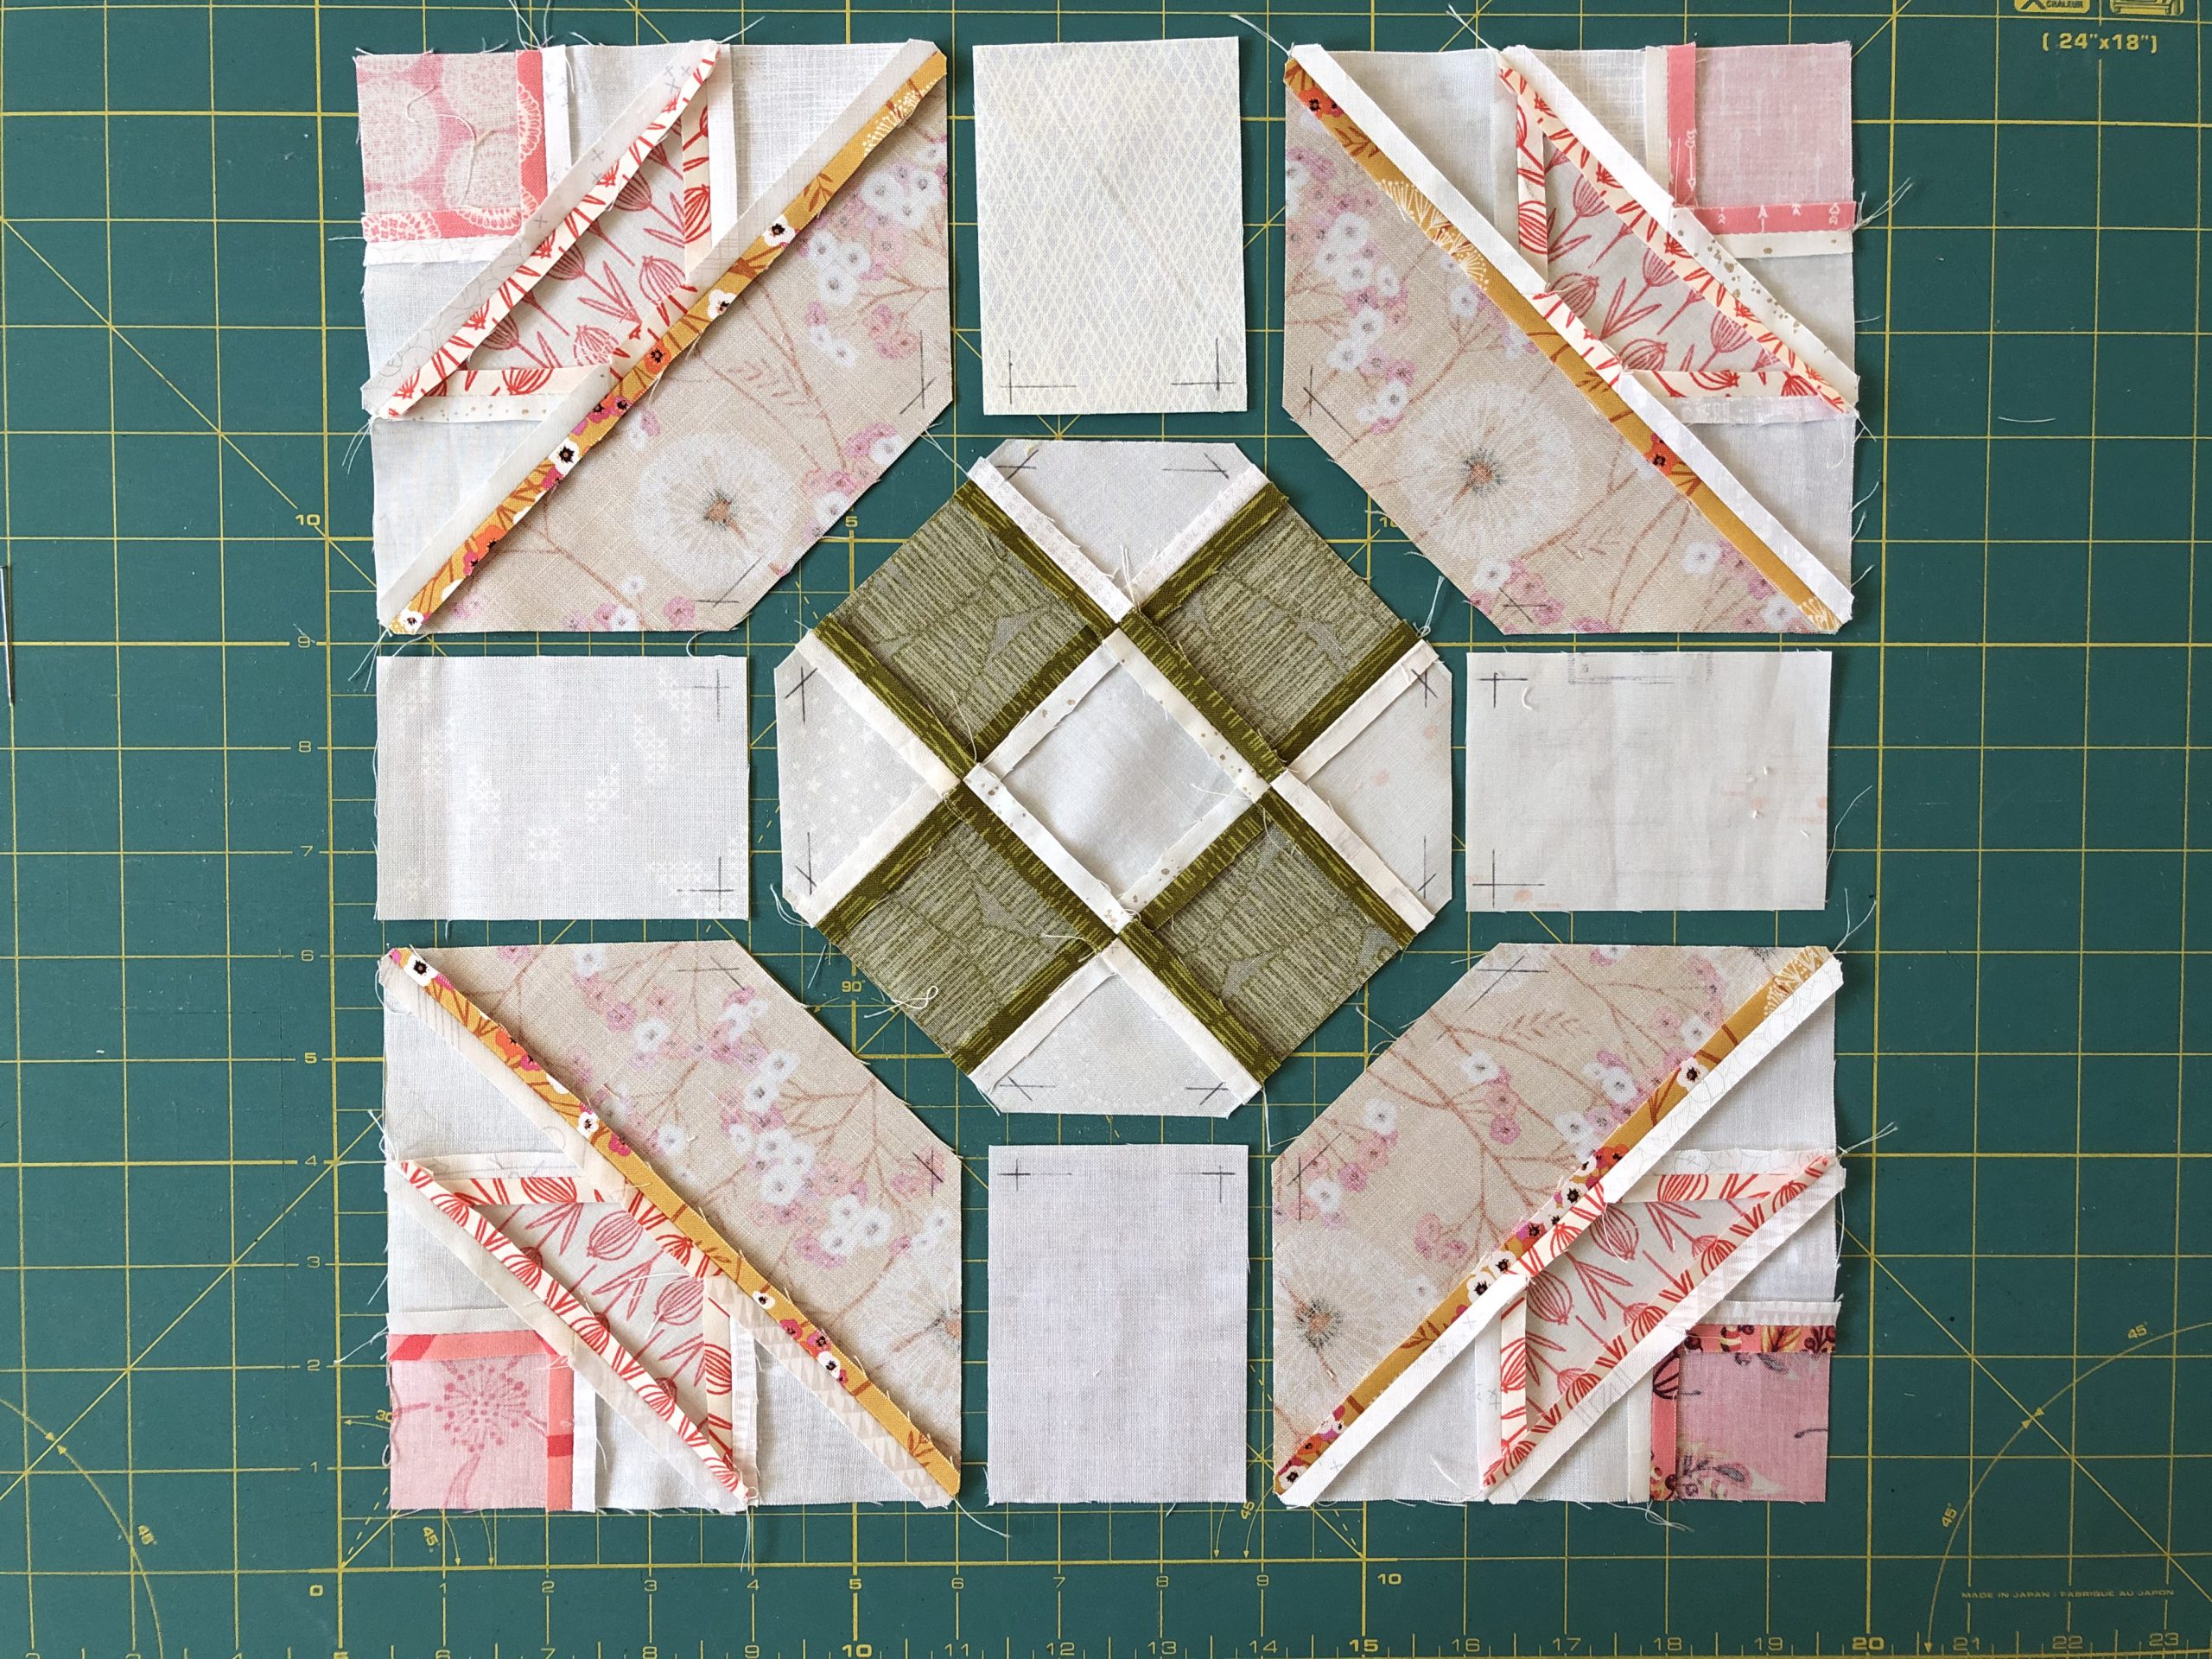
Next, sew the individual outer block pieces onto the middle piece, from one marked point to the next, starting with a corner piece. Secure the seam at both ends. Then, working clockwise, sew the next connecting segment onto the middle section. After that comes the seam between the corner piece and the connecting piece.
This sequence of steps is now repeated all around until all the outer block elements have been sewn onto the middle section.
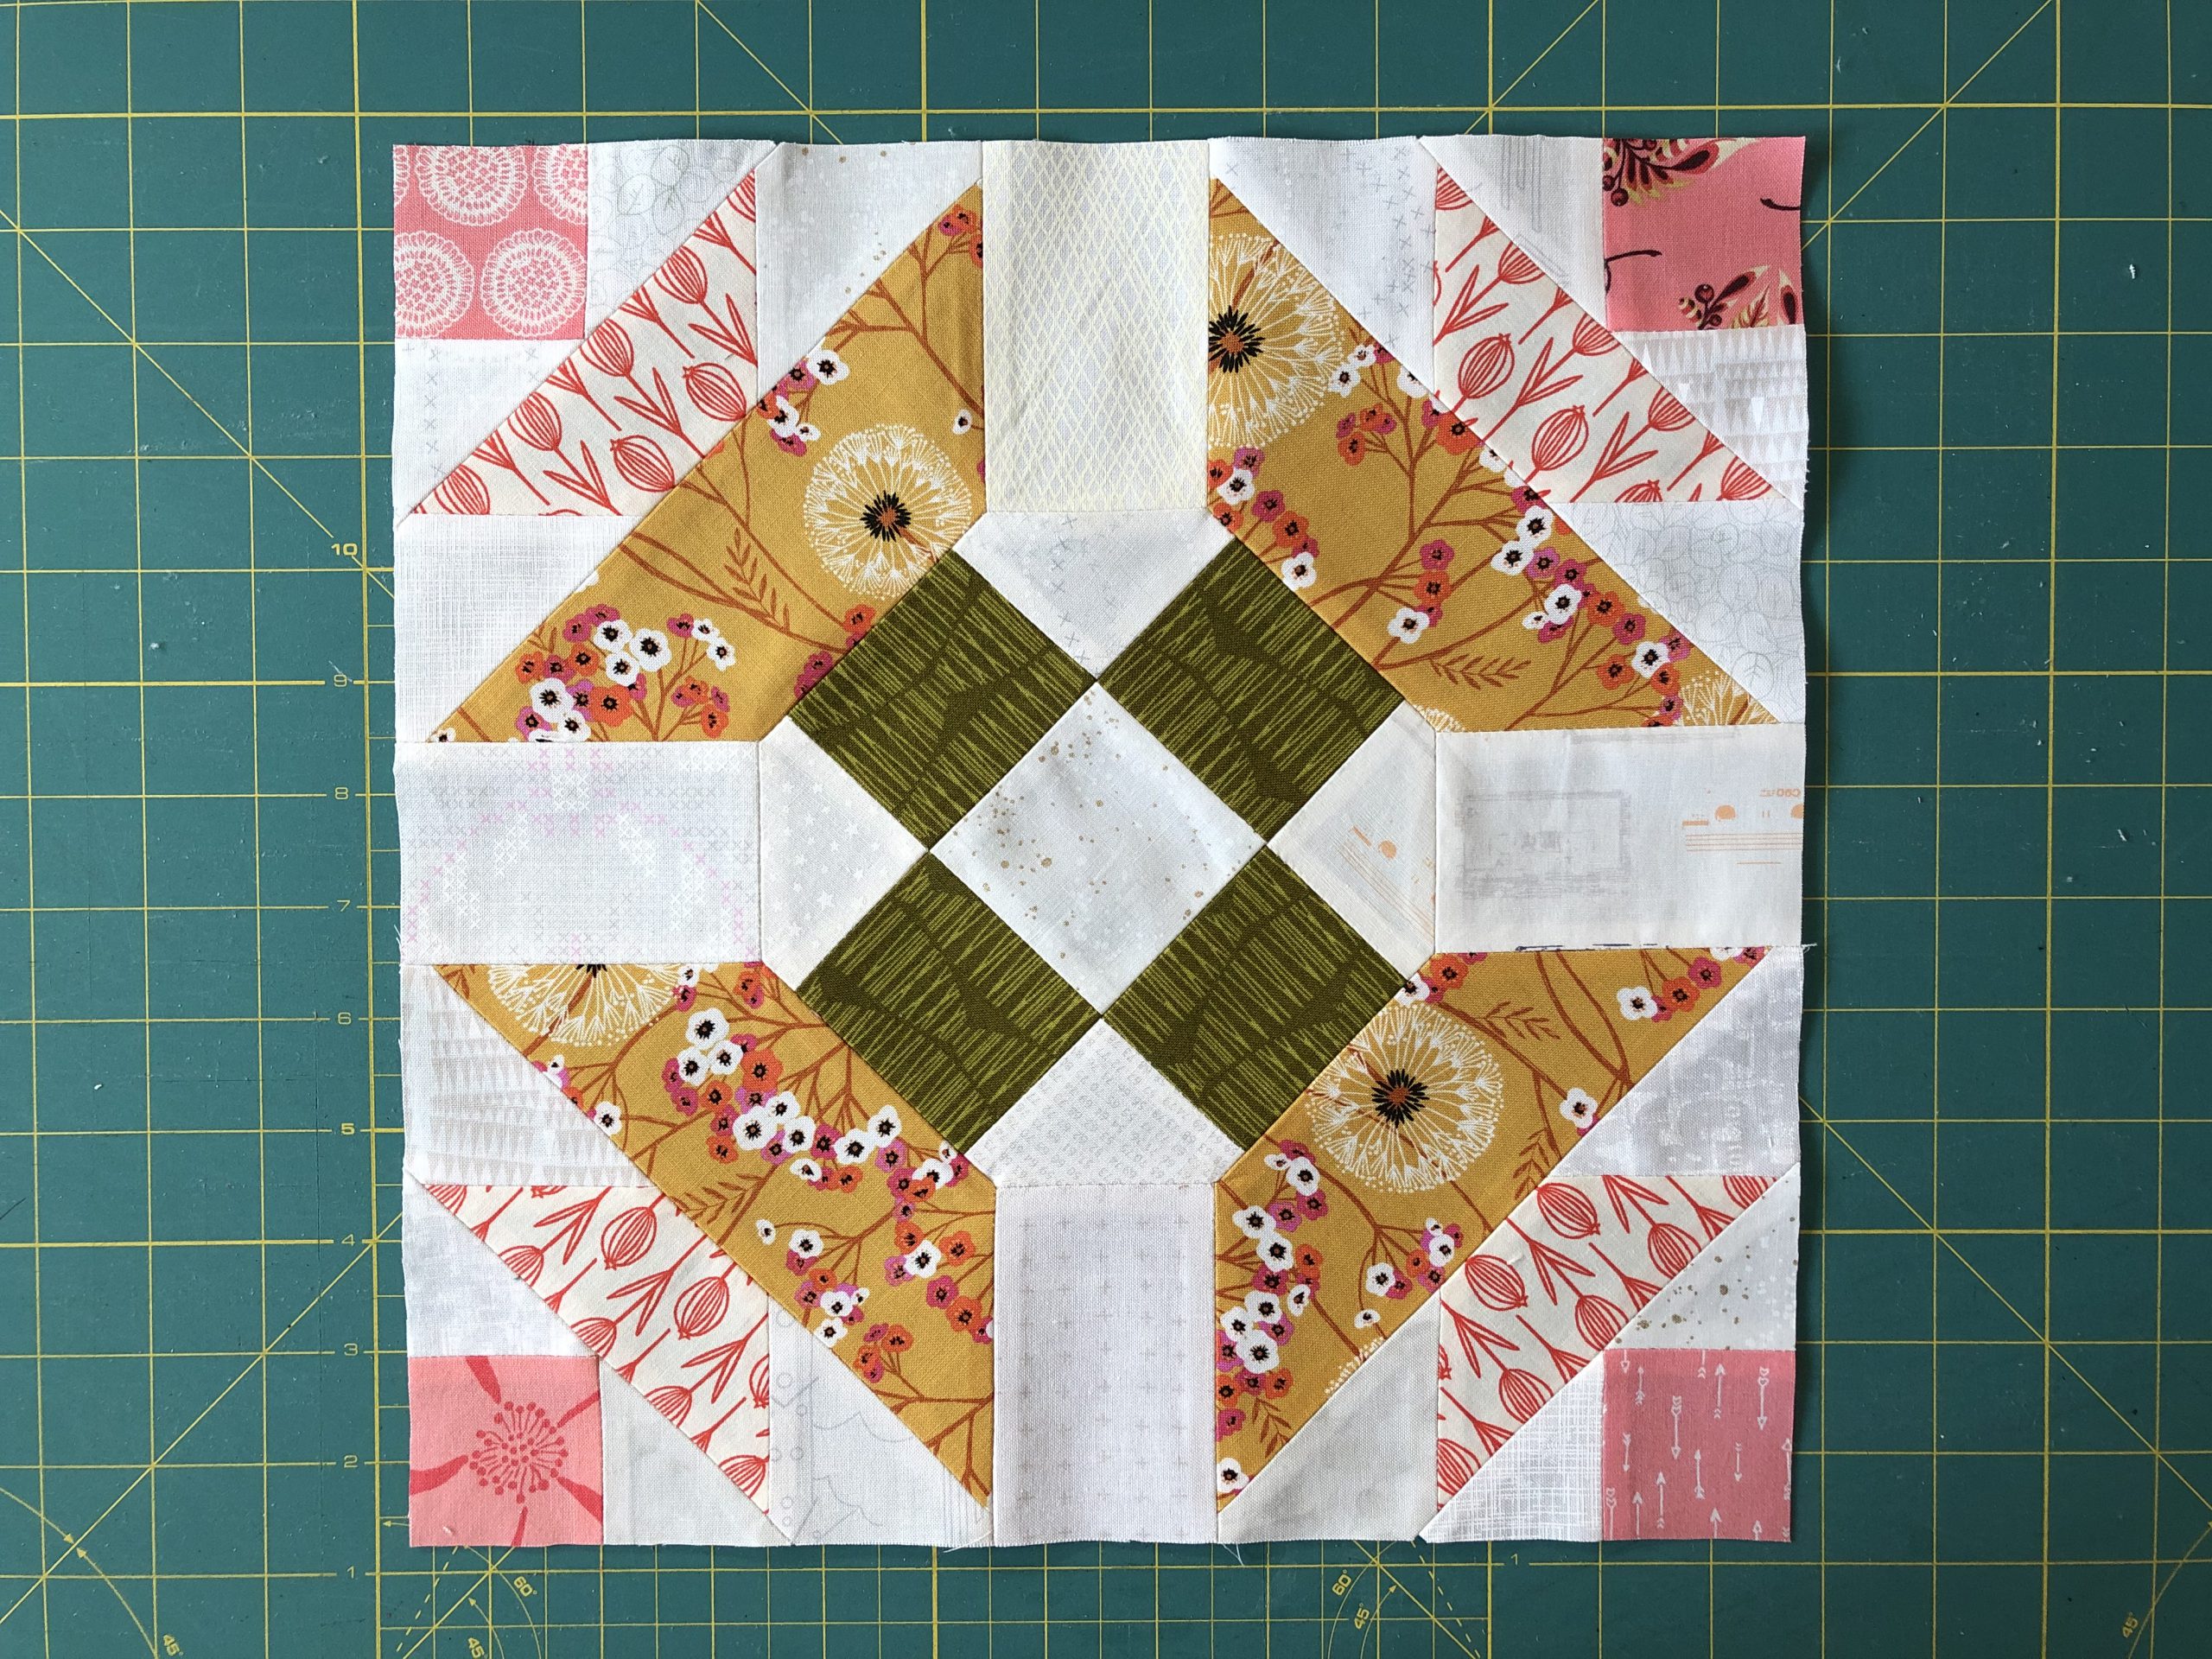
From the front, you can now see your finished “Altar Steps”!
That wasn’t so bad, was it? When you’ve finished, be happy and proud of your work 🙂 and share your picture with us on one of our social media channels! You can post your pictures here on the BERNINA blog in the Community section of the Old Block QAL. Or, if you are on Instagram or Facebook, you can post them there using the hashtag #BERNINAOldBlockSampler.
New here?
Have you only just discovered the quilt-along? No problem! You can join at any time. Registration is not required, and you can win a BERNINA 570 QE! All the posts will remain permanently available at the following link: Old Block Quilt-Along – overview of all the posts
In the first post, which was the invitation to participate in the quilt-along, you will find the important initial information about our joint project:
Old Block Quilt-Along – who’s in?
You can find the rest of the blocks from the quilt-along that have already been published here:
Old Block Quilt-Along, Part 1: “Bride’s Bouquet”
Old Block Quilt-Along, Part 2: “Quilter’s Delight”
Old Block Quilt-Along, Part 3: “Bird’s Nest”
Old Block Quilt-Along, Part 4: “Cross and Star”
Old Block Quilt-Along, Part 5: “Morning Star”
Old Block Quilt-Along, Part 6: “Mill and Stars”
That was quite an easy task today, wasn’t it? I hope you still had fun and we’ll see you again for the next block!
Enjoy your sewing,
Andrea
0 Responses