 BERNINA Corporate Blog -
Problems and how to fix those
Once my quilt was squared off, I realised that I did not have enough little flowers in my foreground. The quiver tree also looked a bit lonely on its rocky hill!
To fix the flower problem, I needed the following:
- Inktense paintsticks
- Fabric medium
- Small paintbrush with hard bristles
To create more flowers in the foreground, I simply put a dab of fabric medium everywhere and used Inktense paintsticks in yellow, orange and red to represent the flowers.
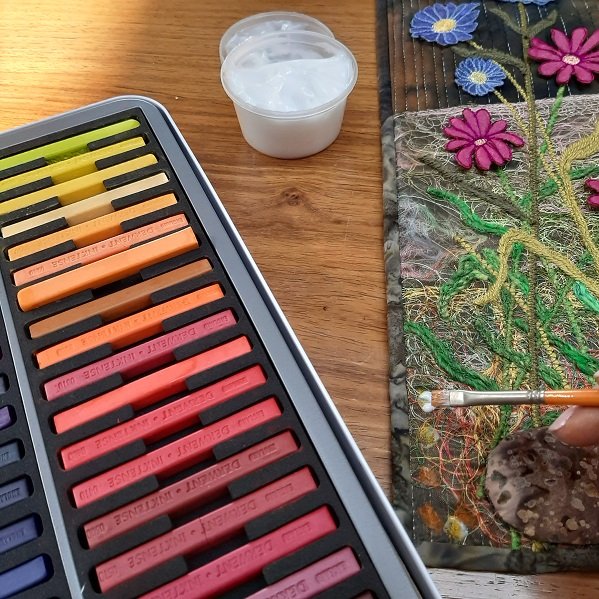
Fabric Medium and Inktense Paint
To lend more interest to the quiver tree on the rocky hill, I needed:

Tree looked too lonely so I added aloes.
- Ruler foot #72 and couching inserts
- One Of a Kind Yarn in interesting colours
- Copper and dark brown shades of machine embroidery threads
- Free Motion Open Toe Embroidery foot #24
- Inktense pencils
- Fabric medium
I couched the leaves of the aloes with the One Of a Kind Yarn and free motion embroidered the stems. Afterwards the aloe flowers were drawn using the Inktense pencils.
My quilt was ready for binding! I cut strips of binding one and an eight inch wide and, using Edge Stitch foot #10D and the dual feed, I sewed my binding on the right side of the quilt after adjusting the needle. Of course, I had to remember to change the stitch plate! What a dream that was!
The fun part of this quilt was to make it shine! I used all the drop-shaped crystals in the Crystal tin and Wonder Invisible thread to sew
all 24 of these onto the quilted ‘rain’ of the background. This took quite a long time to do. I could have used Button Sew-On Foot #10D and do it in a jiffy but sadly, I didn’t think of it until much later! So remember, if you ever have lots of crystals or buttons to sew on, use Foot #10D!
Completing a quilt
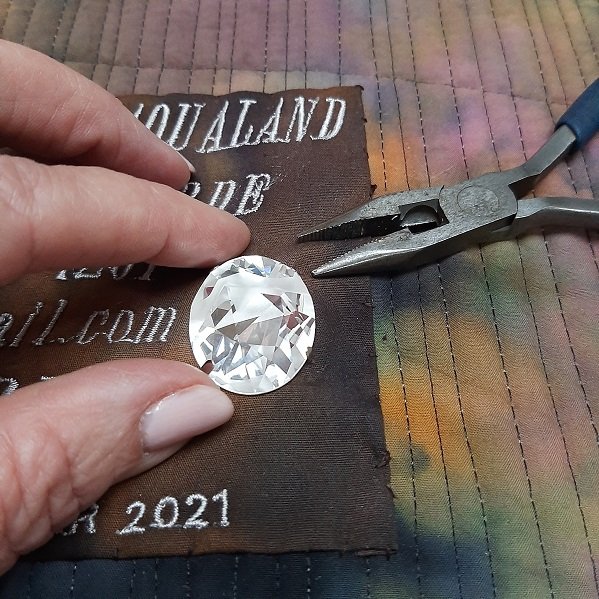
Big crystal clamped onto the label.

Sewing on my label on the back of the quilt.
A quilt is not complete until it has a sleeve for hanging and a label sewn on the back. This was the next step as well as the final one in creating CRYSTAL RAIN IN NAMAQUALAND.
I digitised my label but before attaching it to my quilt, I added the final bit of shine to it! I clamped the biggest crystal in the tin onto my label before I sewed the label onto the back, bottom leftside of the quilt.
FIND OUT MORE ABOUT TIME TO SHINE
If you are wondering what all this talk of TIME TO SHINE is about, sign up for the newsletter at https://www.bernina.com/crystal-edition! There are also some free goodies available! Go and have a look at https://www.bernina.com/crystal-edition. A free diamond-shaped embroidery design is available to download. And there will be more freebies to follow!
I hope you enjoyed going on this journey of creating my own TIME TO SHINE art quilt with me! Please remember to leave a comment below? You can follow me on Instagram and Facebook to see where I find inspiration and what other interesting things I create!

0 Responses