 BERNINA Corporate Blog -
Hello my sewing friends
I am always delighted when I get feedback or questions about my posts on sewing bras. Most of the time they center around fitting issues. That’s why I have decided to show you my fitting process from start to finish. Now, as this is a lot I opted to make it a two-part series. In the first part we’ll focus on the band and in the second part we’ll look at cup fitting.
Ideas and tutorials for your next sewing adventure
Subscribe to the BERNINA Blog Newsletter
If you love to sew you don’t want to miss the chance to receive the latest content from our authors directly into your mailbox.
Sign up for the blog newsletter
Why a fitting band is a good thing
As you start sewing bras you get used to making bra after bra after bra to get the correct fit and slowly you begin to loose your patience with the project altogether. The bramaking world has a solution for this: working with a fitting band. The fitting band is an almost finished bra, that you can sew your cups into. The construction method varies to the usual processing order – but it’s worth it!
Here’s a list of reasons why a fitting band might be the thing for you
- You will notice immediately if your fitting issues are band or cup related
- You can use your fitting band (because you’ve made it fit your body) to sew in as many tester cups as you like without having to sew multiple bras
- You can compare your fitting band pieces all your future bra patterns and make the corresponding alterations without having to sew up the bra first. You just transfer your fitting band to the new pattern and sew the cups of your new pattern into your fitting band to check the fit.
- You can use your fitting band and the corresponding cups to make your own style alterations You know, your bra will always fit you. If you’re not sure about style line alterations in your cup. You can sew up your cup in cut-and-sew foam, draw the style lines onto it, cut it and transfer the pieces to paper (don’t forget the seam allowances).
The thing about the wires
If you’ve been here a while you know that I’ve been writing about bramaking for quite a while. In this post I’ve explained about different wire shapes. Let’s talk about facts. I always start my fitting process with the wire I intend to use. Even when I sew bras for other people I let them choose the perfect wire first and go from there. If you’re unsure about which wire will fit you, go with the wire chart on the pattern you’ve purchased and order “Fit Packs” based on that size. Ideally your pattern will even tell you, for which wires it has been designed (e.g. vertical, round, demi, etc.).
Equipped with the perfect wire we’ll start our fitting process. The wire I chose fits the 90D of the Angie bra, the pattern however puts me at a 90E which is a larger wire size. Because I will make the pattern fit me and not the other way around I will proceed with the 90D. We’ll look at making the cups fit in part two of this series. So I cut all the band and frame pieces for the 90D.

This is the wire in the size 44 (the size I’ll be using). You can see that it would be too small for the green 90E but ok with the blue 90D
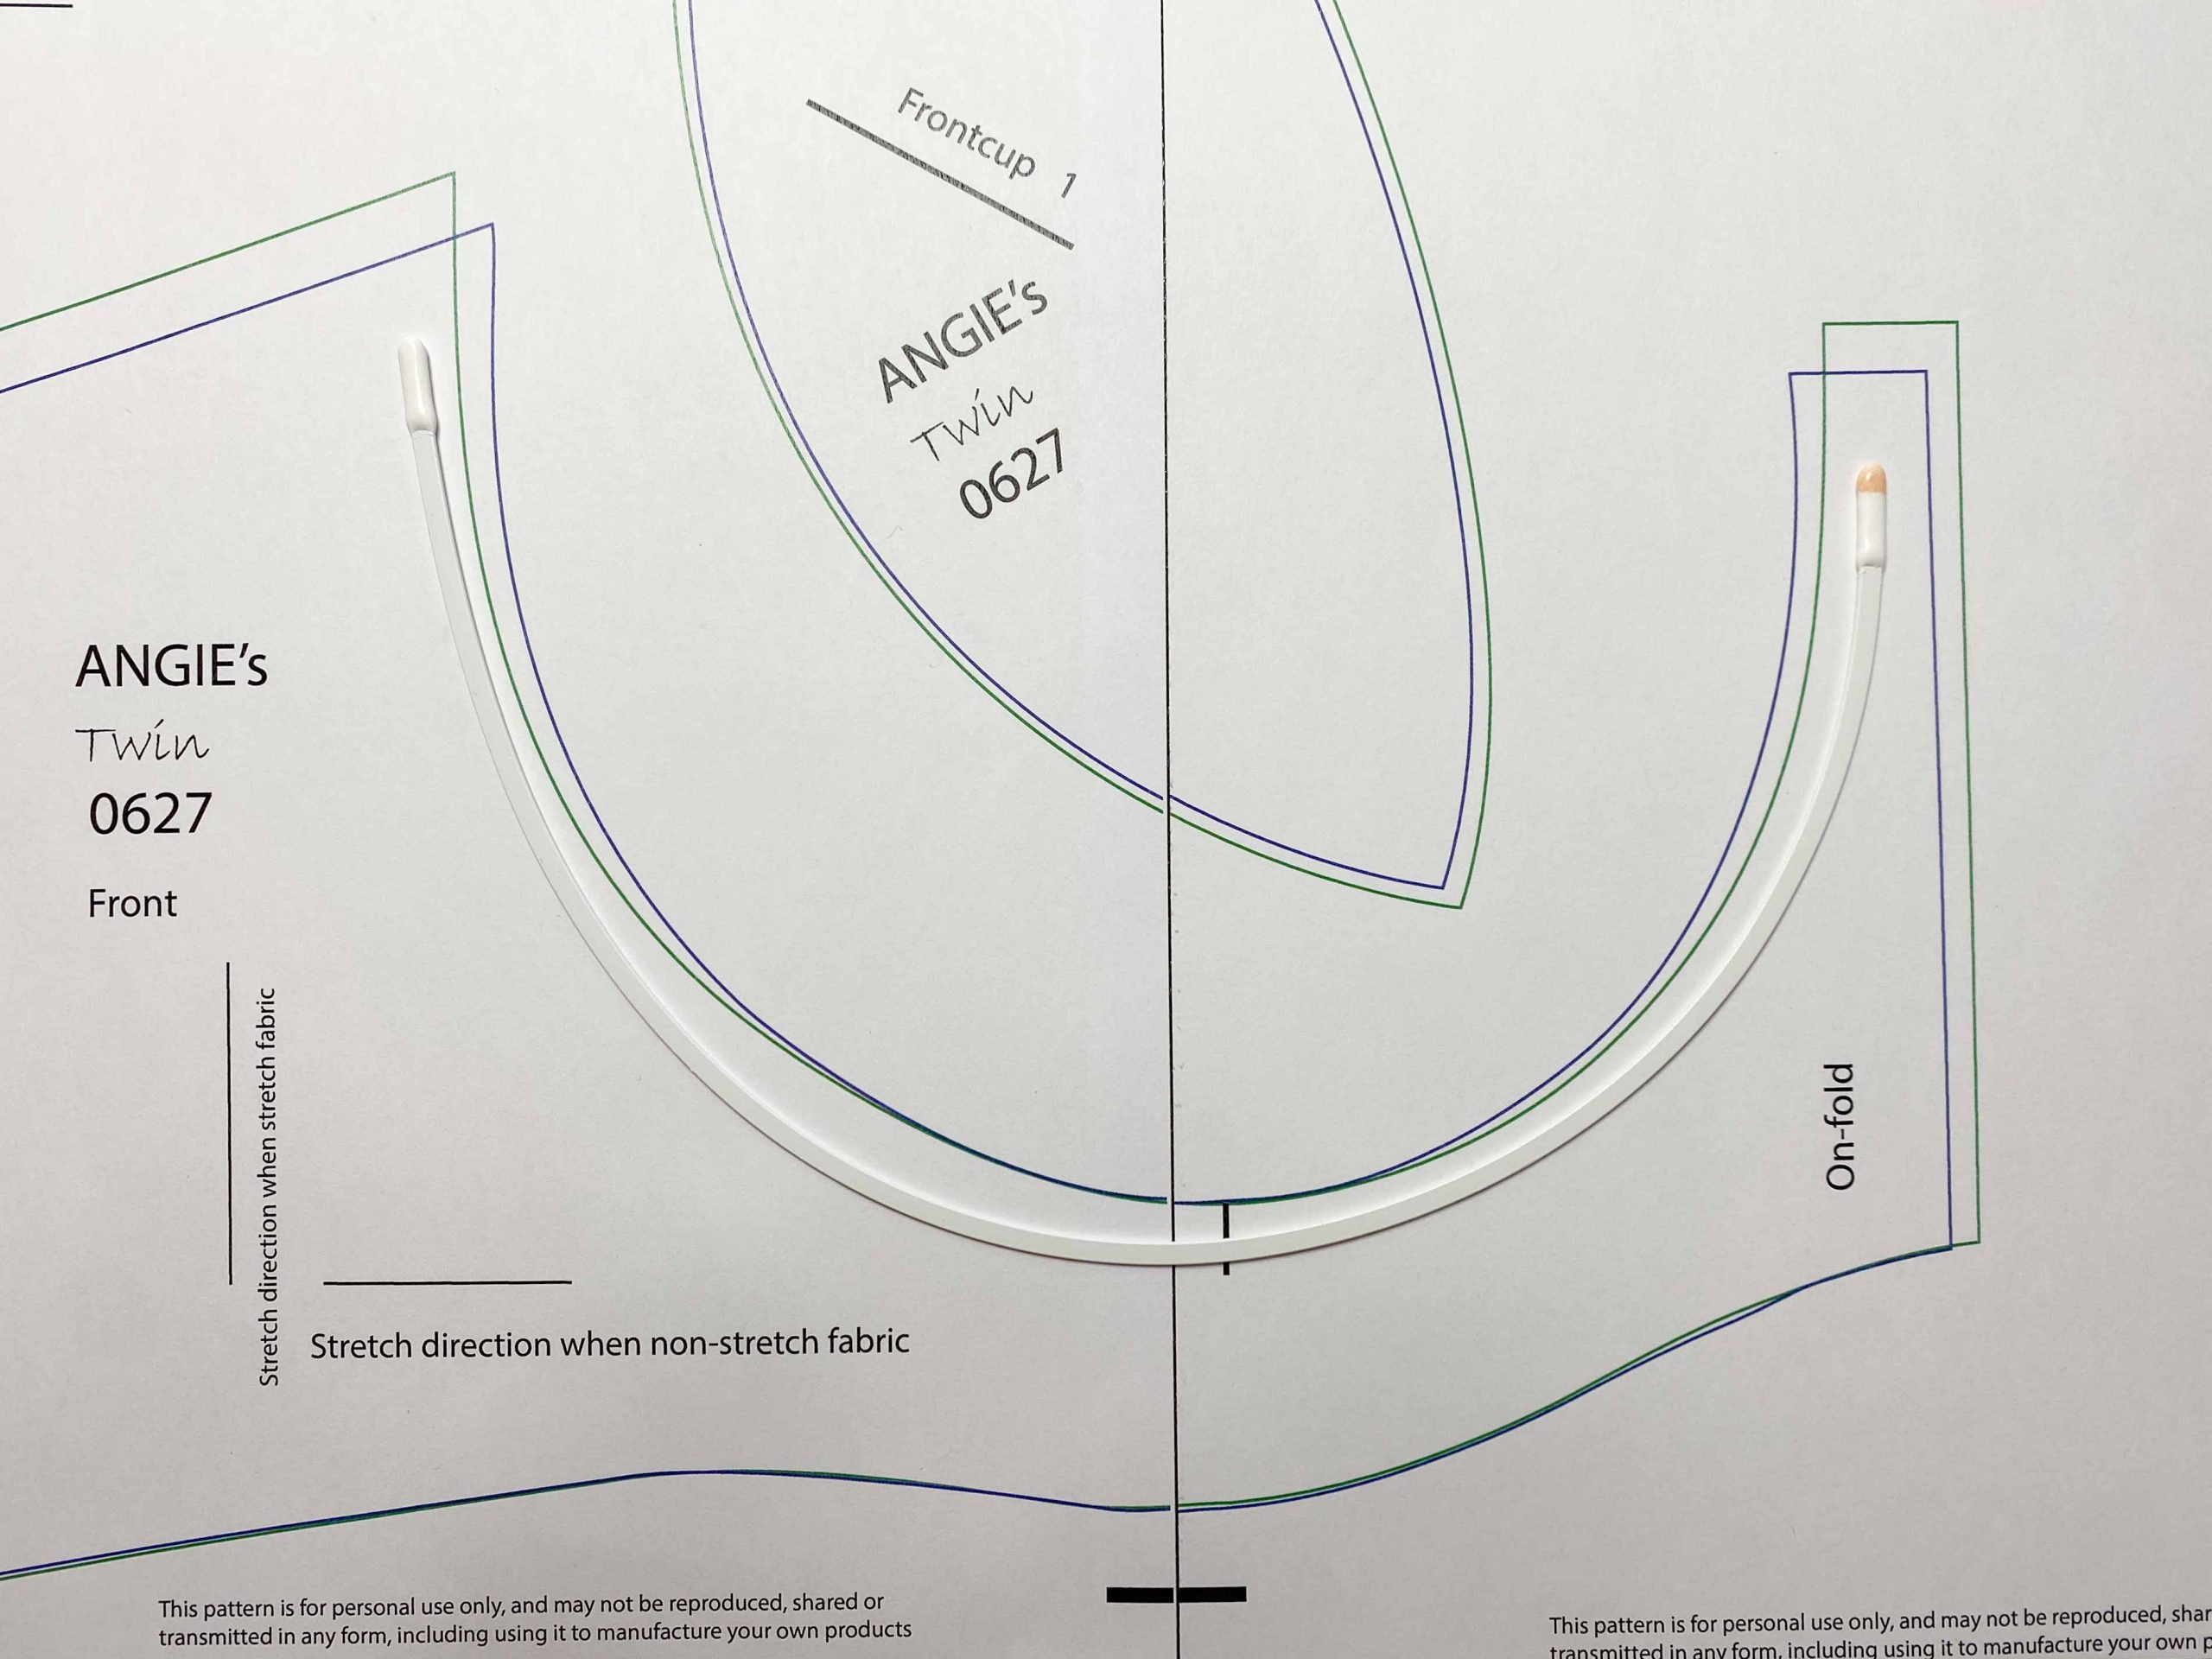
This is the correct wire for the 90E but it would be too big for me.
How to sew up the fitting band
First off, this is not going to look pretty. It’s not meant to, although you are free to use your prettiest material for it. The only thing important is that you use the same material you would use in a regular bra.
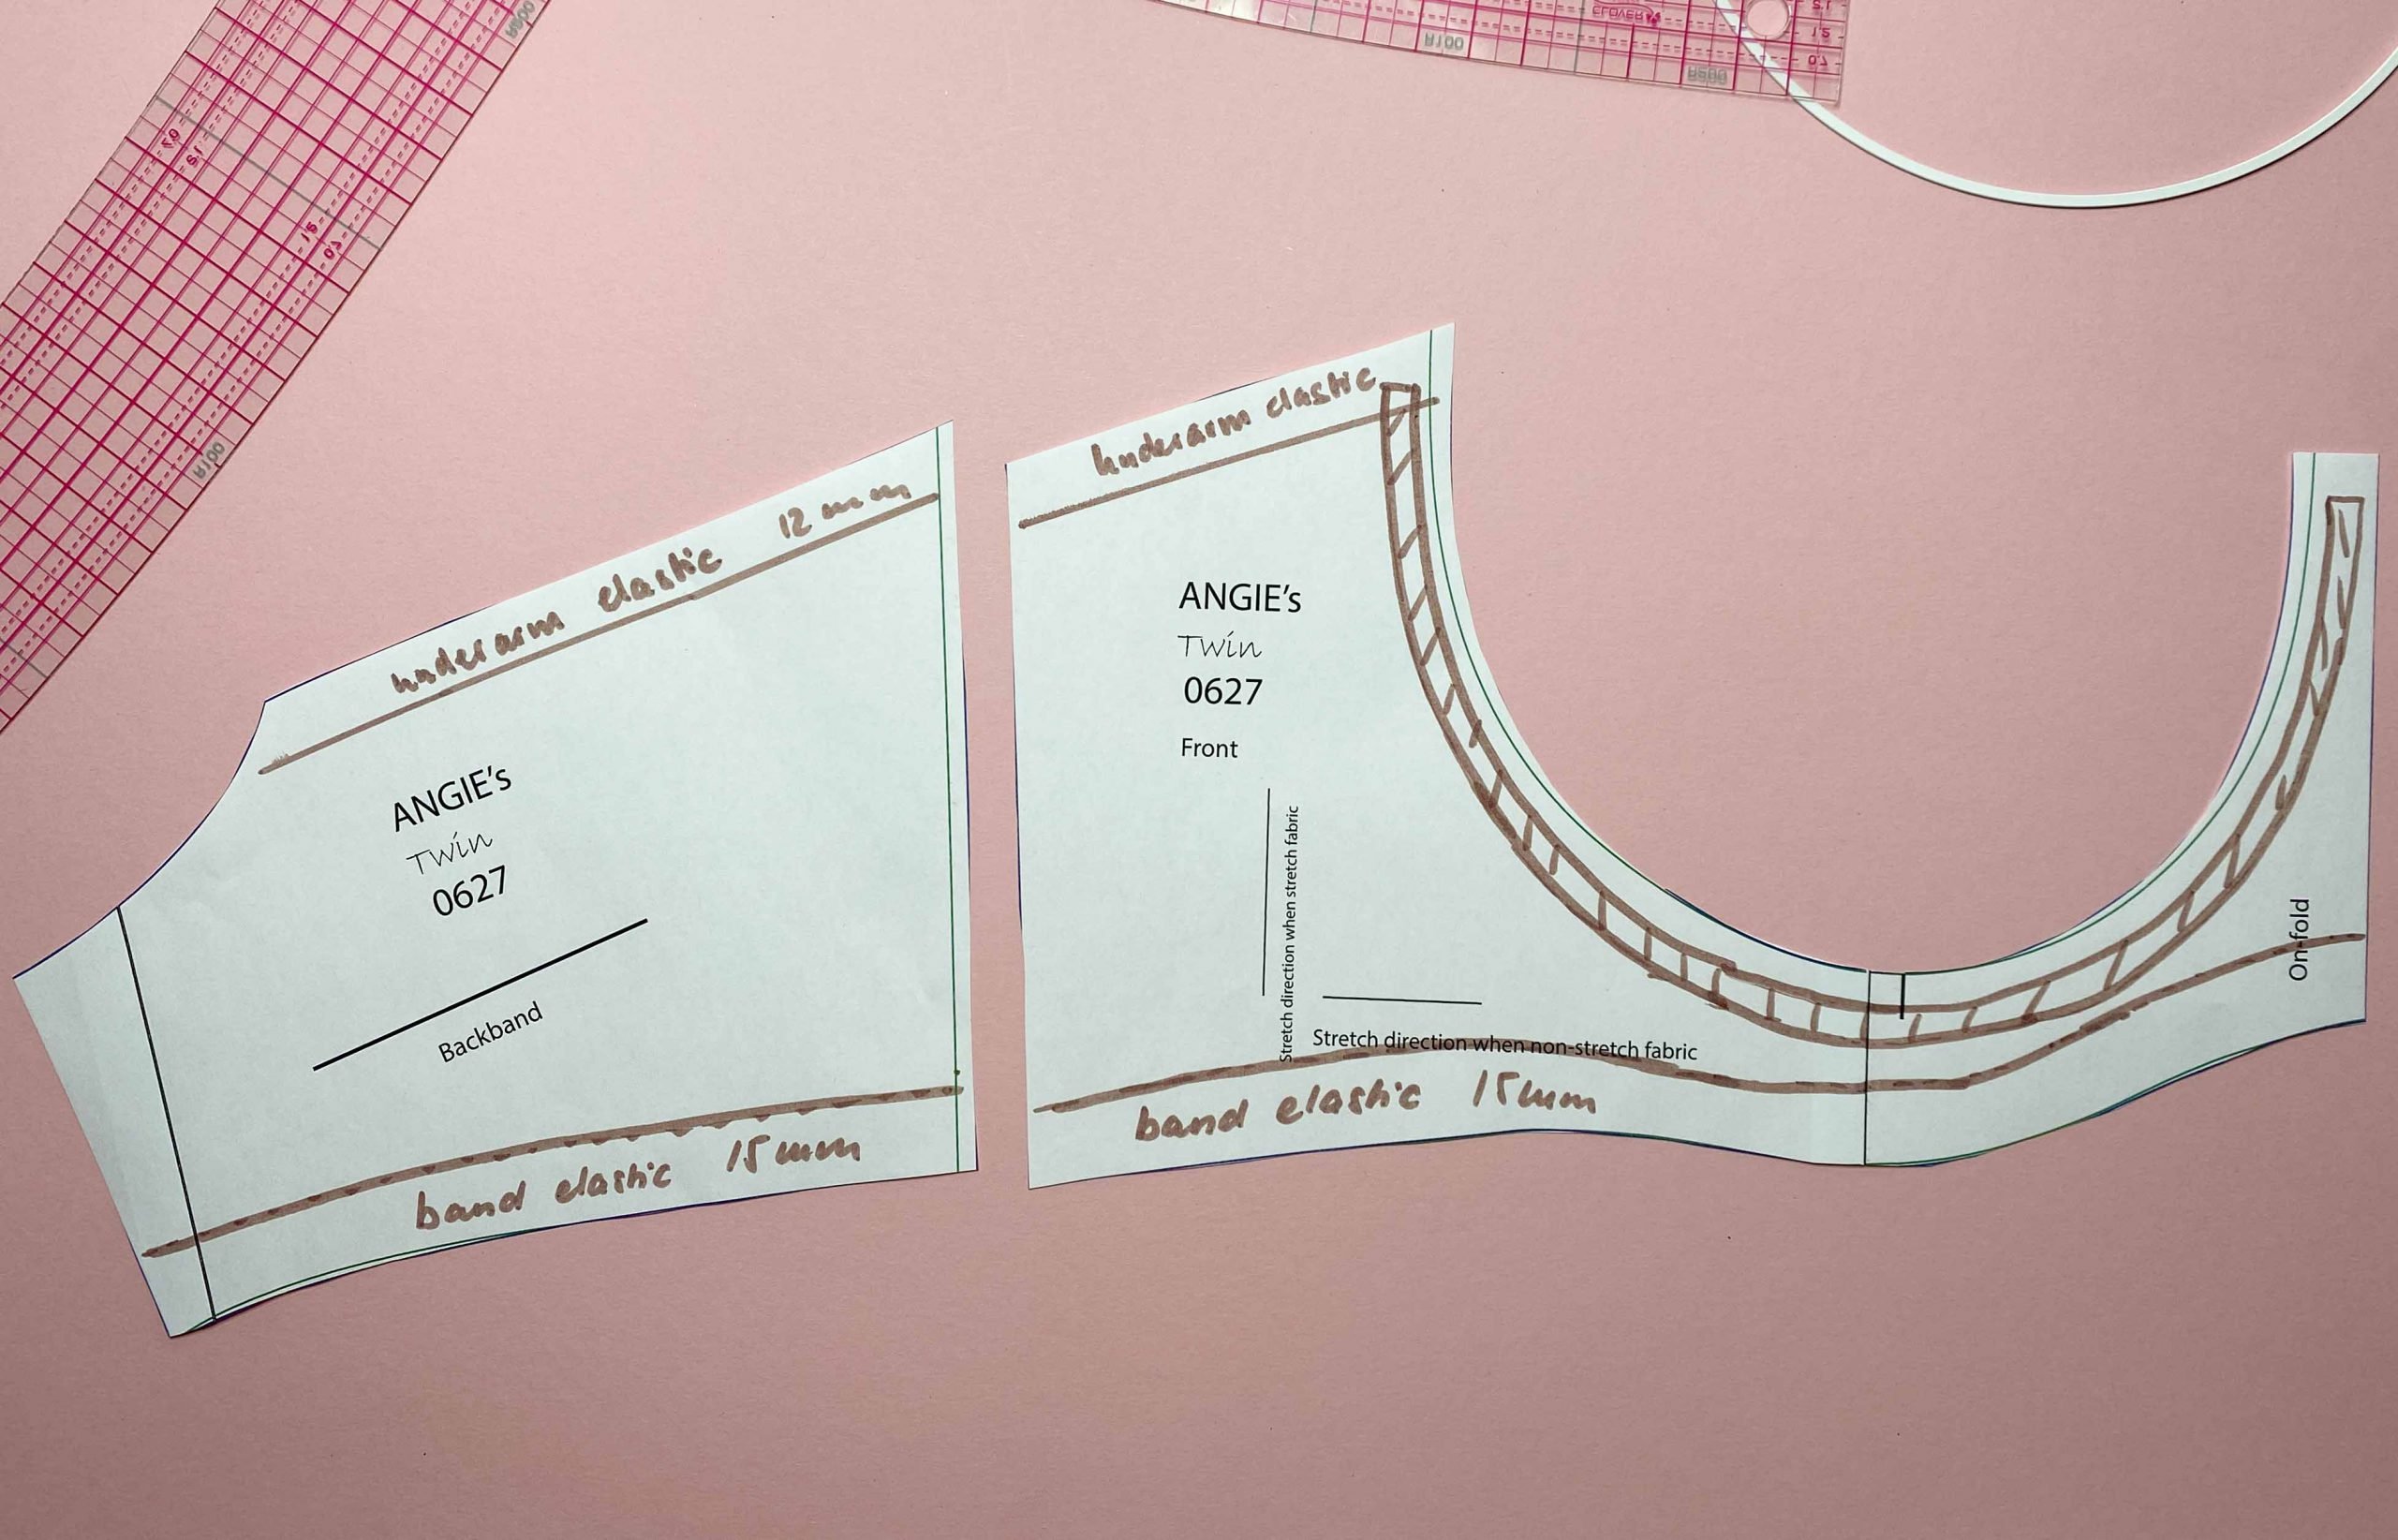
This is how we will be making the fitting band. I drew in where the underarm and band elastic as well as the channeling will go.
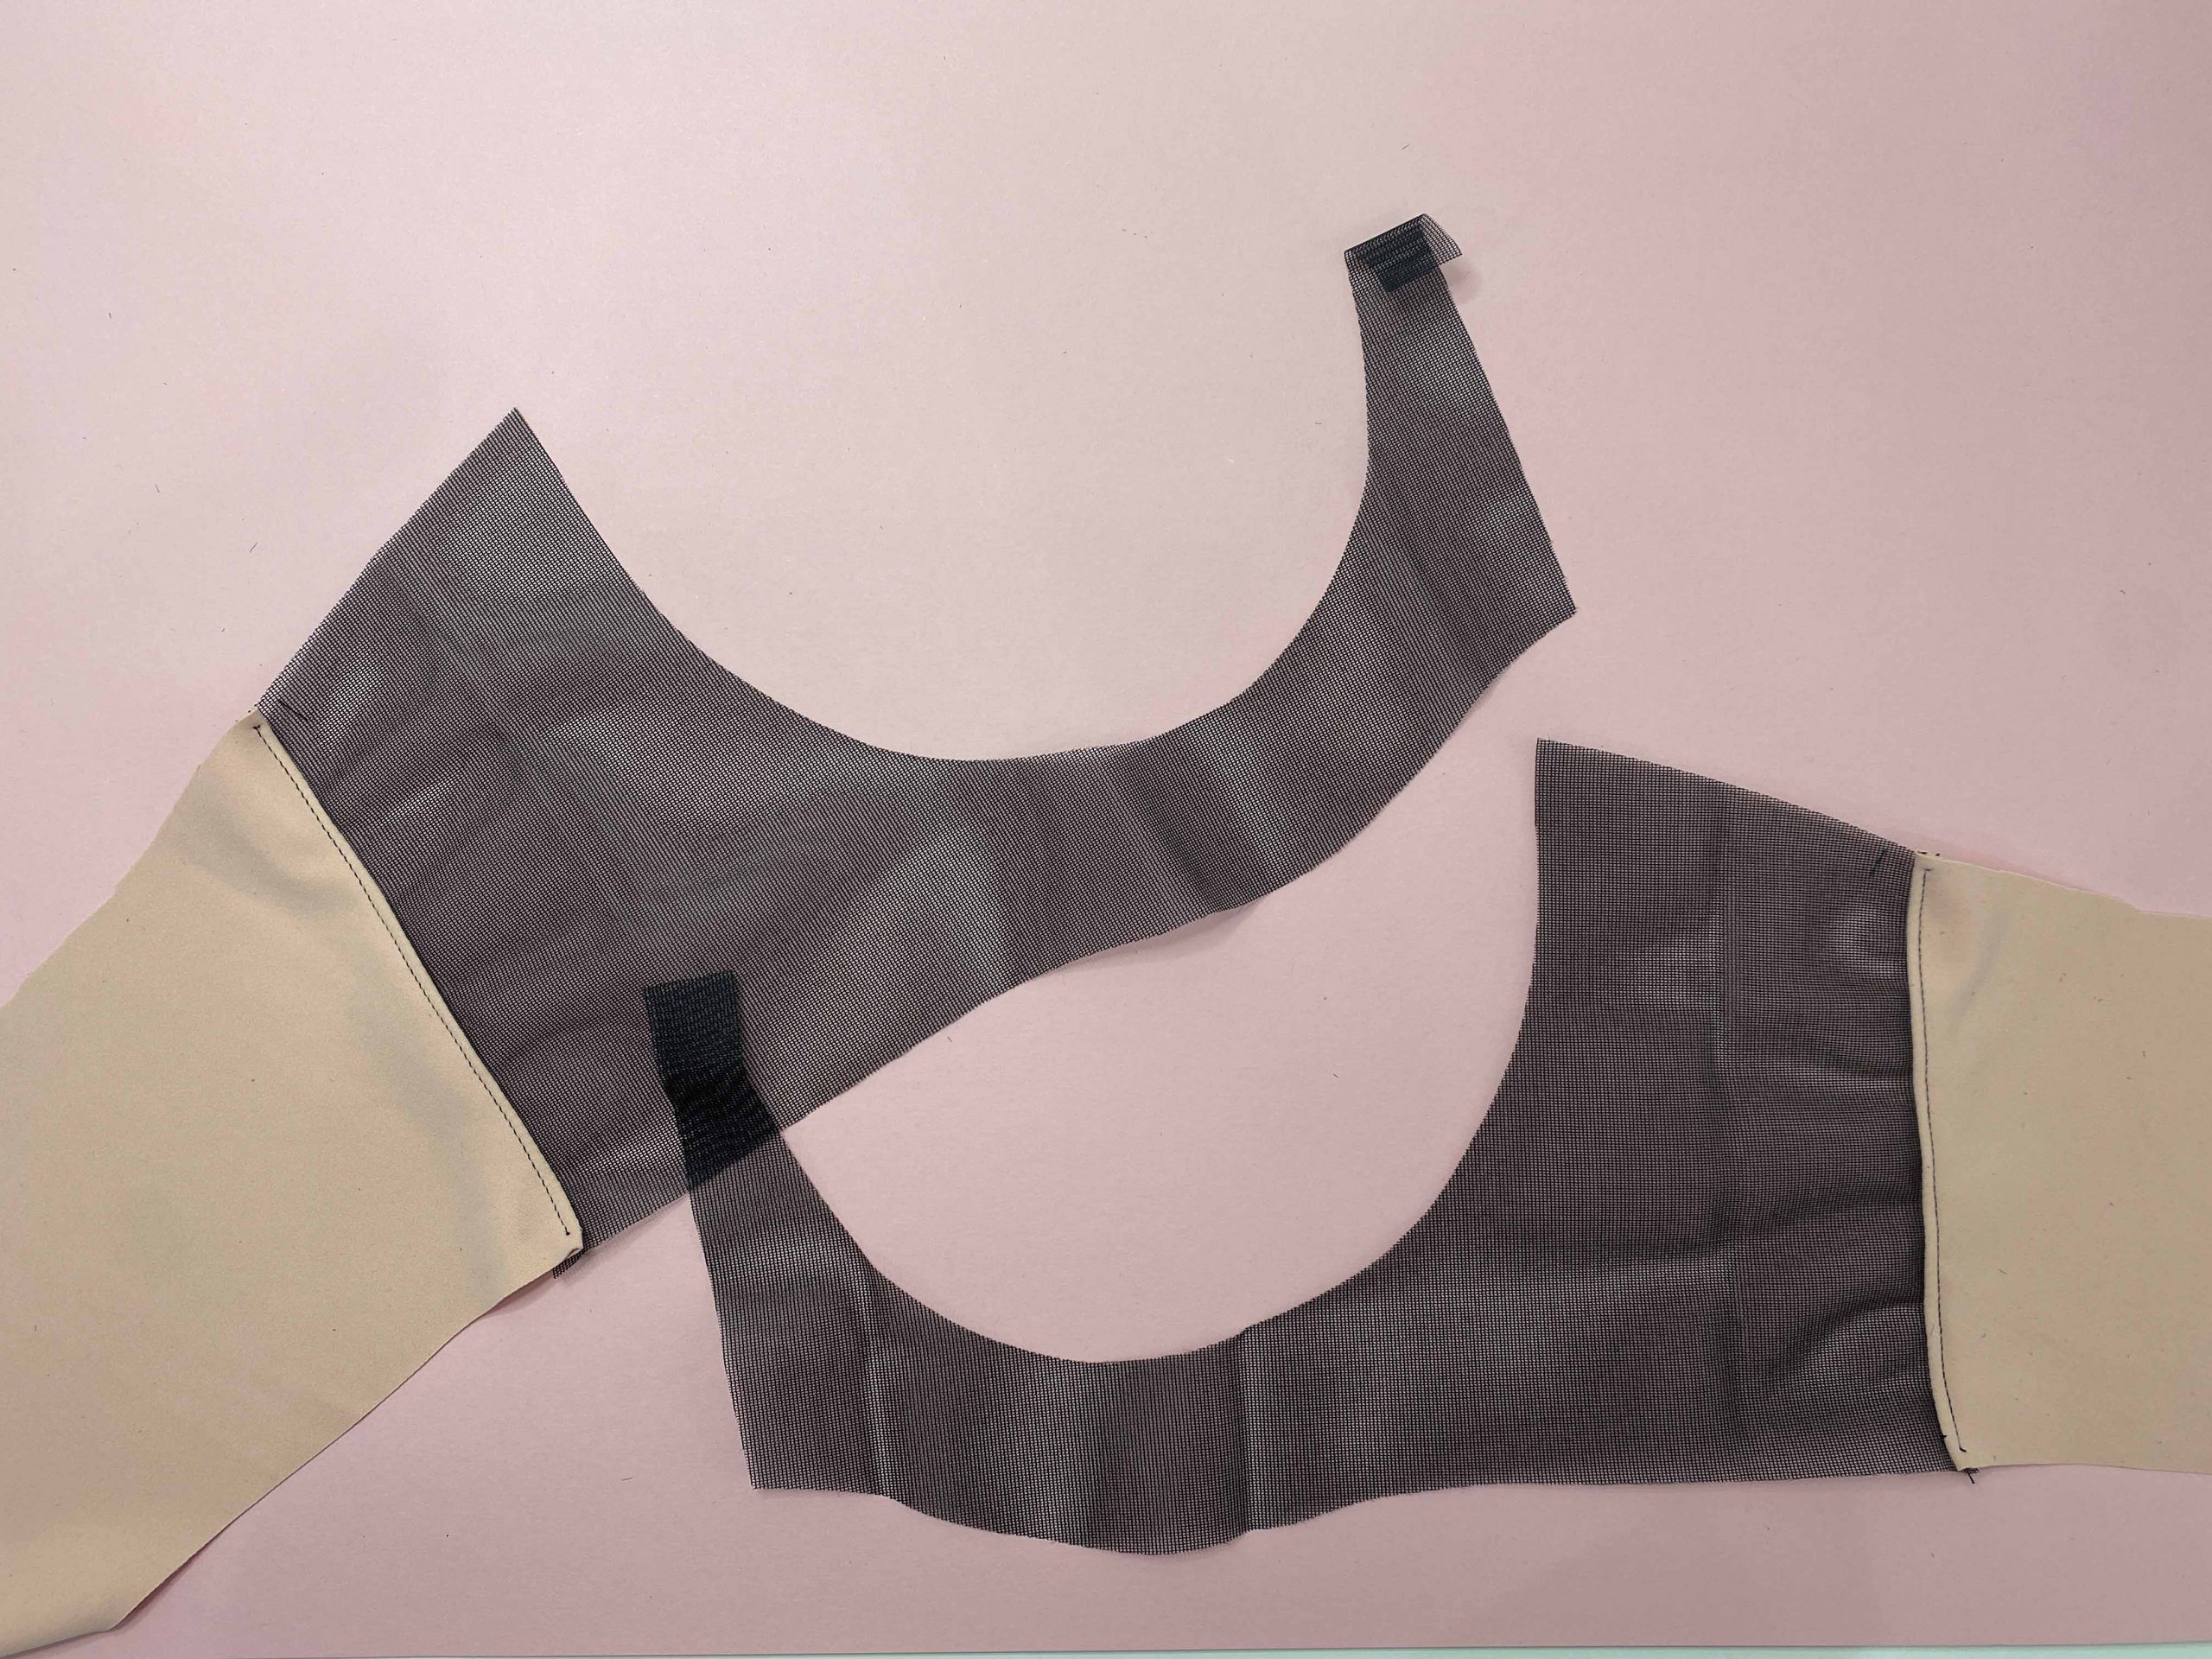
For our purpose it’s important that you will have a seam at the center front. This will help you figure out the width of the bridge. If your piece is on the fold, don’t forget to add in the seam-allowance at the center front. Attach your frame piece to the back band and topstitch.
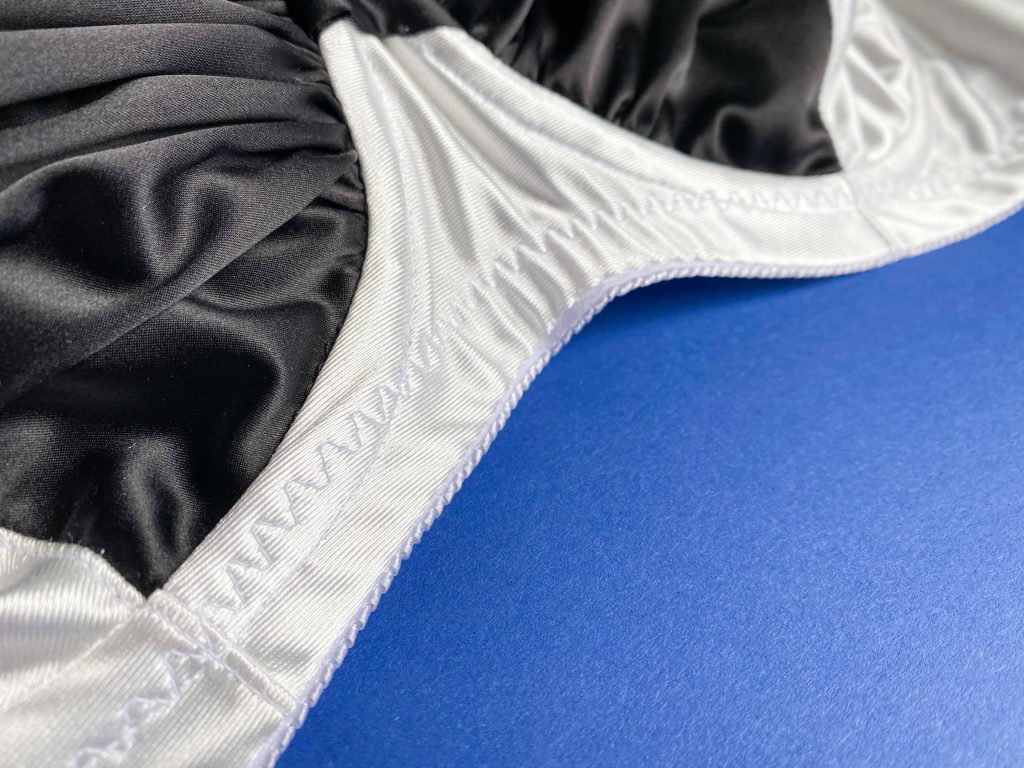
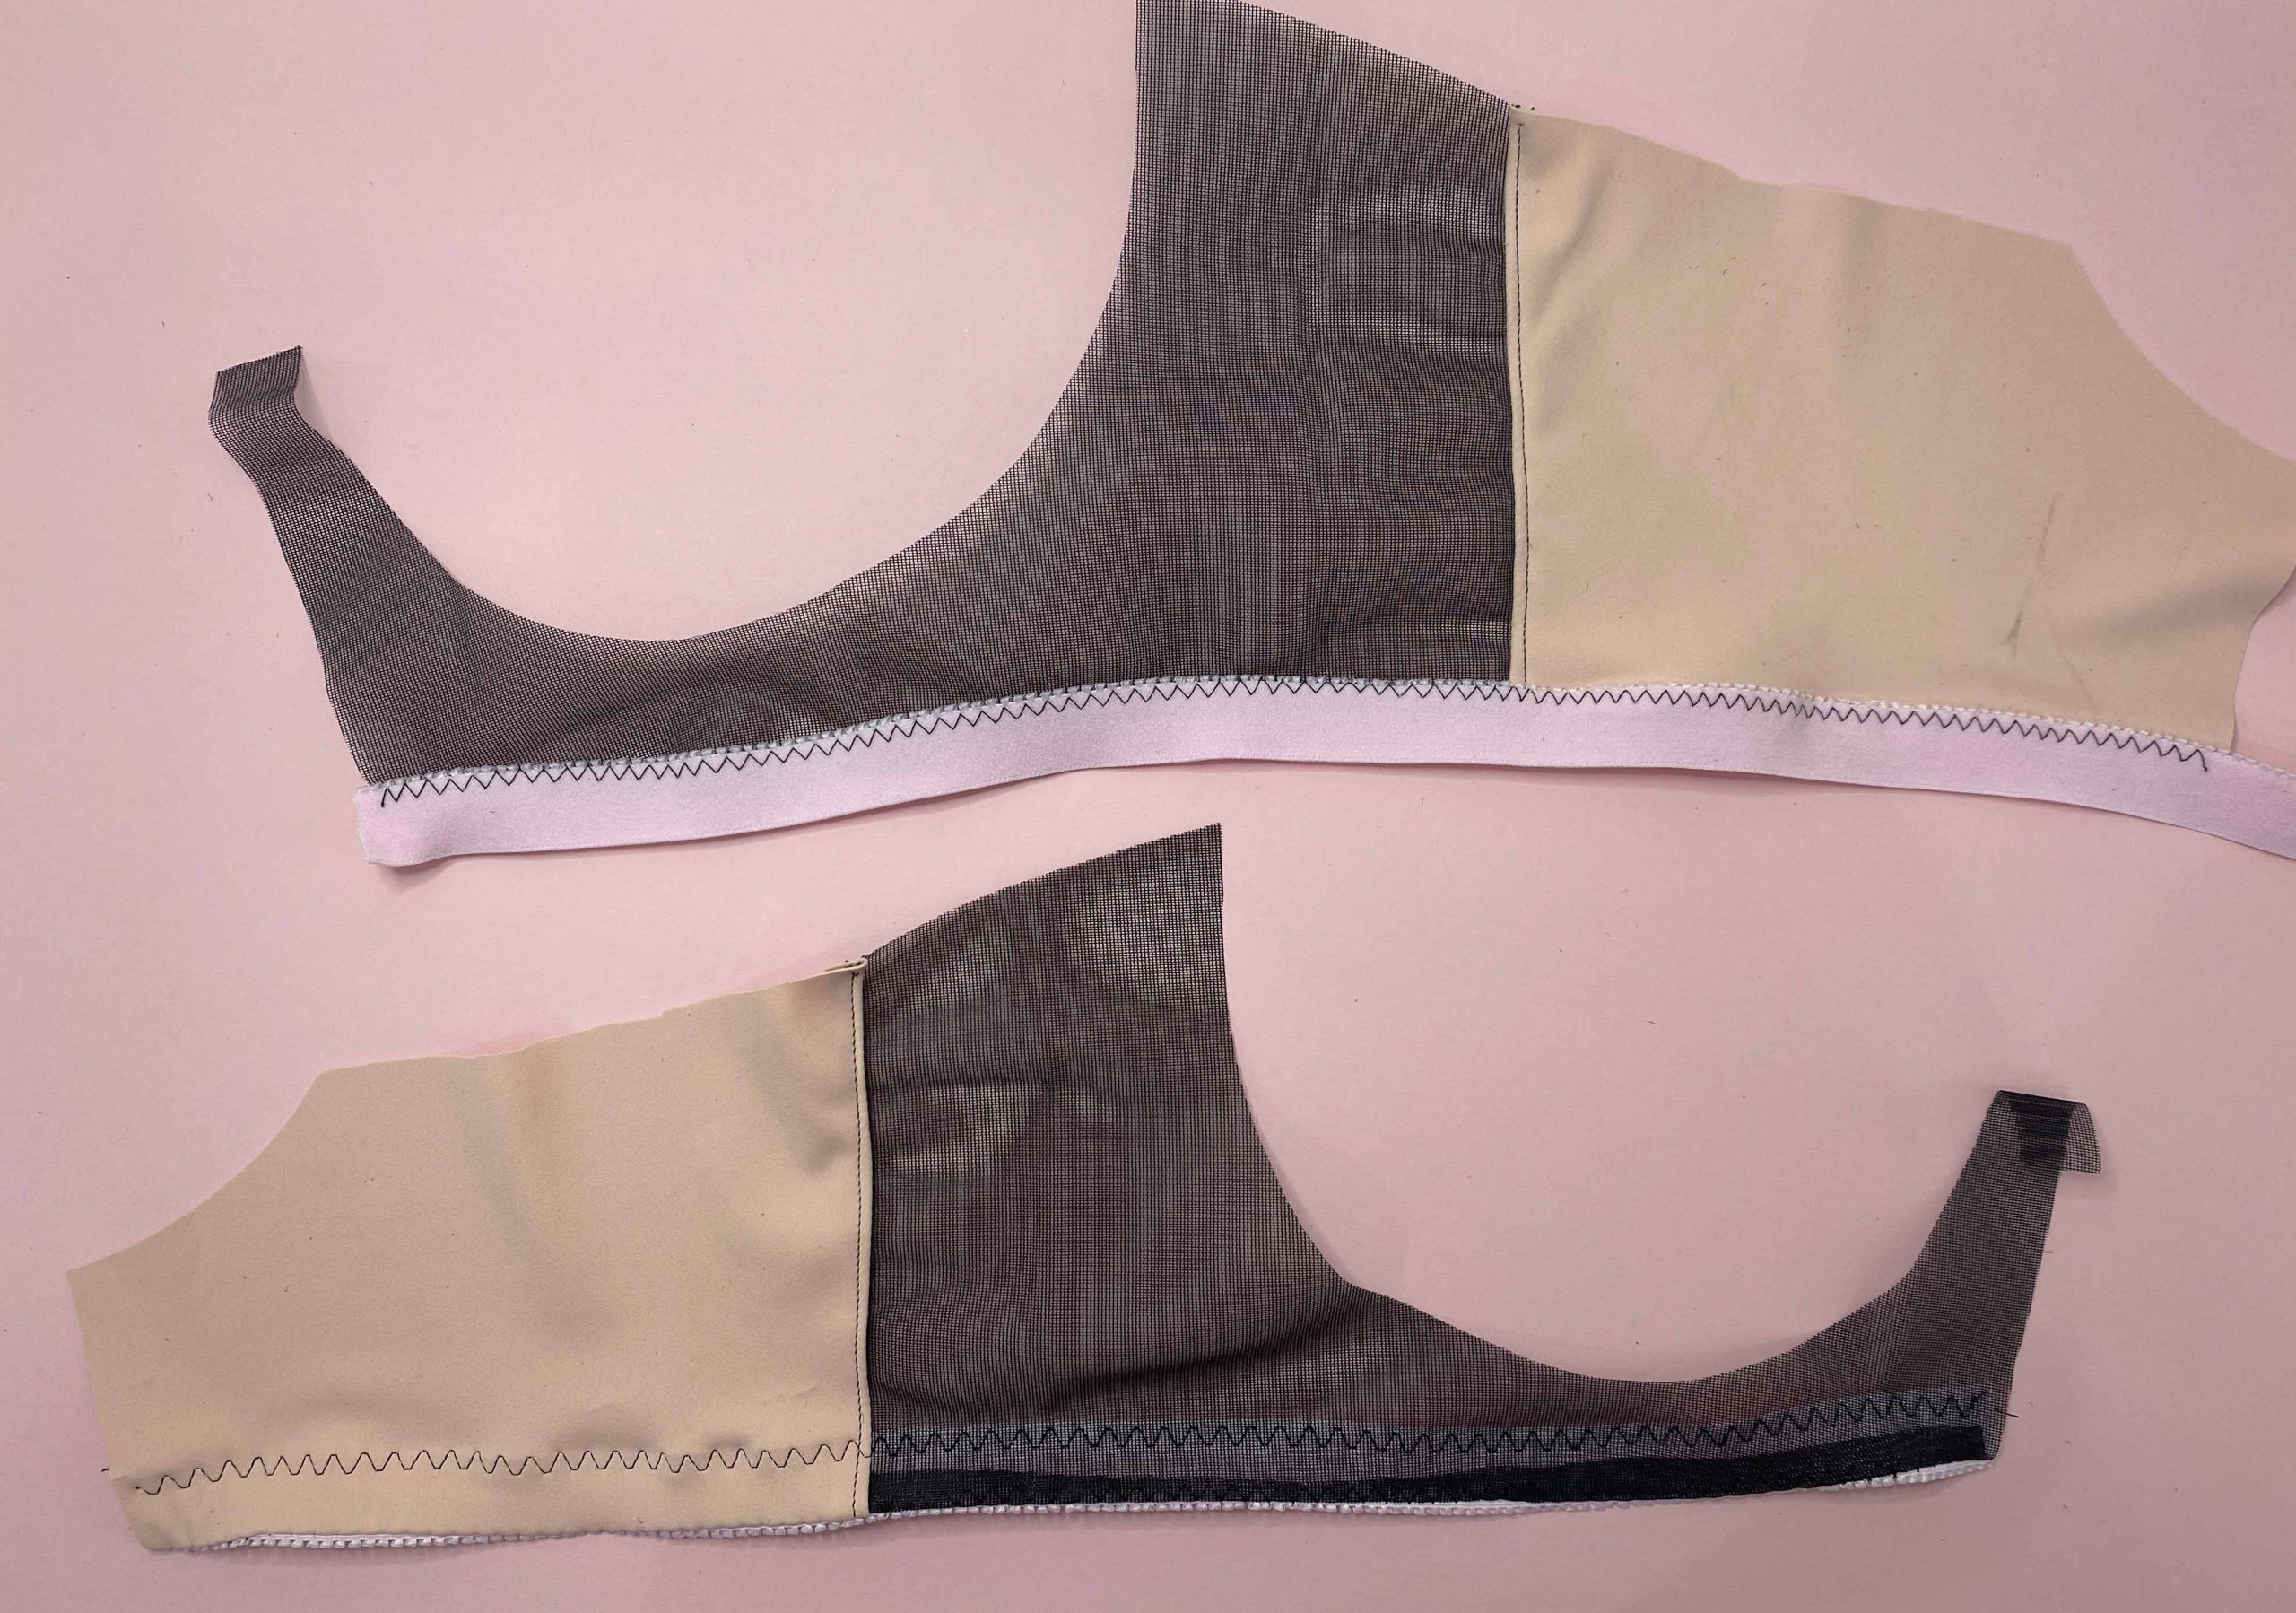 Sew on your band elastic. The first turn (top piece) with a regular zigzag, fold under and topstitch with a second row of zigzags (or a three-step zigzag, lower piece).

Do the thing with the underarm elastic.
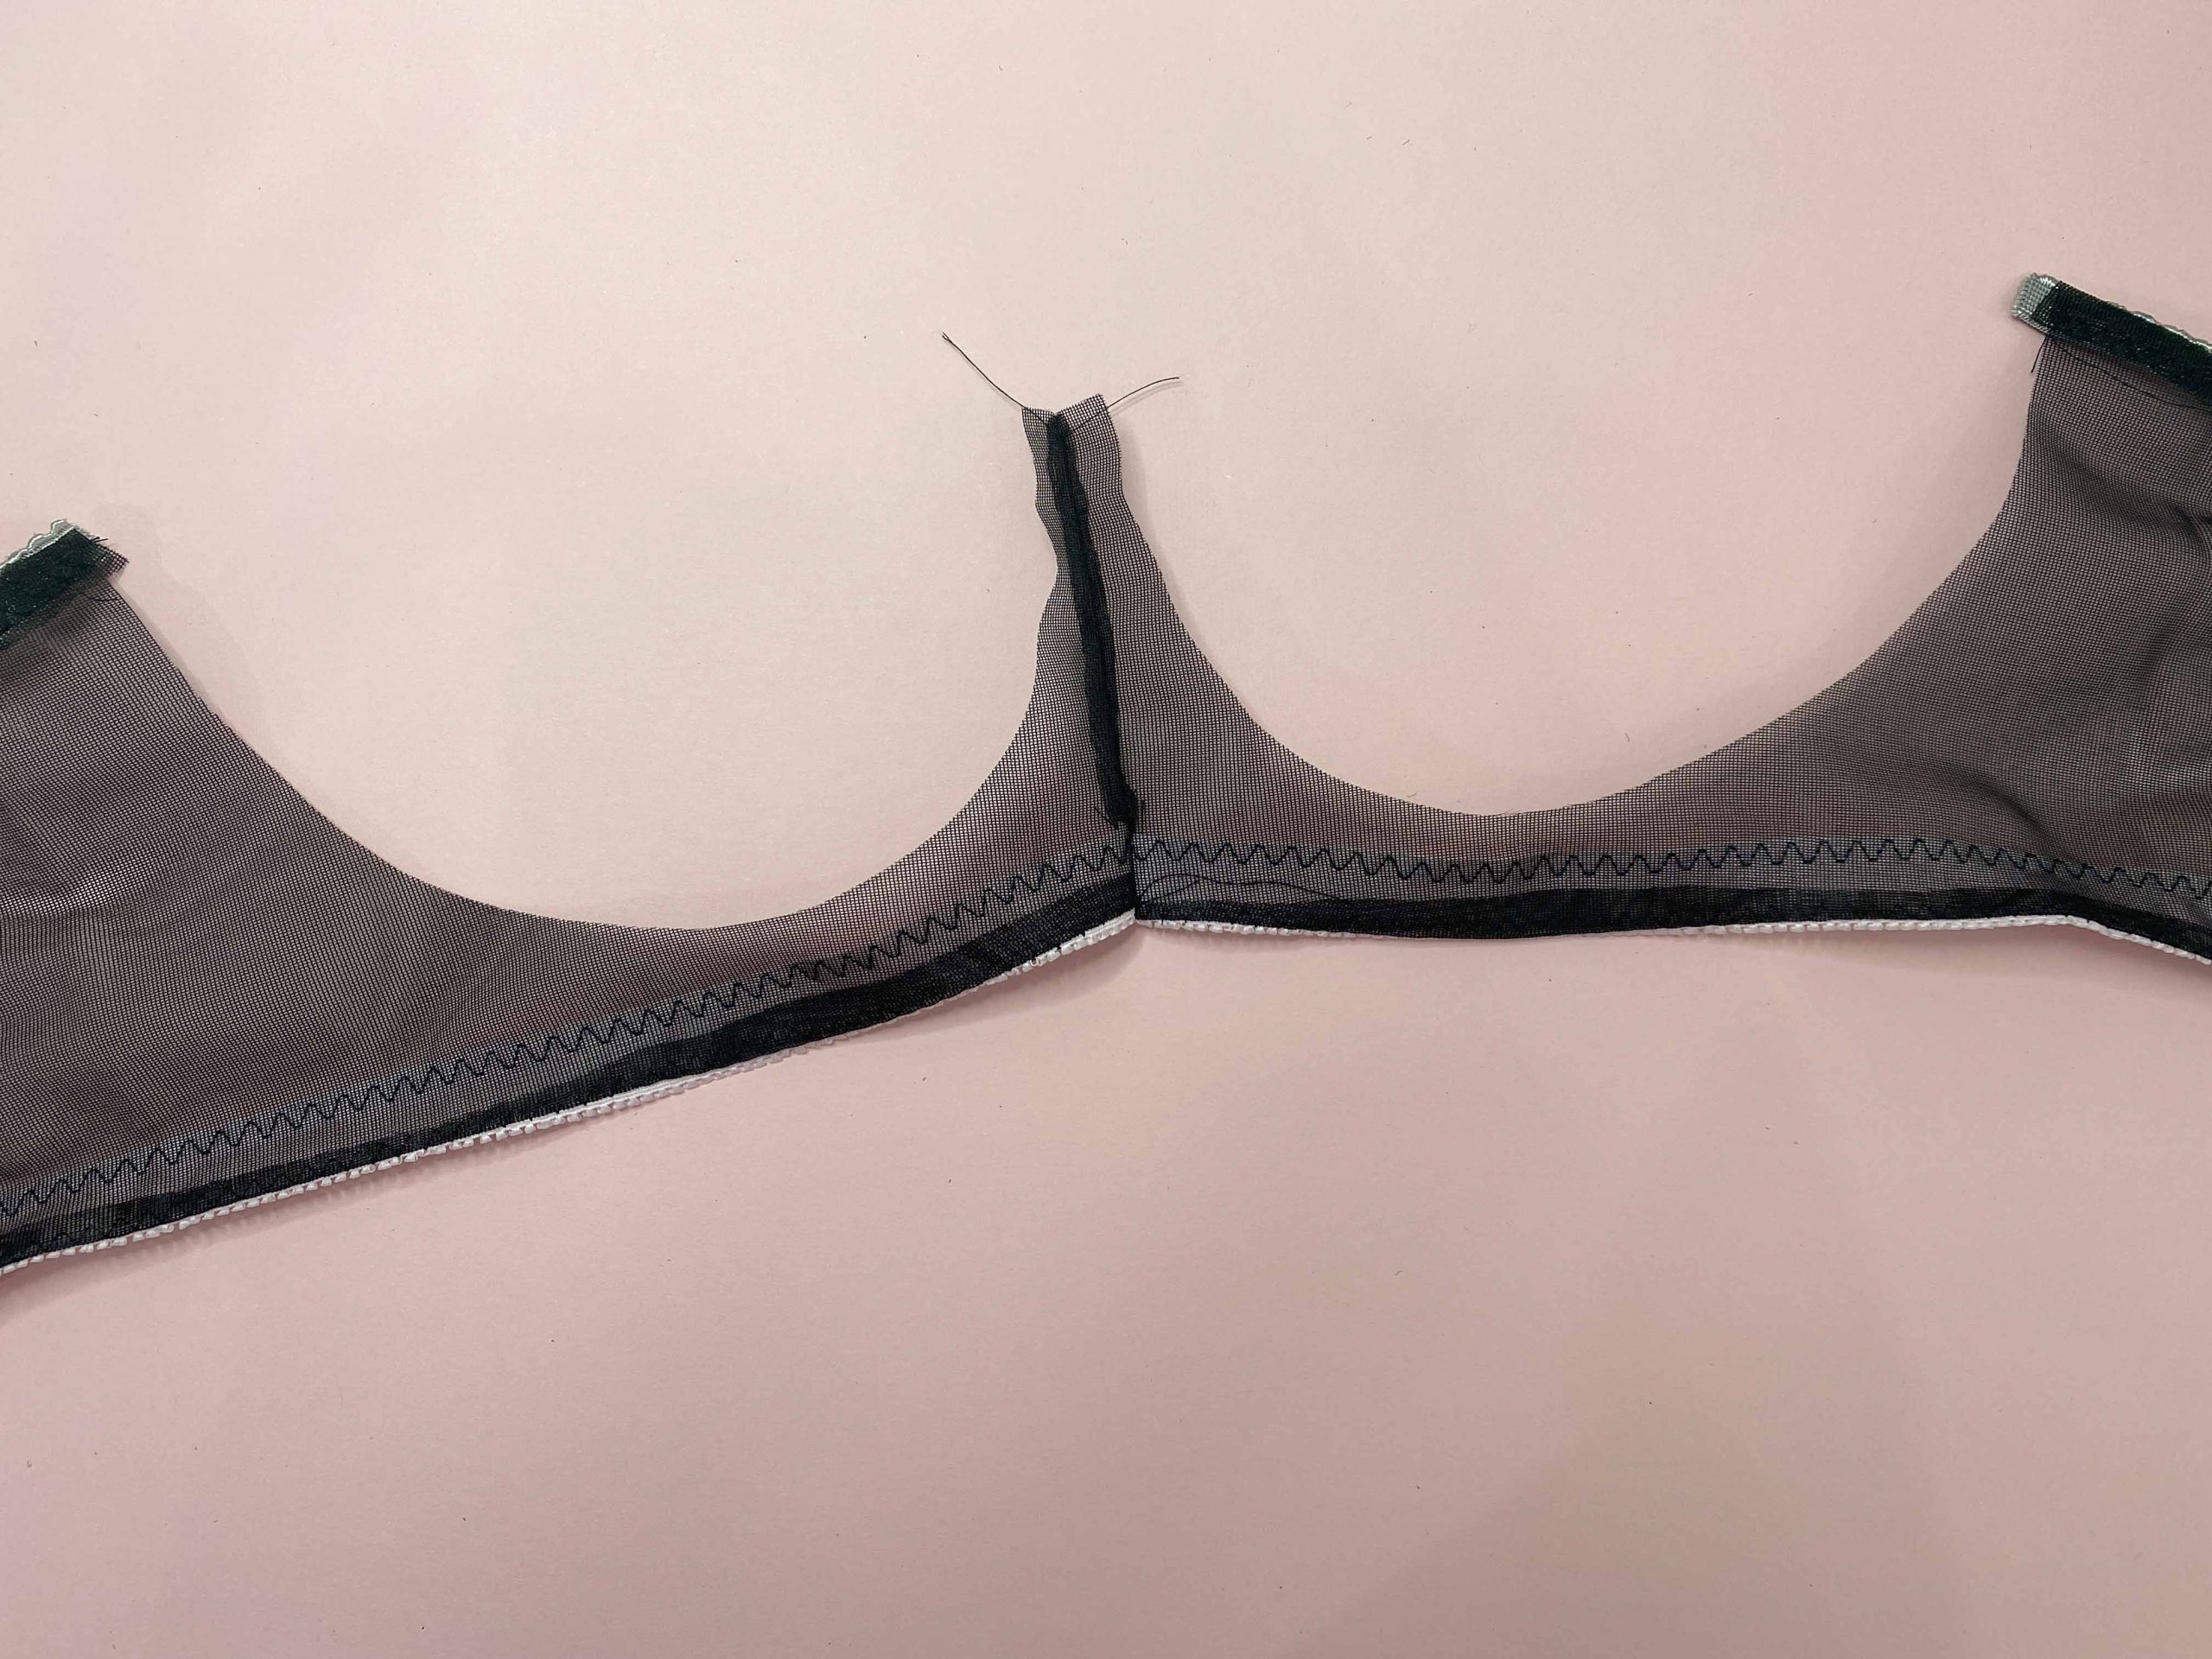
Now, it’s time to join the two pieces. I finished the top of the bridge just the way it would have been if I made the bra up (in my case with a small piece of underarm elastic)
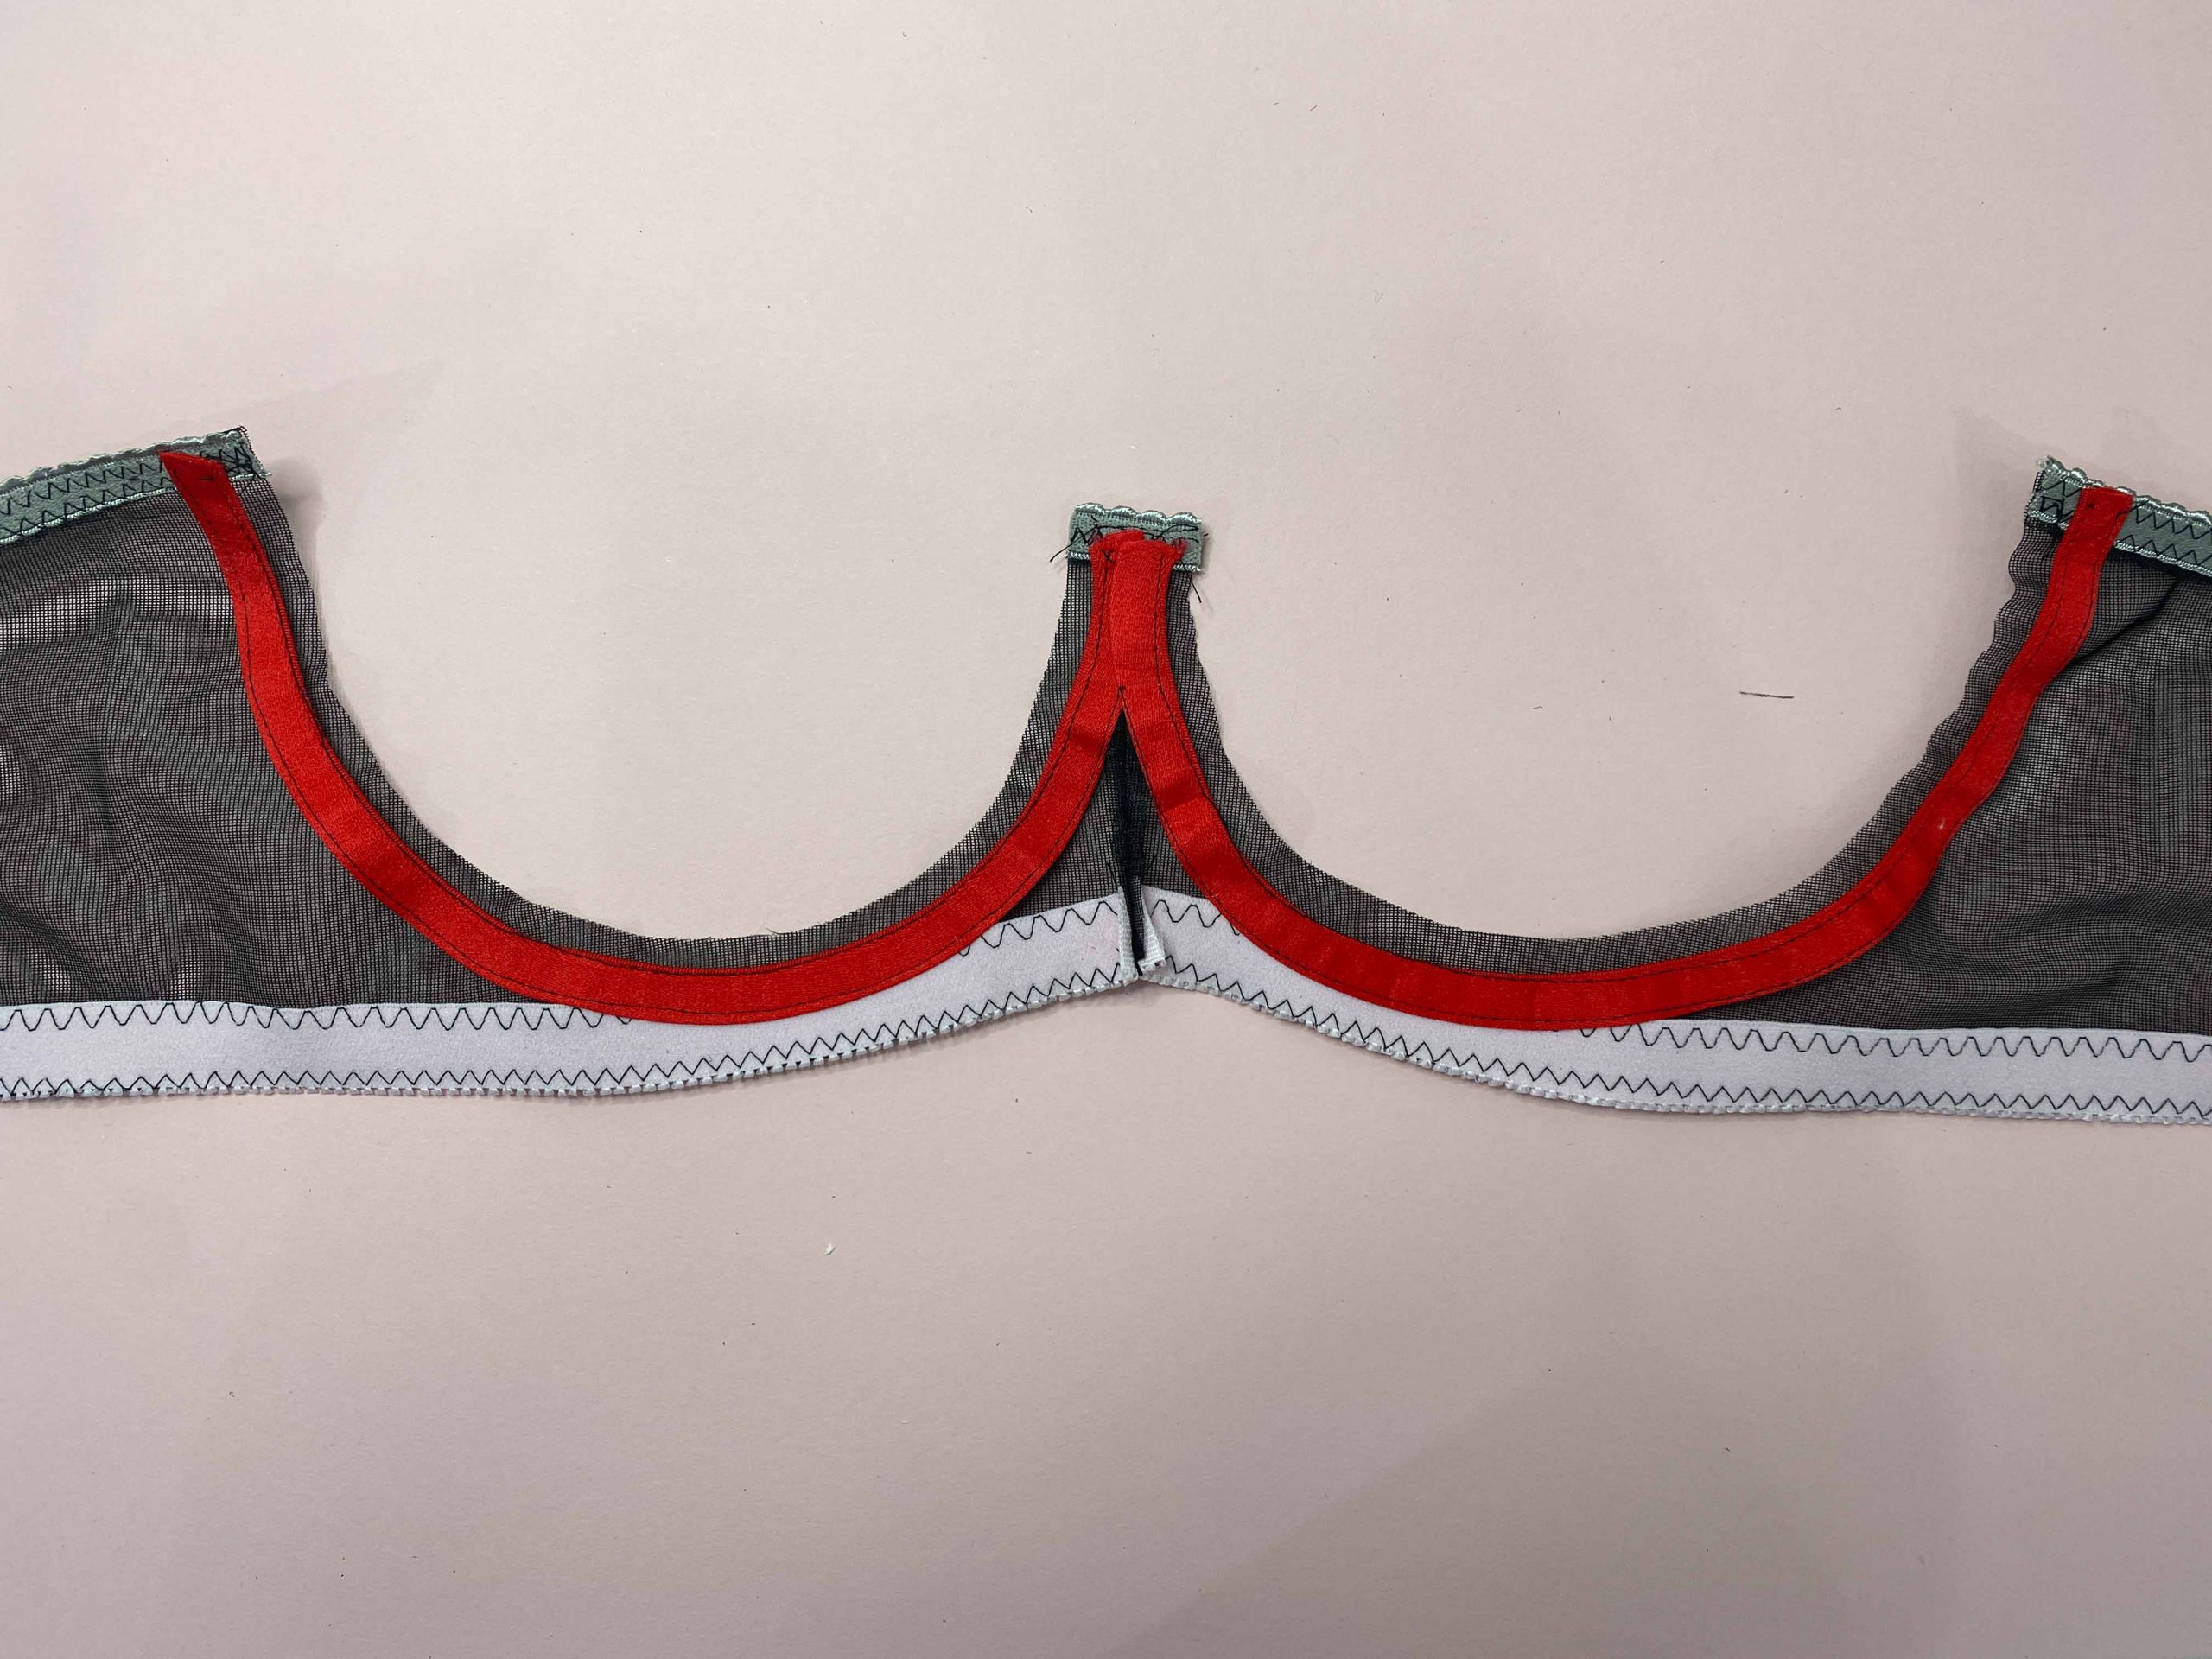
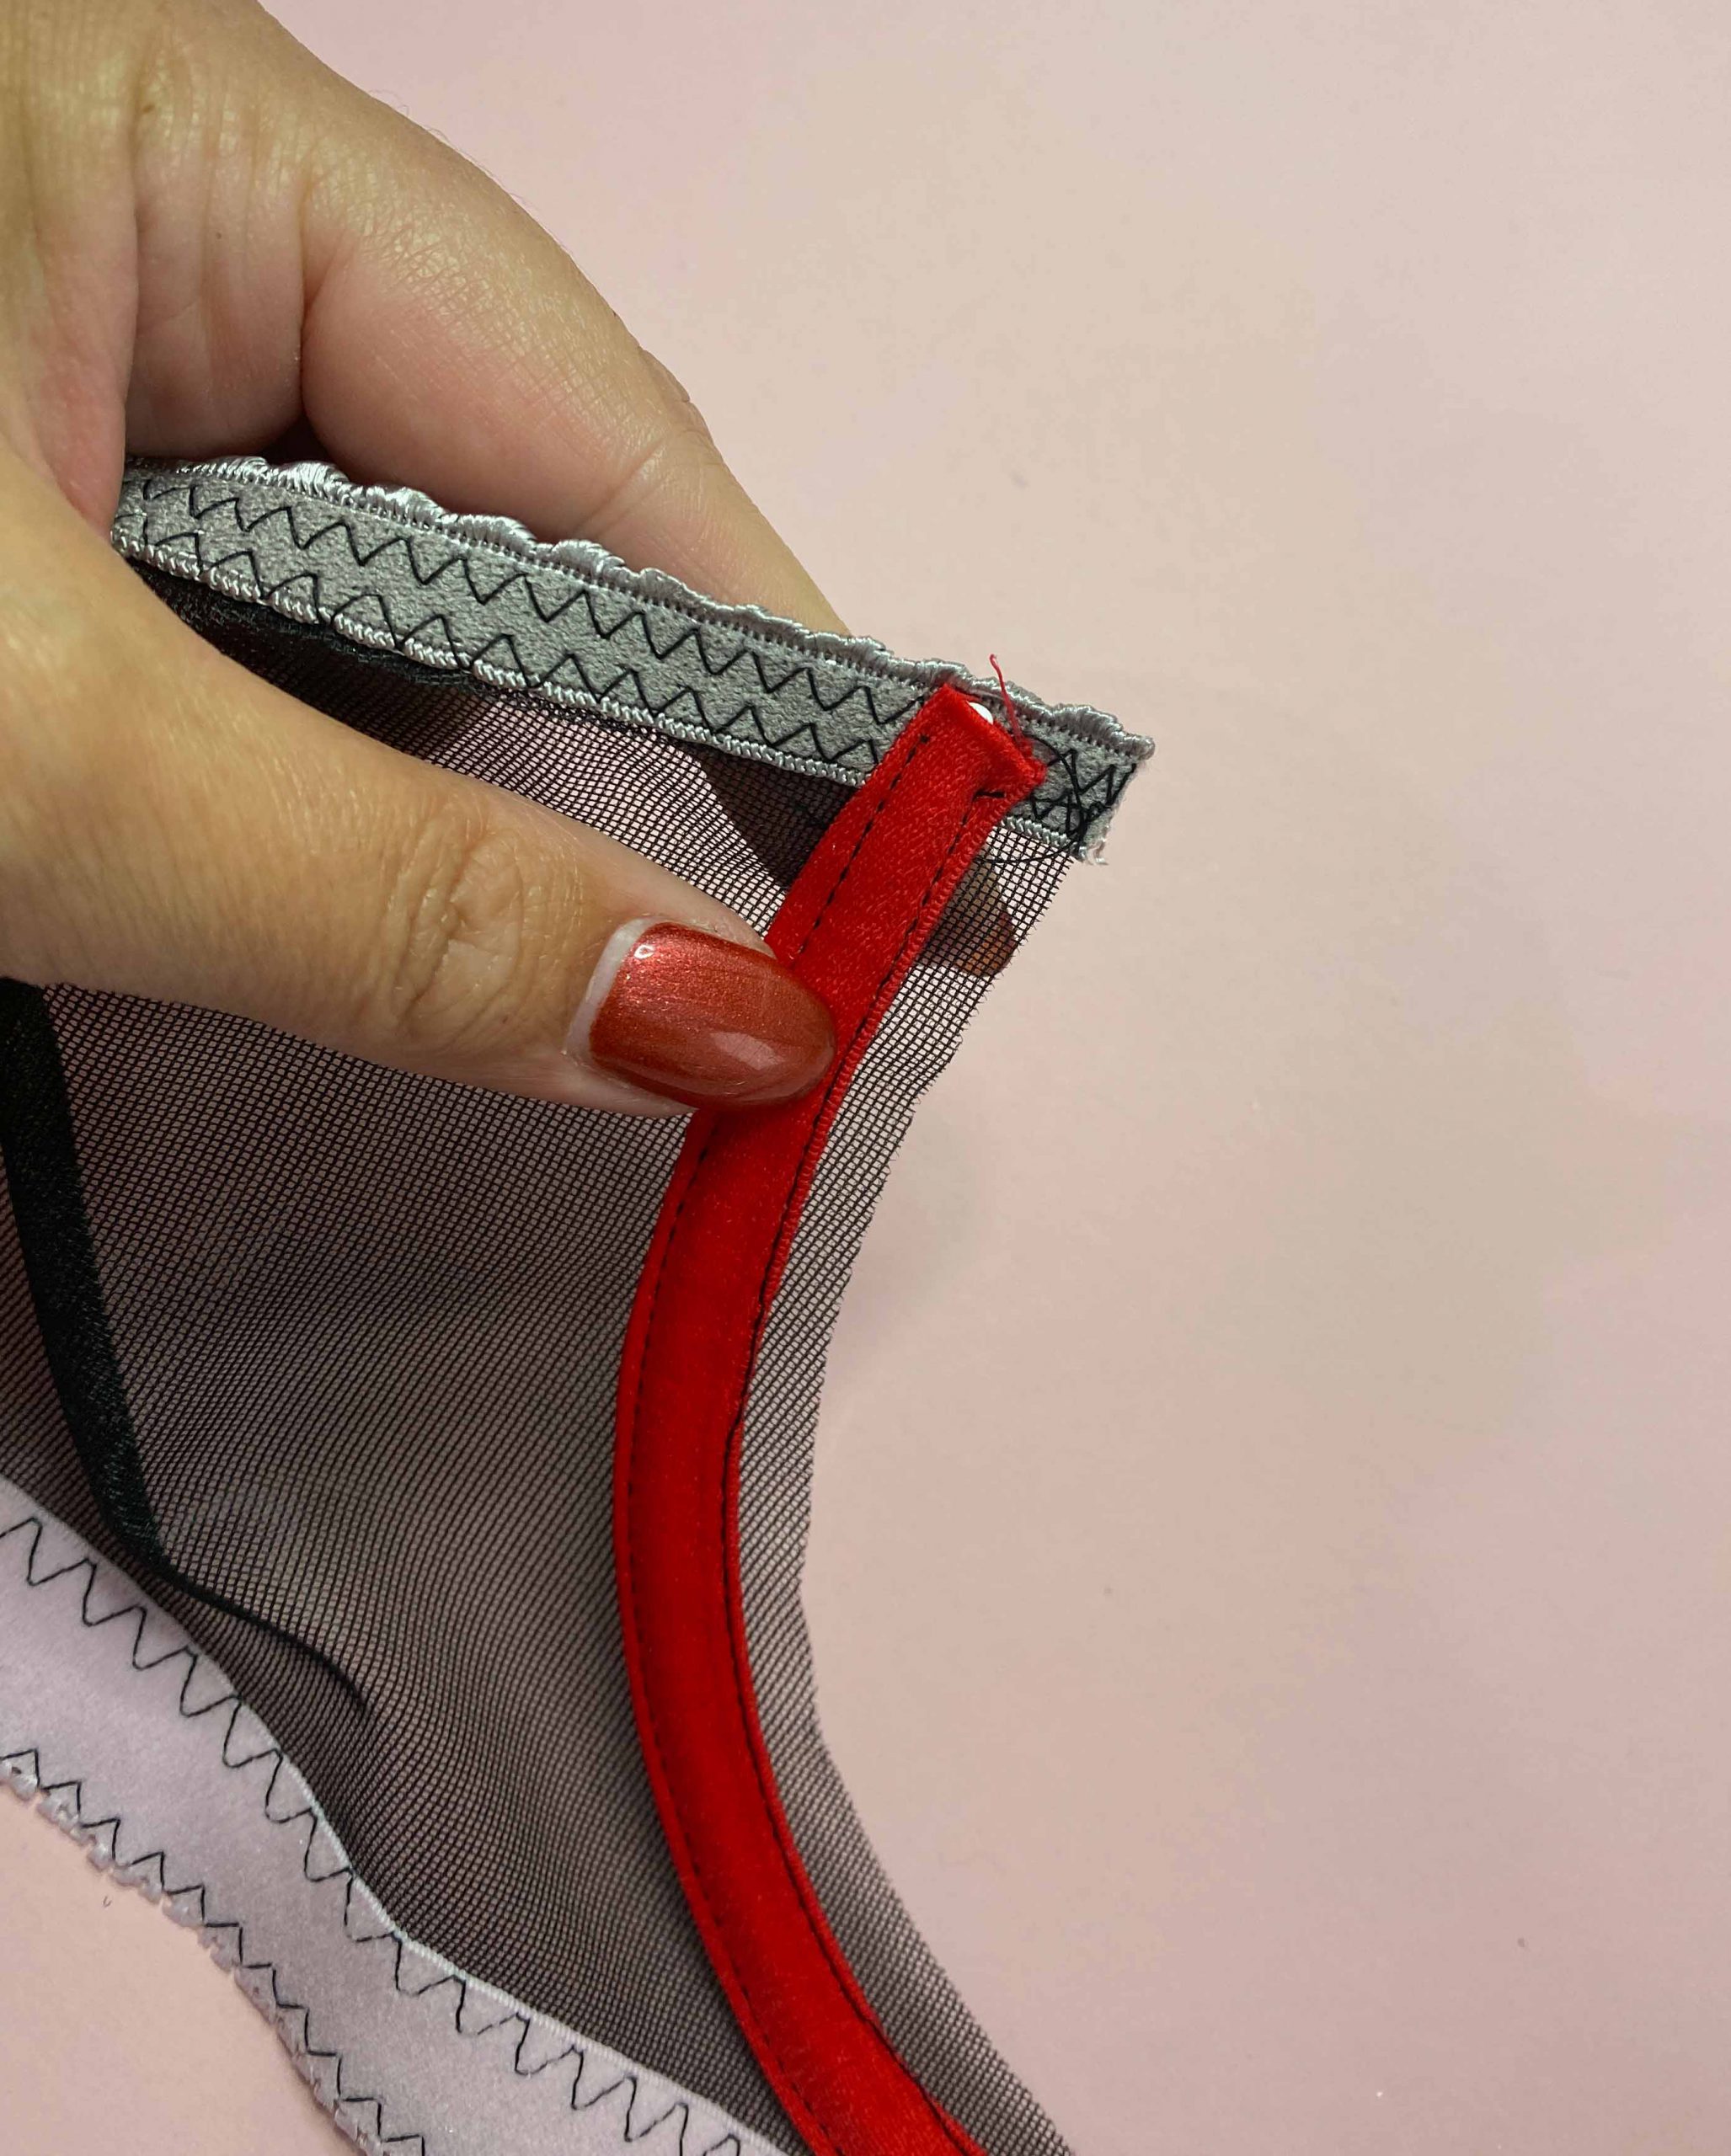
Sew on the channeling. Make sure you attach it where it would be if you had attached the cup pieces before. This means the seam-allowance will be “free” above the channeling. This is where we will sew the tester cups in in part 2. No need to close the channeling.

I like to make straps for my fitting band with some G-hooks in the front. The tester cups will have a fabric fold where I can insert the hooks to really get a good grasp on the bra fit.
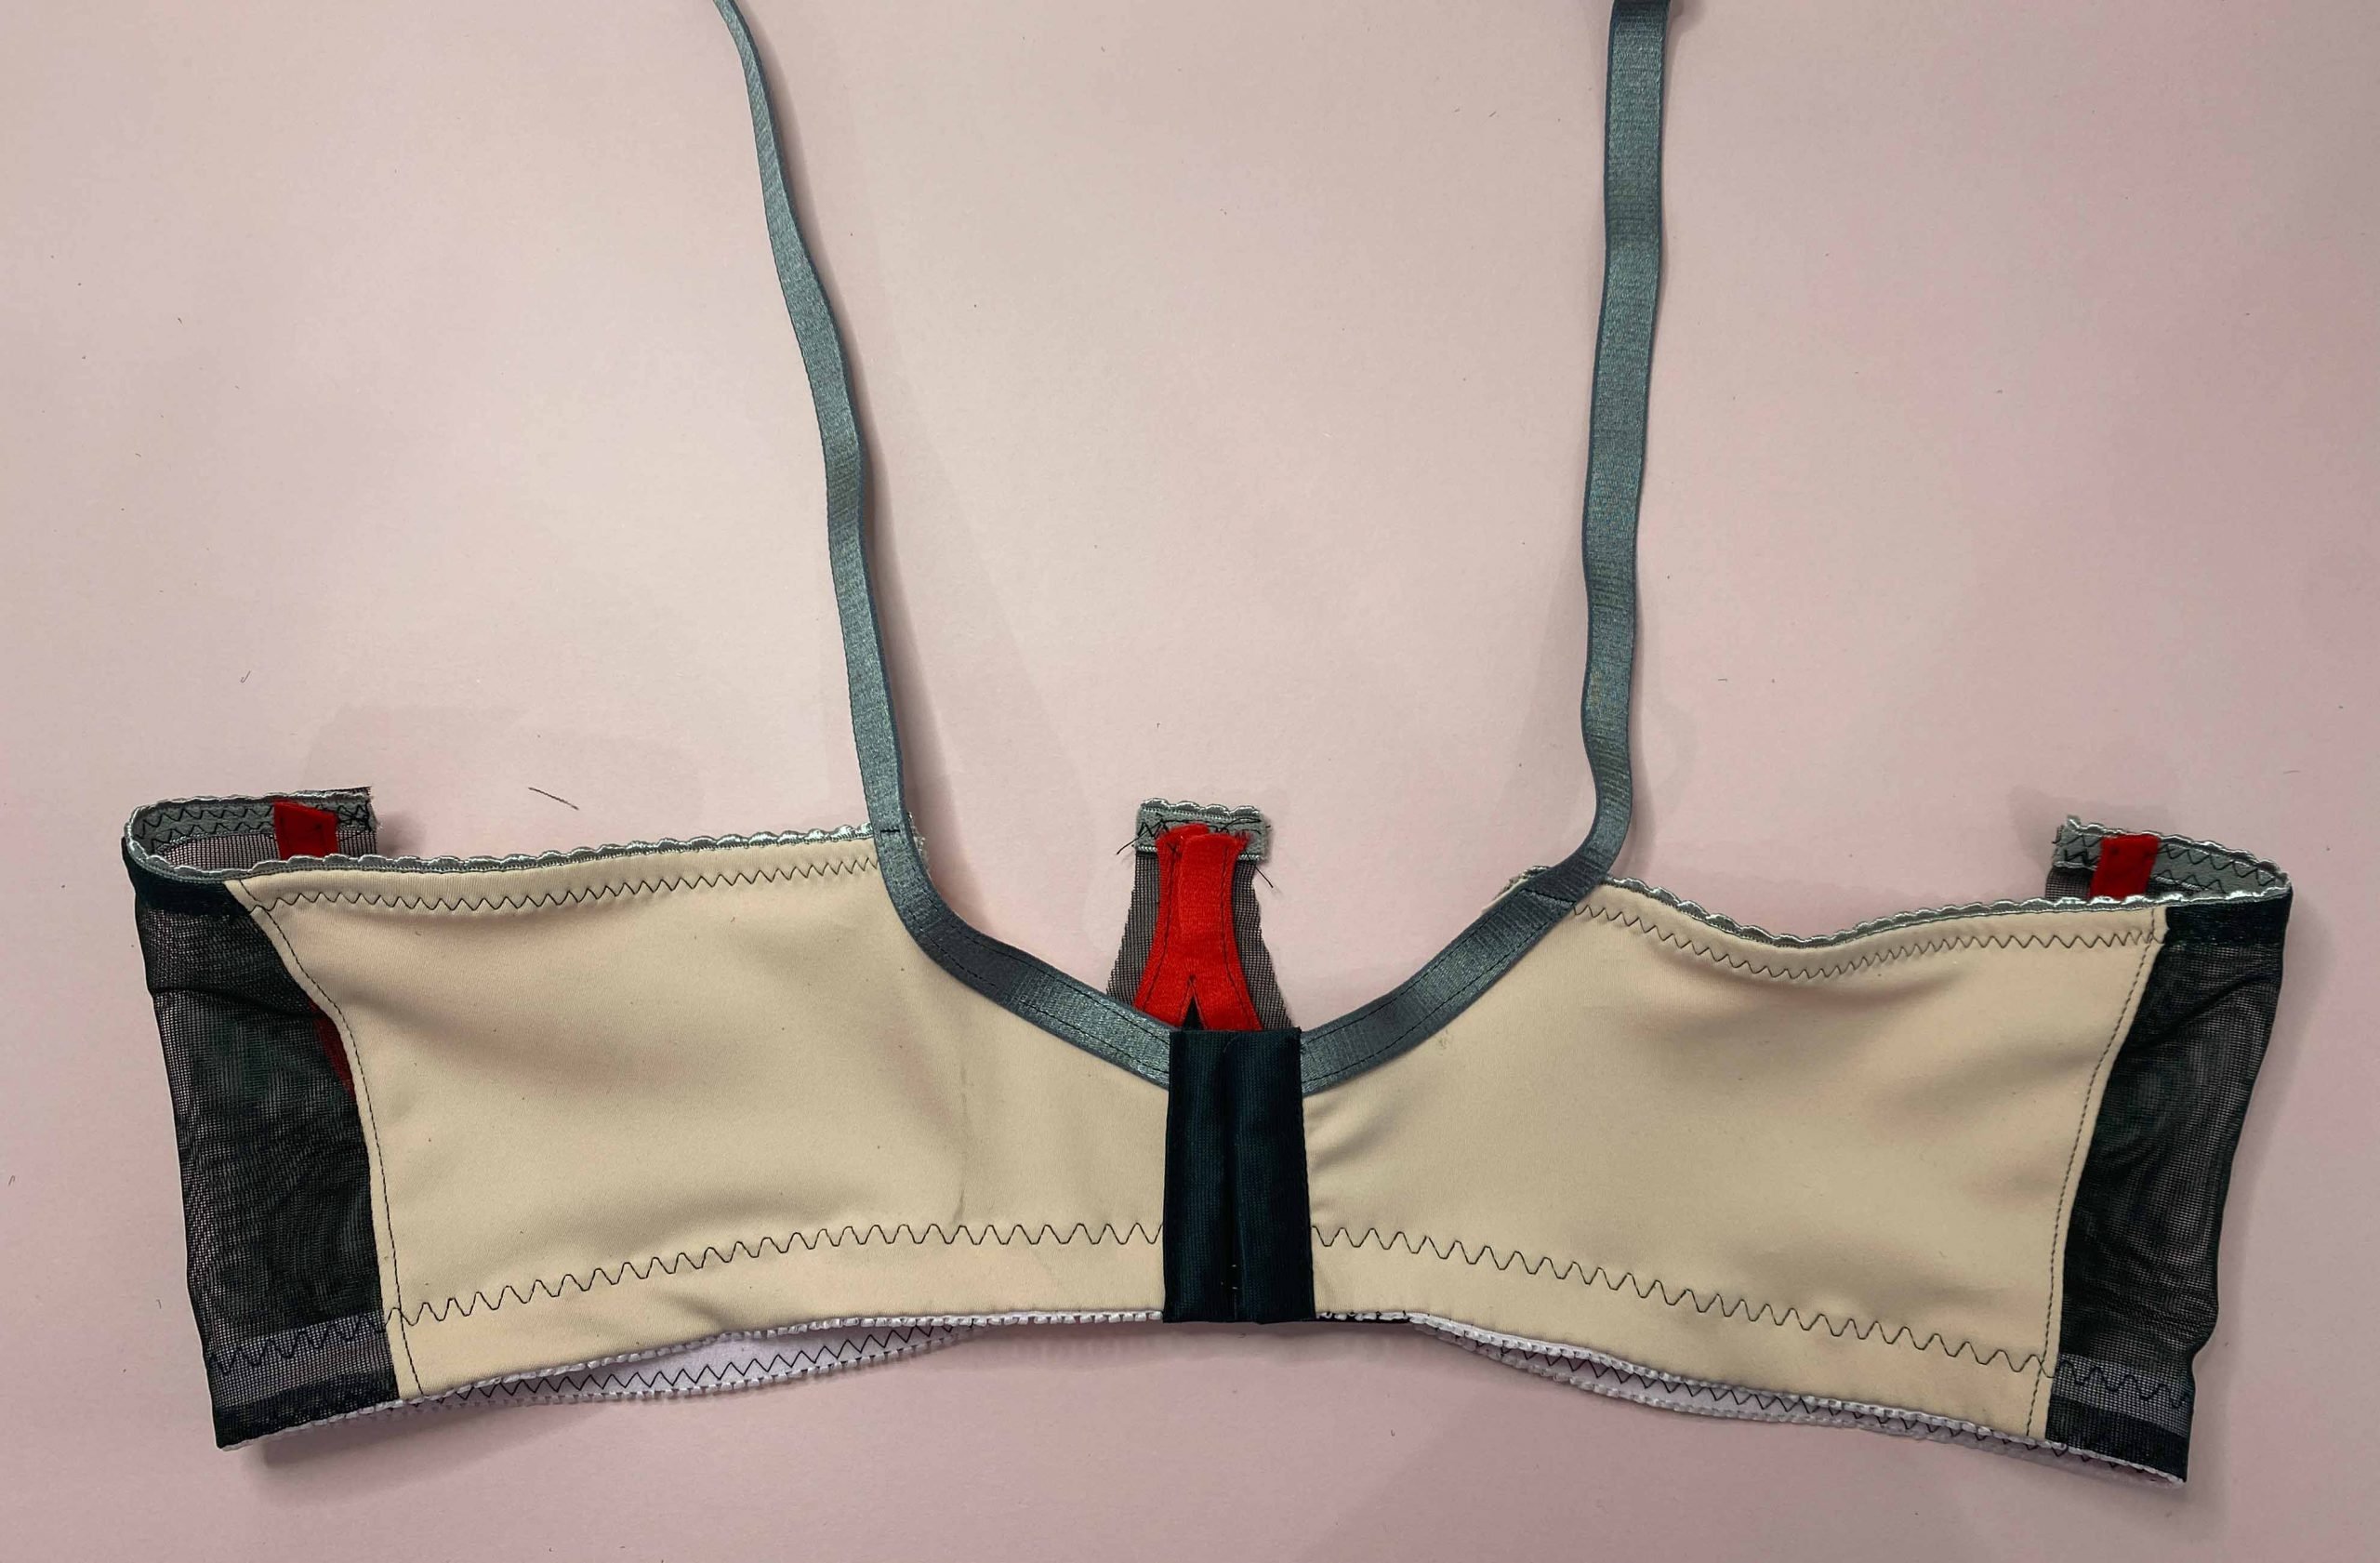
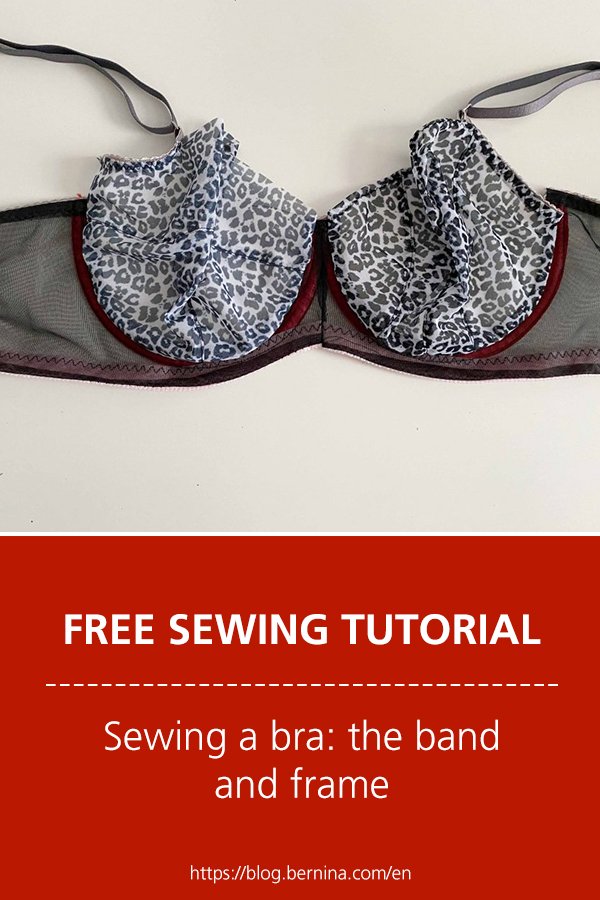
Attach the straps and the closures and your fitting band is done!
Fit alterations
Here’s a list on how I go about making alterations to my fitting band:
- First, I check if the band is the right size. Is it too loose or too tight? If the band is too loose we’ll shorten it, if it’s too tight we’ll add to it. If you have to add more than 2.5cm you might want to size up or down. However, if you size up or down, you will need to go up or down a cupsize. A 90D that will go down to a 85 will become an E and a 90D that goes up will become a 95C.
- Next, I check if the bridge lies flat against my chest. Depending on how you’re built you’ll have to narrow or widen the bridge. I know that my bridge (without seam-allowance) mustn’t be wider than 1cm to fit me of else the wires will pinch me.
- Next, I’ll check if the wires (that I have picked because they fit me) really enclose my breast tissue. There should not be any gap between your breast tissue and your wire. Bear in mind that you may also have to alter the angle at which the bridge piece sits on your chest; e.g. your top bridge might be right but the space at the bottom of the bridge piece might be too narrow or too wide.
- Next, I’ll check if the cupseam starts where the breast tissue starts. You don’t want your seam extending to your underarm area, because your breast tissue should sit at the front. Adjust your pieces if necessary.
- Lastly, we’ll check if our chosen wire has enough space in the channeling and if we like the general height of the side cupseam. Your wire will need about 5mm of wire play at each end of the wire or else they might poke through the channeling after a couple of wears. If you’re wire has more than 5mm of play, it will slide inside the channeling and you’ll not have the support you need. Almost any shape and size of wire will have “short”, “regular” or “long” variations. So you don’t need to adjust every time you don’t have the right height for your wire, you can just purchase your preferred wire in a long or short version as well.
You can see my wires do not have enough “play” at the side.
In my case
In my case I have shortened the bridge before I even made the fitting band, because I know that I need exactly 1cm bridge width. The narrowest your bridge can go, is the width of your wire channeling. You can overlay your wires at the center.
I can also tell that the band is slightly loose which makes sense because my underbust measures 88cm not 90cm, so I will take out 1cm out of the back band piece.
The side cupseam is at the right position. My wires need a little more space, however, which is why I will lengthen the side cupseam by 7mm and 1cm at the side seam (just a preference). Otherwise my fitting band is spot on.
Now, I’ll transfer these changes to the pattern pieces and make a new fitting band that will last me ages…
Let’s adjust the cups then, shall we? You’ll find the post here tomorrow.
Happy sewing
Nadine


Thank you so much for taking the time to write this article. I know it will be very useful for me as well as others.
tHanks!
Wow! Just found this post. What a great resource. Fitting is definitely where I am getting stuck in my sewing-bra’s journey. Going to go back and have a good read of these posts. Thanks!
Glad I could be of help!