 BERNINA Corporate Blog -
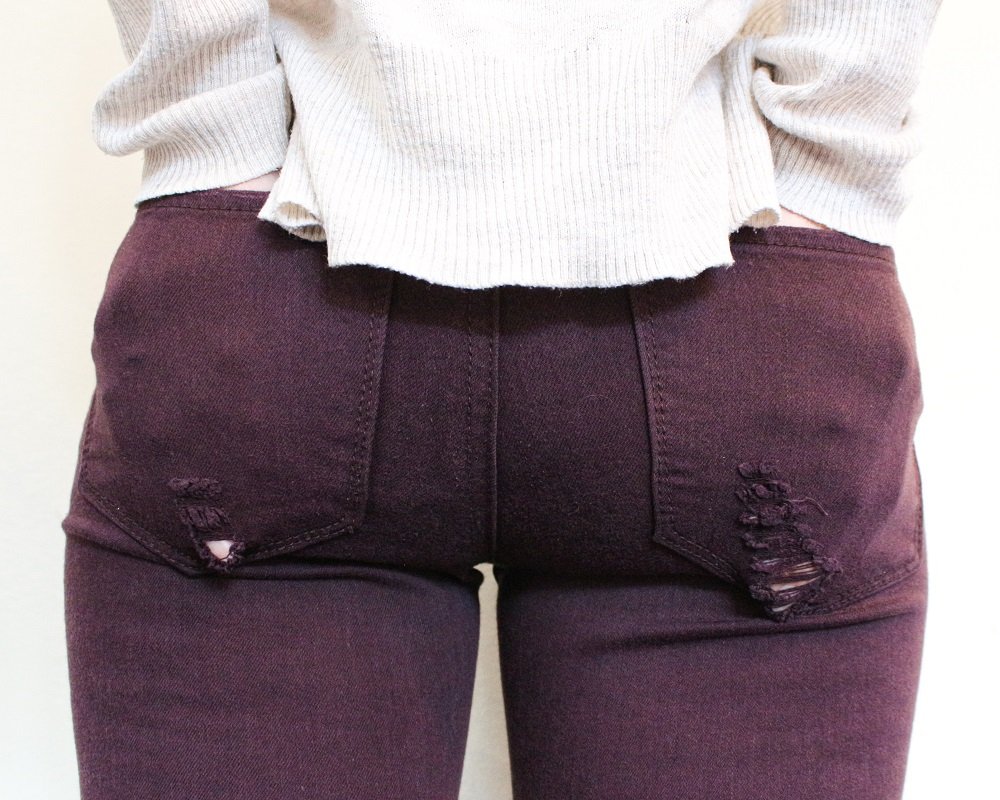
I have a pair of purple jeans that are very comfortable (they’re rather stretchy) and fun but they have holey pockets.
The frustrating thing is that they’re on the back patch pockets and were made that way!
So many times I have forgotten about the holes and put coins or a pen in the pocket and lost them.
Instead of letting this design flaw drive me crazy, I decided to see it as an opportunity to use my creativity to resolve the problem.
What will be needed:
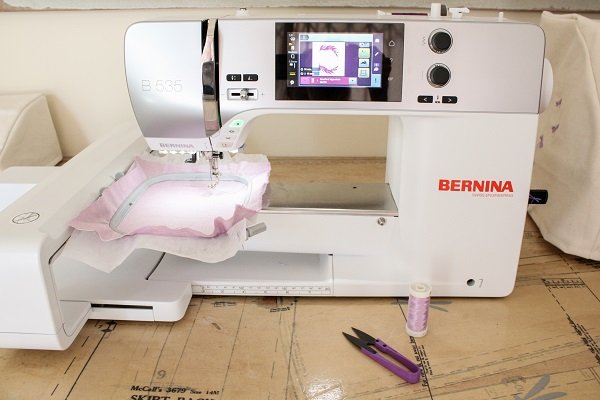
- Sewing machine
- Embroidery Module
- Embroidery Software Designer Plus (V8)
- Tear-away Stabilizer (if you only have Cut-away Stabilizer then you can use that instead, see the Tip section)
- Embroidery Foot #26
- Embroidery Hoop
- Embroidery Threads
- Hand-sewing Needle
- Small piece of sturdy Cotton/Cotton Twill (big enough for your hoop)
Create in the Embroidery Software
Convert an image to Embroidery
 1. Switch to Artwork Canvas and import the image you would like to use.
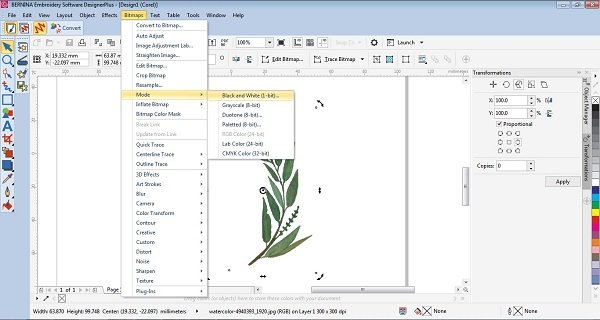 2. Convert the image to Black & White.
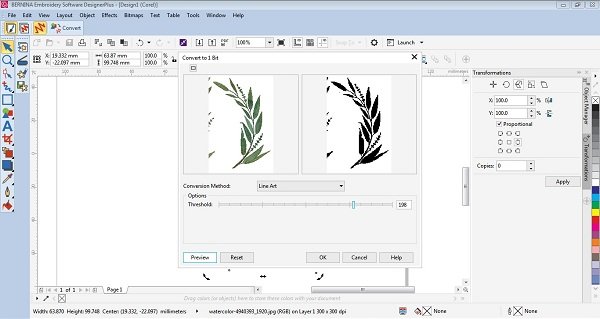 Select Line Art in Conversion Method and adjust the Threshold as necessary.
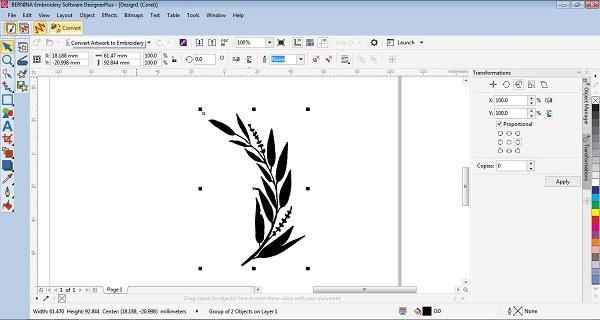
 3. Outline Trace the image.
 Select Line Art as the Image Type.
 4. Select Convert to Embroidery.
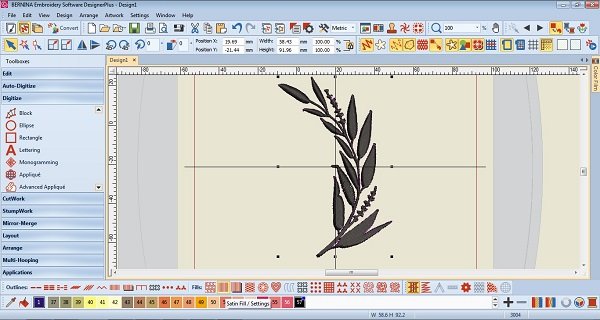 5. If necessary change the Stitch type.
Create an Appliqué
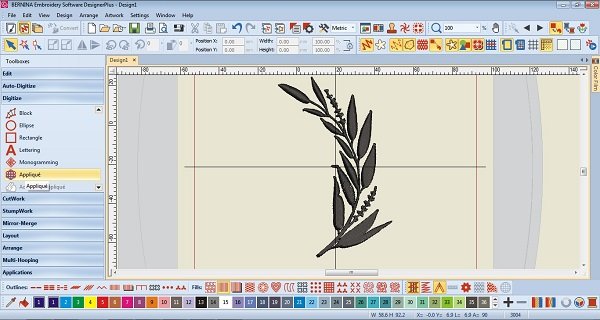 6. Select the Appliqué function under Digitizing.
 7. Roughly draw around the embroidery design.
Left click to create straight lines, Right click to create curves.
When you get back to the beginning node, click Enter.
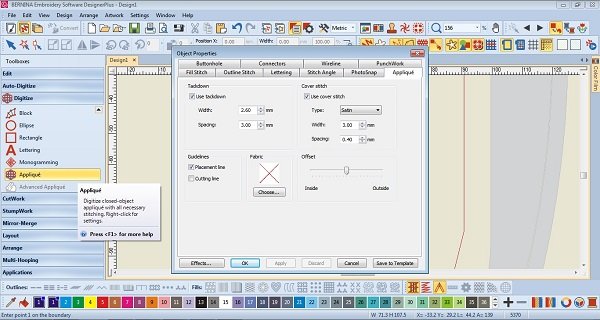 8. Right click on the Appliqué function.
Edit the thickness of the line.
(I should have made mine 2-3mm rather than 1mm thick)
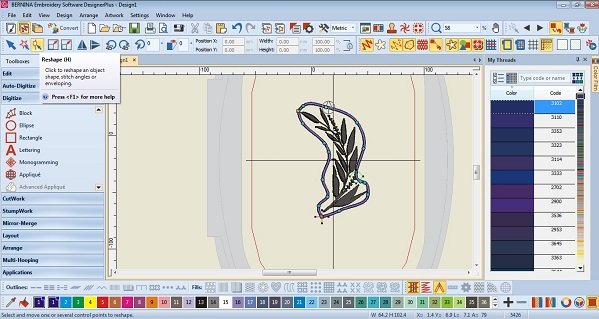 9. Select the Reshape Tool and edit the nodes to create a neat shape.
You can add more nodes in if necessary.
Leave some space between the embroidery design and the appliqué line.
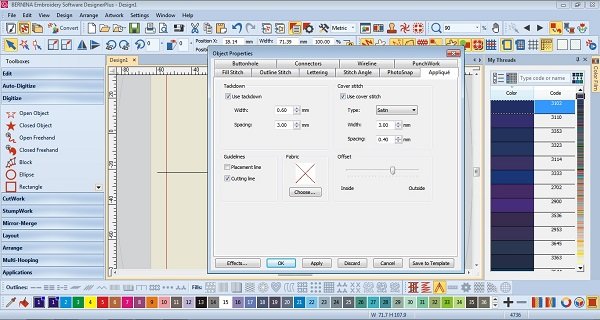 10. As we are creating a Trim-in-place appliqué we’ll need to adjust the Object Properties.
Double click on the appliqué stitch line to open the Object Properties.
Untick the box for the Placement line as it won’t be necessary for this particular Trim-in-Place design.
Tick the box for Cutting Line and move the Offset between the Midway & Outside mark.
Tick the box for Use Tackdown.
Click Apply.
Edit the Embroidered Appliqué design
 11. Take a photo of the pocket.
Lay the garment on a flat surface.
You need the phone to be as parallel to the garment as possible.
Use the grid feature on your phone’s camera to help you get an accurate level photo.
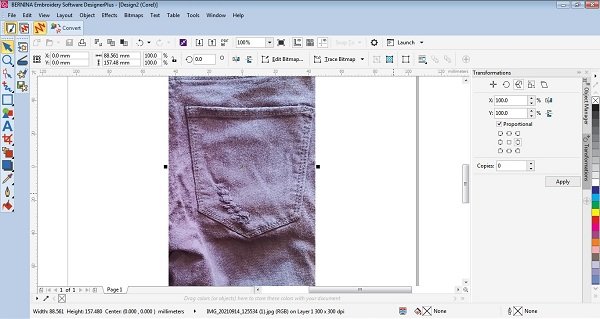 12. Import the photo to your computer.
Open another document in the Embroidery Software and import the image in to the Artwork canvas.
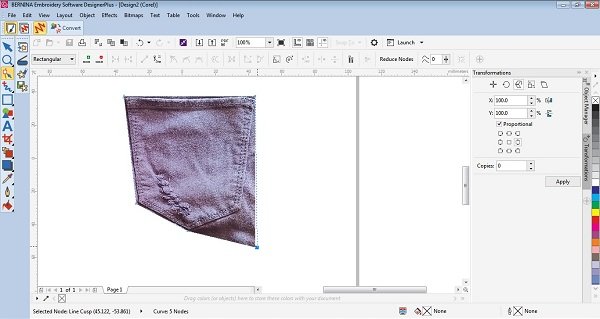 13. Crop as close as possible around the pocket.
You can move the nodes to crop exactly to the shape of the pocket.
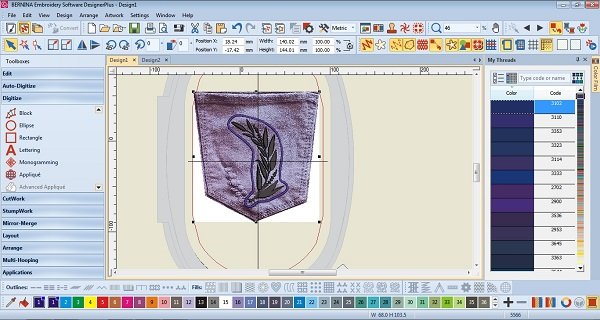
 14. Measure the widest and longest part of the pocket.
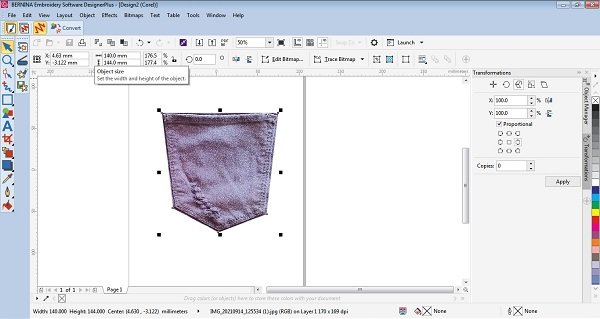 Make the width and length of the image on the Artwork Canvas the same measurements.
 15. Switch to the Embroidery Canvas.
Copy the pocket image to the document with the embroidery design.
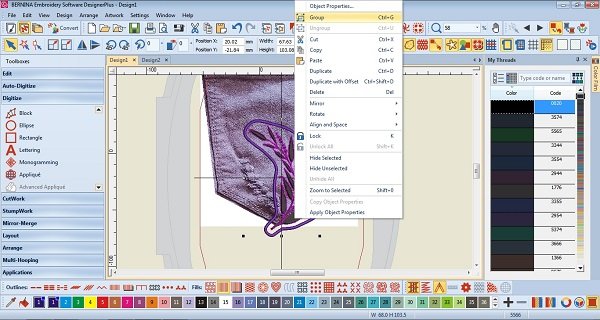 16. Select both the Embroidery design and the Appliqué line and group them together.
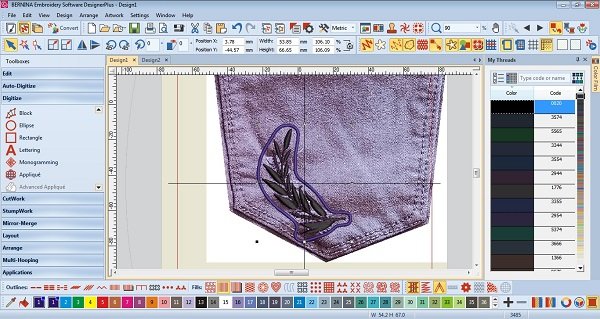 17. Place your Embroidered Appliqué design over the pocket and adjust it to cover the hole.
You may need to mirror, resize or rotate the design.
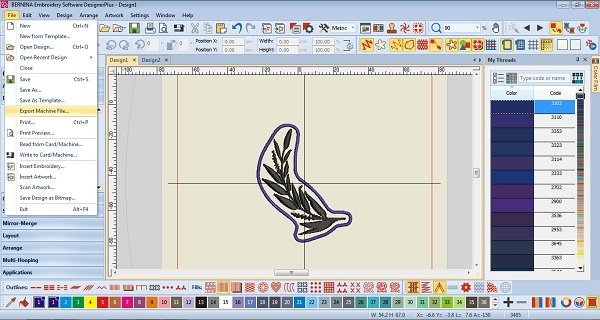 18. Delete the picture of the pocket, ungroup the design and Export the Machine File.
Create the Patch
Embroider the Patch
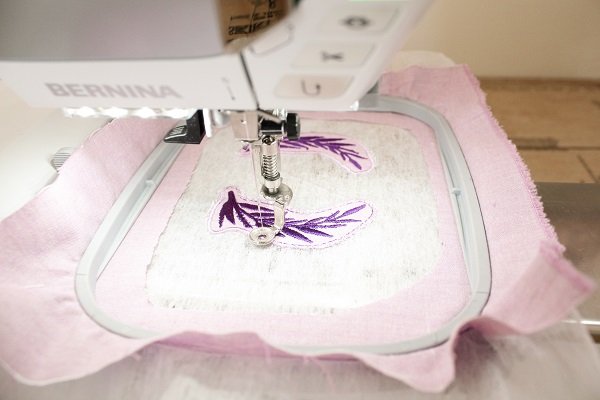
As both my pockets have holes I need to make 2 patches. To save on fabric I made them at the same time and used the Medium Hoop.
 Set up your Embroidery machine as you normally would.
Hoop your fabric with the Tear-away Stabilizer below.
Go ahead with embroidering the inner design.
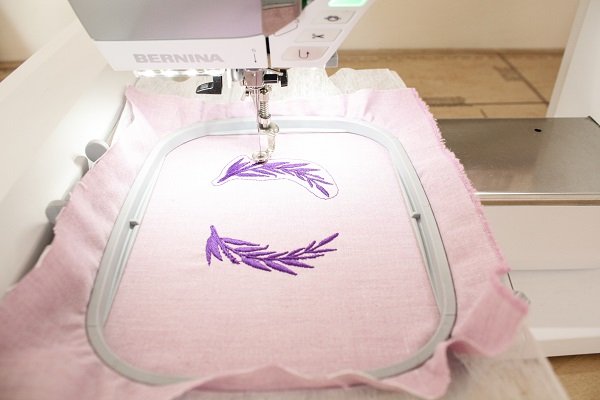 Once the initial embroidery design is complete, let the machine stitch the Cutting line.
This will be the next stitch line the machine wants to embroider.
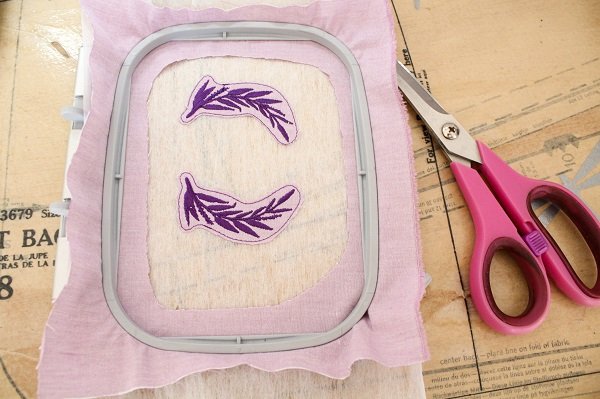 Lift the presser foot and remove the Hoop from the machine.
Do not remove the fabric from the Hoop.
Cut the fabric (not the stabilizer) just outside the Cutting Line. Cut as close and as neatly as possible.
Make a snip at one of the corners and slip the scissors between the fabric & stabilizer. Then cut around inside of the Hoop before cutting around the deisgn.
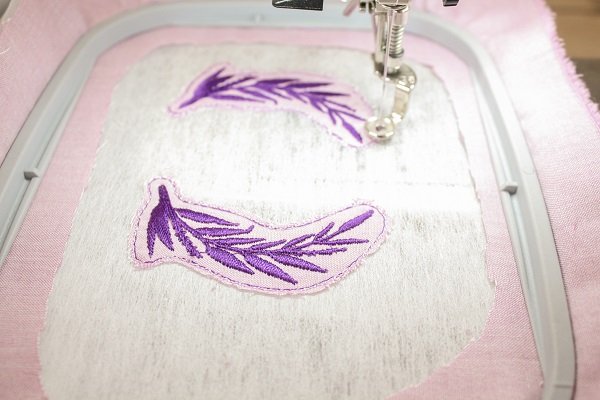 Replace the Hoop and proceed to stitch.
The next stitch the machine will want to do is the Tackdown stitch.
This will help secure the fabric edge you just cut.
 Proceed to embroider the Coverstitch Line.
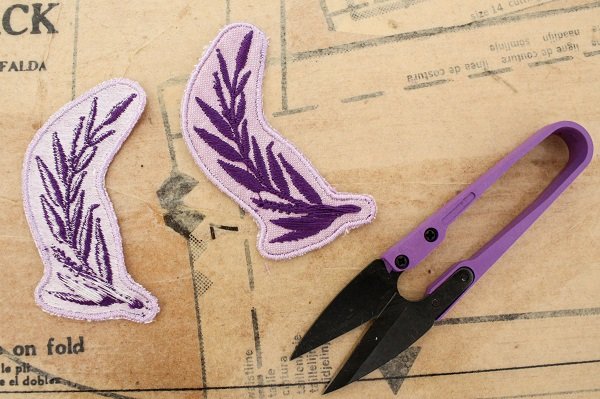 Once complete, remove the fabric from the hoop and remove the excess stabilizer from around the patch.
Tear away the stabilizer as close to the stitches as possible so that it is not visible from the front.
Try tear close to where the stitches interlock a few millimetres in from the edge.
Stitch on the Patch
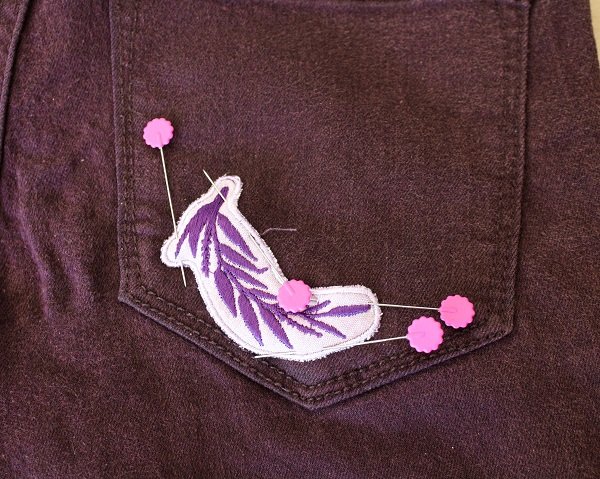 Pin the Patch so that it covers the hole.
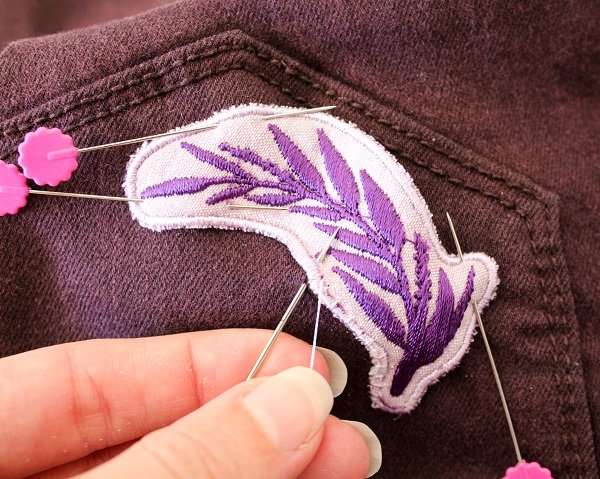 Hand stitch the Patch to the Pocket.
Ensure you are only catching the Pocket fabric and not stitching the Patch & Pocket to the Pants.
Stitch around Appliqué stitches.
Use the same thread as the Cover stitches to make them invisible.
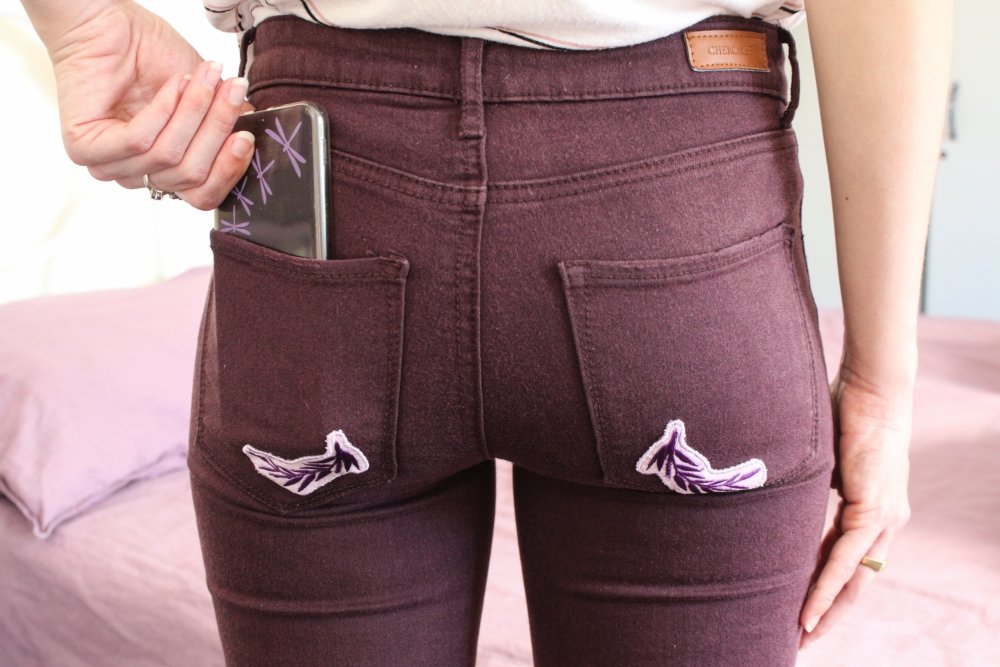
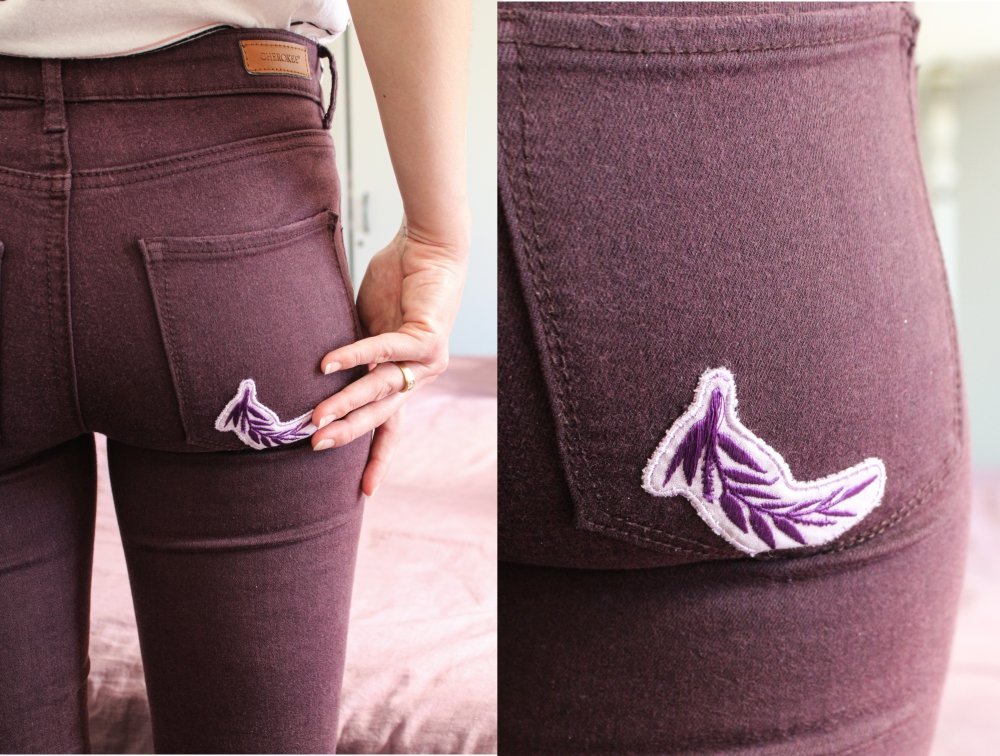
I love the unique and fun effect these patches create. think I’m going to make a few more, some smaller floral ones and fill up the pocket area.
Tips
- Use the same embroidery colour thread for the Cutting Line, Tackdown Stitch & Coverstitch.
- Tear-away stablilizer is what I recommend for this type of Embroidered Appliqué as it helps keep the patch firm/helps it hold it’s shape so that it is easier to attach it to the garment.
If you only have Cut-away stabilizer, you can still use it (you don’t have to buy Tear-away if you’re only going to use it for this project) Just be very neat when you cut away the excess stabilizer from around the patch. - If you feel that the patch is still a bit flimsy, you can iron some Vilene/Fusing on to the back.
Cut it a few millimetres smaller than the patch so it doesn’t stick out around the edges. - If you find that bits of the fabric edge are poking through the Coverstitches, you can of course trim them down. Just be careful to not snip the Coverstitches (the Appliquéd edge).
I would love to see what you make, please feel free to share with me!
Instagram
Facebook
-Hannah-Rose


Thanks for a wonderful idea. I was just wondering why you haven’t used water soluble Vilene or any other water soluble stabilizer and embroider this patch as an In The Hoop design. The edges of the patch will look much neater and the patch will also look more professional. Hoop two layers of the water soluble Vilene instead of the tear away and let the embroidery machine stitch the applique position on the vilene only. Then cover the indicated area with the applique fabric and let the machine stitch the fabric down with the tack down stitch. Without cutting the applique fabric at this stage, proceed with the embroidery design. When the embroidery is done, then take the hoop out of the machine and cut the excess fabric close to the tack down stitch. Proceed to embroider the Coverstitch line. I would prefer satin stitch. Once complete, take the hoop out of the machine, cut away excess water soluble stabilizer and rinse well.
Hi Elsa
Thank you for taking the time to read my blog post, I’m so glad you like the idea ☺
To answer your query, I chose Tear-away Stabilizer over Wash-away Stabilizer as I wanted the patch to be firm, making it easier for attaching it to the jeans. I felt it unnecessary to remove the Stabilizer only to replace it with iron-on Vilene/Fusing.
I’ve also found that Wash-away Stabilizers leave a bit of a starchy residue which works well for Lacework type designs but felt it wouldn’t work with the clean finish needed with this type of Embroidered Appliqué.
What I also like about the Tear-away Stabilizer (as opposed to Cut-away) is that you can tear very closely to the stitches and can actually get a few millimetres in from the edge so that it isn’t visible around the edges.
Thank you for your feedback. I’ll make sure to add my reasoning for the Stabilizer choice to the blog post so as to help others trying the project ☺