 BERNINA Corporate Blog -
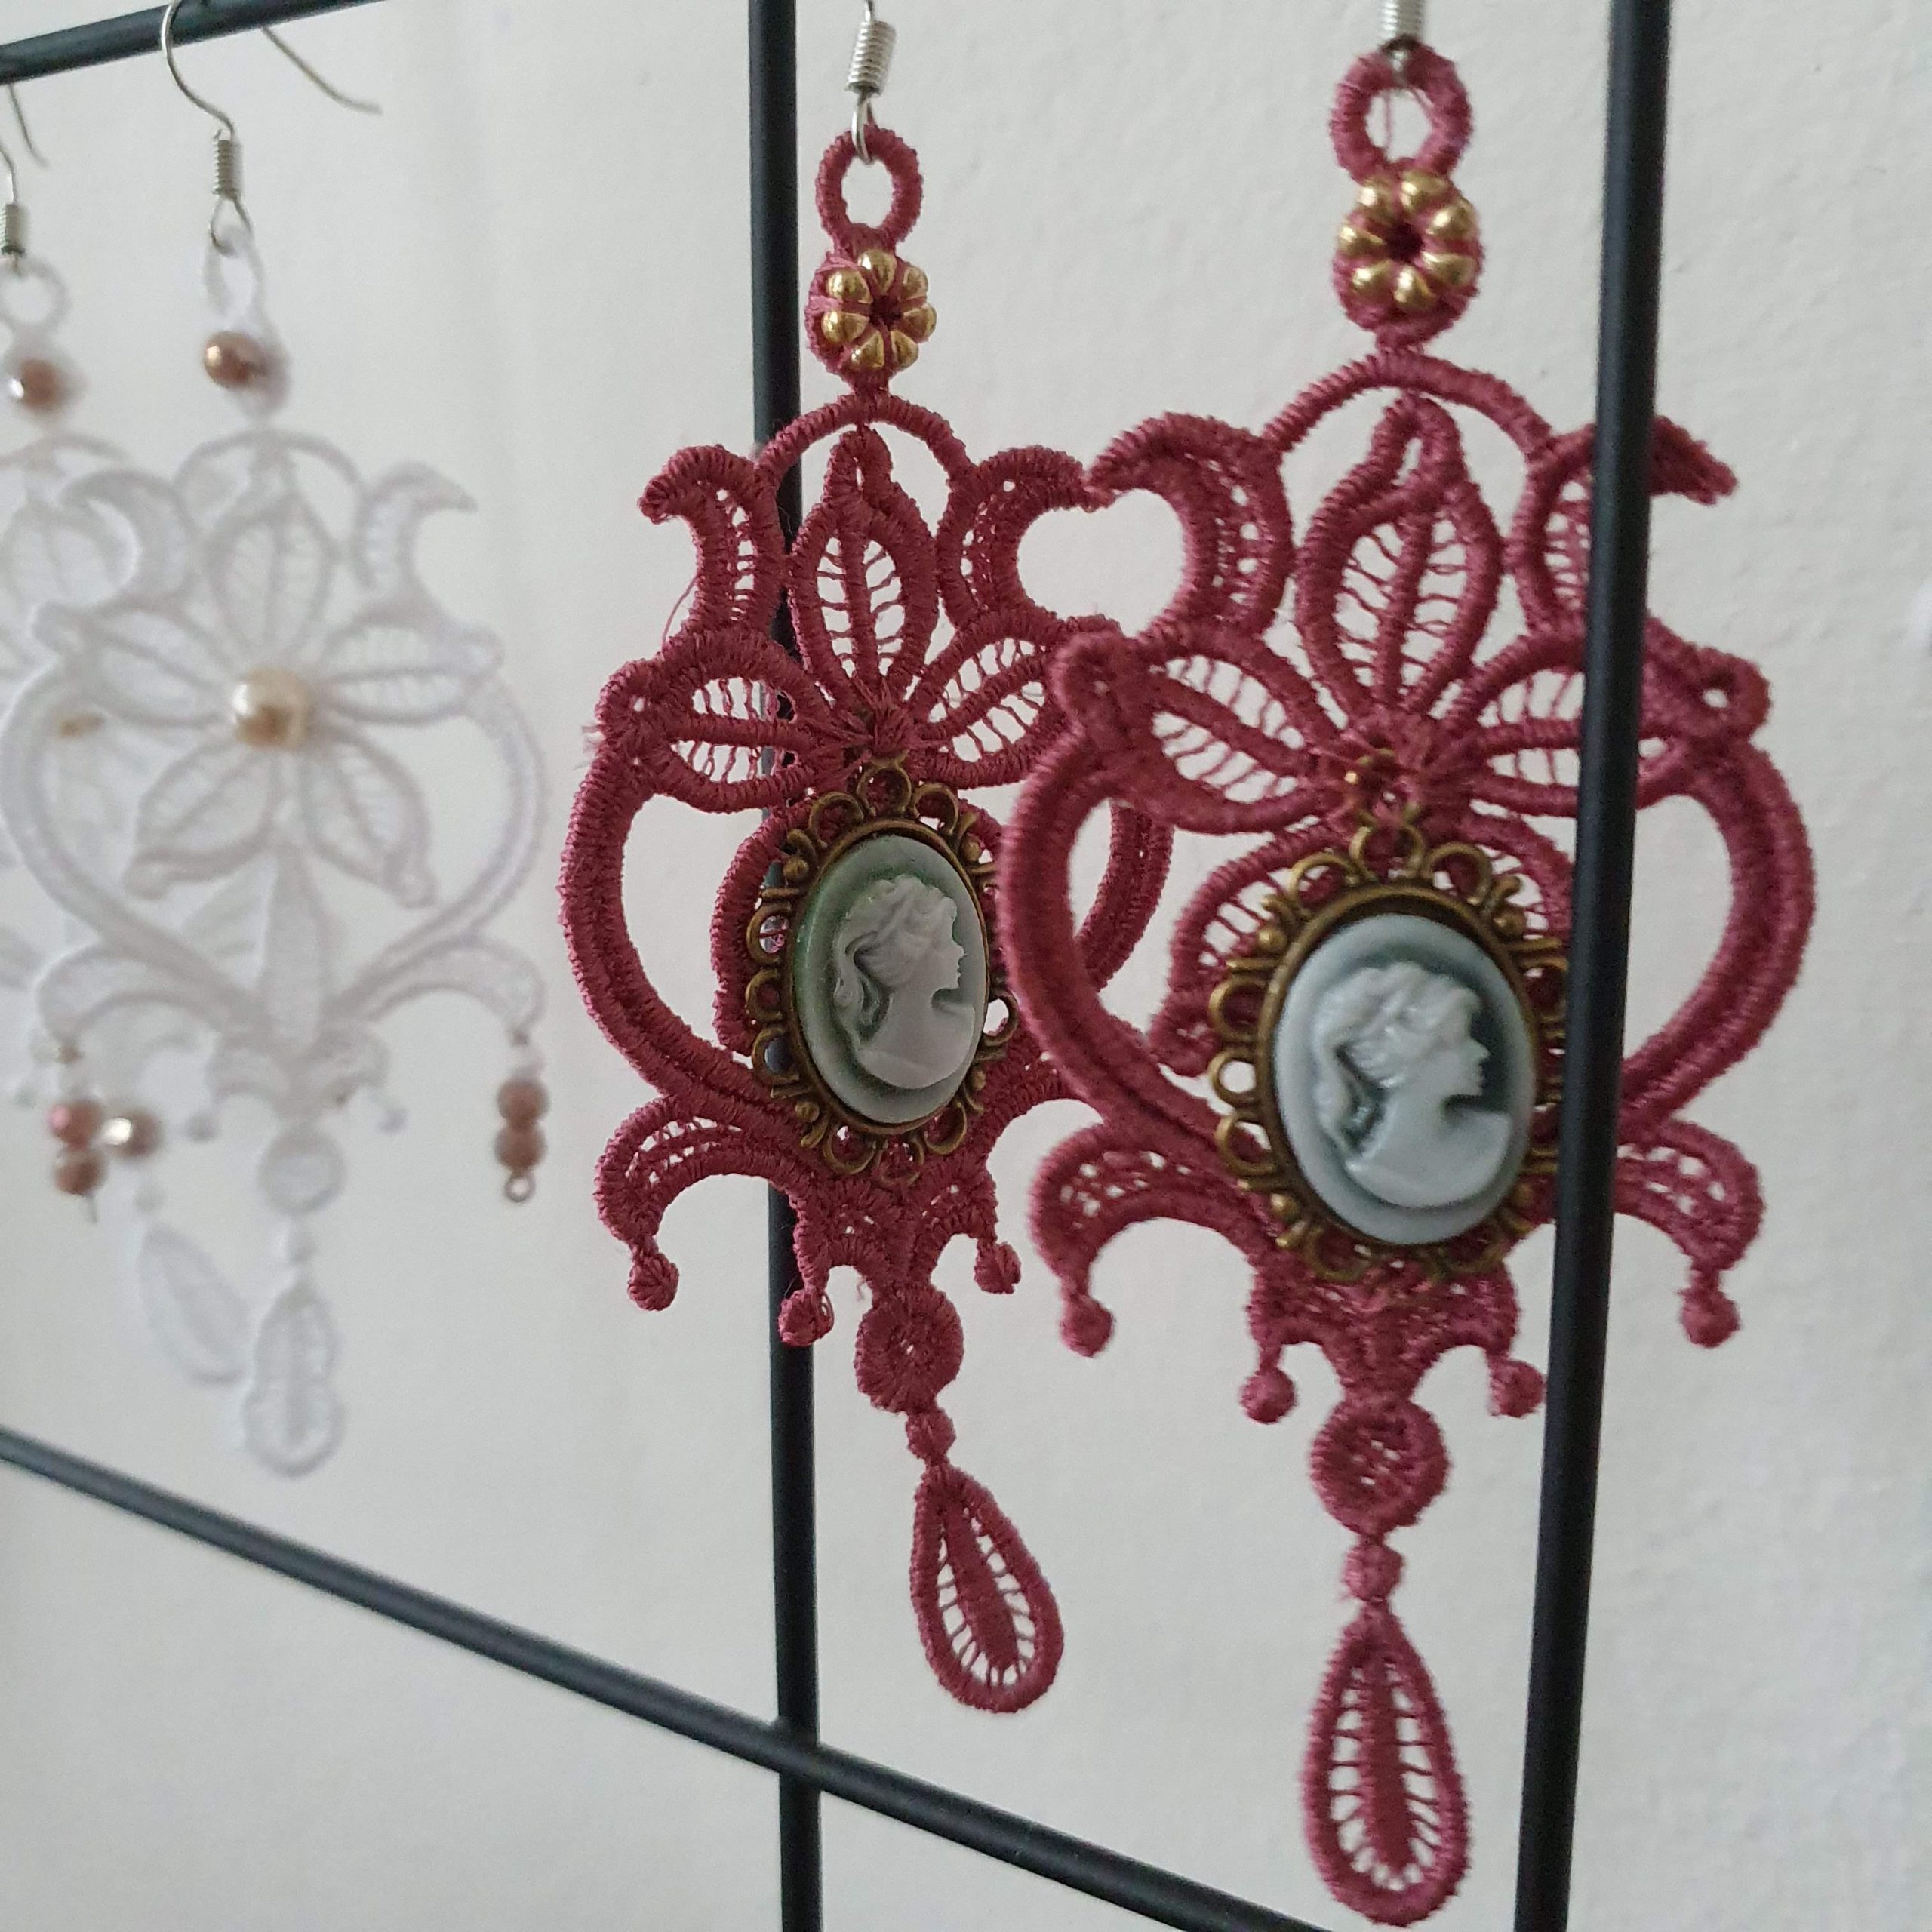
Embroidered ornaments for your ear or your tree!
Enter the Christmas season with a shine with these wonderful embroidered ornaments, it’s time to shine! Although they are 10 cm long and decorated with beads, the ornaments are still light. Ideal for earrings, but if that’s not your thing, hang them on your tree 😉

Embroidered ornaments – What do you need?
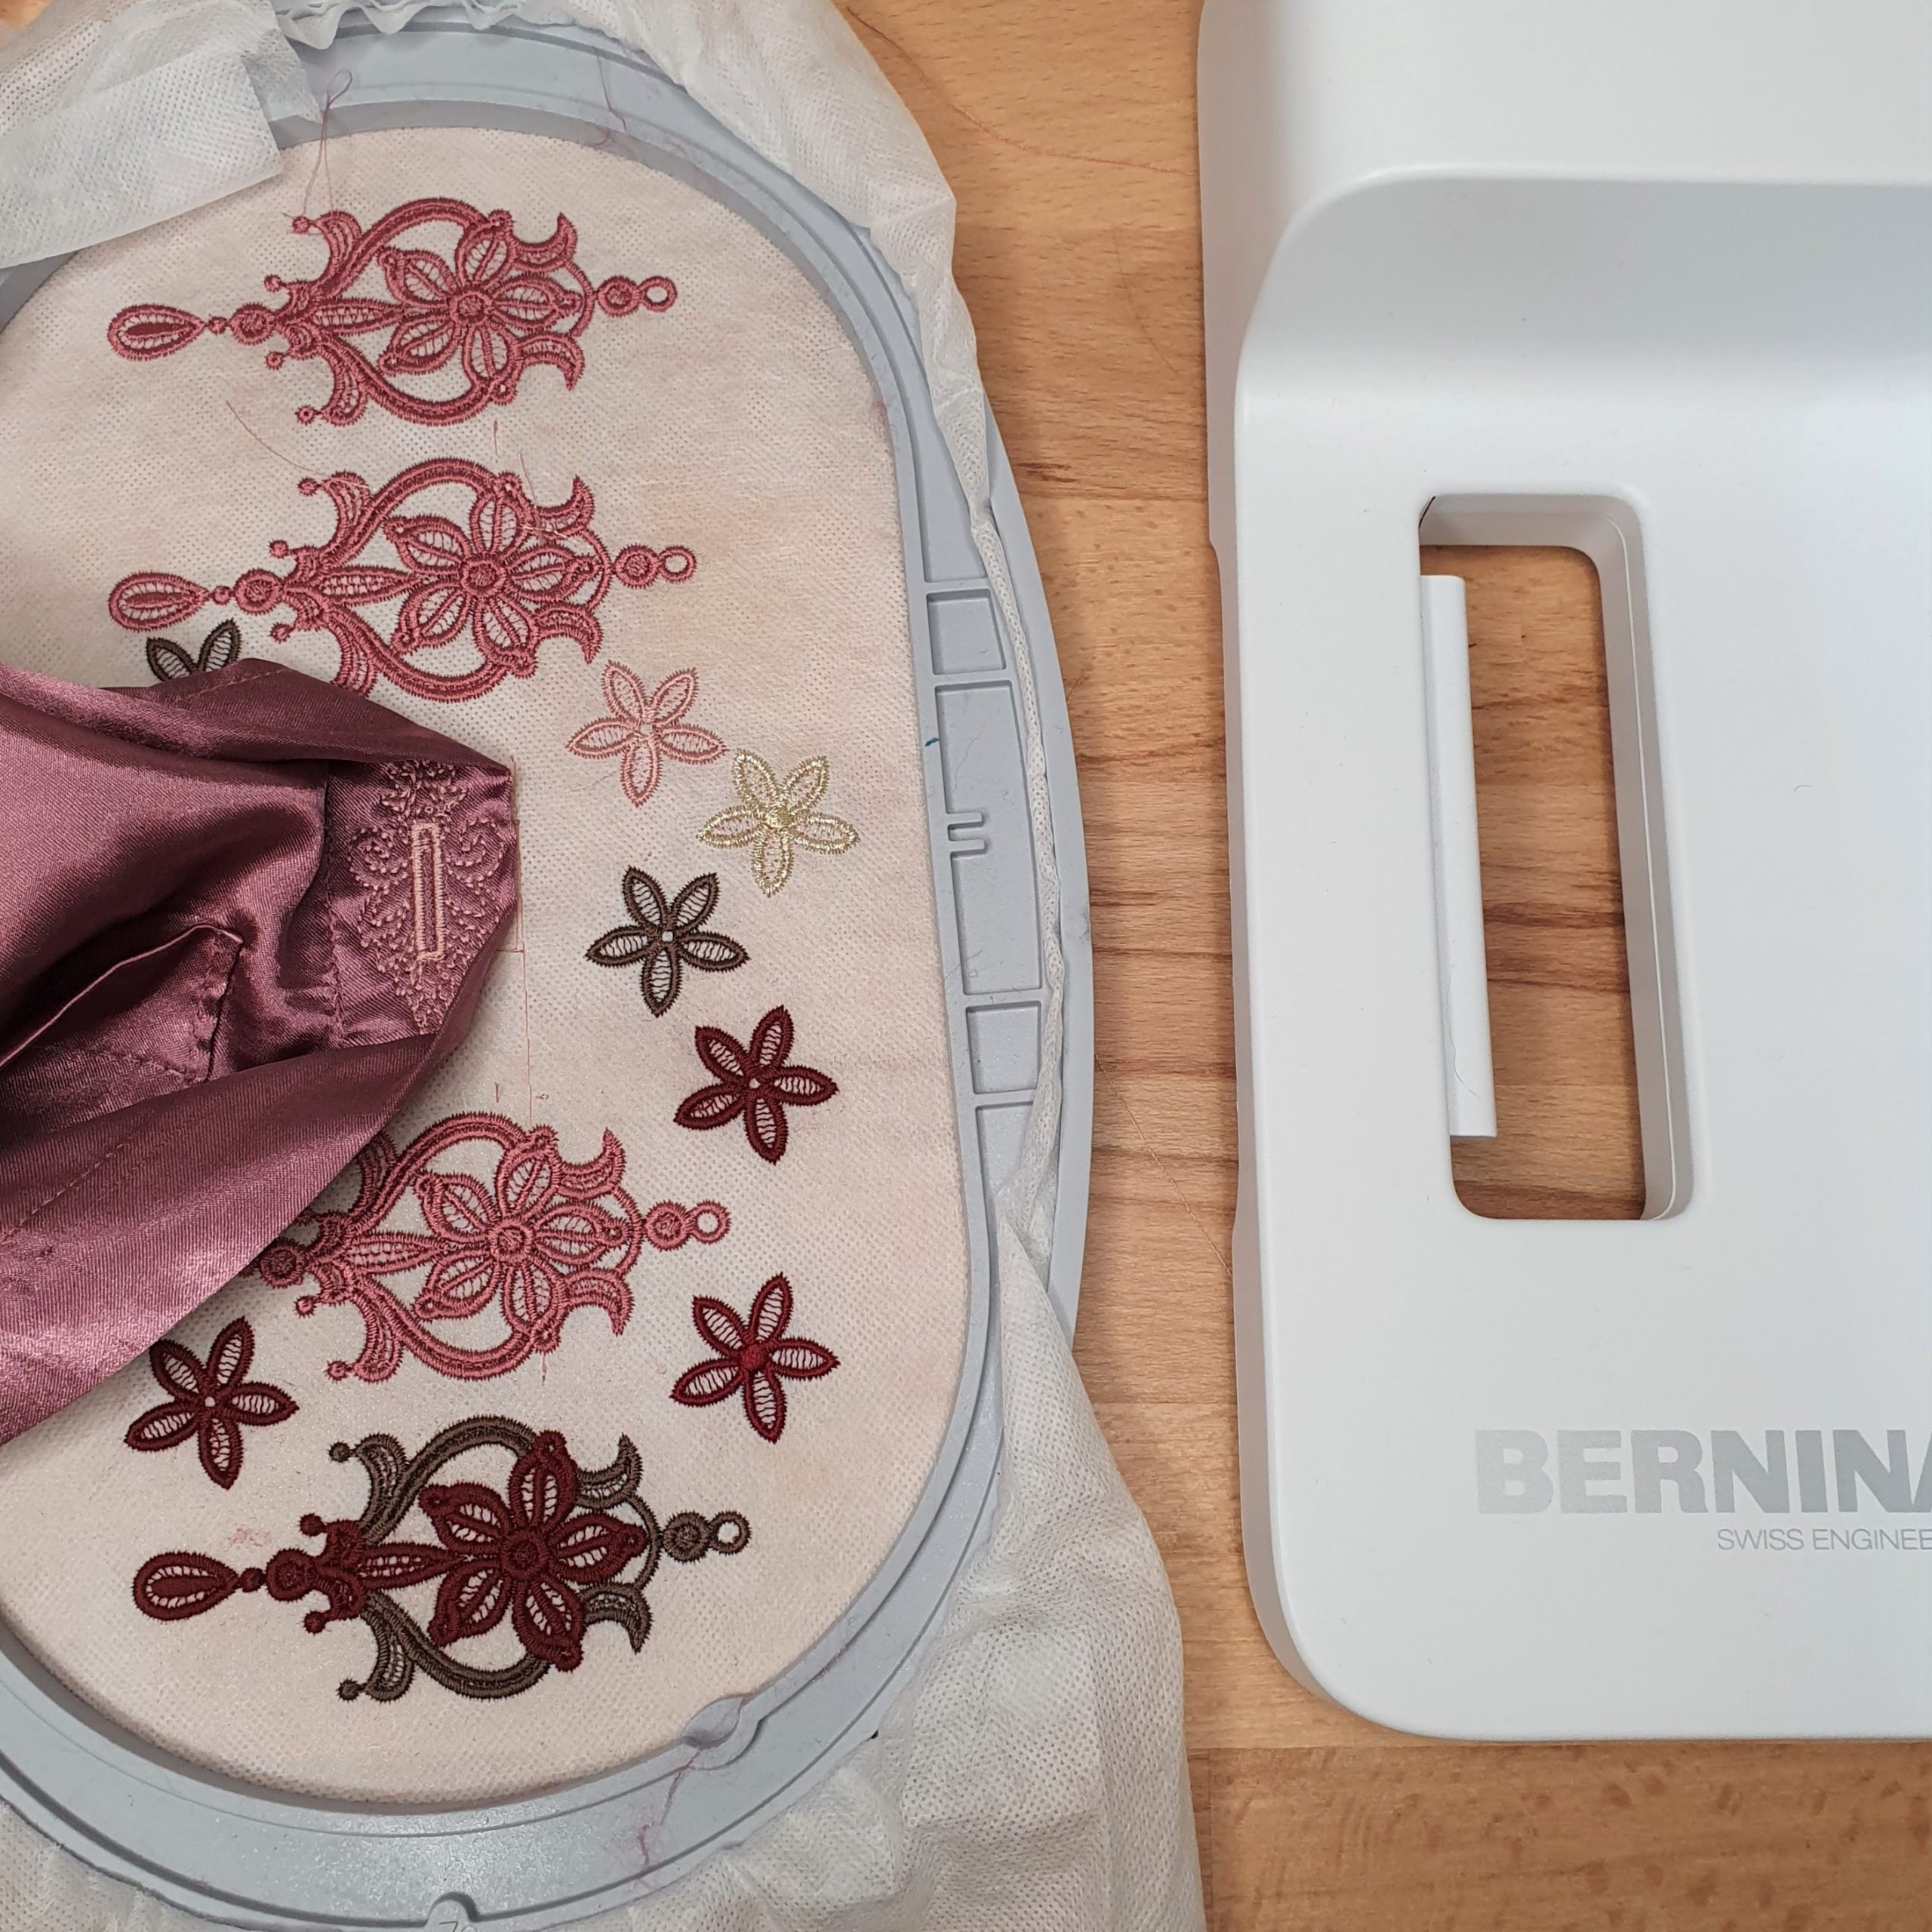
For the ornaments you need a machine with an embroidery module, embroidery thread, water soluble embroidery stabiliser and an embroidery pattern. The BERNINA I use for this is the BERNINA 590 Crystal Edition. For thread I use various colours of PolySheen from Mettler. I bought the embroidery pattern via the embroiderydesigns.com website. You can get various earring designs, I chose these ones.
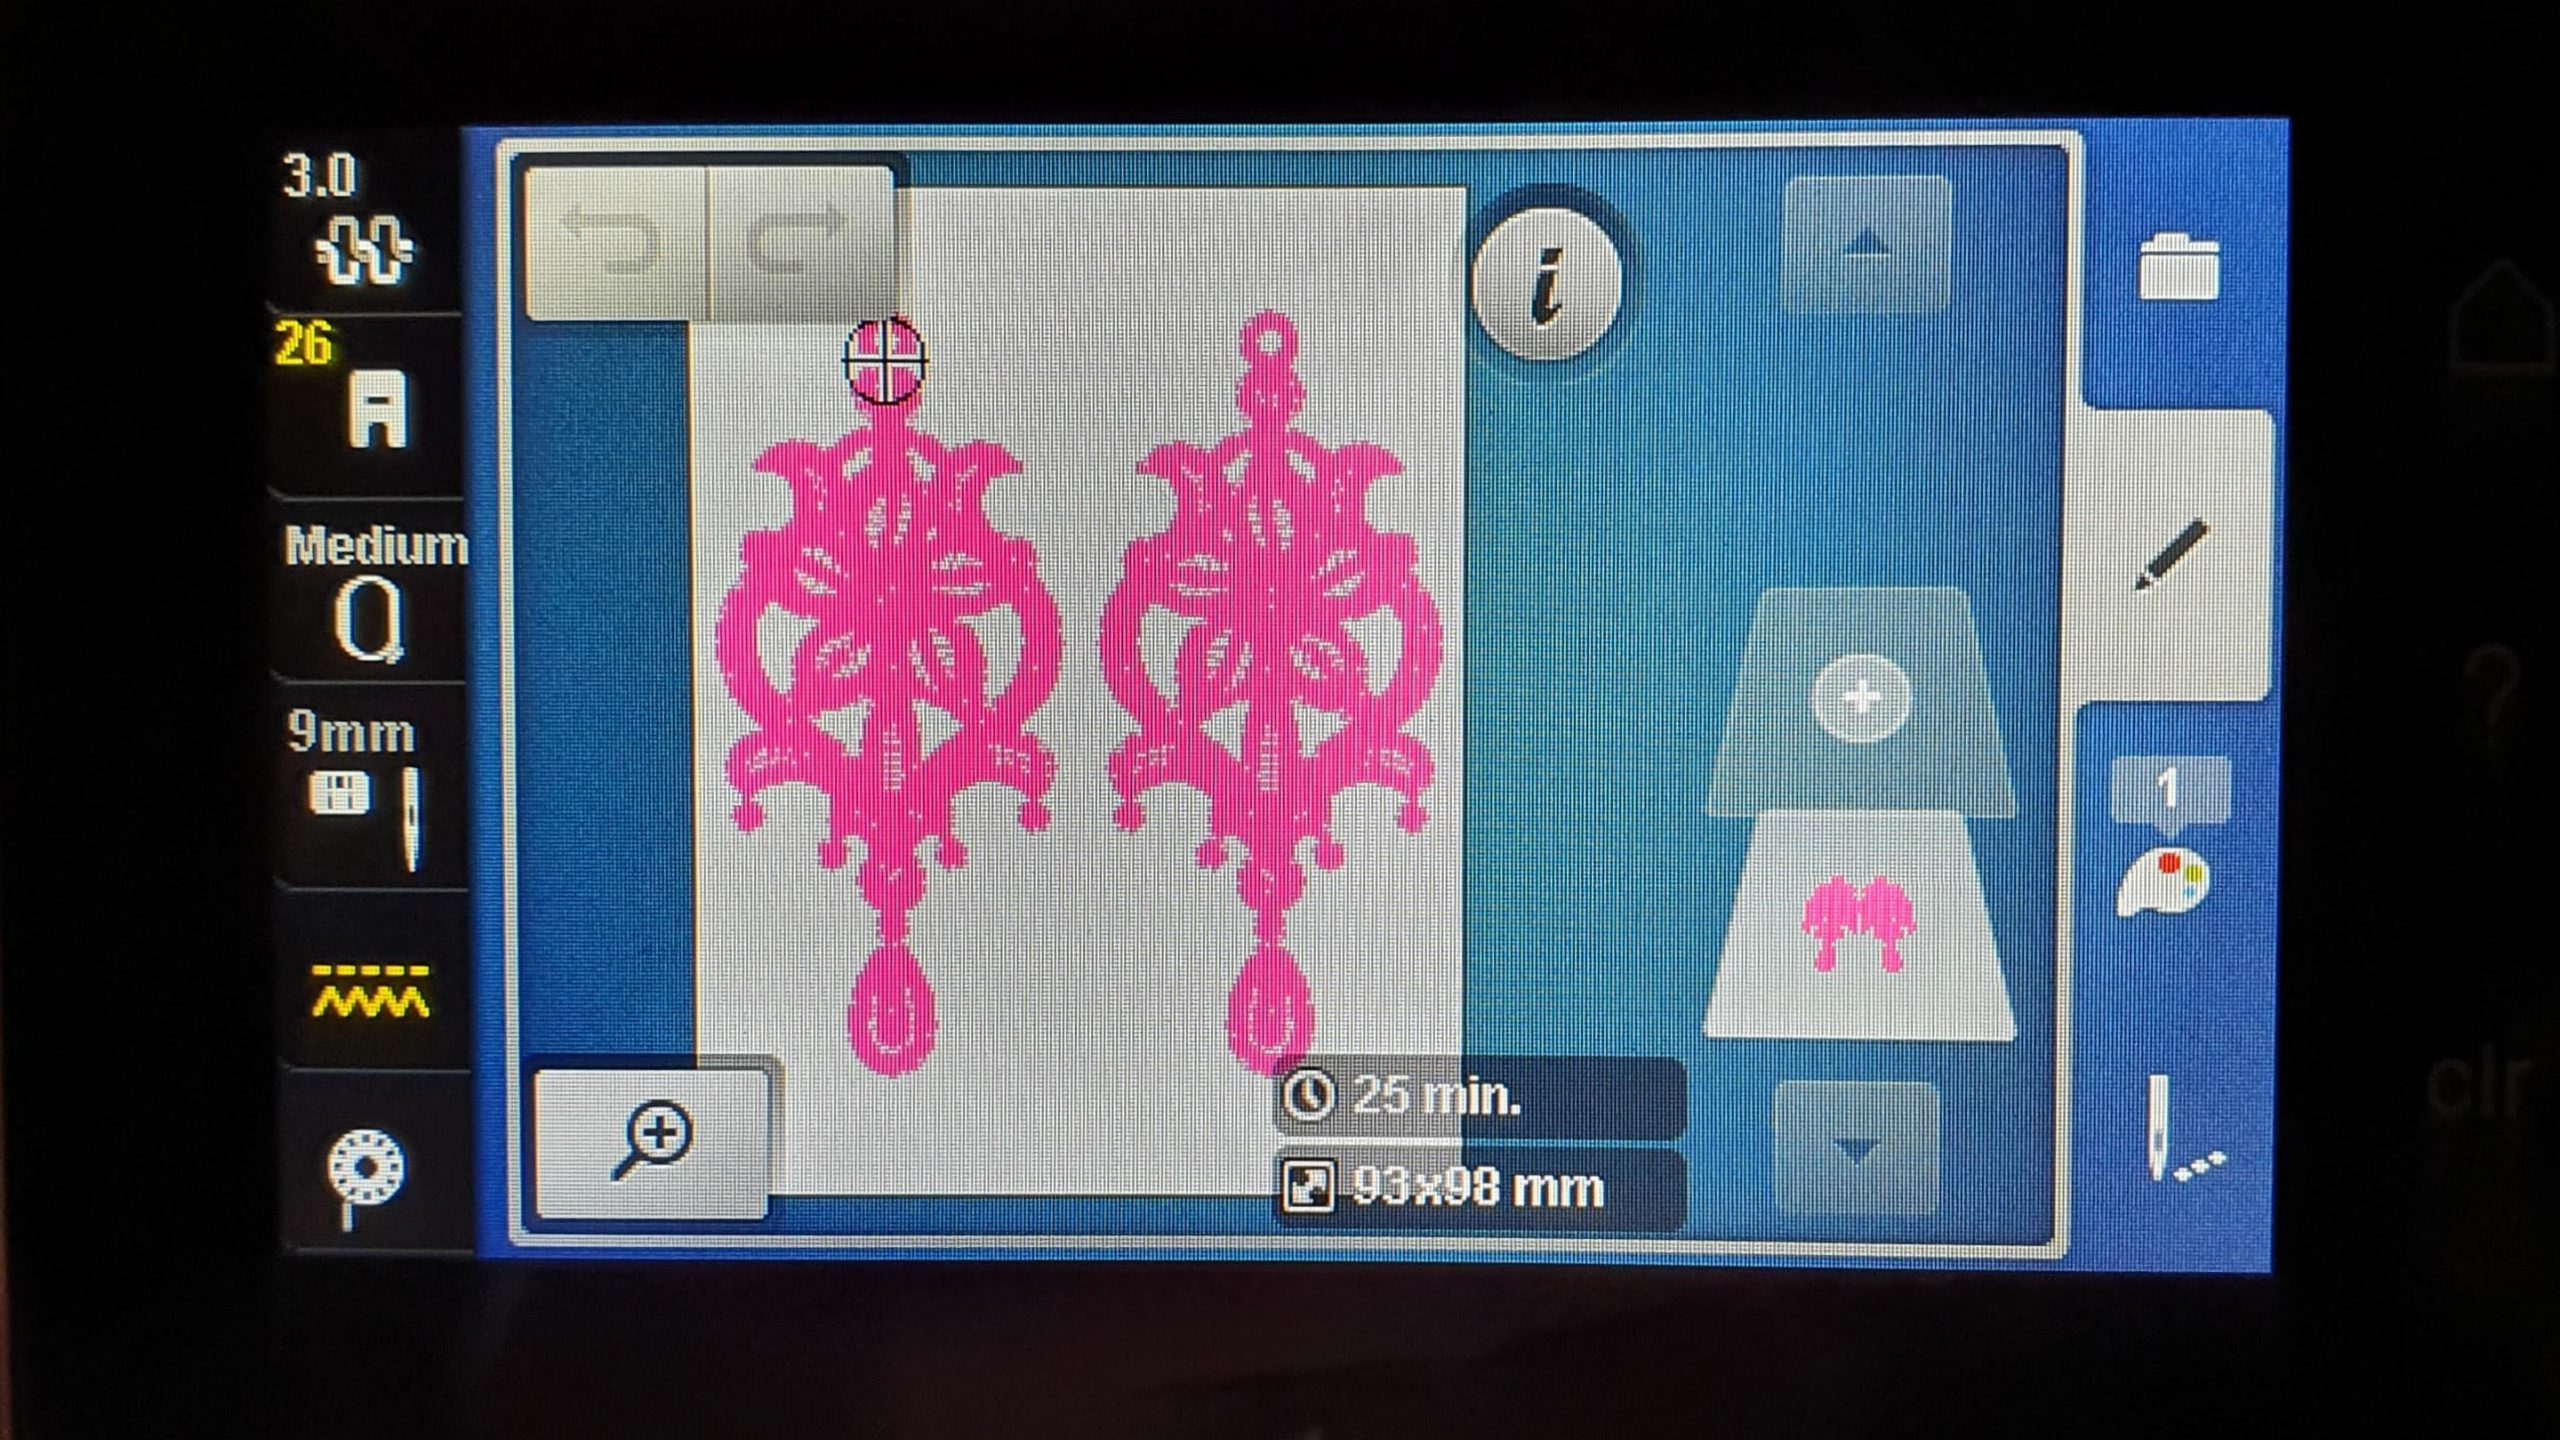
Embroidering
Download the embroidery pattern and transfer it to your machine via a USB stick. Stretch 1 or 2 layers of embroidery stabiliser on the embroidery hoop and embroider the pattern.
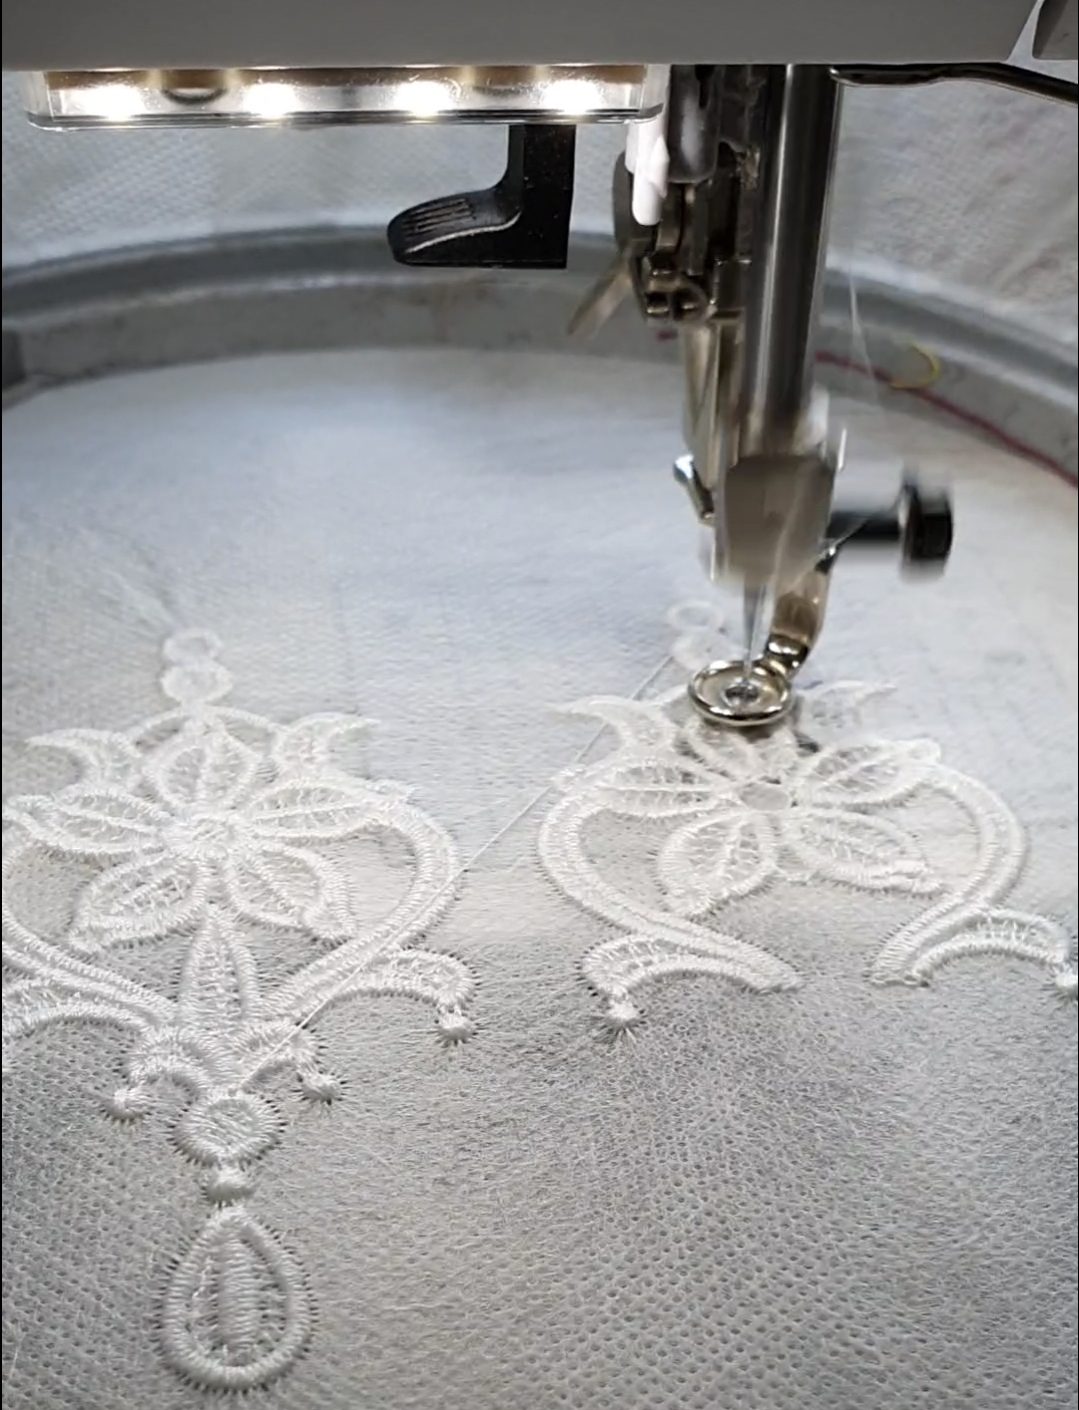
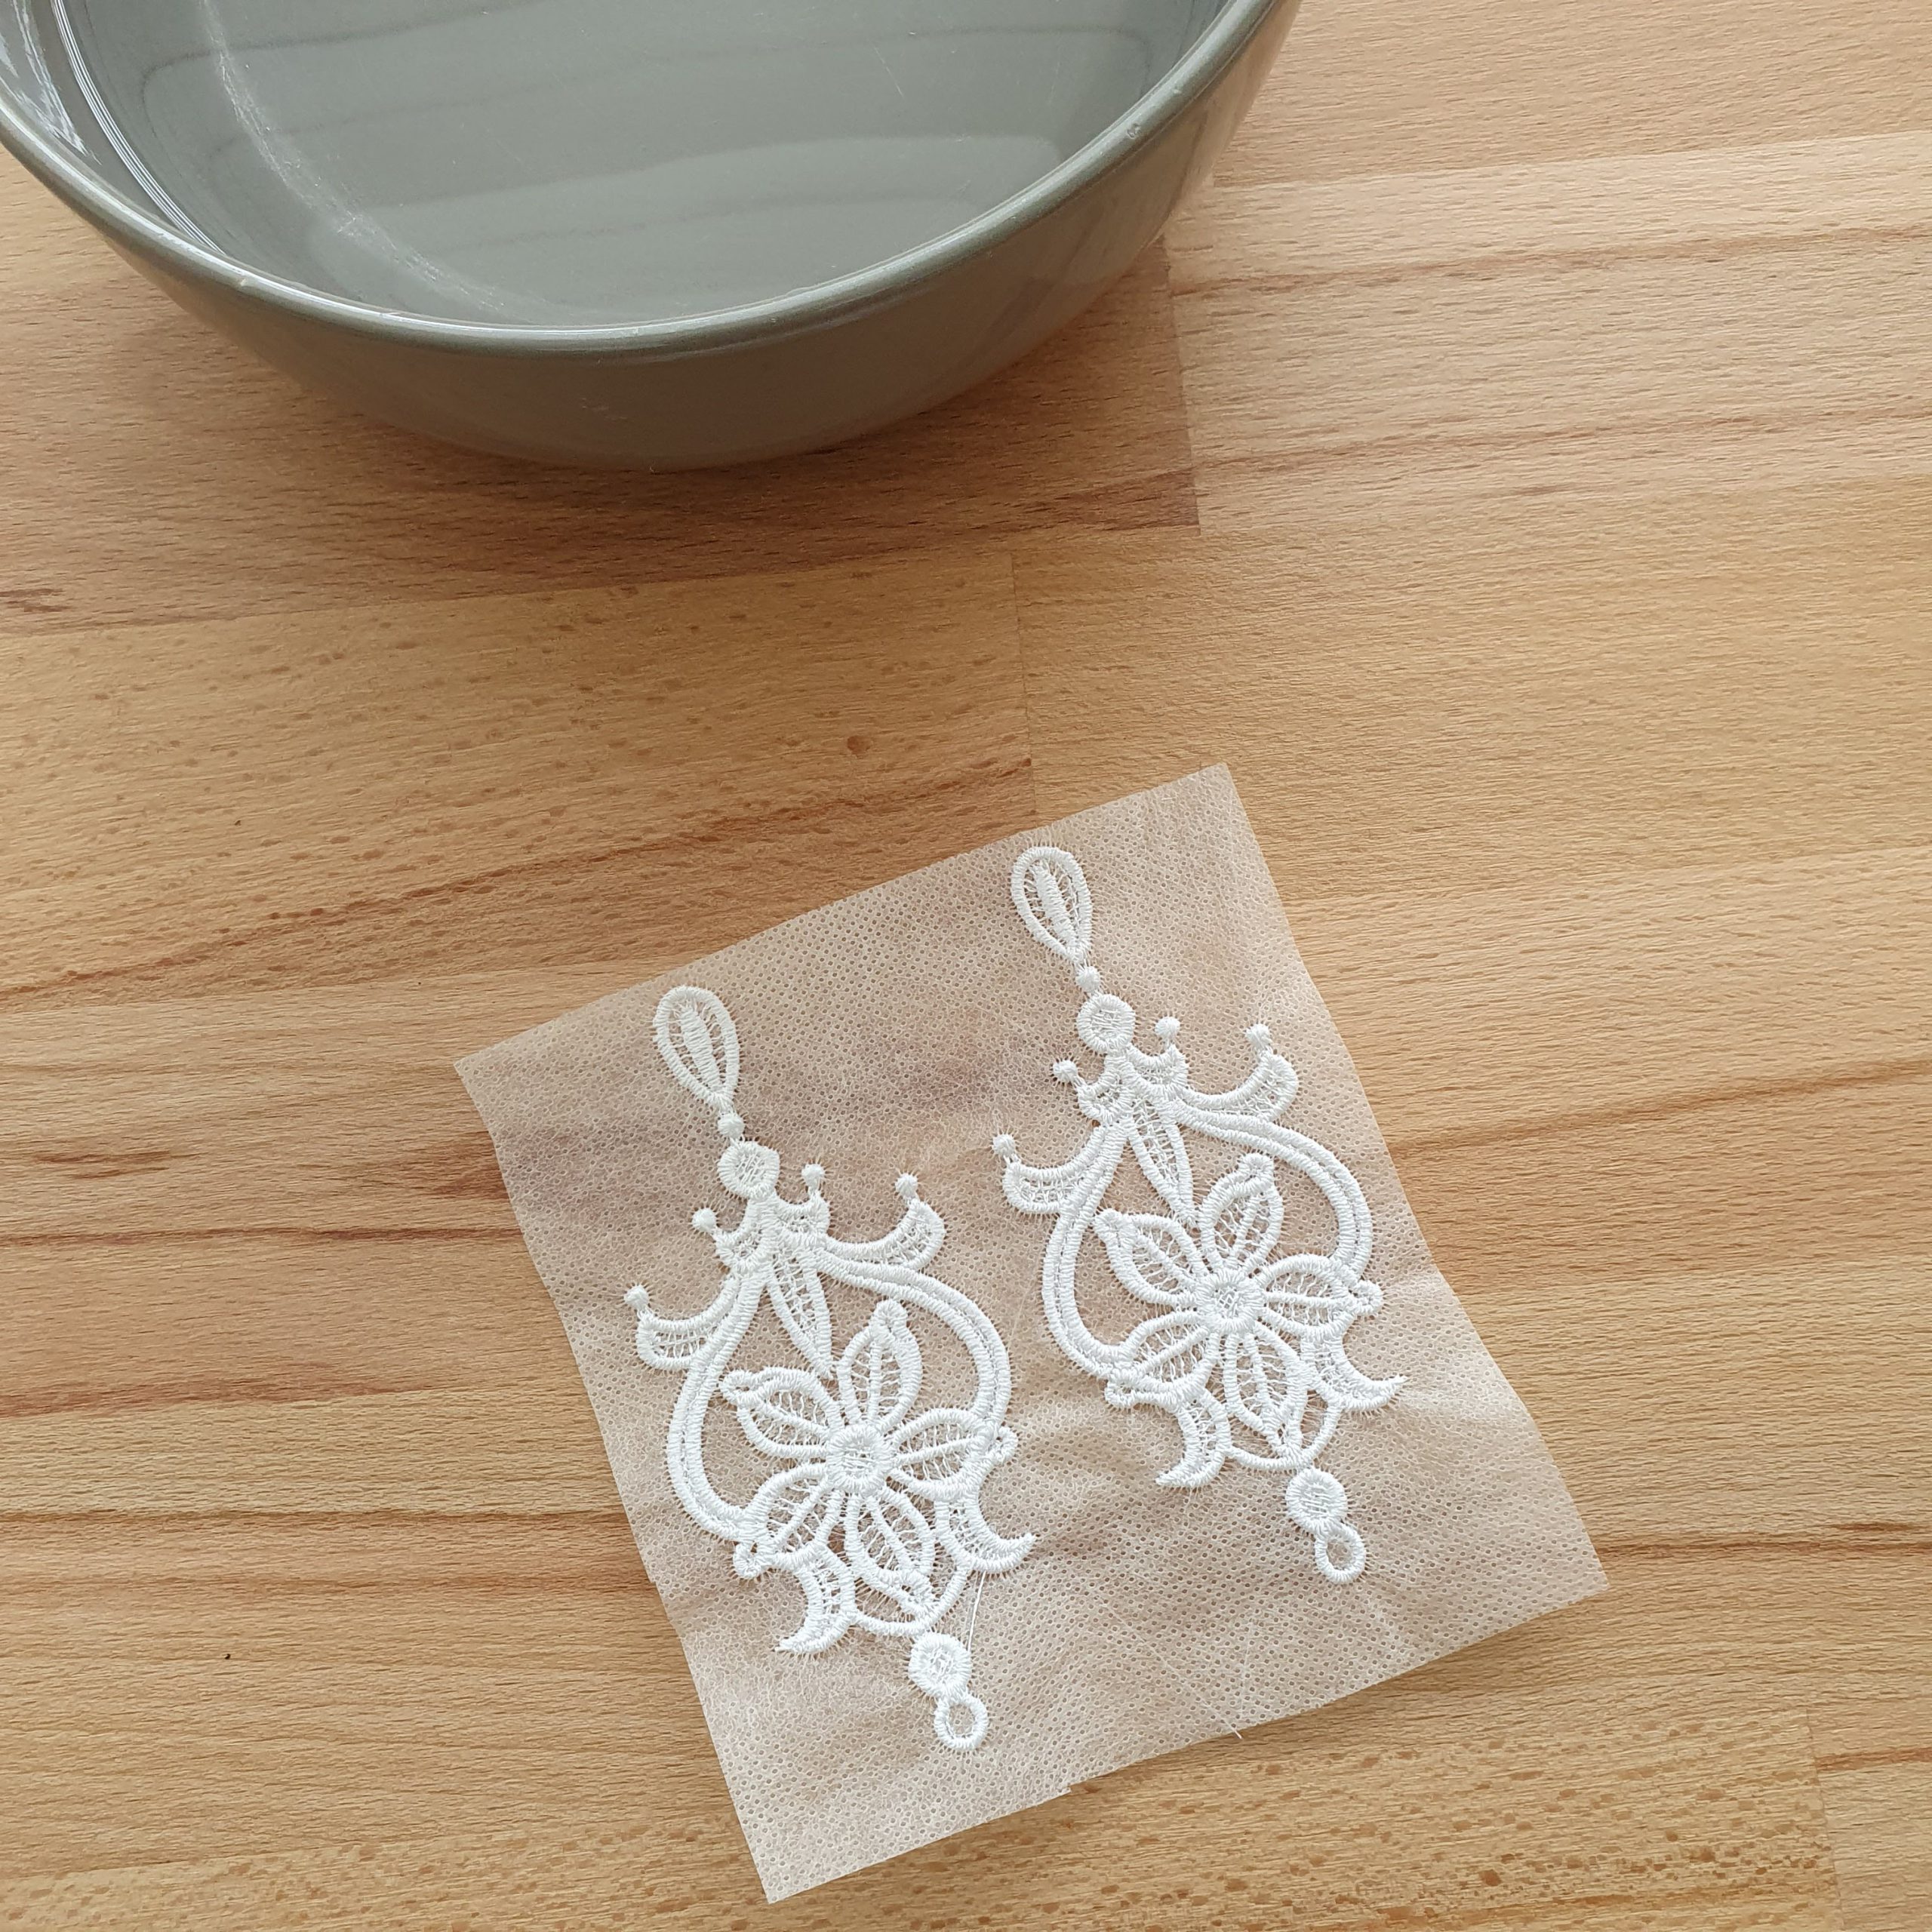
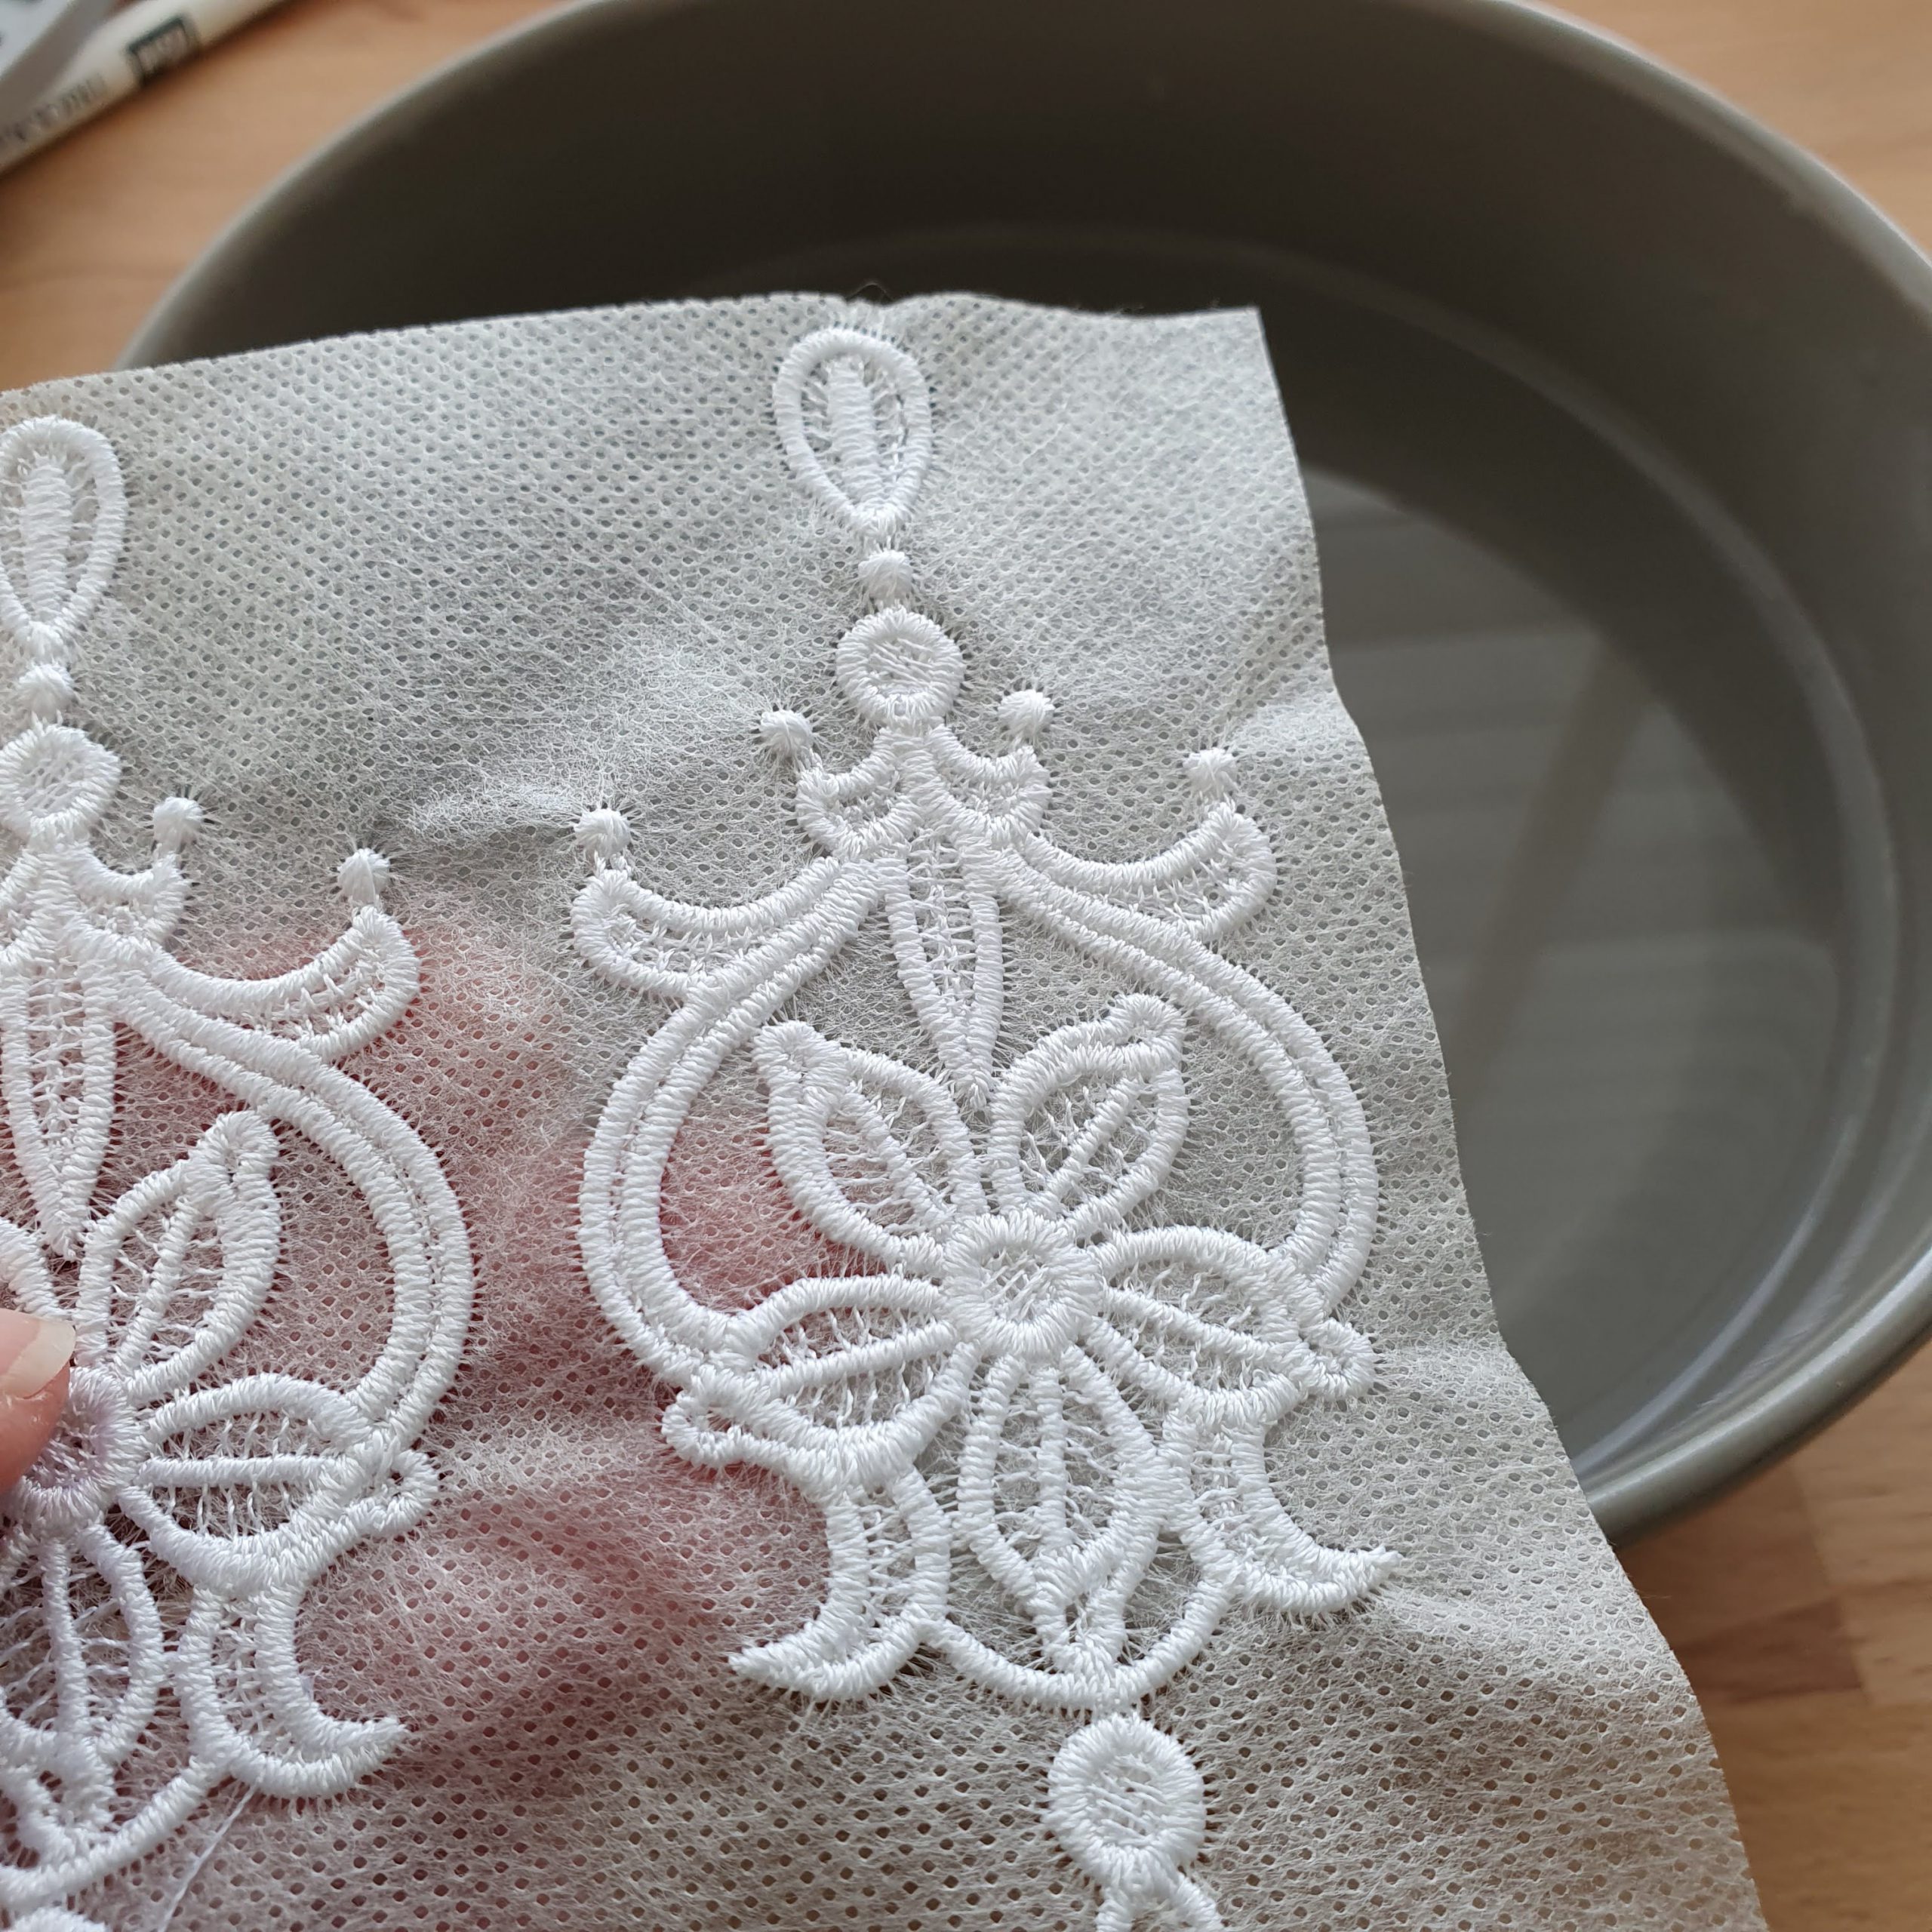
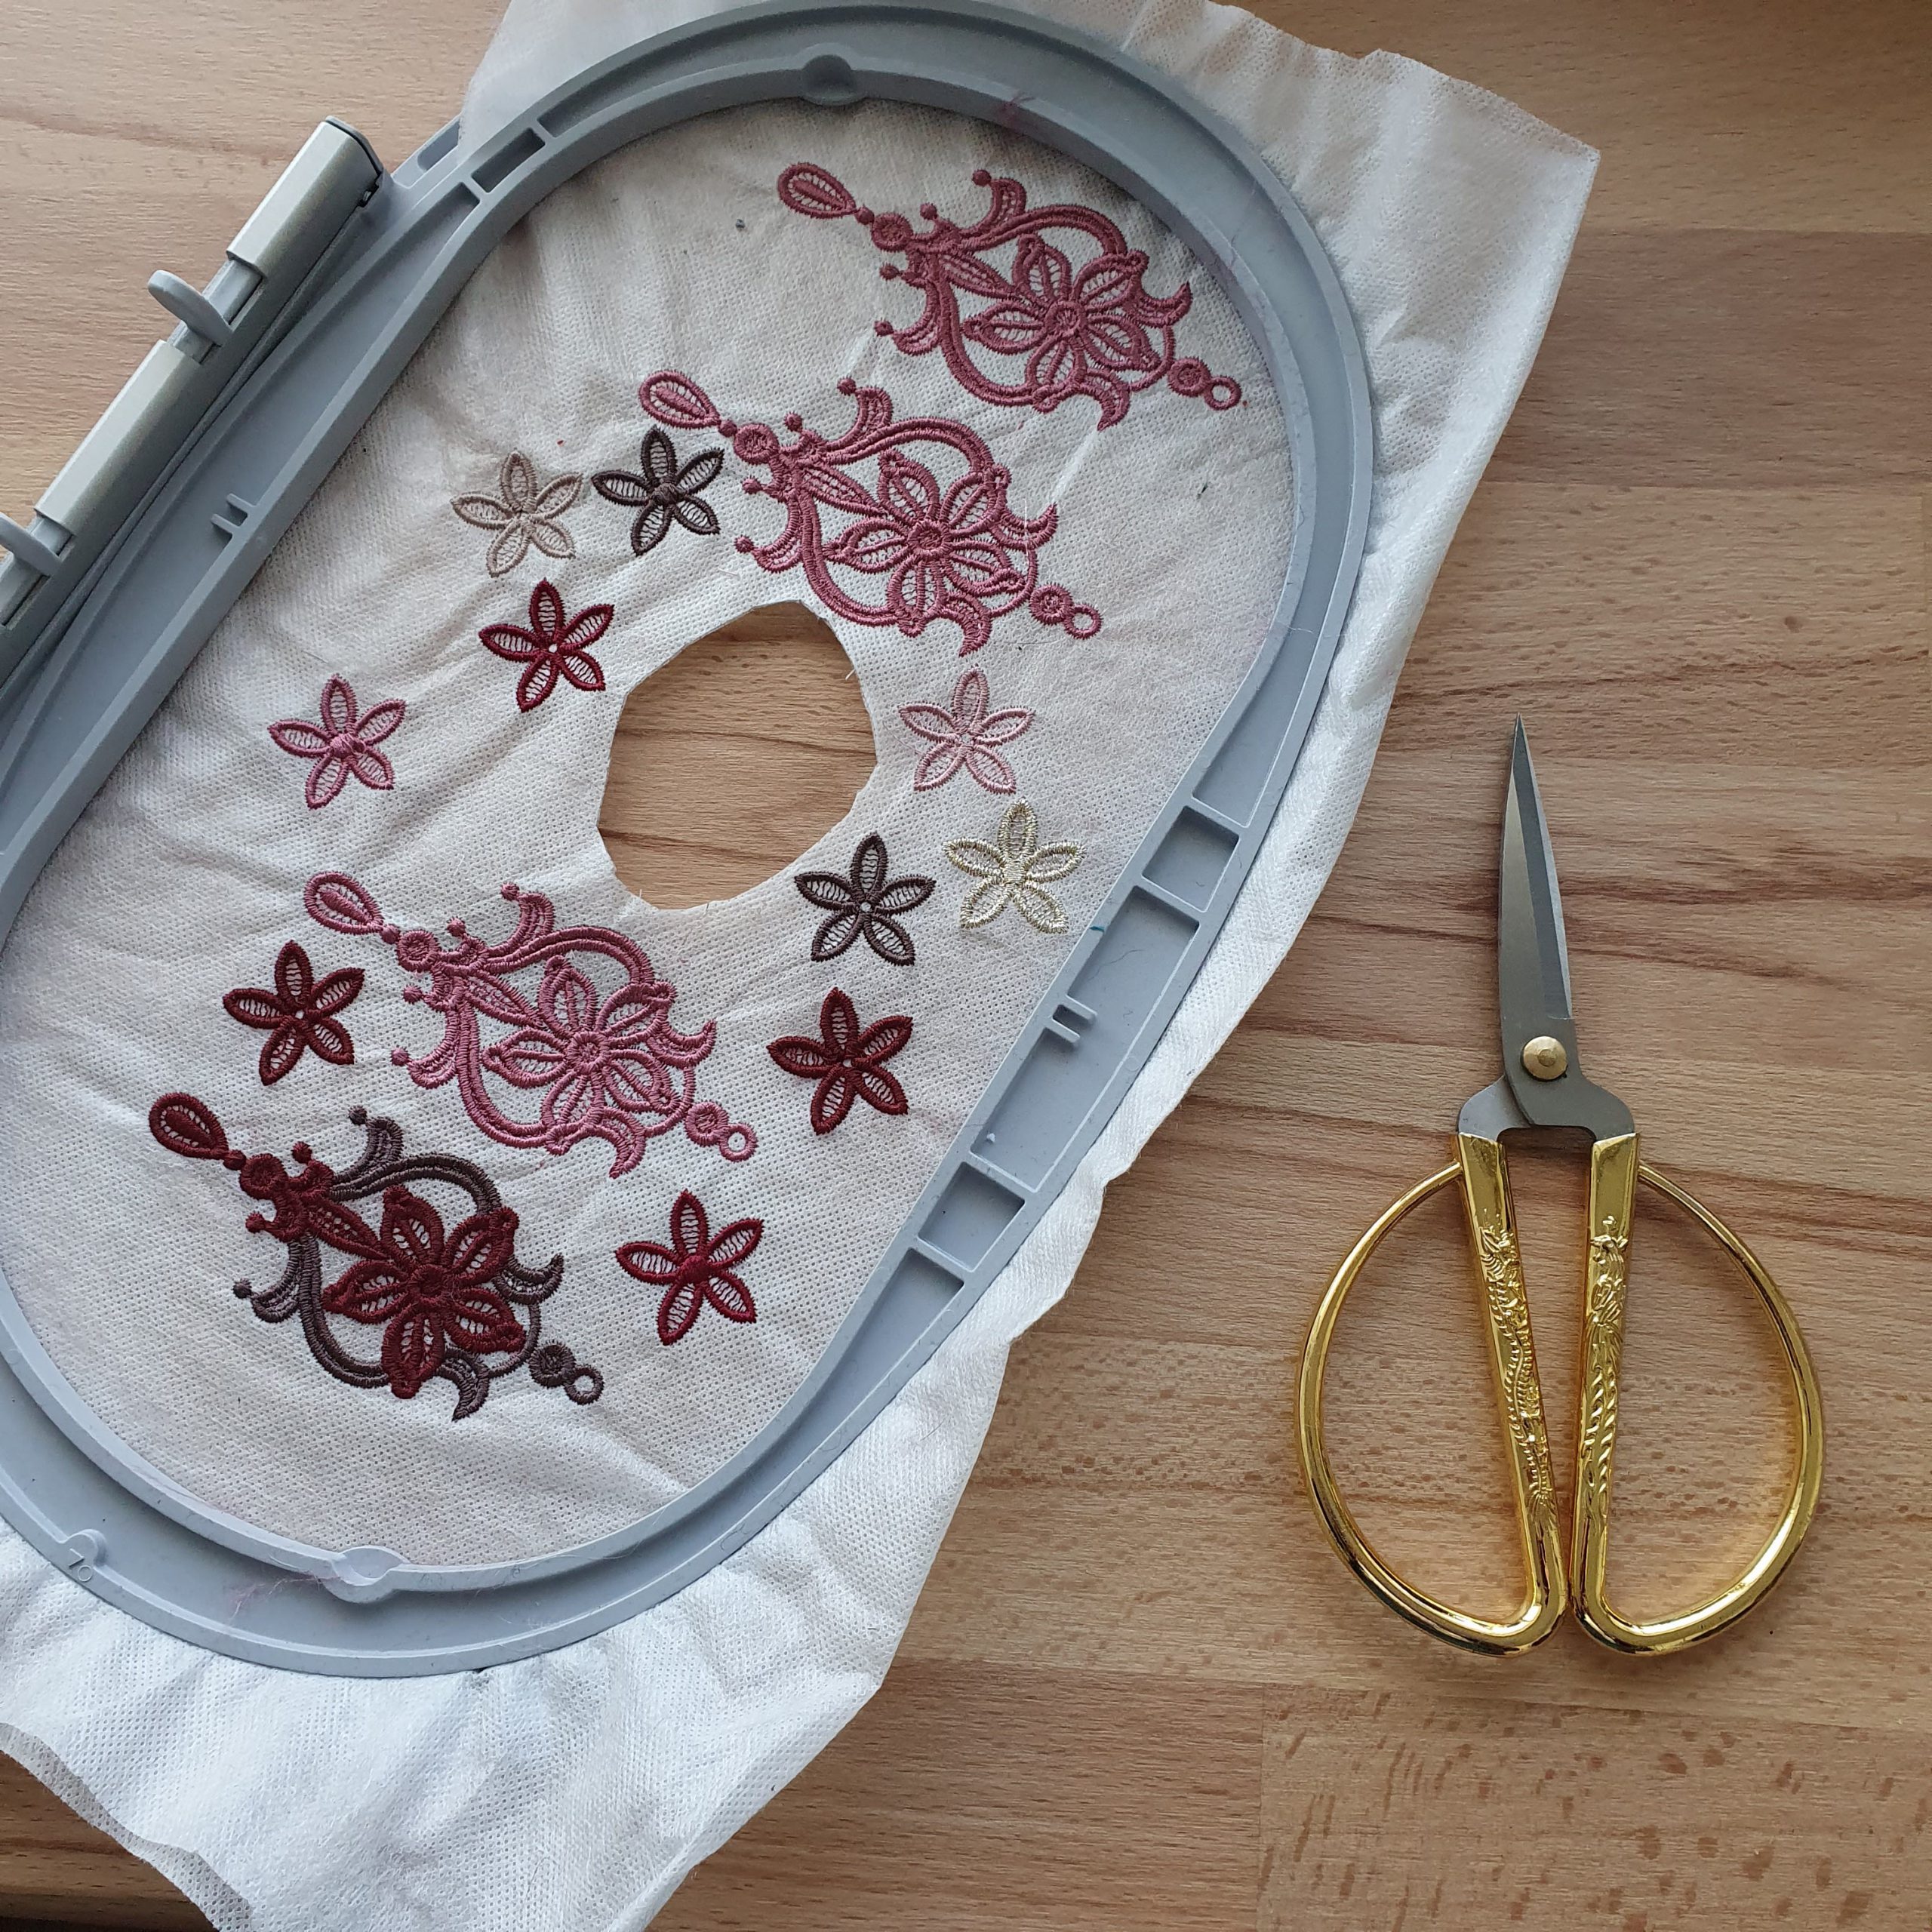
After embroidering, take the stabiliser out of the hoop, clip some stabiliser away around the edges, and dissolve it by dipping it under water. When it has dissolved, let it dry on a towel. Because some of the dissolved embroidery stabiliser stays on the embroidery, it becomes stiffer and the embroidery keeps its shape better.
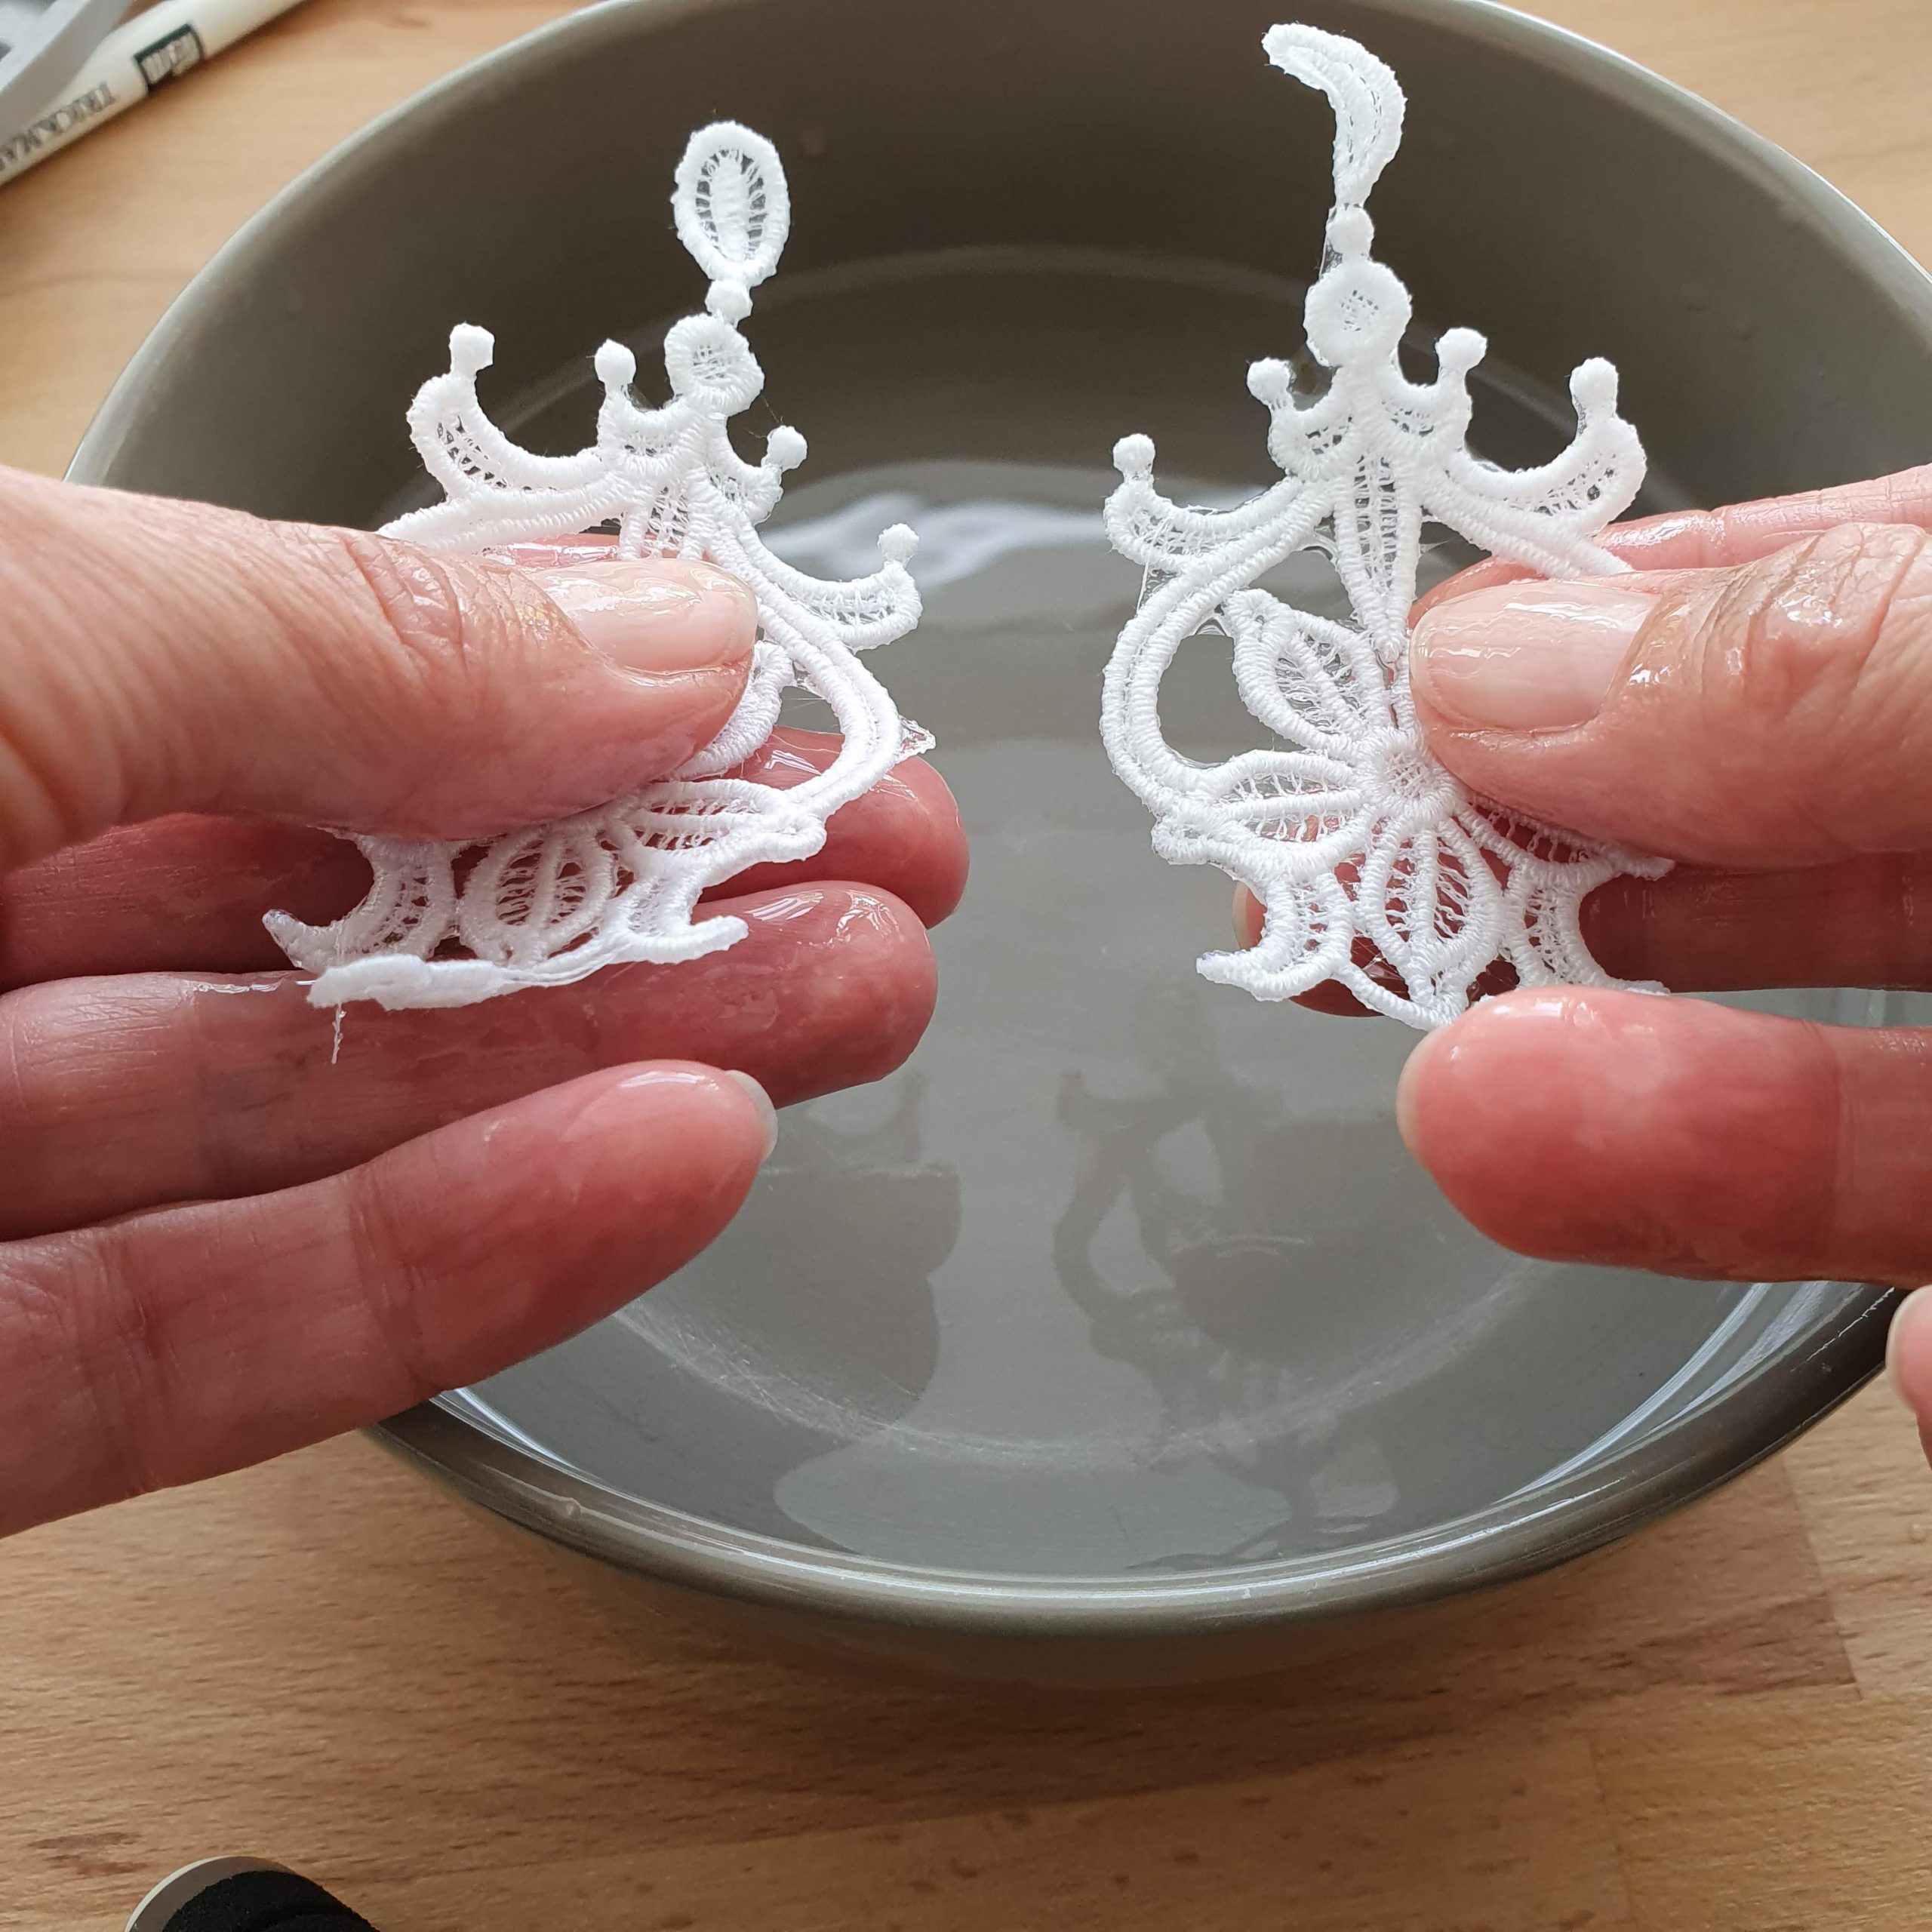
Clip some away around the stabiliser
Ready? Just dip

Dissolved
It’s magic!
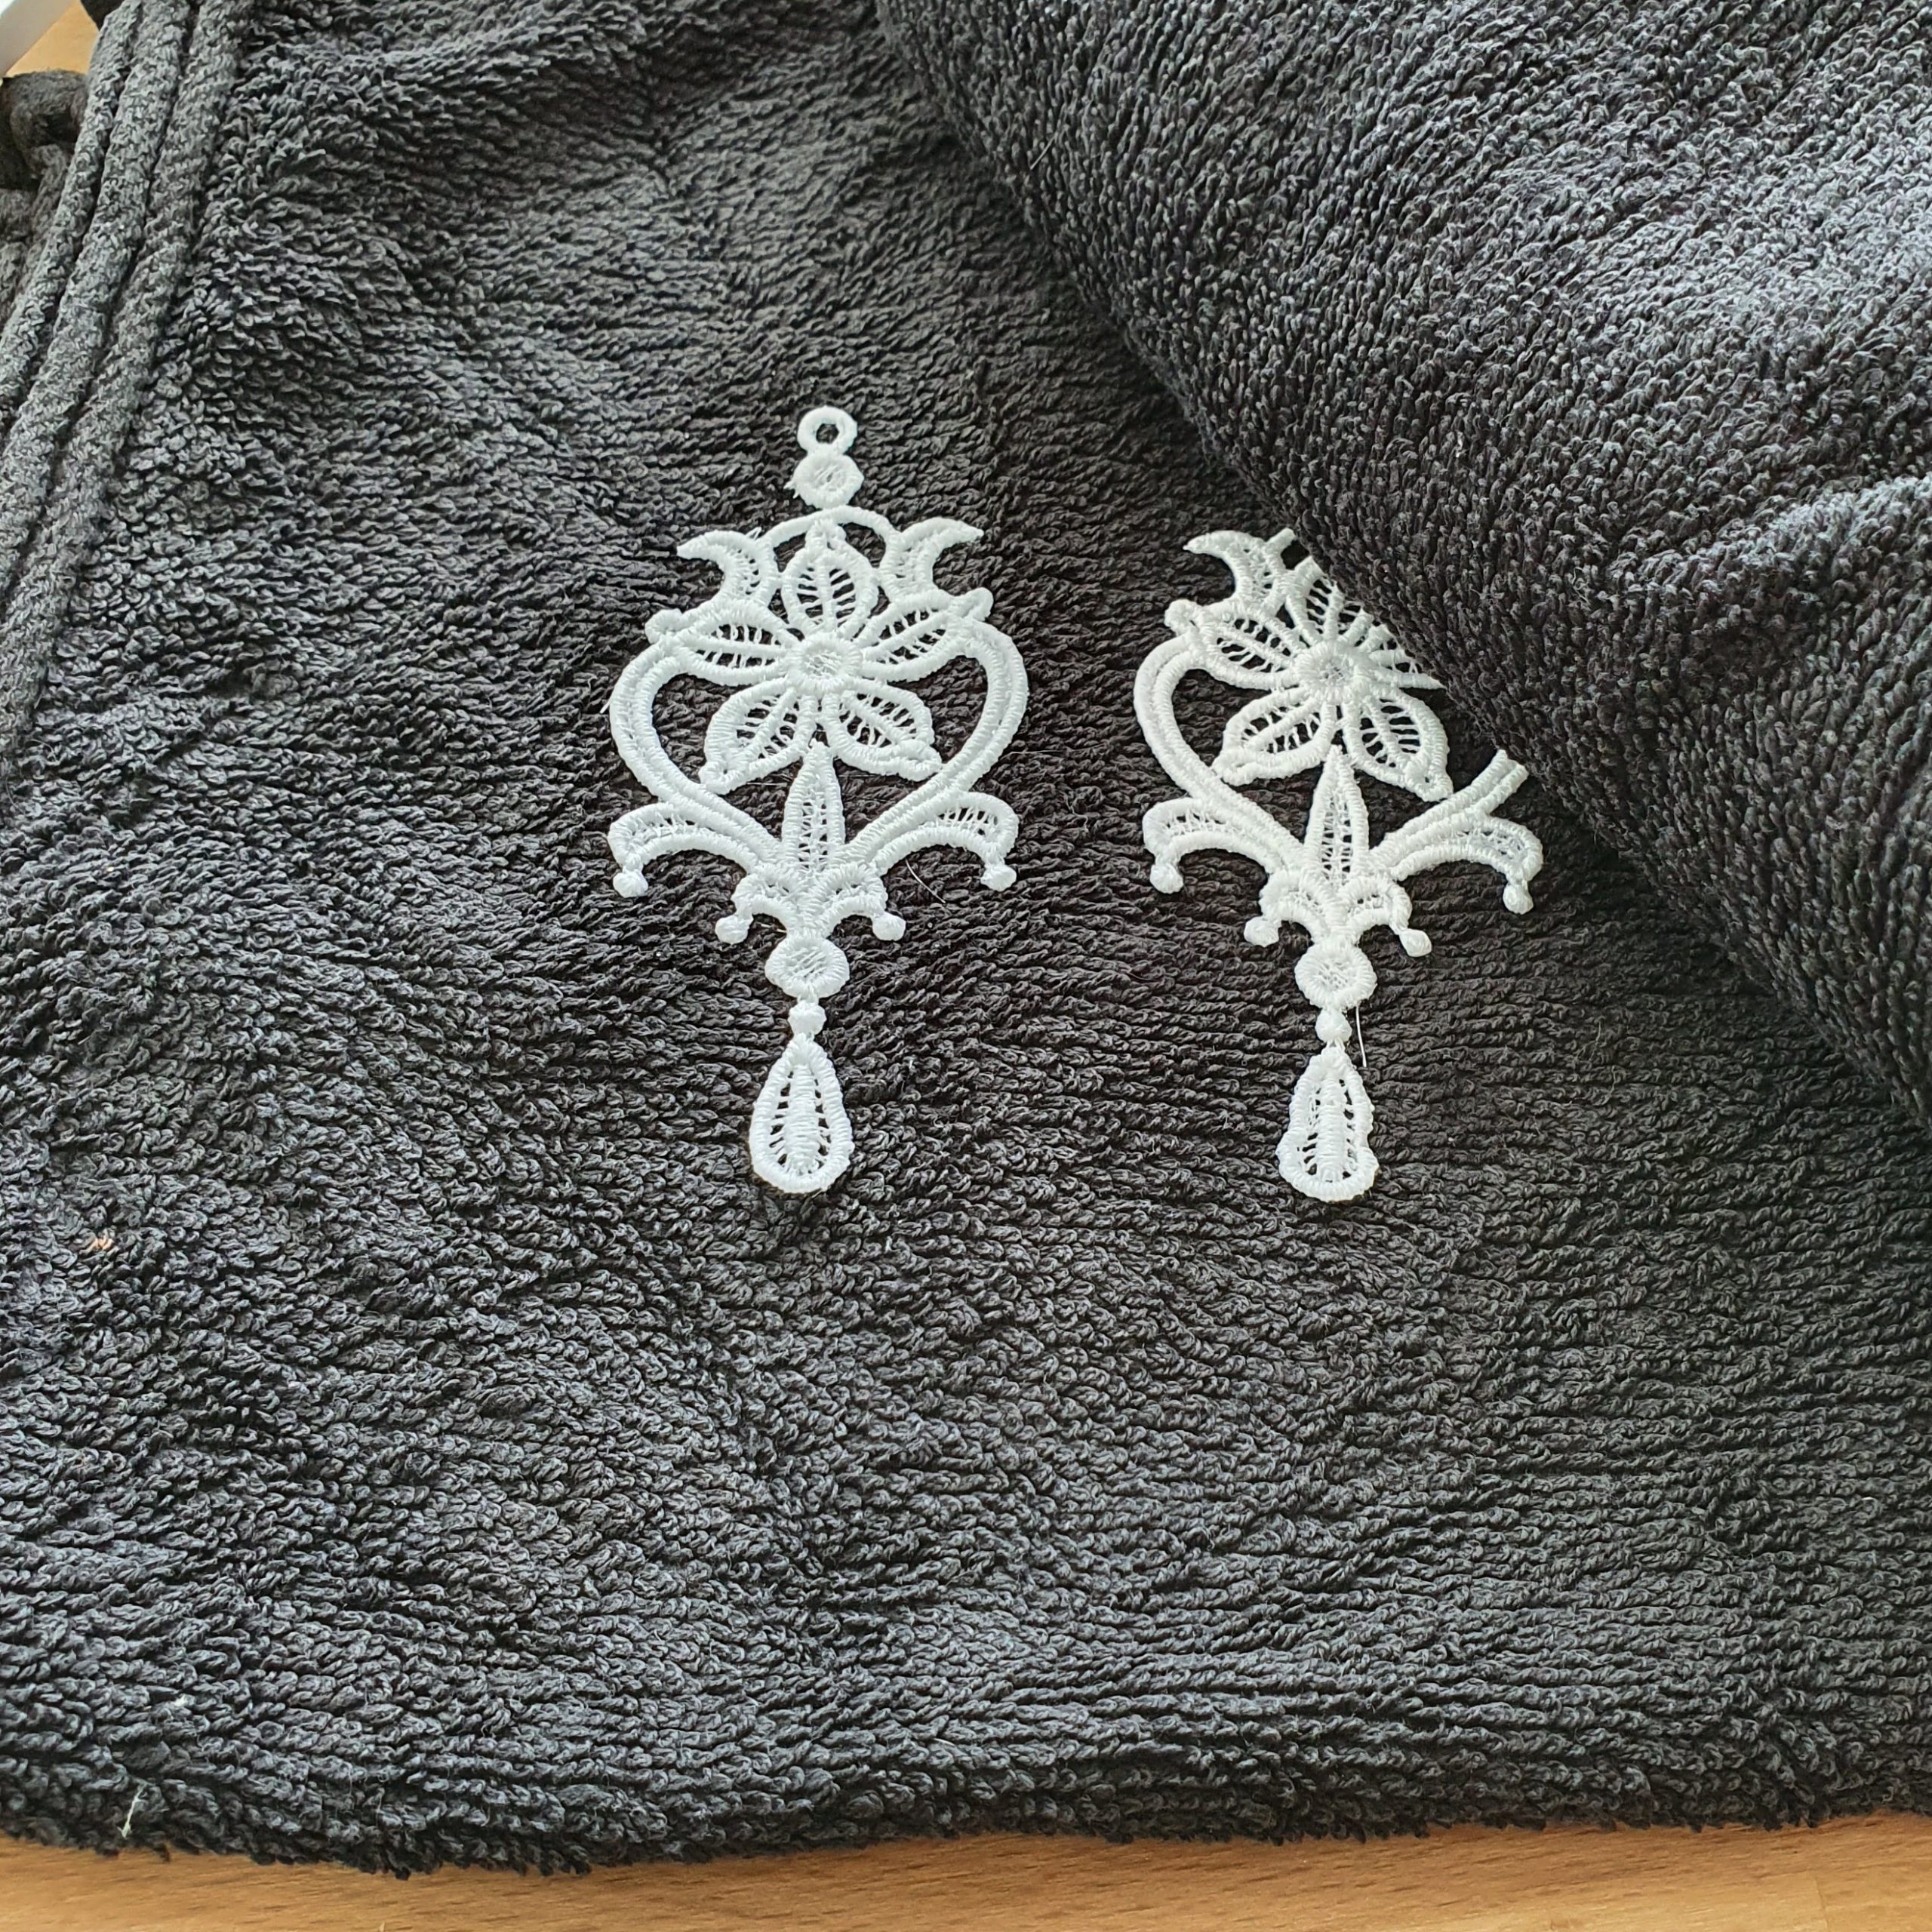
Dry on a towel
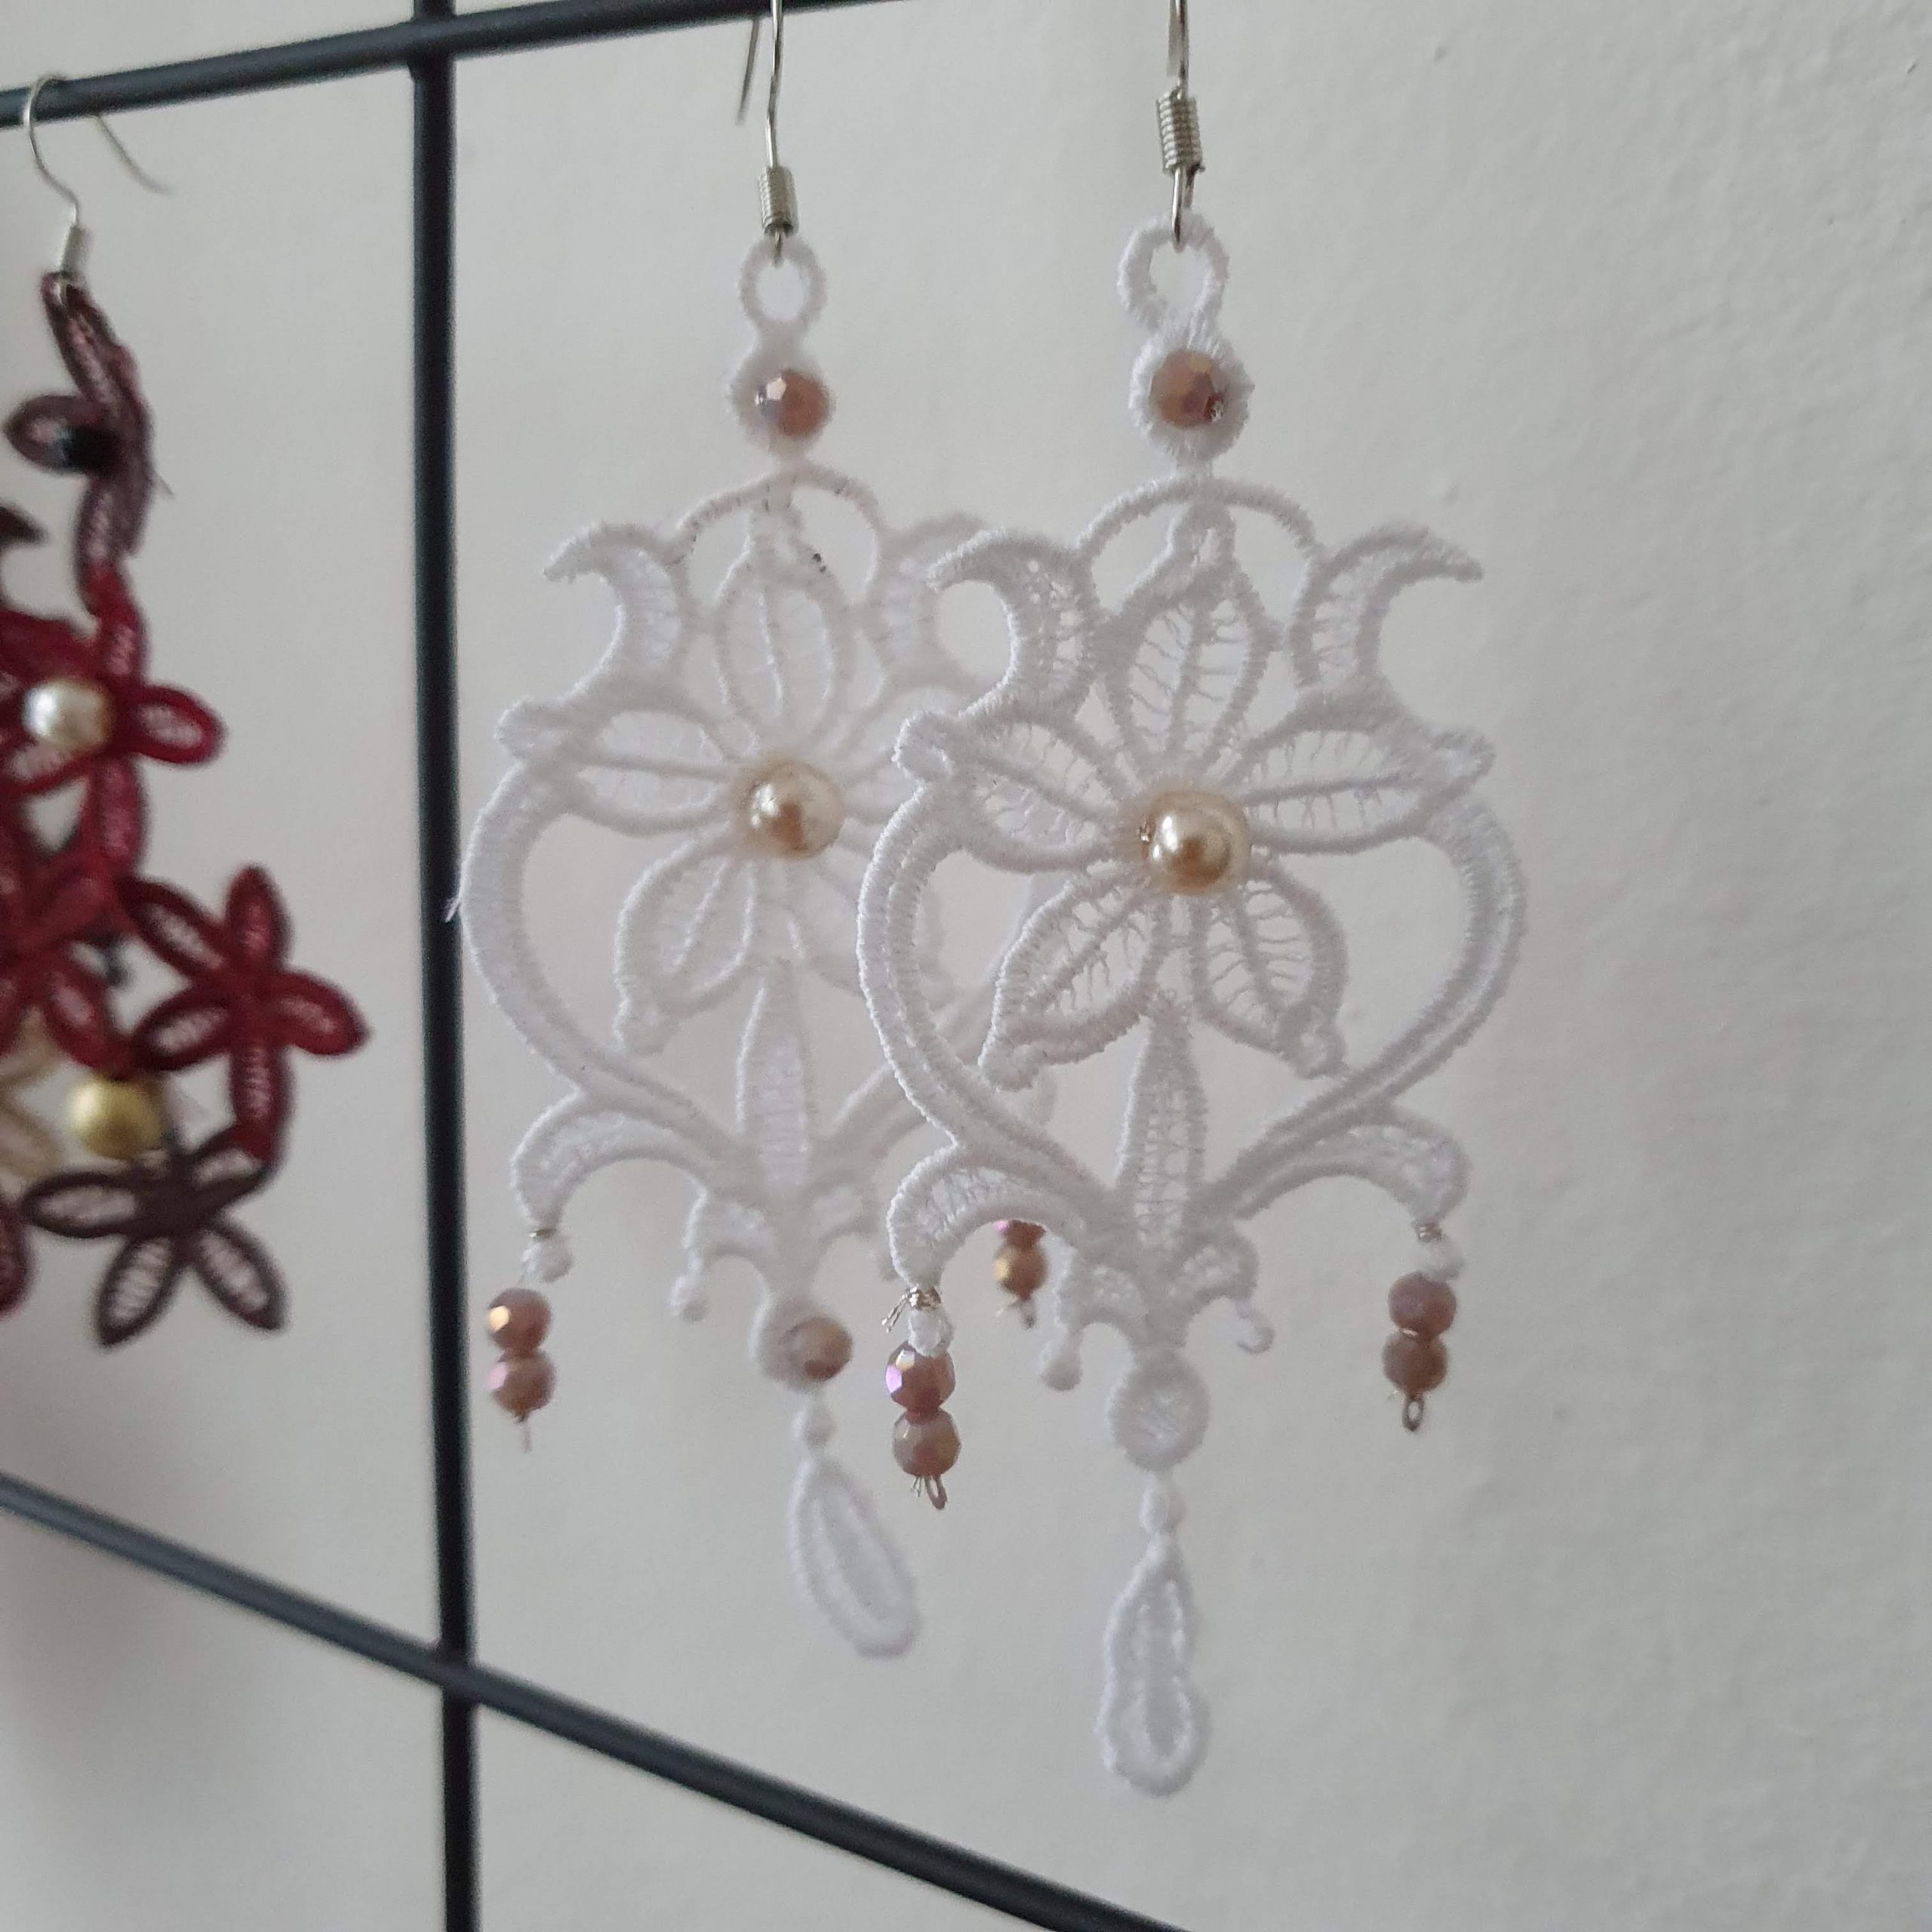
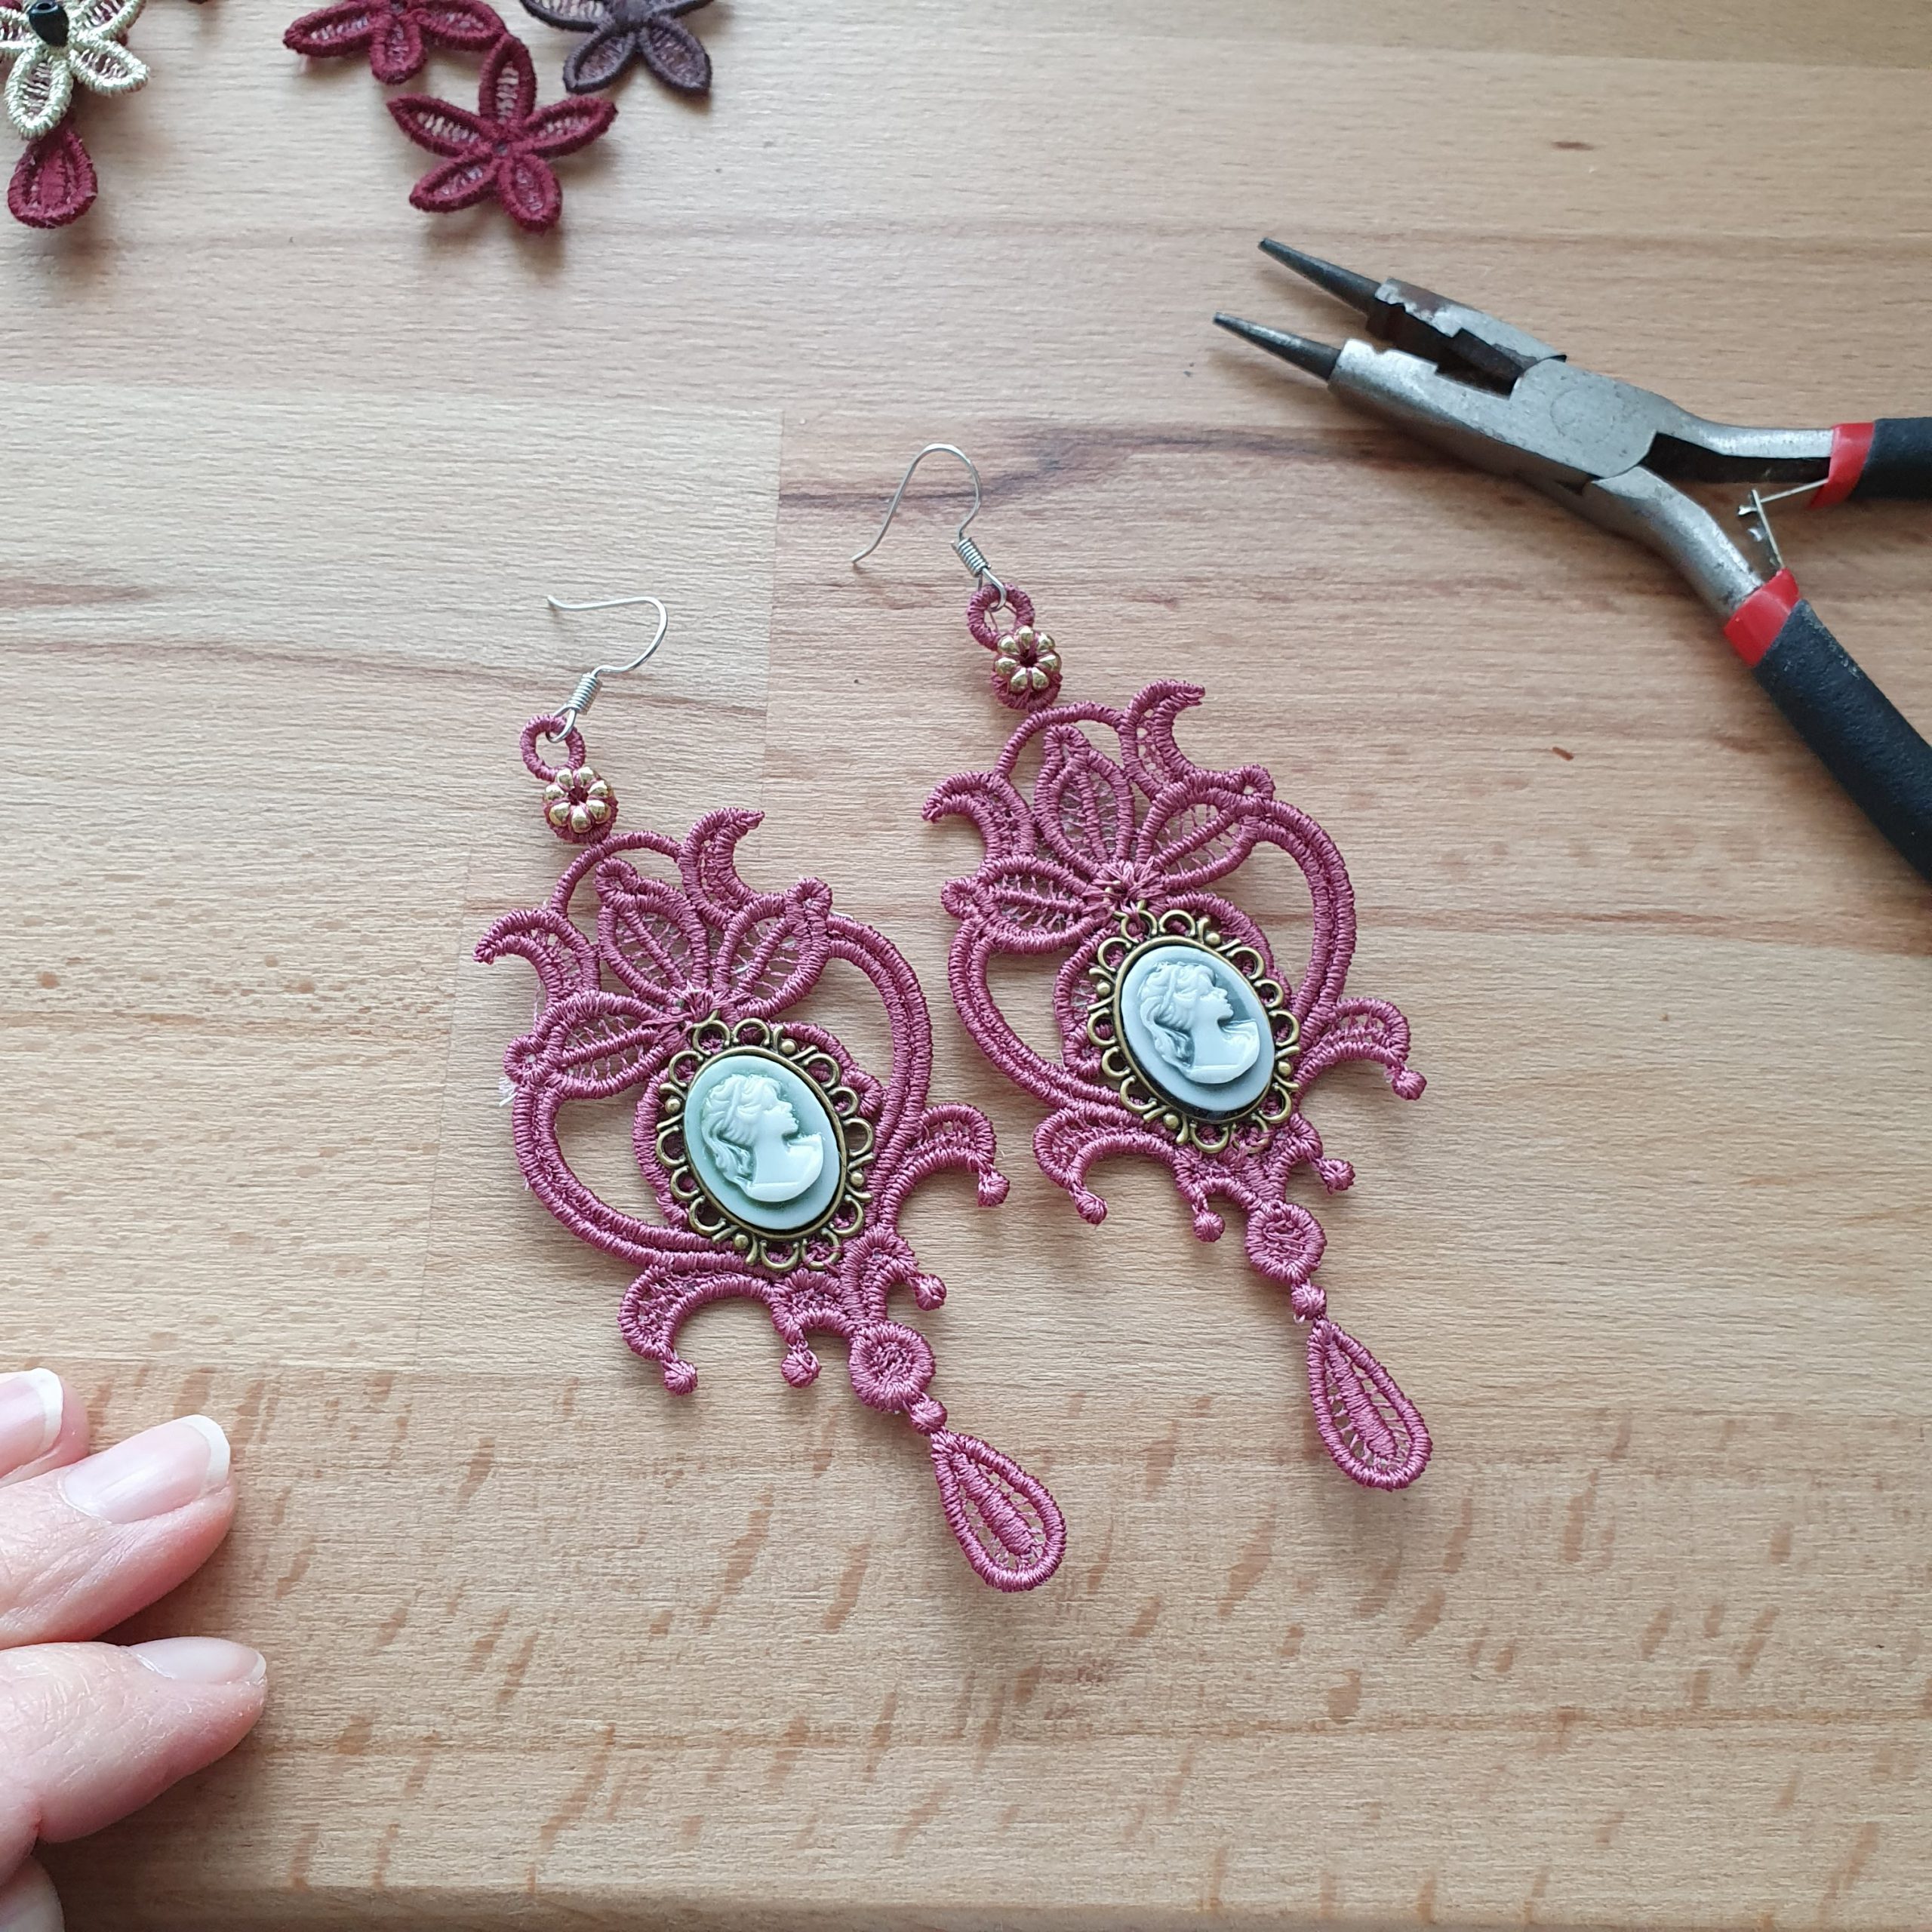
The embroidery is wonderful already, just put a hook in it and you’re done. Or you can make it even more beautiful with beads and other decorations. To fasten the beads I use metallic embroidery thread here. It adds that little something extra.

Add beads
Ready for …
We want more…
And so I had my project ready for the blog….but I was so enthusiastic about the earrings I had made that I wanted to make more. In another embroidery project (the embroidered buttonhole in the Megan blouse sew-along, also shared here on the blog) I had a lot of empty embroidery stabiliser space left over and I thought that was a real shame. After puzzling over the buttonhole pattern with the earring pattern and some loose flowers, I filled up the space and created another pair of earrings.
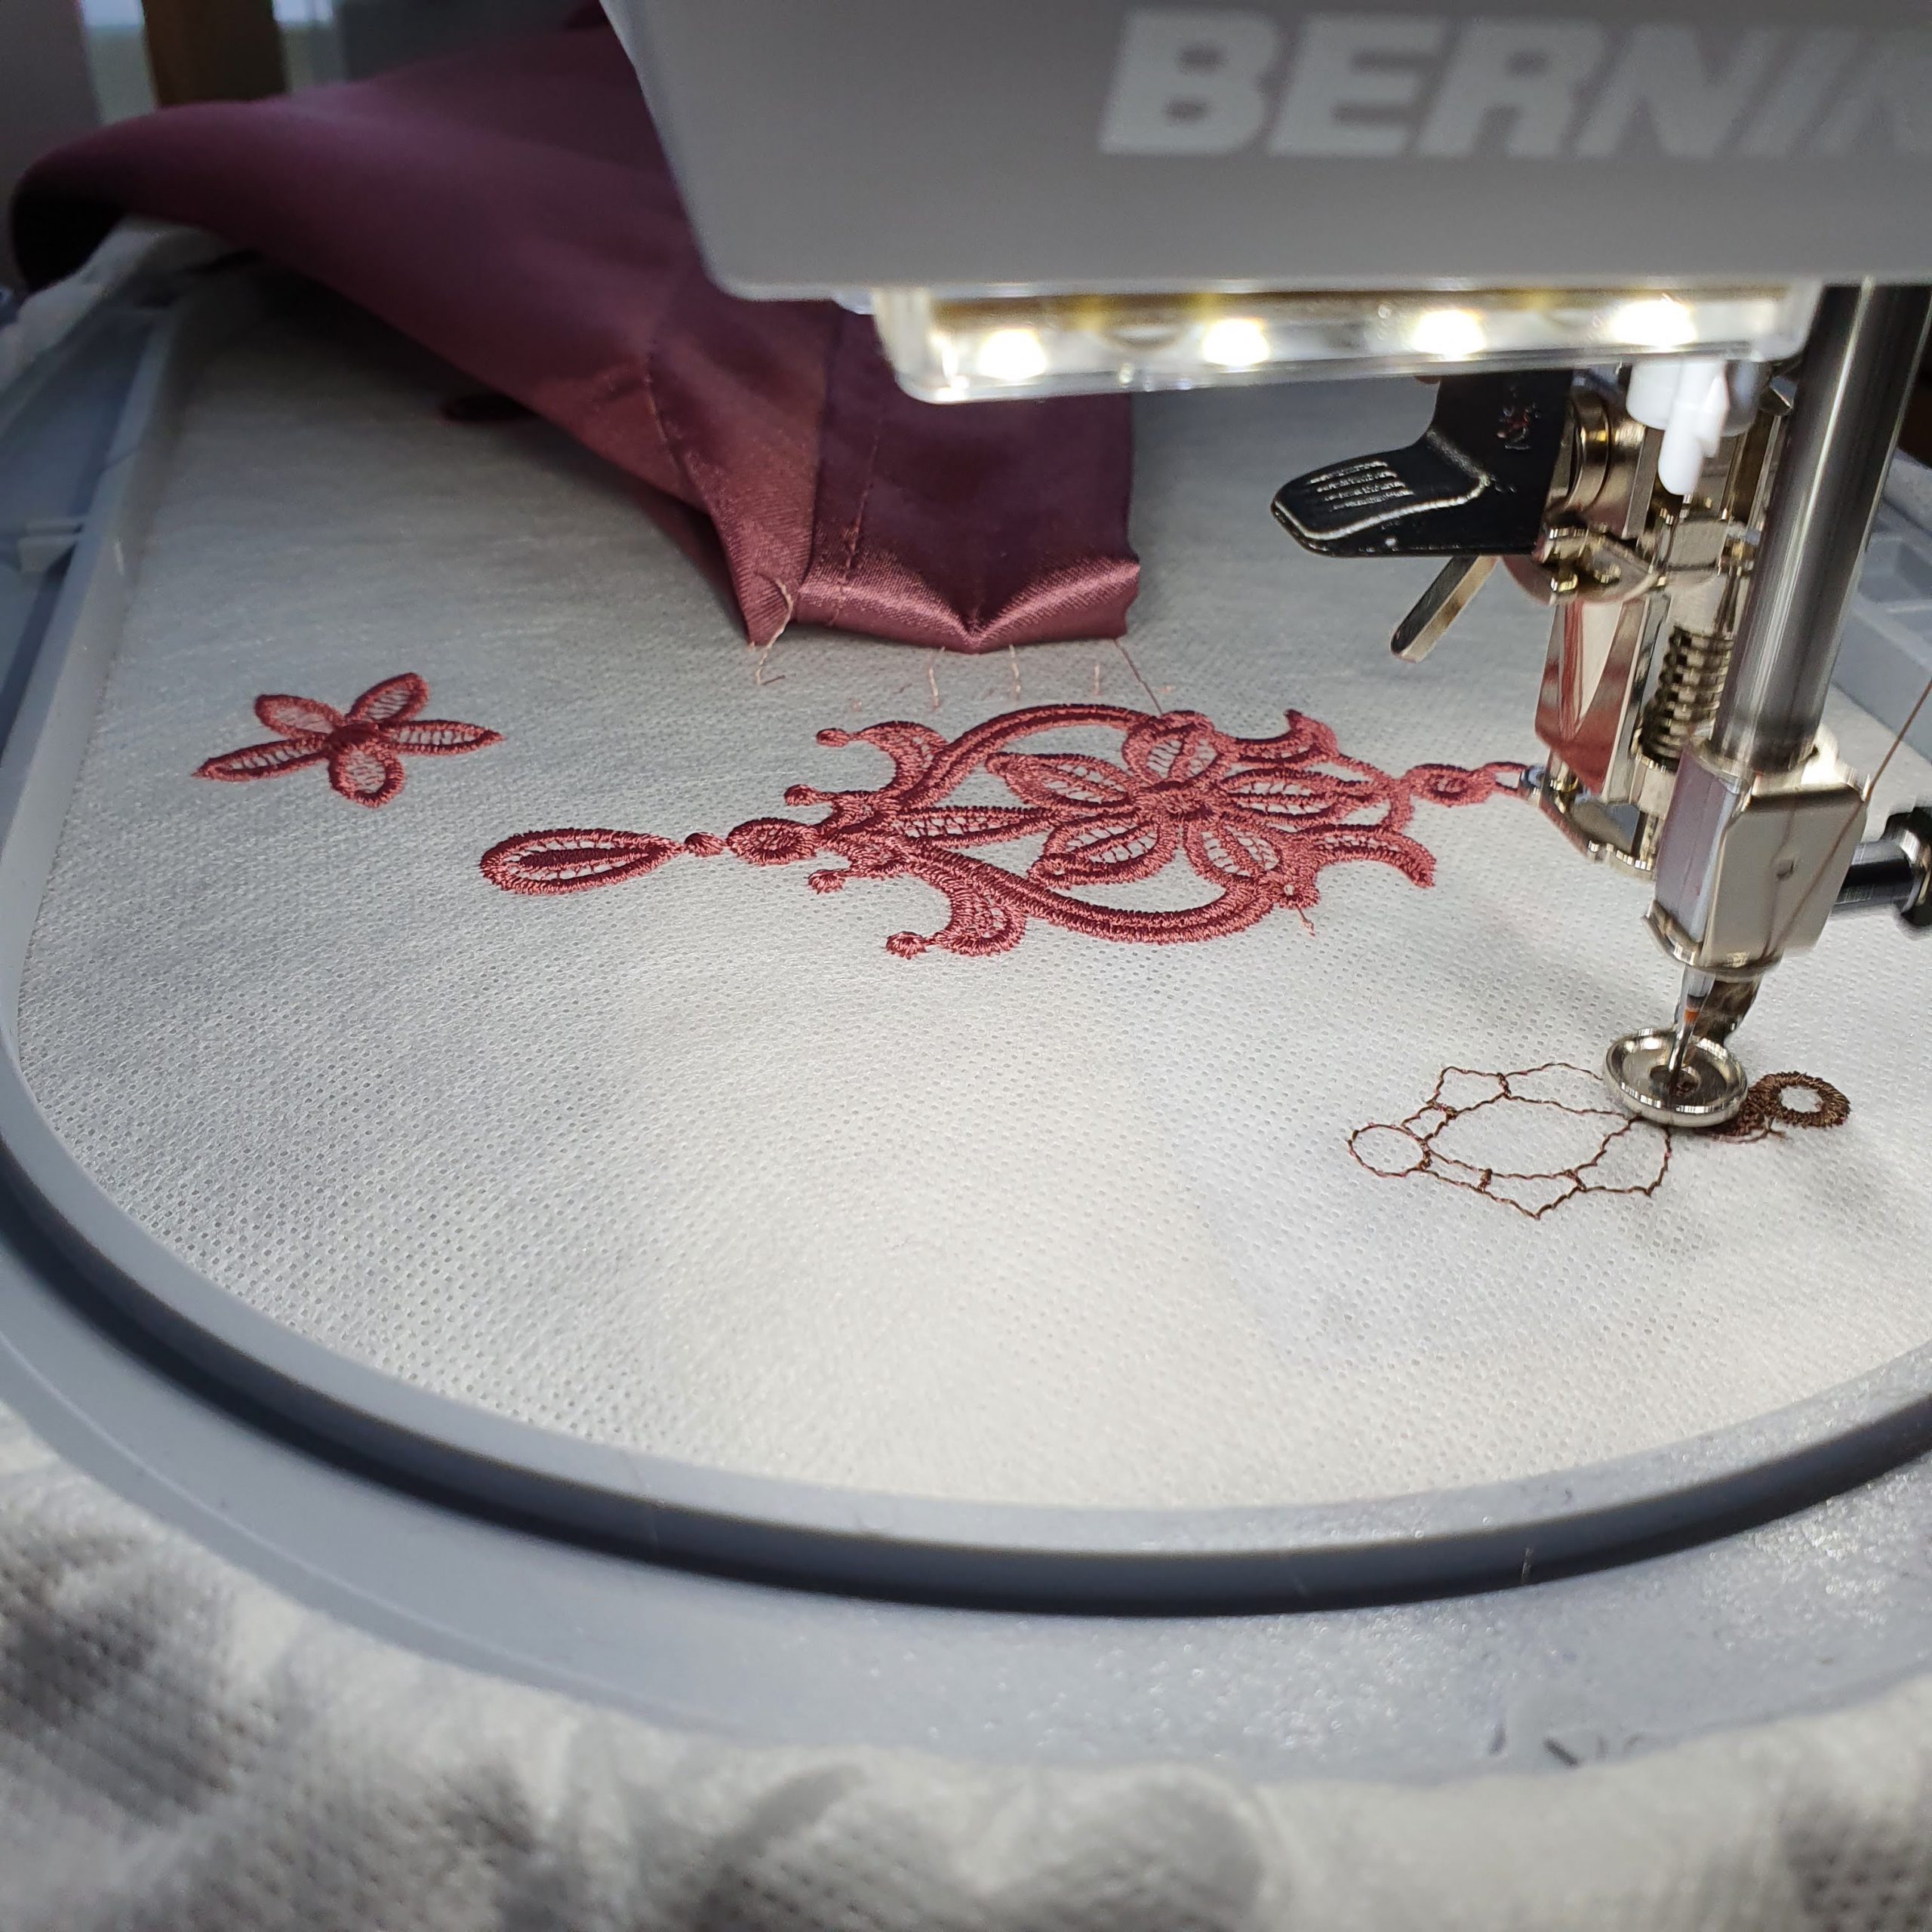
Fill up empty space. (Fold the blouse well out of the way!)
Megan Buttonhole in the middle
Embroider various colours
It’s a great moment to experiment with different colours. These are the colours in the pallet of the capsule wardrobe I am creating on the theme Time to Shine! So I embroidered various colours of flowers. In one earring I changed the colours halfway and it made a cool effect. Since the reverse side of the earring is also visible, I chose to match the colour of the bobbin thread to the colour of the embroidery thread. Normally I use white special bobbin thread (Mettler Bobbinette), but this time an ordinary sewing thread. I was a little worried, but it went well!
After embroidering, remove the embroidery stabiliser from the embroidery hoop again, cut some away and dissolve it in water.
Buttonhole hole
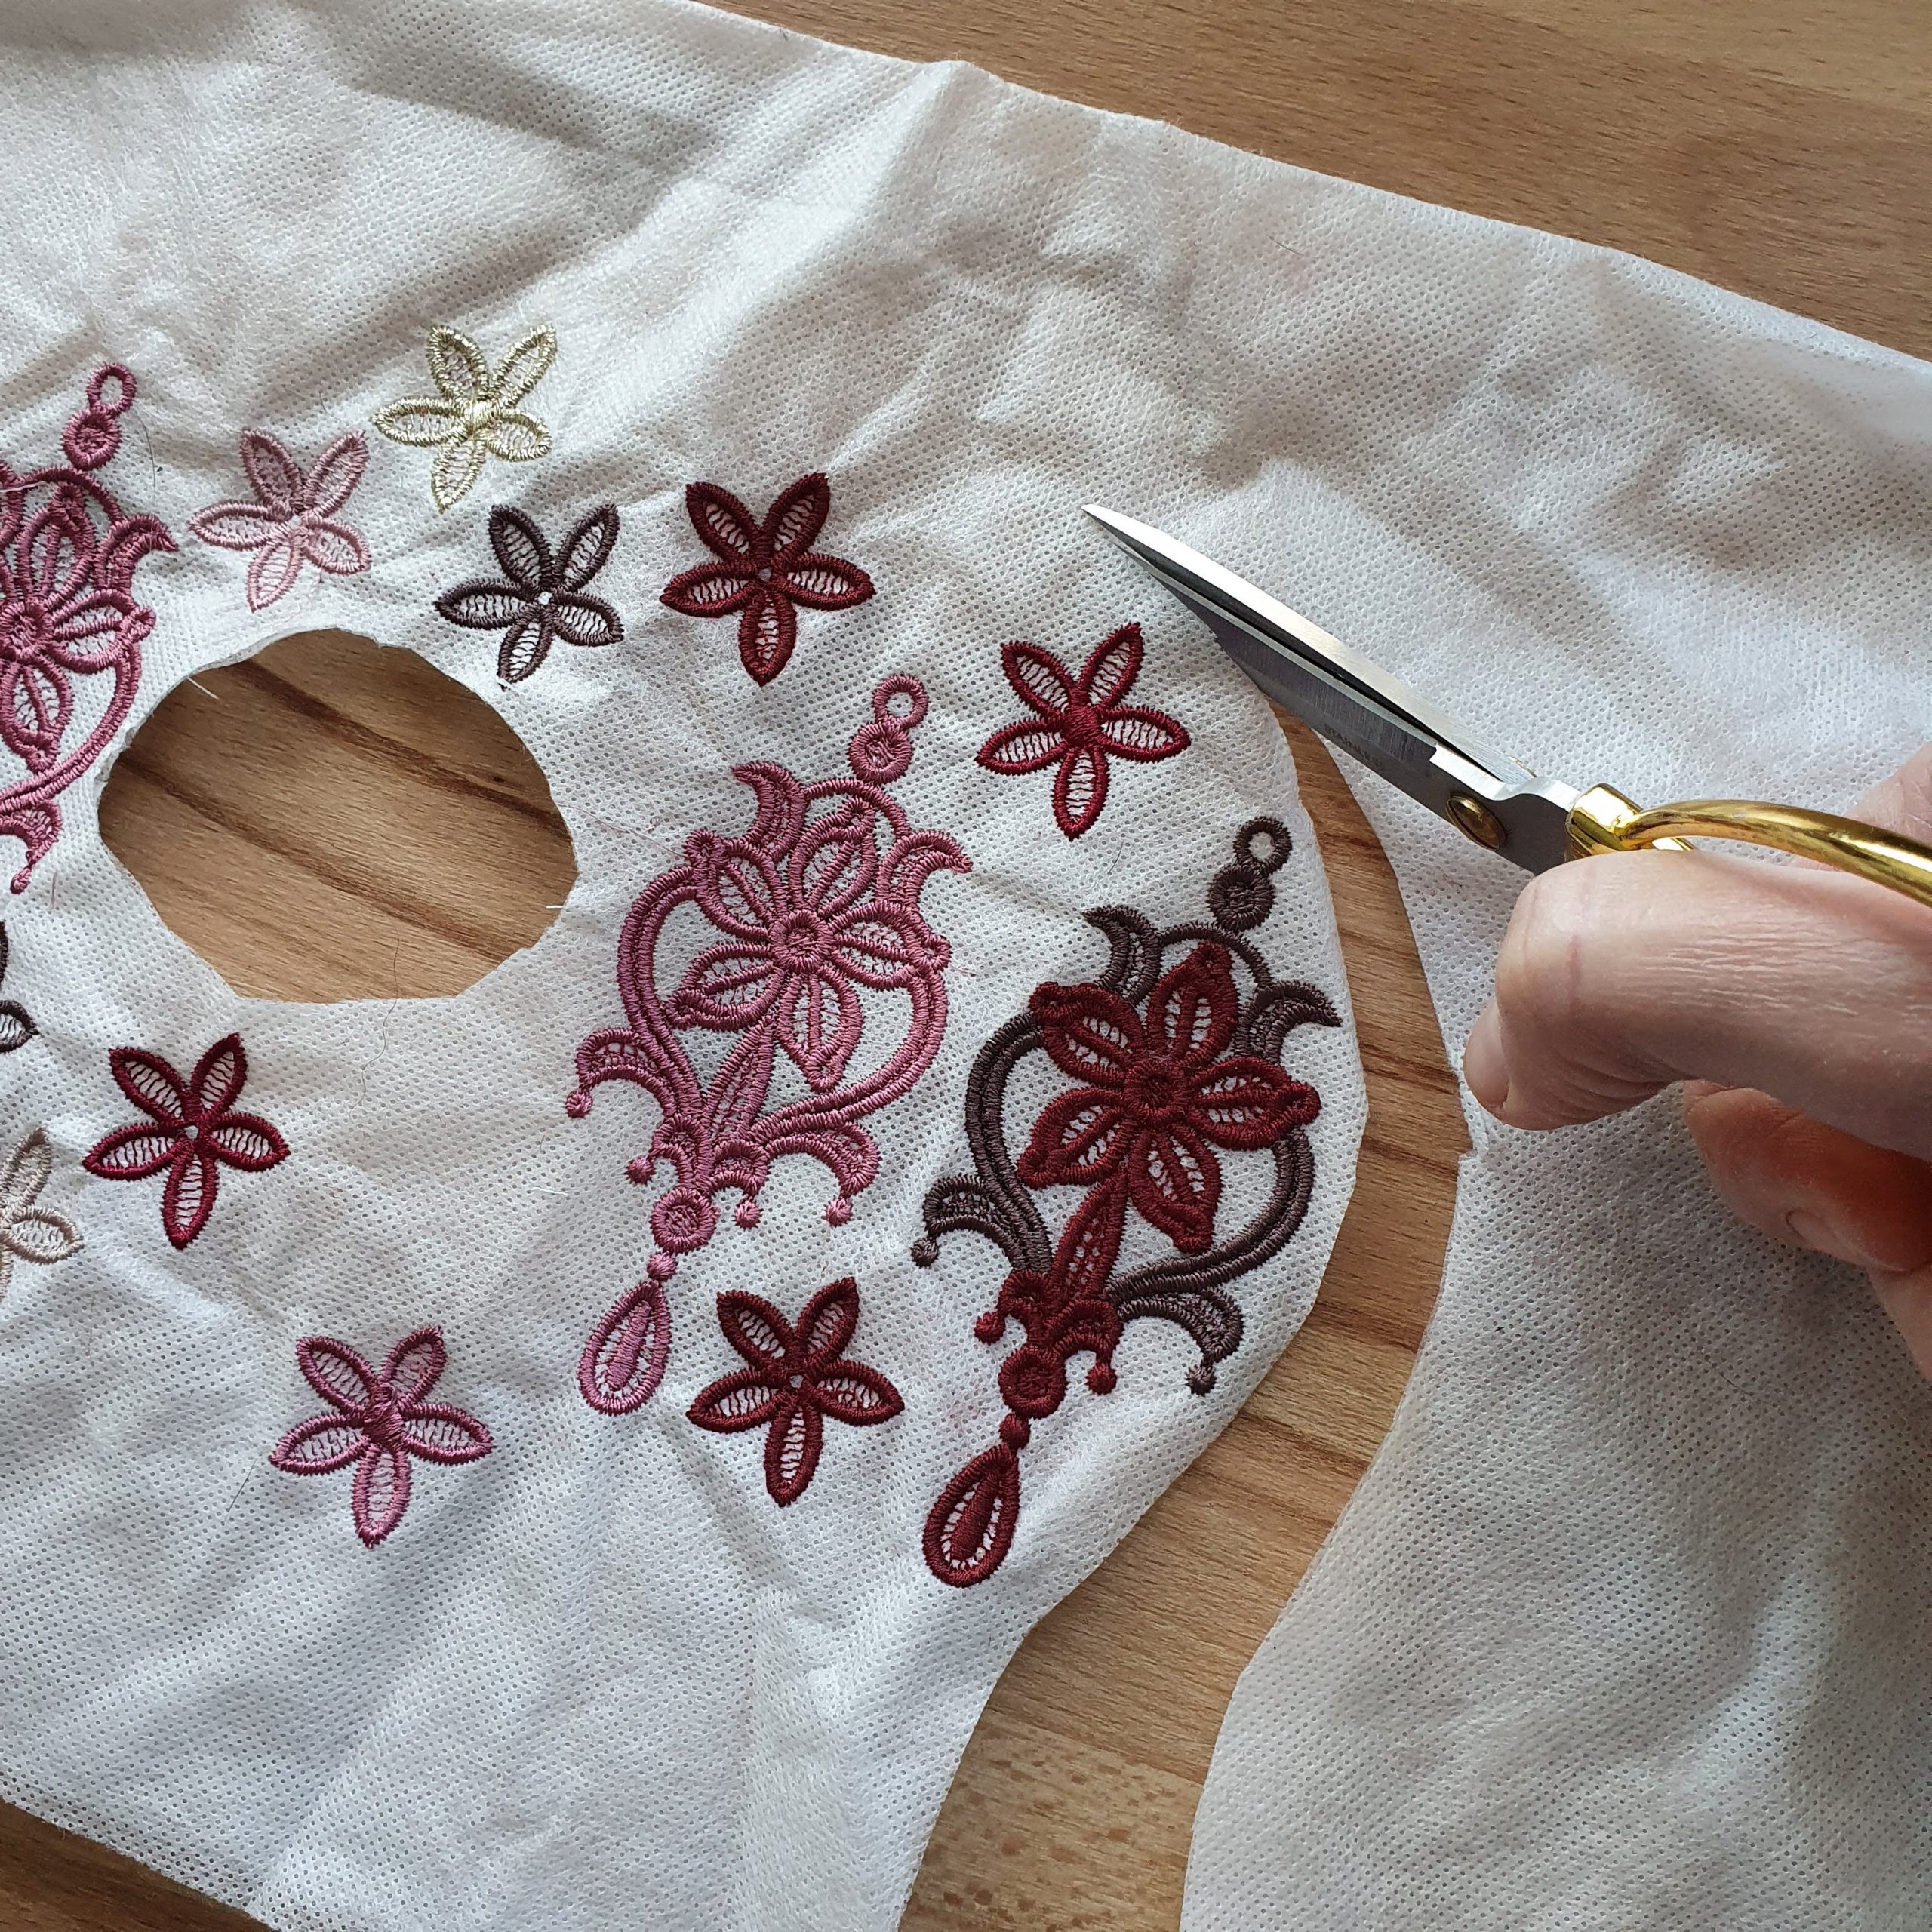
After dissolving, I dried it again and before the embroidery was completely dry, pressed it flat. This was to prevent curling up, especially of the flowers. I laid them on a smooth surface and put baking paper on top (to prevent sticking) and a stack of newspapers for pressure.
Flatten
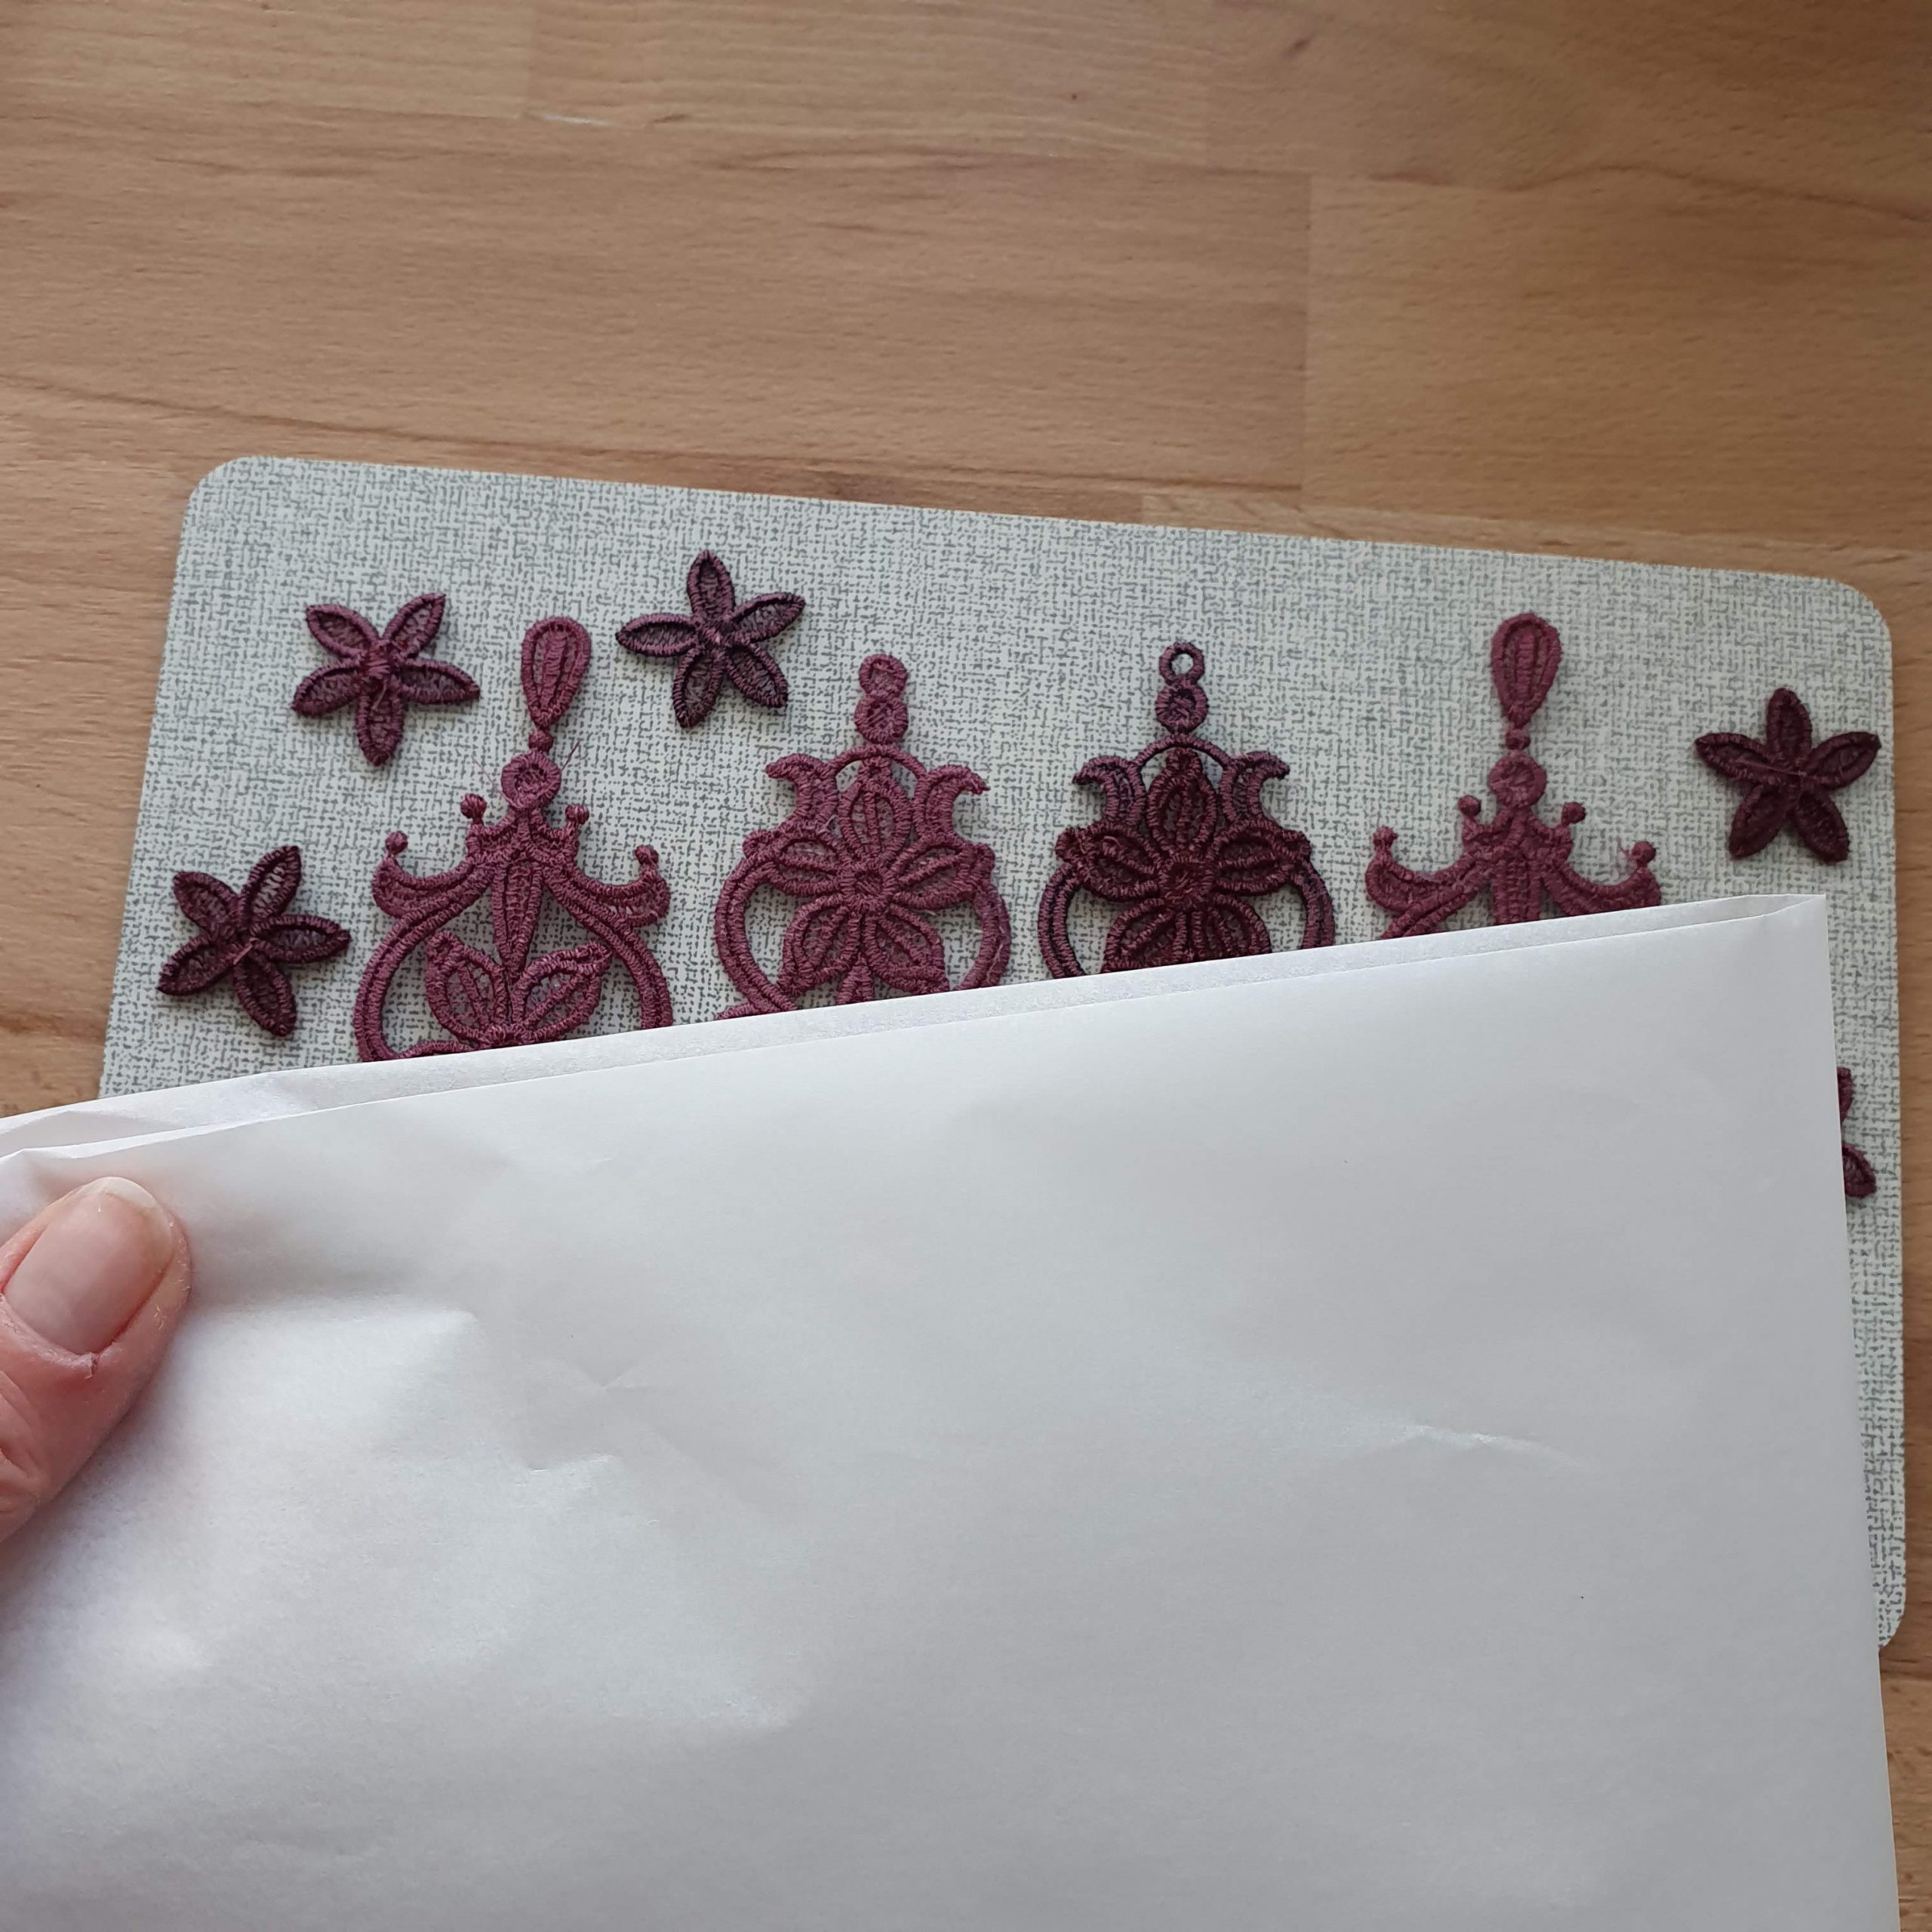
Trimming the embroidered ornaments
When the necessary beads are ready, the design process can begin. It’s great to lay out the various options and choose the nicest one. I take photos of the options so I won’t forget them and to make it easier to choose.
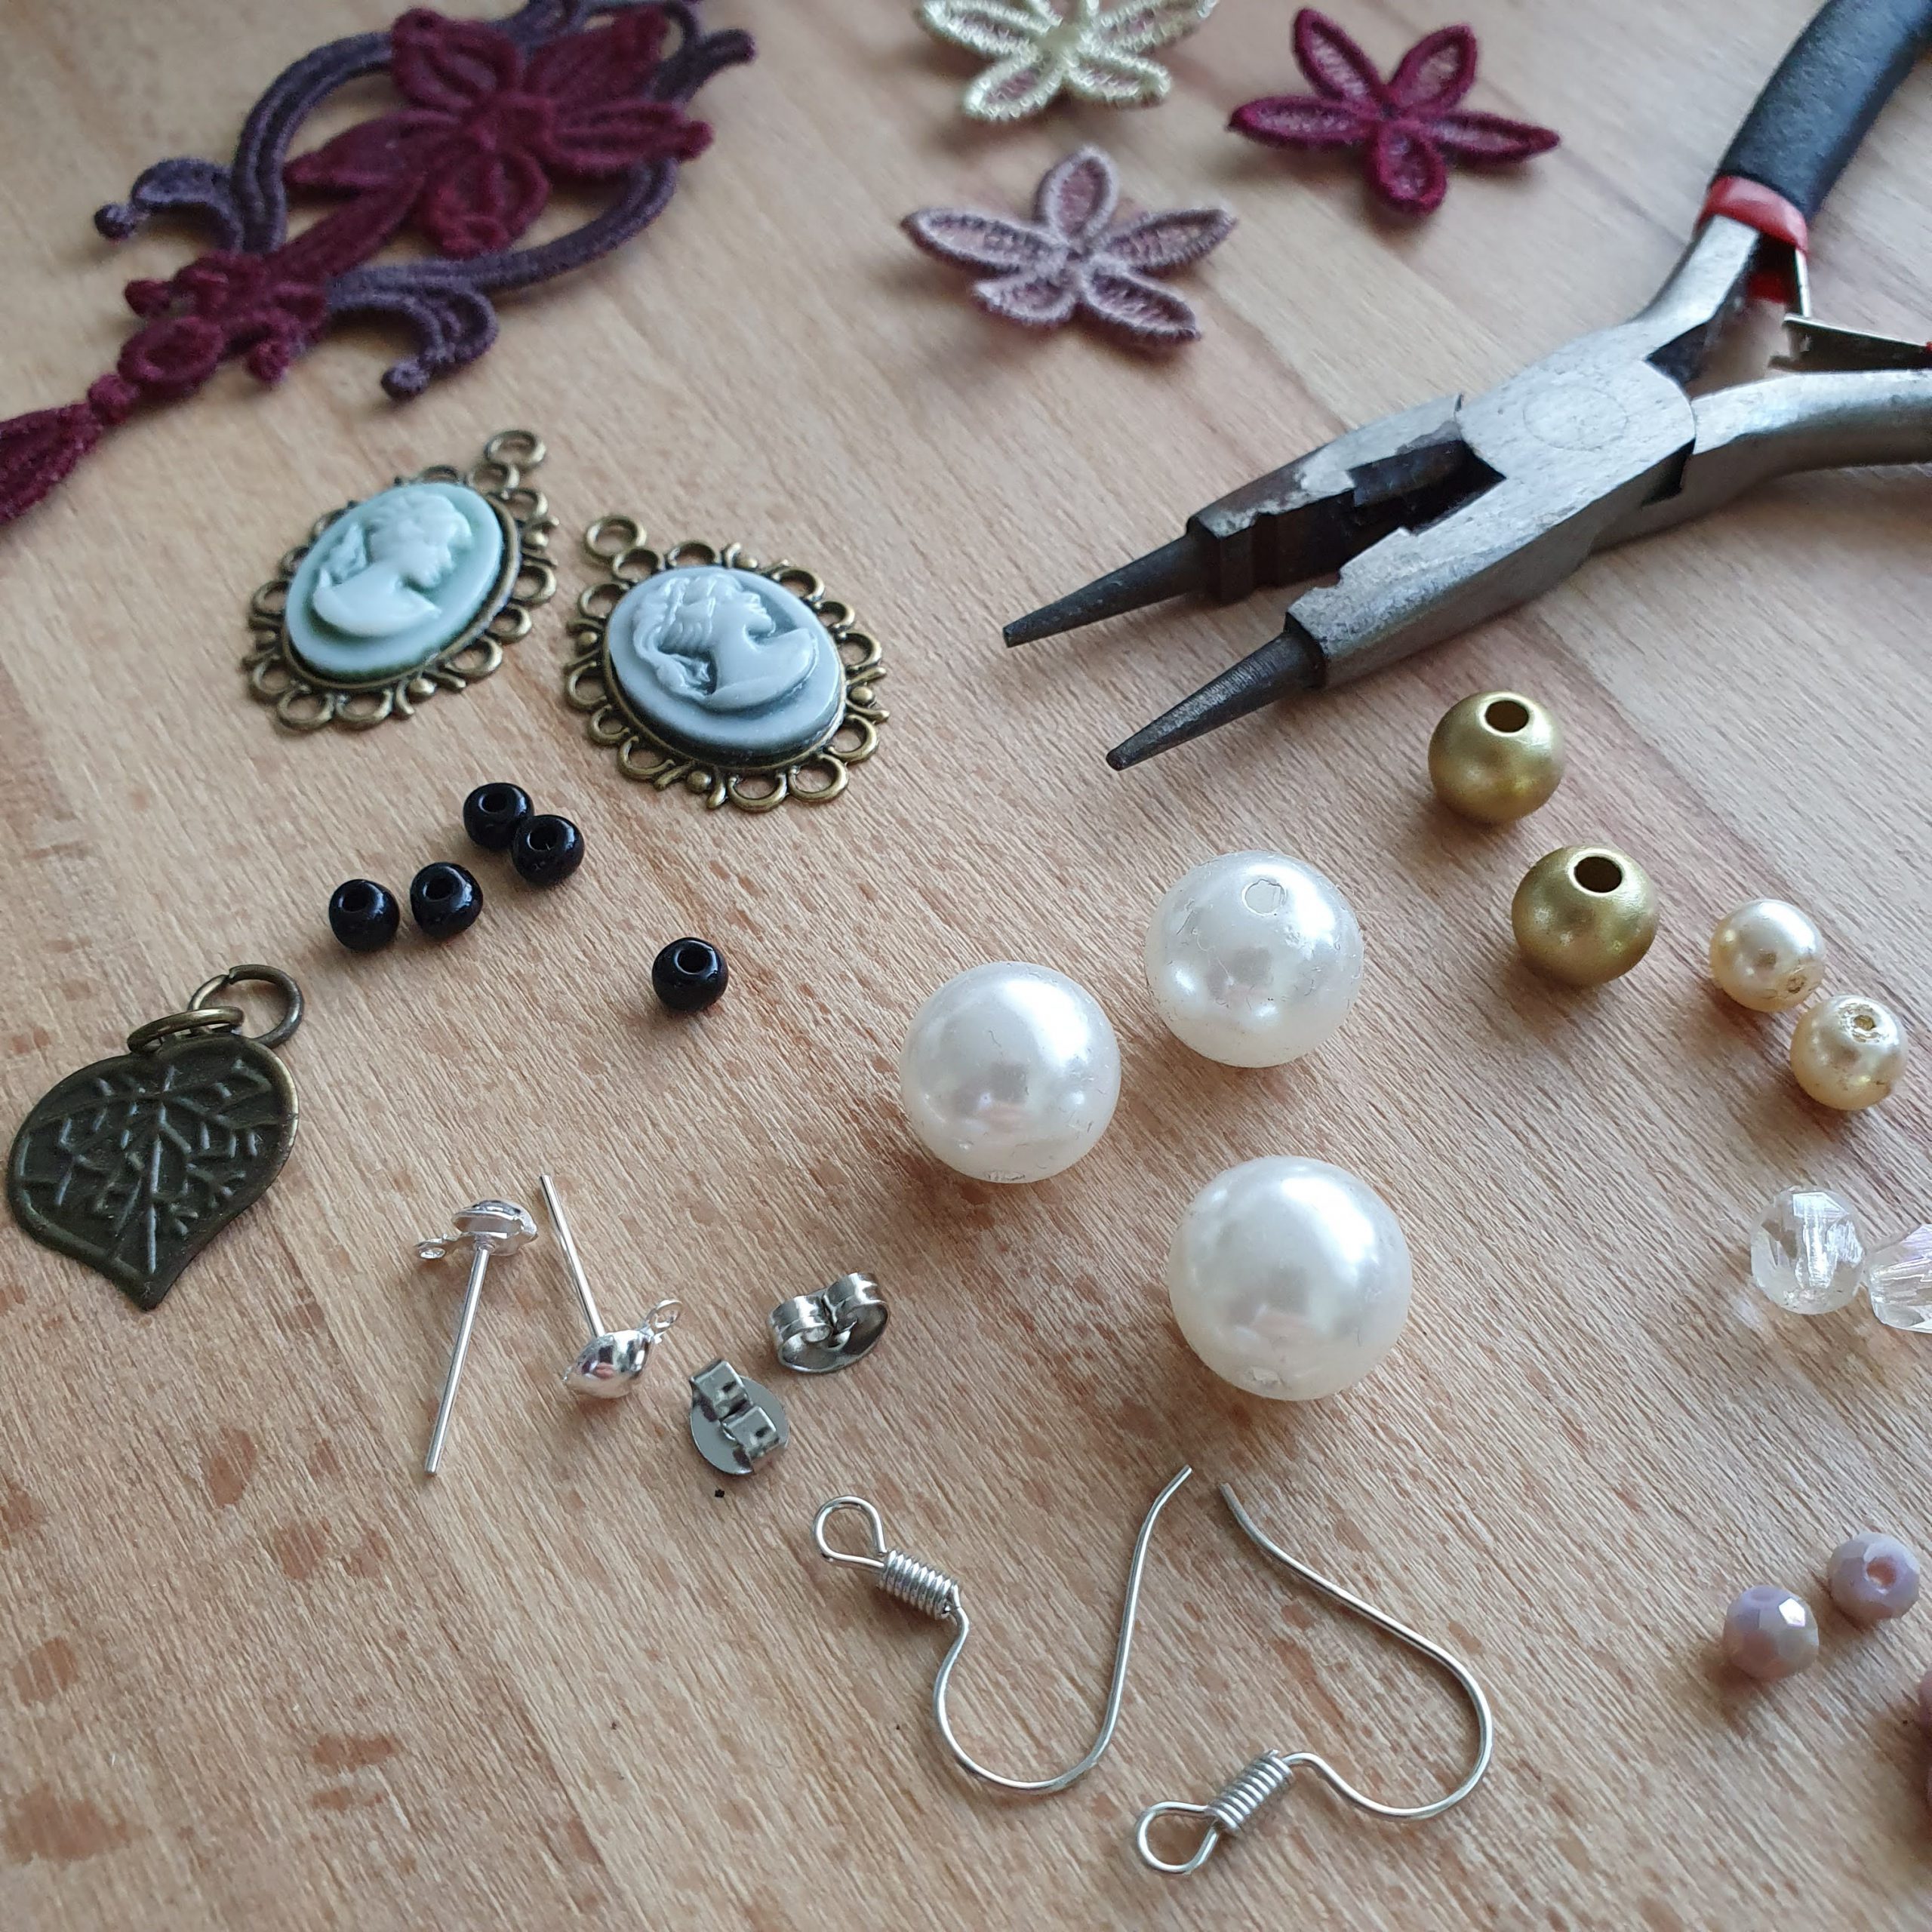
Beads, medallions and recycled charms
Design by doing

Choose
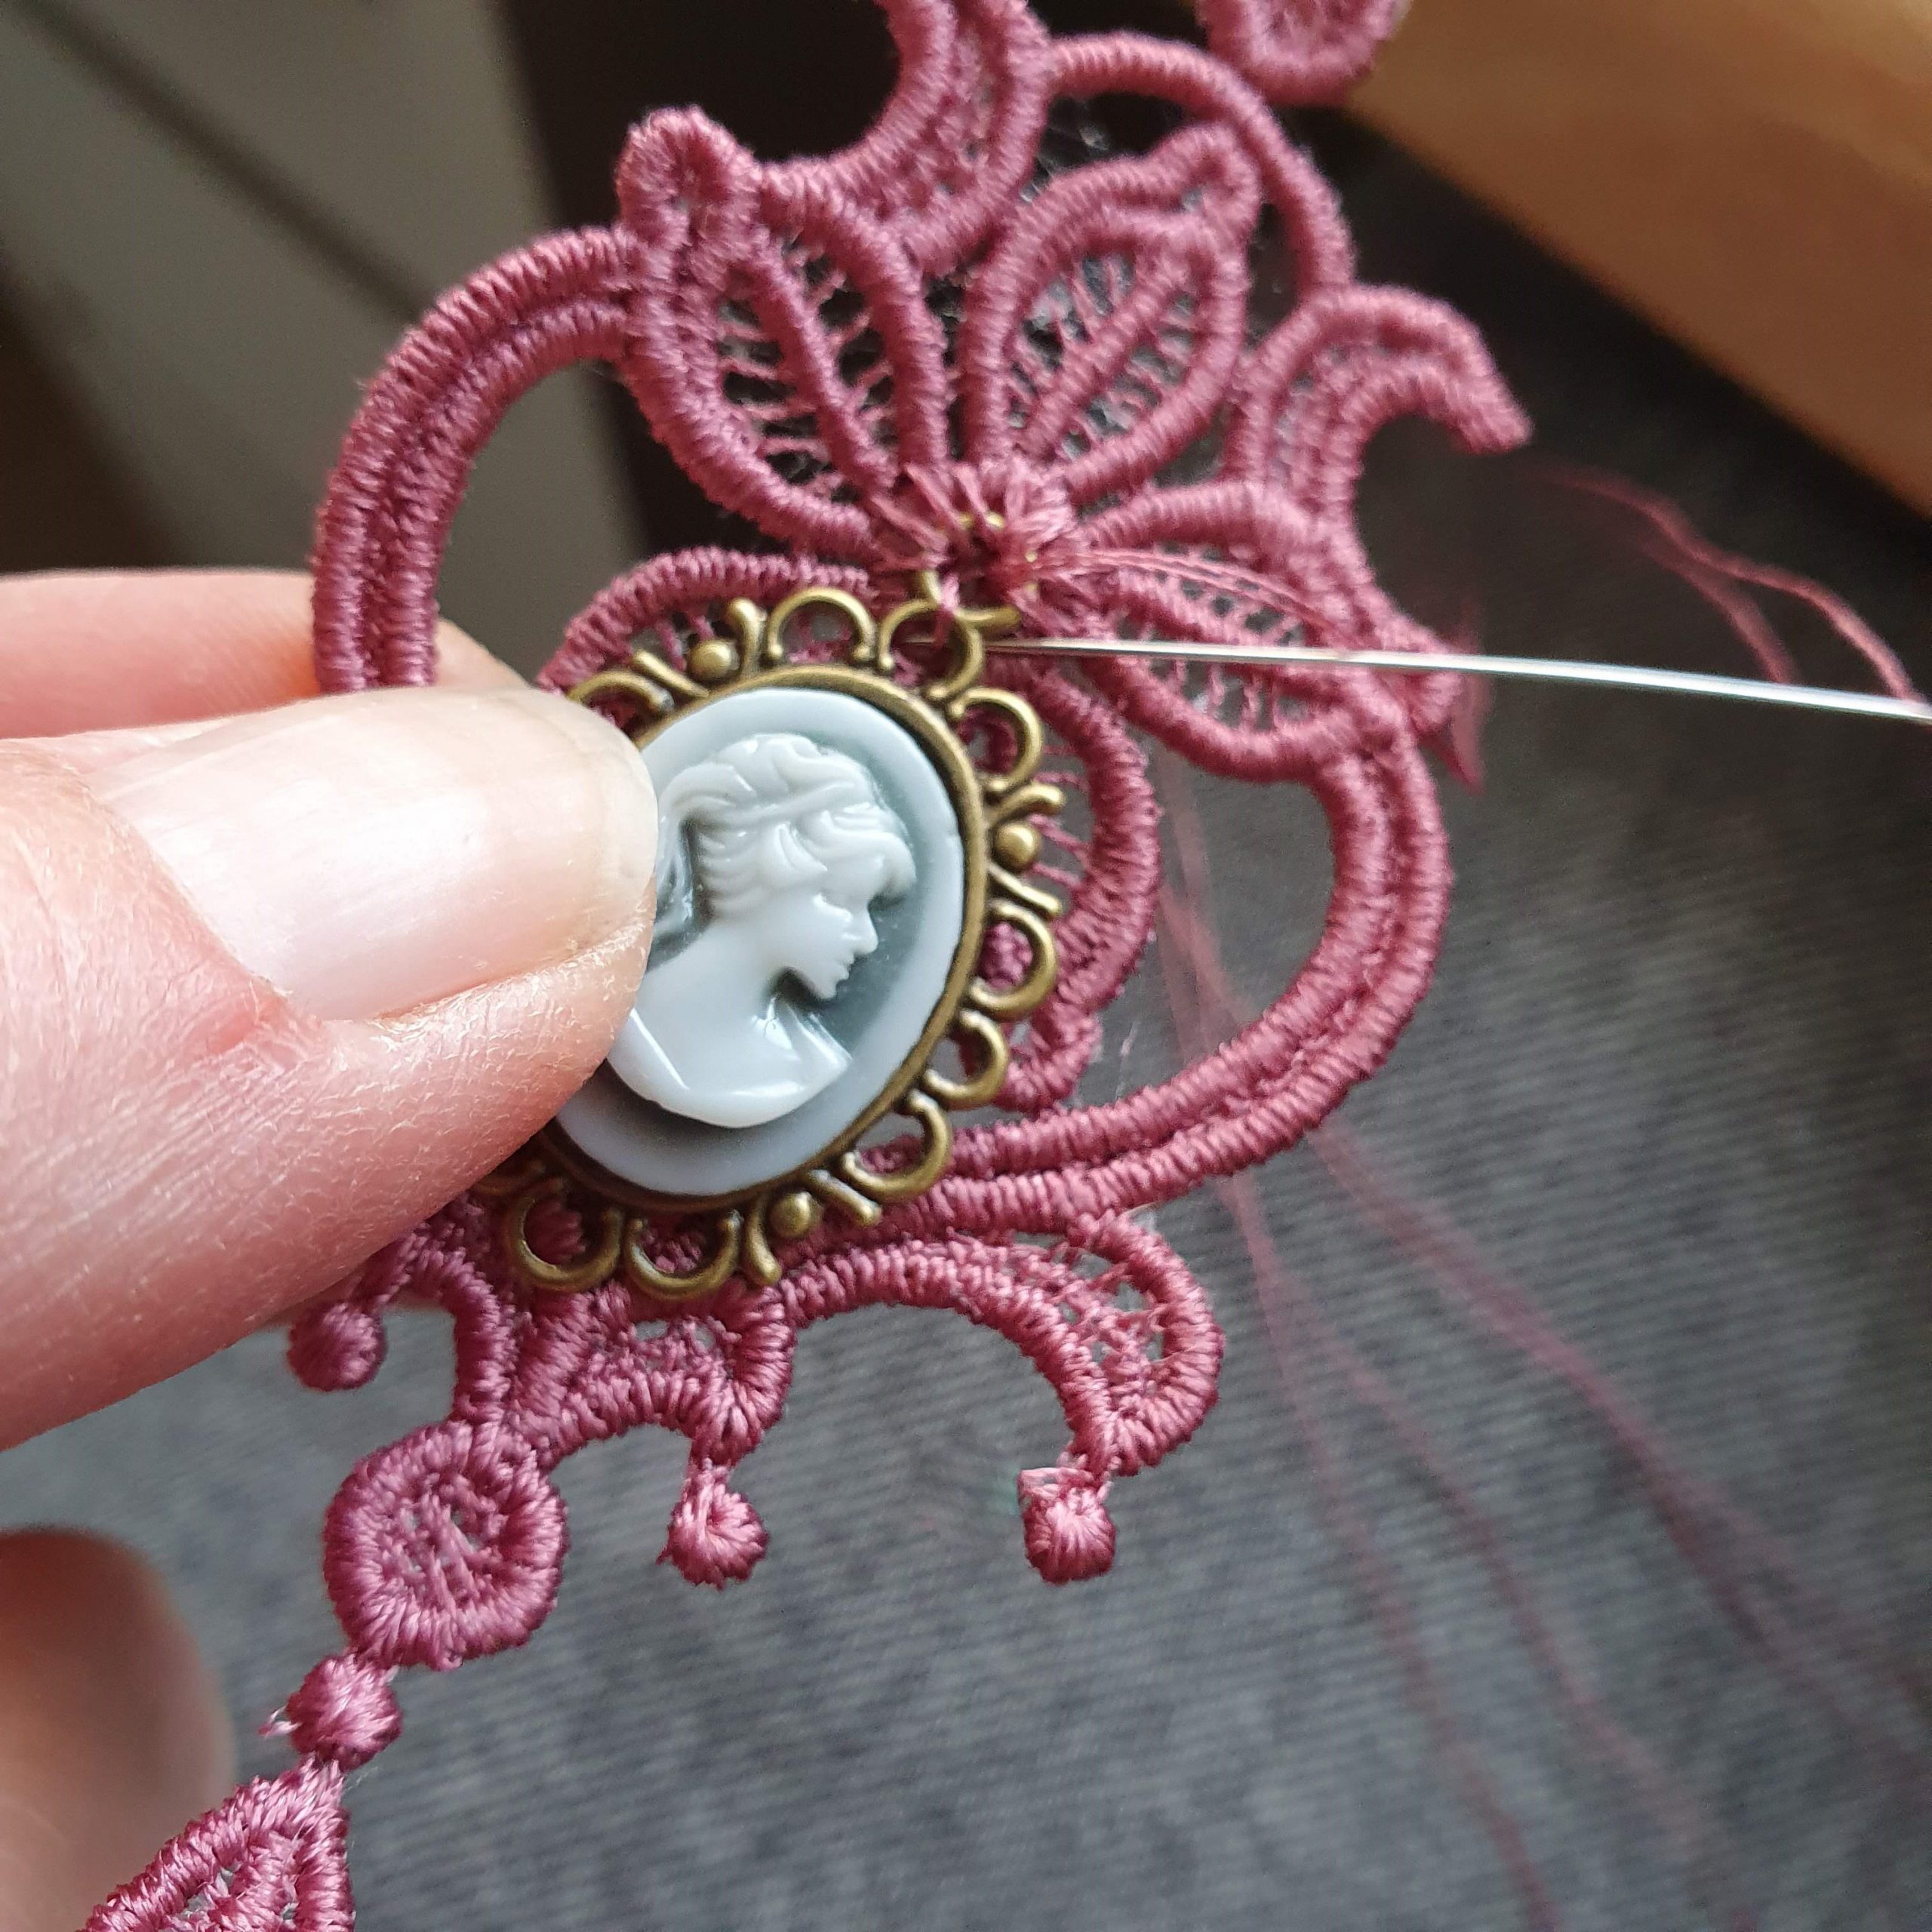
The trimming is sewn together by hand again. This time with the same thread as was used for embroidering.
I bought the earring hooks online and they can be attached very simply by squeezing open the ring and, after drawing it through the eyelet of the earring, carefully squeezing it shut.

Squeeze open and shut
Second pair
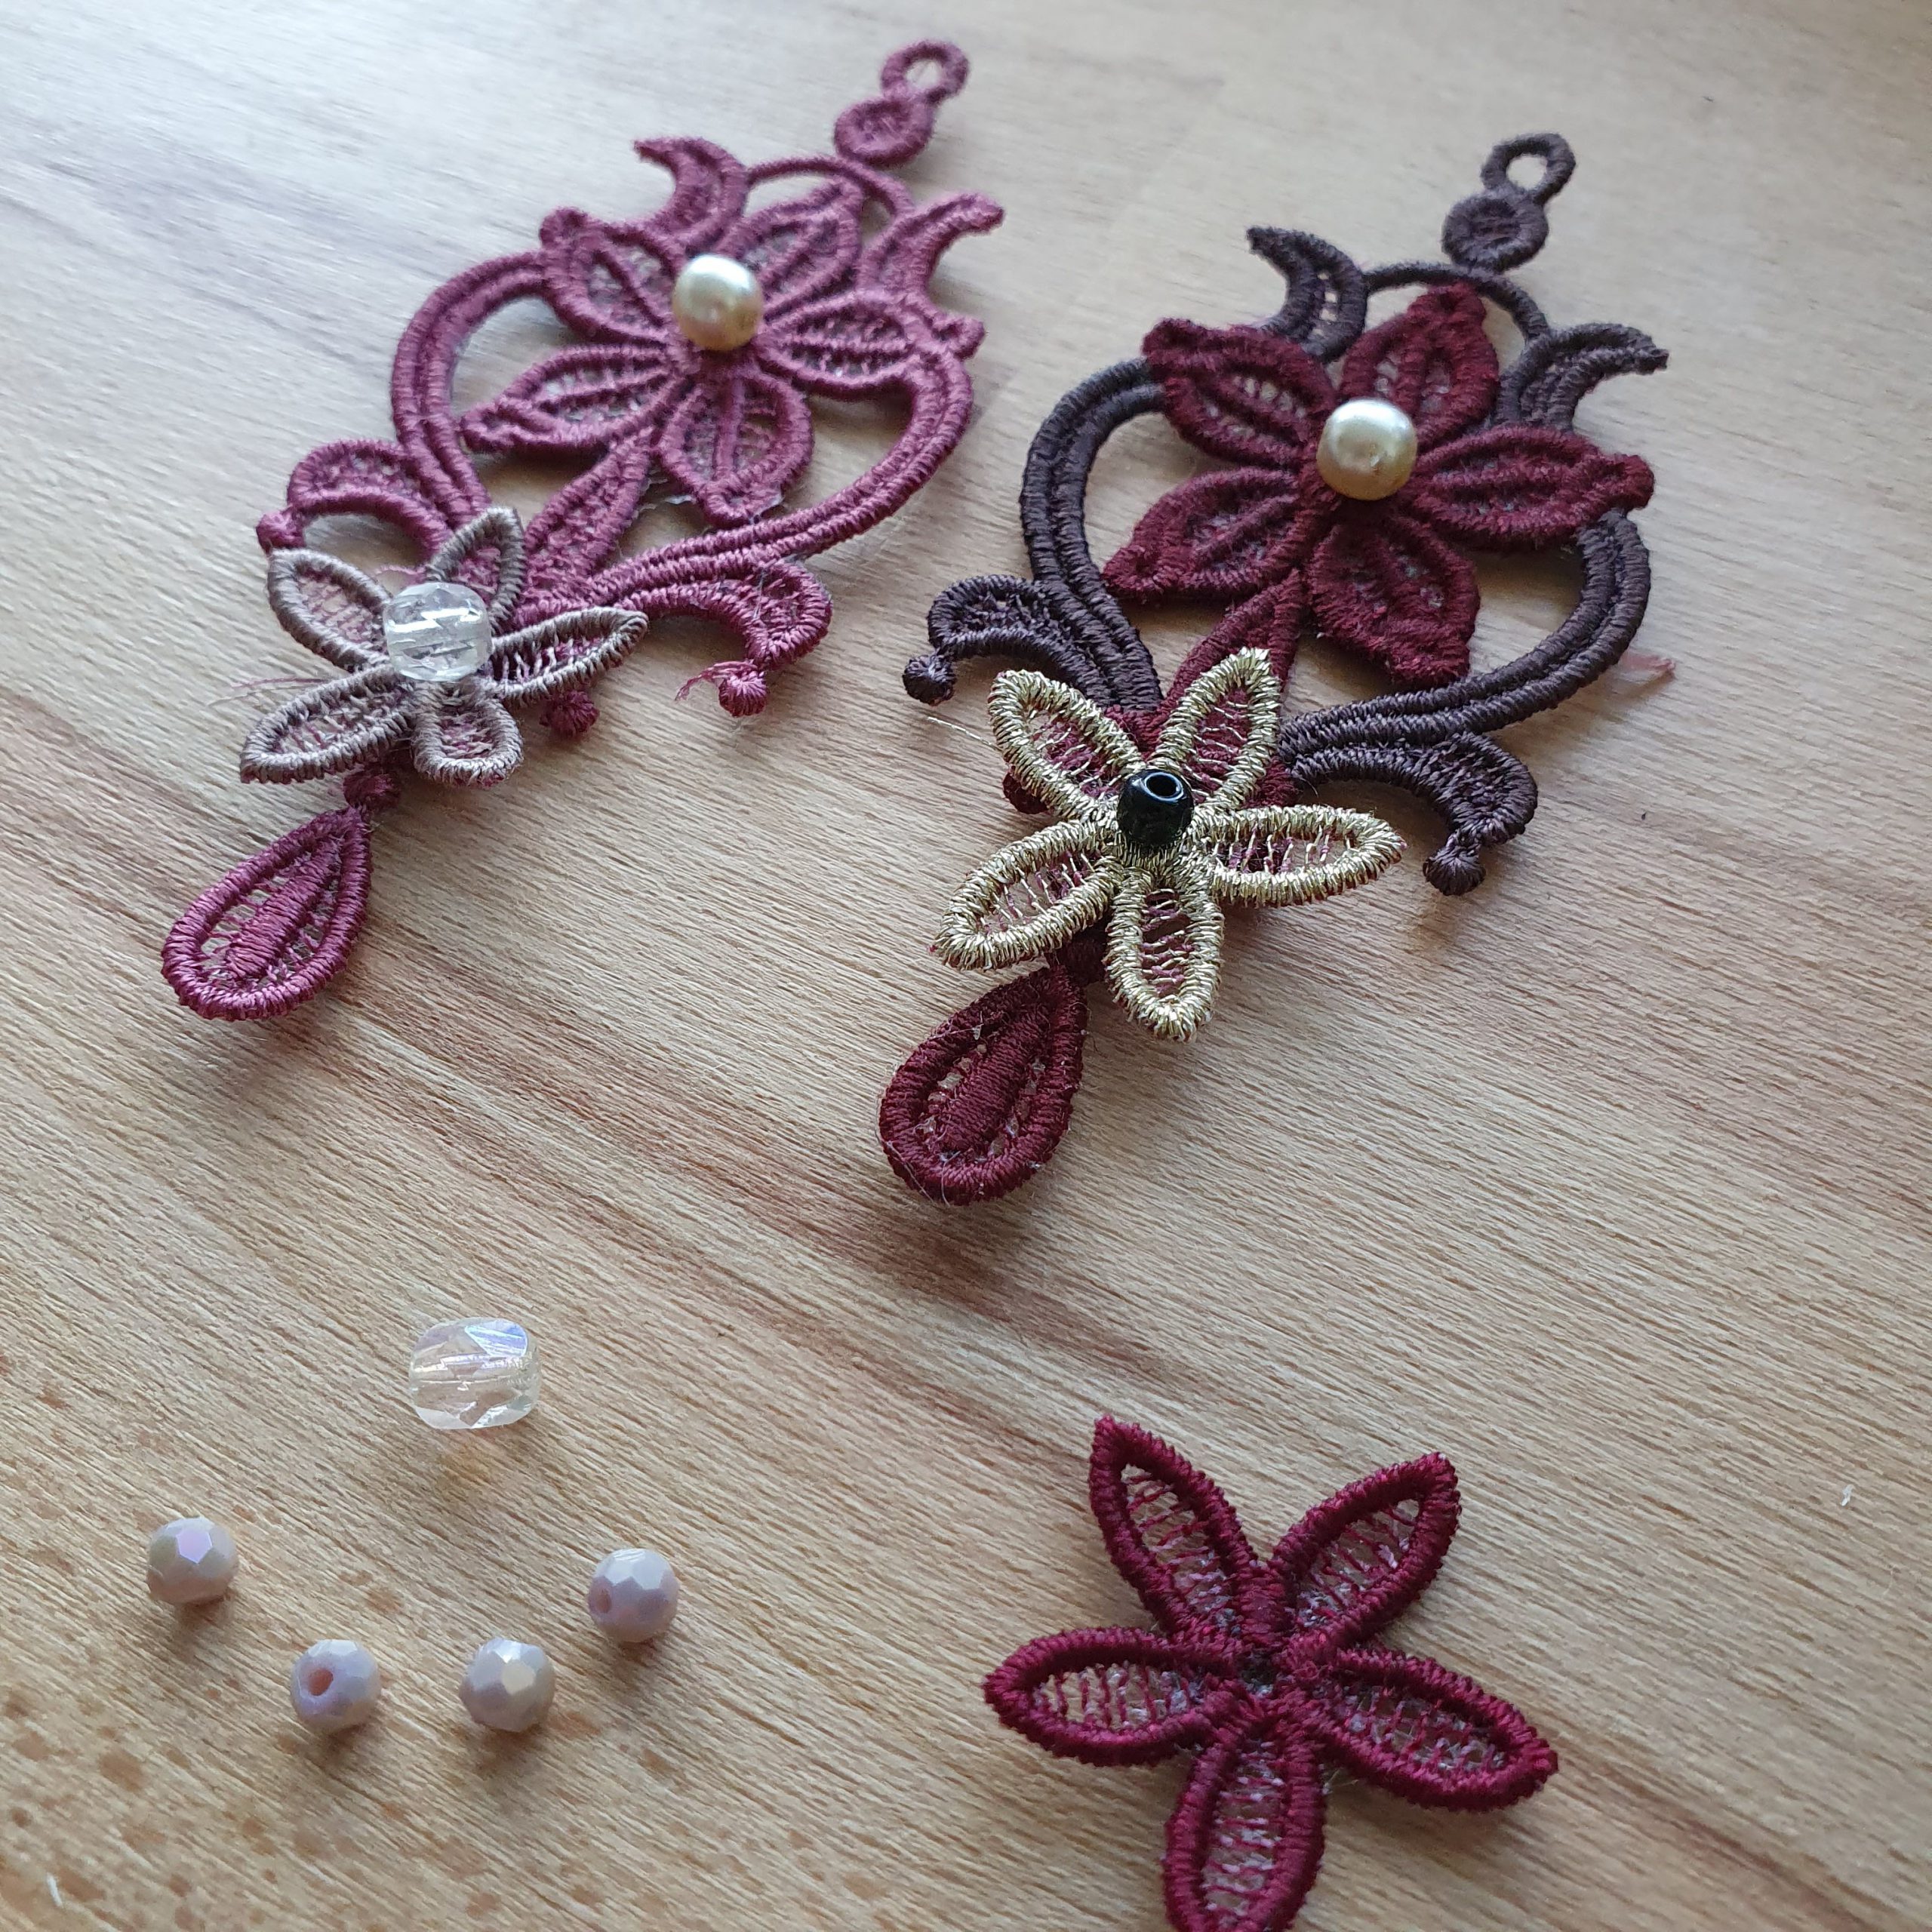
I made the two-colour earring from the loose flowers in the same colours. By attaching these flowers together and decorating them with beads in the same colour scheme as the completely embroidered earring, pair number three was created.

Earring pair with loose flowers
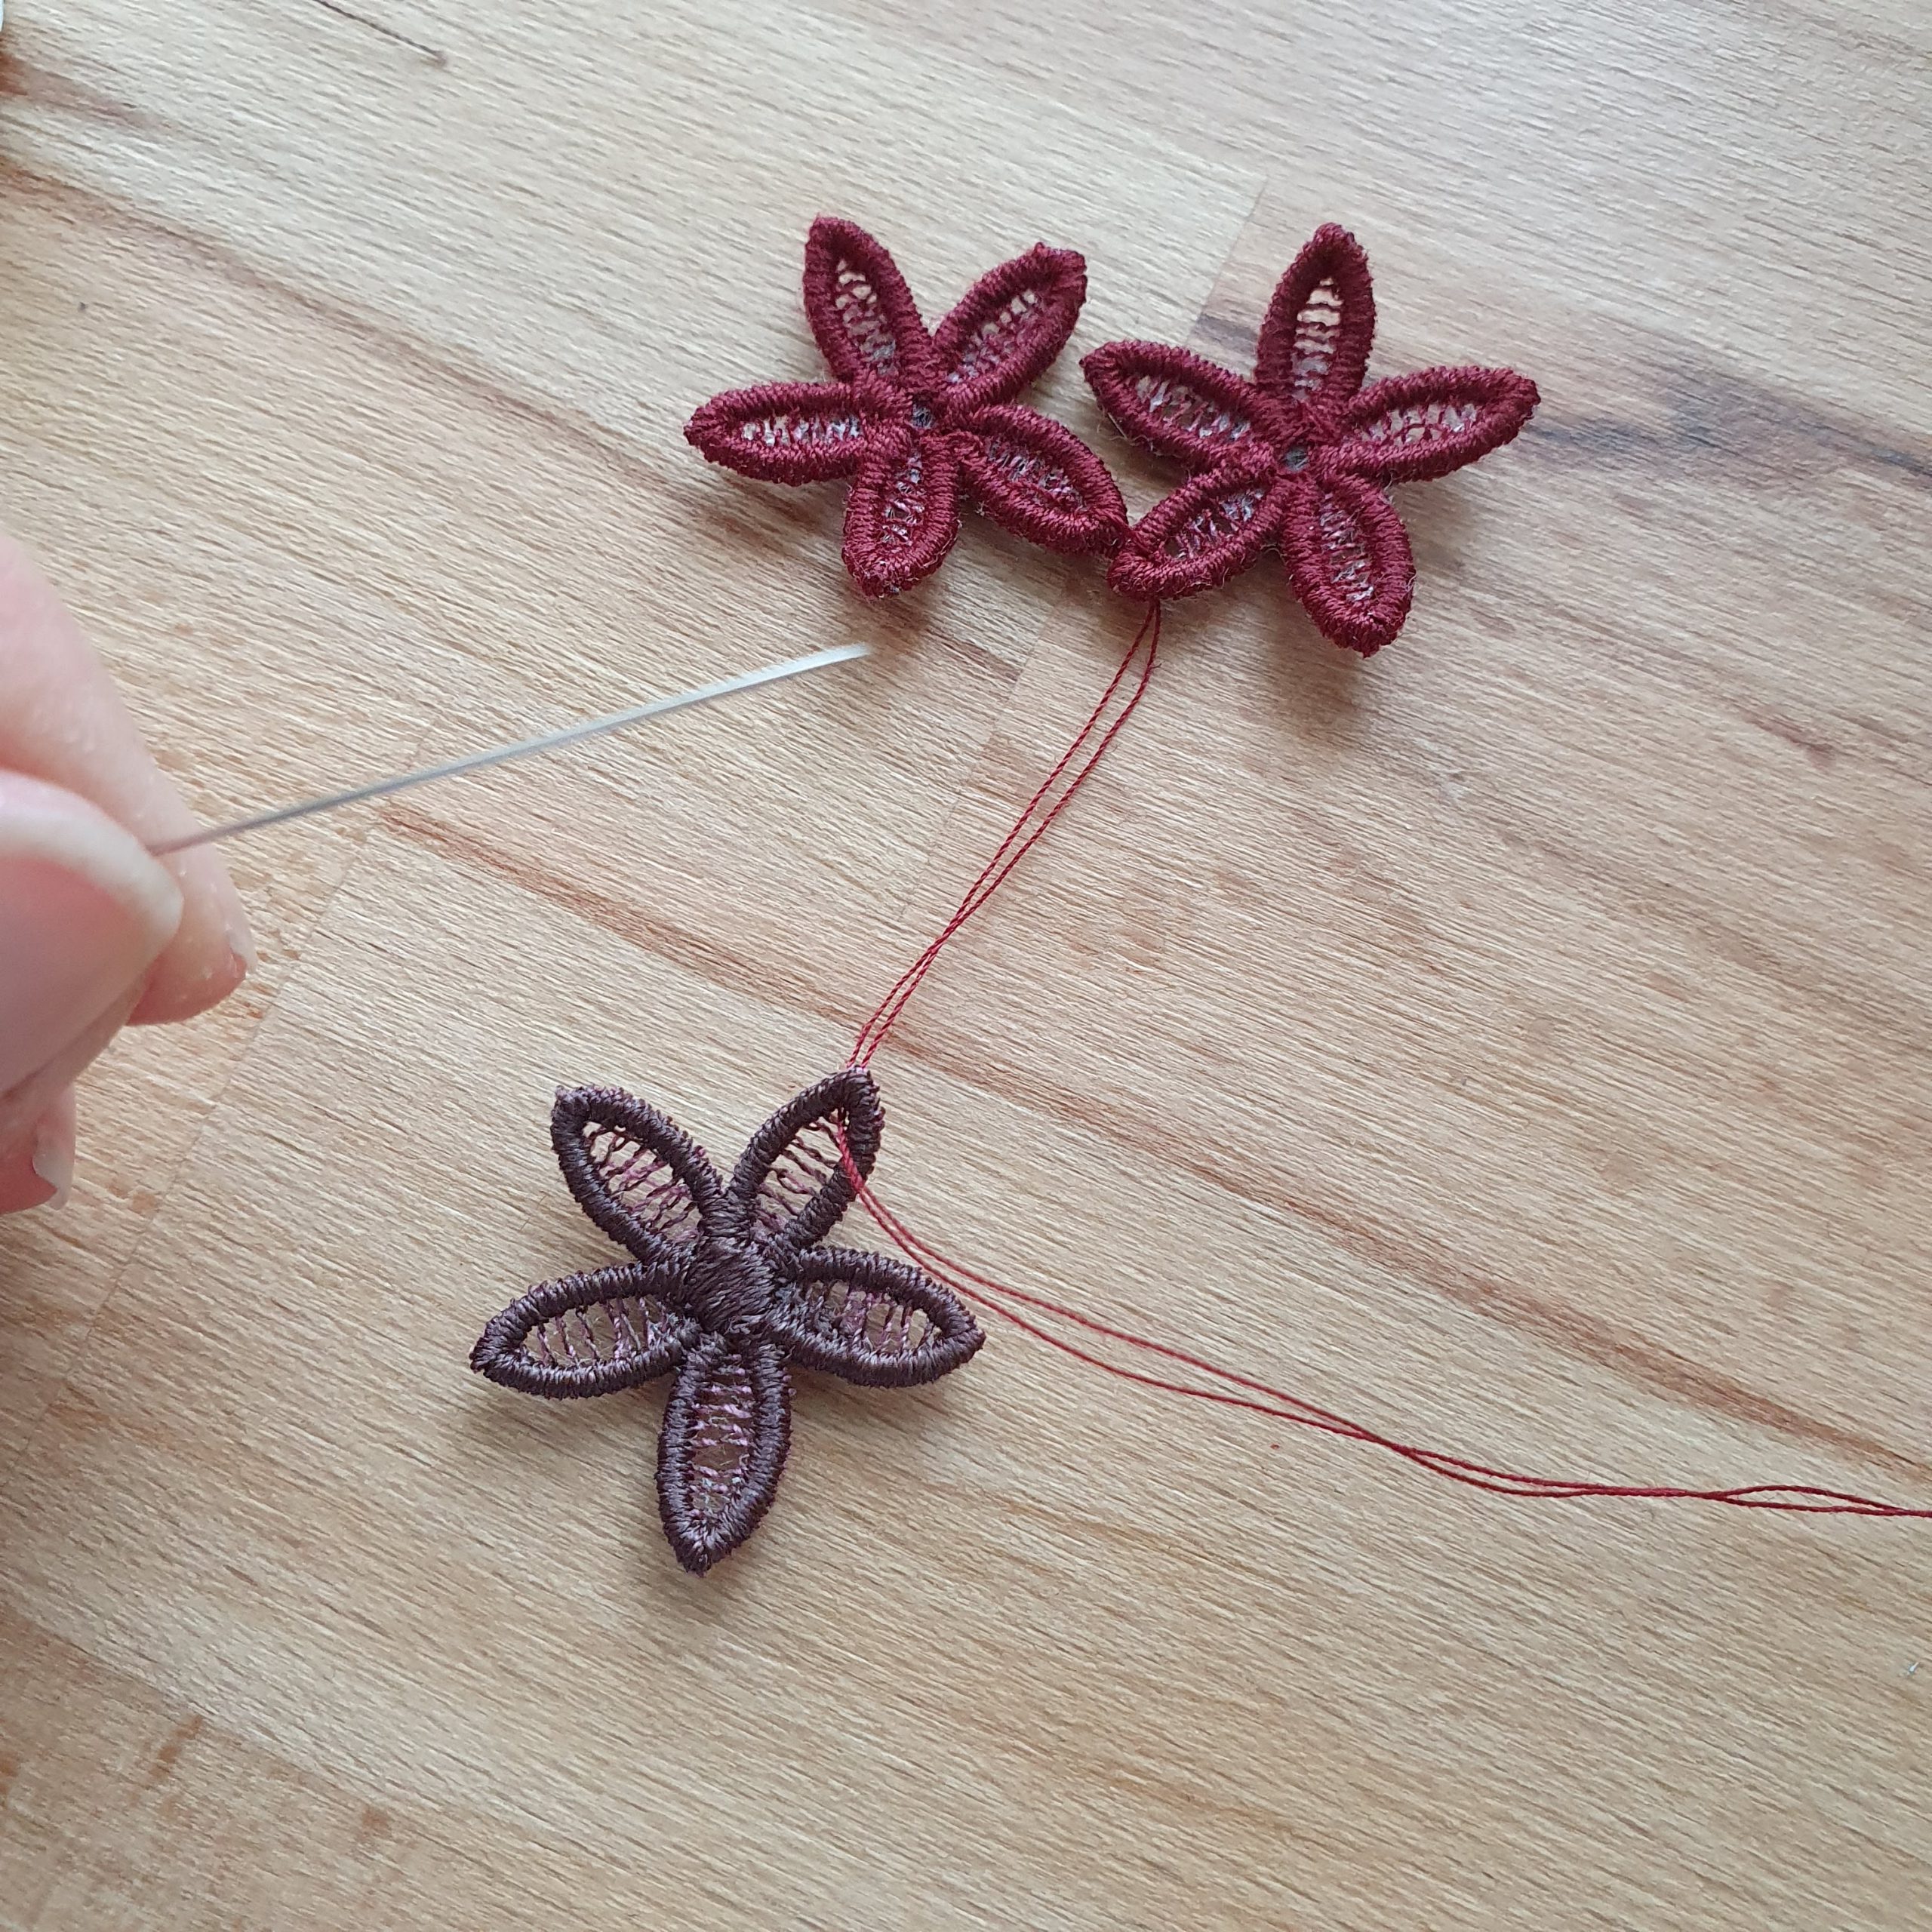
Attach flowers together
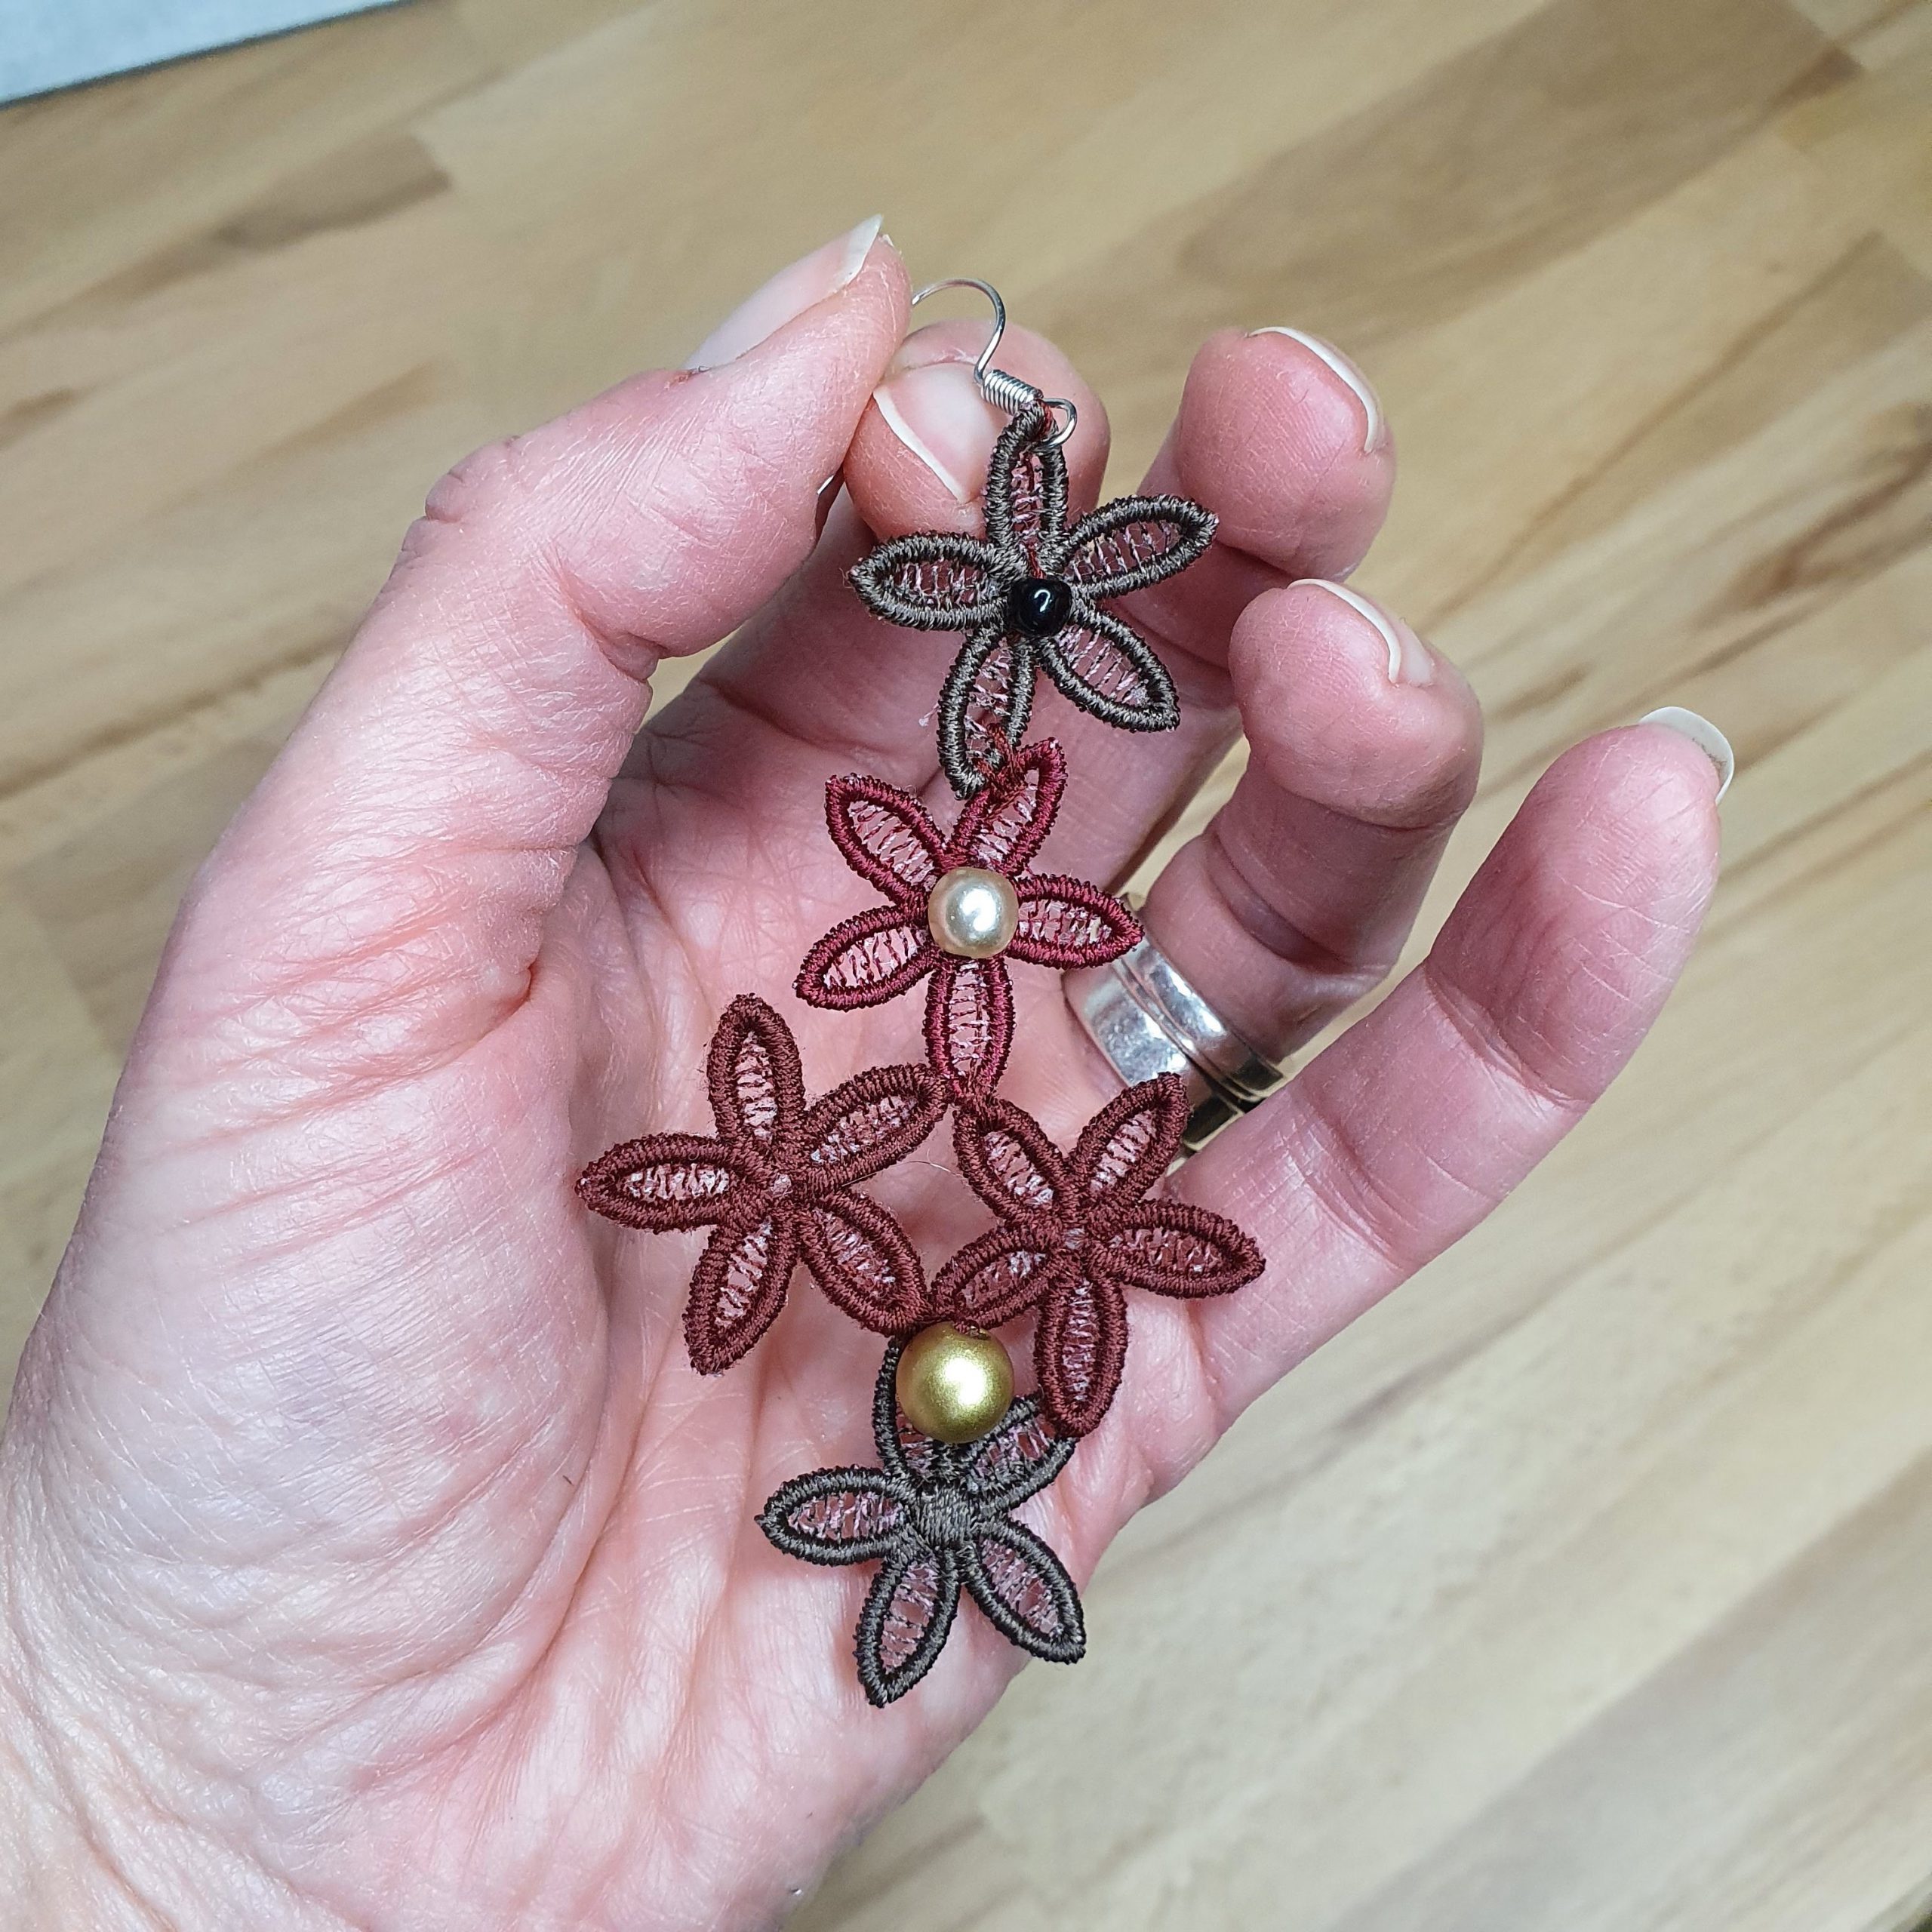
This set matches so well with the armband I made last year for the advent blog, which is special to me. Another example of subconscious styling. In that blog I made accessories for my sisters and brother from leftover fabric from clothes of my father, who had passed away. I kept the armband with covered beads for myself and this year I can wear it again at Christmas, now together with these cool earrings.

Or should I go for one of the other options?

Plenty of choice
Enjoy the little things and each other in the coming days… and on all the other days of the year!
Have a wonderful Christmas and a great 2022!
Love,
Marlies


0 Responses