 BERNINA Corporate Blog -
Covers with the BERNINA L 890, background knowledge and how-to, part 3
Using the BERNINA L 890 a combined overlock/coverstitch combo machine, I will show you in three contributions how you can sew a beautiful coverstitch seam. In my small series of articles, I will explain the influence of different settings on the machine to the stitch and answer common questions about Coverstitching.
In Part 1 we looked at basic knowledge and in Part 2 we talked about fine tuning, using the stitch optimizer on the L 890 and further possibilities for optimizing a coverstitch seam.
Today we want to find out what exactly the differential feed and the stitch length mean for cover seams. In order to understand the background exactly, we first look at what the two parameters do when sewing a coverstitch seam.
Sewing the coverstitch seam – the stitch length
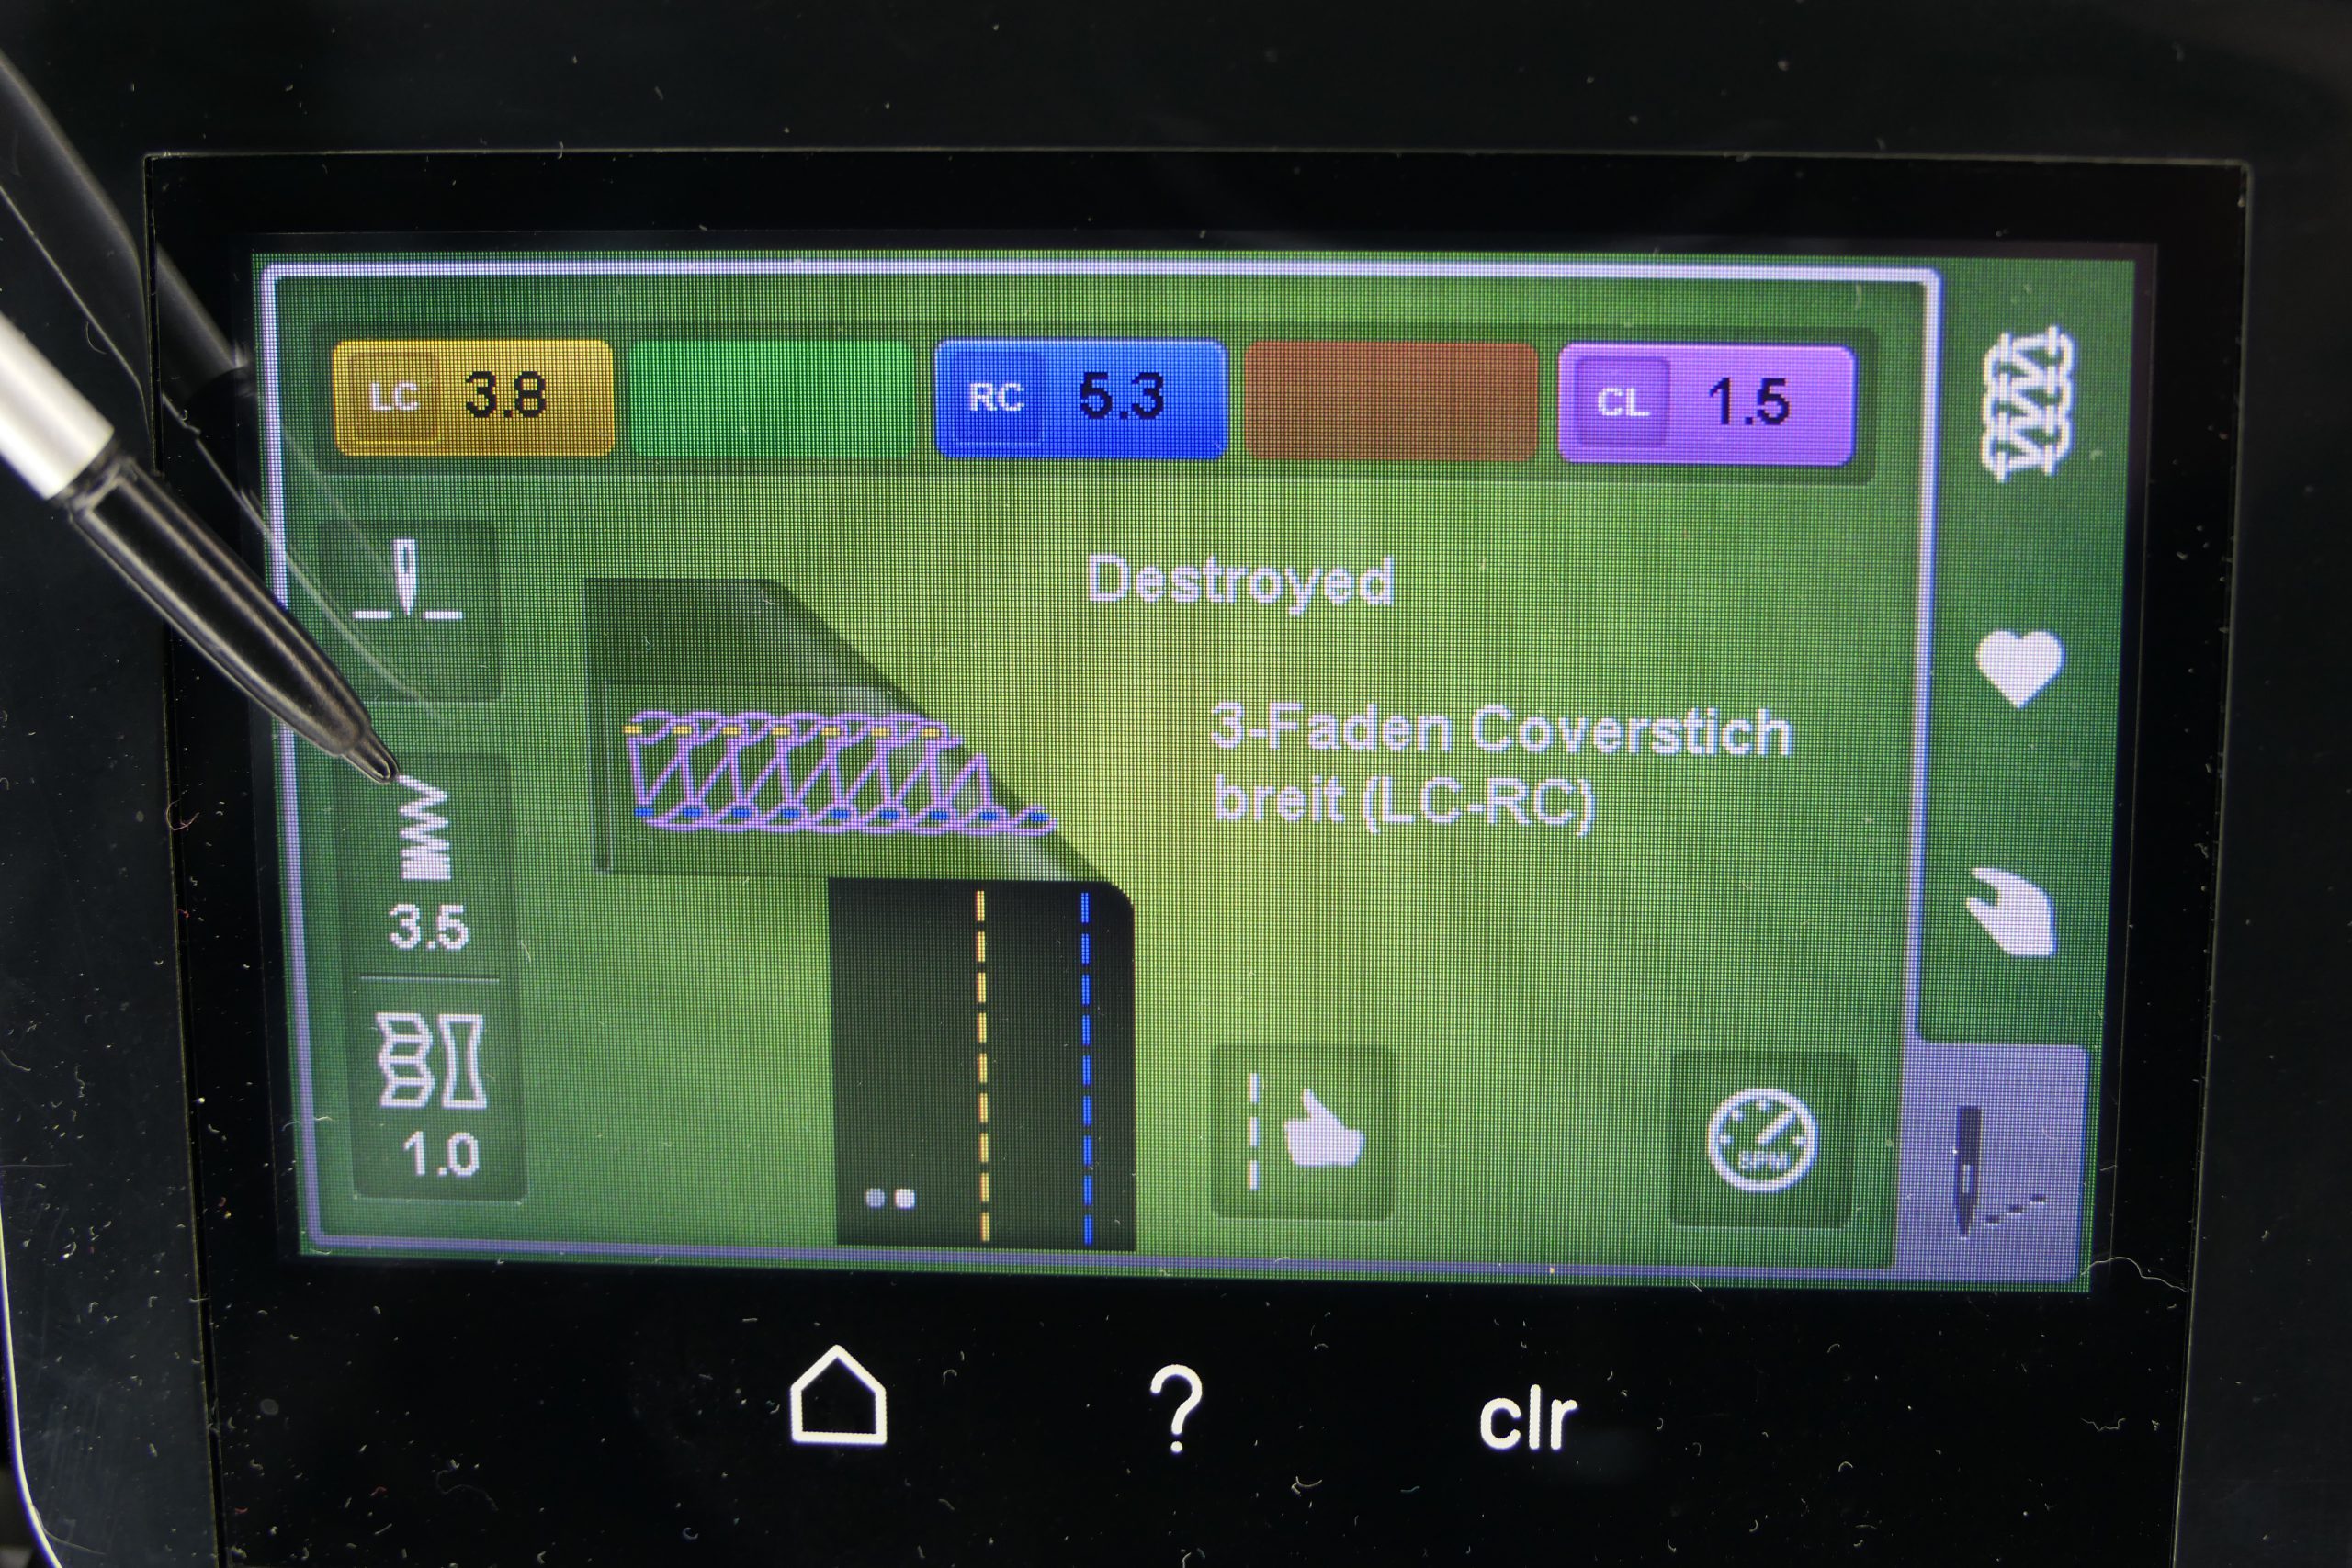
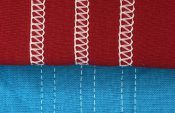
We must adjust the stitch length on each machine, whether we sew with a sewing machine, a coverstitch, an overlock or a combo machine. The stitch length always determines how far our fabric is transported between two stitches. If the stitch length is short, we have very tight stitches – the shorter, the narrower. That’s why, for example, even with an overlock machine, the rolled hem stitch length is always in the low range.
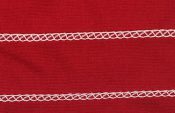
If we have a long stitch, a lot of fabric can be seen between the individual stitches.
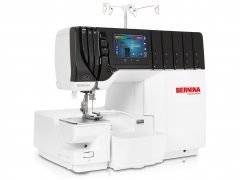
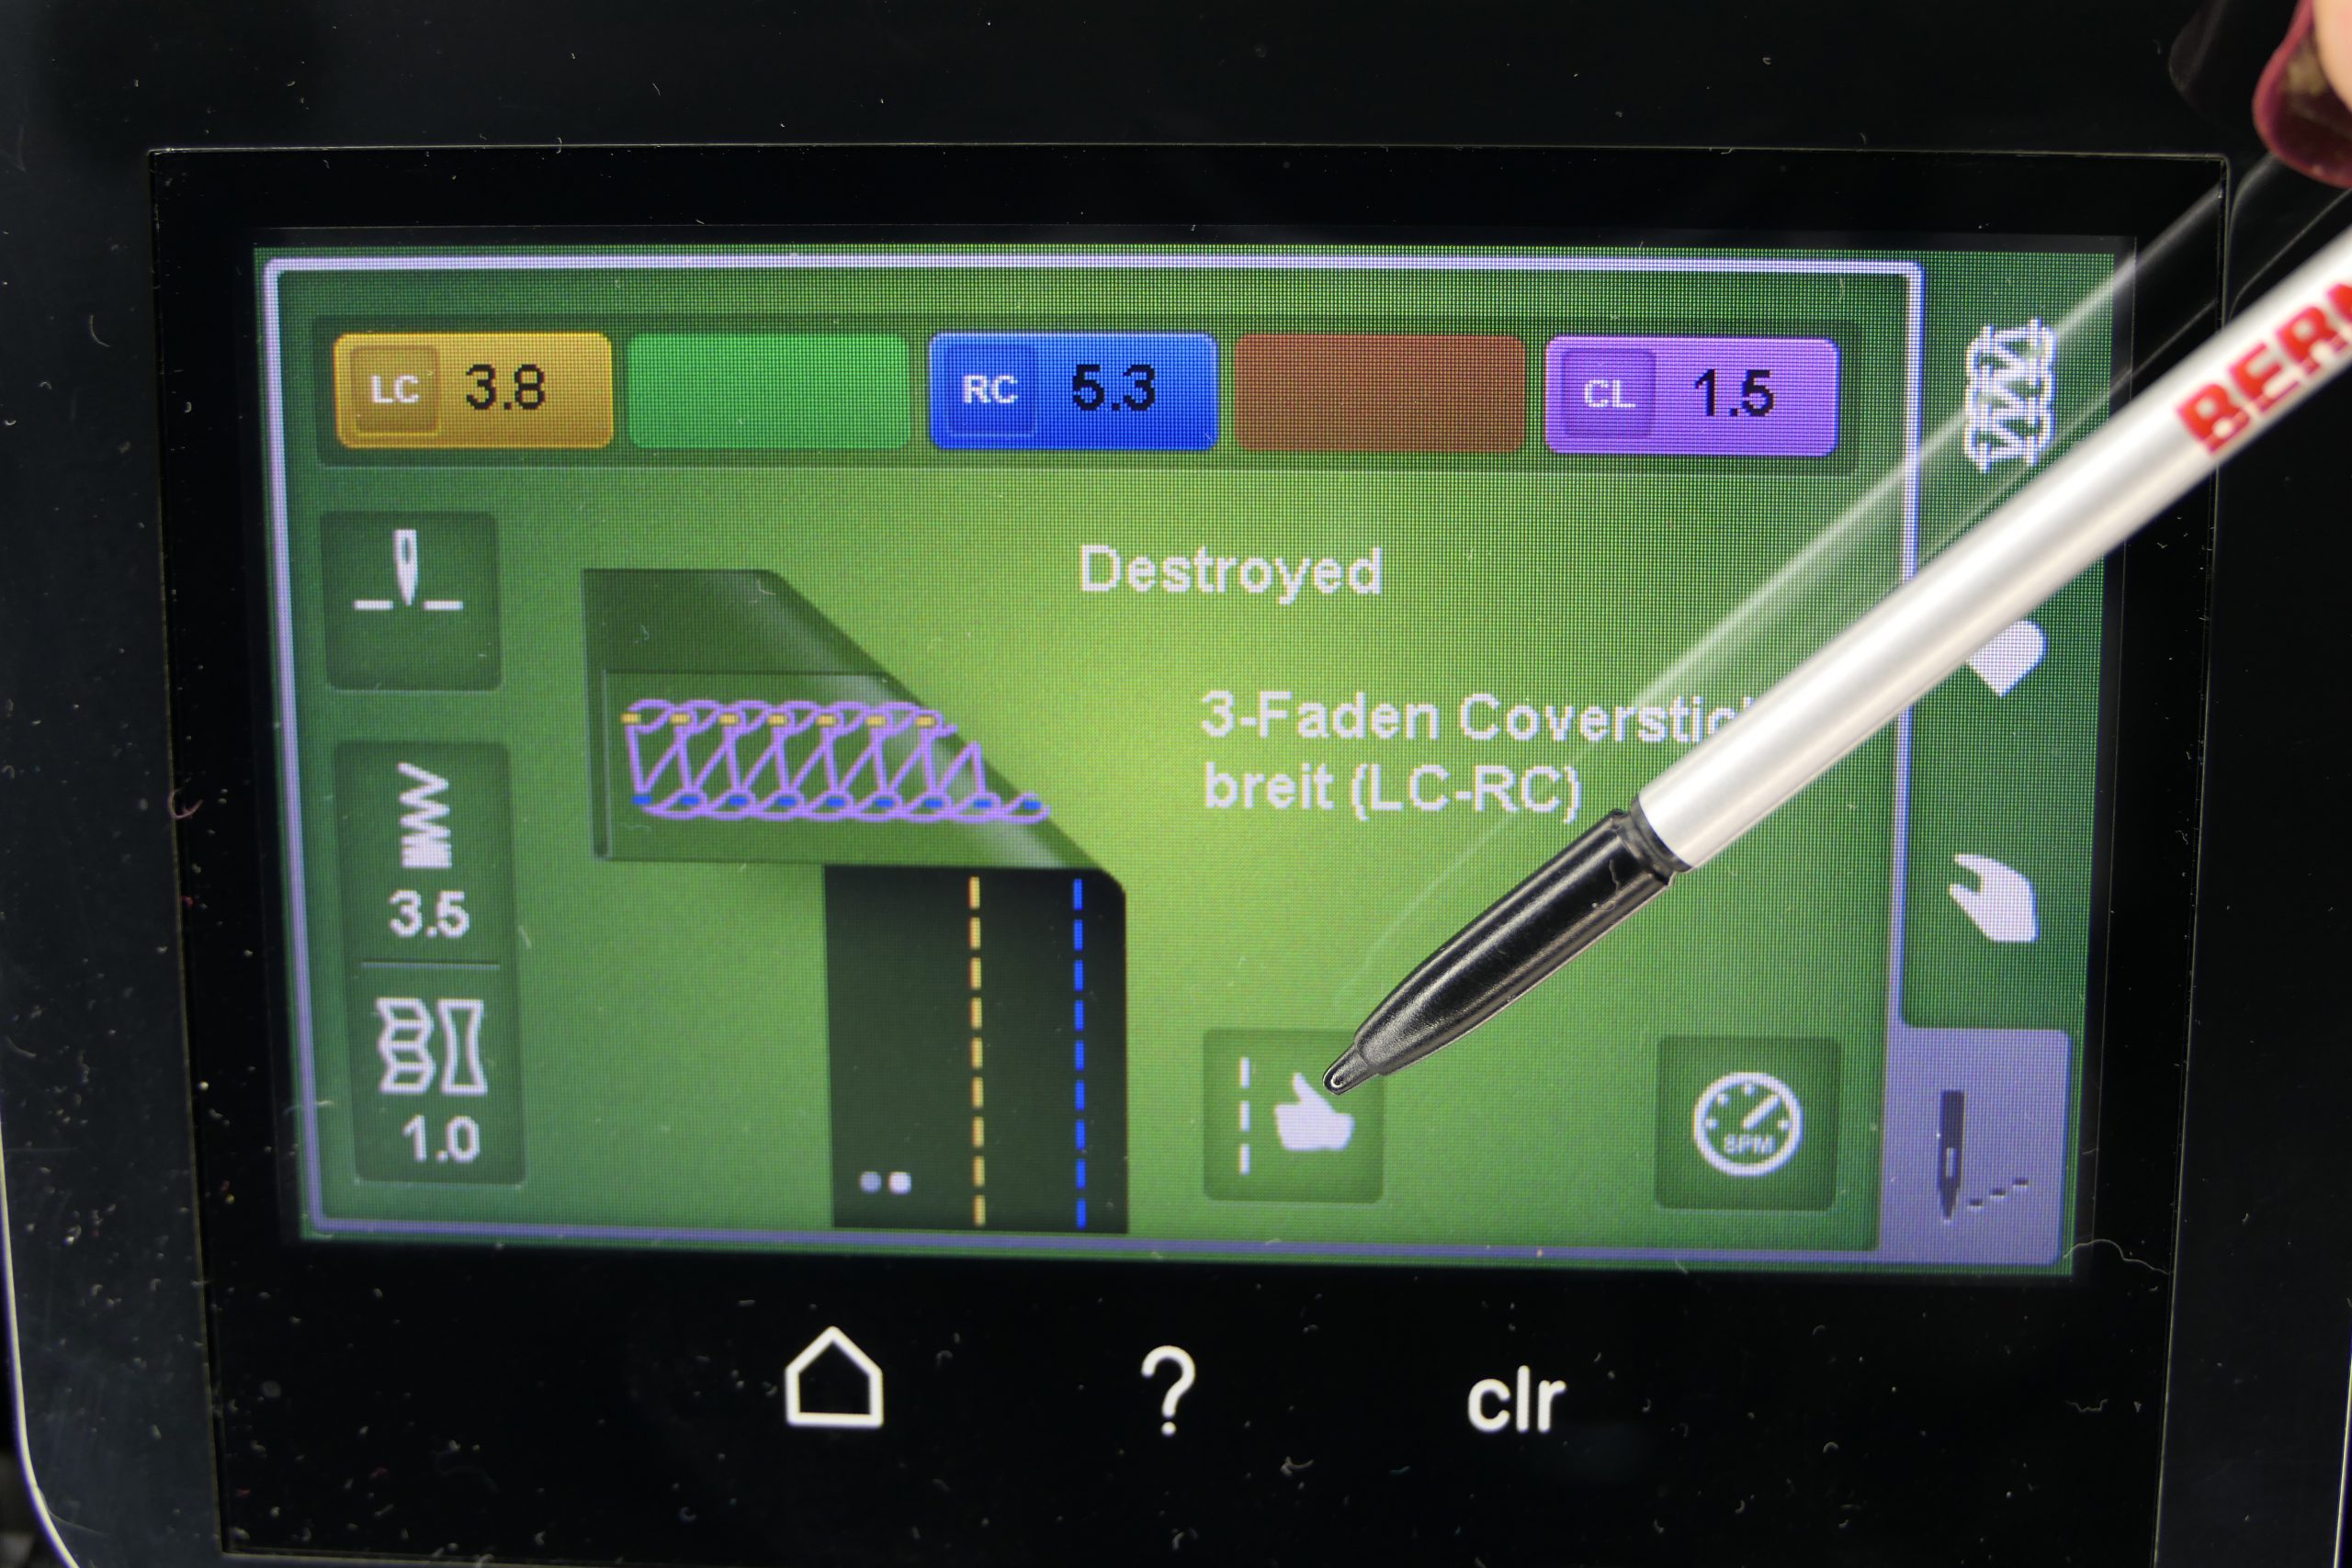
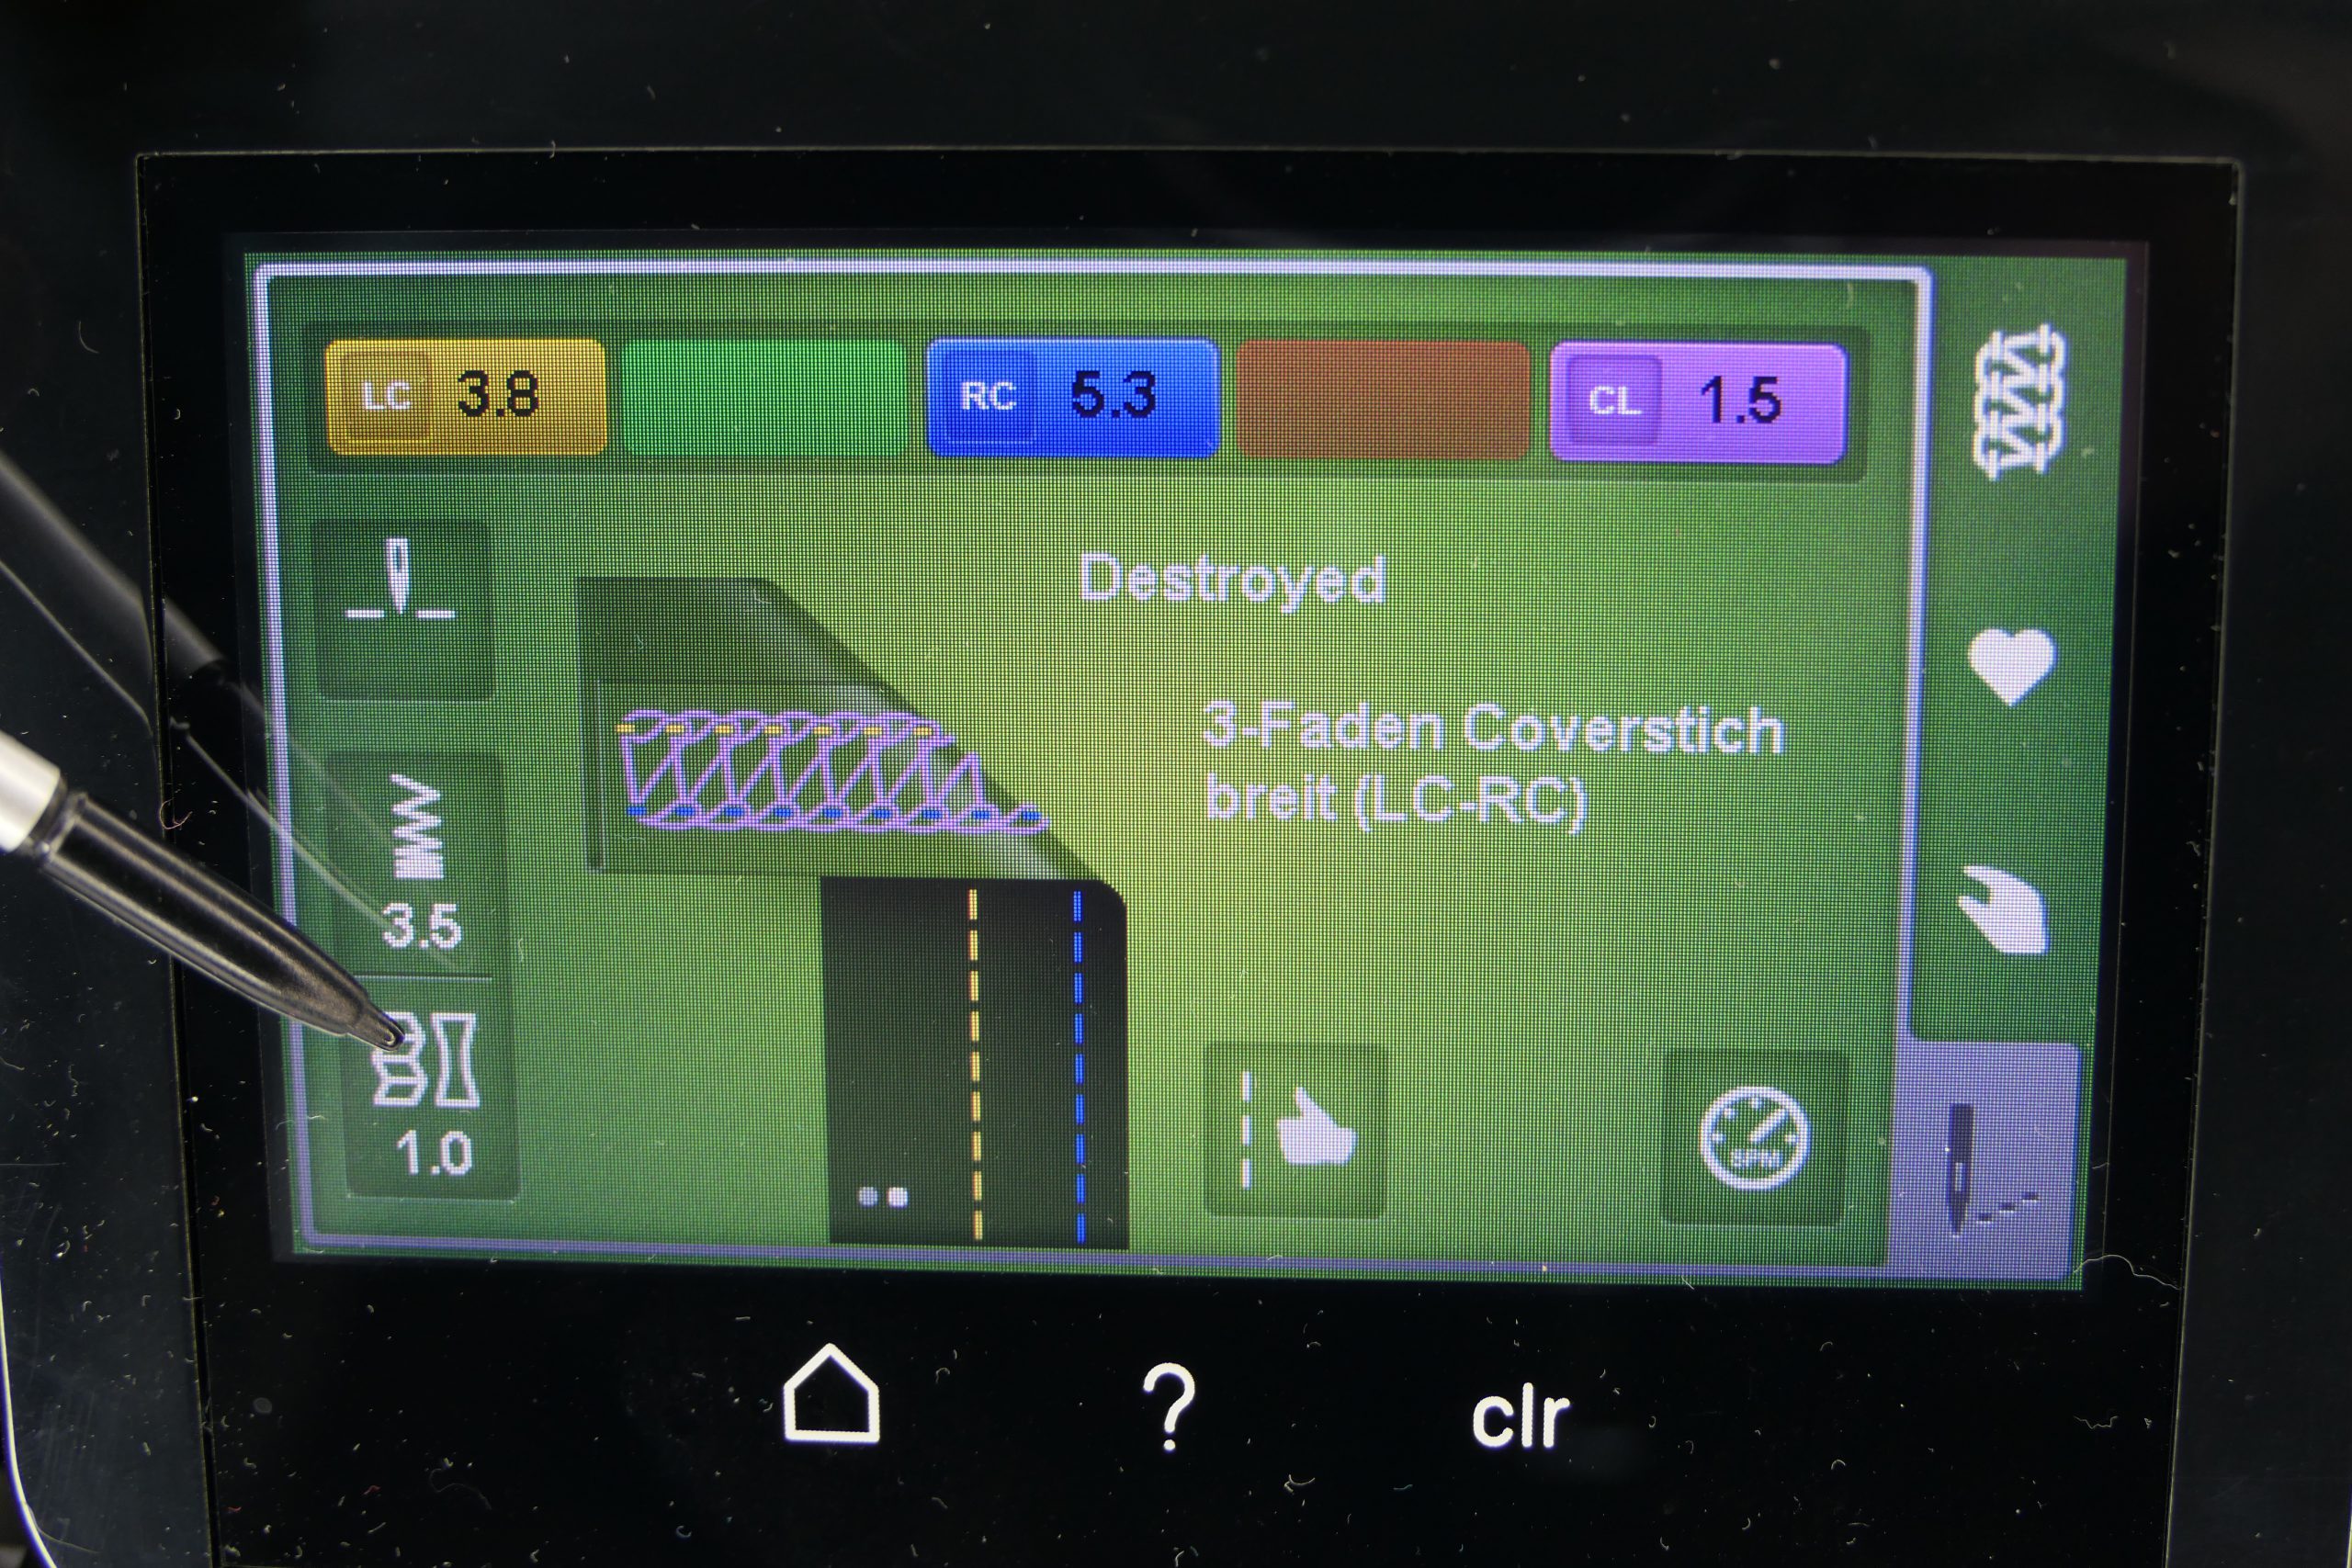
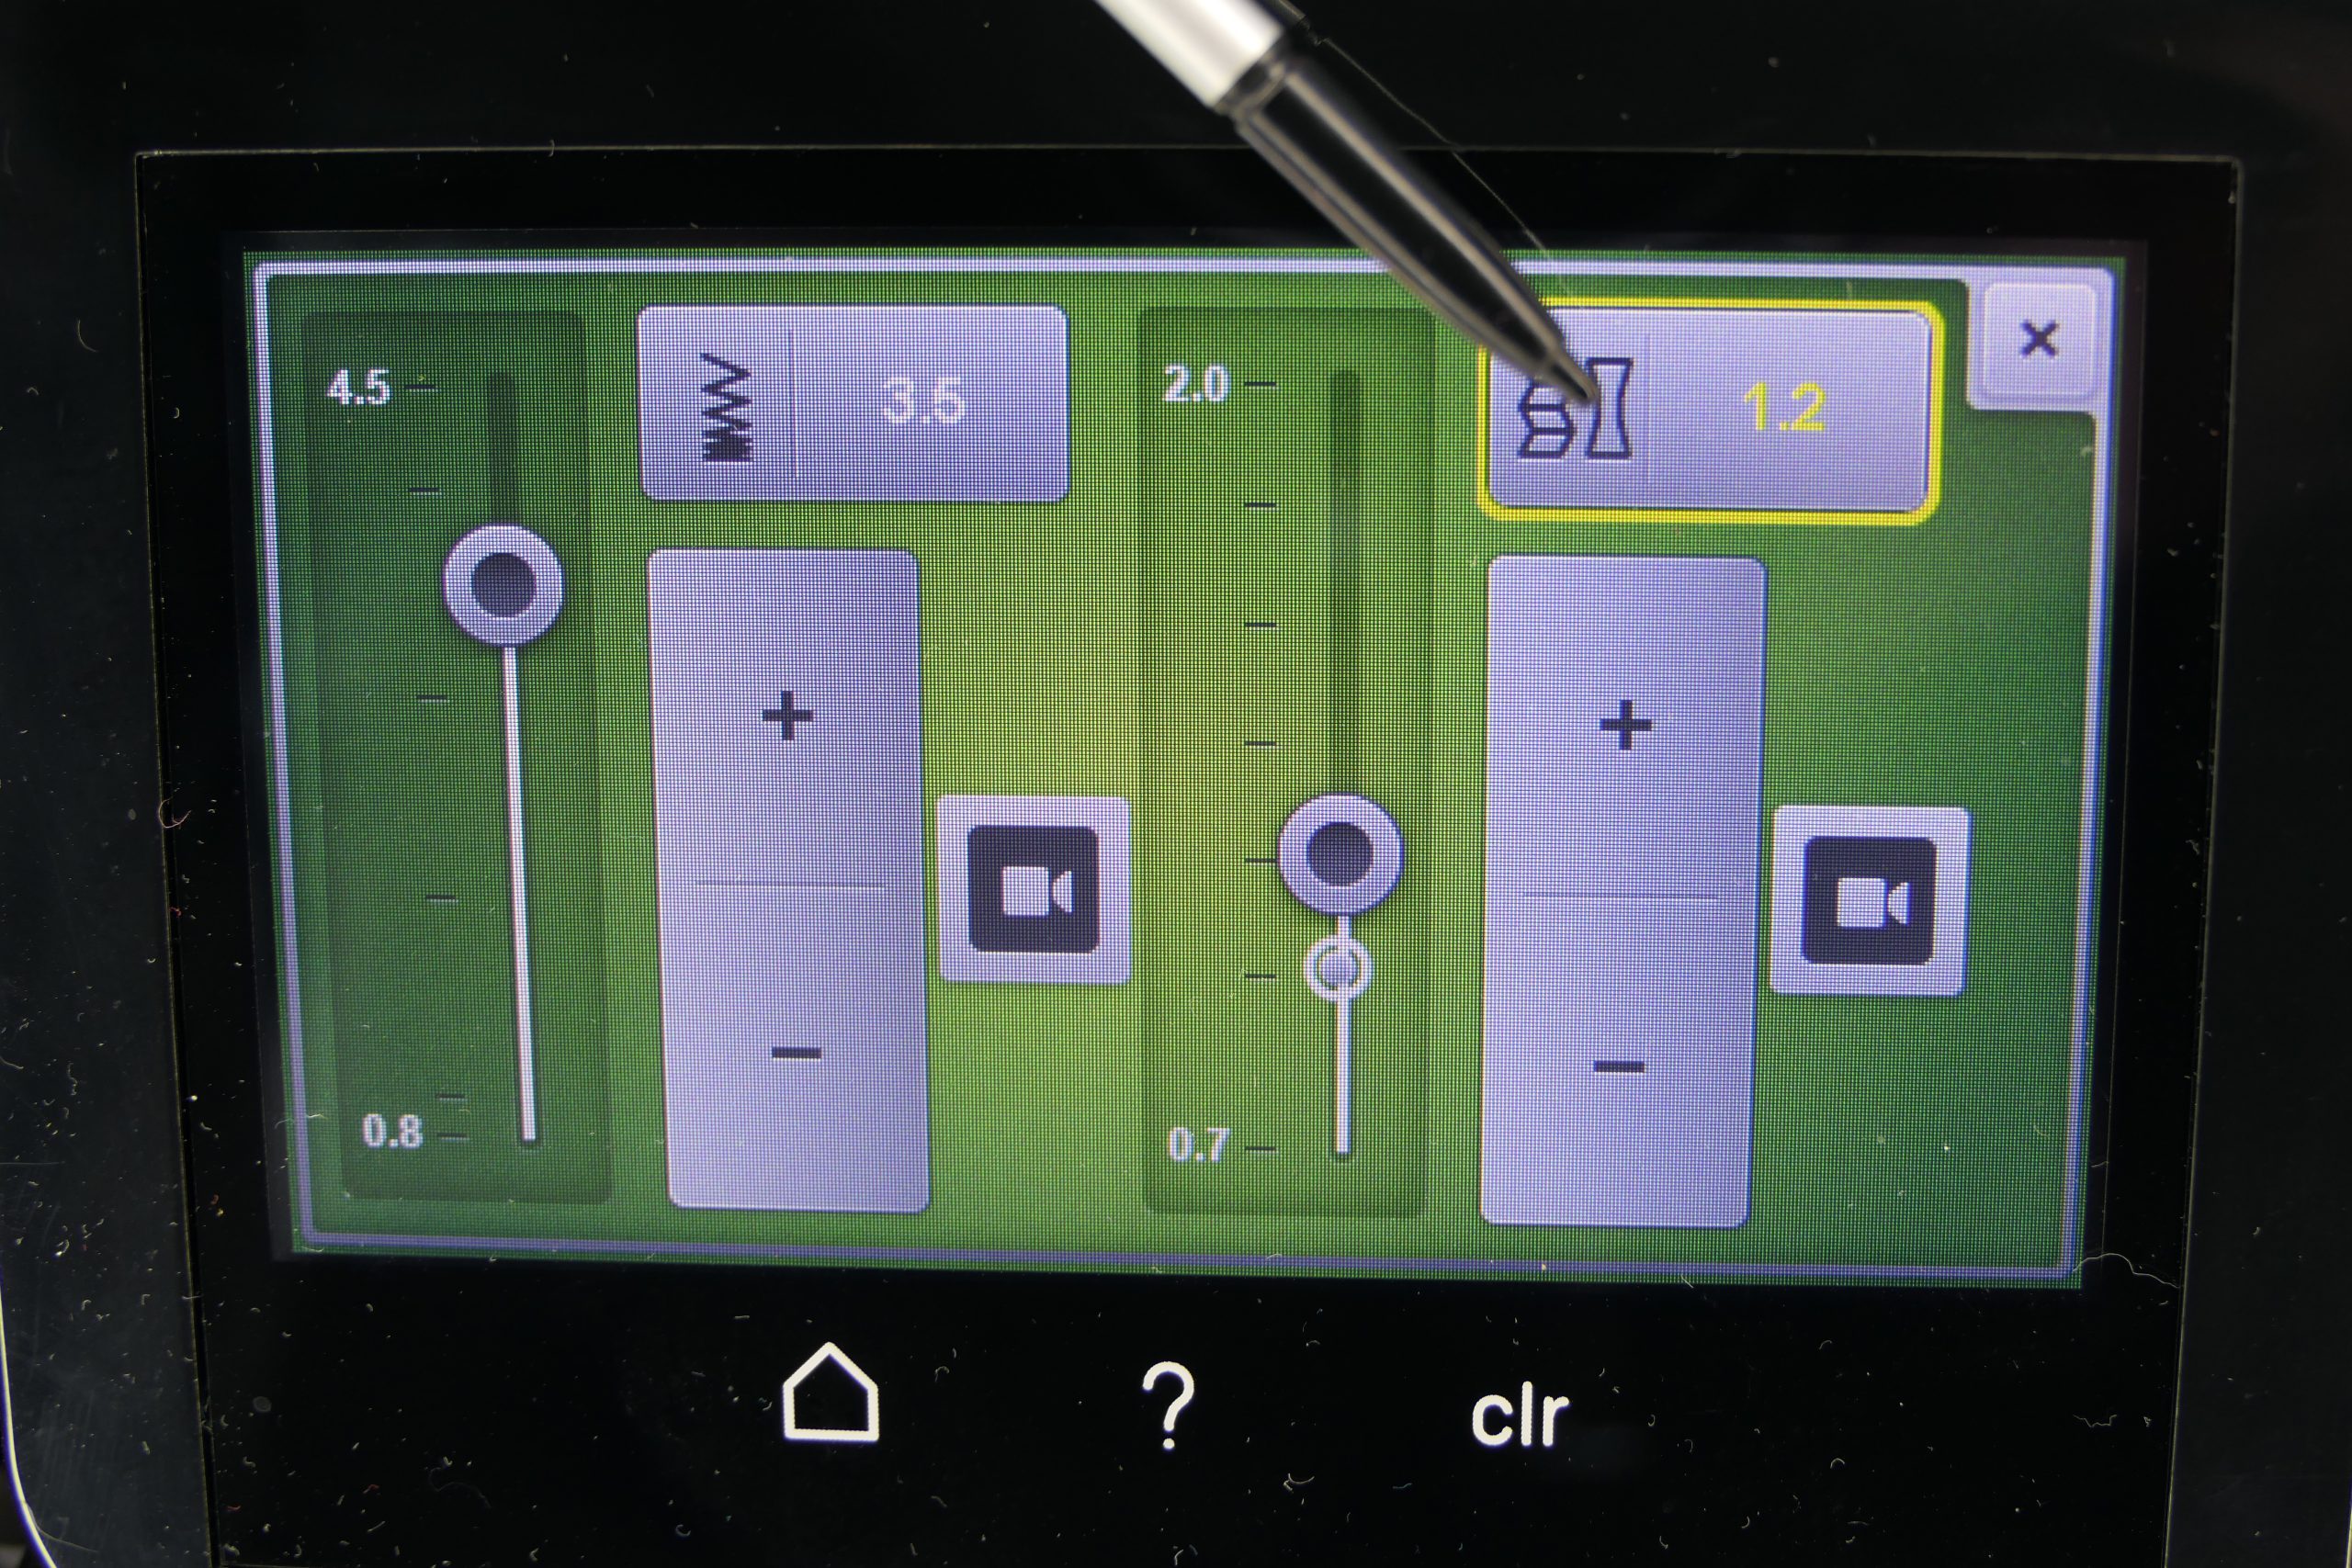
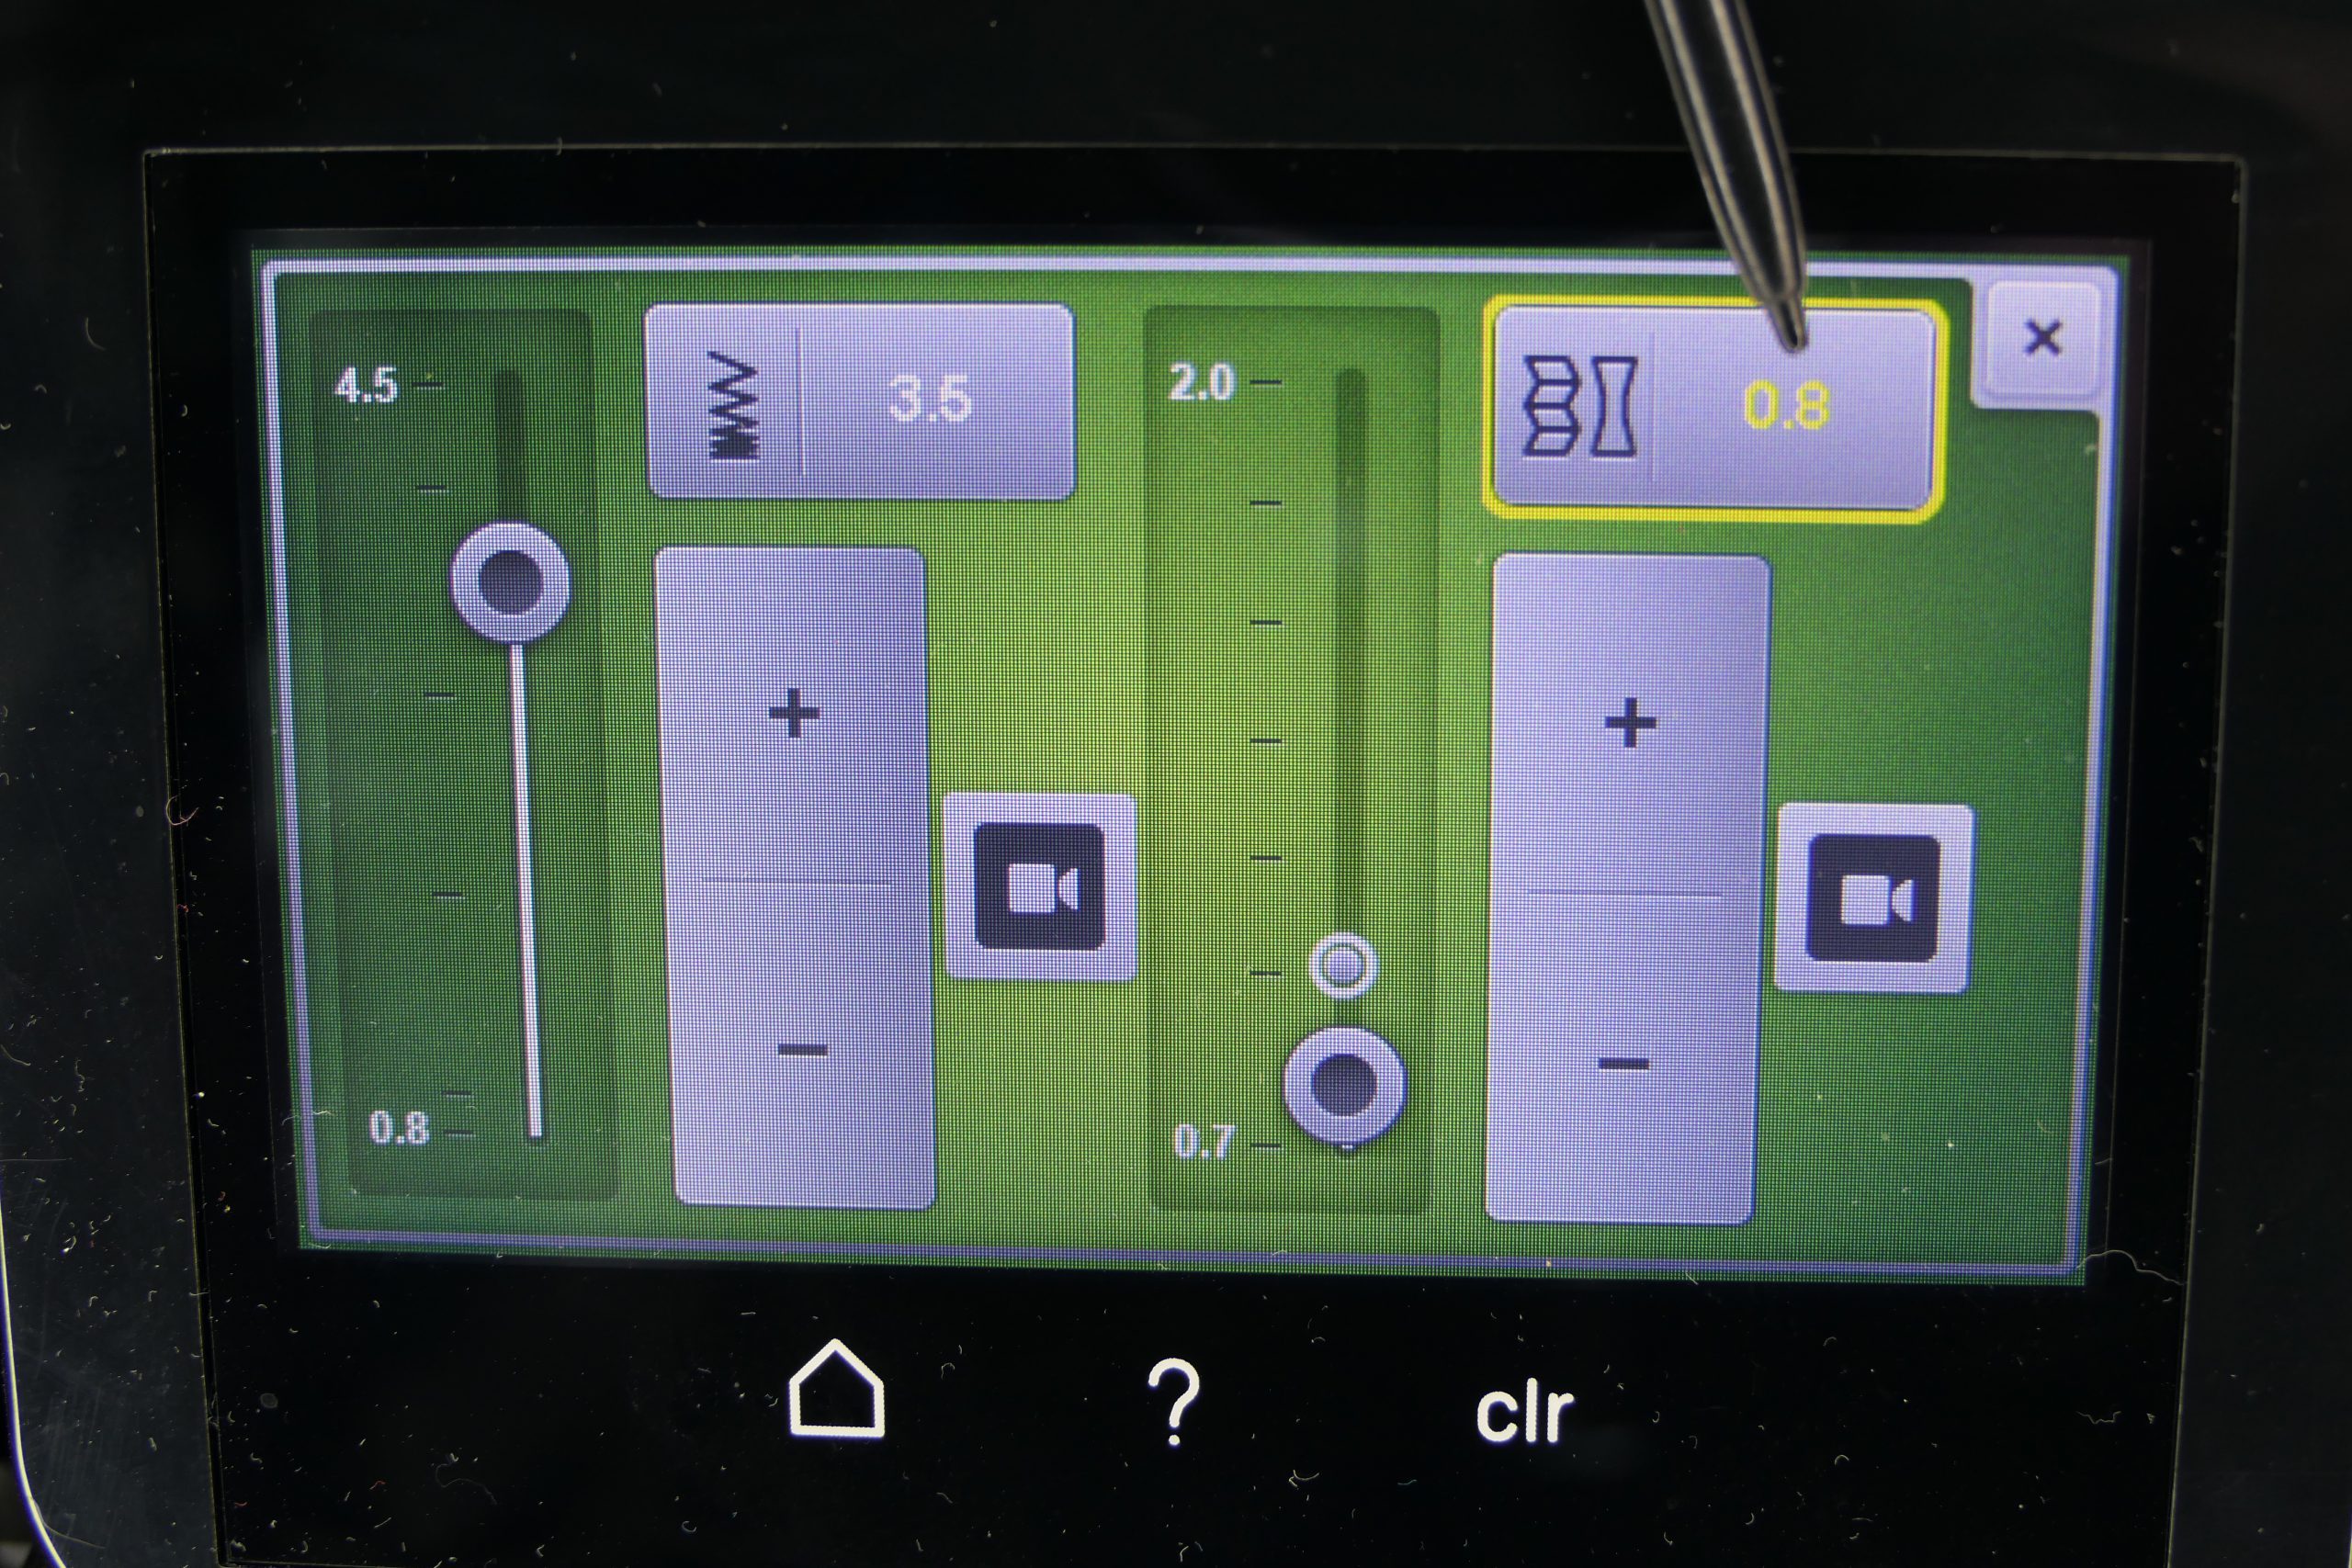
The nice thing about the BERNINA L 890 is that, as with all new BERNINA’s, we always see exactly with the yellow marking when we have changed something, compared to the default setting.
The stitch length must always be adapted to the fabric. The finer a fabric is, the tighter the stitch may be, and the heavier, the longer the stitch. You would not sew denim/jeans with a stitch length of 1 and not silk with a stitch length of 4.
Basic rules for thread
Just as important as the type of fabric is our thread. When we sew with thick thread, the single thread needs much more space in our seam to be able to come to rest than a fine thread. Therefore, first and foremost, the rule applies: the thicker a thread, the longer the stitch. And: The finer the thread, the shorter the stitch may be.
In the nature of things, you do not sew a fine silk with a thick decorative thread, because the silk could not hold the thread at all. And a thread designated for denim would tear a fine thread with its pulling power. That is why the fabric and thread must fit well together.
Mathematics Excursion
The stitch length therefore determines how much yarn gets into our seam. For the sake of simplicity, let’s stick to a universal overlock thread that we want to use.
If we have a stitch length of 2.5 mm, then we need per stitch …
- the stitch width 2x in our seam of 6 mm cutting width (12 mm)
- plus, 4x the stitch length for a wide coverstitch (10 mm with 2.5 mm stitch length)
… makes a total thread length of 2.2 cm, which we need in the chain looper per stitch.
This makes a total of 4.4 meters of thread on half a meter of seam (200 stitches)!
If we reduce the stitch length to e.g., 1.5 mm, we still have the same width due to the needle stand and only need 6 mm yarn per stitch for the stitch length. The yarn requirement per stitch is 1.8 cm. But because we now have more stitches, namely not only 200, but 277, we now need almost 5 meters of thread (4.9 m) in the chain looper.
That sounds mathematical, and no one has to calculate that, but it’s about the principle behind it: The more thread I have in my seam, the more stretch you have in the seam!
If, to put it simply, I only have 1 m of yarn in the seam, I cannot pull the seam 3 m long, because then it tears. This may have already been noticed by one or the other who topstitches a neckline for example with the sewing machine and the normal straight stitch.
The bottom line is, the shorter the stitch length, the stretchier the seam (because more needle thread and looper thread is included)! It also means: If I use stretchy thread (metro-flock), I get an even higher stretchability.
Stitch Optimizer
In the stitch optimizer of the BERNINA L890 there is the “Chain looper thread – this forms loops on the underside”. As a solution, it is proposed: “Increase stitch length”. Why? because then the multi-length thread, which currently obviously leads to loops, is then distributed over more seam length!
When we start thinking in terms of seam length vs. thread quantity, we free ourselves from the thread tension and deal with it more logically.
Before we bring stitch length and differential feed together in the stitch optimizer, let’s first look at what the differential feed does at all.
Sewing the cover stitch seam – the differential feed
On the L890, like all other combo machines, we have two sets of feed dog. Exactly – two feed dogs! One at the front and one at the rear. In setting 1, both feed dogs move at the same speed and travel the same distance:
If you change this setting, that they no longer have the same speed, they run differentiated. So much for the word.
If we go to the area above 1, the front feed dog will travel a faster and a longer way. If the front feed dog brings more fabric in than the rear feed dog transports away, the fabric compresses between the two sets, exactly at the needle point. This function is used when you want to gather, i.e. on the overlocker when you want to prevent the fabric from stretching out and become wavy. You hold the fabric together; this it results in a nice flat seam. Depending on the differential feed setting, you can produce nice gathers, for example with fine woven fabric.
If you set the differential feed lower than 1, the front feed dog travels slower and a shorter distance. As a result, the fabric is tightened between the two sets of feed dog, resulting in stretching the fabric, thus resulting in preventing seam puckering.
In overlock, this function is also often used if you want to produce a lettuce edge with rolled hem. The seam length is stretched, so that more stitches fit on it. If everything comes out from under the foot afterwards, the whole amount of yarn does not “know” where to go and begins to wave. All pure science. The seam length is elongated and thus does not remain in the length, but goes up and down, undulates.
Differential feed in connection with stitch length
If we now bring differential feed and stitch length together, this means:
If we go up with the differential, into the range above 1, our fabric is gathering slightly or more. If it comes out of behind the foot, it jumps apart a little. Thus, the amount of thread that was intended for the shorter stitch must be distributed over more seam length. This means that the stretchability is limited. If I have set this in the differential feed because my fabric may have been waving out, I may no longer be waving out, but I also have significantly less stretch in my seam. How much less the seam is stretchable depends largely on how much I have adjusted the differential feed.
If the elasticity is now too low, I run the risk that my seam will tear. Here I can either remedy with more thread/tighter stitches, or I leave all settings as they are, and use a wash away. We talked about this in part 2 of this series.
If we go with differential feed to the range below 1, our fabric becomes wavy – possibly. But by pulling the fabric apart during sewing, we also increase the seam length, similar to the rolled hem, and thus the amount of thread in the seam.
So instead of using the differential for greater elasticity, I would rather use the stitch length setting.
Finally, the question remains: Do I use the differential feed when coverstitching?
Seldom. When I sew in curves, I like to take it down, under 1. As a result, more thread goes into the seam, and the curve is more beautiful. However, I always (!) first do a small sewing test sample and take a close look at how the fabric and setting suit my expectations.
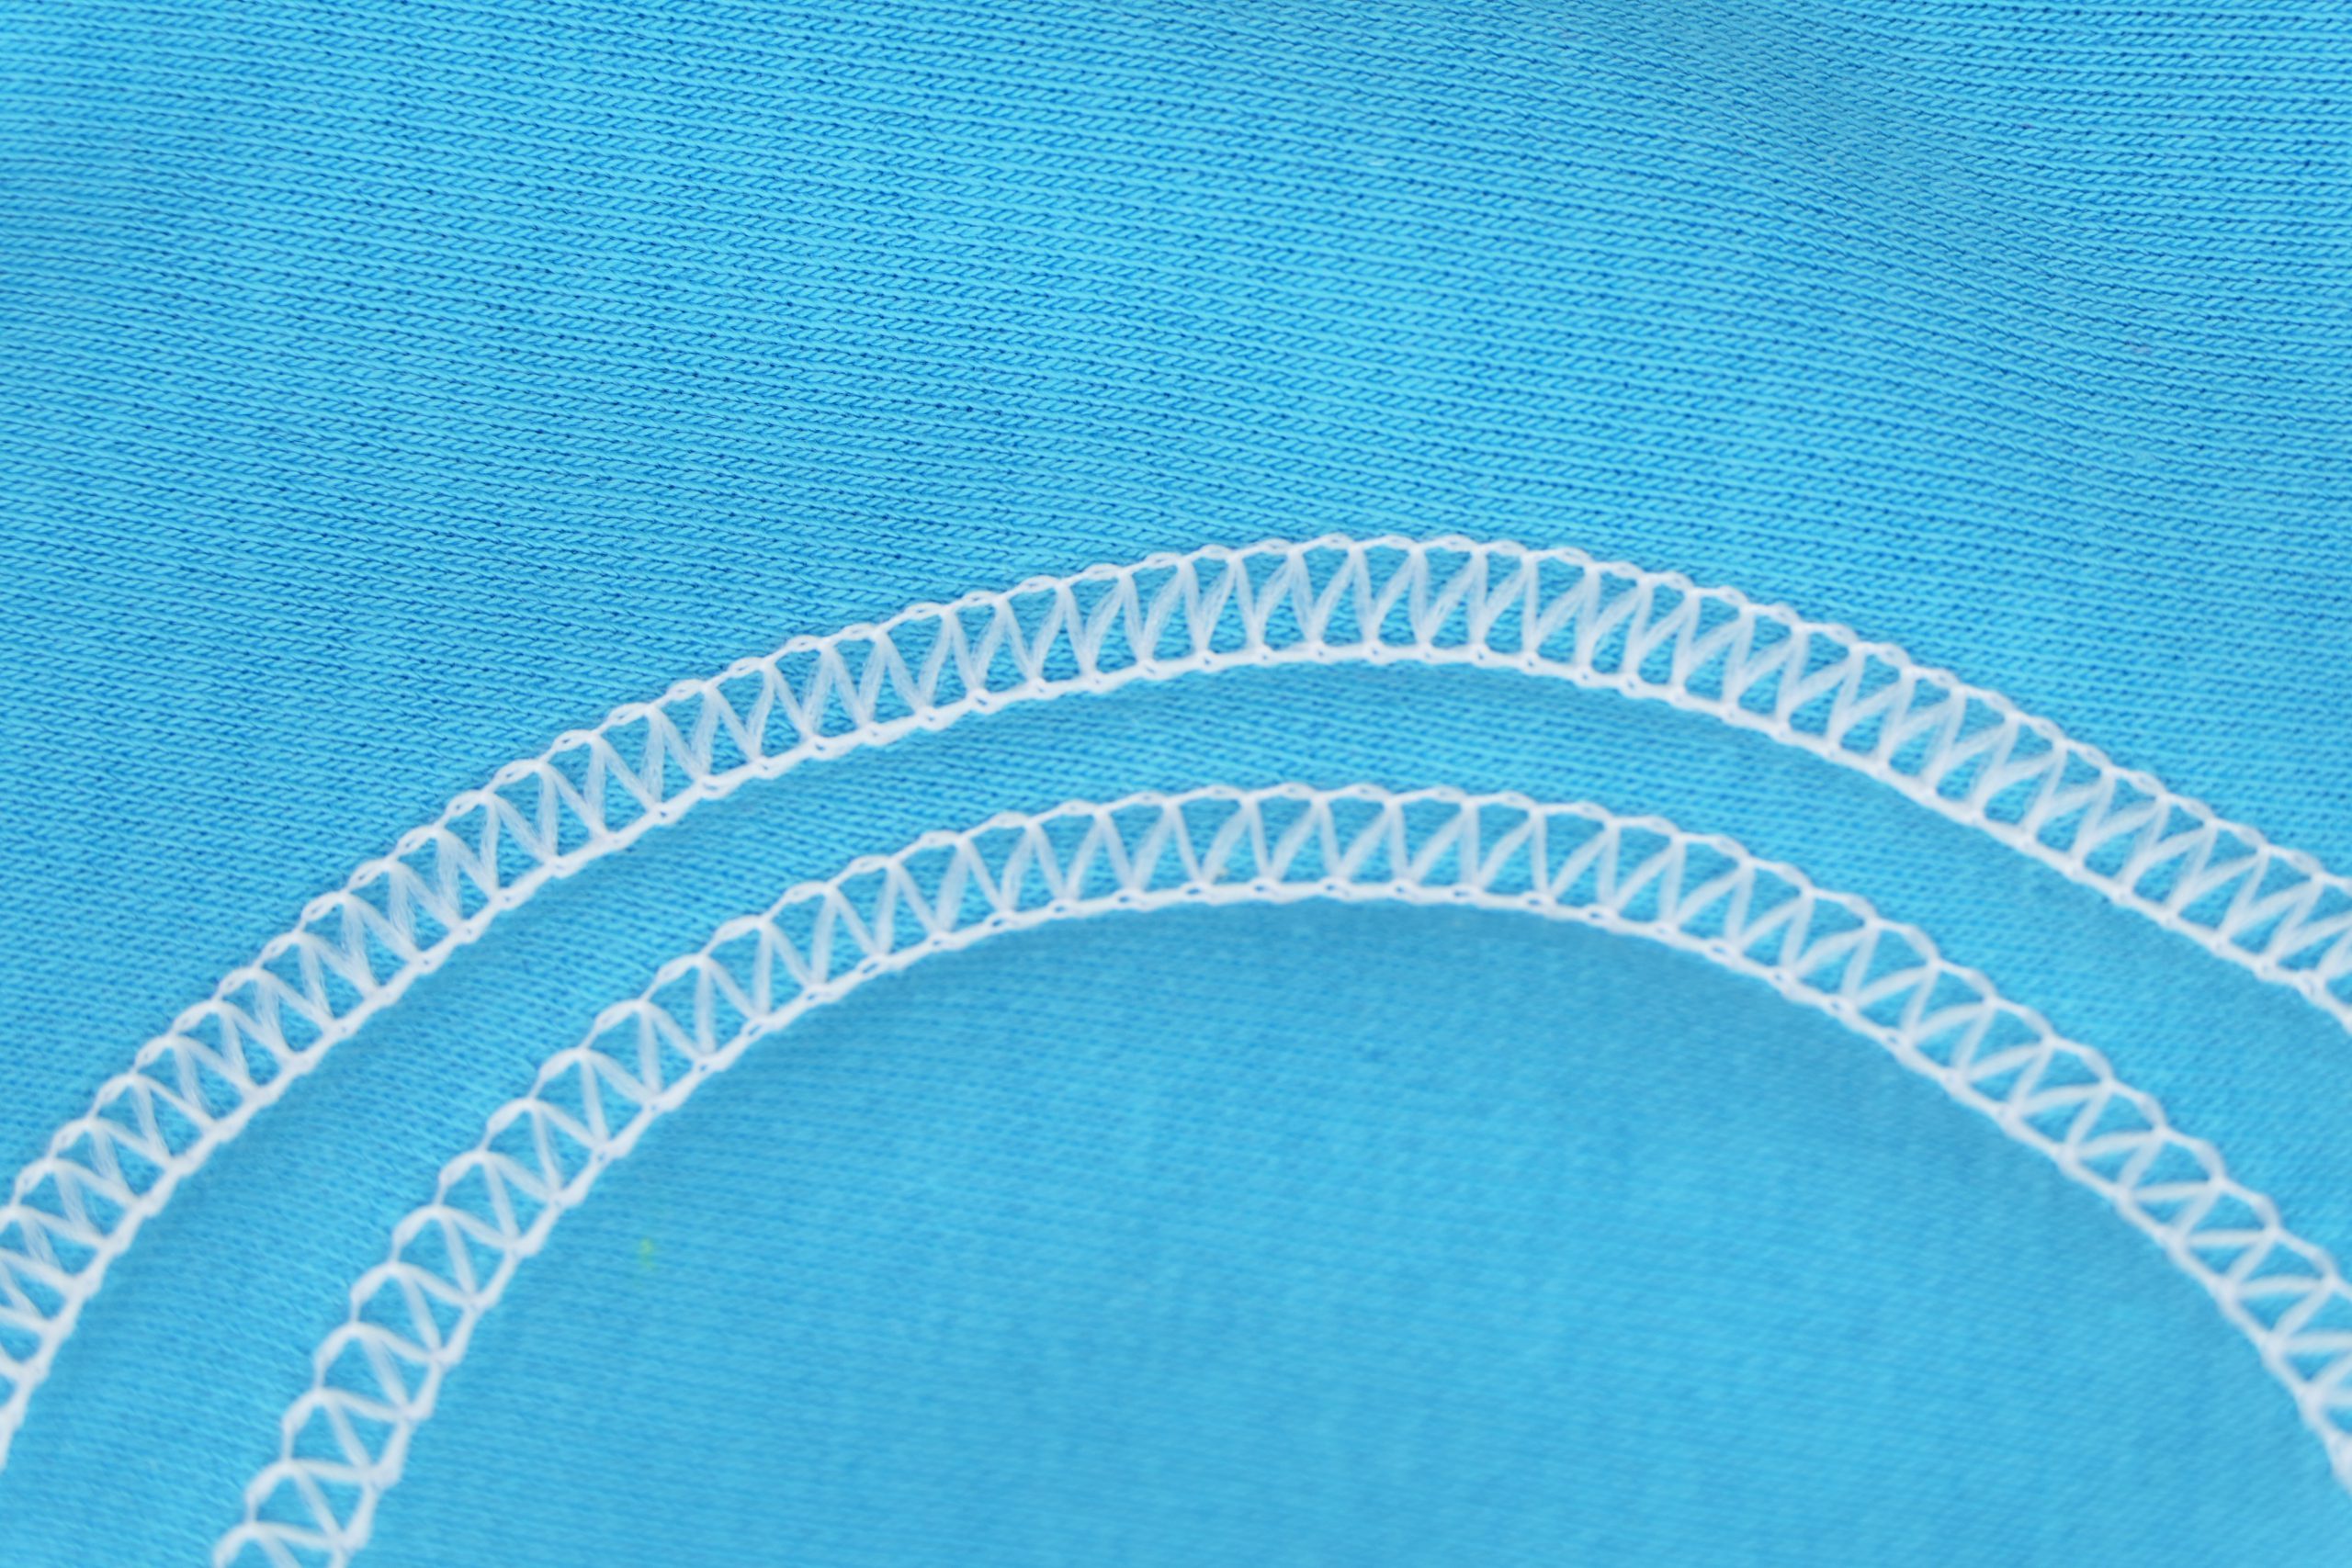
In the image below, the inner curve is sewn with a balanced differential feed at default.
I started evenly with the outer curve. From where I went into the curve, I lowered the differential feed, sewed the curve (with now longer stitch length), and after the curve set the differential back to default. Behind the foot, the fabric has bounced back a bit. As a result, we now have a much more regular seam in the outer curve than in the inner curve with the default differential feed:
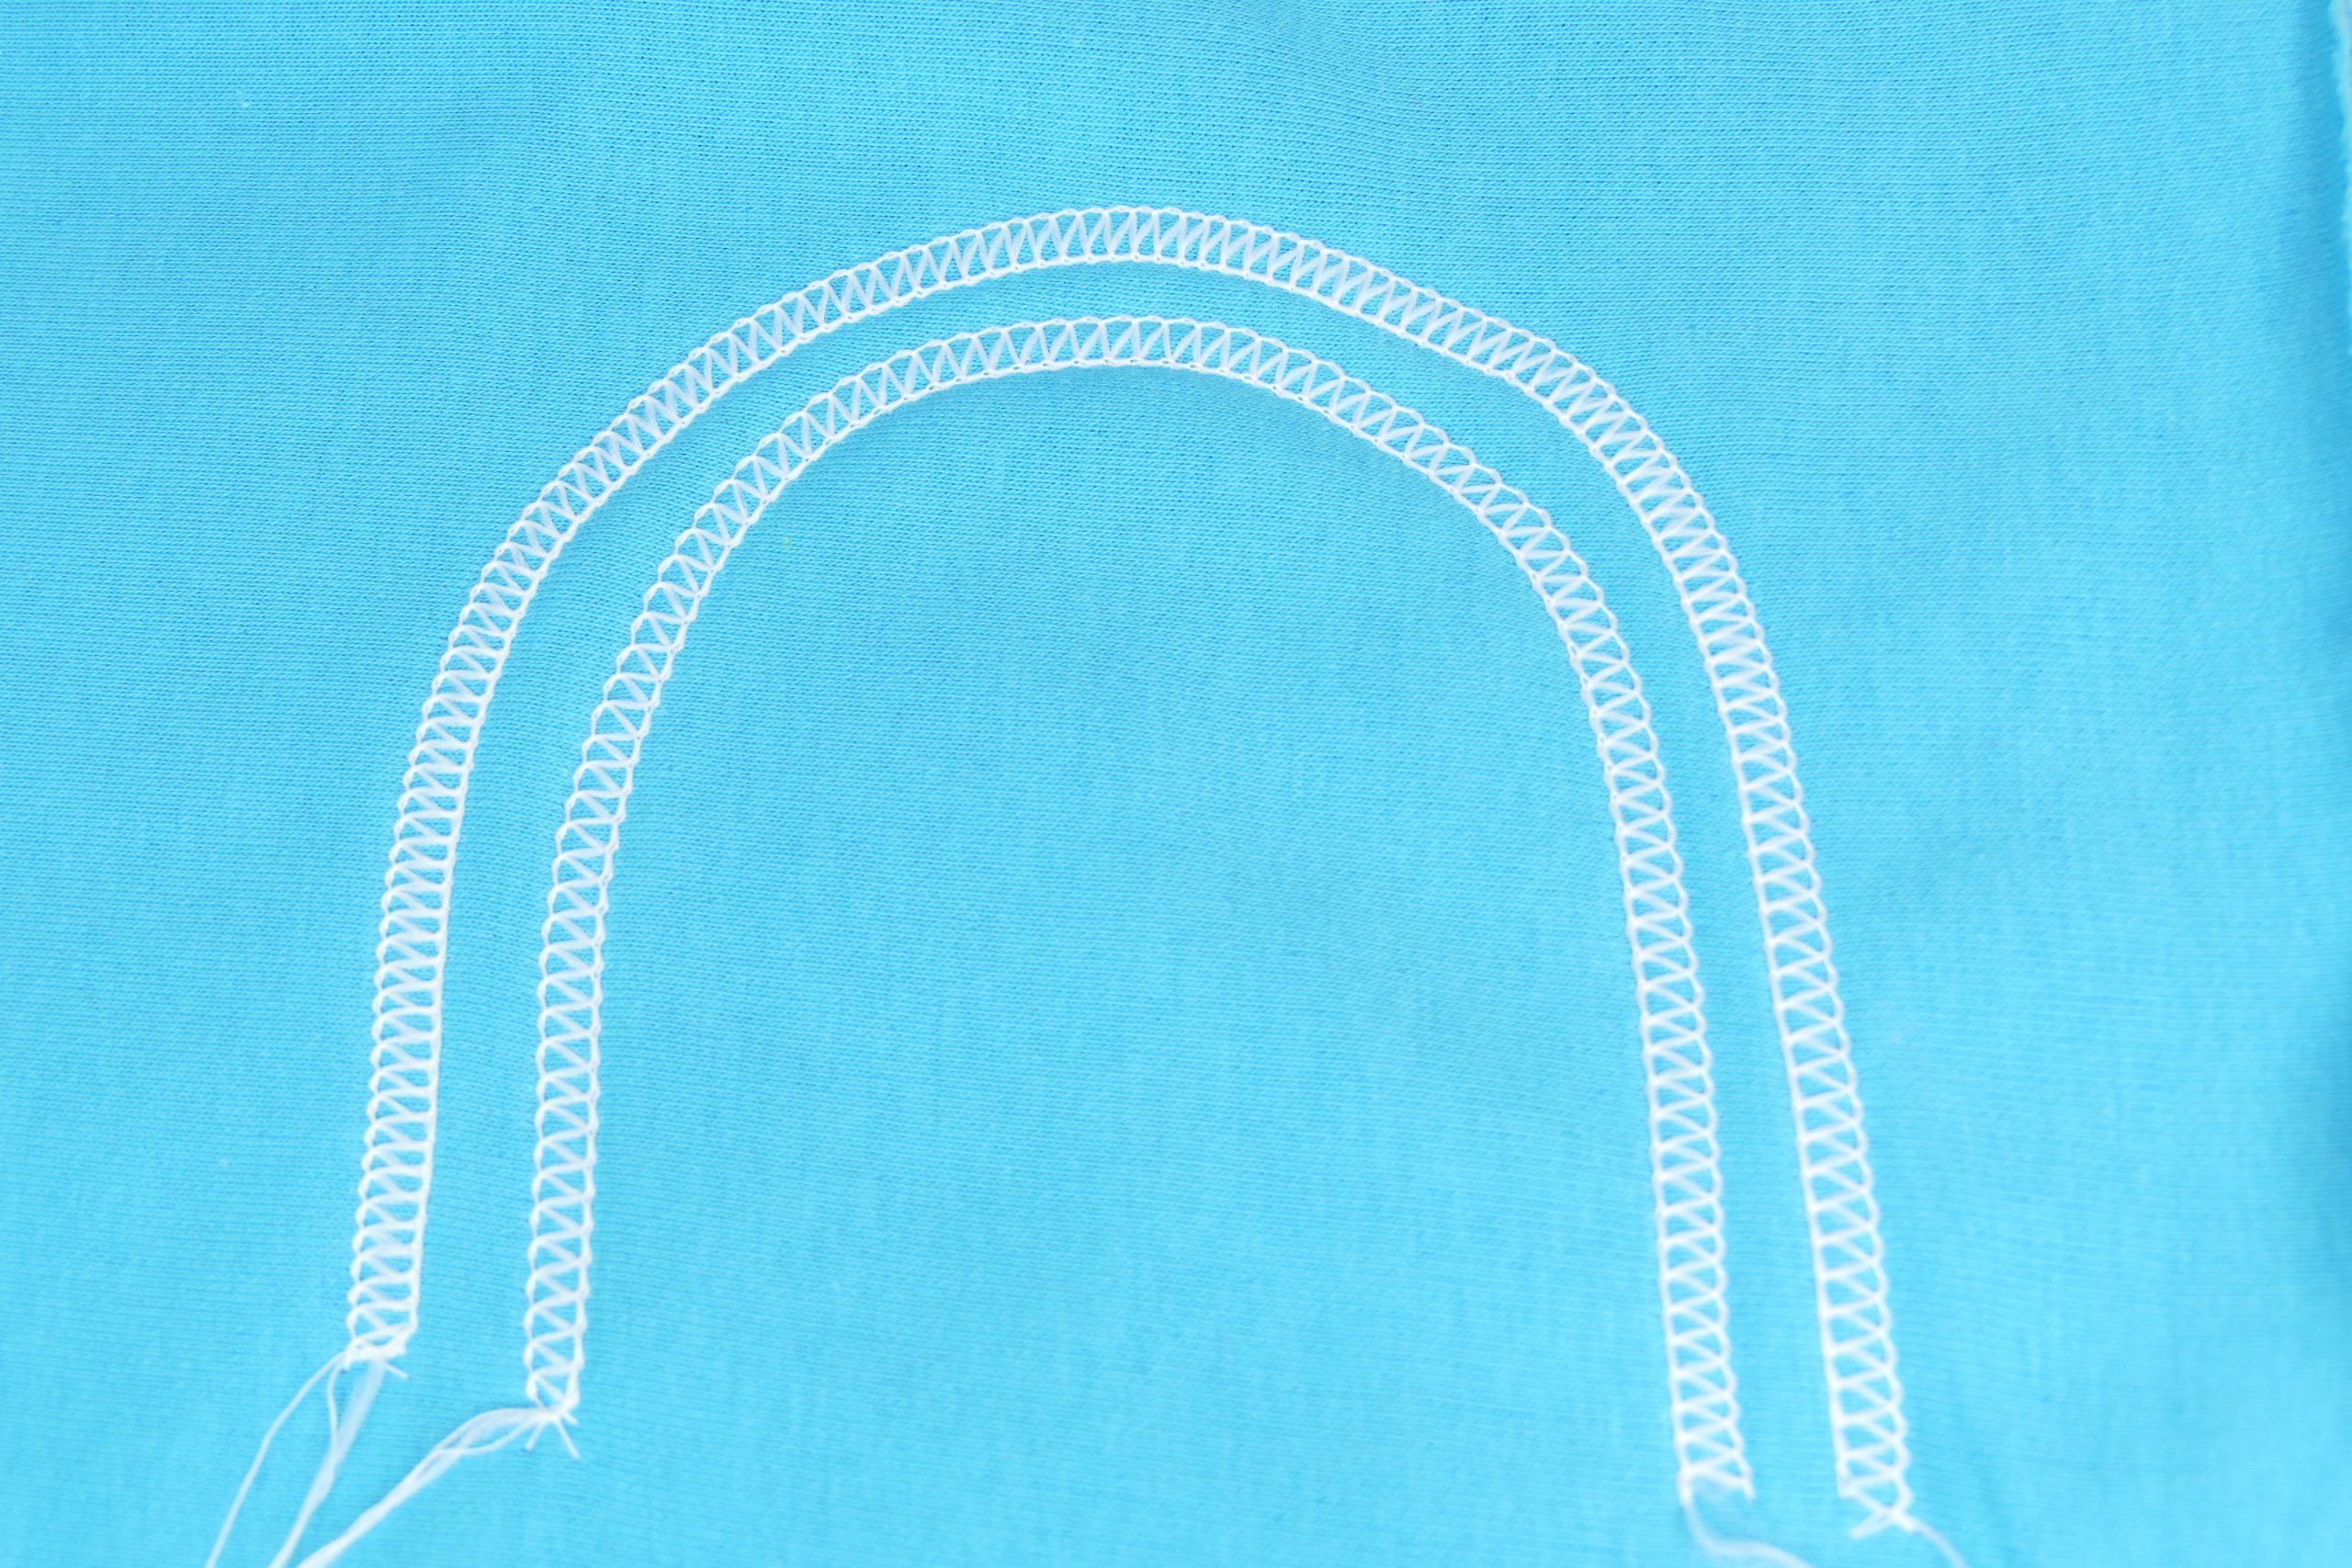
Here is a zoomed look into the seam. As you can see, the outer seam is smoother:
If I work with the hemmer guides and have the skirt e.g., slightly rounded, I go up a little with the differential feed setting. As a result, the flared extra length is adhered to a little, and thus fits perfectly to my hem stitching. But here, too, the following applies: Check the setting and do a test sewing sample.
Unpicking the Coverstitch – Freebie Online Class
It is always important to know when coverstitching, how can I quickly unpick the seam if it did not fit. Here we have a great video tutorial as a freebie:
Quickly unpick or secure coverstitch
A coverstitch seam can be easily unpicked in 20 seconds! Even though the video is in German, I am sure it will be possible to follow along.
Your Manu

0 Responses