 BERNINA Corporate Blog -
Are you ready? Today we will start with sewing our first trees for the One Two TREE Quilt Along. I’m so happy that we’re going to start cutting and sewing with our beautiful fabrics. I can’t wait to see the first trees pop up on Facebook and Instagram.
Winners of the Mystery box
Before we dive in I would like to announce the winners of the three Sugaridoo Mystery boxes! Congratlations to @buffalotinchen, @maggiecapone and C from the Bernina blog! Please get in touch through [email protected] so I can send the mystery box your way.

Flynn
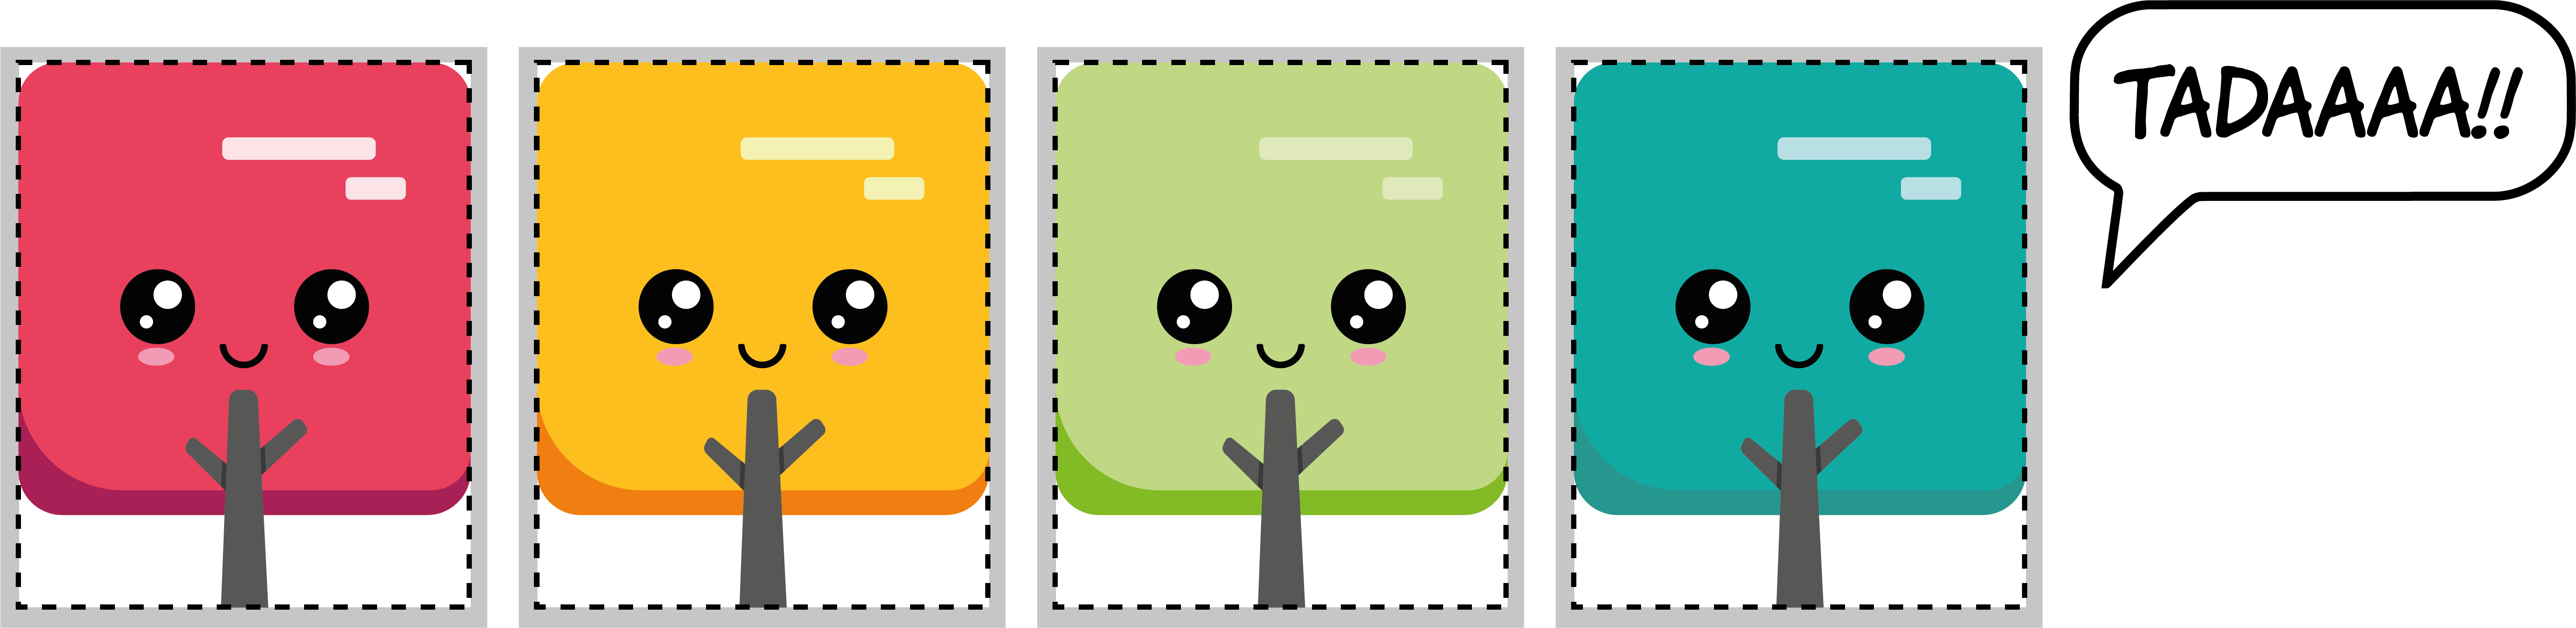
Today we will start with our first blocks of our tree buddy Flynn. Flynn is such a happy little fellow. Well, little he is actually the tallest of our tree friends. If you run into him, you’ll probably hear him humming a song while swaying in the wind. Or you’ll find him playing with the babies from Mr. and Mrs. Dove that just hatched from their eggs on his branches. If you ever need cheering up, make sure to pay Flynn a visit, his funny jokes will for sure put a smile on your face.
In this blog post
In this blog post you’ll find the foundation paper piecing pattern for Flynn. If you’re experienced with this technique, go ahead and sew four blocks with this pattern. If you’ve never done foundation paper piecing, don’t worry. I recorded a video tutorial and made written instructions to help you.
You will also find a diagram to see in which fabrics you will need to make Flynn and where in the quilt he will appear.
New here? Welcome!
This blog post is part of the One Two TREE Quilt Along. This is a free QAL where you will learn to confidently quilt your quilts yourself with free motion quilting and rulerwork quilting.
First we will sew 16 trees and those trees we will use as a canvas to quilt a different pattern in each of them. We’ll take it slow and start with the very basics. Want to join in? Start here and read more about the Quilt Along and the Fabrics and Materials.
Fabric requirements
You will need the following amount of fabric to make one Flynn block. This block measures 12.5 x 15 inch, that is 13 x 15.5 inch including seam allowance.
- Tree 20 x 18 inch (50 x 45 cm)
- Tree trunk 4 x 8 inch (10 x 20 cm)
- Background fabric 8 x 12 inch (20 x 30 cm)
Fabric kits
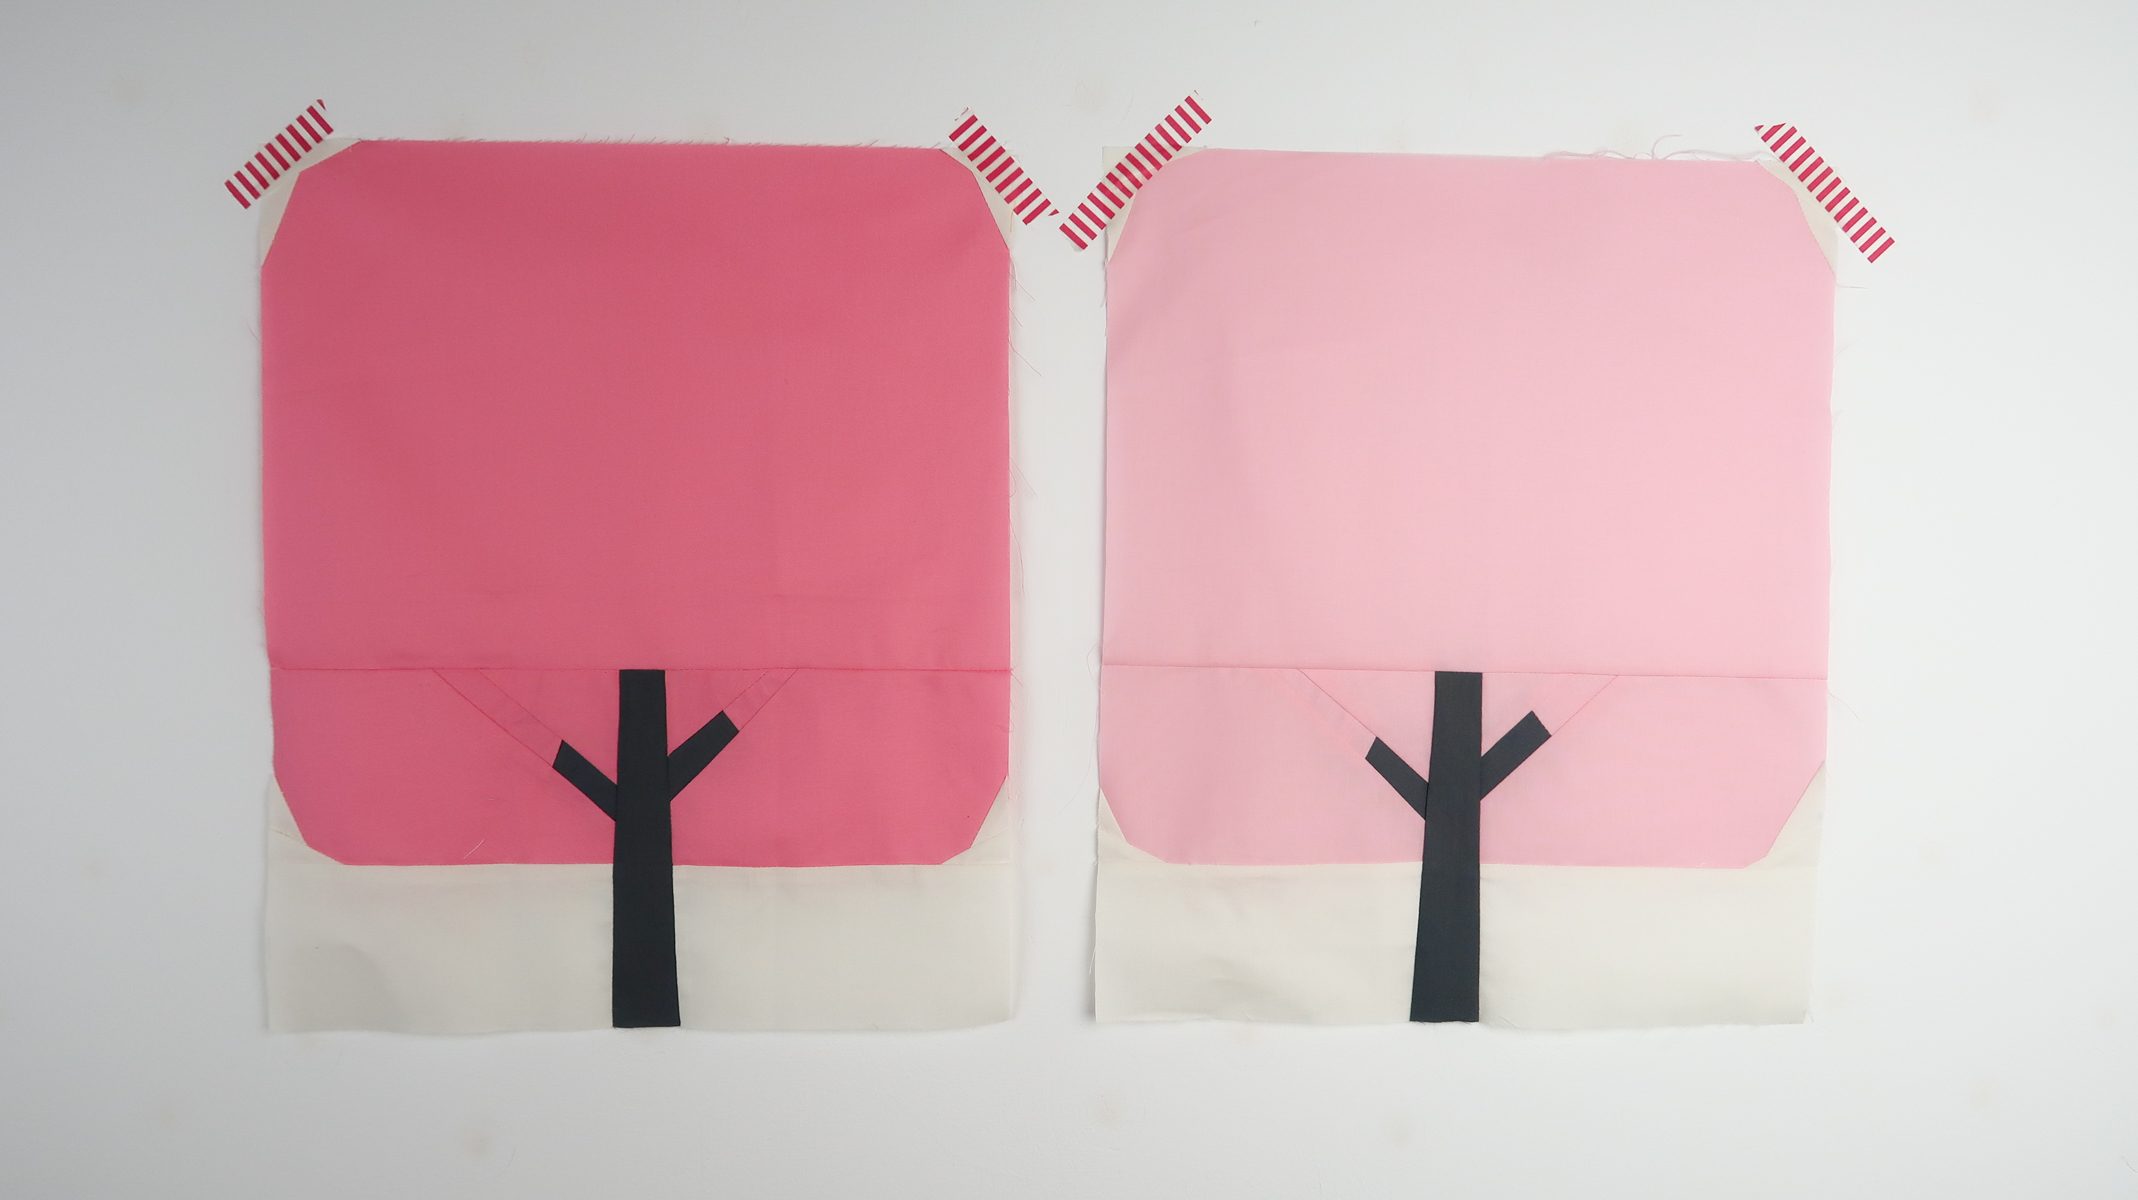
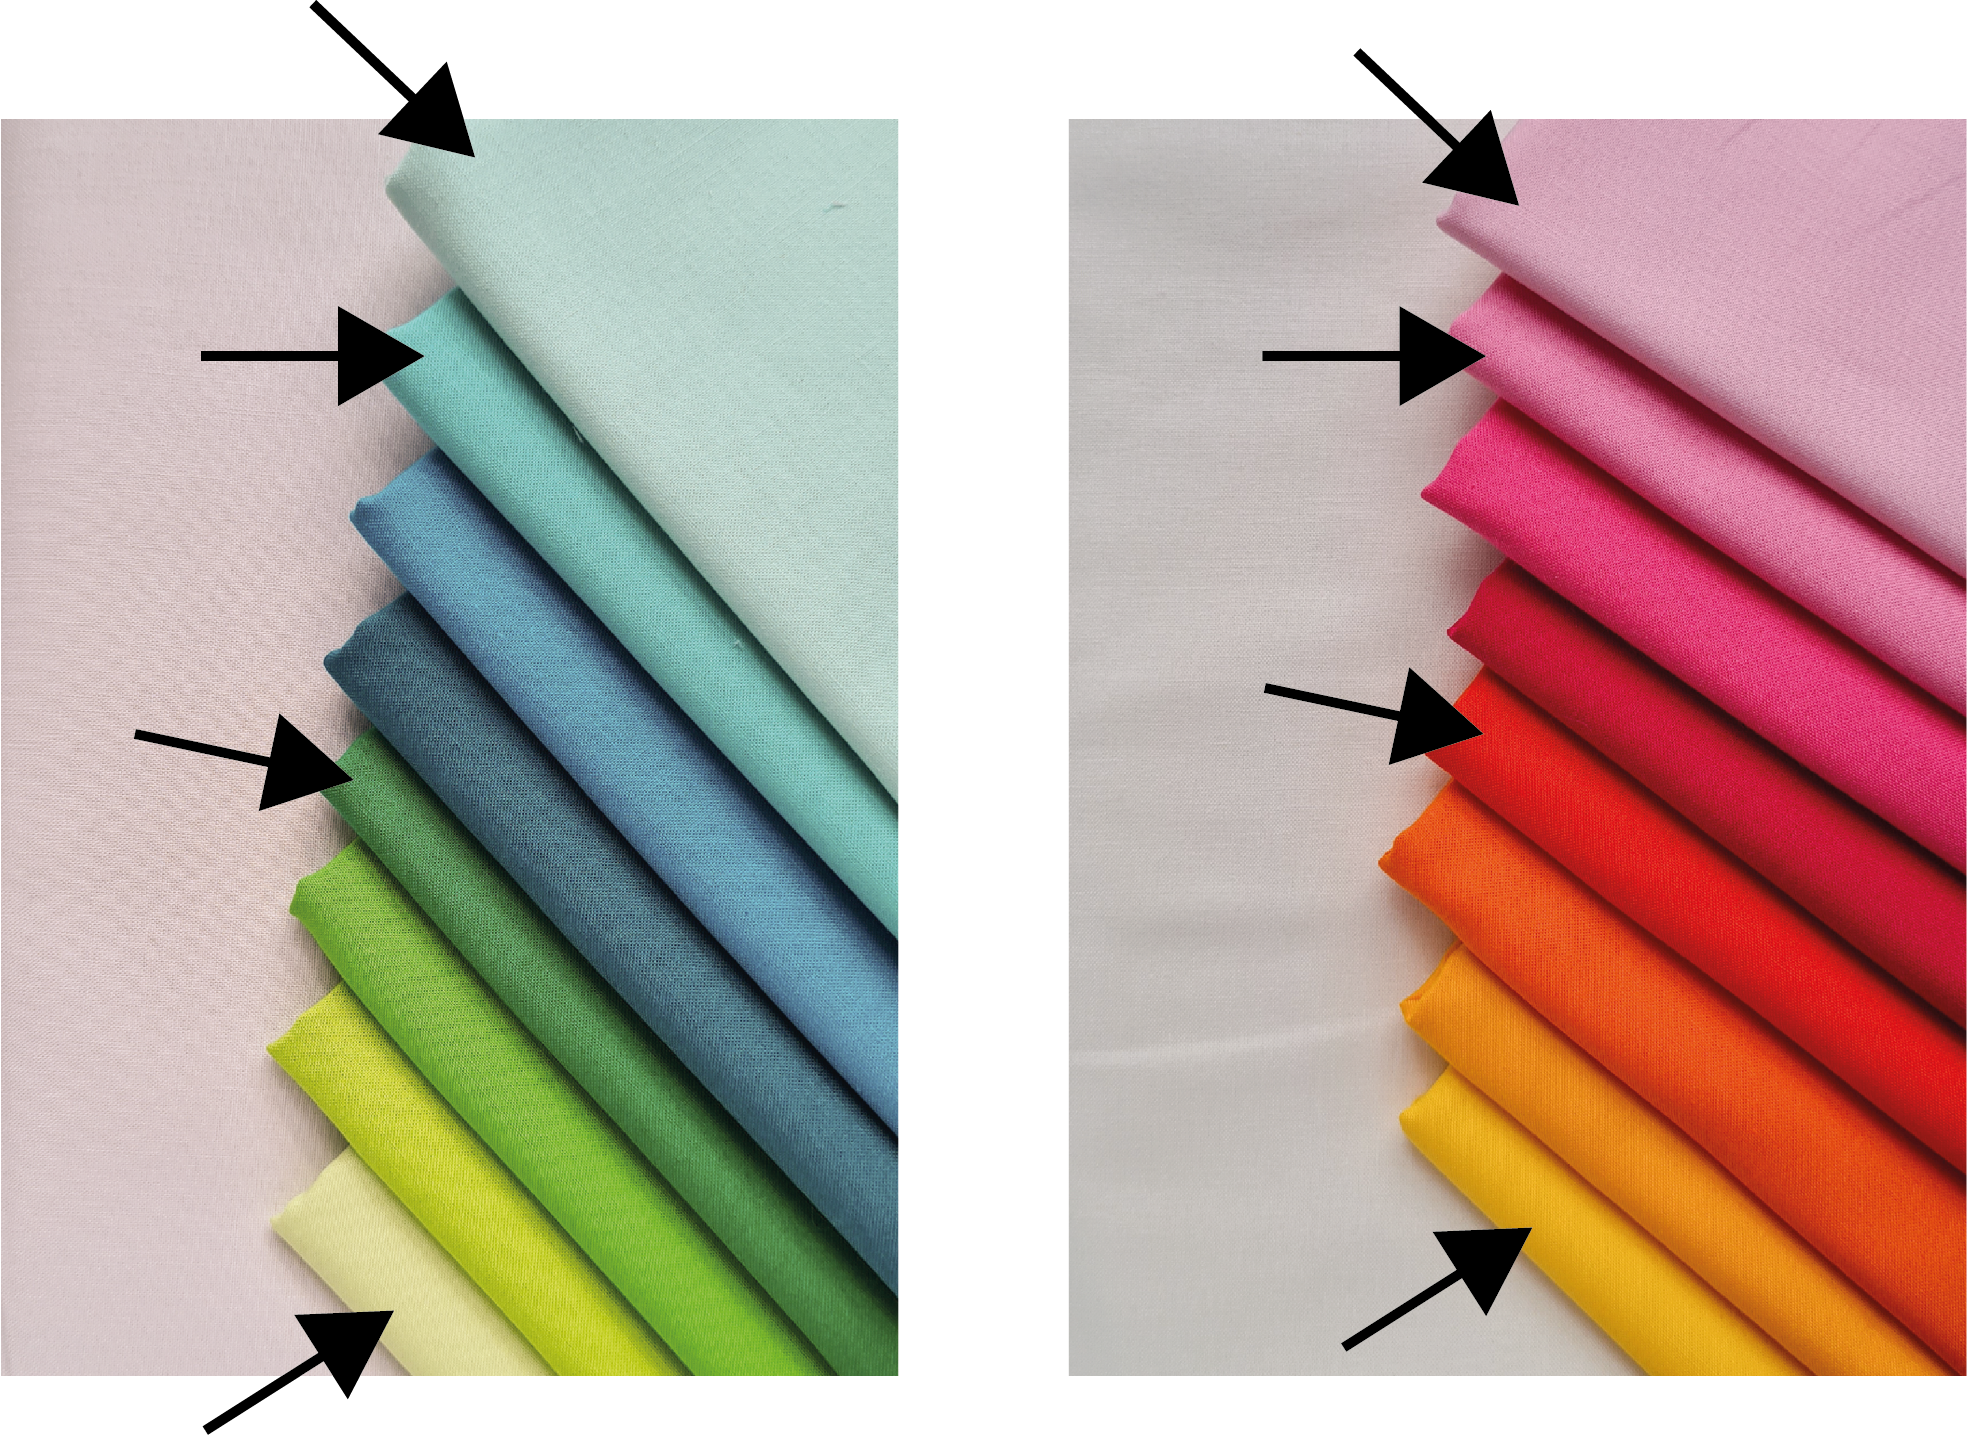
When you’re working with a rainbow fabric kit for the QAL you will make Flynn with the following fabrics.
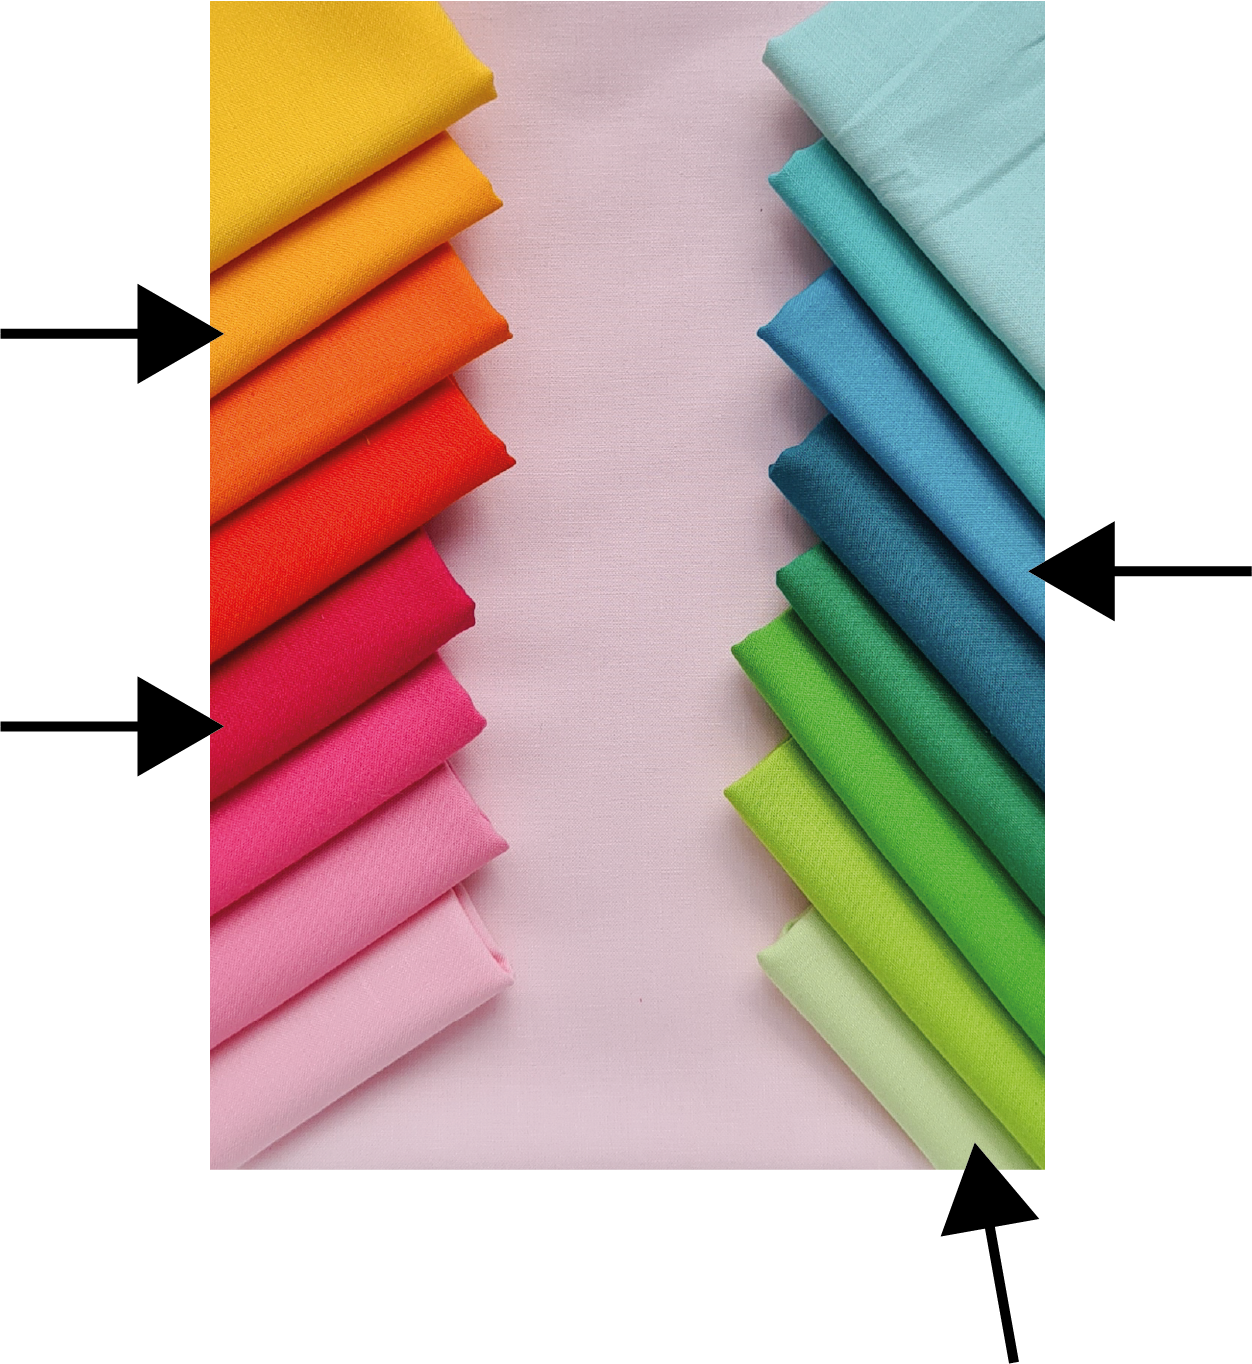
When you’re working with the Green/Teal or the Orange/Pink kit you will make Flynn with the following fabrics. Make sure to use only half of each piece of fabric, since you’ll need to make two trees in each color.
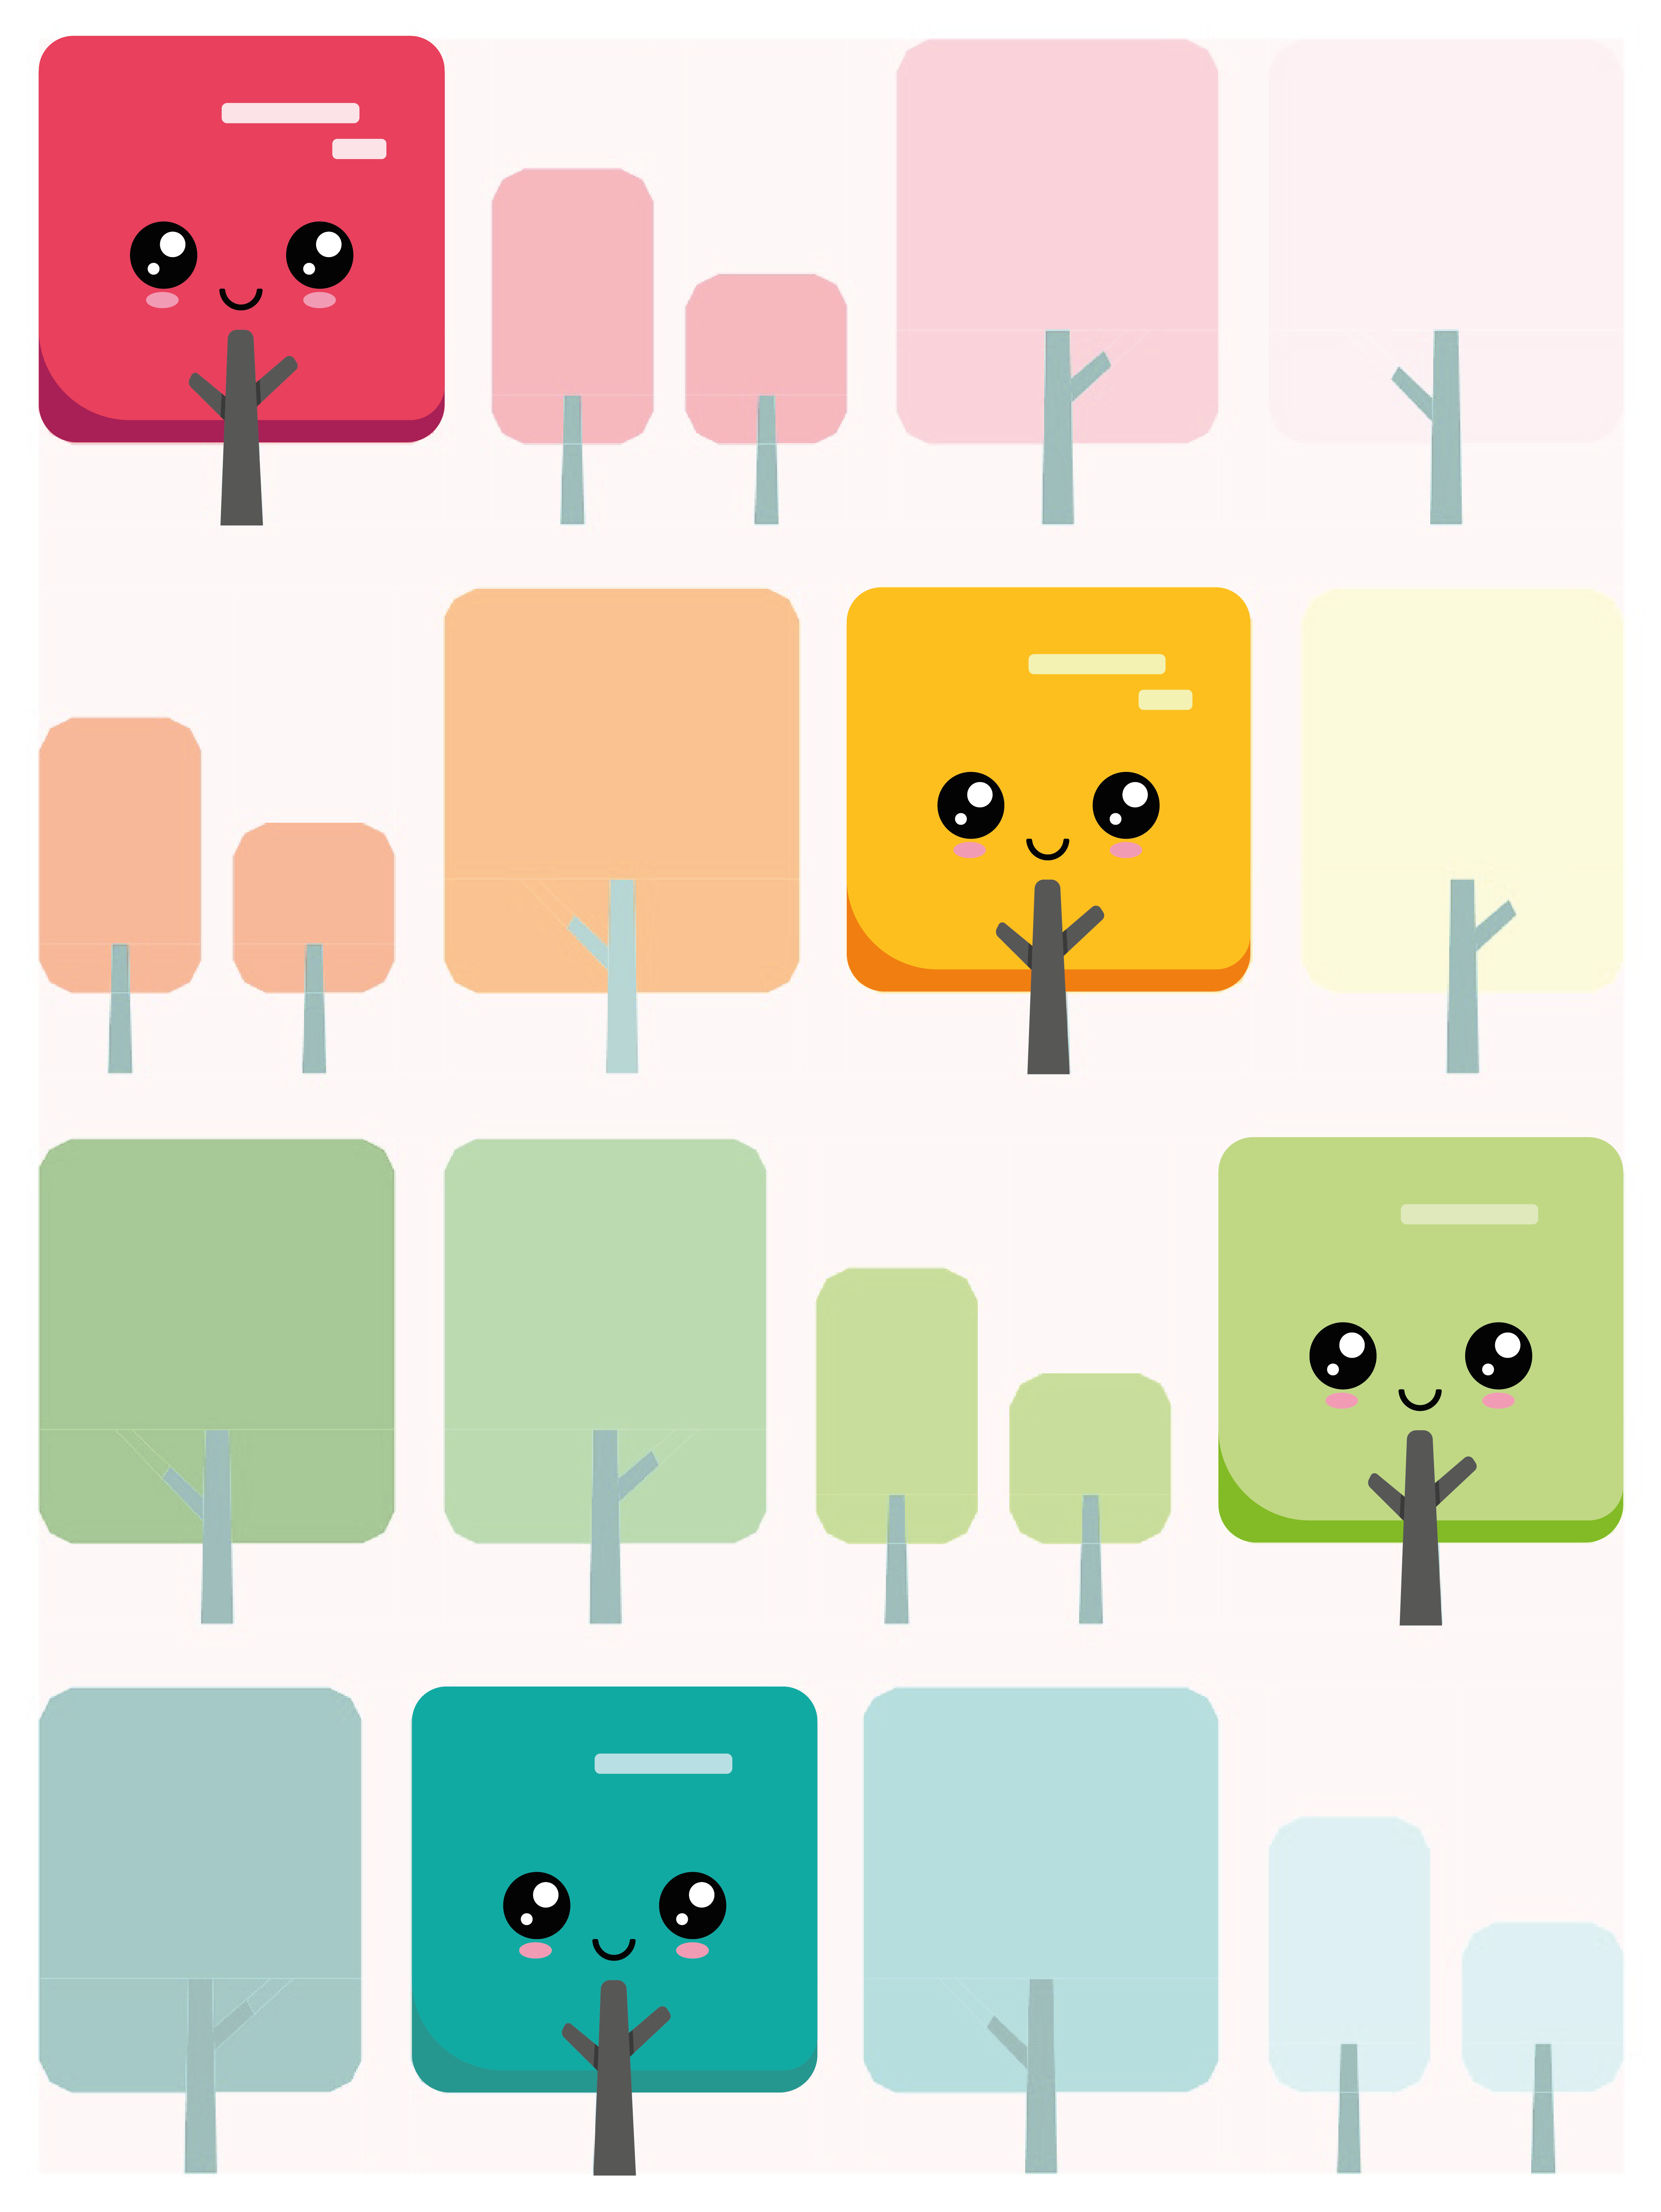
Quilt overview
This is where Flynn will be placed in the quilt.
Pattern
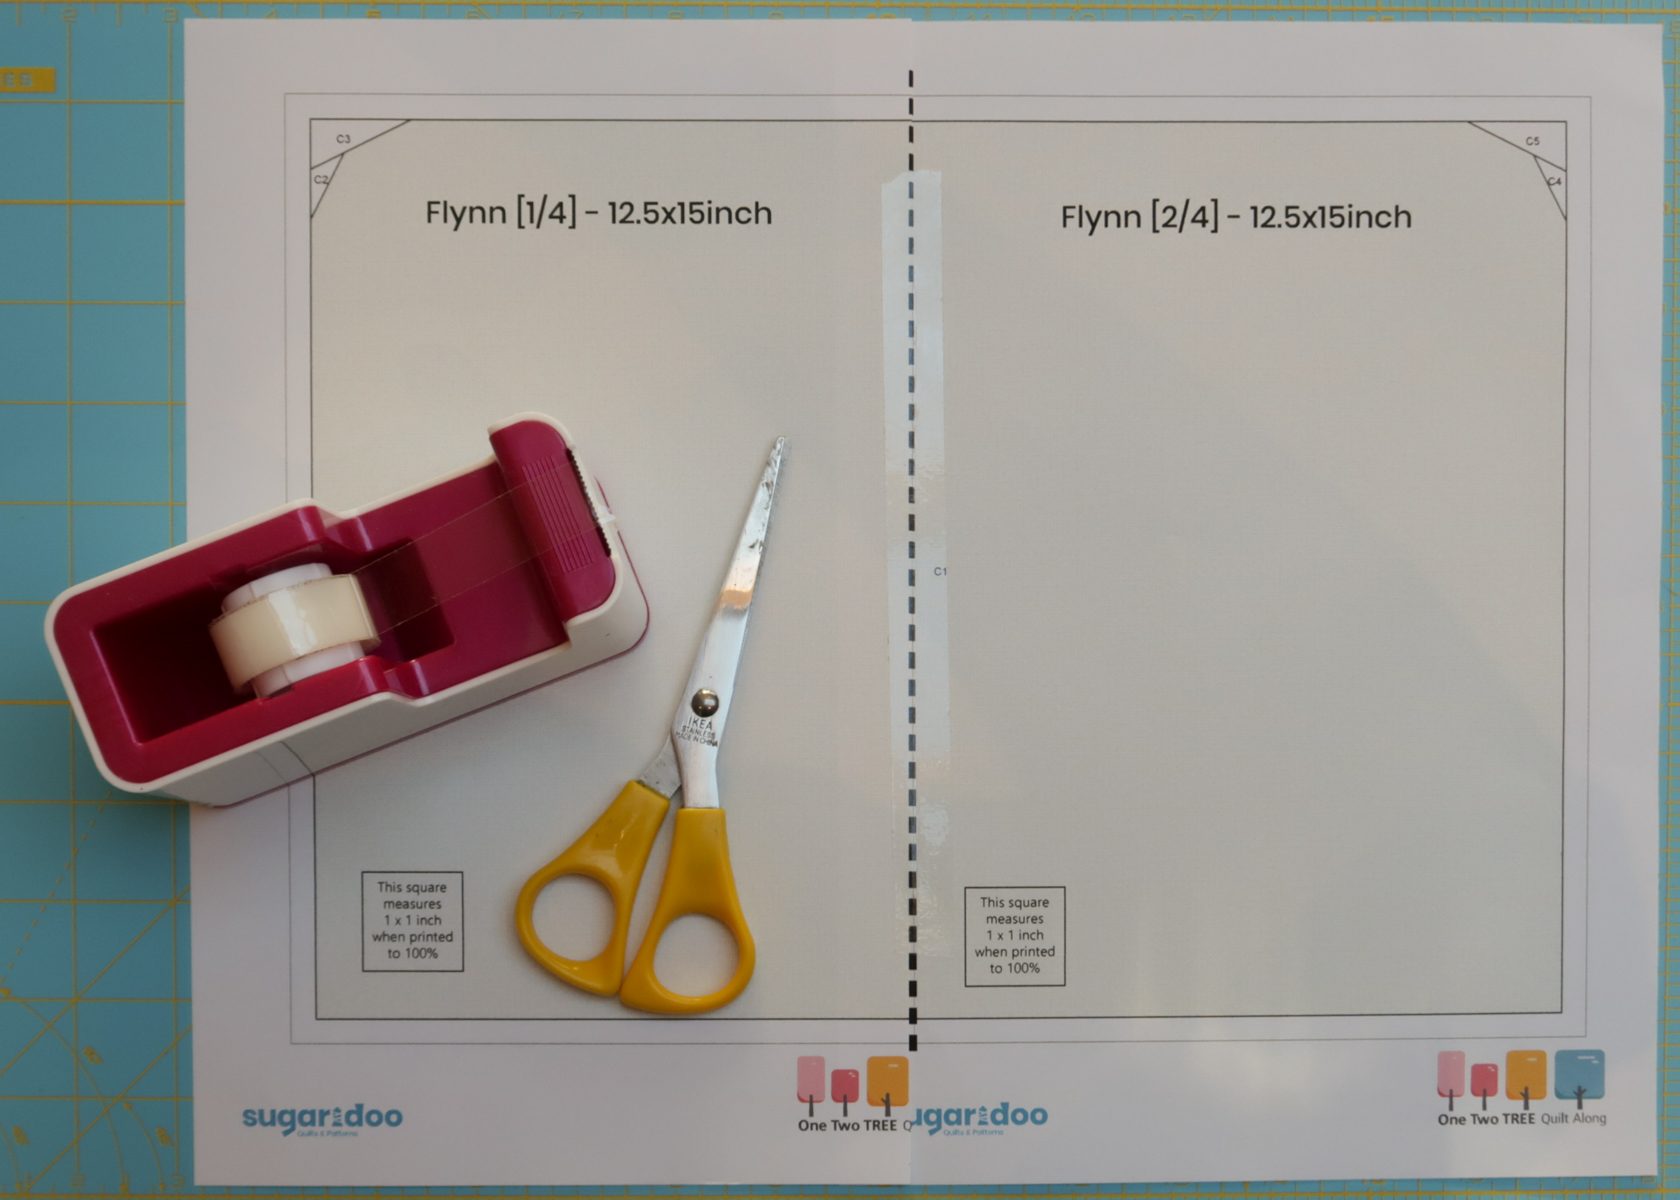
Here is the link to download the pattern for Flynn. Go ahead and print it true to size. Select ‘do not scale’, or set your printer settings to ‘scaling: 100%’. To check if you printed the pattern the correct size you can measure the one inch square.
The finished block measures 12.5 x 15 inch, 13 x 15.5 inch including seam allowance.

Prepare your pattern
Assemble section C by cutting over the dotted line and taping the two pieces together.
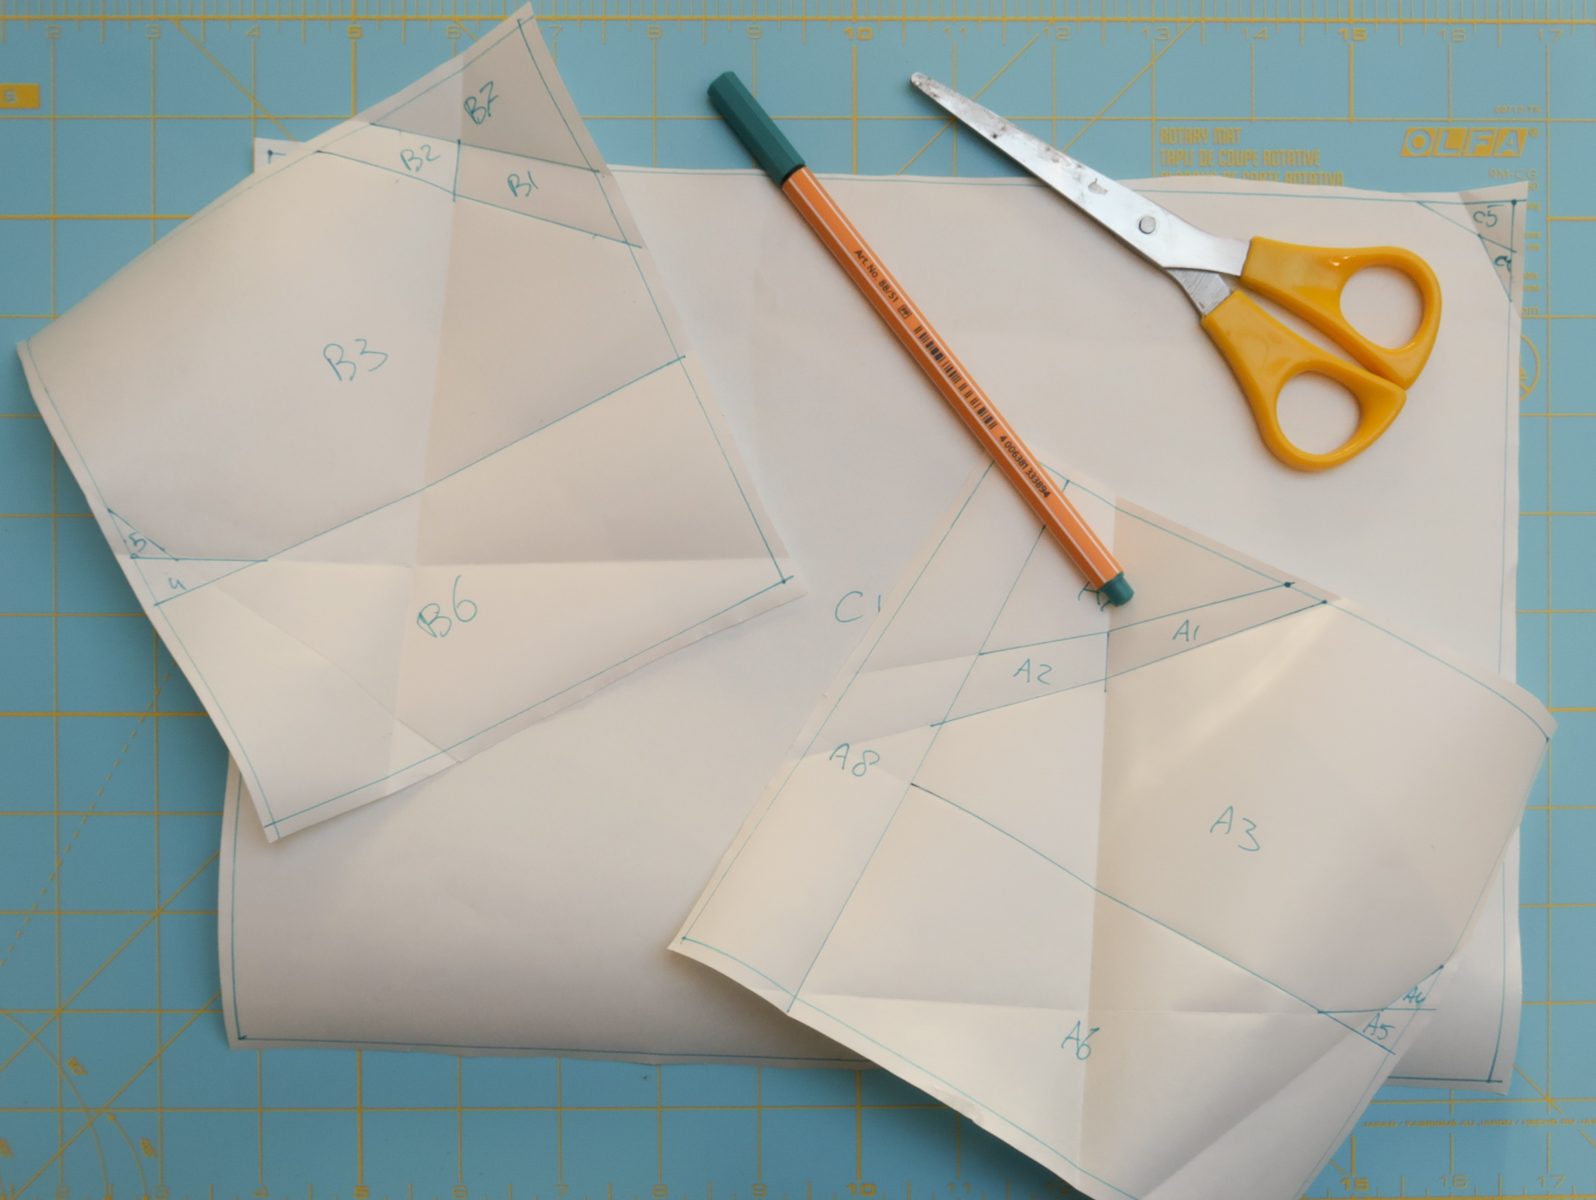
Now take a piece of freezer paper and transfer section A, B and C to the freezer paper. Place the glossy side of the freezer paper down. You draw on the ‘paper’ side of the freezer paper.
You only need to make one pattern for each section. The awesome thing of working with freezer paper is that you can use is multiple times.
I like to use a pen instead of a pencil to transfer the pattern. In the next step we are going to fold all the lines of the pattern and pencil tends to smudge a bit. You don’t want that on your fingers and on your pretty fabric (talking from experience here.. whoops!)
Cut around your pattern piece with a little bit less than a 1/4 inch. Now you can fold your freezer paper over the lines of the pattern, paper side to paper side. Folding this on forehand will help a lot when we start sewing.
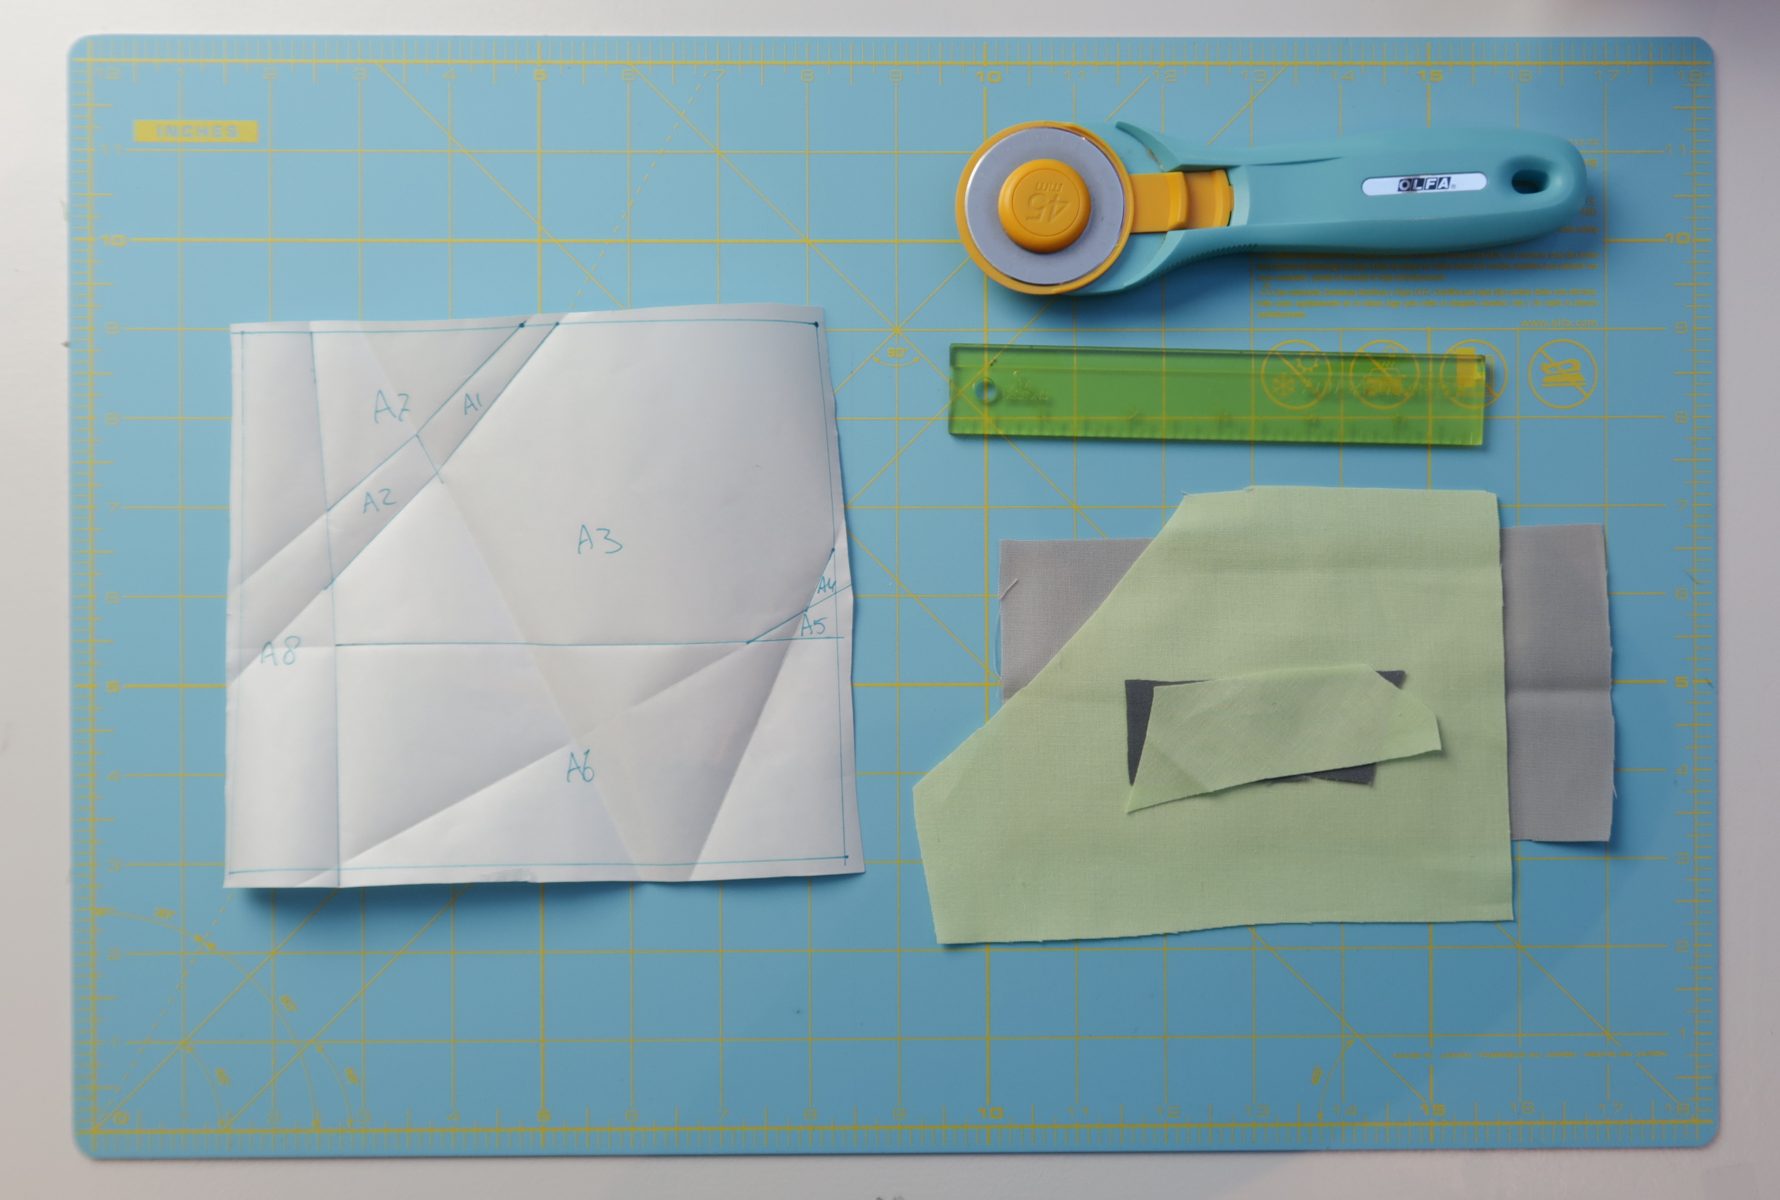
Cutting the fabric
Before you start cutting in to your background fabric, make sure to set 40 inches aside for the sashing between the blocks and the border around the quilt. Cutting instructions for these strips will follow after we finish all 16 trees.
When you are done transferring your pattern, you can use the pattern as template pieces to cut your fabrics.
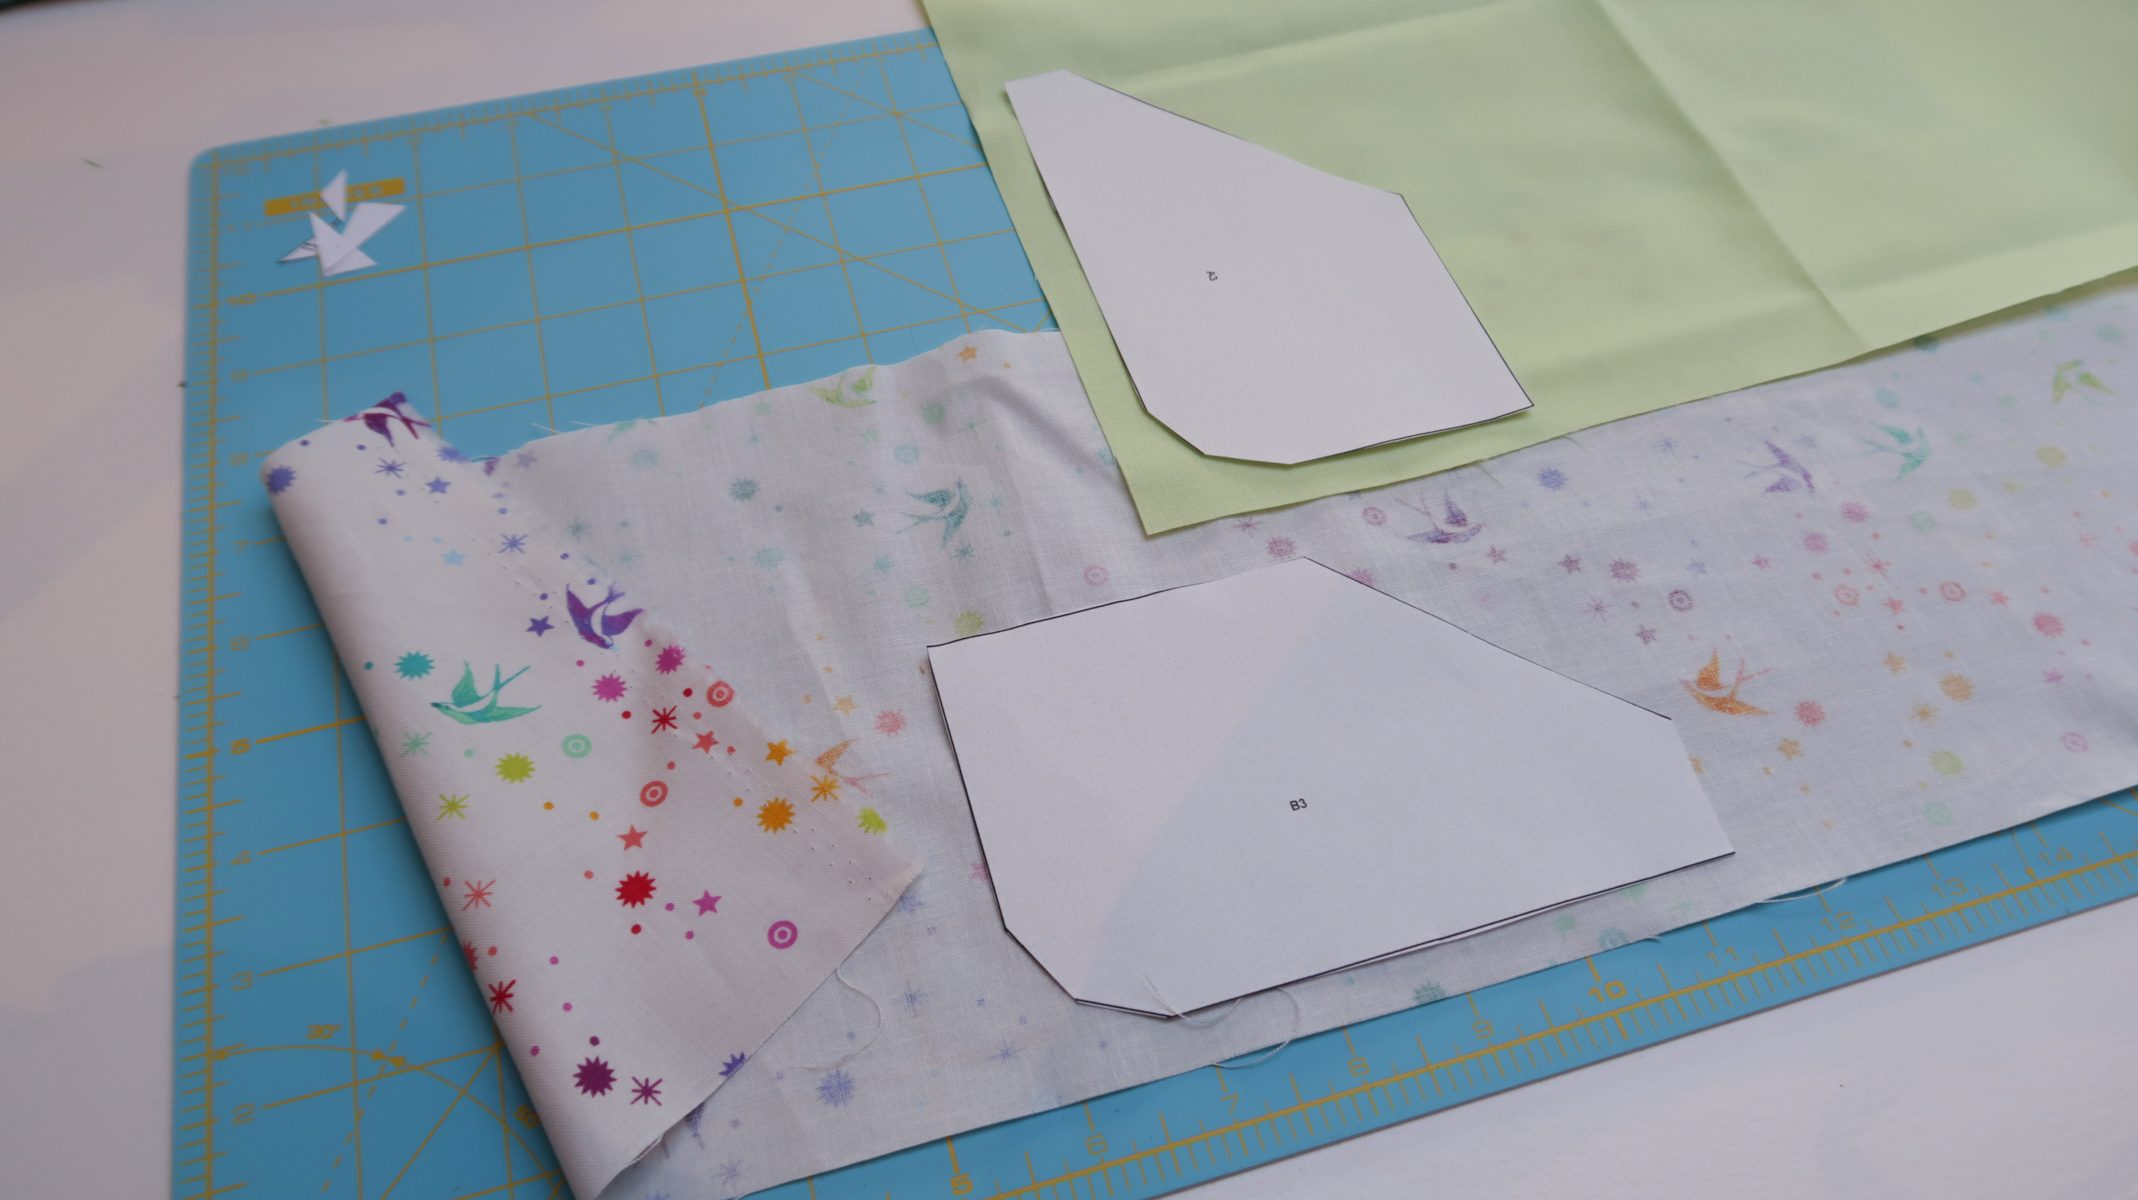
Make sure to place the template piece, right side up, on the back of you fabric when you’re using print fabric. When you’re using solids it doesn’t matter on which side you place the templates.
I like to cut out all my fabric on for hand so I have everything in place when I start sewing.
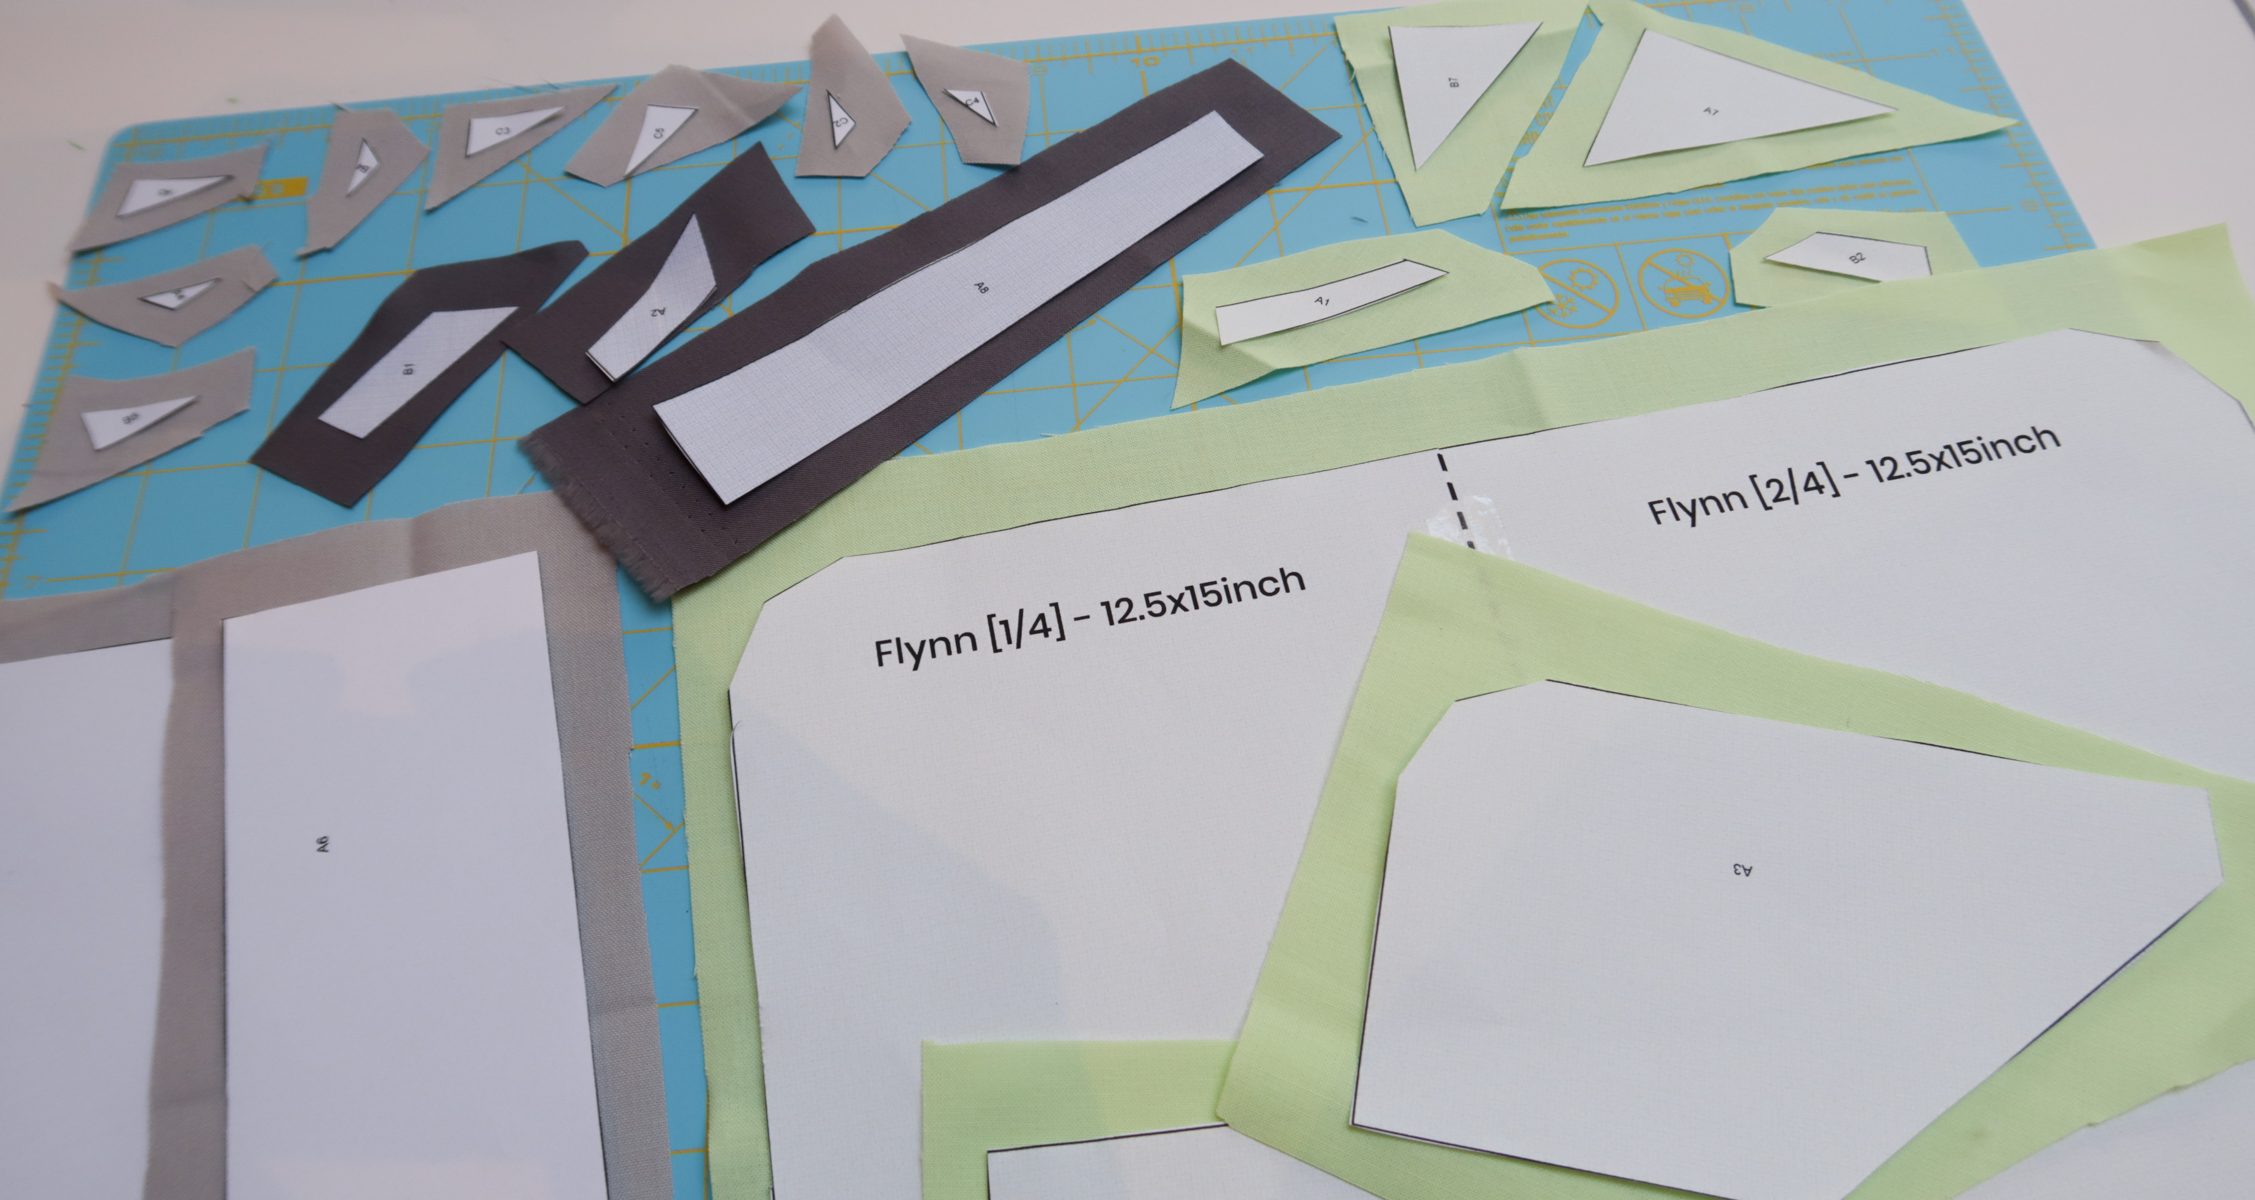
If this is you’re first time doing foundation paper piecing, just start with cutting a few pieces. And make sure to cut your pieces big. That really makes it easier when you’re trying this for the first time.
Let’s start sewing
If you’ like to sew along with me, just start the video below and make a Flynn block together. Or read on below for the written instructions for foundation paper piecing on freezer paper.
Make sure to have your iron plugged in somewhere close to your sewing machine, we will be using it a lot today.
The first steps are the hardest. You can always start with some scraps to get comfortable with this method.
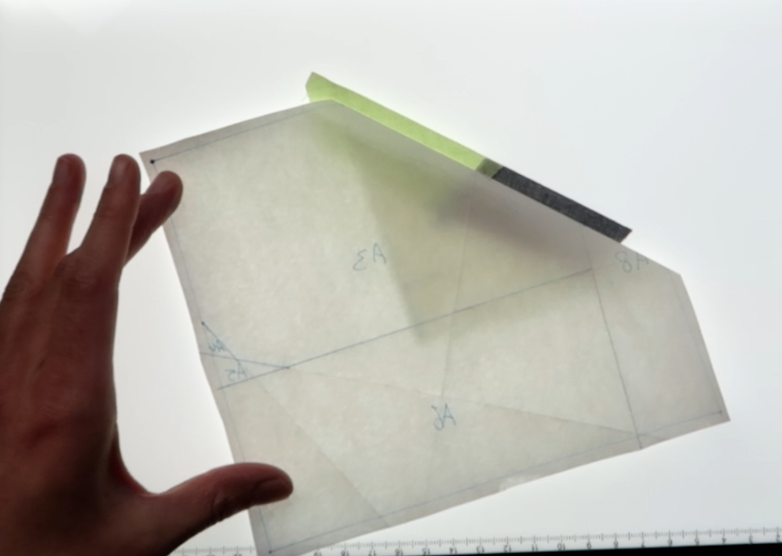
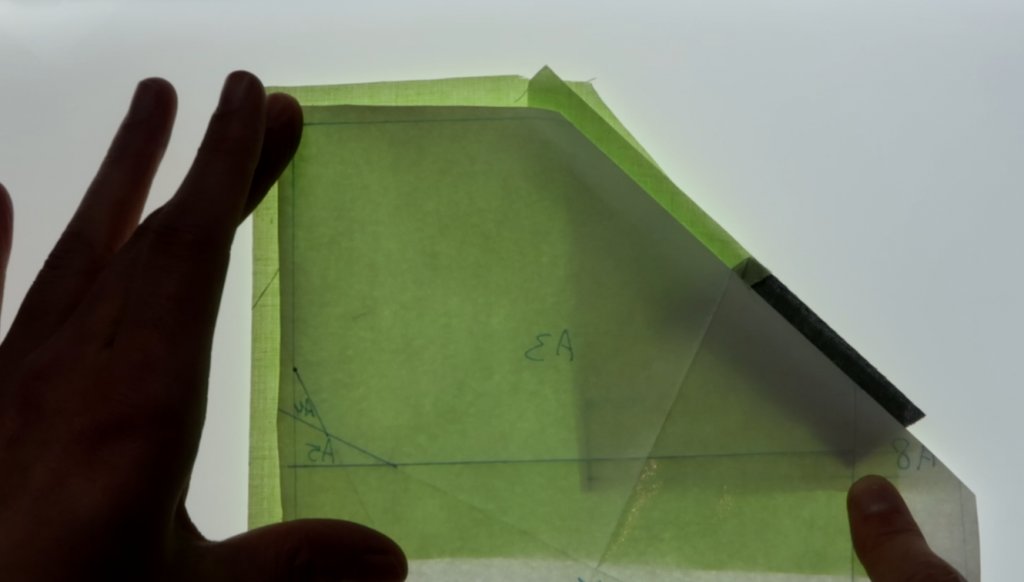
I use a light box to place my fabrics in the photo’s and video. But just holding your fabrics up towards the light will help you place your fabrics just as well.
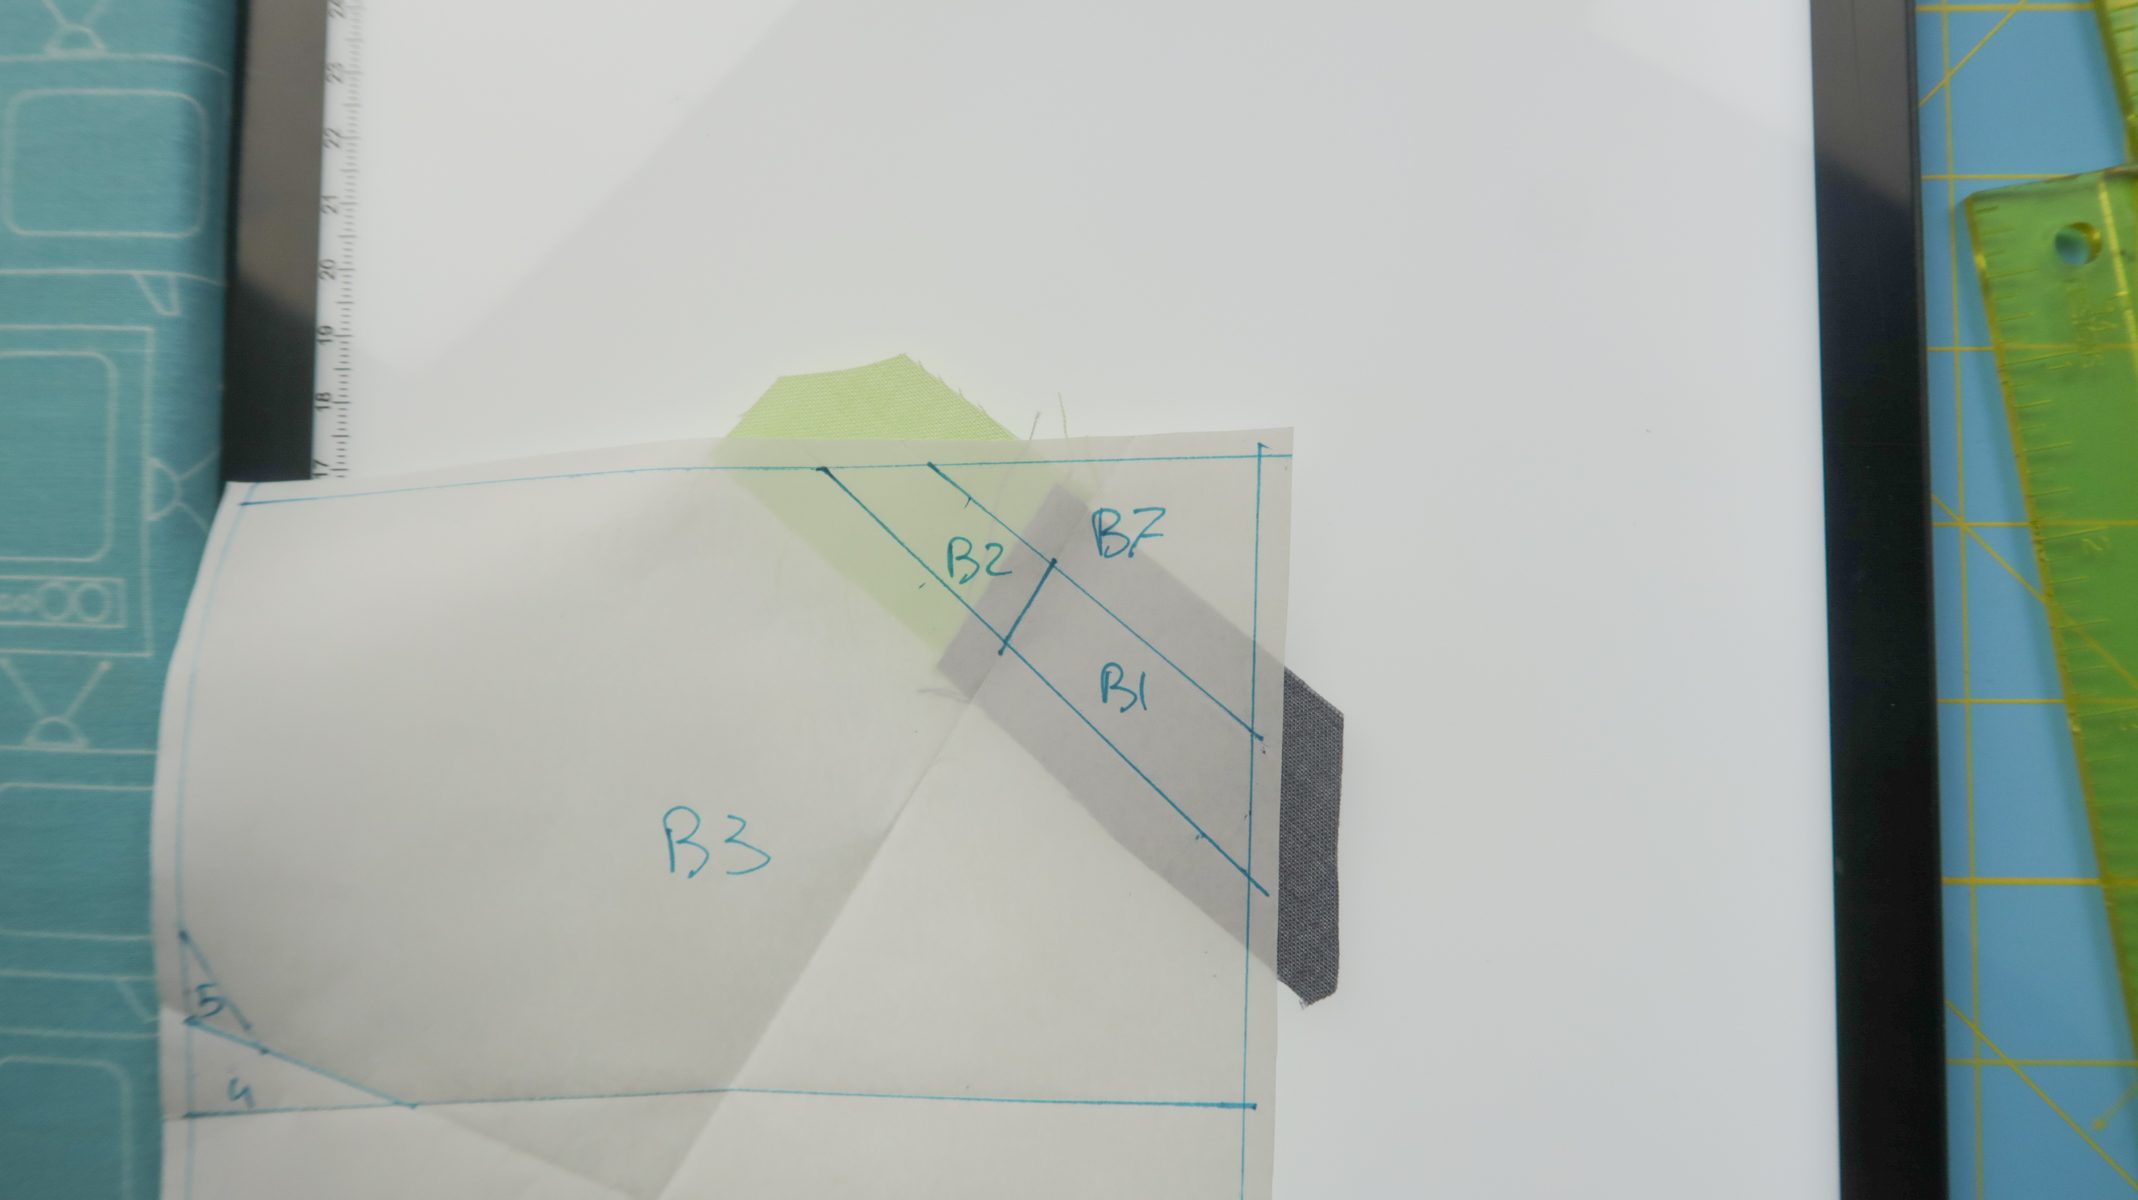
- Place piece A1 with the wrong side up on your ironing board. (I photographed section B here, but idea is the same for each section.) Place your freezer paper on top of it, making sure that piece A1 on your pattern is within your fabric piece

- Fold back the paper on the fold between piece A1 and A2.
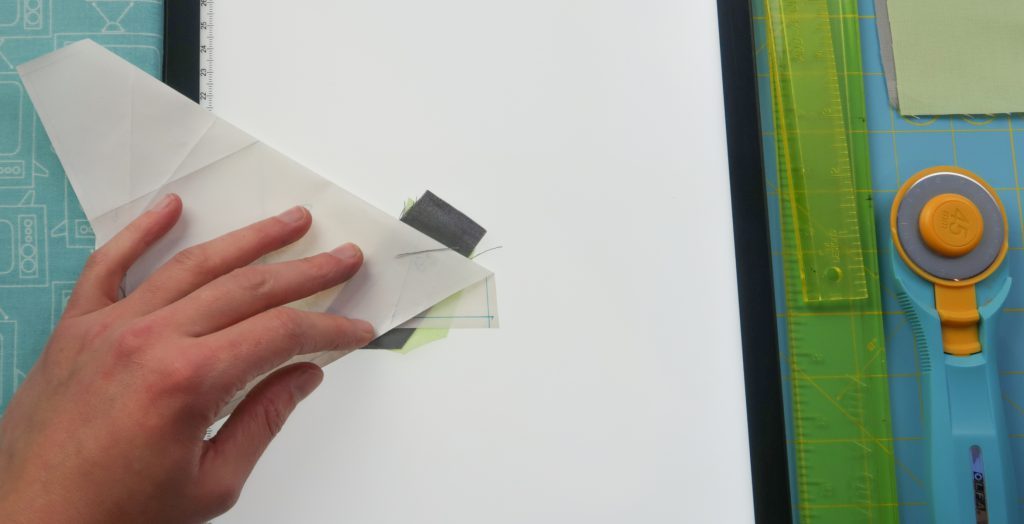
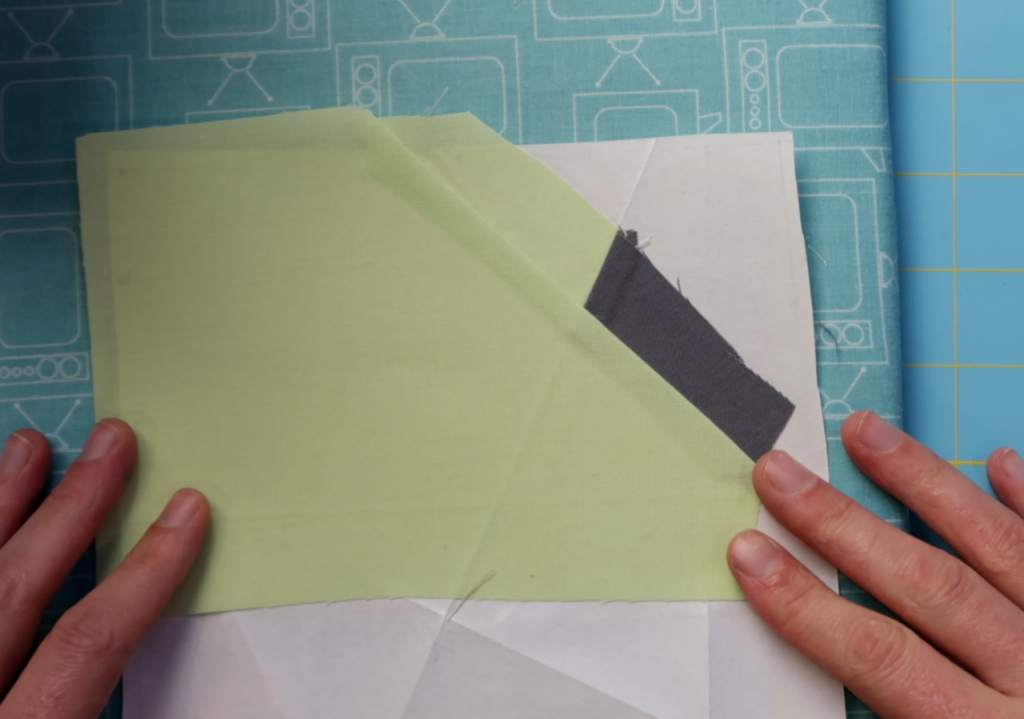
- Place piece A2 with the right side up under piece A1. So A1 and A2 are now with the right sides together.
Tip: Here is a little trick to make sure that your piece is in the right position every time. Make sure that piece A2 is underneath piece A2 on your pattern that you have folded back. You can see how I check this in the video for this block. When it is under piece A2 on the folded part of the pattern, it’ll turn out in the correct position after you sew and press open piece A2.
-
Now you can sew along the fold. Try not to sew through the paper

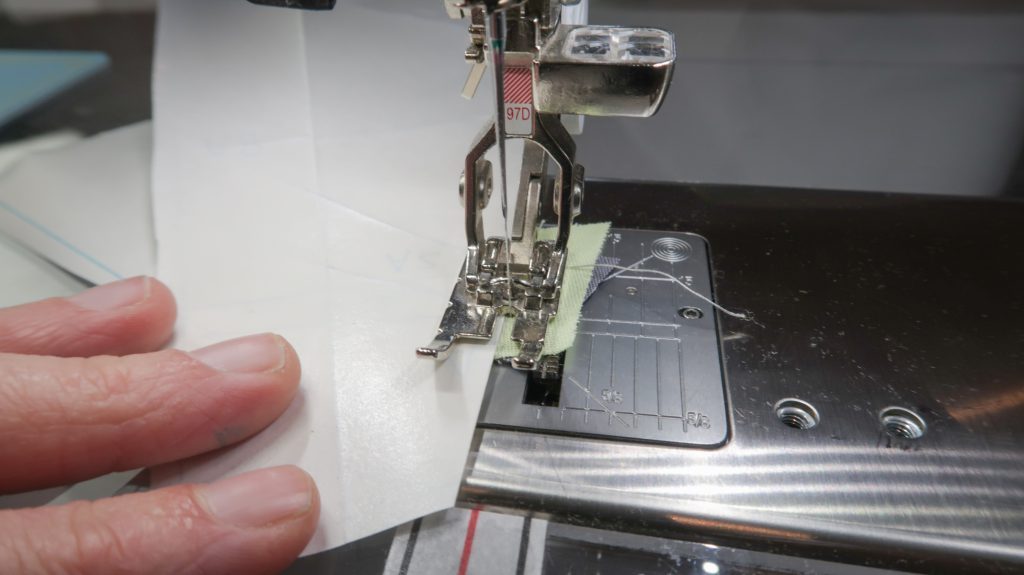
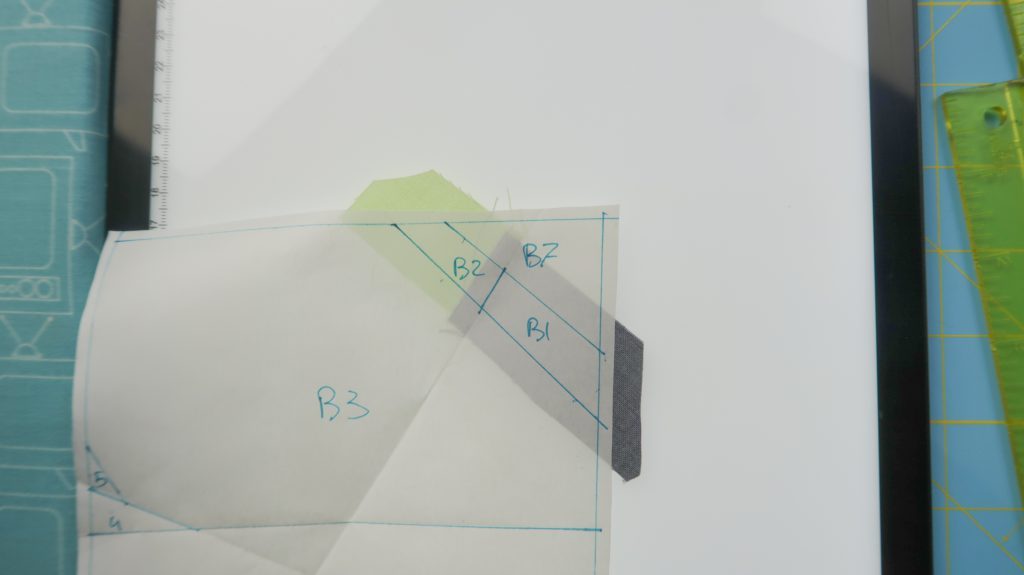
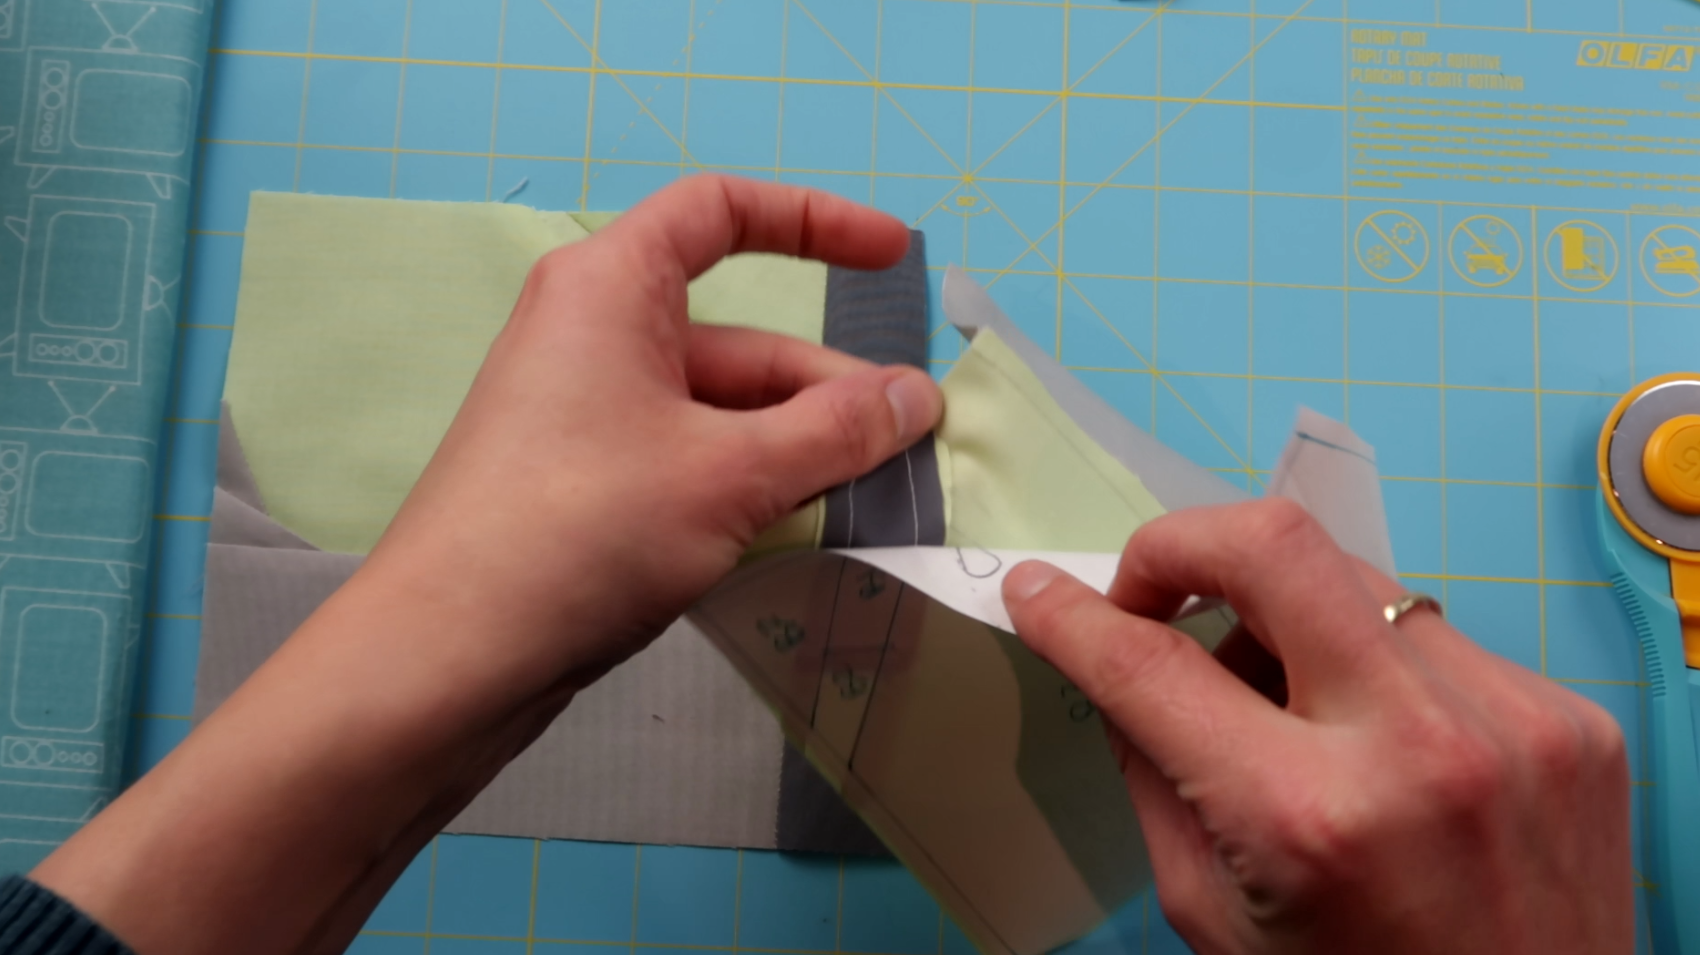
In the picture below I pealed the freezer paper back a little to show you the seam. You should leave the paper attached to the fabric and just fold the paper open.
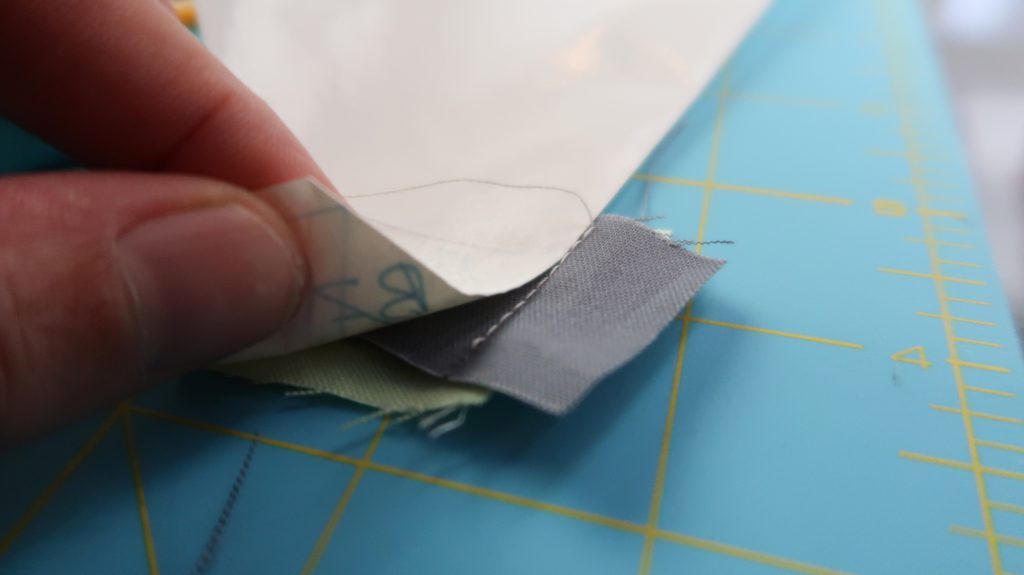
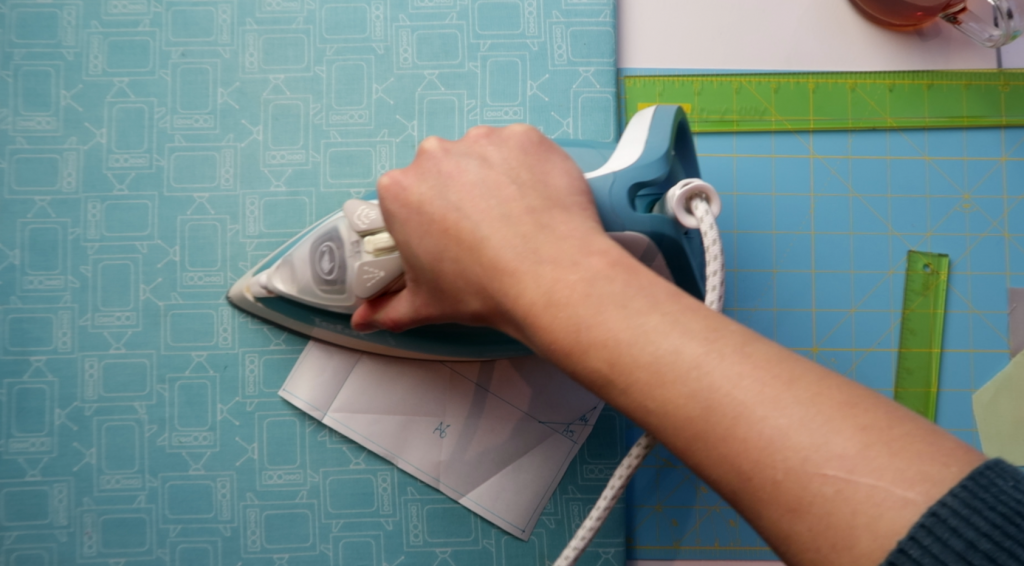
- Fold the paper open, and fold the fabric open. Finger press the fabric and then give it a press with you iron to stick the paper to piece A2.
Tip: Make sure not to touch the glossy side of the paper with your iron, that will make the paper stick to your iron.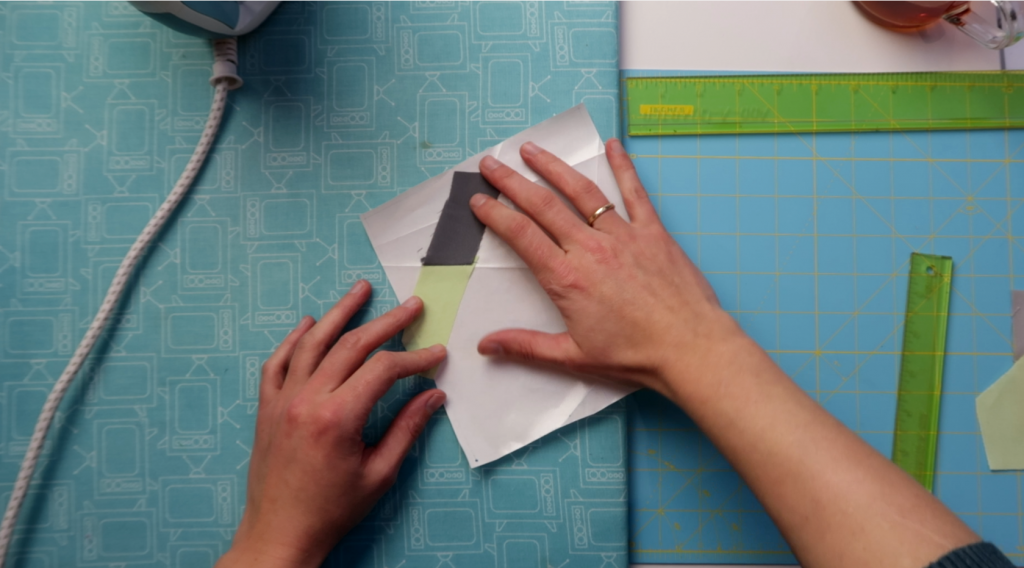
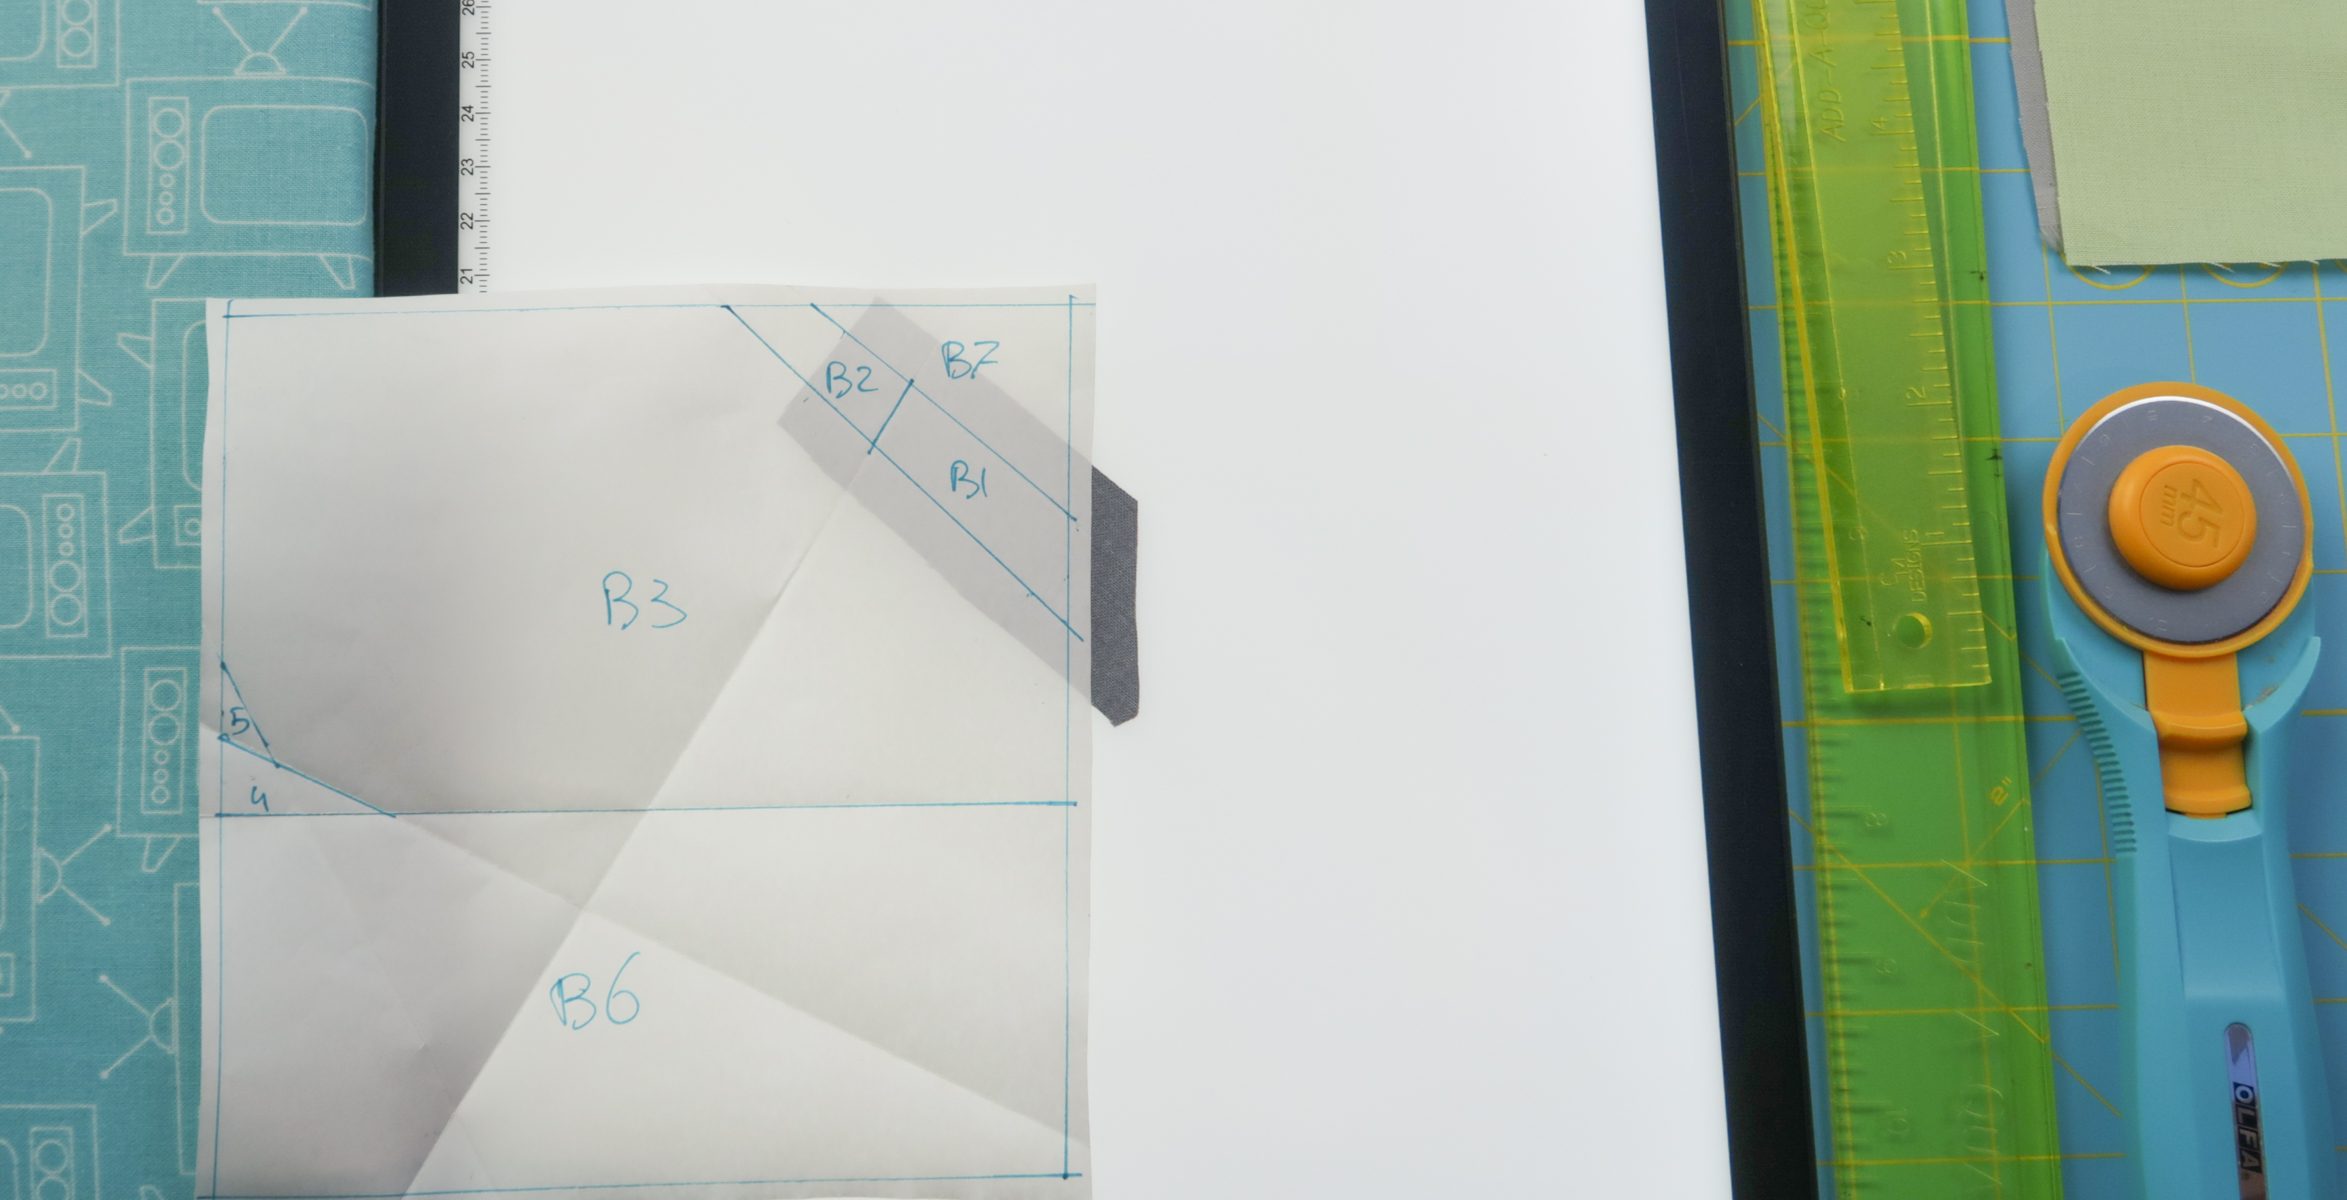
- Fold the paper back on the line between piece A2 and A3
- Take your Add-a-quarter ruler, or your normal inch ruler, and place it with the 1/4 inch mark on the fold of the paper. Trim off any access fabric.
- Place fabric piece A3 under the A3 piece on your folded back pattern. Position it like you did in step 3. (If you’re a bit puzzled at this point, check out the video for this row, or my other video on the freezer paper technique, or join my Foundation Paper Piecing Course)
- Now sew along the fold in the freezer paper and there you will have your third piece added!
- Fold the paper open, fold the fabric open, finger press it and then iron the fabric to the freezer paper. Give everything a good press from the back of the freezer paper.


You can now continue adding all the other pieces by repeating steps 6 to 10. The steps are the same for all the pieces you are going to join, no matter their shape or size.
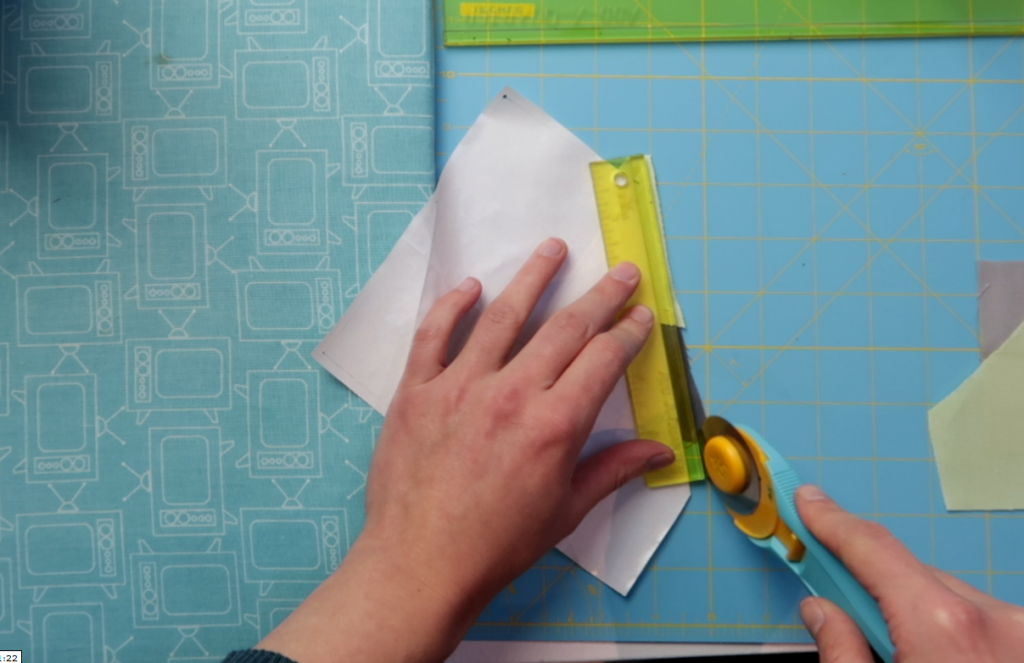
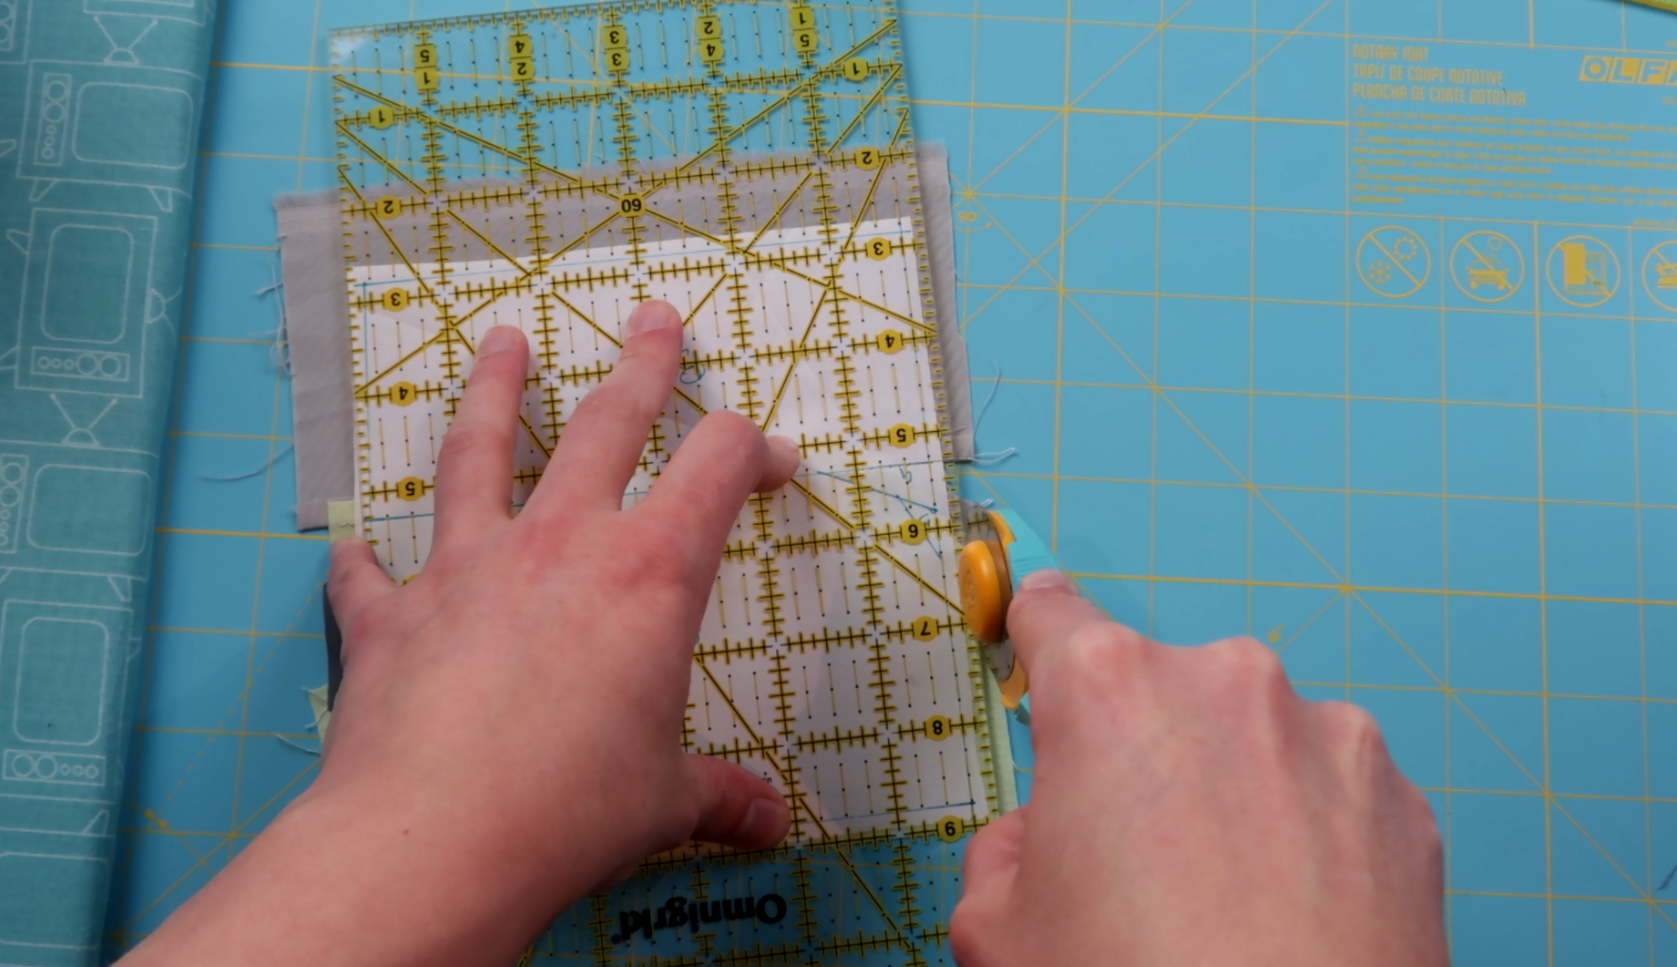
Squaring up your section
When you finish you first section you are going to square it up. Cut all around the pattern piece leaving a 1/4 inch on all sides. This is the reason why you should cut your freezer paper pattern with less than a 1/4 inch around it, so you don’t have to cut through paper.
Peal away the freezer paper aaaand you’re done with your first section! Now you can repeat these steps to make section B and C.
Make sure to square up the sections before you peal away the freezer paper.
Putting the blocks together
Now you’ve finished all the sections you can put the blocks together. We cut our sections with a 1/4 inch seam so we can put them together using a 1/4 inch foot on your sewing machine.
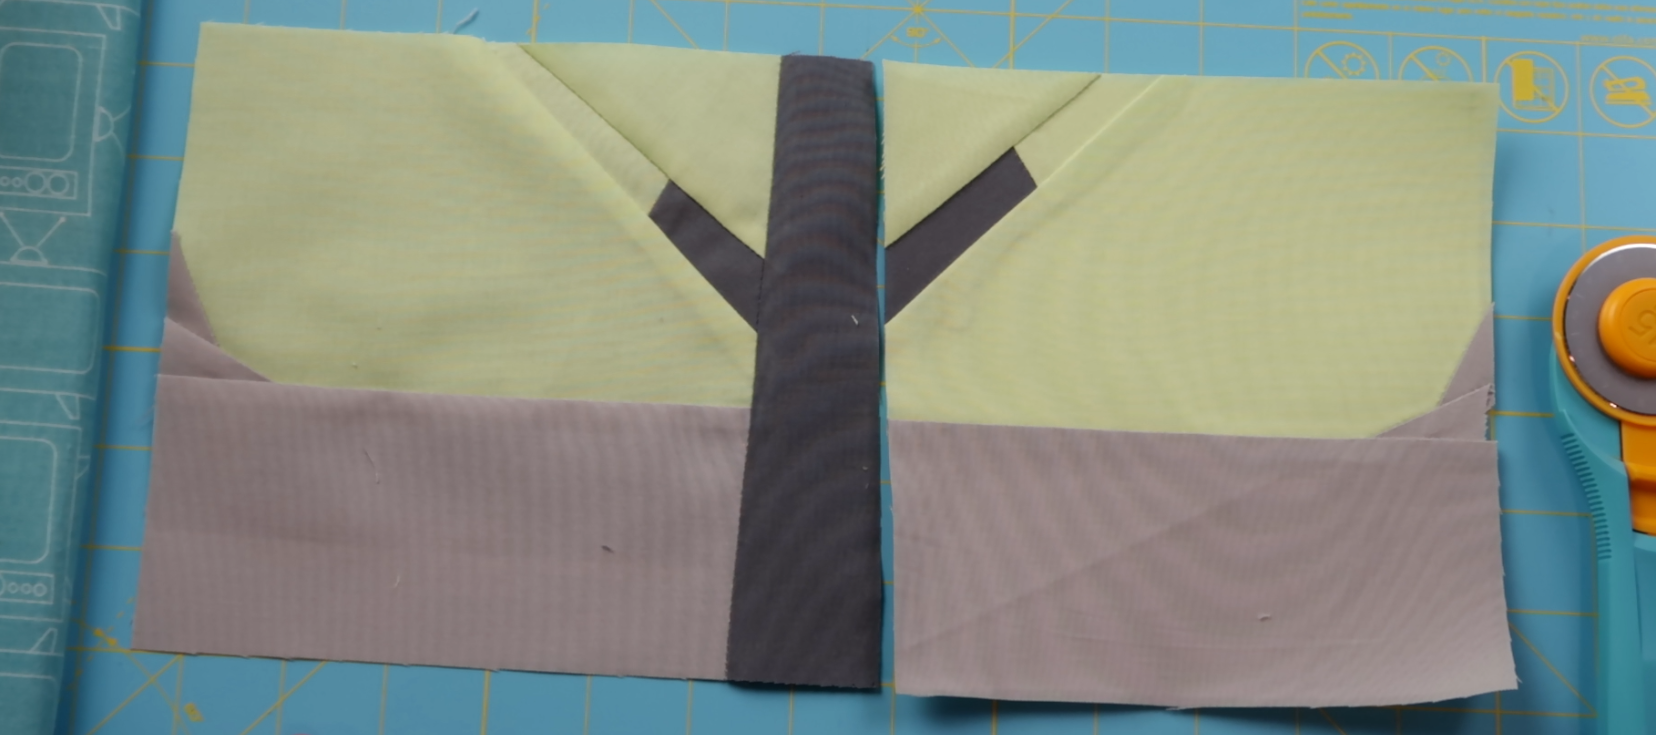
First sew the bottom parts together, sections A and B. Then sew section C to section AB.

Tadaaaa!
And there is your first block finished!
Was it your first time trying foundation paper piecing? How did it go? Let me know in the comments below if you have any questions. You can share your trees with the hashtag #onetwotreeQAL on Instagram of share them in the Facebook group. I’d love to see how your trees are turning out.
I’ll be back in two weeks with our next tree friend!
Irene
Here are my Flynn blocks. I have never done paper piecing before and I love it. I feel like I can make anything! Thank you Irene.
I’m a little late to this ballgame, but I’m here now! I am new to quilting and want to learn properly. Thank you Bernina and Sugaridoo for doing this. Here is my first Flynn. A quilt shop here went out of business during COVID, so I bought several pretty batiks. Decided they would make lovely trees. Wish me luck.
Yay!!! It works! Question, why not use FPP to see the sections together?
The first block I fpu d quite difficult as I had never used this technique before but each block I did I found it easier 🙂
Finished my first 4 Trees (Flynn). Completely new to me foundation paper piecing. Thank you Irene for your very clear tutorial. A few mistakes and a bit of undoing on the first tree, but after that it went very quickly . Really good fun.
Learning learning learning & Flynn 4 sections completed. Also added to the Community New Project One Two Tree. [should I be adding to the 2 places!]
I did a sample block with freezer paper, and I did not prefer it. I usually use actual foundation paper, so I will do my actual blocks that way. I found it too hard to see where to place the fabric and it was hard to press since I didn’t want to ruin my iron. At least I have it a try.
Two completed and on design wall to keep me going to finish the four. A good challenge for the new year I am so looking forward to progressing through the stages from start to finished quilt. I can see already that I have a lot to learn. Yay! even using blog and uploading picture is a learning curve. Note to self shrink photo first.
C’est ma 1re expérience avec le papier congélation. Yeah ! J’ai réussi alors j’ai hâte aux arbres suivants.This is my first experience with freezer paper. Yeah ! I succeeded so I can’t wait for the next trees.
I’ve made the first two Flynn blocks. I really like the freezer paper technique, it took a bit of getting used to but once I got my head around it it’s great, no papers to pull out at the end. Thank you for the tutorial.
My first block! It’s a tad short of 15.5 inches so I may have to add a little extra sashing. And some seams are less than a quarter inch. When Irene said to cut your pieces bigger, you definitely should cut them bigger than you think you need to. I was tempted to just call this a practice block but I really like the color. I’m using a fat quarter bundle of Gelato Ombre by Maywood Studios with cerulean background from Designer Solids by Free Spirit Fabrics. Thanks, Irene, for good directions through the video and blog – I promise to follow all your directions for future blocks.

That fabric 😍
I love your colour scheme, especially the tree truck.
My kits are still lost in custom Covid mix up but I am pulling fat quarters and stash ready to practice on Flynn! Wish me luck!
You are super smart to practice! Good luck!
Good practice sewhappy43. A mini Flynn quilt won’t go wrong with your stash until your kit arrives which I hope is soon. 🤞🏻
My kit has still not arrived but im so anxious to join in that I put together some fabrics from my stash. A downside of my darker fabrics is its difficult to see the fabric placement. I’m just cutting larger snippets and having fun!
Good practice toninh. Hoping yours arrives soon too.
please clarify what portion – size and from which end – we save back from the background grey?
Hi Rebecca, You will need to keep about 40 inches fa fabric for the strips.
Irene mentioned in her video that the Bernini Blog would have instructions on cutting some strips from the background fabric which she suggested we do before cutting out the pieces for the FFP pieces. I cannot find these instructions in this Blog, can someone help me?
Dear Elisabeth,
You can find the instructions for the Happy Scrappy quilt backing in this article:
https://blog.bernina.com/en/2021/12/happy-scrappy-quilt-backing-one-two-tree-quilt-along/
Enjoy!
Kind regards, Ramona from BERNINA International
Im so sorry but I am confused ,on you tube you said about about cutting the sashing/big pieces first , scared to start now, is there a cutting diagram?
Like Rachelle, I would also like to know the colours that are used for the GREEN/TEAL Group. I’m thinking possibly the for 3 of them – Honey Drew, Clover, Candy Green, but really unsure.
Can you list out the actual color names for the green palate that we are using this round? My screen looks very different than my actual fabric.
Hi Rachelle and Ippy, Yes, thank you for the suggestion. It is Honey dew, Clover, Candy green and Ice Frappe for the Green/Teal kit.
Thank you.
Many thanks Irene.
Colours can look so different on screen.
Background fabric requirements – 2.75 yard. When you say to set aside 40″ fabric for the background sashing, do you mean 40″ by width of fabric, so 1 and 1/8 yard? I just want to make sure that I am reading this correctly. Thanks. So excited.
Hi Patti, yes that is correct. 40 inch times width of fabric. That is indeed about 1m or 1.1/8 yard.
hi irene, i have a printer that can print A3, and I’m sure many would have access to the same out there, would it be possible to get the pattern without the joint which could be printed on a A3 or legal size paper.Thank you Bunty
Hi Bunty, I’m sorry, but for this quilt along the patterns are all designed on A4 paper and won’t be available on A3.
Hey Irene, no worries at all, maybe something worth looking into in the future. but not sure how many it would be useful for. planting some trees this weekend using my sewing match. whoop whoop….