 BERNINA Corporate Blog -
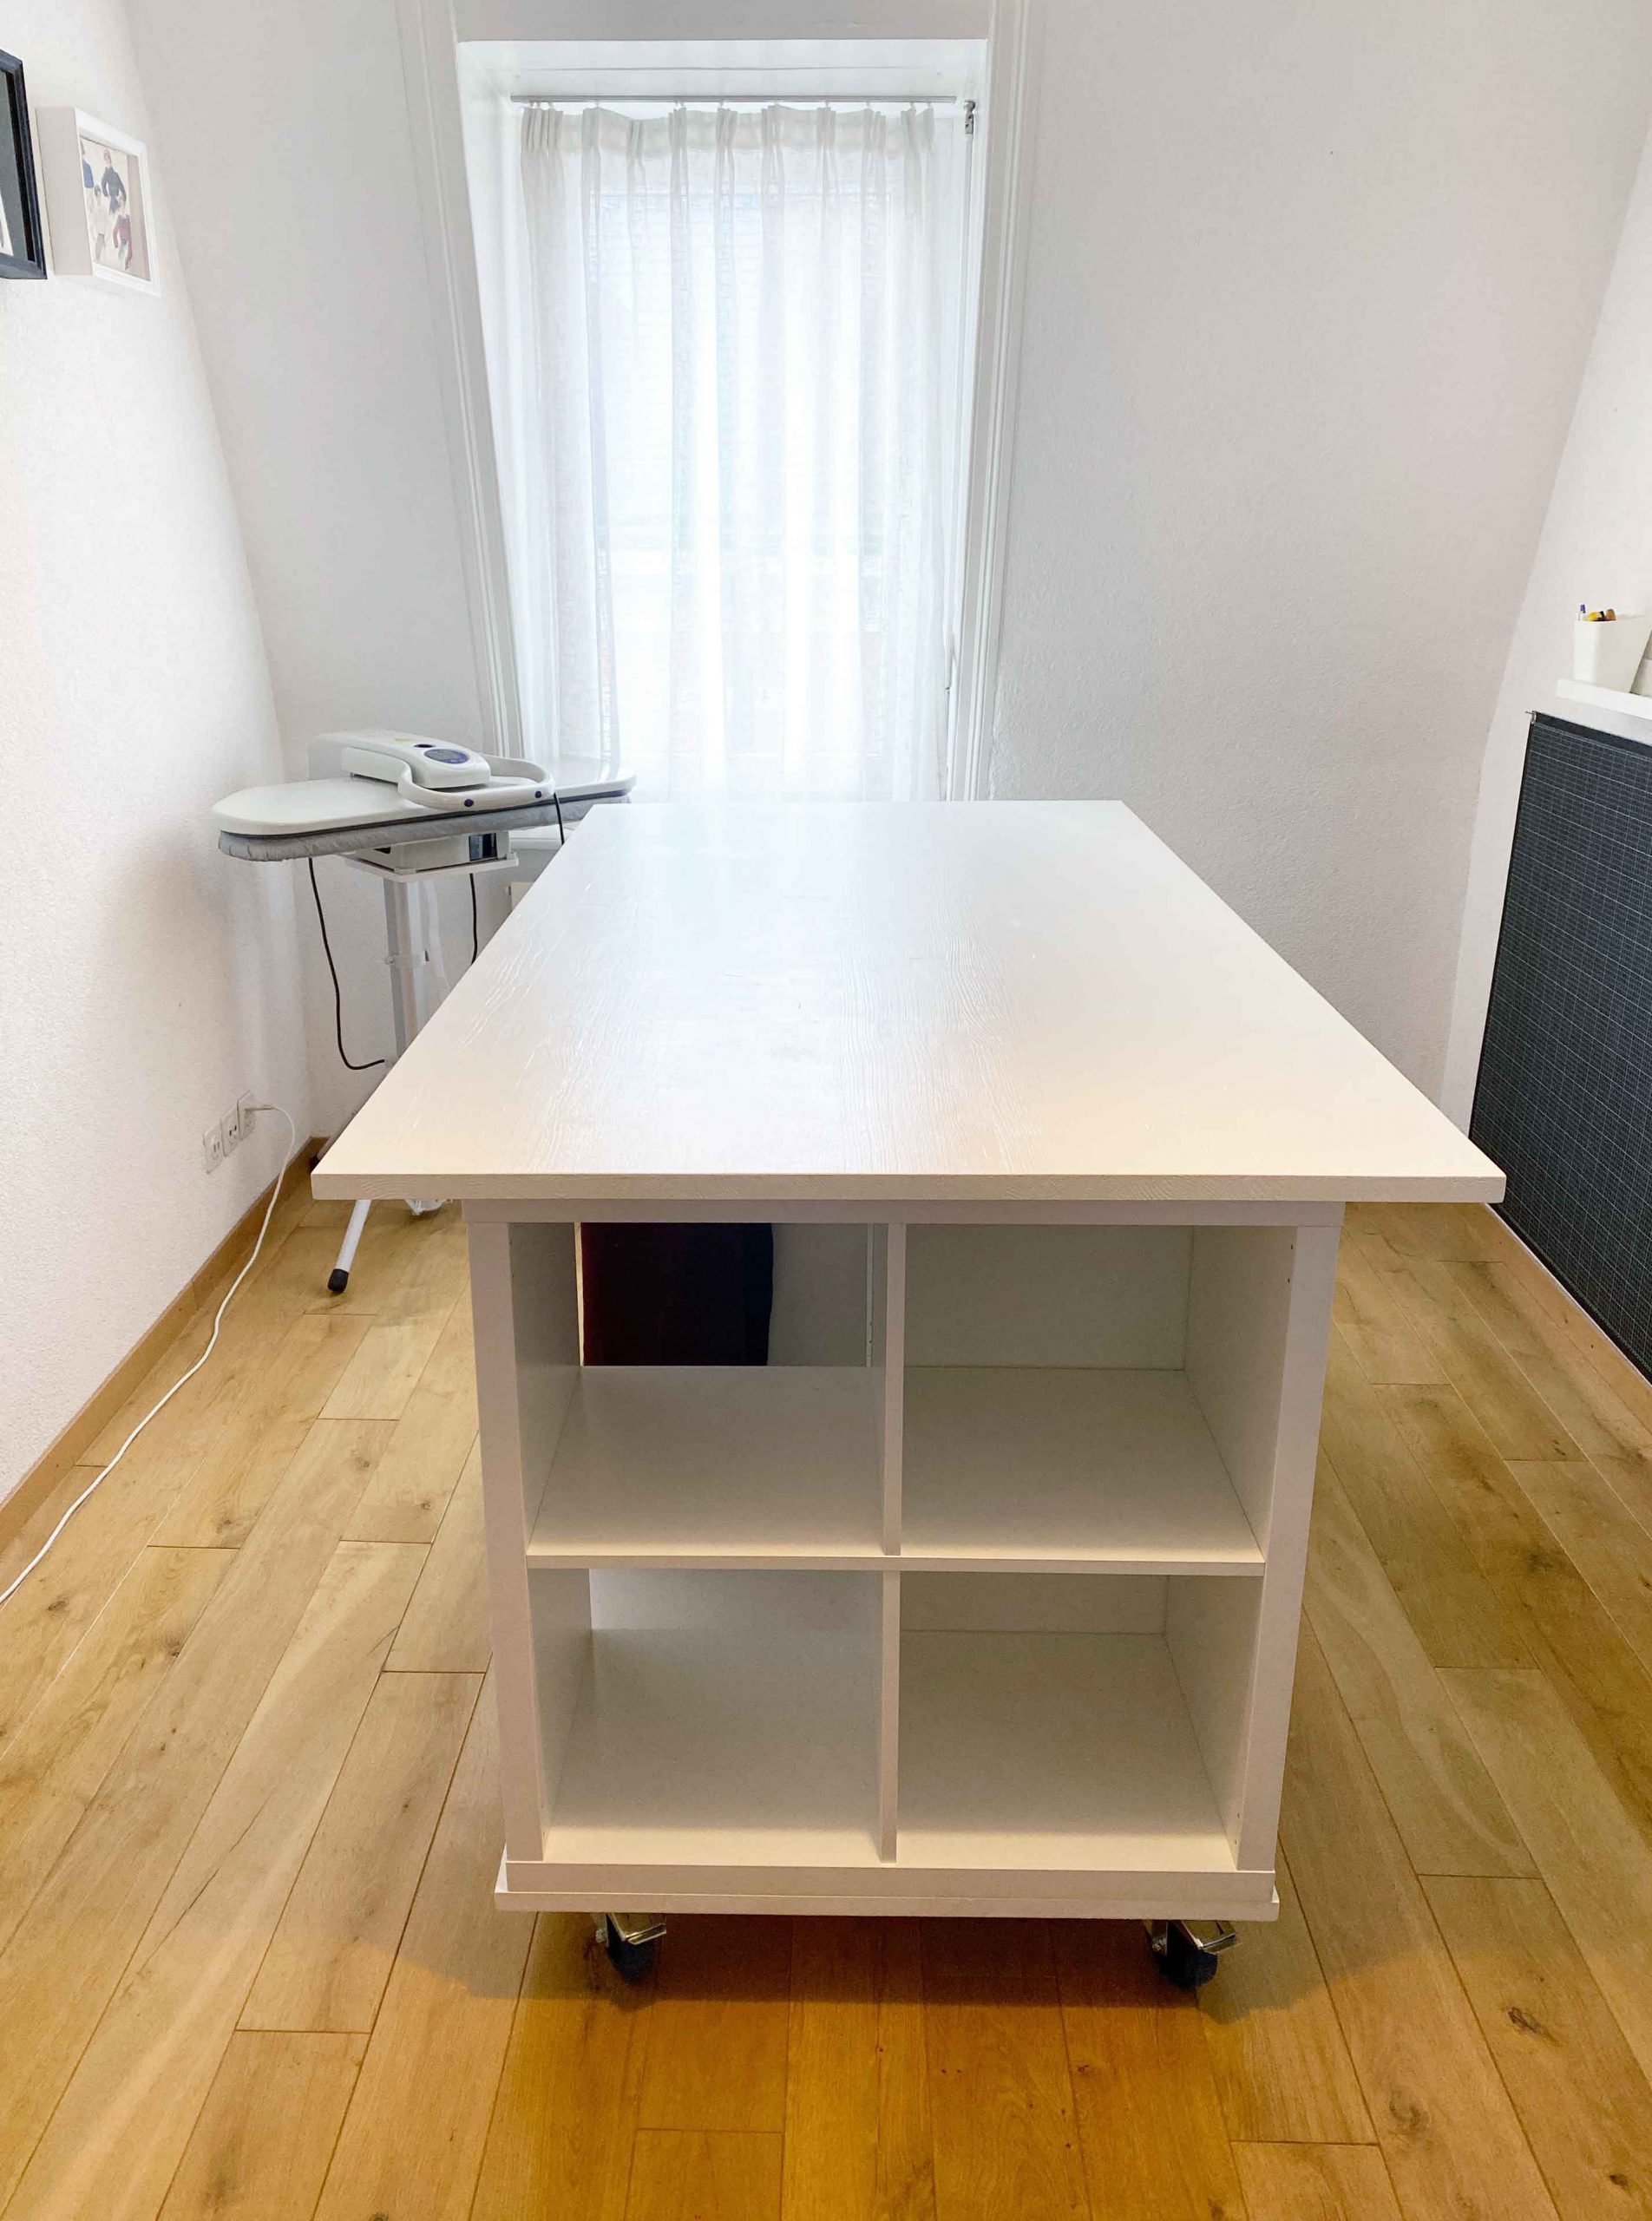
Idea
Ever since I’ve been able to sew I’ve been thinking back to those large tables we had back when I was in primary school in home economics.
I’ve picked up sewing again in 2017 and much to the annoyance of my back I have had to cut out larger projects on the floor. Among other things, this was one factor which always kept me from sewing more frequently.
The floor has made way for a medium sized cutting mat and a fold-out table from IKEA. It was the ideal solution for a small space and sporadic cutting sessions.
And then? Well, I’ve taught my partner how to sew and one of the first things he said was “I can’t even cut out one pantleg on that mat”. So we bought a new custom sized mat that would neatly fit on our dining table. Of course I was over the moon with the new mat as well but slowly we stopped eating at our dining table and moved our dinners to our kitchen so we did not have to move the mat.
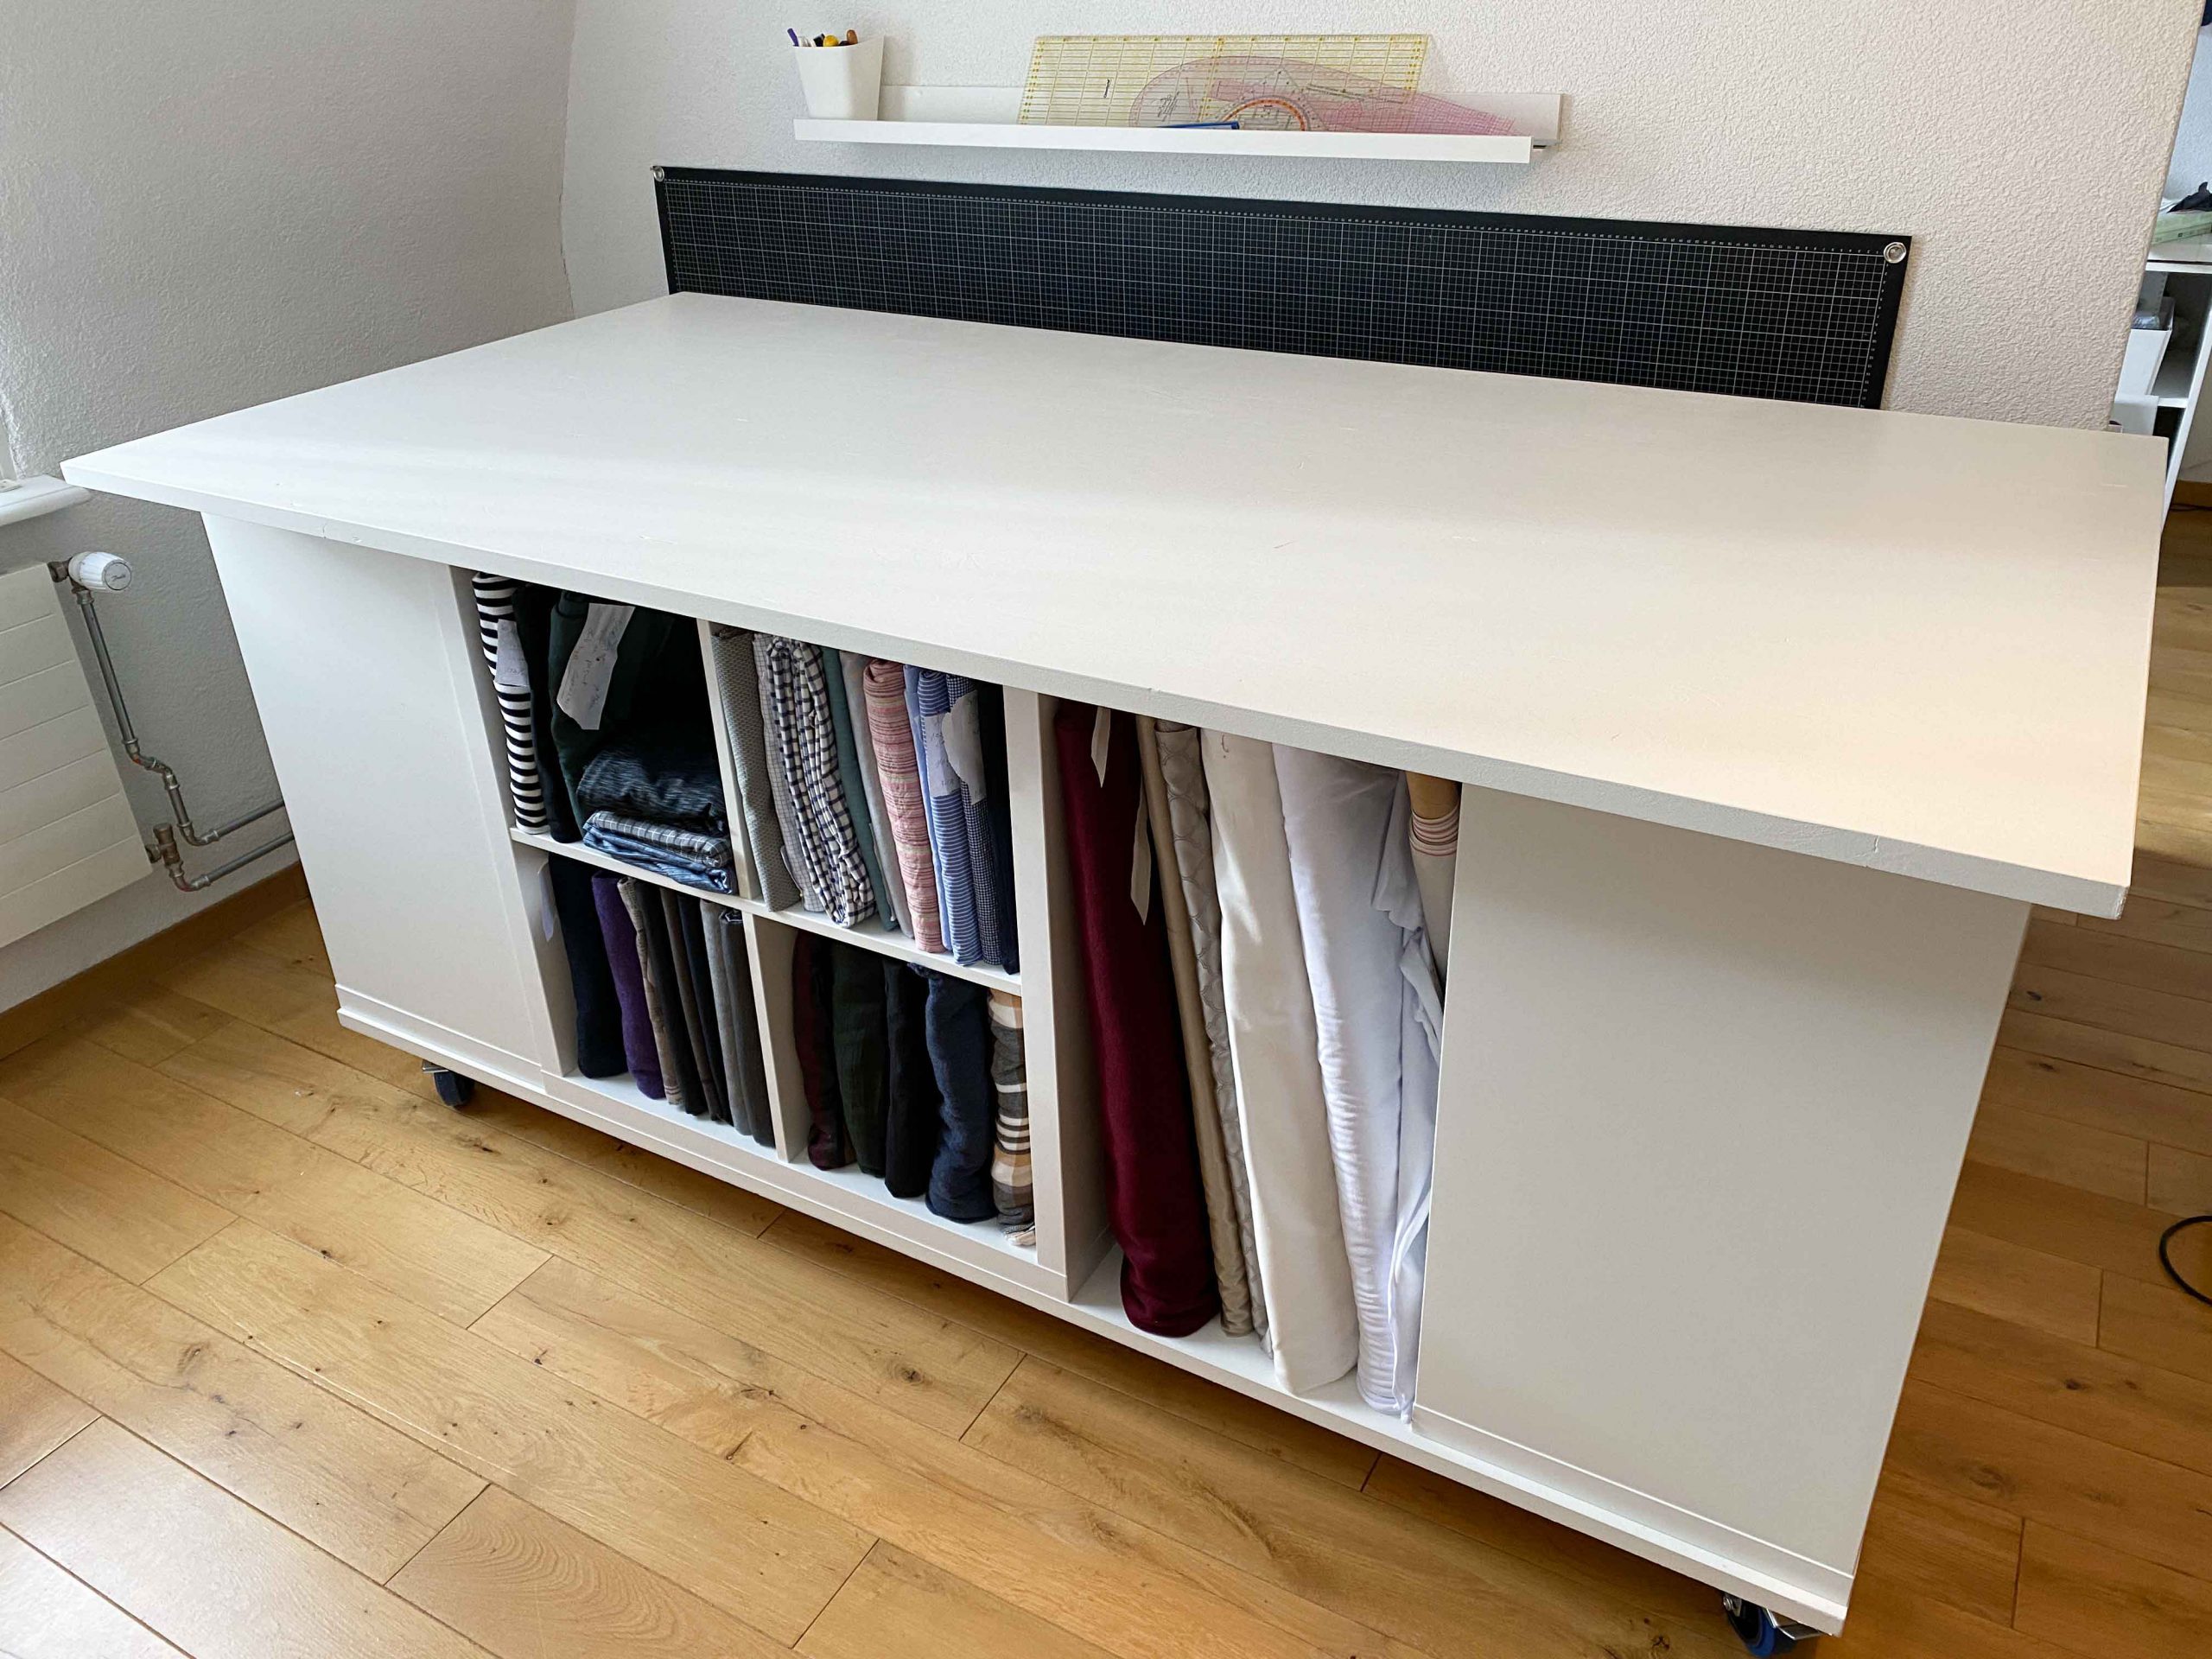
I’ve been daydreaming of a real “cutting table” with built in storage for a while and they have been popping up all over social media. Basically, you can use any type of storage you wish and construct a cutting table around it. I have even seen someone putting in drawer chests… So, if you want to make your own, it definitely doesn’t have to be as large as our table. You do you.
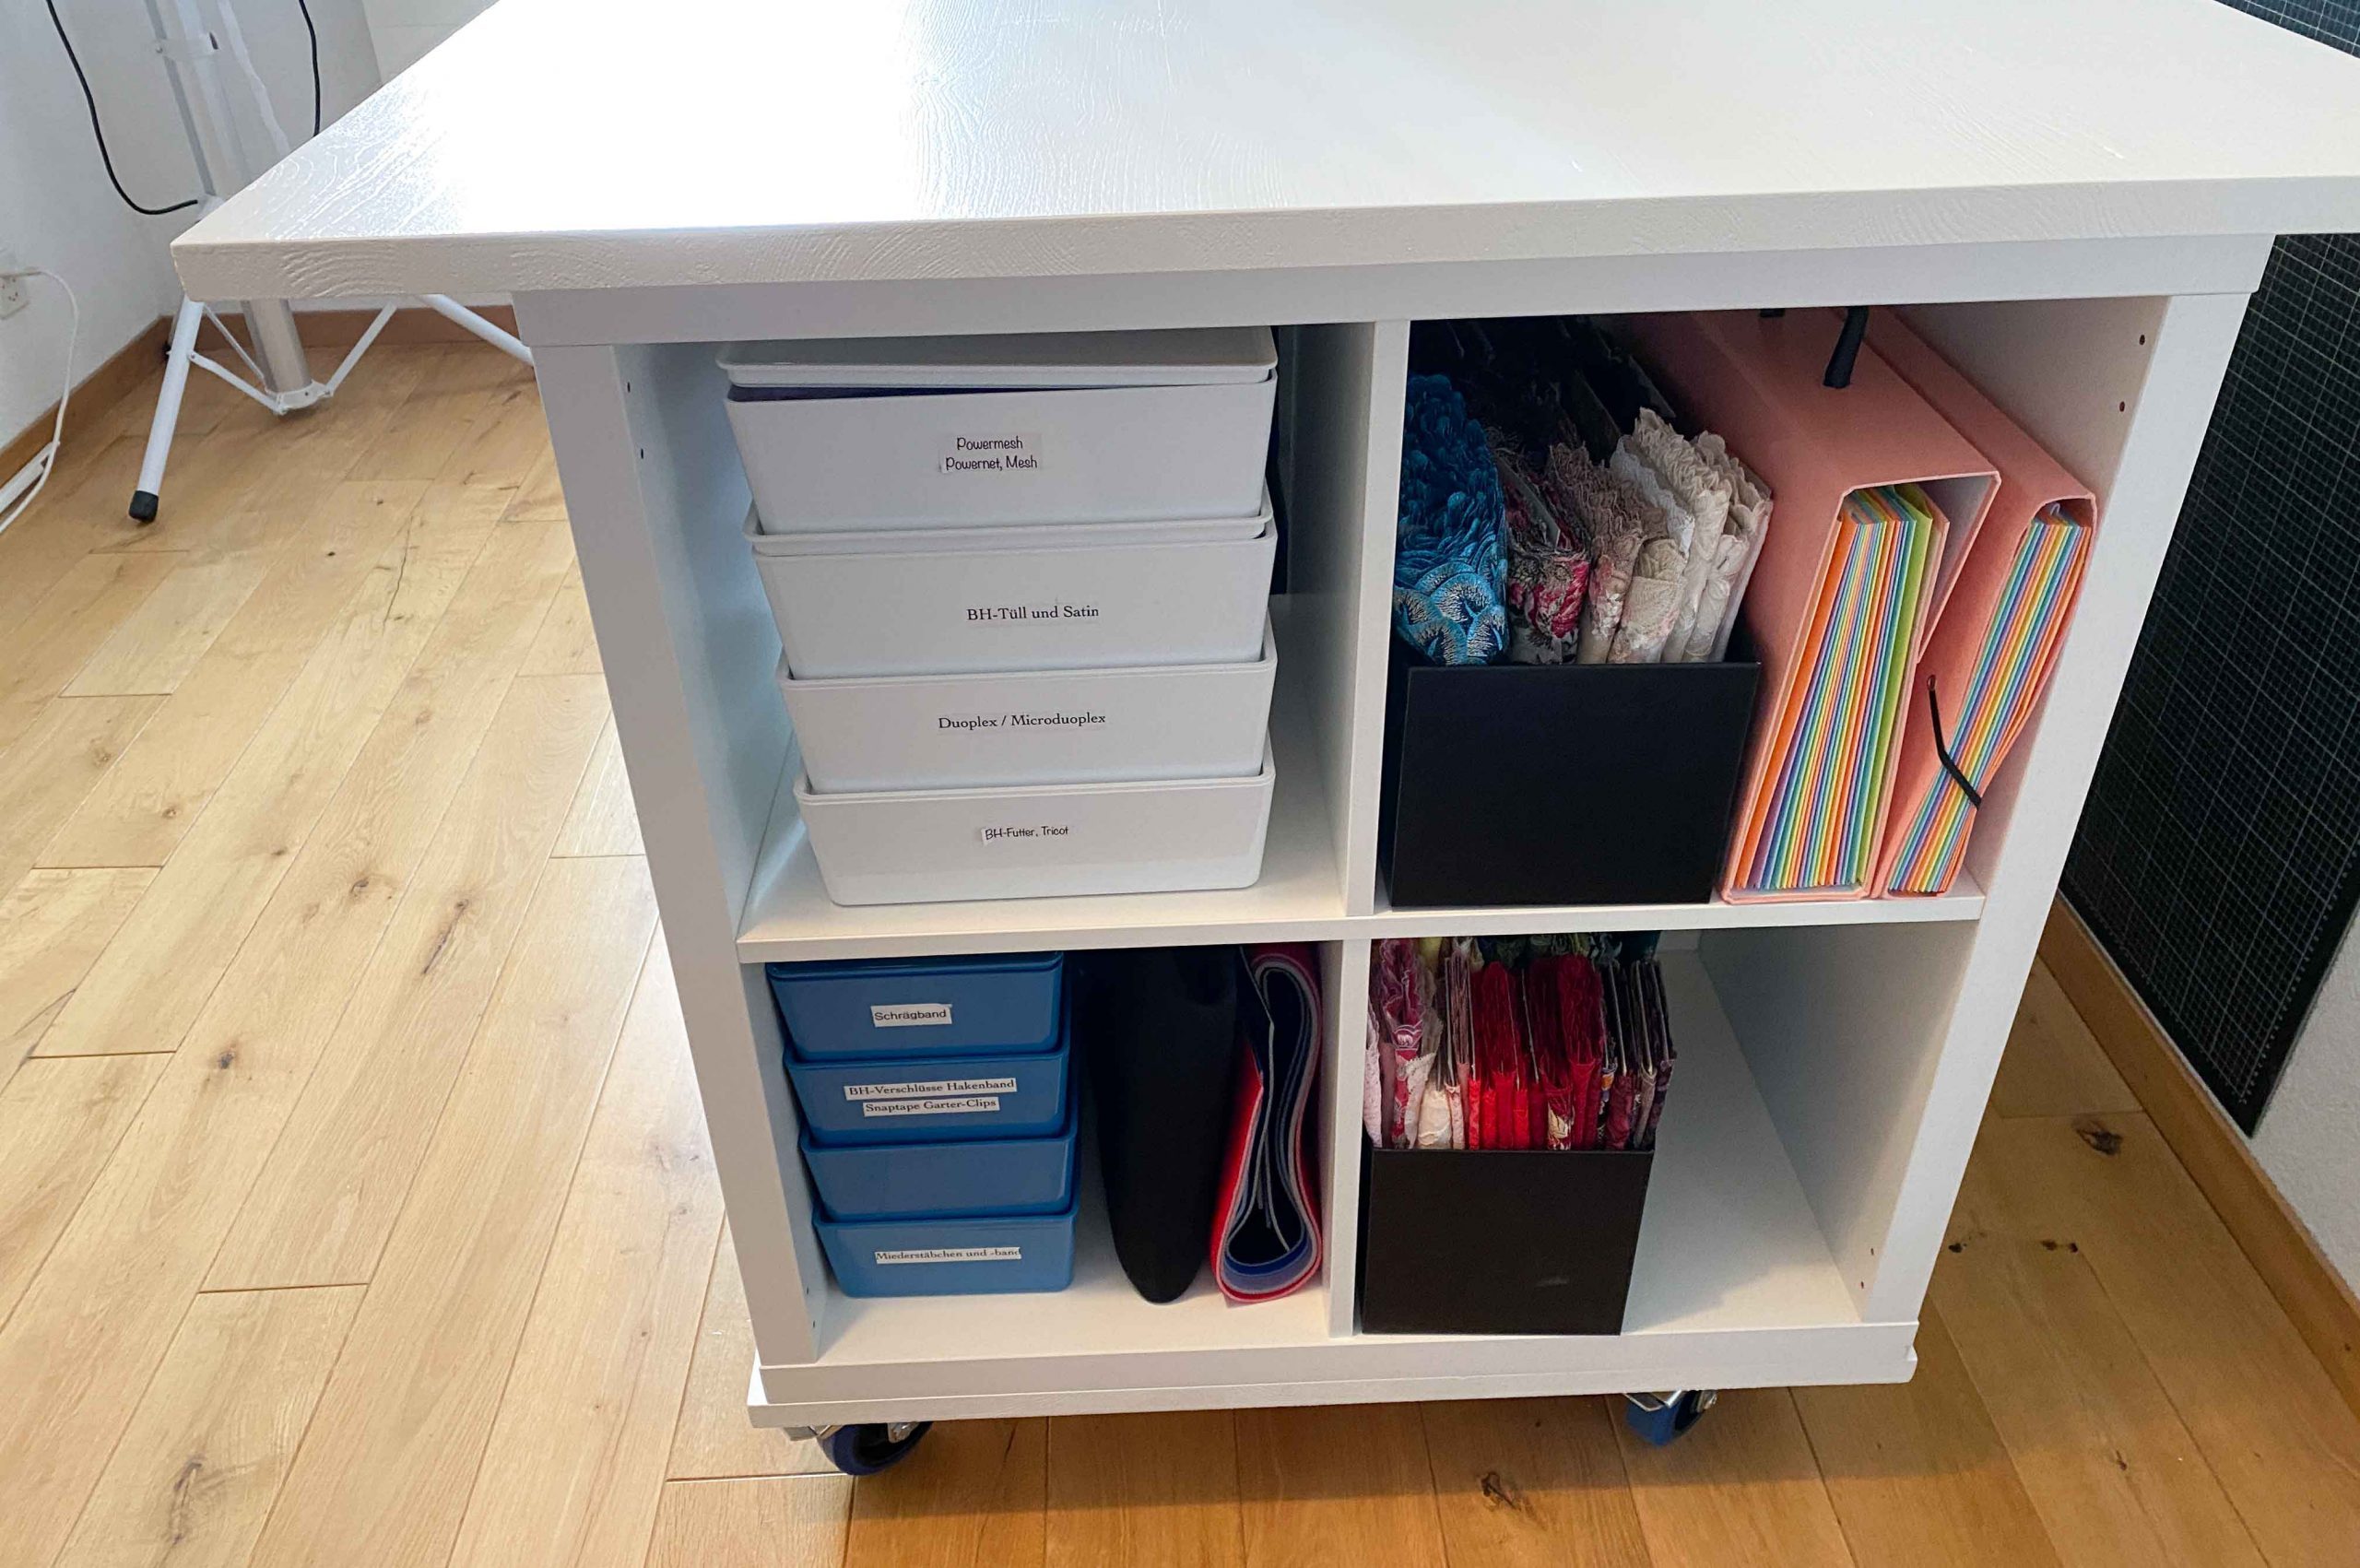
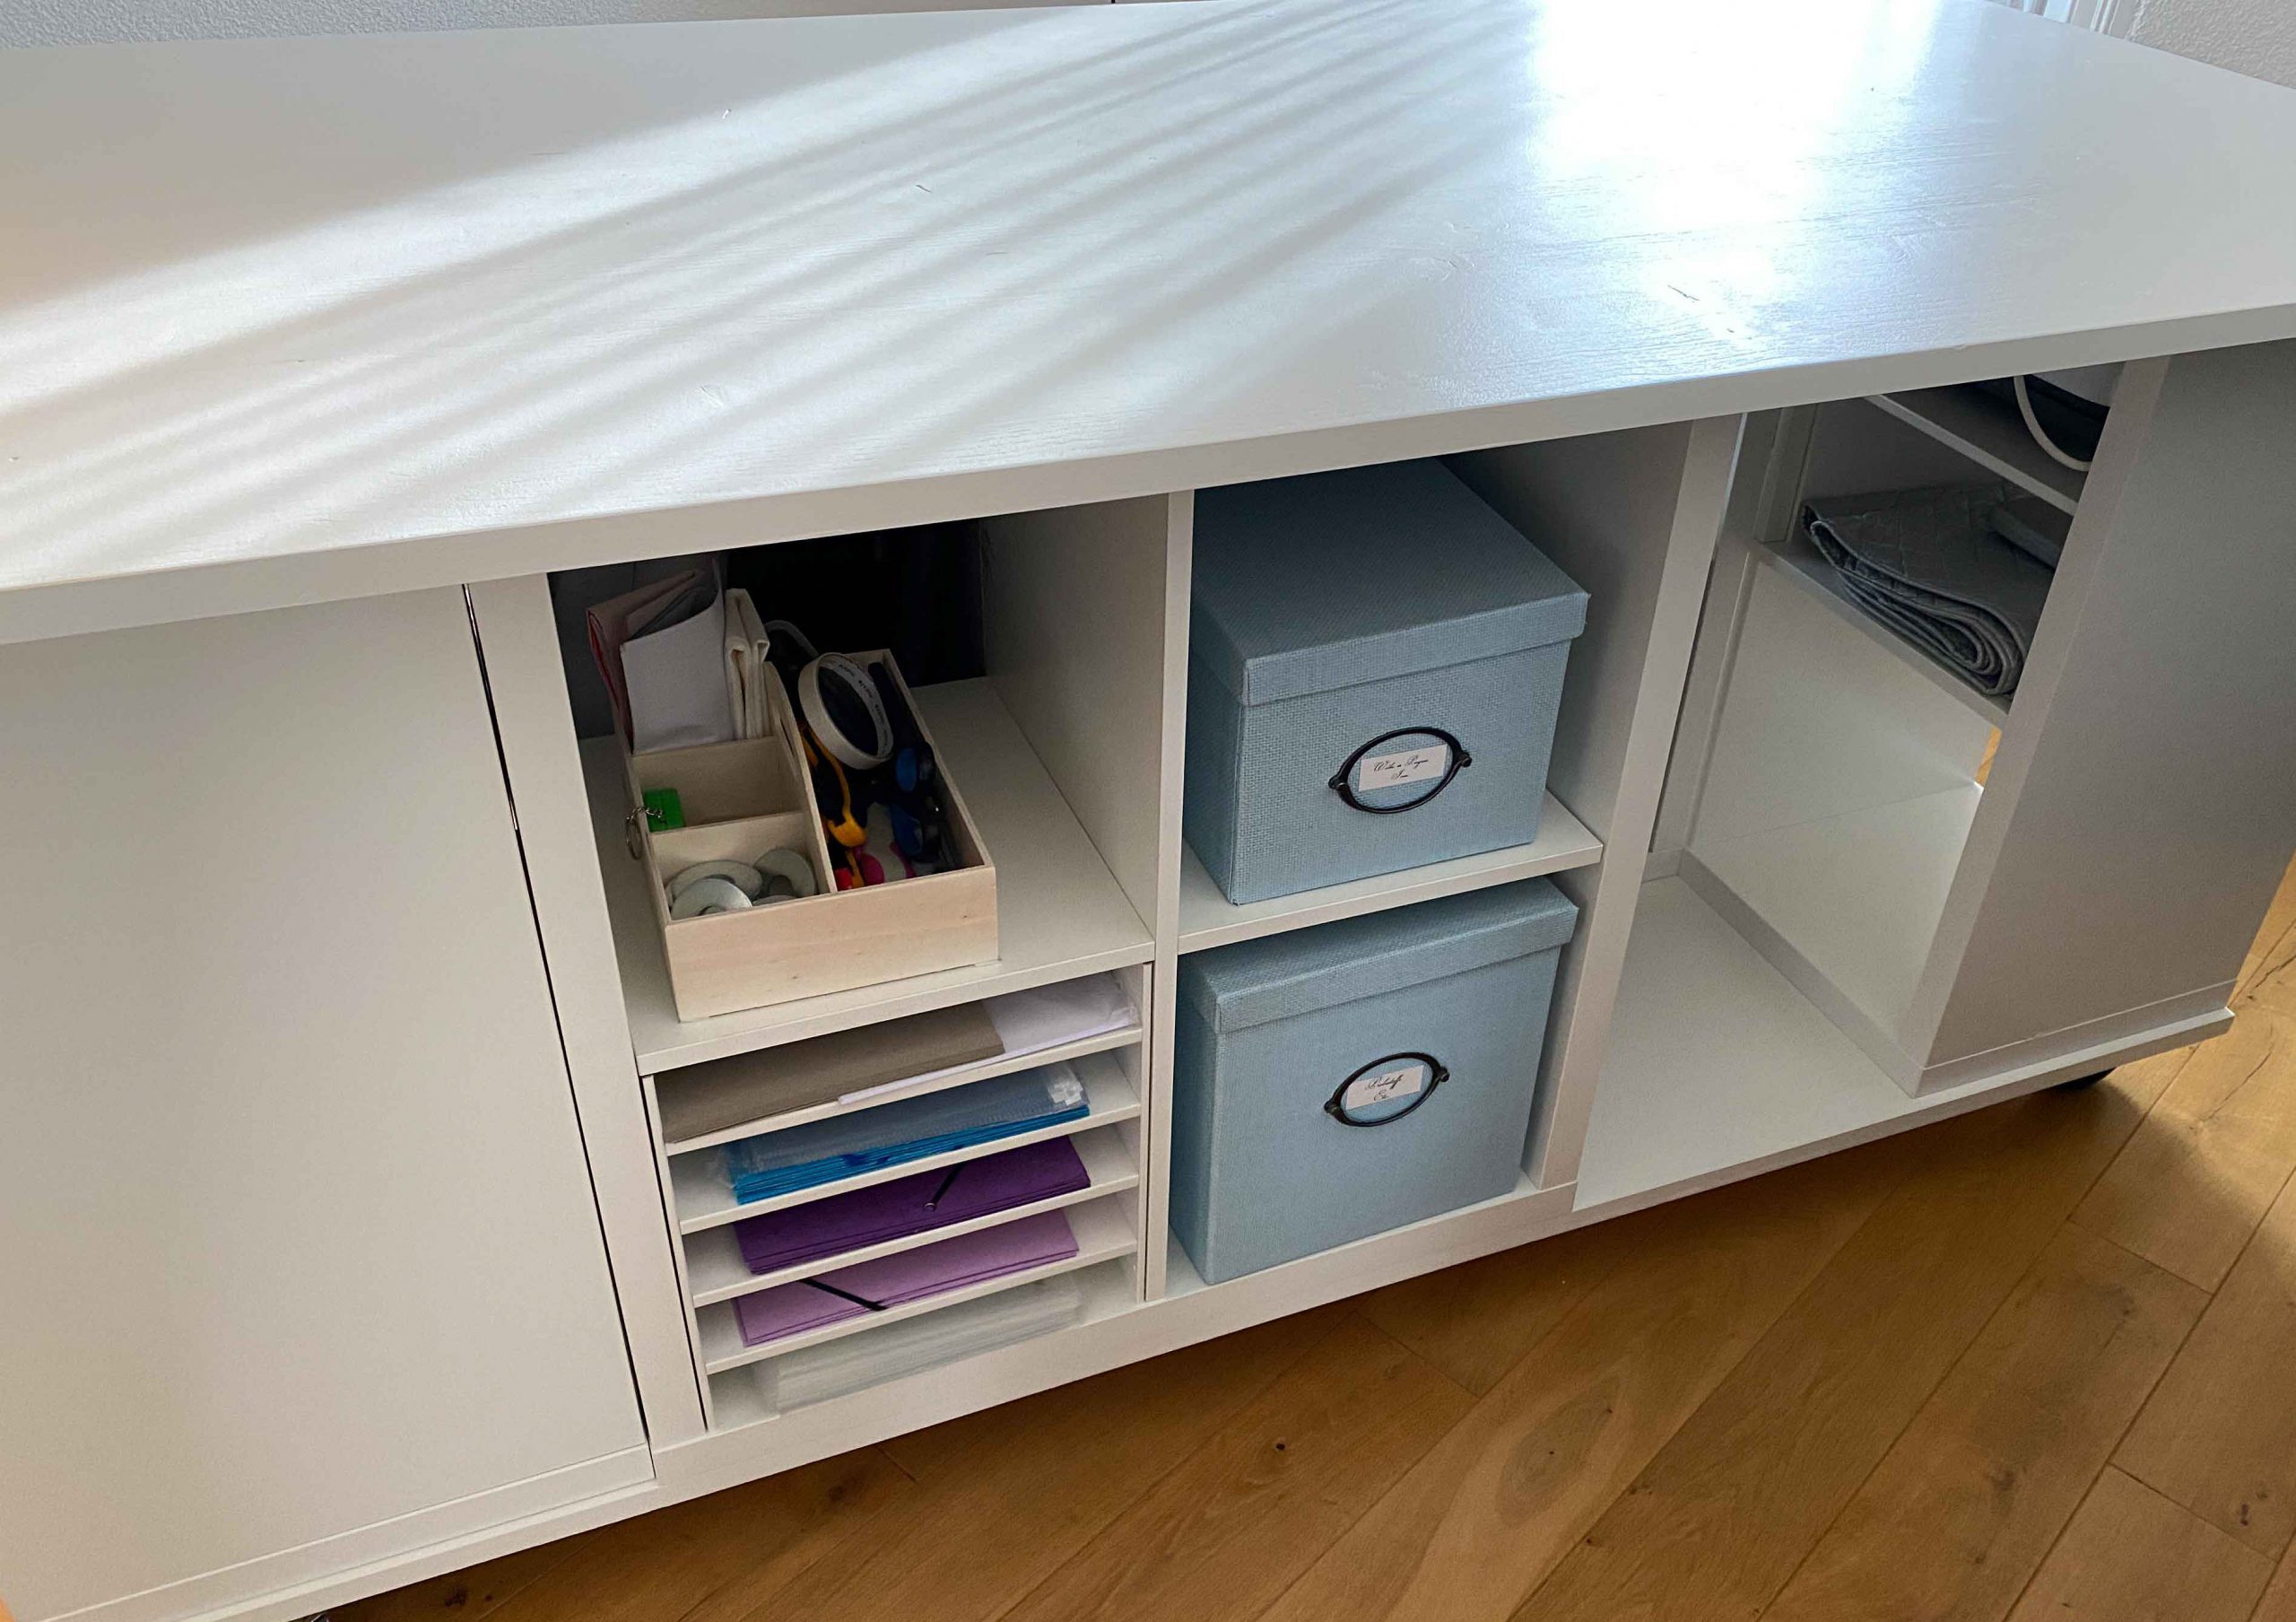
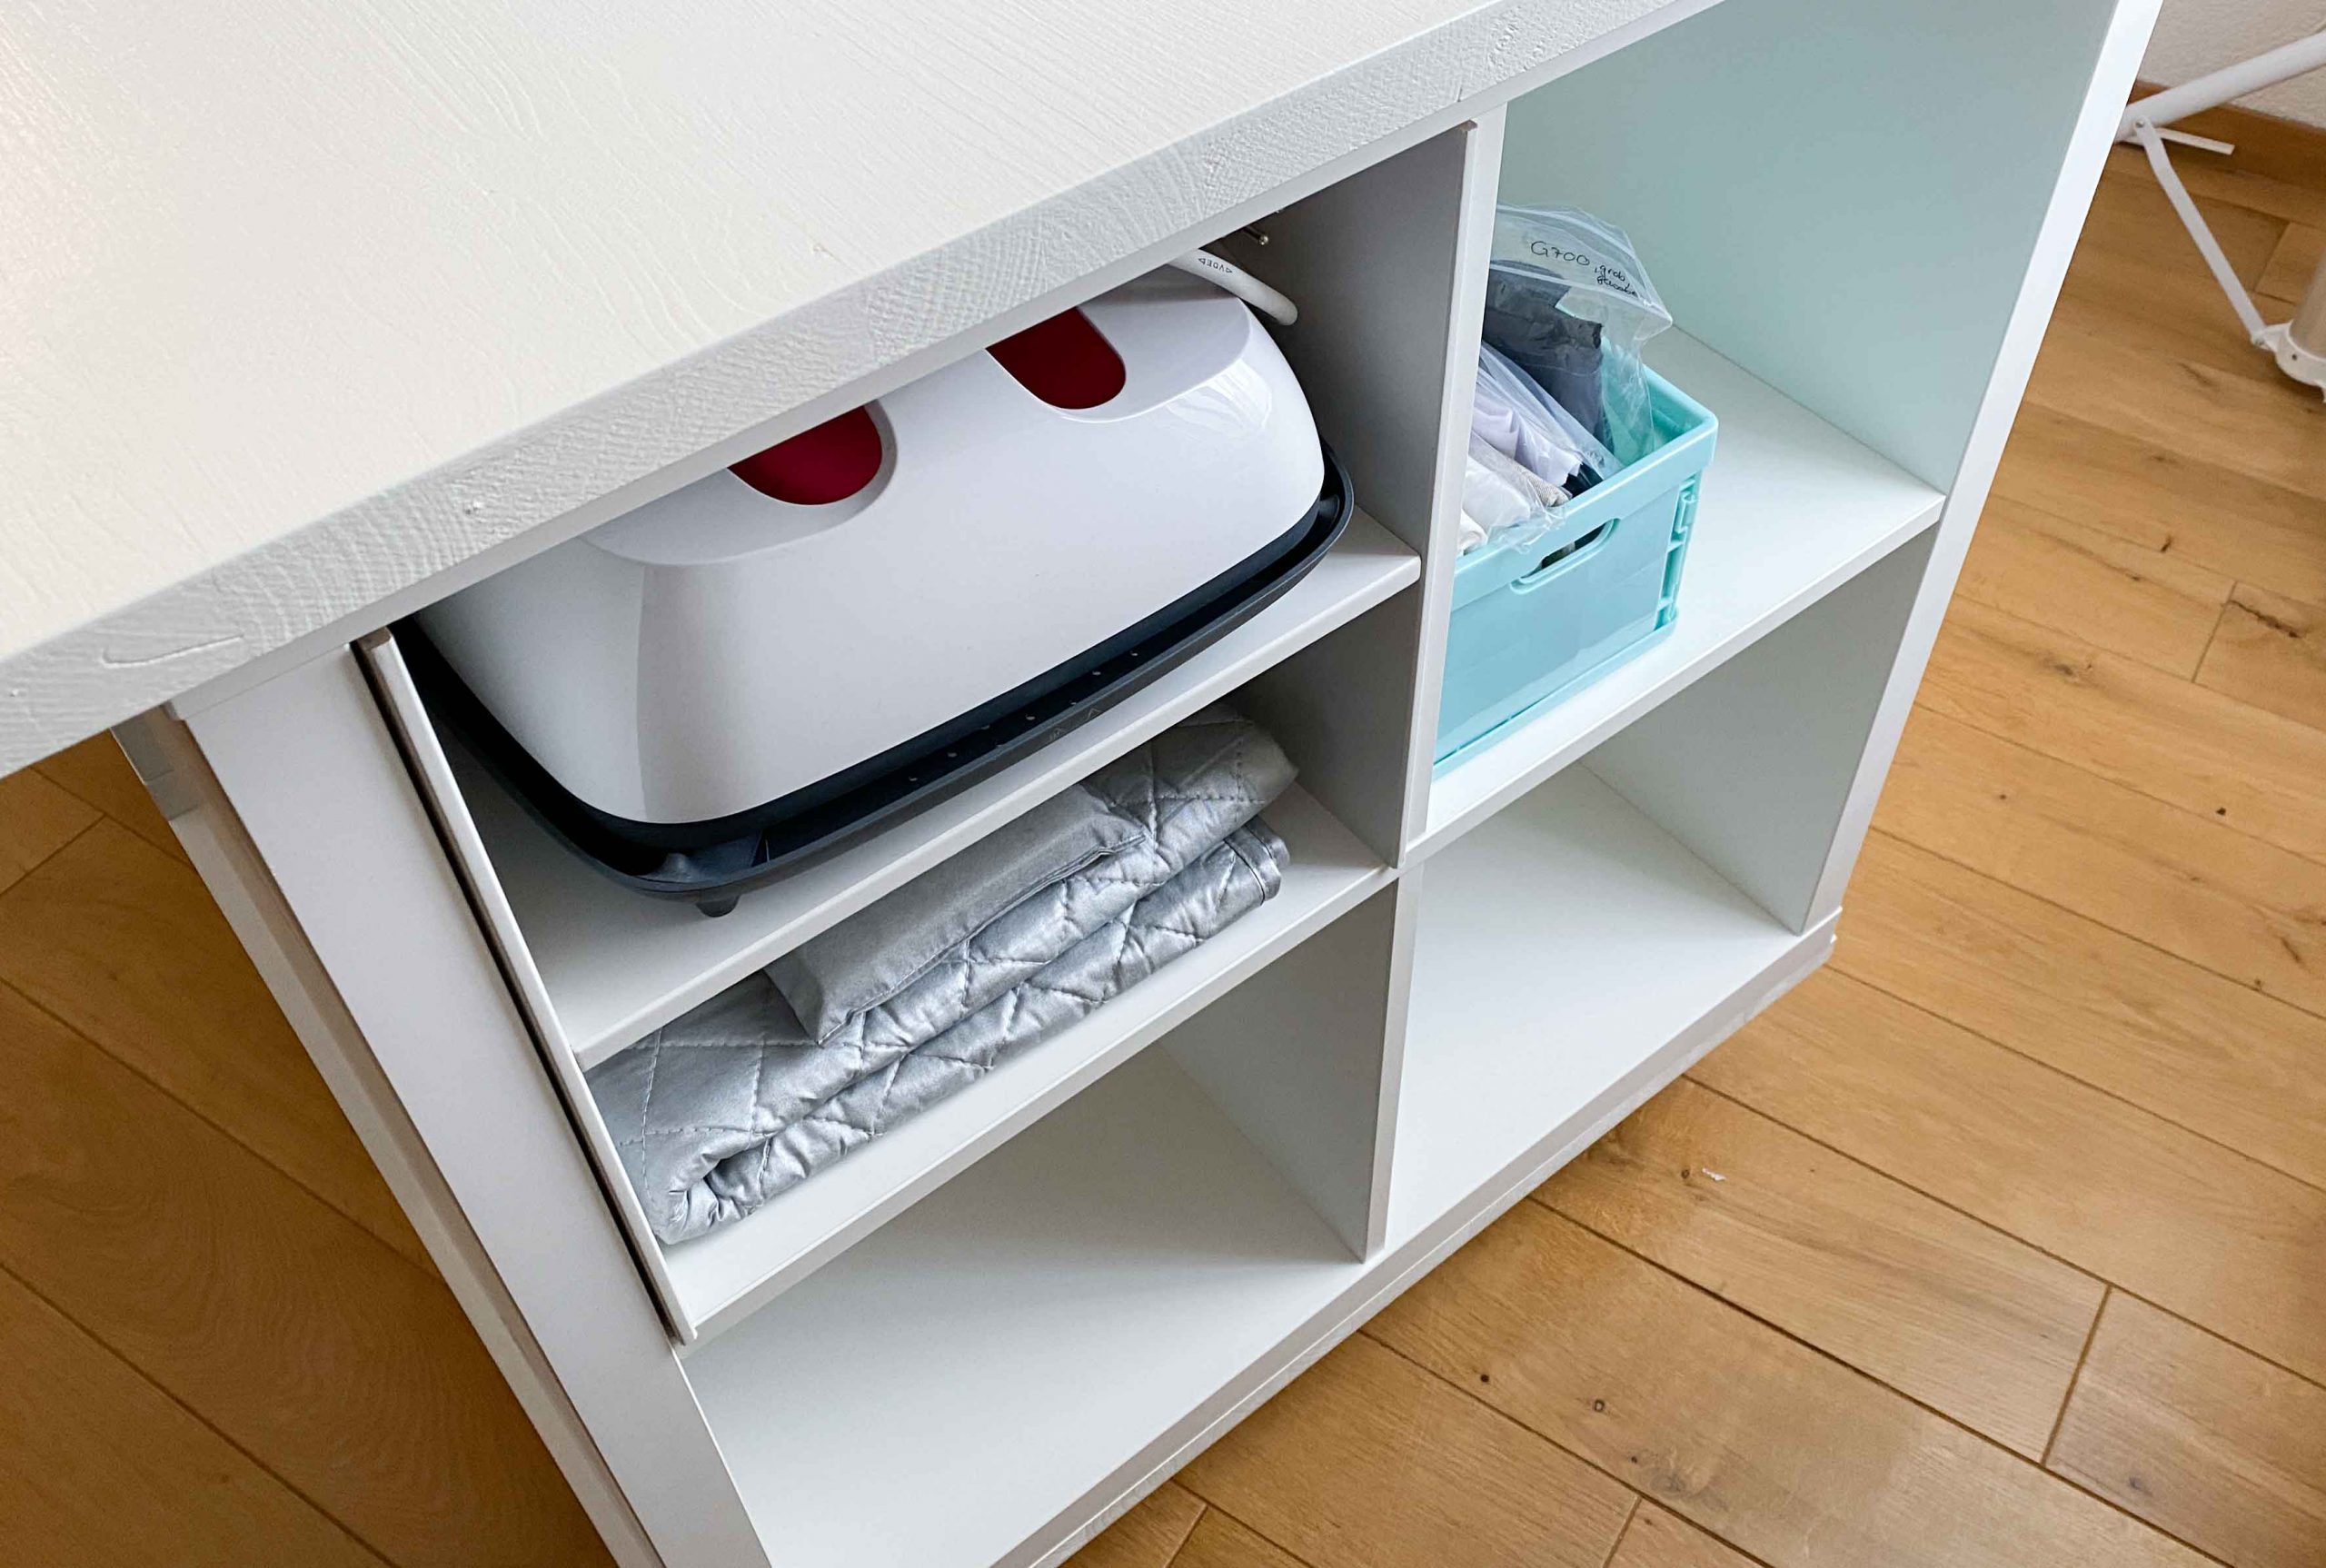
Our table size has been a given because of our large mat (and luckily, the space we have available). We decided on using four Kallax cubes from IKEA. It was important to me, however, that I could store bolts of fabric underneath the table so we “created” spaces between the shelves.

Since we had all the Kallax cubes already, it was easy for us to just position them as we liked and measured the base. As for height, we used our kitchen counter to determine how high it should be. We decided to land between 90 to 95cm. The Kallax cubes are 77cm high and we wanted real wooden and sturdy tabletops at the bottom and at the top. So the only way we would be able to influence the height, was the wheels. (In theory you could also put some pedestals under the wheels to gain some height).
Materials
- Tabletop, spruce, 24mm, 200 x 100cm,
- Tabletop, spruce, 24mm, 192.5 x 78.5cm
- 5 steerable wheels with stoppers, height 12.8cm
- 4 Kallax cubes
- White base coat paint
- White acrylic paint
- Sand paper
- Screws
- Angle joints
Assembly
First off we sanded the tabletops and removed all lint afterwards.

Then we applied a base coat to the top of the lower and on both sides of the upper tabletop including the sides of course.
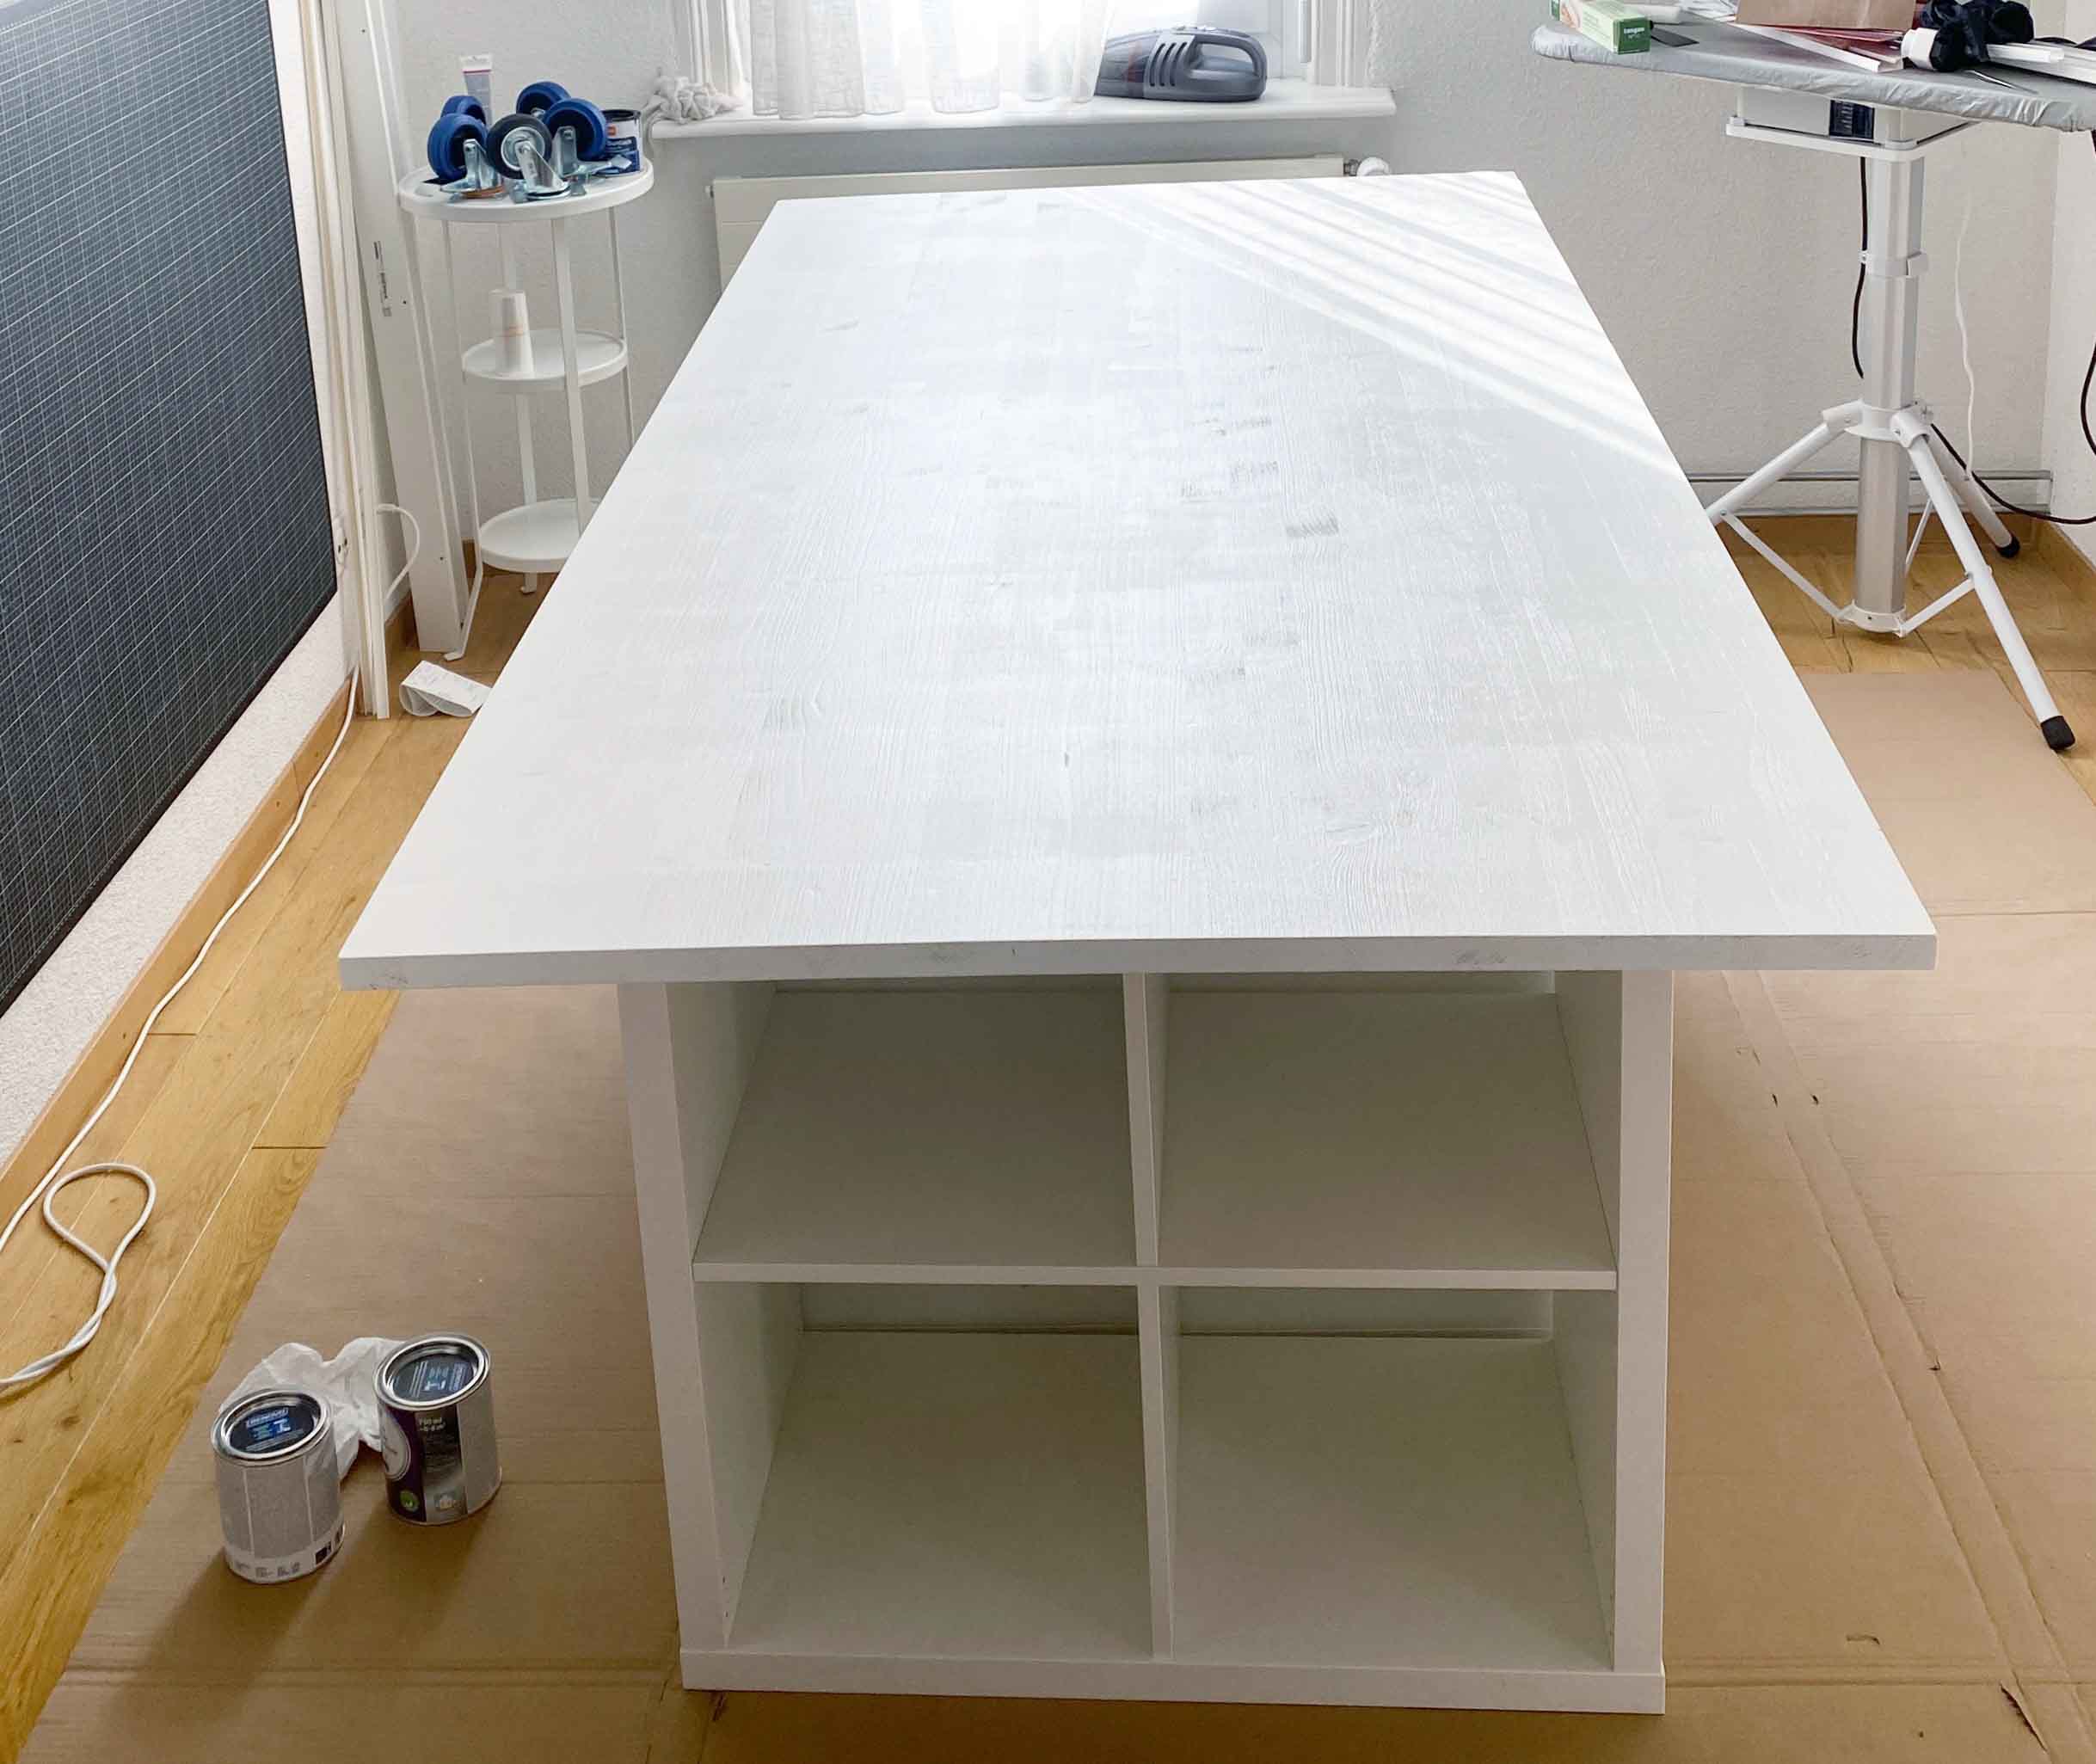 After letting it dry according to the instructions we applied the white paint to those areas that would be visible (the spaces where the fabric bolts will go) and on the top of the upper tabletop. We repeated these steps twice and sanding the tabletops in between to get an even result.
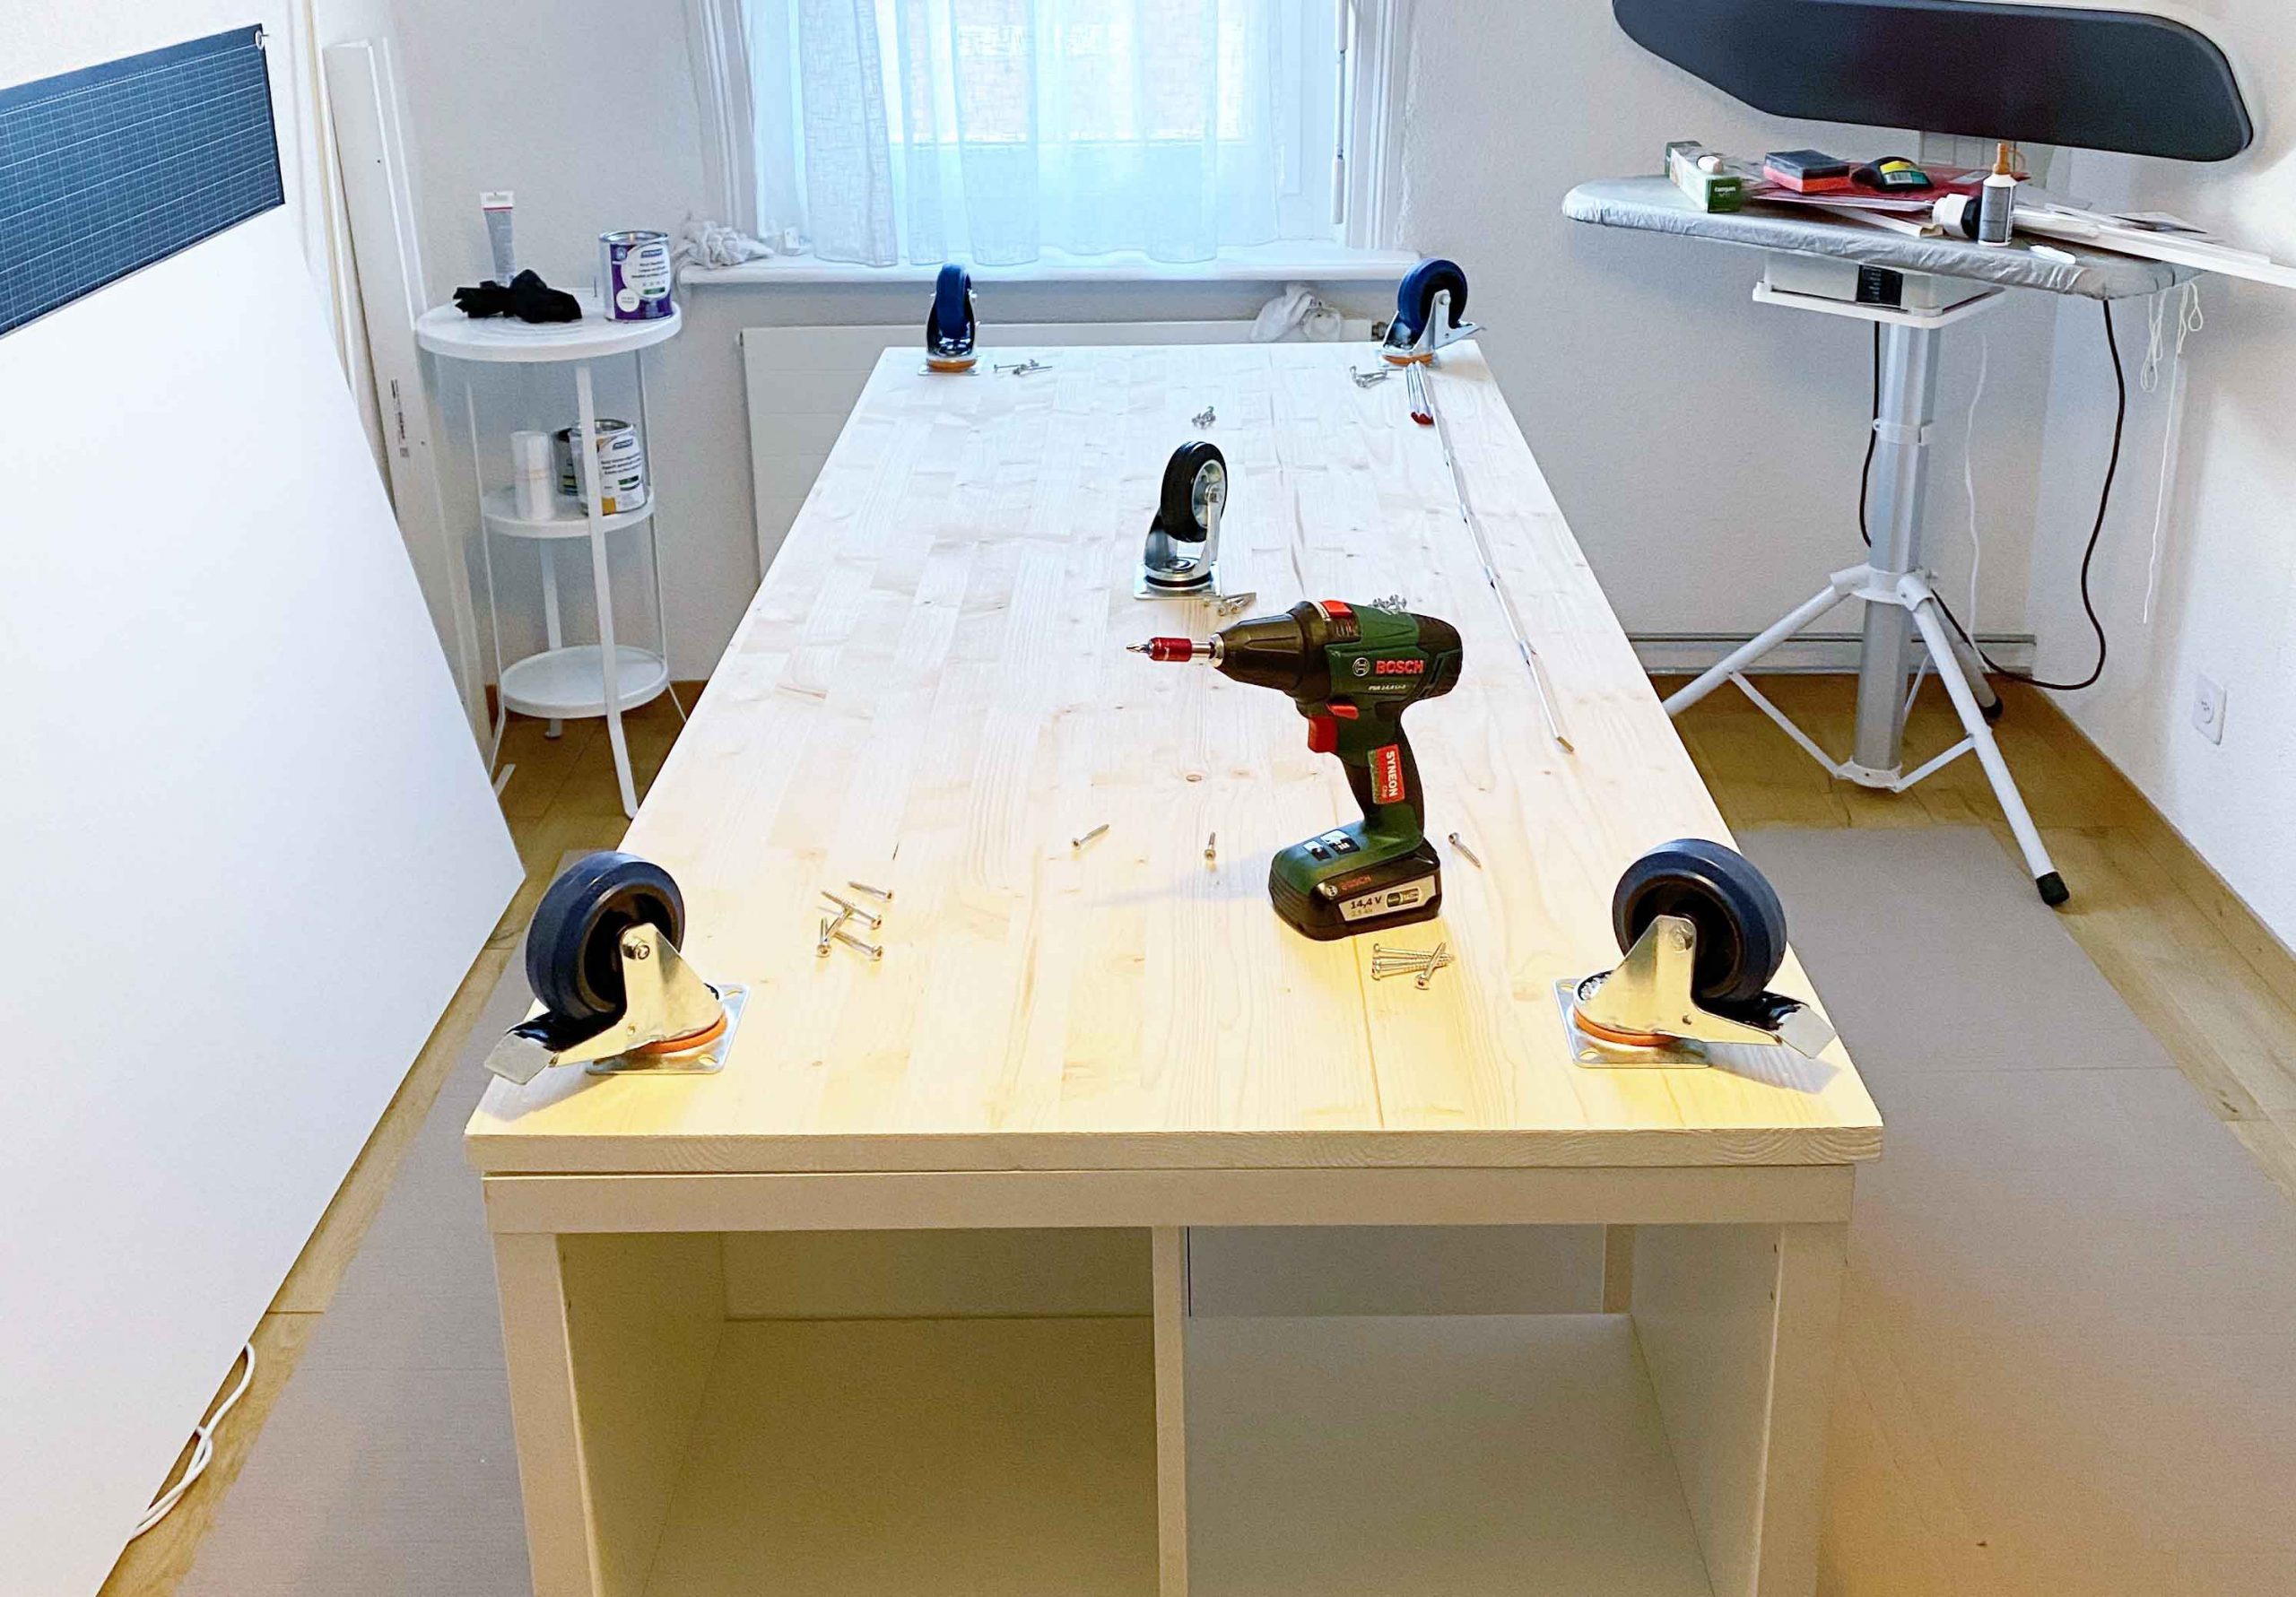
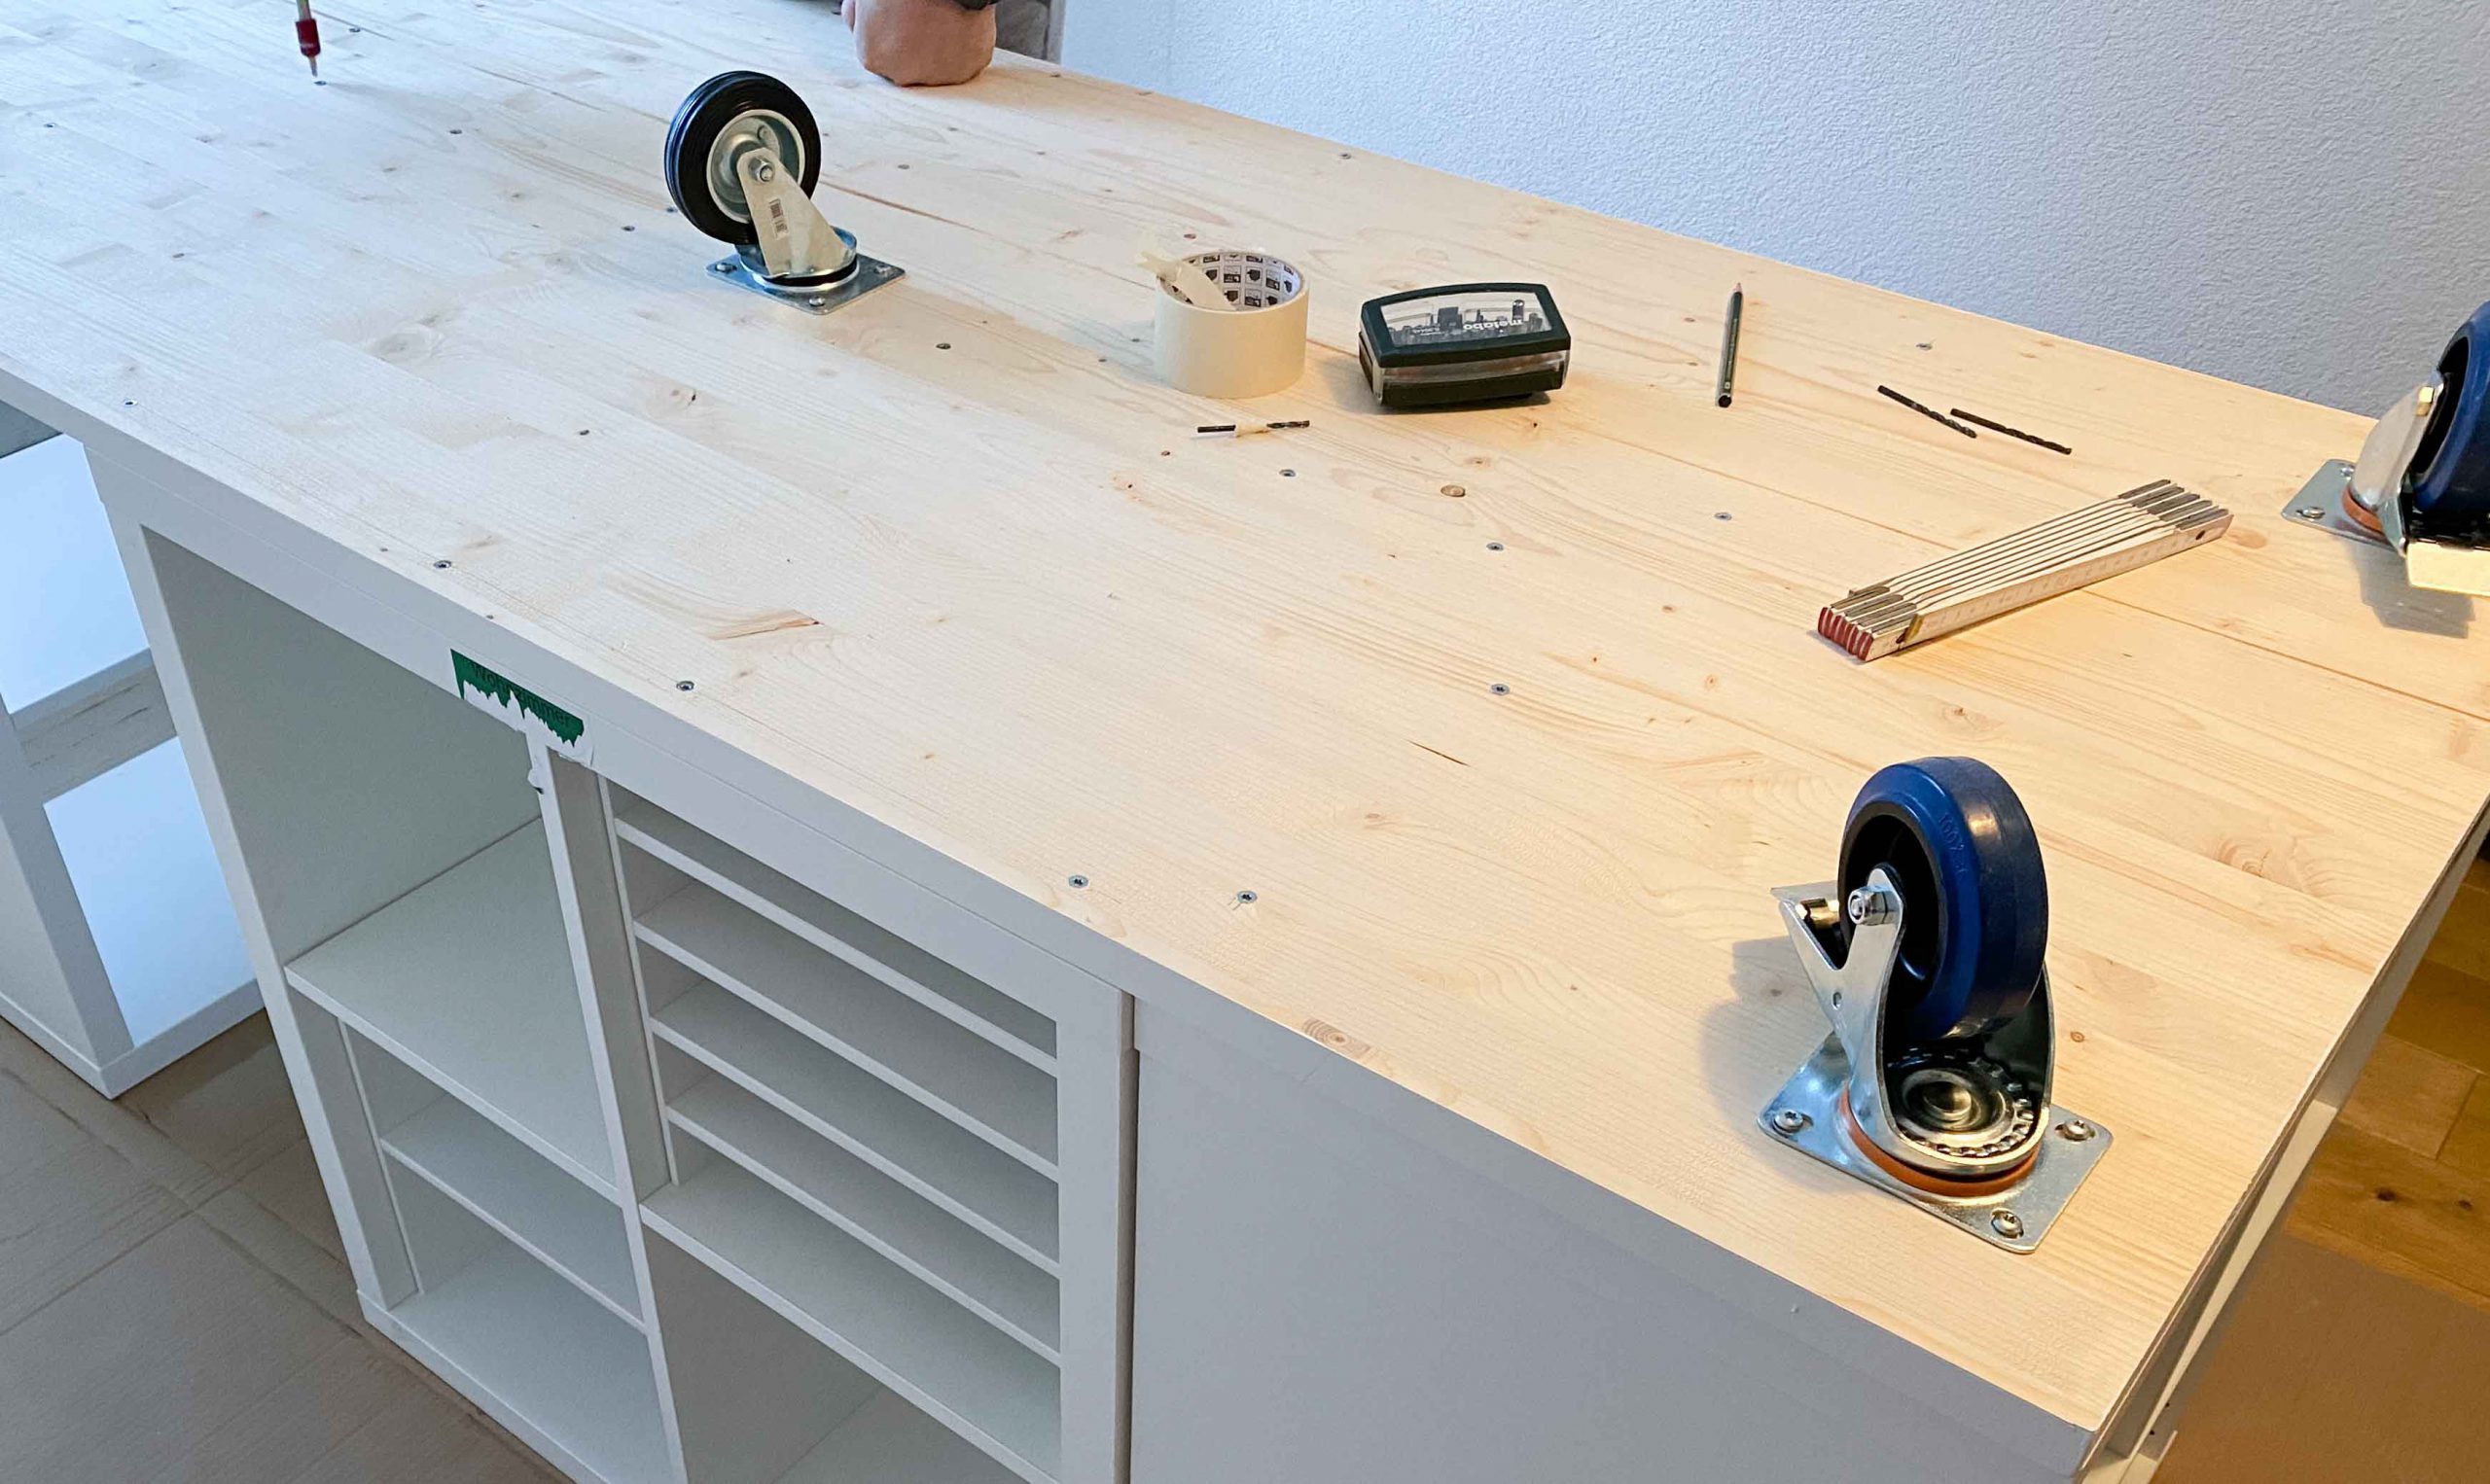
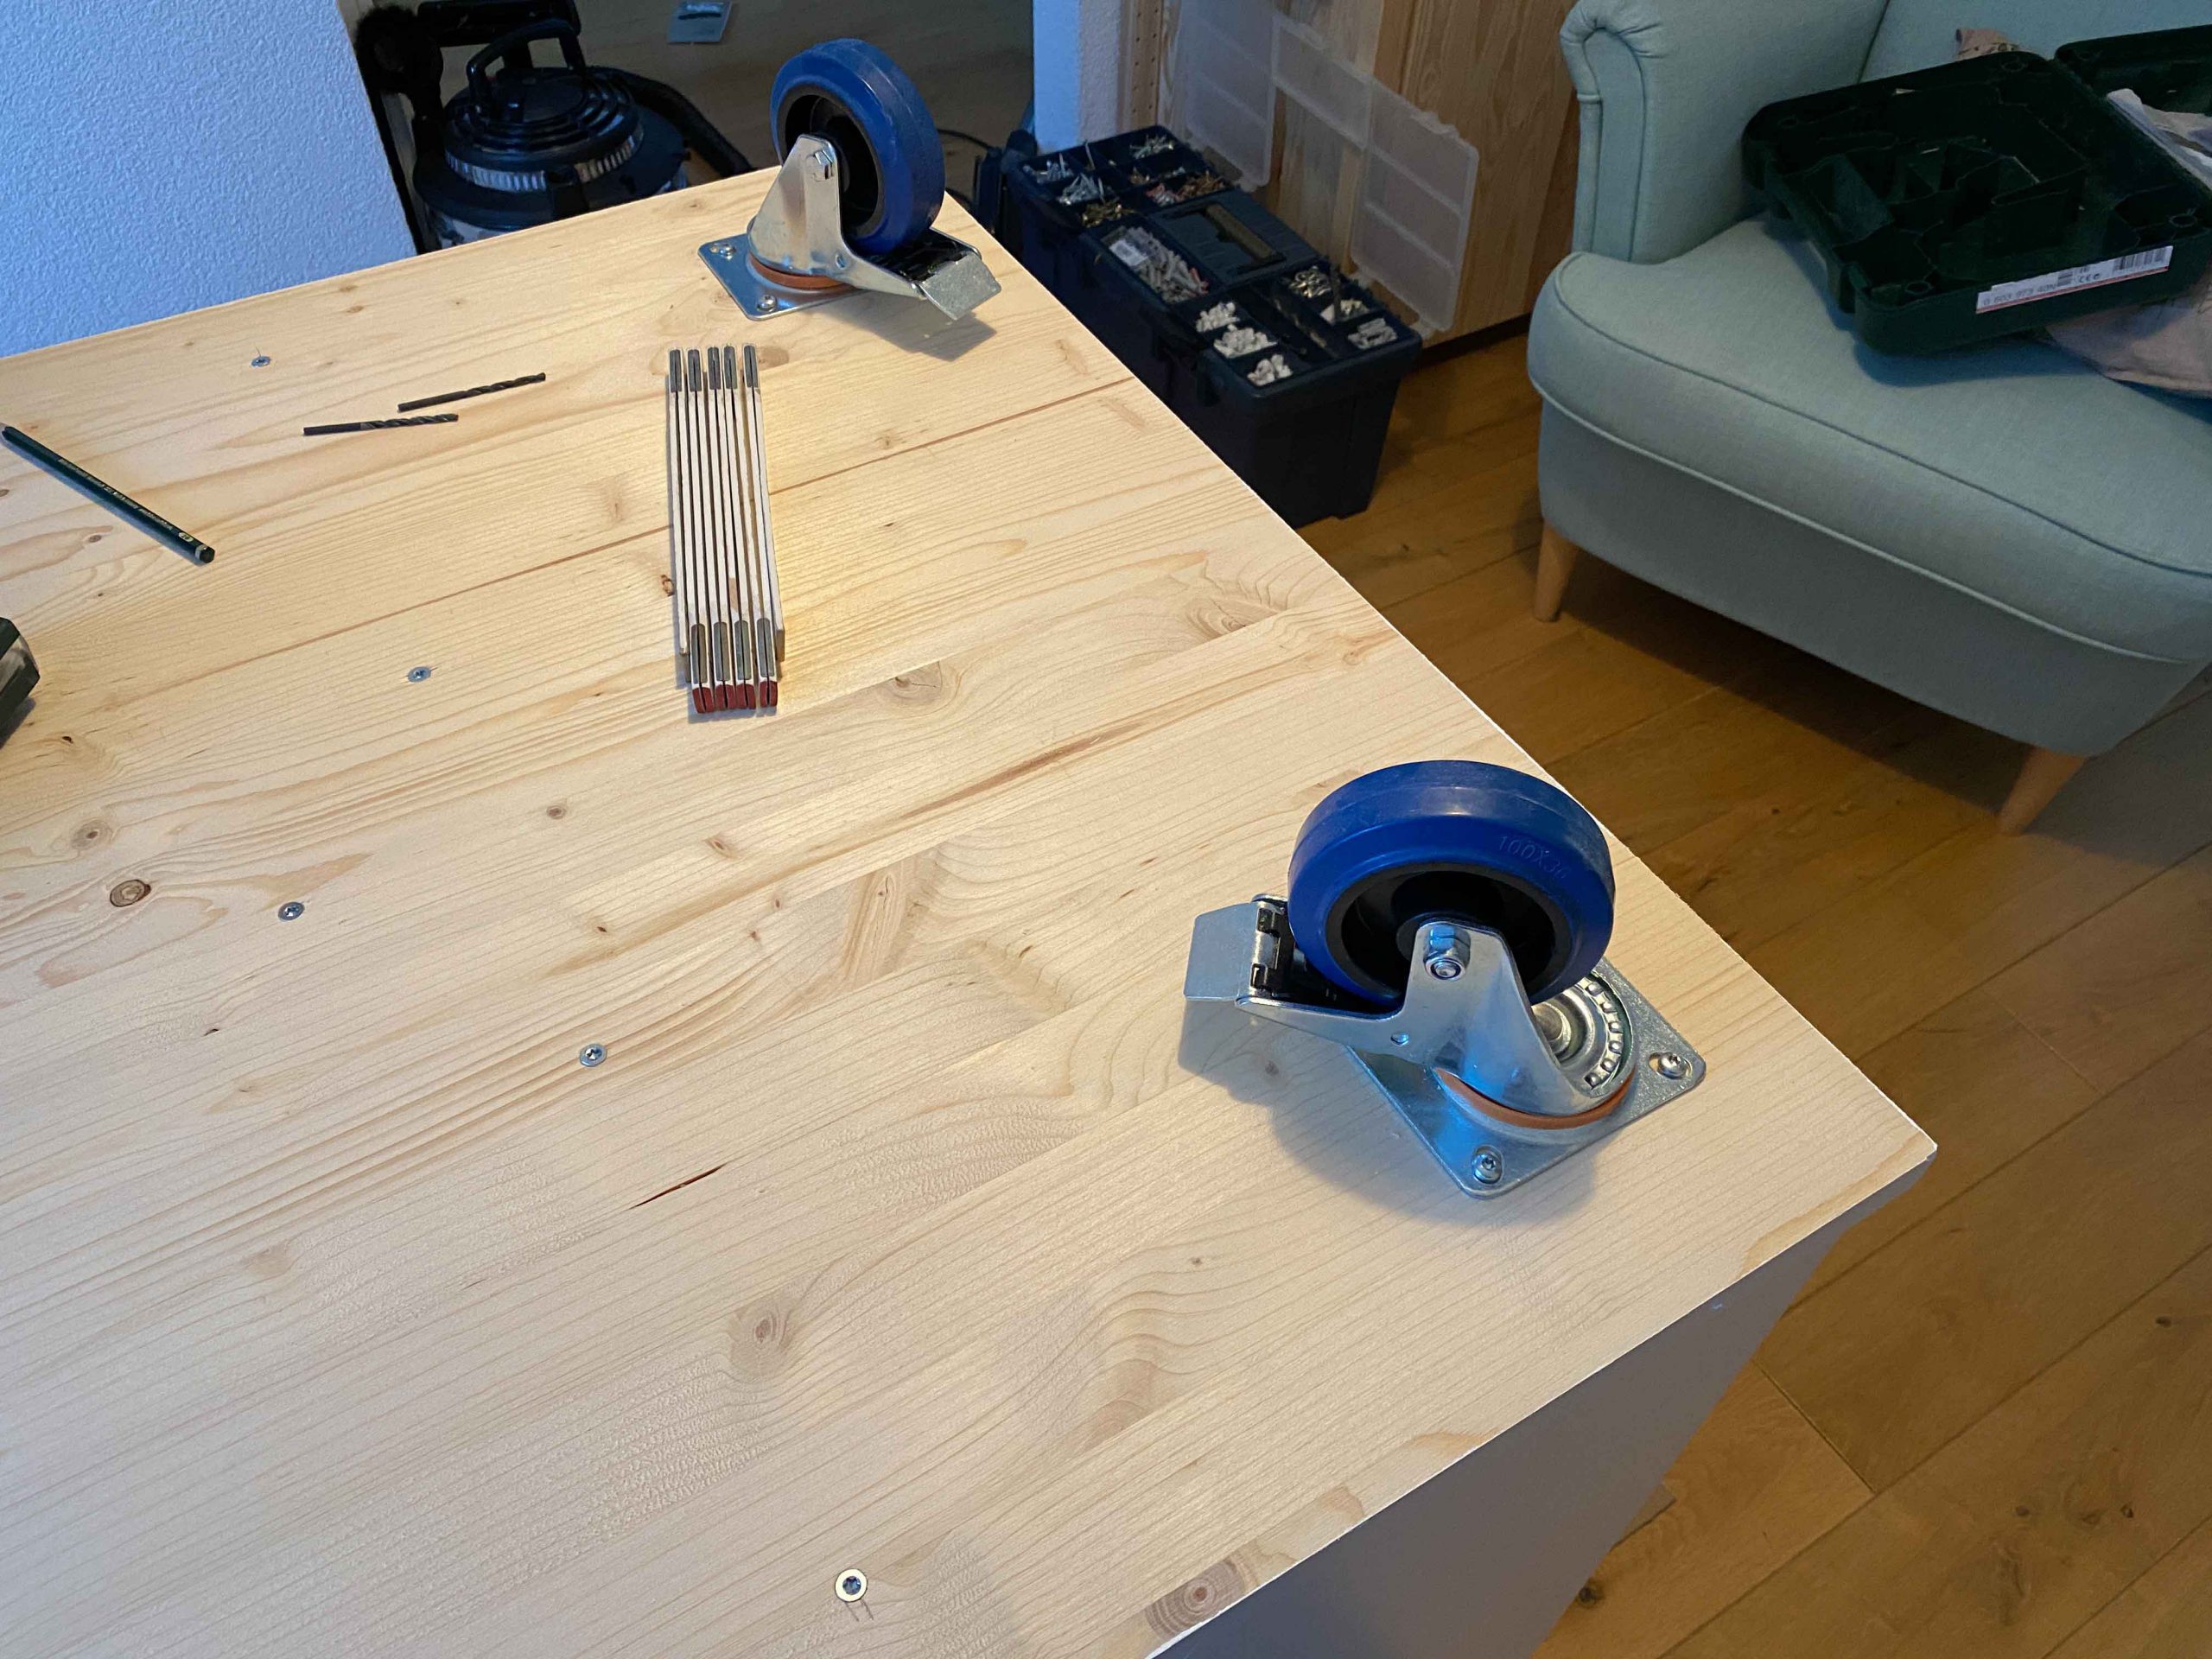 Next, we screwed on the wheels and the lower tabletop. We used long screws to get through the wood and into the Kallax cubes. Additionally used multiple screws to stabilize all the cubes all the way around. Every hole as been “pre-drilled” (is that the right word?) to avoid splintering the wood.
The whole monster is turned around and the upper tabletop is attached using multiple angle joints.


We are completely in love with our lates creation. It was worth all the effort we put in.
 Happy sanding 🙂
Nadine @heart.pleat


Hello,I am looking for cutting table with approximate size 1.8 by 3 m. What would be the price?
Dear Elena,
This is a do it yourself project, so you will have to plan and calculate yourself how you wish to build it and how much it would cost.
This is funny I was just telling hubby that I need a cutting table in sewing room. And I just showed him on paper what I wanted. Great table.
I did this exact Ikea hack a couple of years ago. It is an excellent cutting table and easy to make. We bought a white counter top from IKEA as well so didn’t need to paint it. We used a piece of plywood for the base for more stability and screwed the wheels into it. I also bought the largest cutting mat I could find and it fit it perfectly. Highly recommend it.
This looks like what I’m looking to build. Where did you purchase your Spruce table tops?
Dear Susan,
In my country, I can order big pieces of Spruce either at the local craft & building supplies shop or I would ask woodworkers if they could provide me with the pieces I require ^^
Kind regards, Ramona
What a great idea! I love this. Now, I just have to figure out whether my space is big enough and where could I roll a cutting table that is big enough!
Wow that is brilliant, I’m going to try something like this I think.
where did you find/order your custom cutting mat ?
I love this idea! So simple and clever, just brilliant! And I would have immediately made this if I hadn’t a very large table in my workroom already. So I have shared this on Facebook, so others can profit from this super table. Thank you for sharing this great project!
Is it 2 units? how are they connected? It looks awesome. What was the final size?