 BERNINA Corporate Blog -
All our tree blocks are done! Time to sew together our quilt top. In this blog post you’ll find instructions on how to cut and sew the strips for the sashing and border of the quilt.
New here? Welcome!
This blog post is part of the One Two TREE Quilt Along. This is a free QAL where you will learn to confidently quilt your quilts yourself with free motion quilting and ruler work quilting.
First we sewed 16 trees and those trees we will use as a canvas to quilt a different pattern in each of them. We’ll take it slow and start with the very basics. Want to join in? Start here and read more about the Quilt Along and the Fabrics and Materials.
Materials needed
To finish your quilt top you will need 40 inches x width of fabric (WOF) of your background fabric. You could also use a different color if you like to ‘frame’ the tree blocks. But in all images from the QAL you can see my quilt tops have the sashing and borders in the background fabric.
Video instructions
In this video I’ll talk more about what to do when your blocks aren’t all the same size. A short recap of what I explain in the video:
- When some blocks are a little narrower then they’re supposed to, no problem, no need to adjust that.
- When some blocks are shorter then they’re should be, go ahead and add a strip in the background fabric to the top of the block to make it as high as the other blocks.
Cutting fabric
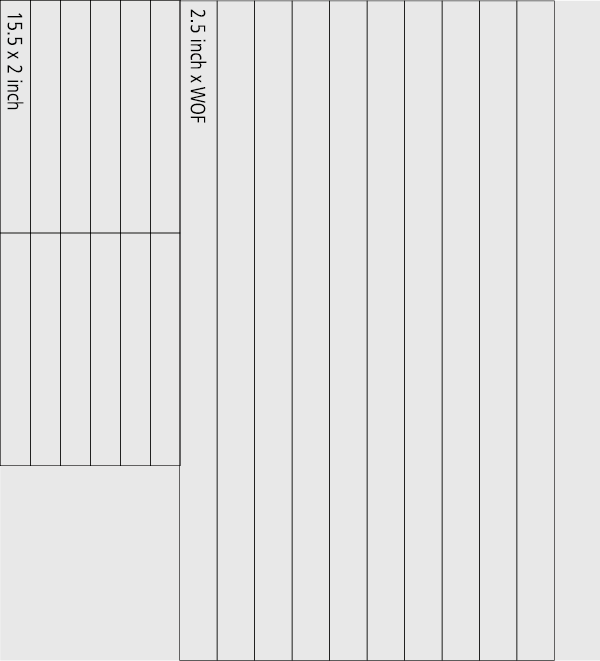
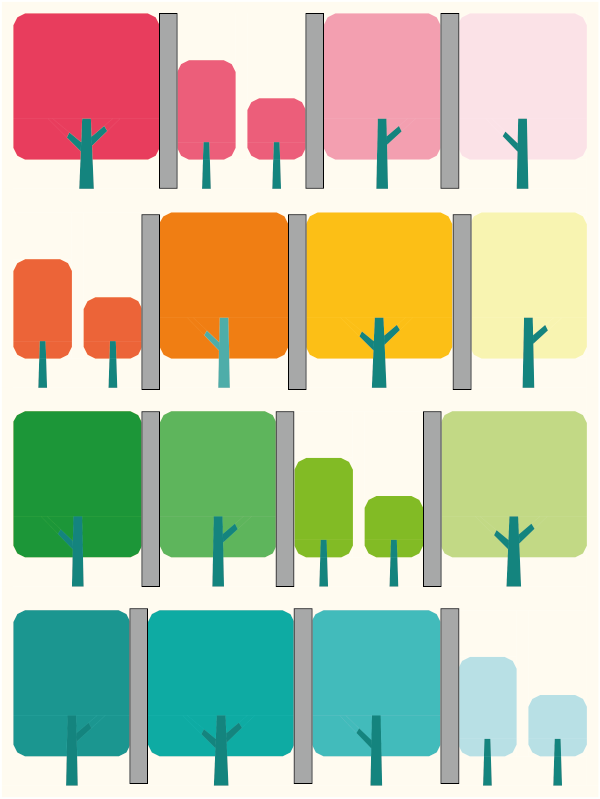
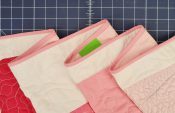
In the cutting scheme below you can see how to cut all of the strips from the fabric.
This is a little bit different then what I showed in the video. In the video I use 40.5 inches of fabric, and with this cutting scheme below I only use 37 inches of fabric. So you’ll have less fabric waste when you follow this blog post 🙂
You can start with the longer strips. For this you leave the fabric folded double on your cutting mat, the fabric will be about 22 inches high.
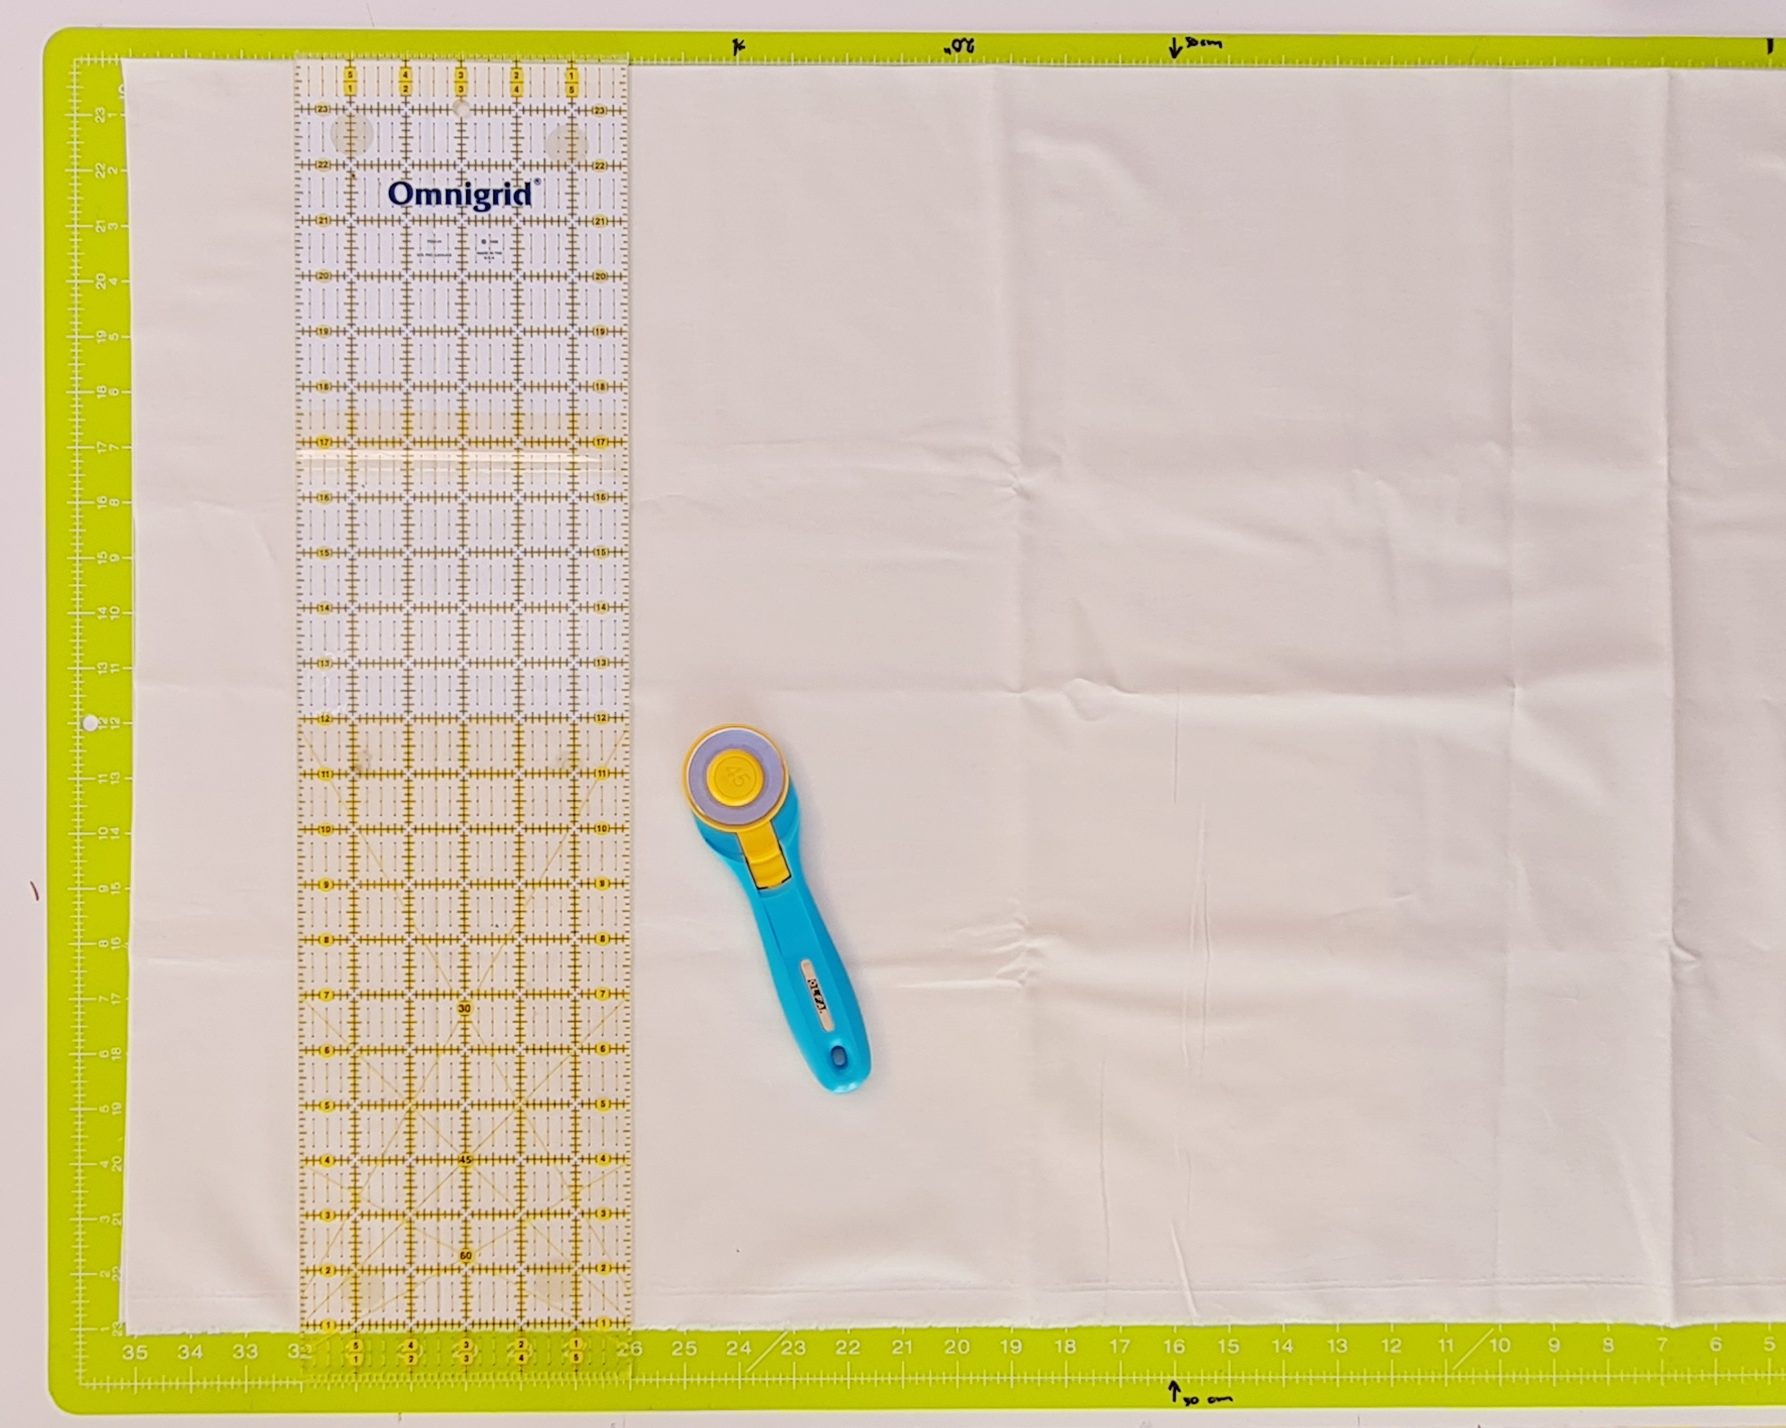
You can fold it in half when you’re working with a smaller cutting mat, that will leave your fabric about 11 inch high. For this, fold the fold in the fabric toward the selvadge edge of the fabric.
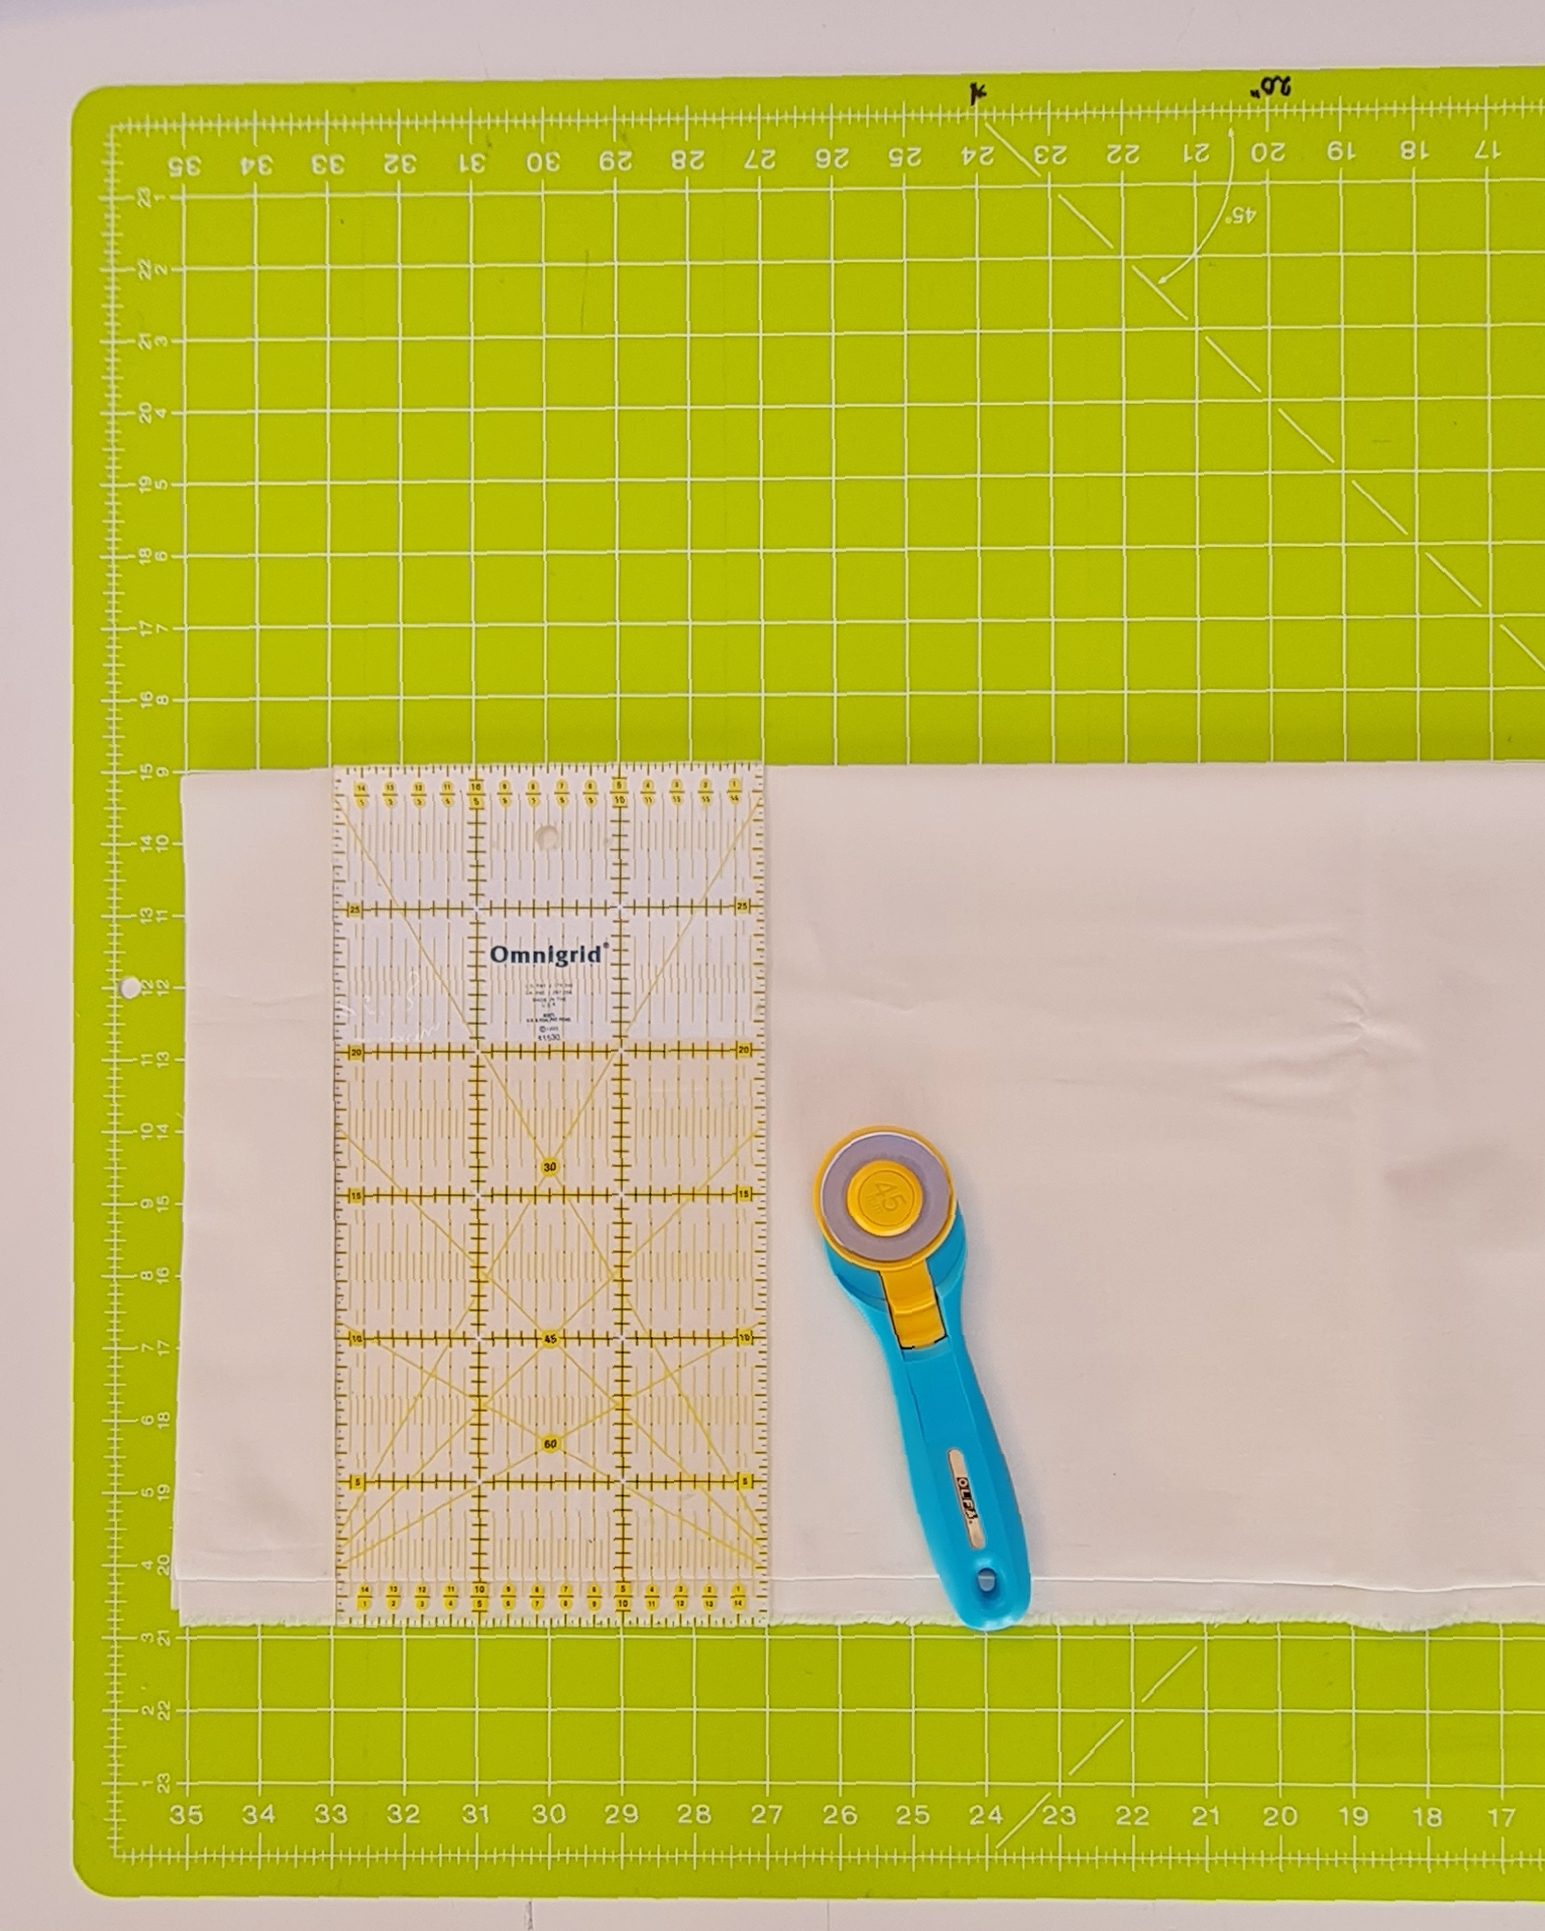
Square up the side of the fabric. This means you cut a tiny strip from the side of the fabric to make sure the edge is straight.
Cut ten strips of 2 1/2 inch x WOF. We will use these to go in between the rows of trees and around the quilt as a border.
Then use the left over fabric to cut twelve strips of 2 x 15 1/2″. These will go in between the trees to sew them in to rows. If your trees turned out a little taller or shorter, you can alter the 15 1/2 inches to fit the height of your trees.
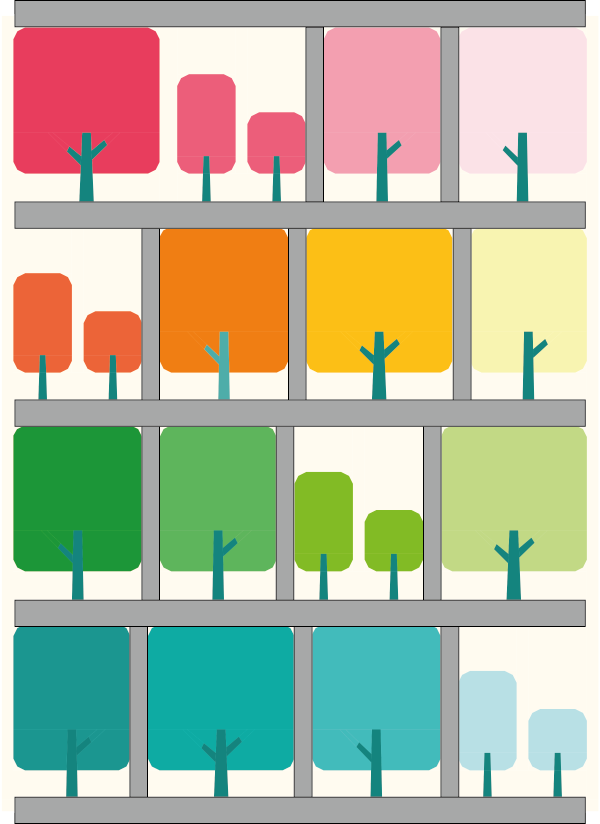
Sewing the top together
Start with sewing the twelve strips in between the trees. Use a 1/4″ seam allowance. The sashing between the blocks should turn out 1 1/2 inch wide when you’re done.
Now you can sew all the 2 1/2″strips together in to one long strip.
From this long strip you’ll cut five strips that are as long as your rows are wide. Just measure your rows and cut five strips that match that size.
Sew three strips in between the rows. And then one above and one below the rows.
The quilt top is now almost finished. You only need to add the border to the left and right side of the quilt. For this you measure the height of the quilt on the left, in the middle and on the right. If all is well, these will measure about the same height. Cut two strips that match this height (or take the average and use that as you measurement).
Sew the strips to the left and right side of the quilt and you’re done!

Basting
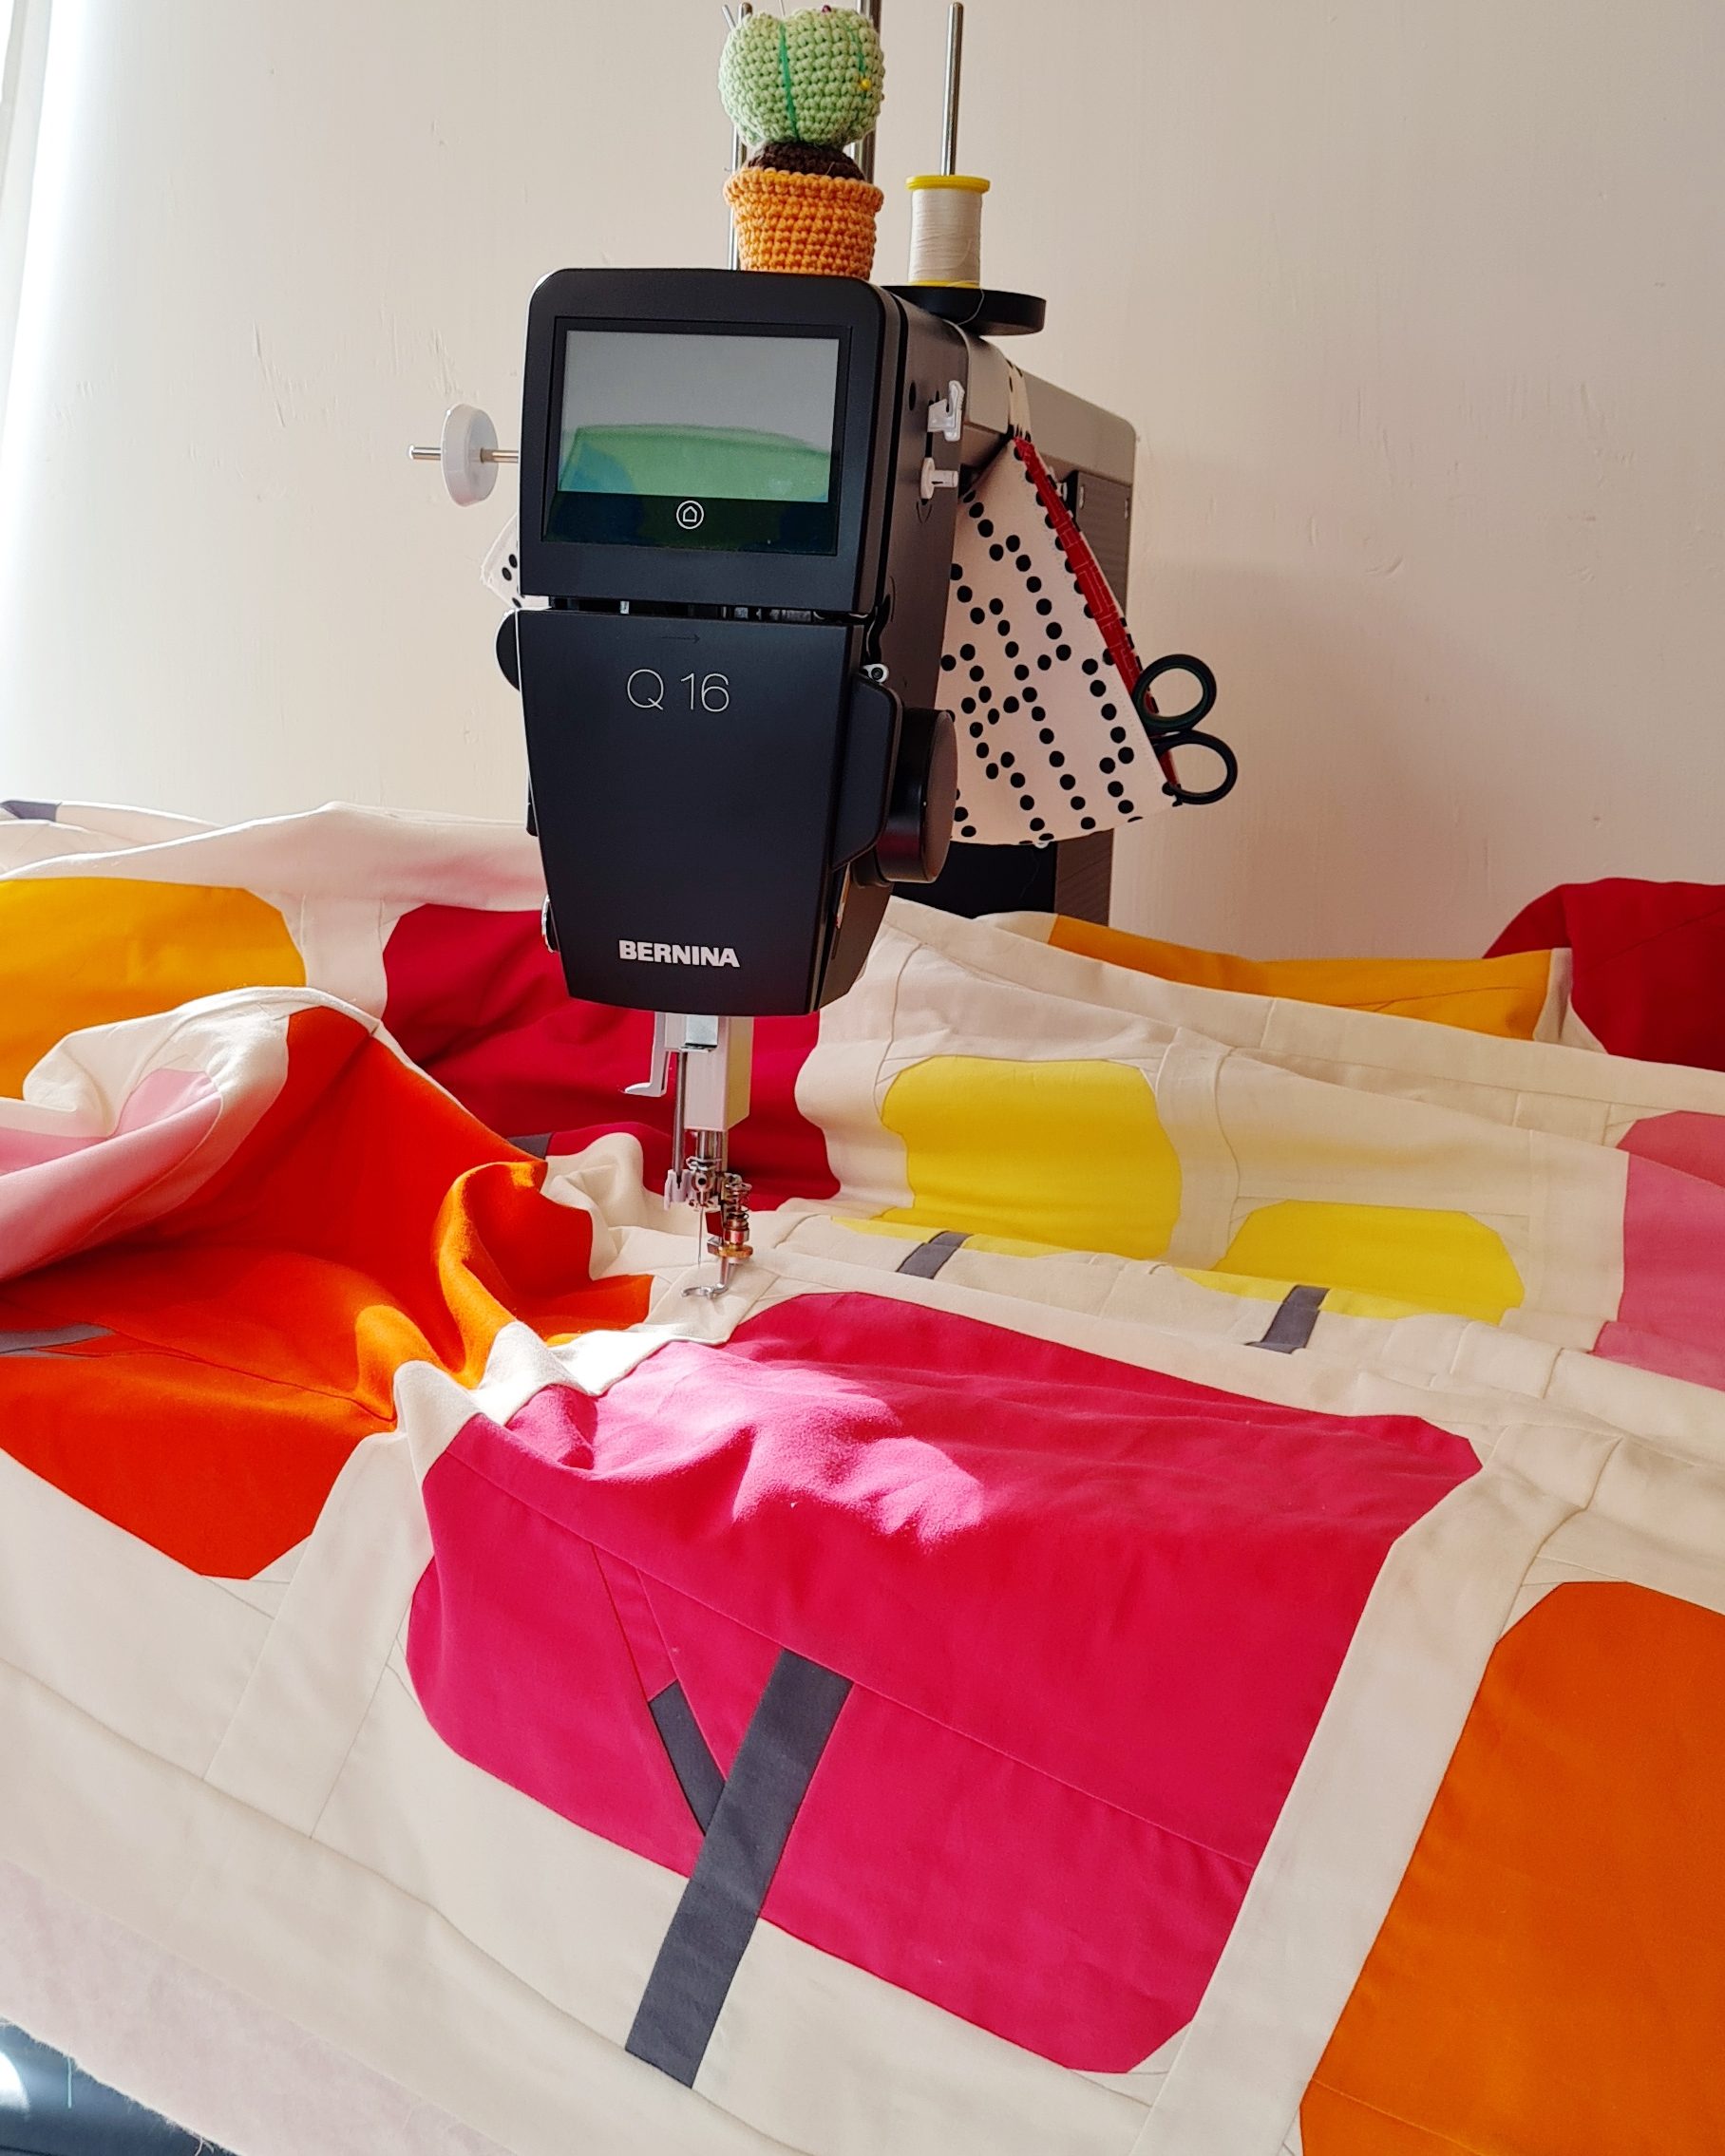
Now the quilt top is done we need to make a quilt sandwich. That means putting together a backing, batting, and the quilt top.
For this quilt I used a thin bamboo batting. This batting is very light and soft. That will make quilting the quilt easier. It is easier to move around a light weight soft quilt under your machine than a heavier stiffer quilt.
You can find batting and kits for the backing of the quilt in the Sugaridoo web shop.
For the backing of the quilt you can use the Happy Scrappy backing I designed for this quilt along. Hop over to this blog post to find the pattern.
My favorite method for basting a quilt is with spray basting. In our previous quilt along I wrote a blog post with instruction on how to spray baste your quilt. You can find it over here.
In the video of this blog post I’ll also show you how I basted the quilt for this quilt along. But the instructions are the same as for the previous QAL.
Tadaaa
Yay! You are all set to start quilting your quilt! Well almost. Next week, on March 17th I’ll be back to go over the thread and needles I use for the quilting. Then on the 31st of March we will start quilting the first two trees.
Time for a giveaway!
Now we assembled our quilt tops it’s time for a give away. BERNINA will be giving away 3 times a Mettler thread box. And I will give away 3 times a Sugaridoo curated fabric bundle.


Would you like to win? All you need it the following:
Finish the quilt top and post a picture before the 25th of March 12pm CET.
There are two options to post a picture:
- Post a picture of your quilt top on Instagram, tag @Sugaridoo and use #OneTwoTreeQAL on that post.
- Or upload your picture to the community section on the BERNINA blog. When uploading to the BERNINA community section make sure to select “One Two Tree QAL” from the dropdown list.
We will draw six random winners from the entries and publish the winners on March 31st in the first blog post on quilting our quilt. The winners will also be announced on the Sugaridoo Instagram feed and in the One Two Tree Facebook group.
That’s it for now. I can’t wait to start quilting our quilt!
See you soon,
Irene

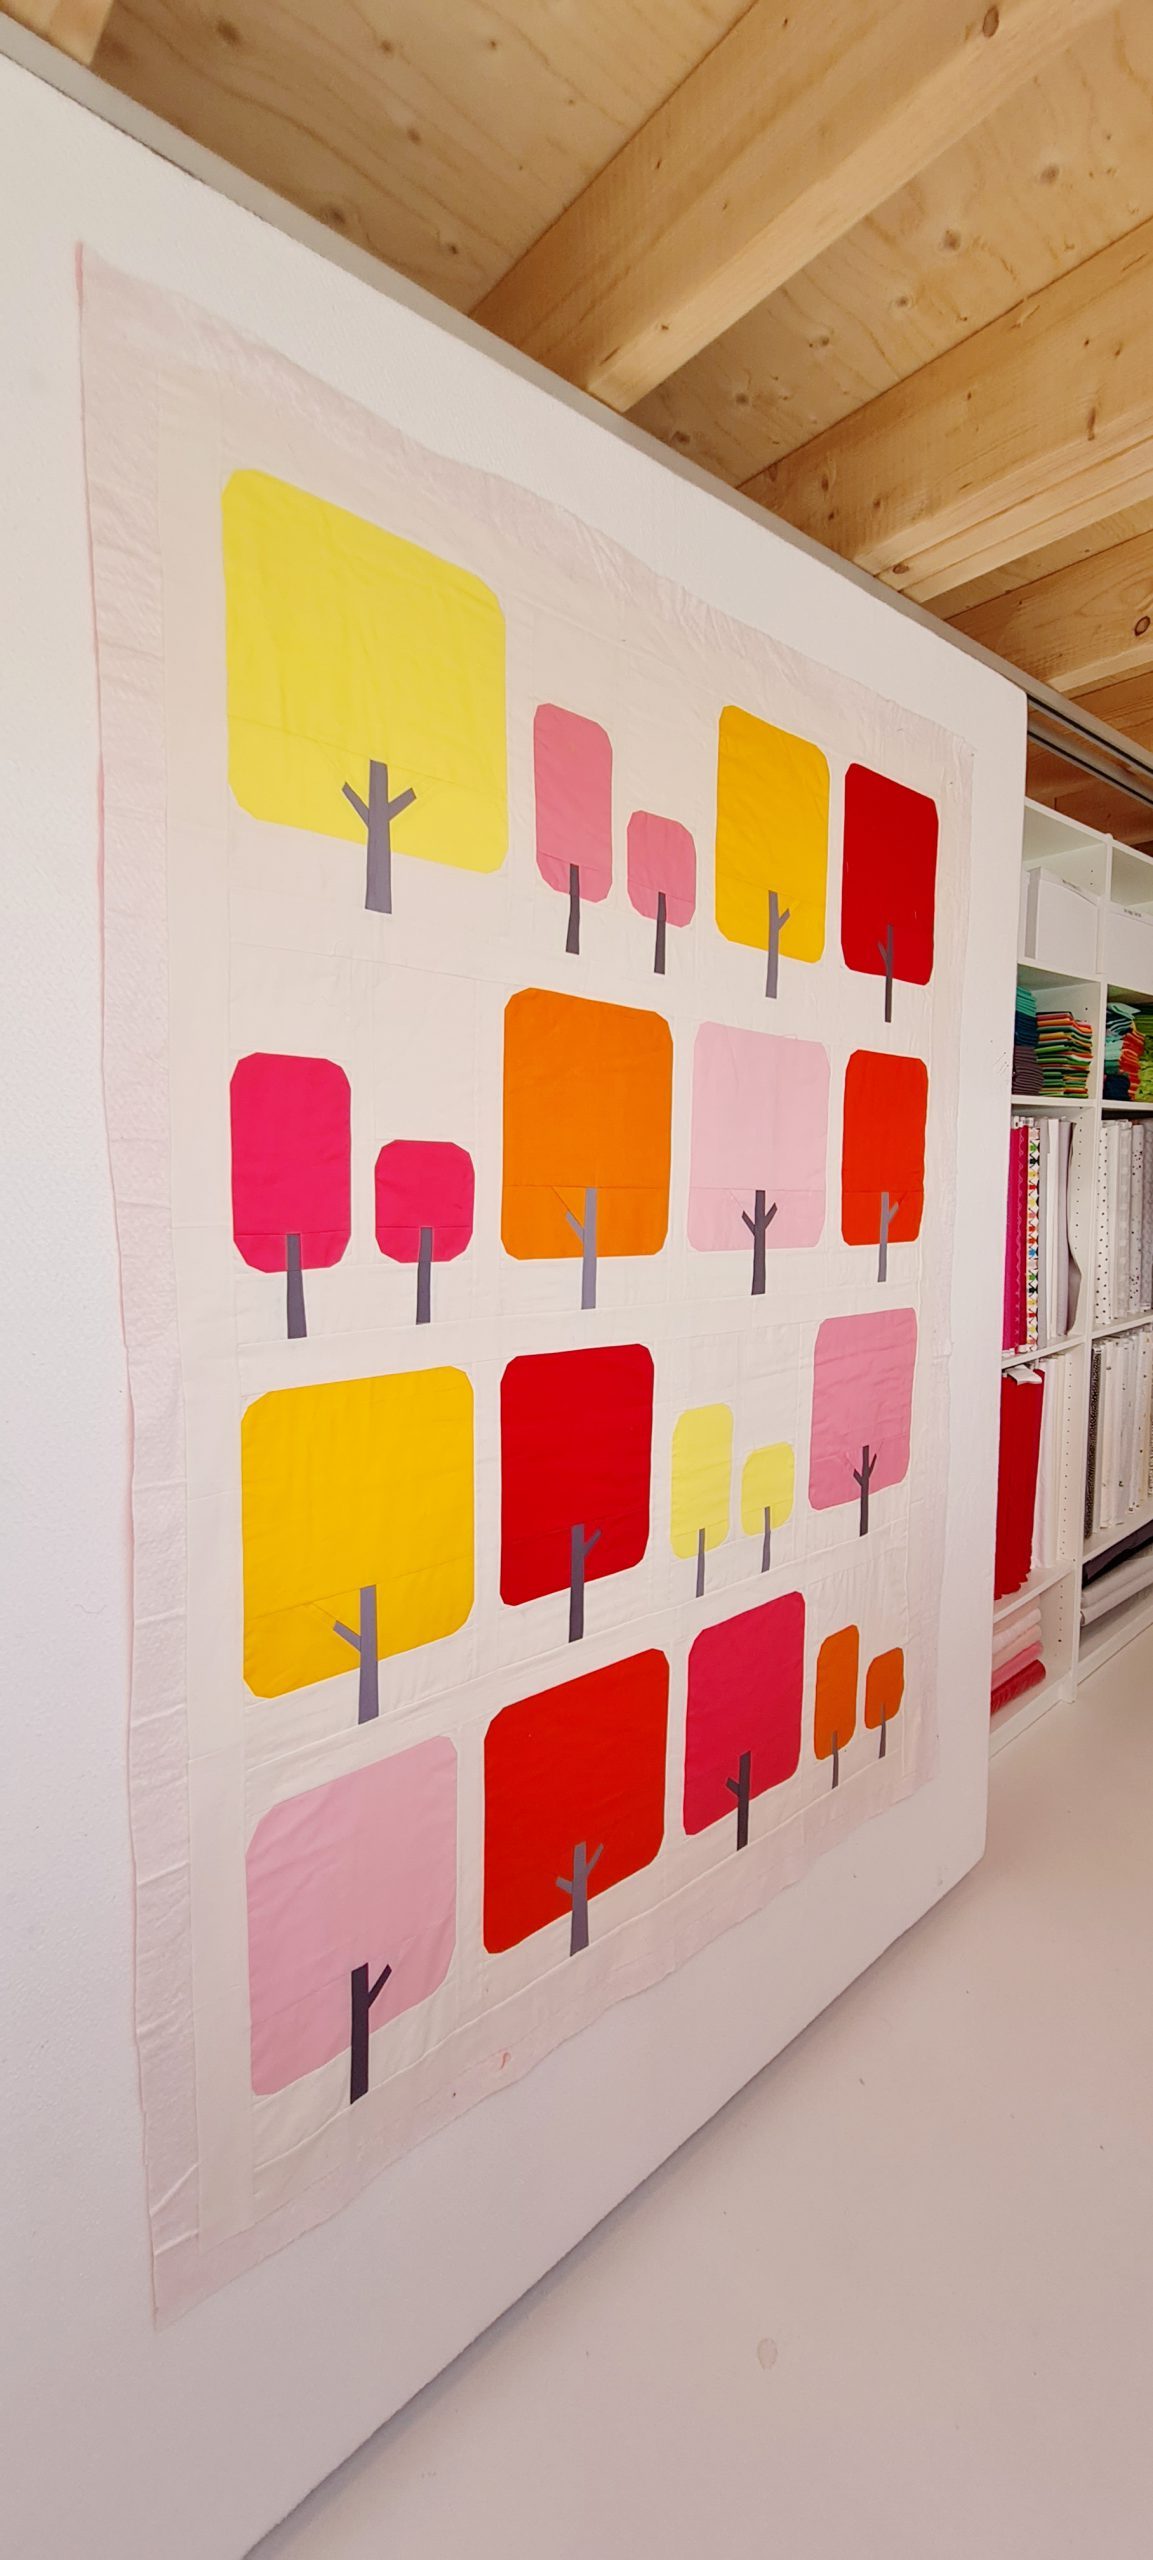
Okay. Here is my quilt top! Finally it is done!! It is fun so far and now the real fun begins from quilting the quilt!!
Here is my One Two Tree QAL. I used some ombre fabrics, batiks and some hand-paints. I made it larger so it will fit on a bed. I really enjoyed the piecing and am excited to learn to quilt with rulers.
I can post comments but cannot post my picture of my quilt top. Any suggestions?
Dear Marianne,
Would you like to post your picture in the comments, or are you having troubles with creating a post in the Community Section for the raffle? Only a post in the Community Section of the Blog or on Social Media with the right tags will enter you in the raffle. If you want to know how to post your Quilt top in the Community Section, just scroll down and read through the other comments – I have already posted a Tutorial on how to do that. If you have a registered account, you will be able to post your Quilt top in the Community Section.
If you want to post your picture in the Comment, thats also something only a reader with a registered account can do.
Let me know if you need more help 🙂
Kind regards, Ramona from BERNINA International
I had so much fun and learned a lot.
Love, love the quilts posted here. I am participating in the QAL with a friend. She has set up an account and now is unable to log in so she has tried to reset her password. Now she can’t reset her password. It says the link to reset it is “invalid”. Her Username is “pupknitter”. Any ideas would be helpful. Thanks!!!
Dear Rachel,
Thank you for reaching out for your friend. I have manually sent her a Password Reset. Can you ask her to look into her emails? If that has not worked, I can set a new password and send her an eMail.
Kind regards, Ramona from BERNINA International
Dear Rachel,
I see your friend was able to log in and create a new Project in the Community Section to join the Halfway Giveaway. Happy to see it worked!
Kind regards, Ramona
Dear Vicki,
Just a little reminder: You can only take part in the halfway giveaway if you either post your Quilt Top on Social Media with the correct tags or if you post in the Community Section of the BERNINA Blog, as Irene mentiones at the end of this article. Commenting does not enter you in the raffle.
However, congratulations to your beautiful, finished quilt top!
Thank you! I will try to figure out How to do that!
Hmmmm, I really don’t understand how to post in the community section. I followed the link in Irene’s post, and the only place to click is “create project” …. Is that how to comment? By creating a project? Wouldn’t that just be called “create a project with the One Two Tree QAL selected in the drop down? I’m looking for any guidance that can be offered. Thank you!
Here’s a little guide, I hope that will help you:
– As you said, follow Irenes link to the Community Section
– Click on the red Button “New Project” at the top left
– This will forward you to a this page:
– Enter a Title for your Project (for example “My finished One Two Tree Quilt Top”)
– Choose a fitting category (Quilting) in the Drop Down
– Choose the “One Two TREE” Campaign in the Drop Down. This will make your Project appear on the page Irene has linked in her post. It’s also where our team will look at all the entries, because they are all at one place.
– If you want, you can enter a description: What were your thoughts, how did you enjoy it, what did you struggle with the most, which different ideas or solutions did you have?
– You do not have to enter any Tags, you can ignore that one
– Most importantly: Add the picture of your Quilt top! If you have everything ready, you can click on the button “Create Project” and your Post will be created on the Blog for everyone to see.
Hope this helps 🙂
You are the BEST!!! Thank you!
You are very welcome, happy to support!
Hi Irene. I can’t figure out how to create a post in the Community Section. I have created the account, created a project. But when I go to the community link you posted I can’t find where it says to create a post, only to comment on other’s posts. Can you help? I am trying to post my quilt top for one two three, and am having no luck.
Dear Barouty,

I guess your gallery is not shown in the One Two Tree Community Section because you have not chosen the right campaign. When you create a post in the Community Section, you can click on the little arrows to choose different Categories and a Campaigns.
If you choose the Campaign “One Two TREE”, your post should turn up in the One Two Tree Community Section. If this still does not work, please contact me again and I will see if I can help you further.
Kind regards, Ramona from BERNINA International
How do you create a post in the community section? I have chosen those drop downs in my project (the ones above). The problem is I don’t know where to go to post. What box do I click to post. When I go to the Community Section of the blog (using the drop down menu on the left), I arrive at the community page where there are pictures of quilt tops for the quilt along. It is the link Irene gave in her instructions. Where do you go from there in order to post. I have created a project and my picture is in my gallery and everything is correct. How do I post the picture to the page?
So I figured it out by reading your answers to the other posts. In order to post to the community section I had to create a new project, even though I had already created a project that had the correct drop down selections. Do you have to create a new project every time you post? Why doesn’t it say post to the community section instead of create new project?
Dear Barouty,
I can see your Quilt top in the Community Section, so everything is good!
It is entirely up to you if you want to create a new project everytime you want to post.
– You can create a new project for every new thing you make and want to show
– If you want to update a project you have done, you can also add more pictures and text as a comment to your own project. But other readers wont see your update if they do not open the original project.
– For raffles, its best to create a new project since we will see your entry directly.
Regarding the naming of the button, that was probably a decision made when the blog was first built. Since you can show your own sewing projects there, the ones who built the blog probably decided on naming the button “Create new project”.
Irene, do you put 1 ou 2 batting in your quilt for mroe thickness. If so is it more difficul to stitch with two layer? Thanks.
This is a question for Irene. I am wary to finish the top as directed. I have an old Bernina, with only 6.5″ throat space sewing area. I have not been successful doing free motion quilting on a 54″ x 70″ quilt with my machine. I have only been successful with a quilt that size to use a walking foot and do straight lines, or to do some sort of quilt as you go, by breaking the quilt up into smaller horizontal sections.Will directions for quilting in smaller sections be made available or discussed? I wish to learn how to do more free-motion quilting and I really want to learn how to do ruler work. I just do not see how it is feasible to do either of these in the limited throat space of my machine. Thank you.
Patti,
I am not Irene, but I have machine quilted on a small throat space domestic machine, and I agree with you, the size of this top would be hard to manage, especially doing ruler work. If you already know how to join sections ‘quilt as you go” without sashing, (I think it needs a different term than QAYG), then I would recommend you do that. I am doing that even though I have a sit down longarm. Ruler work is so much more manageable if you have less bulk of the quilt pushing back at you. Mine will be separated with one horizontal split, and I am leaving the side borders off, cutting my batting and backing larger on the sides to accommodate the borders (this is mainly to keep the edges from getting so beat up, as there won’t be that much less bulk). Even if you need to release some seams at this point, I would encourage you to do that to make your project easier to manage so that you can learn ruler work, and not how to fight your top into submission. Hope you have fun when we get to quilting! I have done some ruler work, but this will be the most so far for me! josietoo
YOU ARE FABULOUS
I had a lot of fun making birds and added a border full of colors.I had a lot of fun making birds and added a border full of colors.J’ai eu beaucoup de plaisir à faire des oiseaux et j’ai ajouté une bordure pleine de couleurs.
Dear ladgin,
Your comment on this article does not enter you into the prize raffle. As stated above:
– Either post your Quilt top on Instagram, tag @Sugaridoo and add #OneTwoTreeQAL to your post (be aware that your profile has to be public, we can’t see posts of private accounts)
– Or register an account on the BERNINA Blog and then create a Post in the Community Section, using “One Two Tree QAL” from the dropdown list.
These are the two ways you can enter the price raffle. Good luck!
Kind regards, Ramona from BERNINA International
Hello Ramonawirth.
Do you see my name and my quilting in the Community of Bernina Blog?
Thanks.
Yes I do, you already posted it a week ago. Everything is good!
Dear Mattias,
Your comment on this article does not enter you into the prize raffle. As stated above:
– Either post your Quilt top on Instagram, tag @Sugaridoo and add #OneTwoTreeQAL to your post (be aware that your profile has to be public, we can’t see posts of private accounts)
– Or register an account on the BERNINA Blog and then create a Post in the Community Section, using “One Two Tree QAL” from the dropdown list.
These are the two ways you can enter the price raffle. Good luck!
Kind regards, Ramona from BERNINA International
Hi can you make these instructions into a pdf like the other patterns when they have come out so it is easy to save to a folder in my laptop so I can save it with the other parts of the pattern. It is confusing to try to find it again say a year or longer down the track, not to mention it might have been taken down from the blog post. Thanks
Dear Rholanda,
You can make your own PDF’s of every Blog article. Go to “Print” in your Browser and instead of choosing a printer, you choose “Print to PDF” / “Save as PDF” (or any other sentence that describes the same). You can save the article with instructions on your laptop this way. I understand its easier to save it on your own computer instead of searching through the blog again. I hope this works for you!
Kind regards, Ramona from BERNINA International