 BERNINA Corporate Blog -
This tutorial was written by Ines, an author for the German BERNINA Blog, and translated for our English readers.
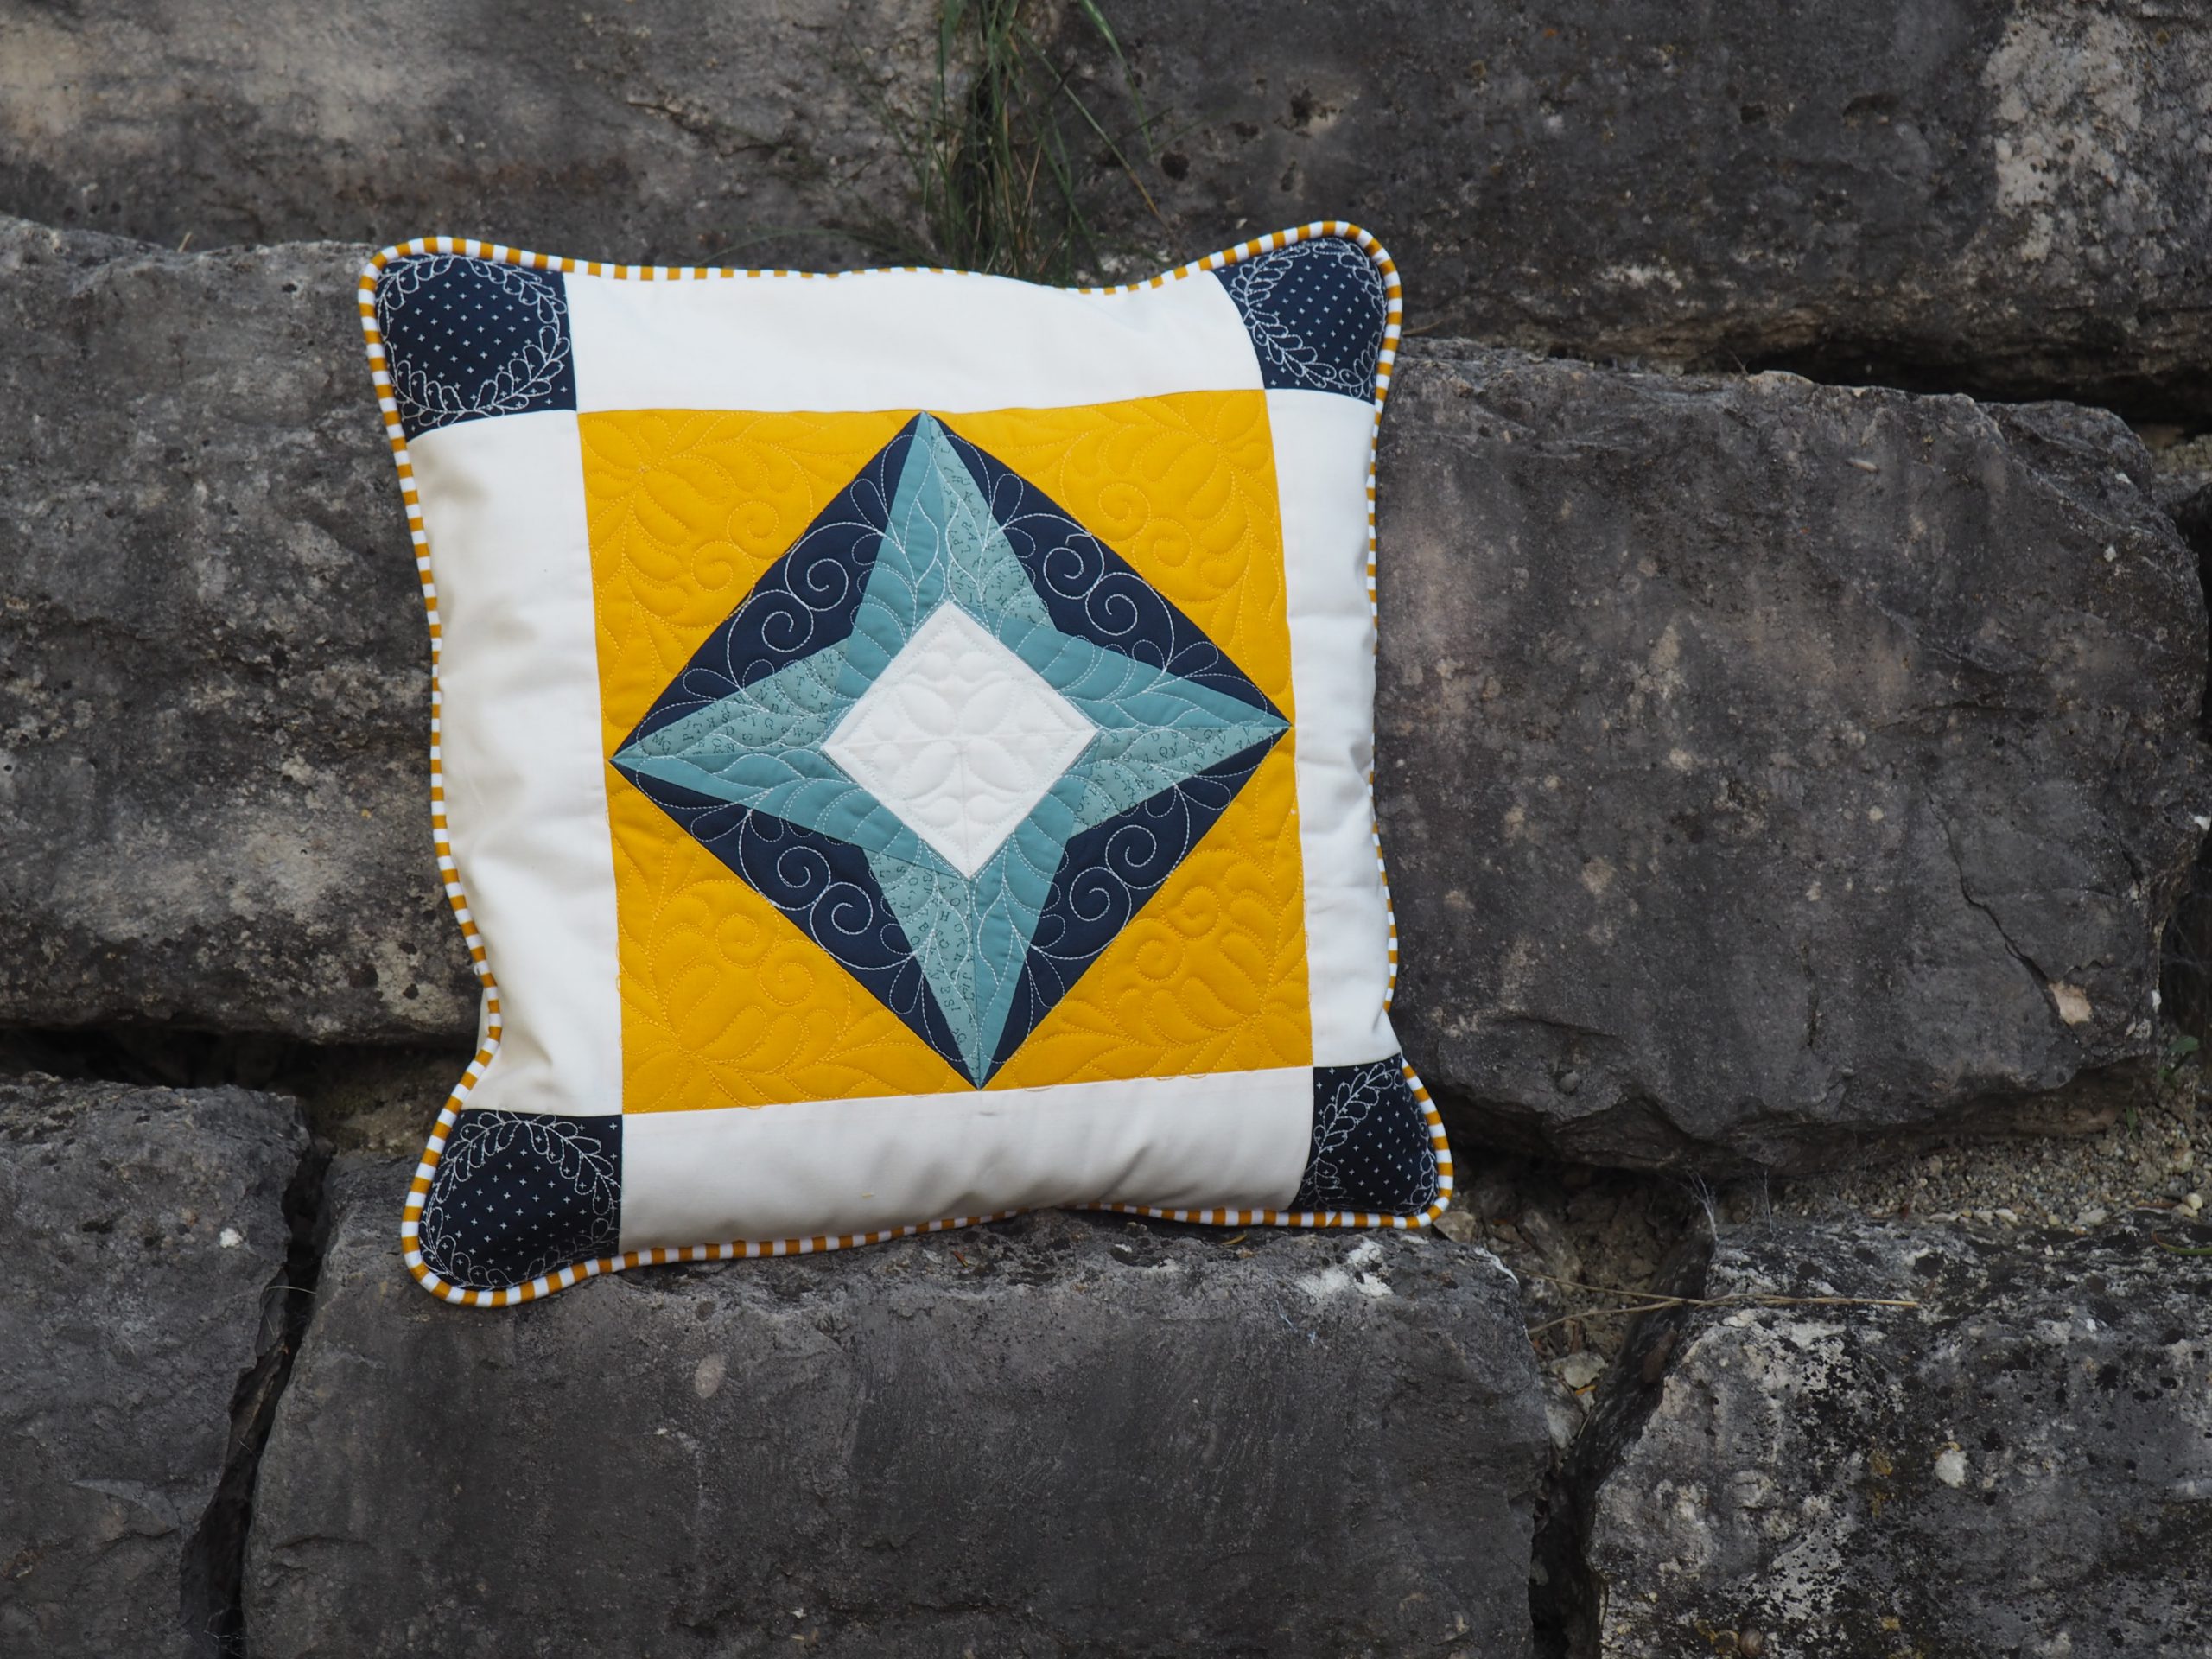
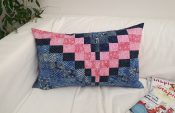
I also sewed a cushion using the new “quilting in the hoop” projects. They are now available on my BERNINA 770 QE since I installed the BERNINA PLUS Upgrade, The four blocks that make up the main block of this cushion are embroidered and quilted in the embroidery hoop. I’m going to show you how I did it here in this post.
If you don’t have a BERNINA 770 QE PLUS or a BERNINA 770 QE with the Upgrade, you can buy individual files or the complete series of files for these “quilting in the hoop” projects from OESD.
A detailed description of how to carry out a patchwork project “in the hoop” can be found in my two blog articles about the PLUS Upgrade and the “quilting in the hoop” projects:
“Quilting in the Hoop” – Embroidering a Patchwork Block in the Embroidery Hoop
“Quilting in the Hoop” – Quilting a Patchwork Block in the Embroidery Hoop
Preparing the patchwork block
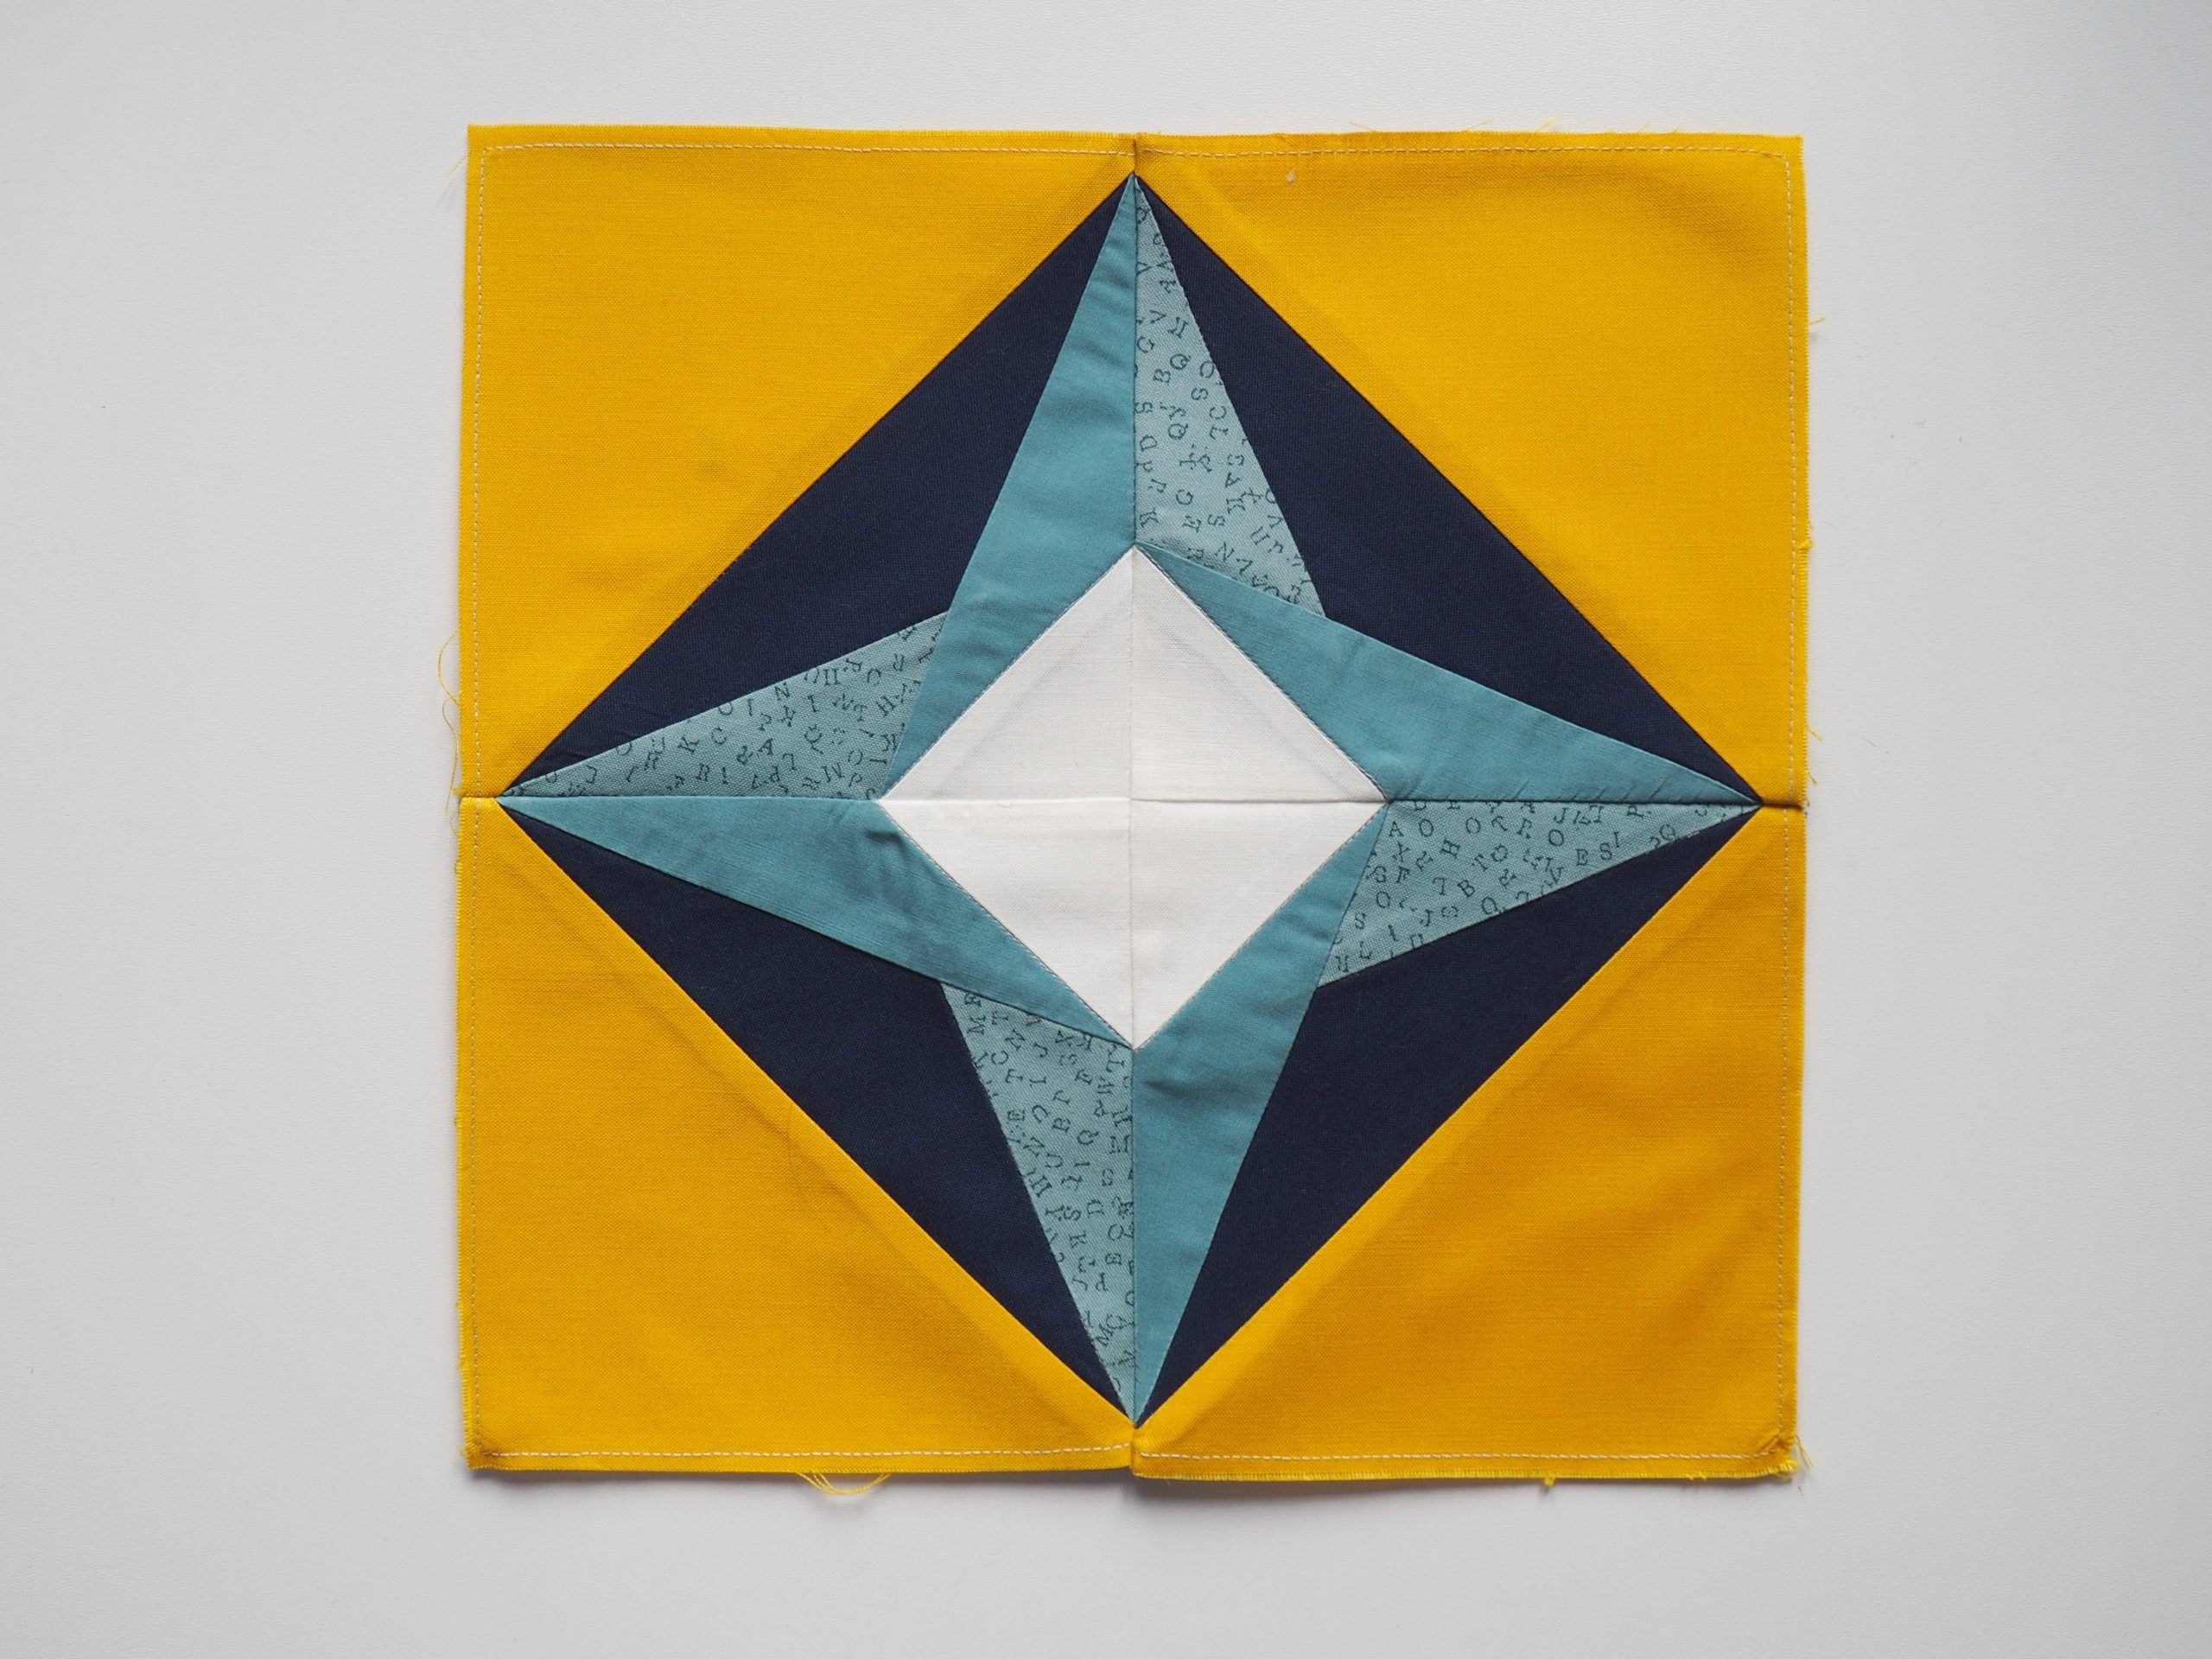
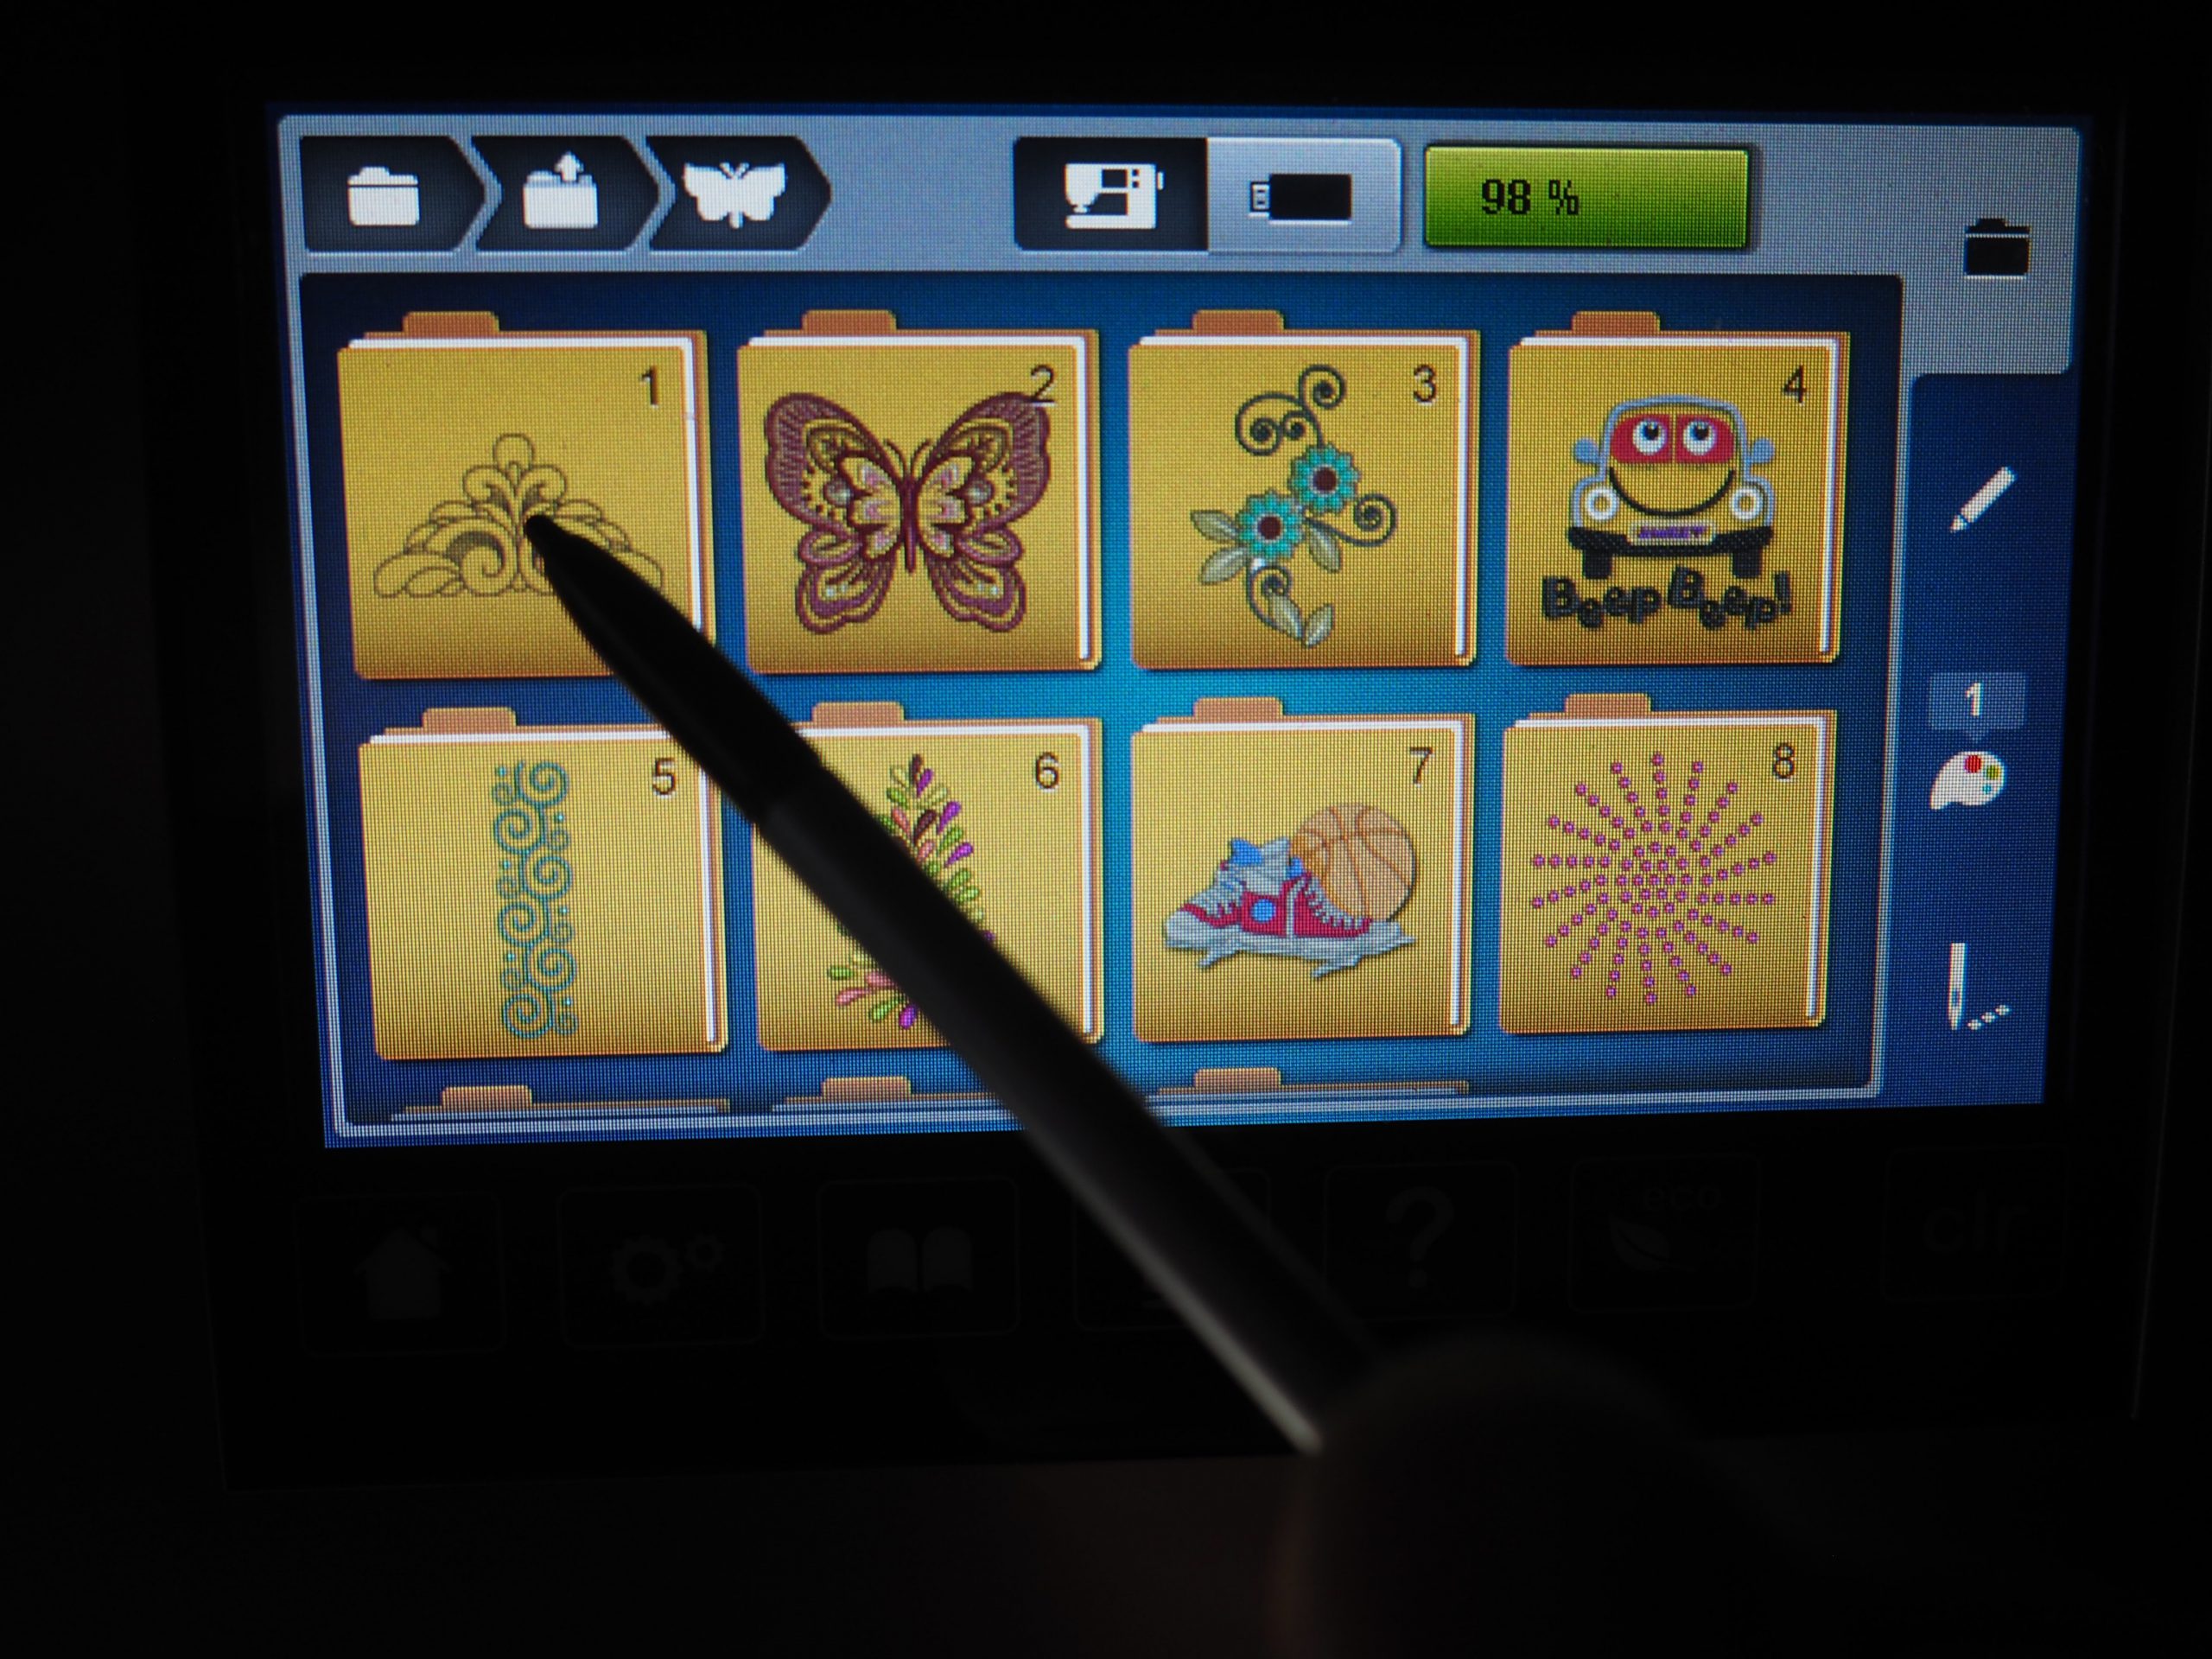
The new embroidery file folder no. 9 for the “quilting in the hoop” projects contains the following nine patchwork blocks. The diagrams also show the embroidery sequence of the individual areas. I chose block no. 9 for the cushion. This is the block in the middle on the right.
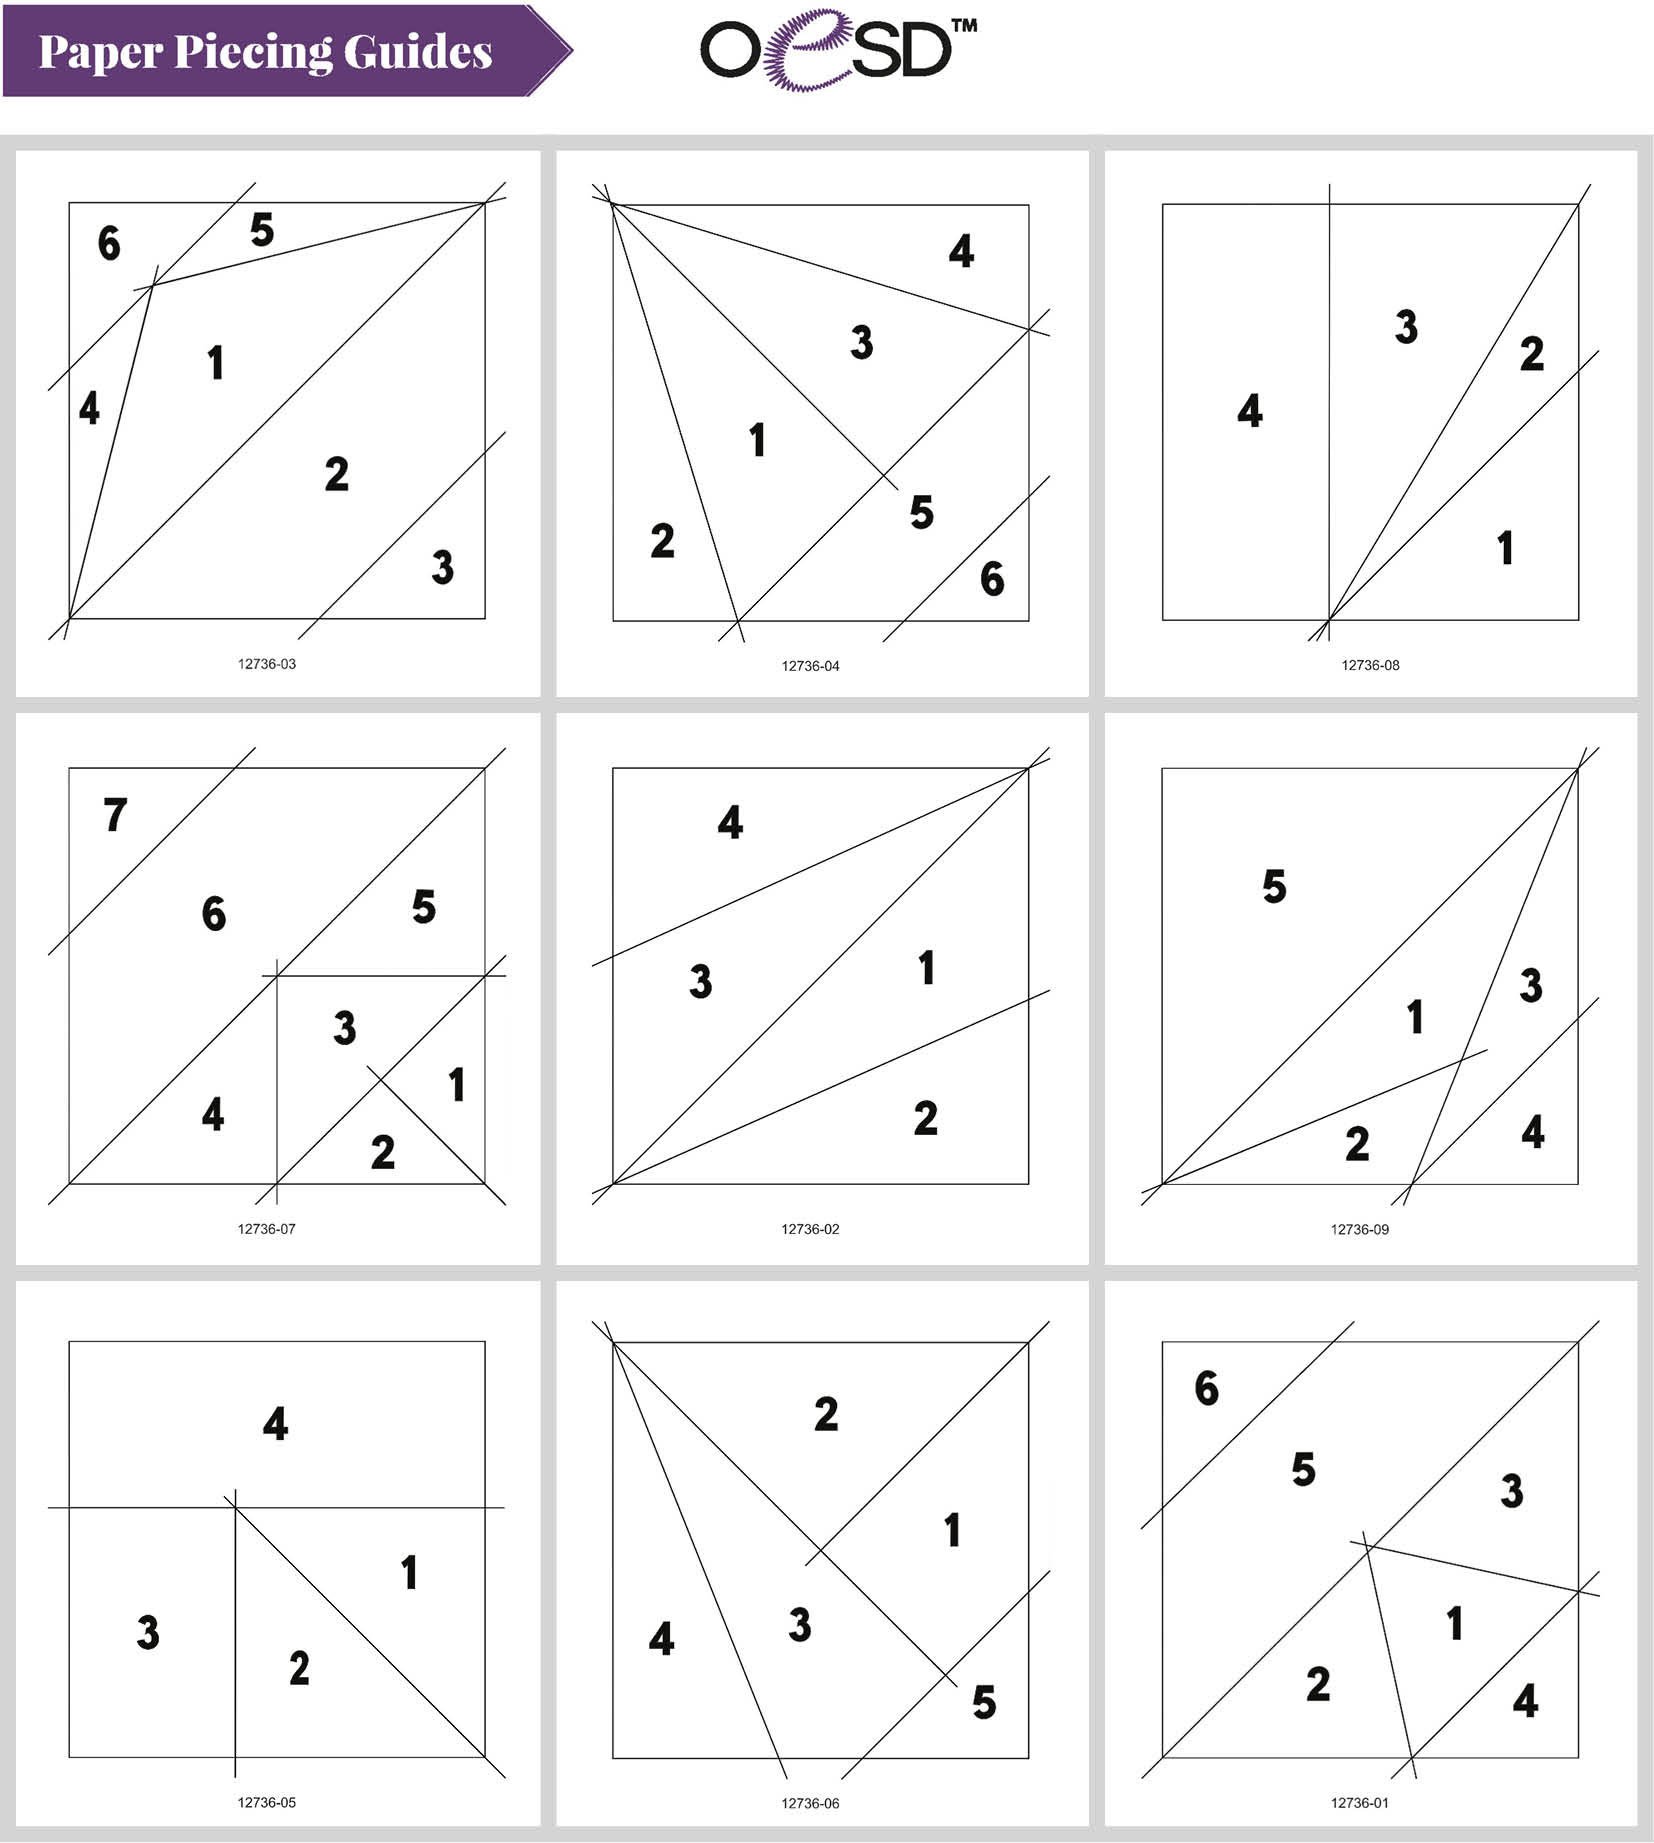
For the cushion, I embroidered four of these blocks, two at a time, in the Maxi Hoop. In my post “Quilting in the Hoop” – Embroidering a Patchwork Block in the Embroidery Hoop, I show you step-by-step how to embroider a patchwork block like this in the embroidery hoop.
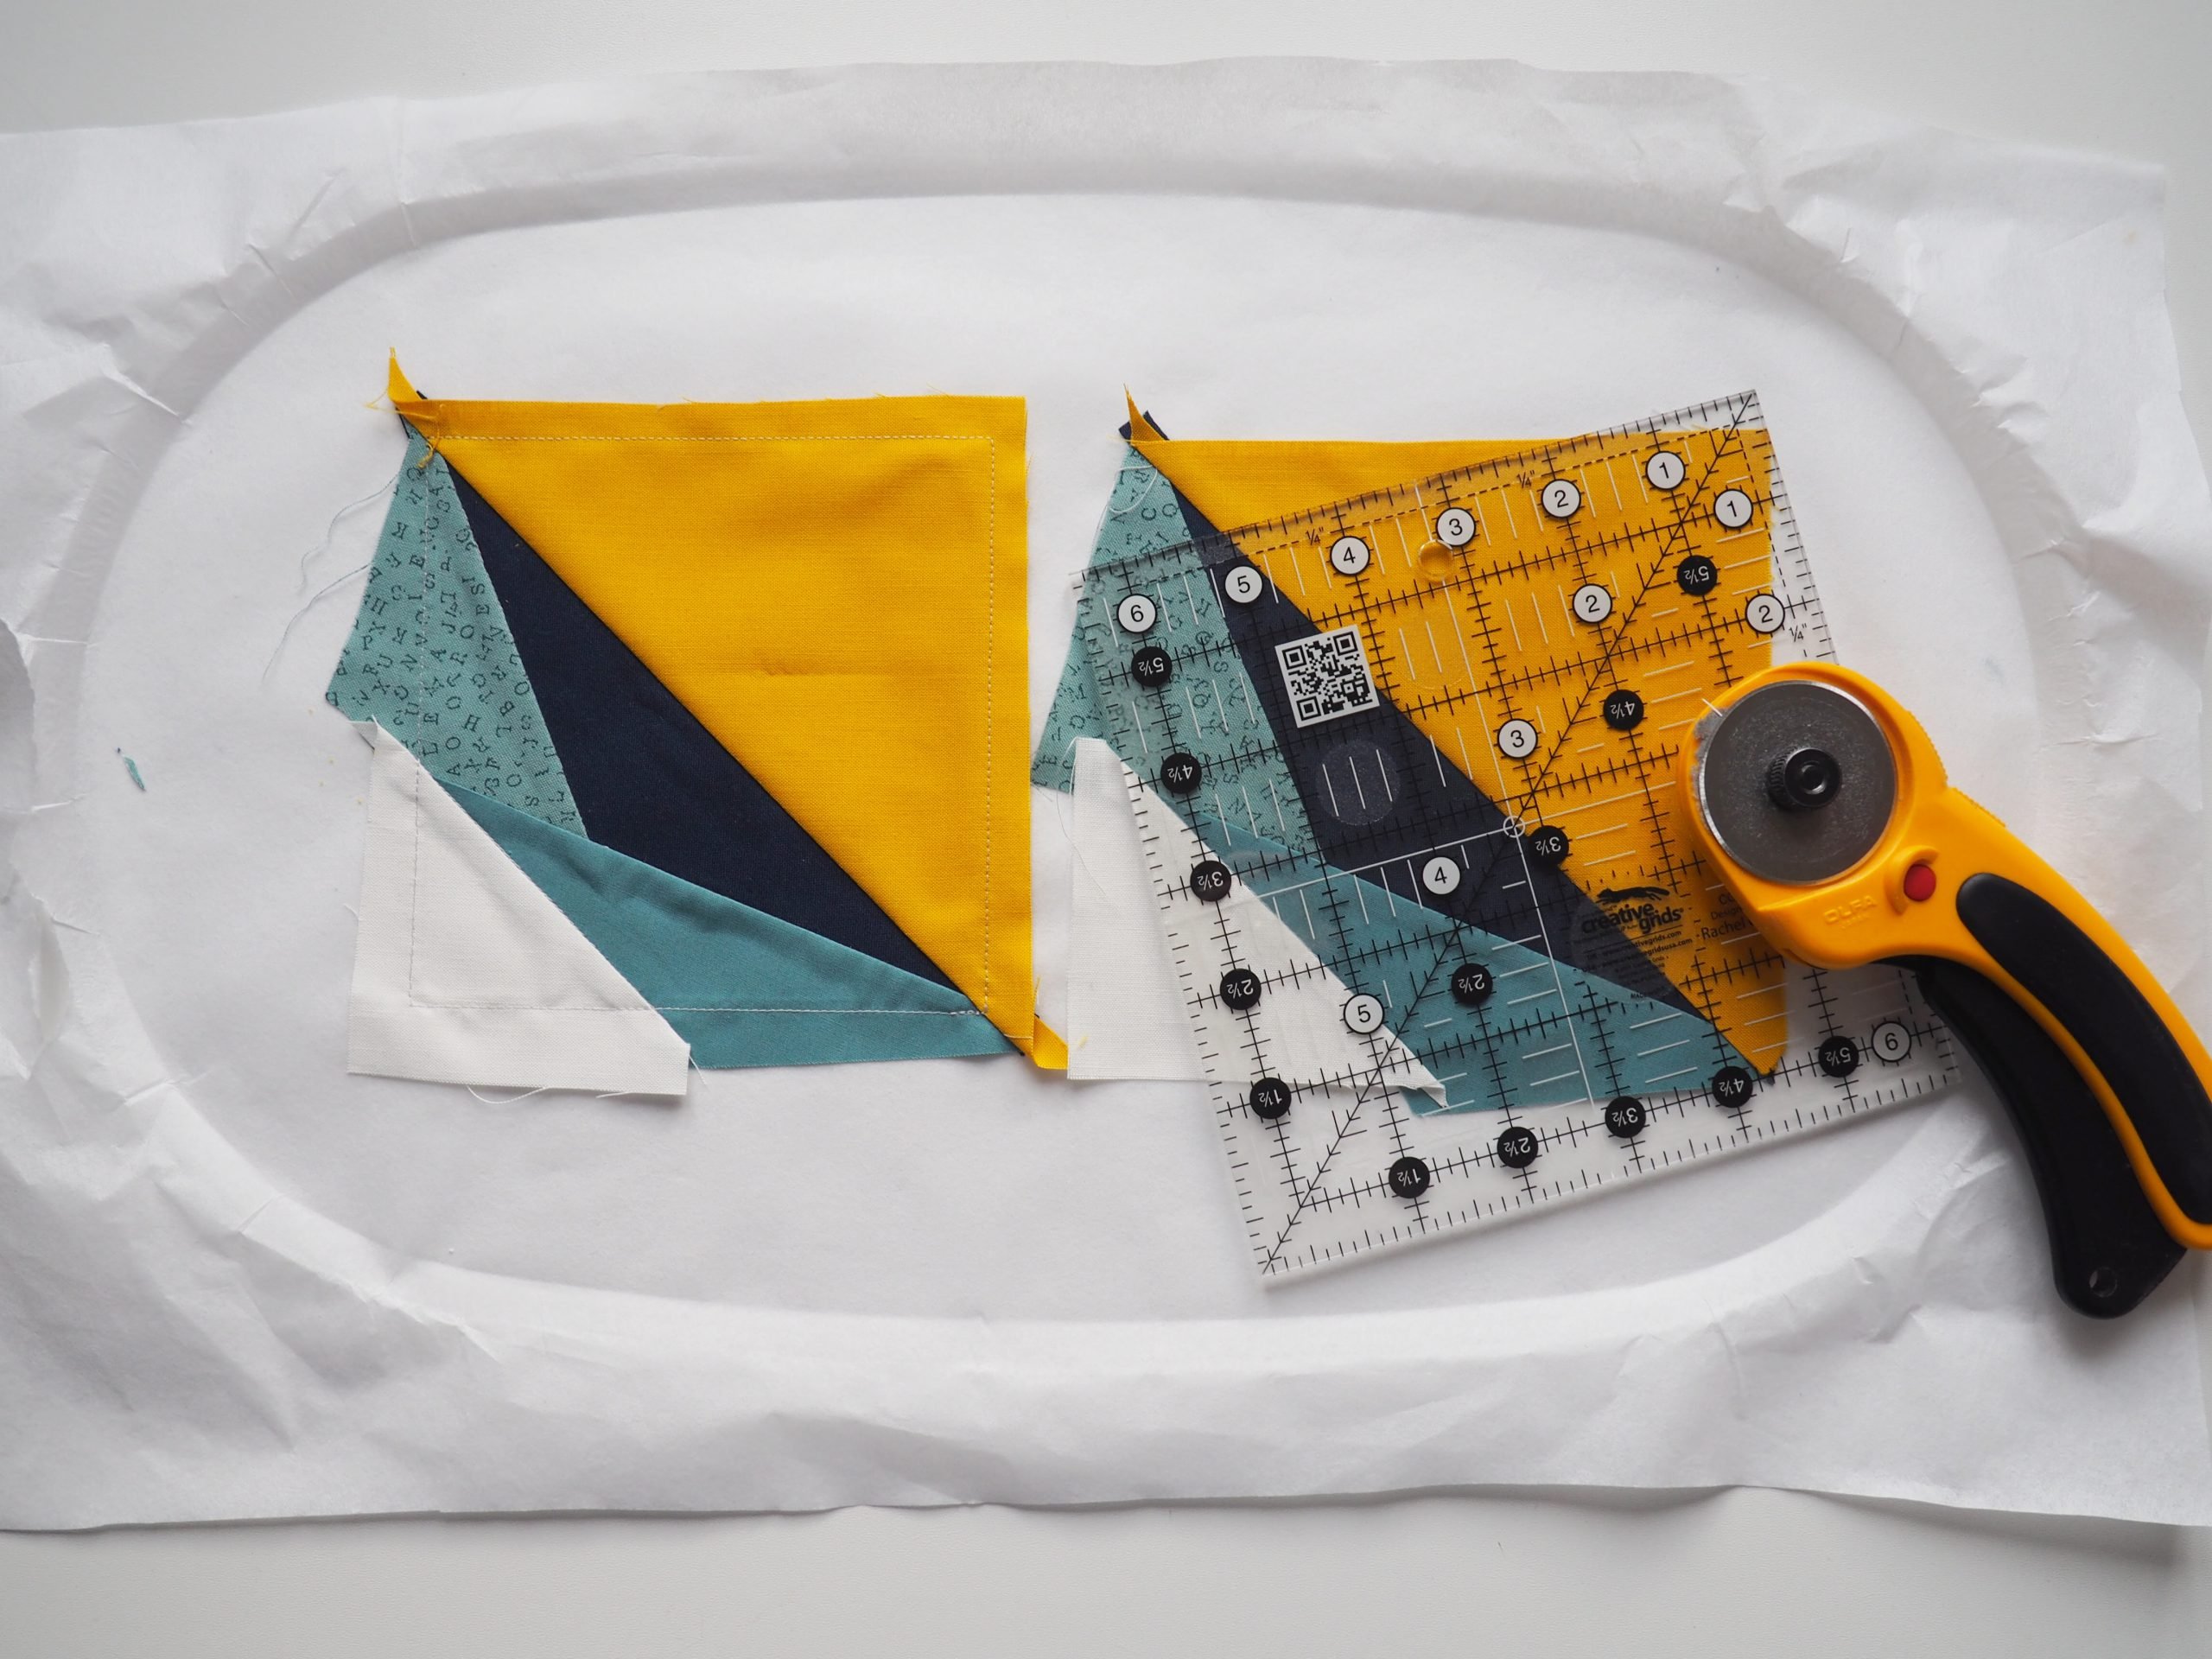
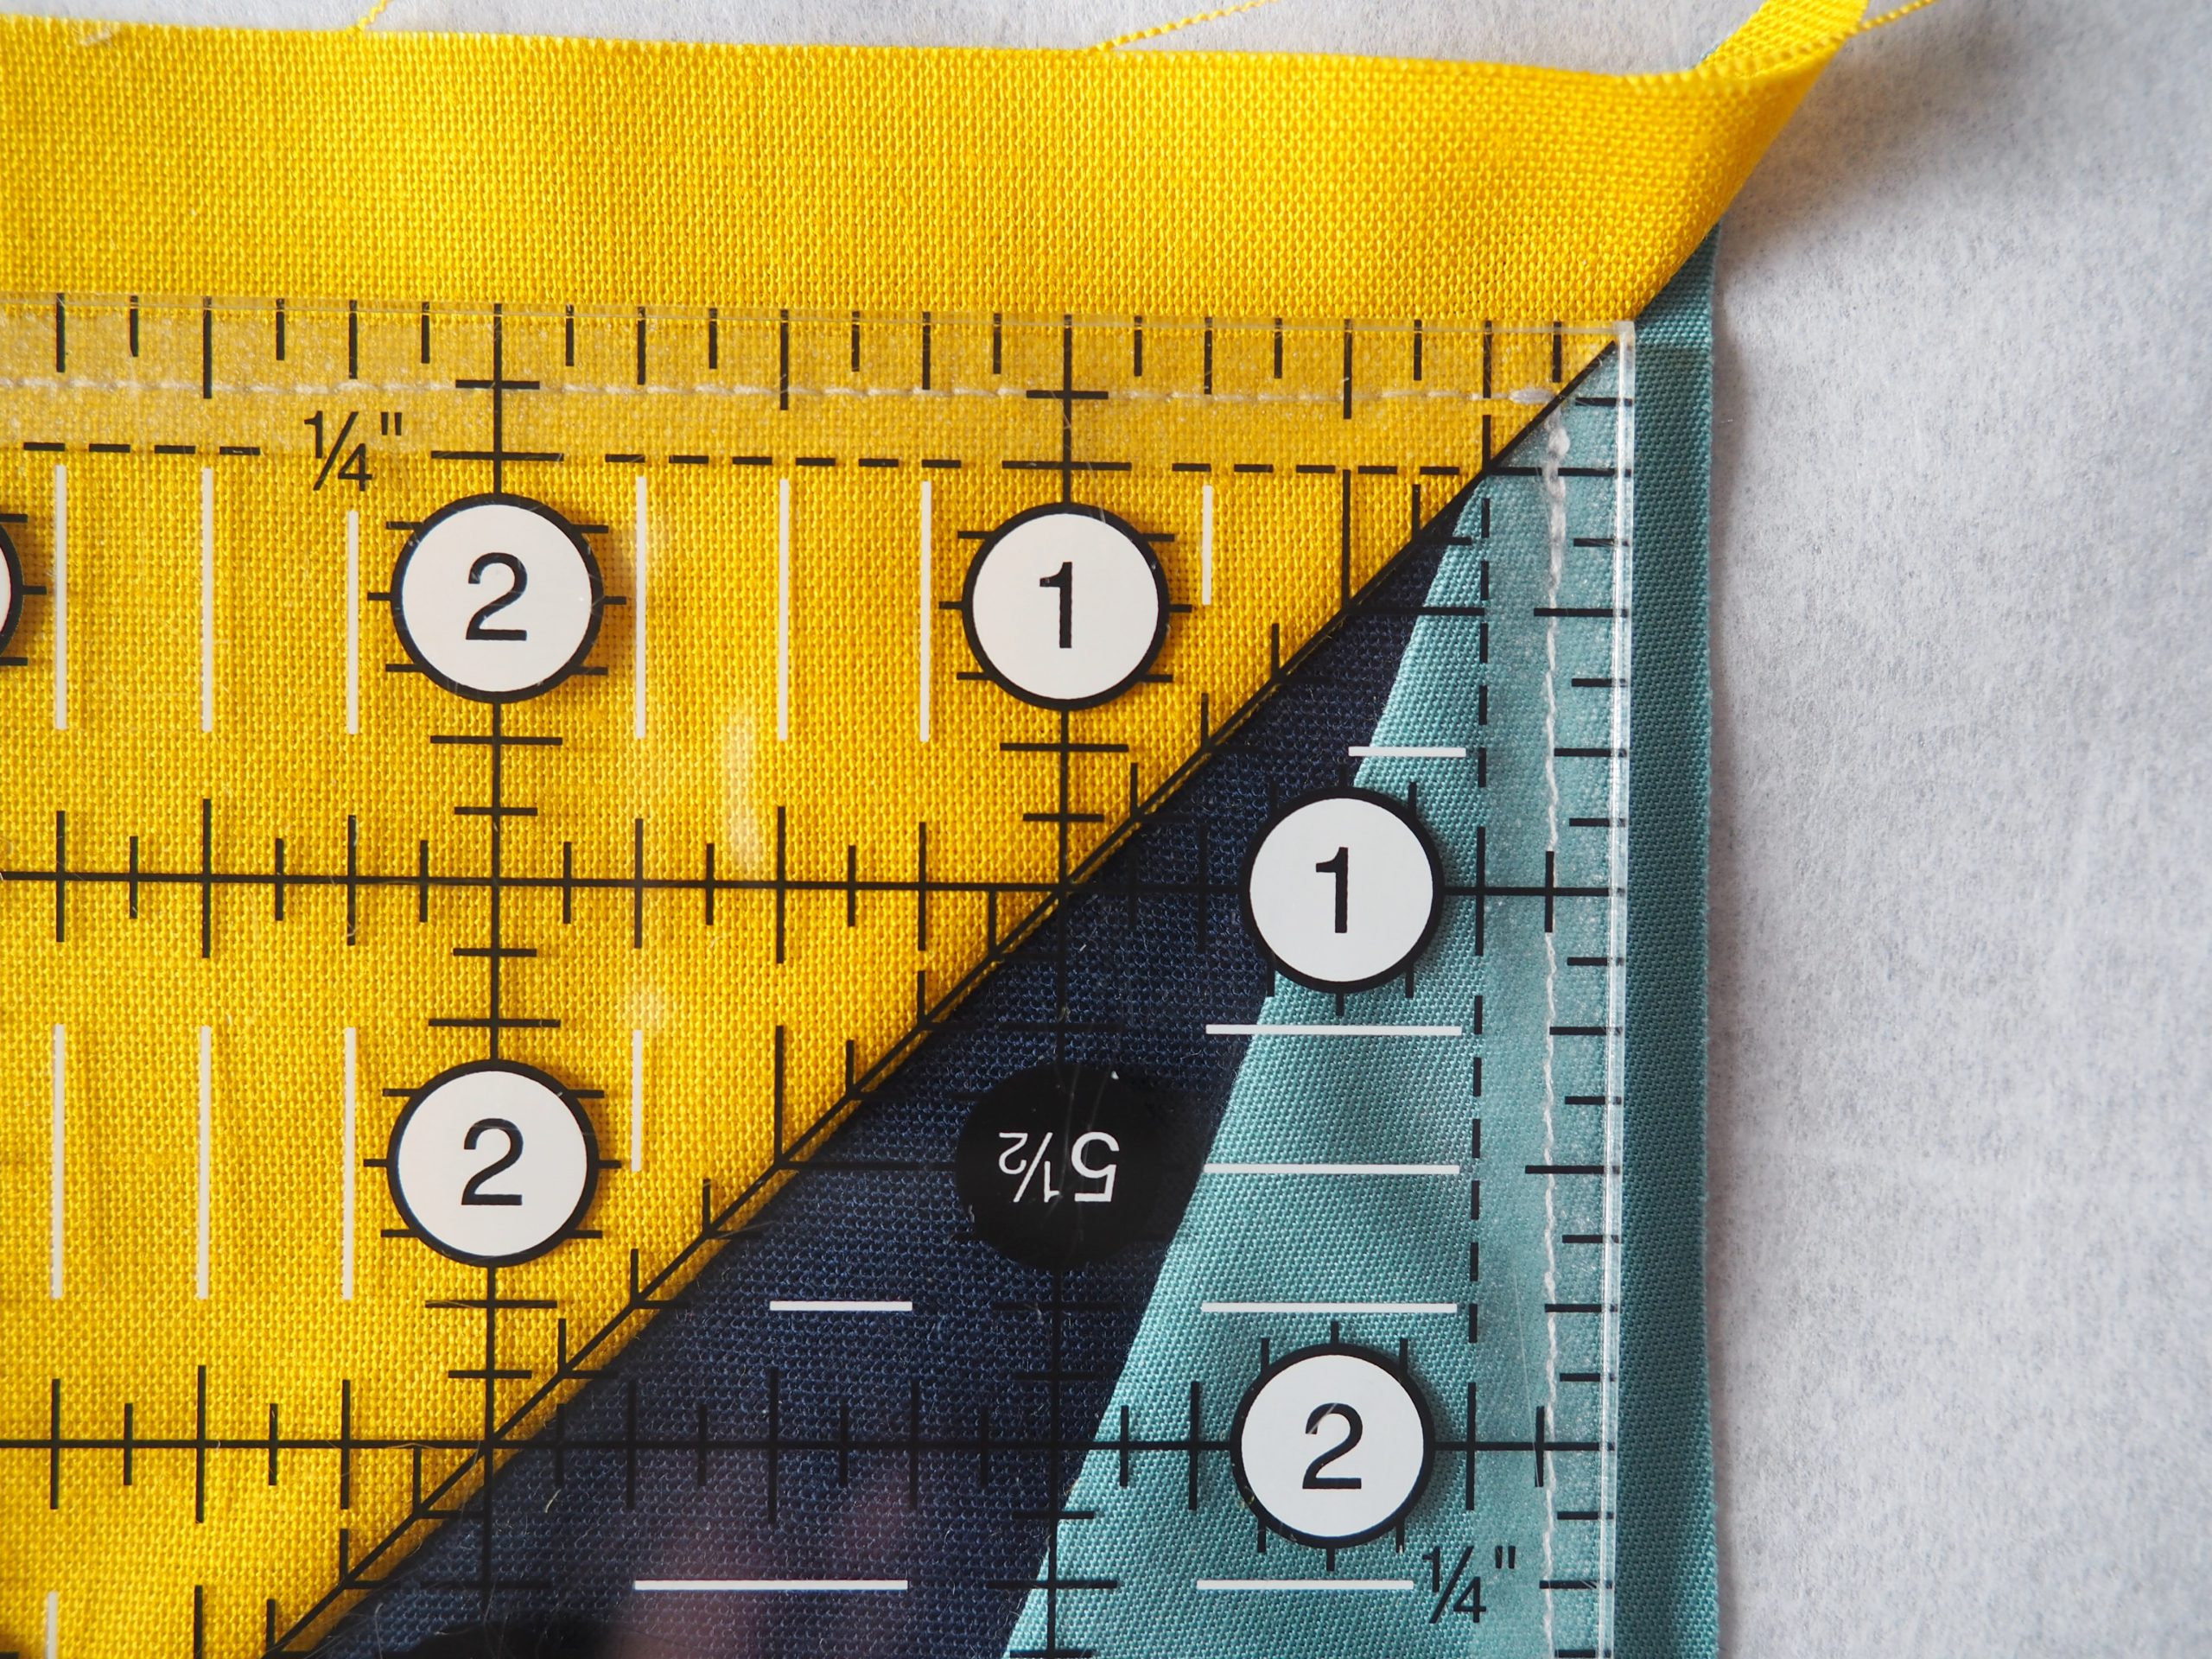
For my cushion, I embroidered the blocks including the last embroidery sequence: a seam is embroidered around the edge of each block at the end as a border and for added stability. This last embroidered line makes it easier to cut the block out accurately: using a ruler and the rotary cutter, the block is cut 1/8″ away from this line to a size of 5.5″ x 5.5″.
For my table runner project, I left this last embroidery sequence out to make it easier to remove the fusible stabilizer from the back. The square border visible on the back then serves as a cutting aid: by cutting 1/4″ away from it, I cut the block to a size of 5.5″ x 5.5″.
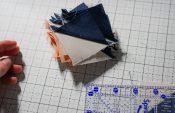
I sewed or embroidered four identical blocks of block no. 9 and cut them out.
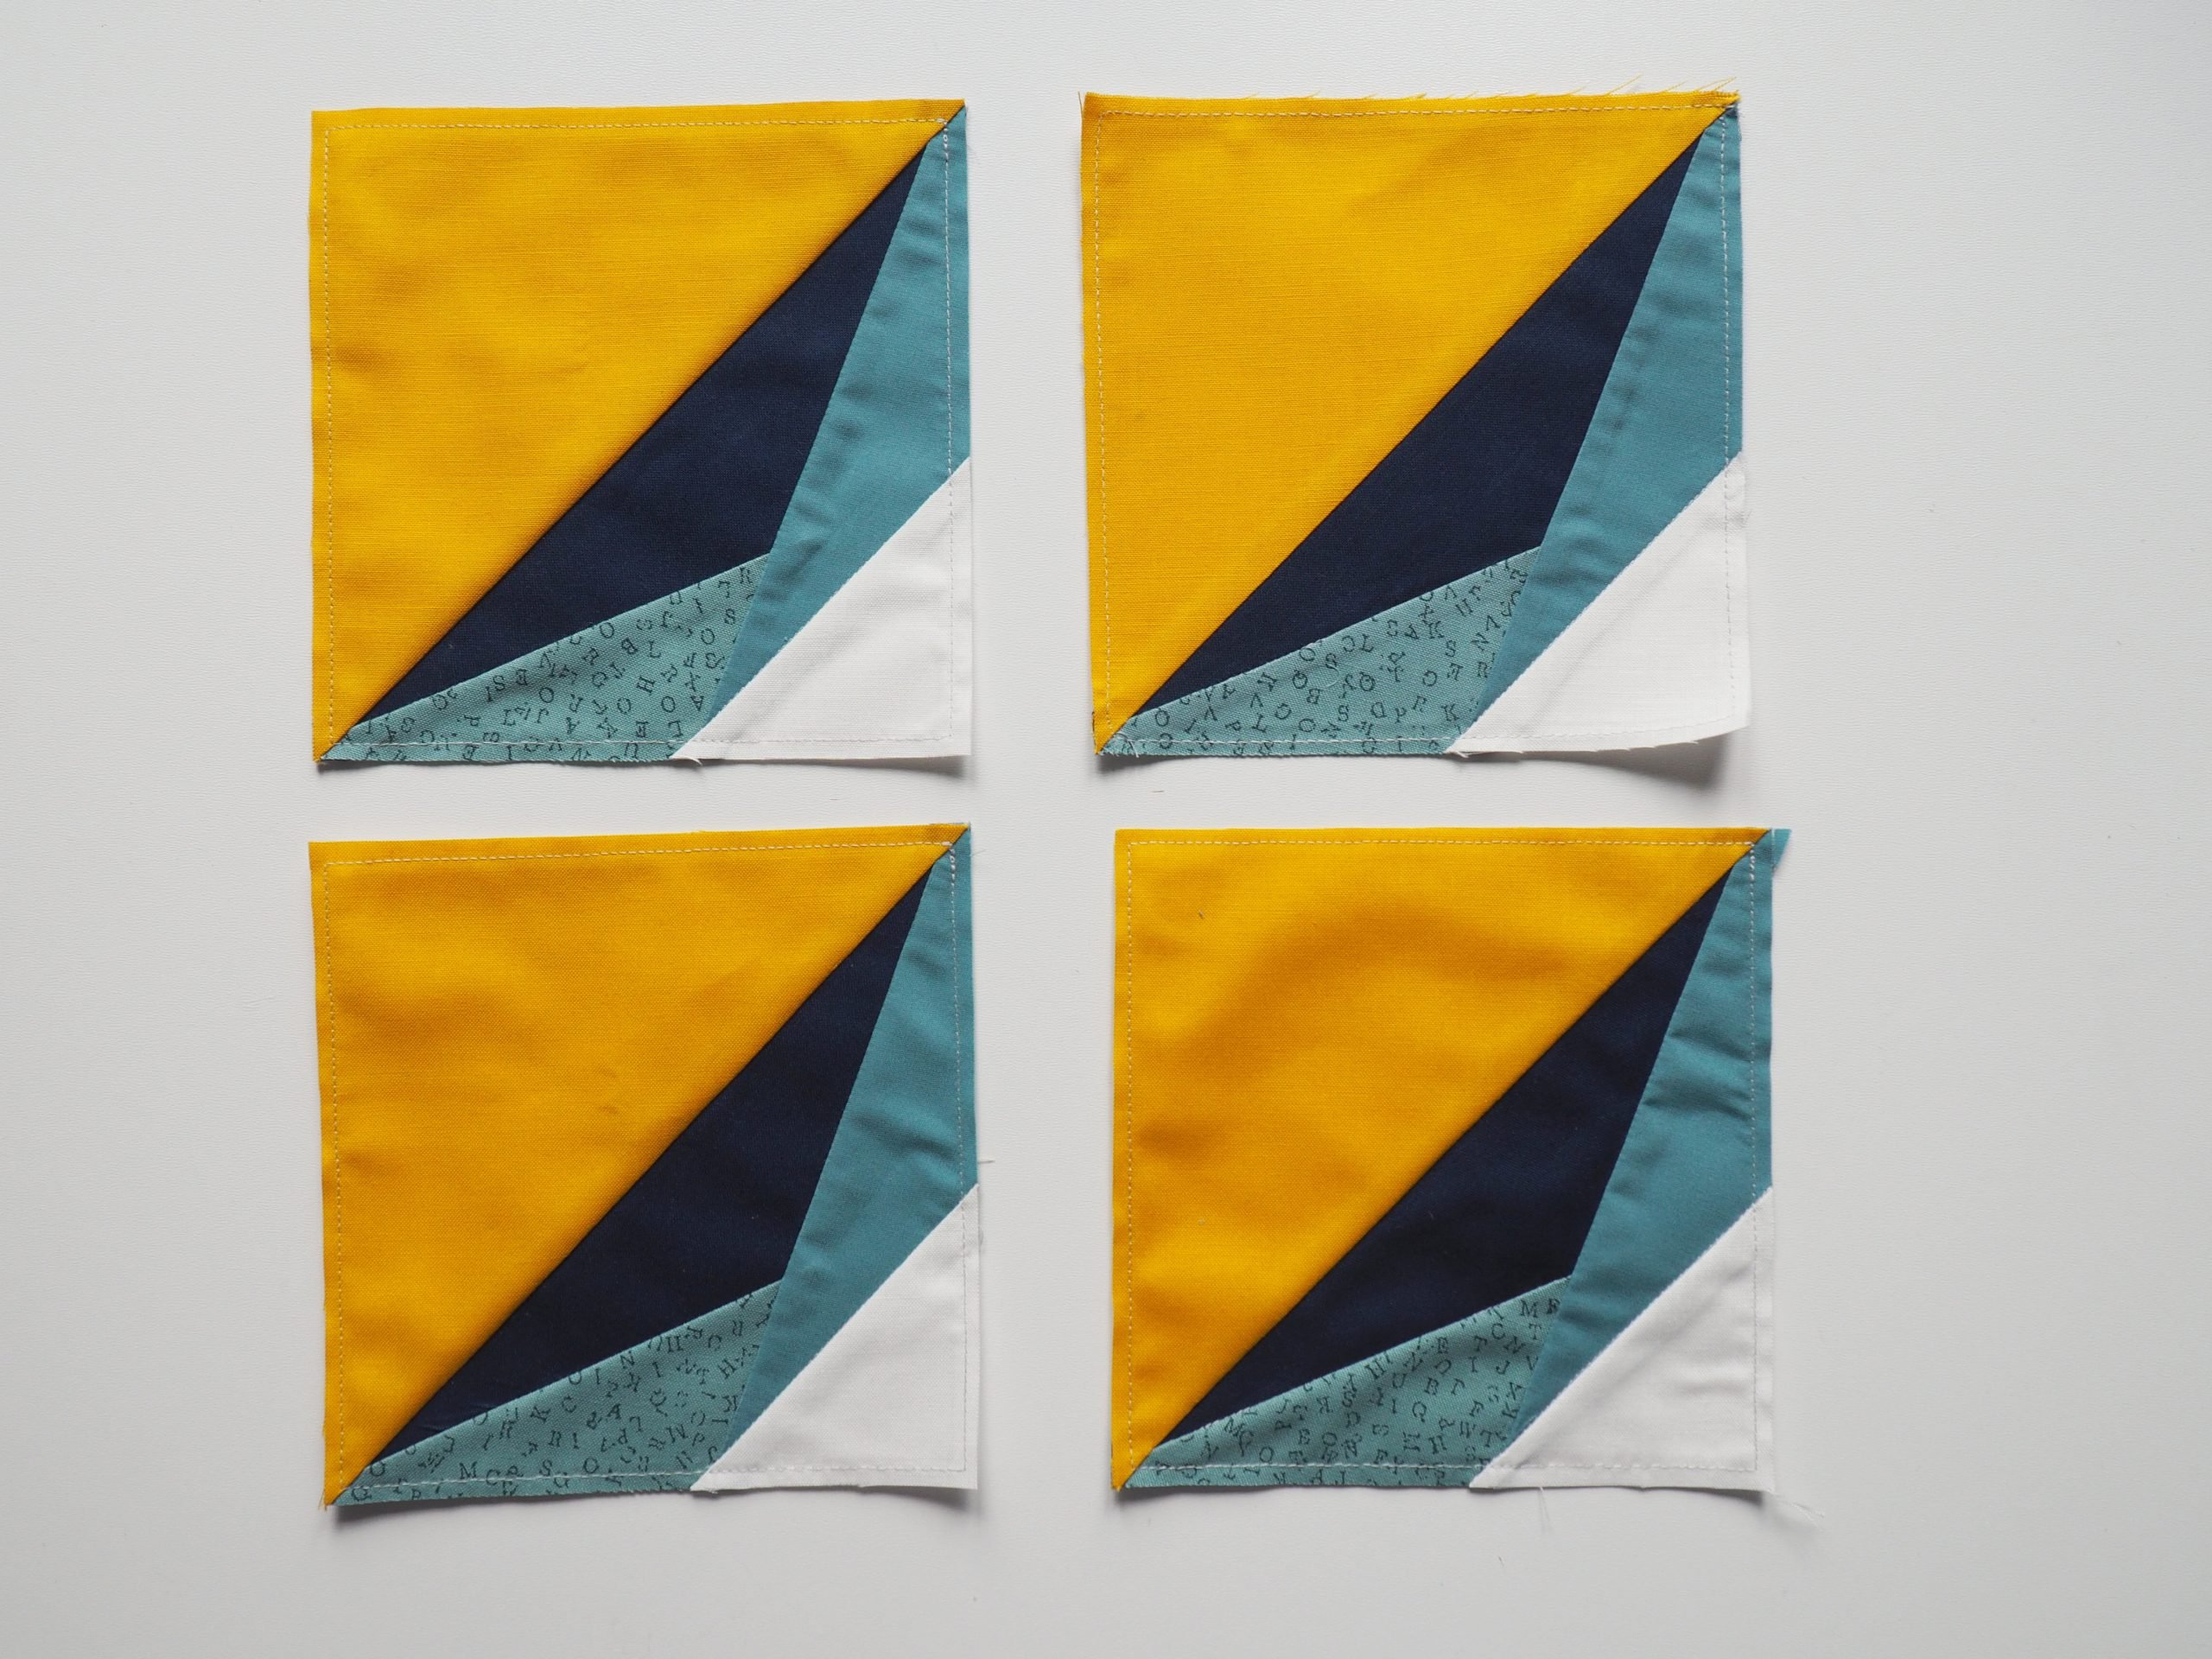
To make a large block, I arranged the four blocks and first sewed two blocks each together.
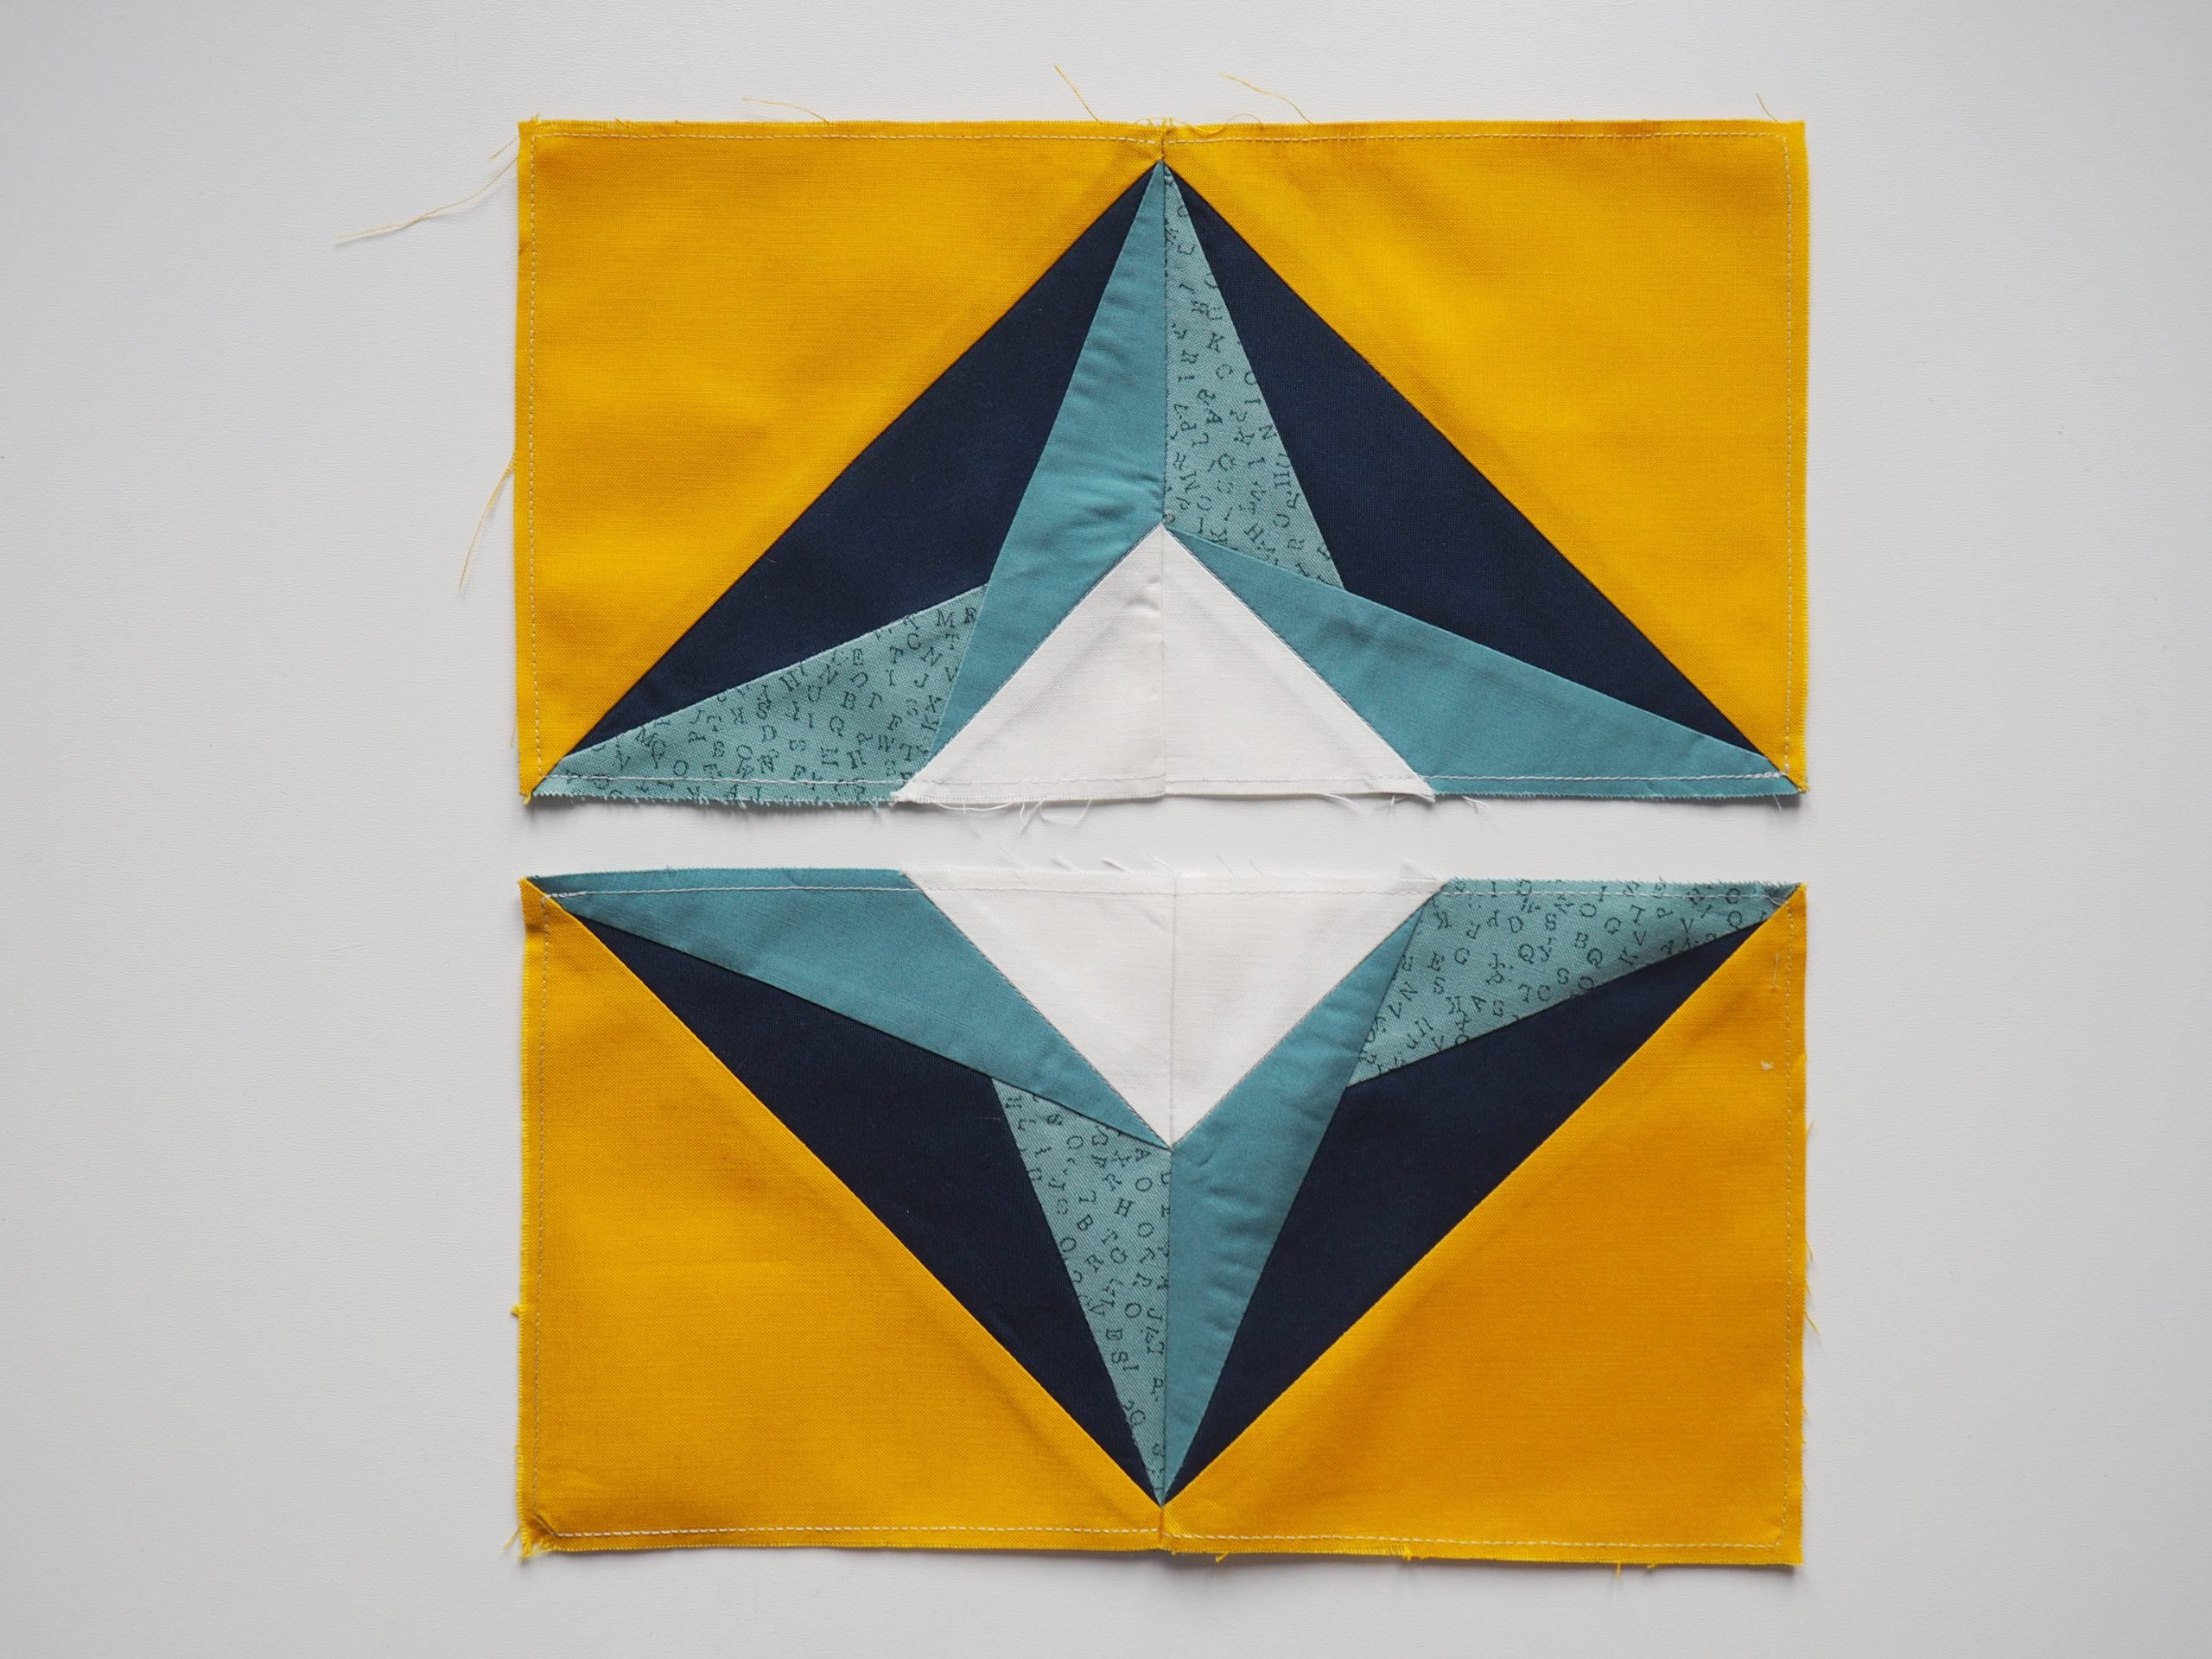
Then I sewed the two sets of two blocks together to make a 10.5″ x 10.5″ block.
Before the next step, I removed the fusible stabilizer from the back of the blocks.
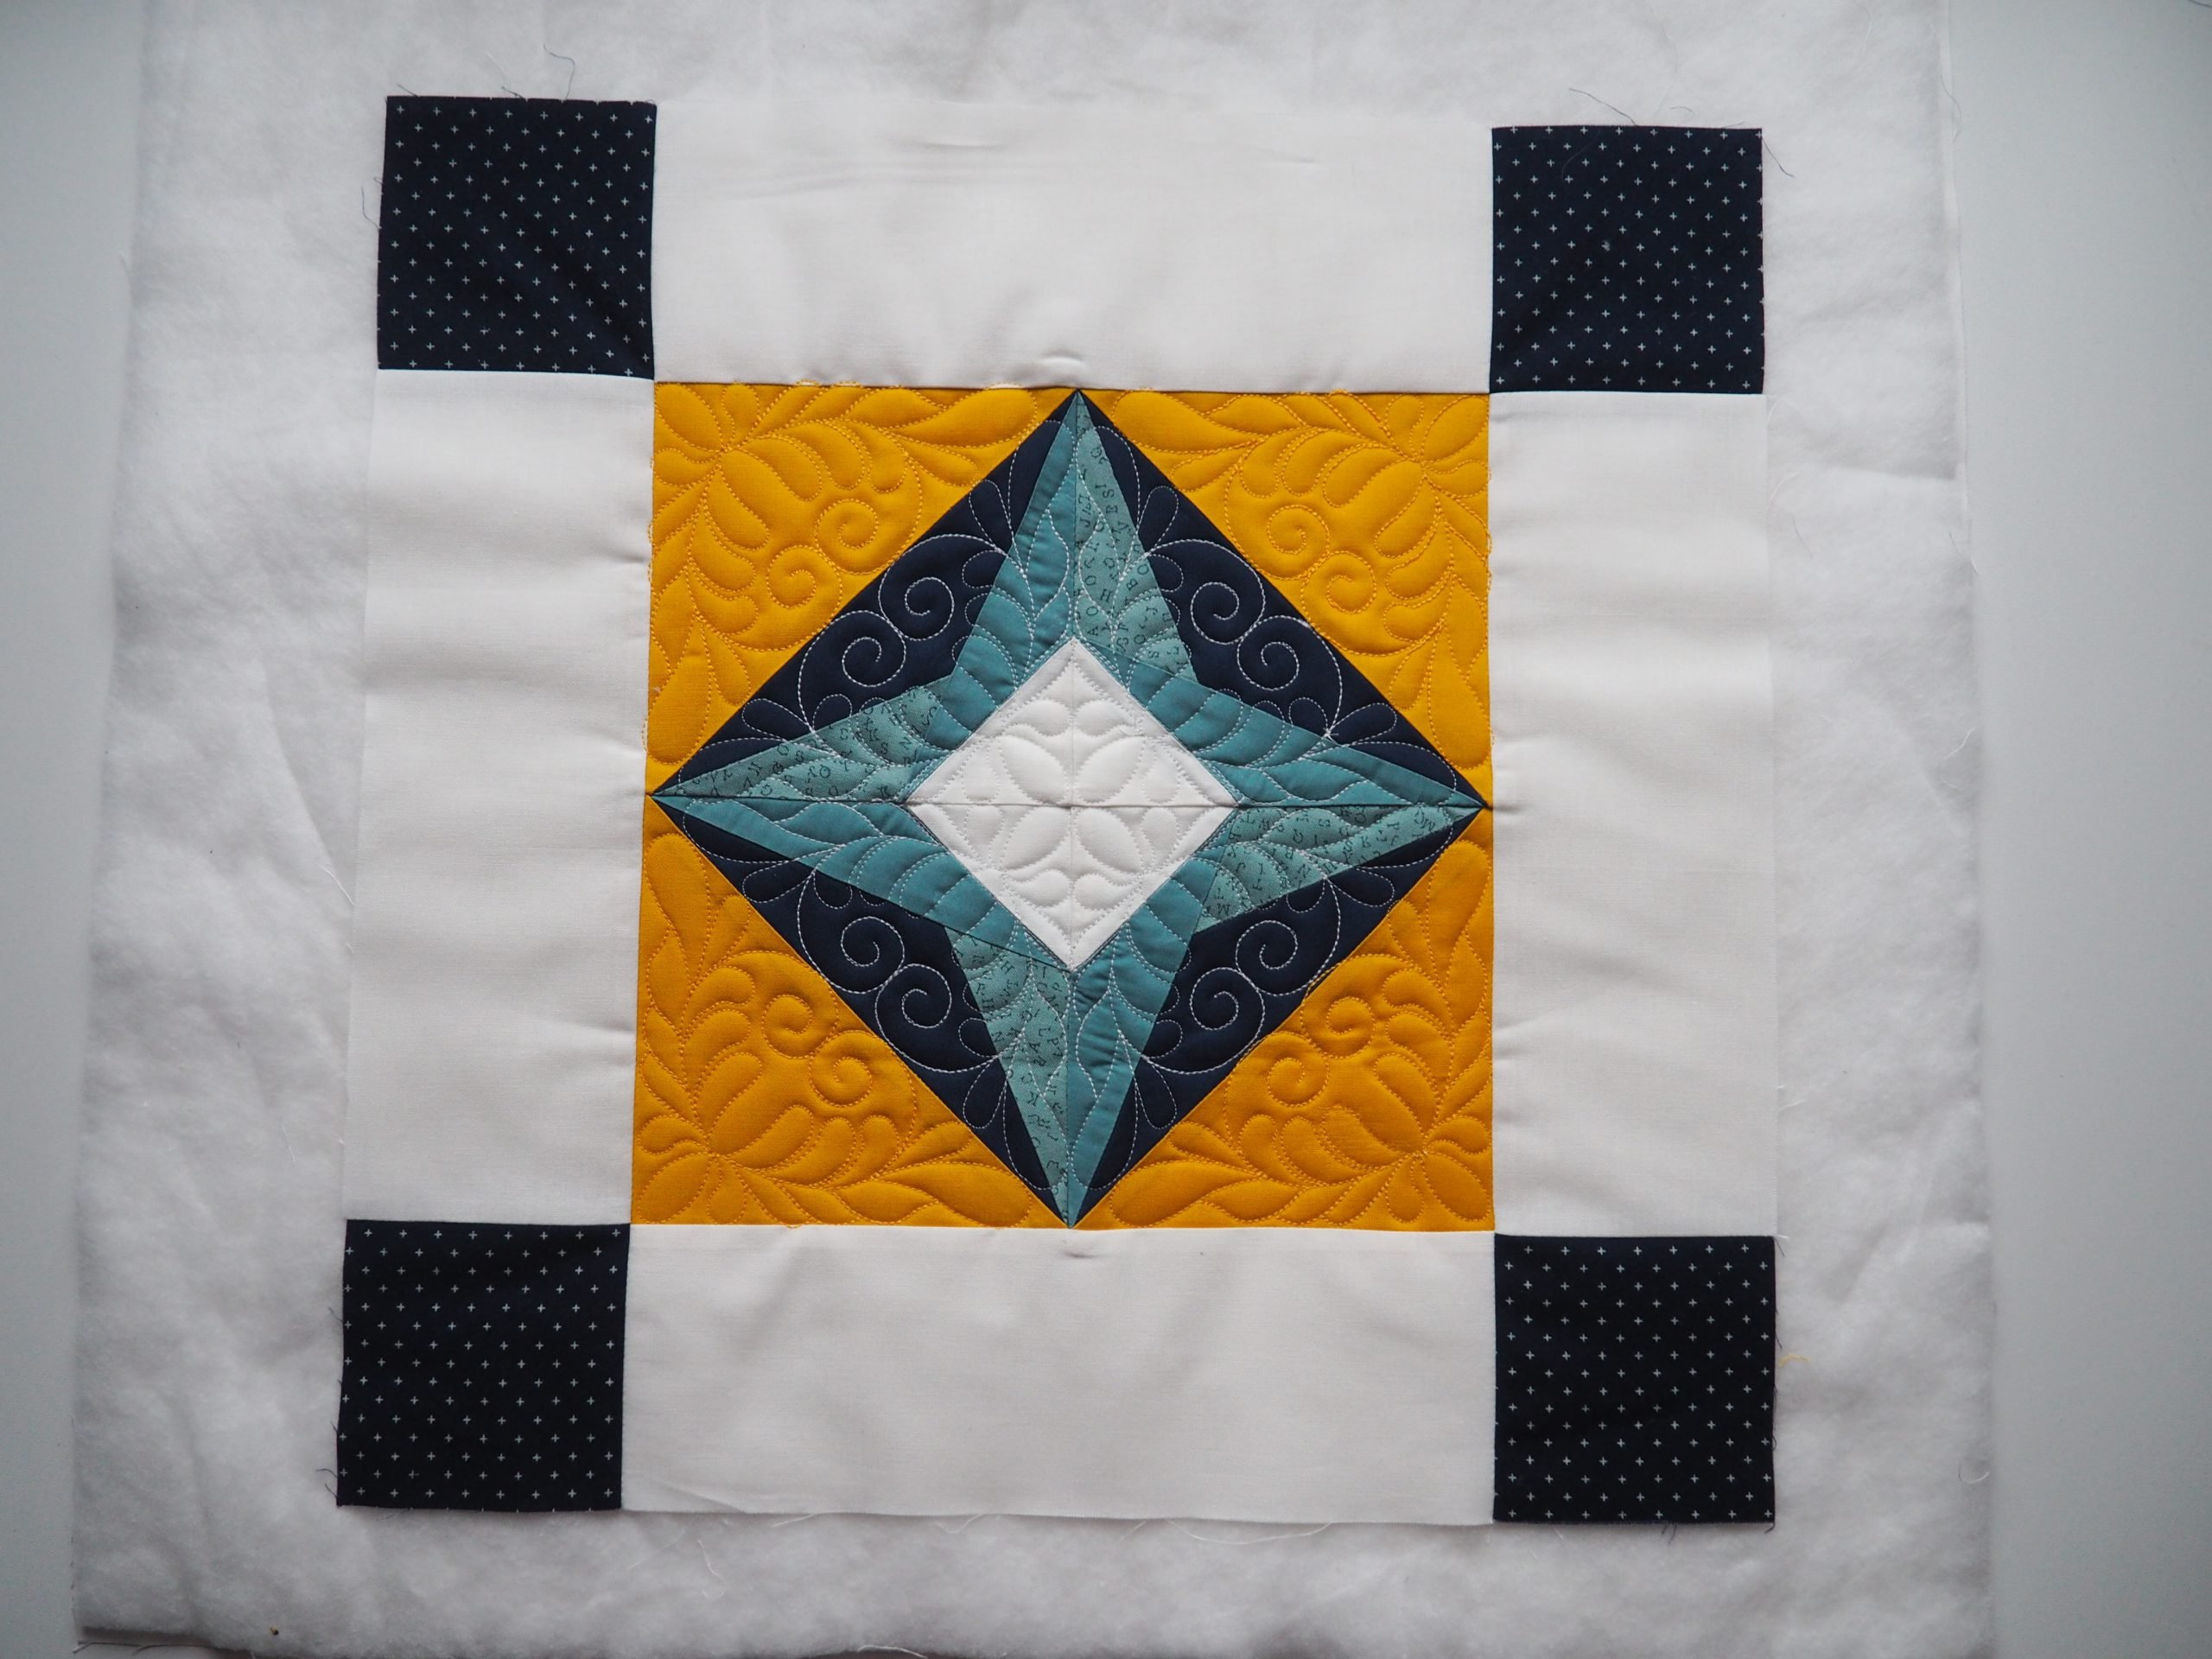
The border for the “quilting in the hoop” cushion
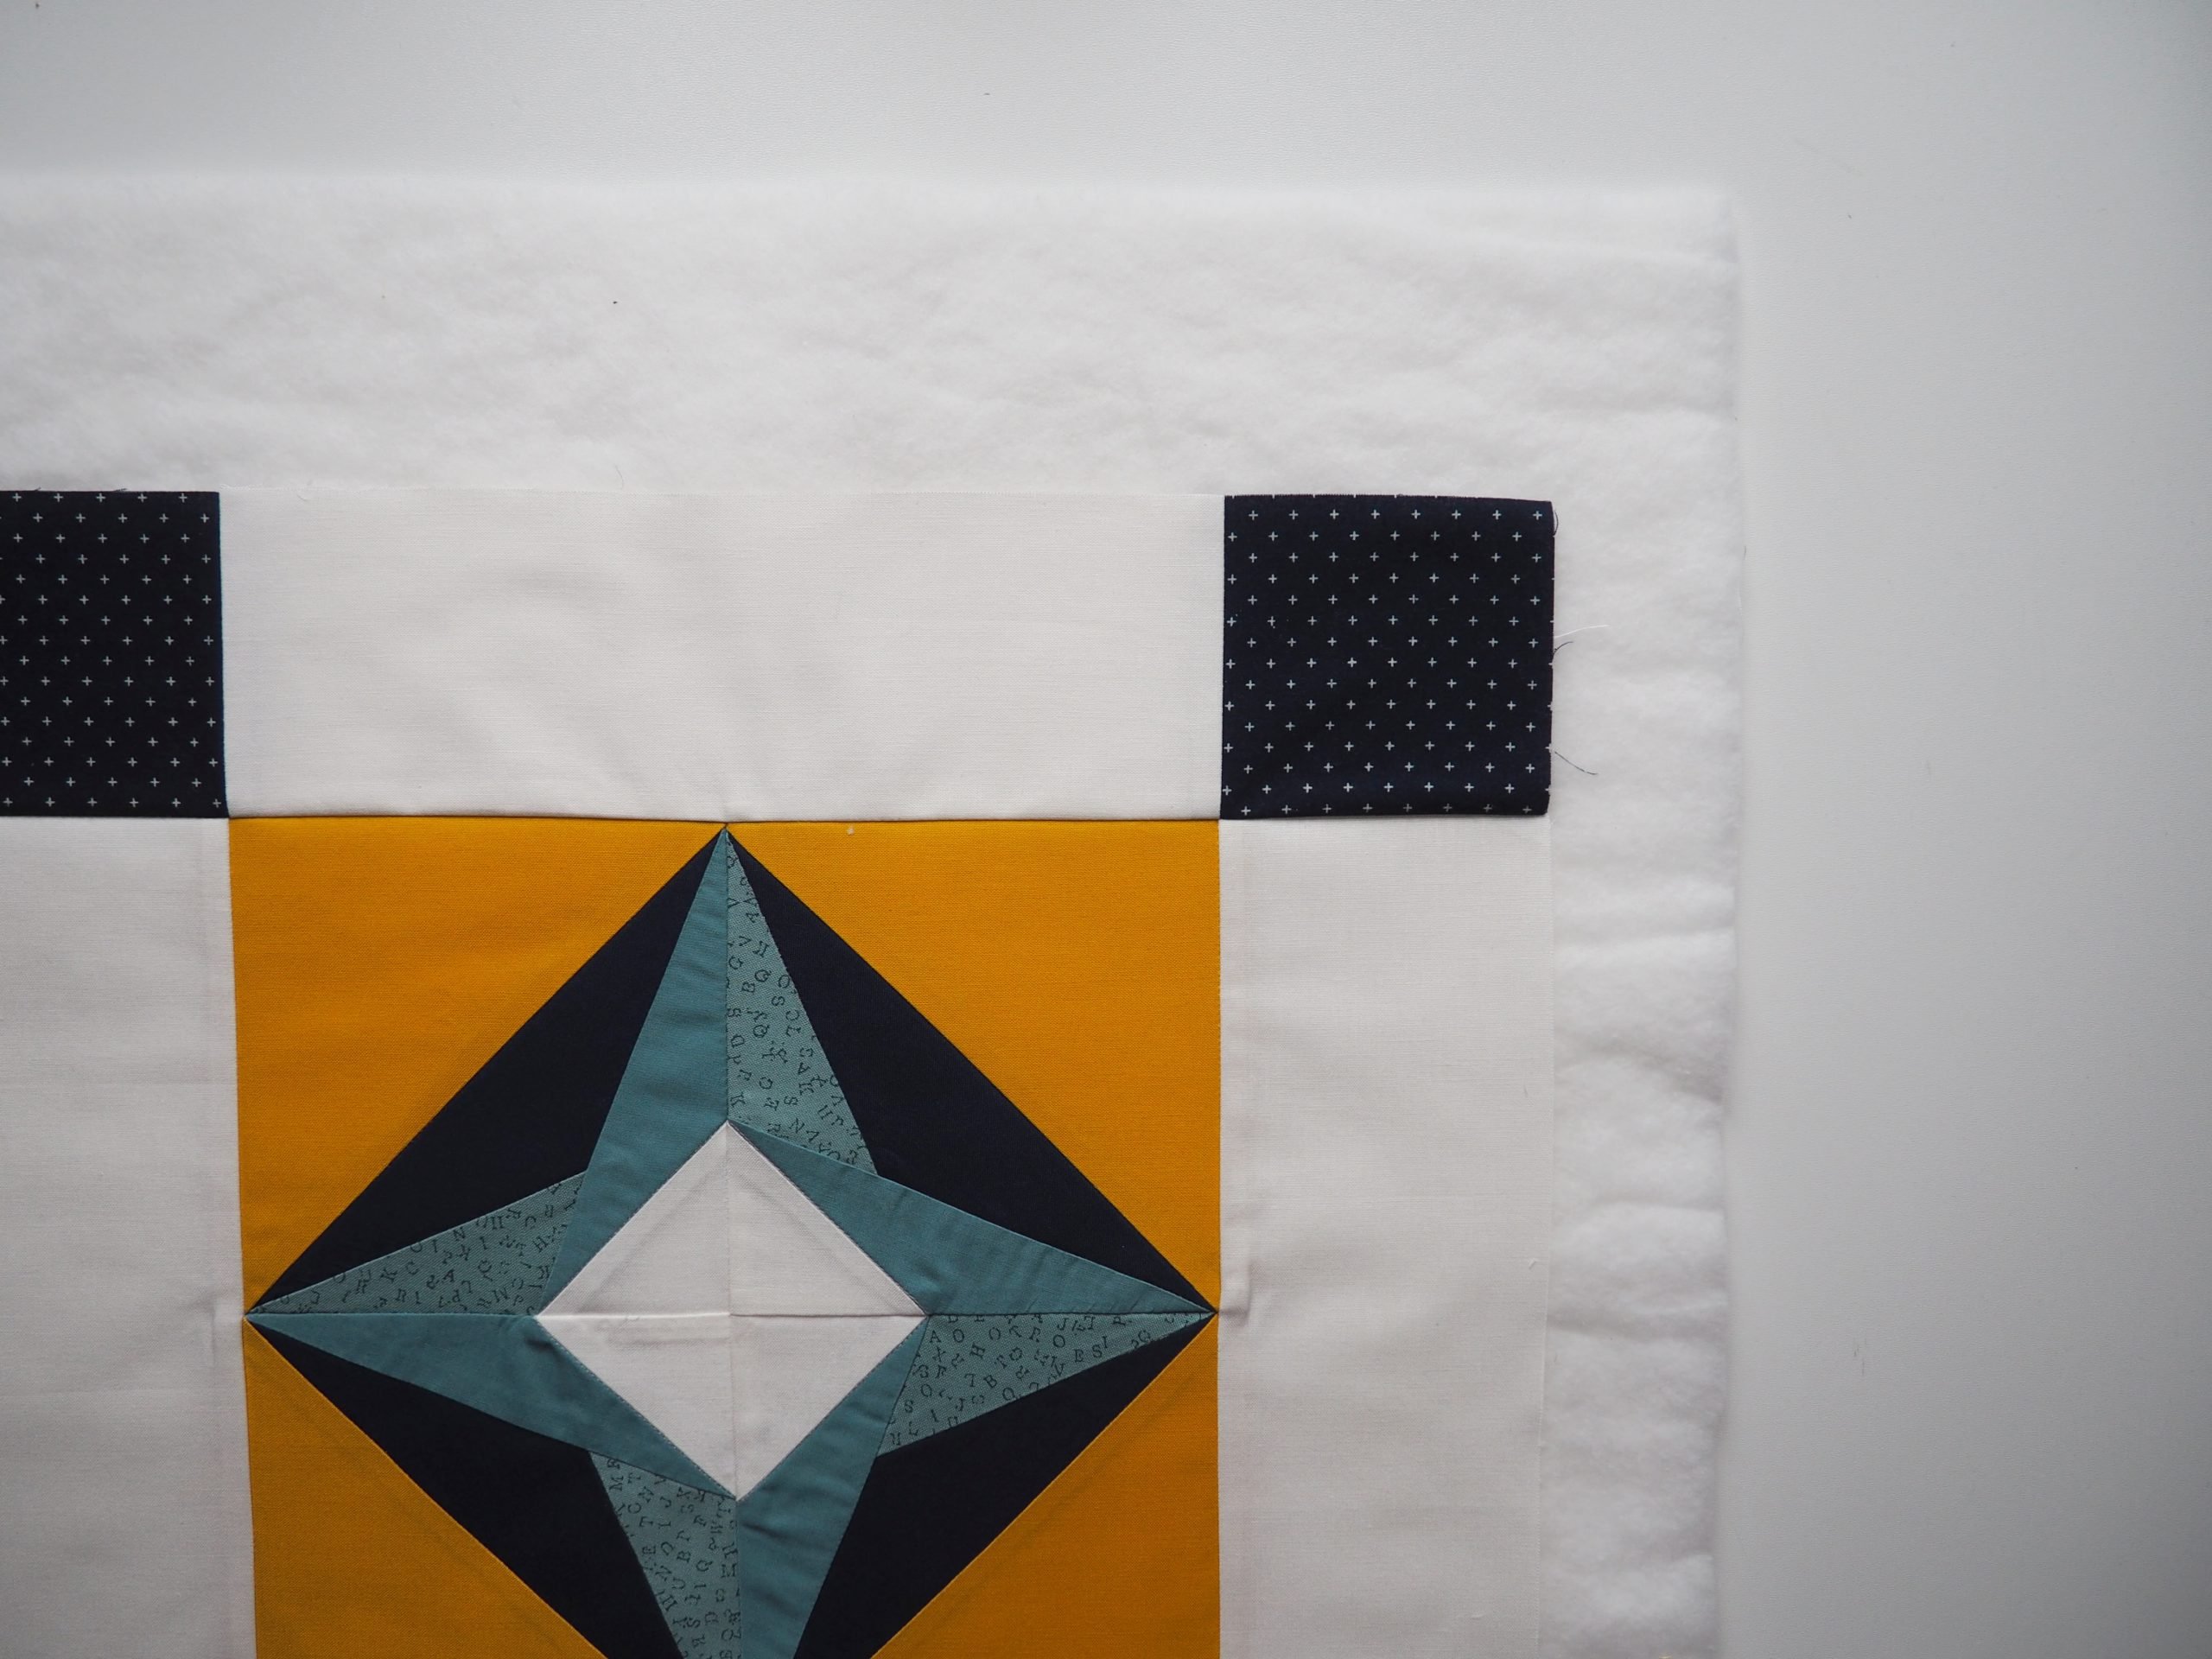
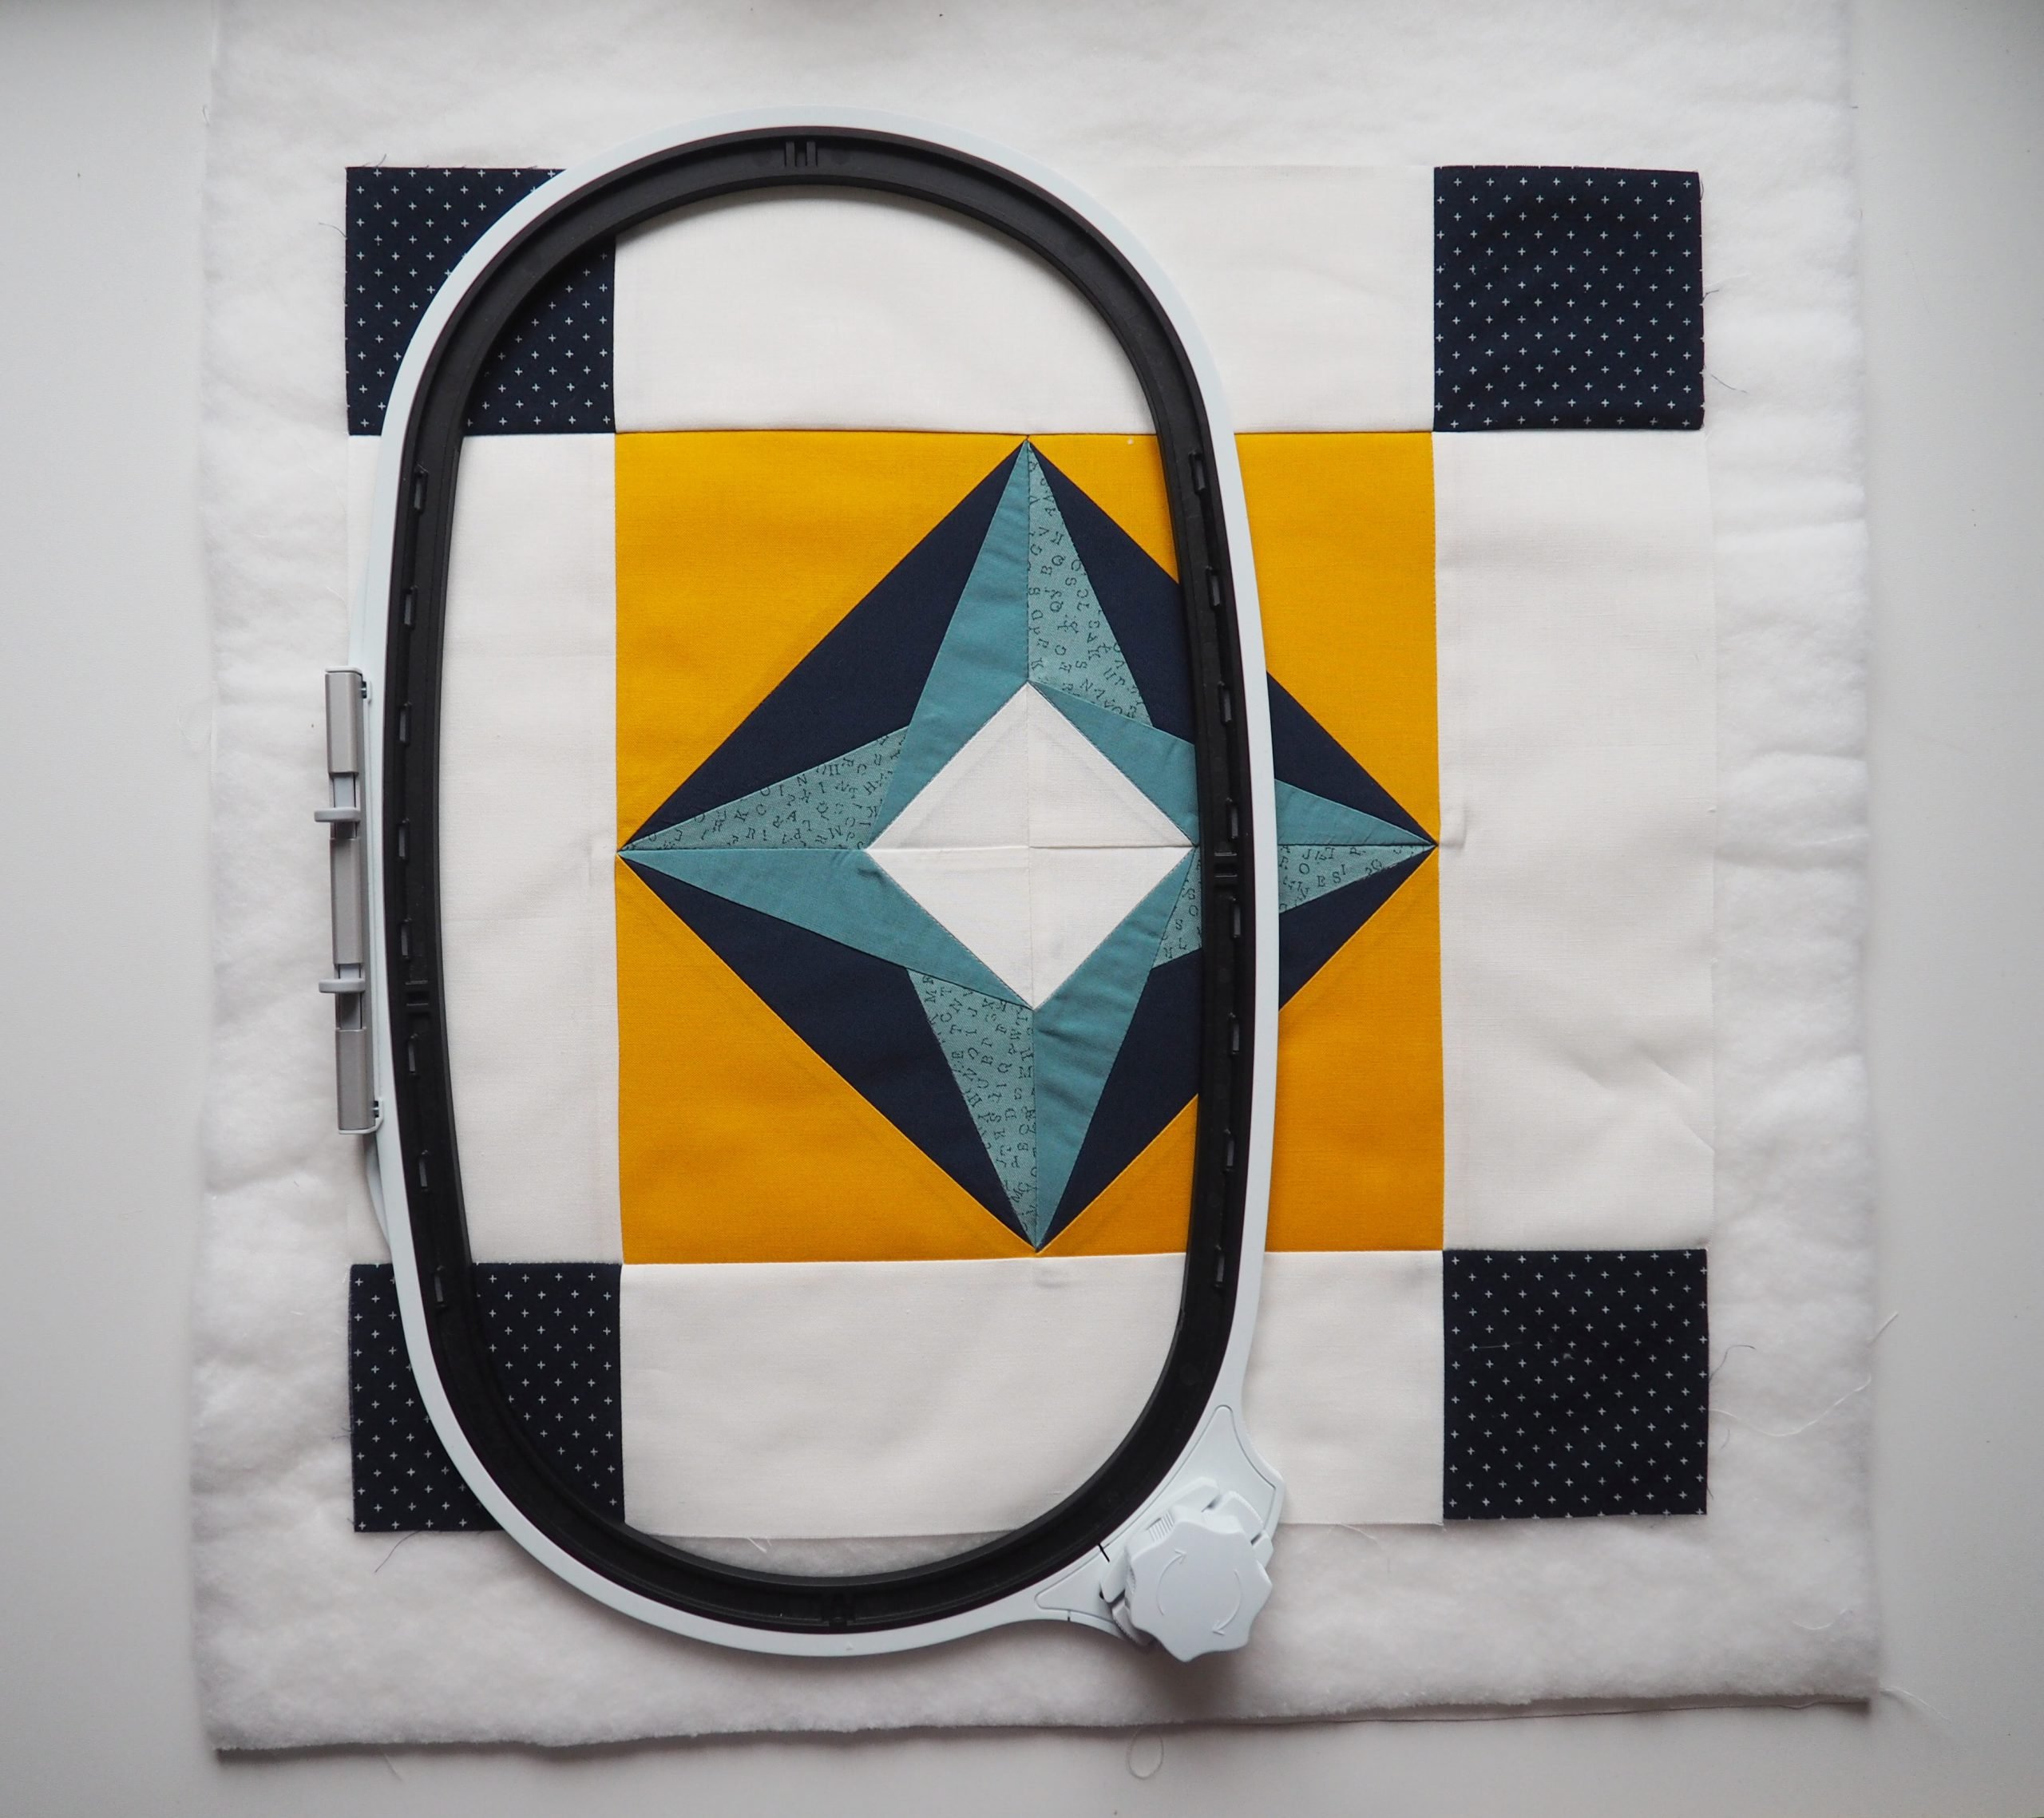
As the large 10″ x 10″ block is too small for a cushion measuring 40 cm x 40 cm, I added a border around the block with contrasting colored corner squares (10″ ~25 cm).
For this, I cut out:
- 4 x 3.5″x 3.5″ for the corner stones: the blue squares in this case
- 4 x 3.5″ x 10.5″ for the border: the white strips in this case
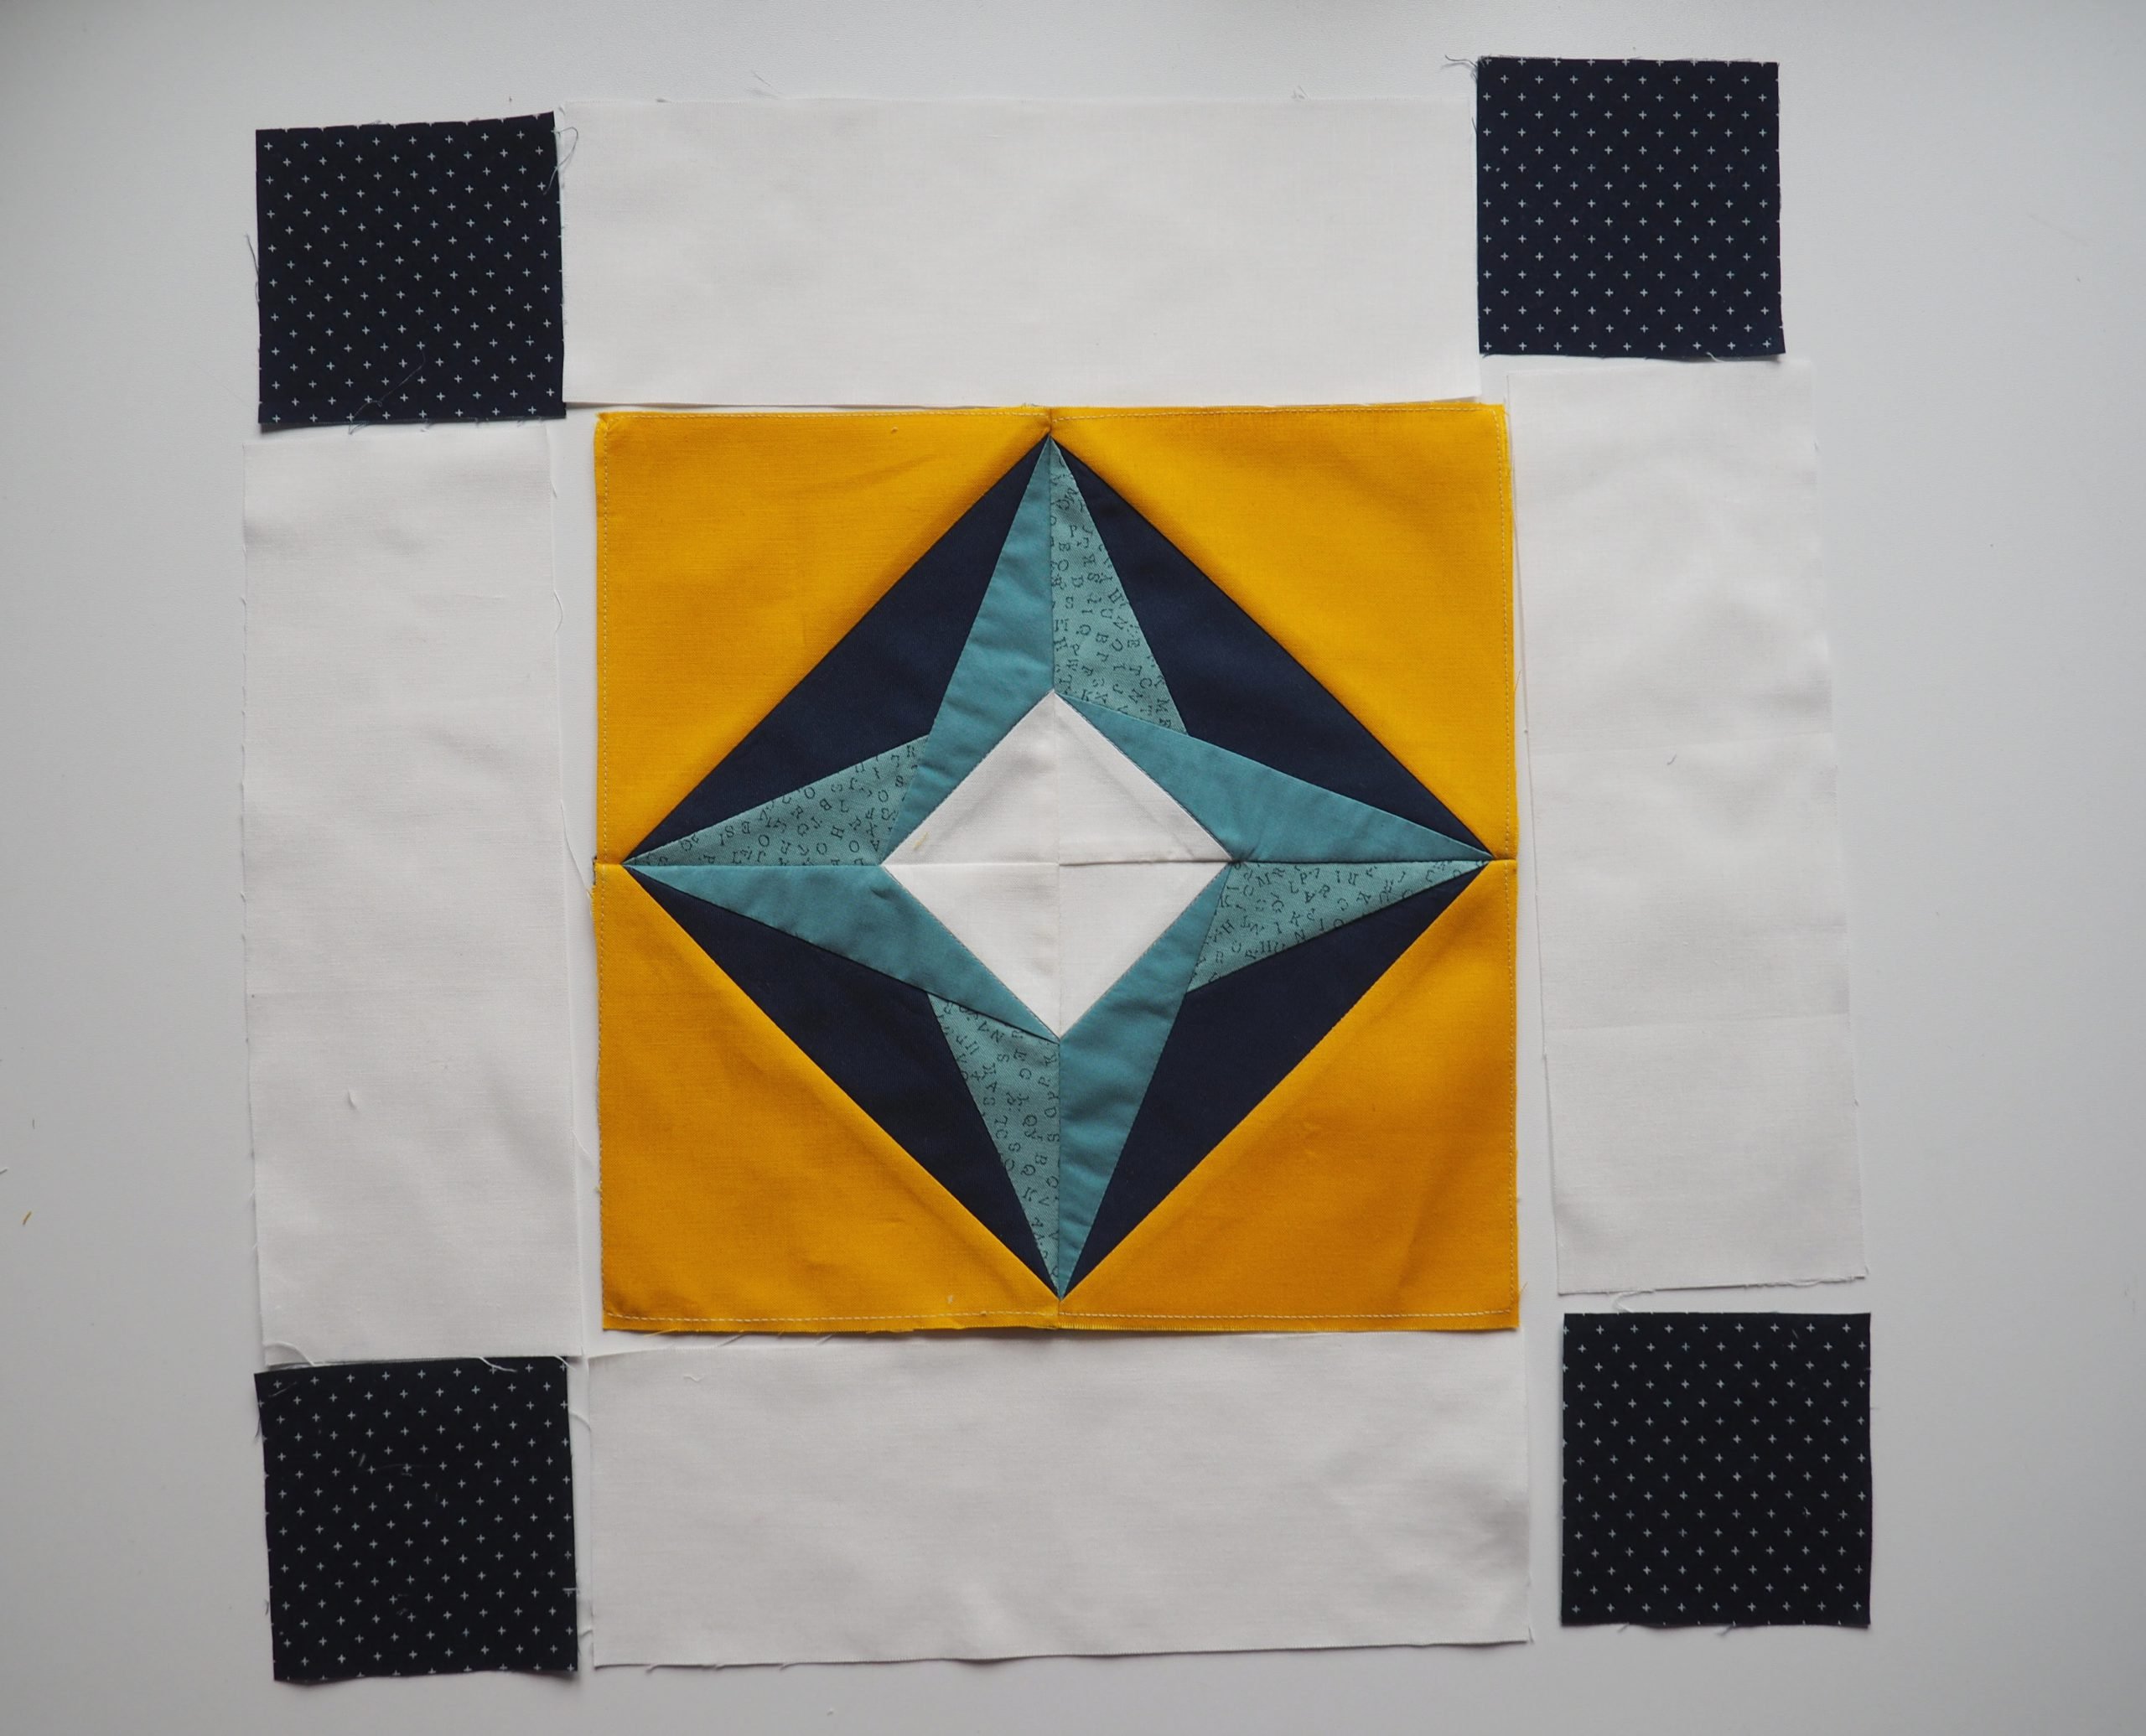
I sew the contrasting squares on to the left and right ends of two of the white strips, then I iron the seam allowances towards the darker squares. Then I sew the other two white strips on to the sides of the patchwork block. The seam allowances are ironed towards the patchwork block. These three pieces are then sewn together. The seam allowances go one way and then the other.
The cushion top should now measure 16.5″ x 16.5″. To make it easier to quilt the cushion top in the embroidery hoop, I iron the seams flat, but I also iron the entire top thoroughly.

Preparing the cushion top
To quilt the cushion top in the embroidery hoop, I first join it onto a stabilizer and a backing fabric to form a quilt sandwich. For a larger project, I would have either basted the three layers together using the new third BSR function, or glued them together with spray adhesive. However, as I used a strong adhesive stabilizer, smoothing the layers down firmly with my hands was sufficient to prevent the fabrics from slipping.
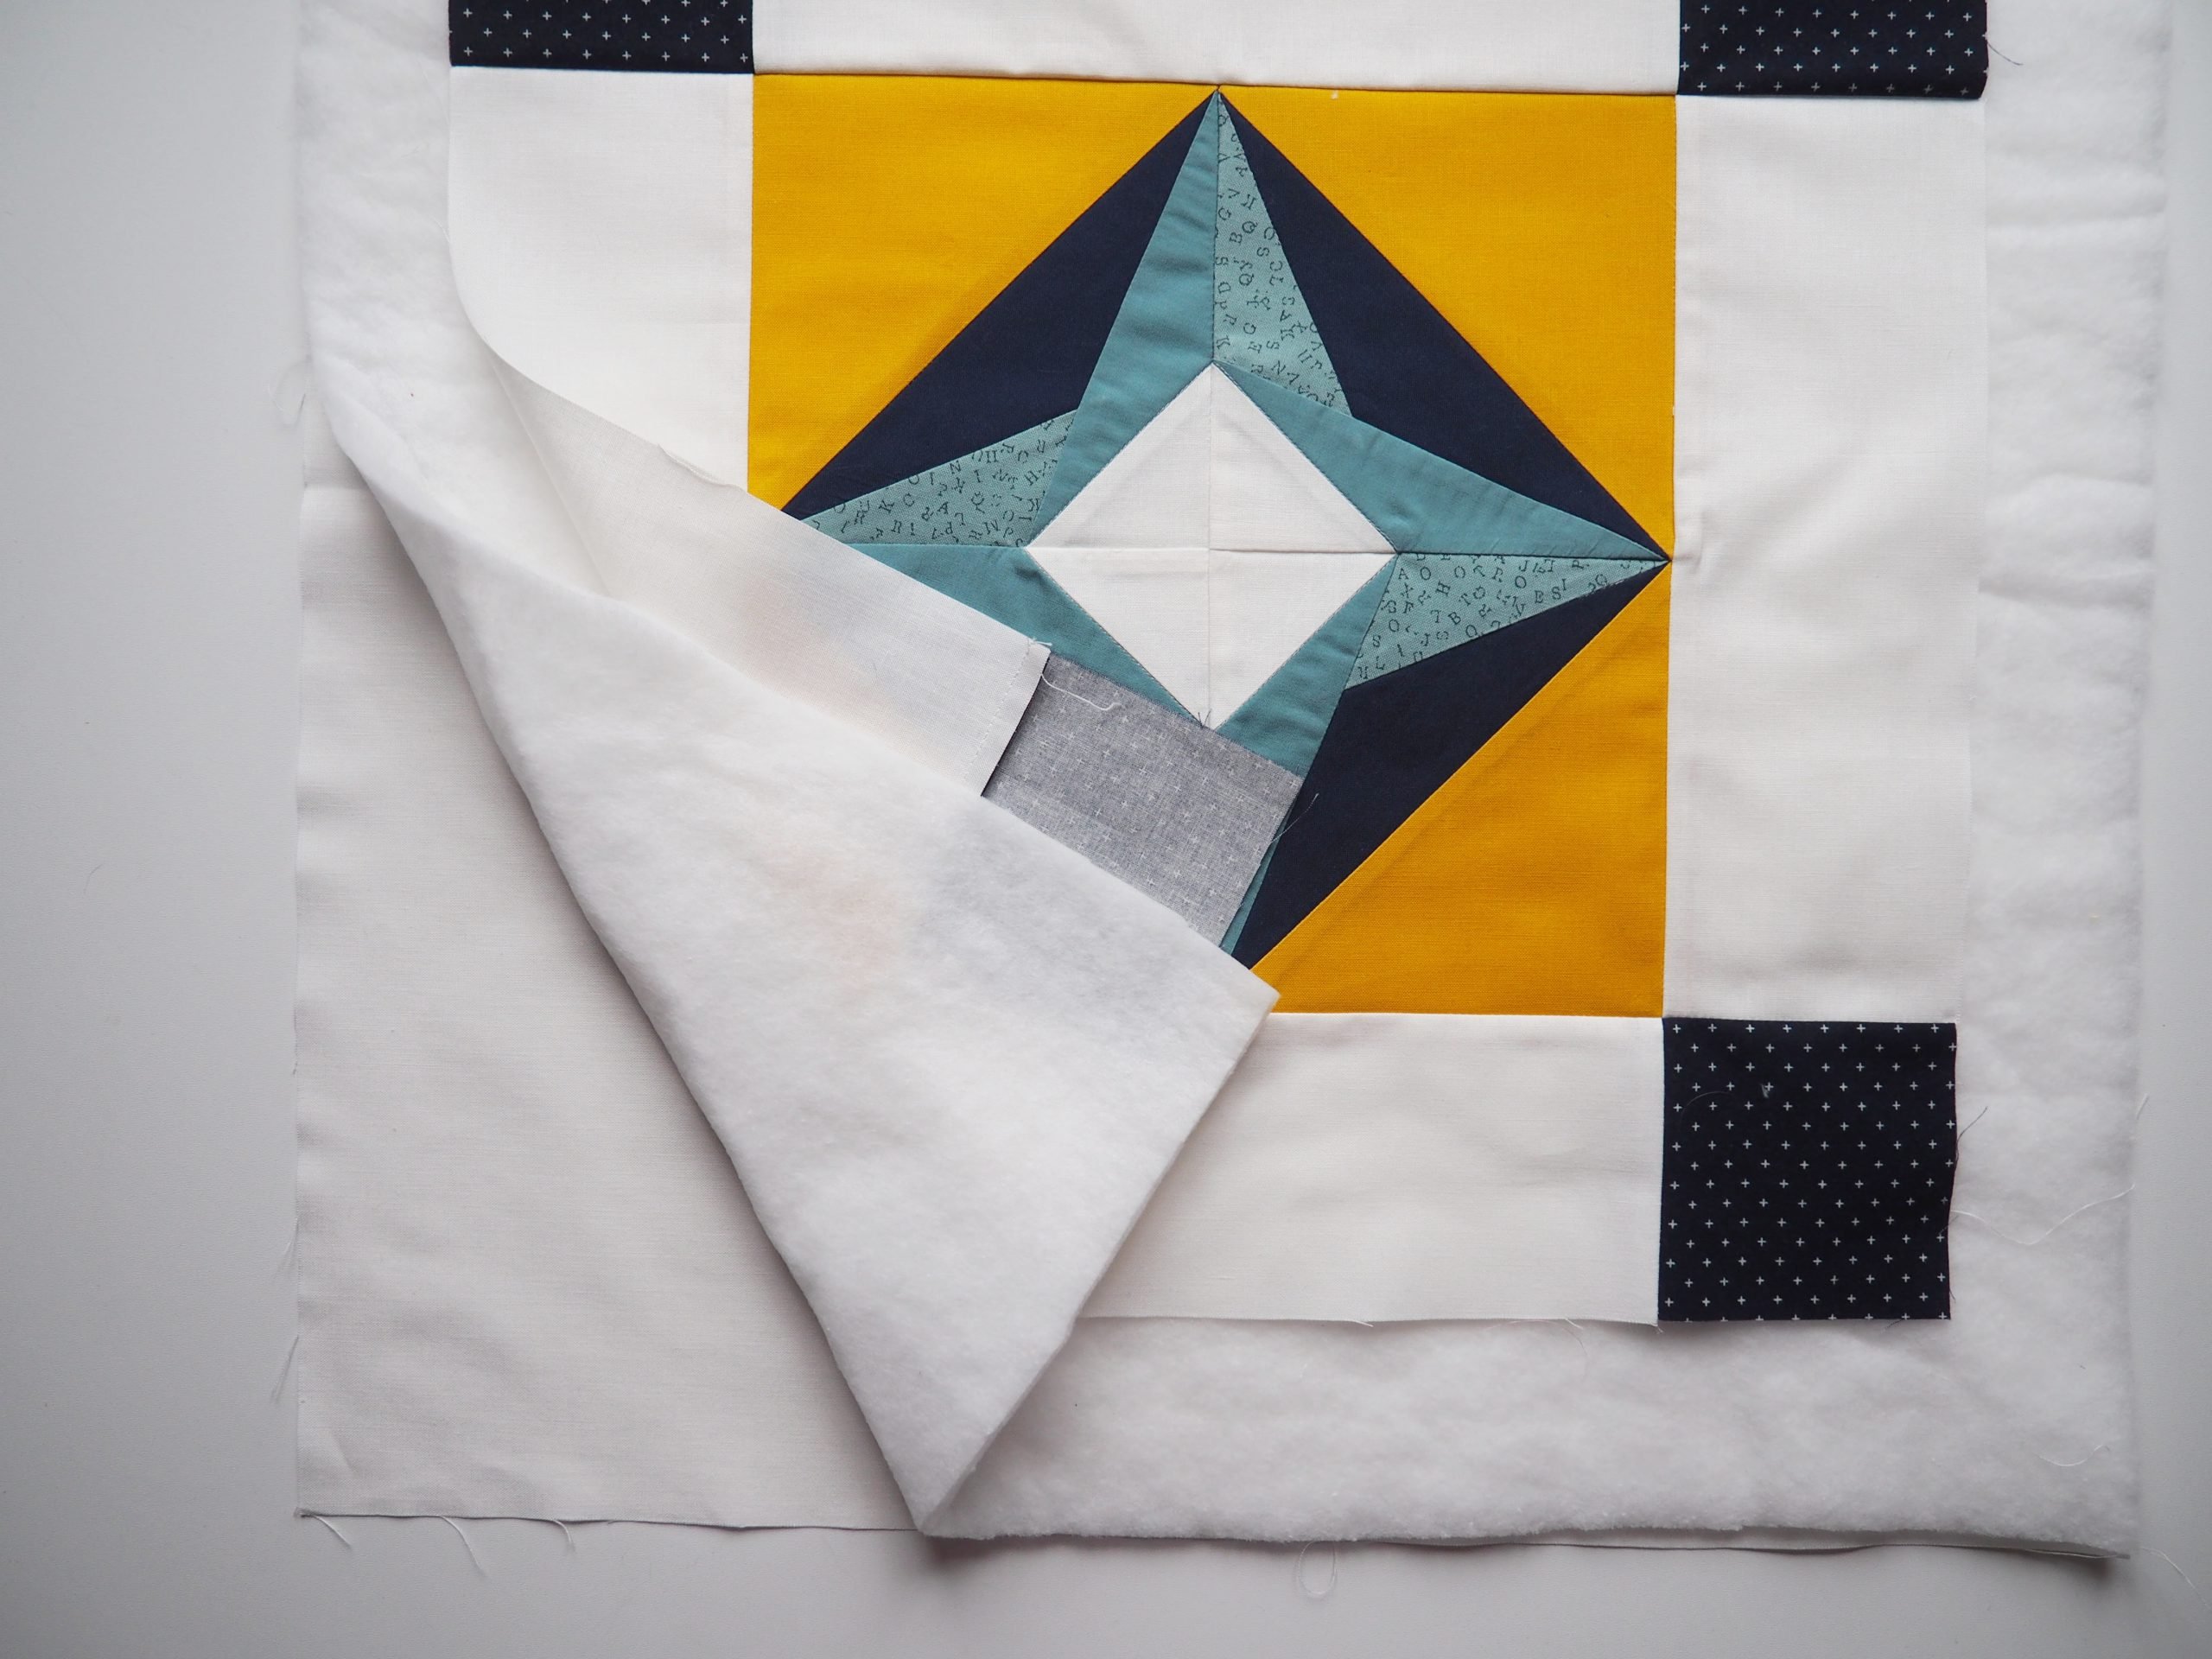
It is important that the stabilizer and the backing fabric are at least 5-10 cm larger than the cushion top – as mentioned in my post “Quilting in the Hoop – Quilting a Patchwork Block in the Embroidery Hoop”. As I also want to quilt and embroider the blue corner square, there is enough fabric around it to allow the cushion top to be hooped securely.
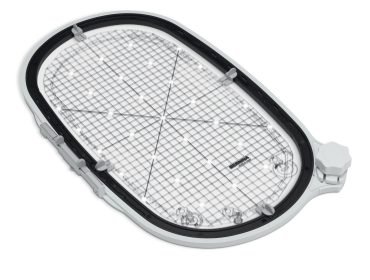
I like to use the Maxi Hoop for these “quilting in the hoop” projects, as it allows me to embroider two blocks at a time.
Preparing the quilting pattern
Selecting the quilting pattern
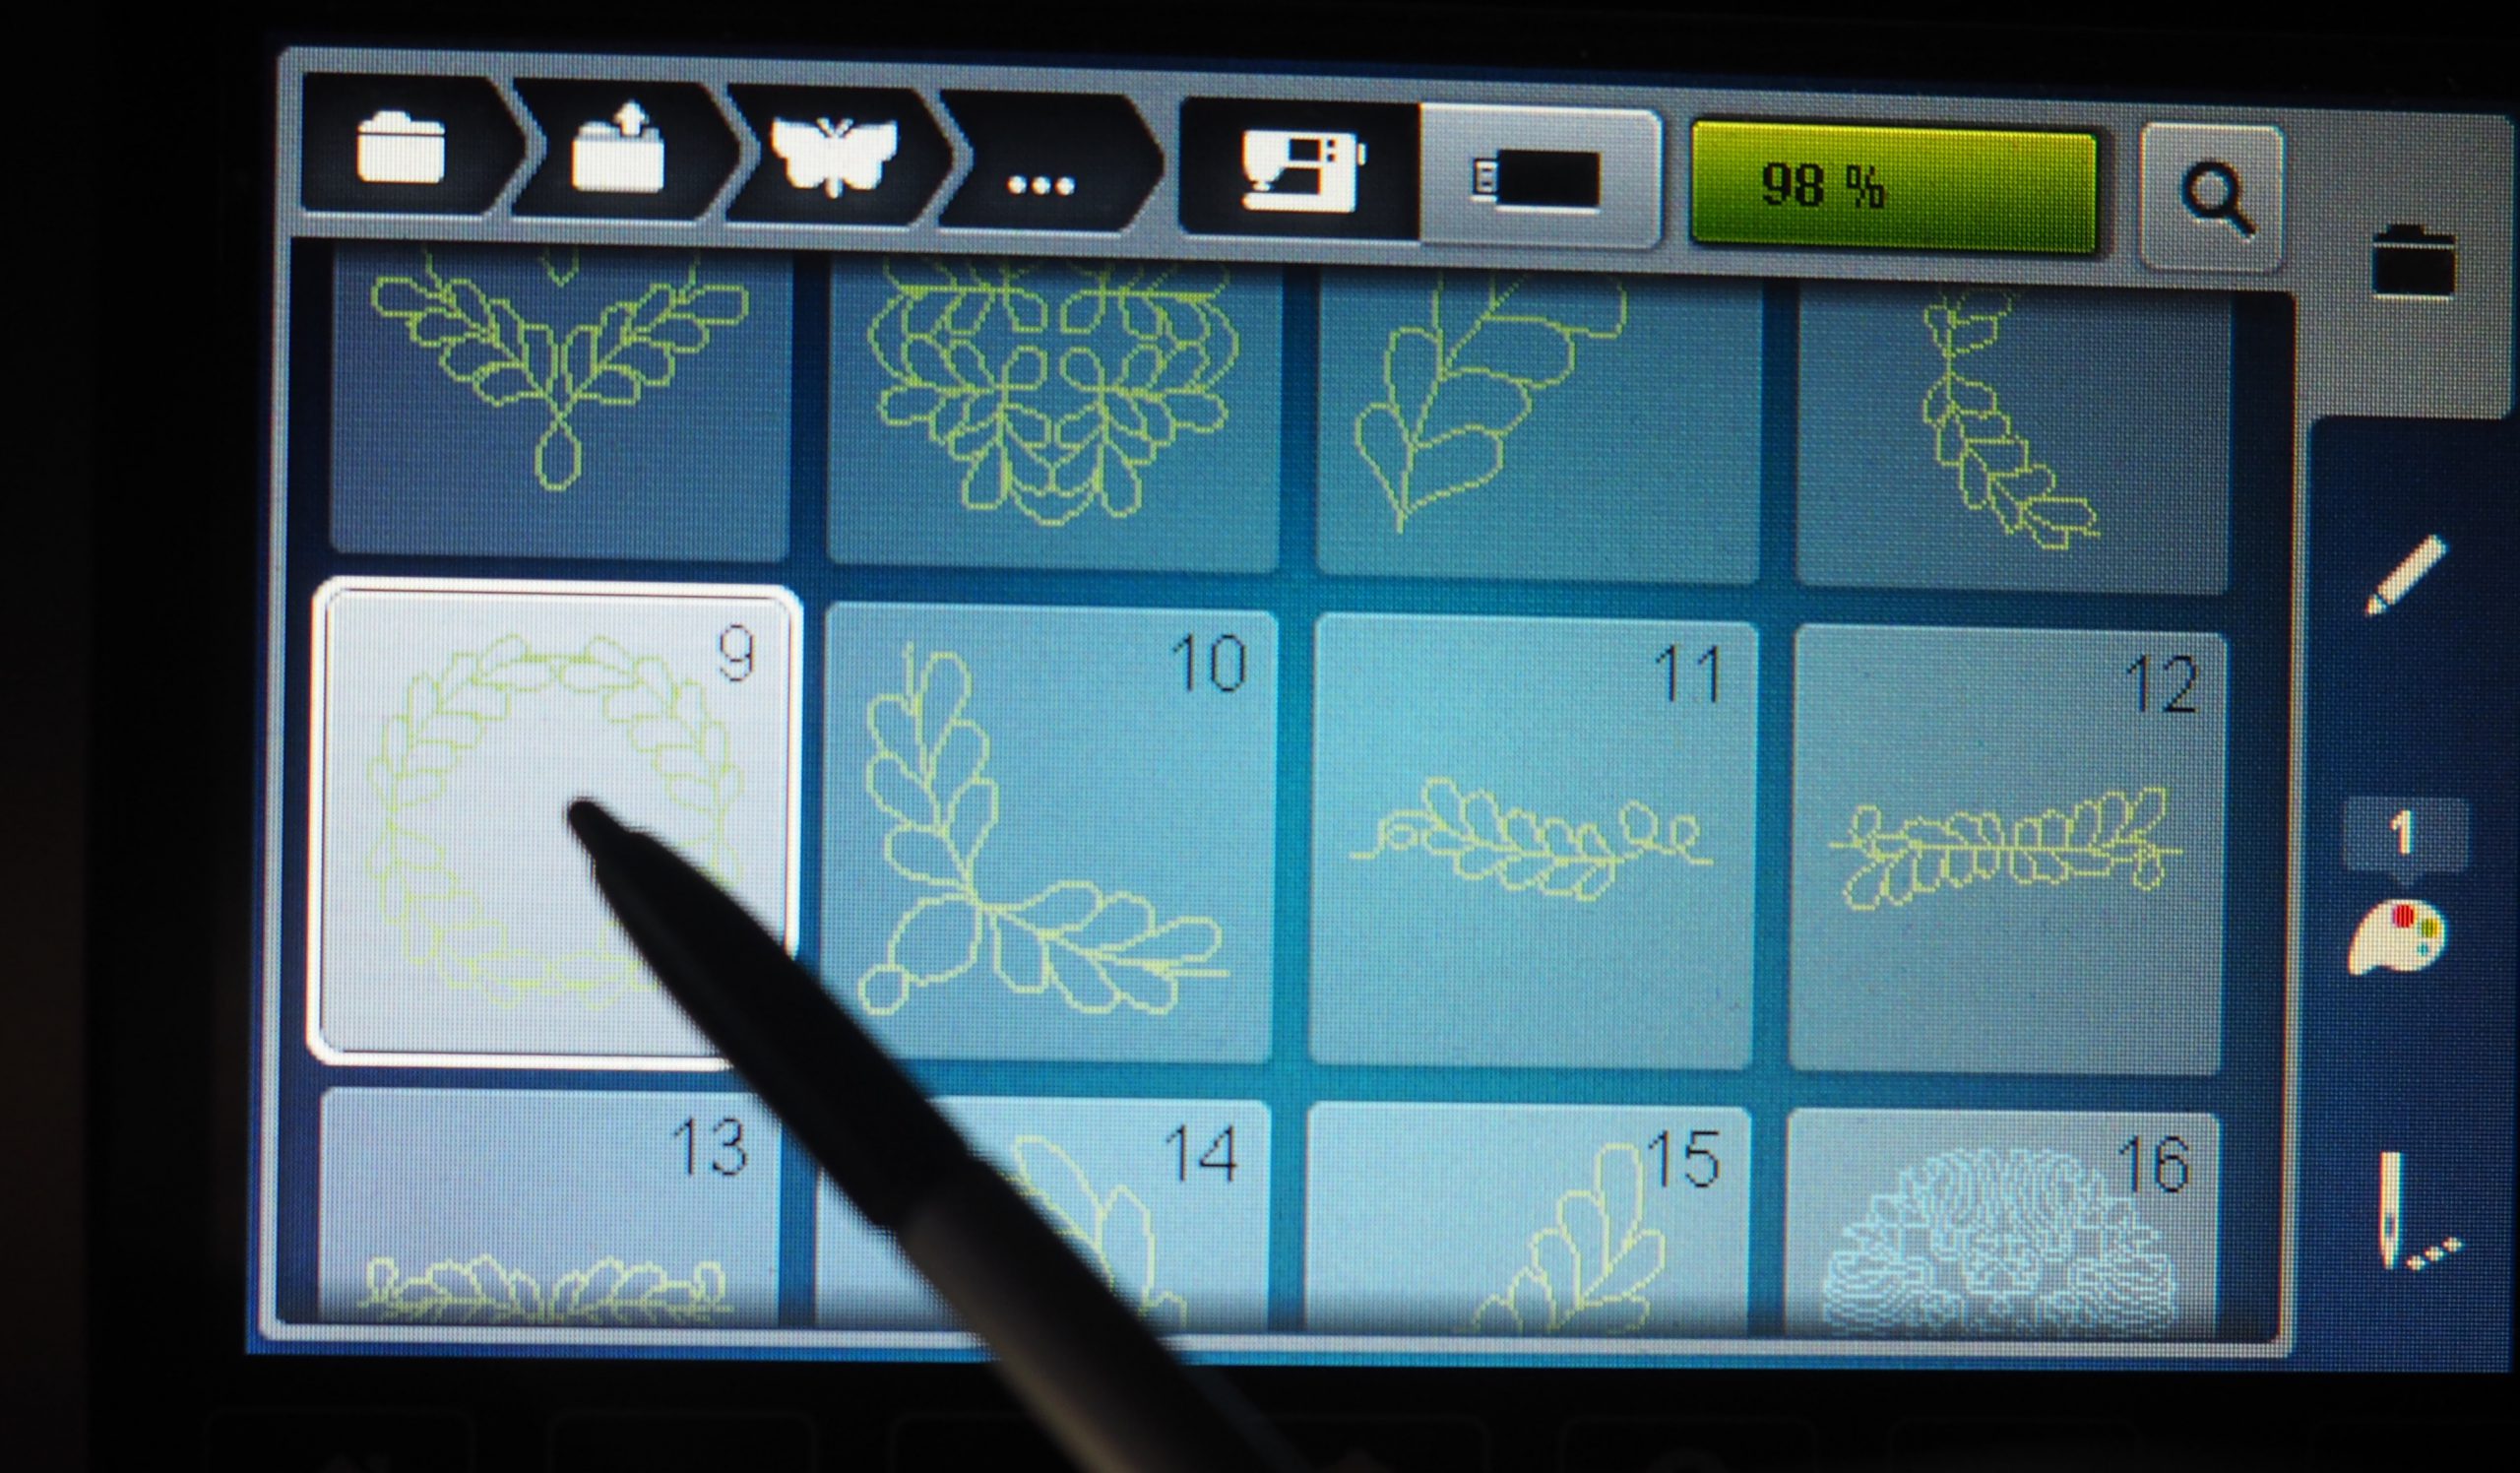
I select the new embroidery file folder no. 9.

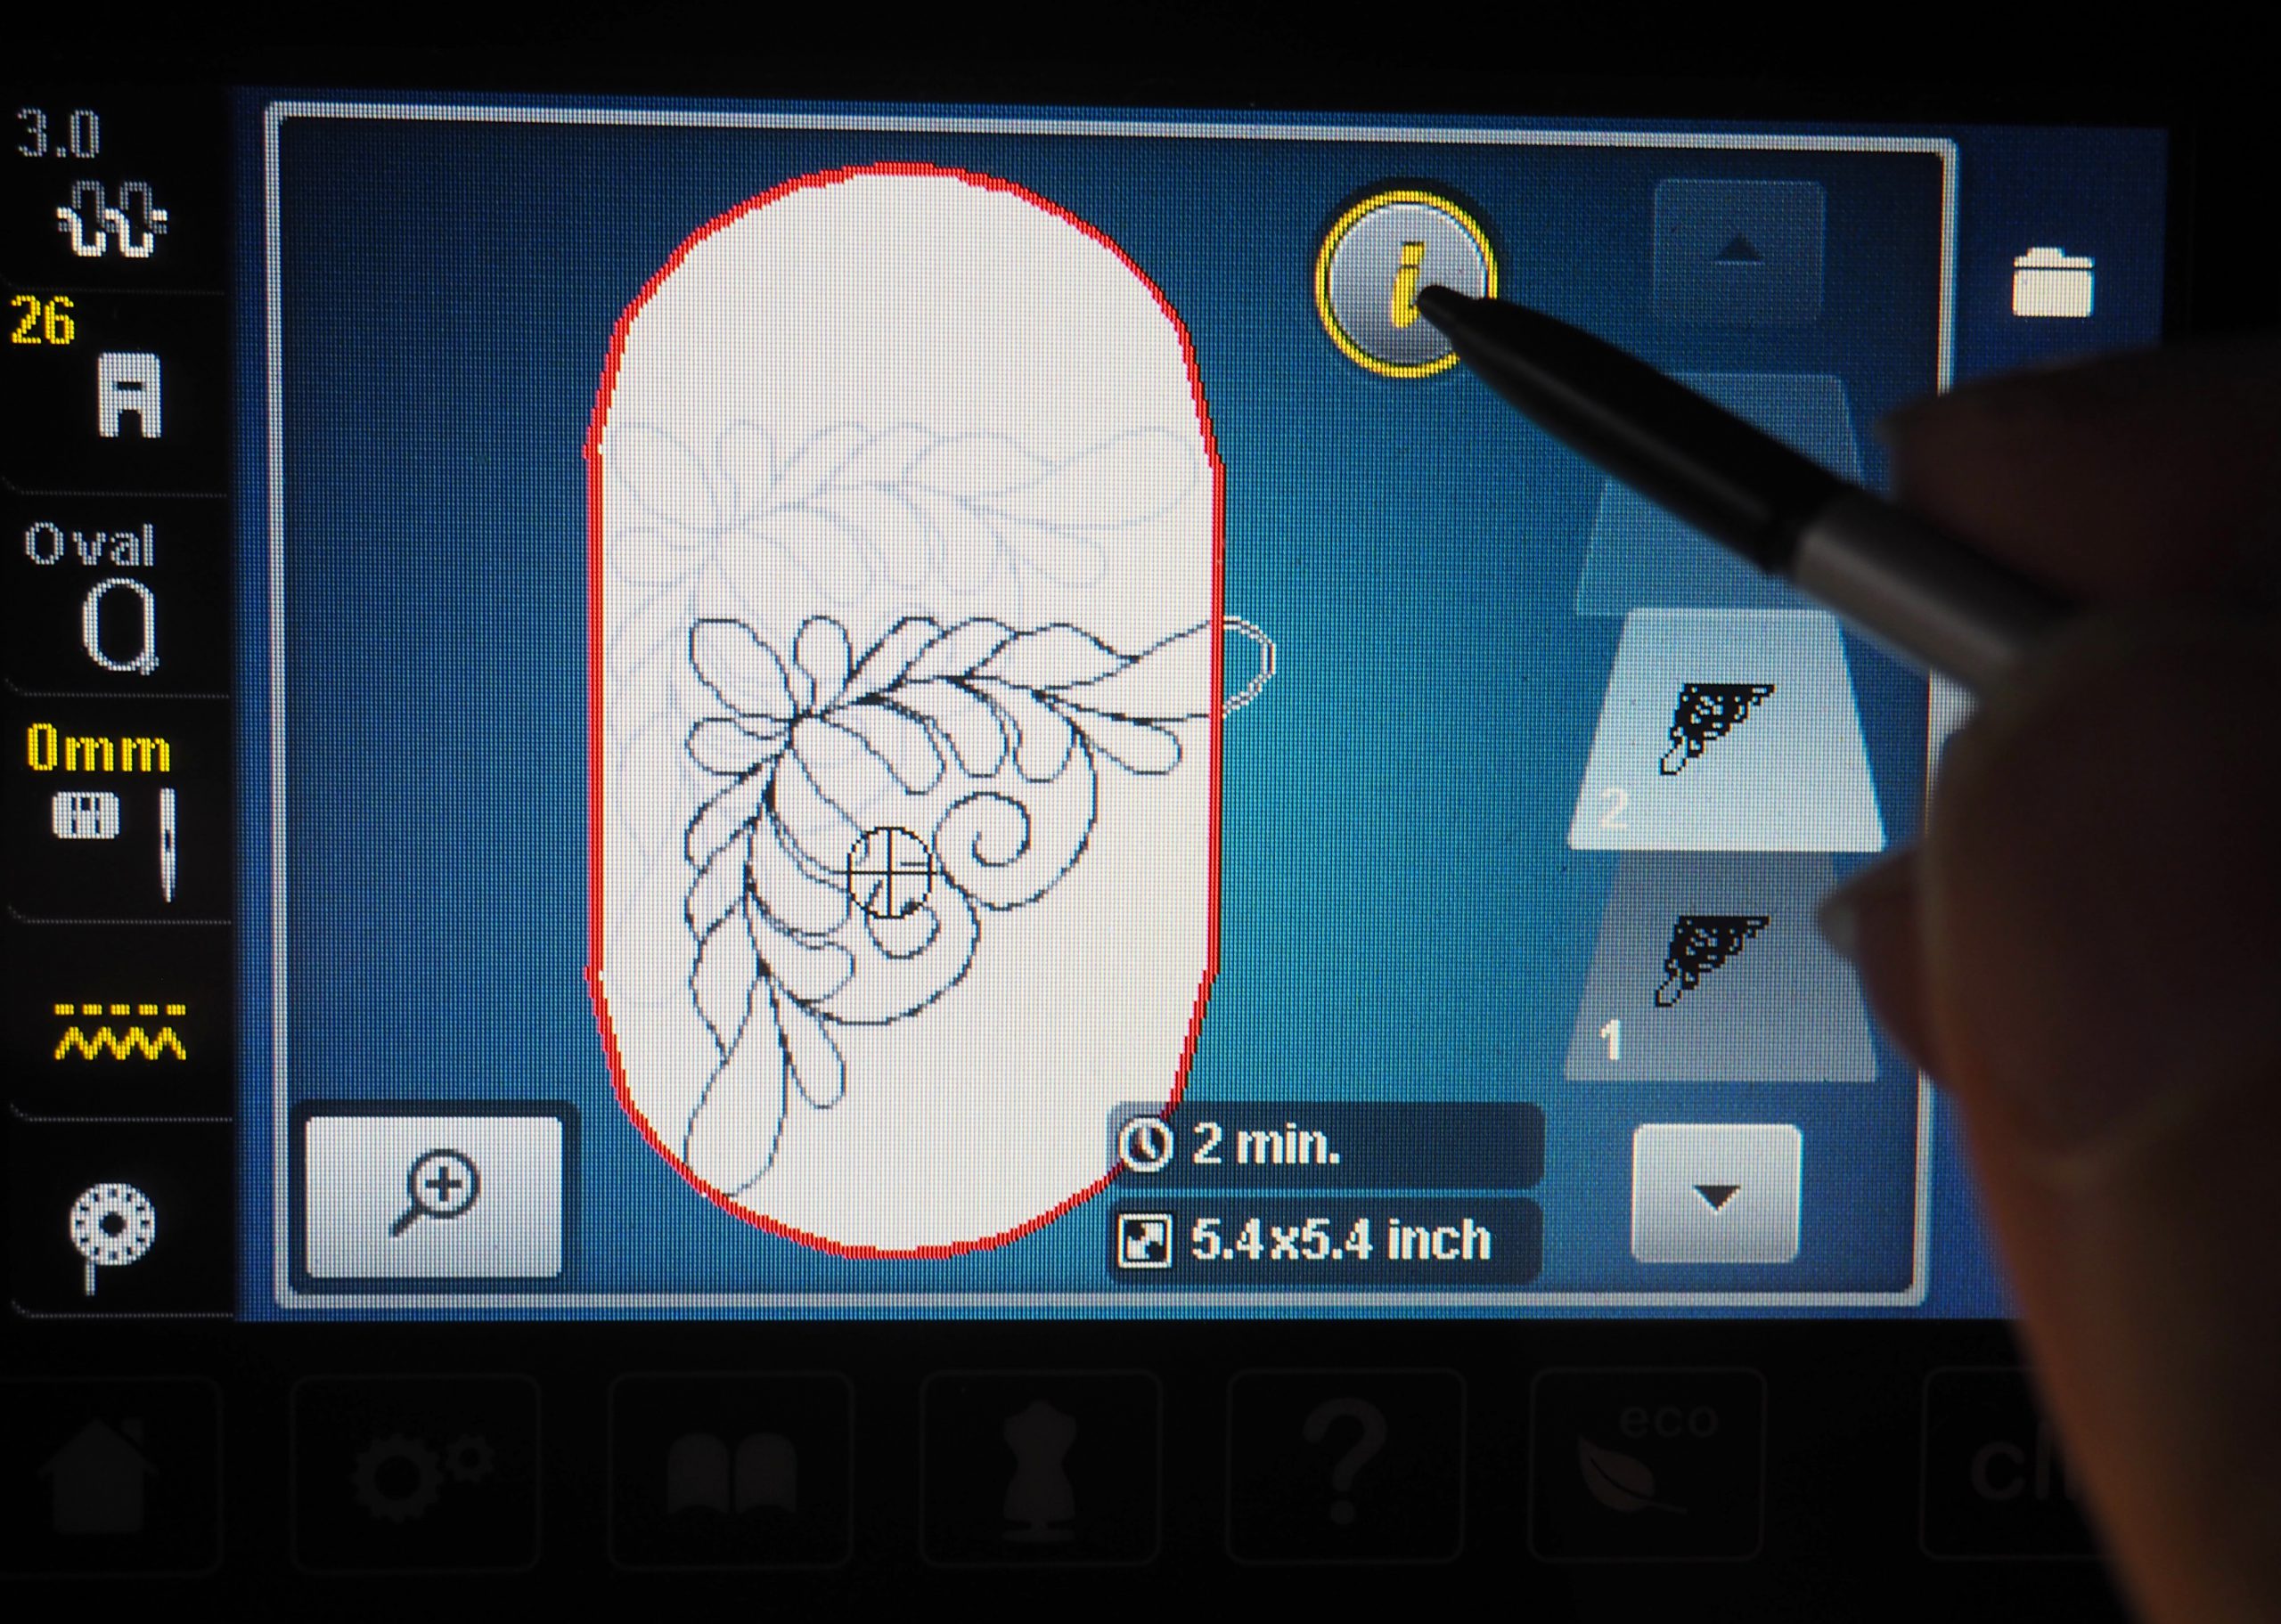
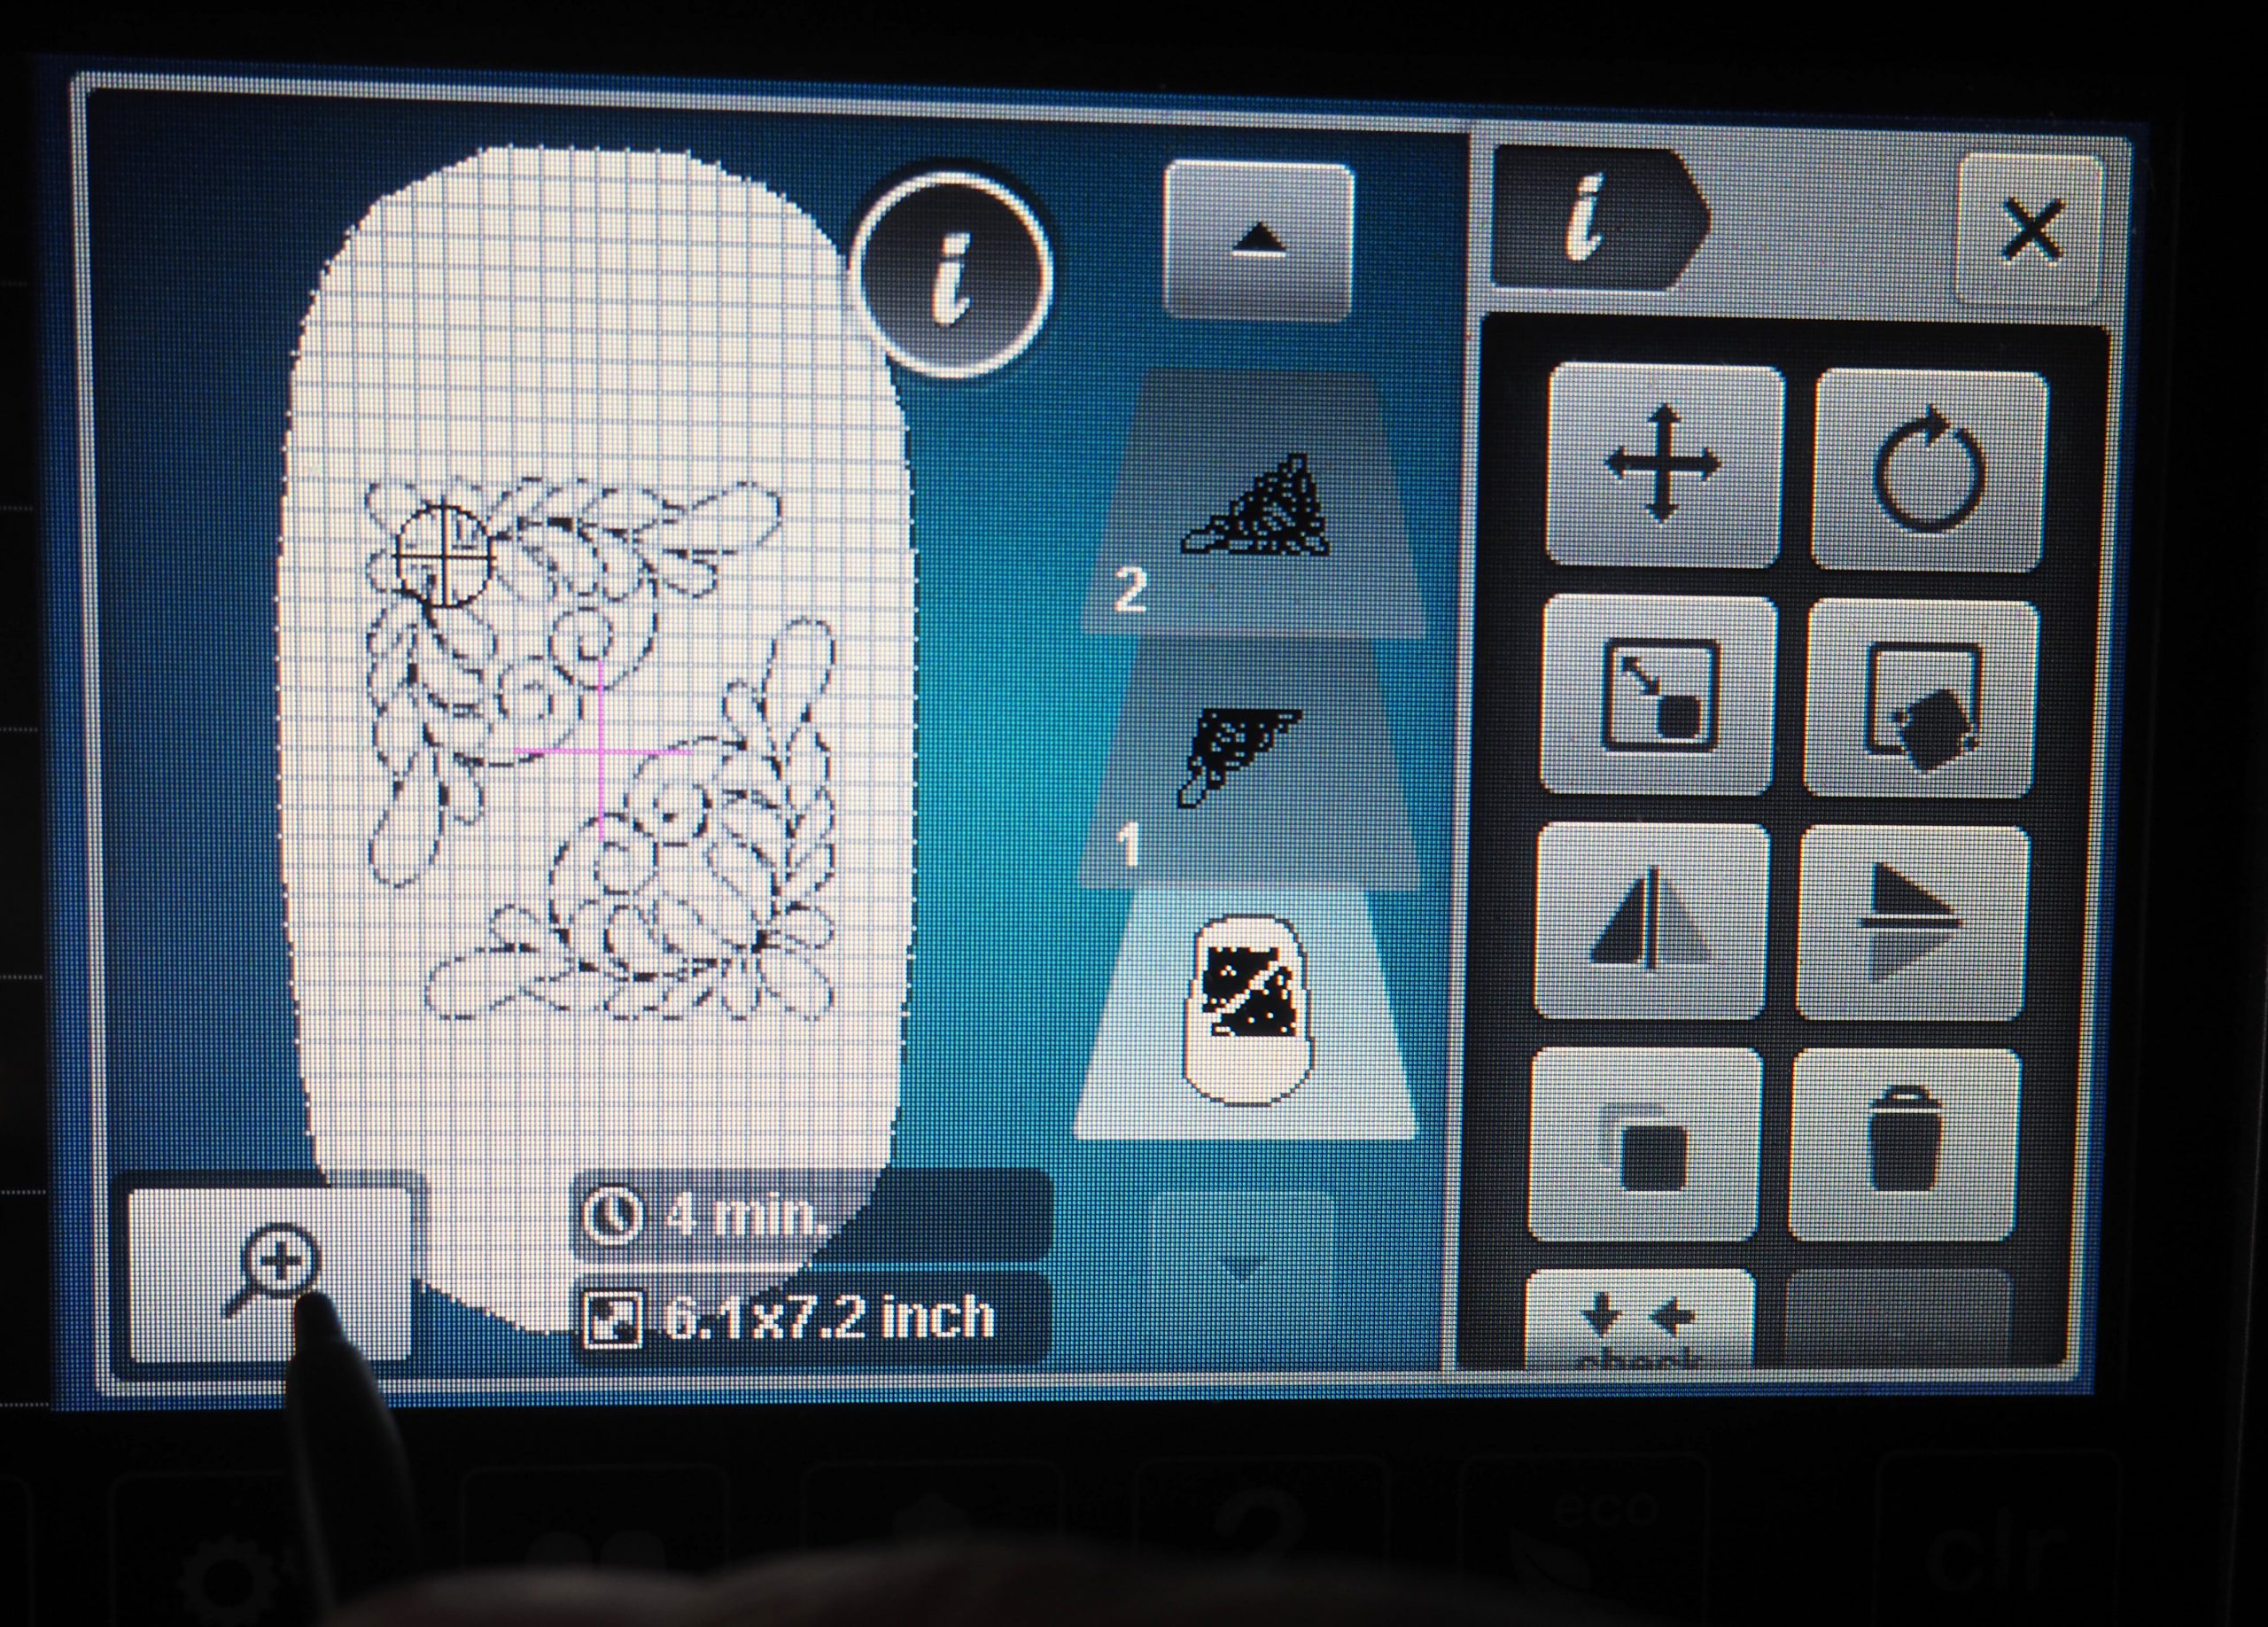
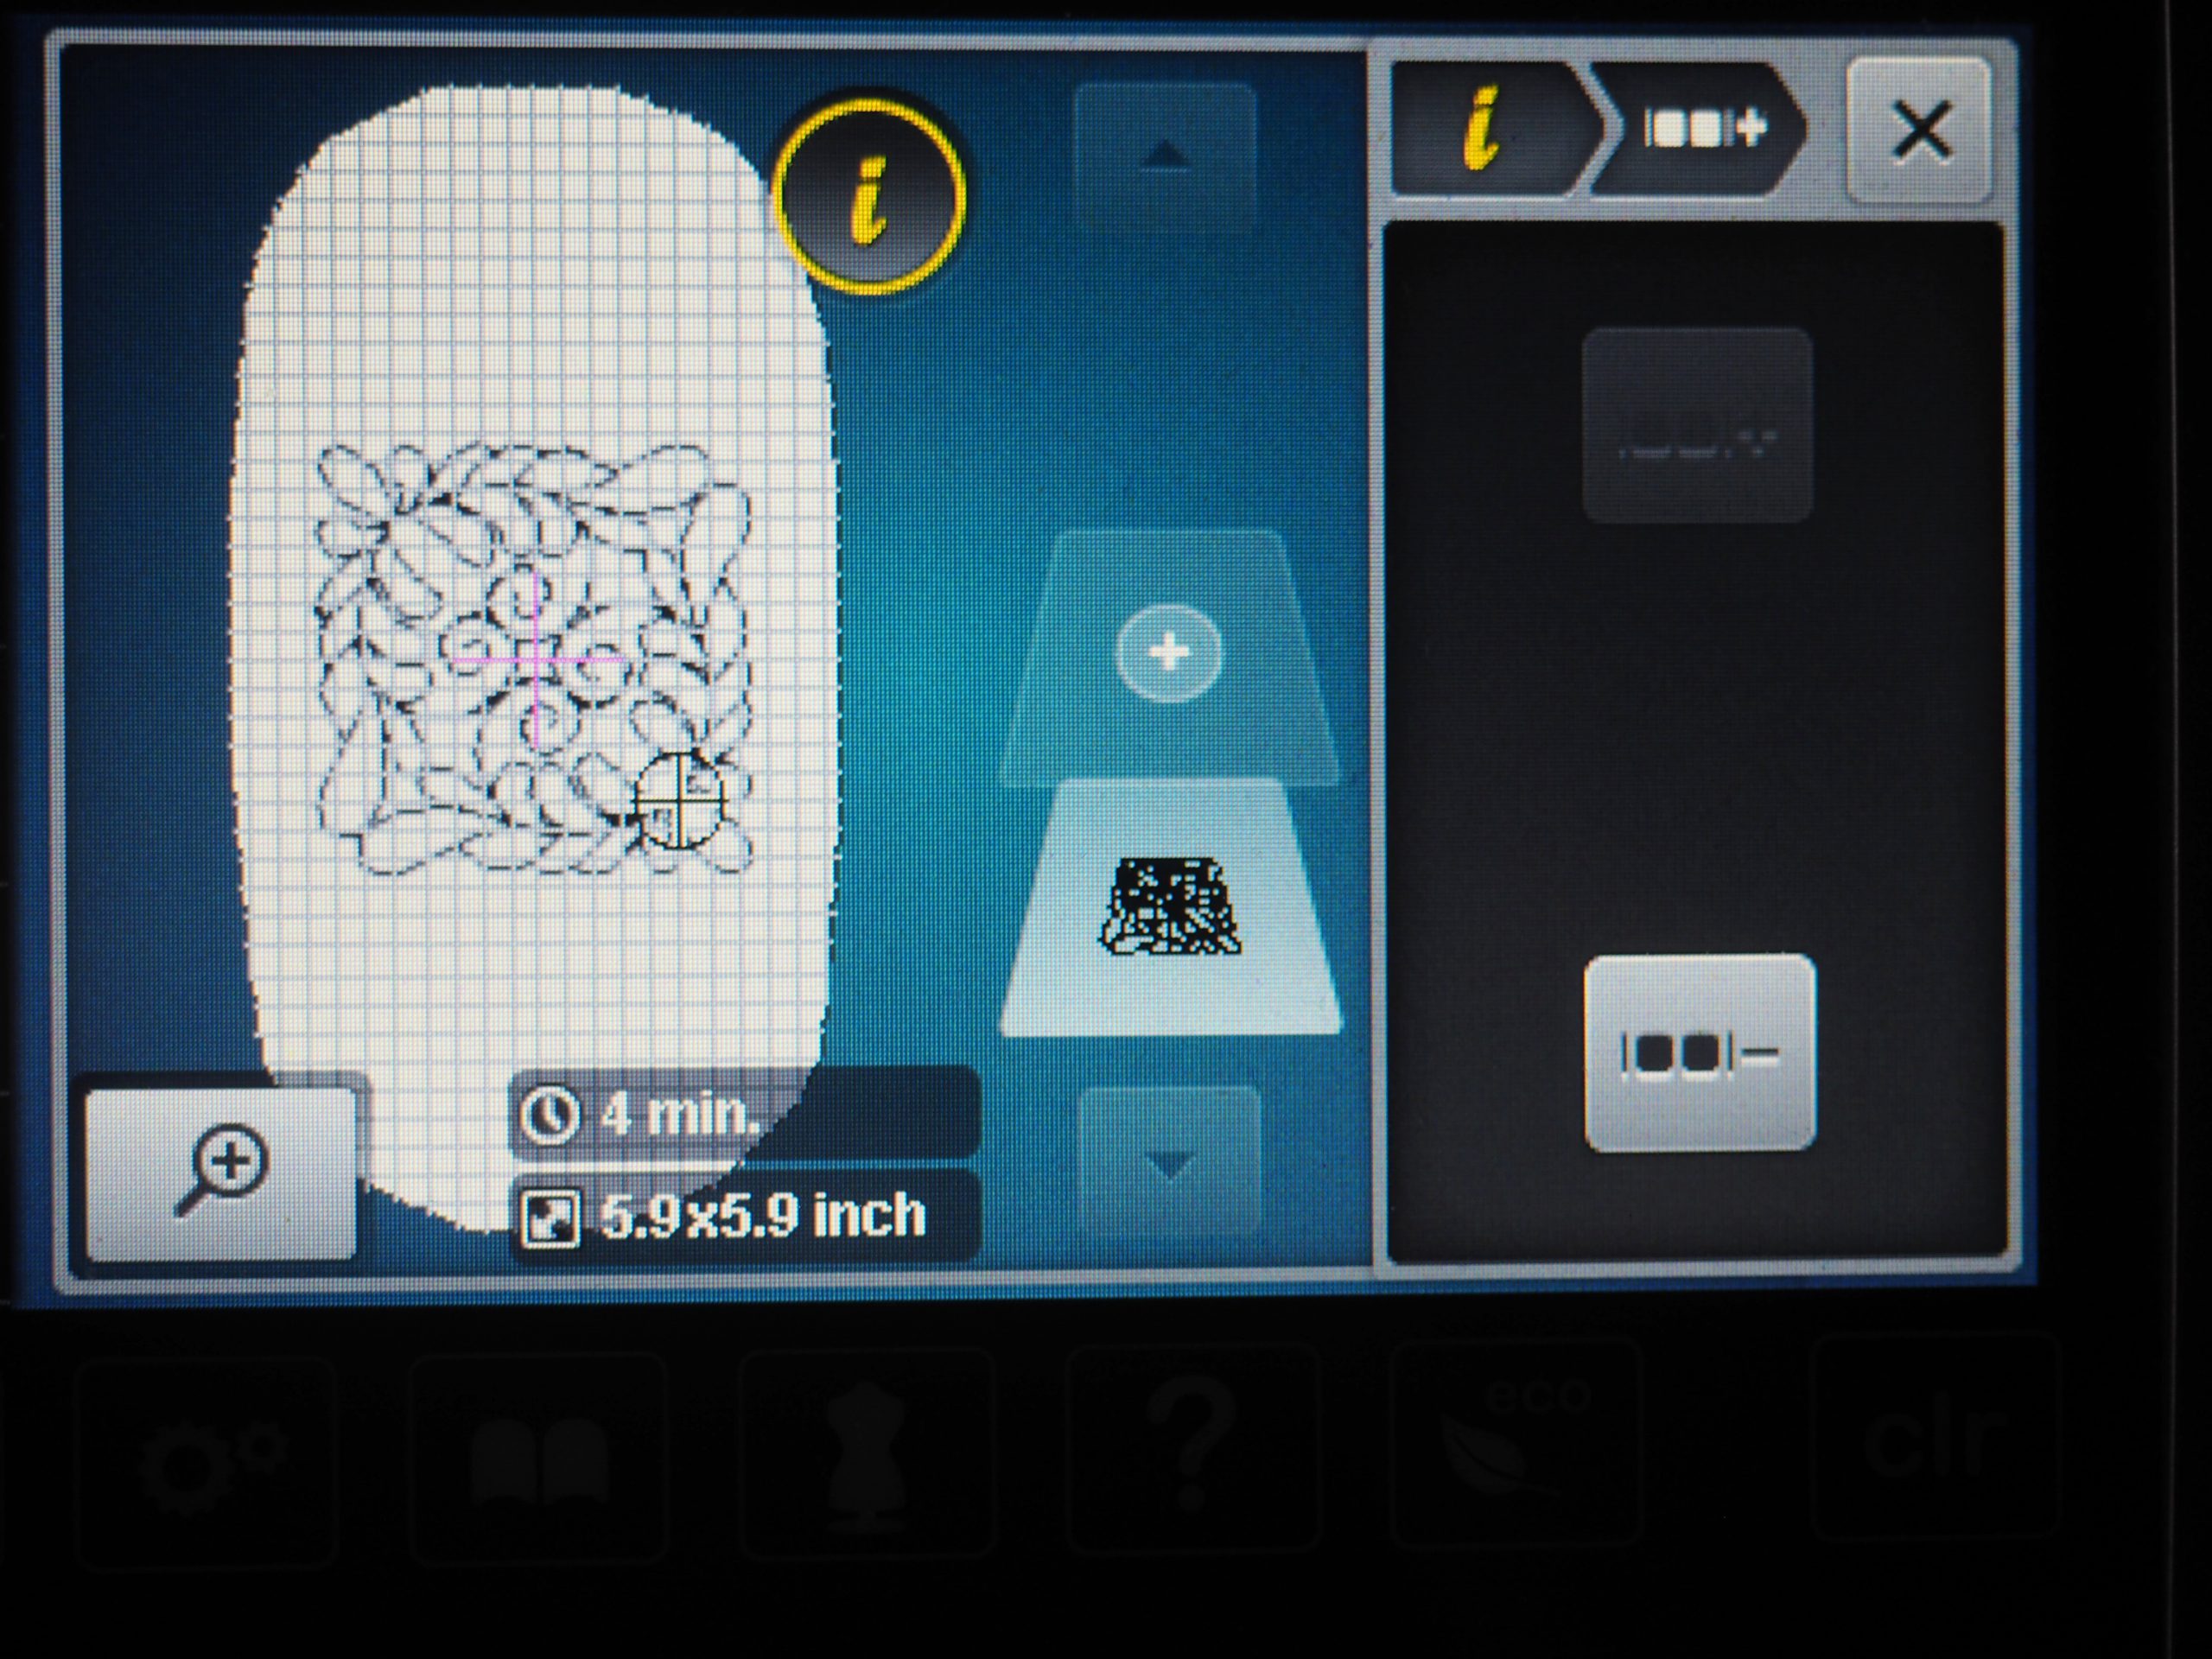
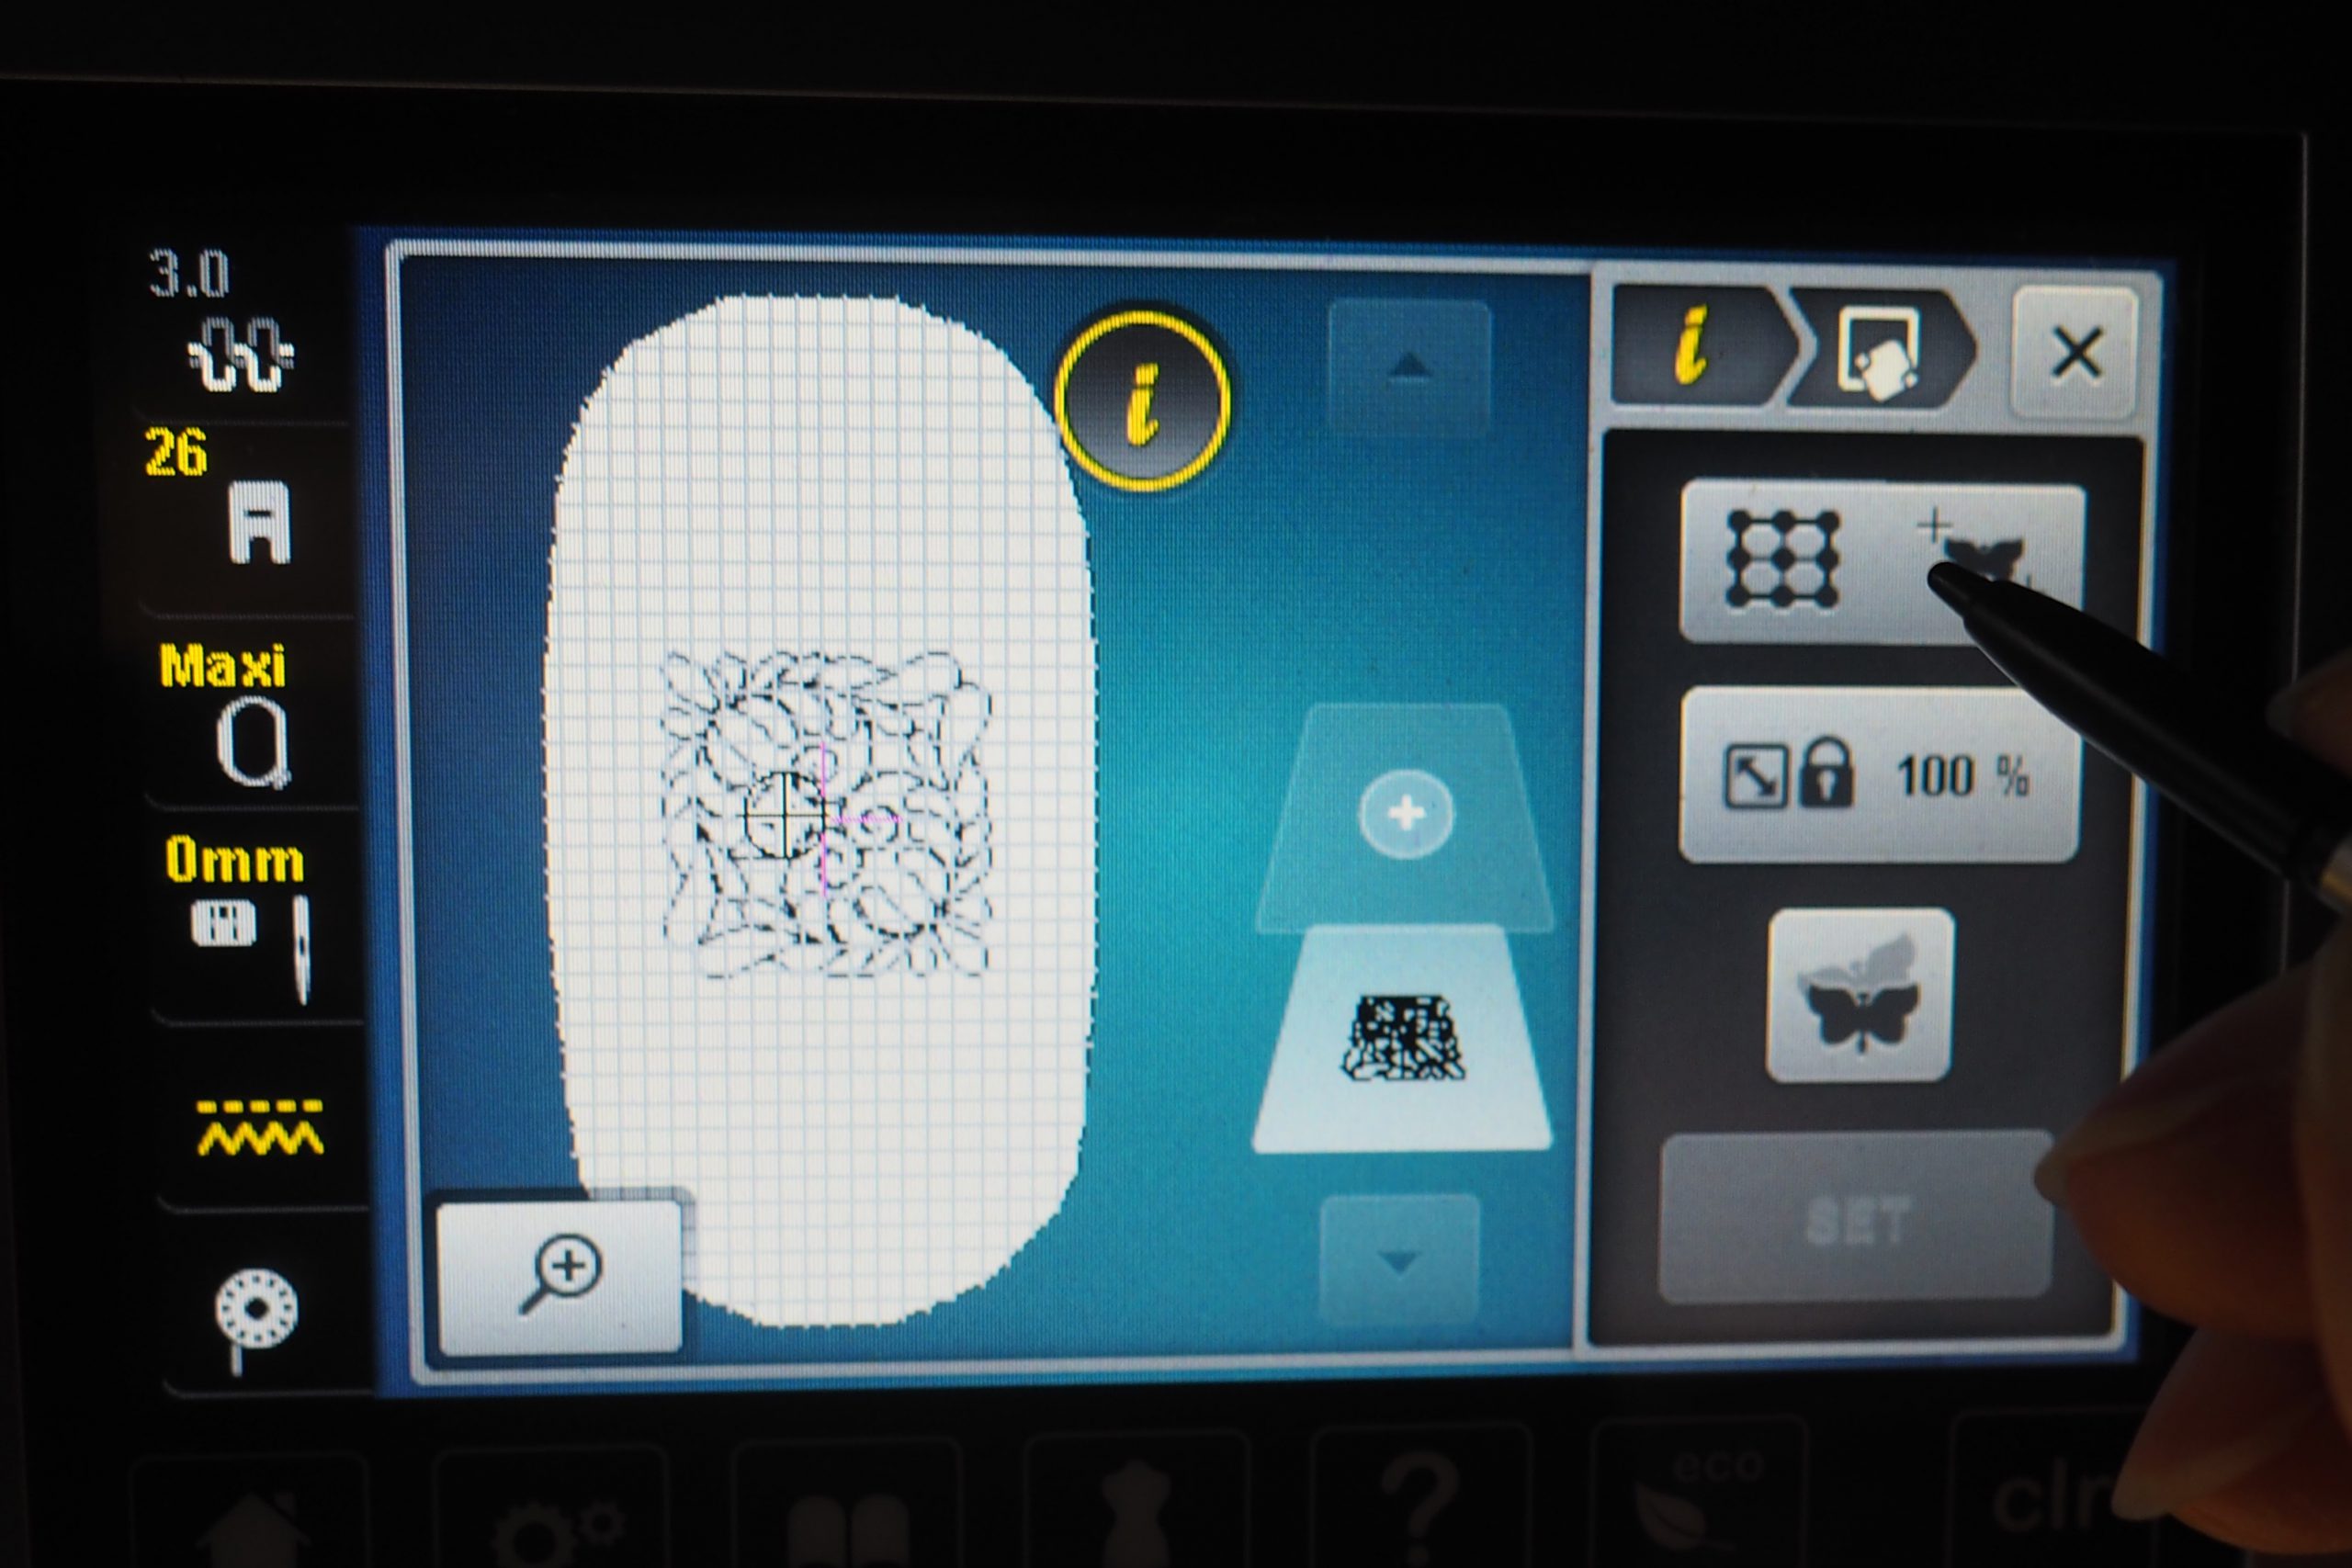
To quilt the patchwork block I used here, which I embroidered using file no. 9, I use quilting pattern no. 10. I select this file.
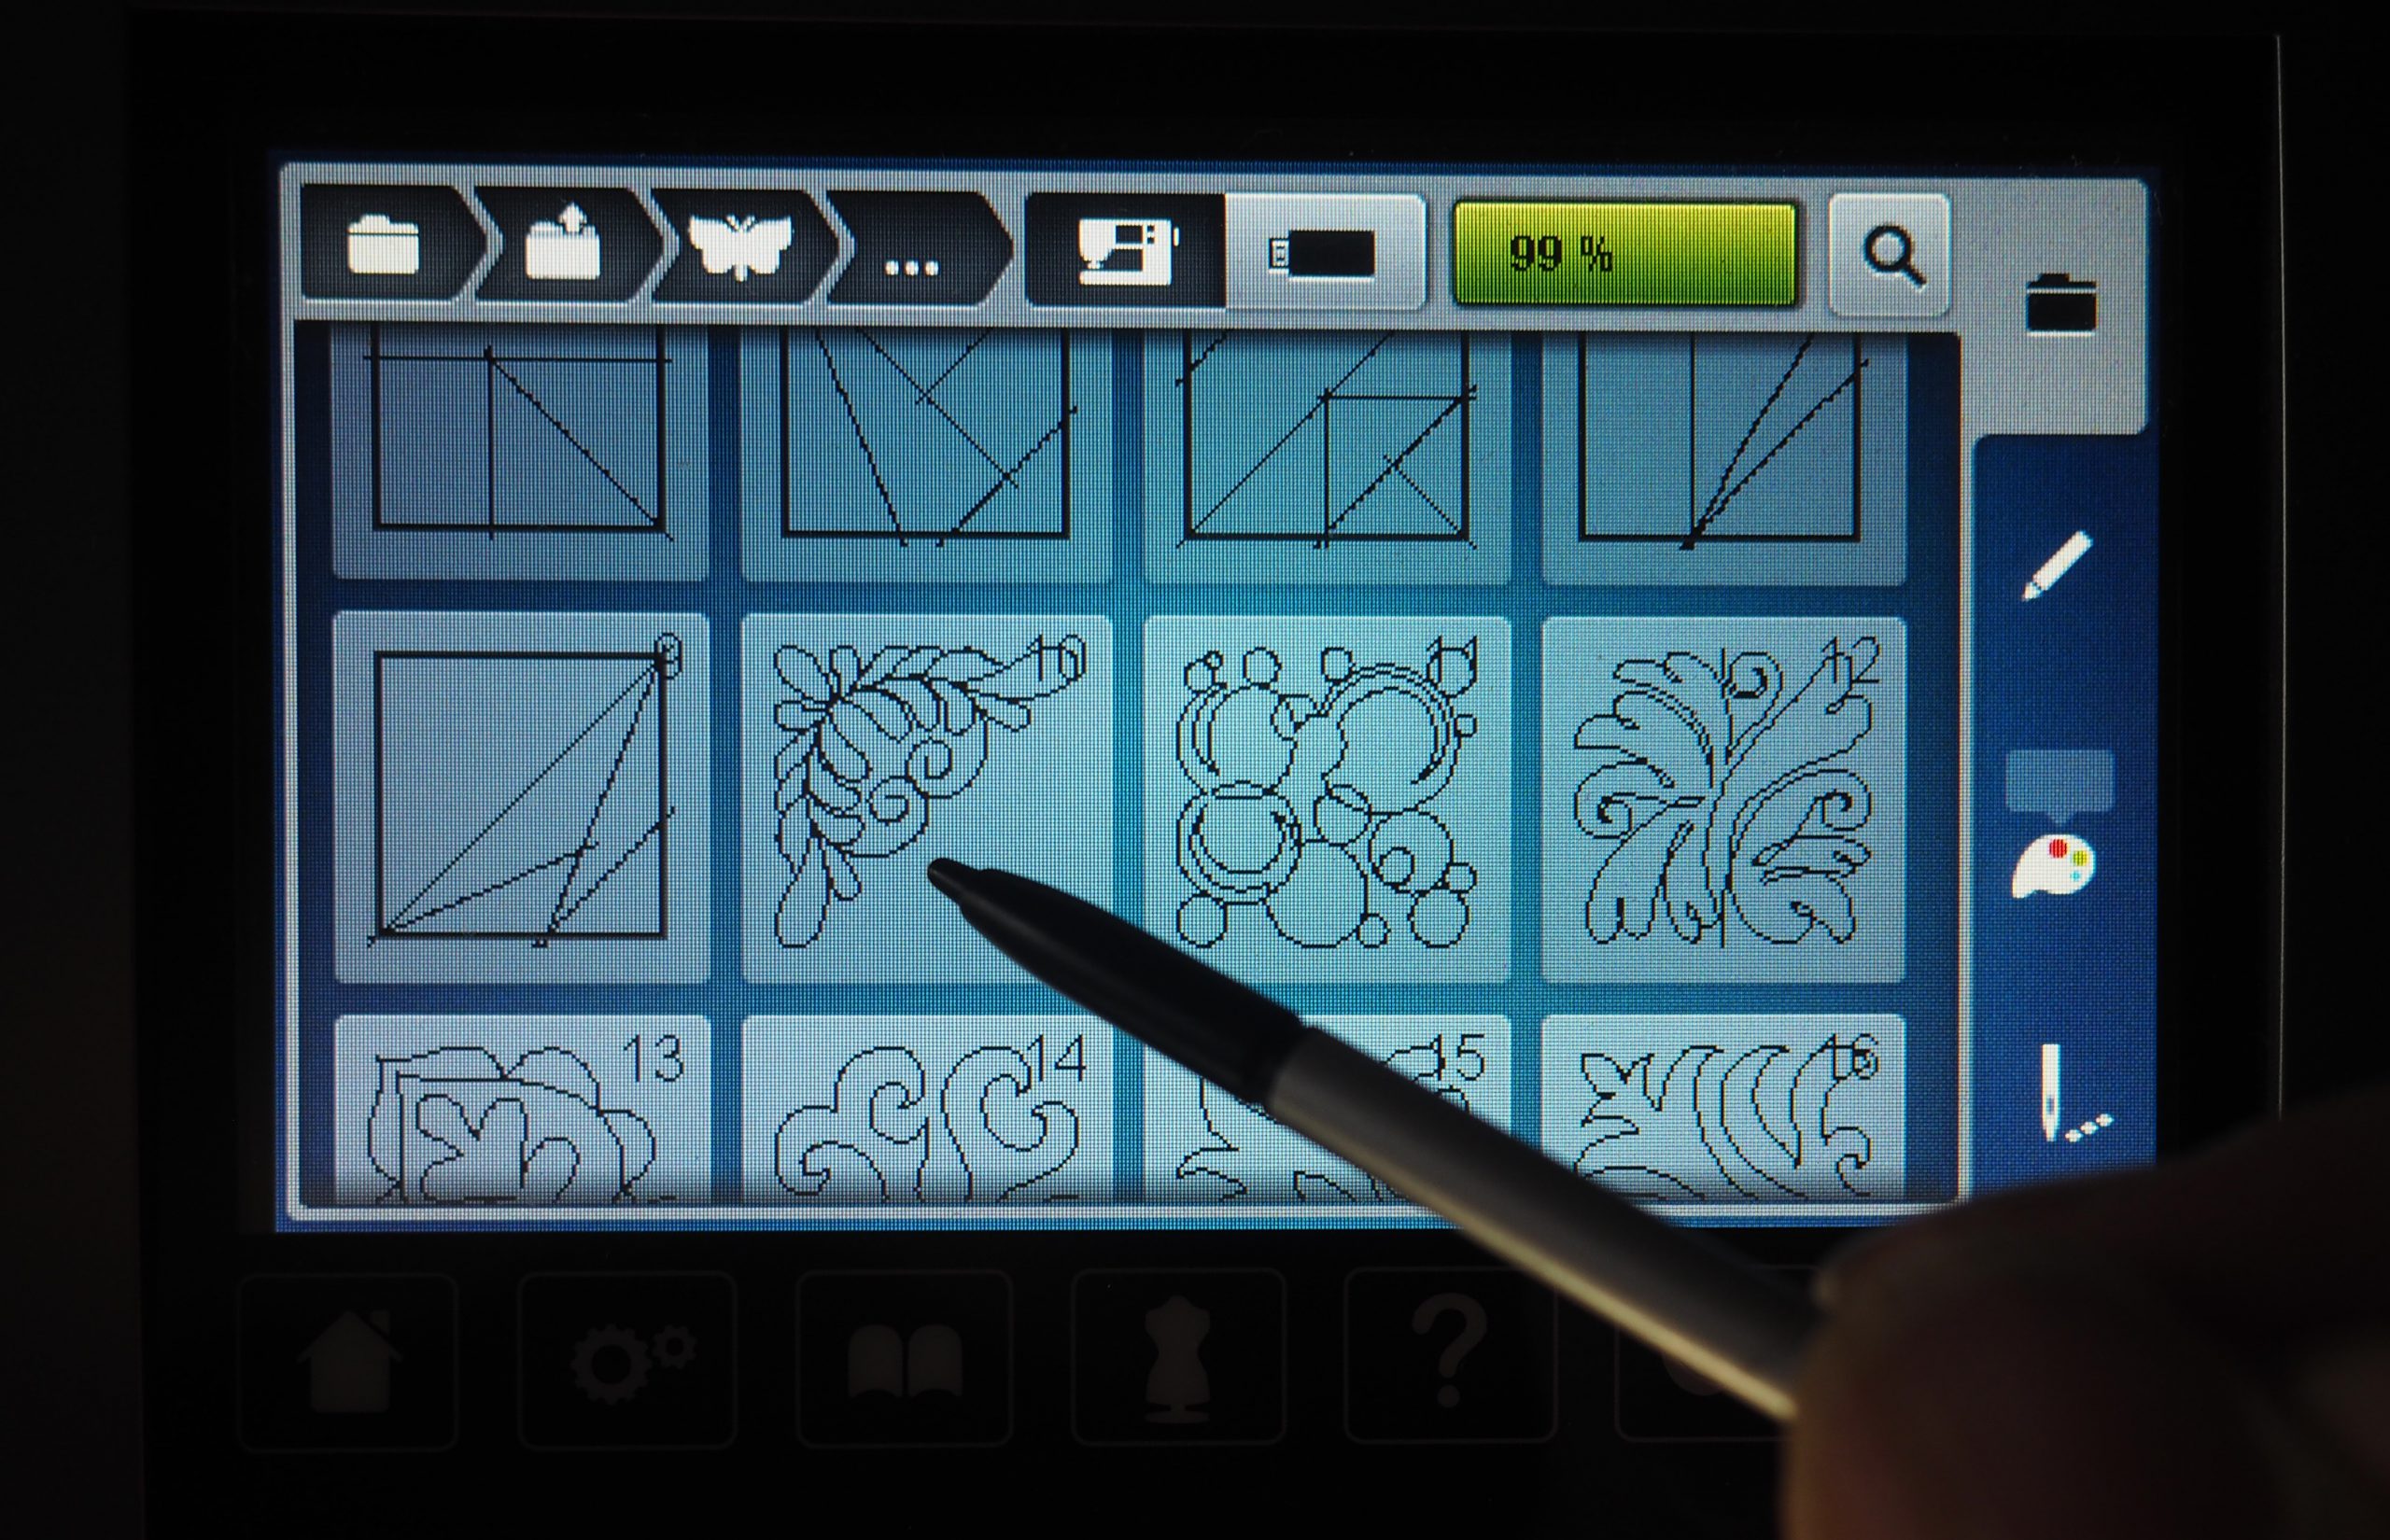
I want to embroider each of the small 5″ x 5″ blocks with two of these feathered corners. So I select the file a second time by clicking on the plus symbol.
In the “i” dialog box, the two files can be customized for use in one quadrant, i.e. one of the 5″ x 5″ blocks.
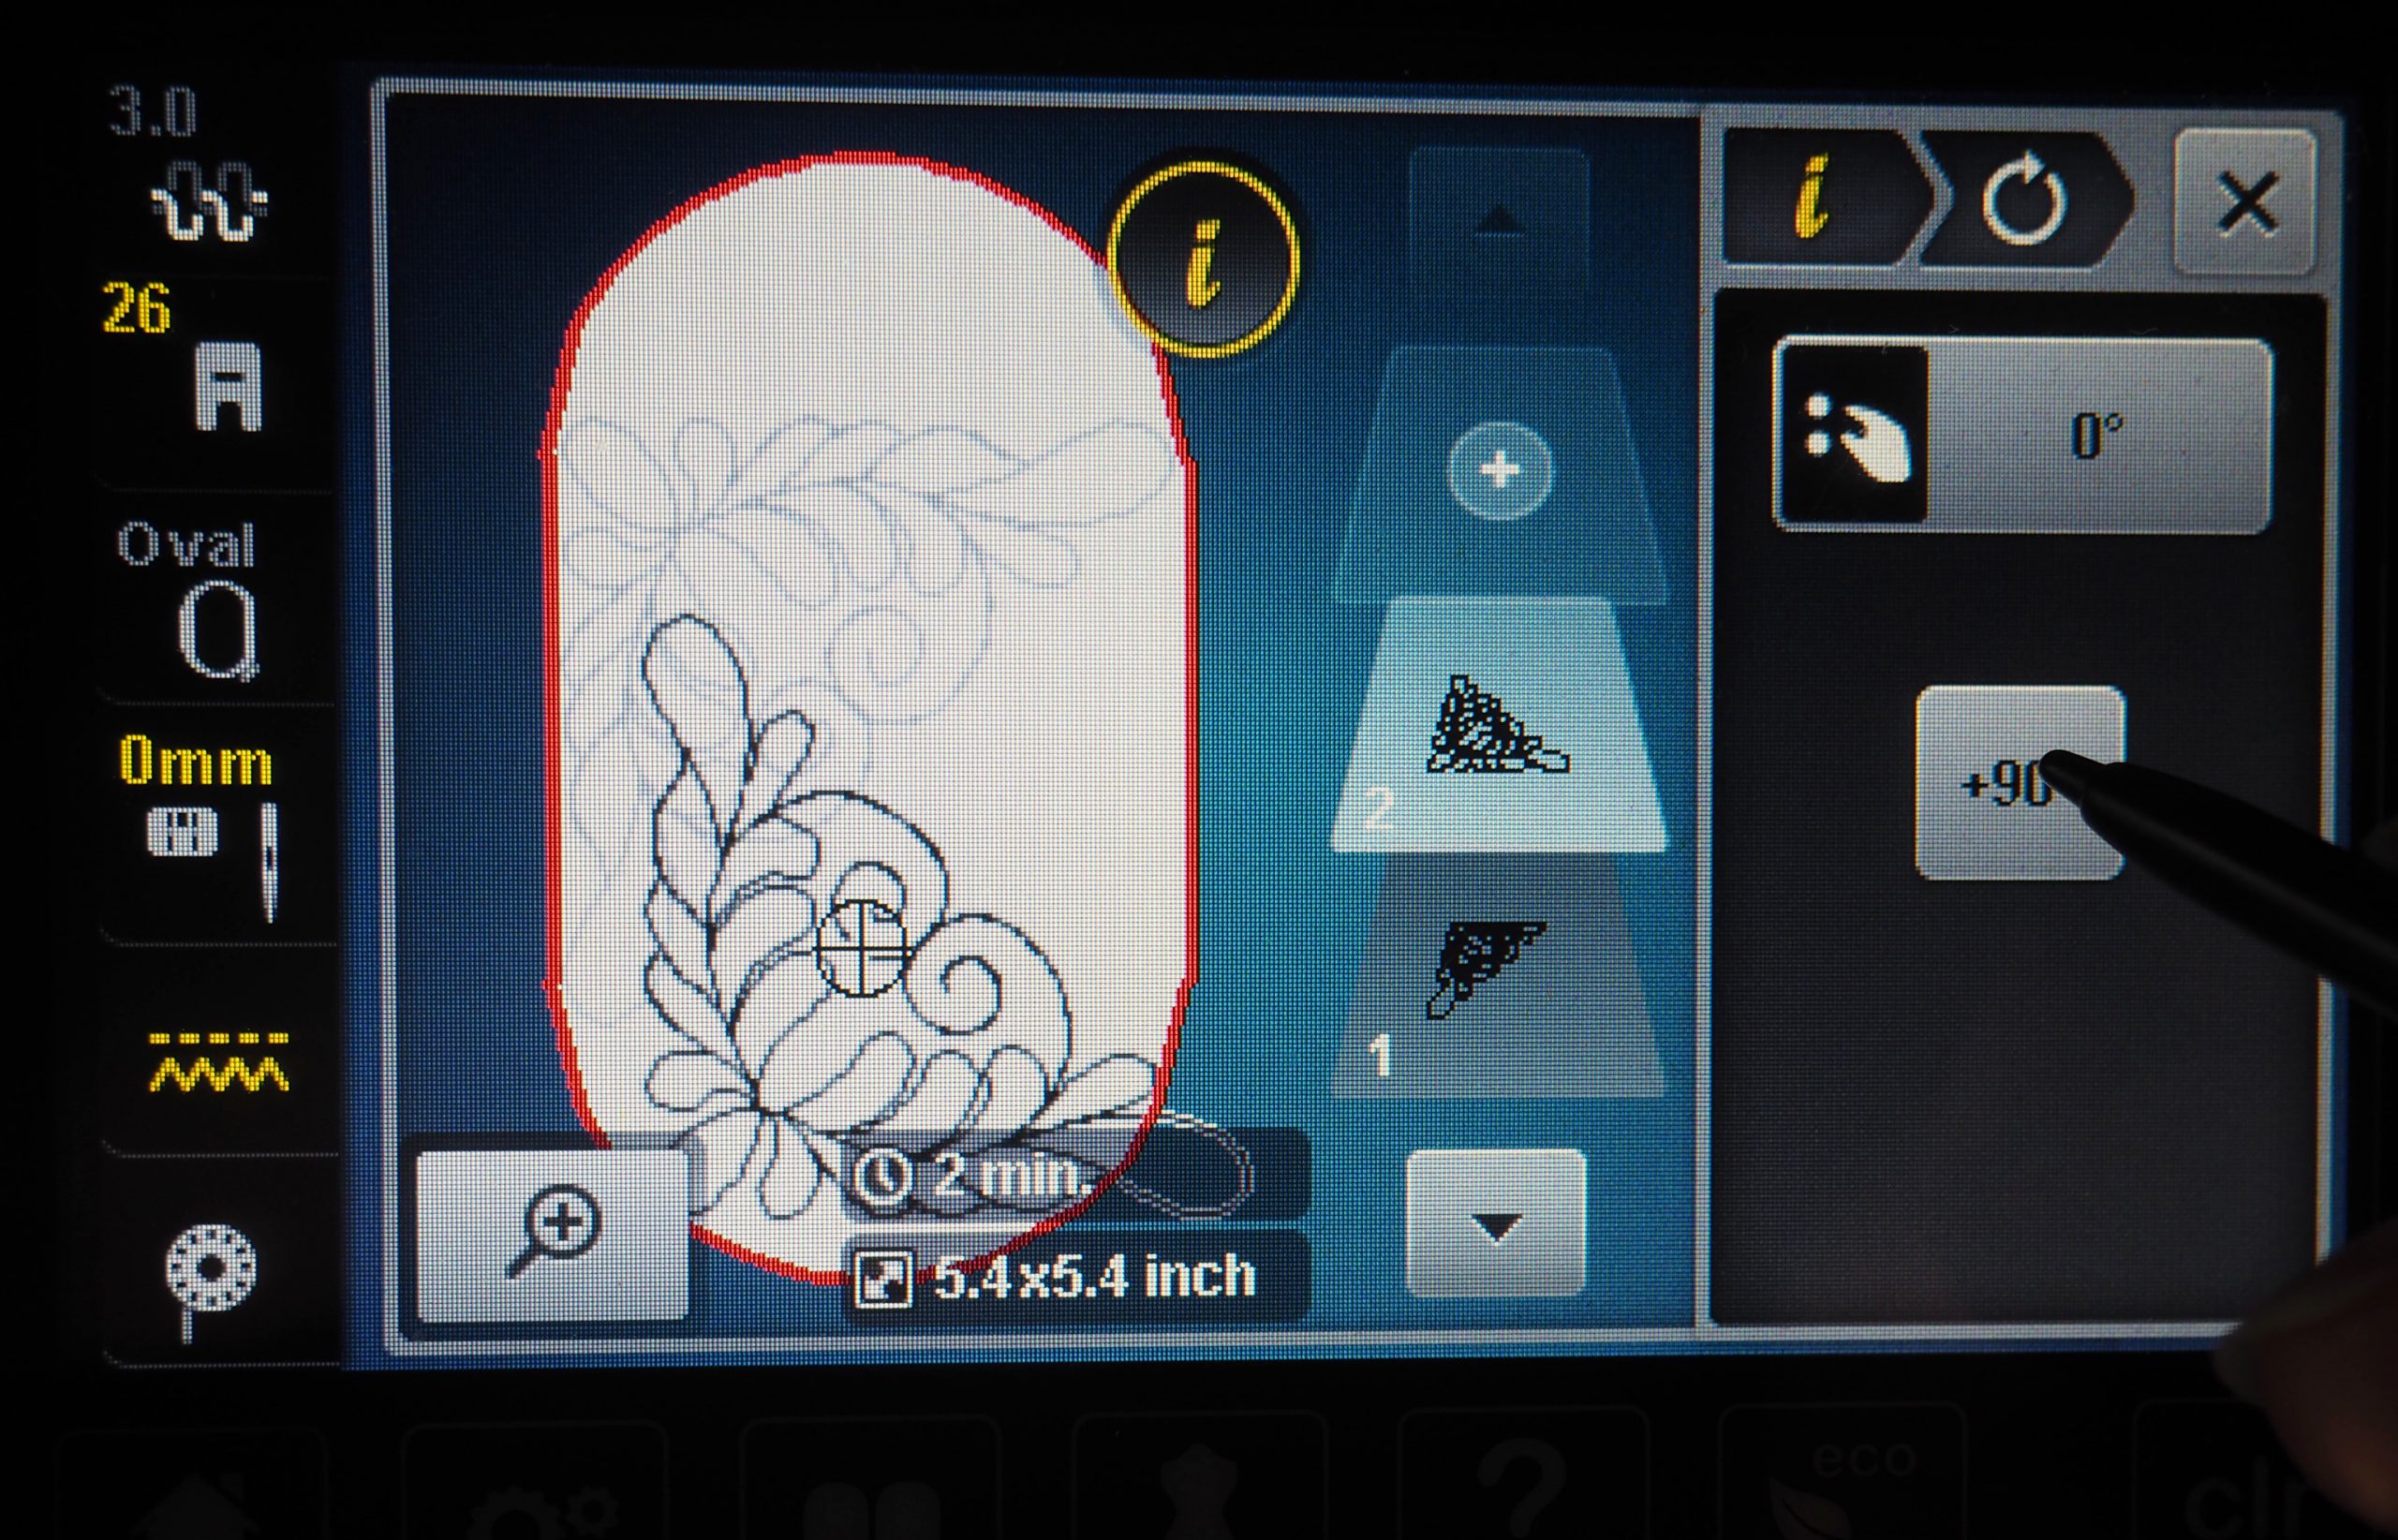
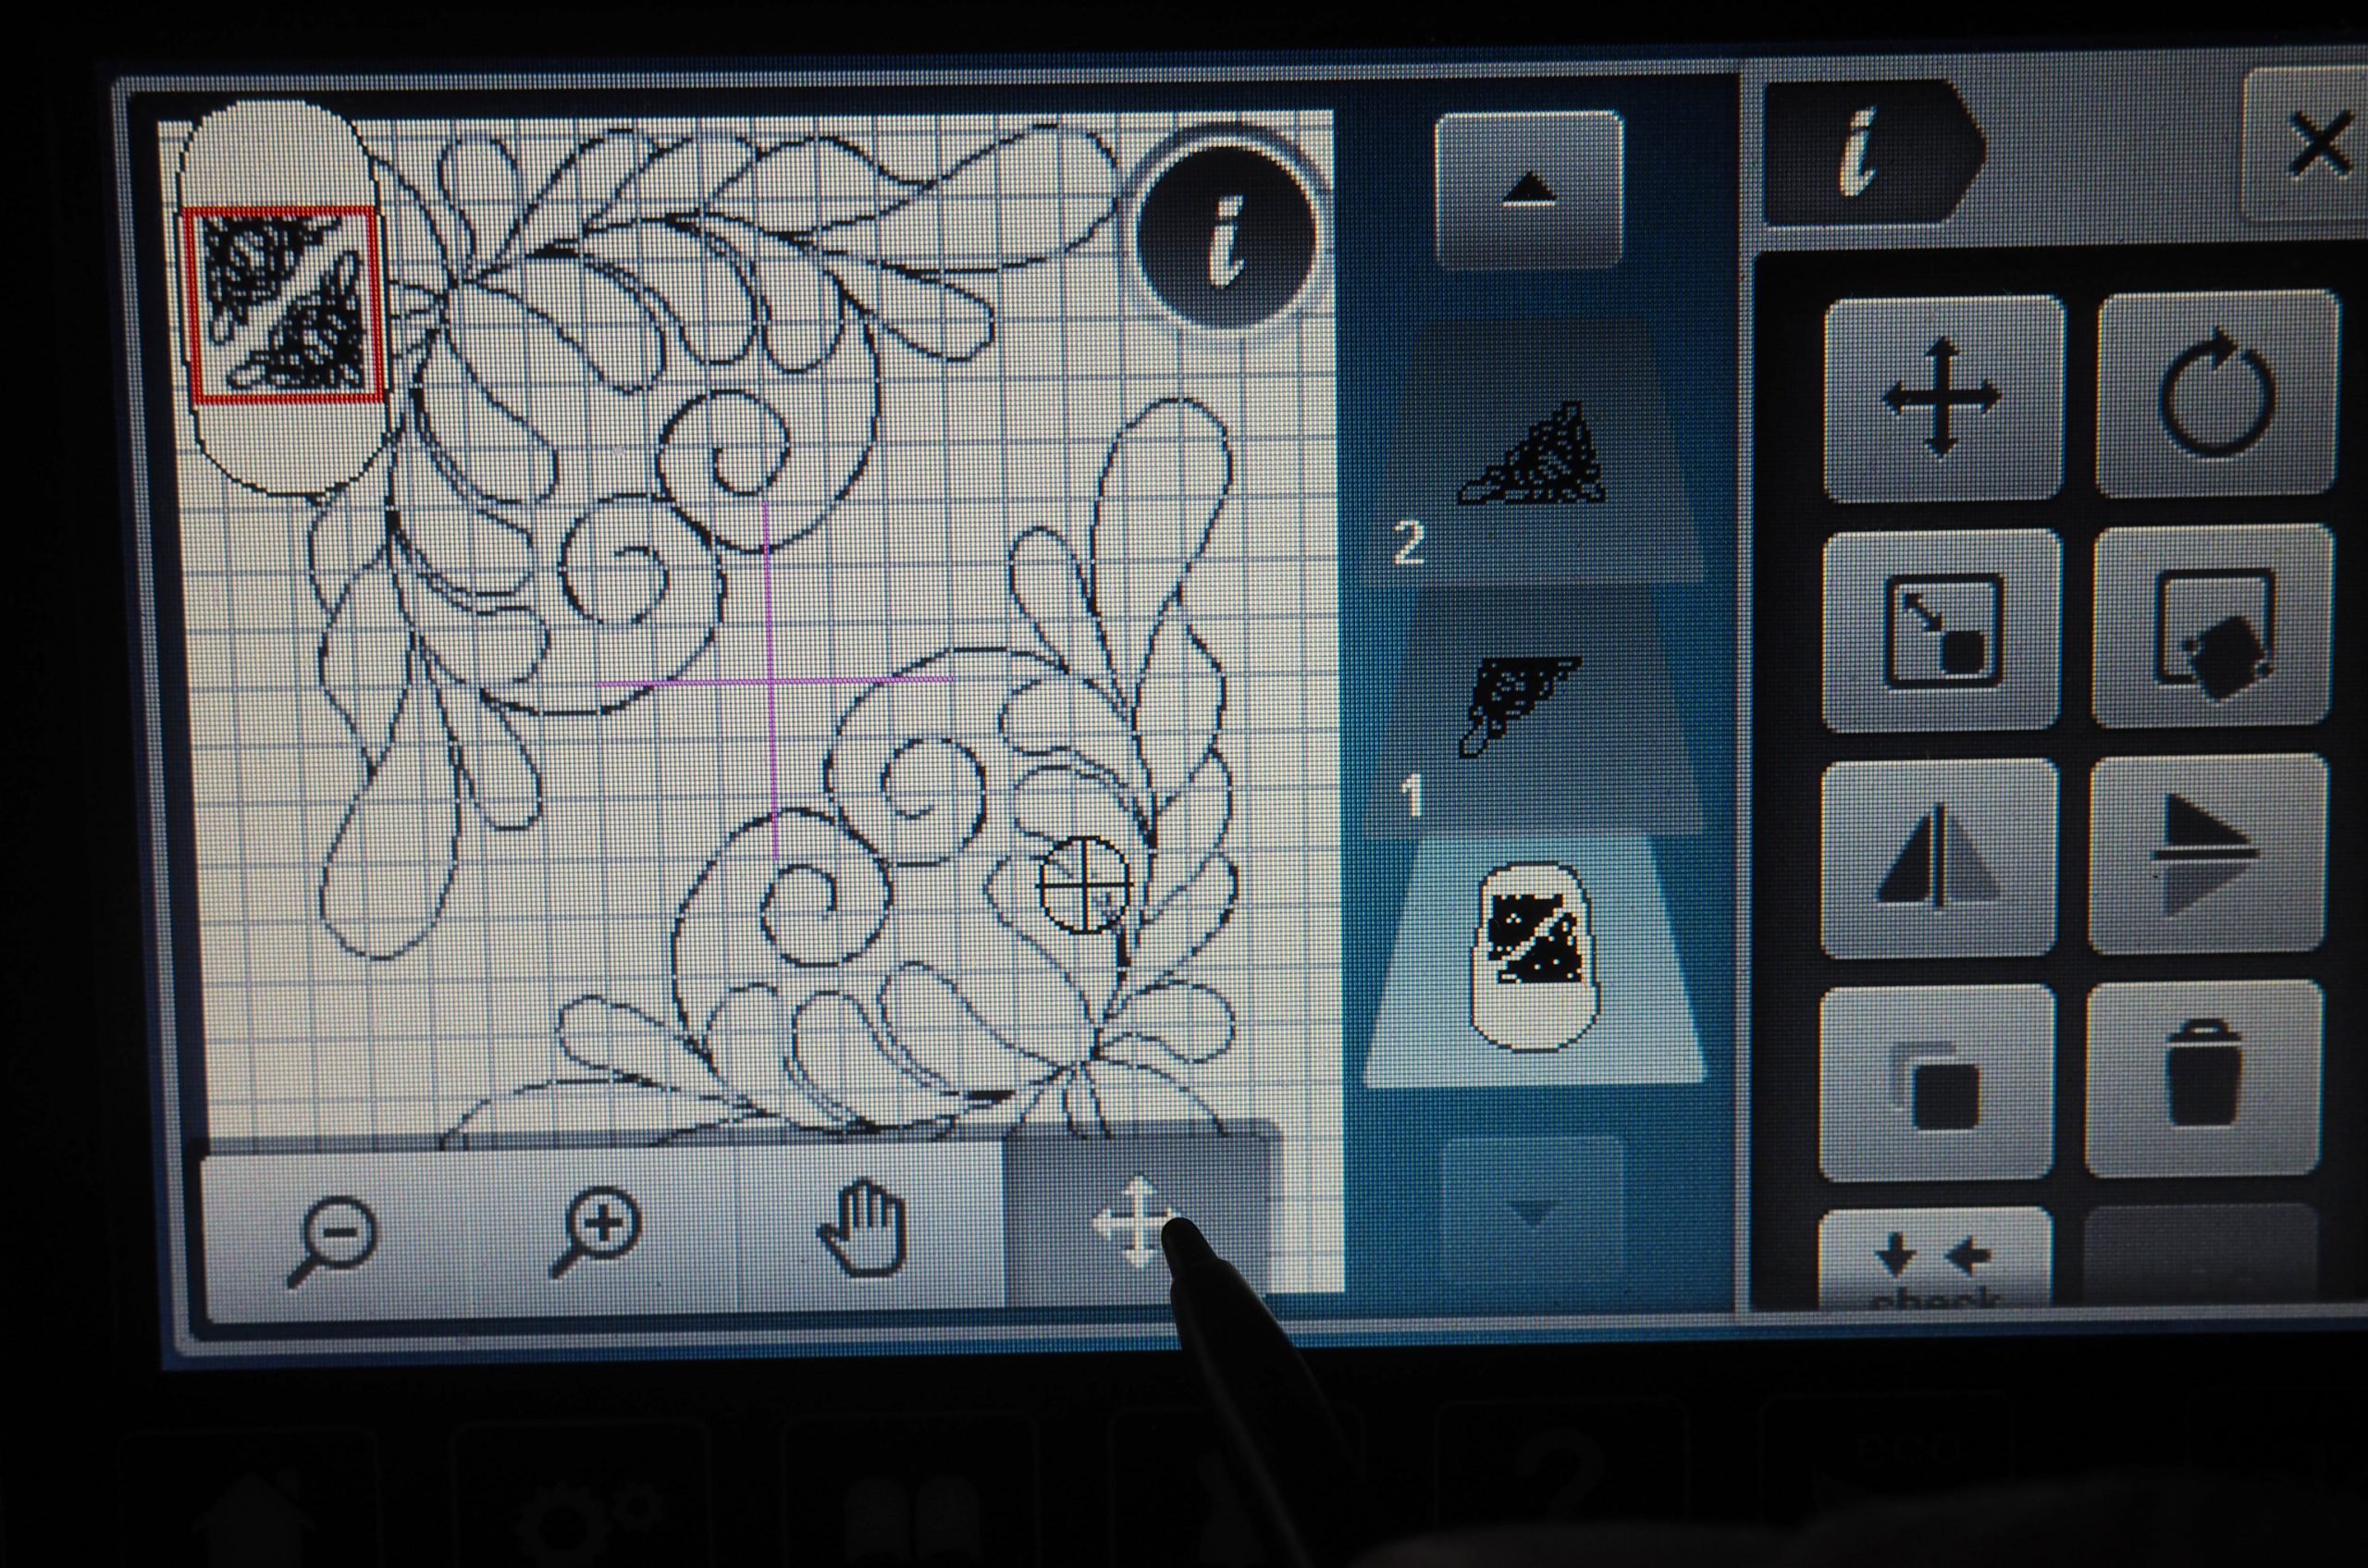
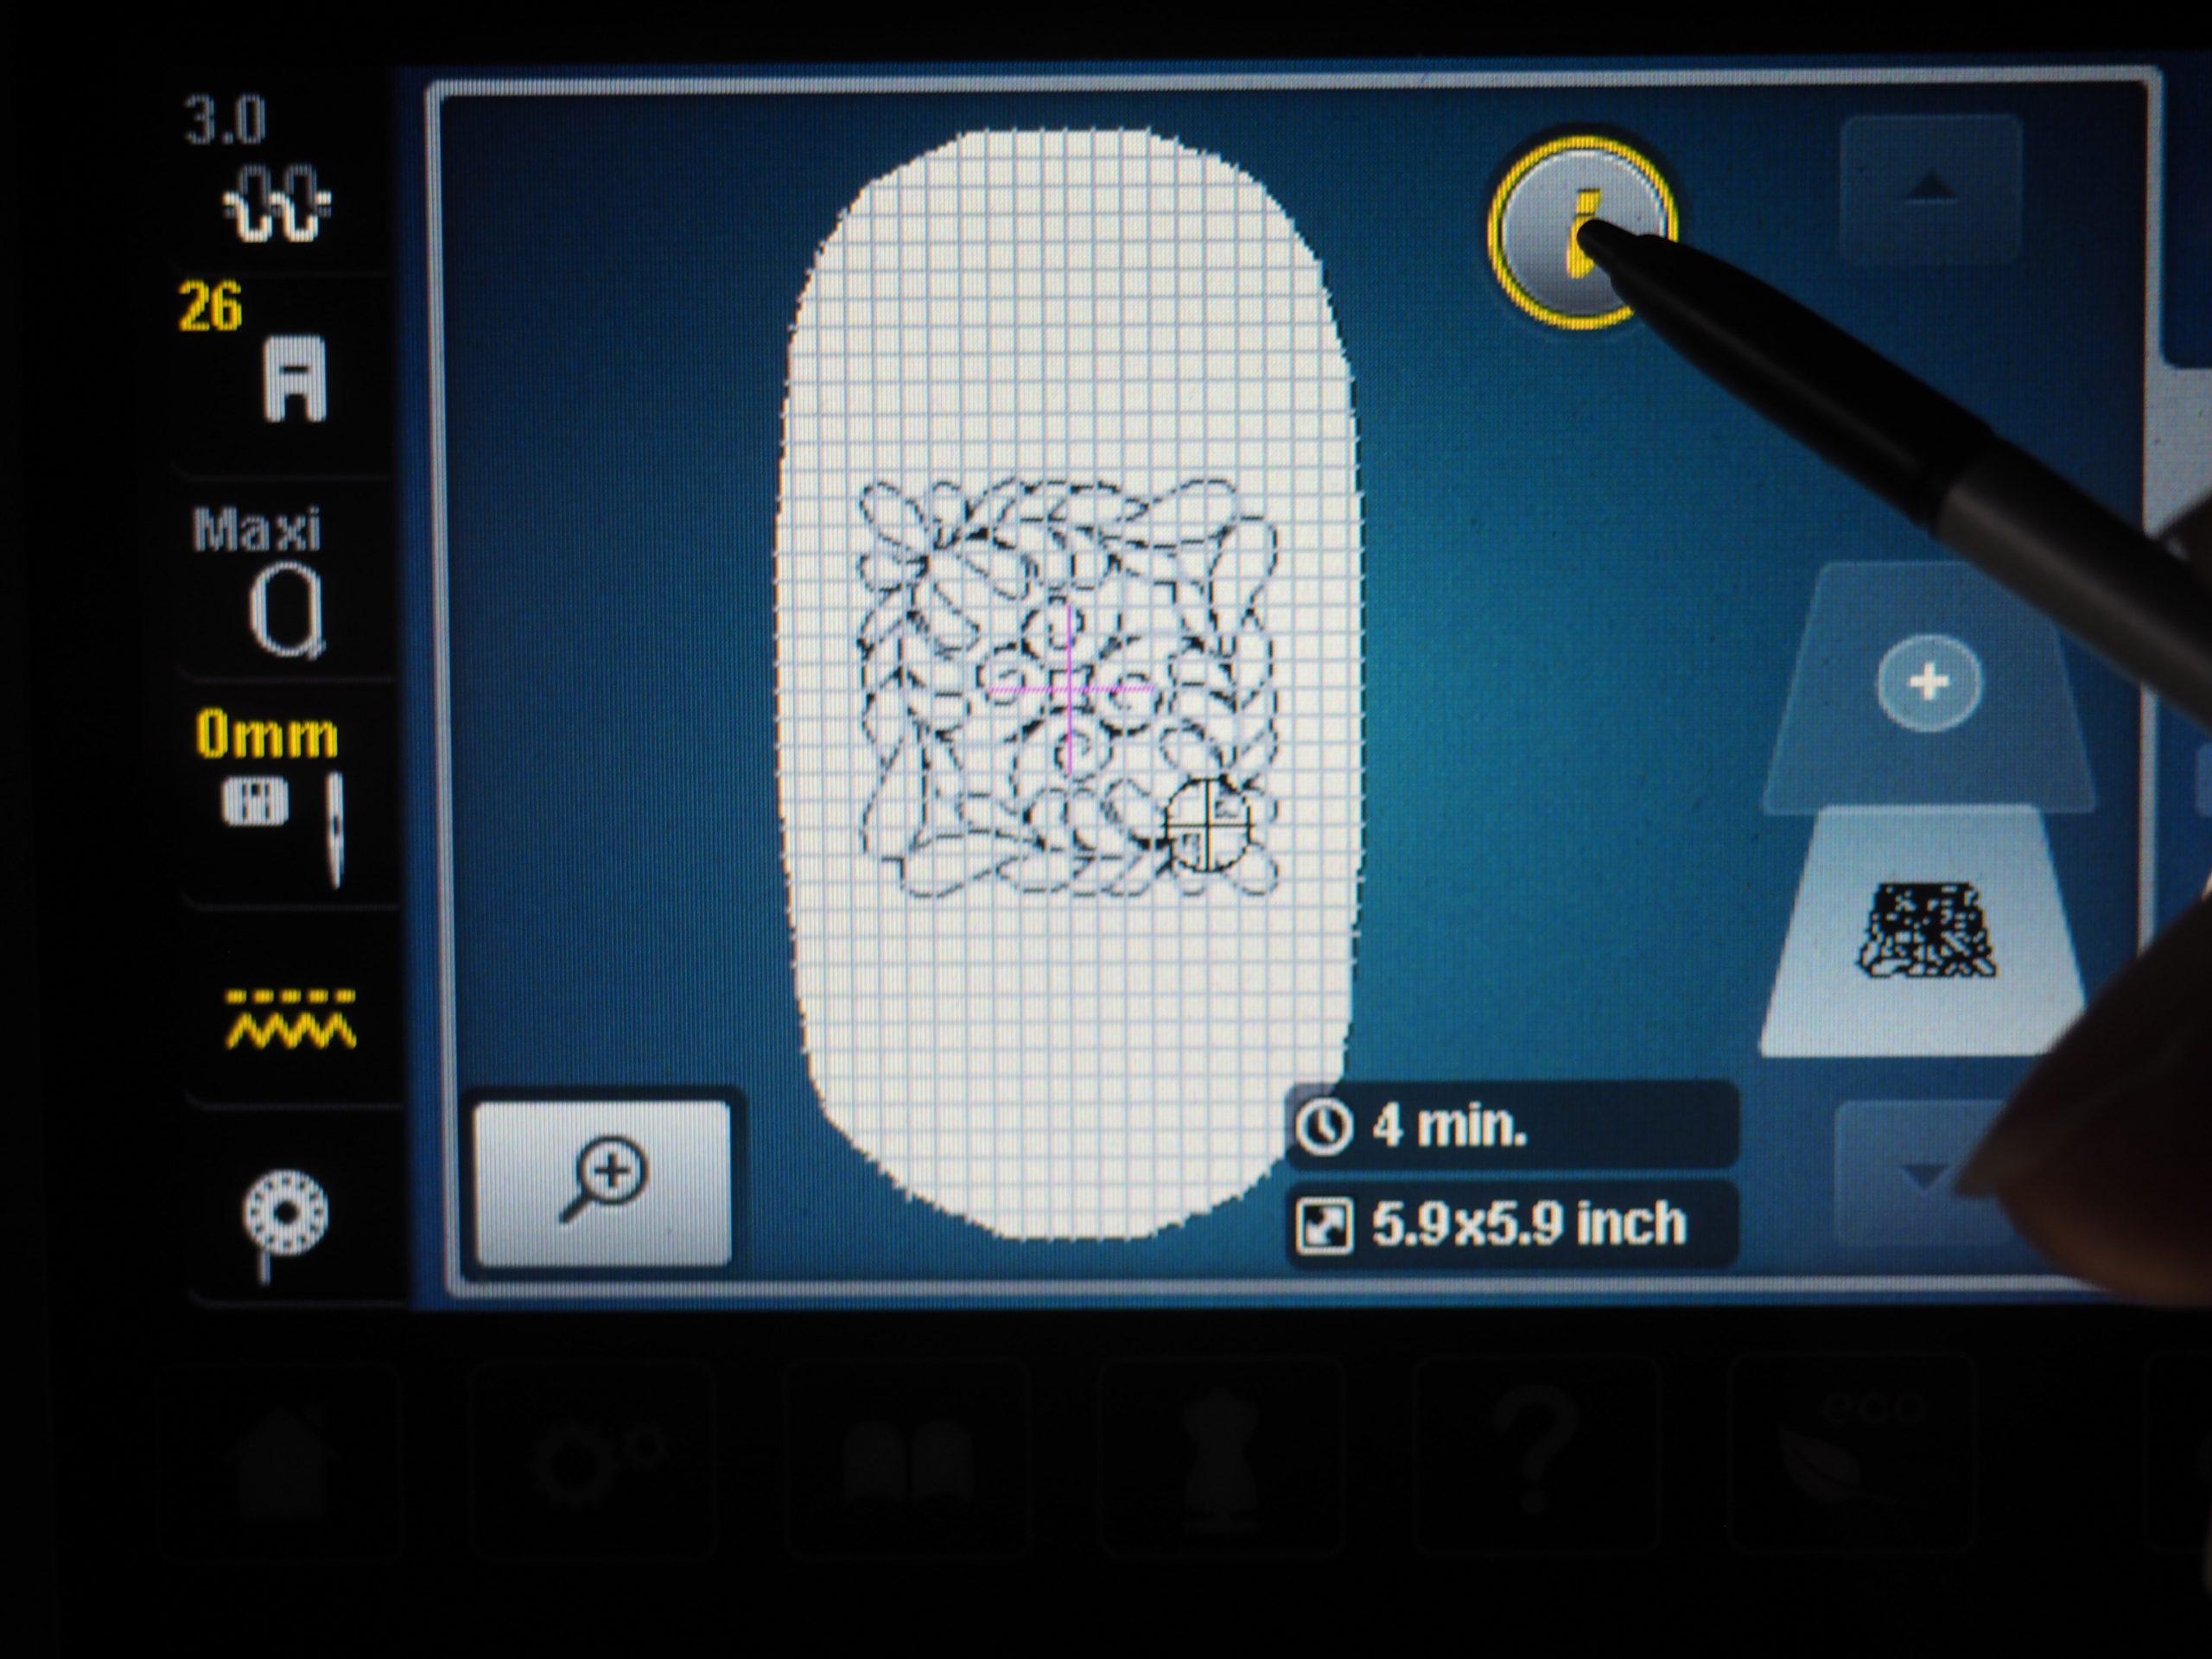
First, the two blocks are rotated individually so that they fill a square: click the “Rotate” button
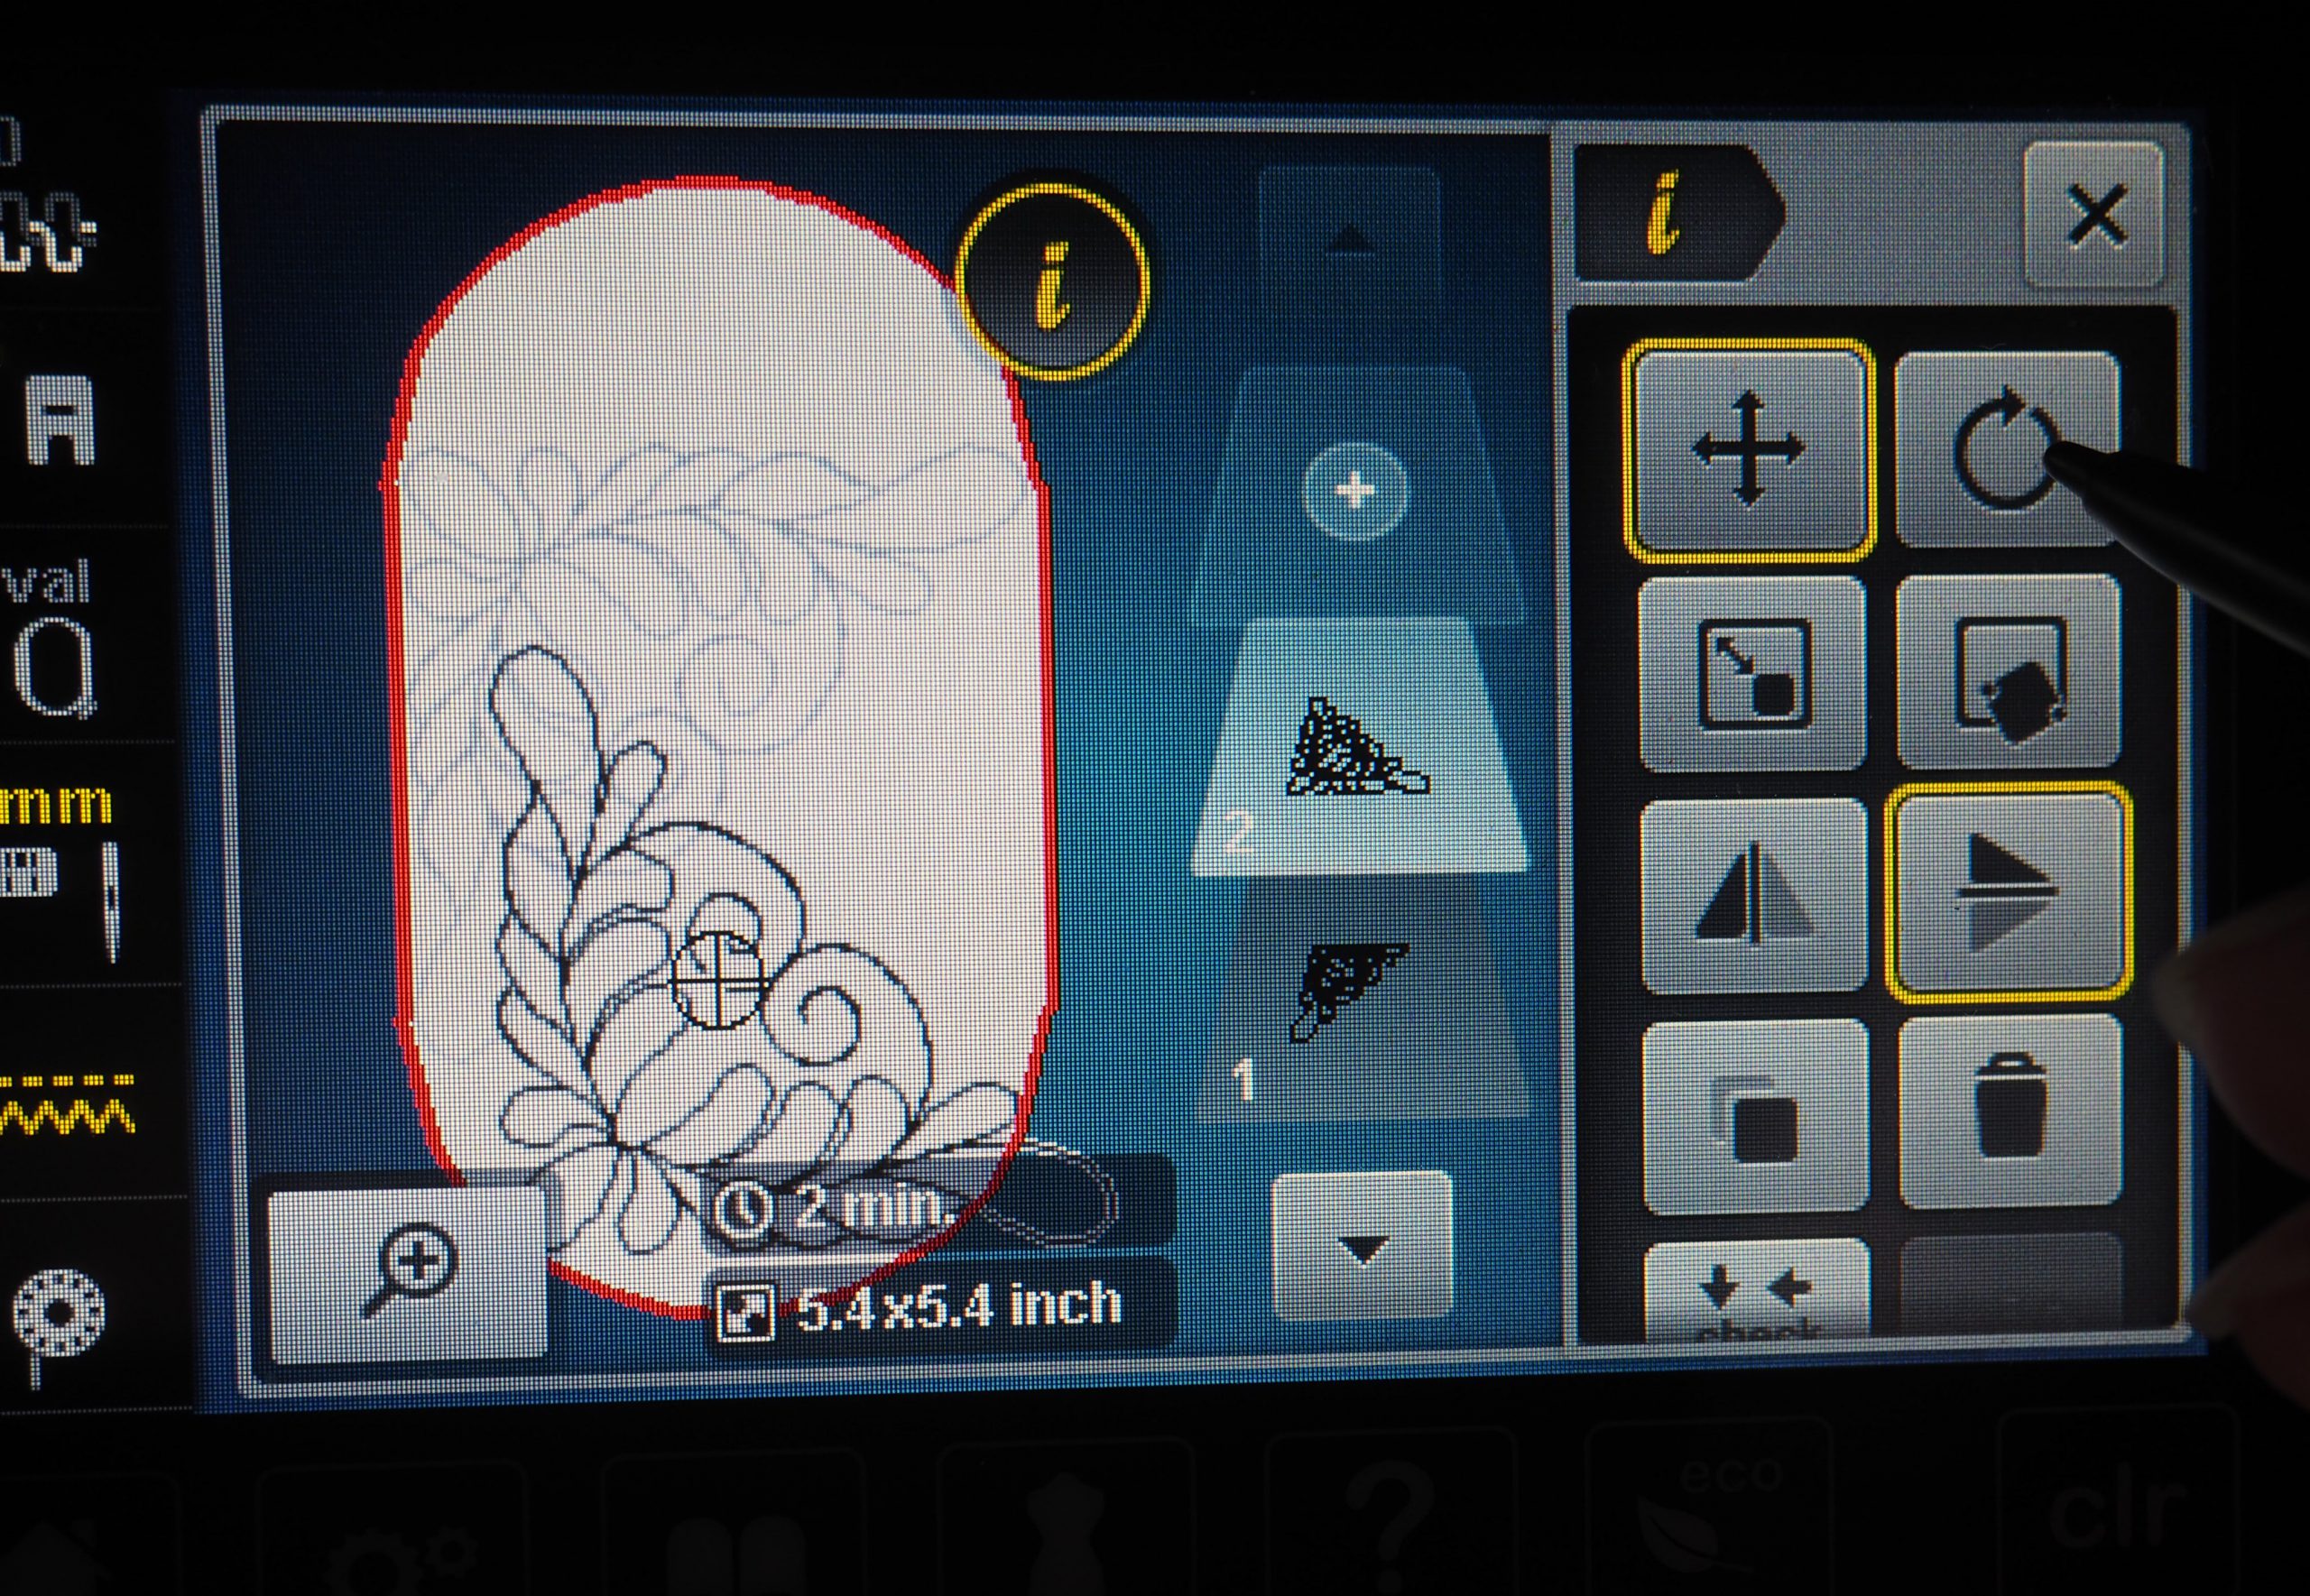
and rotate the design using the 90-degree button until the two feathered corners appear.
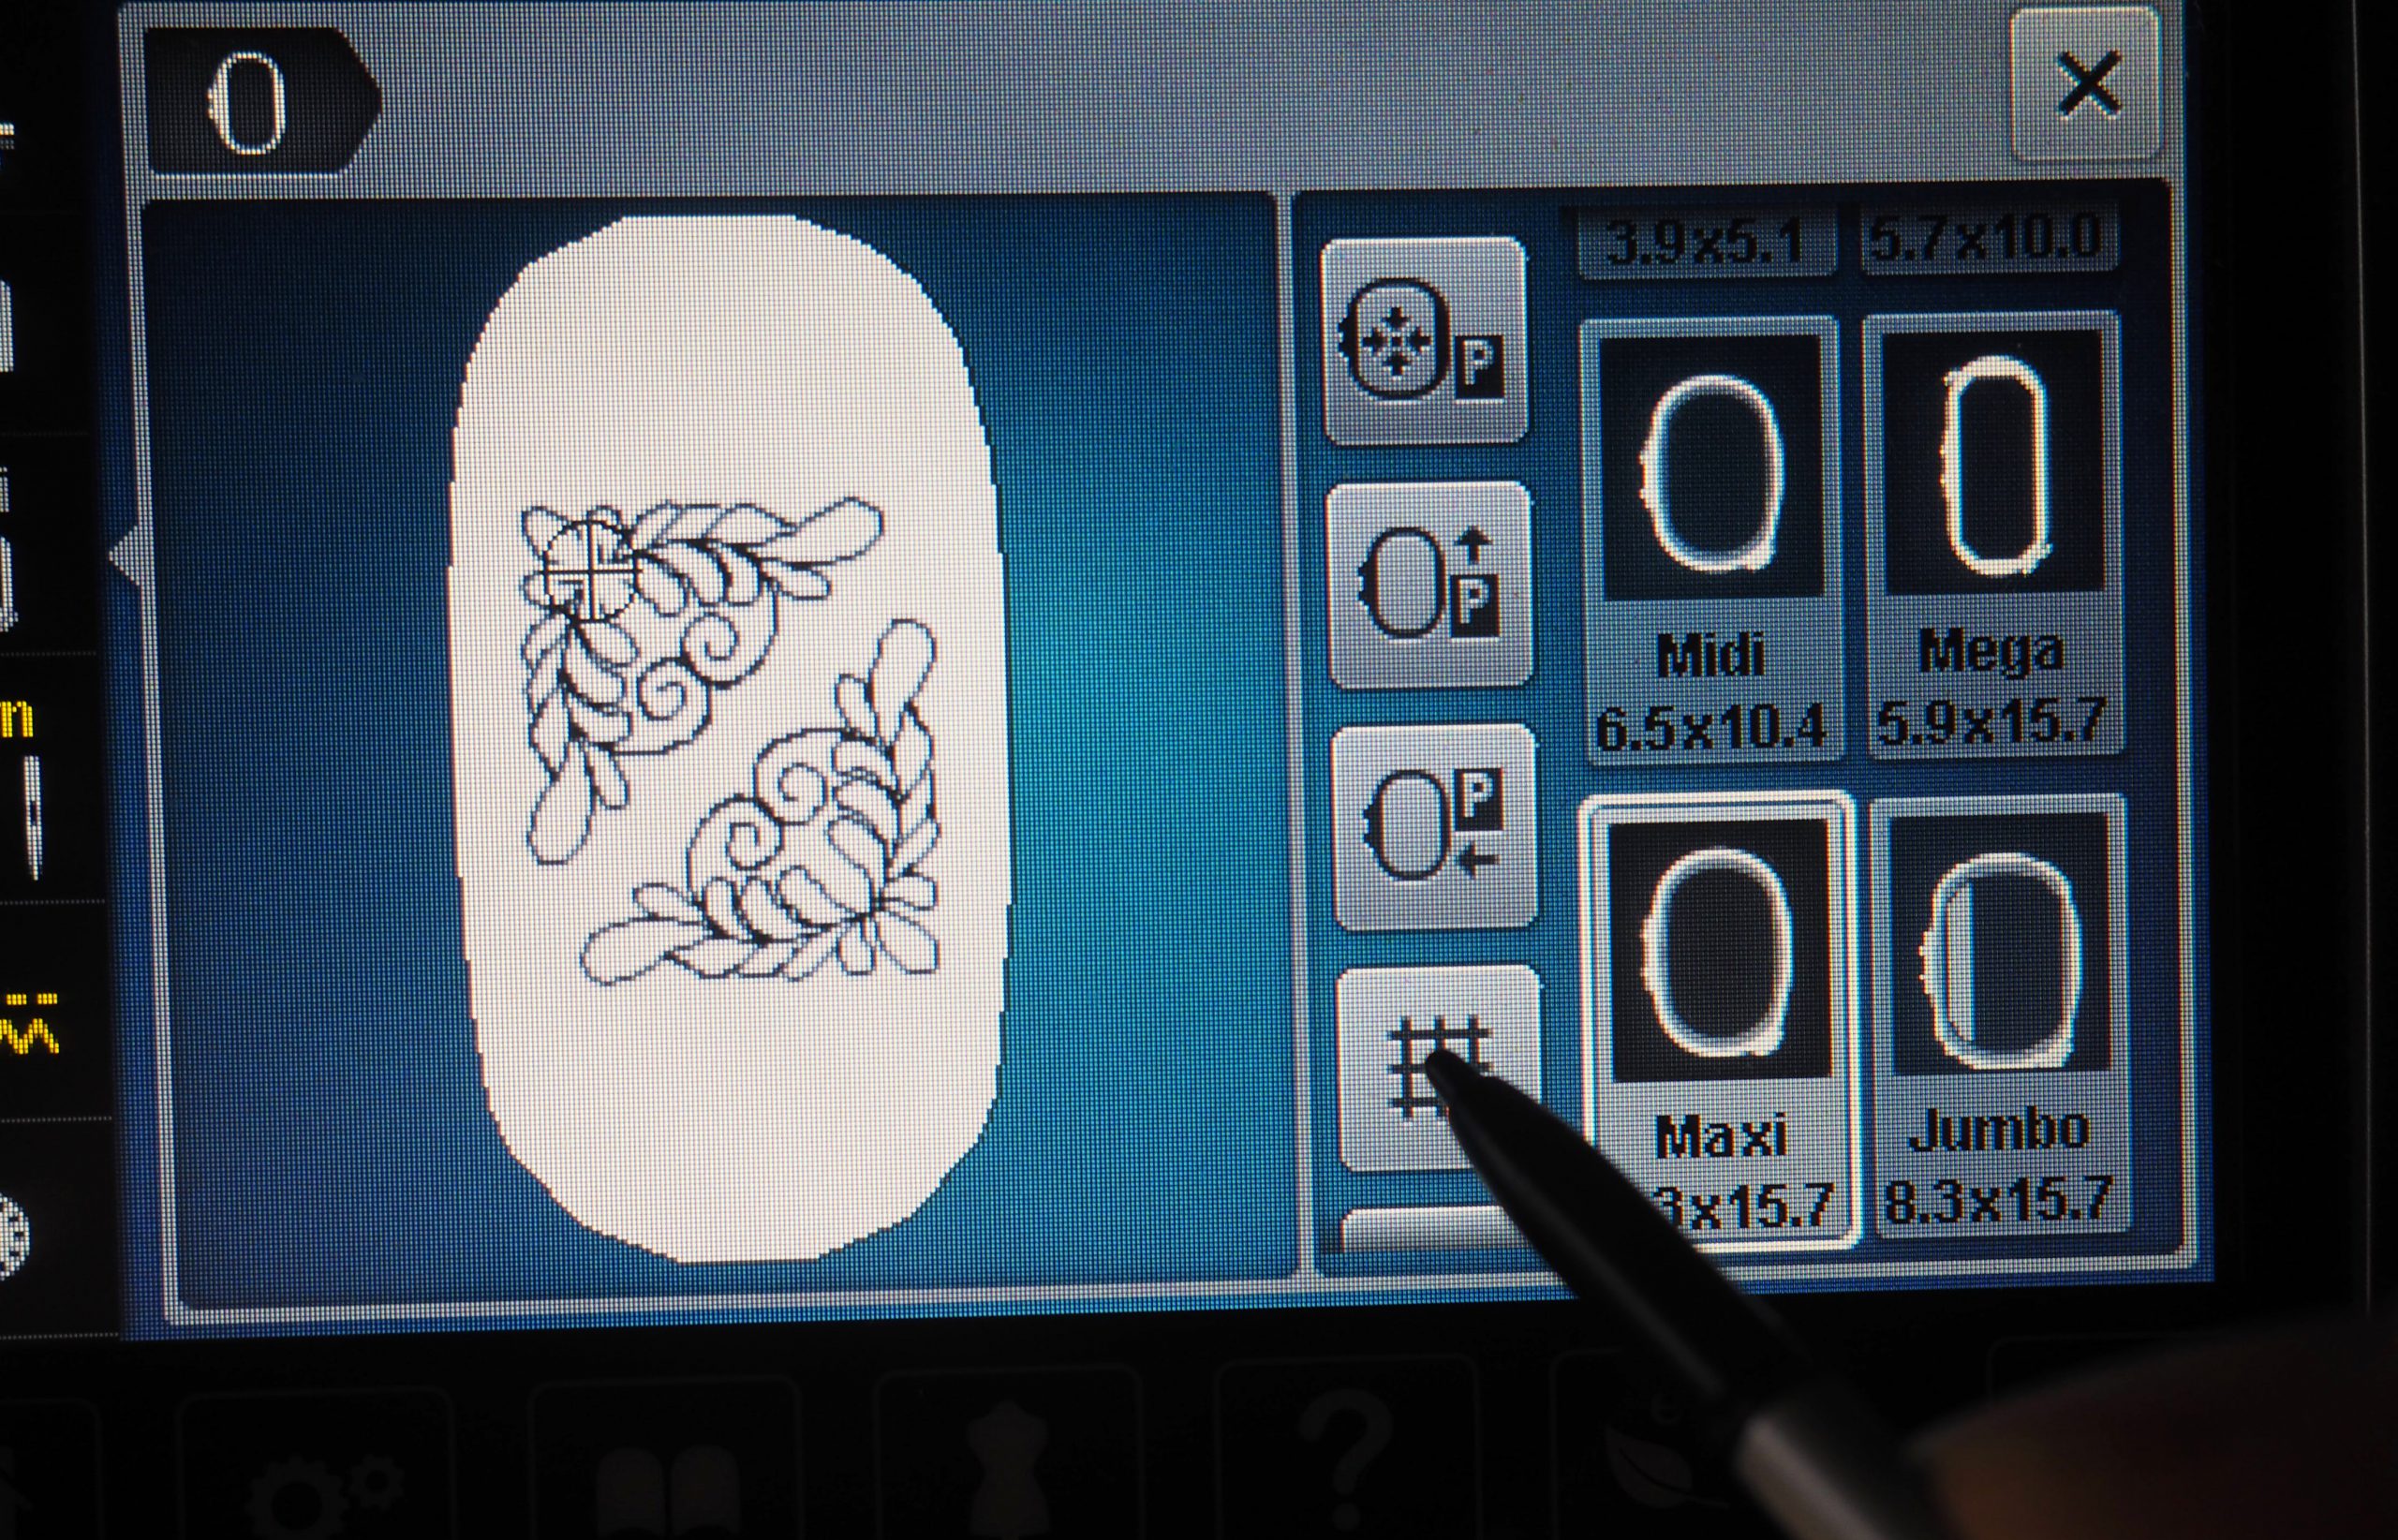
Selecting the embroidery hoop
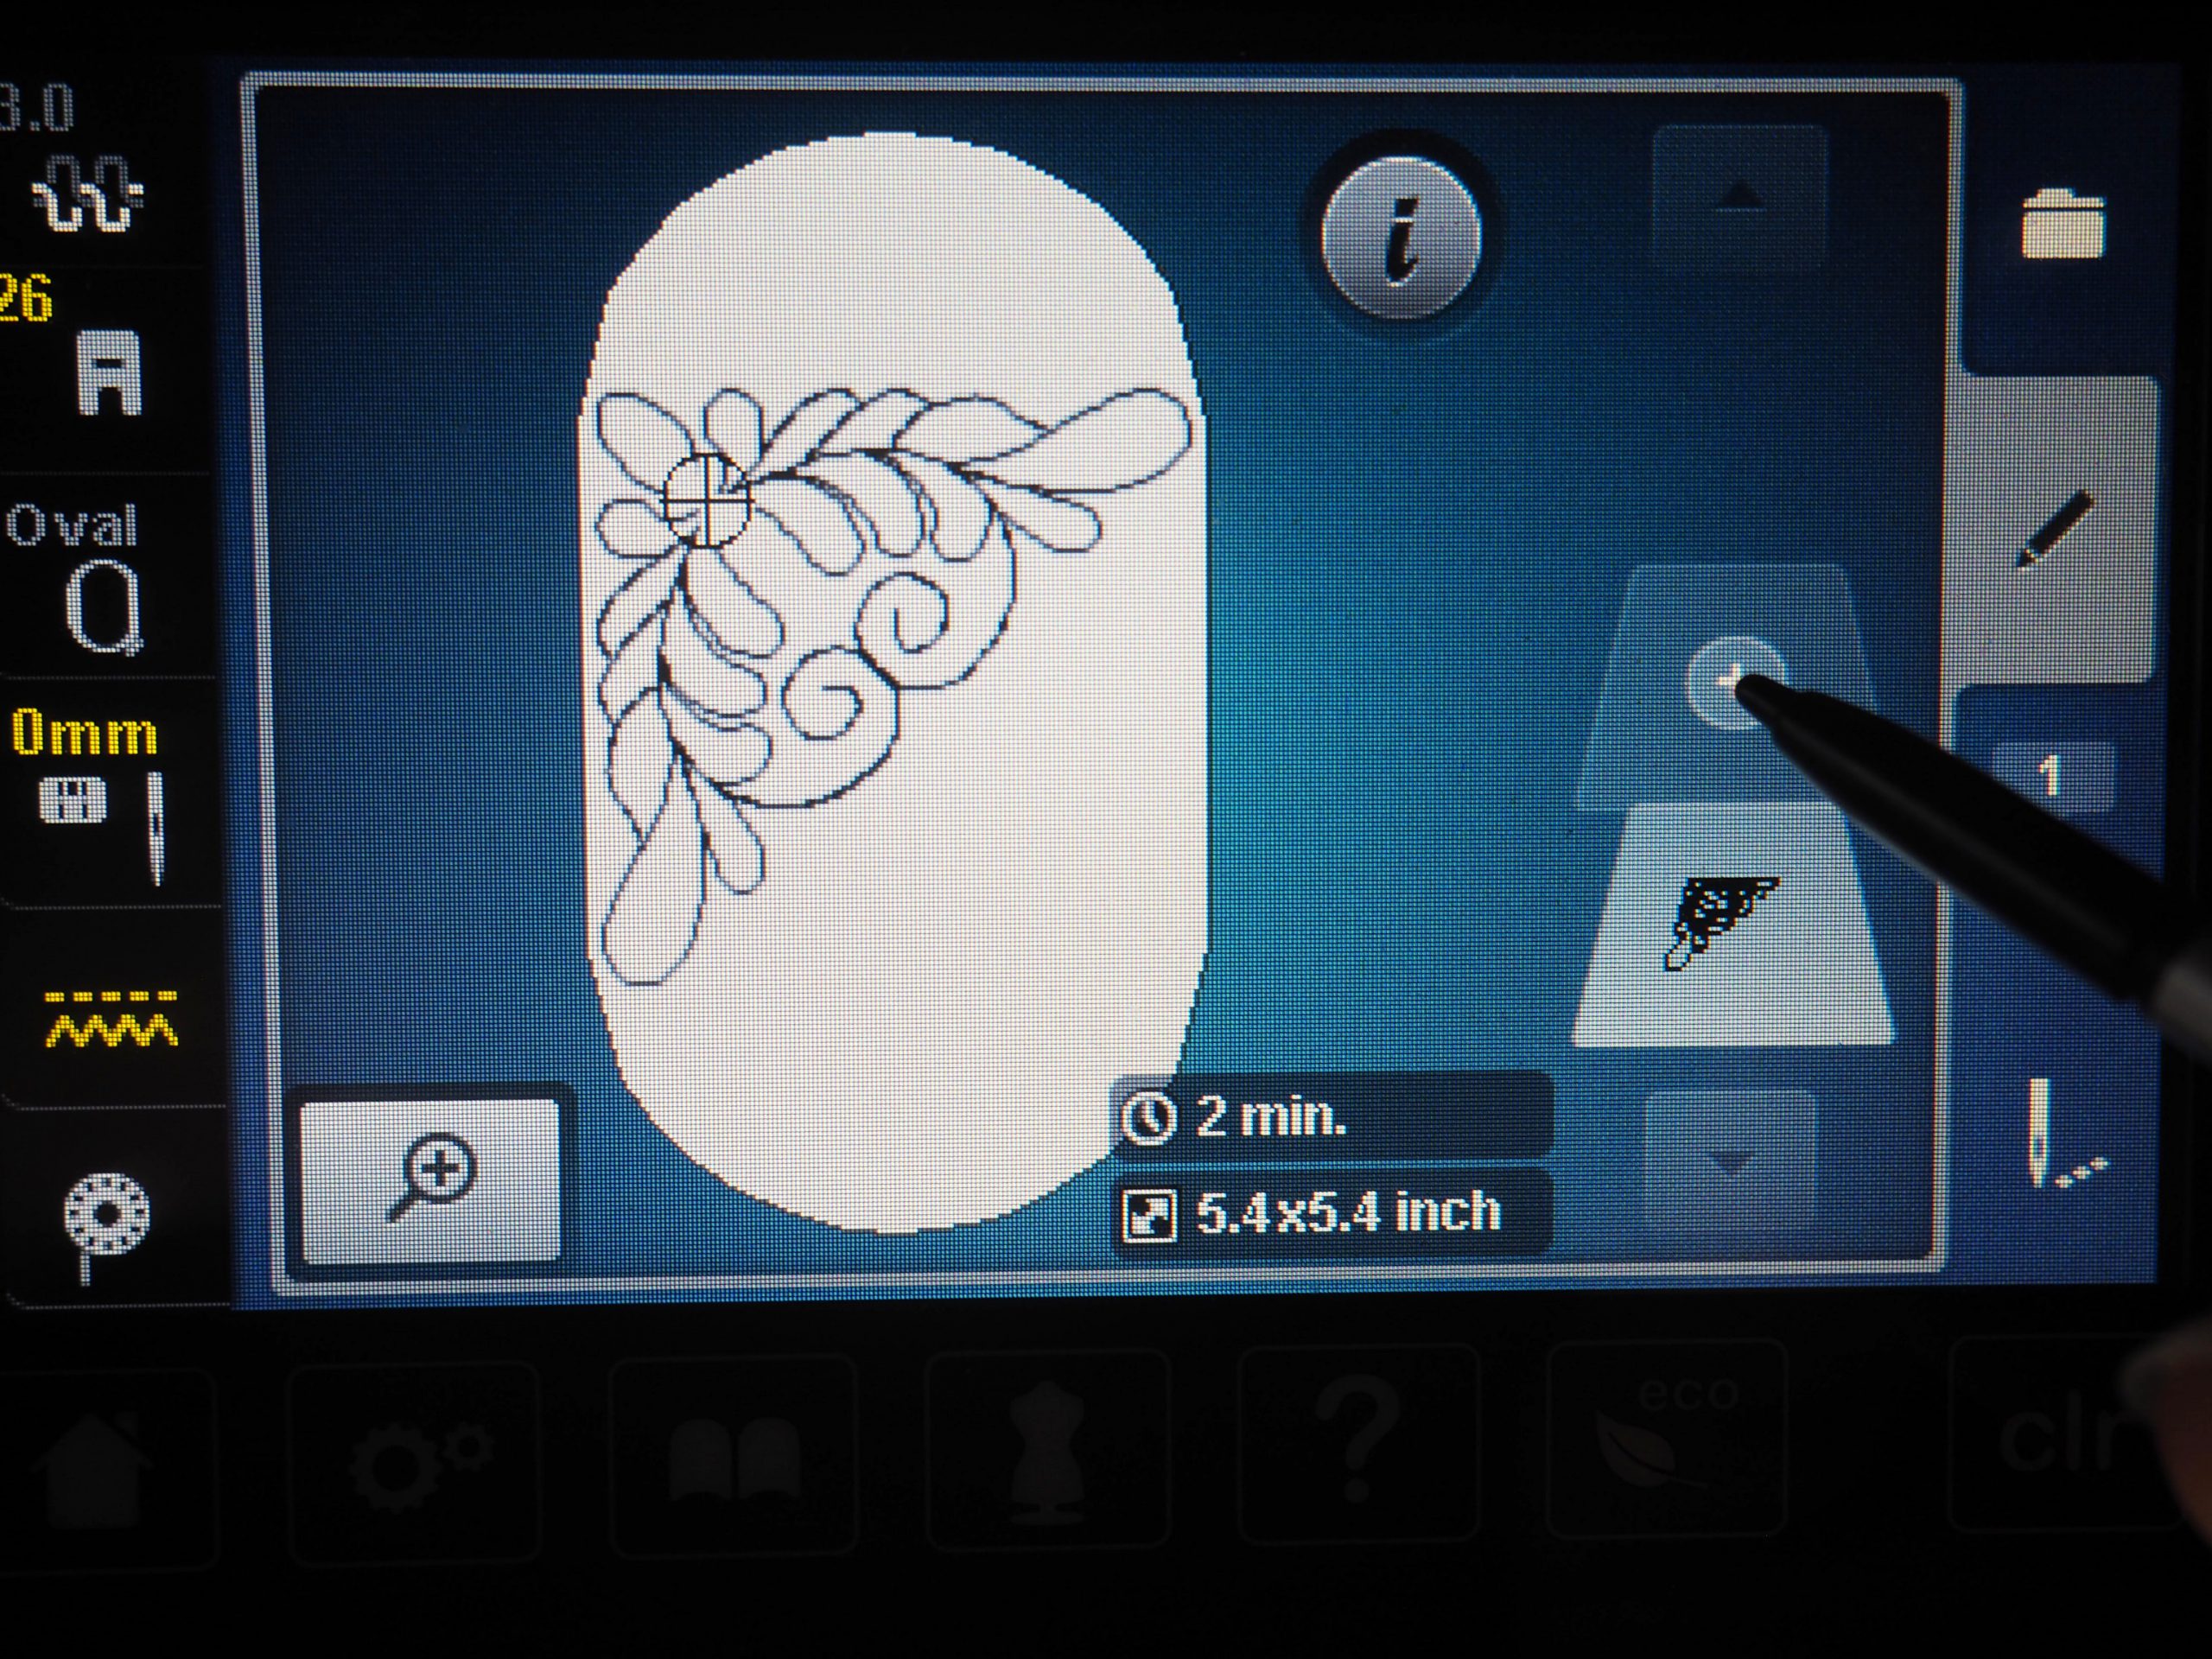
The smaller Oval Hoop is displayed, which means I can’t see clearly if the design fits. I have not yet attached the Maxi Hoop, so I switch to the Maxi Hoop by choosing it on the display.


Moving the embroidery design
In order to precisely adjust the two embroidery files, I select the grid lines on the screen. This button is located in the hoop selection menu,
Back in the “i” dialog box, my next goal is to move the two files so they are flush with each other. To help me do this, I use the magnification function, the magnifying glass with a plus symbol.
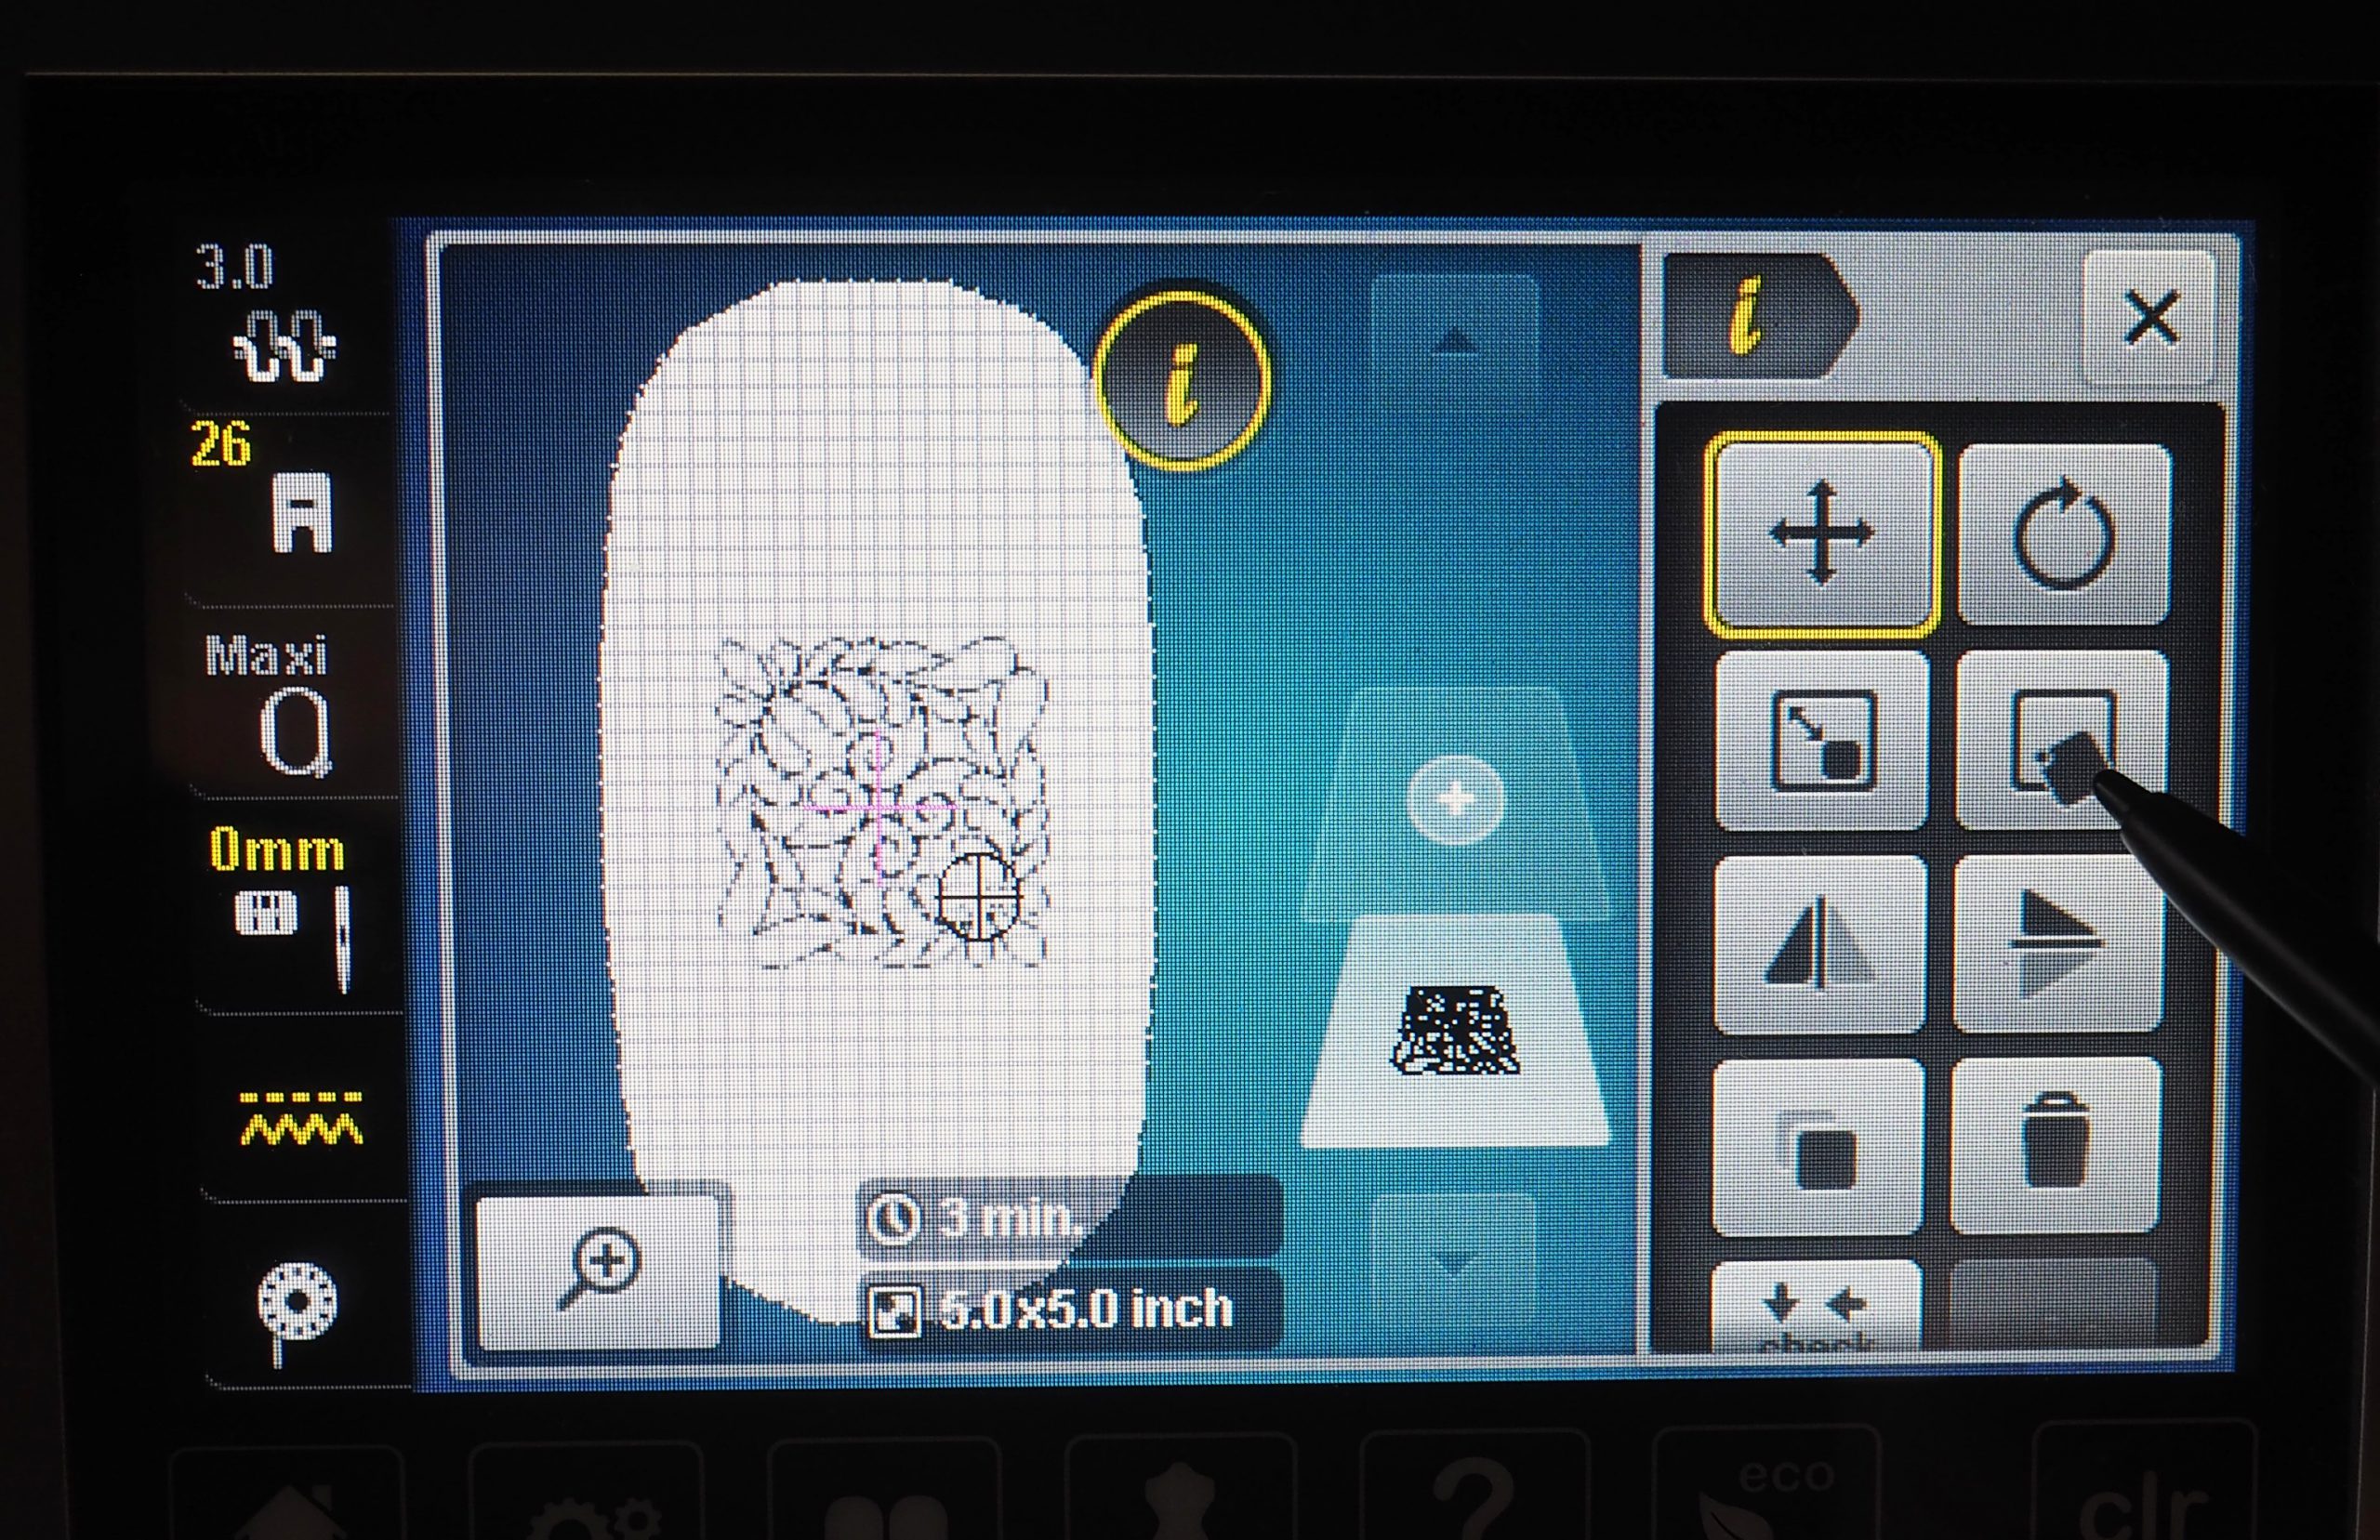
To move the designs, I select the arrow cross icon.
I use the Touch Pen to select which of the two designs I want to move.
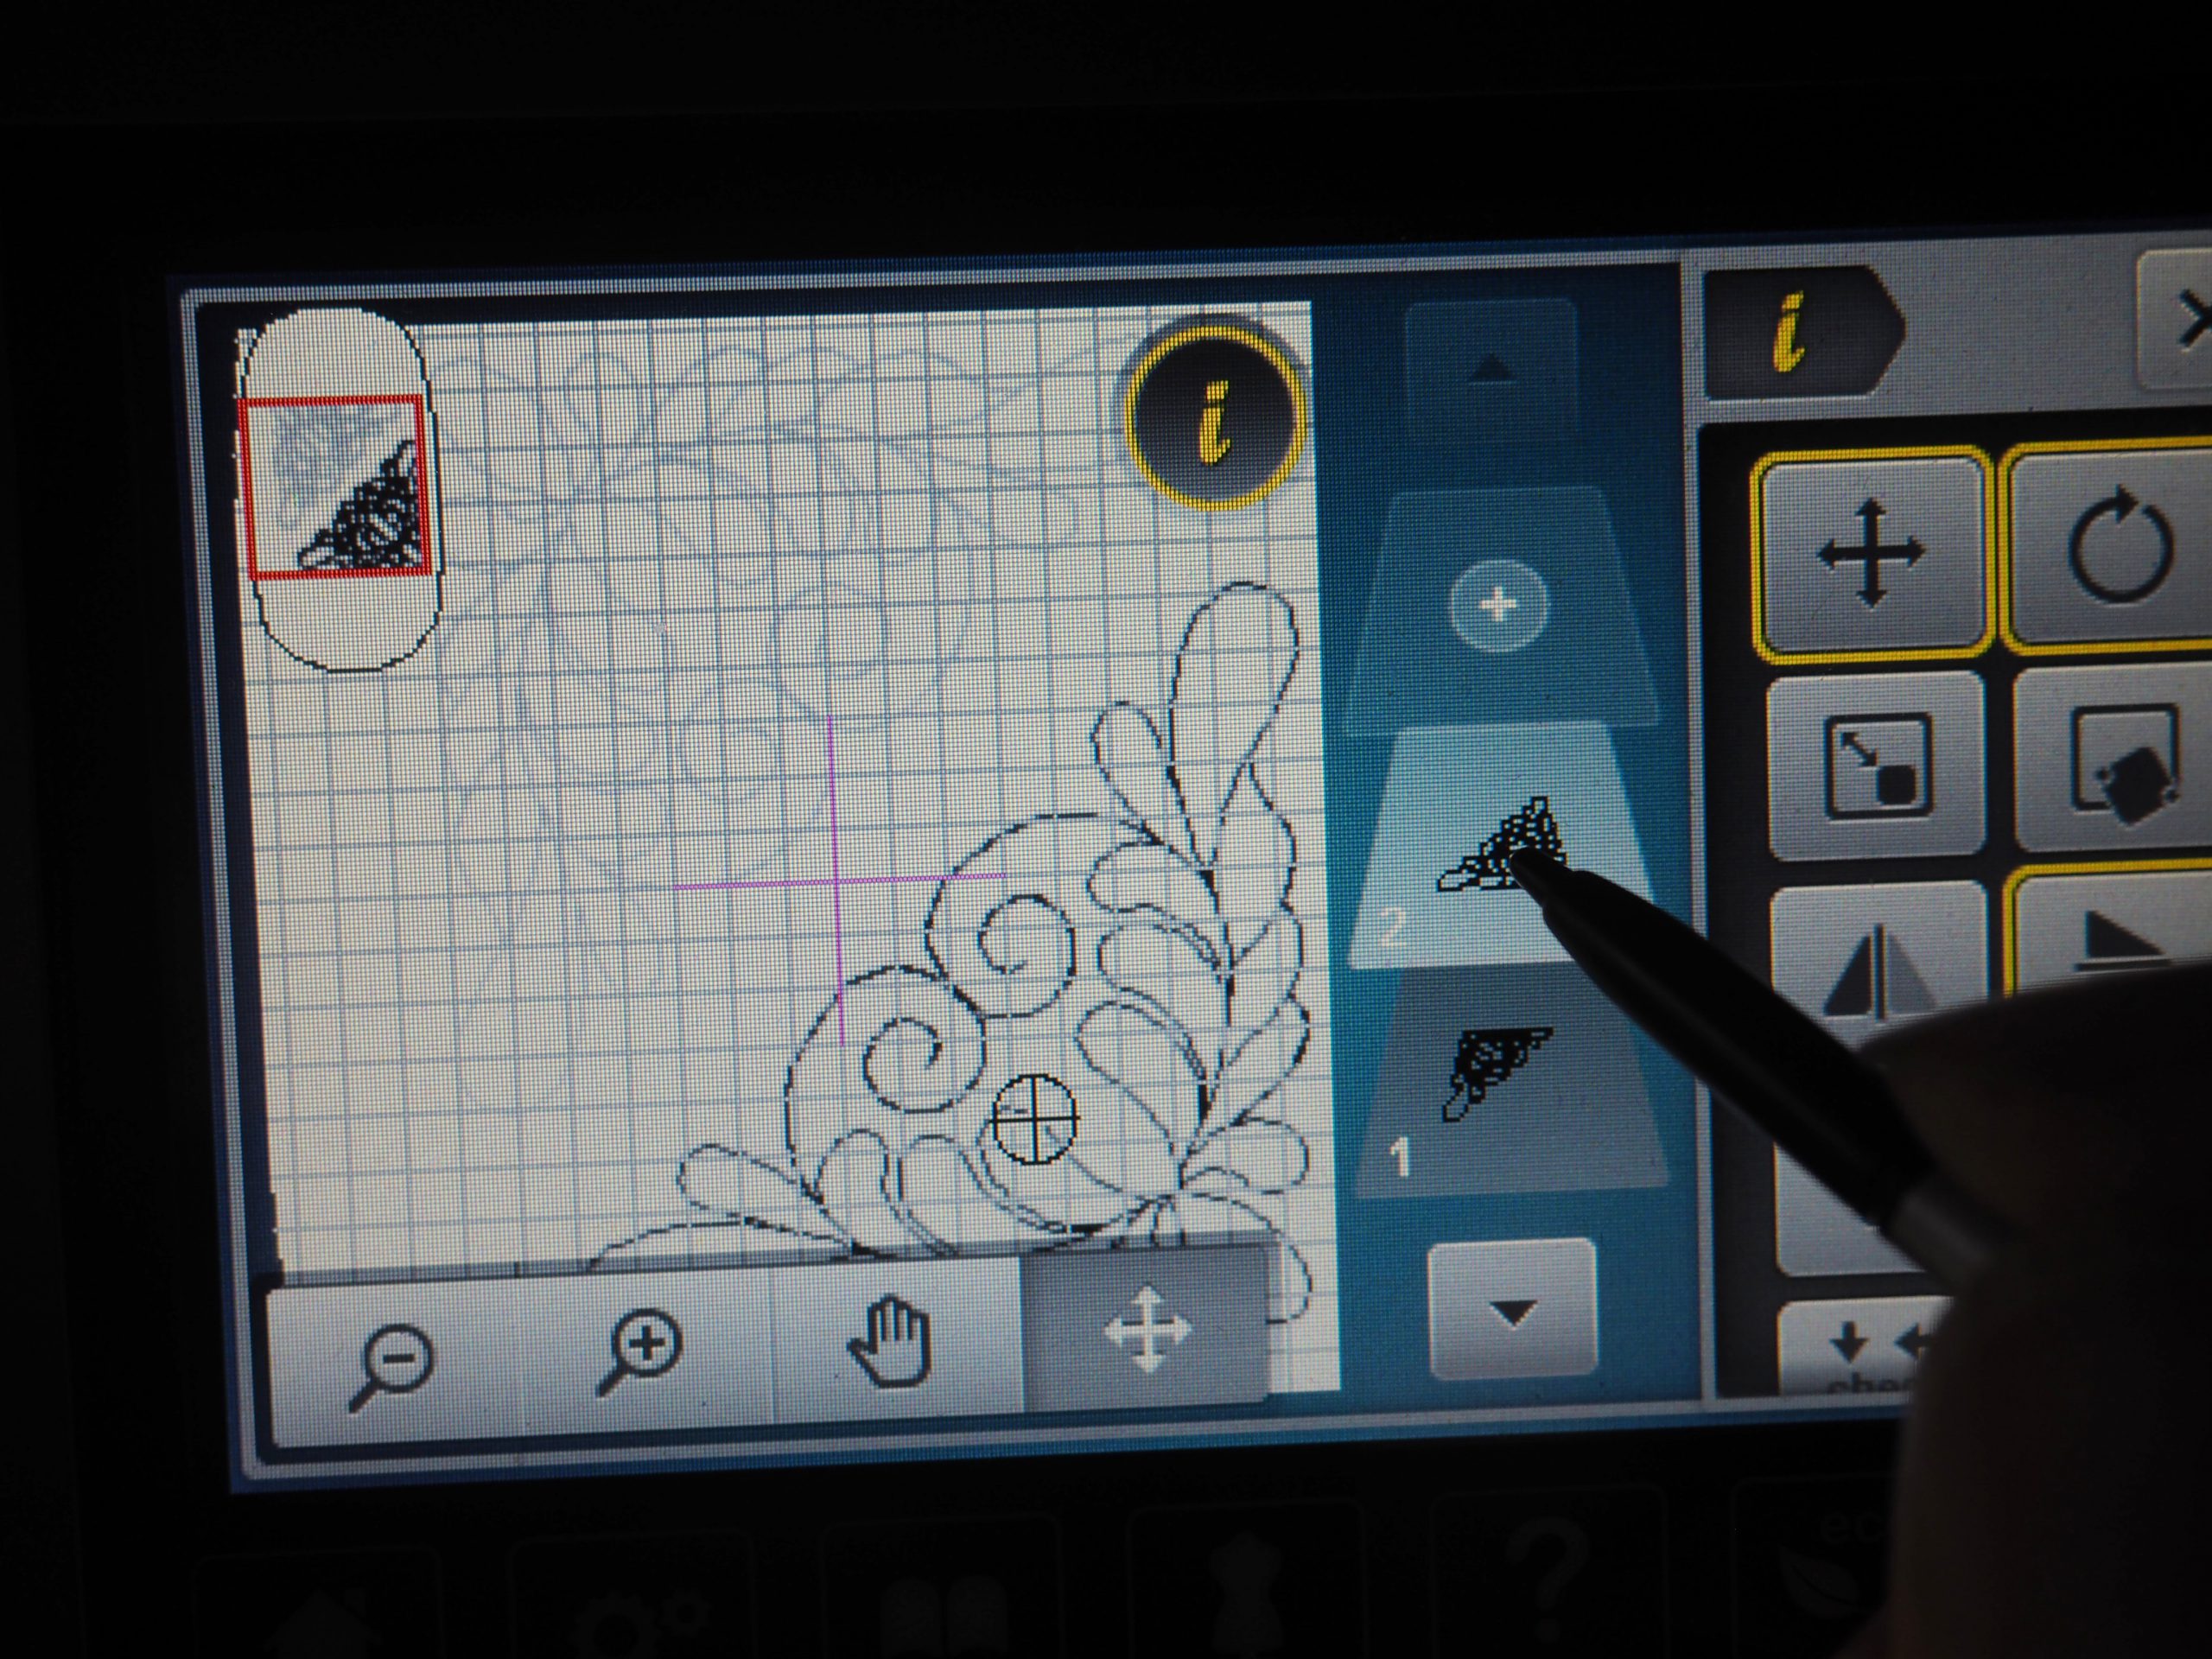
Using the pen or the multifunction knobs, I move the designs towards each other until the edges come together without overlapping. The grid is very helpful for positioning the designs.

Combining individual designs into one design: grouping
To make it easier to reuse this customized embroidery design later on, I group the two individual designs into one design by clicking on the “Group” button.
The layers next to the hoop in the screen now show that the two designs have been joined – there is only one layer between the plus and minus symbols.
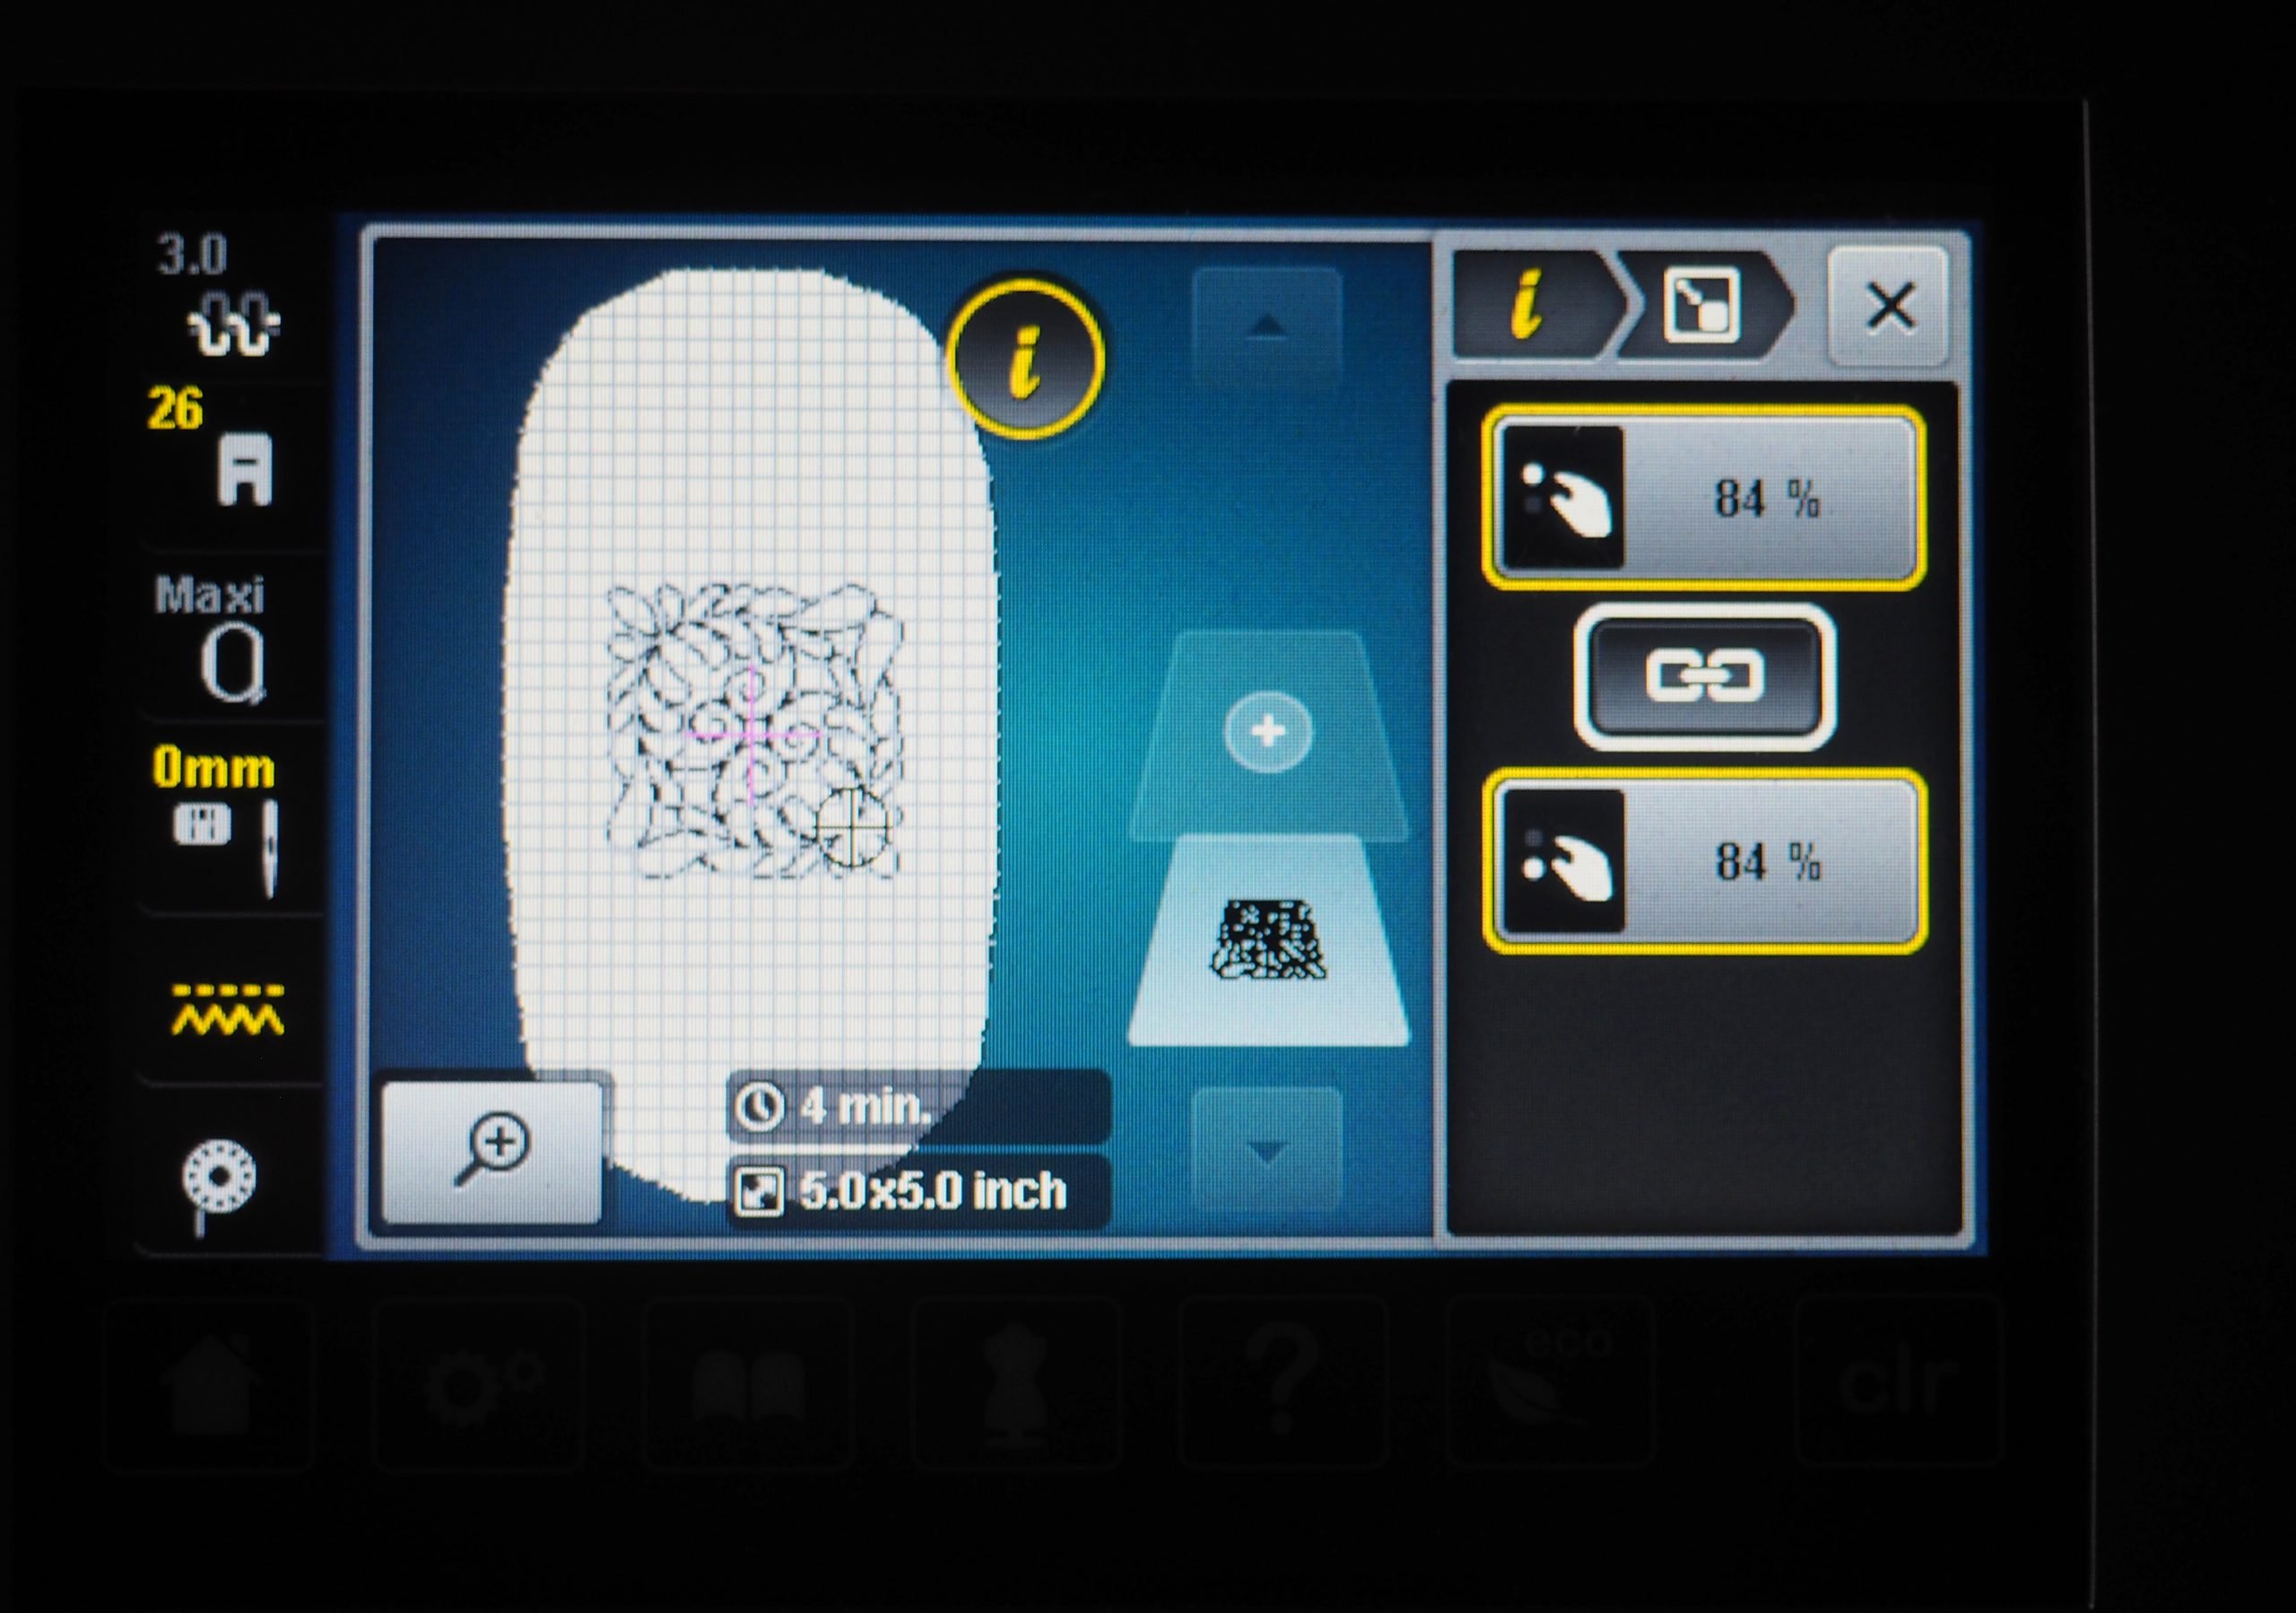
Adjusting the size
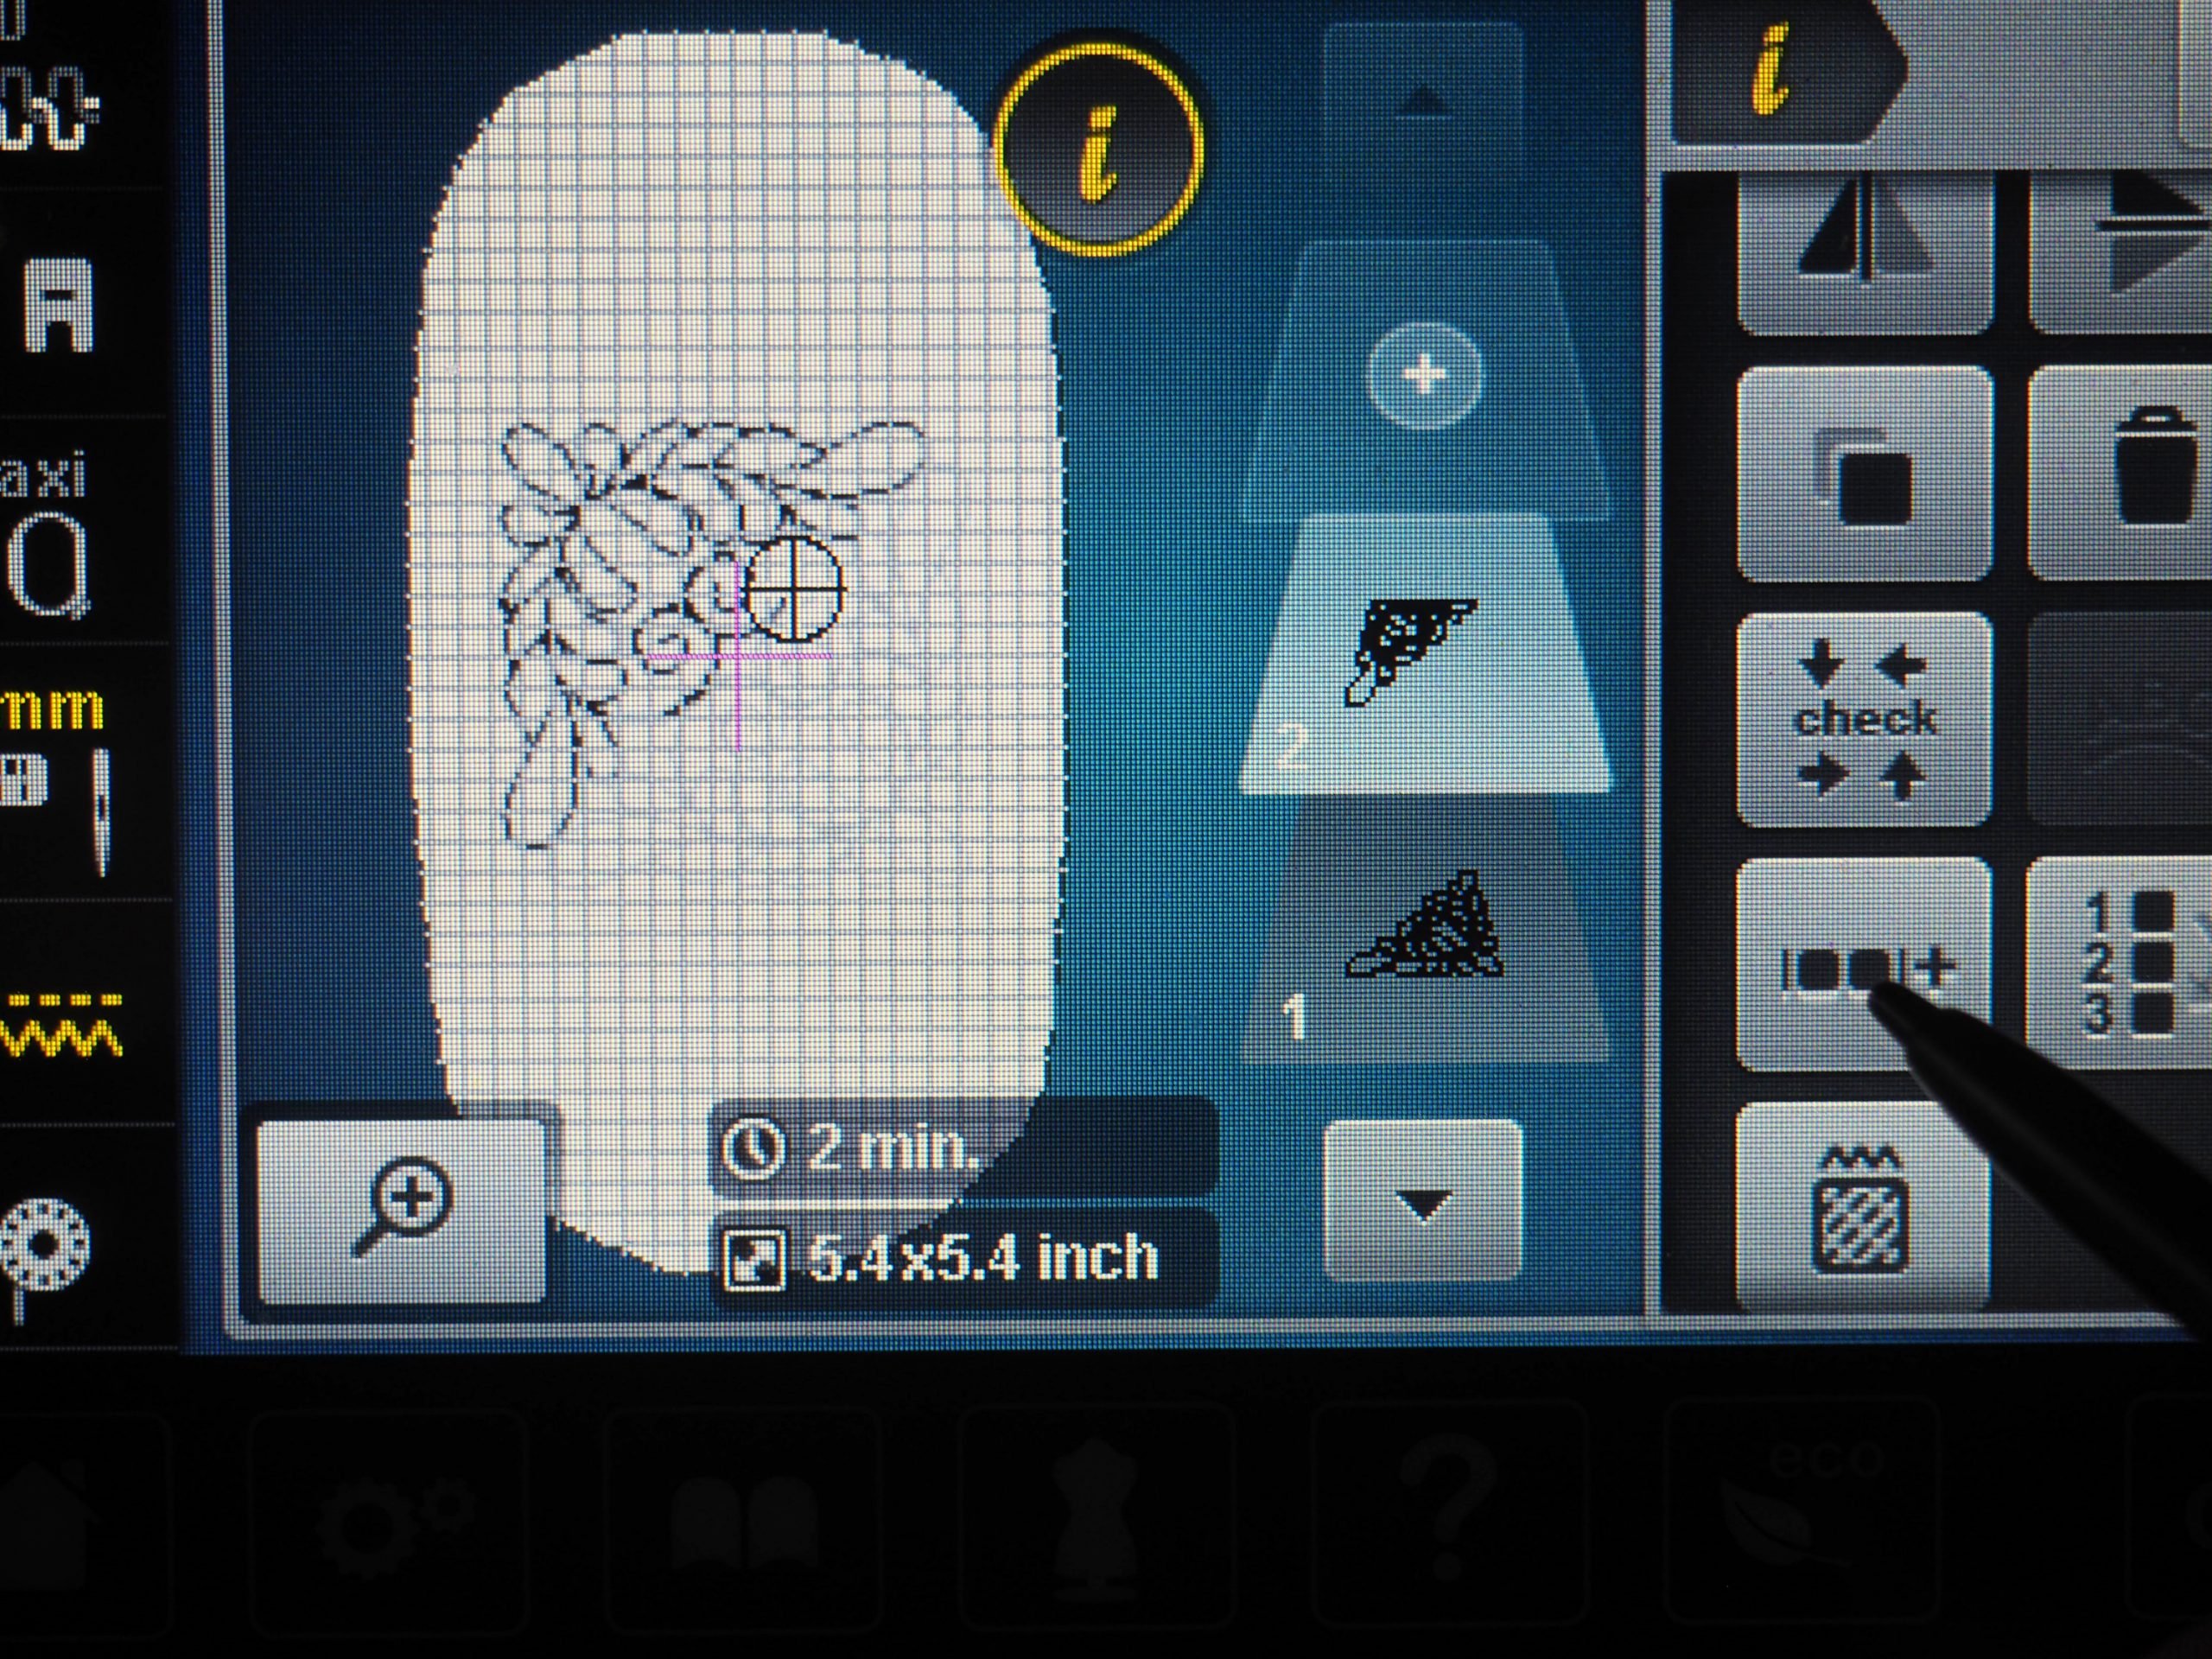
At the moment, the embroidery design still has a size of 5.9″ x 5.9″, which is clearly too large for the 5″ x 5″ block to be embroidered. Using the “i” dialog box, I switch back to the editing menu.
I select the change motif size menu – the button with the small square at the bottom right.
In order to retain the proportions of the embroidery design when enlarging, the chain icon must be outlined in white. I use the multifunction knobs to adjust the size. In this case, I have to reduce the size to 84%.
Saving the customized embroidery file
As I want to embroider this file on each of the four quadrants of the large block, i.e. on each of the small 5″ x 5″ blocks, I save the customized file. I select the “Save file” button.

Then I confirm that I want to save it by clicking on the green check mark.

Pinpoint Placement of quilting patterns
Now that I have the PLUS Upgrade , I can position quilting patterns precisely, in other words, my embroidery file can be tilted and moved so that I no longer have to hoop the fabric as accurately and don’t have to use the grid templates.
I select the “Pinpoint Placement” icon in the “i” dialog box.
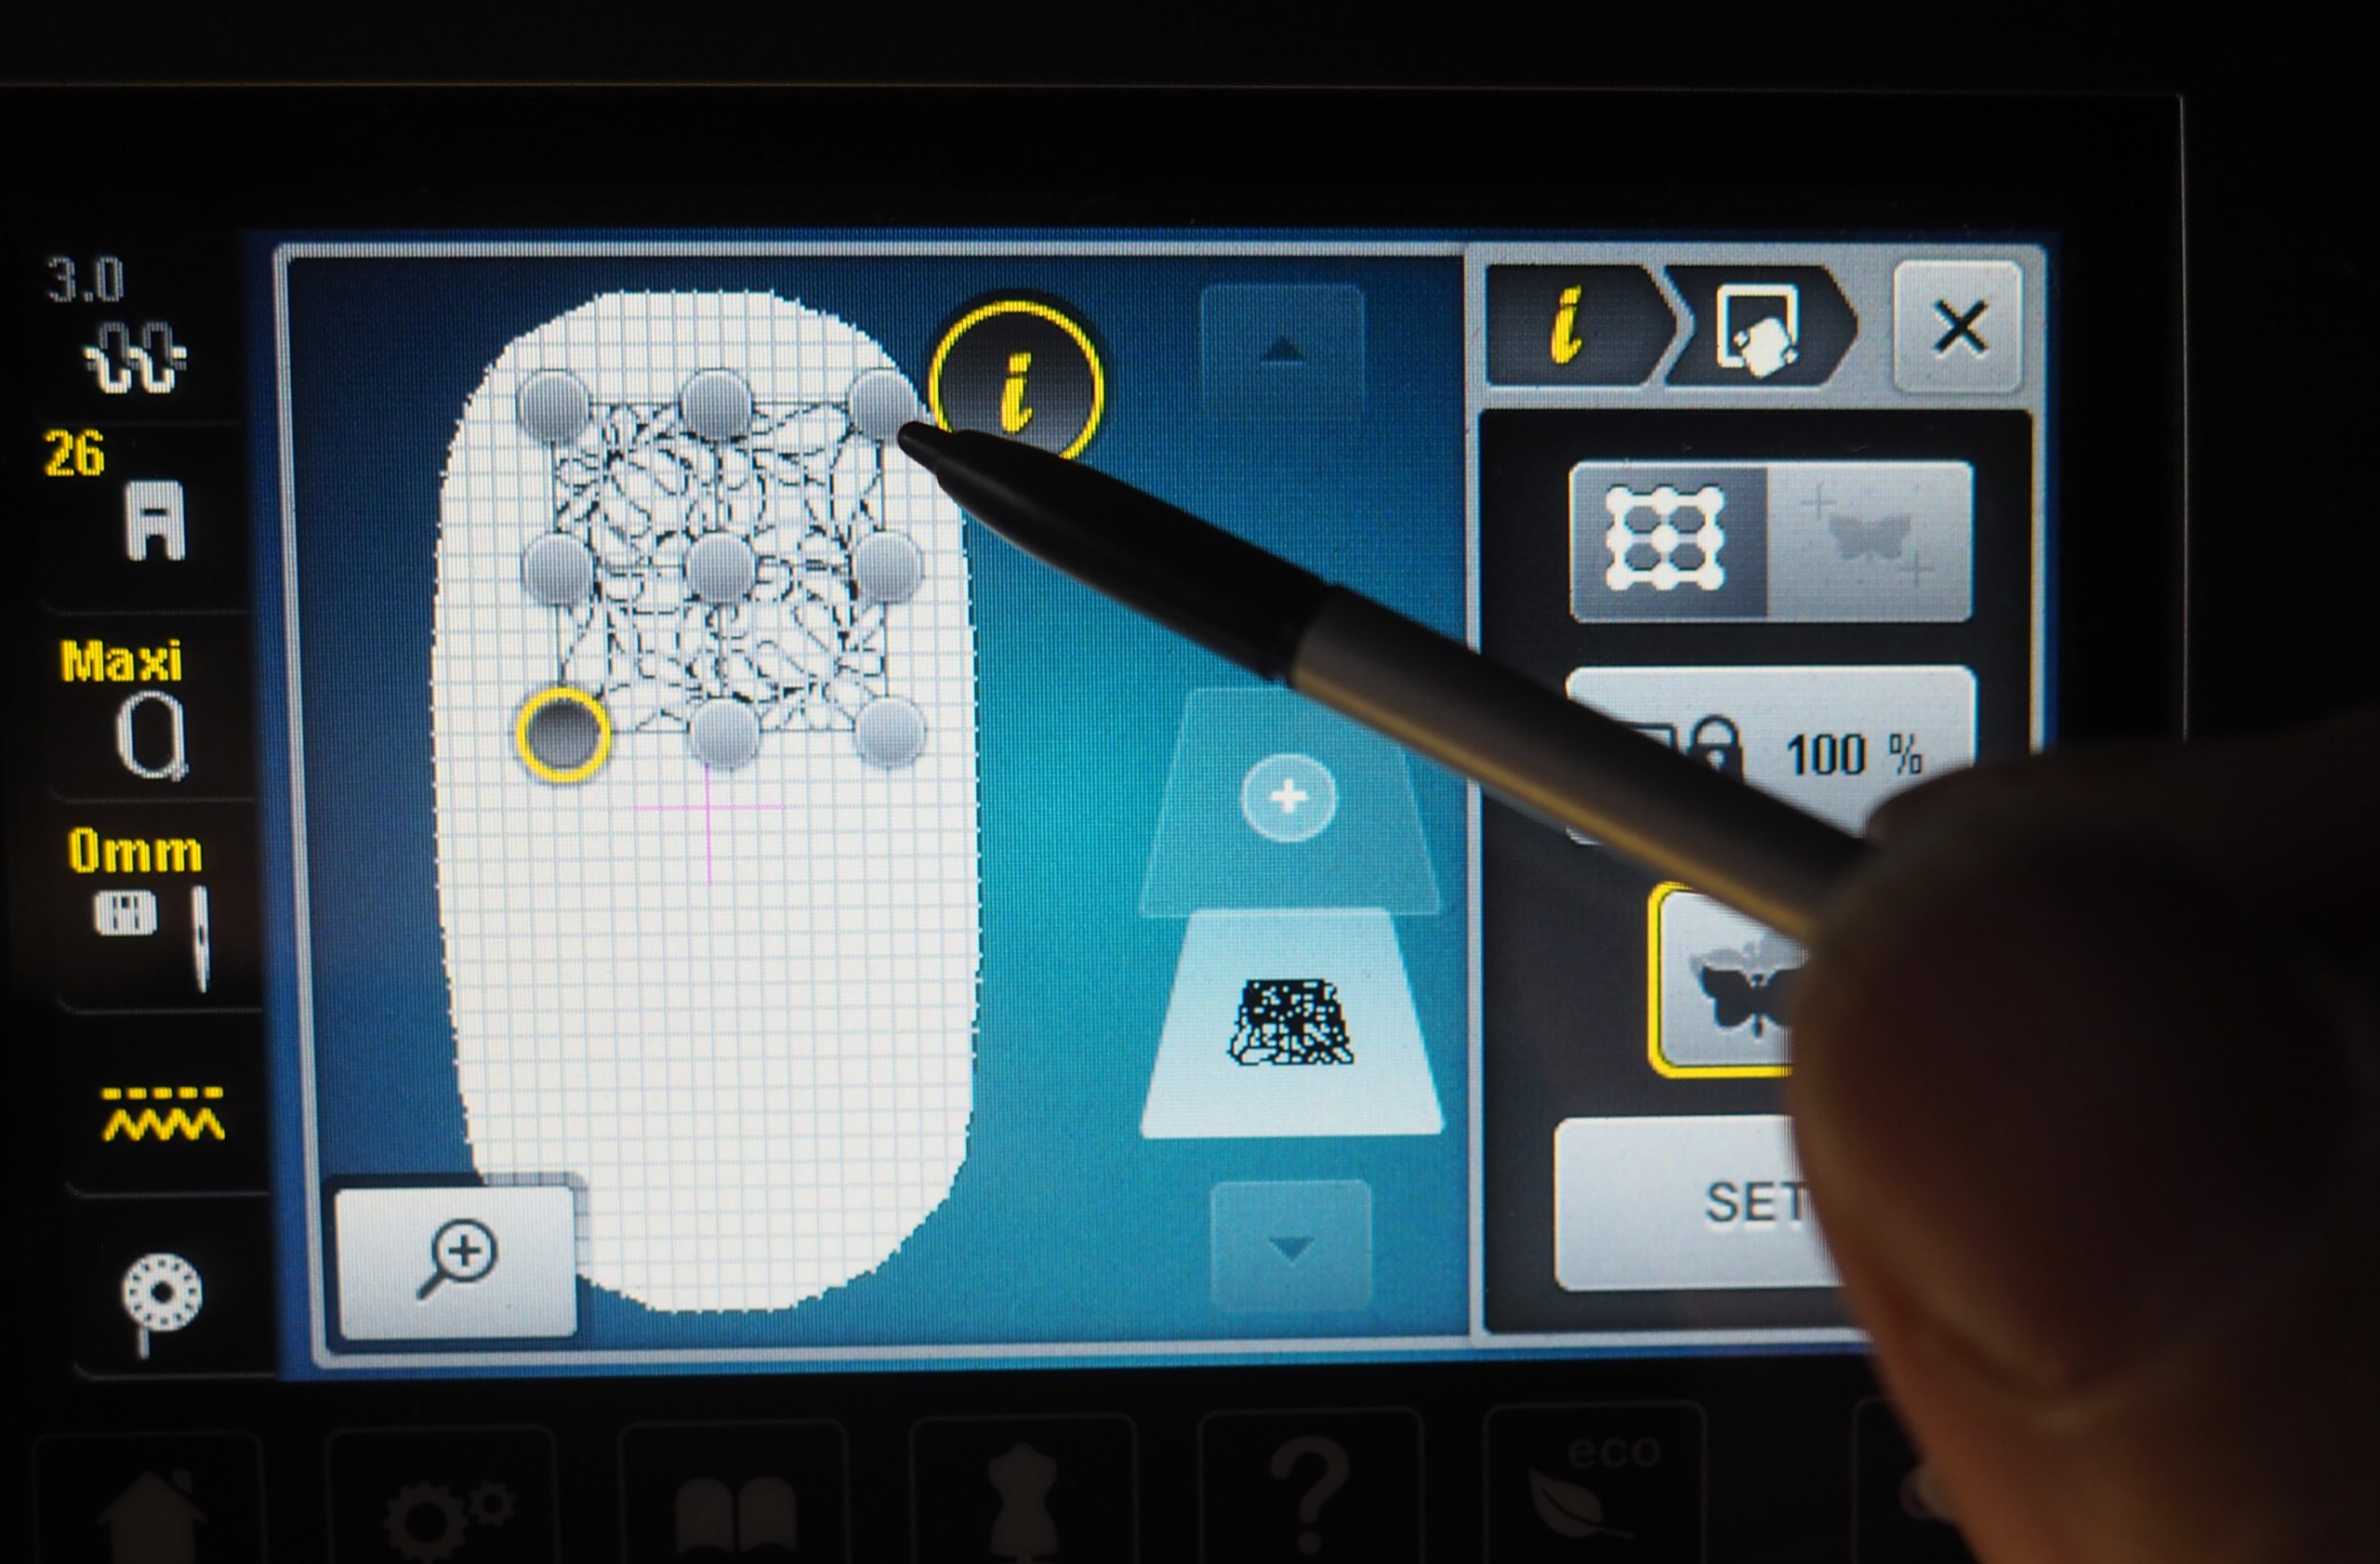
I click on the 9-point grid.
Nine points appear on the design in the hoop shown on the screen – the four corner points, the middle of the sides and the center of the design.
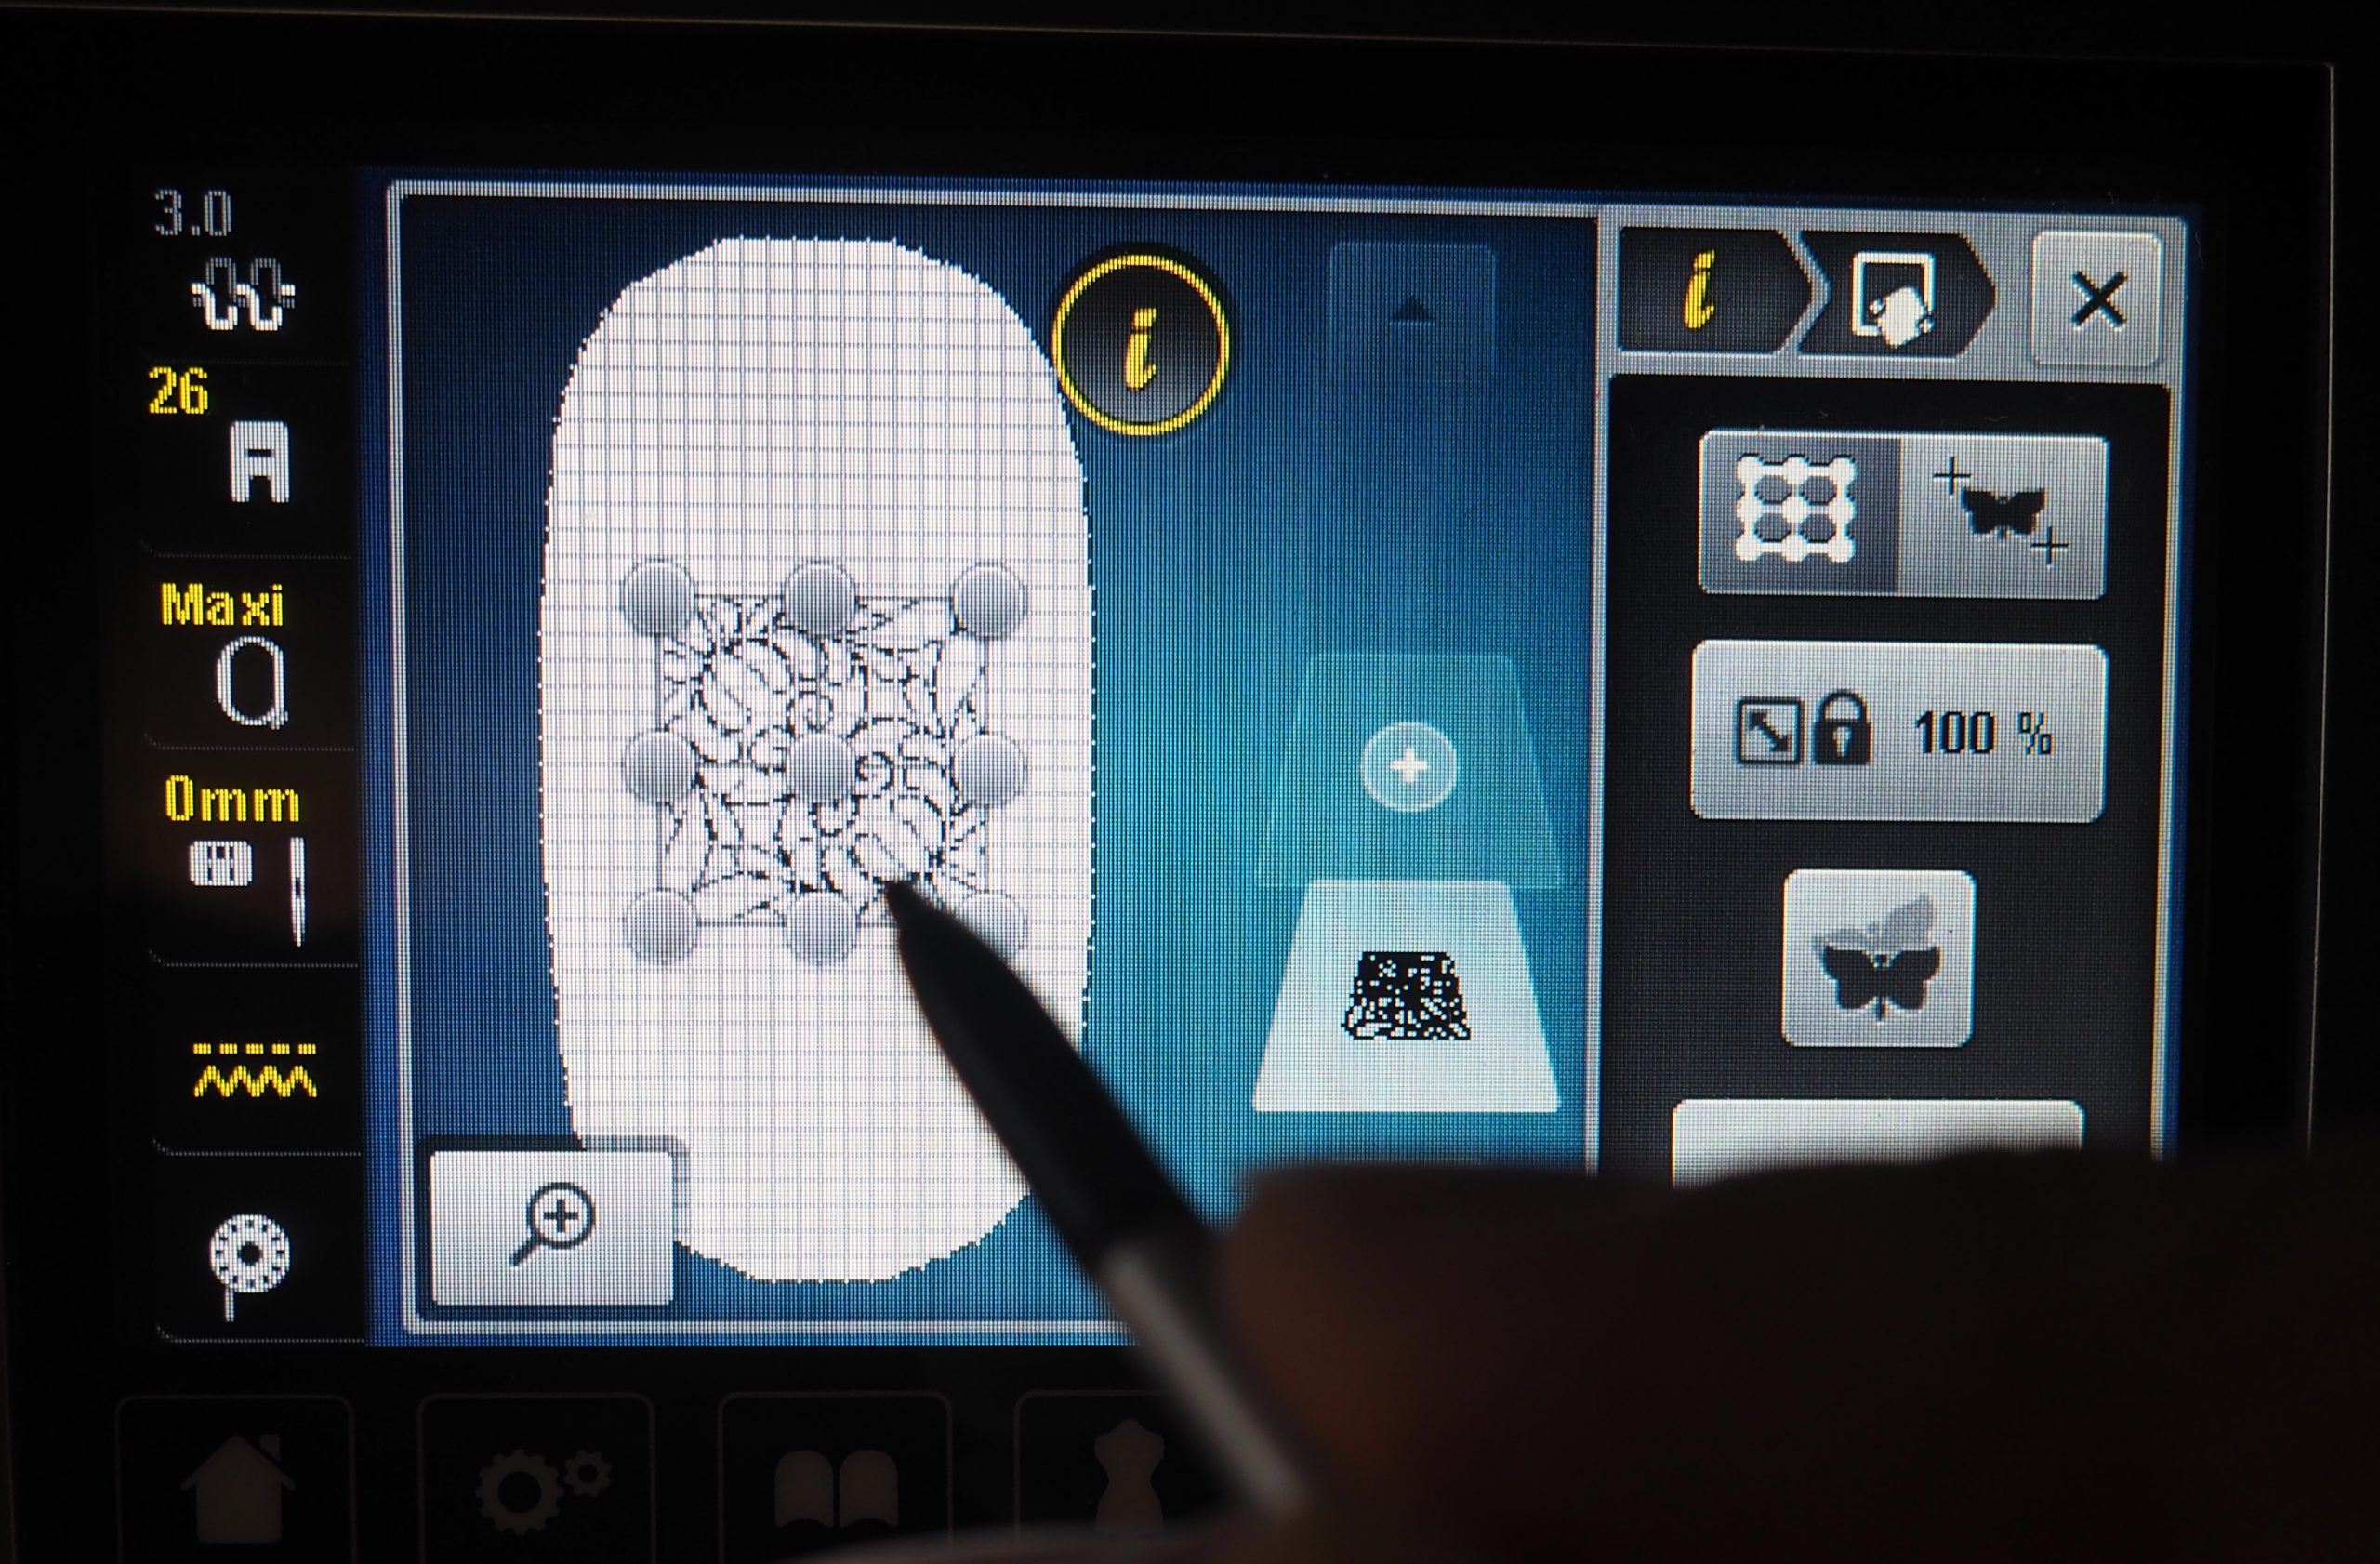
For Pinpoint Placement, at least two points in the design must match up with the corresponding points on the surface to be embroidered. In this way, the position of the embroidery pattern is precisely defined.
First, I want to quilt the top squares on my cushion top. I therefore select the bottom left corner point on the screen.
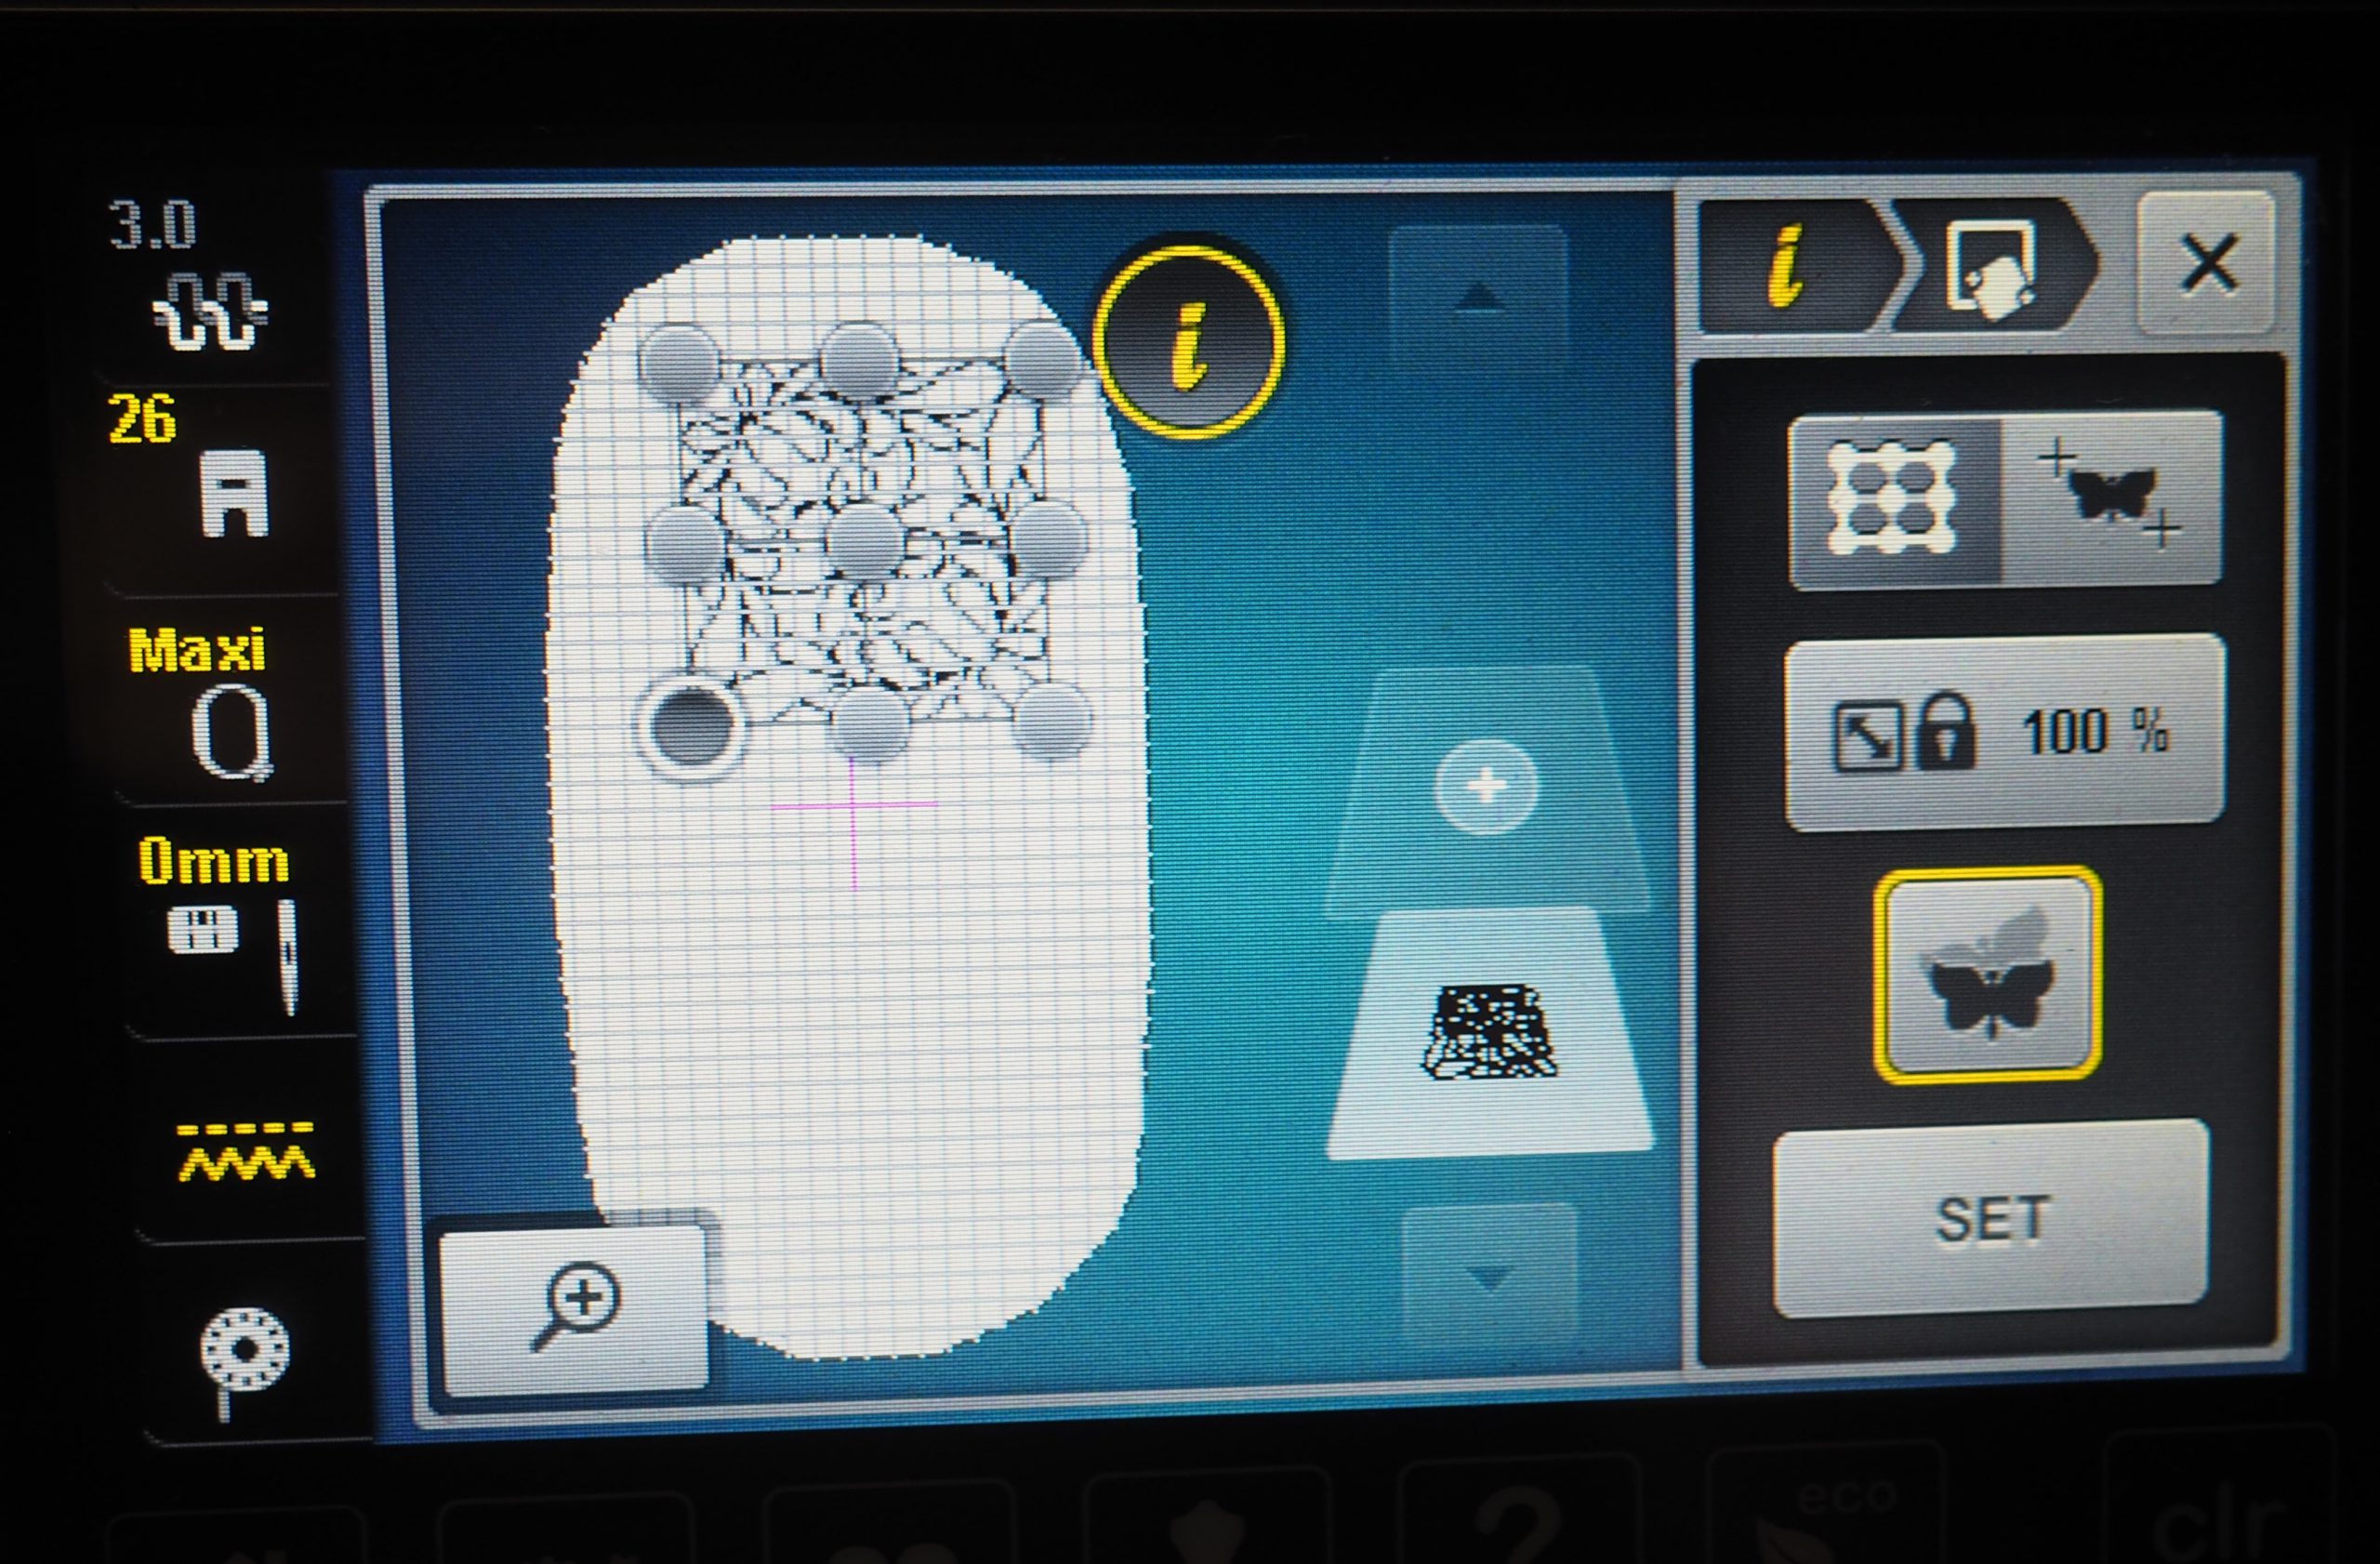
By turning the multifunction knobs, the hoop attached to the embroidery module is placed under the needle so that the needle pierces the corresponding point on the fabric.

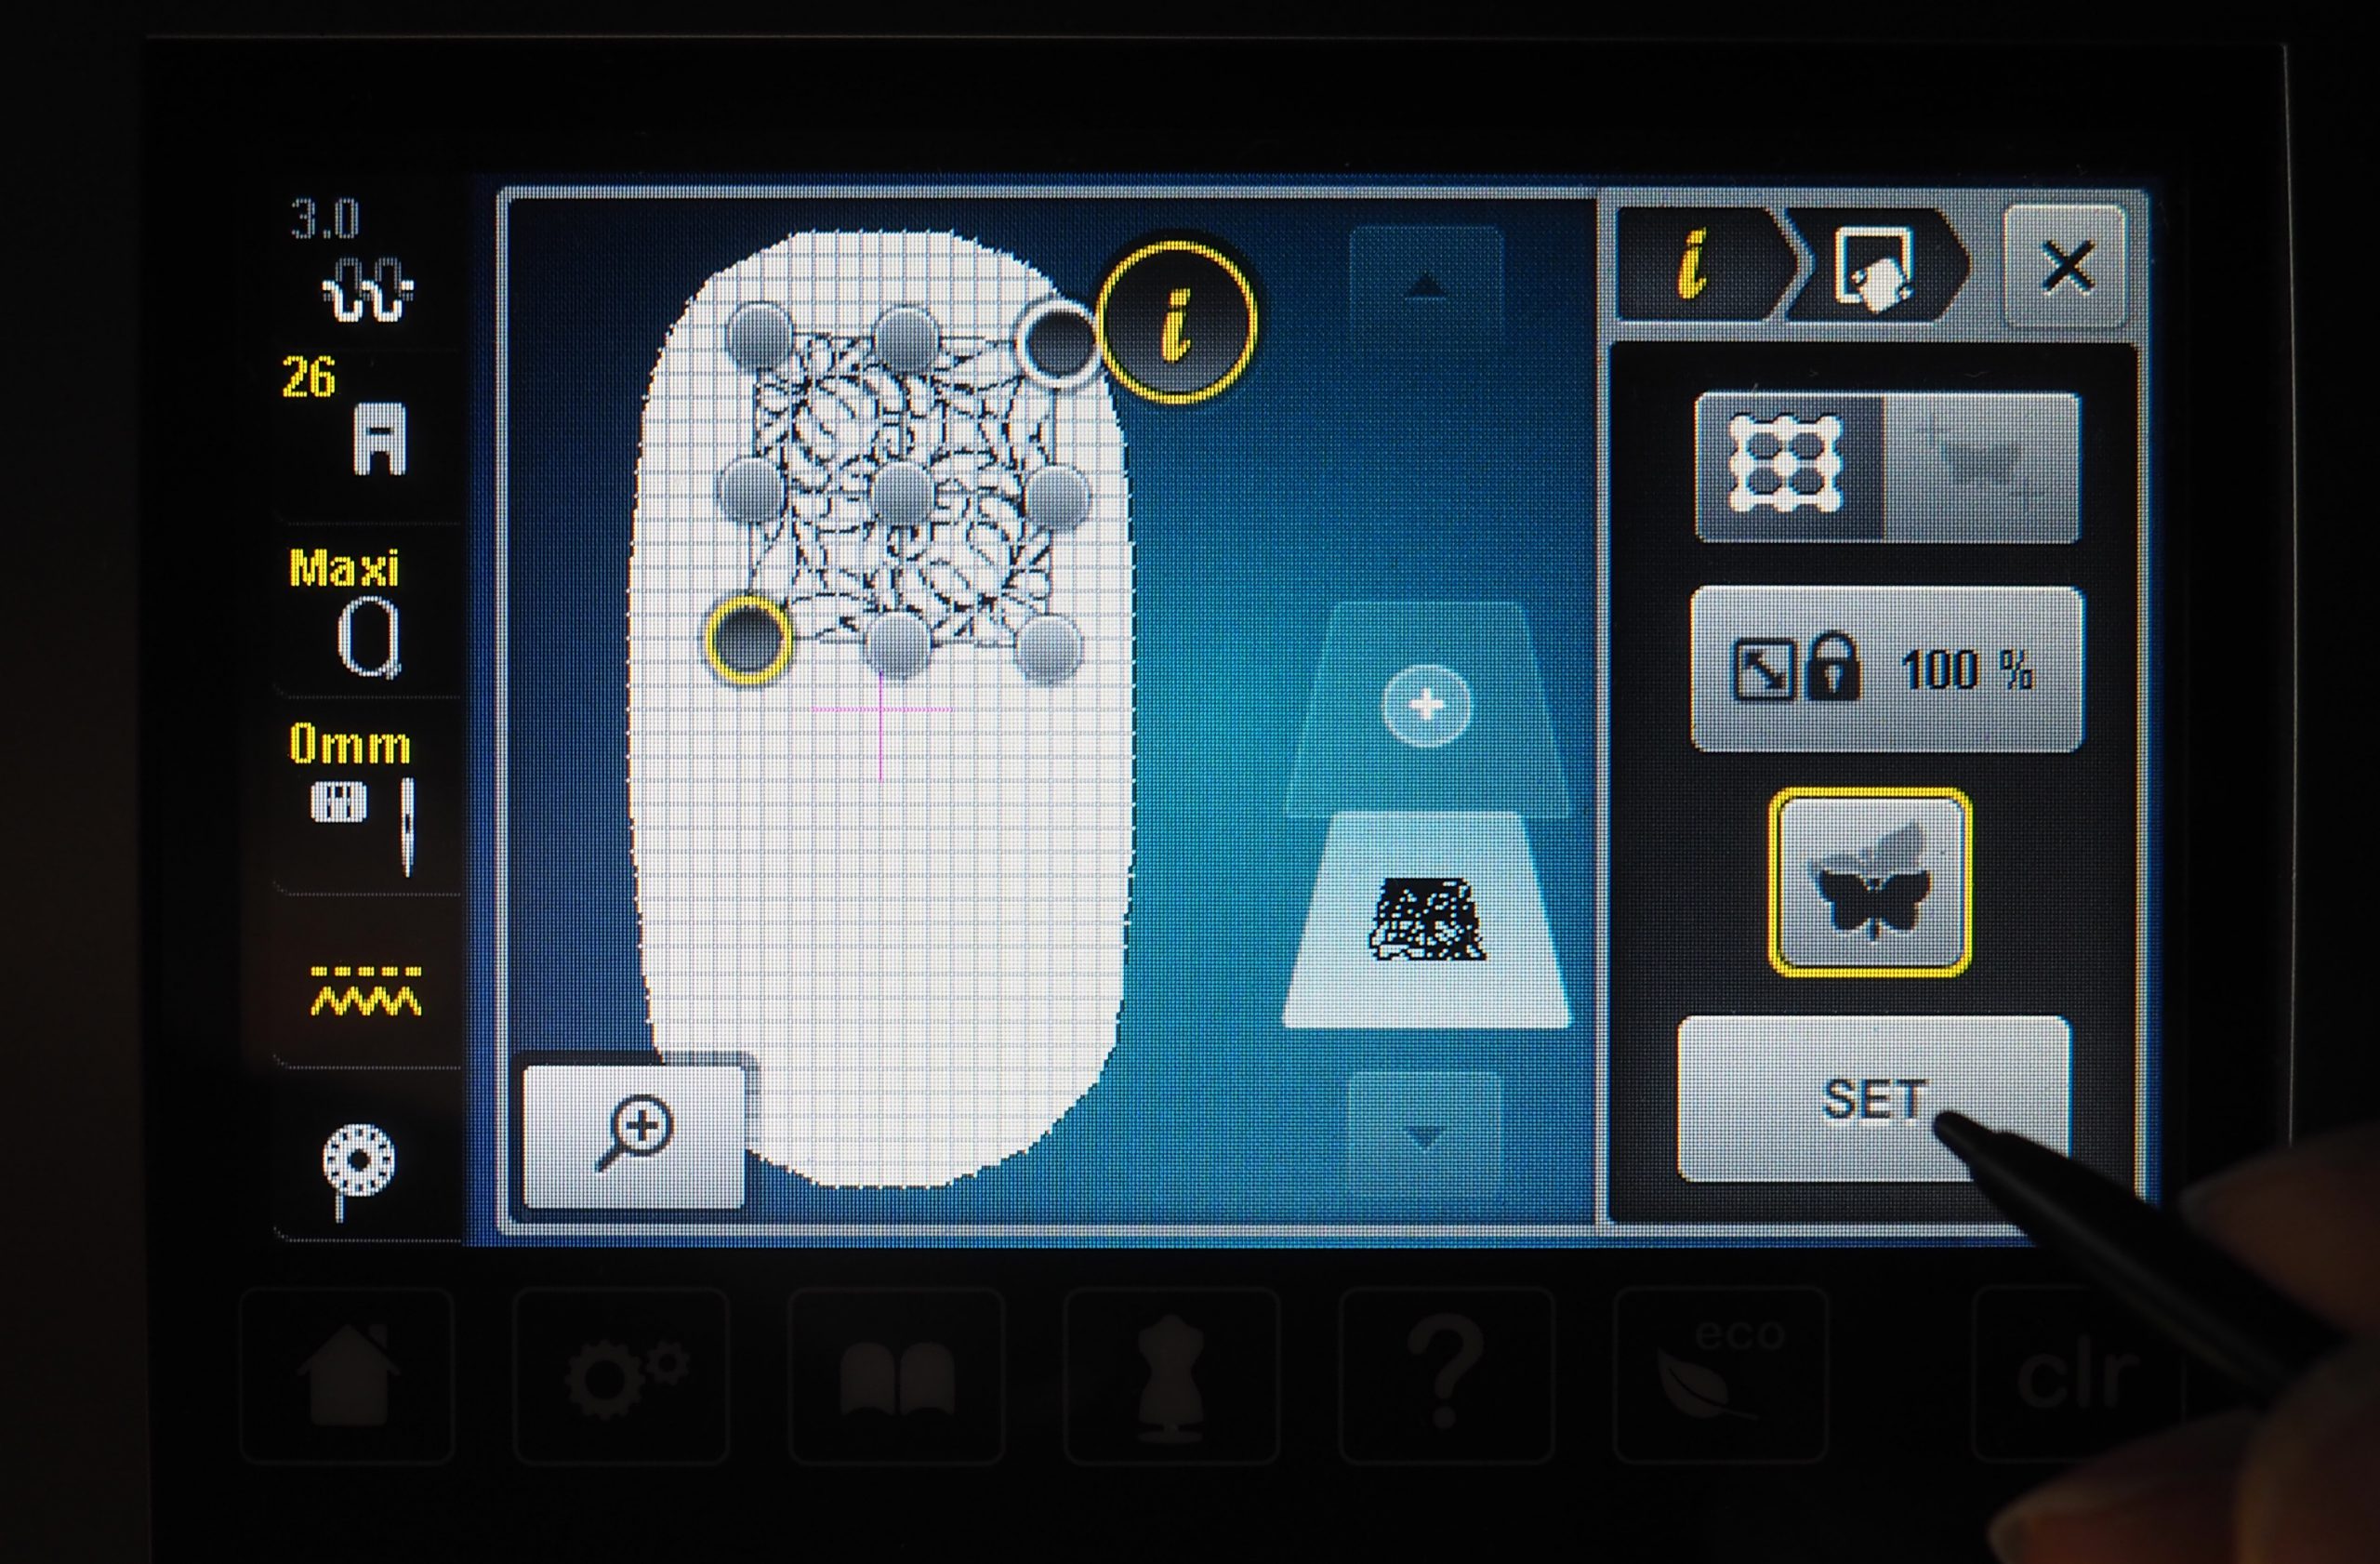
I then press “SET” to confirm the match.
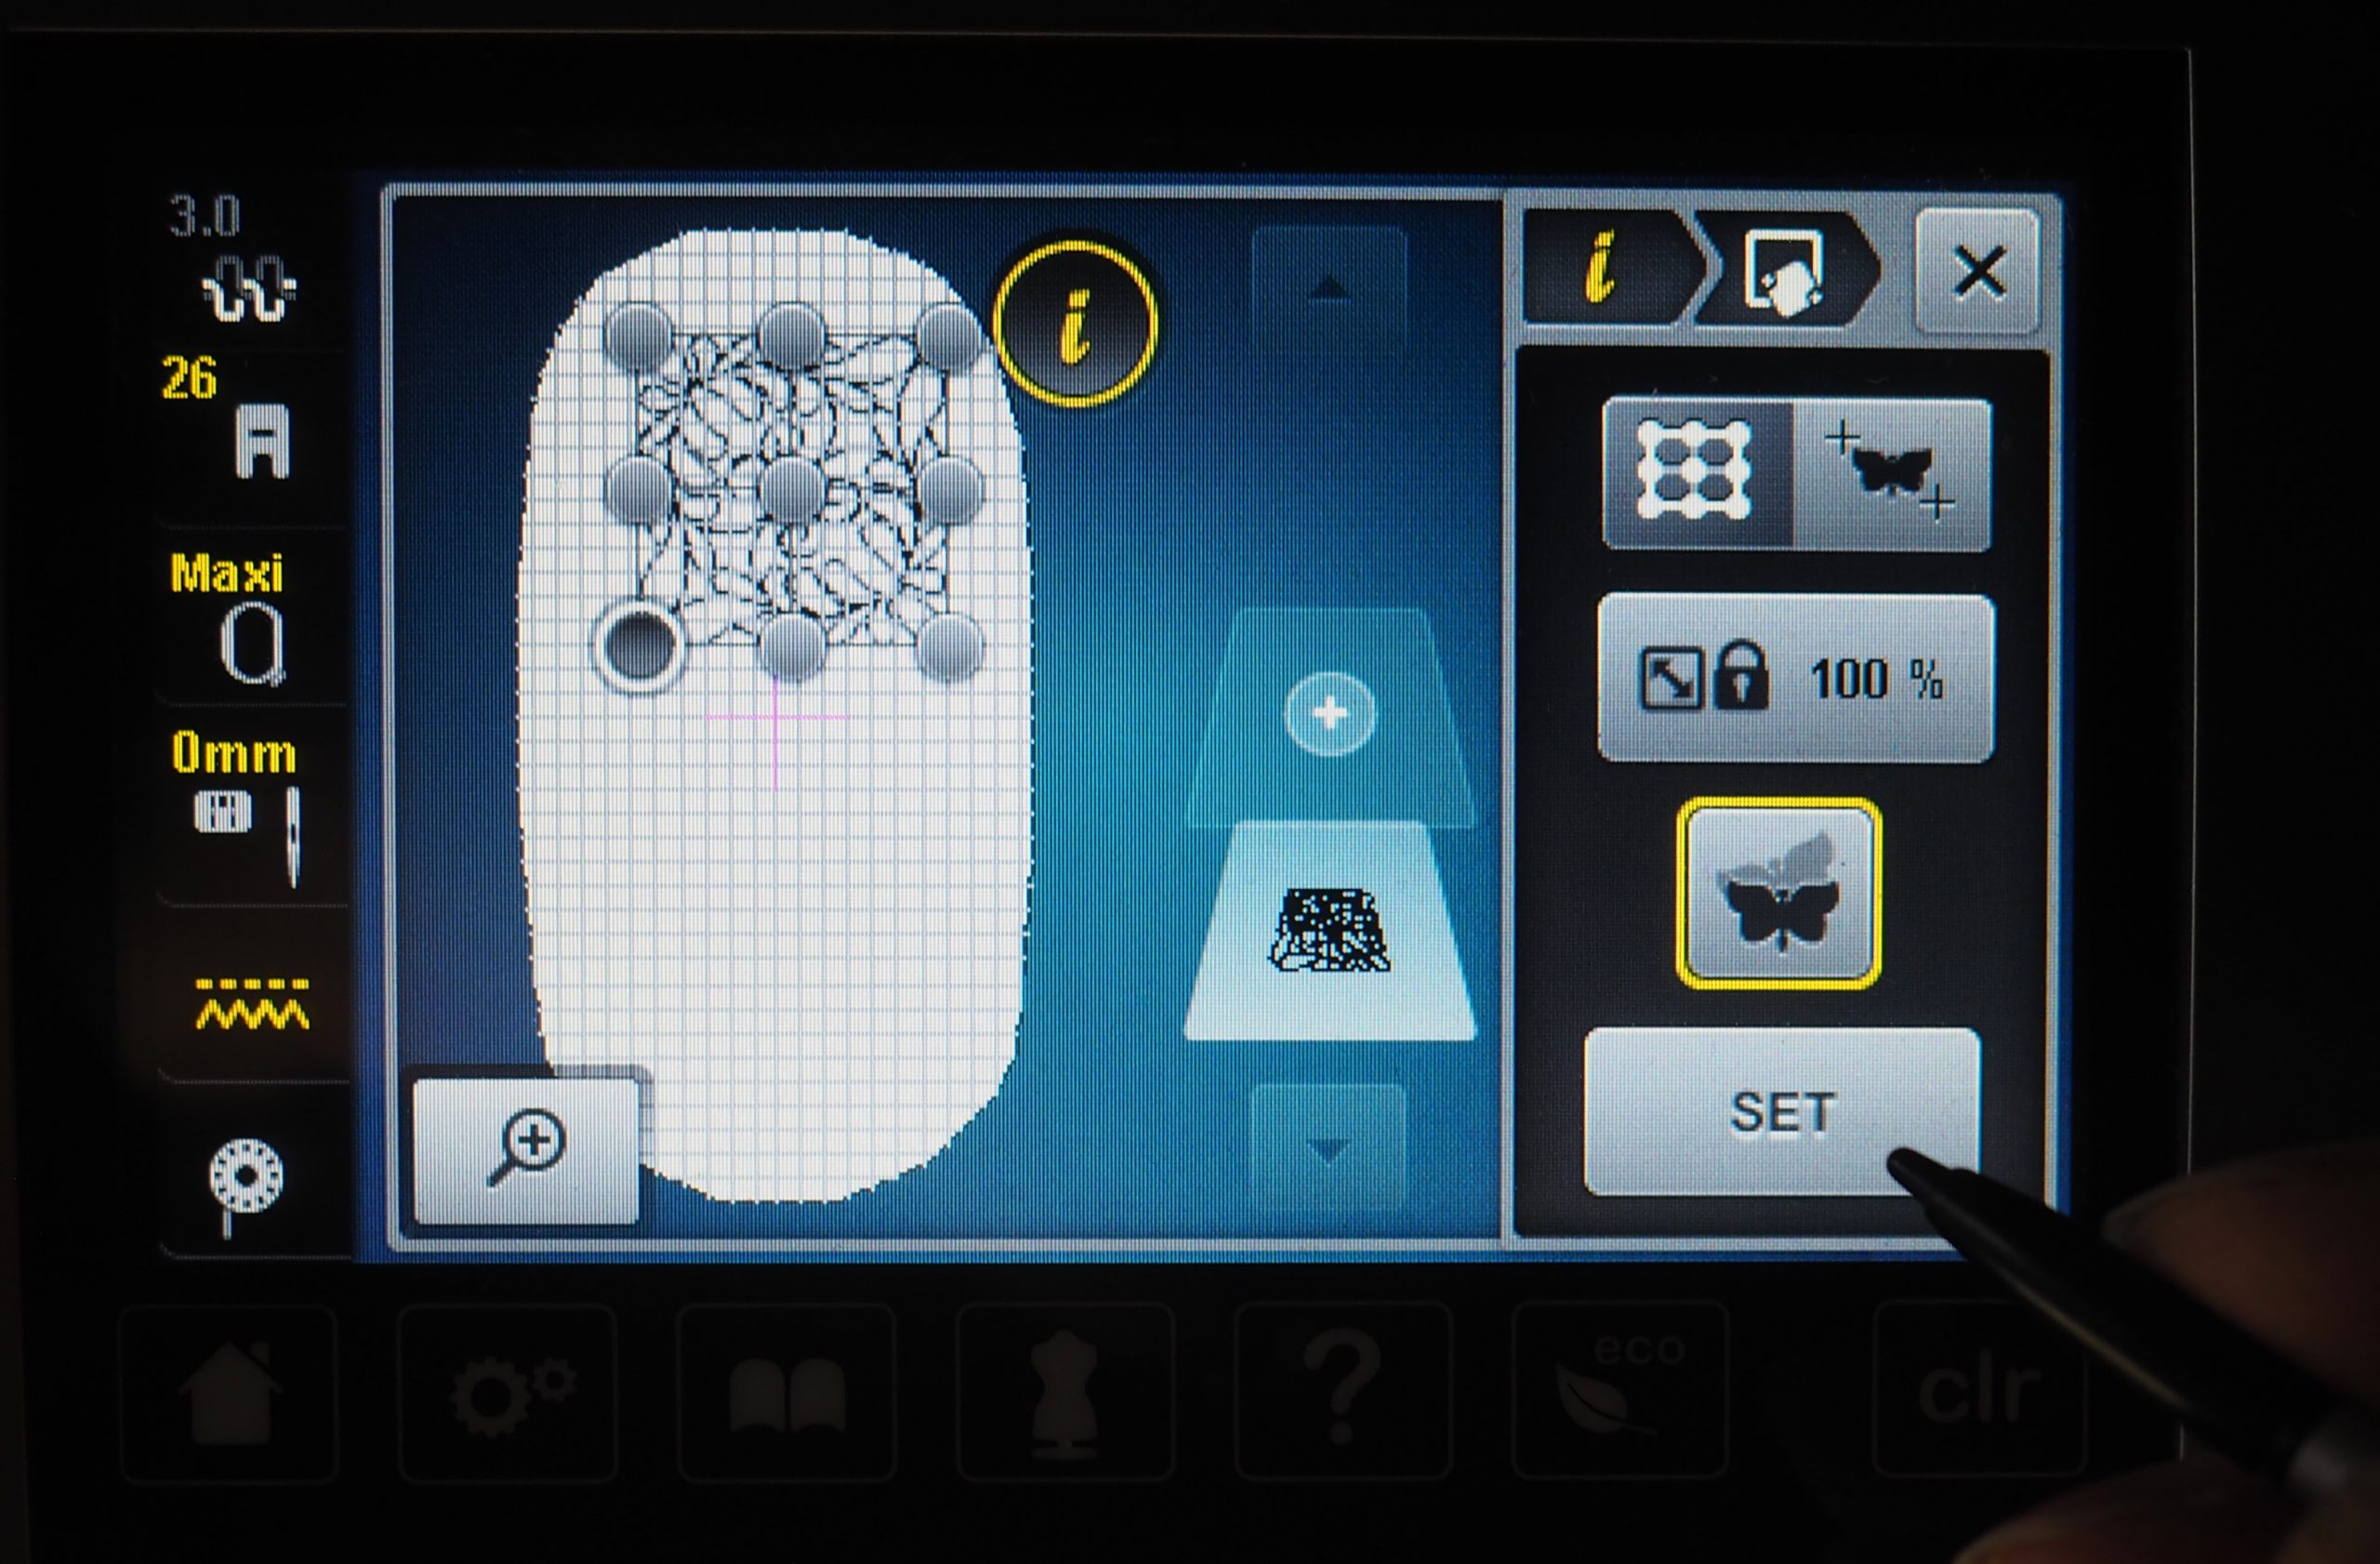
I now select the top right point on the screen.
And adjust the needle insertion position accordingly.
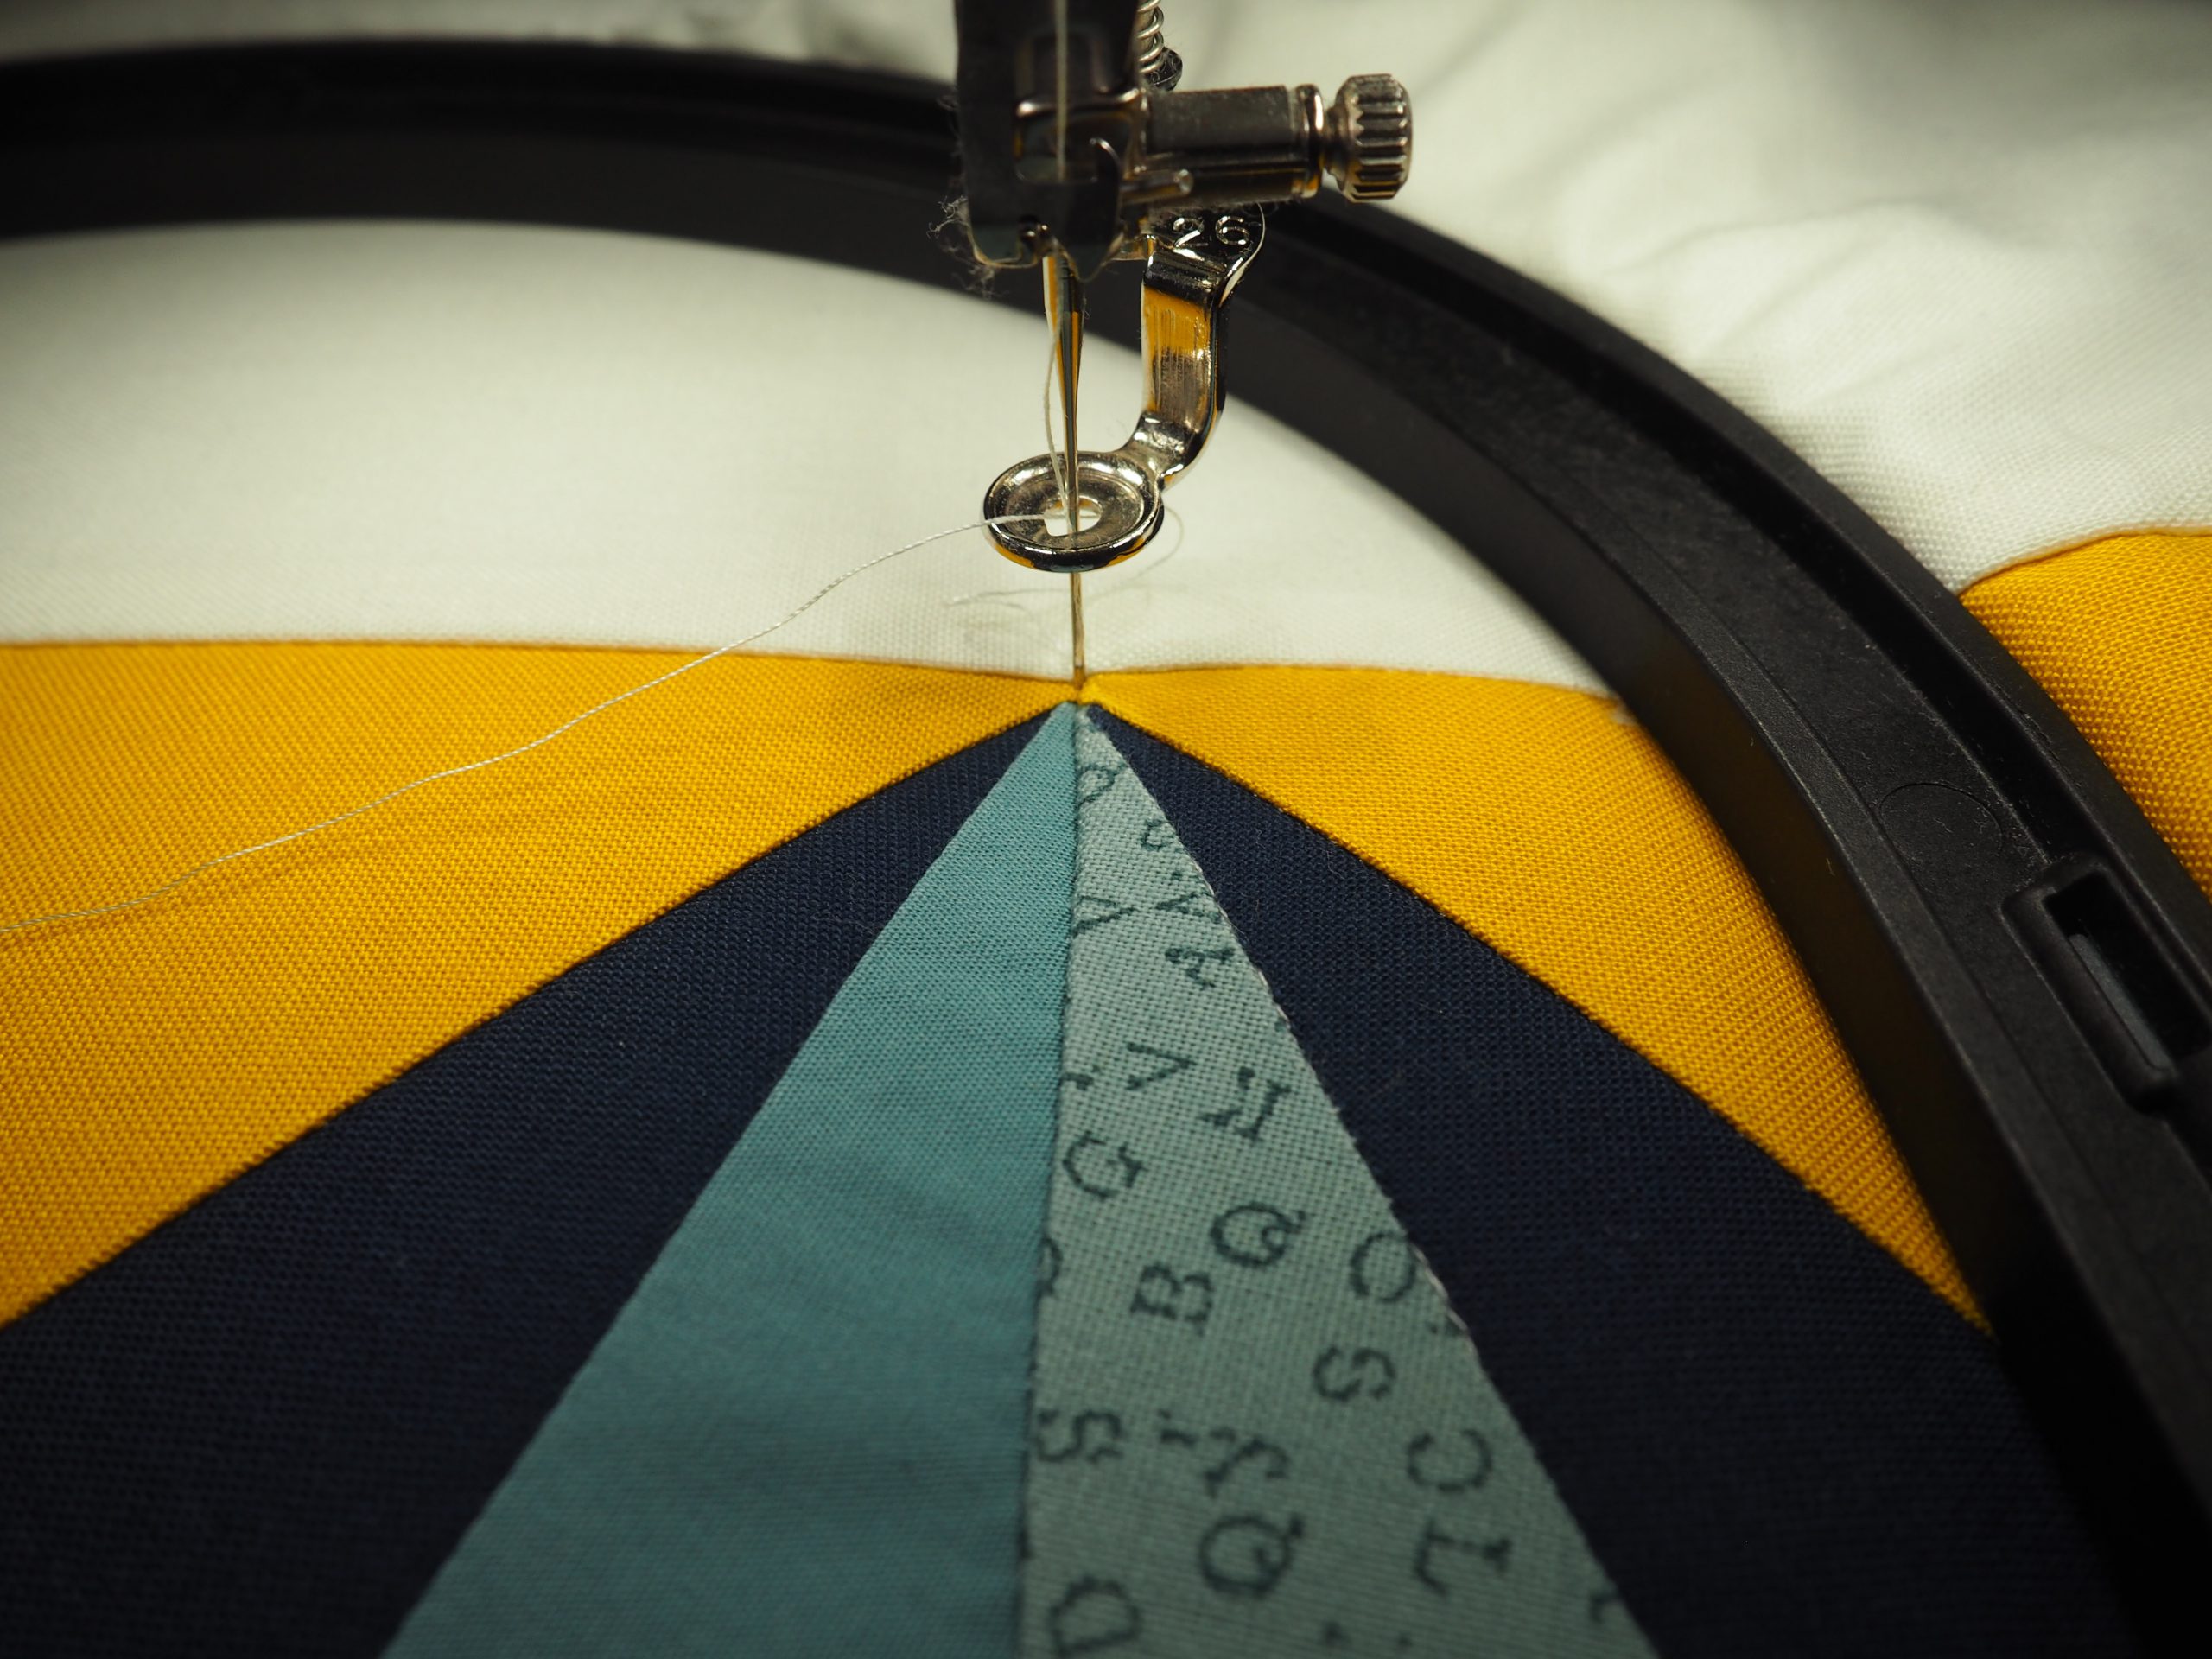
Again, I confirm by clicking on “SET”.
Embroidering the quilting patterns in the embroidery hoop
Embroidering the quilting pattern on the patchwork blocks
Once all the adjustments have been made to the quilting pattern for the patchwork block, it’s now time to start embroidering. I choose a light-colored thread for the inner corner of the feather pattern.
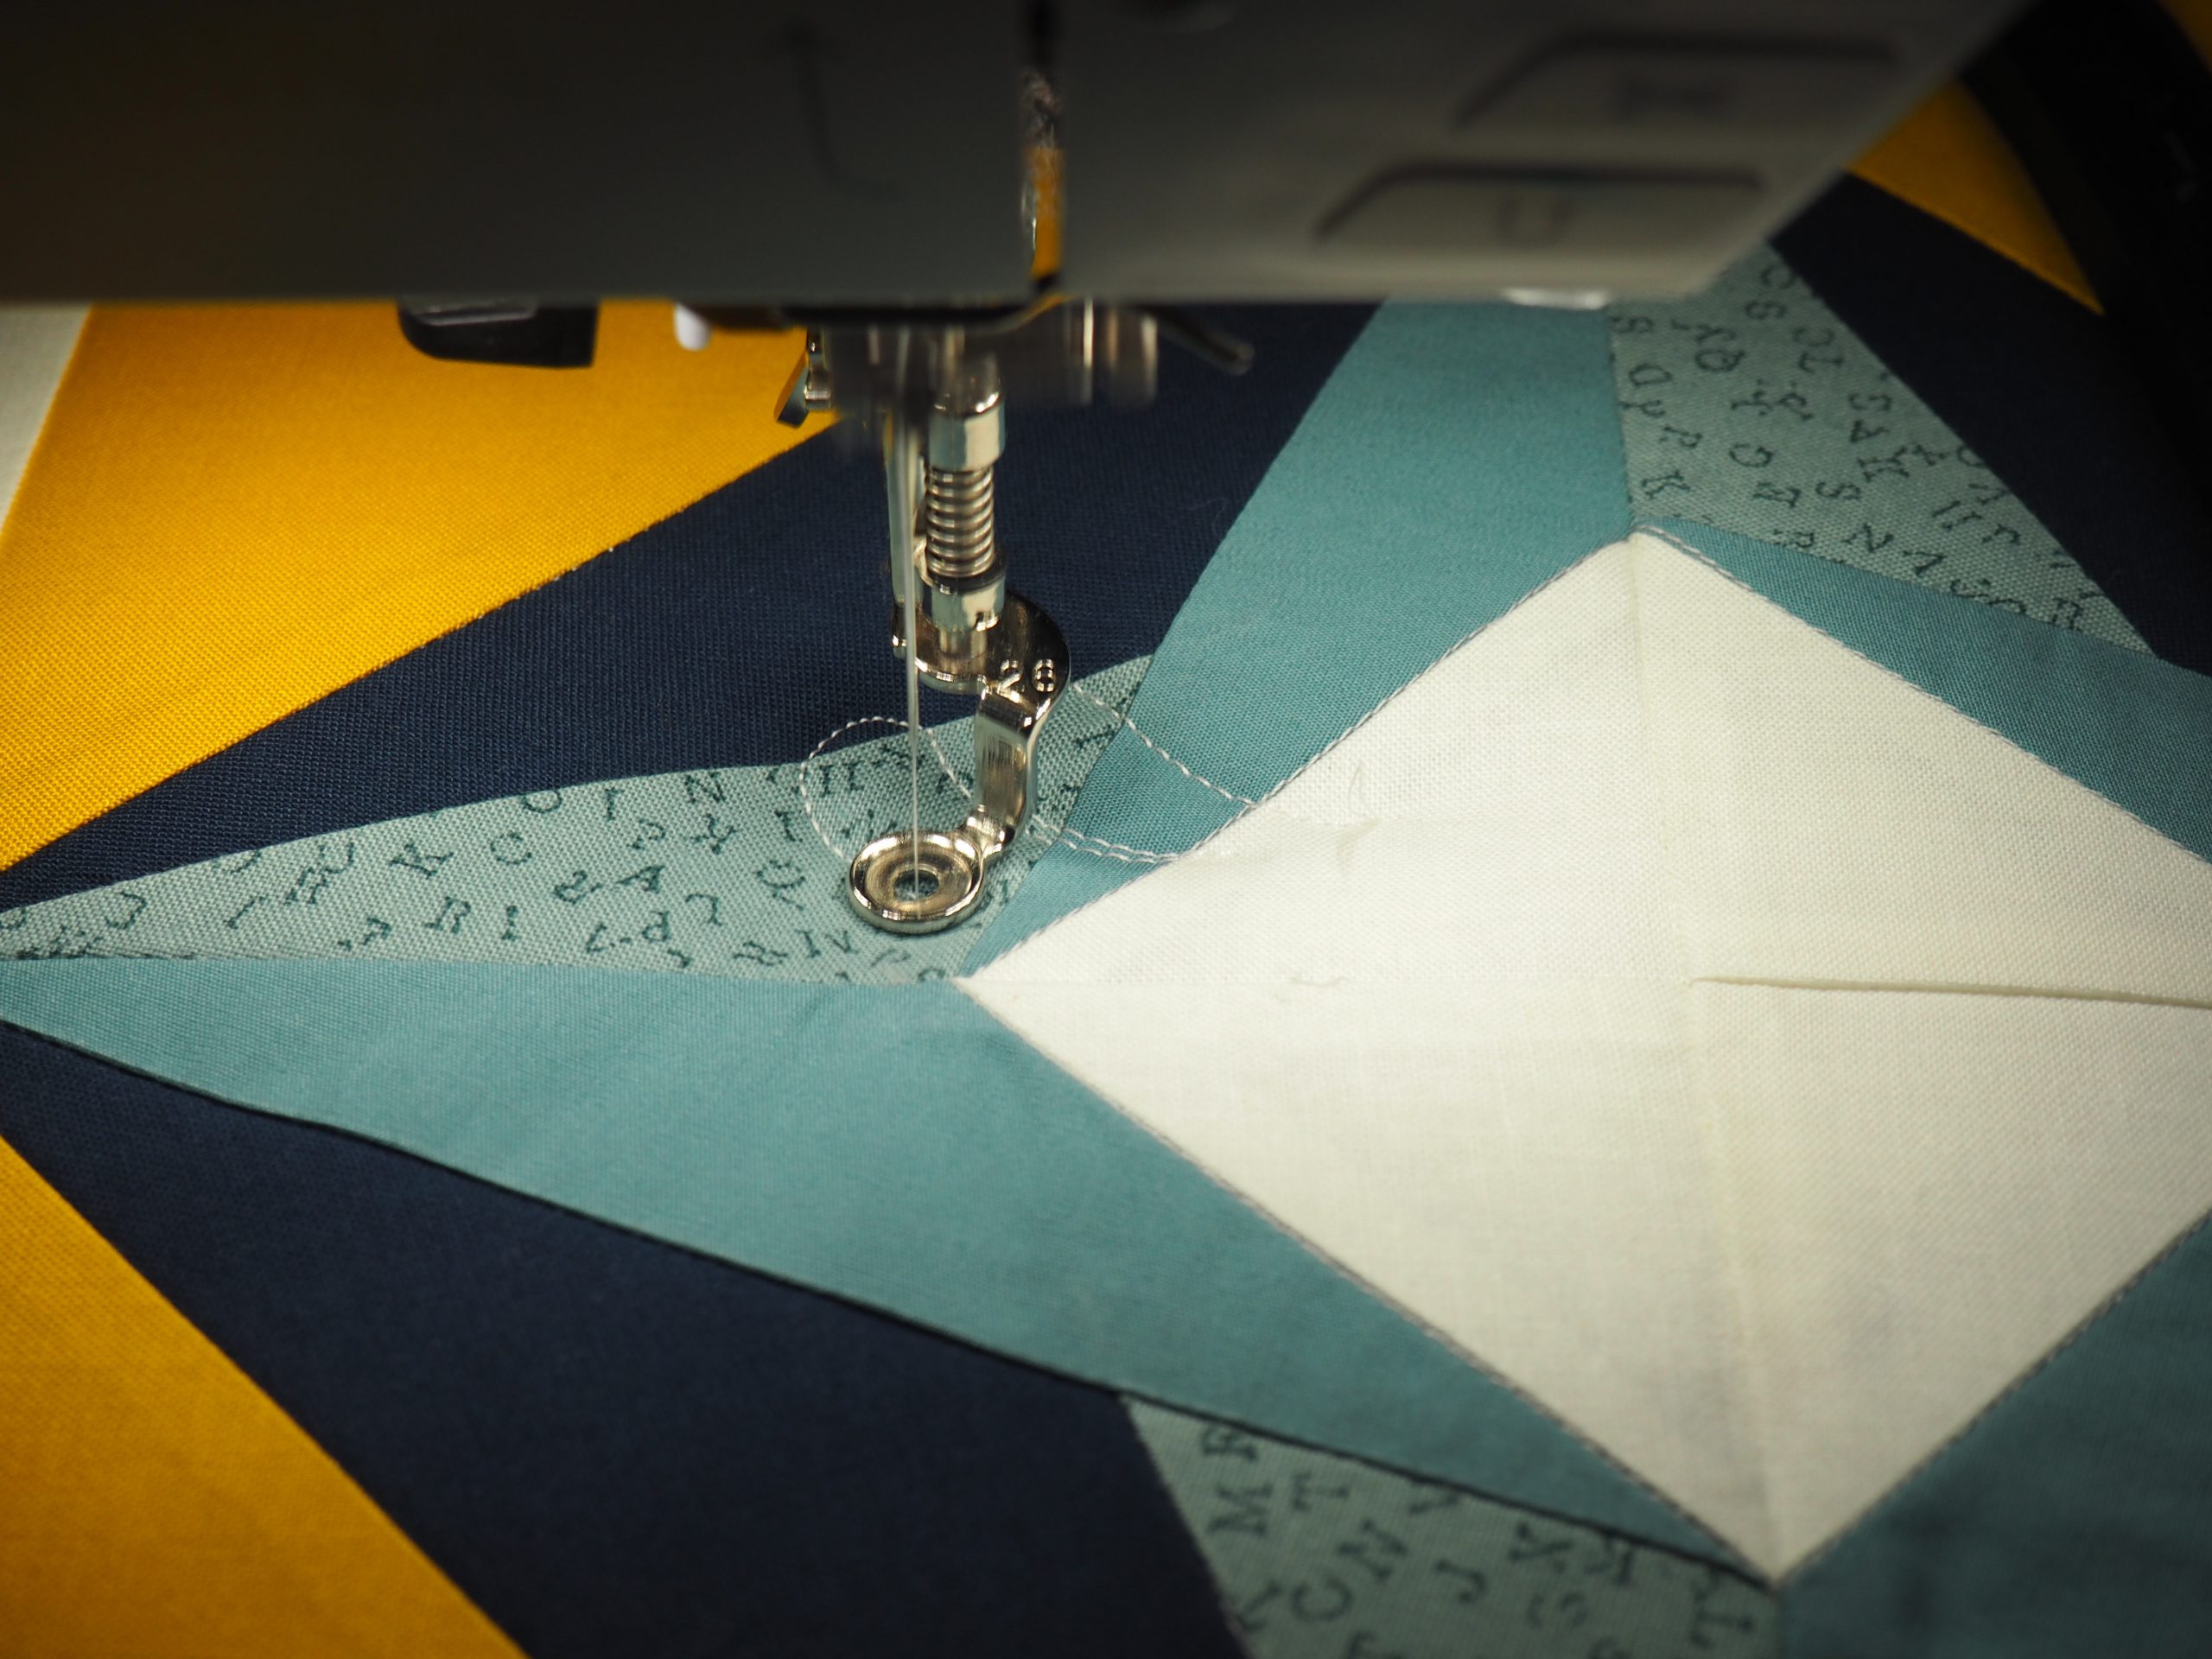
I quilt the second feathered corner, which will decorate the outer corner, using a matching yellow thread. That is why I did not rule out color changes when preparing the embroidery file – something I could have done if I was quilting in a uniform color.
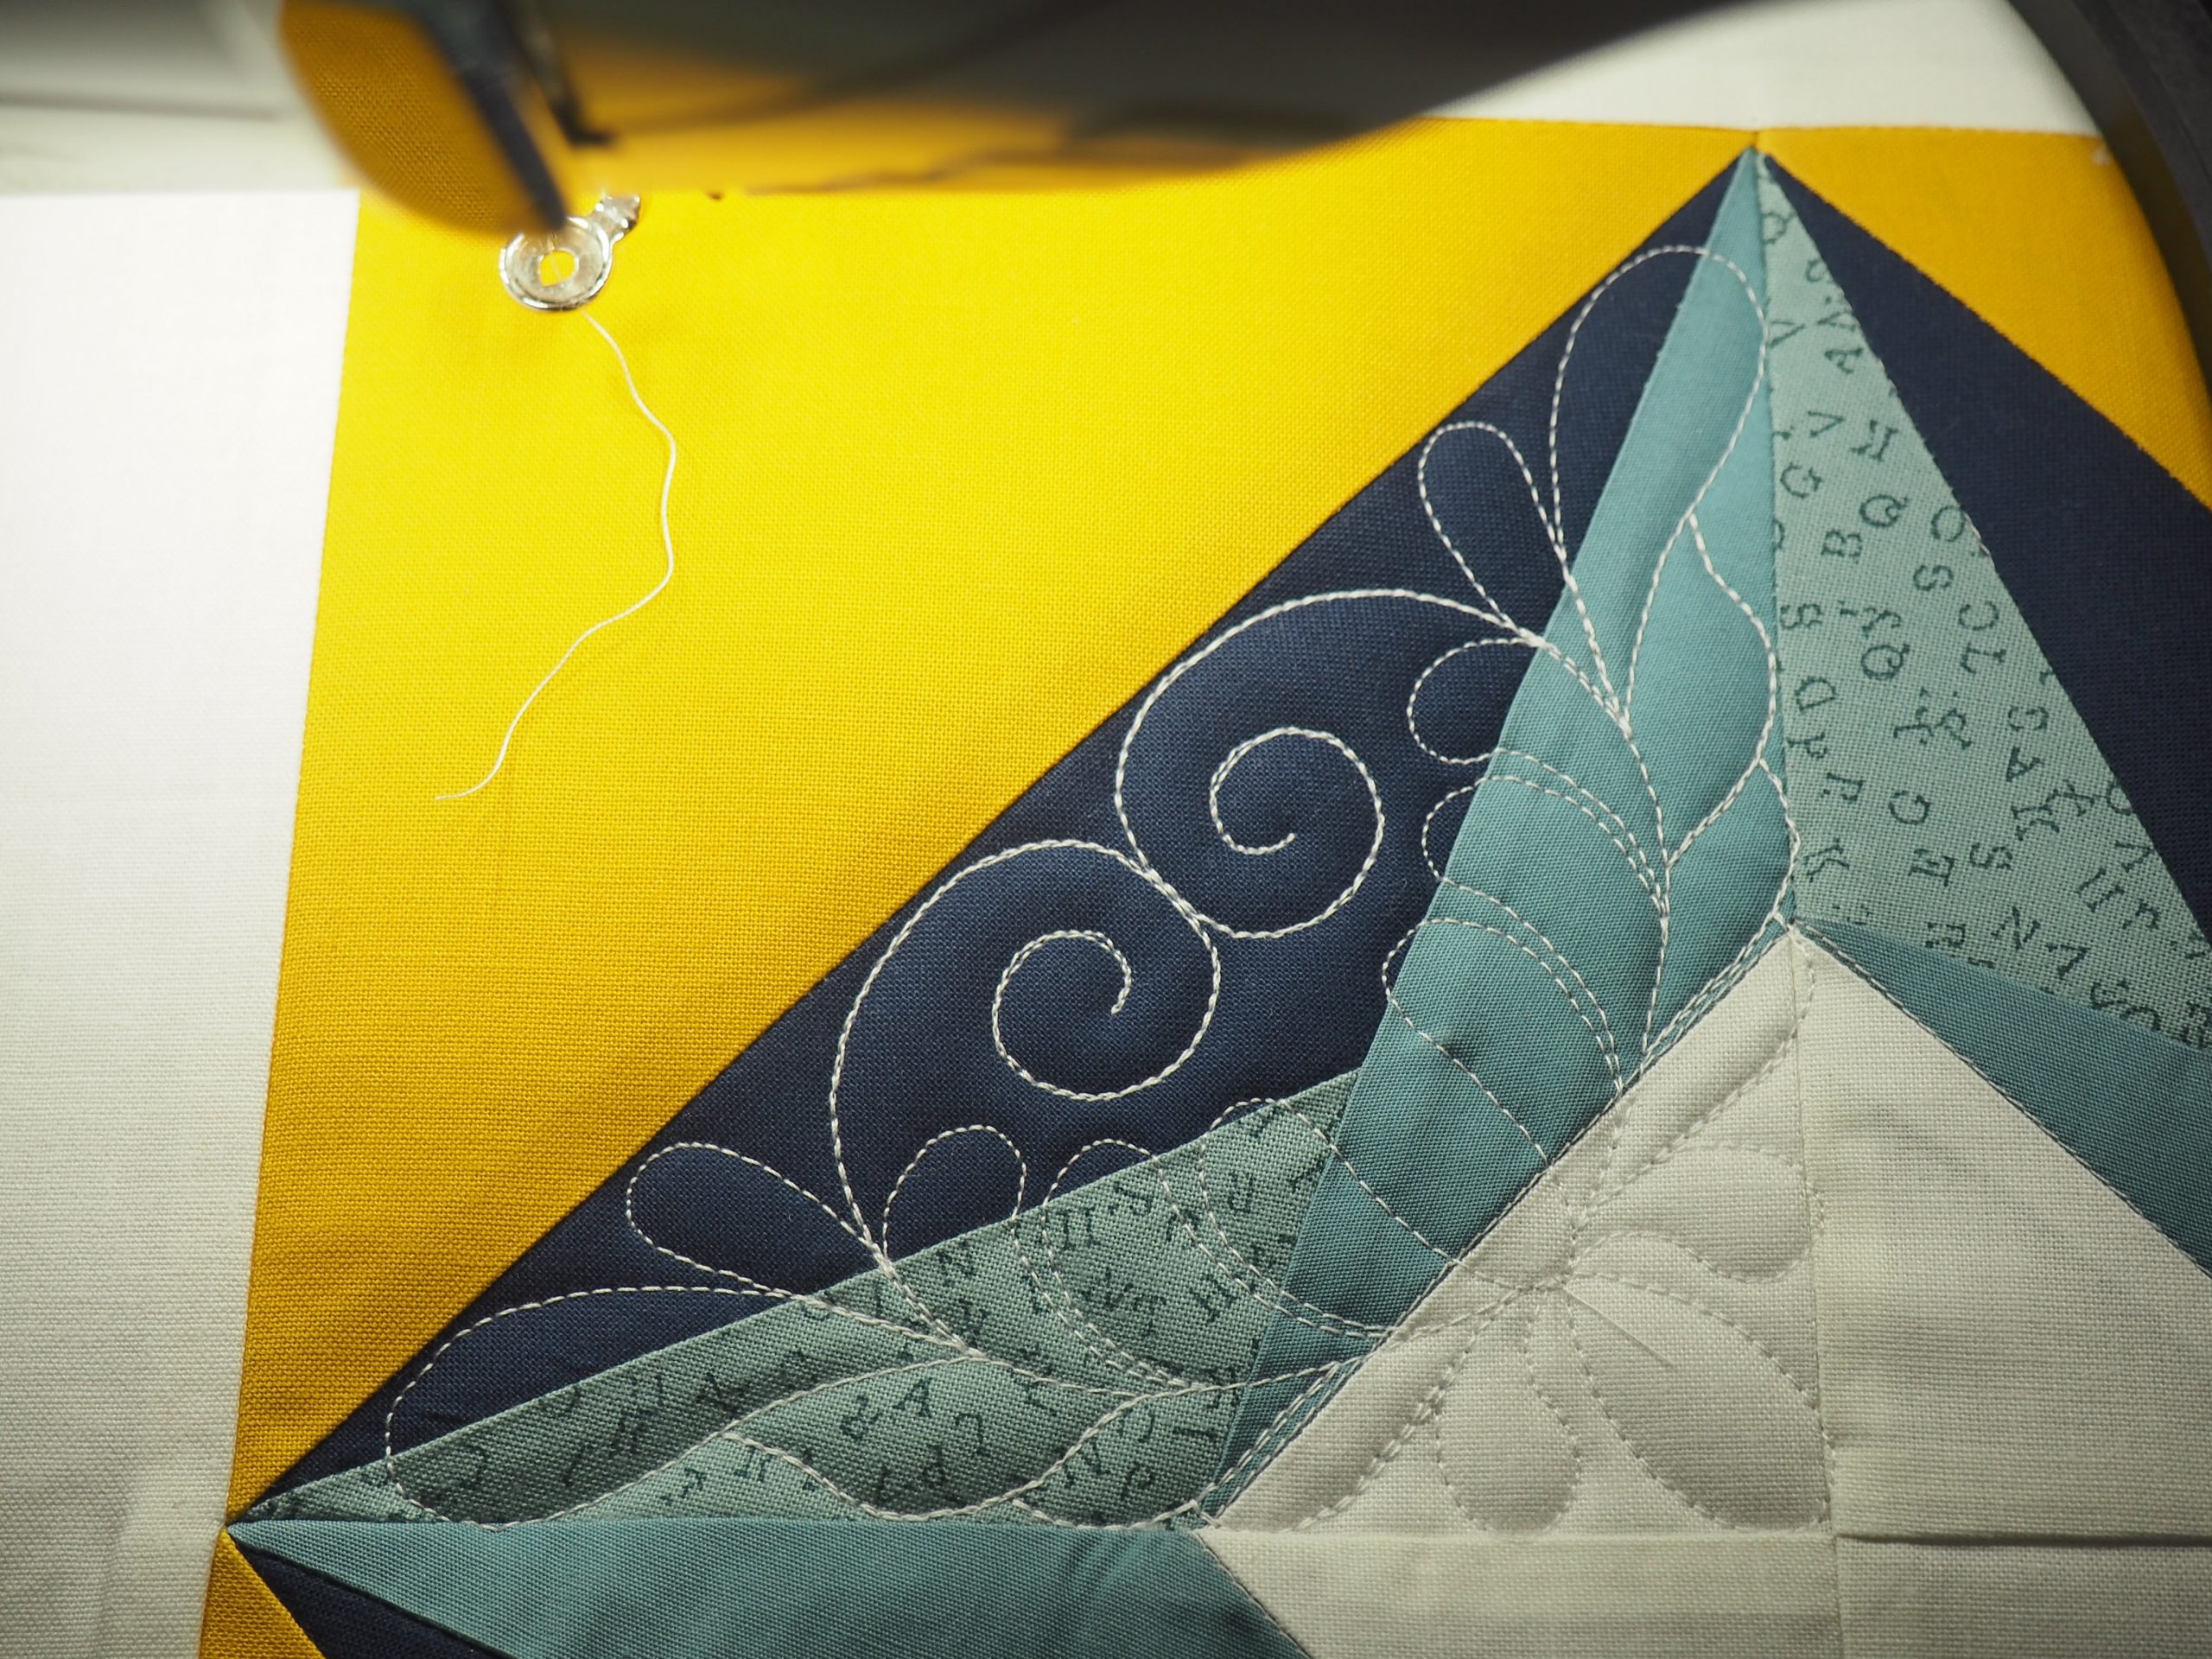
For the second quadrant, I reload my saved file or embroider it again if I have not switched the sewing machine off in the meantime. However, the file has to be rotated for the quadrant to be embroidered. I only carry out the Pinpoint Placement of the second embroidery design once I have embroidered the first design, as the quilt sandwich can be distorted during hooping and this way, I can better compensate for any inaccuracies.

Then I embroider or quilt the second half of the cushion top in the same way. I load, rotate, and position the saved design.
Embroidering the corner squares
The Large oval hoop is handier for embroidering the corners. I hoop the quilt sandwich so that one corner can be embroidered and the edges of the stabilizer/backing are still sufficient to ensure the sandwich is hooped reasonably well.
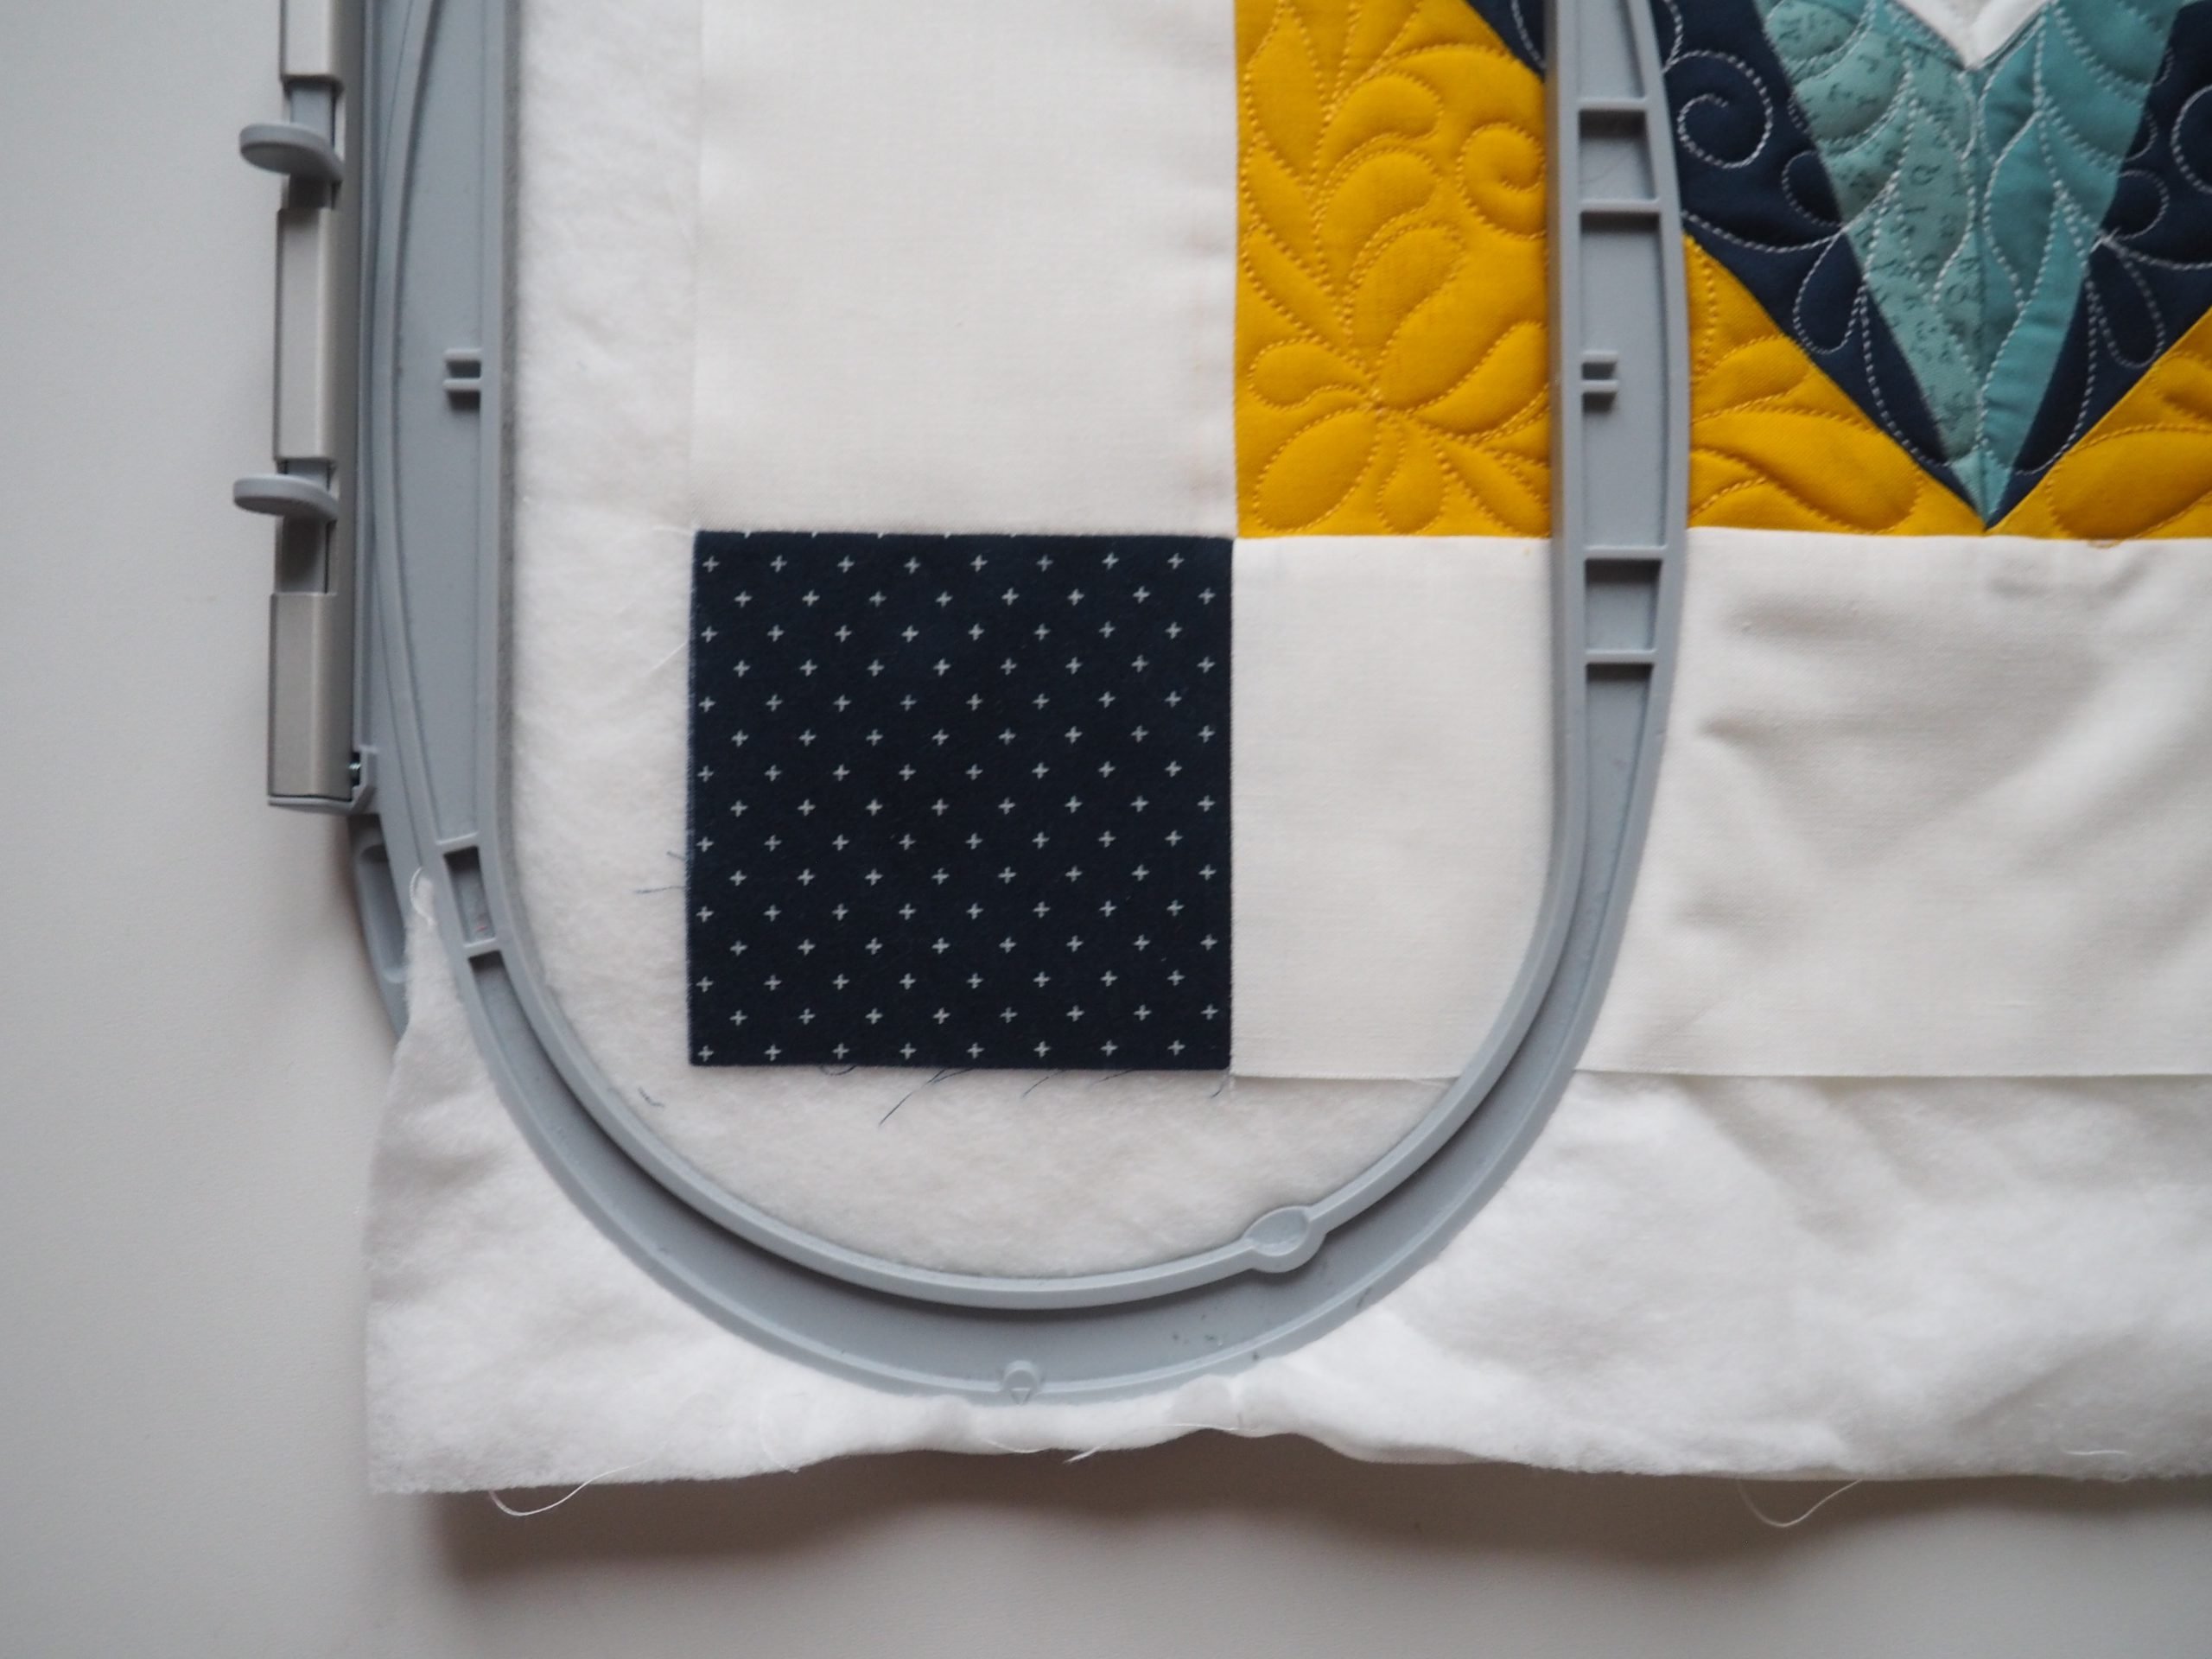
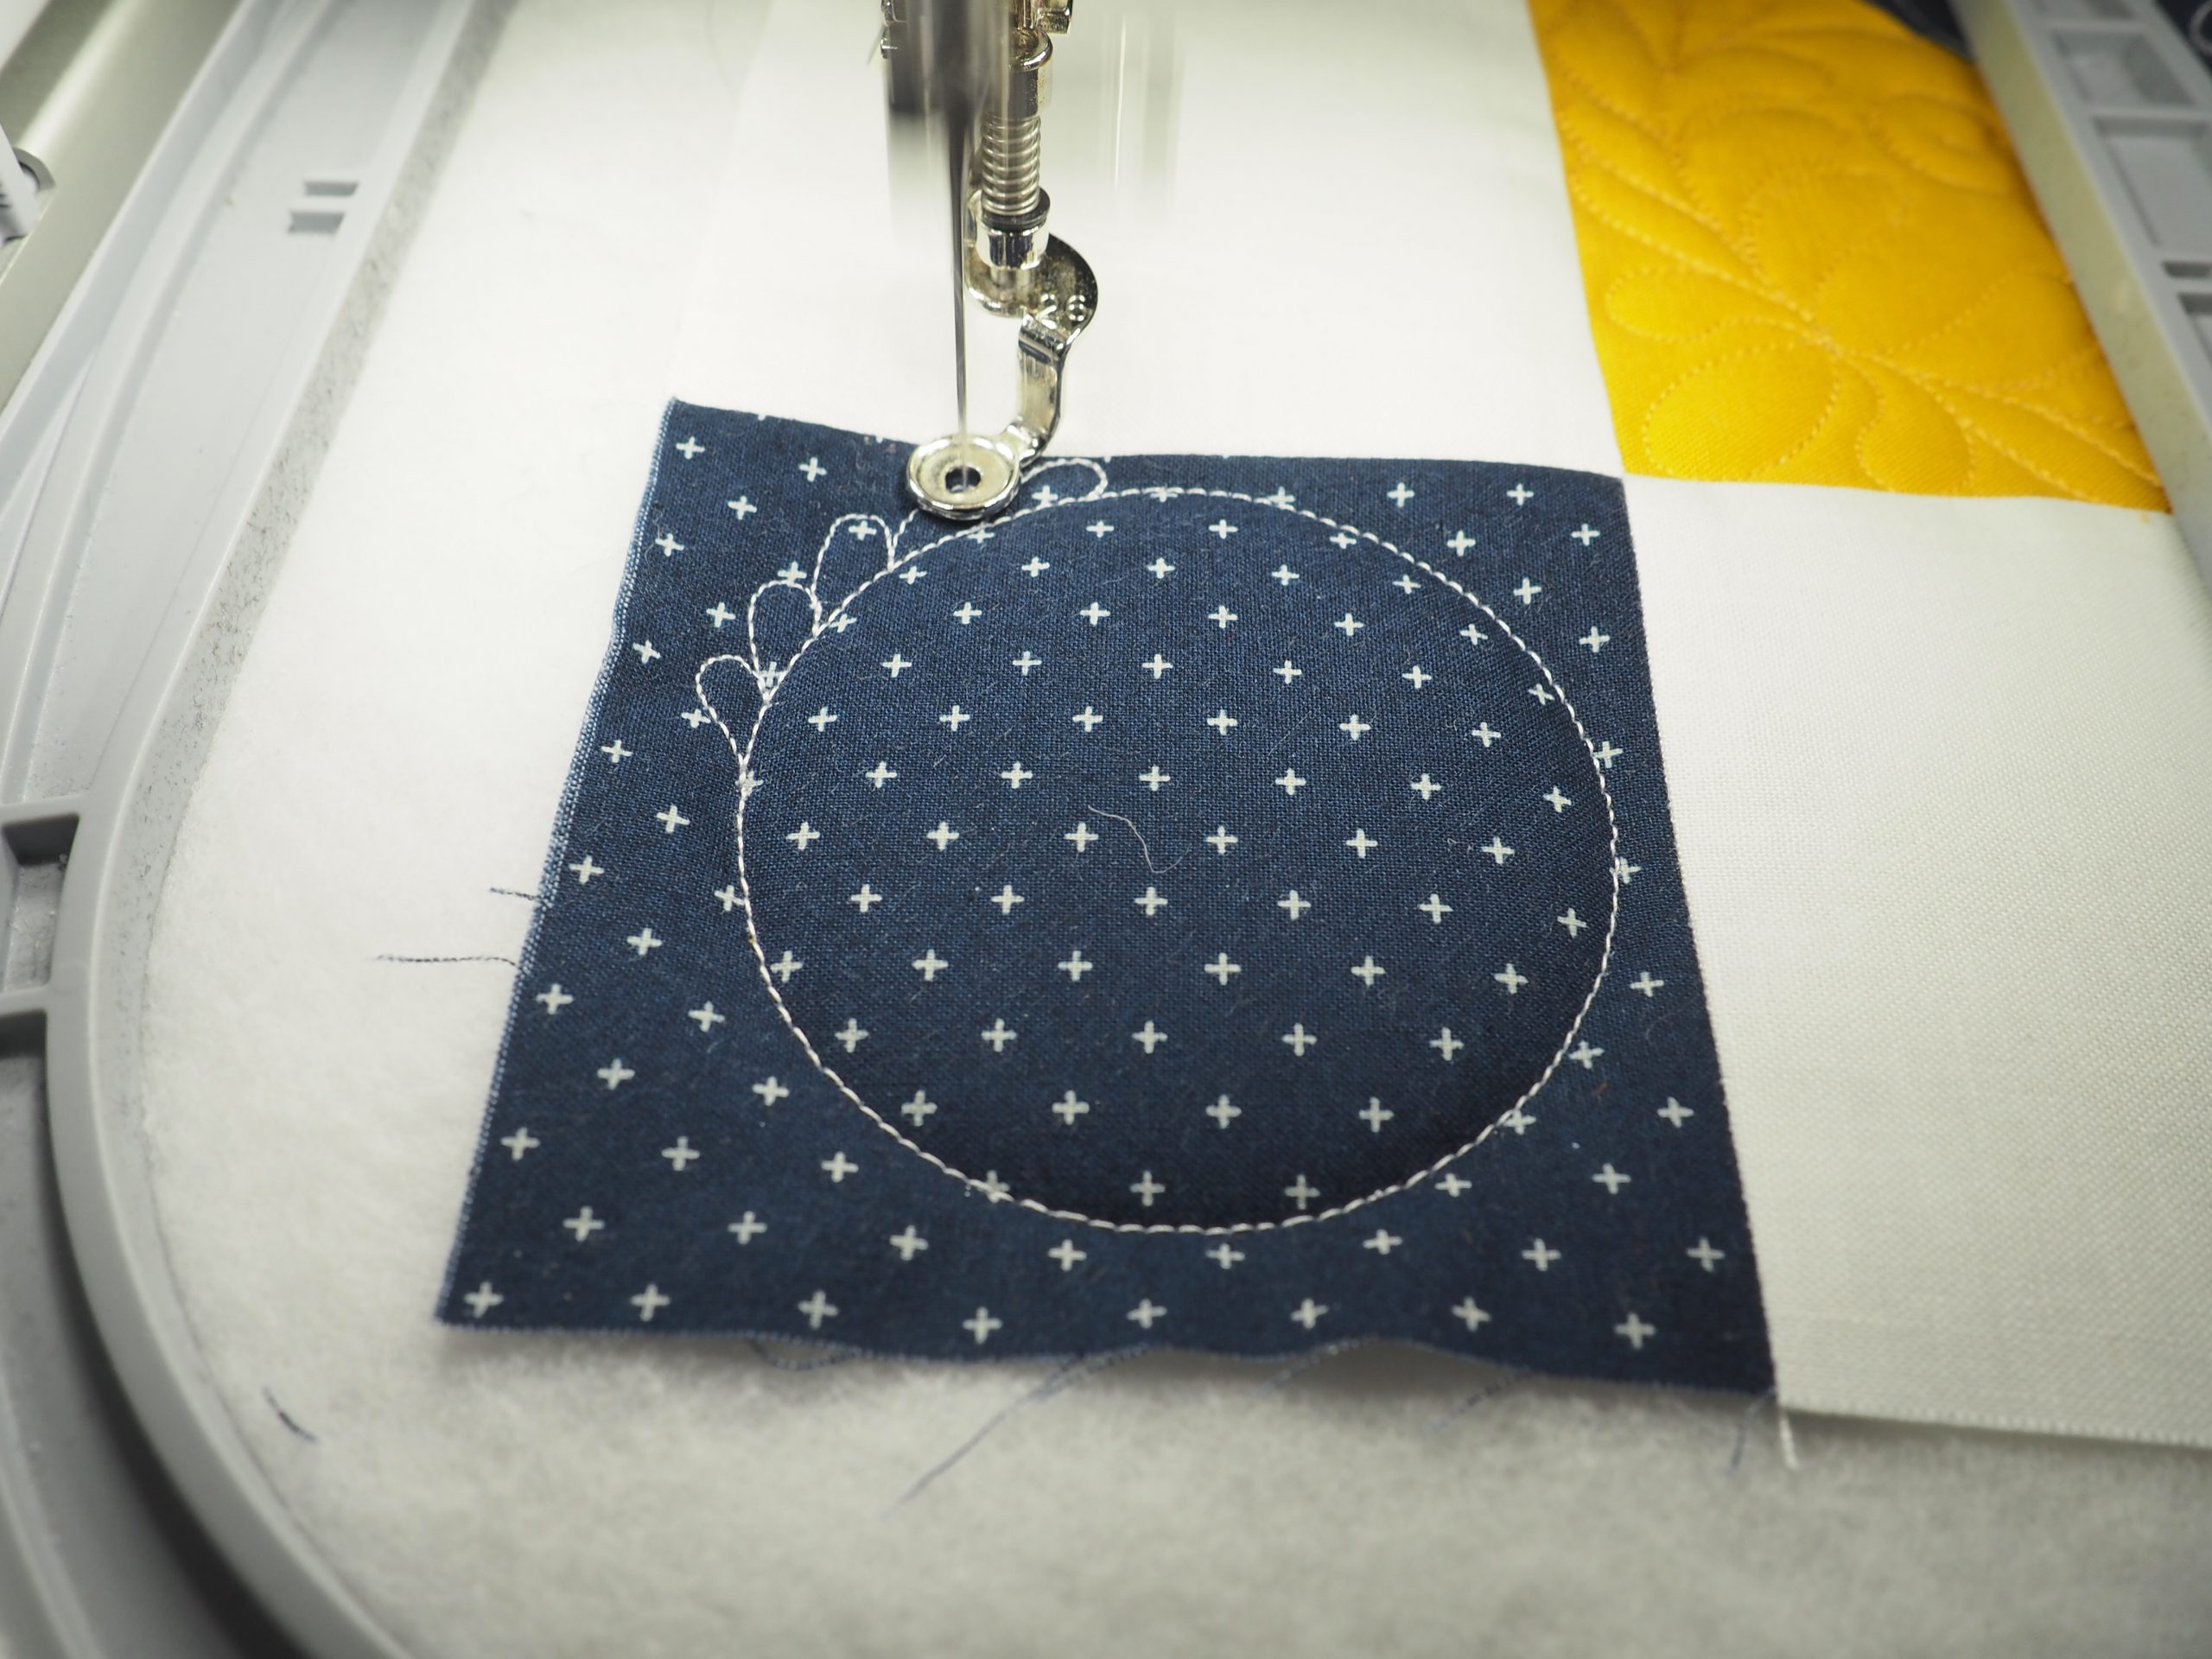
For the corners of the cushion, I discovered a small square feathered wreath among the new quilting patterns included in the PLUS Upgrade. These are located in embroidery design folder no. 1.
I select pattern no. 8, a small feathered wreath.
As I described above, I adjust the design to the correct size and carry out Pinpoint Placement. When placing the design, I make sure there is a seam allowance of 1/4″ at the outer edges that will not be embroidered.

Here, you can see that the circle is not in the middle, but has to be moved towards the inner corner. The center of the circle can be determined with a chalk pen after the seam allowance has been marked.
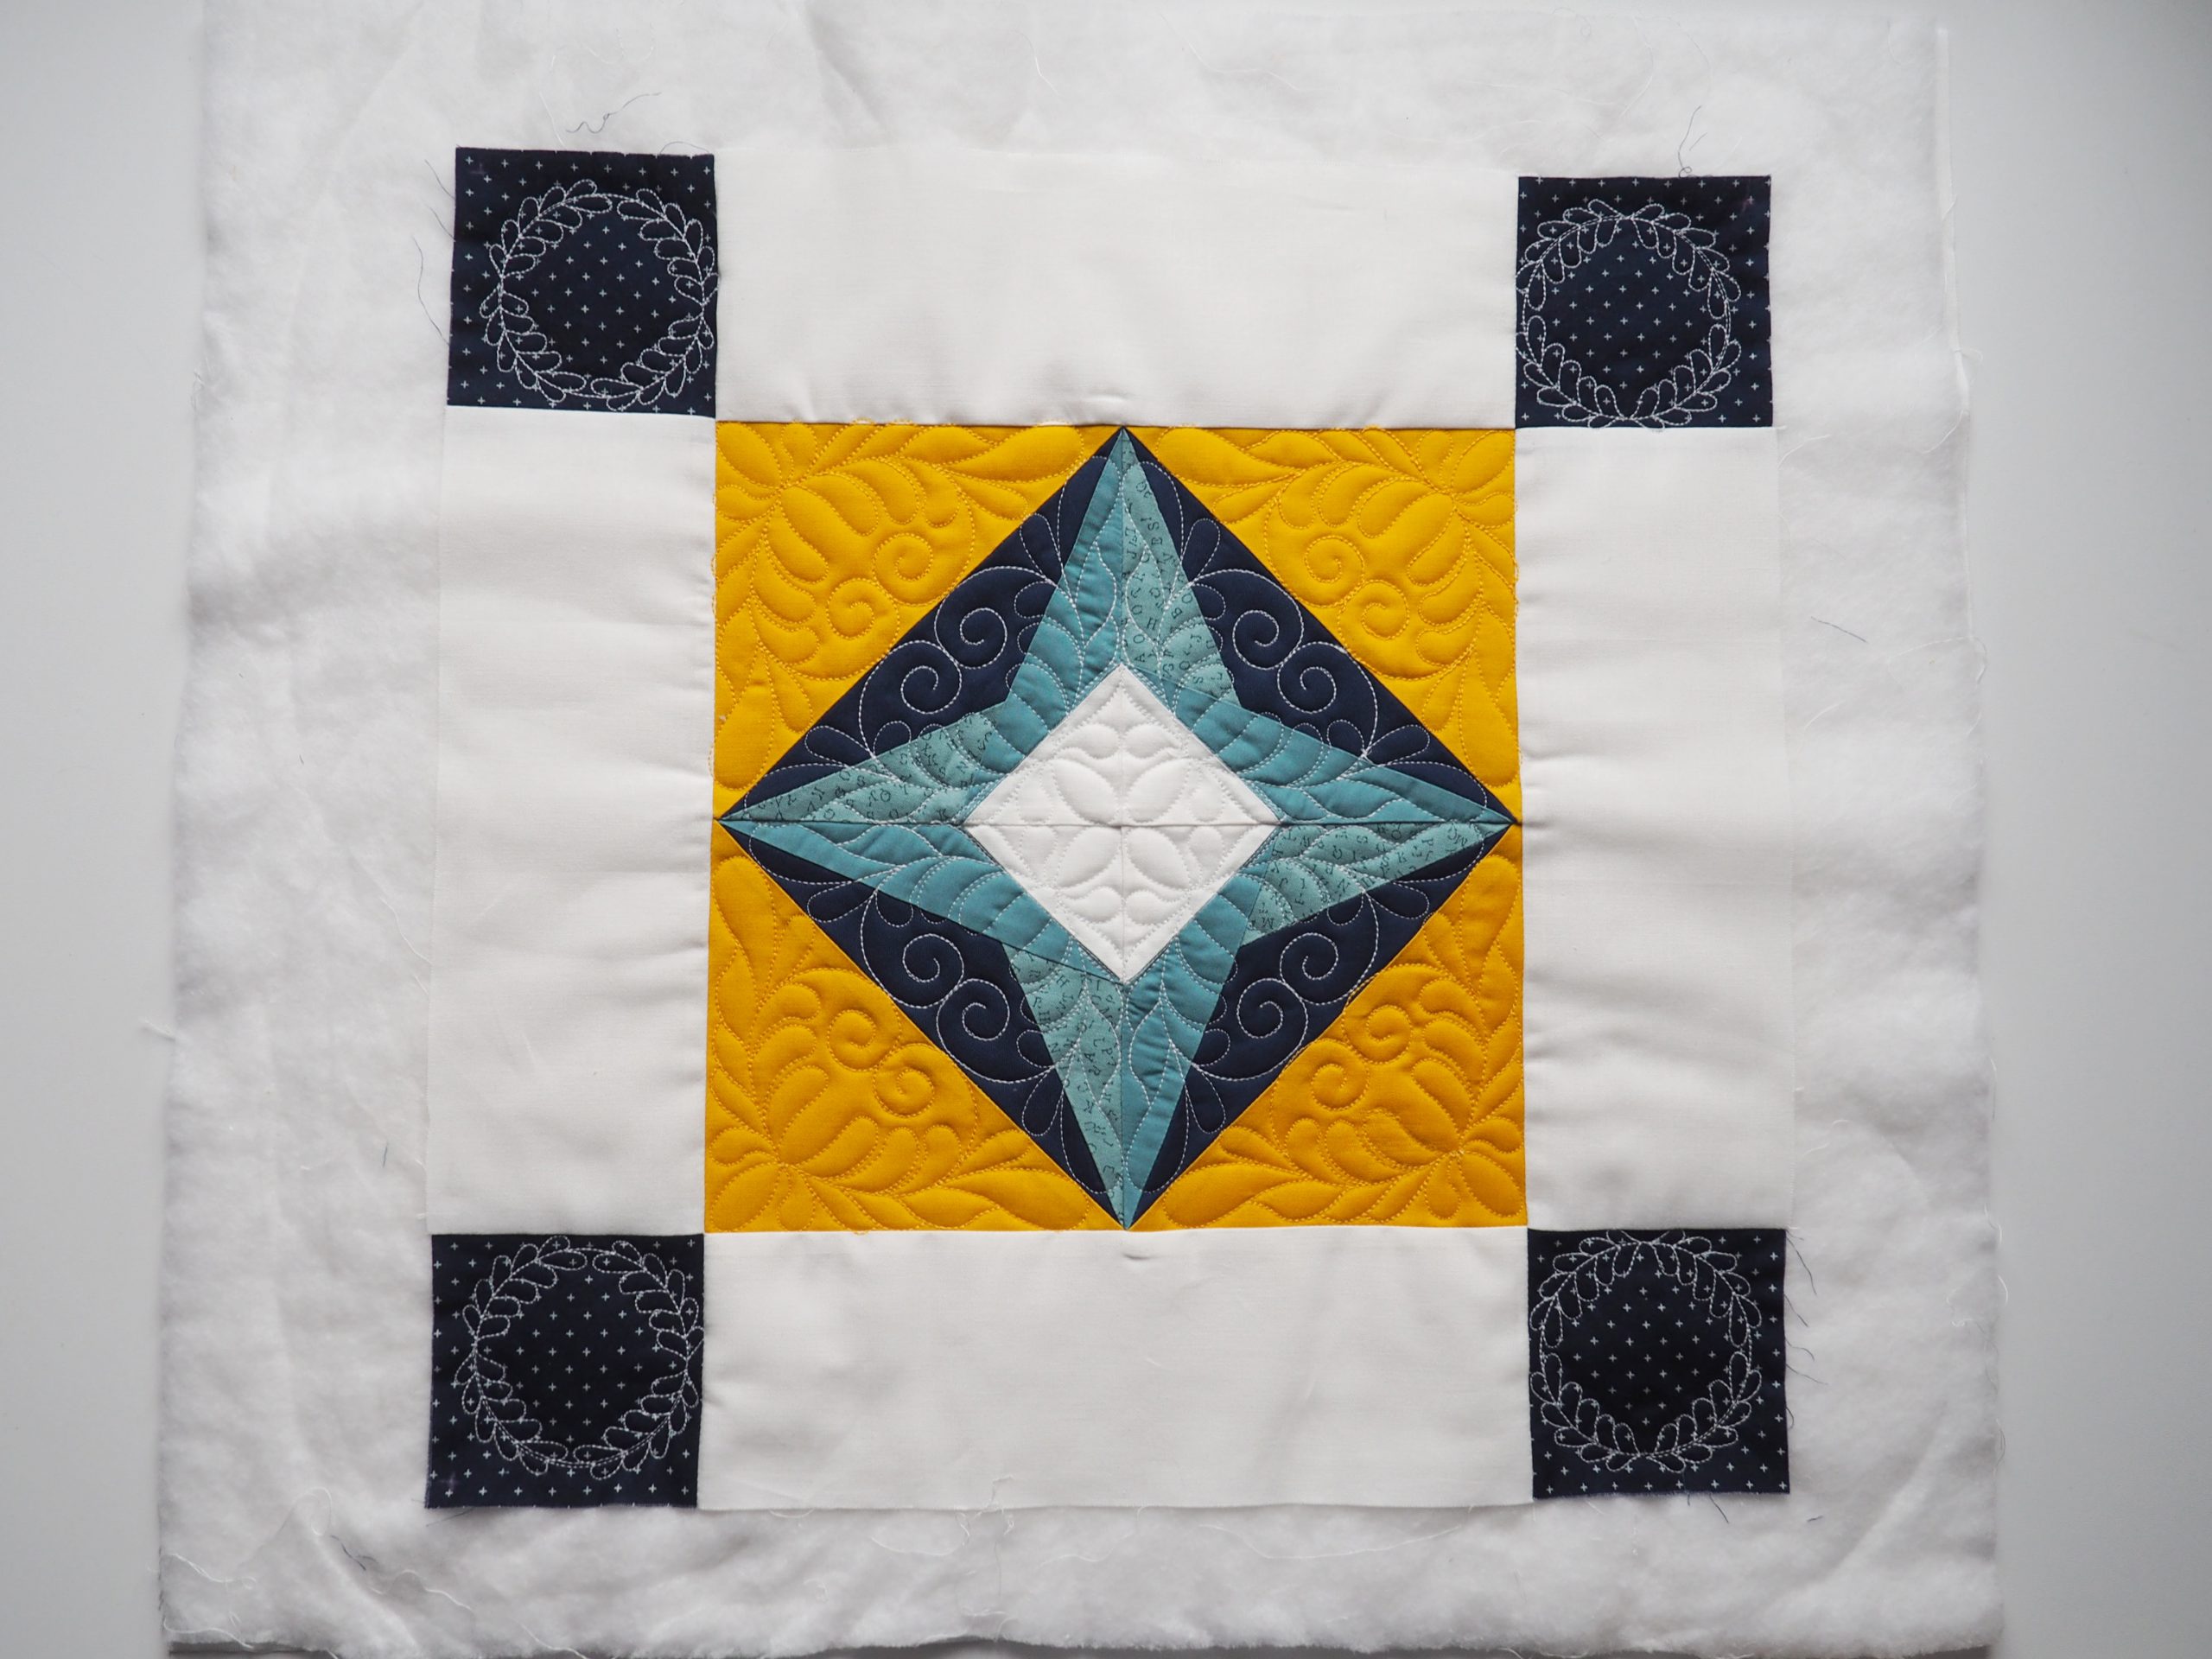
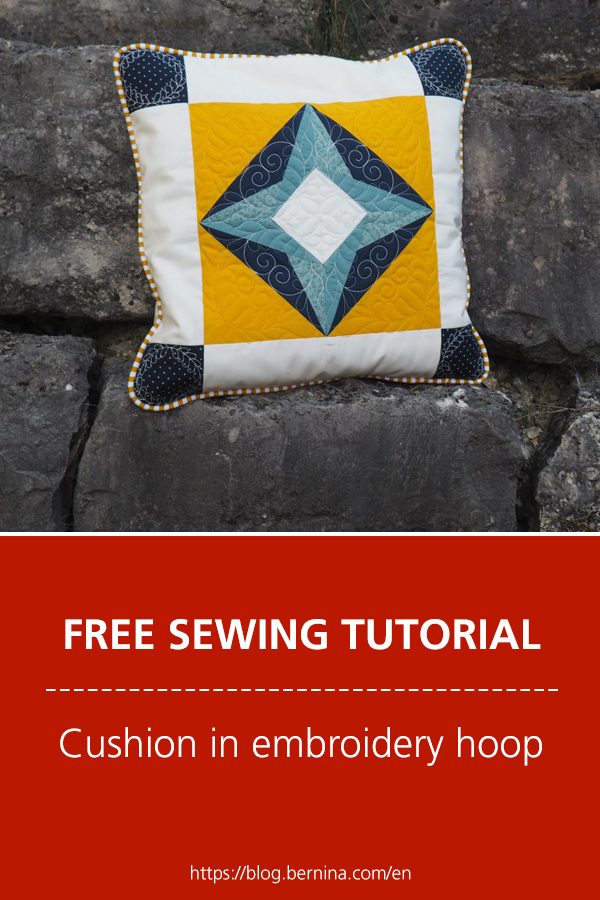
This is what the quilted cushion top looks like – the only issue is that I didn’t pay close attention when rotating the feathered circle in the corners.
Finishing off the “quilting in the hoop” cushion
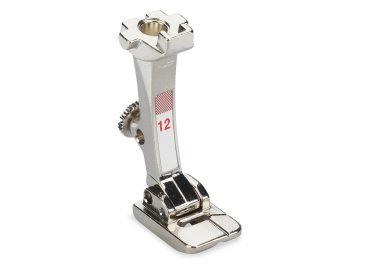
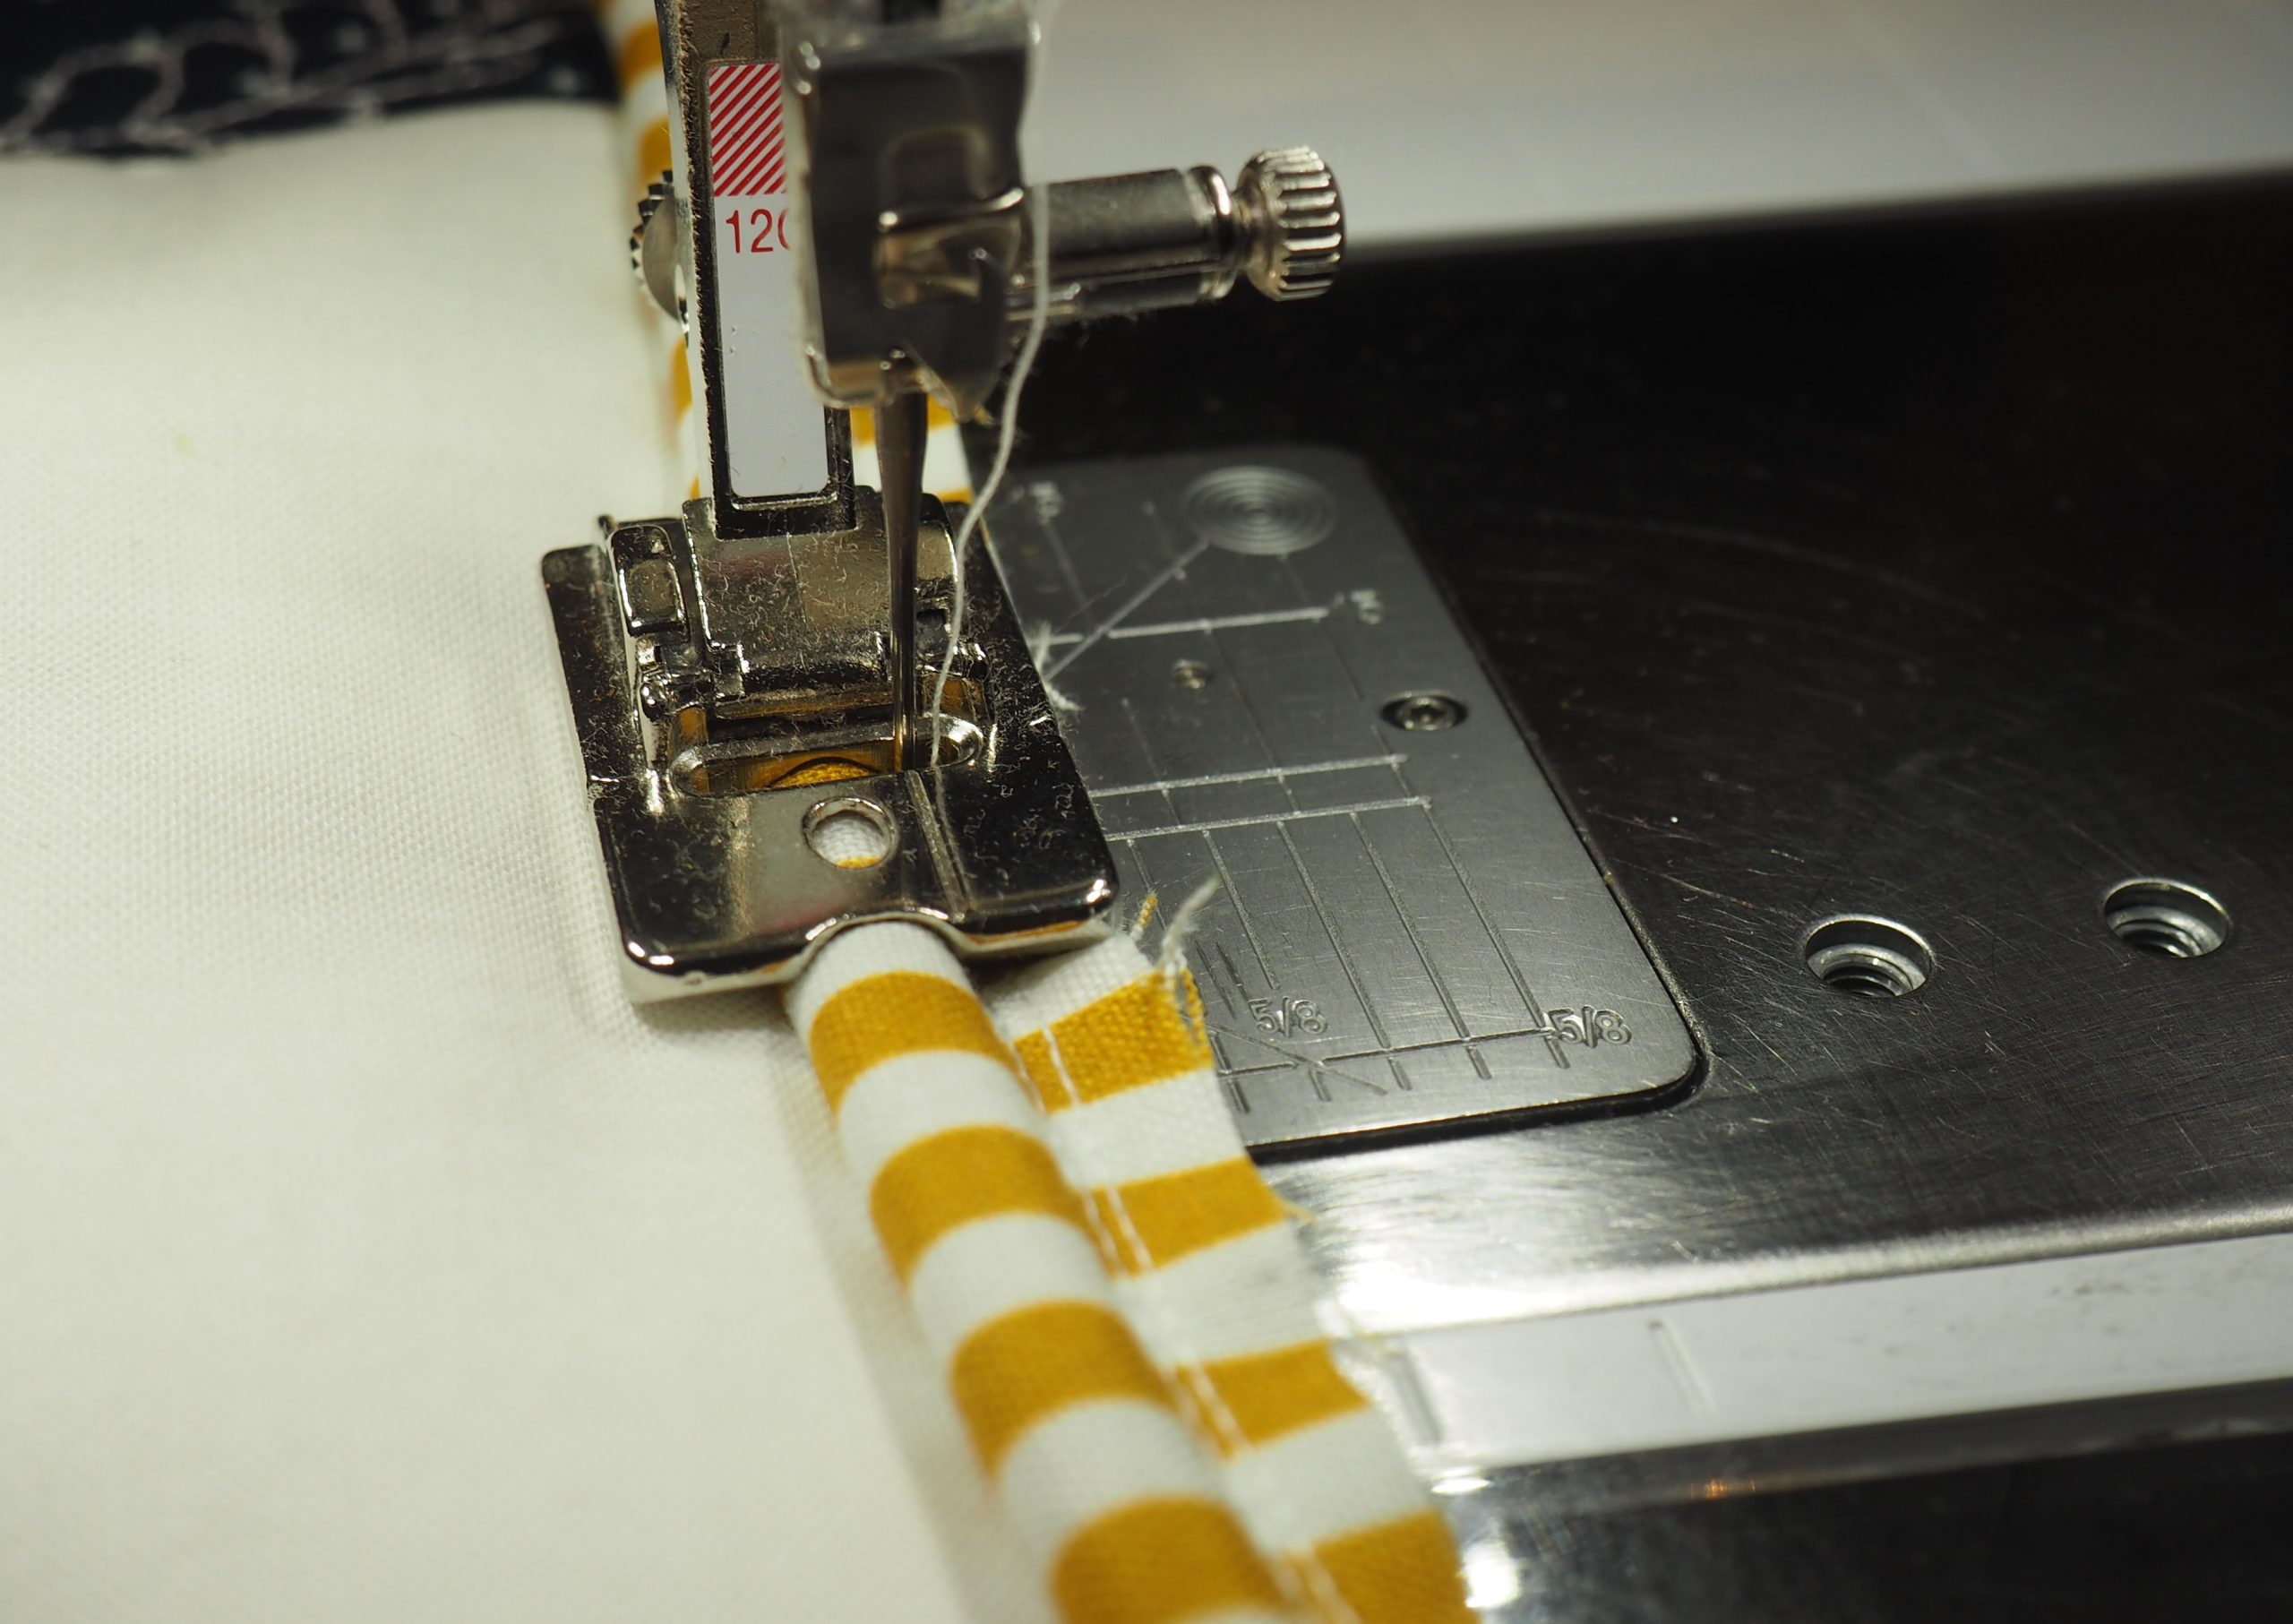
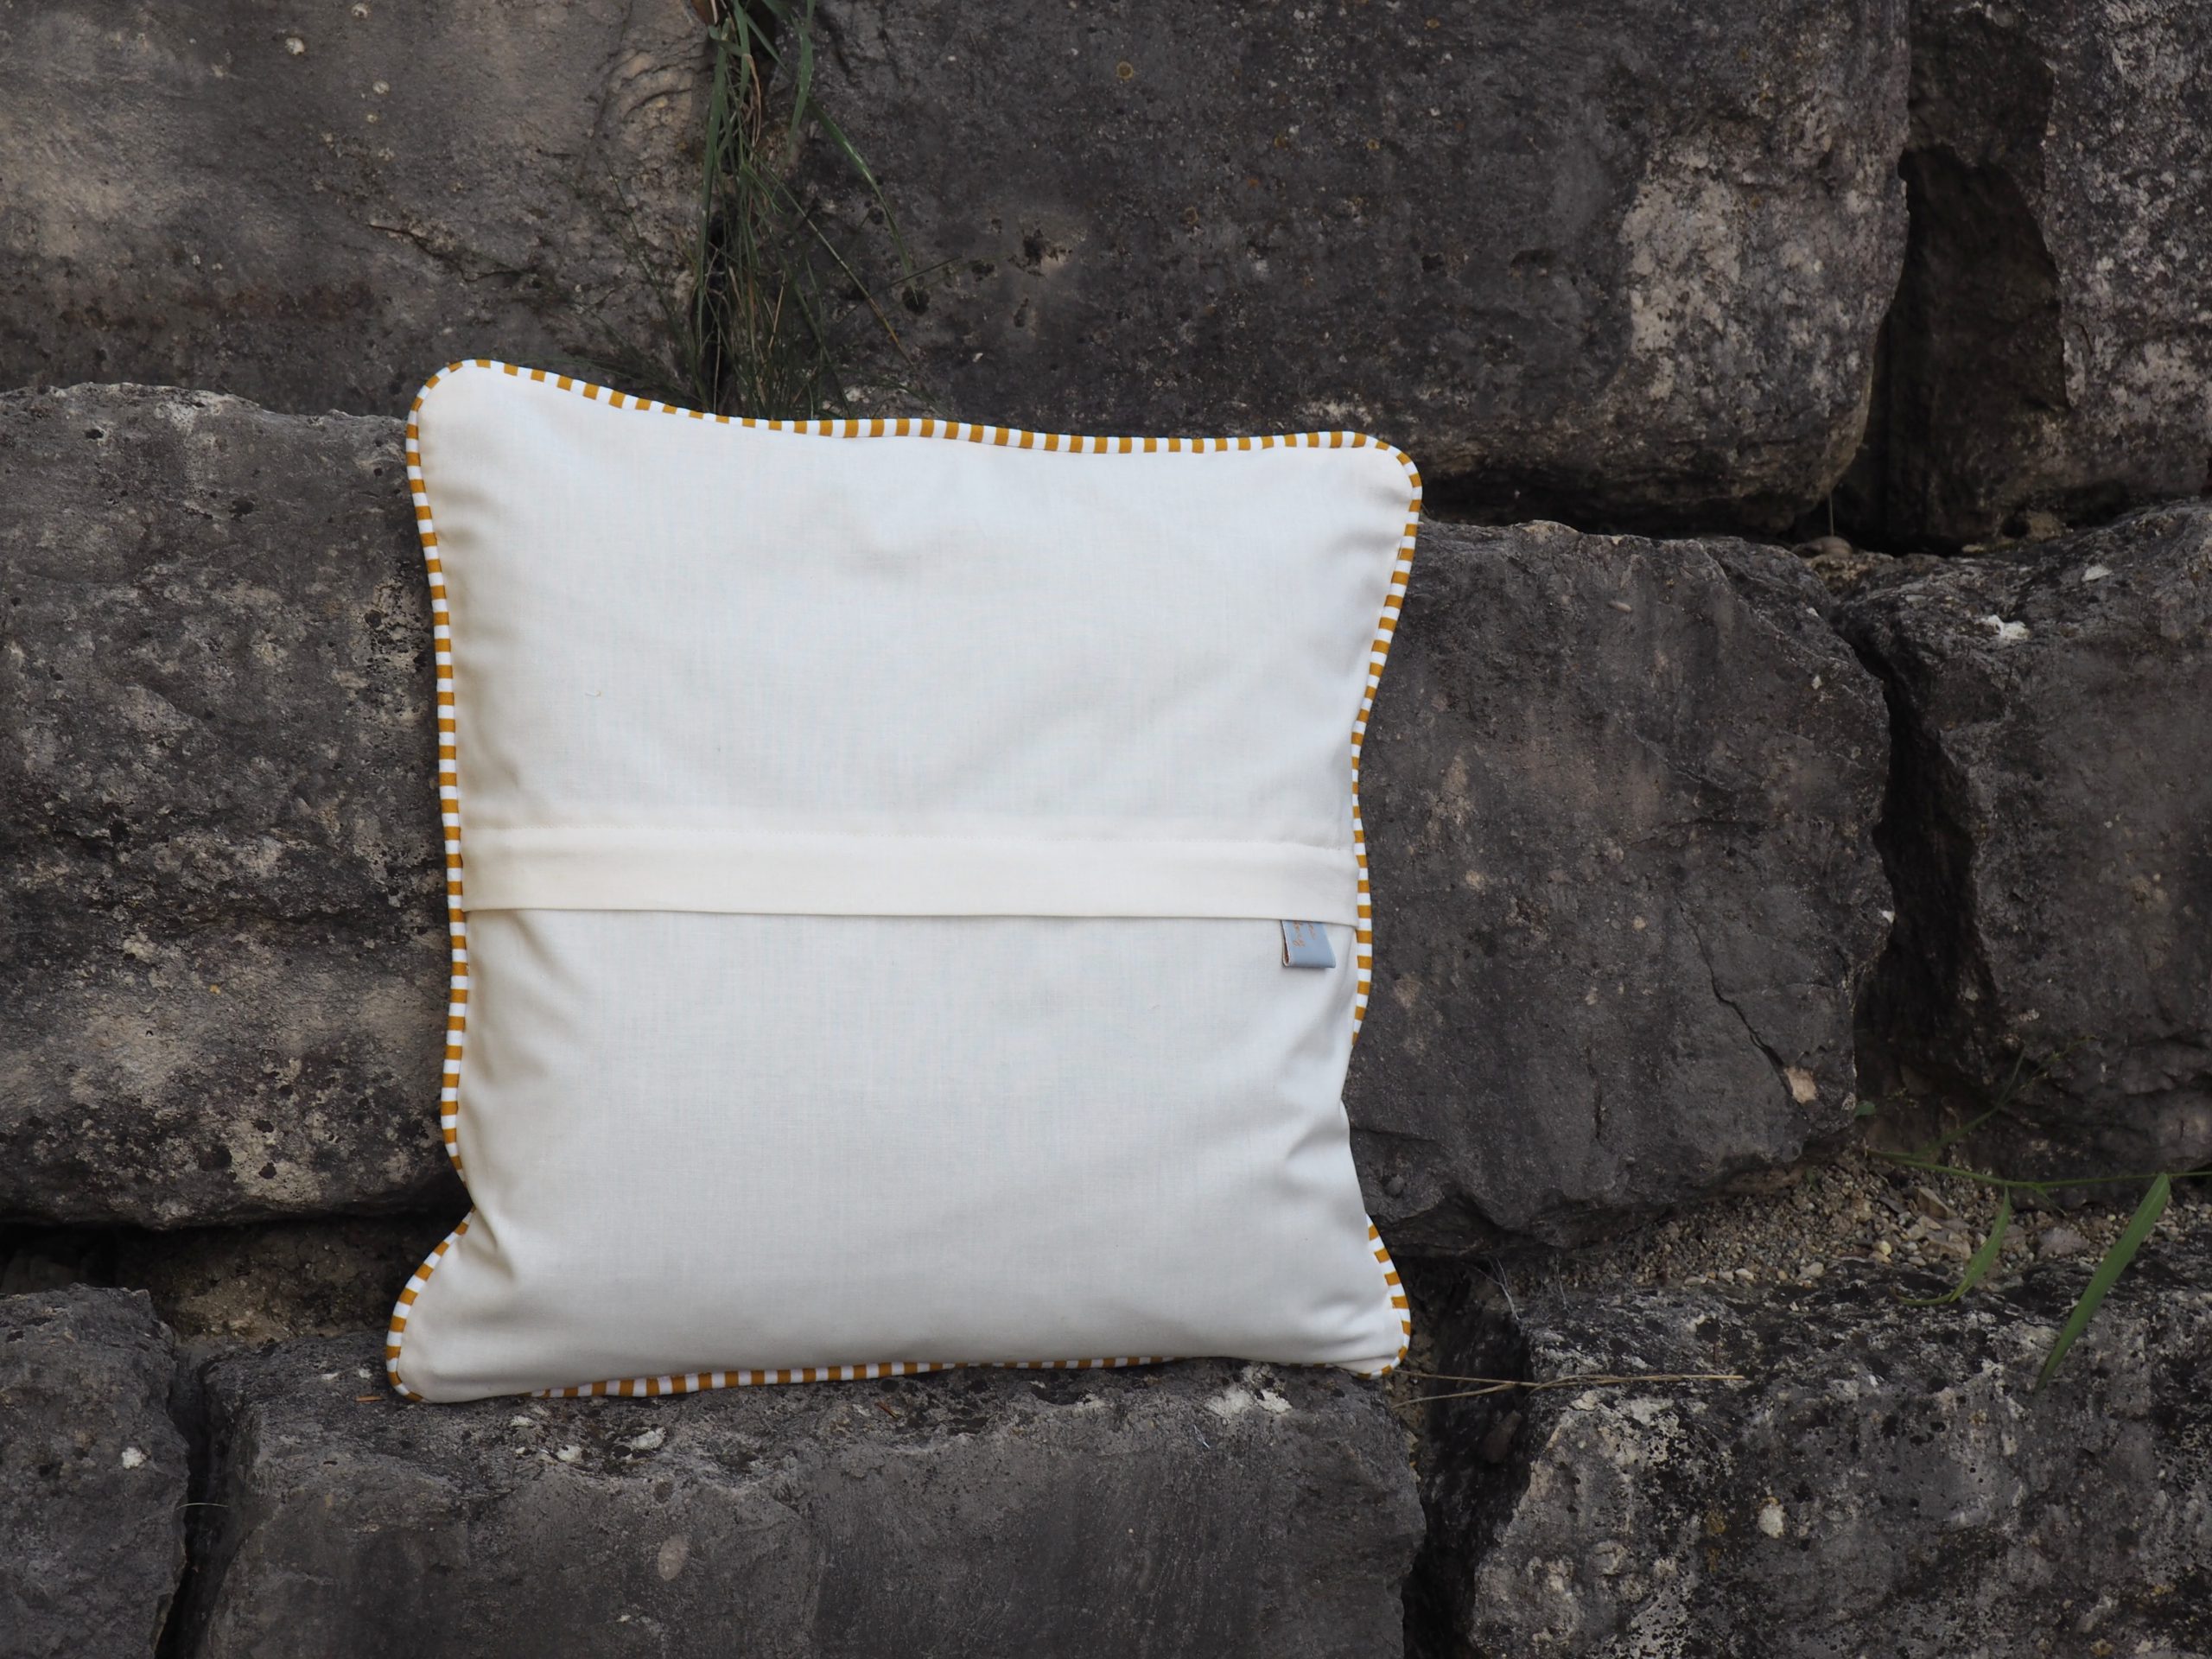
Patchwork cushions often look more striking when they are framed by colorful binding or piping. I chose a striped fabric to go with my cushion and used it to make some piping. You can find detailed, but German instructions for strong piping like this in my blog post “Binding a Cushion with Piping”. For this, I tried out the Bulky overlock foot # 12 with its special groove in the presser foot sole. I love how easy it is to sew and sew in piping with this foot.
I used a concealed zipper as the fastening for the cushion. In her article “Instructions for a Cushion Cover with a Concealed Continuous Zipper”, Iva shows how to sew this kind of flap.
The new quilting patterns included in the PLUS Upgrade, in combination with the Pinpoint Placement function, really invite you to “quilt in the hoop”. I am delighted with the result and I’m sure I’ll be using the technique often in the future!

Have fun trying out the new quilting pattern embroidery files!
Best wishes,
Ines


THANK YOU! I have searched high and low to find out what the designs 1-9 on my Bernina 770QEE Plus upgrade were for in the quilting folder for the embroidery module. I finally landed on a video that sent me here. It was really nowhere to be found in all the manuals I searched. Thanks so much for a clear cut explanation and introduction to this really fun project. Looking forward to starting it now.
Dear Pam,
I am happy this little series of articles was able to clear that up for you! And thank you for the feedback, I will forward it to our product management team and suggest they might want to include an explanation about these files in future product descriptions. I wish you a lot of fun with quilting in the hoop!
Kind regards, Ramona from BERNINA International
Fabulous work!