 BERNINA Corporate Blog -
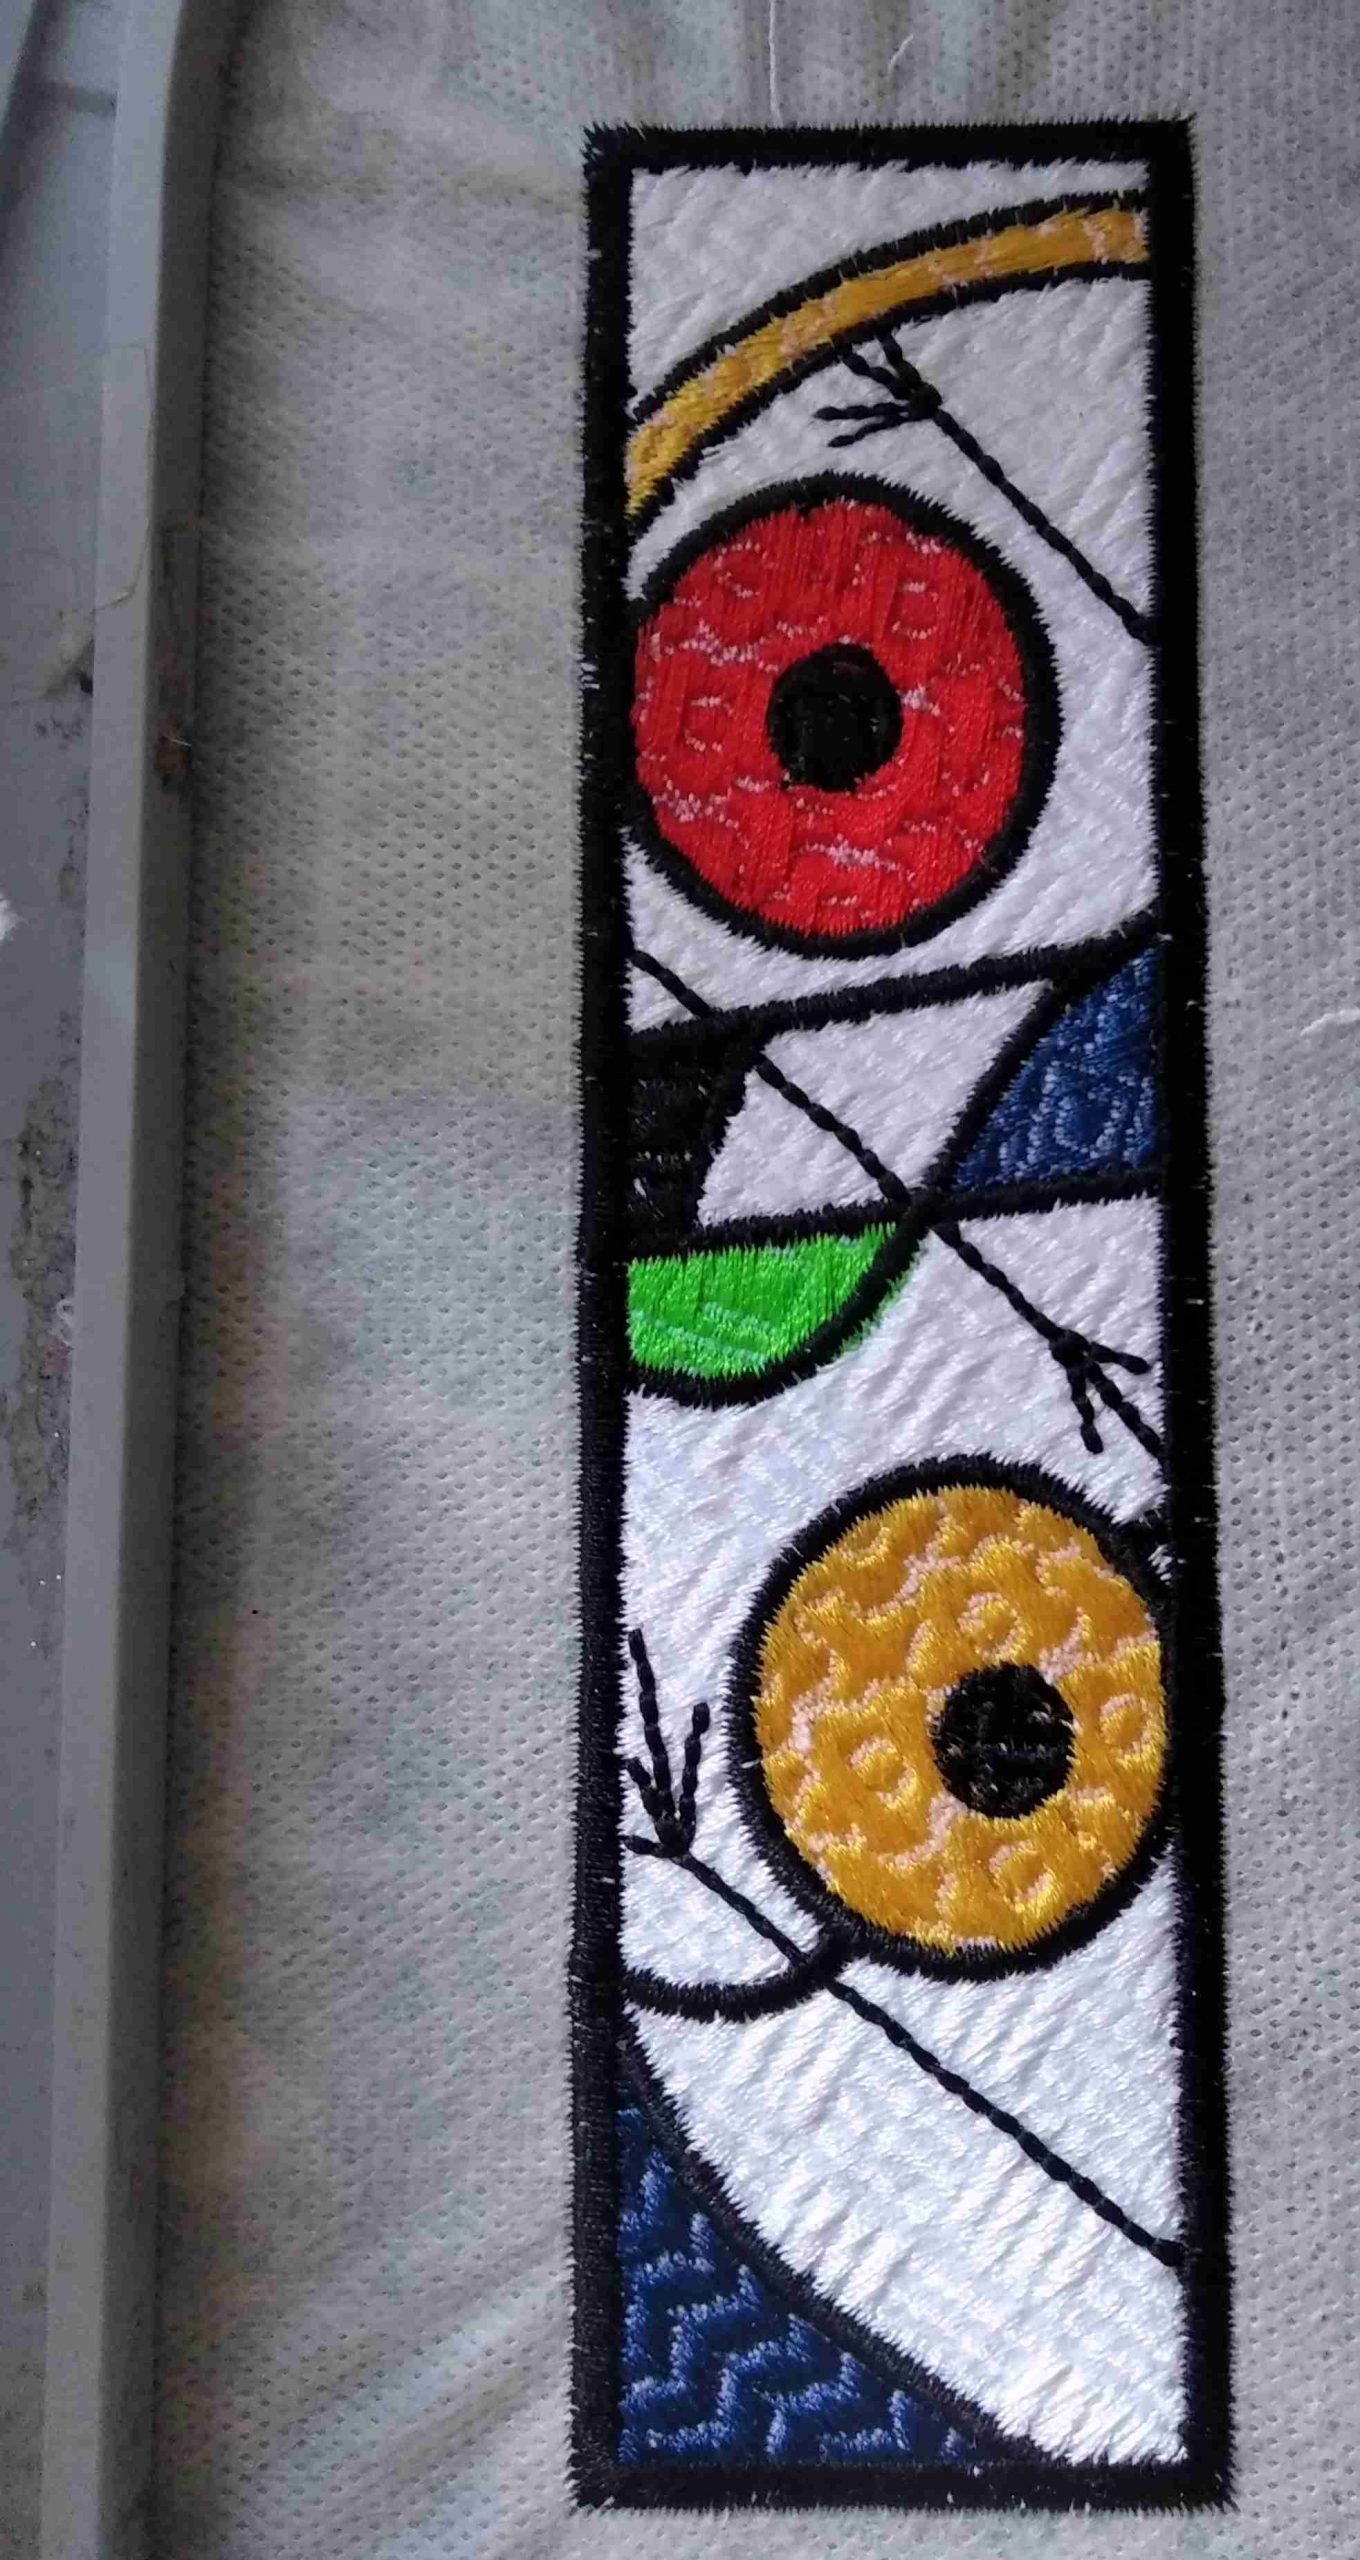 This Blog post should come with a health warning as Fancy Fills are addictive to play and experiment with!
In the Object properties box of each ‘Fancy Fill’ you have a number of options to change the look of each fill, and there is a choice of over 180 fills.. A great way to waste time on a wet afternoon!
I hope this article will give an insight into how to make the most of the amazing world of fancy fills within our Bernina Digitising software.
To get started I have provided the EMB files of the two bookmarks that I created so that you can change the chosen fill stitches as you wish.
EMB files These are zipped files. ‘Fish 1’ is the file that I started with in this tutorial. ‘Fish 2’ and ‘Round Miro’ are my final designs which I then wrote to the machine to stitch out.
At the end of this post is also a link to the EXP files.
- Open the provided EMB file ‘Fish 1’ in Bernina Digitising software
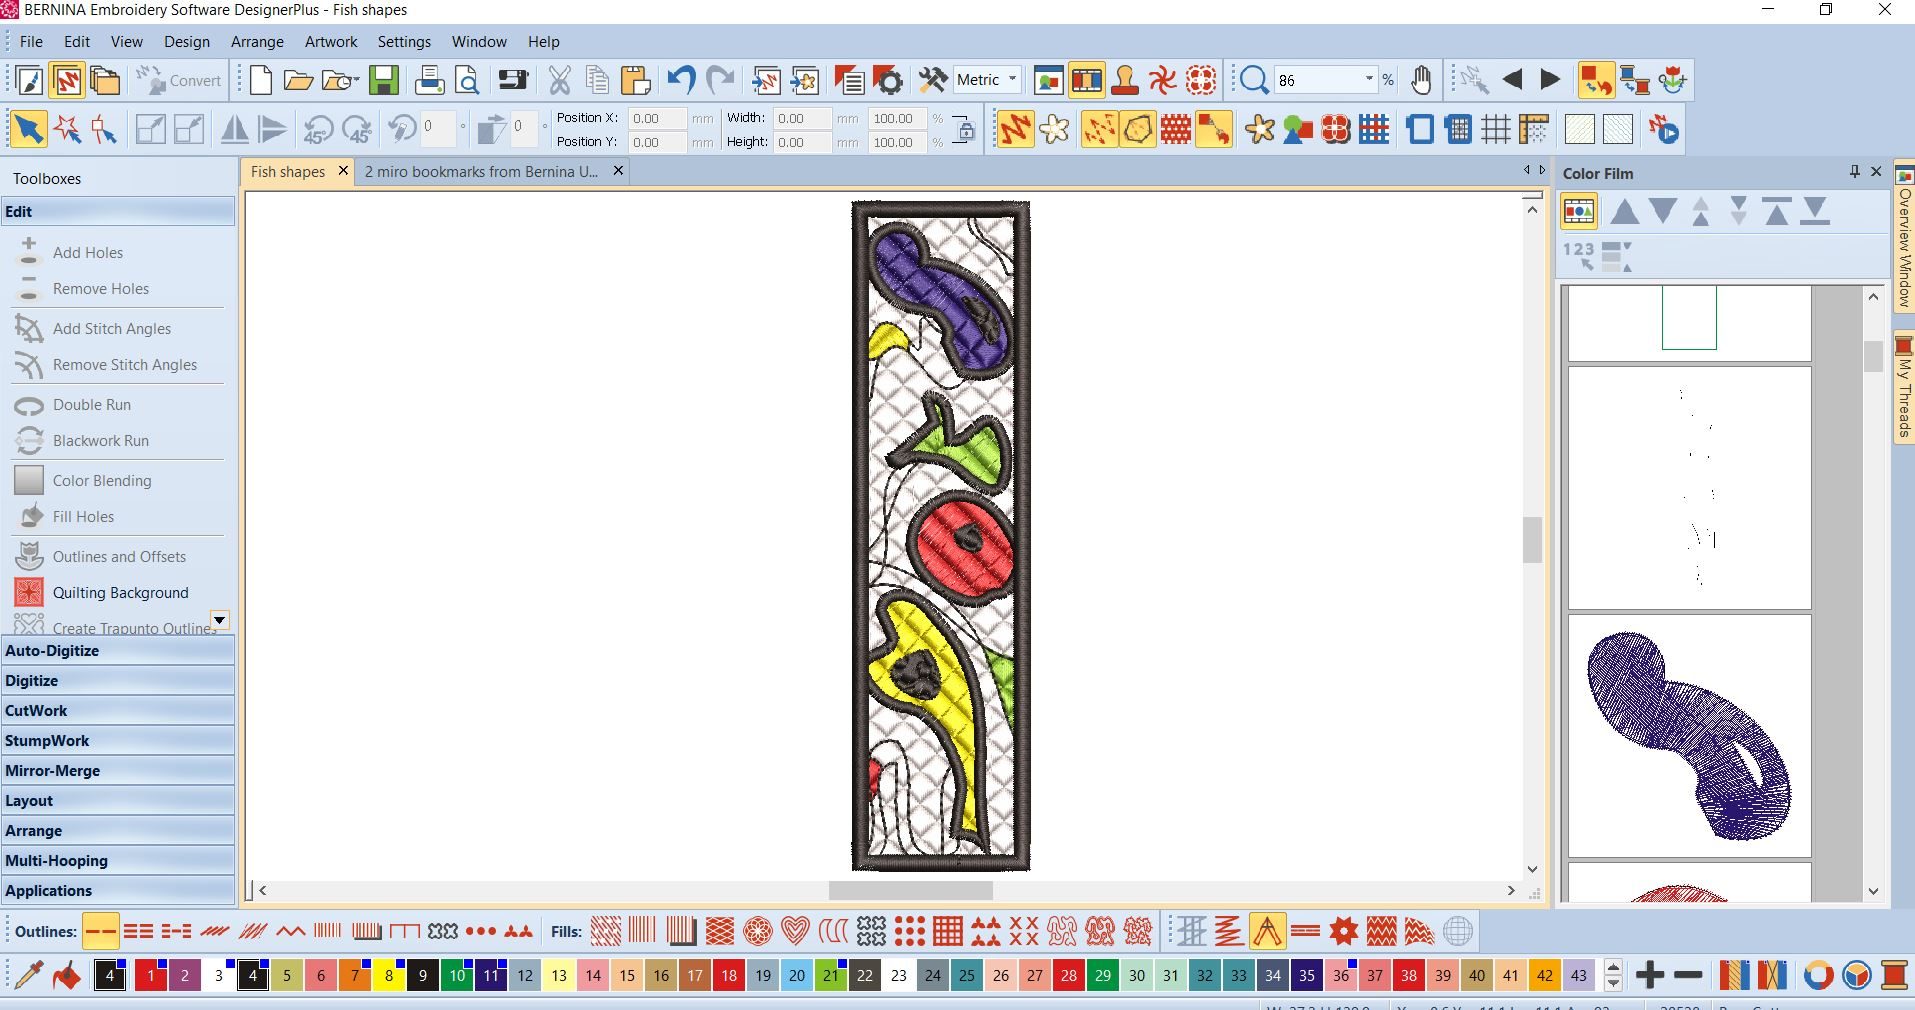
close up of filled areas withe same diamond fill in all shapes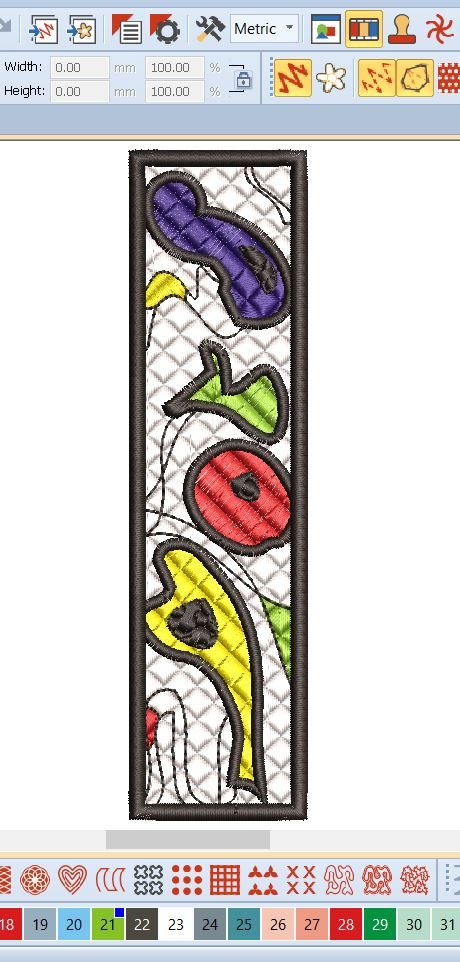
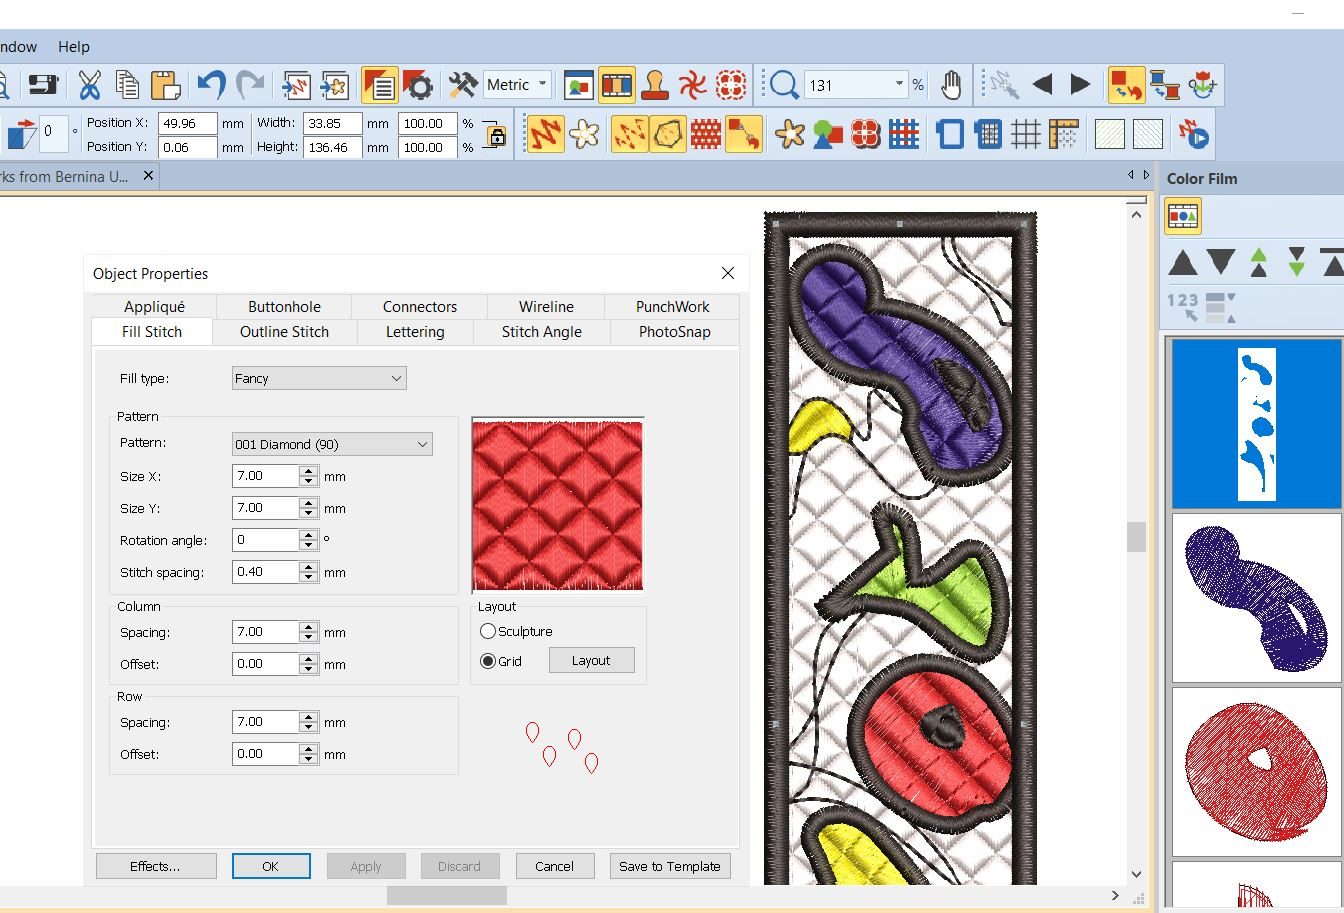
2. Select the white background area in the ‘Colour film’ and right click to open the object properties box.
Move the ‘Object properties box’ by dragging it on the screen so that it is alongside the design
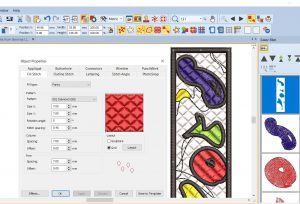
3. The object properties box shows the selected fancy fill and its default settings, all of which can be changed,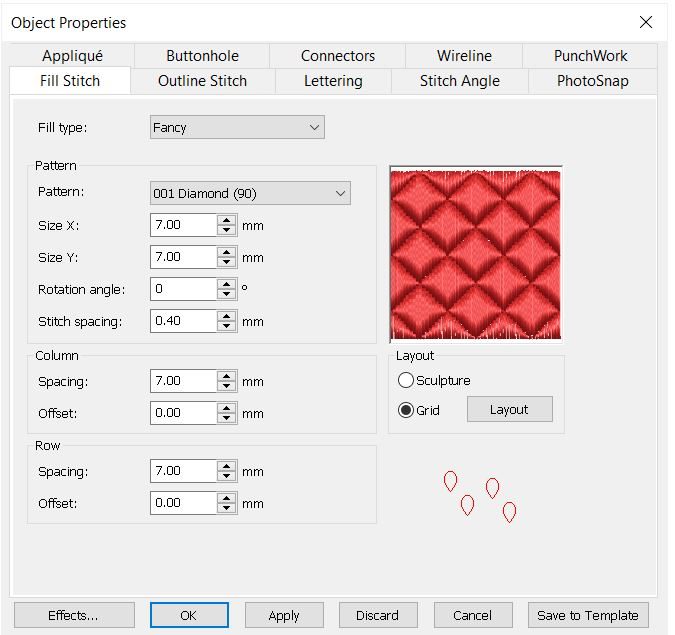
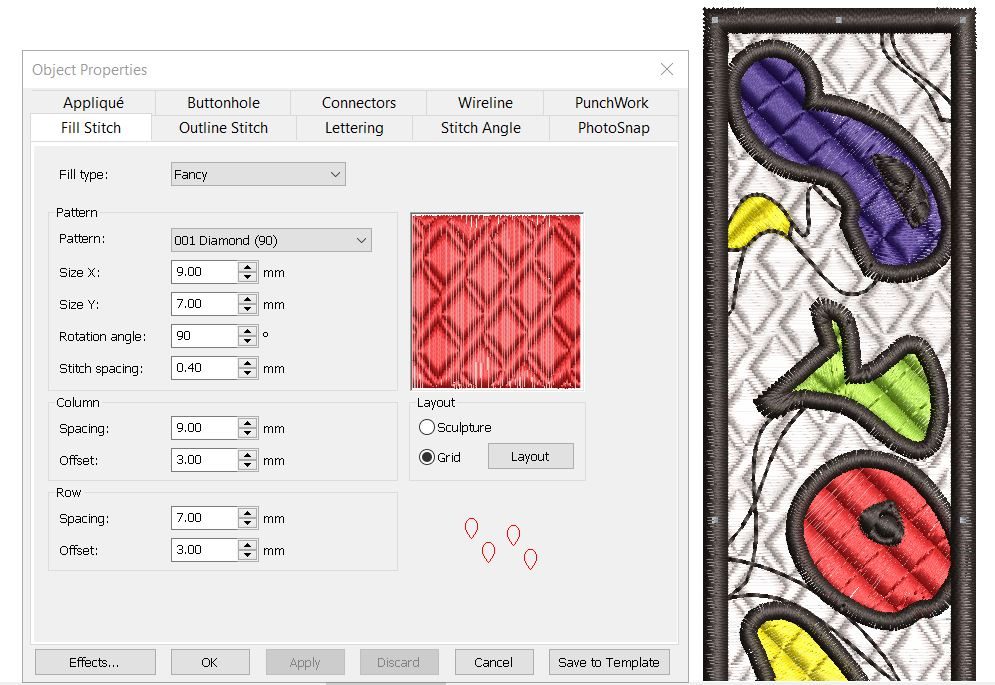
4. Changing the rotation angle and the x and y sizes immediately changed the look of the diamond pattern. Tip. Remember to click apply to see changes in design.
4. As I saw fish shapes in this design I wanted a background fill that looked a little more like waves so clicked the arrow on the left of the pattern box to view my options and tried a fill called ‘Dune’
5. I changed the stitch angle and x and y sizes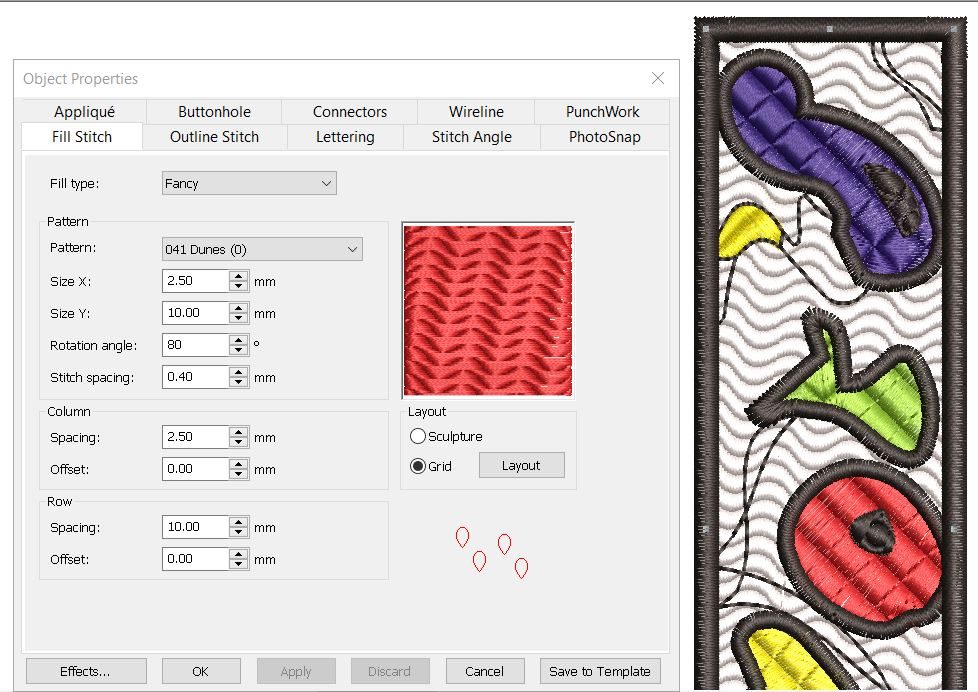
6. I continued to experiment as there are 180 patterns to choose from and finally decided on ‘Wave ‘ for my background.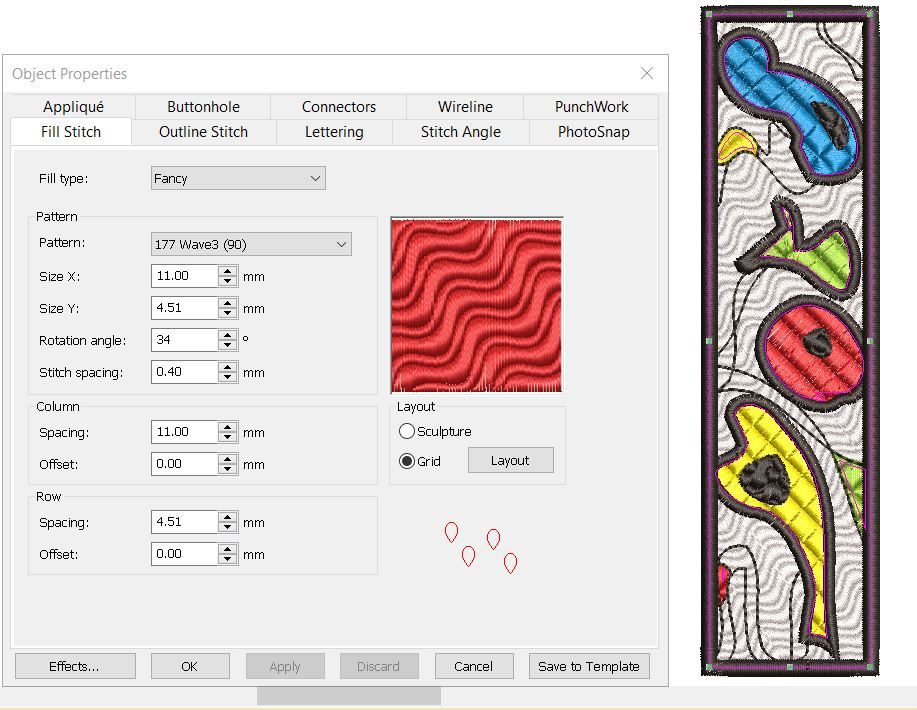
7. Now for the coloured shapes. I selected the top blue shape and pattern 114 Shell Inlay. Underneath the box showing the pattern fill in red there are two options ,grid or sculpture. Grid is the default setting and the pattern simply follows a straight line.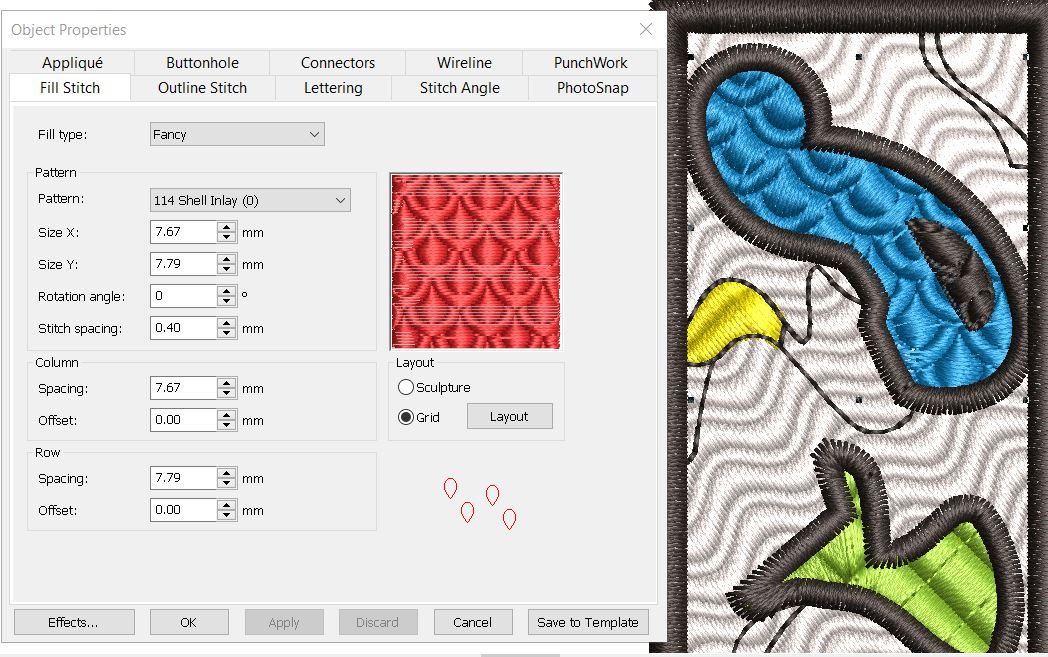
8. Select Sculpture rather than grid and the pattern follows the shape of the object and becomes much more organic and interesting.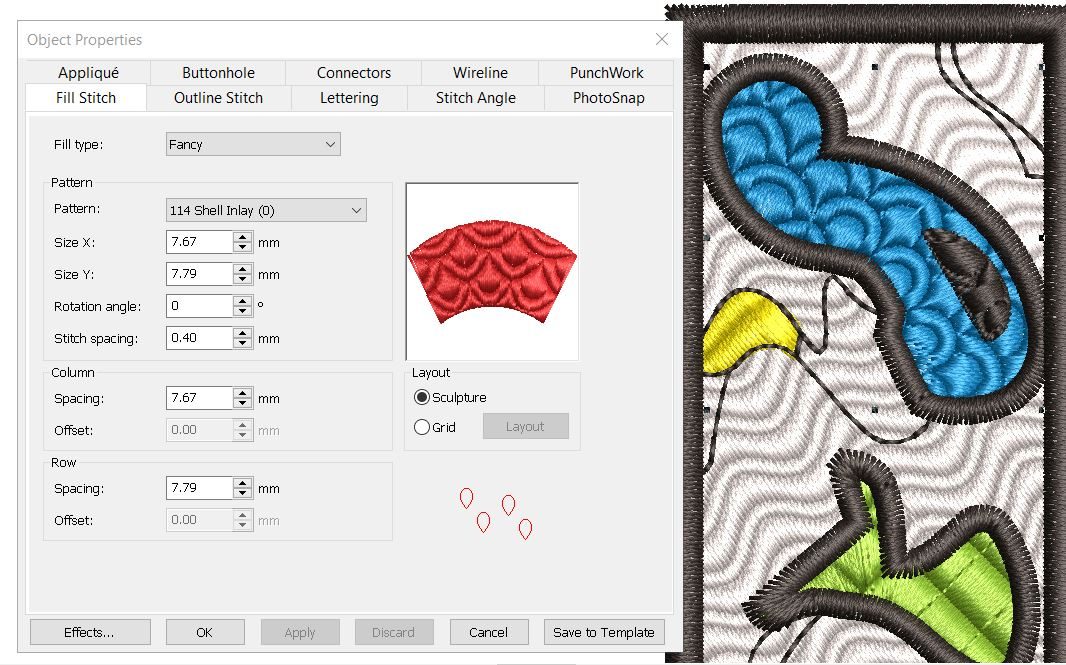
9. For the large yellow area I chose a different fill stitch pattern ‘090 Spirrali.’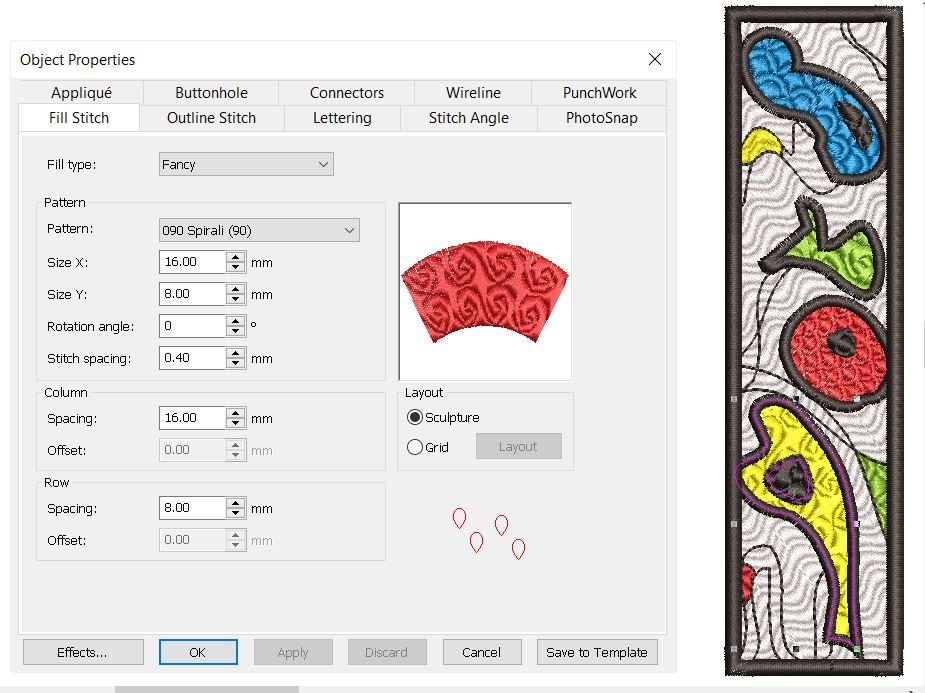
Now continue experimenting with filling each shape with fills and changing their settings until you are happy with your design.
Here is the link to the EXP embroidery files as in the previous Blog post. Miro stye bookmaks EXP files
I hope this has given an insight into how to make the most of the amazing world of fancy fills within our Bernina Digitising software.


0 Responses