 BERNINA Corporate Blog -
There we are again! A new week in the One Two Tree QAL. Time for three new quilting patterns.
This week we’re going to work on our free motion wiggles. Take a practice piece before you start to practice some of the designs to get good a feeling of the motions you need to make.
Wiggle Wiggle
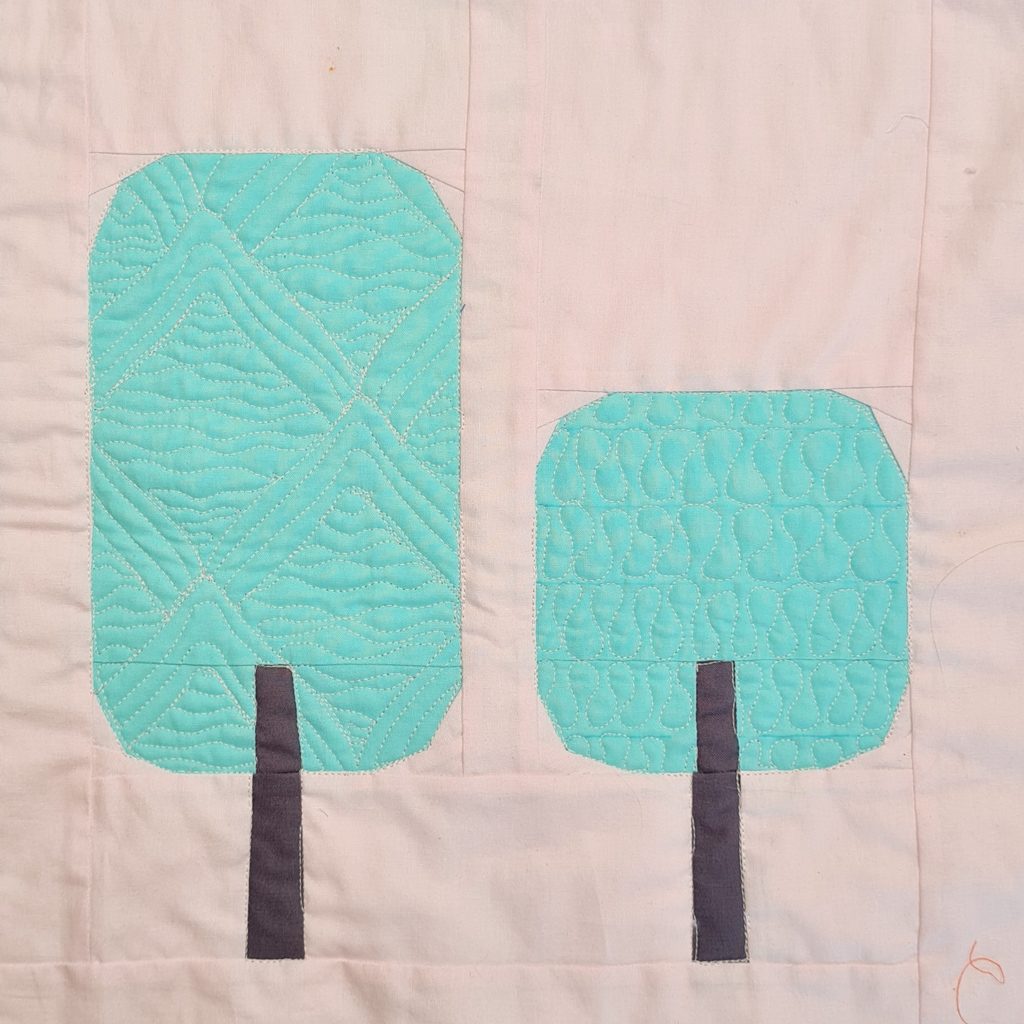
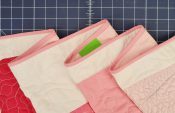
The theme of this week is wiggle wiggle. Here is the overview of the quilt which shows where we are going to quilt the designs for trees 13a, 13b and 14.

Video instructions
We will create three different designs. One with free motion quilting, and two combinations of ruler work and free motion quilting. In this video you will see me quilting all designs.
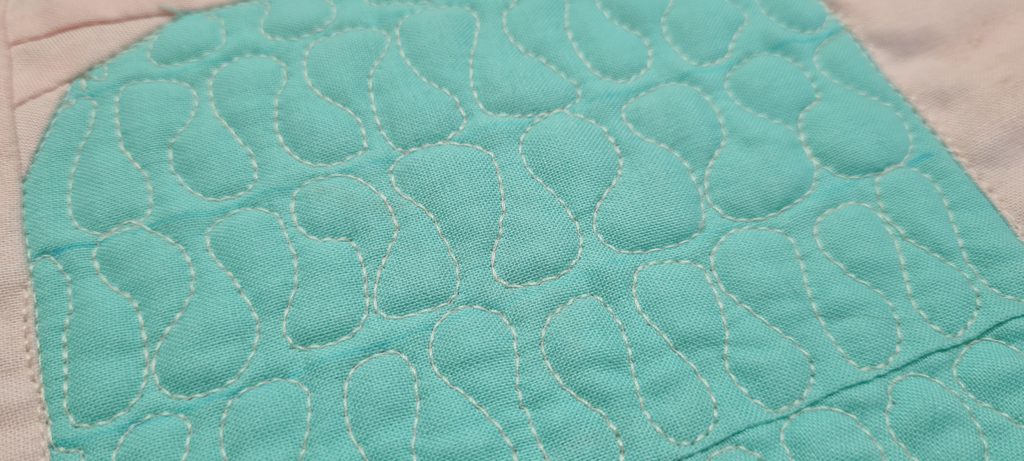
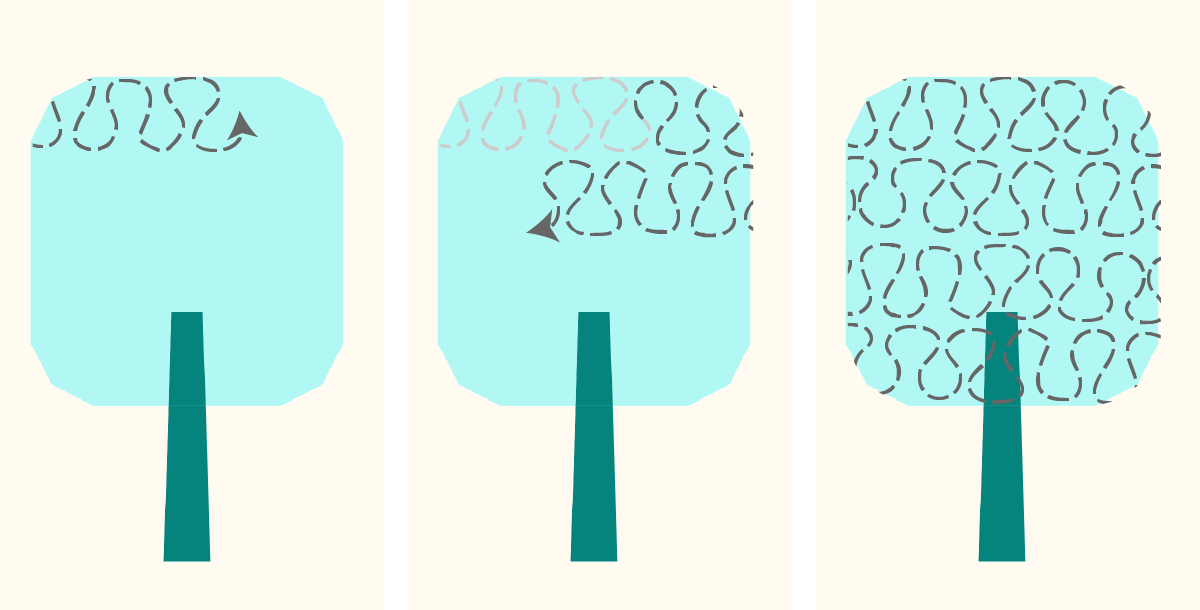
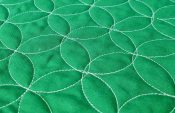
Quilting Tree 13a
For tree 13a we will use a Taj ruler and free motion quilting.

Start with the Taj ruler to make a grid.
You can first make a single line with the top half of the Taj ruler from one side to the other. In the video you can see me quilting in three extra lines after that with the Taj ruler. (This is what you see in the first three steps of the illustration below.)
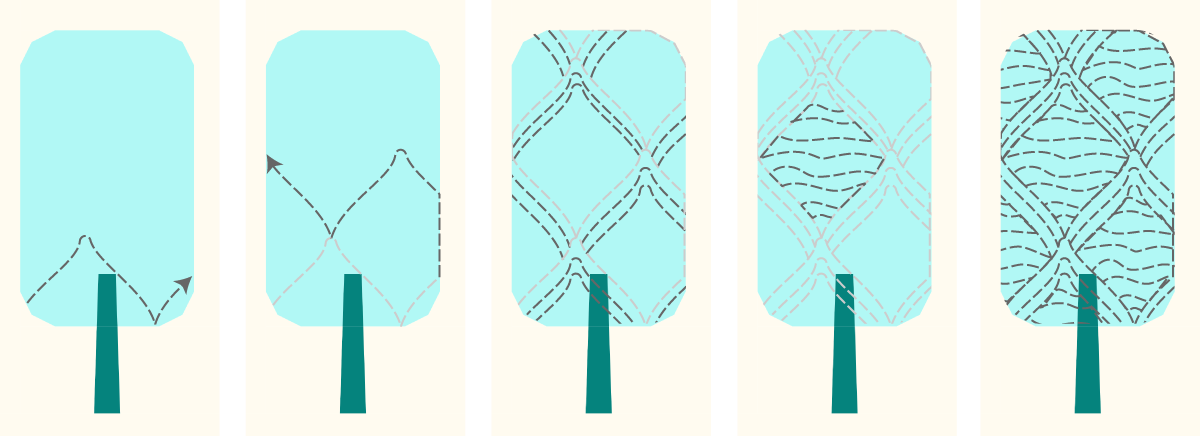
After you’ve made a basic structure on your tree you can start filling in the open shapes. I chose a wavy motion from left to right.
This design might get a little messy, there is a lot going on. It’s also much more dense than then most of the designs we quilted before. I think it’s nice to experiment with different styles to find what you love most.
When you’ve quilted the whole tree you might not even recognize that we started out with a ruler at first. The combination of ruler work and free motion makes it look quite organic.

Alternative
Don’t have a Taj ruler? You could make the base of this design with scallops. Of start with free motion quilting some shapes to fill.
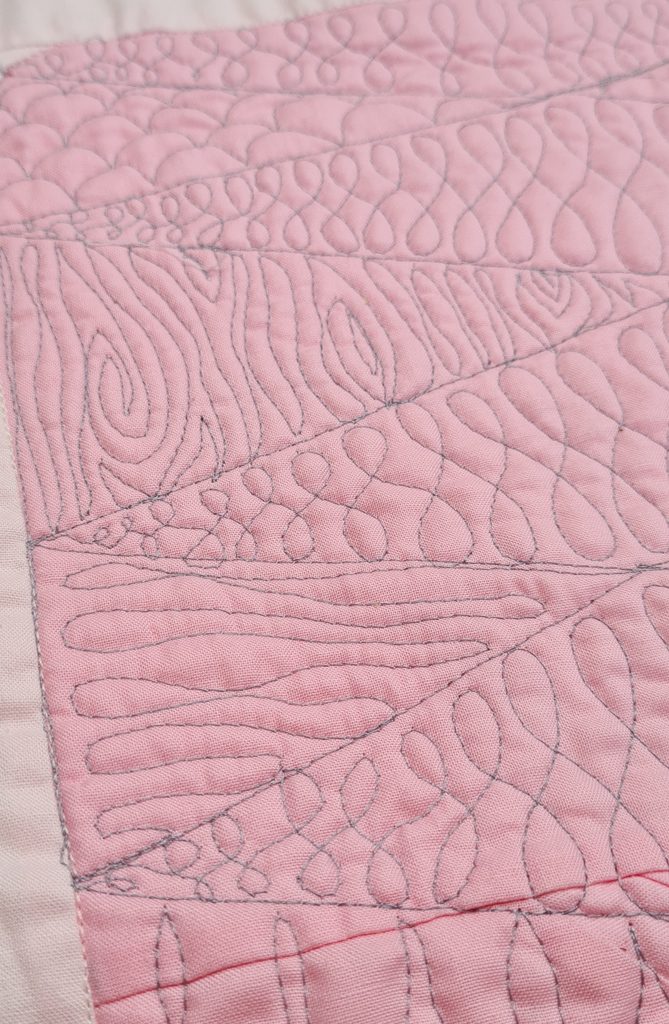
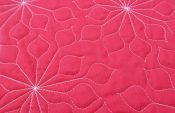
Quilting Tree 13b
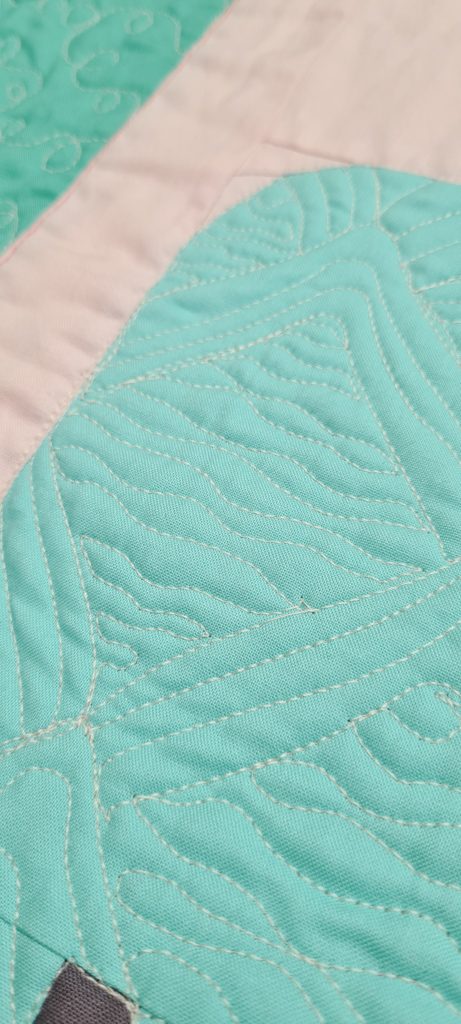
For tree 13b we will practice with the ‘ribbon candy’ design. When you search Google imges for ‘free motion ribbon candy’ you will find lot’s of inspiration of what this design could look like.
I the illustration and video you see that I kept my design open. I find this look a little more forgiving. A next step would be to make the loops touch at the top and bottom. But making them equal in height and with is already a nice challenge to start practicing on.
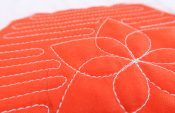
Quilting Tree 14
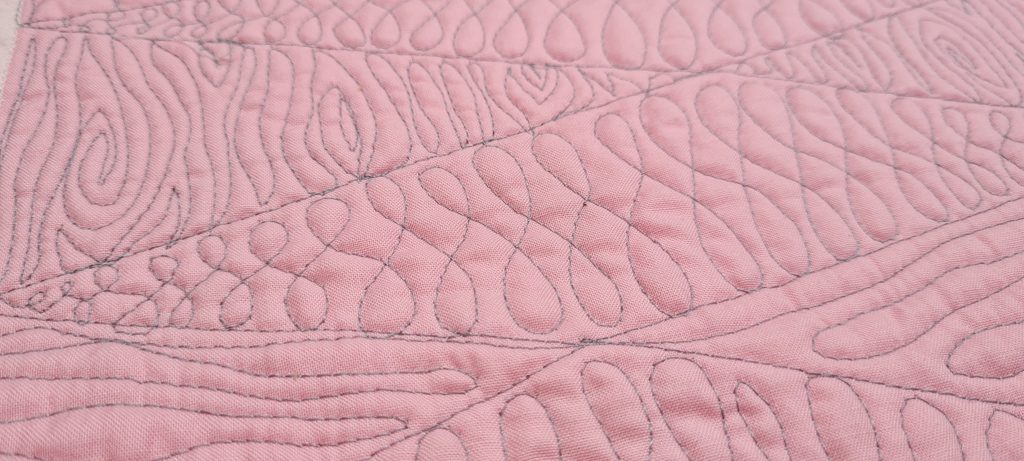
In this tree we will combine ruler work and free motion quilting. I made a diamond shape with rightist lines in the illustration below. And in the video you will see that I made triangle shapes. You can pick any straight line design you like. The idea is that we make a base structure, which we will fill with free motion quilting.
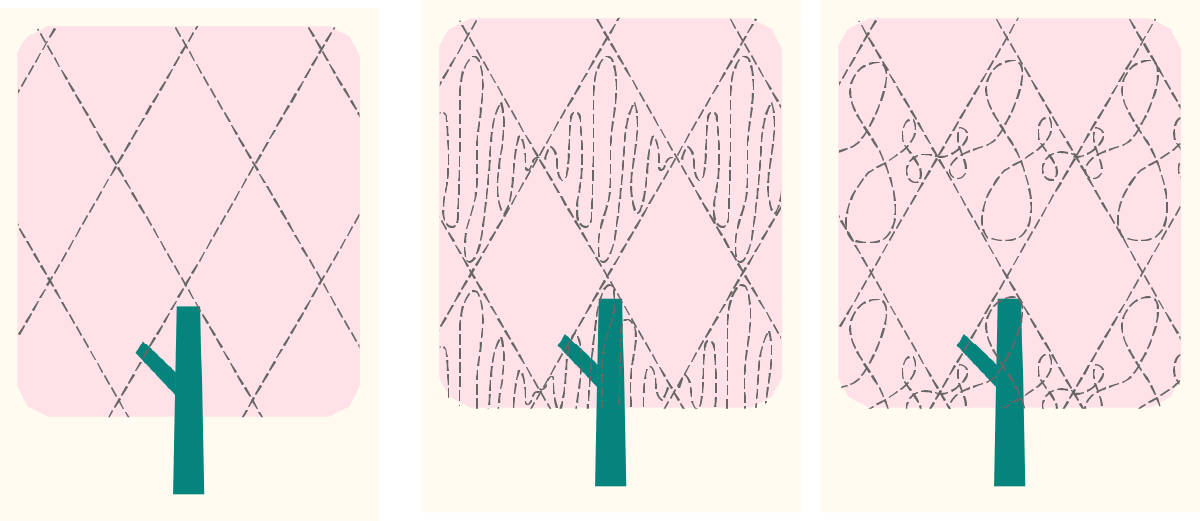
When I was done quilting this tree I wasn’t too happy with it at first. I used a darker thread for more contrast on video, this created a pretty harsh look. (All the lines are also so much more visible..) Also I made a several different free motion designs and made all the design pretty dense.
It’s probably not my best quilting, but I had so much fun filling in those shapes and trying you new designs! Recognizing the fun I had in making this tree makes it instantly so much prettier to me.

Sometimes it’s just nice to let go of how it ‘should’ look, and just enjoy the making.
Next week
The theme for next week is Flourish. We will be making our final two trees with the lollipop rulers and also with the Taj ruler. And I’ll give alternatives in case you prefer to do free motion quilting or work with straight and circle rulers.
See you next week for our final quilting session!
Irene
Lots of great ideas! So many people that give quilting patterns neglect to give quilting instructions. No wonder so many go unfinished. This will really help me quilt it when I finally finish piecing it. I agree with you about the thread color. Going to use matching thread for sure.
[caption id="" align="aligncenter" width="1920"] Ruler work challenging[/caption]
I am recuperating from corporal tunnel surgery and not a patient patient lol. I have done some of the sashing with circles flourish 3.5 as I felt. Now I just want to get back at it.
I can’t access the video. I only see [hier komt de video] but no link?!
Go back to the Facebook post and scroll a little more, there is a direct video link beneath all the languages, or so I just found.
I have thoroughly enjoyed this series even though I wasn’t able to join in at this time. I have some of those rulers but have not learned how to effectively use them. You have put a lot of thought into using them. I hope you have more tutorials coming in the near future. Thanks to Bernina for sponsoring this tutorial