 BERNINA Corporate Blog -
MY INSPIRATION FOR THIS QUILT.
The traditional Rose of Sharon block was the inspiration for me to design this quilt. It is not a very big quilt and I was in the mood for a machine applique project. It is a very accurately designed quilt. The purple and green colour scheme appealed to me. I designed this quilt when I studied for my teachers’ accreditation. You can design a quilt just like this one!
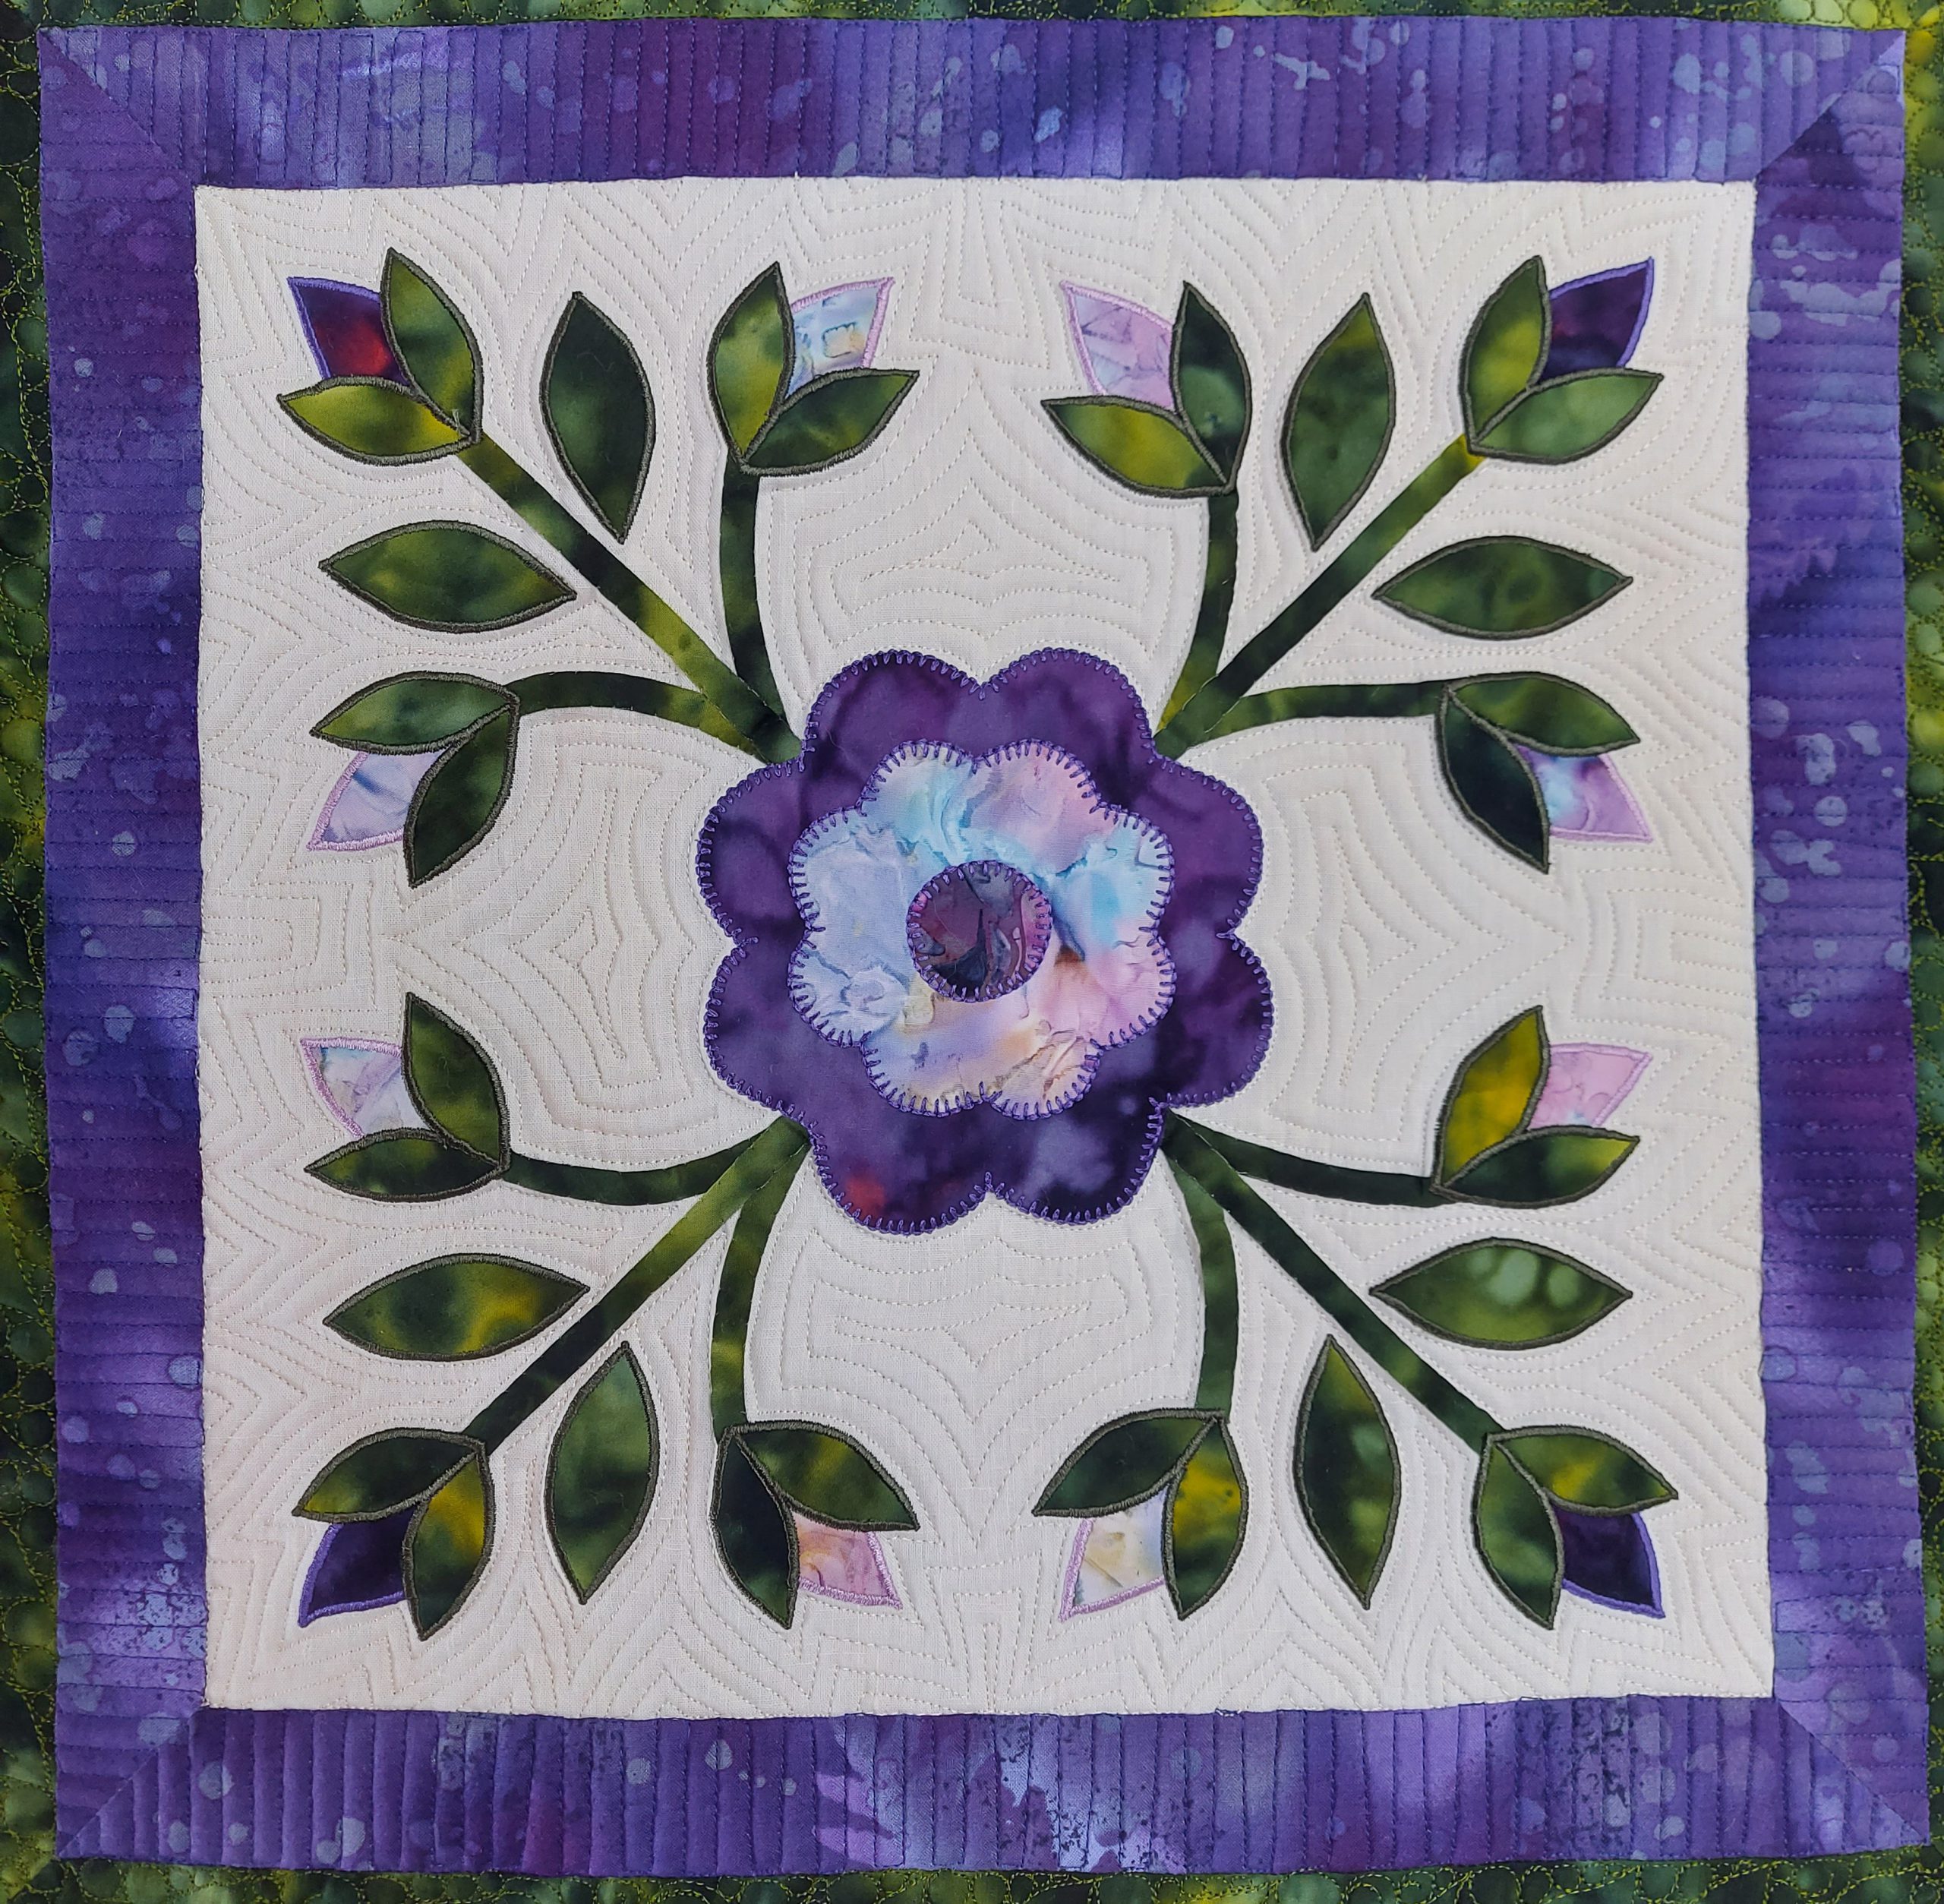
Accurately Designed Applique Quilt Based on the Ros of Sharon traditional block.
YOU WILL NEED:
- Graph paper for a very accurately designed quilt
- Sharp pencil
- Ruler
- Applique paper 30 cm
- 45 X 45 cm cream background fabric
- A strip of the width of purple 100% cotton fabric, 2” wide.
- A beautiful green 100% cotton fabric (preferable batik) fat quarter.
- Scraps of shades of purple and green 100% cotton fabric for the buds and the leaves.
- Purple, green, pink and cream machine embroidery thread.
- A neutral all-purpose thread.
- Wonder Invisible thread
DESIGNING THE QUILT ON PAPER
- Draw only one corner (a quarter) of the quilt and be sure to be absolutely accurate.
- Flip the design over to repeat the pattern.
- Flip this design over to repeat that pattern and you have a full picture of your design.
TRANSFERRING THE PATTERN
- Use a water soluble pen and trace the design onto the cream fabric.
- Use a sharp pencil and trace the design onto applique paper. Remember that you will get the mirror image of your design.
SEWING EVERYTHING IN PLACE
- Cut the stems, some on the bias, some on the straight grain of fabric and position these first in the correct places. Use foot 20D and Wonder Invisible thread and set your machine on the blind hem stitch setting. Sew the stems in place.
- Roughly cut out the applique paper shapes and iron these onto the wrong side of the correct fabrics. Cut the shapes out, score the paper with a pin and remove the release paper.
- Iron the flower(s), buds and leaves in place.
- Use a matching colour thread, foot 20D and set your machine on blanket stitch. Sew around the flower(s)
- Use a matching colour thread, foot 20D and a fine satin stitch and applique the buds and leaves in place.
- Square off and sew a 2” border on the green border and mitre the corners.
- Sew this double border onto the cream centre and square off.
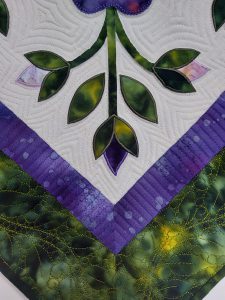
Accurately Appliqued, using Satin stitch and a Mitered Corner.

QUILTING
- Layer the three layers and pin or use spray glue.
- Use foot #44C to do echo quilting around the flower, stems and leaves.
- Use ruler foot #72 and a straight ruler and do match stick quilting on the purple border.
- Use the adjustable stippling foot #73 and do FMQ on the green border.
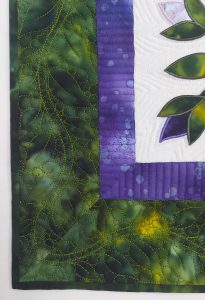
Mitre All Corners and do Match-stick quilting and Echo Quilting

FINISHING OFF
Cut a ” strip, join on the bias and sew around the edge, using foot 97D along with the dual feed. Mitre the corners.
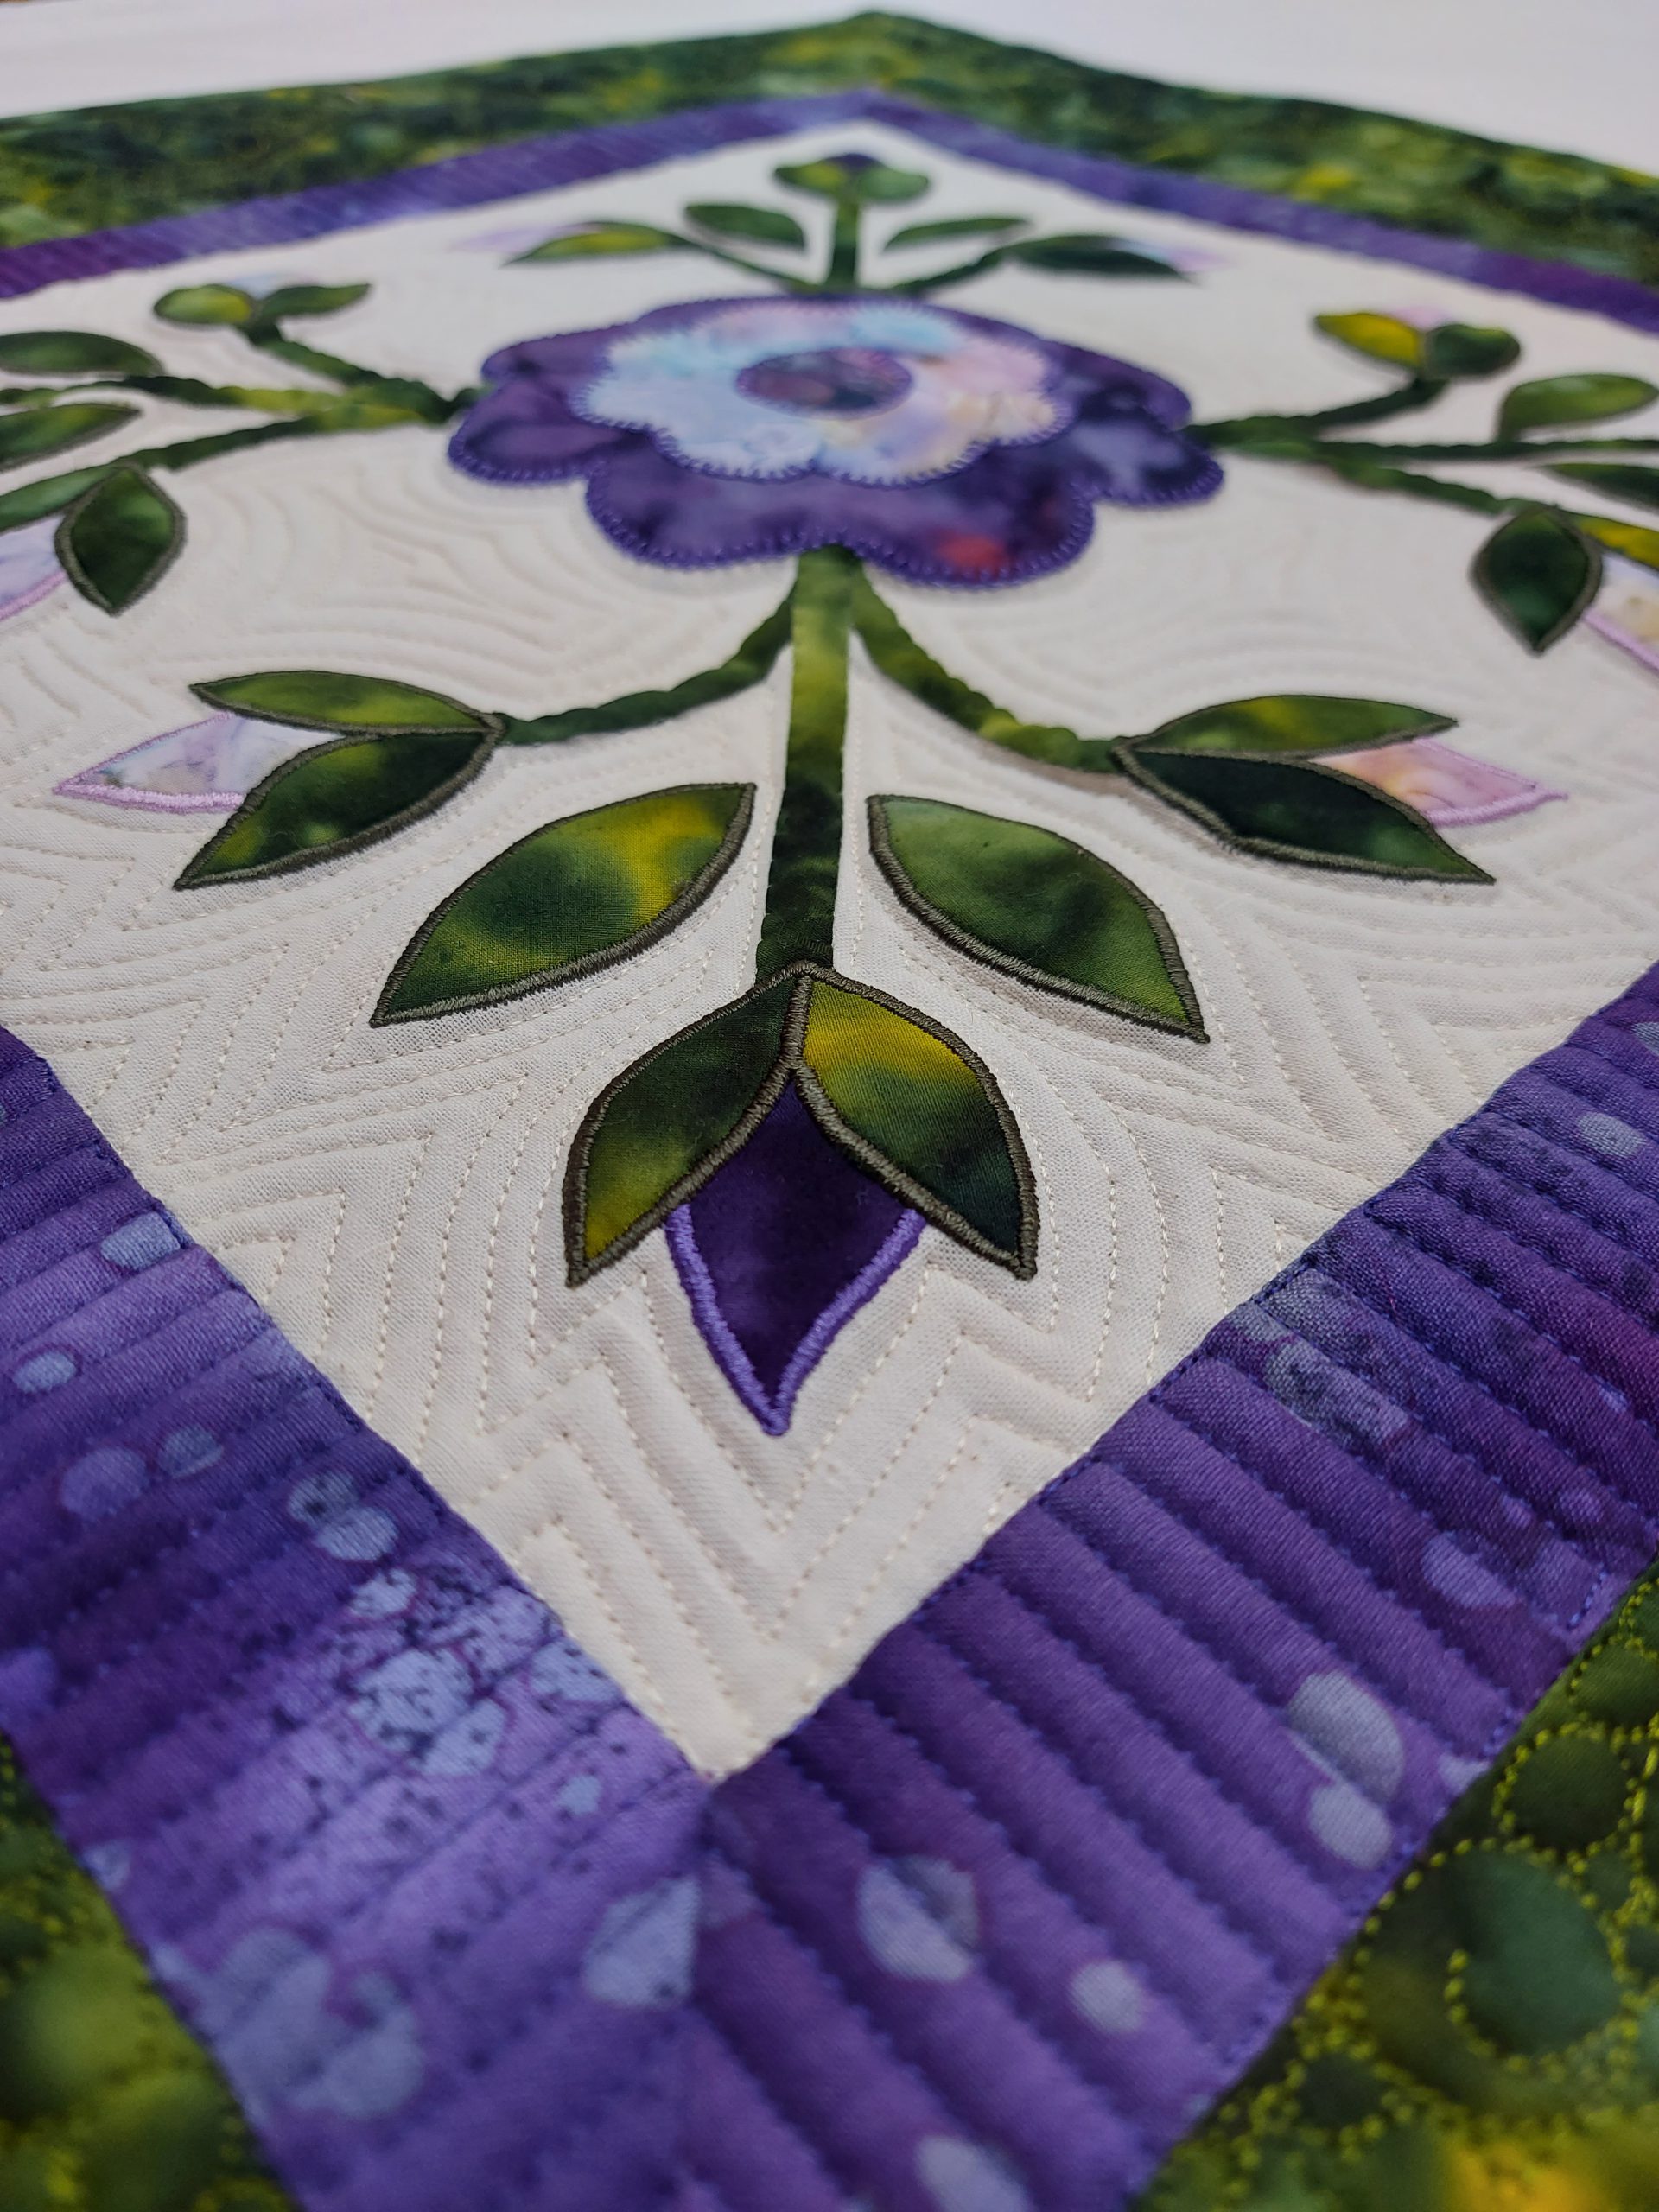
Match Stick Quilting and Echo Quilting with a Quarter Inch binding sewn on by hand.
Turn your work over and sew binding on wrong side by hand.
Sew a hanging sleeve and a label on and your accurately applique quilt is complete!
If you are passionate about textiles and want to learn more about how to incorporate my innovative techniques into your work, follow me on Instagram @tillydeharde and Facebook, Tilly de Harde Fibre Artist & Teacher and visit my website www.tillydeharde.com & subscribe to my mailing list. Please don’t forget to leave a comment in the comment box below!
I have hand quilted a queen size bed quilt with the rose of sharon design. I really like hand appliqué, it turned sew beautiful……someday I’d like to appliqué another one in different colors. I really need to perfect my machine appliqué for future when my hands won’t do the work that they can do now.I love your quilt and colors you chose.
Hi Clara, thank you for your comment! I agree with you about perfecting your knowledge of your machine for machine applique! It is such a good idea. I think you were very brave to hand applique a queen size bed quilt…so much work! I often wonder if people who create such beauty are making use of that quilt as a utility quilt or is it packed away because one feels too precious about it. I love the green and purple colour combination, I wonder…what colours did you use in your quilt?