 BERNINA Corporate Blog -
Summer collar!? Make your own statement collar pattern and turn an existing camisole into an (slightly more dressed) airy top
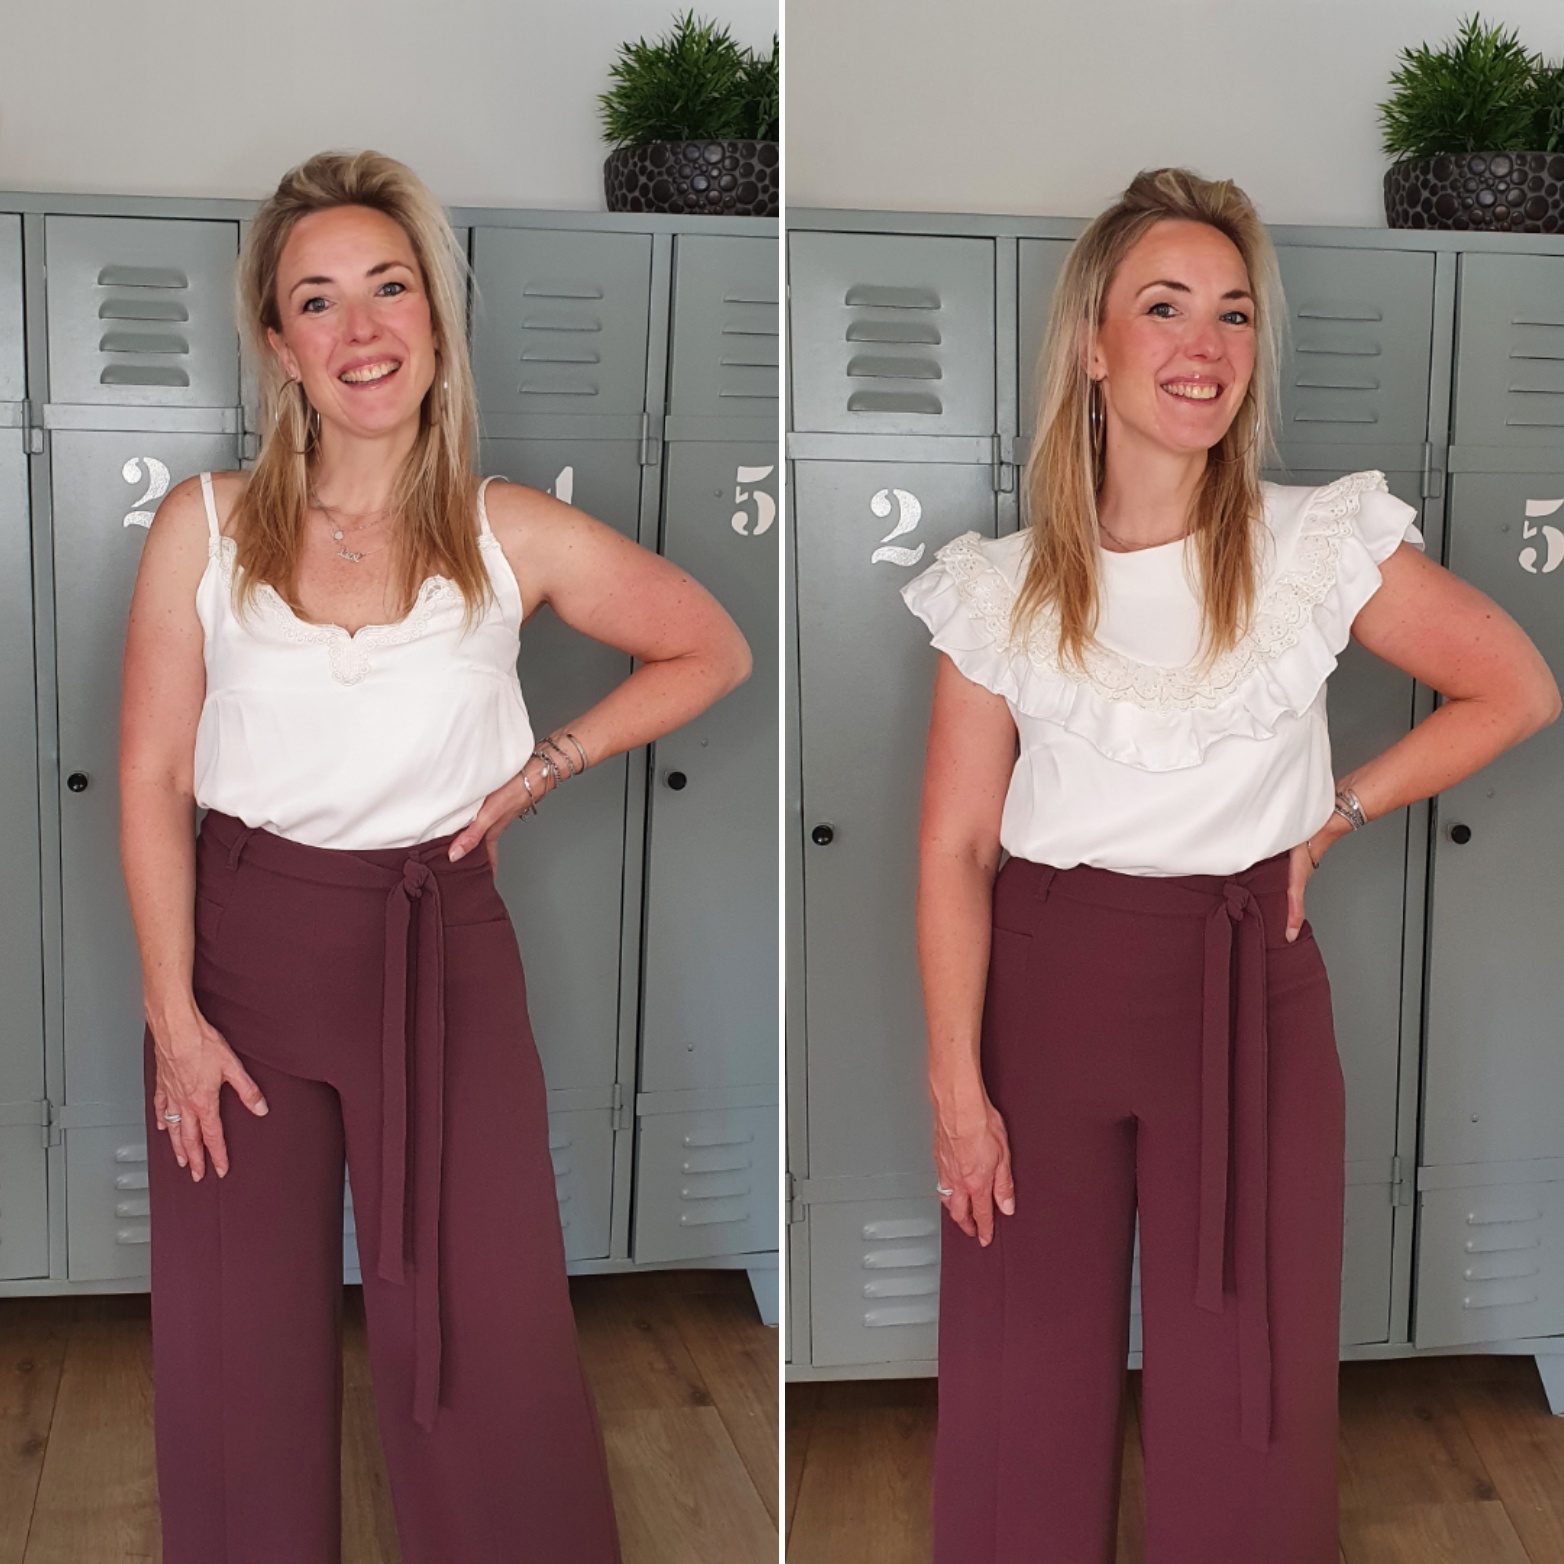
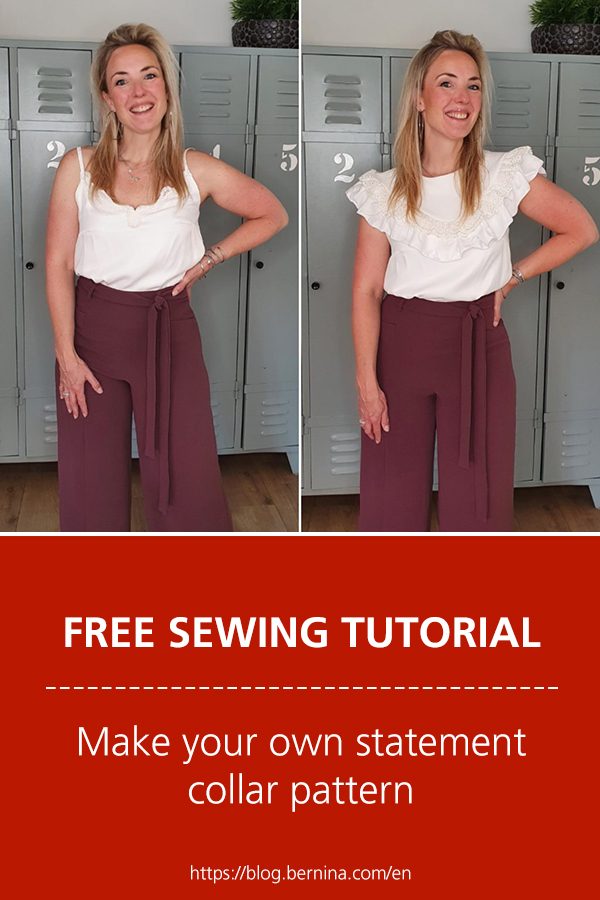
Turn your camisole into a top with a statement collar. The collar has ruffles and these cover the shoulders, but you still keep it nice and airy. Another project where you can easily process leftovers and if you like you can also go wild with different straps and laces. I previously implemented the idea of a collar for a more dressed look. Then to make a summer dress more suitable for work. View that result here.
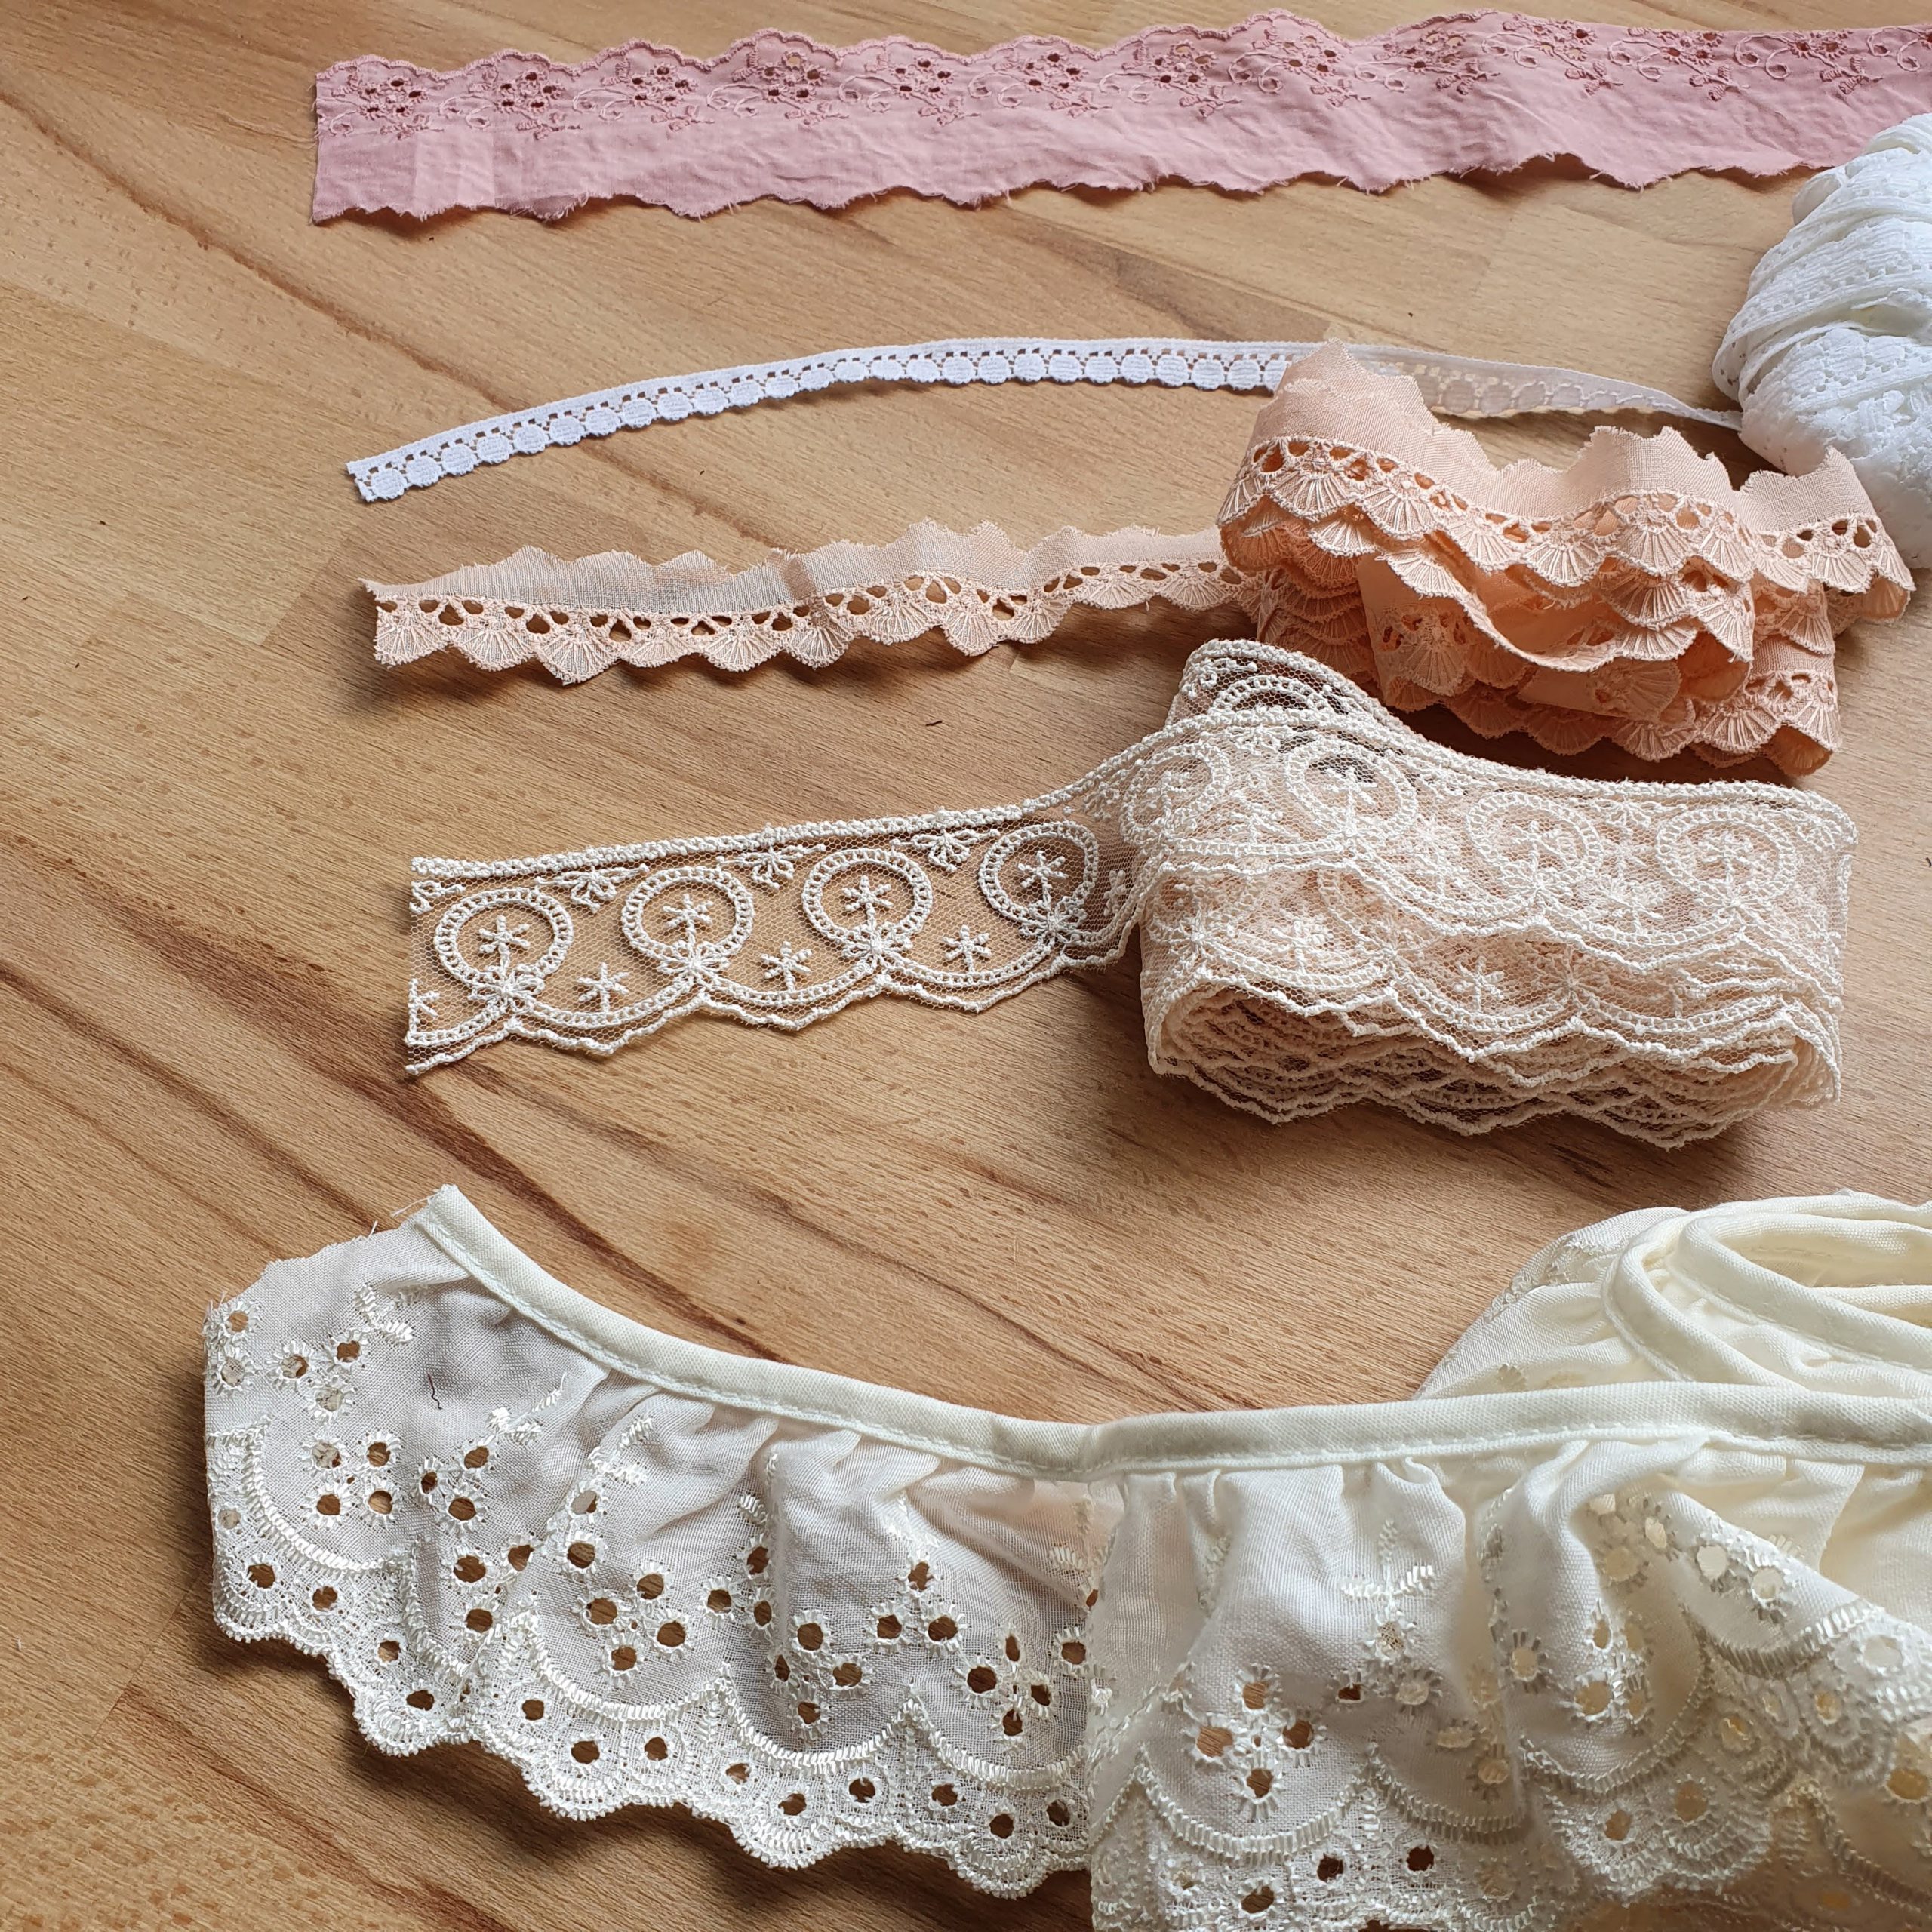
Straps and laces – options
To make this cool collar I use the BERNINA 590 Crystal Edition
The pattern
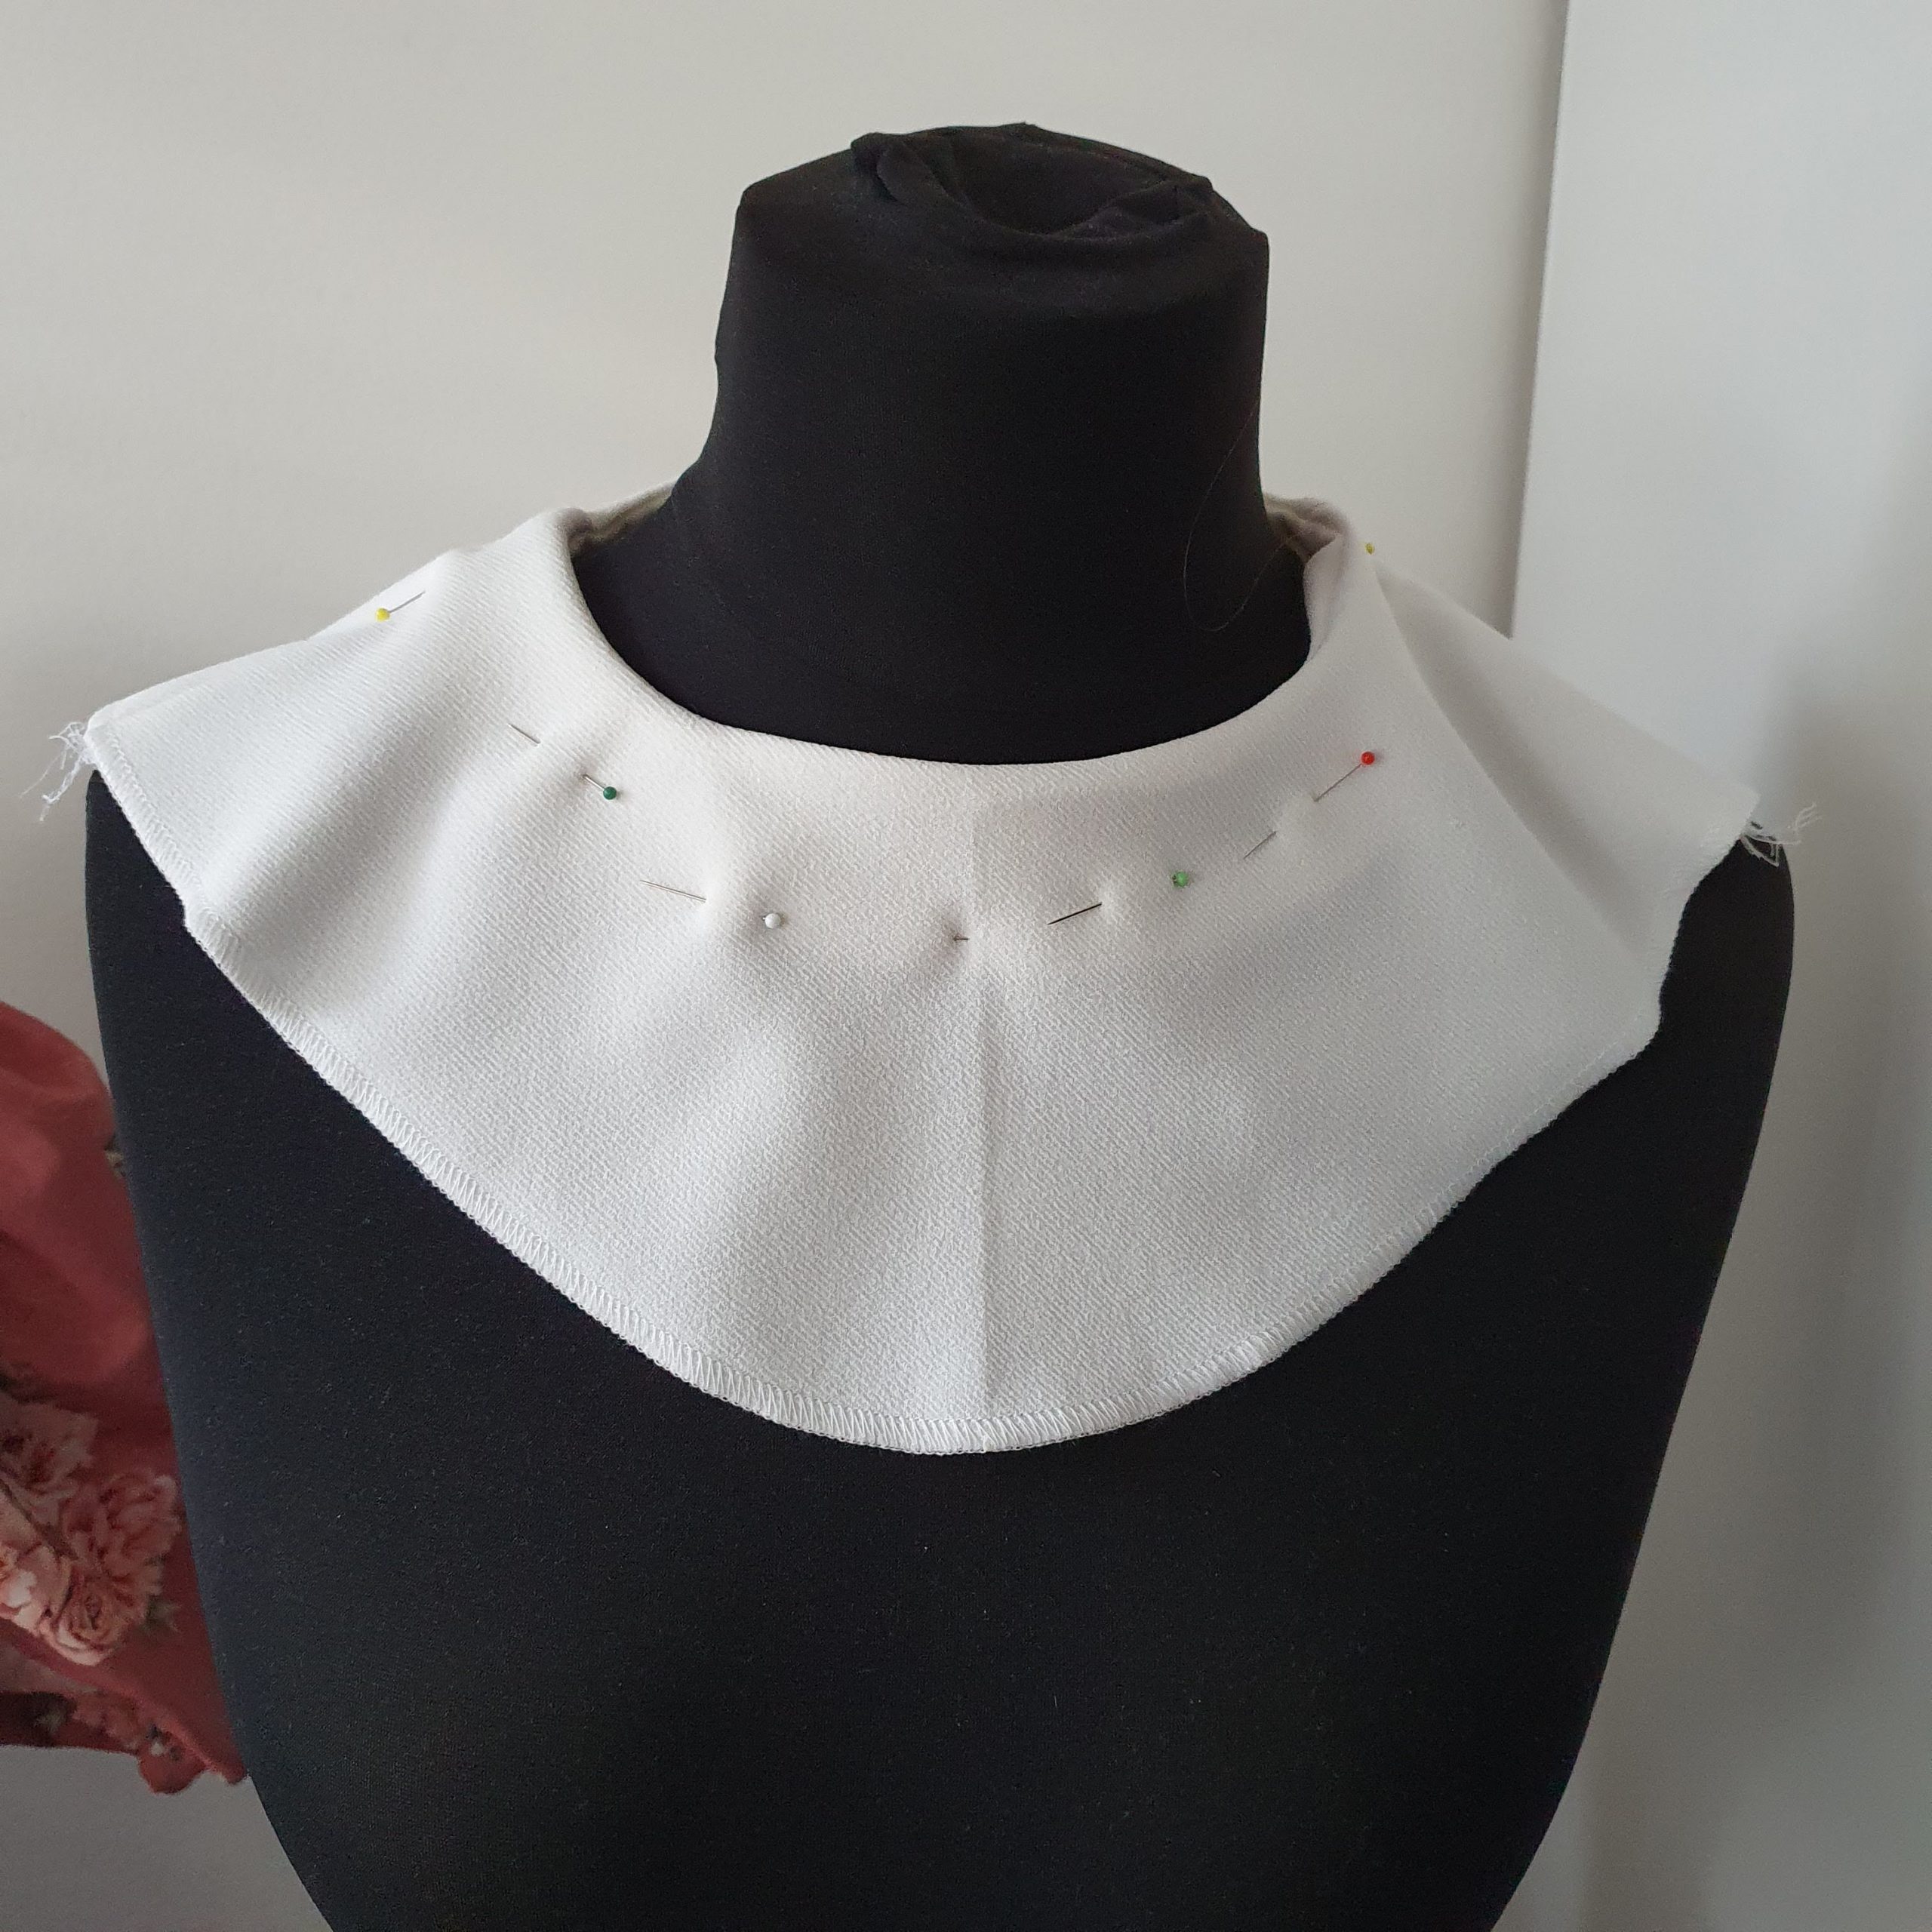
You can easily make the statement collar pattern yourself using an existing pattern for a shirt or top. You need the pattern front and back. On the front pattern piece (1) you draw a smooth line (pink) from the shoulder point to the centre front. Choose your own point at the centre front from where you want the frills to fall. For me this was 13 cm from the neckline.
For the back piece (2) you do the same: You draw a line (pink) from the shoulder point to the centre back. This point falls a bit lower. In my case at 16 cm from the neckline. Determine what is best for your figure. Make a test pattern out of paper, tape the shoulder seams and fit it to your body. Estimate what works for you.
At 3 cm from the neckline you draw the facing line (orange dotted line).
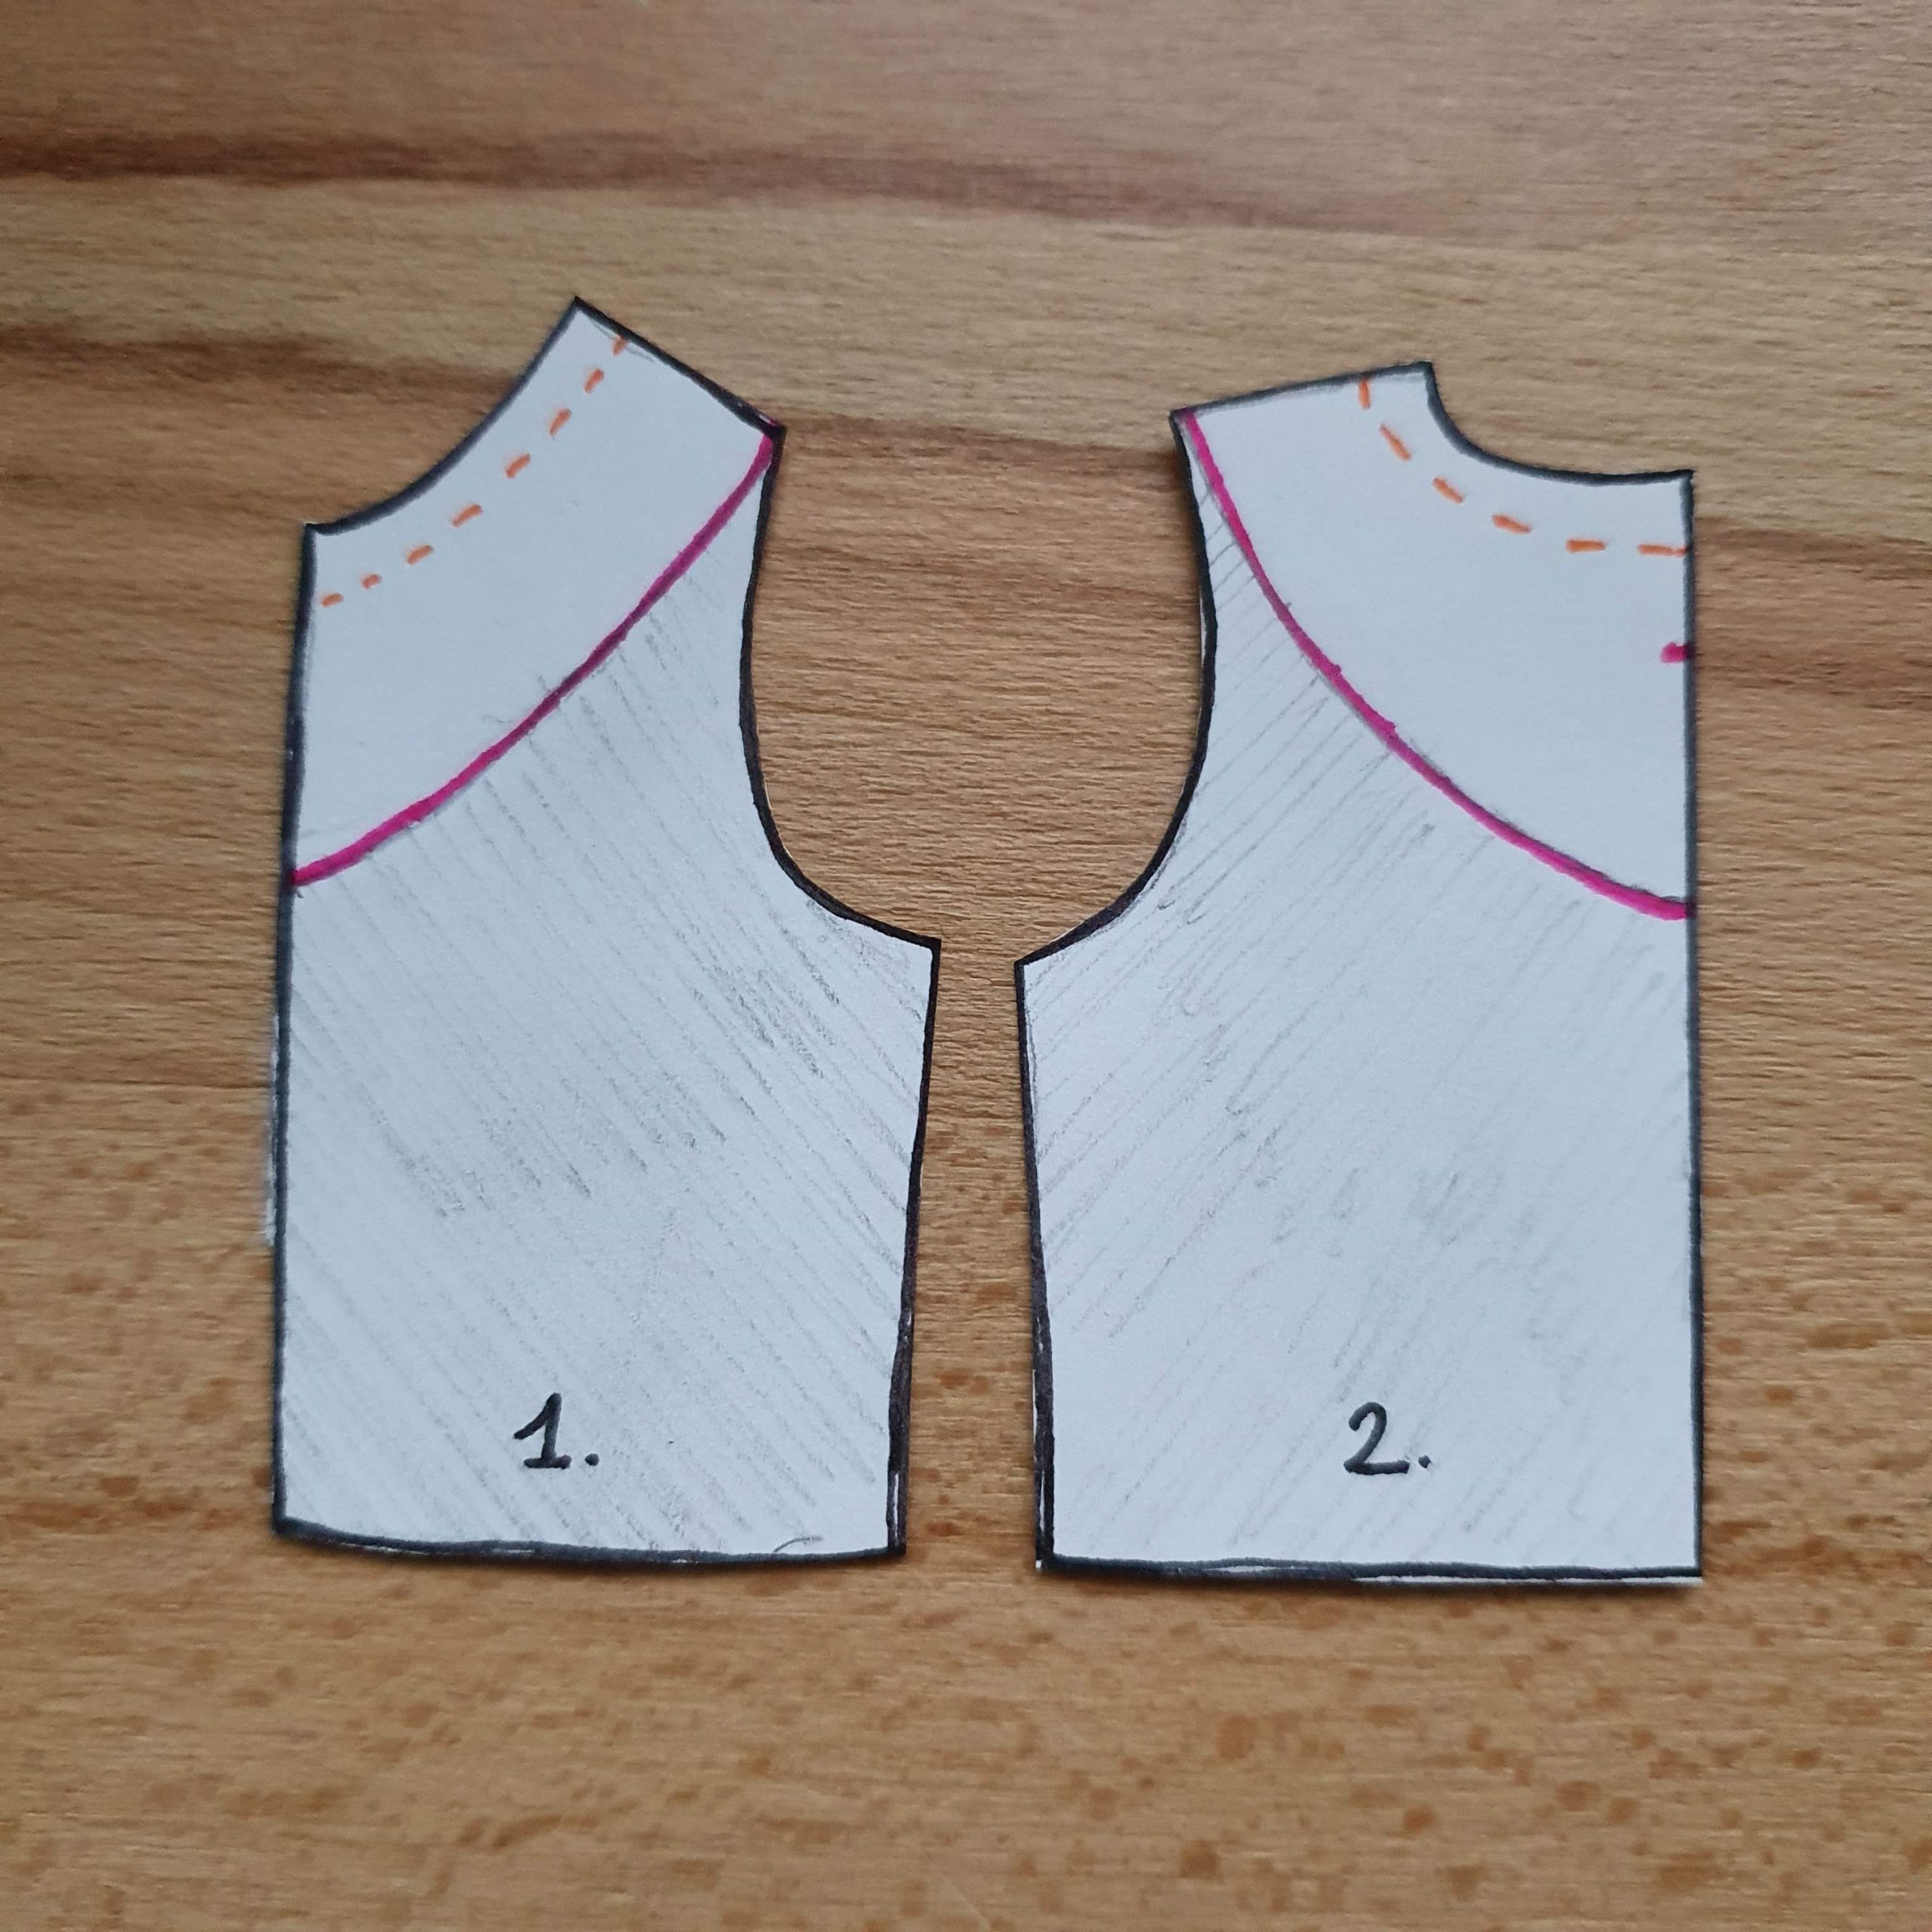
The resulting pattern is without seam allowance
Cutting the fabric
Place the centre front on the fabric fold, for both the collar and the facing. Cut a seam of 2 cm at the centre back. The other seams are 1 cm.
Collar
The statement collar base is made of a leftover crepe fabric. For size 38 I needed 2x a piece of about 20×50 cm. What you need depends entirely on your drawn collar.
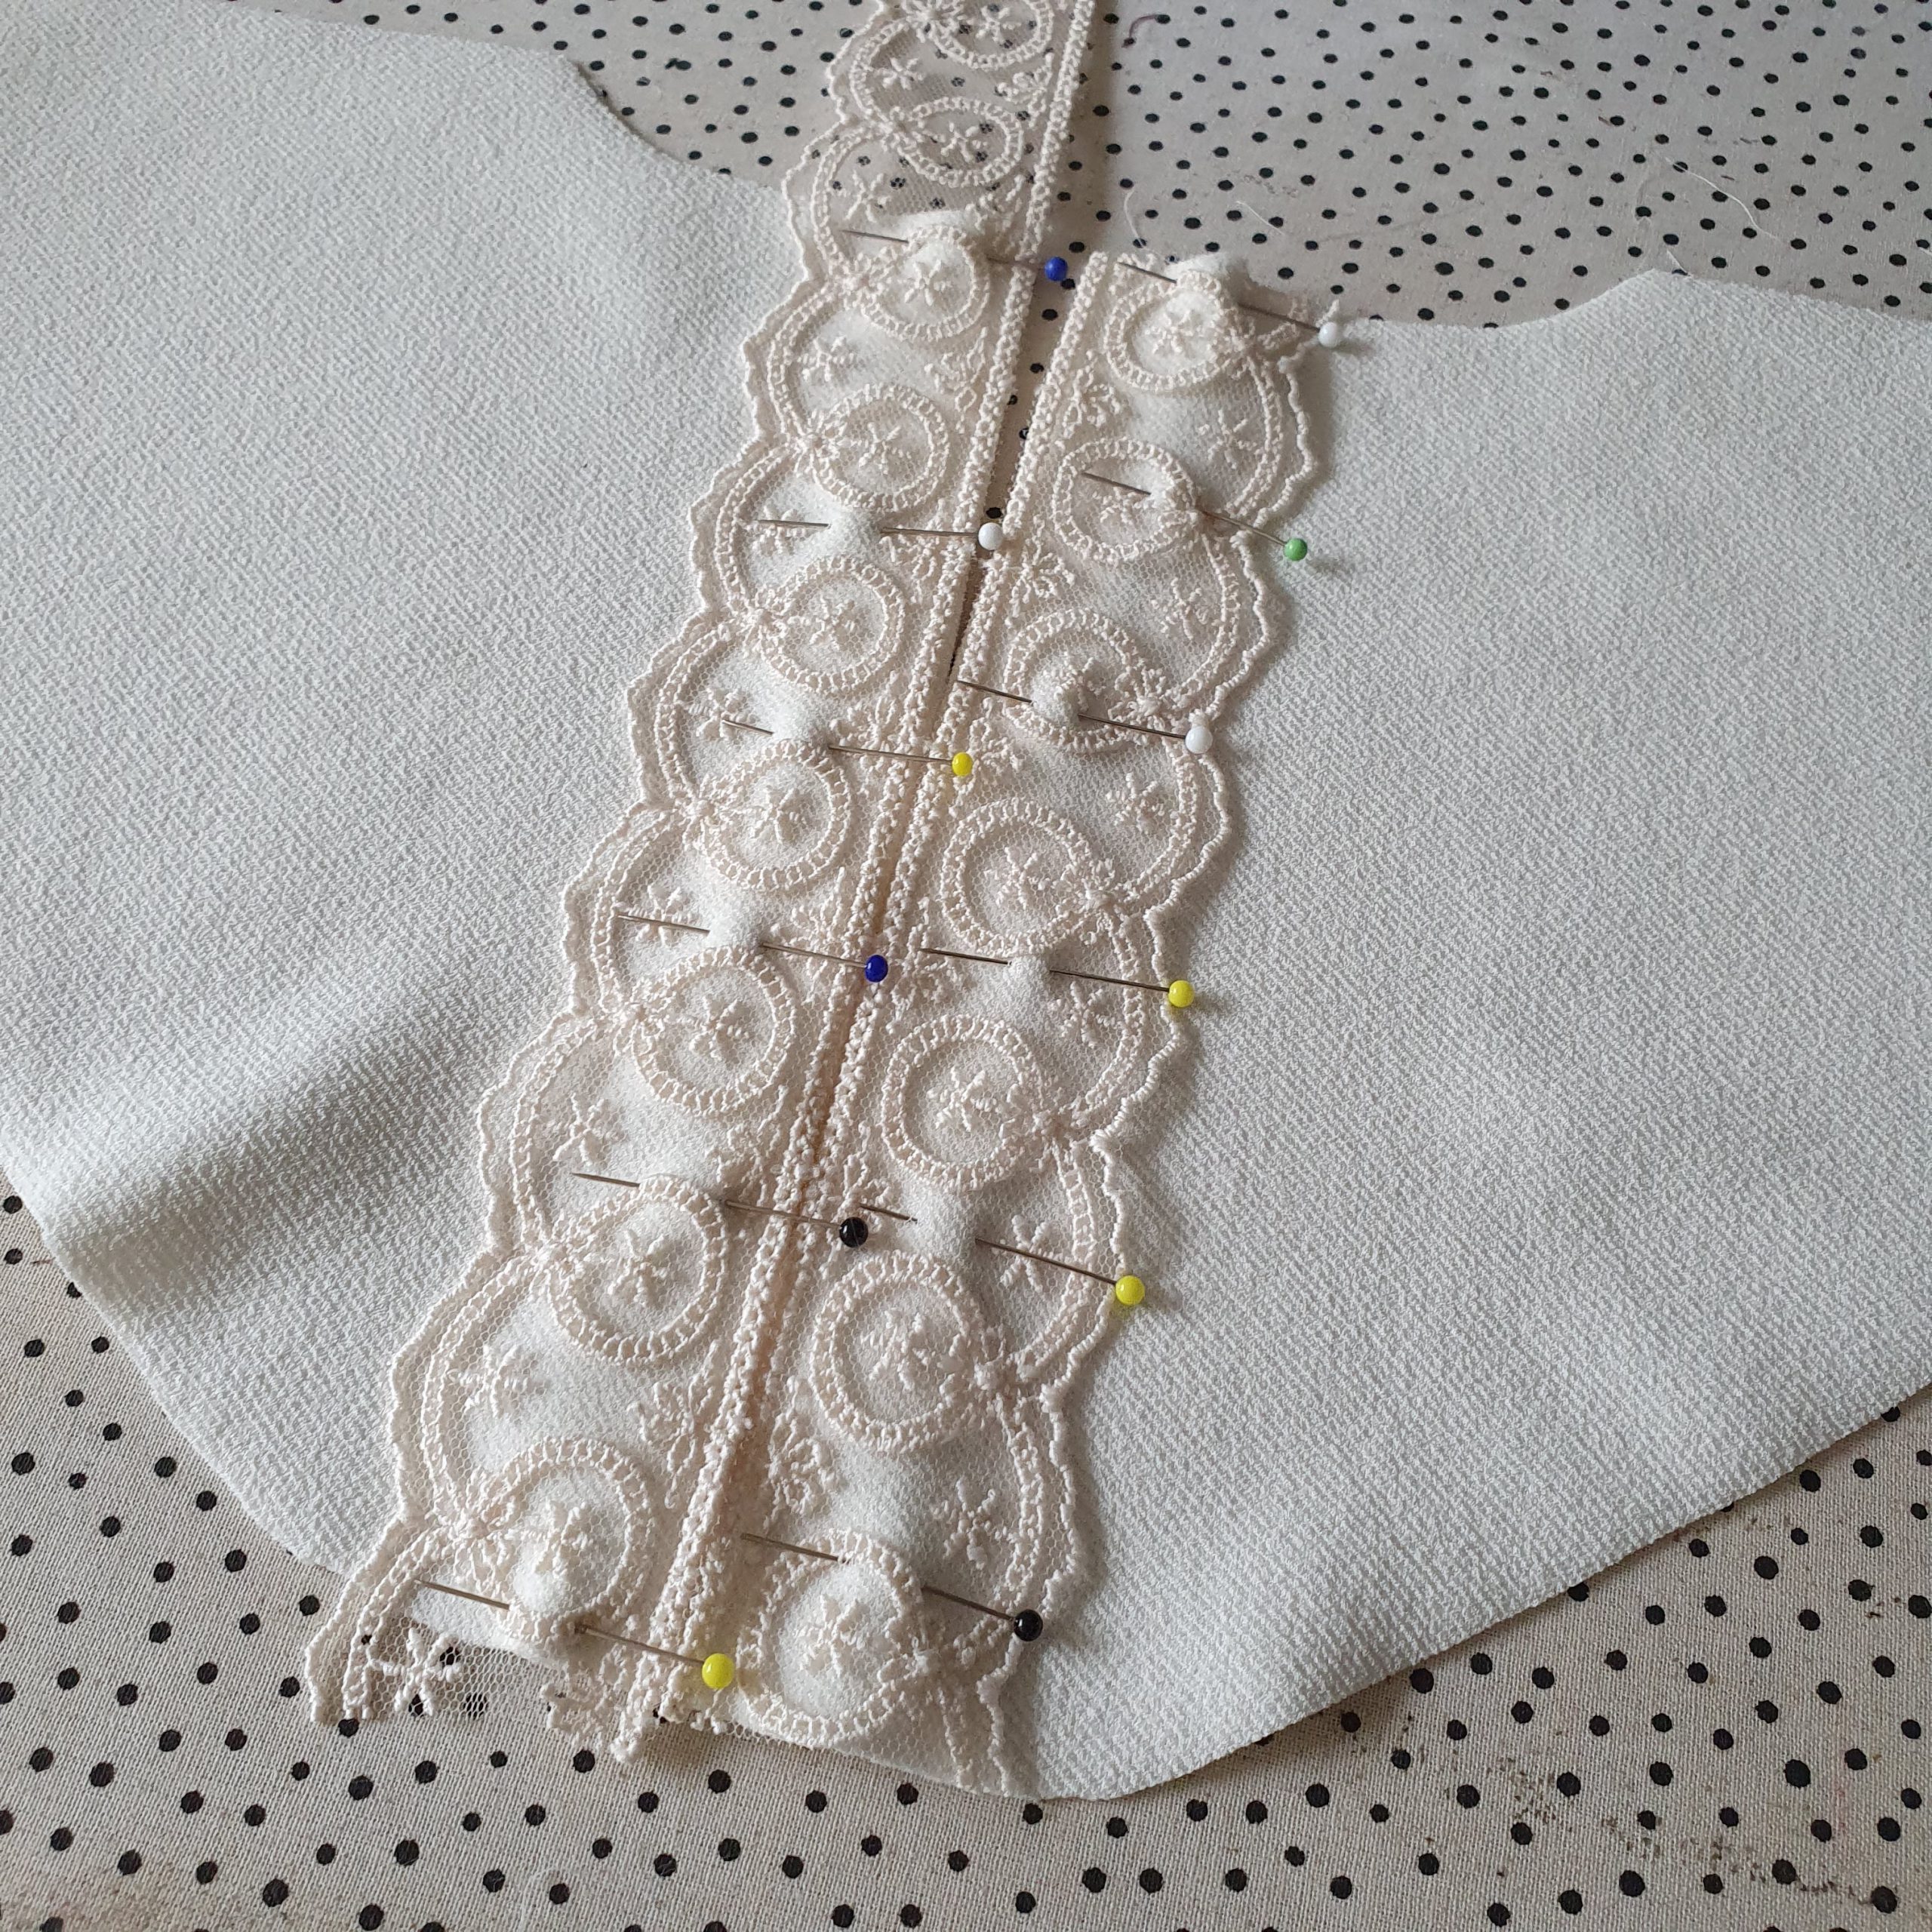
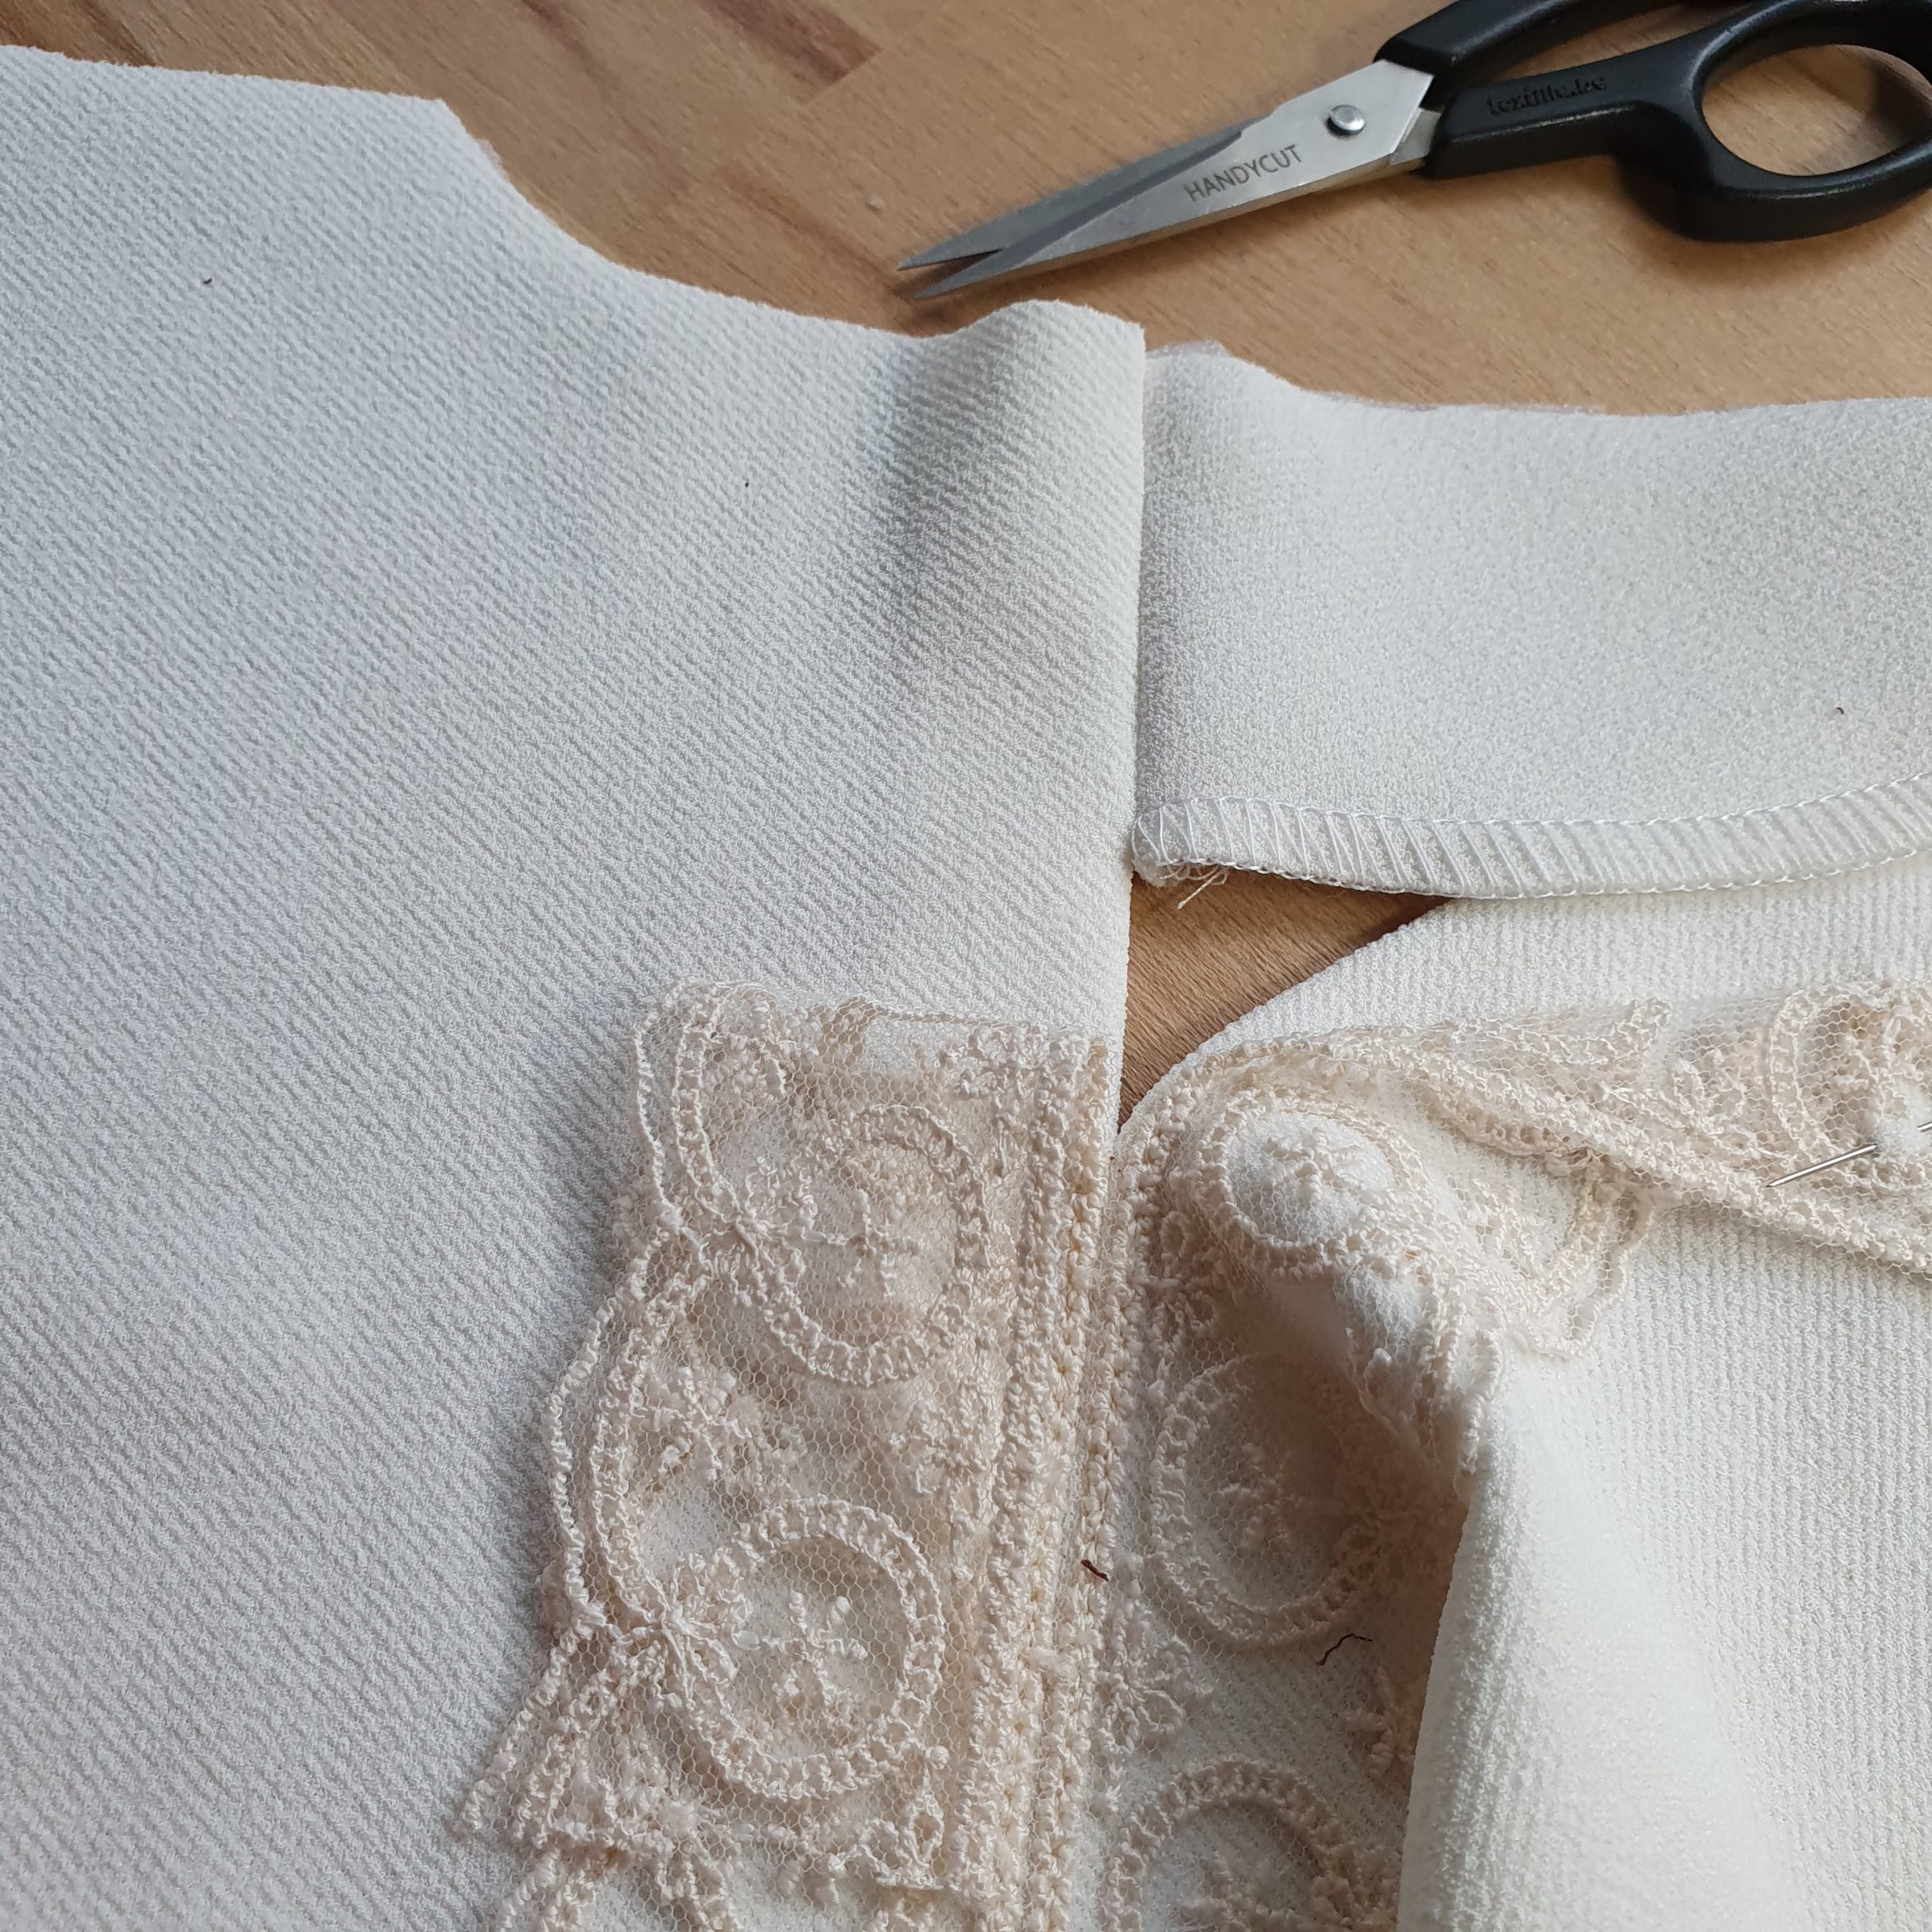
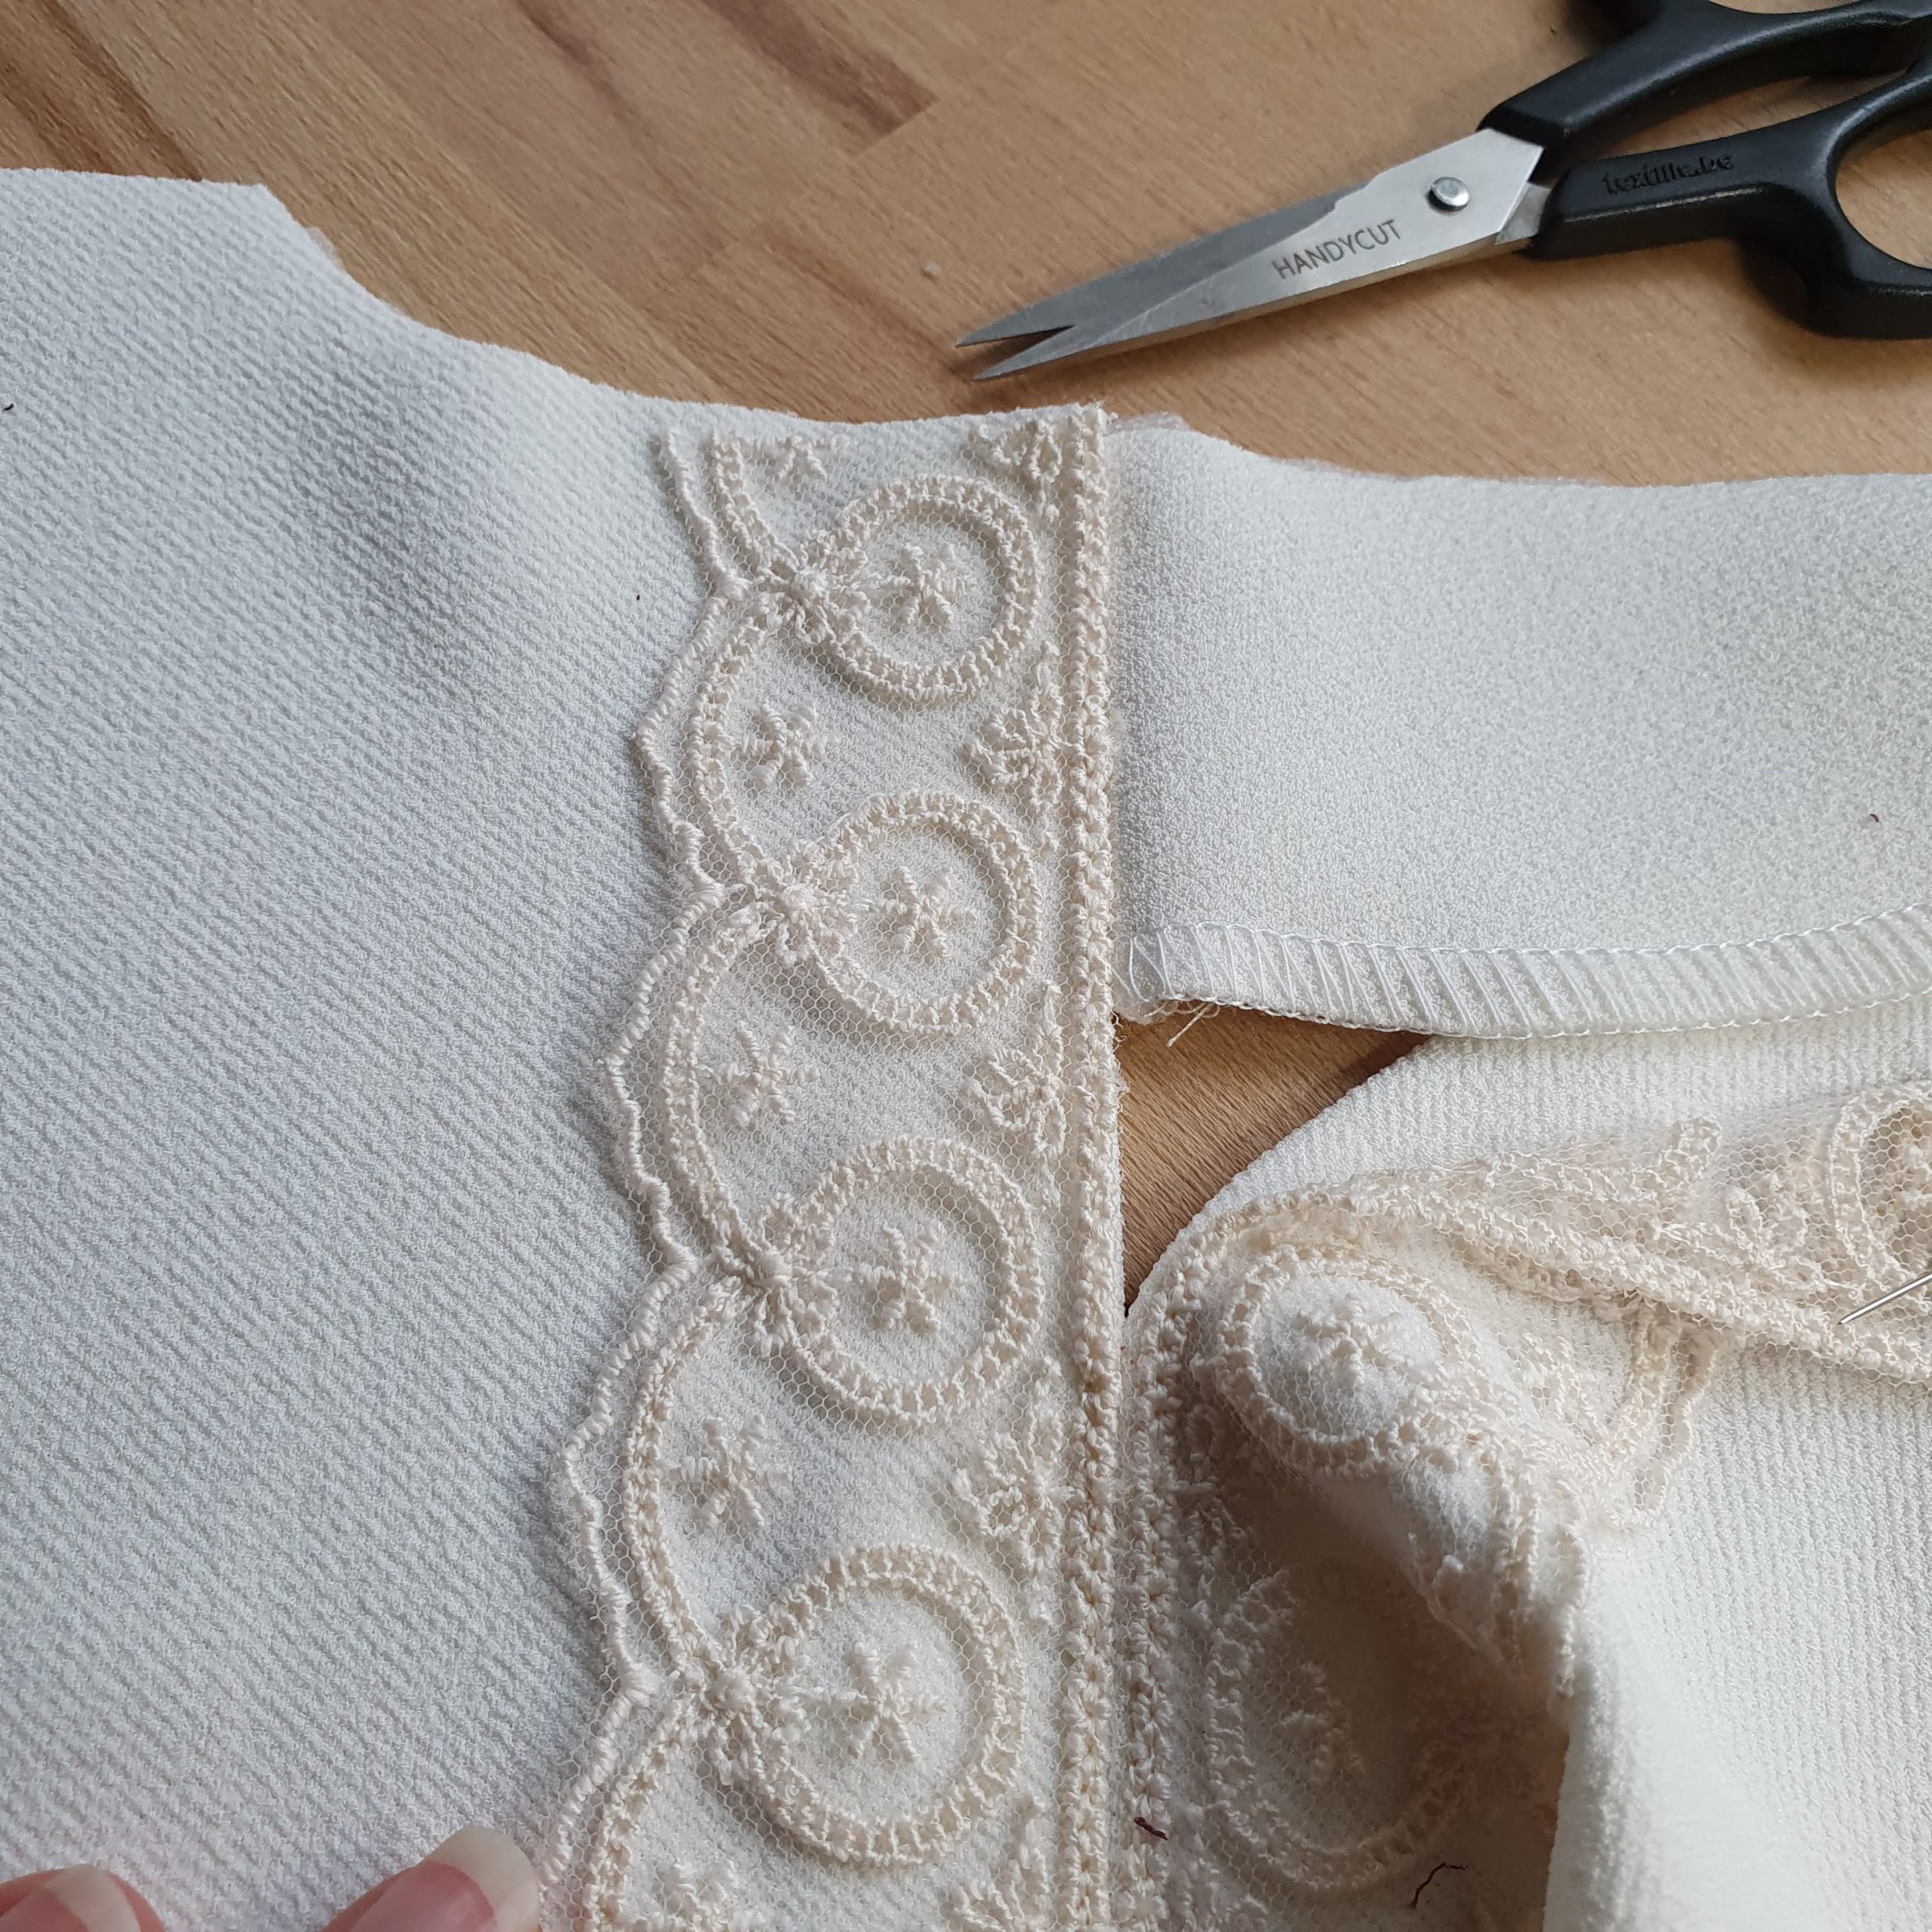
At the back I keep a split, so that it is easier to get over the head. As decoration I sew a beautiful lace trim on the seam. For this I use Open embroidery foot # 20 and silk finish thread from Mettler. To be able to sew this along the split, I already attach the facing there. See below.

Collar of crepe
Lovely lace trim

Silk finish
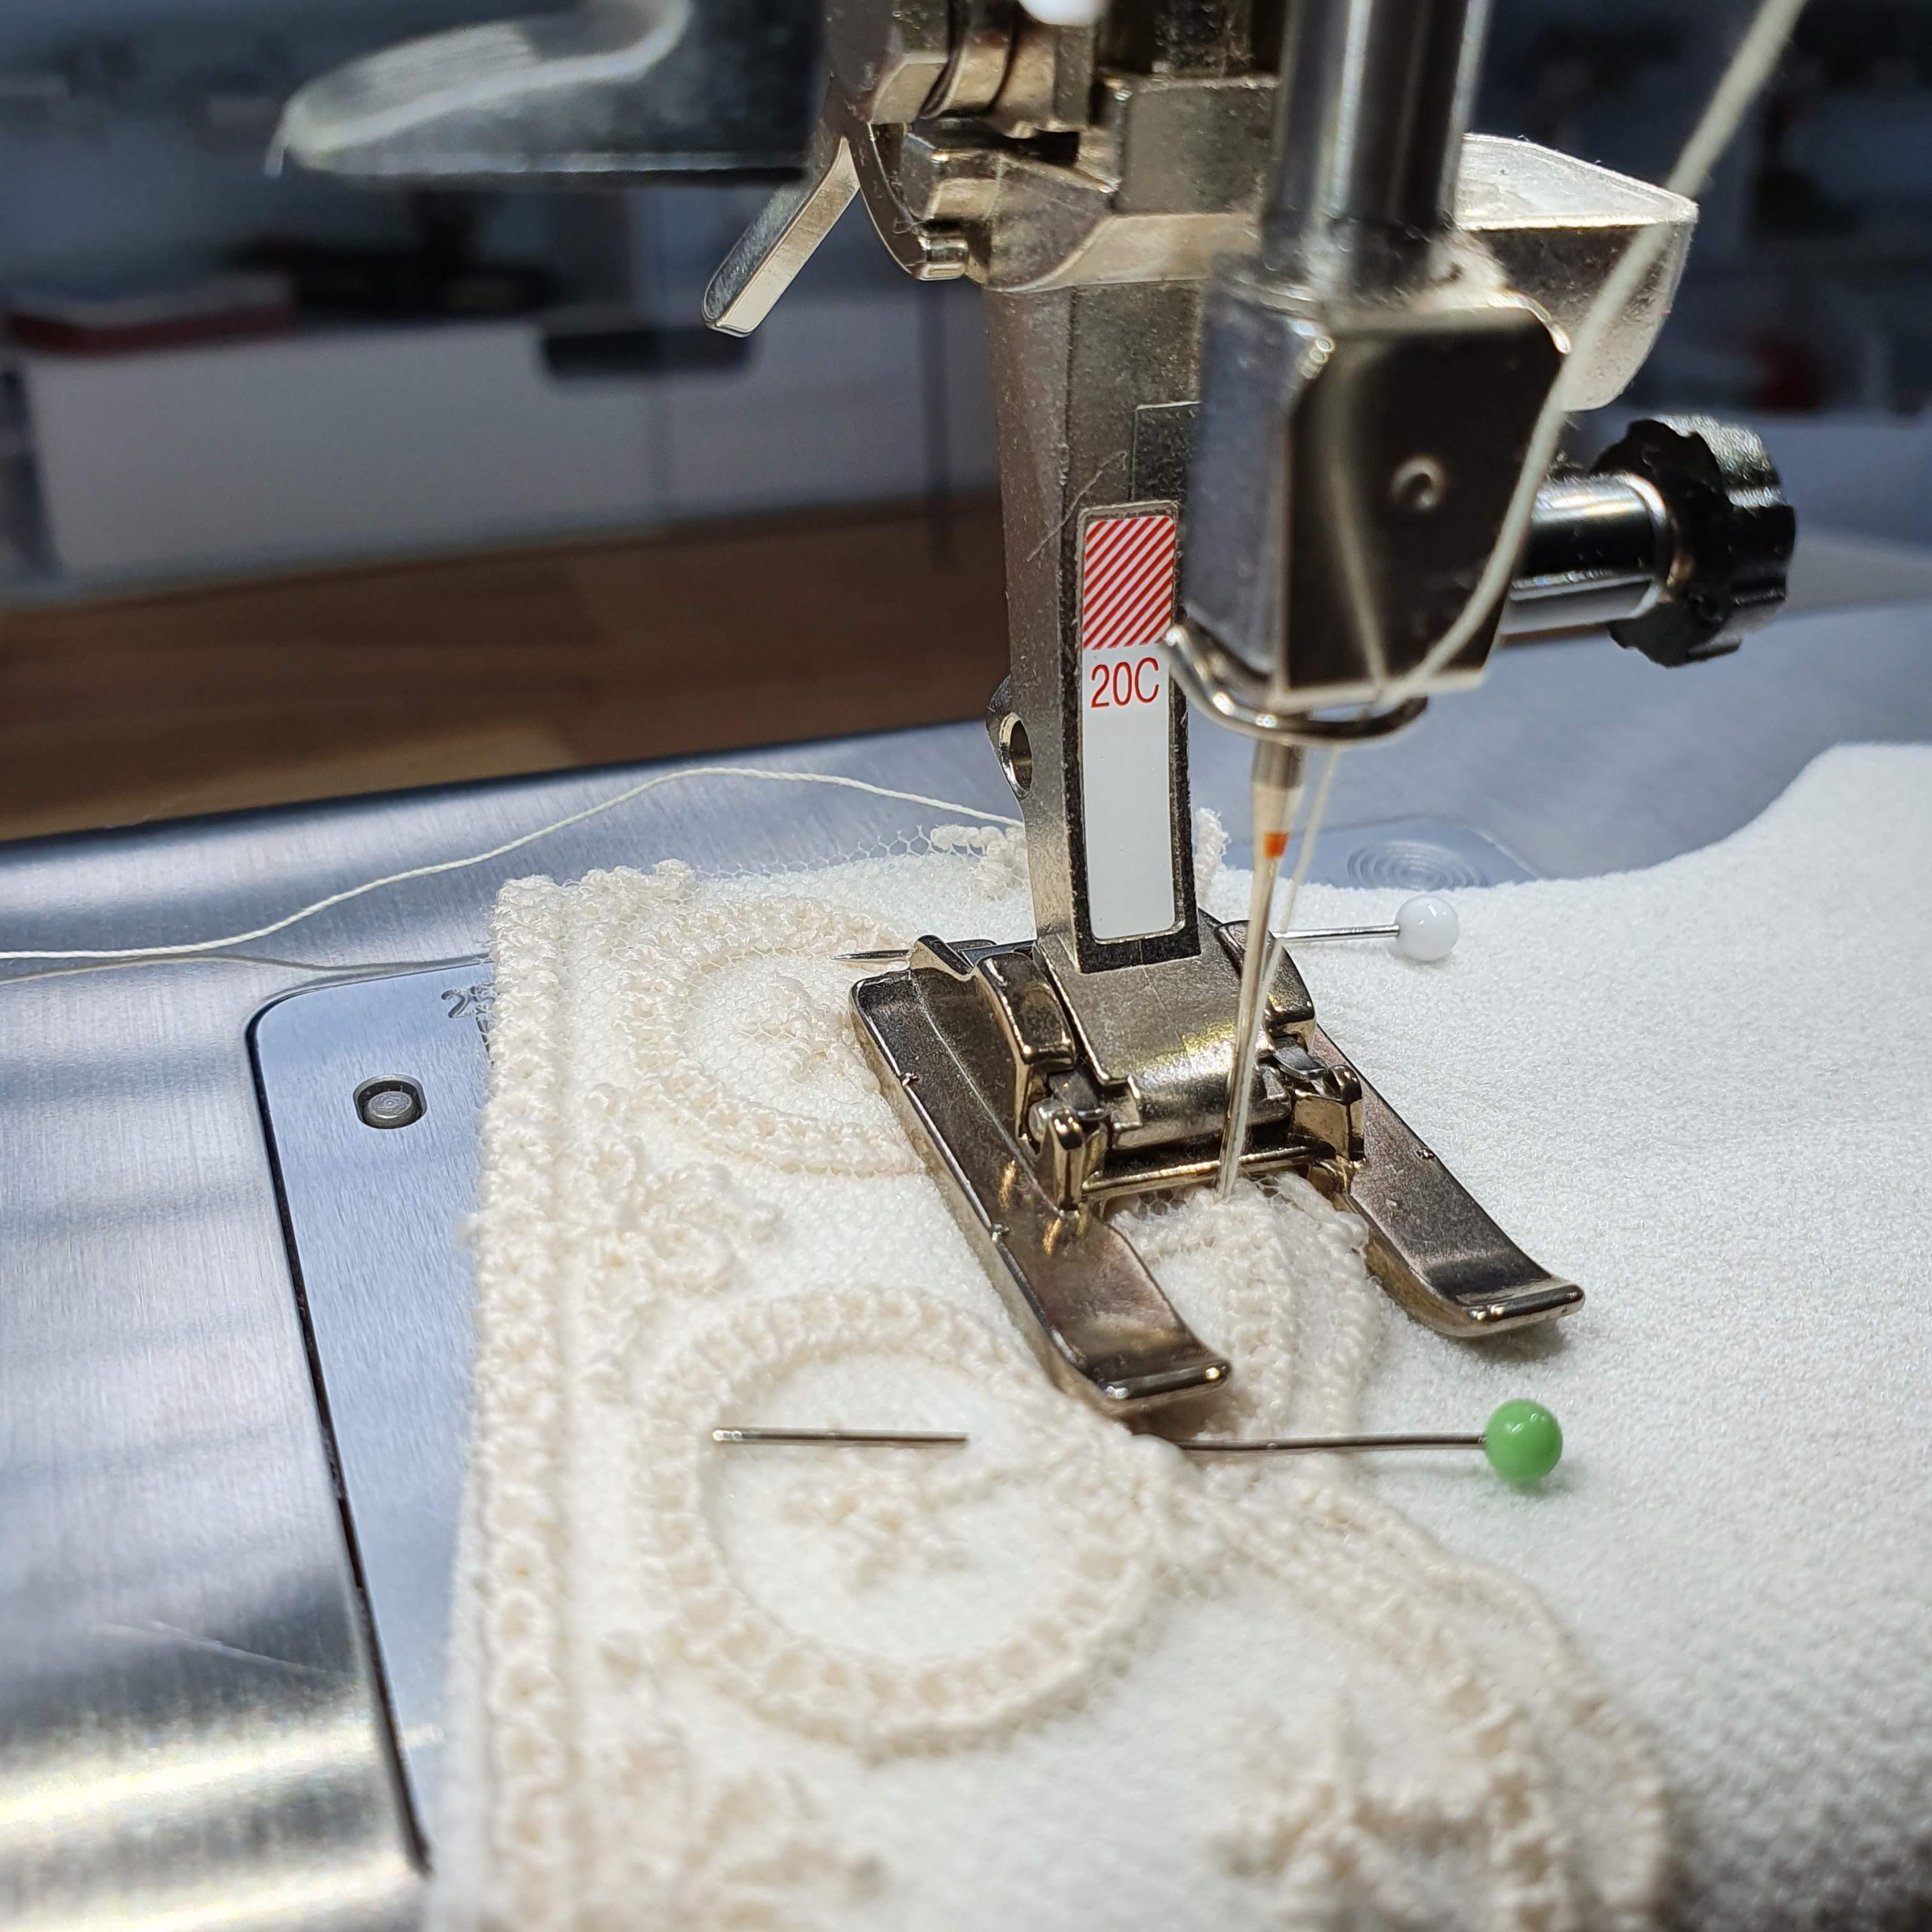
Open embroidery foot 20C
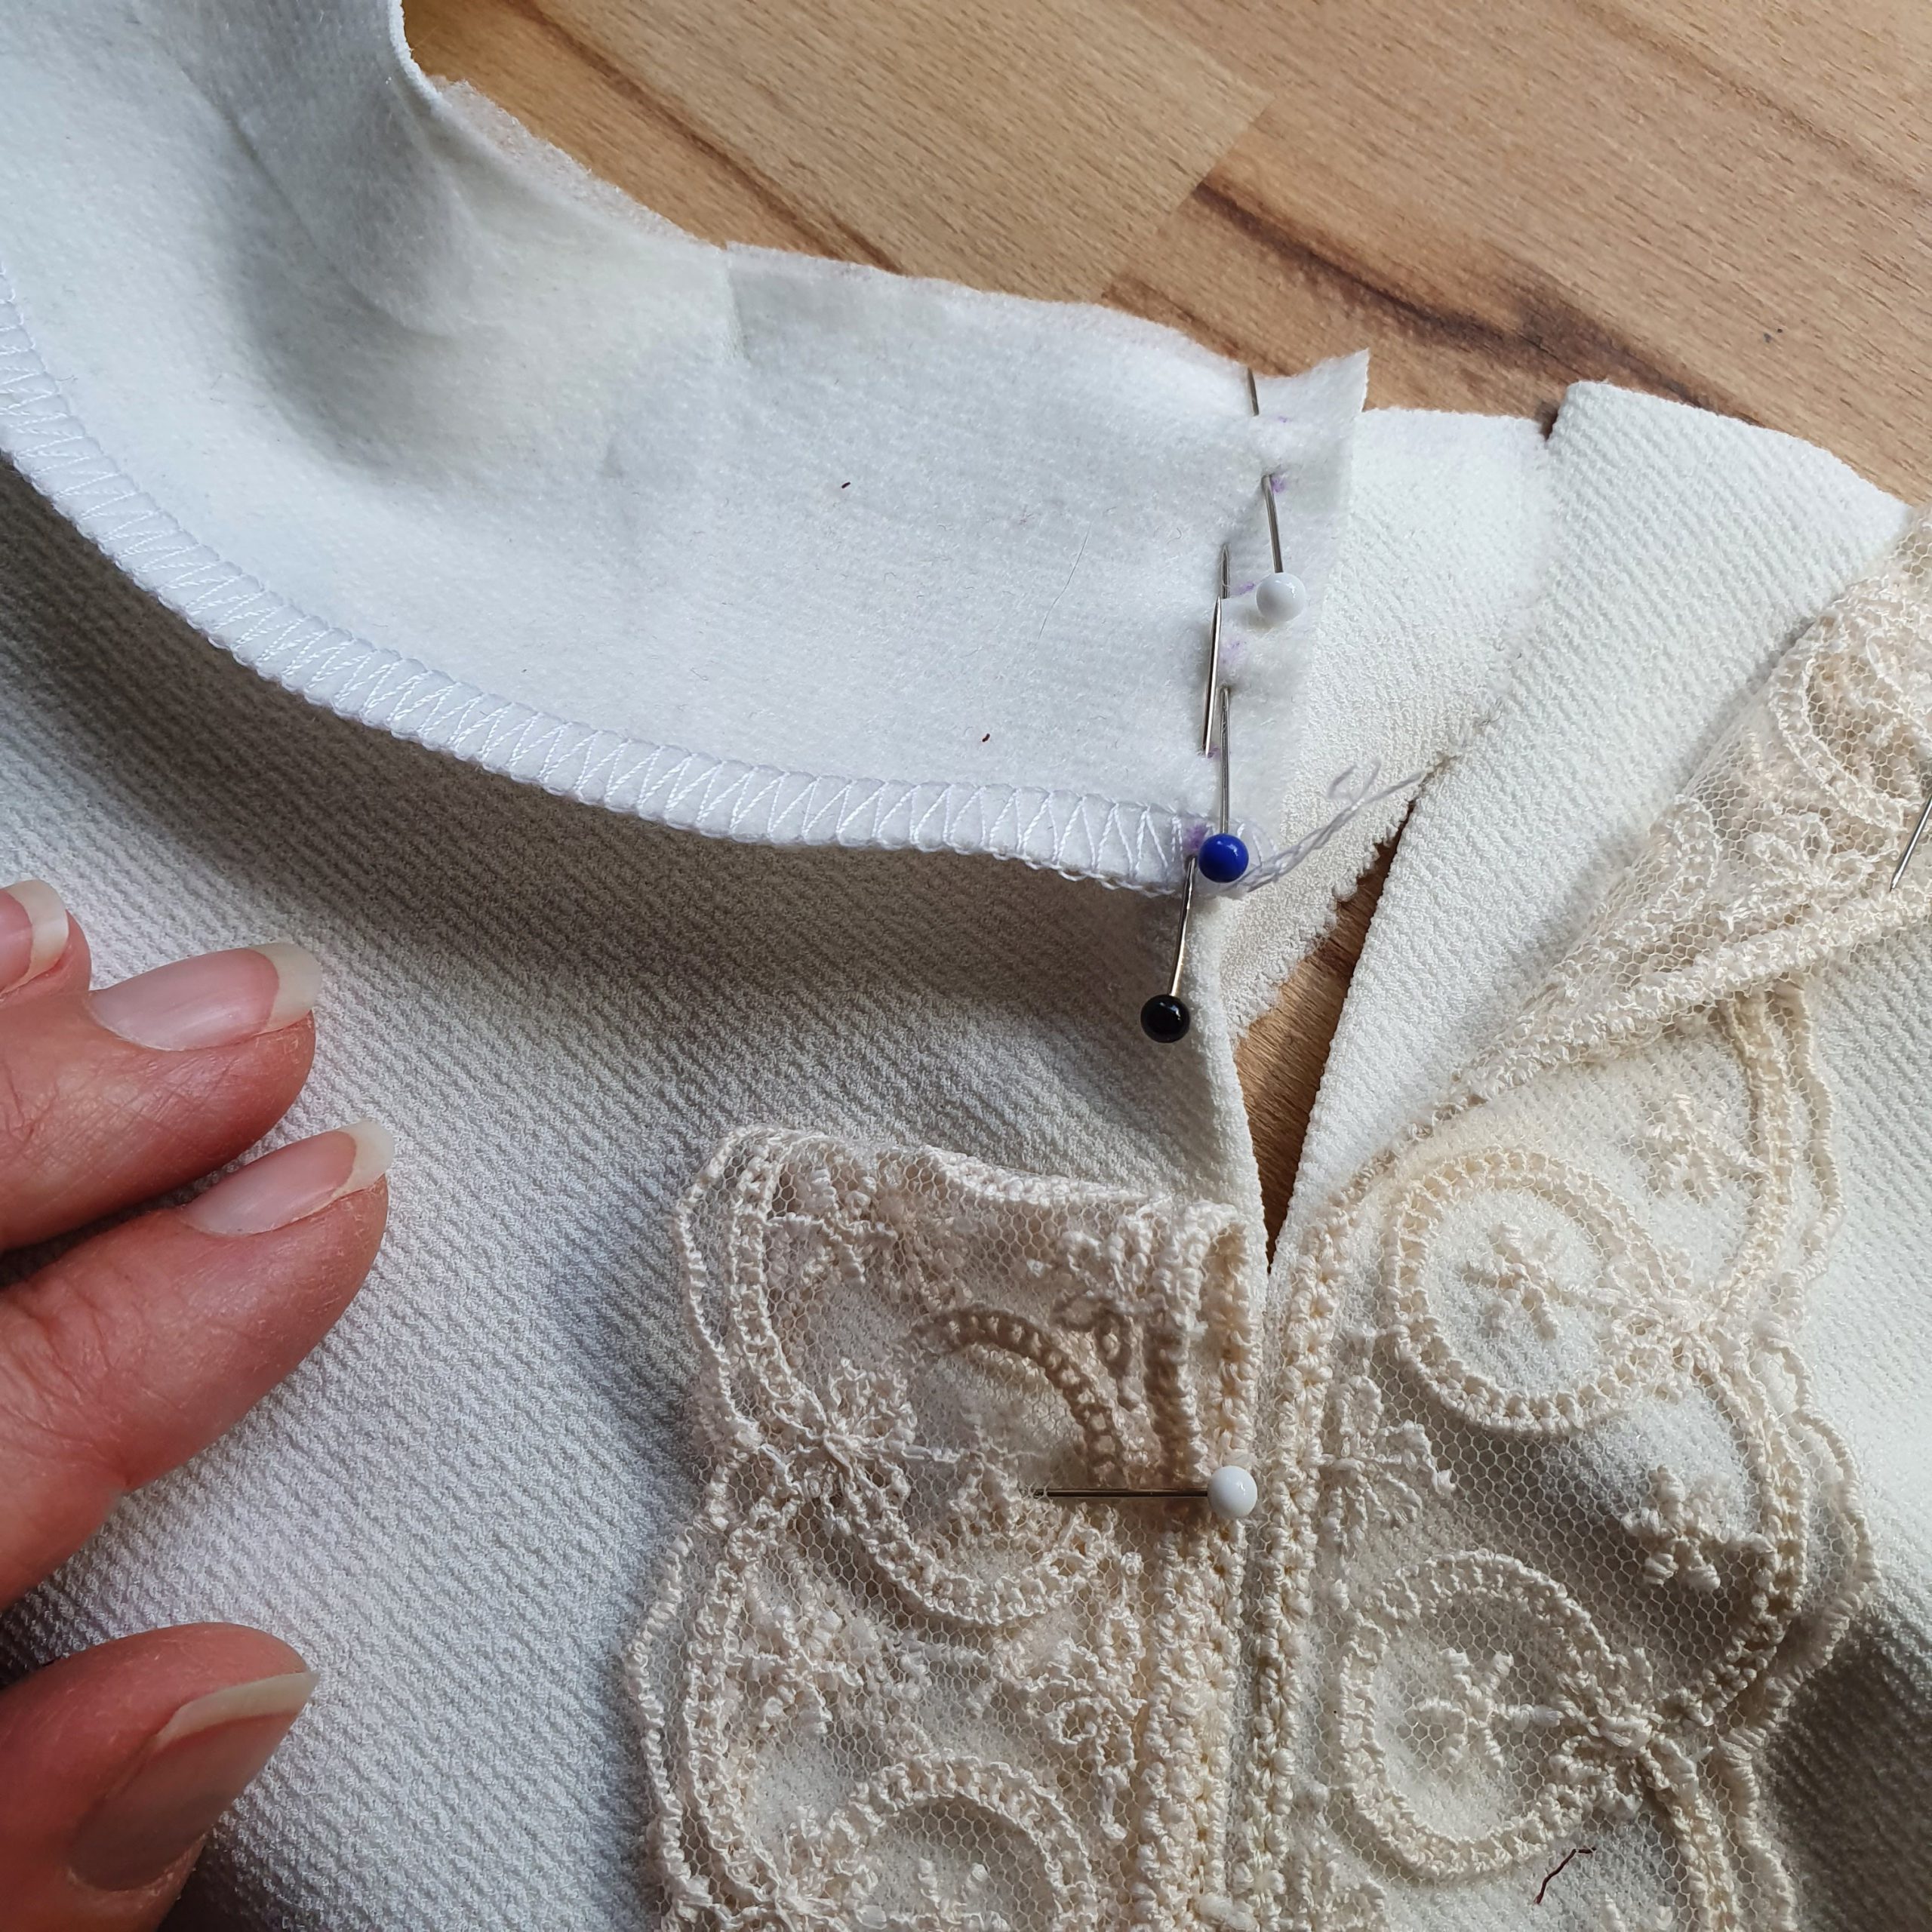
Attach facing
Iron before you proceed
Fasten the rest
Fastening the facing on the right side of the split you stitch a loop of thin elastic for the button closure. Then close the shoulder seams and secure the facing at the neck as well. Snip the seam a few times for a nice round neckline. Iron the seam in the direction of the facing and sew it narrowly on the edge to the facing. Press the neckline. Then secure the facing in a number of places by hand.
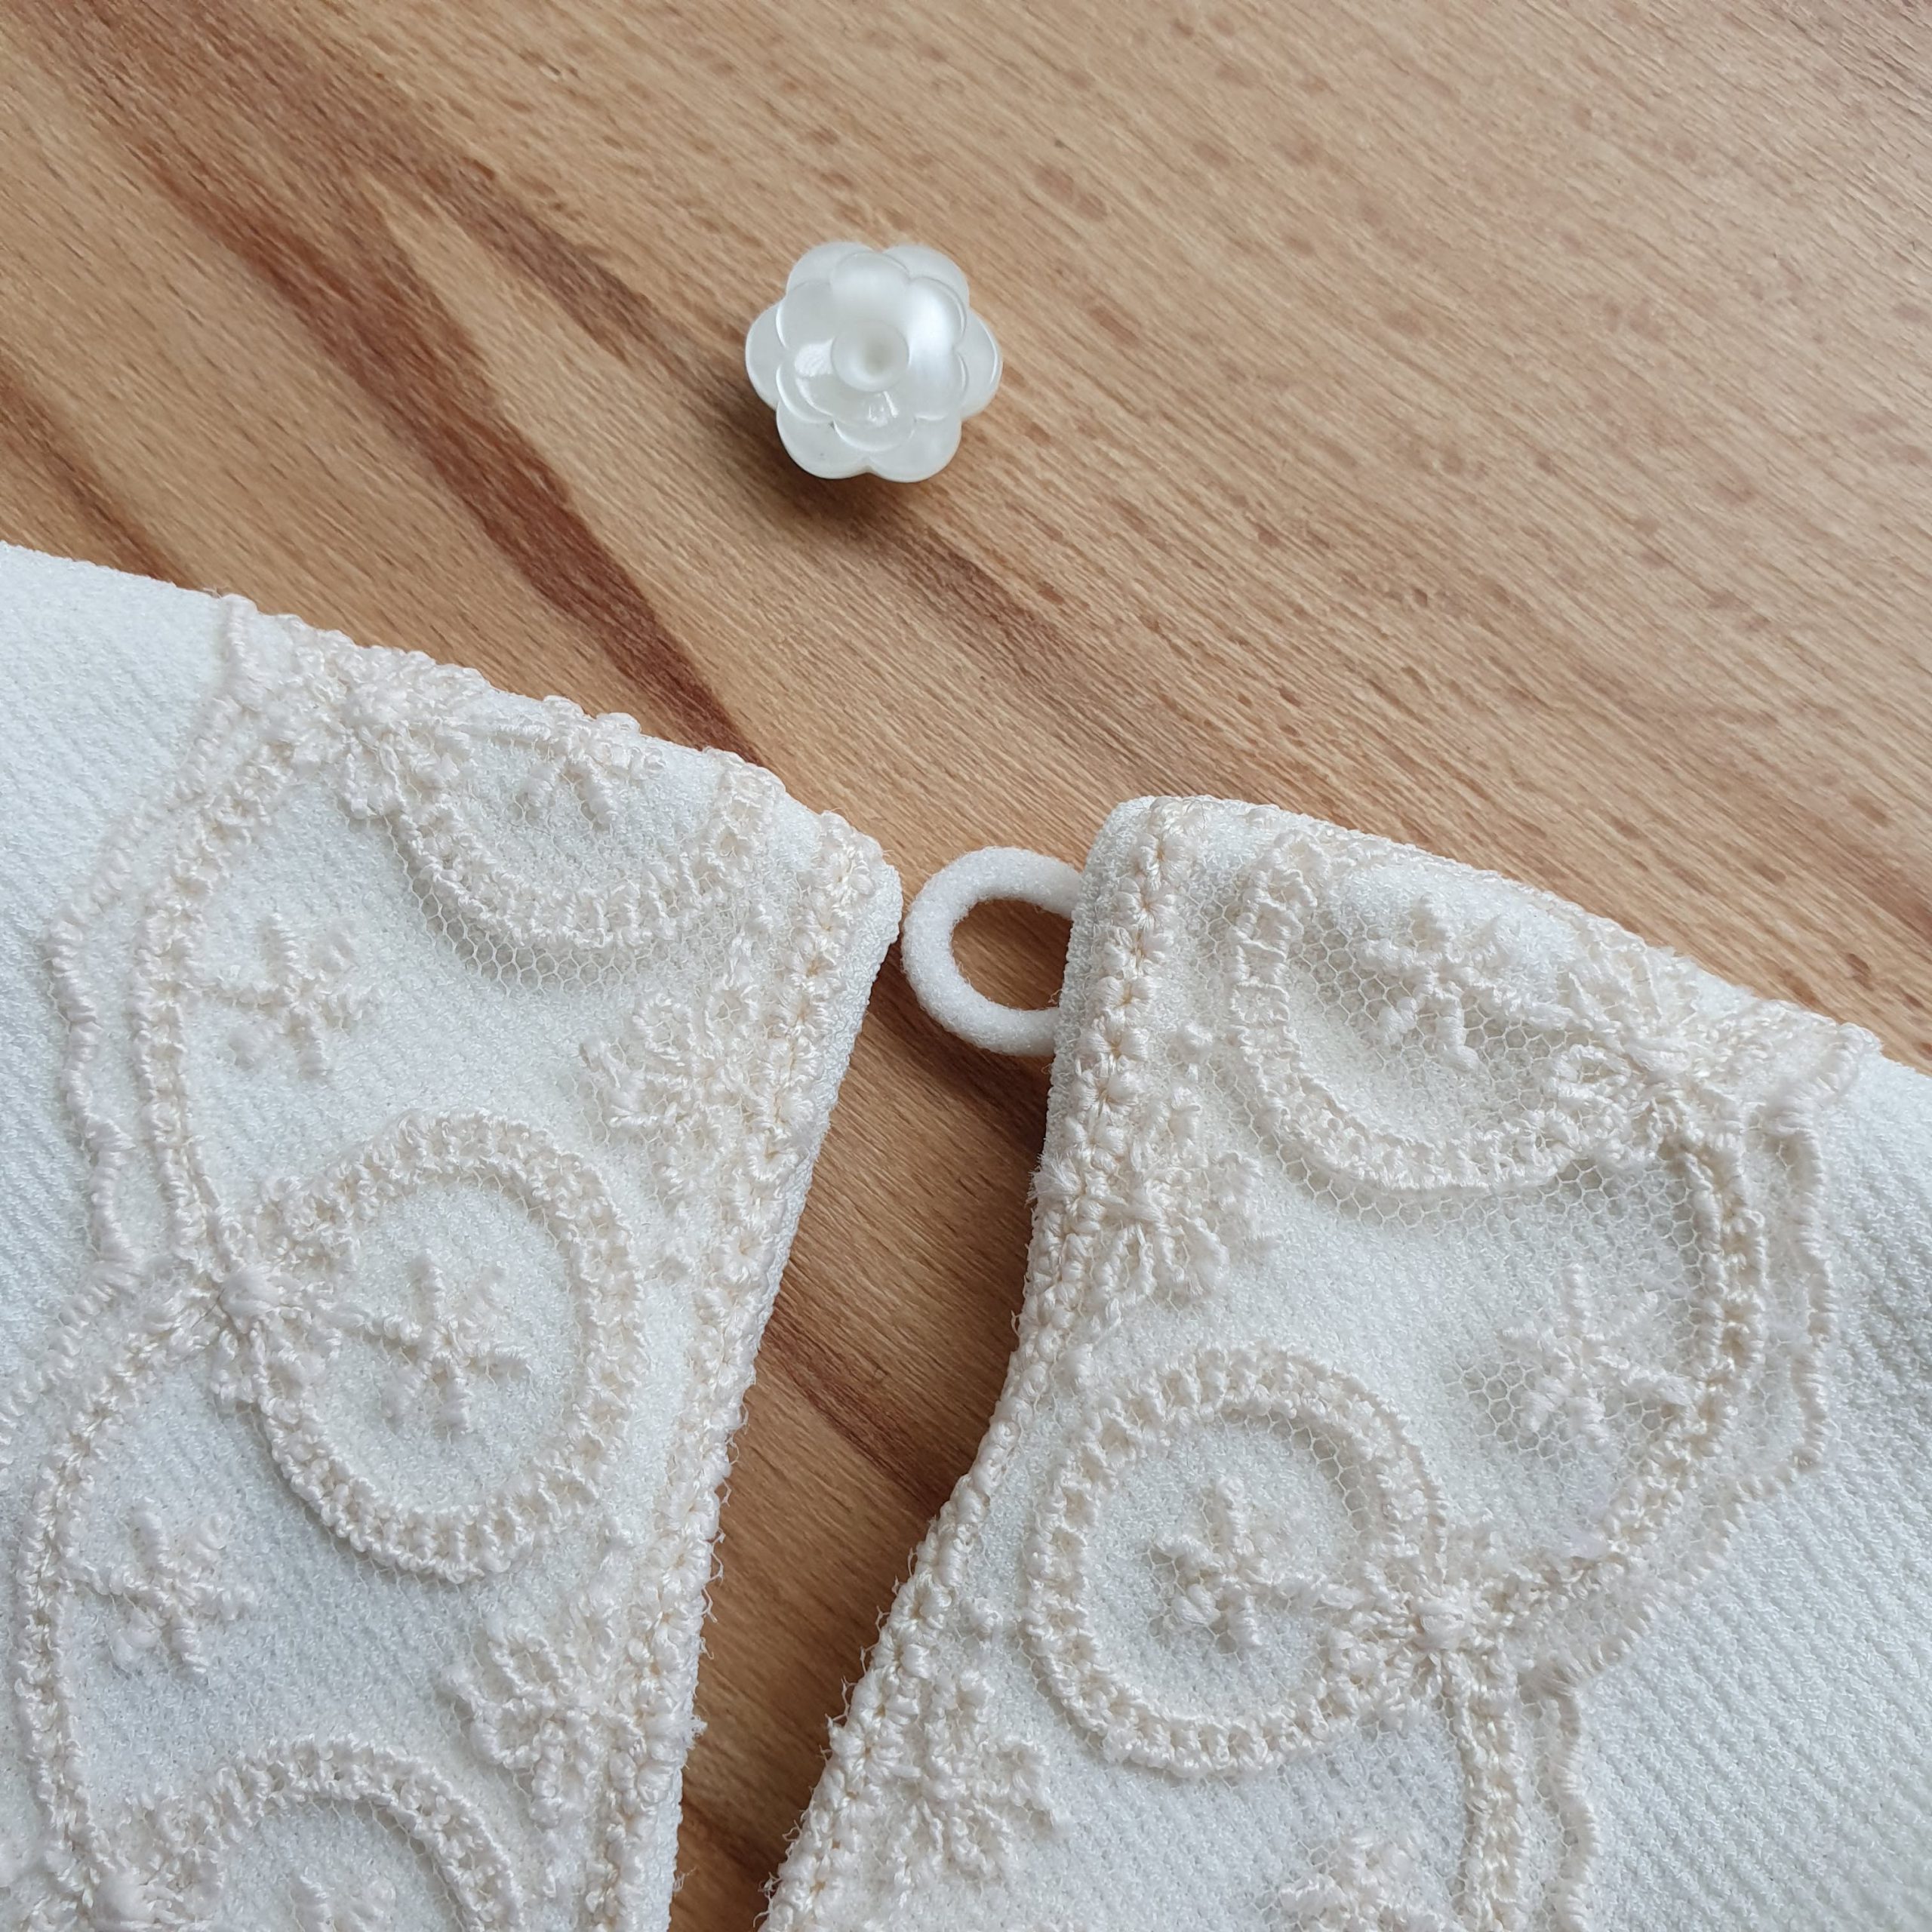
Button closure
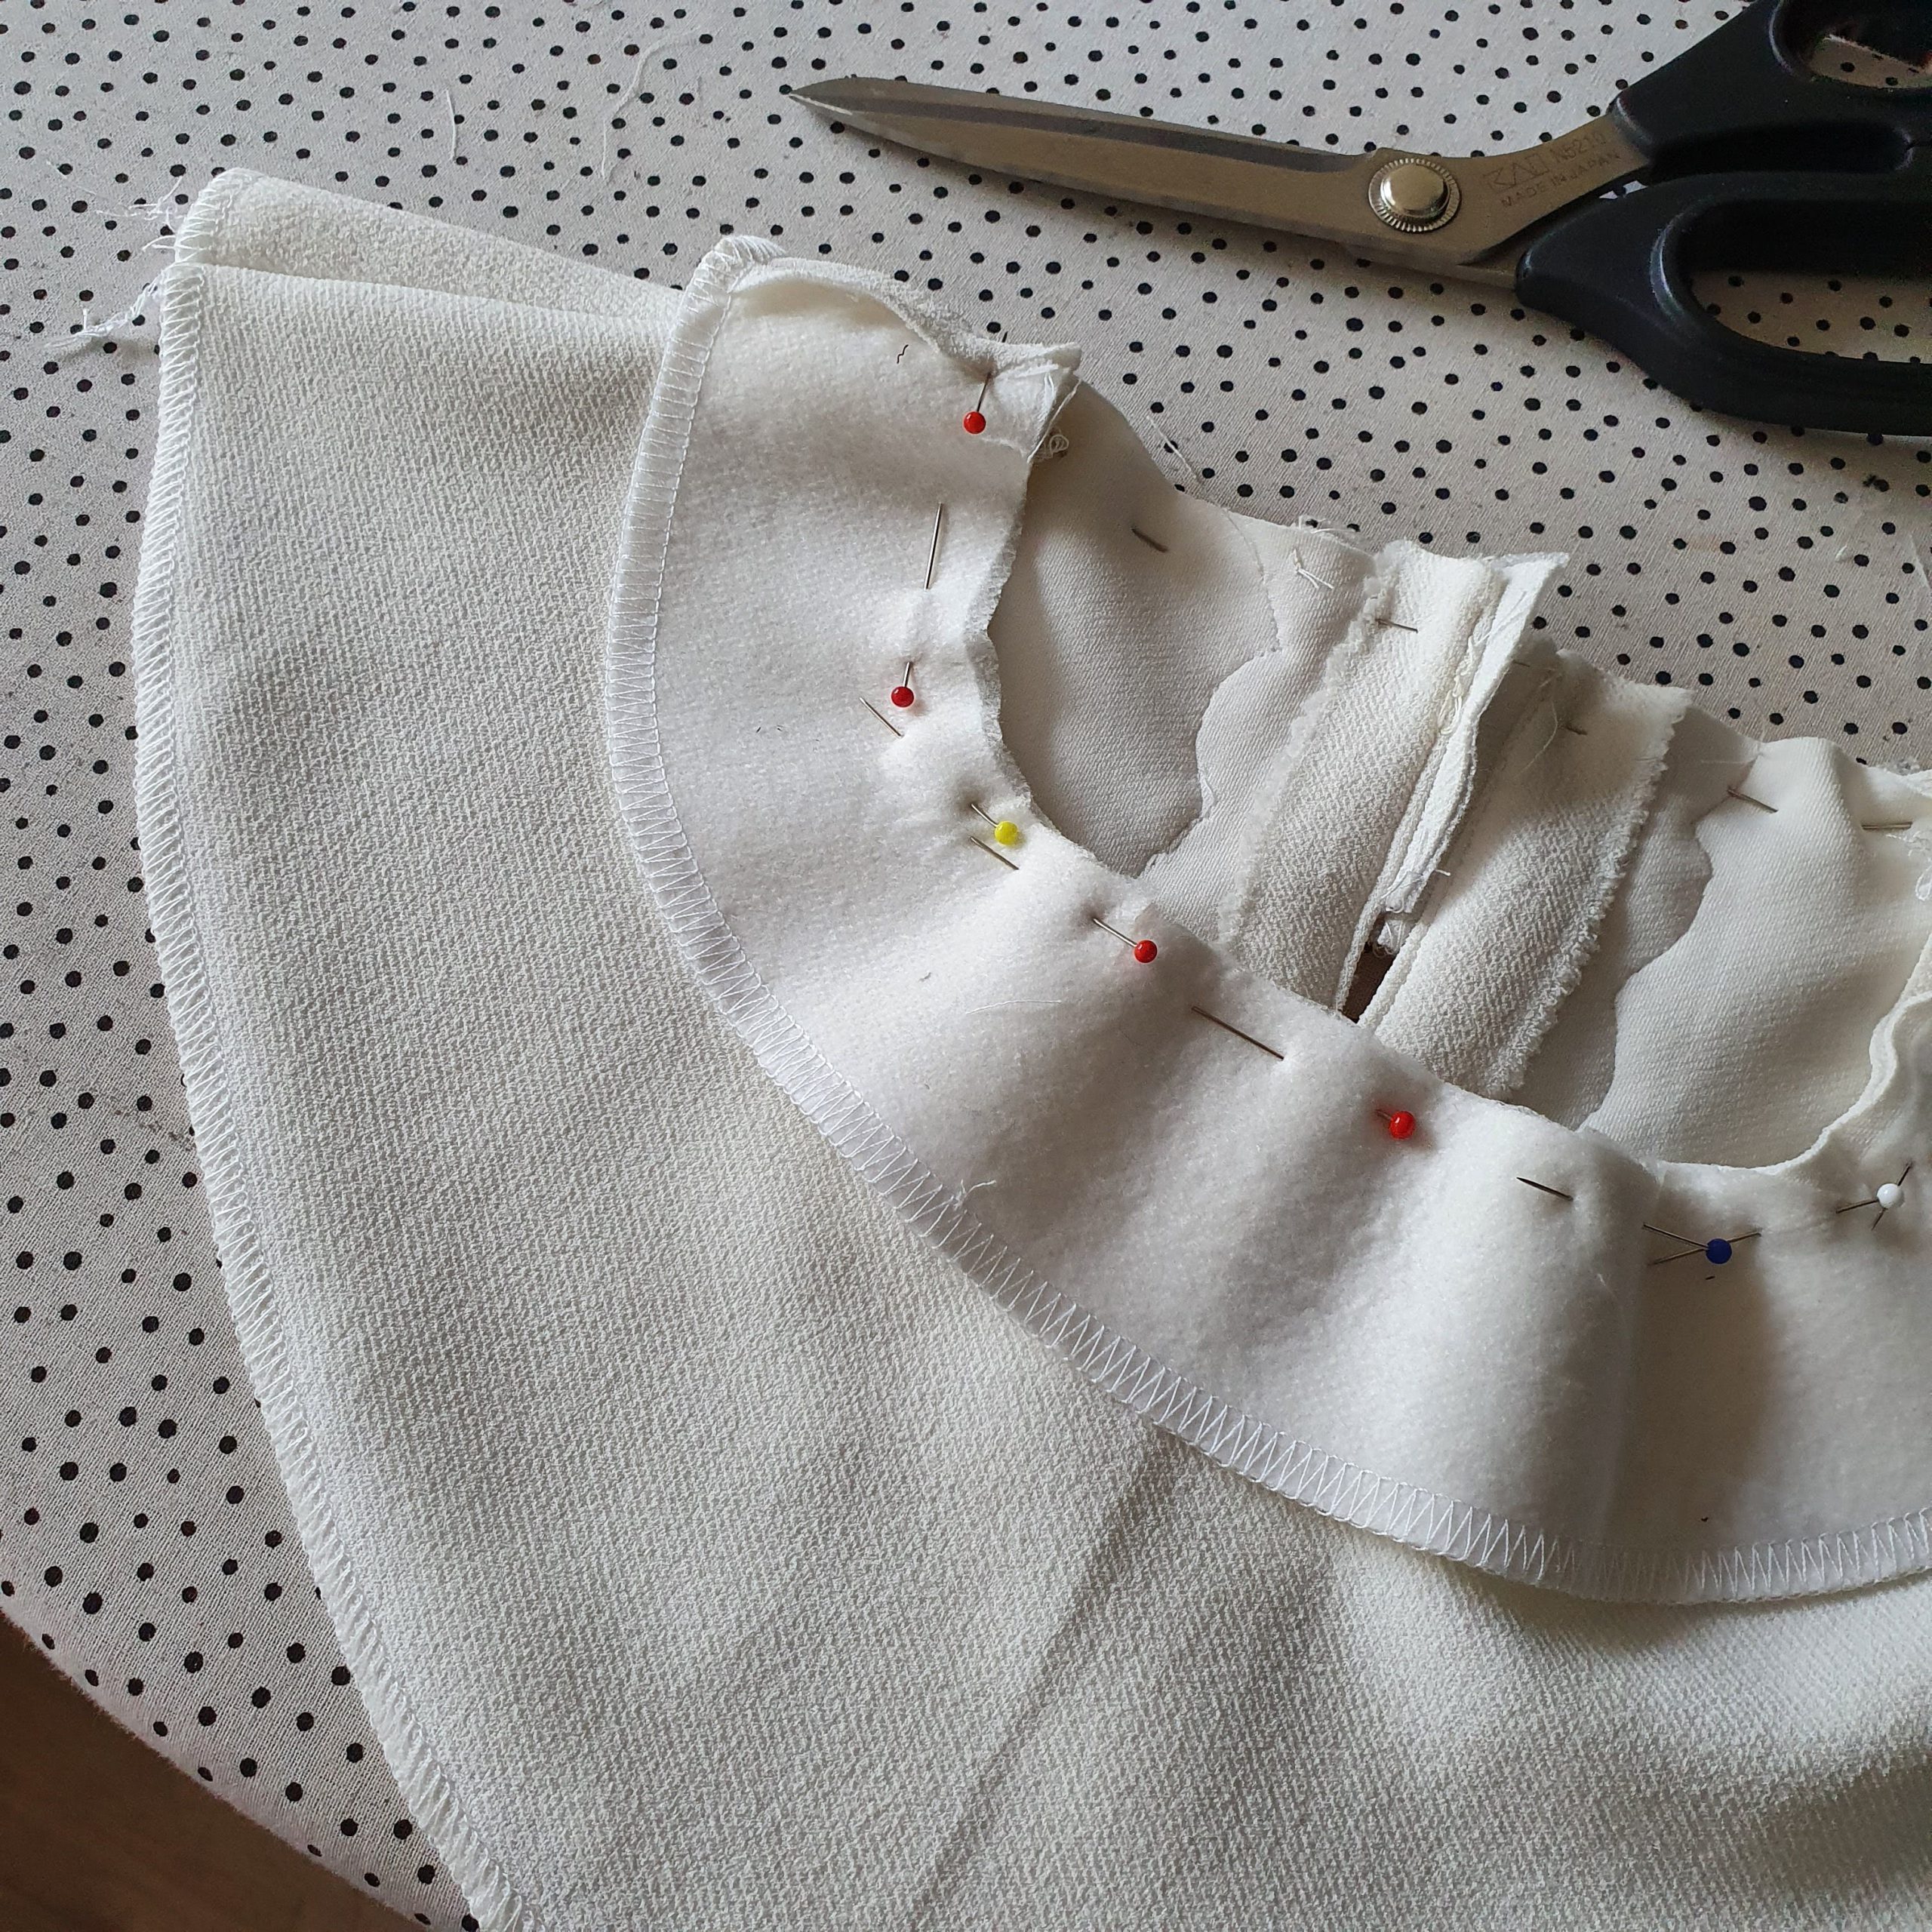
Stitch facing to the neckline
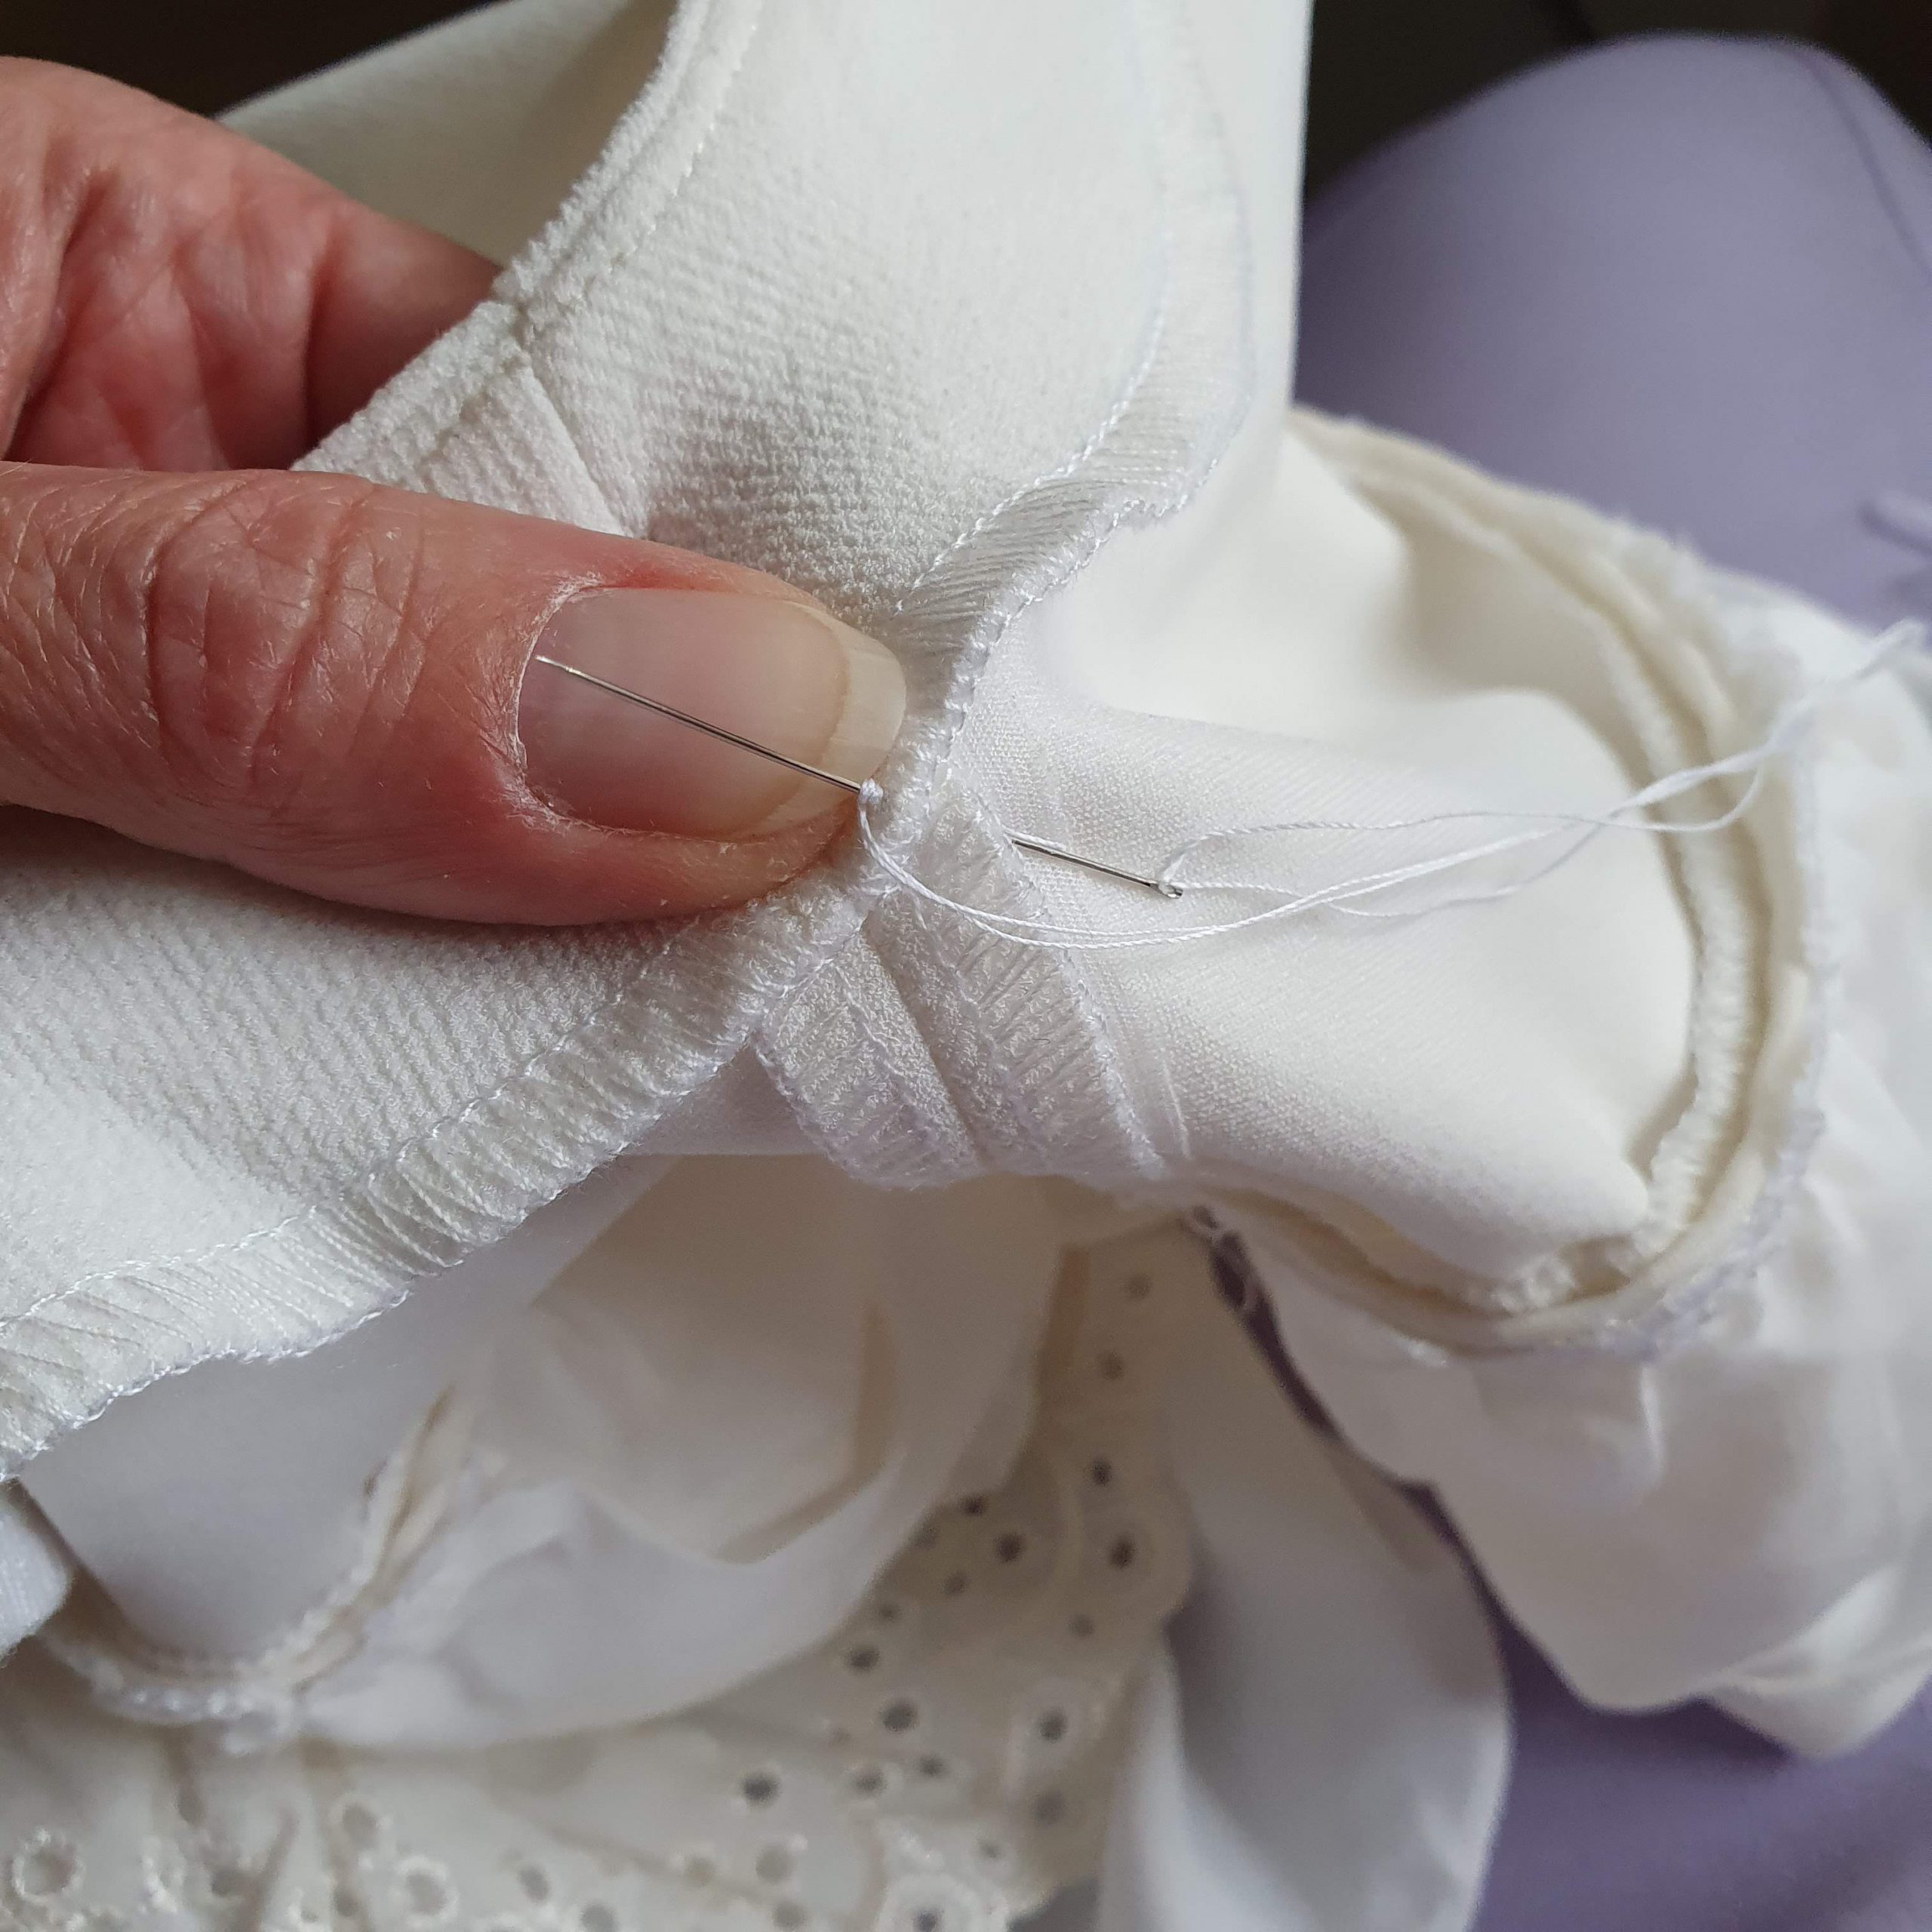
Fasten by hand
Ruffle 1
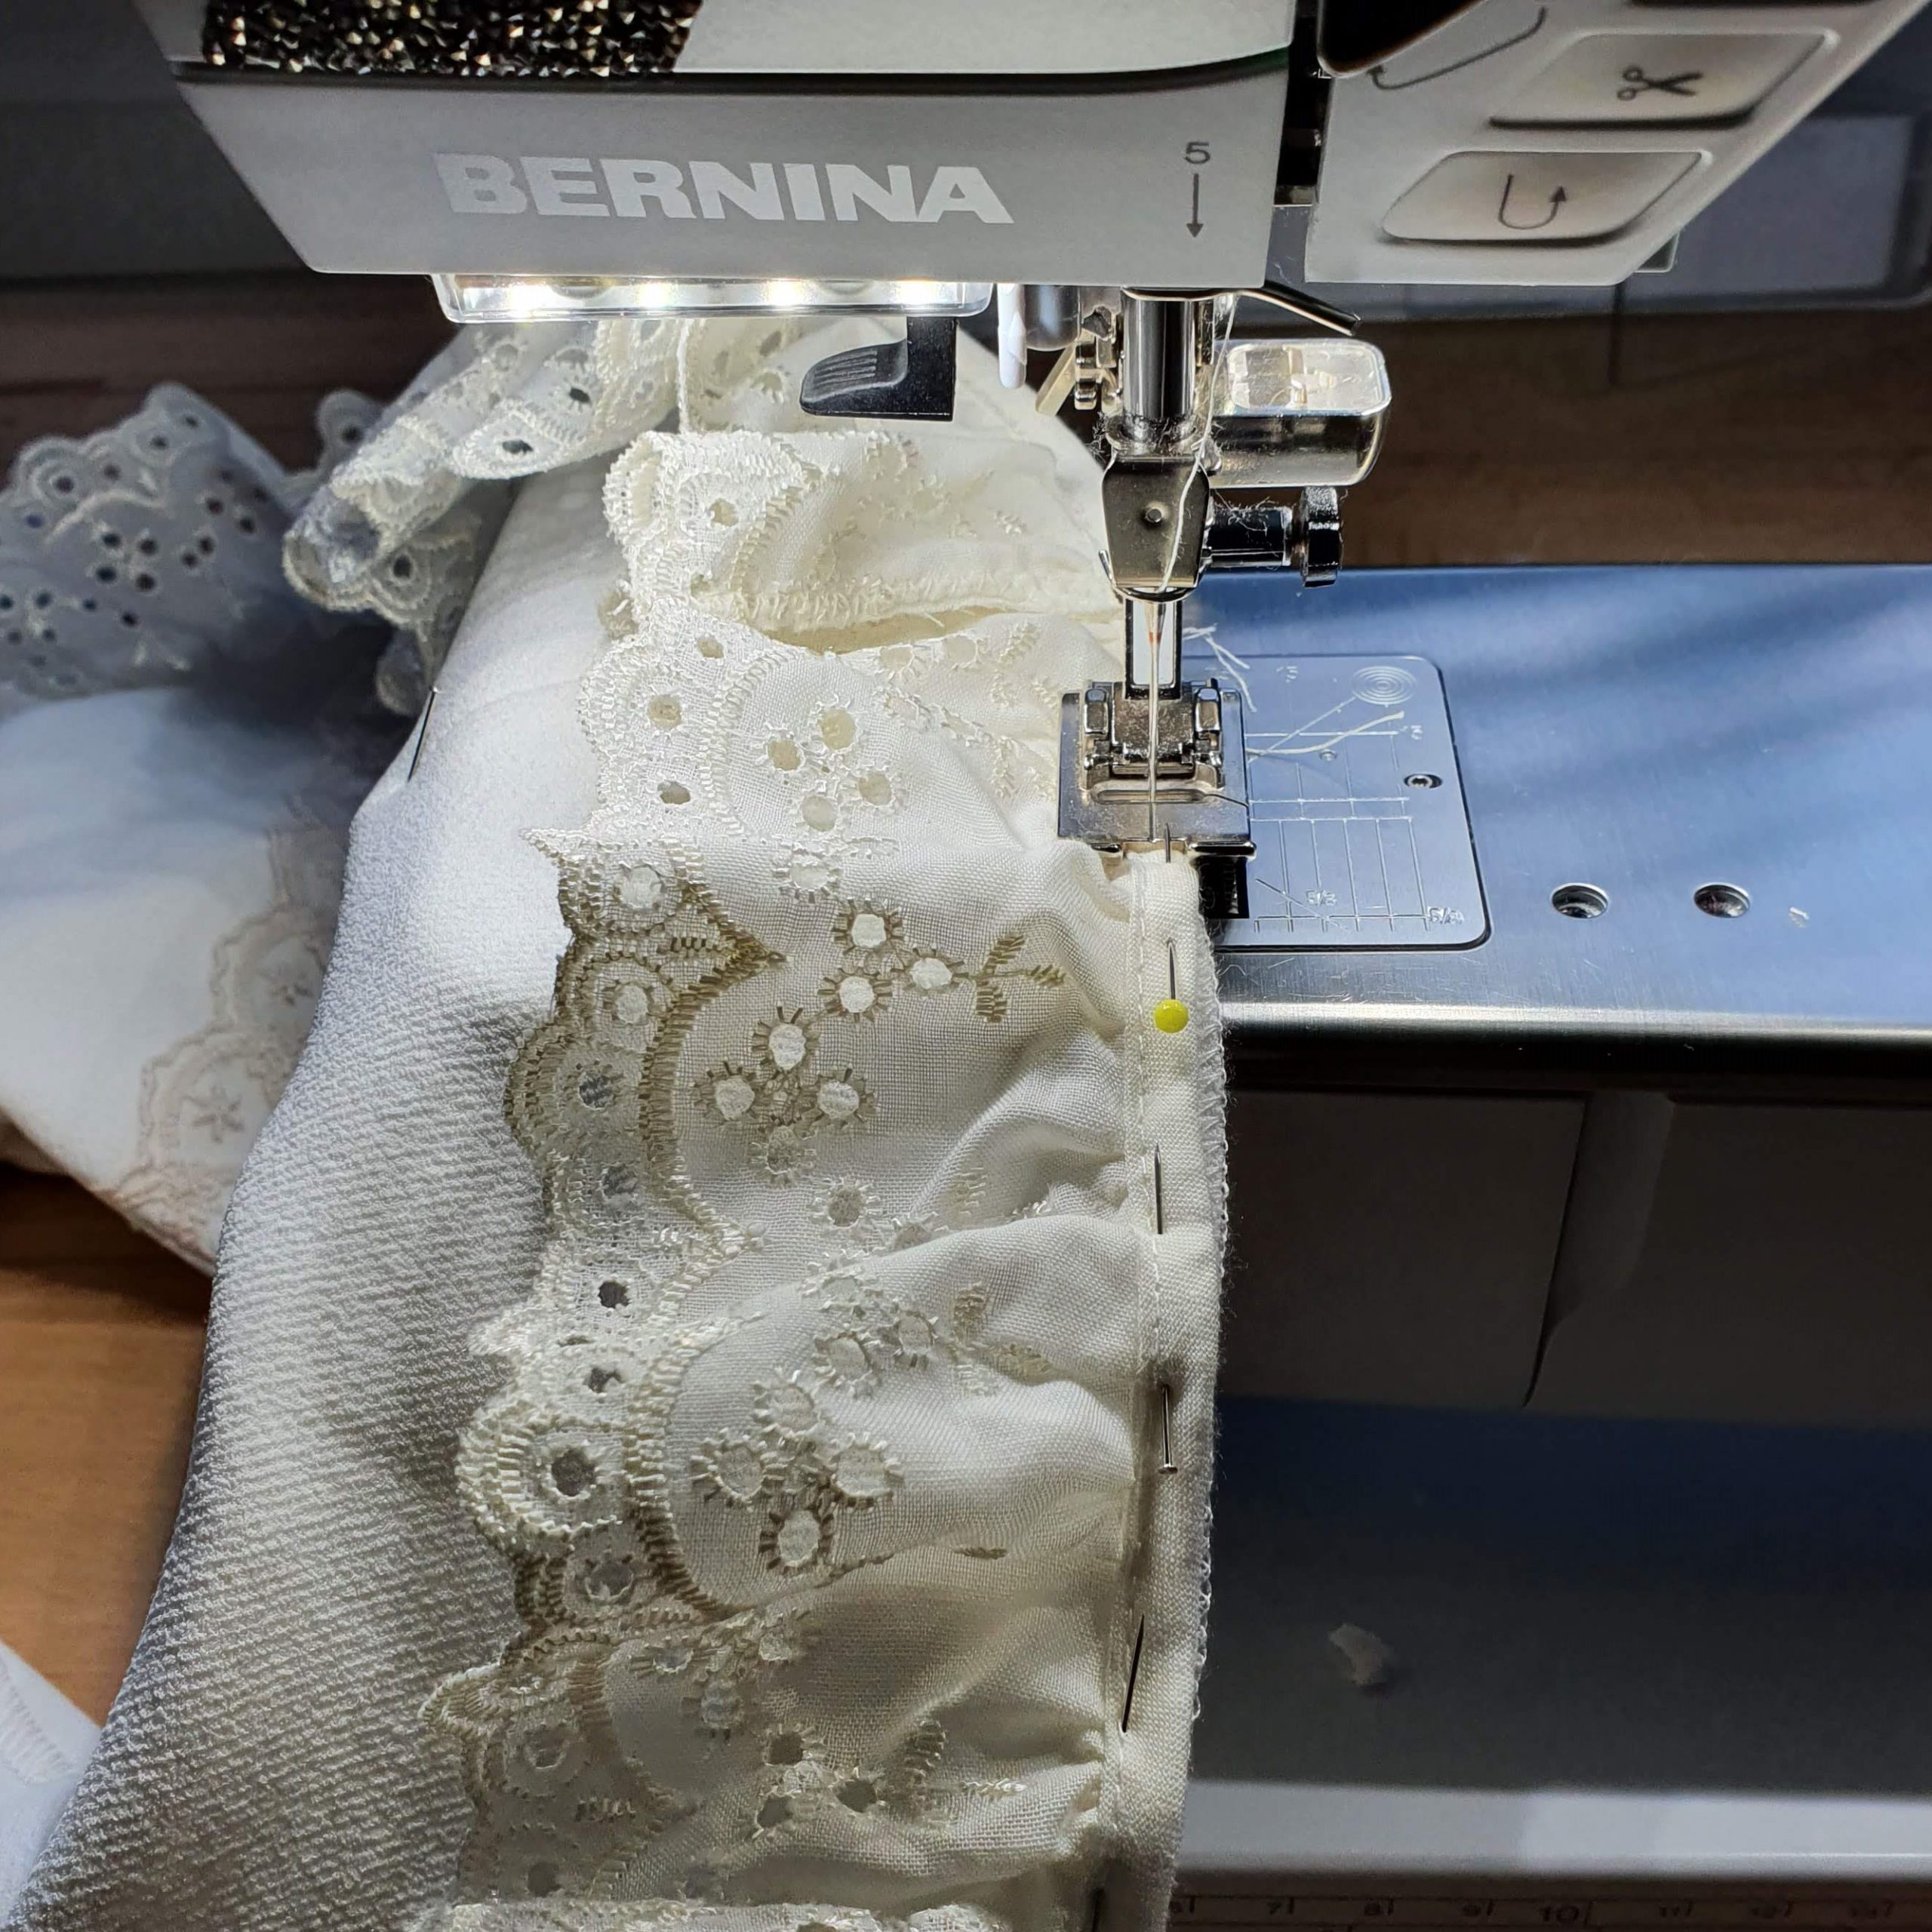
The broderie ruffle I found at Jan de Grote Kleinvakman (Albert Cuyp, Amsterdam) and is as long as the curve of the collar. Pin and baste it first (with the machine, stitch 6) in the seam allowance.
Basting by machine

Ruffle 2
The self-cut ruffle at the bottom of the collar is 10 cm wide (excluding seam allowance) and almost twice as long as the curve of the collar. You first gather this ruffle before it goes on the collar. For gathering tips with an overlocker, take a look at this blog I did making a ruffled skirt.
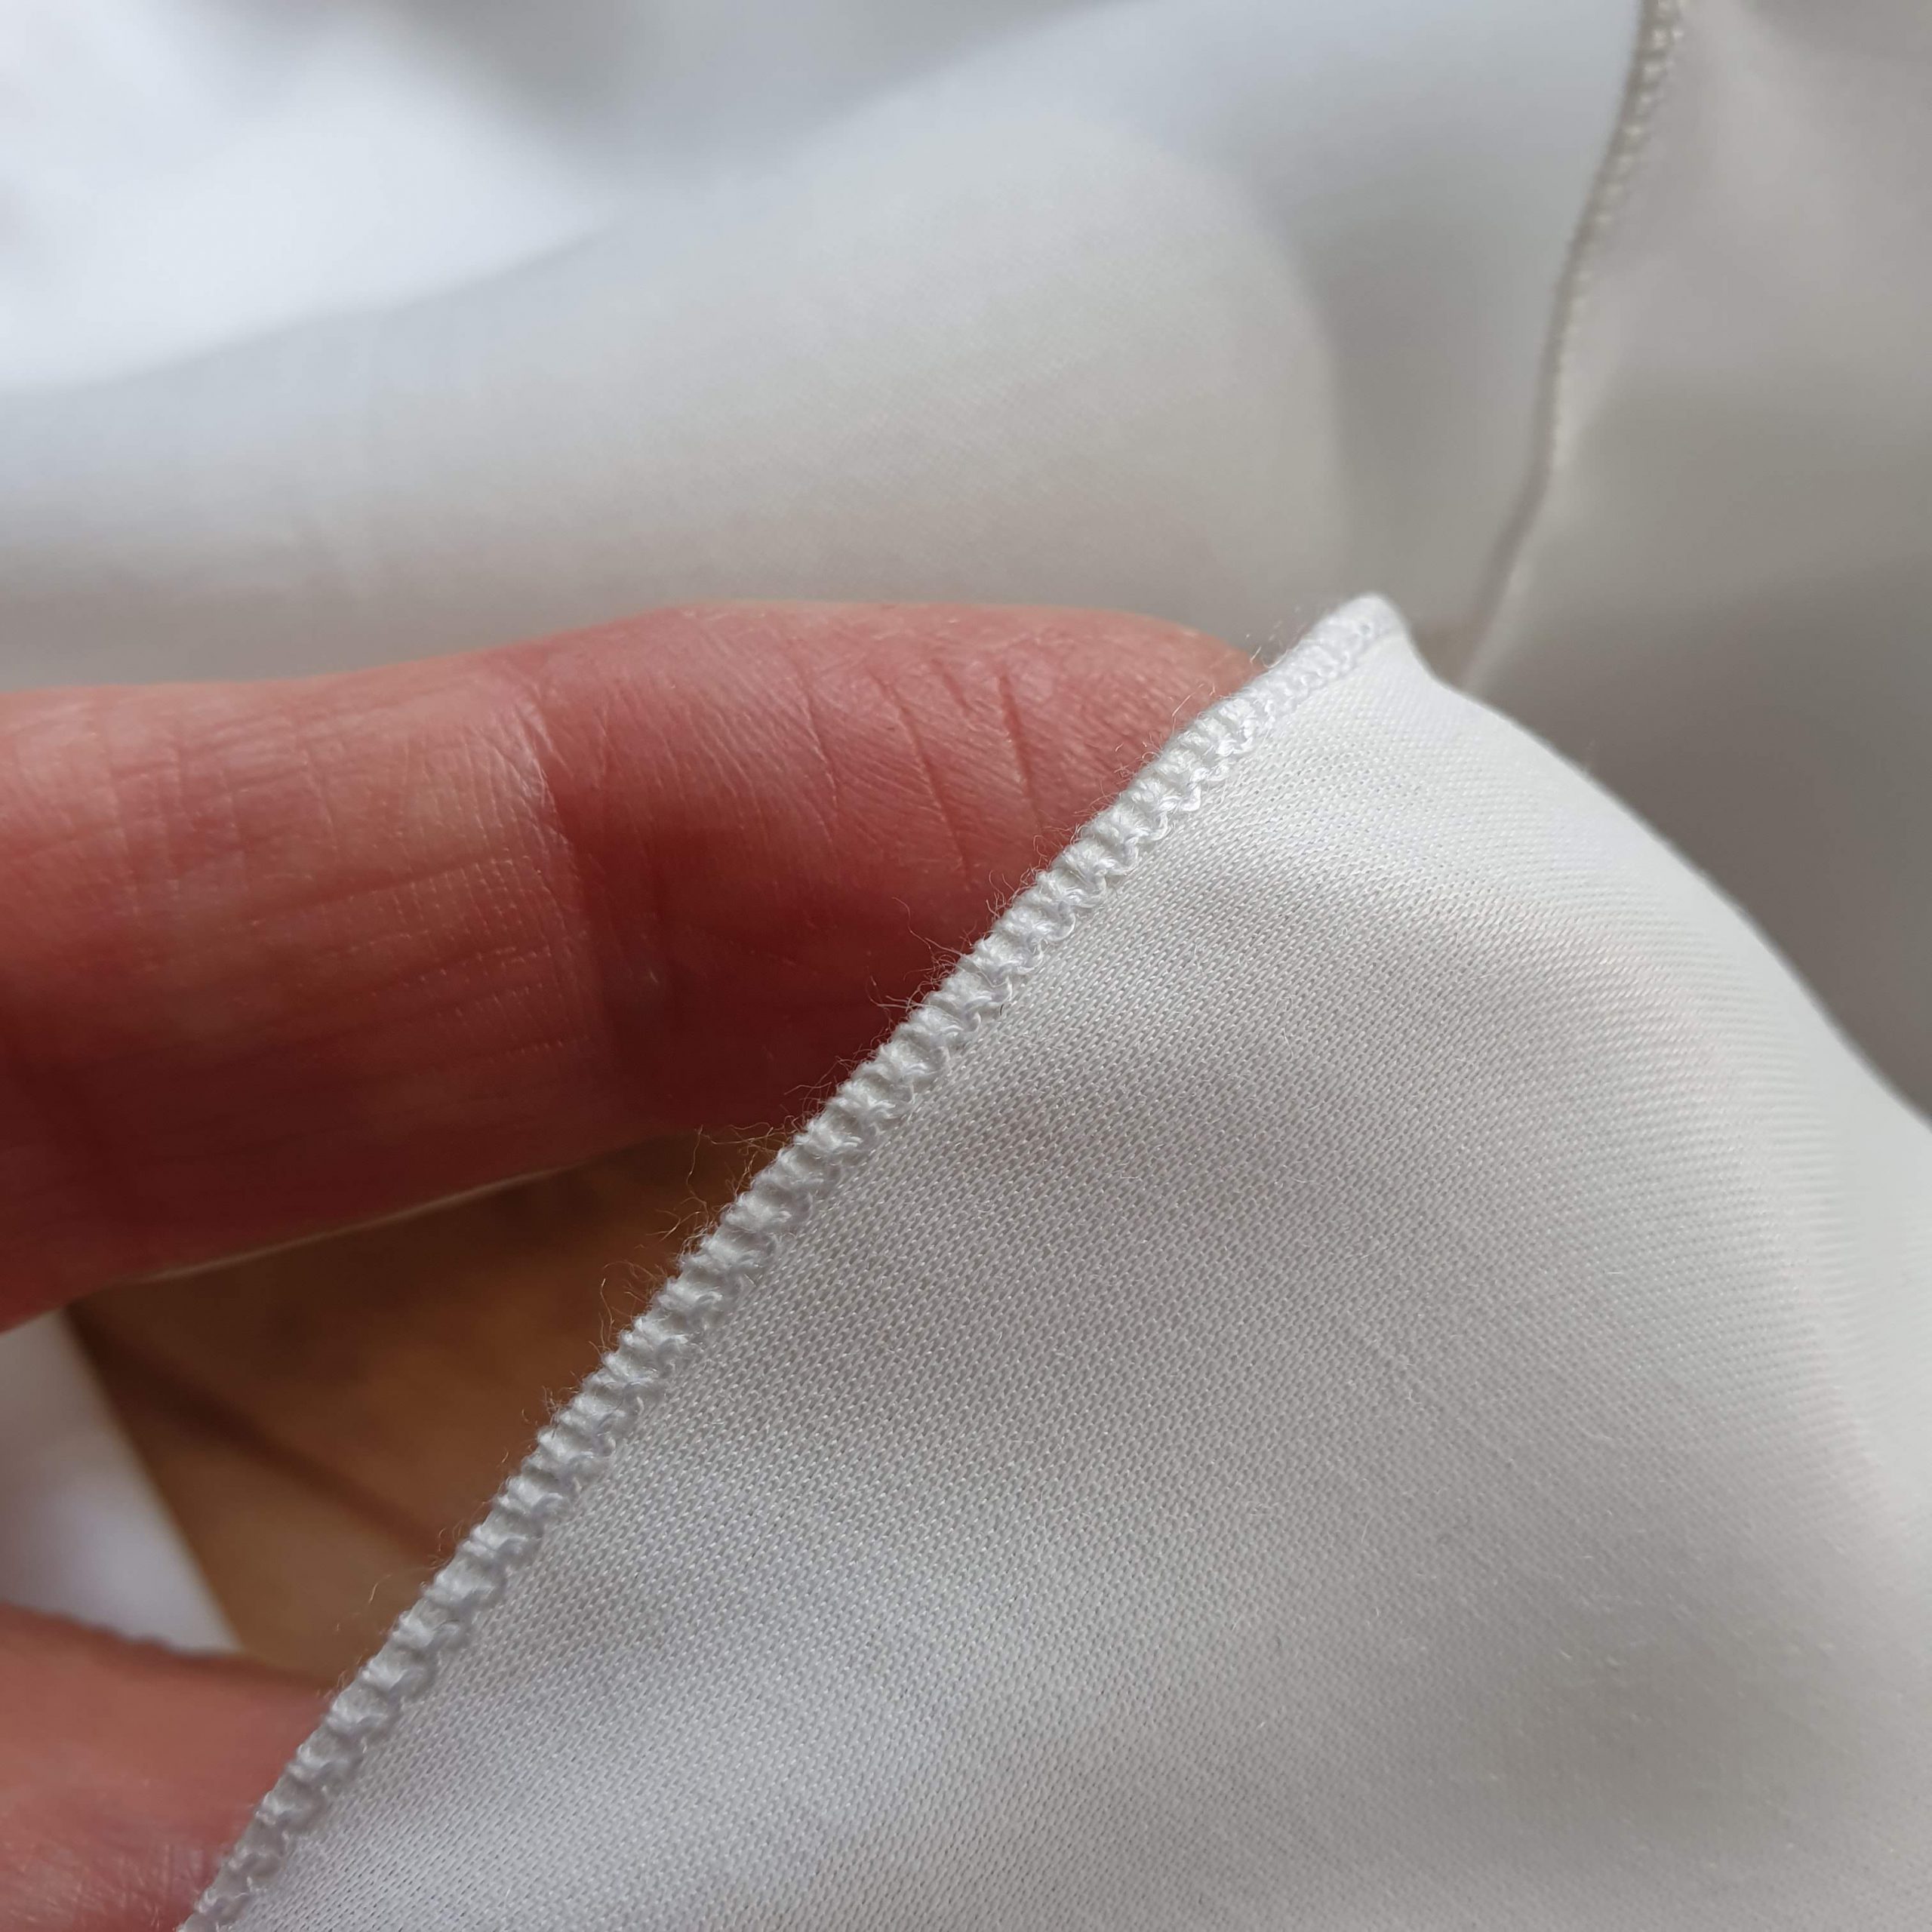
Finish the strip with a zigzag stitch or an overlocker. The side that is visible is finished with a rolled hem. I did this with the overlocker.
Put the ruffle on top of the basted eyelet embroidery ruffle and stitch them both to the collar piece.
Rolled hem

Gathering with the sewing machine

Pin…
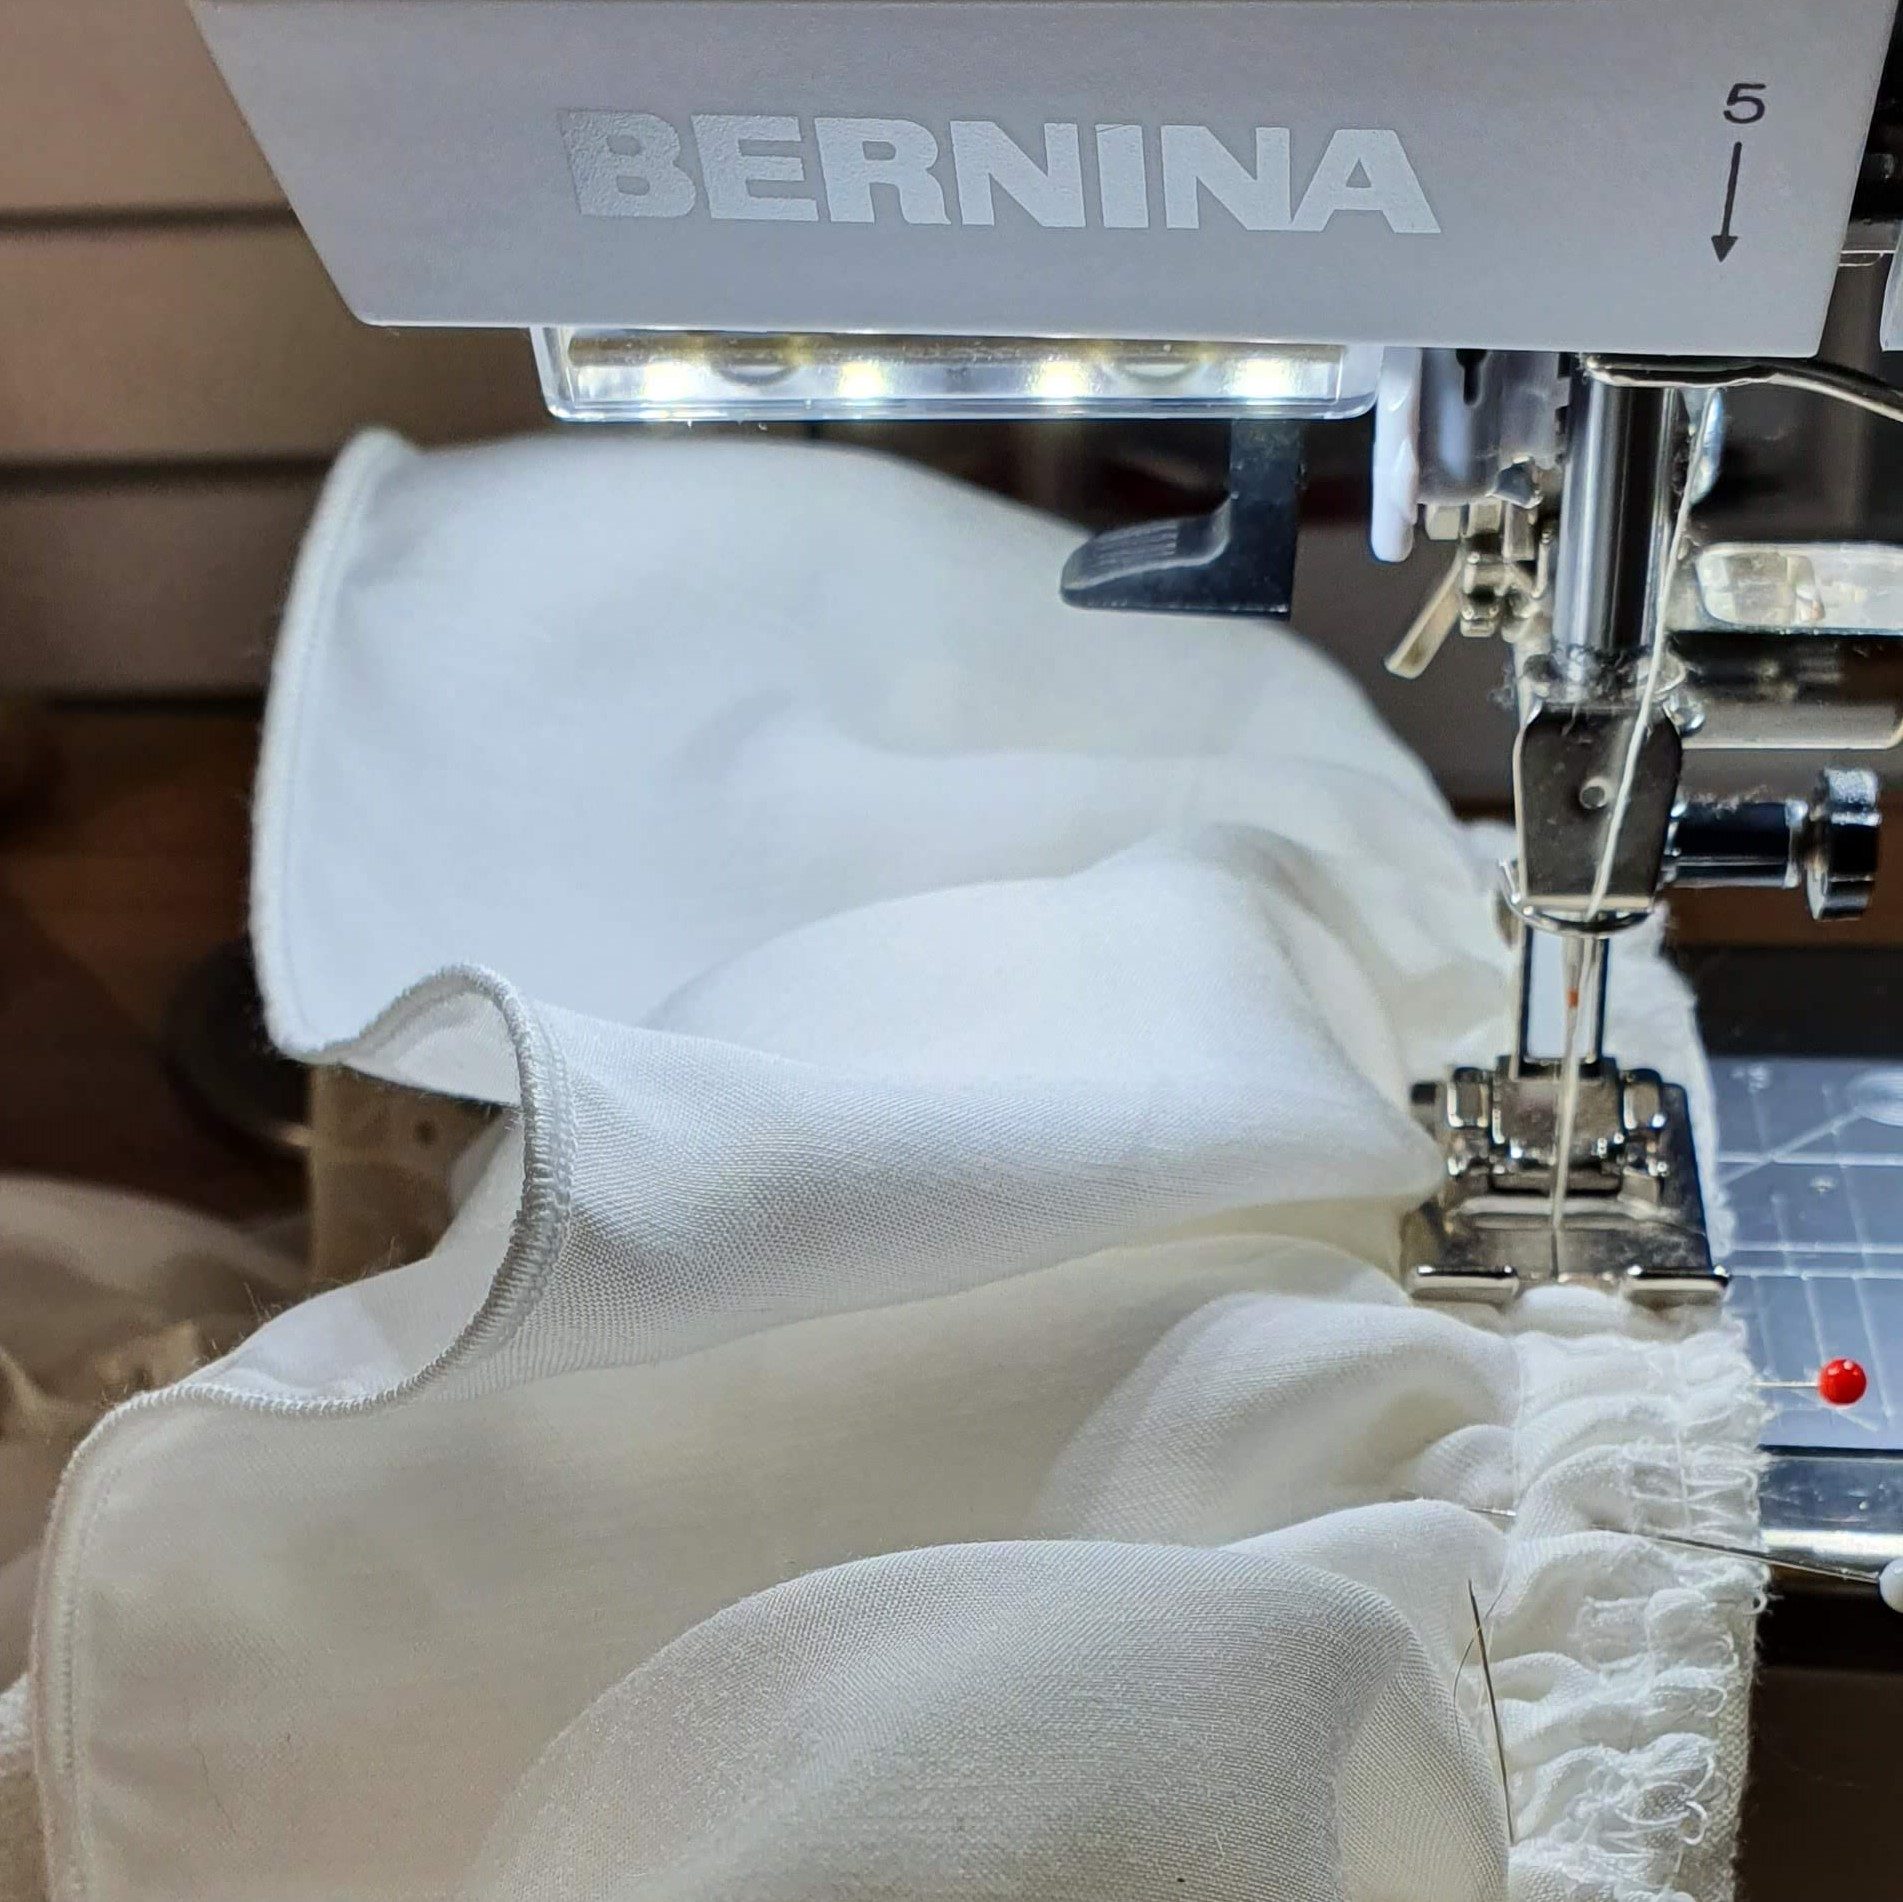
and stitch
Ruffel 3?
Prior to this project I thought that I was going to process a lot of lace and trims. During the project I noticed that less is more also applies here. Still, I really wanted to incorporate that beautiful side. With the lace pinned to the collar I just snapped a photo and I decided. I like it better without it.

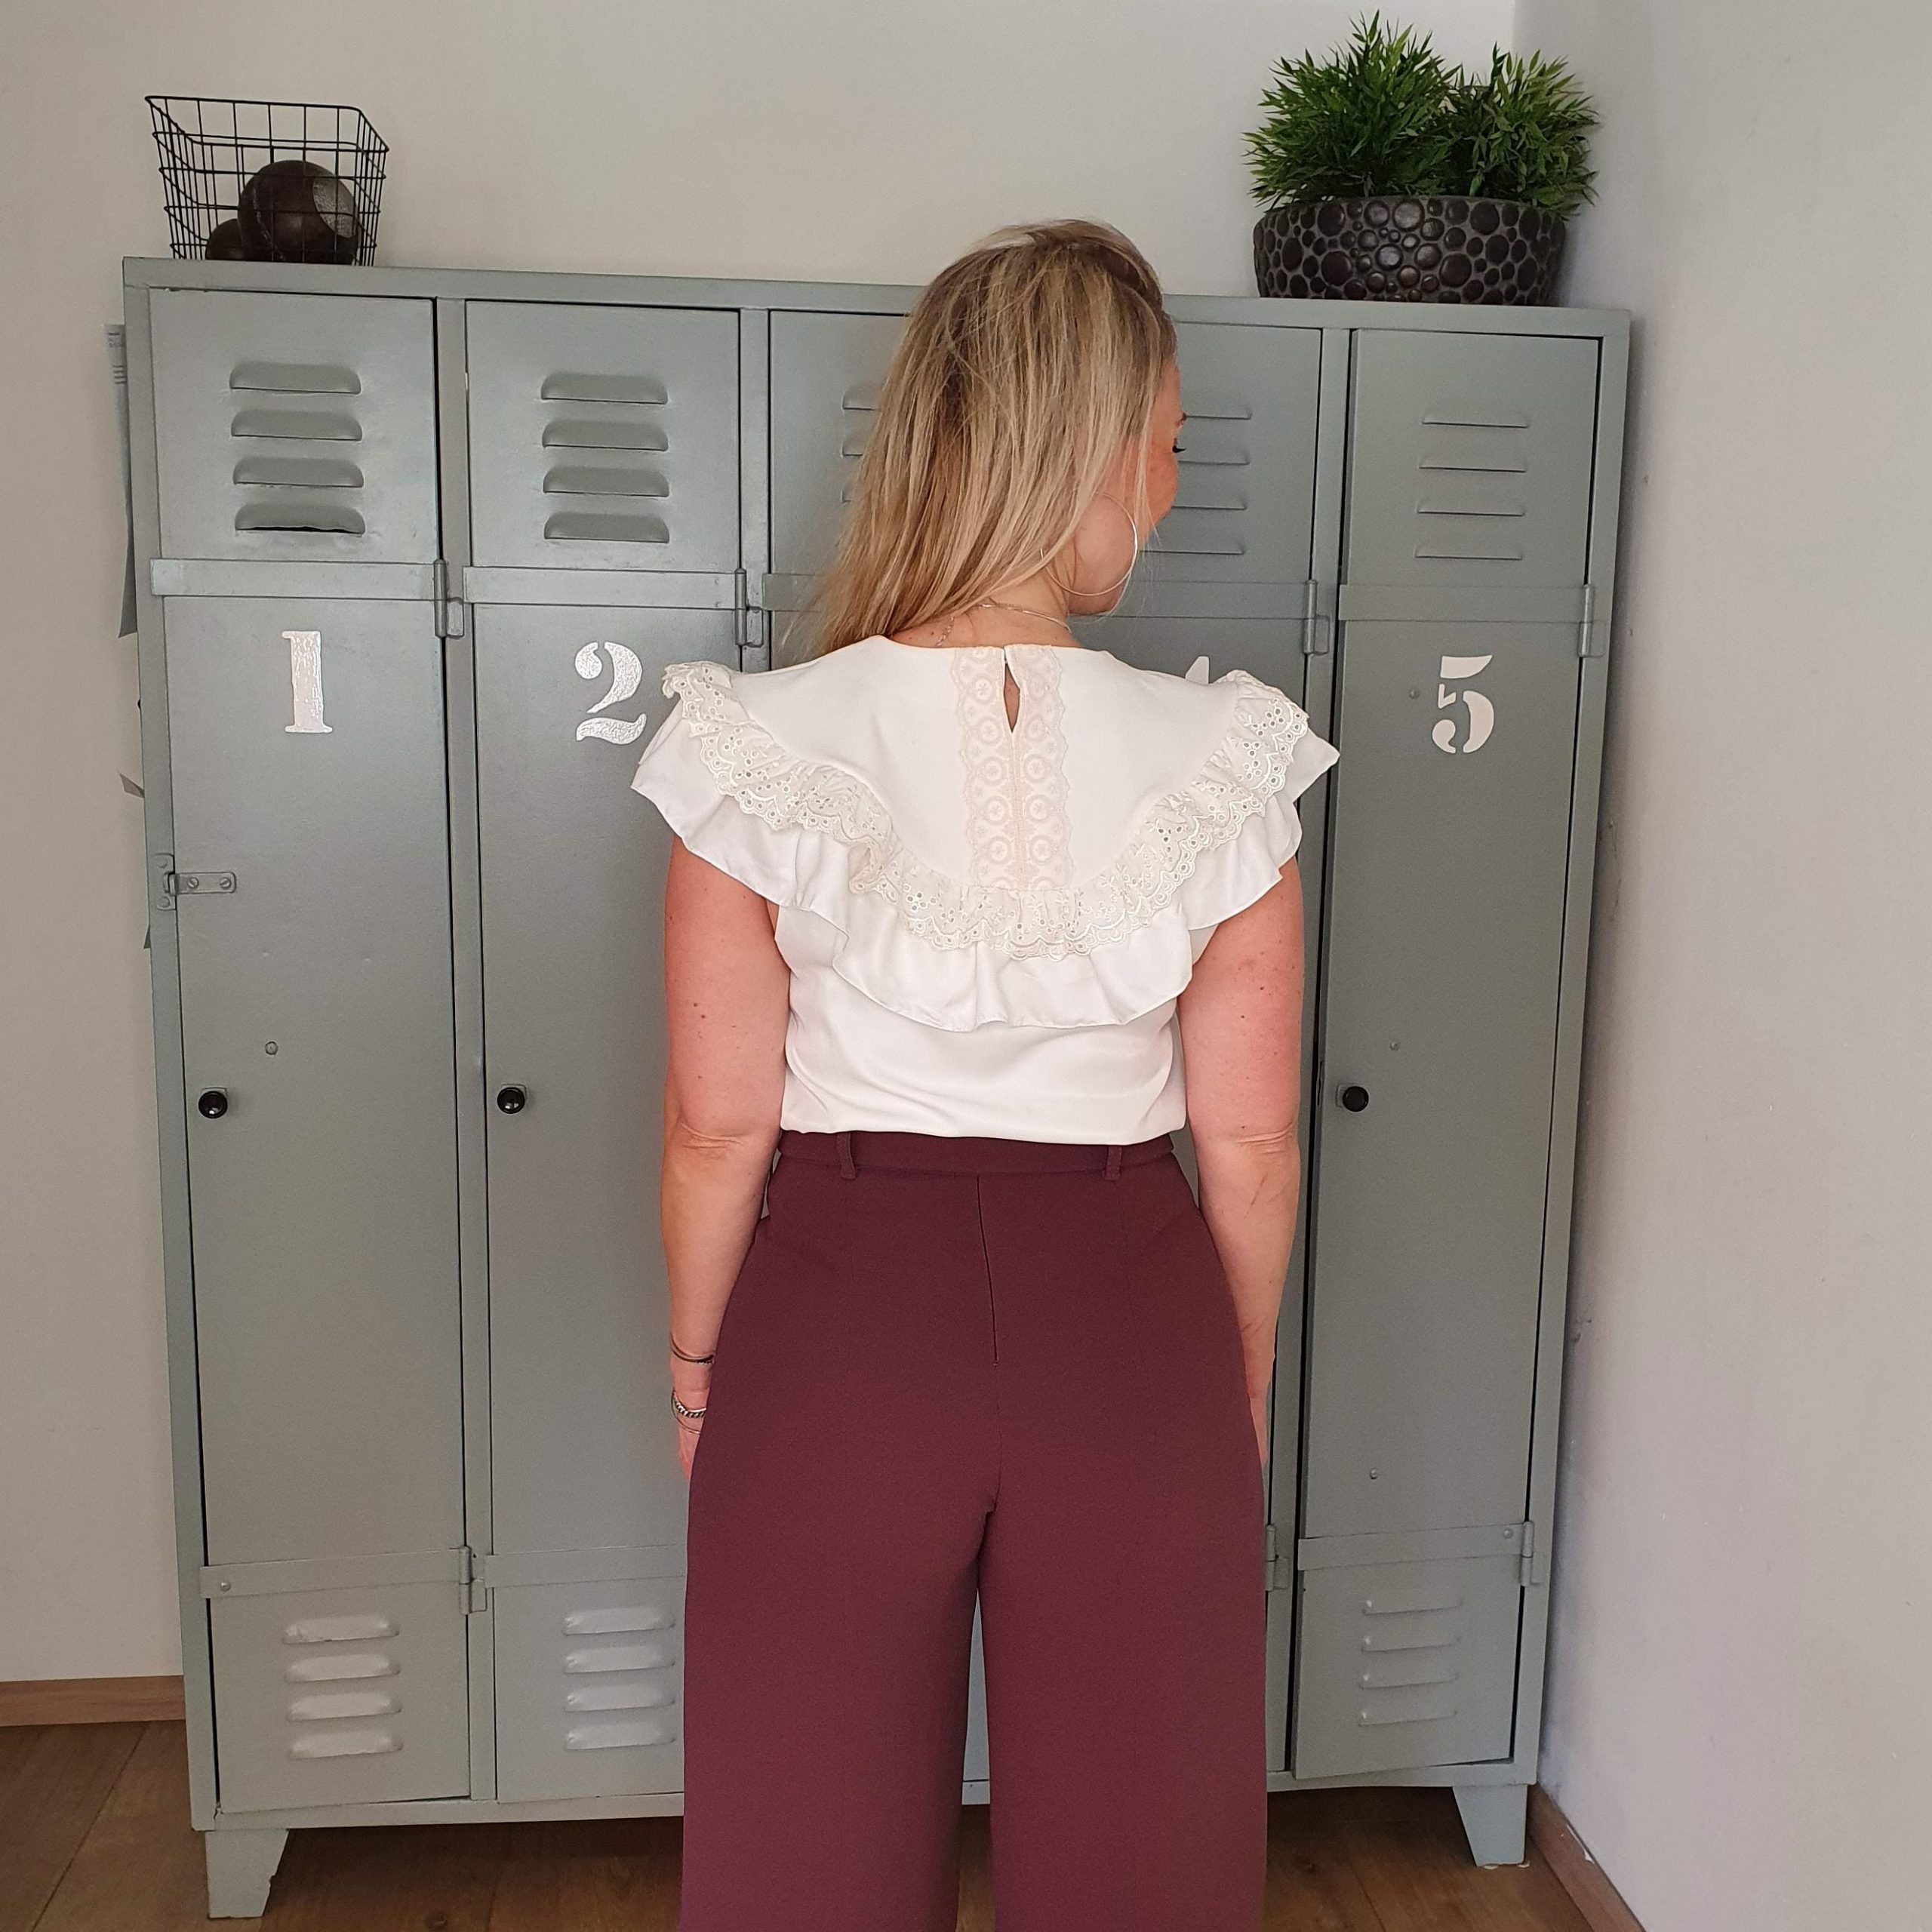
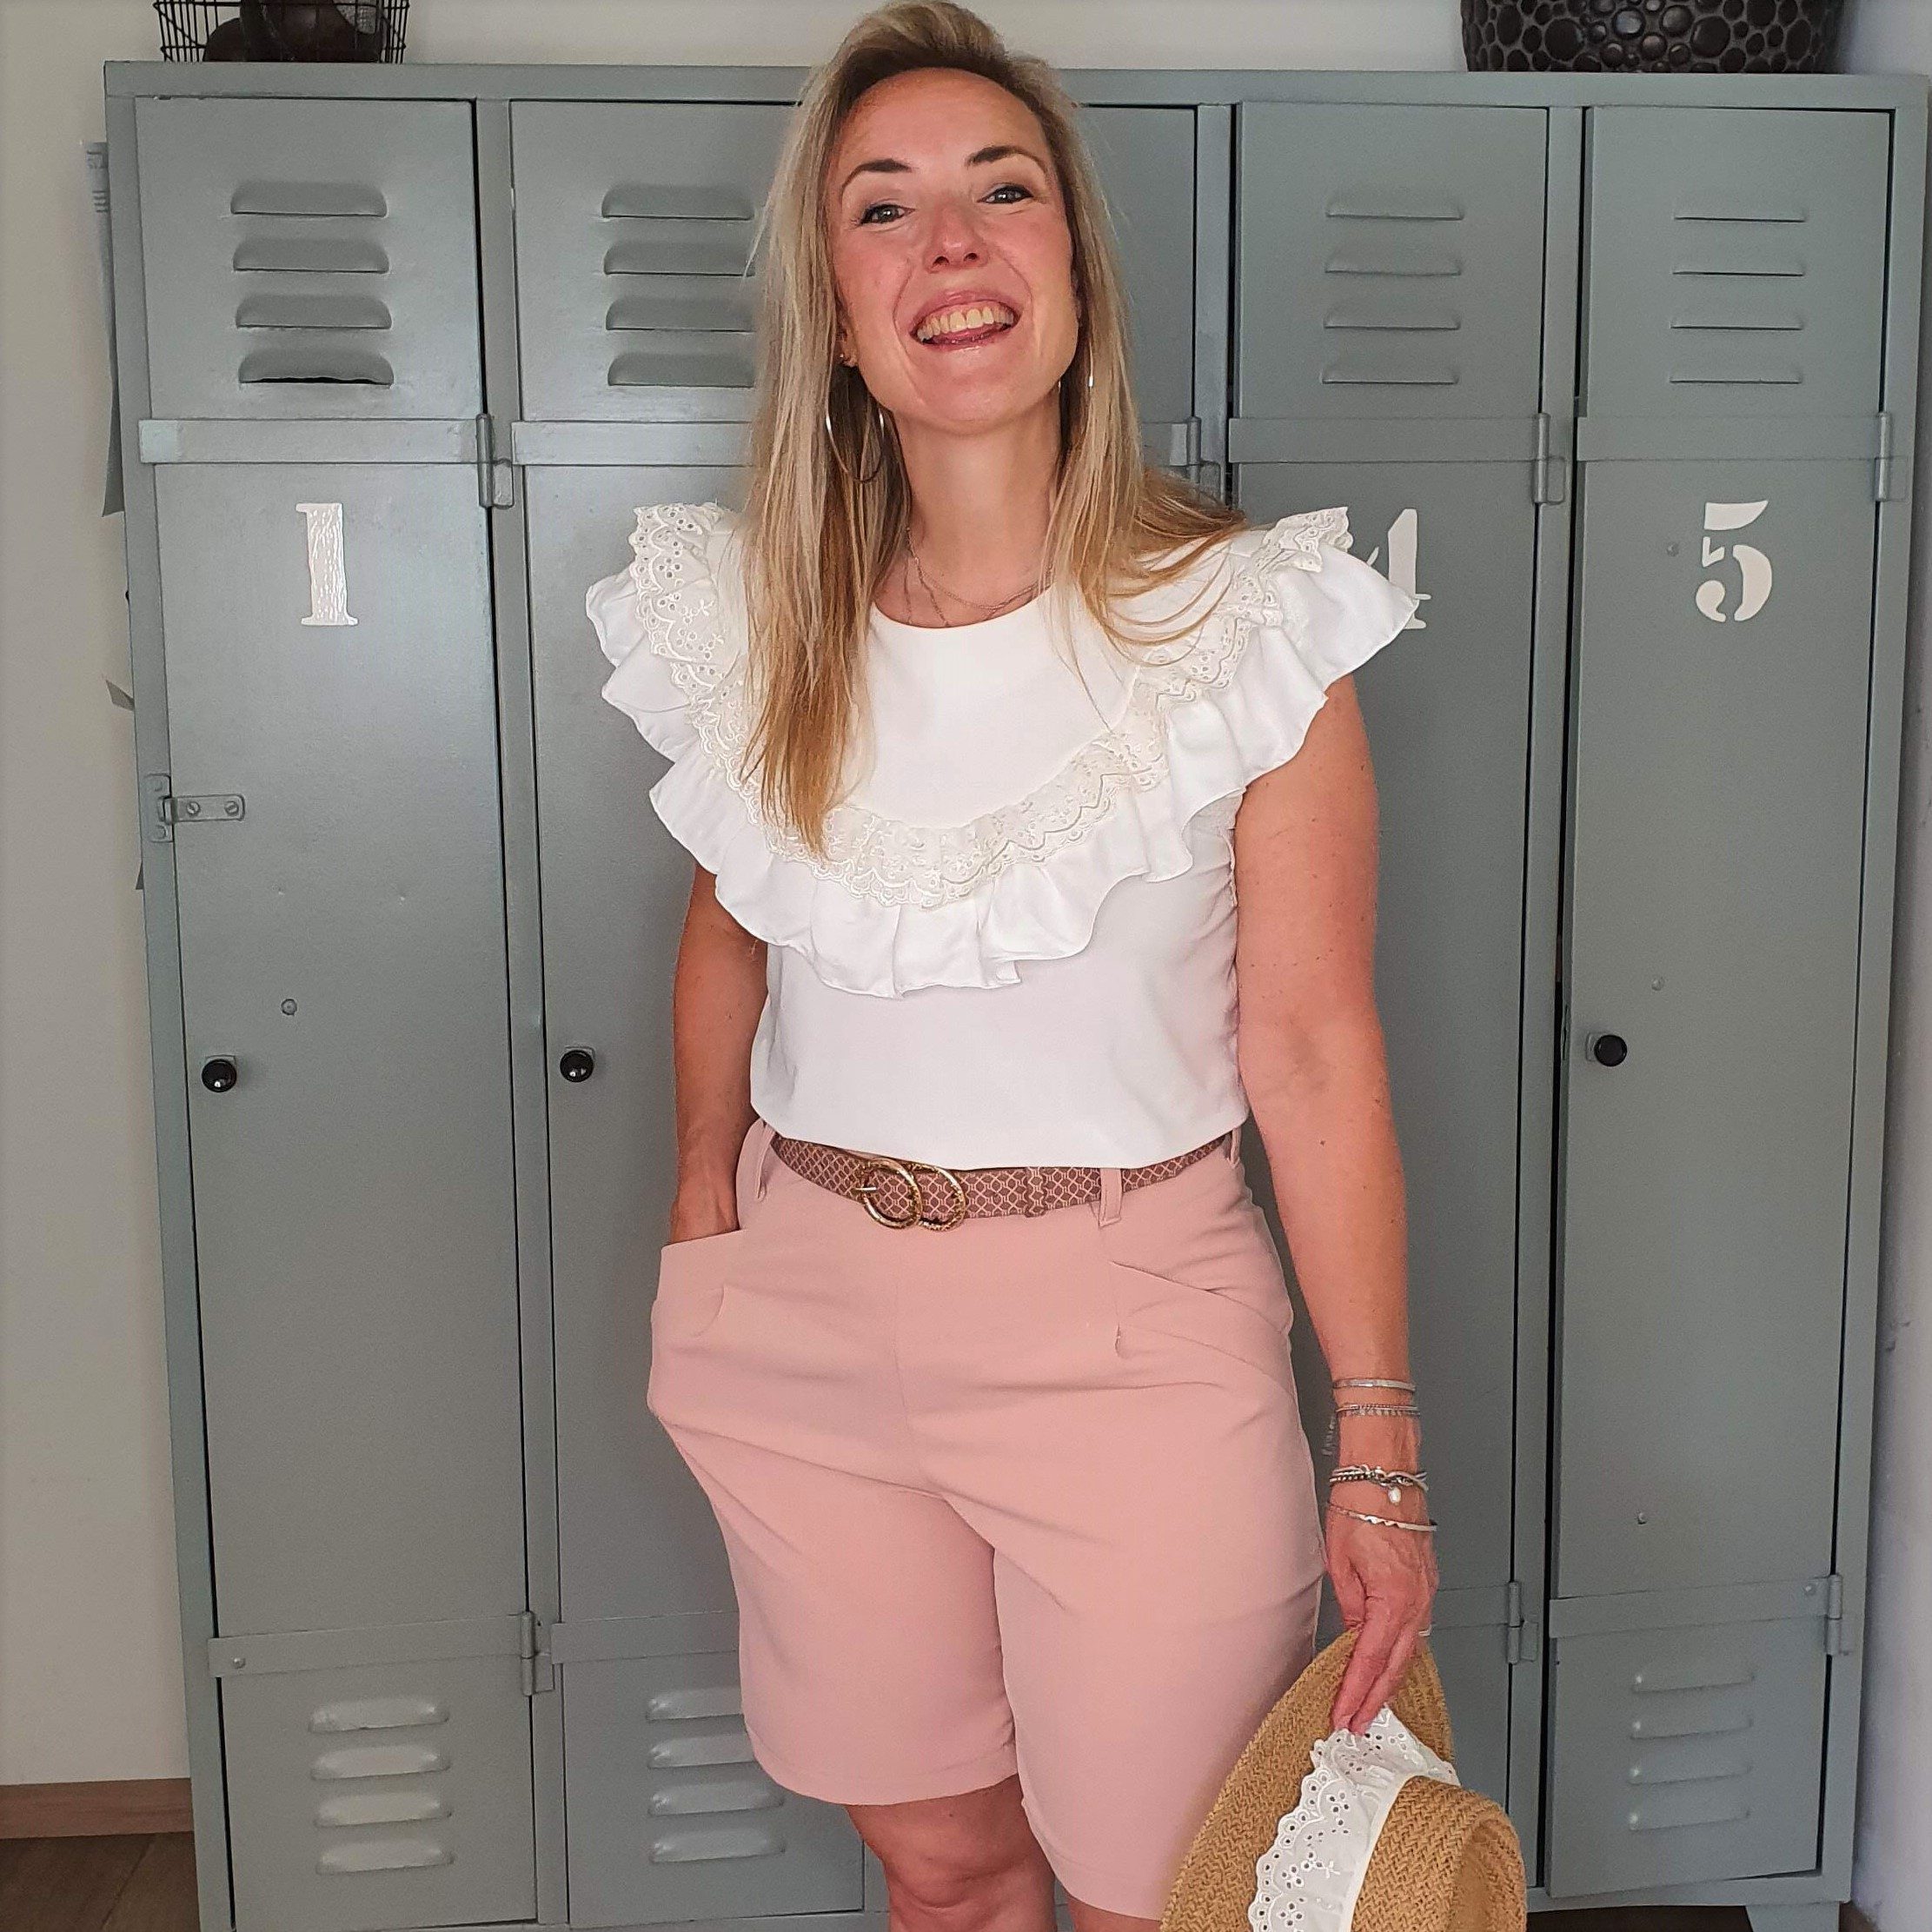
The result
The top was already featured in the Time to Shine! capsule wardrobe upcycling it to new life. It now has even more time to shine. The collar is a sublime match, especially because the self-gathered ruffle is made of the same fabric ;-). And how nice is it that I can also wear it back to fron, so that you can see that lovely lace trim. Options options options!

Happy statement collar!

Back to front
Sneak peek shorts
0 Responses