 BERNINA Corporate Blog -
Button borders are more up tp date than ever and a lovely alternative to zips. Get to know two different borders and learn how to change the button borders on your paper cutting pattern.
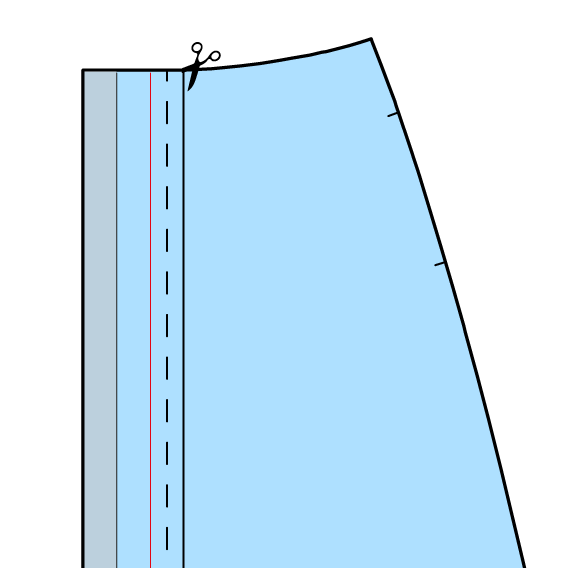
The cut button border
In the inspiration Magazine Nr. 01/21 we have designed the patterns of the dress “Mara” and the skirt “Daisy” with a cut button border. This is the fastest and easiest way to sew a button border. Depending on the fabric used there is no need to iron on a stabiliser.
Procedure for very thick fabrics
For very thick fabrics, the second weft is omitted (in the illustration the area to the left of the green line) and iron-on stabiliser is used instead.
The top edges of the button border disappear in the collar or the waistband and the hems are finished, ironed up and topstitched.
NOTE
In the illustrations, the right side of the fabric is shown darker, the wrong side lighter.
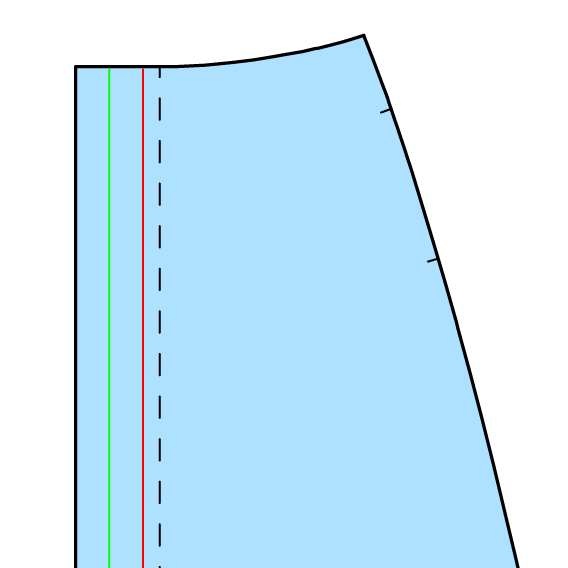
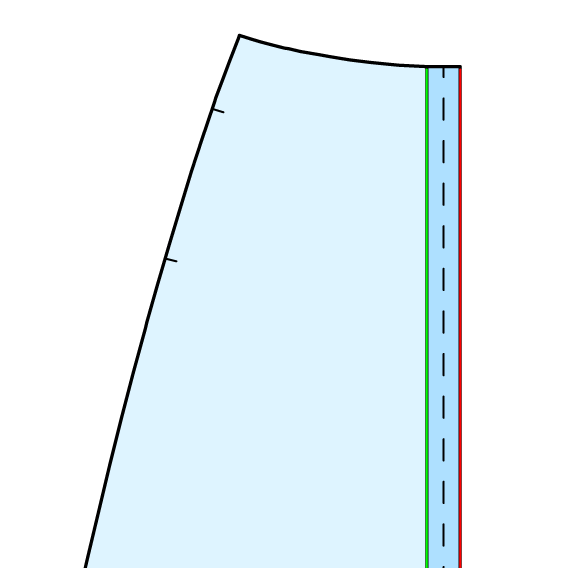
Iron the fold edges
No allowance needs to be added at the outer edge of the front cut. Fold the front partinwards twice – once at the fold line (green) and again at the “front edge” line (red). Narrow-topstitch the long edge.
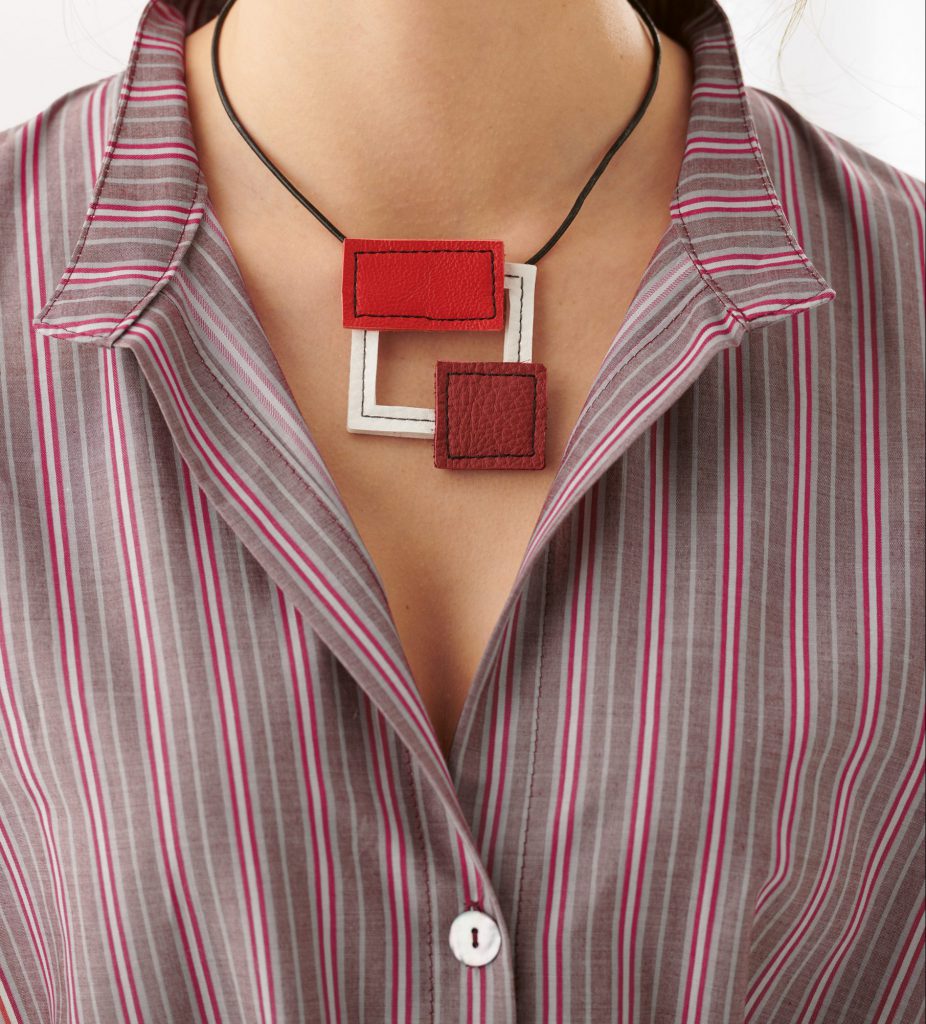
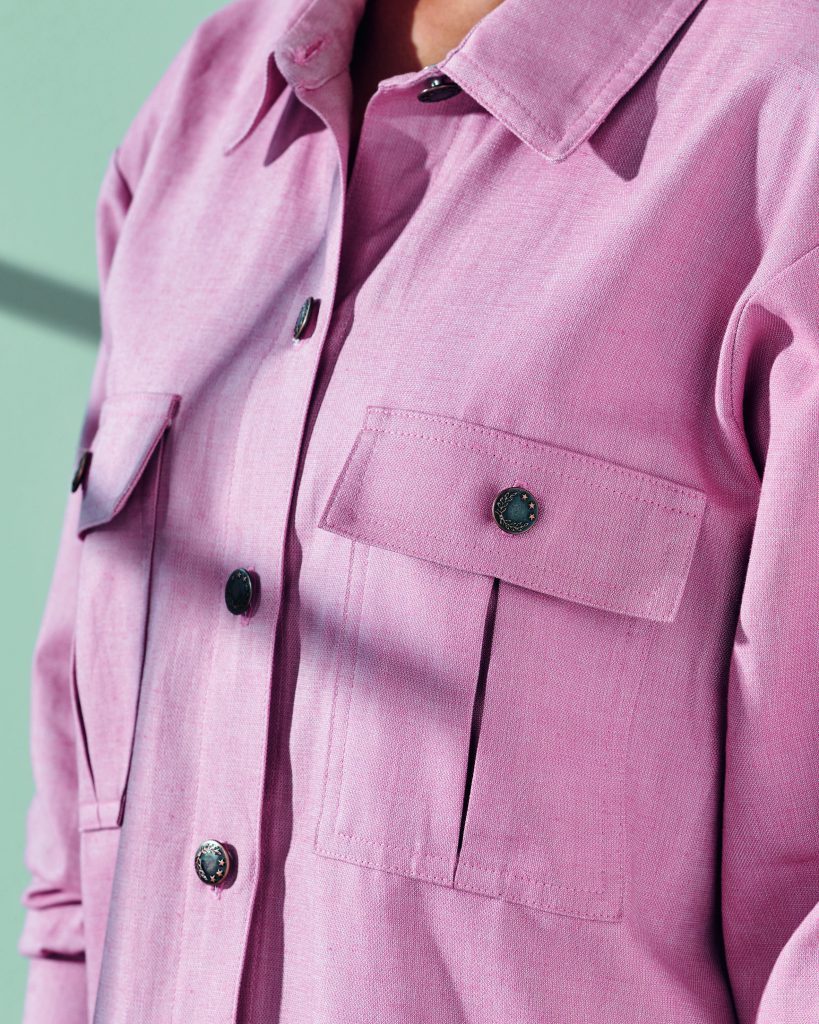
The extra button border
It is made of a separate cut piece, such as on the blouse “Megan”, and is sewn right side on right side to the front part. This makes sense if, for example, the fabric width is not large enough for a cut button border or if special effects, such as a different stripe pattern, are to be achieved.
The extra button border is also an advantage if the upper and lower edges cannot disappear into the hem, the collar, or the waistband. To do this, finish the upper and lower edges of the button border by sewing and turning over right away after having sewn the button border on the front part.
Easily change the paper cutting pattern
To change a pattern with cut facing into a pattern with extra button border, the paper cutting pattern can easily be changed.
- Measure the distance from the “front edge” to the “centre front”.
- Draw a parallel of this width on the other side of the centre front.
- Cut the paper there.
- Detached strip forms the separate button border.
- Cut off weft (shown in grey).
Fitting button sizes
A button border should always be about twice as wide as the button. If buttons are used which are at least 2 mm larger or smaller than those indicated in the section, the distance from the centre front to the front edge and the facing width should be adjusted. The position of the front centre always remains unchanged!
Additional BERNINA tips for you
You may have noticed that we have already published a few blog posts with helpful tips. These tips are written for various BERNINA inspiration magazines.
Are you looking for a specific topic right now? You’ll find a lot of supporting content on this page. And if the topic you’re looking for isn’t listed yet, check back regularly for the latest tips.
If you have any other useful tricks, feel free to share them below in the comments. Let’s take your sewing experience to the next level! 🙂
Creative regards,
Jasmin
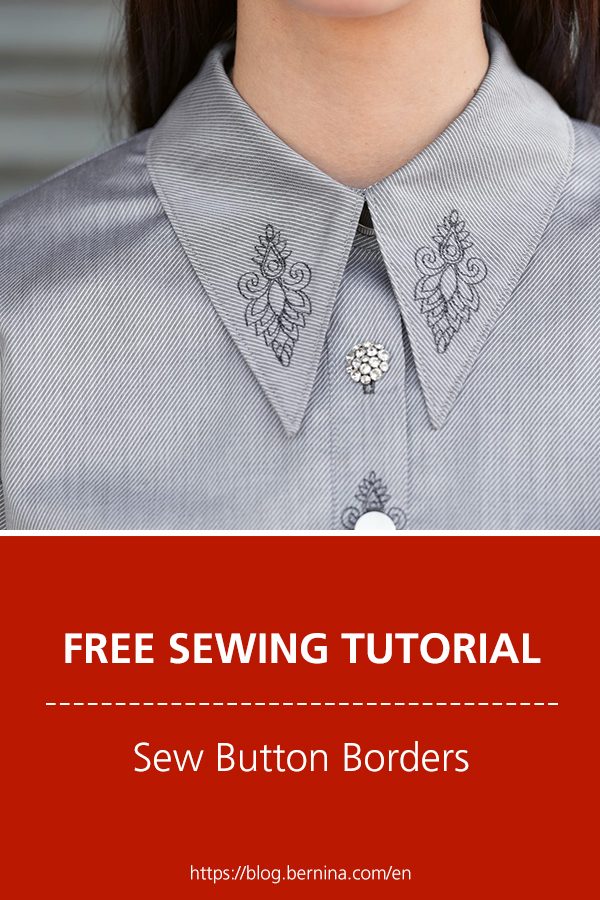


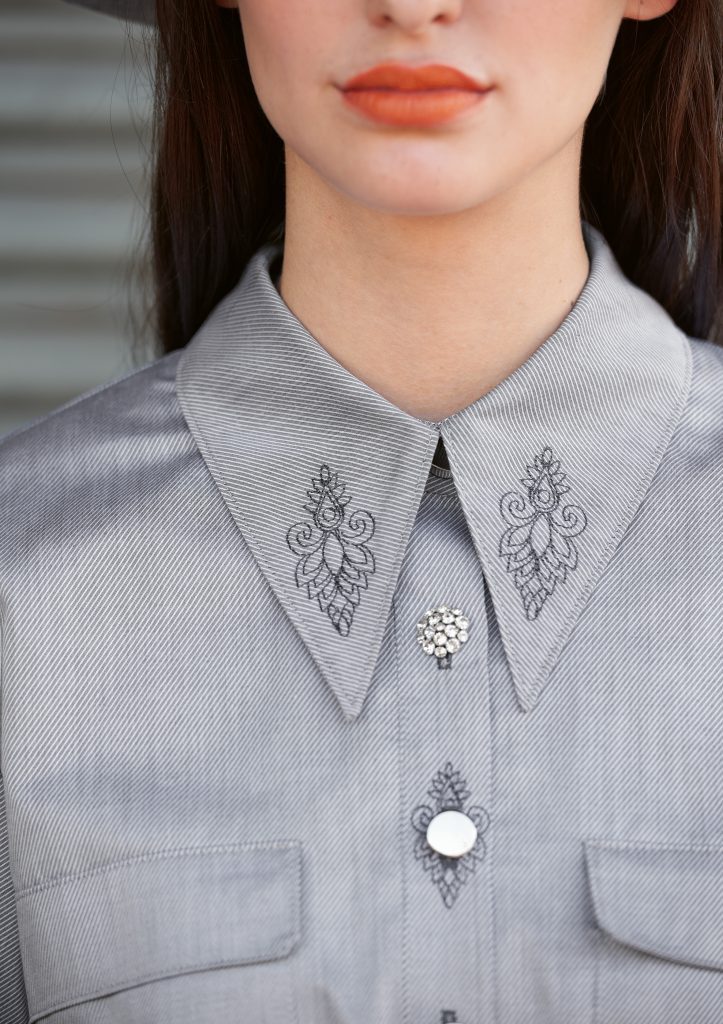
I love the embroidery on this grey shirt and would love to know about it. Also thank you for this band information, it is invaluable.
Dear Robyn,
You can find the pattern for the grey shirt here: https://www.bernina.com/blouse-megan
And here you can download the embroidery which is on the shirt: http://www.bernina.com/downloads-inspiration-1-21