 BERNINA Corporate Blog -
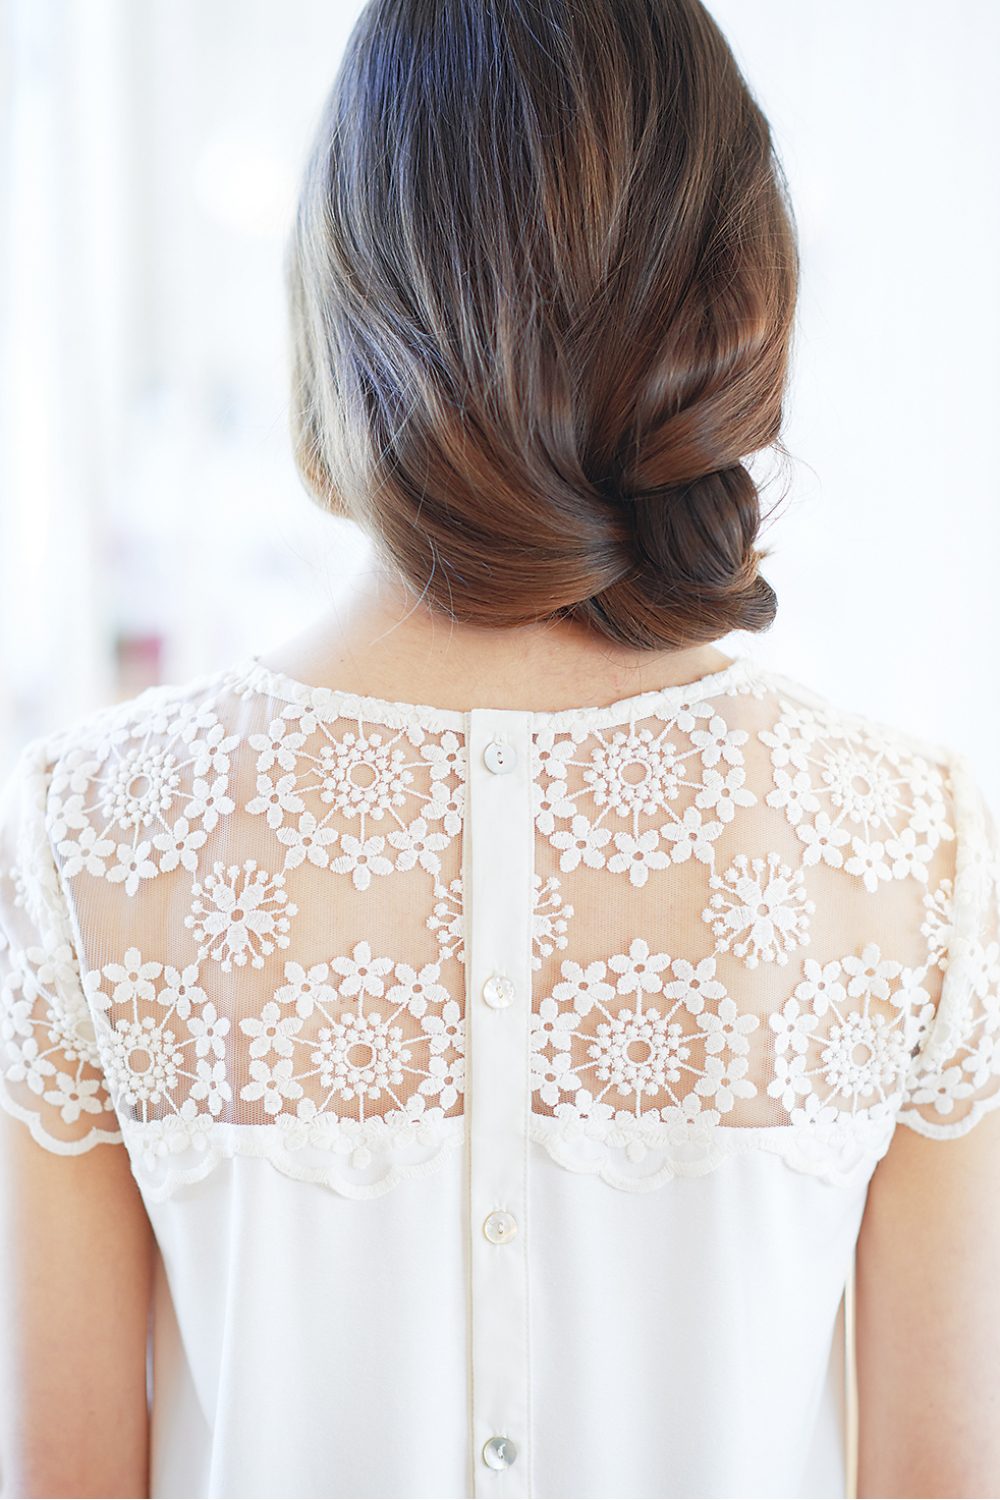
With lace fabrics, you can see the seams from the outside as well, which is why particular care is warranted here. Here are some tips from the inspiration Magazine on how to finish your sewing allowances on the inside. These techniques were used with the shirt “Sue”, the monthly free pattern of August 2022.

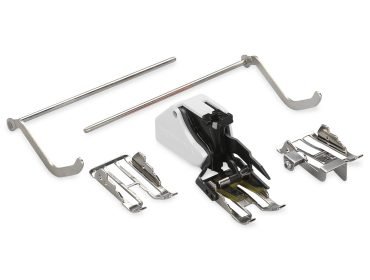
Recommended accessories
The different fabric thicknesses of the lace and jersey, as well as the stretch in different parts of the same fabric, require the use of the Three-Sole Walking Foot with Seam Guide #50 or the Dual Feed (BERNINA 7 and 8 Series). To improve the feed, particularly on corners and edges, water-soluble stabiliser is placed below the fabric. The stabiliser is simply sewn too, then carefully torn away or dissolved in water. Use a new 70 needle and sew with a 2.5 mm stitch length. If the lace is stretchy in places, a narrow zigzag stitch will prevent threads tearing when the garment is worn. A width of 0.3 to 0.5 is generally sufficient. Buttons and buttonholes should be avoided. In their place, we sewed on a button tape from fine cotton fabric.
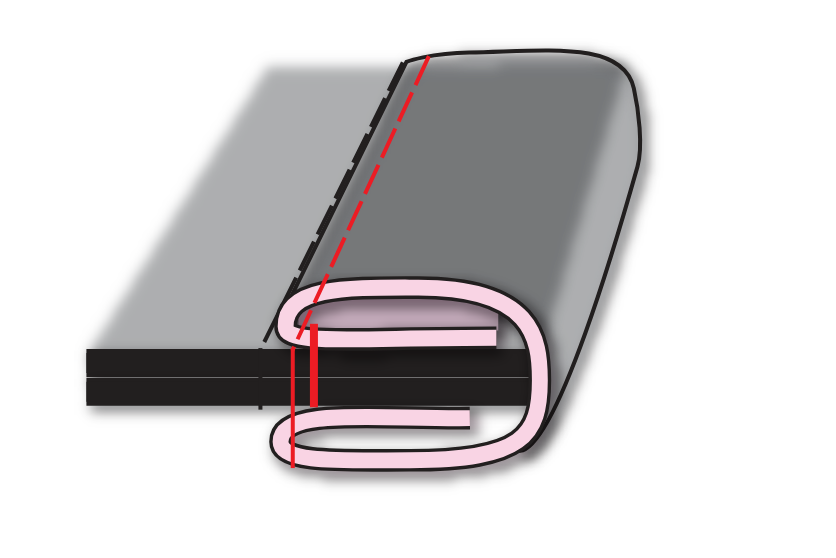
Binding seam allowances
Bind all visible seams with bias binding; for a lace shirt, this means the shoulder seam and armhole. Binding involves encasing the fabric edge in a bias strip. After the seam is sewn, the seam allowances are trimmed to approx. 5 mm width. Cut out bias tape with 2.5 cm width and place right-sides-facing over the seam allowance; stitch down. With the armhole, the tape is stretched slightly as you do this, and quite a lot in the bottom curve.
NOTE
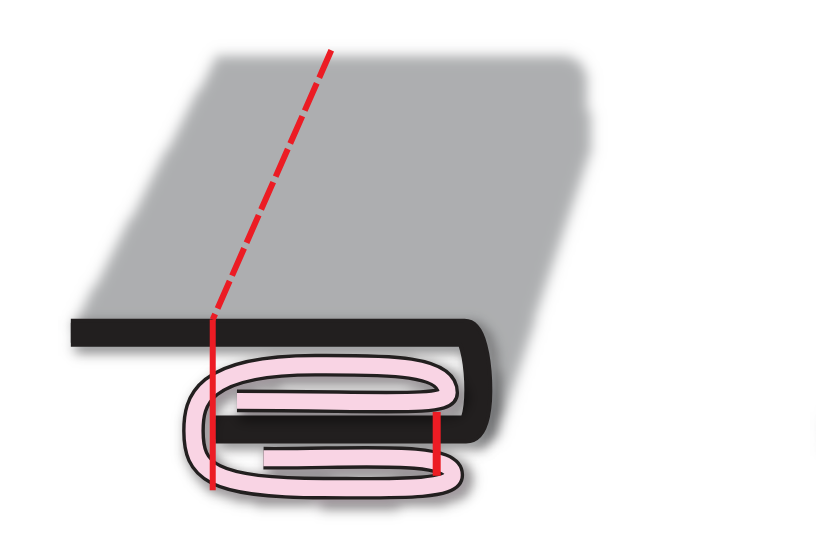
Positioning the fabric edges slightly stepped rather than flush will yield a softer-looking edge in the end. Fold binding around edge. Turn under seam allowance of free side of binding and pin on. Stitch in the ditch from the right side with the sewing machine and the Walking Foot (dashed red line in drawing). The finished seam-allowance width will be about 7 mm.
If you’re feeling fearless, you could also iron both raw edges of the binding inwards, slide the raw edges of the lace in between, and stitch down like that. This method is only really recommended for straight seams and flat fabrics, however.
Second method for quick binding
This variant is a second method for quick binding : unfortunately, there are 2 fabric layers more in the finished bound seam allowance, making the final result somewhat thicker. Fold and iron bias binding lengthways with the long edges of bias binding slightly offset. Sew binding to fabric with the open edges towards the seam allowance.
Now place the fold of the binding around the edge and stitch on from the right side.

Binding necklines
he neckline of the lace shirt is edged with bias binding, since a facing would be visible from the outside. “Edging” means turning under a seam allowance, then covering it with facing or binding. For this, we used 3.5-cm-wide bias binding. Place the right side of the binding on the right side of the fabric and stitch down.
NOTE
Positioning the fabric edges slightly stepped rather than flush will yield a softer-looking edge in the end. With inside curves, like here especially in the shoulder area, the binding is gathered as you do this. Normally the neckline seam allowance is notched in the corners, but with stretchy lace this is unnecessary.
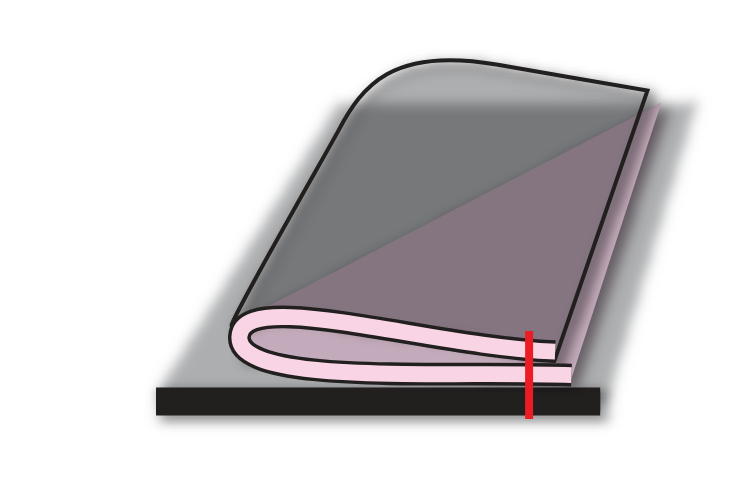
Pull binding onto the wrong side of the fabric so that approx. 1 mm of the outer fabric lies with it on the wrong side. Using a sewing machine and the Walking foot, stitch on from the right side just
short of the fold of the binding (dashed red line).
Additional BERNINA tips for you
You may have noticed that we have already published a few blog posts with helpful tips. These tips are written for various BERNINA inspiration magazines.
Are you looking for a specific topic right now? You’ll find a lot of supporting content on this page. And if the topic you’re looking for isn’t listed yet, check back regularly for the latest tips.
If you have any other useful tricks, feel free to share them below in the comments. Let’s take your sewing experience to the next level! 🙂
Creative regards,
Jasmin


0 Responses