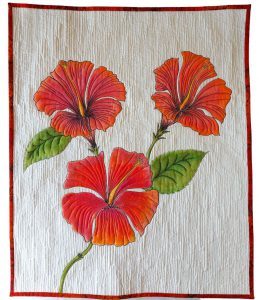
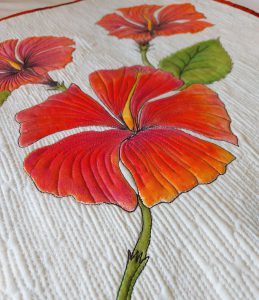
INTENSE INKTENSE HIBISCUS FLOWERS
PAINT AND FREE MOTION QUILT YOUR HIBISCUS FLOWERS!
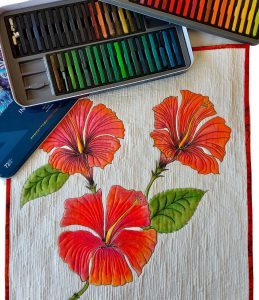
The inspiration for this work came to me a little while ago. I was asked to do a demonstration and as usual, I decided to take a walk in my garden. It was summertime and the hibiscus was in full bloom. With the very concentrated colour that Inktense paint blocks/pencils give, it was the ideal inspiration!
TO CREATE YOUR OWN, YOU WILL NEED THE FOLLOWING:
- A piece of 100% cotton fabric in a very pale colour, 60cm X 50cm, mine is white.
- Loomtex batting 65cm X 55cm
- Backing 65cm X 55cm
- Enough fabric for a narrow binding in your choice of colour.
- Freezer paper 50cm X 50cm
- Black Isacord machine embroidery thread.
- White Isacord machine embroidery thread.
- All-purpose thread for sewing on the binding
- A reference picture of hibiscus flowers of your own (in colour)
- Inktense paint blocks or pencils
- Fabric medium
- A firm paint brush
- A container with water
- Kitchen towel.
- Sewing machine of which the feed dogs can drop
- A marking tool (not chalk and nothing permanent)
- A light box
- Spray glue or quilting safety pins.
GETTING STARTED!
- Use a light box and trace your reference picture onto the white fabric using a water soluble pen.
- Iron freezer paper onto the wrong side of the above.
- Use fabric medium and Inktense paint blocks or pencils to paint.
- Set aside to dry
- Peel off the freezer paper.
- When dry, run iron over it. Inktense is permanent when dry but just double check.
-
NOW FOR THE SEWING PART!
- Set up your machine for free motion quilting and black embroidery thread.
- Layer the quilt top, batting and backing and secure with spray glue or quilting safety pins.
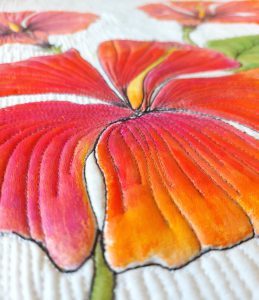
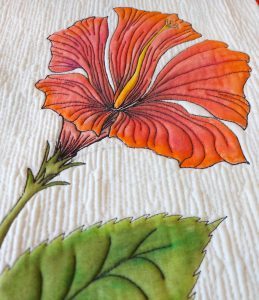
- Stitch along the outline of the flowers. (This can also be done before you start painting)
- Add detail for example the veins on the petals.
- Change thread to white embroidery thread and quilt the background in your favourite quilting style.
- Square off and sew binding on.
- Sew hanging sleeve and label on and enjoy your painted Hibiscus flowers!
If you are passionate about textiles and want to learn more about how to incorporate my innovative techniques into your work, follow me on Instagram @tillydeharde and Facebook, Tilly de Harde Fibre Artist & Teacher and visit my website www.tillydeharde.com & subscribe to my mailing list. Please don’t forget to leave a comment in the comment box below!
 BERNINA Corporate Blog -
It is beautiful!!! Hibiscus is one of my favourite tropical flowers. This is going on my bucket list.
Thank you Tilly – your work inspire me.
Hi Yolande, thank you! That is such a nice compliment! I love inspiring people everywhere! I hope you will post photos of your work somewhere so that I can see it! Love, Tilly
Espetacular!!!
Hi Rosemary, thank you, I am pleased you like my work! Love, Tilly
Thanks Tilly
Hi Jenny, I hope it will be inspiration for one of your beautiful quilts! Love, Tilly
Oh my gosh – I have to make this! As a child growing up in Southern Africa our hedges were red hibiscus! Thank you so much for this beautiful piece! I only hope I can do it justice when I make it!
Hi Felicity, I wish I could see your hedges in full bloom! I have two hibiscus shrubs in my garden here in Joburg and I just love it when they bloom! It brightens up my day to walk around my house and see it. You will definitely manage it and I hope you will send me a photo of your work! Visit my website as my contact details are there and also remember I teach online classes if you are interested! Love, Tilly