 BERNINA Corporate Blog -
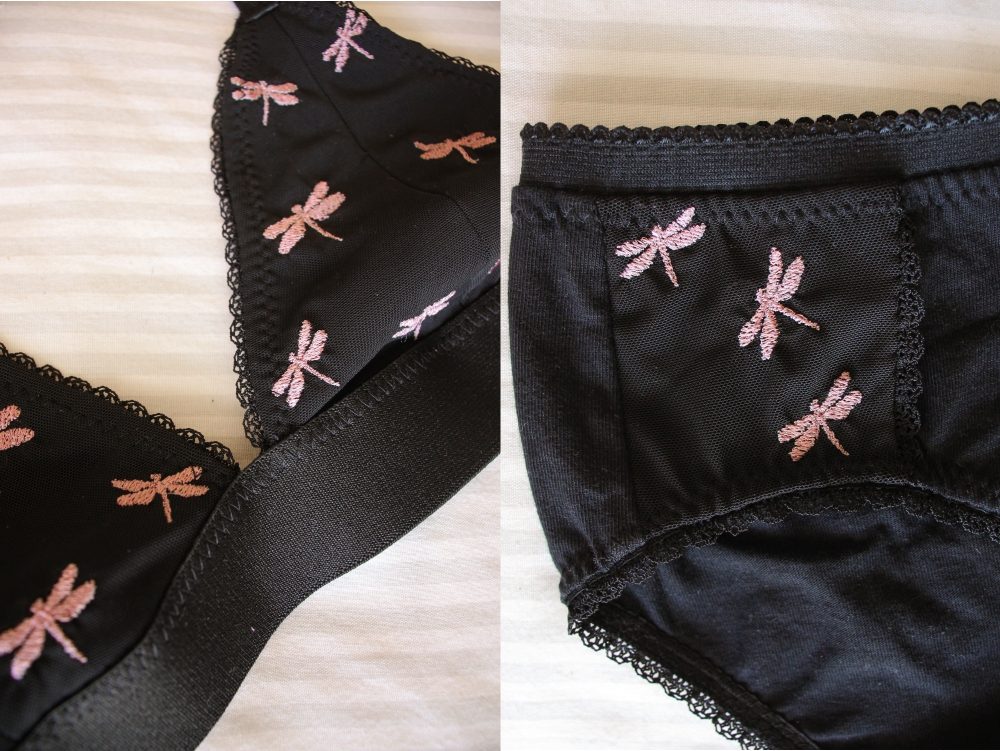
While the idea of making lingerie can be intimidating, the practice isn’t actually that complicated.
When you get the hang of it, making your own undies will be a quick and fulfilling project that can even use up scrap fabrics or repurposed tshirts. You can even make them without an overlocker.
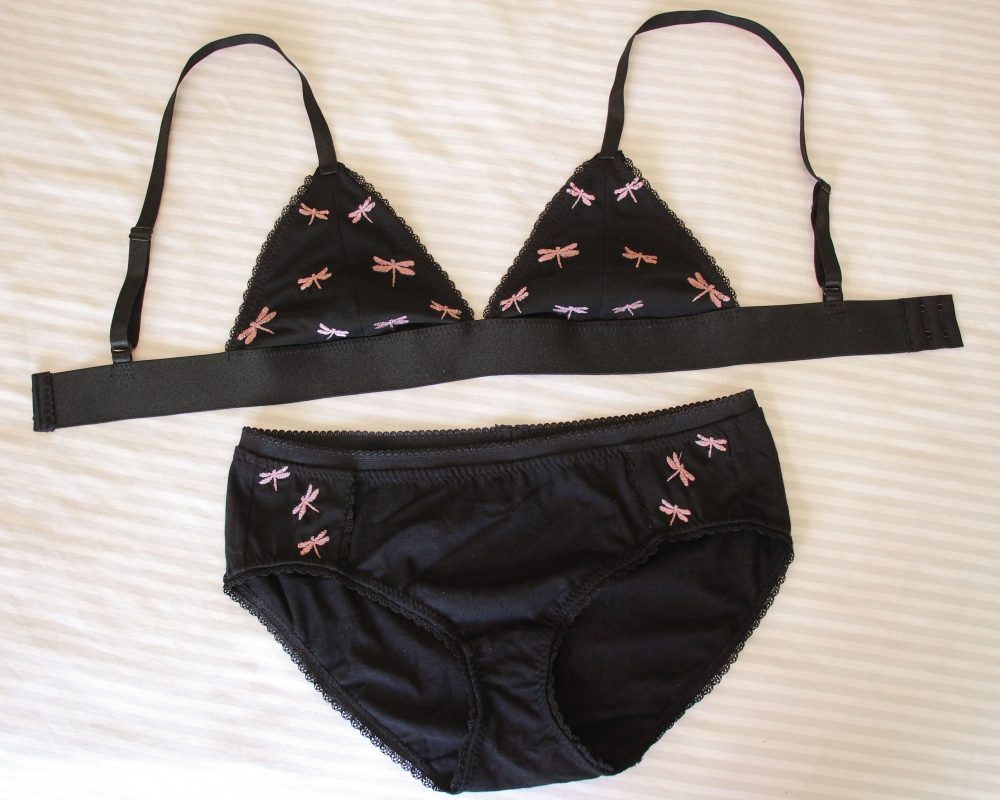
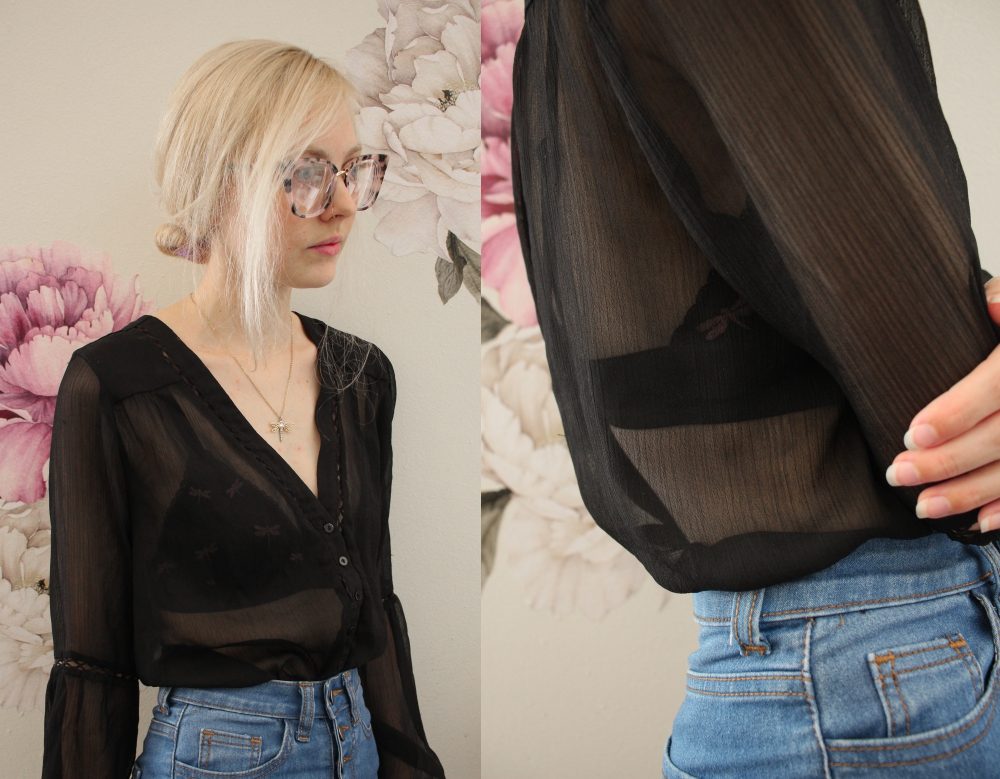
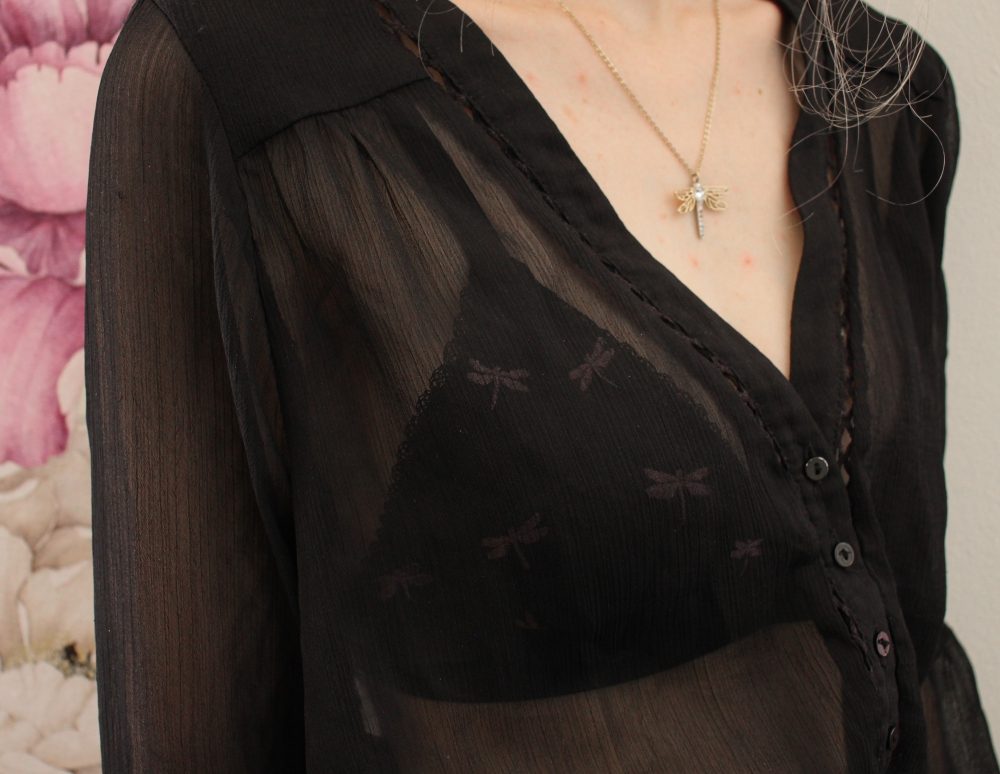
When I find a pattern that I like the fit of, I cut it out in different colours and sew up a few at a time. I have made a few pretty lace bras & bralettes which are great for wearing under sheer or loose tops. But wearing something comfortable wins over everything. Comfort doesn’t mean that they can’t be cute, pretty or fun. And it’s a bonus if you make a matching set.
What will be needed:
- Sewing machine 735
- Bra pattern (see free downloads below)
- Undies pattern (see free downloads below)
- 1cm wide plush elastic*
- 1cm wide picot/lingerie elastic*
- 5cm wide picot/band elastic*
- 3cm wide band elastic* (if making the Venus bralette)
- Hook & eye tape same width as band elastic
- 2 sliders/adjusters
- 2 rings
- Power Mesh fabric*
- Cotton knit fabric*
*Quantities will depend on your patterns
Patterns
I used the Venus Bralette by Nocturne Design except I lined it with a cotton knit fabric and made a few adaptions which I explain below.
For the undies I used the Kwiksew 3881 Misses’ Panties pattern, View B as it is a pattern I have used many times and love the fit.
Here are some free patterns that you can make using the tips learnt in this blog post: Free underwear sewing patterns
Adaptions
Bra:
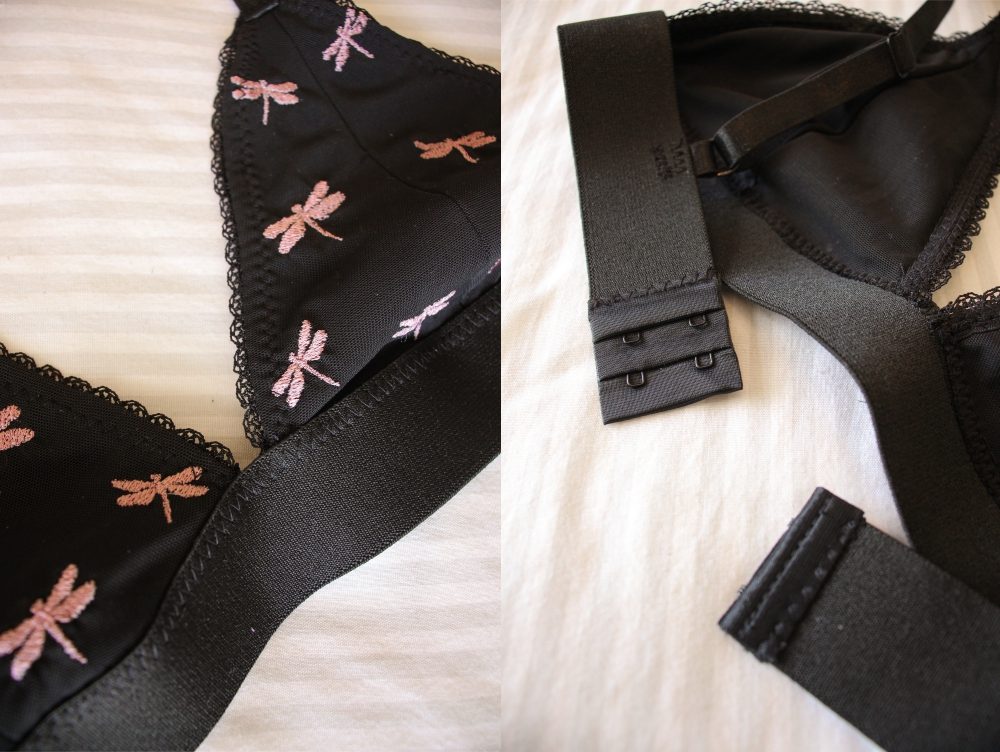
The Venus Bralette is drafted to use fold over elastic along the sides of the cups. Therefore there is no seam allowance along the outer edges of the cups.
I want to use Picot elastic, so I added 1cm seam allowances just to these 2 seams.
The pattern has 7mm seam allowances included along the bottom edge of the cups to join to the band and along the inner edges to join the cups together.
I also swapped around the straps so that rings and sliders are at the back. This is just an aesthetic preference.
Undies:
My Kwiksew 3881 pattern was drafted for picot elastic. However, if your pattern was drafted for fold over elastic, you can add a seam allowance (the width of the elastic) around the leg & waist openings to be able to use picot elastic.
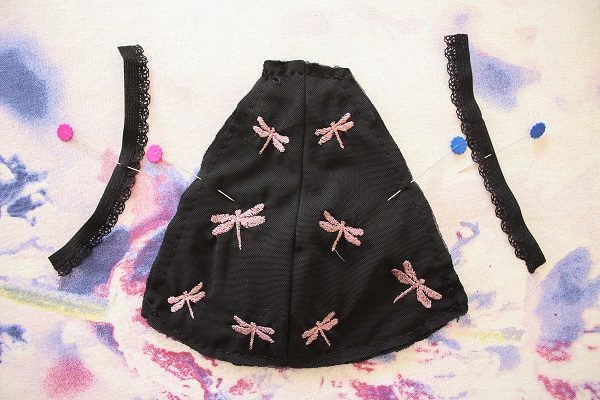
To add panels to the undies, I traced off my front & back pattern pieces and drew lines where I wanted to insert my panels.
I then cut out the pattern pieces and cut along the lines.
Then I added seam allowances (1cm) to the lines.
Remember to add the details of the pattern to the pieces.
Fabric & Habby
Here is some info of the different types of lingerie fabric & habby: Lingerie Fabric & habby
For my lingerie set, I used cotton knit fabric leftover from a tshirt I made for my boyfriend. I also used power mesh that I embroidered in this blog post: Custom embroidered tulle for lingerie
Normally one would line the cotton knit with the power mesh, however I used the cotton knit as a lining for my embroidered power mesh in my bralette. I used power mesh instead of tulle as it is not scratchy, has more stretch and I will still benefit from its support.
My bralette is made up of 3 layers. The outer layer is embroidered powermesh lined with cotton knit for modesty, comfort and to prevent visible seams. I then added an inner layer of plain power mesh to encase the seams and neaten the inside.
Steps
Instead of repeating the pattern’s instructions of how to make my lingerie set step by step. I will instead share the tricks I used.
Undies
Gusset
Regardless of the fabric of your underwear, the gusset lining should be made from natural fibre fabric.
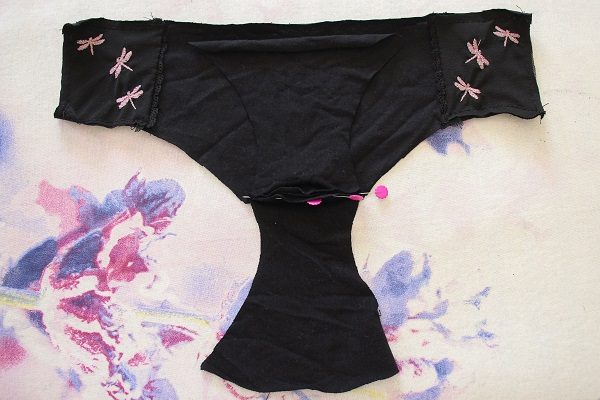
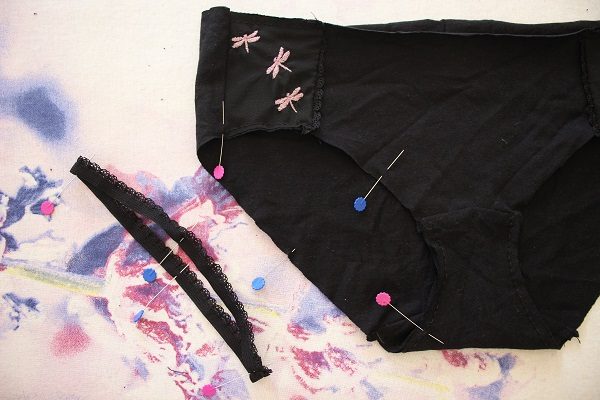
- Pin the Gusset Pieces to the Undies Front piece (right sides together) sandwiching it between the gussets.
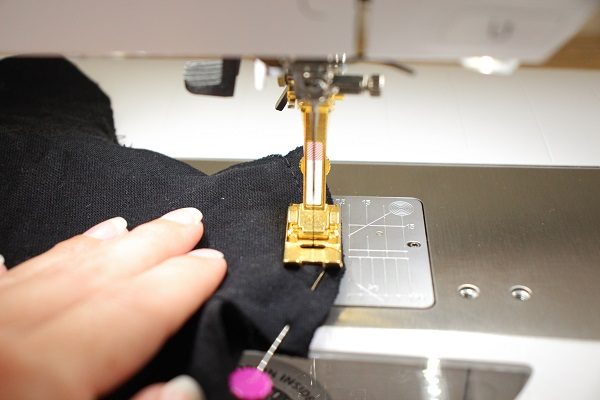
- Secure the layers, you can use straight stitches as this seam isn’t expected to stretch.
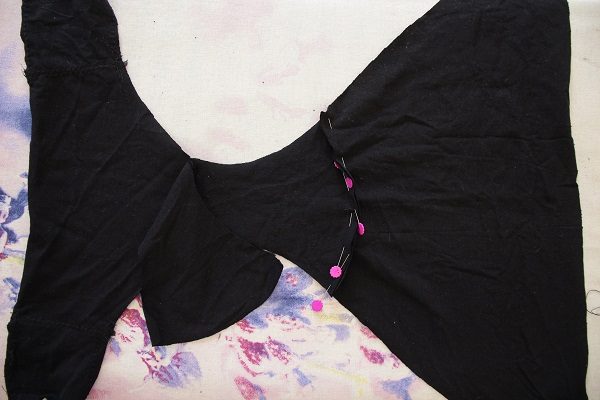
- Pin the Outer Gusset to the Undies Back (right sides together).

- Turn the garment over

- Roll the Undies Back towards the middle, exposing the pinned seam.
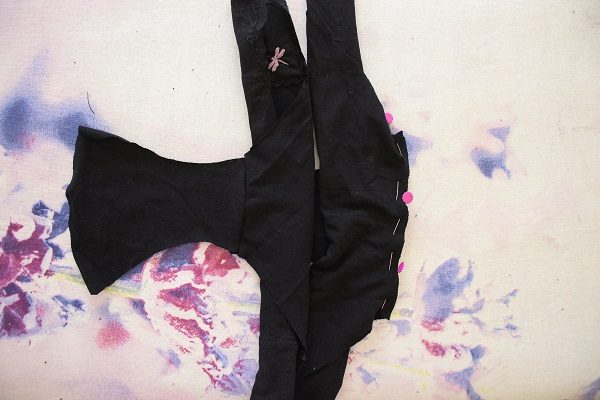
- Roll the Undies Front towards the middle, exposing the Inner Gusset.
- Bring the Inner Gusset over and re-pin the seam. The Gussets must sandwich the Undies Back.
- Sew the seam.

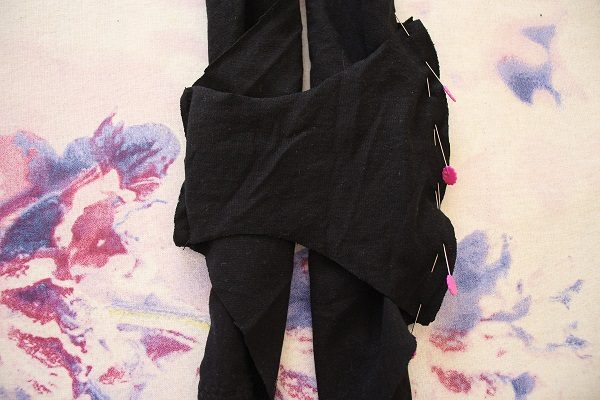
- Turn the garment right side out, pulling it through on of the openings.
Attaching elastic
- Cut your elastic to the lengths according to your pattern’s instructions.
If there are no instructions, cut the elastic 8%-11% shorter than opening.
Measure along the raw edge of the leg or waist opening and deduct 8%-11% from that measurement to get the elastic measurement.
If your elastic is soft (can easily see light through when stretched), make it 11% shorter for the waist and 10% shorter for the leg opening.
If it is sturdy (can’t really see light through when stretched, tends to have a plush texture on one side), then make 9% shorter for the waist and 8% shorter for the leg opening.
I would also recommend adding 1cm seam allowance to each end of the elastic.
- Attach the ends of the elastic to create a loop using straight stitches.
I used a 1cm seam allowance.
- Divide the elastic into quarters and divide the leg openings into quarters.
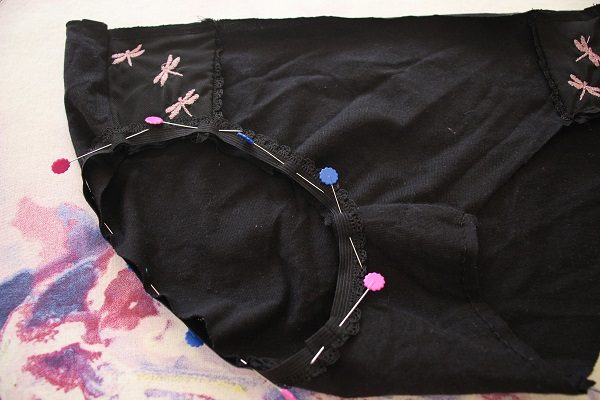
- Match up the divisions of the elastic to the leg openings.
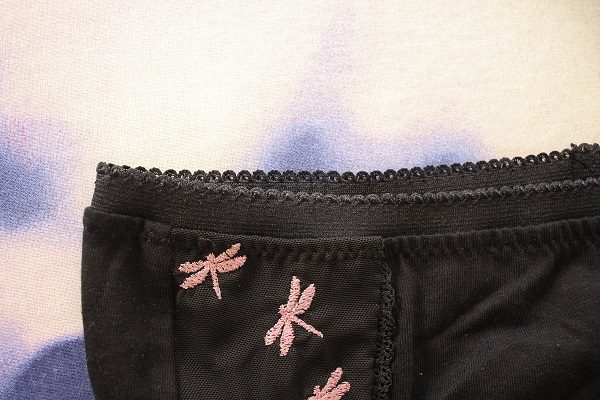
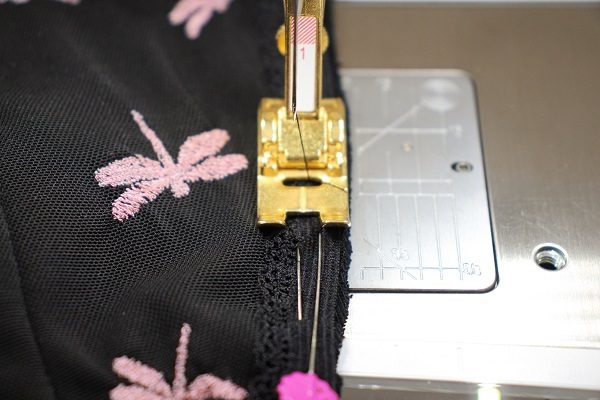
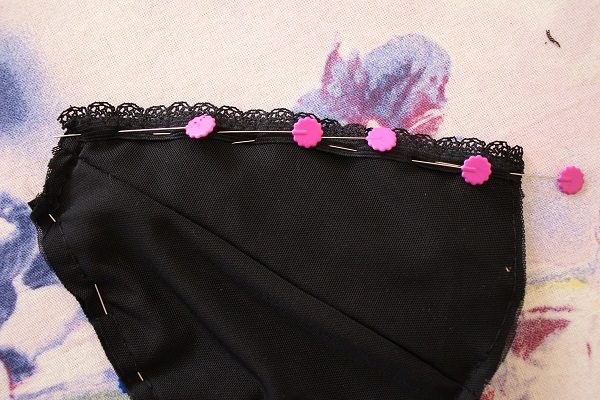
Pin elastic to Right Side of the leg opening edges with the decorative edge pointing towards the centre of the garment. Have the right sides together.
If your elastic has a plush/soft side, you’ll want this against your skin. This would be considered the wrong side in this case. The shiny side would be considered the right side.
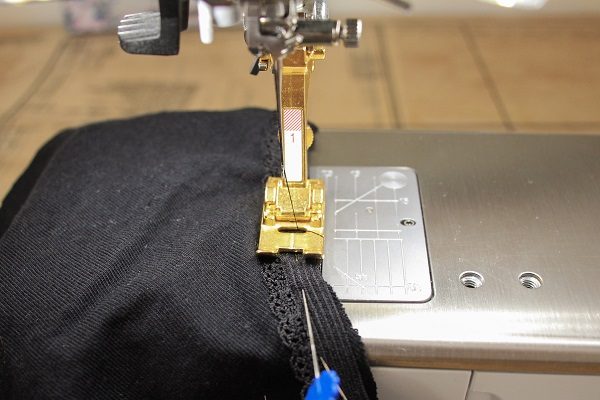
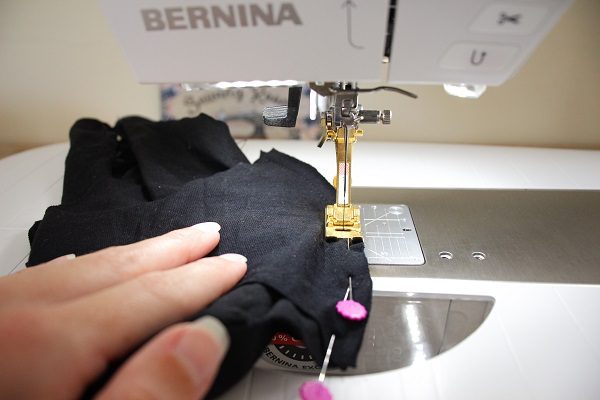
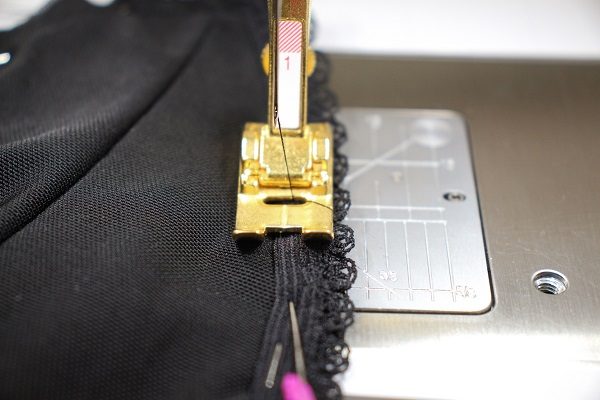
- Stitch with a narrow zigzag close to the decorative edge.
The stitch width should be about half the width of the elastic.
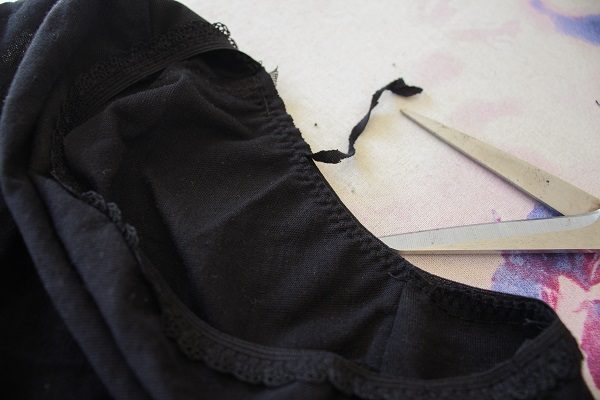
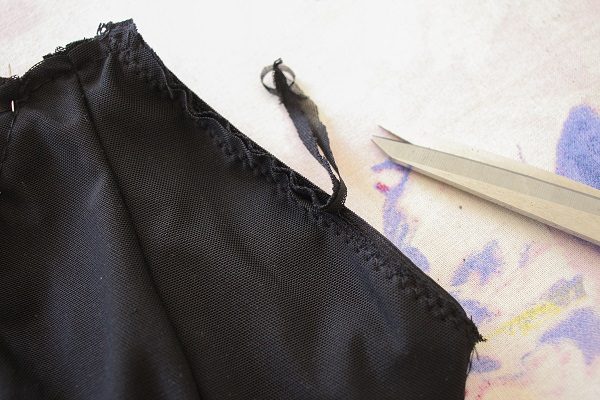
- Trim the fabric (not the elastic or the stitches) close to the stitches.

- Turn elastic to the inside, pin and zigzag stitch close to the other elastic edge.
- Repeat the above steps for the waistband.
I used the wider picot elastic for my waistband but kept my seam allowance the same.
Bra
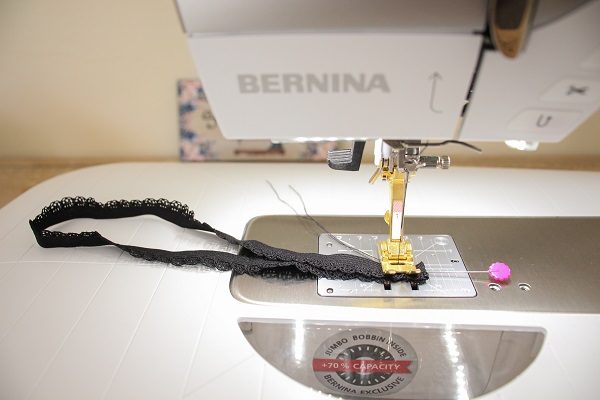
Attaching elastic
- Cut your elastic to the lengths according to your pattern’s instructions.
If no instruction is given, cut the elastic 3%-5% shorter than opening.
Measure the seam where the elastic will be attached and make the elastic 3-5% shorter than that measurement.
For the part of the cup that is near the armhole, deduct 5%. If you feel that is not enough, you can deduct up to 8%.
For the neckline (and the top of the band that goes around the back if making a bra like the Maya) deduct 3%. If you feel that is not enough, you can deduct up to 5%.
- Find the middle of the seam and the middle of the elastic.

- Match up the markings and pin elastic to Right Side of the bra at the neckline and armhole edges with the decorative edge towards the inside.
- Slightly stretch the elastic to fit the seam and stitch with a narrow zigzag close to the decorative edge.
The stitch width should be about half the width of the elastic.
- Trim the fabric (not the elastic or the stitches) close to the stitches.
- Turn the elastic to the inside and pin.
- Zigzag stitch close to the other elastic edge.
- If you are using plush band elastic for the Venus style bralette, attach the cups to the elastic.
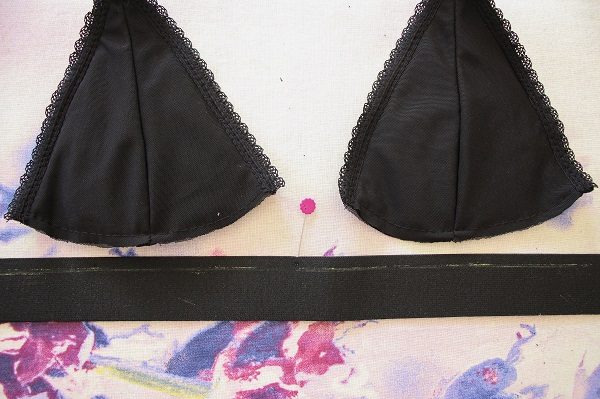 Find the centre of the band and draw the seam allowance with chalk on the Wrong Side of the elastic..
 With the Right side of the elastic facing down, place the cups also Right Side face down on the elastic. Pin the cups to the band using the pattern’s seam allowance, do not stretch the cups.
 Secure the cups to the band using a medium width zig zag stitch.
Attaching Hook & Eye Tape
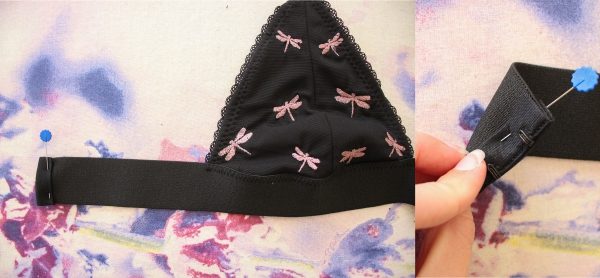
- Fold the Eye tape over the Right side of the band.
The Hooks must be facing down.
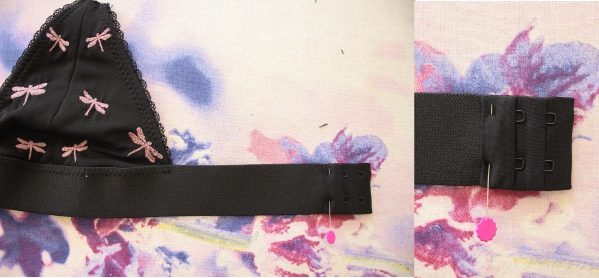
- Insert the Left side of the band into the Eye tape.
The Eyes must be facing up.
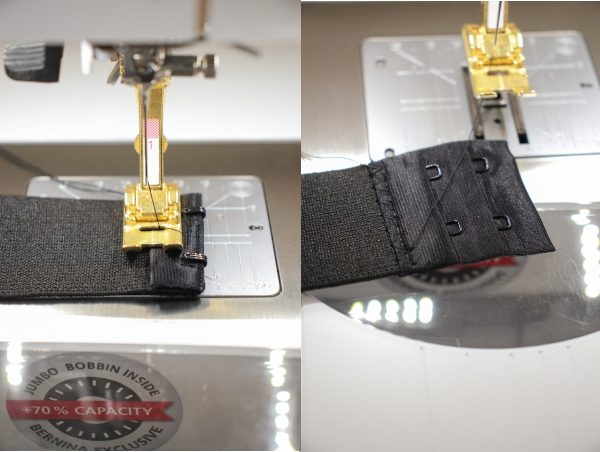
- Small zigzag stitch to secure.
Adjustable bra straps
- Cut your elastic to the length according to your pattern’s instructions.
If no instruction is given, I recommend making each strap 55cm long and assessing if it needs to be shortened from there.
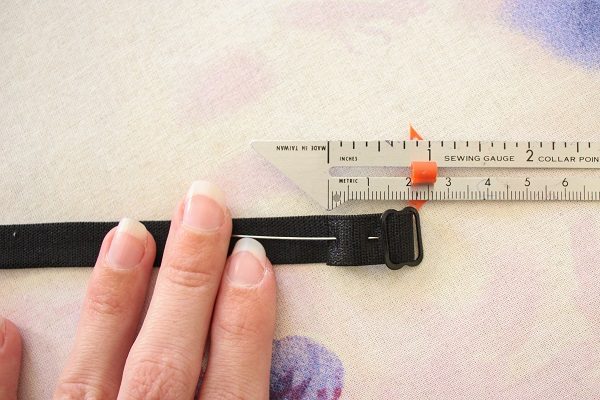
- Insert the strap (1cm or 1.2cm wide Plush elastic) into the slider and fold over the centre bar 1.5cm-2cm with Wrong Sides together.

- Secure with a row of narrow zigzag stitches.

- Insert the other end through the ring.
The part of the elastic with the slider must go against your skin.
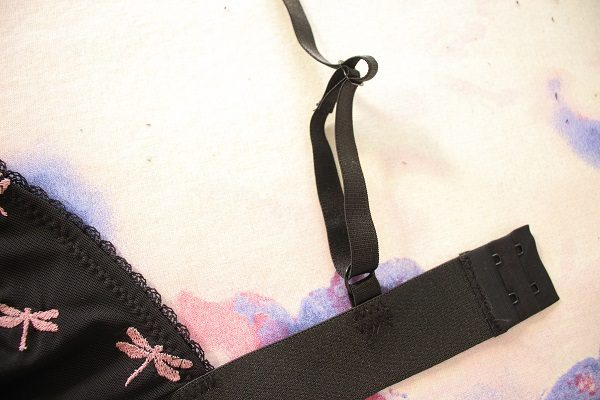
- Feed the elastic back through the slider.


Tips
- When working with knits, it is best to use a 12/80 Ball-point sewing machine needle. The rounded point will push the fibres out of the way rather than cutting the fibres and possibly causing a run in the fabric.
- Using good quality elastic will help achieve a neat finish as well as extend the longevity of your lingerie. It’s worthwhile to spend a bit more if you can so that you can enjoy your creation for longer.
- If you are making the Venus Bralette, I recommend making a mock-up of a cup to check that it will provide enough coverage. The pattern seems to be drafted according to bust size rather than cup size.
- Bra’s should actually be worn on the loosest hook. That way as the elastic naturally stretches over time, you can adjust the fit of the underband. For a good fit, you should be able to fit 2 fingers under the band.
I would love to see what you make, please feel free to share with me!
Instagram
Facebook
-Hannah-Rose
All rights and credits to the respective pattern designers/owners/providers.


Well done Hannah Rose. I can’t wait to try and make my own. You make it look so easy. 🥰
Thank you Trish! 🙂
I hope you find it just as easy 😉
The more you make, the easier it will be.
Some of the patterns have step by step video tutorials too.
Happy sewing!